 Your Privacy Choices
Welcome everyone to the TFB Armorer’s Bench! As mentioned in the little blurb below, this series will focus on a lot of home armorer and gunsmith activities. In this article, I decided to jump right back into the Savage Model 101 that I touched on in the most recent Rimfire Report. In that article, I broke down how this goofy pistol (not a revolver) came to be and why. Folks seemed interested enough in it or rather intrigued by the oddness so I feel it is time for the backstory on how I got it or more specifically how I fixed it. It has been two years since my last Diagnosing and Assessing article. Glad to be back! Let’s dive right into diagnosing and assessing a Savage Model 101.
Gun Specific TFB Armorer’s Bench Reading @ TFB:
- TFB Armorer’s Bench: Diagnosing and Assessing an S&W 642 Airweight
- TFB Armorer’s Bench: Diagnosing and Assessing a Remington 1858
- TFB Armorer’s Bench: Commentary on The Savage 1907 Pistol
- TFB Armorer’s Bench: Commentary on The 1915 Spanish Ruby Pistol
- TFB Armorer’s Bench: Commentary on The Marlin Model 60
- TFB Armorer’s Bench: Commentary on the Remington 74 Series
TFB Armorer’s Bench: Diagnosing and Assessing a Savage Model 101
Here, we at TFB hope to inform, entertain, and even inspire any would-be gunsmith or armorer out there. Ideally, with the information I provide and with the help of our sponsors, you can have some useful knowledge pertaining to the conservation and improvement of firearms technology while at the same time sharing experiences and teaching each other new tips and tricks along the way in the comments. Digging deep into what it is to be an armorer or gunsmith has significance but what is important is what those people do to show they’ve earned that title. I am happy to share my experiences and knowledge and hope it is informative!
Make your personal safety a priority:
- Practice proper gun safety. Always make sure before the firearm hits your bench that it is unloaded and safe to be handled.
- Wear the proper safety equipment. The main one would be safety glasses (decent ones) since parts are often under spring tension and you may work with high RPM tools. Other honorable mentions would be latex gloves or a respirator when working with potentially harmful solvents and oils. Also hearing protection when working with loud machinery or test-firing firearms.
- Modifications, alterations, and customizations will void your firearm’s warranty 9.5 times out of 10. Please take that into consideration before attempting any at-home gunsmithing.
- If you are unsure about proper safety practices, disassembly procedures, or warranty standards, stop, put down the tools, and consult a competent gunsmith.
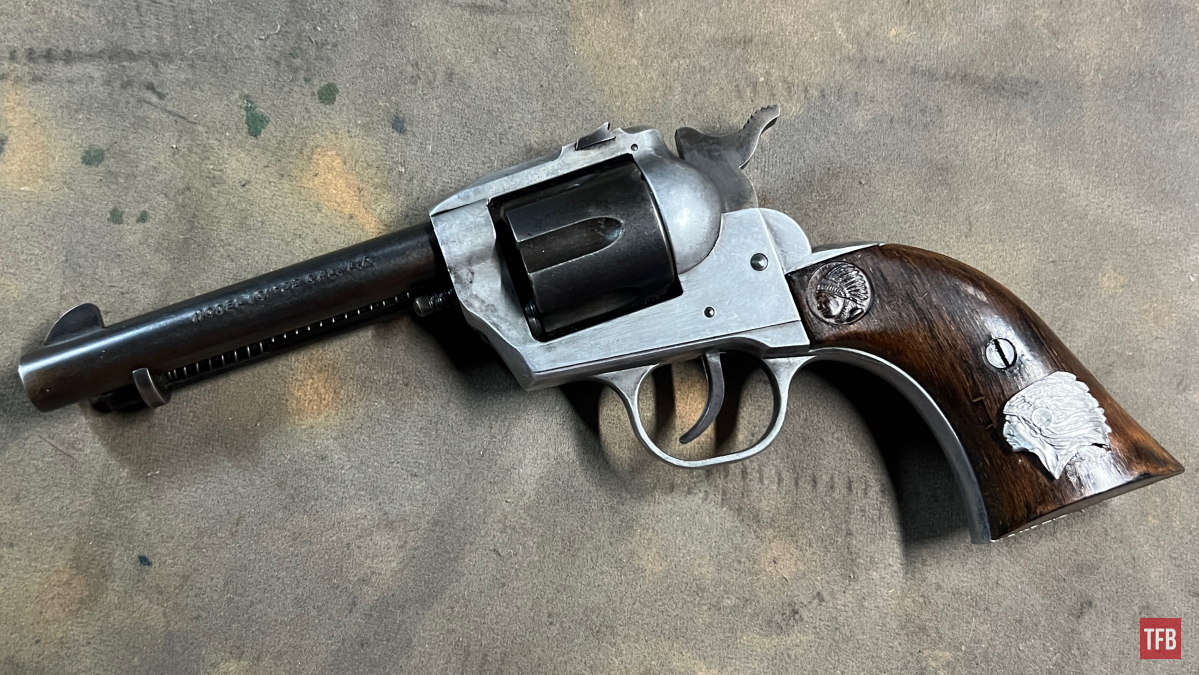
Note: I feel that it is important to explain exactly what the Savage Model 101 is. You see, it may appear to be a small single-action revolver similar to a modern Ruger Bearcat. In reality, it is a single-shot pistol. The cylinder and barrel are one conjoined piece and there is only one chamber. The barrel assembly pivots to the side in order to load and unload. Single shot, no cylinder, no revolvers here.
Quick Background & The Issue – Savage Model 101
The Savage Model 101 has been on my list for a long time. It’s kind of hard to find them at a price that matches what the blue book puts them at let alone my own personal limit. it’s a single-shot pistol basically taking its place in a collection. To me, it was unlikely I’d end up with one anytime soon.
To my surprise, I found one on Gunbroker and it did not look like anyone was going to bid on it. Most listings where they mention something does not work tend to dissuade people from buying it. Not me! This one said the trigger did not work. That is all it said. I went “Psh that looks like an easy fix. I bet that gun has like five main parts and won’t be hard to take apart or put back together”. Boy, what a pleasure it is to take apart and reassemble a gun that you never had before. One unlike any other. It may look like a Single Action Army but it sure does function differently and that necessitates a different internal design.
Initial Diagnostic Look – Savage Model 101
As the Gunbroker listing mentioned, the trigger was “dead”. Initial diagnostics were simple. First, look into any schematics or exploded parts drawings. If you do not have hands-on access to this, look at Numrich or Google Images. This way we can see what parts interact with the trigger. Most of us who are very familiar with how these things work know that the main interaction in this sort of system would be the end of the trigger hooking into a notch in the hammer.
Check the hammer for spring tension (yep). See if holding the gun pointing up or down changes how the hammer feels (nope). Check the trigger for any sort of contact or spring tension (nope). Did it pass the “shake test” (no broken bit sounds to be heard)? Just from that little bit of playing my bets were on a broken trigger or chipped hammer notch. Why would that happen? I’ll cover that once we tear her apart and see what the issue is.
Closer Inspection – Savage Model 101
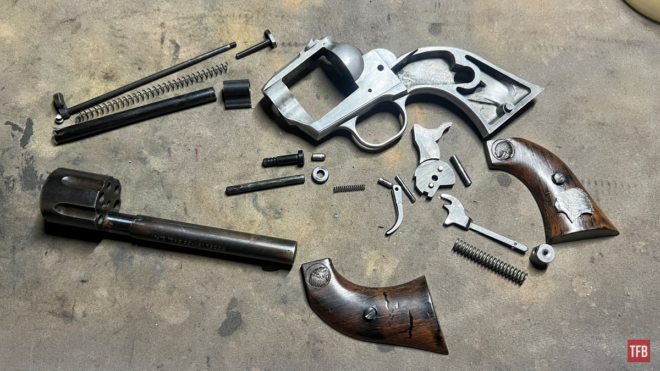
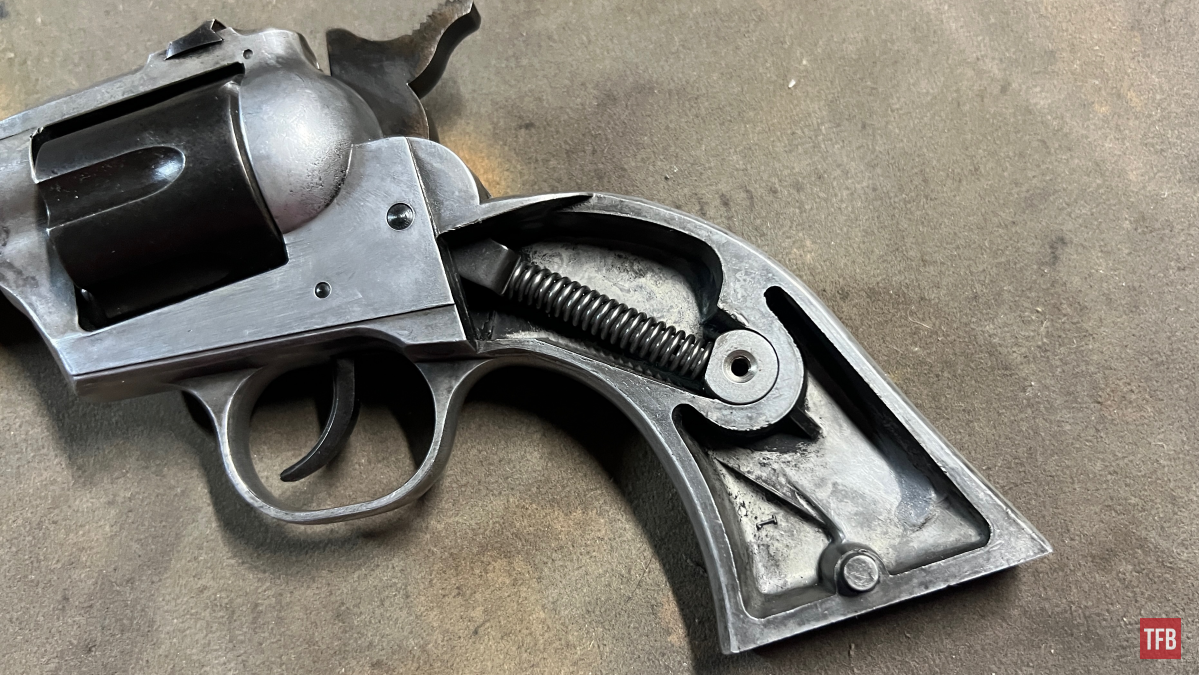
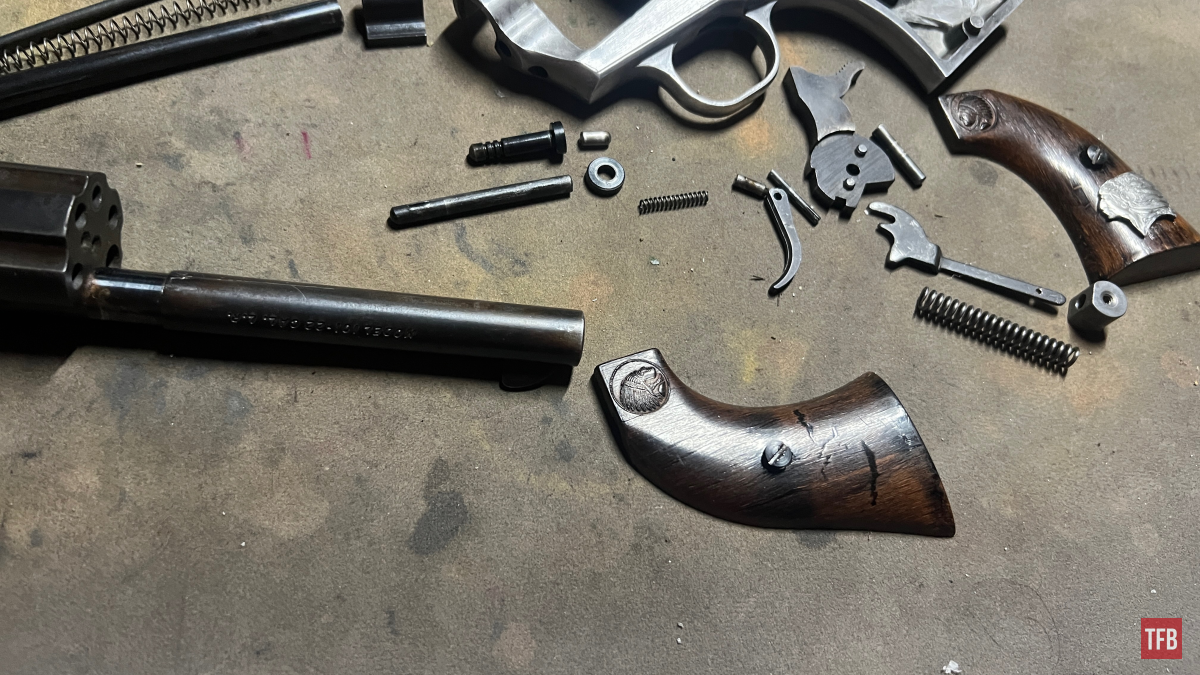
Alight, let’s tear it down and see what is going on. With the grips off, we can see that the mainspring and hammer strut are intact and correct.
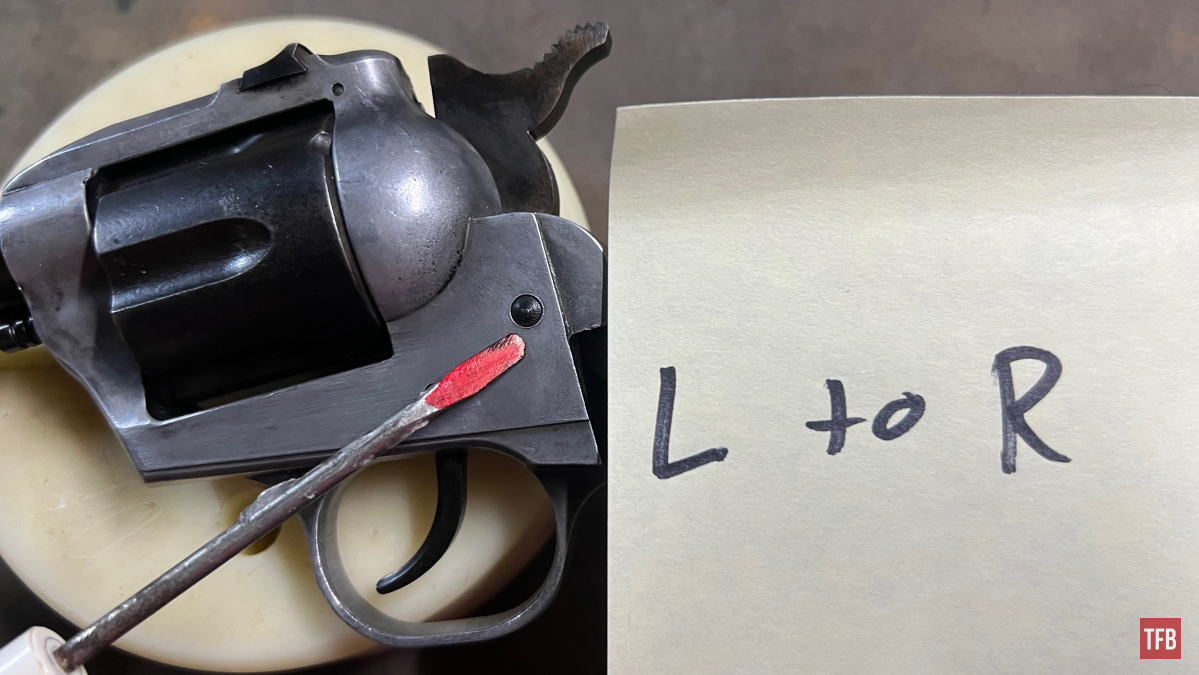
With a closer look at the pins (both hammer and trigger), it appears they are supposed to be driven out left to right (confirmed). The hammer pin needs to be punched out and the hammer removed before the strut and spring can be removed.
With the hammer out, we can relieve pressure on the strut guide/retainer and punch it out the other side.
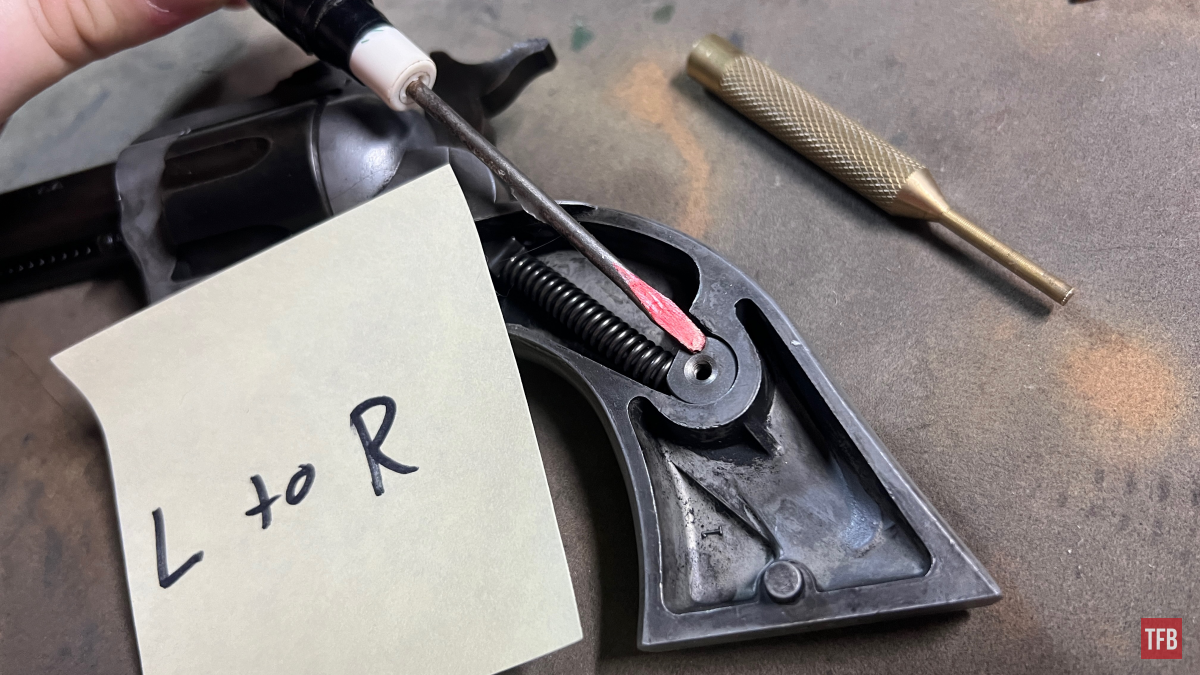
The strut sping can slide off the bottom and the strut can be removed through the top.
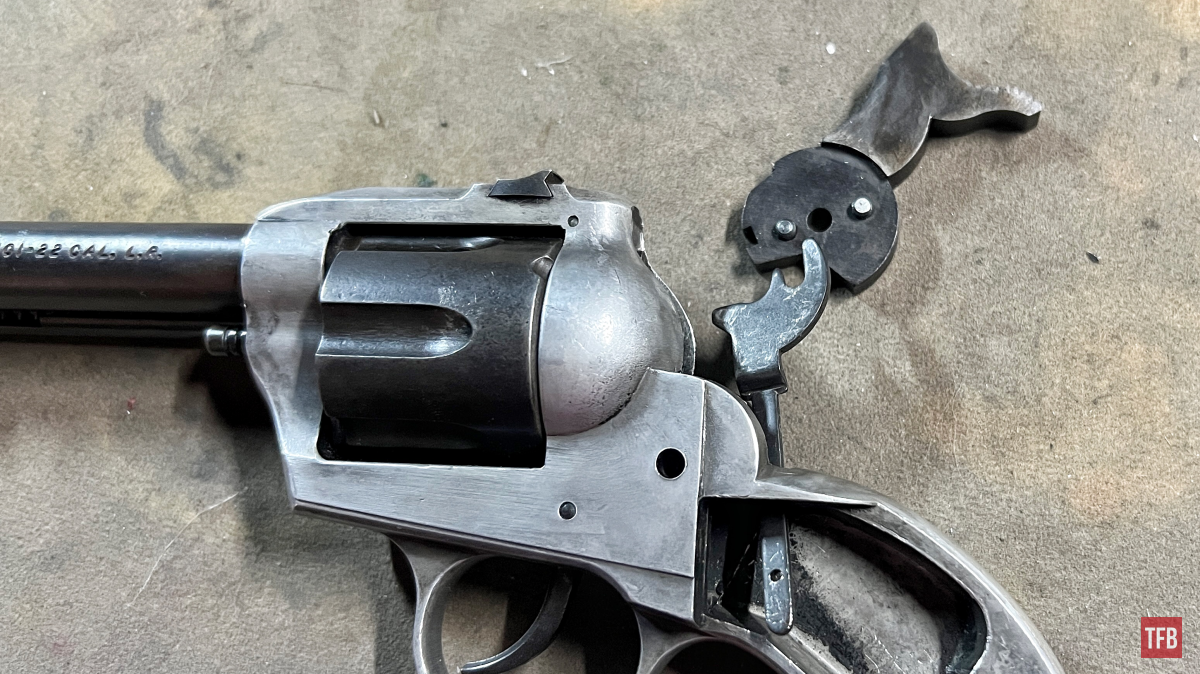
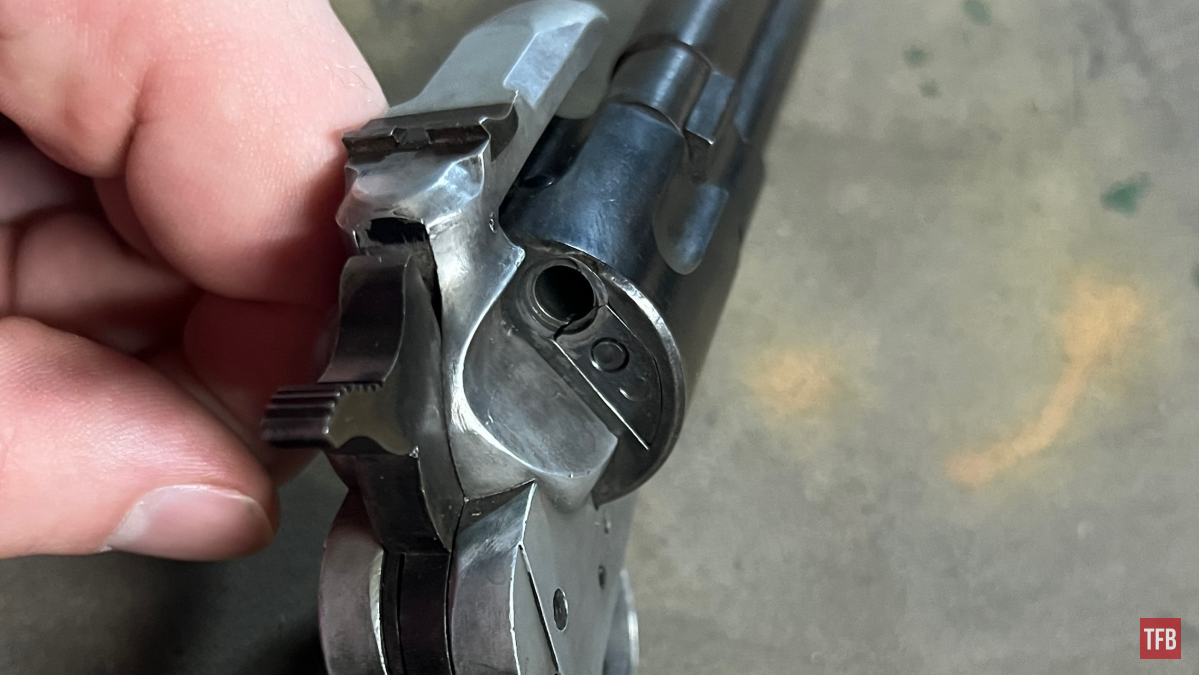
“Well, there’s your problem”. At this point, the answer fell out and a further examination of the hammer revealed we should take a look at our trigger.
So, yeah the trigger is busted. Luckily for me, spare triggers are available across most parts companies at the moment so this was a quick-ish fix. I say quick-ish because further disassembly, evaluation, and reassembly had some learning curves that I will be happy to share in a separate article.
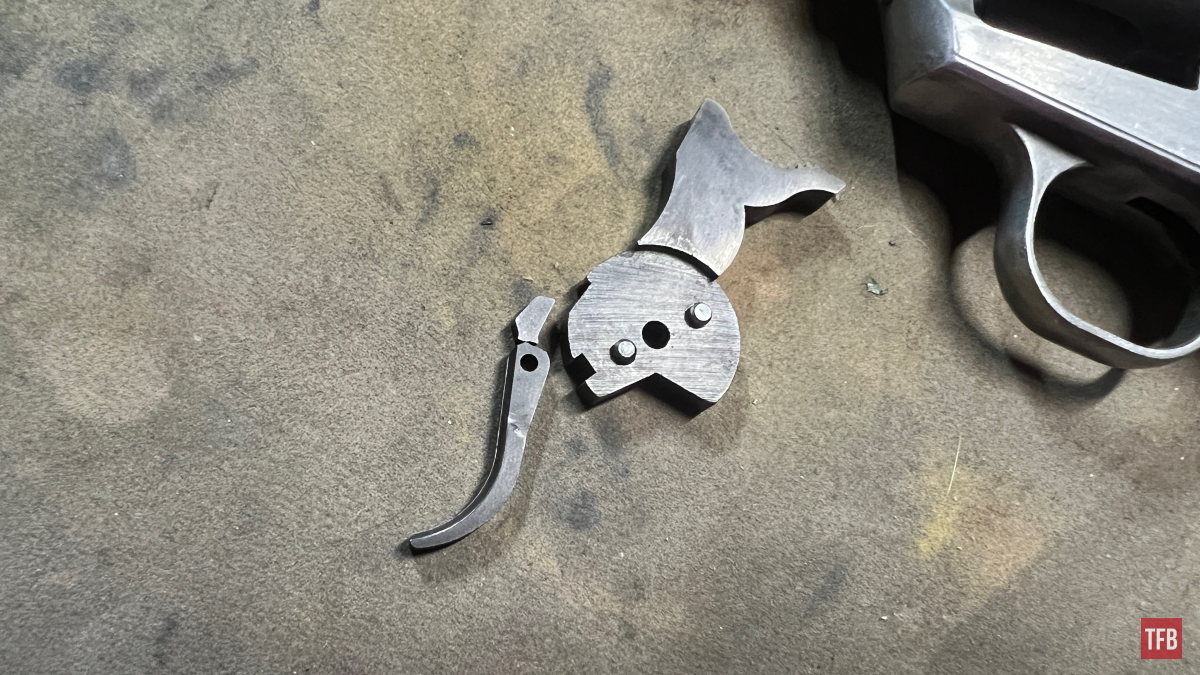
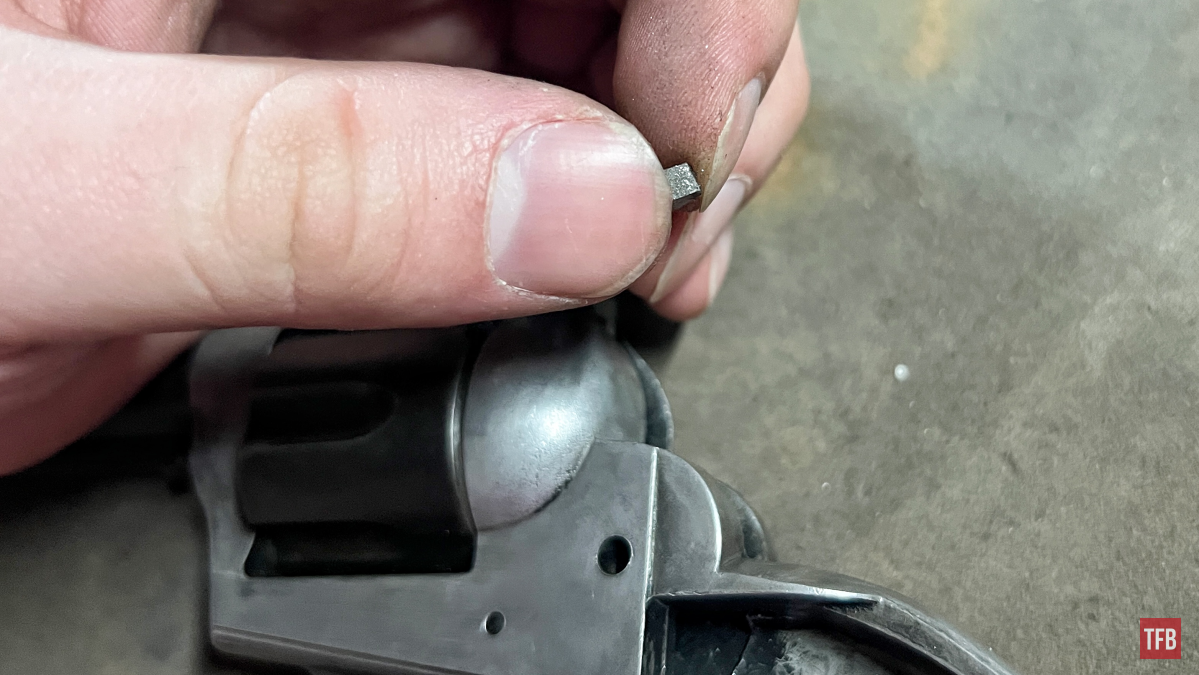
Why would the trigger break? I think the answer is fairly easy to guess. One, looking at the break itself we can see this was a brittle part in of itself. Two, and most probable, this gun was marketed for kids. Kids watch Western movies and TV shows and want to be cowboys. Cowboys fan their revolvers in every fight cause it looks good on TV and regular old single-action click-boom, click-boom, click-boom is kind of boring.
If you were to fan this (even though it is one shot) and release the trigger at the wrong time, then the hammer notch would be able to slam down on that brittle trigger. I bet it not only broke like that but also went bang.
Conclusion – Savage Model 101
There you have it, folks. Another old gun saved from probably being parted out. A simple fix for sure but surprisingly not a gun for the lighthearted to take apart and reassemble. But what if someone has to?! Let me know if I should dive into what makes this gun tick (or should I say click) with a disassembly/reassembly article. Safe shooting, all!
If you want some history on this gun check out this article here and here.
As always, thank you for reading TFB! Be safe out there, have fun while shooting, and we will see you next time for the TFB Armorer’s Bench! Also, let us know what you think in the comments below! We always appreciate your feedback.