 Your Privacy Choices
Welcome everyone to the TFB Armorer’s Bench! As mentioned in the little blurb, this series will focus on a lot of home armorer and gunsmith activities. In this article sponsored by Wheeler, Tipton, Caldwell, and Frankford Arsenal, I decided to take you along with me in diagnosing and accessing a Remington 1858 reproduction. This revolver showed up having severe issues with its timing mechanism which I have seen before. Unfortunately, this article will not cover how to time a revolver, that should be its whole other thing. I just thought it would be fun to take a peek under the hood with everyone to show how I knew what was wrong with this gun. Let’s dive right into diagnosing and assessing a Remington 1858 revolver!
TFB Armorer’s Bench: Diagnosing & Assessing a Remington 1858
Welcome to our recurring series of Armorer’s Bench which is made possible and brought to you by Wheeler, Tipton, Caldwell, and Frankford Arsenal who are our sponsors. Here, we at TFB hope to inform, entertain, and even inspire any would-be gunsmith or armorer out there. Ideally, with the information I provide and with the help of our sponsors, you can have some useful knowledge pertaining to the conservation and improvement of firearms technology while at the same time sharing experiences and teaching each other new tips and tricks along the way in the comments. Digging deep into what it is to be an armorer or gunsmith has significance but what is important is what those people do to show they’ve earned that title. I am happy to share my experiences and knowledge and hope it is informative!
Make your personal safety a priority:
- Practice proper gun safety. Always make sure before the firearm hits your bench that it is unloaded and safe to be handled.
- Wear the proper safety equipment. The main one would be safety glasses (decent ones) since parts are often under spring tension and you may work with high RPM tools. Other honorable mentions would be latex gloves or a respirator when working with potentially harmful solvents and oils. Also hearing protection when working with loud machinery or test-firing firearms.
- Modifications, alterations, and customizations will void your firearm’s warranty 9.5 times out of 10. Please take that into consideration before attempting any at-home gunsmithing.
- If you are unsure about proper safety practices, disassembly procedures, or warranty standards, stop, put down the tools, and consult a competent gunsmith.
Quick Background
So when it comes to common single-action revolvers made from the early 1850s all the way through the 1890s, they are similar but different enough to get away with their own patents and avoid others. Reproductions of these revolvers do not necessarily have to avoid the exact same legal landmines. That being said, the inside of this gun may be different when compared to another.

This reproduction of a Remington 1858 black powder revolver is an older Pietta brand one. The malfunction/breakages are probably not due to the manufacturer in this case but rather the owner’s care or lack thereof. Black powder guns are exposed to corrosive materials and have a habit of getting very dirty. The owner of this revolver did not do the necessary maintenance to keep it running and they also did not care to take it to someone who would until it was too late.
The Issue – Remington 1858
This Pietta Remington 1858 came in with a cylinder falling out of time. The hammer cocked and fell as it should but the cylinder was not rotating or locking correctly. I have inserted a video below to properly demonstrate the malfunction.
When cocking this single-action revolver, the cylinder would rotate clockwise but not lock up. In fact, as the hammer is let down the cylinder is biased counterclockwise and rotates that way. If this gun was somehow fired reliably for let us say about two shots, the rest of the loaded chambers would almost certainly bias the cylinder to rotate back to where it was. On the off chance, it stopped with a chamber lined up properly with the barrel it would probably be a spent one. Then there is the obvious and likely chance of firing out of tike which has the potential for catastrophic consequences.
So What is Wrong? – Assembled Diagnosis
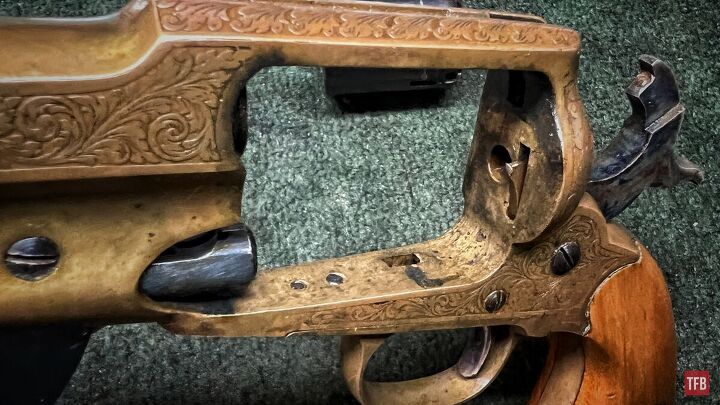
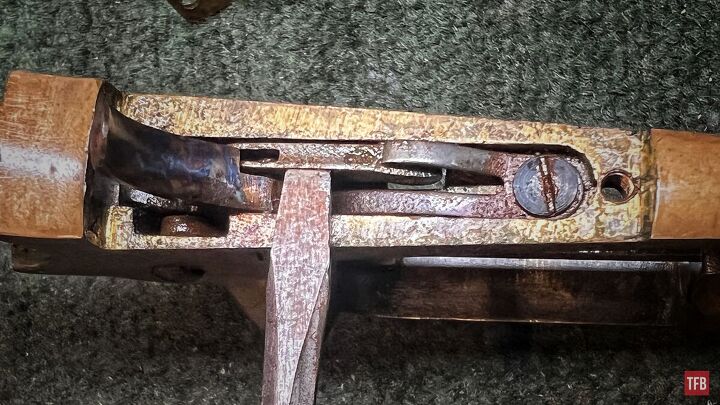
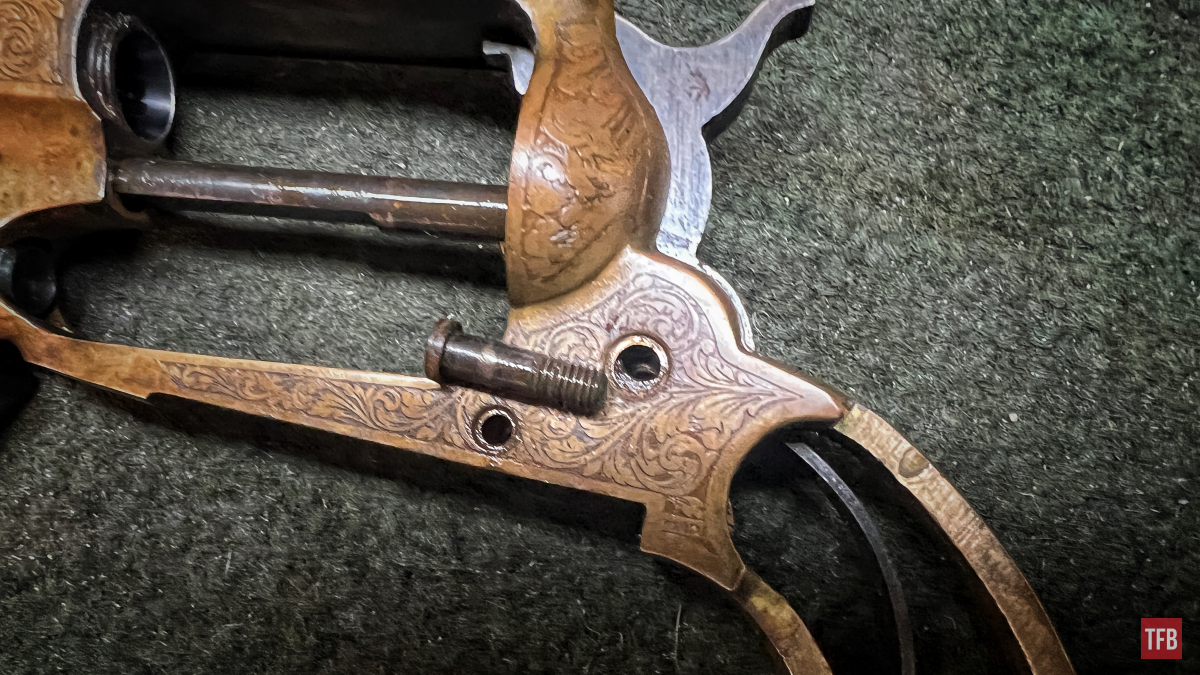
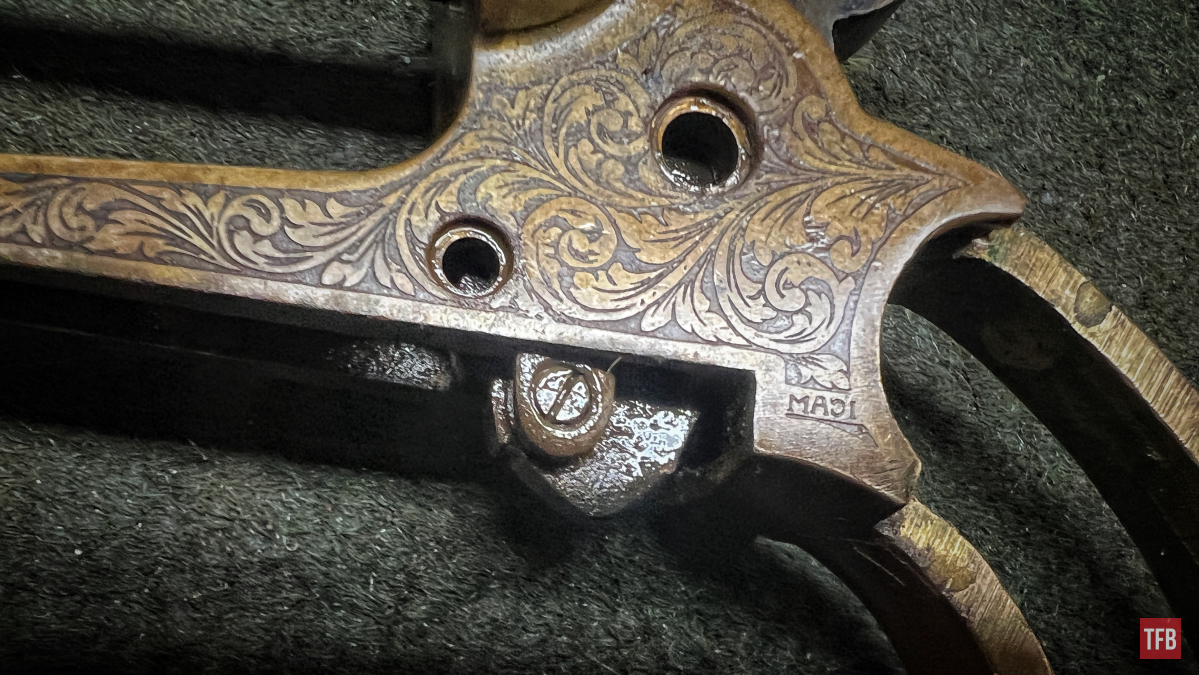
Since this is something I have dealt with before, in Colt 1873 reproductions of all things, I knew where to look and the obvious signs. First, besides monkeying with the action to feel if anything more severe was going on, I examined the square hole in the receiver where the bolt pokes through. The bolt is a half-moon-shaped nub that pokes through a square notch on the inside of the bottom of the frame. The bolt’s job is to lock into the half-moon cuts of the cylinder in order to prevent it from rotating while the hammer is all the way to the rear and also while being dropped.
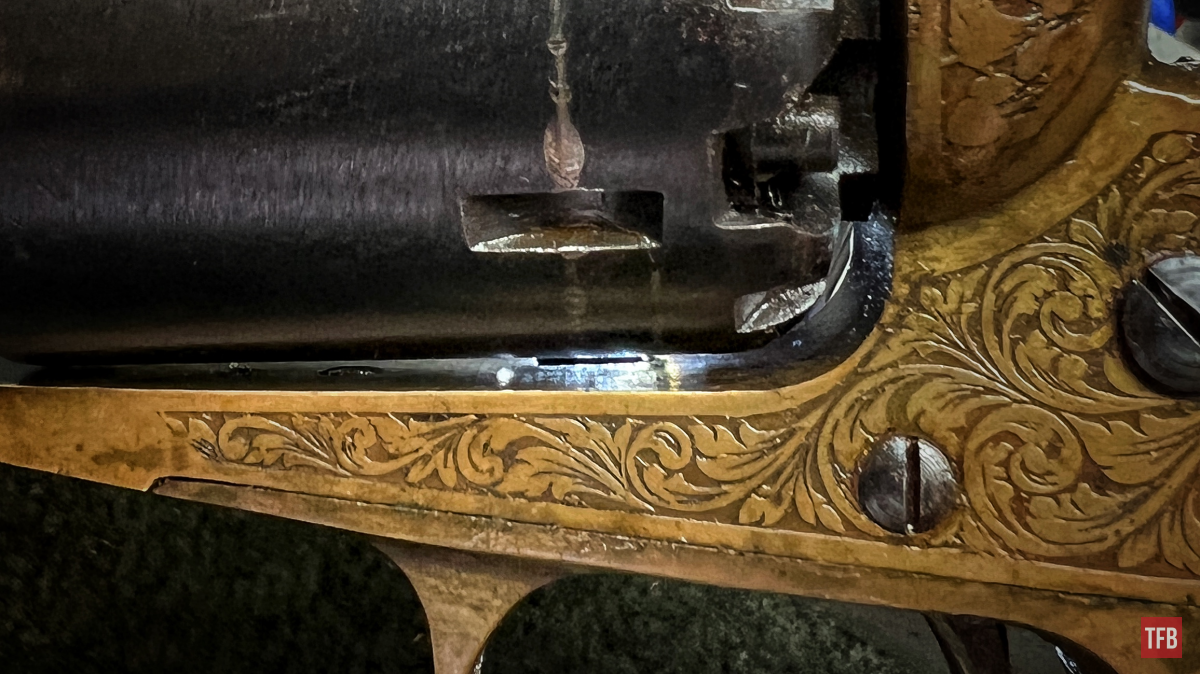
Remington 1858 – Note the empty square pocket at the bottom of the frame.
As you can see with the hammer fully cocked the bolt is not poking up through its hole. This to me means one of three things. One, the bolt could be broken (unlikely but possible). Two, the bolt could be missing altogether (more unlikely but still possible). Or three, the spring which forces the bolt through the hole has broken, bent, or somehow lost its temper (I have seen perfectly “good ones” snap in 1873 guns). I was 95% sure it was the spring because I have encountered it before. The bolt spring is typically a flat spring split down the middle with two fingers biasing parts upwards. One finger is directing force to the bolt to help it through the hole in the receiver and the other finger puts spring force on the trigger to help give it tension and help it return. This bolt/sear spring is most commonly the flat split spring steel style but they also can be a wire spring set up (sort of looks like a paper clip).
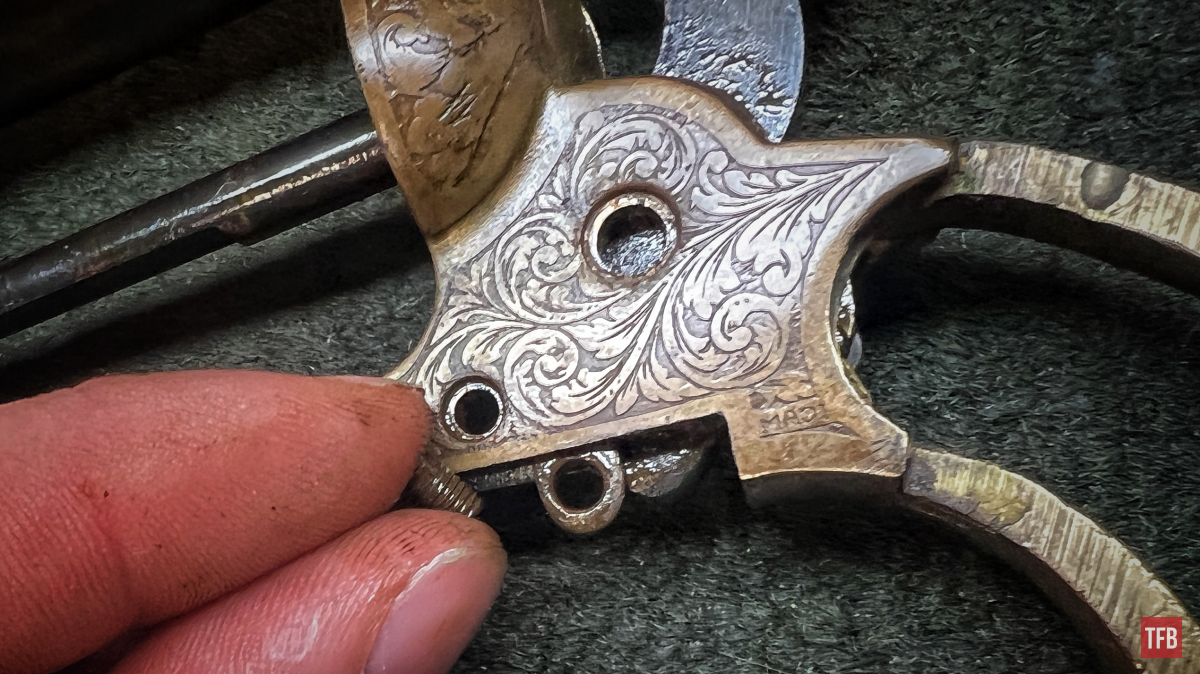
Remington 1858 – Note the empty square pocket at the bottom of the frame.
Aside from the obvious lack of a bolt poking through, I suspected that the hand and its spring may be in poor condition or broken. The hand (sometimes called the pawl) is the finger that pokes through the rear of the receiver when the hammer is moving to the rear. It moves at an upward angle and is intended to do the actual revolving of the cylinder. Since the cylinder does somewhat rotate, it was obvious the hand was still in there but in whatever time between the bolt spring breakage and now this gun could have been monkeyed with far more and the hand could be damaged as a result. Sometimes if one part stops working it will negatively affect others. This was my worry with the hand.
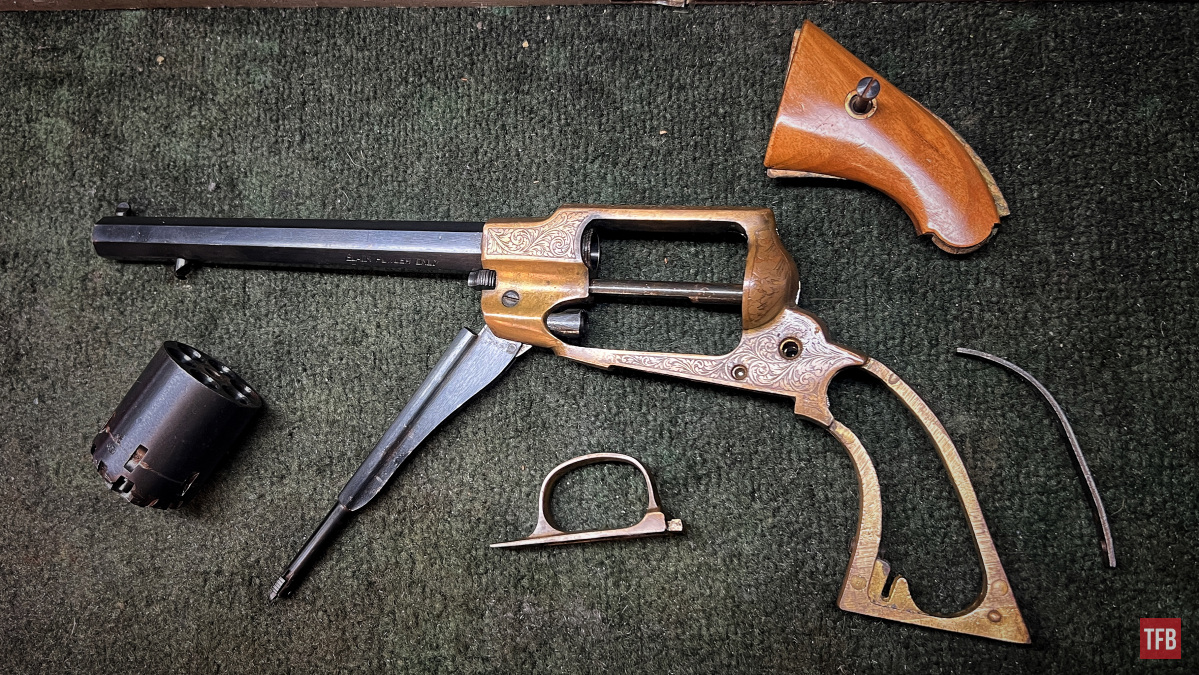
Under The Hood – Disassembly & Assessment
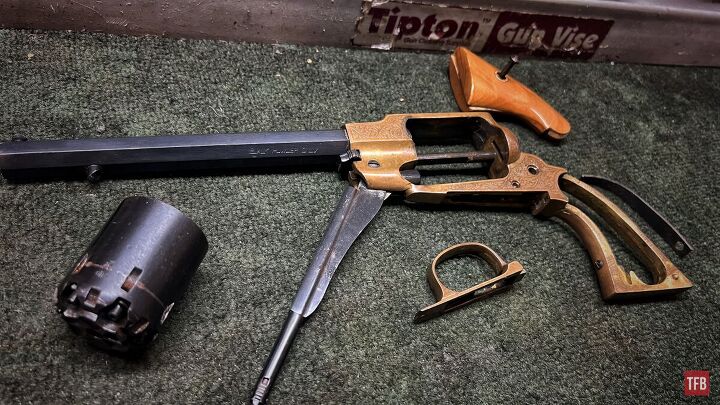
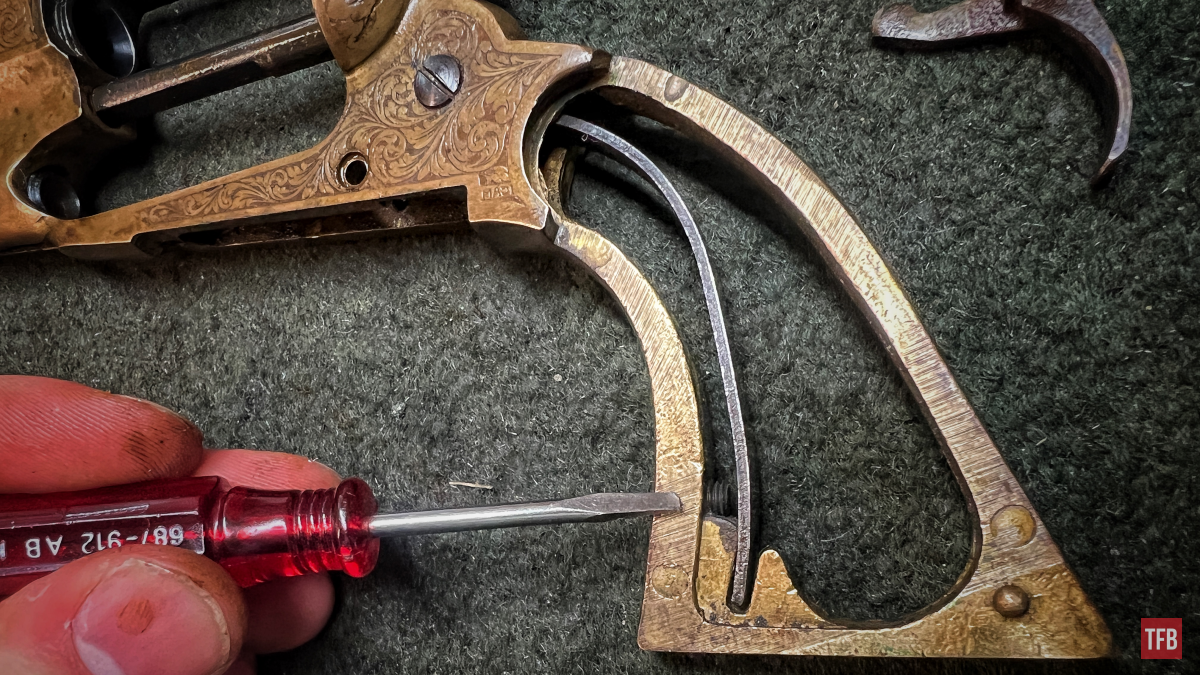
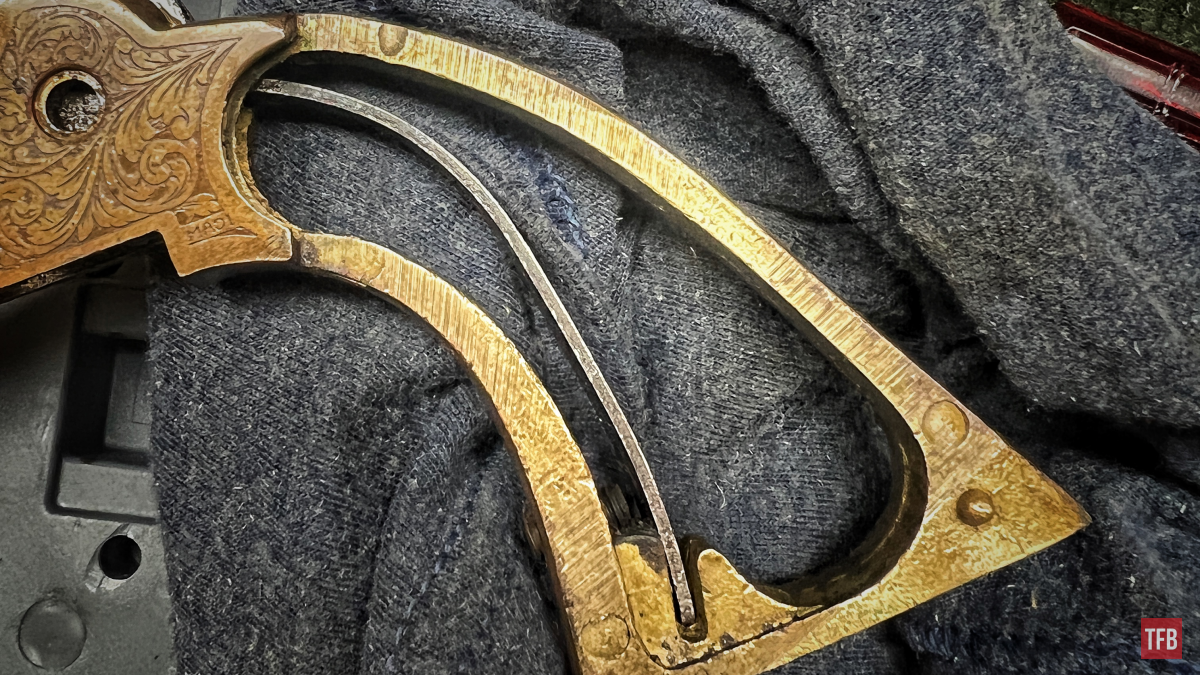
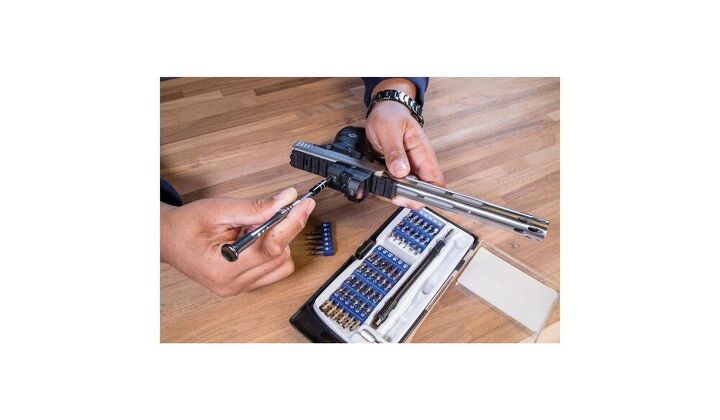
So taking this Remington 1858 all the way apart is not entirely necessary but I decided at least all the internal parts needed to be examined. A good screwdriver set should be used. Match the correct bits to the correct screws to prevent any further damage to the firearm. Wheeler offers quite a few different sets! Starting with unscrewing the trigger guard screw, we can take the brass trigger guard off by lifting and pivoting the guard toward the rear.
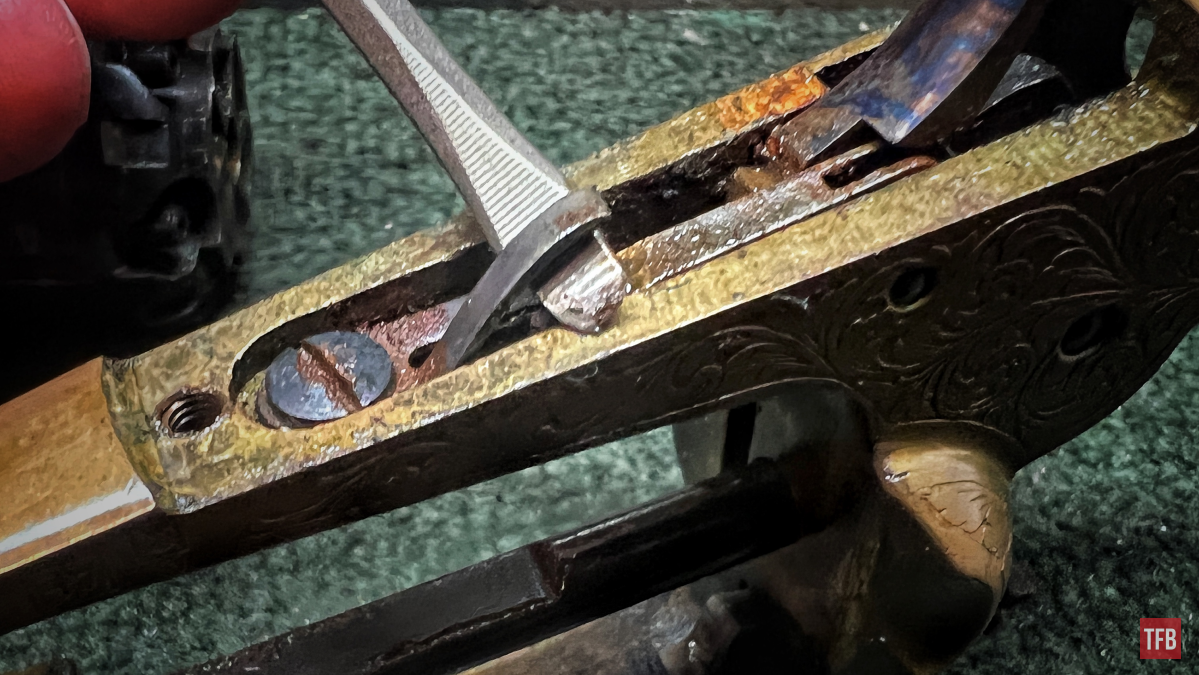
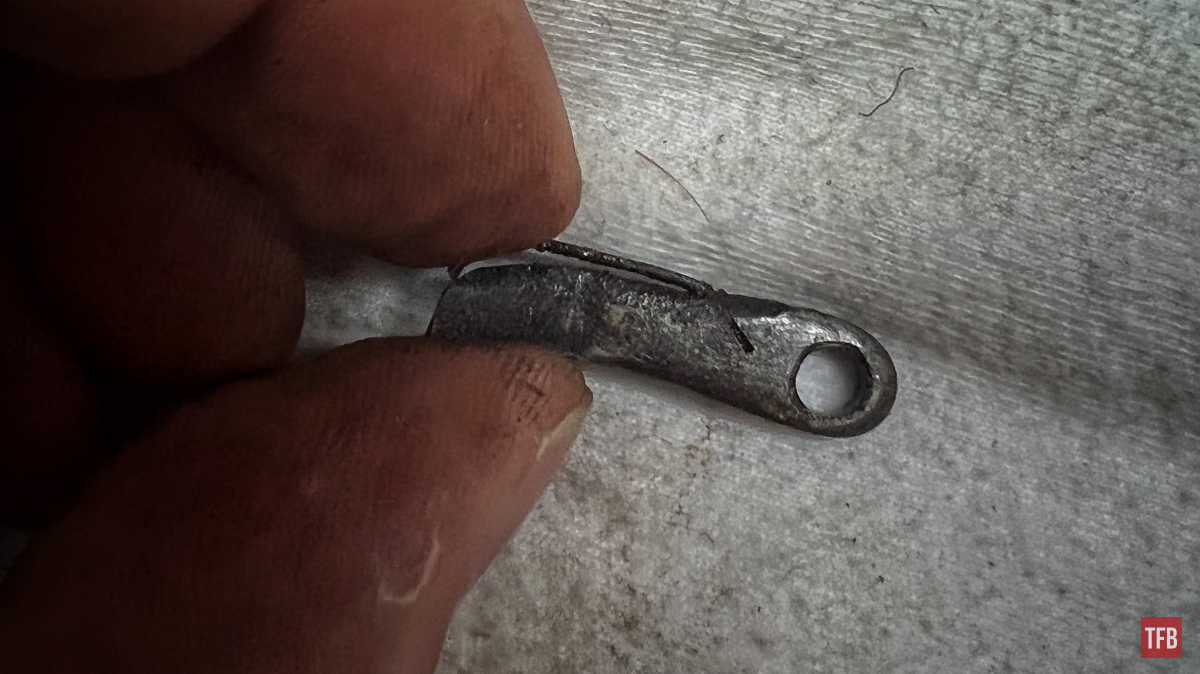
This gives us the first look at the bolt/sear spring. As you can see it is pretty rusty and when I worked the hammer it would not move the bolt at all.

Here my screwdriver is pointing at the bolt. I applied pressure and it slipped into its hole with no problem and then I checked and the half-moon nub was still there. The spring however was frozen in the air. This (as you can see below) tells me it is cracked or broken and either surface finish or rust or both are keeping it from fully falling apart.
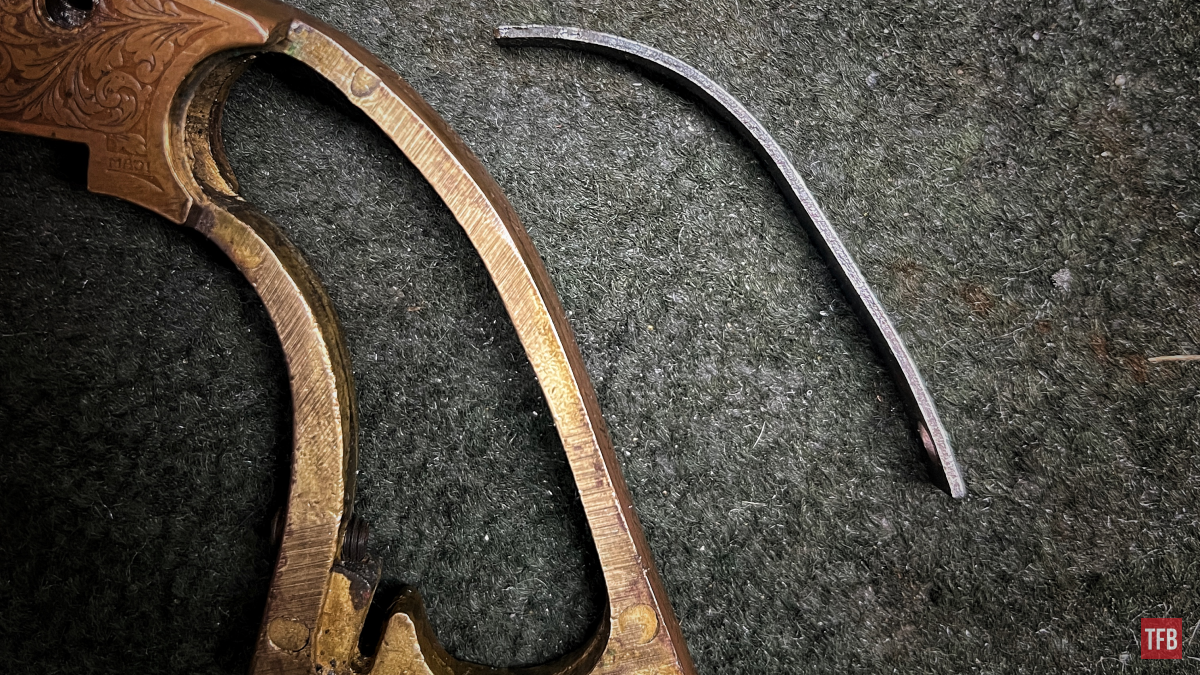
My guess of there barely being any meat left holding onto the finger of this spring was further reinforced by the fact that I could slide a screwdriver tip under the finger and lift without any discernable resistance.
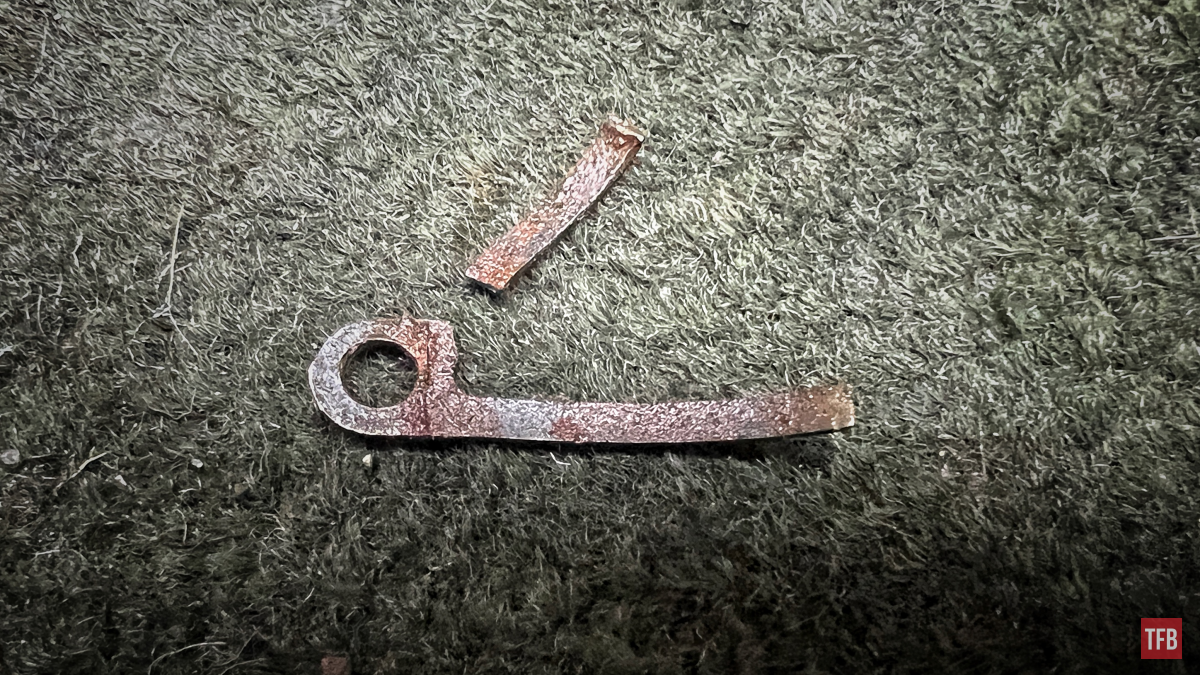
Easy to say that the bolt/sear spring did not survive being removed from the gun. Without being able to rest on the underside of the bolt, gravity itself let the finger detach itself from its break.
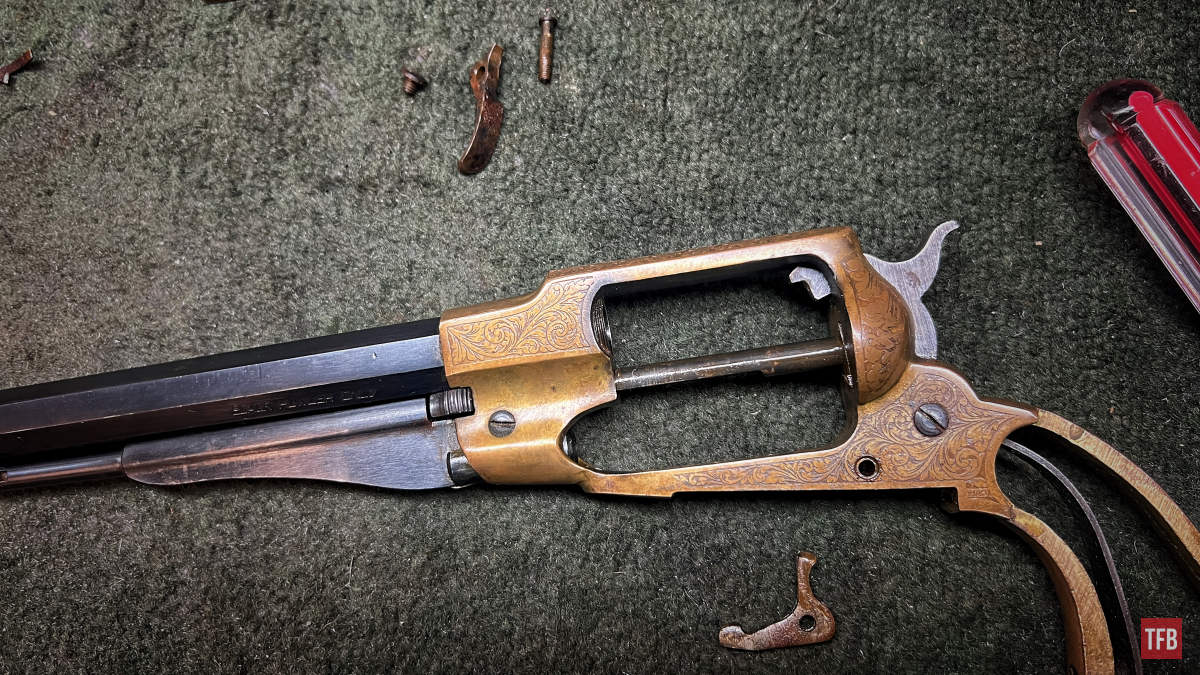
This far into the gun I wished to proceed to double-check on the hand of the revolver as well as all other parts for any severe wear or rust. I removed the bolt and trigger since spring tension was removed from them already.
After this, I looked to remove the rest of the spring tension built up in the gun. I removed the grips and revealed the long flat hammer spring. There is a screw residing at the bottom inside of the grip where your pinky finger would rest. This screw is not necessary to be removed but I chose to loosen it. Its purpose is to add to or lessen spring tension to the hammer. As a result, the hammer will drop harder or lighter and the trigger will pull harder or lighter. The reason this exists is if you have especially hard percussion caps the screw can be adjusted to drop the hammer harder to set them off reliably.
Removal of this spring is pretty easy with the aid of a rag or a piece of cloth. Simply wrapping the grip of the gun with this cloth and pushing out the bottom portion of the spring to the side will result in the spring popping out and being captured.
Note: Not all revolvers with this style of spring are straight-up plain flat springs. Some have hooks that grasp a hammer or hammer strut. Removing the spring incorrectly will result in damage to the spring, the gun, or yourself. Be careful and considerate.
From here the hammer screw can be removed. I actually removed it before taking out the hammer spring but this would be the proper order of disassembly, I just got ahead of myself and did not have any time to correct the photographic continuity. Really, it can be removed before or after but the easiest/more streamlined process is spring first and then hammer screw.
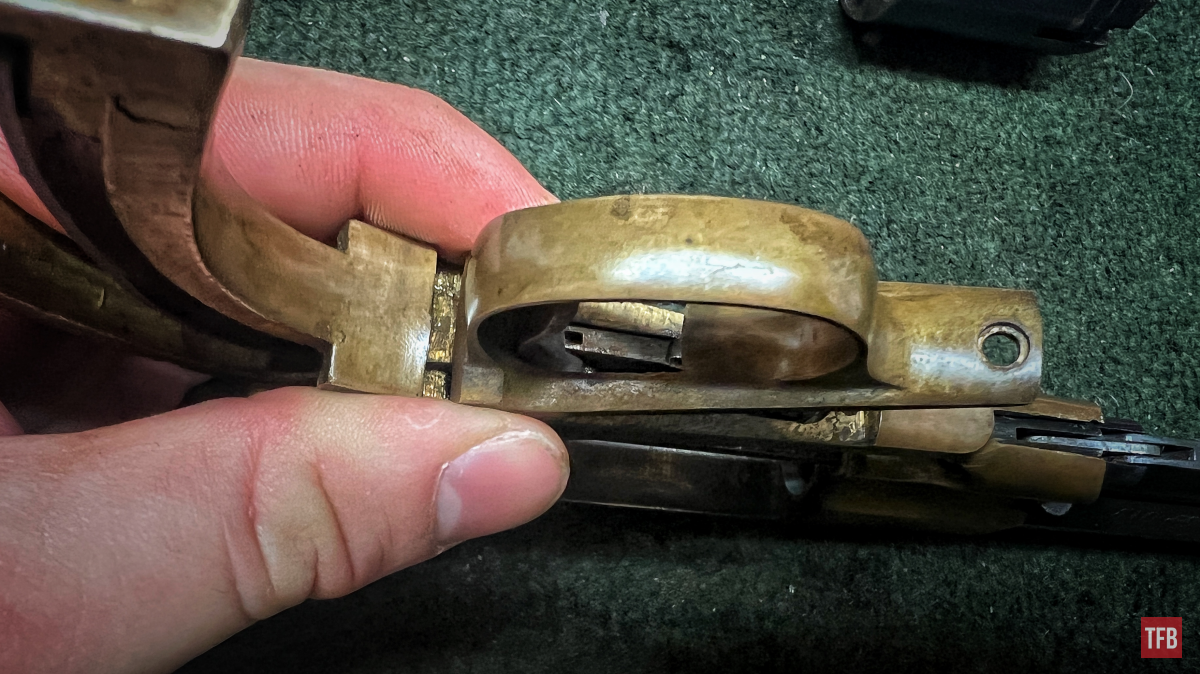
The hammer and hand assembly are attached to the hammer by a small screw. The hammer and hand assembly can be pushed down toward the trigger end of the receiver. This will give you access to the hand screw.
If you need a decent set of micro screwdrivers, Wheeler has some!
From here, the hand can be slid down and out of the receiver. Upon examination, I noticed the spring offered very little resistance while being pulled out of the receiver. It was dirt but also at much more of an acute angle when they are normally at an obtuse angle. In the picture below I am not squeezing it, only holding onto it with very light pressure.
When I attempted to scrub away the grime to get a better look at the condition of the spring it did exactly as I feared and fell apart.
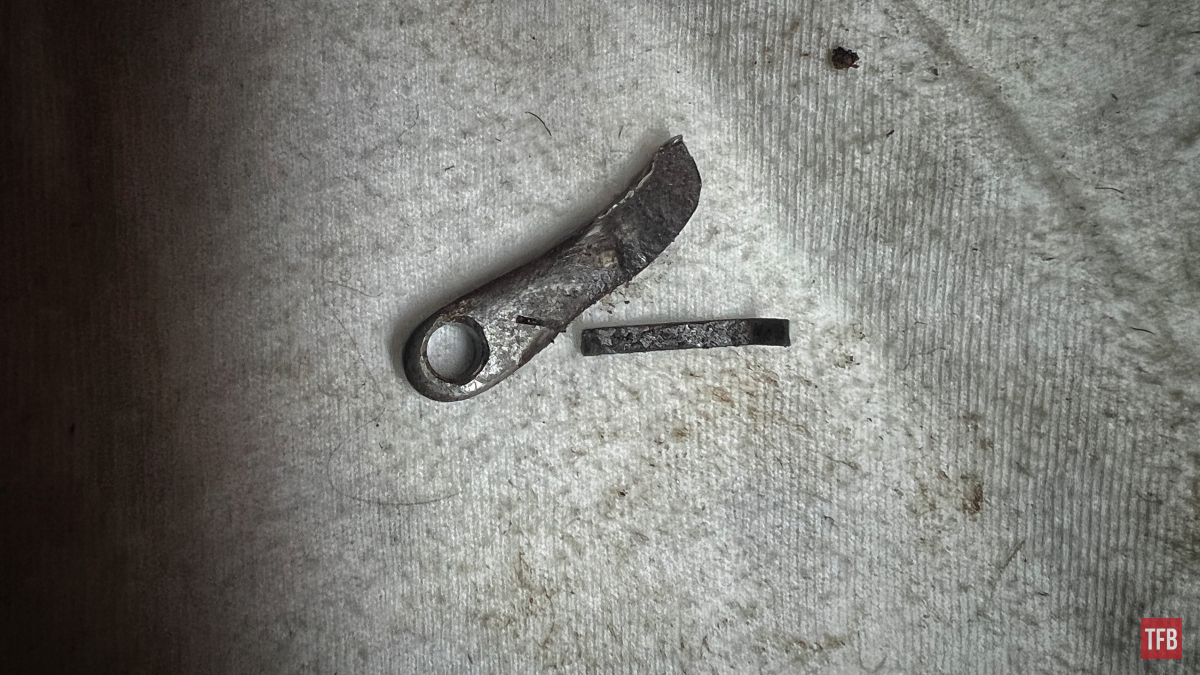
The grime, corrosive nature of black powder, and lack of proper maintenance were too much for these two springs. They are undoubtedly the culprits of the timing issues which at the end of the day is a good thing given they are easily replaceable and affordable. That being said, it is necessary to make parts for this revolver since it would soak up valuable time that is worth much more and the parts will just be looked up and ordered.

Remington 1858 Hand Assembly and Bolt/Sear Spring
Conclusion: Diagnosing & Assessing a Remington 1858
Well, there we have it! It is not always as easy as taking a gun apart and being like “well, there’s your problem!” but when it is, it’s a relief. I guess if I was trying to make any teaching points they would be to acknowledge the problem in full and when you find the problem (or think you have found it) look for more. More problems can be caused by one part’s malfunction and breakage. Not just that but also look for what caused the initial parts breakage in the first place. In this situation, it was a classic case of neglect or poor maintenance.
Black powder firearms such as this Remington 1858 reproduction are prone to expedited wear due to their corrosive nature. Take care if you own any. I hope everyone who tuned in enjoyed this exercise. I encourage you all to share any maintenance tips or other tricks in the comments below!
As always, thank you for reading TFB! Be safe out there, have fun while shooting, and we will see you next time for the TFB Armorer’s Bench brought to you by Wheeler, Tipton, Caldwell, and Frankford Arsenal! Also, let us know what you think in the comments below! We always appreciate your feedback.

Caldwell Pro Range Glasses, Clear

The Caldwell® Pro Range Glasses feature a stylish wrap-around design and are a great choice for all shooters. They feature an adjustable nose piece and temples for all day comfort. The scratch resistant lens meets ANSI Z87.1 standards and offers 99.9% UV protection.
72 Piece Professional Gunsmithing Screwdriver Set
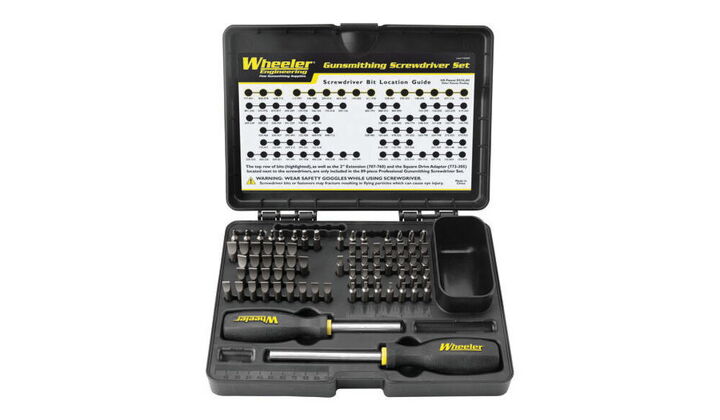
The Wheeler 72 Piece screwdriver set features 54 hollow-ground flat bits, 4 phillips, 3 torx, and 8 specialty bits all made from durable S2 tool steel with a 56-58 Rockwell “C” hardness rating. The precision-engineered bits have a concave shape that allows for insertion all the way into the screw slot of rmaximum contact to prevent burred, buggered, busted up screw slots. The kit also includes 2 non-slip, overmolded plastic handles that come in a convenient hinged storage case whcih includes a bit location guide.
Universal Bench Block
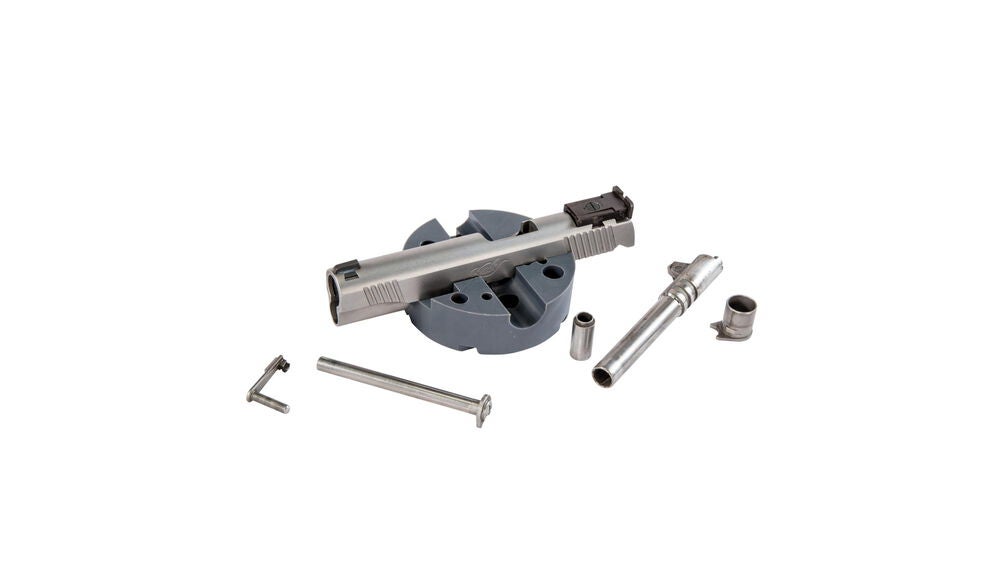
Made of non-marring urethane, the Universal Pistol Bench Block is perfect for use on M1911 pistols as well as other firearms such as 10/22s.
Tipton ULTRA GUN VISE
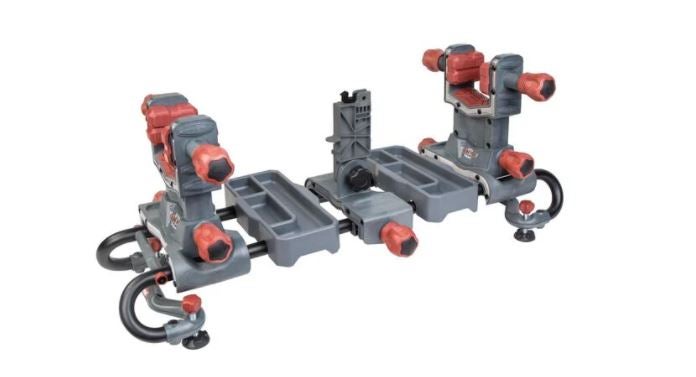
The Tipton® Ultra Gun Vise features a completely modular interchangeable design to allow virtually any shape firearm or crossbow to be cleaned and worked on with ease. The ball and socket articulating clamp pads allow for the pads to adapt to any surface. The dual clamp technology rigidly holds any firearm shape in place, while the rigid steel tube frame structure allows for complete access to your firearm or crossbow. The front and rear clamps are both height and length adjustable, and feature fast-turn knobs allowing for quick clamping. The solvent-resistant accessory and tool trays are movable and removable to stand up to even the toughest jobs.
Precision Micro Screwdriver Set
Frankford Arsenal Stainless Steel Dial Caliper
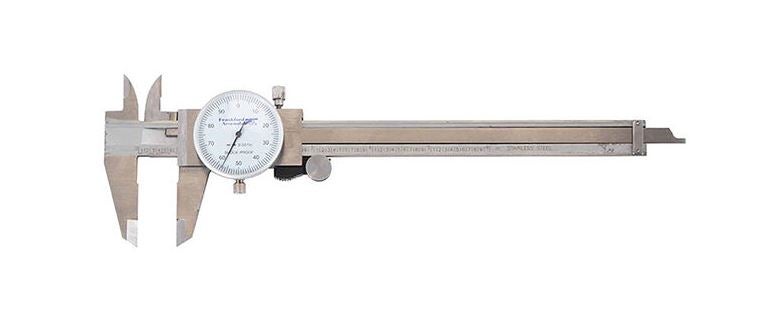
Reloading ammunition requires attention to many critical cartridge dimensions, including case length, neck and base diameters, overall length, primer pocket depth, etc. Verifying these dimensions is quick and convenient with the Frankford Arsenal® Stainless Steel Calipers. These calipers are accurate to within .001″. The calipers allow you to measure inside and outside diameters, plus depths. You will find them useful for many measuring tasks on and off the reloading bench. Packaged in a convenient and protective case.