Your Privacy Choices
Welcome everyone to the TFB Armorer’s Bench! As mentioned in the little blurb below, this series will focus on a lot of home armorer and gunsmith activities. I am stoked to finally be writing this article. This has been on my list since I was in school for gunsmithing. Today we are going over firearm conservation. This is a process of halting a firearm’s decay and slightly restoring it to what it once was. Just because a gun has turned into a boat anchor does not mean it is too far gone. Let’s dive right into bringing this Marlin A1DL 22LR back to life with some good old conservation.
Related TFB Armorer’s Bench Content:
- TFB Armorer’s Bench: Rust Bluing The Blunderbuss
- TFB Armorer’s Bench: Initial Steps with a Muzzle Loader Kit
- TFB Armorer’s Bench: Stock Finishing – Blunderbuss Kit
- TFB Armorer’s Bench: Education on Bluing Types & Processes – Part 1
- TFB Armorer’s Bench: Education on Bluing Types & Processes – Part 2
- TFB Armorer’s Bench: Cleaning Up and Fire Bluing Screws
TFB Armorer’s Bench: Rust Bluing The Blunderbuss
Here, we at TFB hope to inform, entertain, and even inspire any would-be gunsmith or armorer out there. Ideally, with the information I provide and with the help of our sponsors, you can have some useful knowledge about the conservation and improvement of firearms technology while at the same time sharing experiences and teaching each other new tips and tricks along the way in the comments. Digging deep into what it is to be an armorer or gunsmith has significance but what is important is what those people do to show they’ve earned that title. I am happy to share my experiences and knowledge and hope it is informative!
Make your personal safety a priority:
- Practice proper gun safety. Always make sure before the firearm hits your bench that it is unloaded and safe to be handled.
- Wear the proper safety equipment. The main one would be safety glasses (decent ones) since parts are often under spring tension and you may work with high RPM tools. Other honorable mentions would be latex gloves or a respirator when working with potentially harmful solvents and oils. Also hearing protection when working with loud machinery or test-firing firearms.
- Modifications, alterations, and customizations will void your firearm’s warranty 9.5 times out of 10. Please take that into consideration before attempting any at-home gunsmithing.
- If you are unsure about proper safety practices, disassembly procedures, or warranty standards, stop, put down the tools, and consult a competent gunsmith.
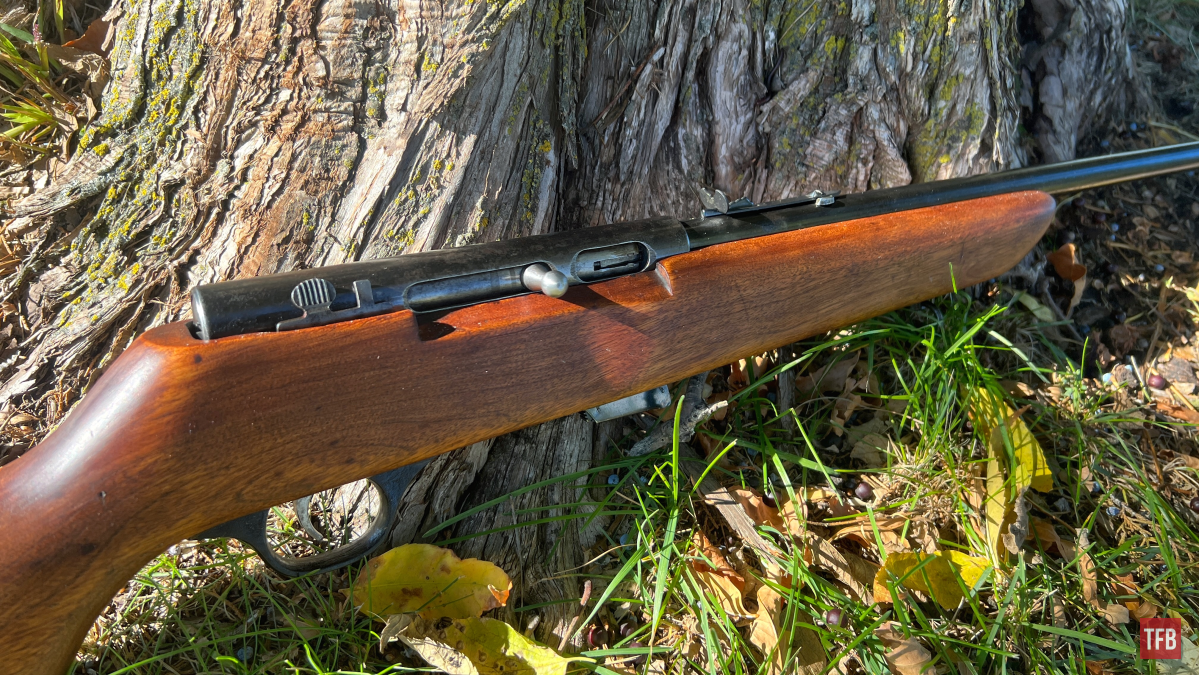
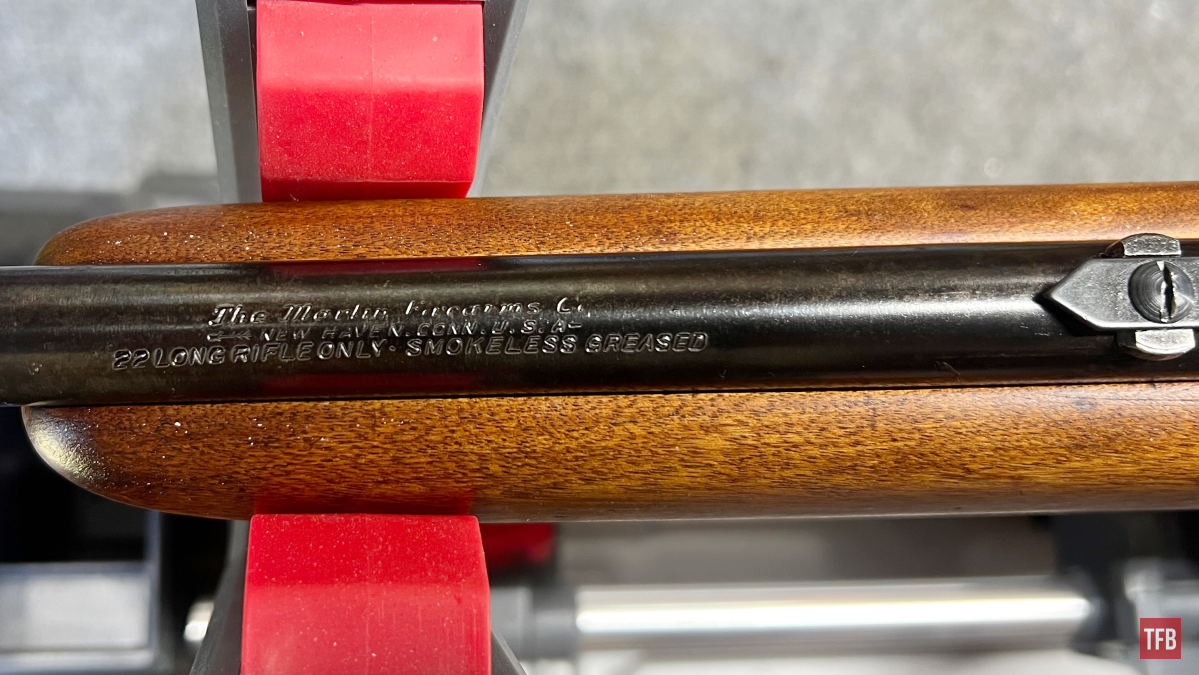
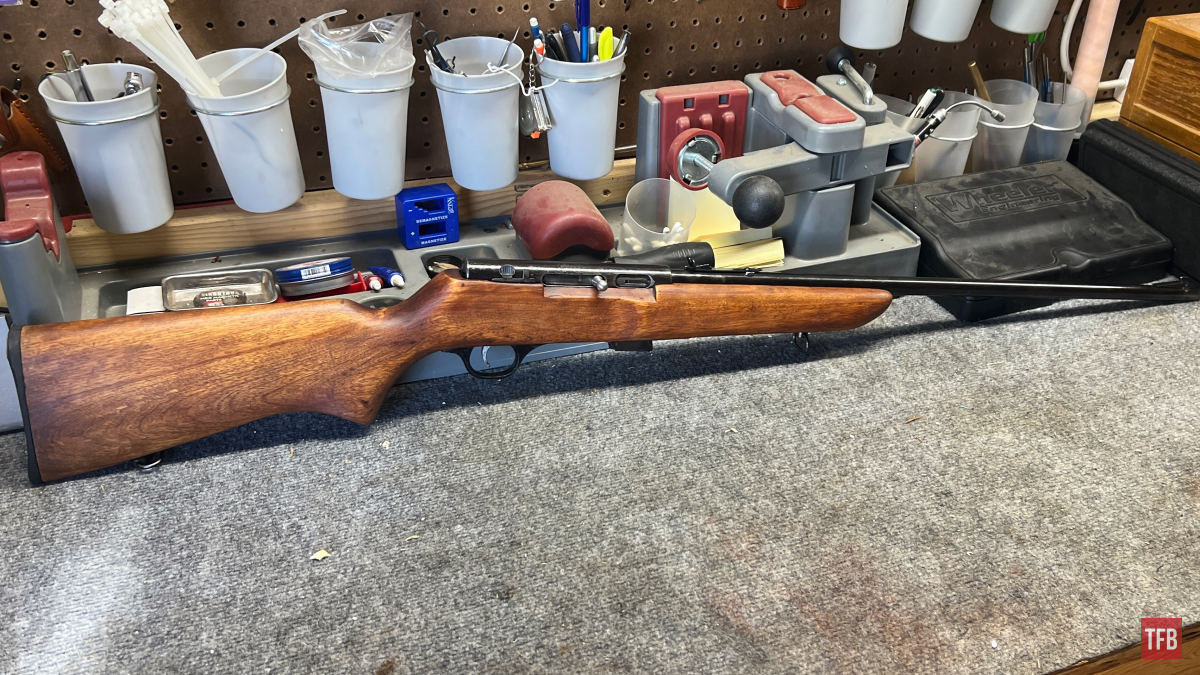
Little Background: Our Marlin A1DL
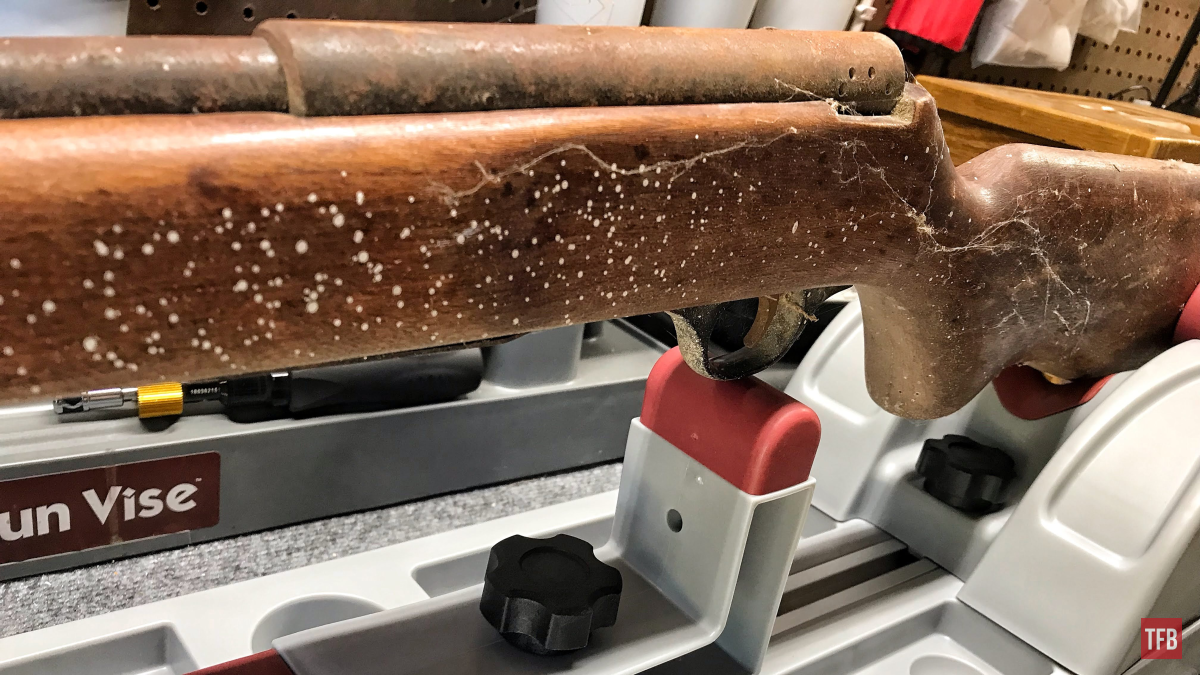
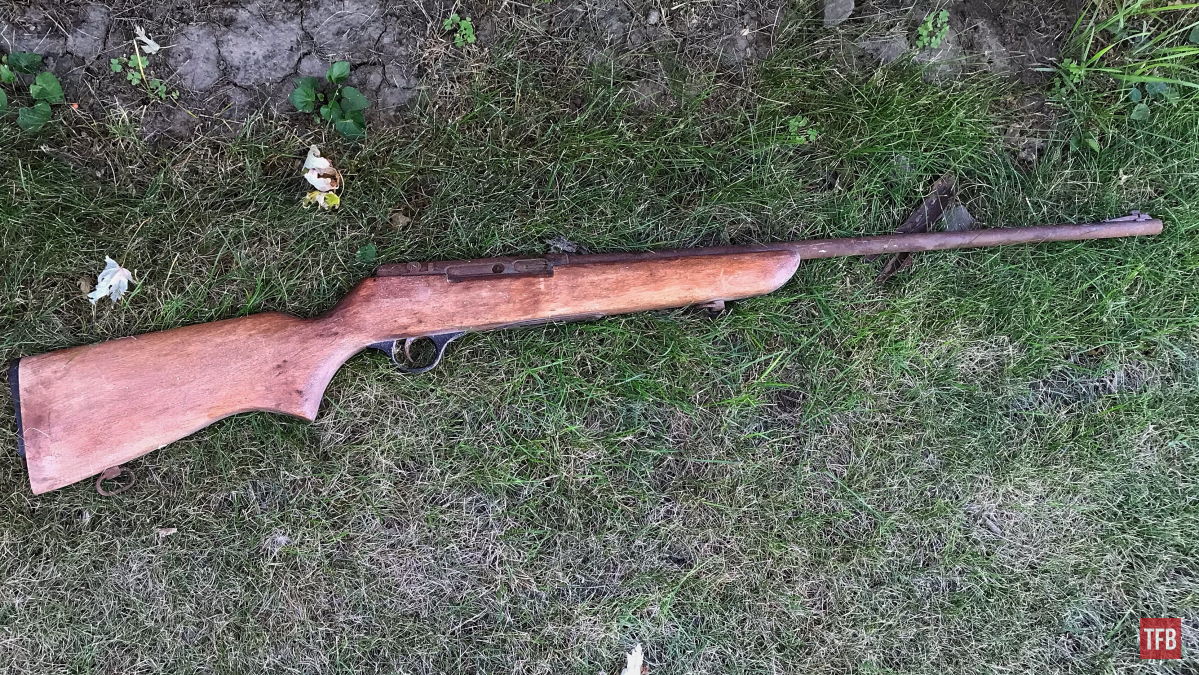
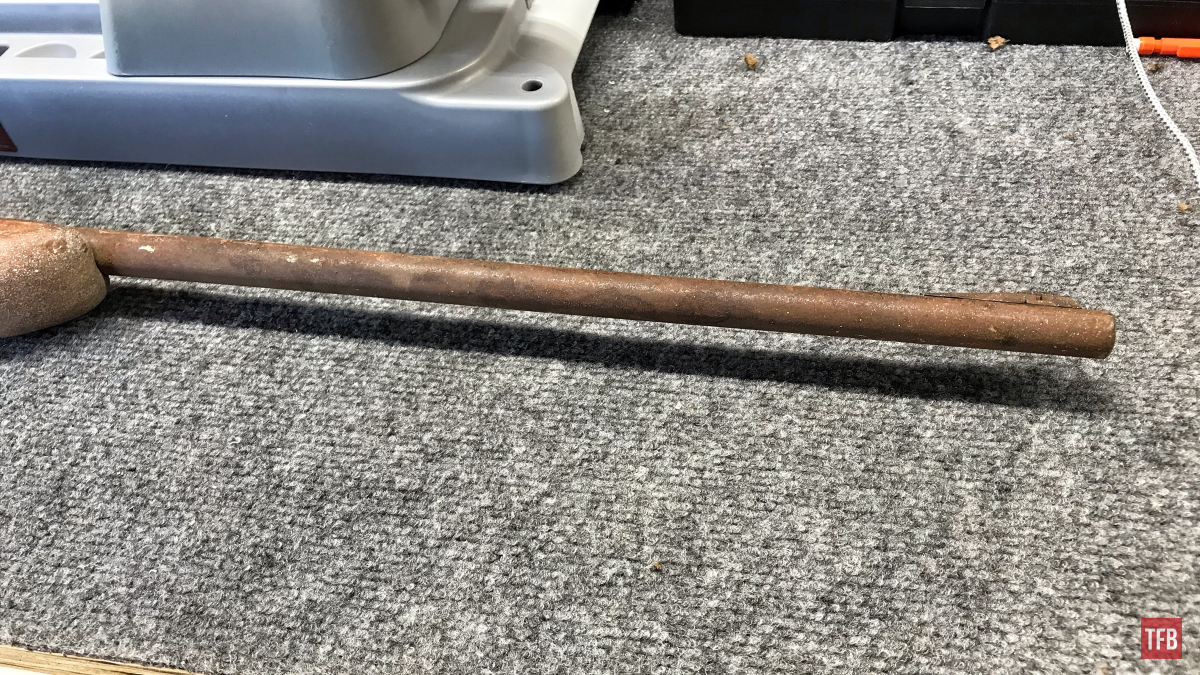
This rough as heck Marlin has been like this since I can remember. When my folks bought the house my mother grew up in, my grandfather left some stuff in the garage. One item was this 22 and it looked just like this back then. Rusted, locked up, and missing parts.
He explained a neighbor gave it to him long ago and it just rotted away over time being the equivalent of a barn gun. So time went on, I went off to college and then a couple summers ago, my father found this gun again after organizing some stuff in his shed. It has been on the list of projects ever since.
First Steps of Firearm Conservation
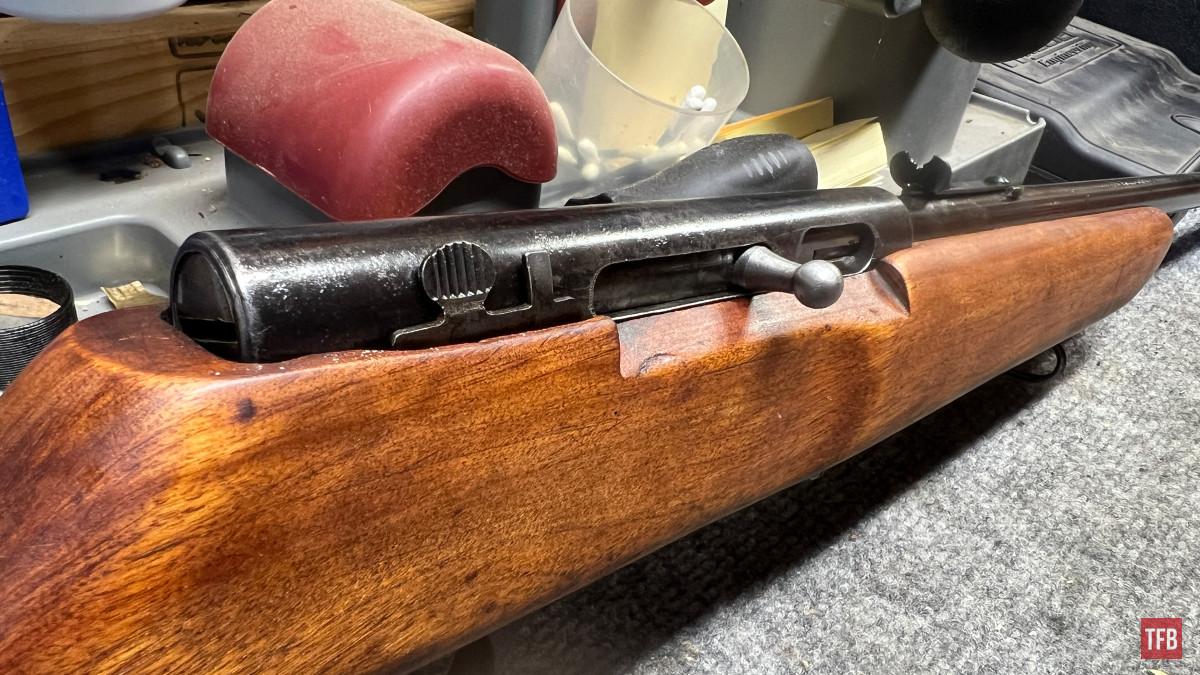
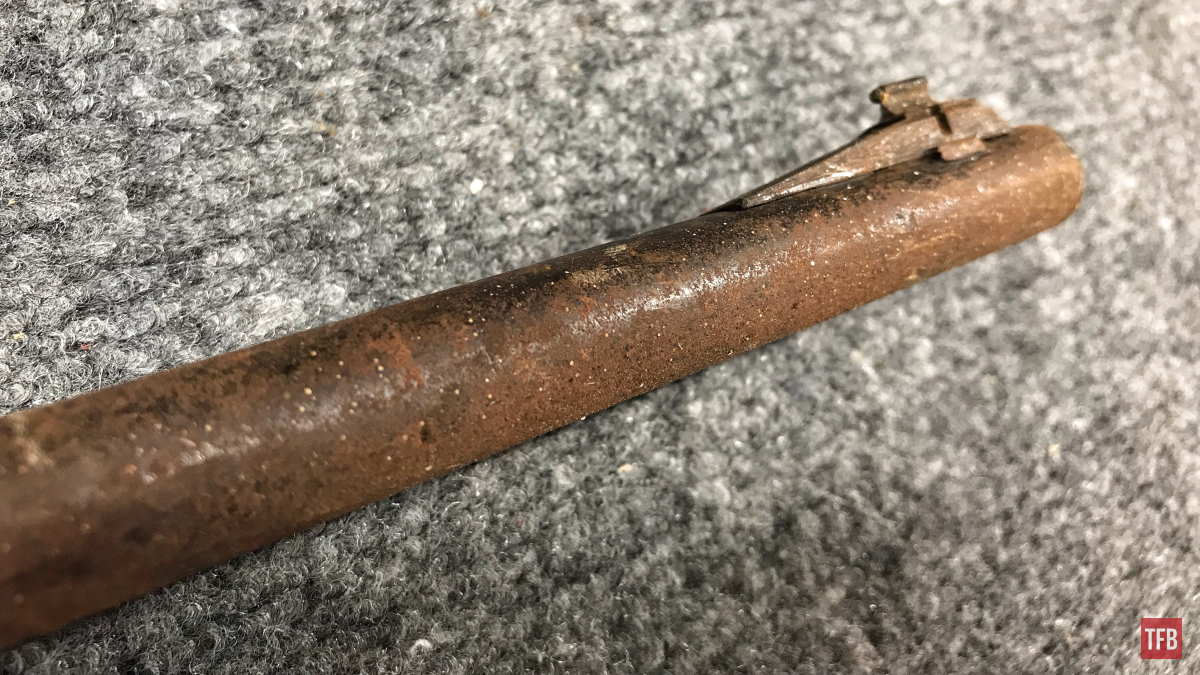
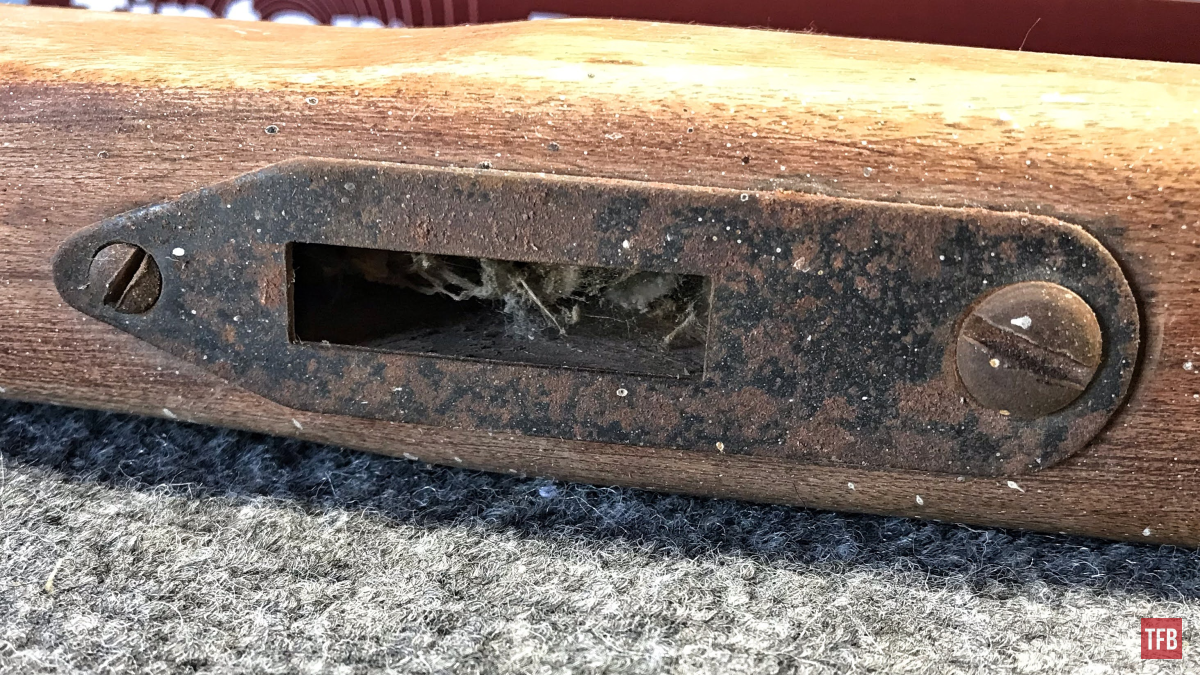
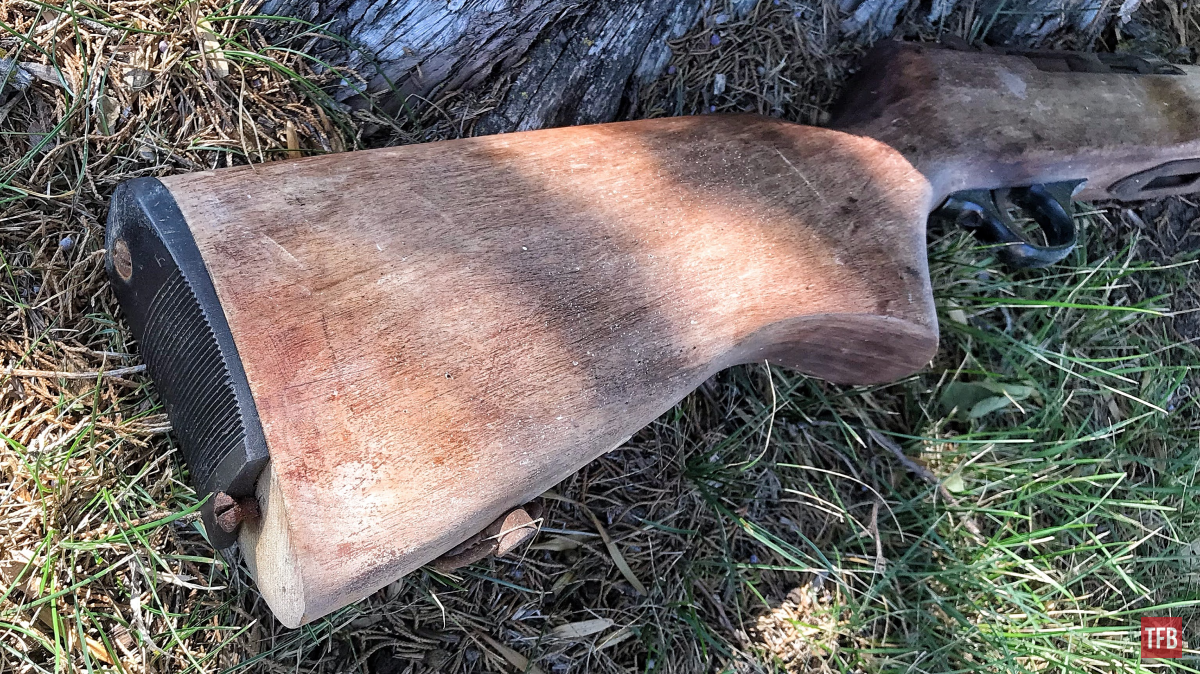
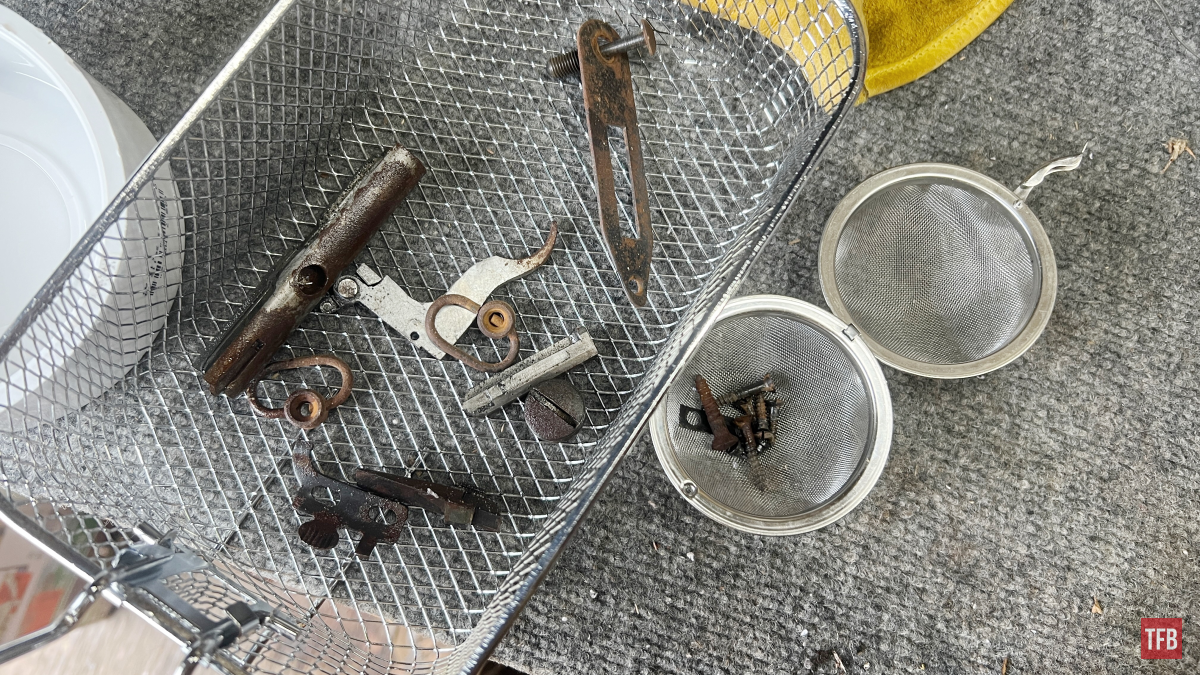
First, we need to figure out what parts we have and what parts we need. This gun was obviously in need of a charging handle, a buttplate (the existing one was broken) a rear sight (I could not locate the specific short-style peep these would have used), and a magazine.
Yes, any gunsmith can manufacture a part like a charging handle but it’s not necessarily always worth the time. Especially when the parts are affordable and still available. Thanks, Numrich!
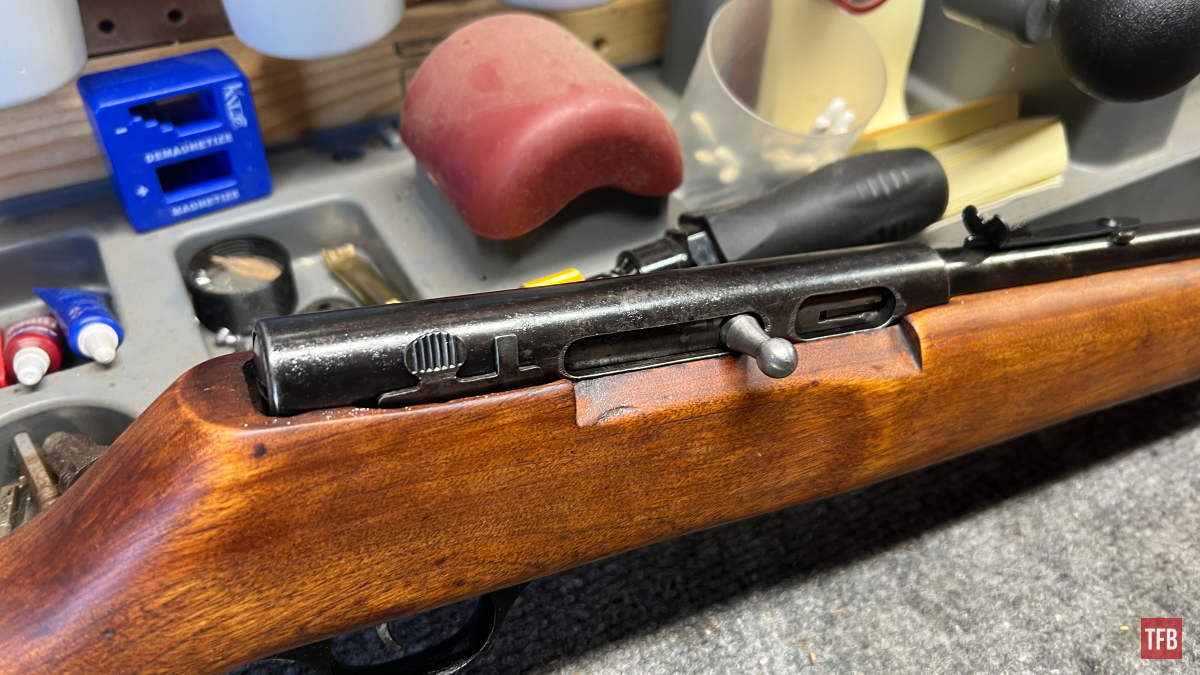
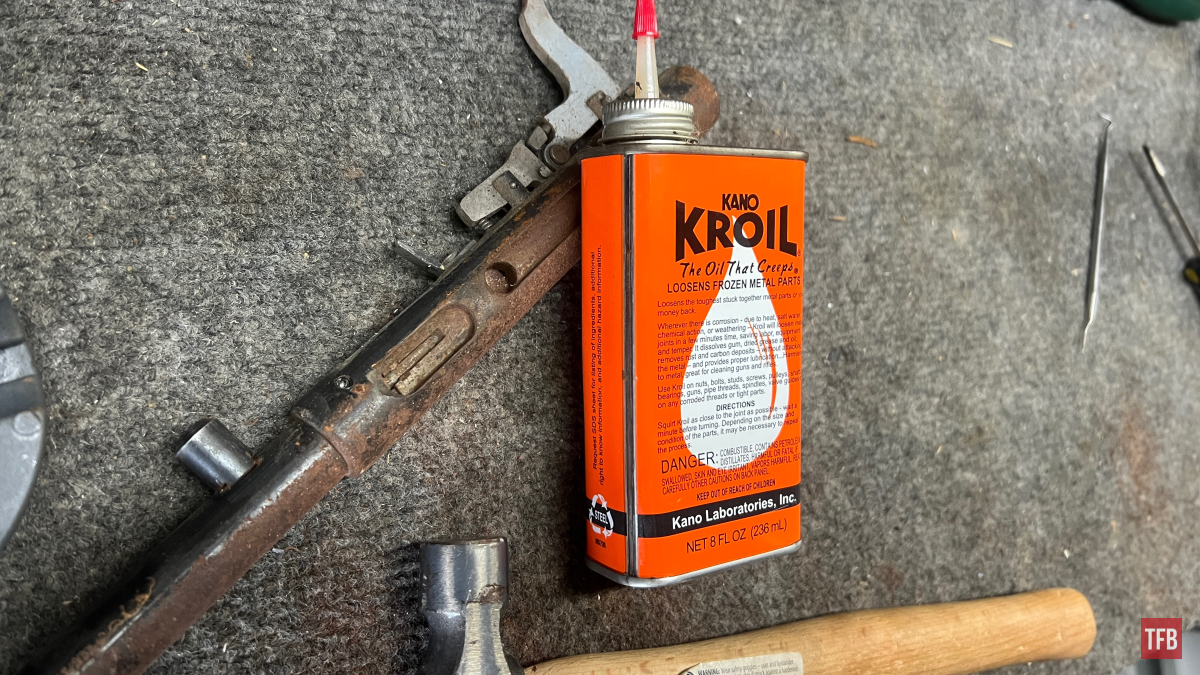
Internal parts are of course a mystery until we get it apart. Spoiler – all internal parts were fine and lacked corrosion. Taking things apart is as simple as unscrewing things here and there but given the presence of years of rust, it is advisable to apply penetrating oil to just about everything and give it 30 minutes to an hour to soak. I typically use Kroil but have found Liquid Wrench is a heavy-hitting backup to the normal default gunsmith penetrating oil.
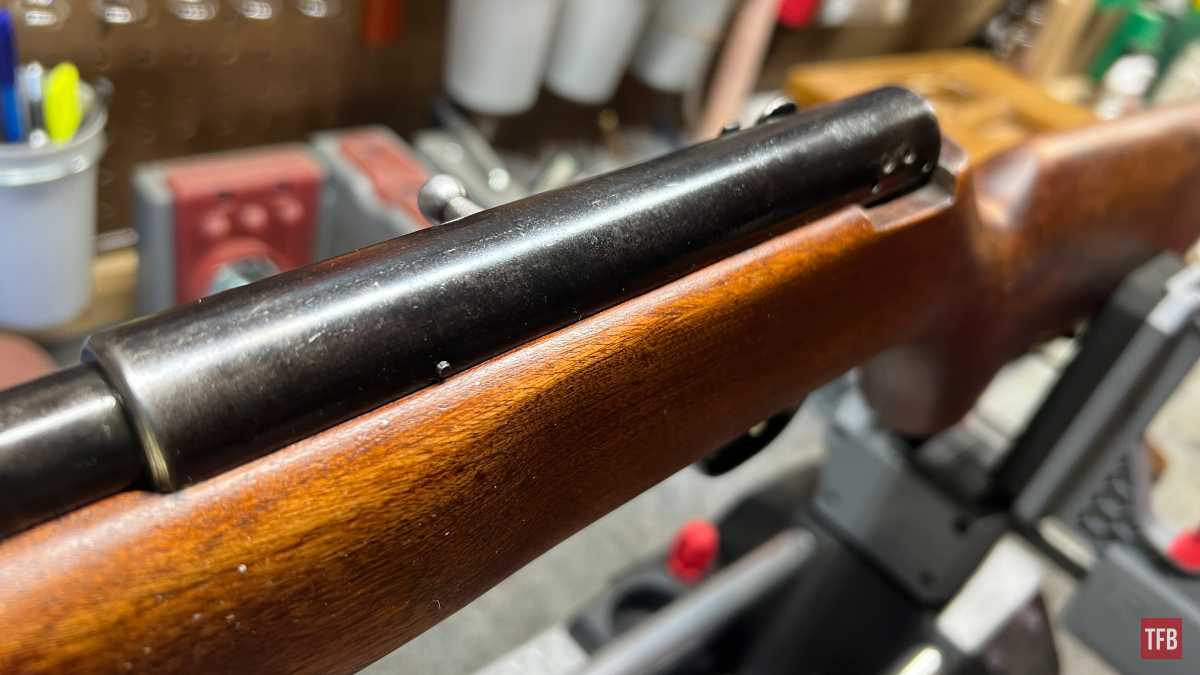
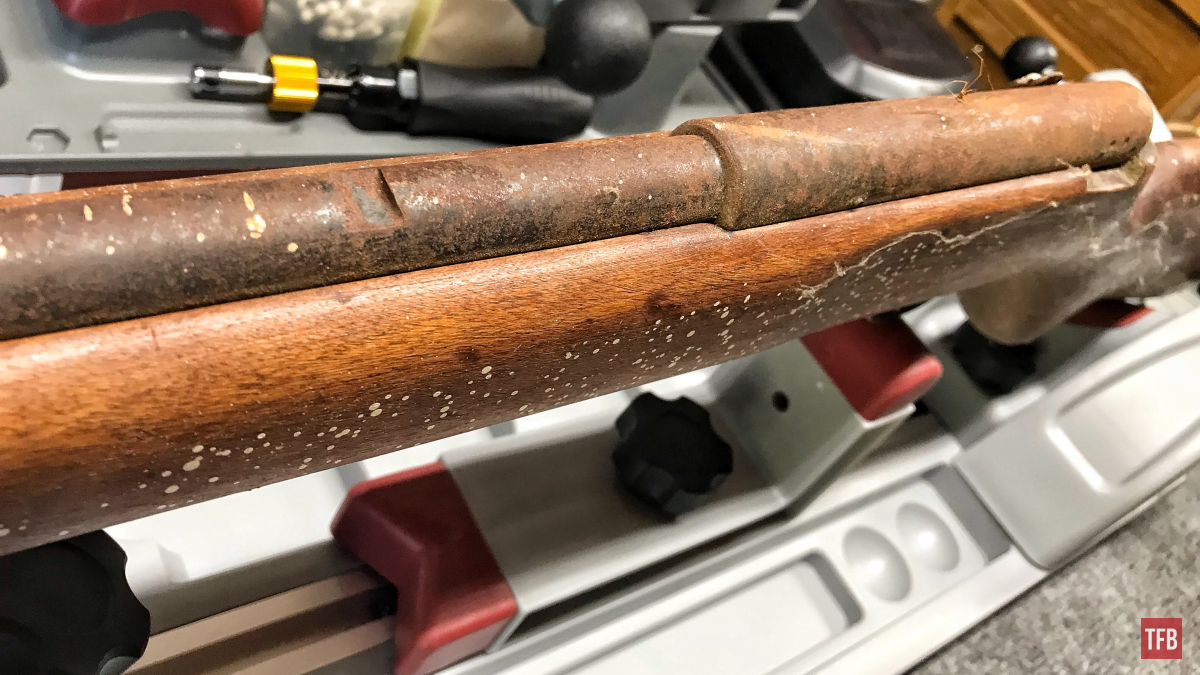
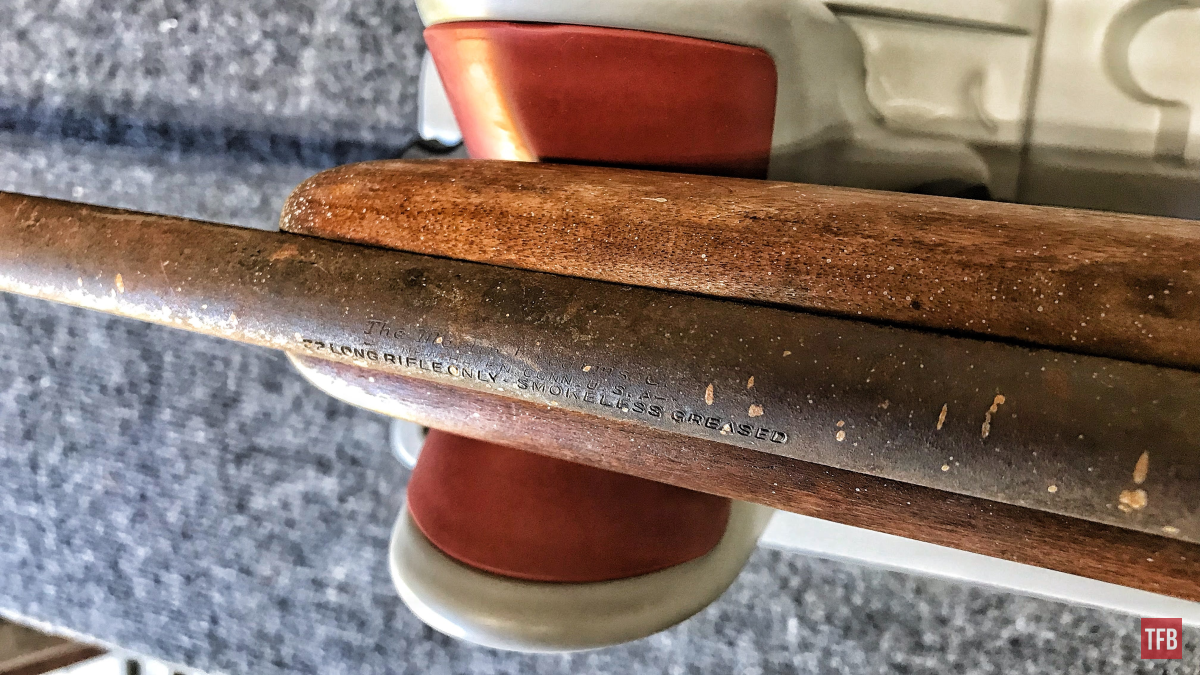
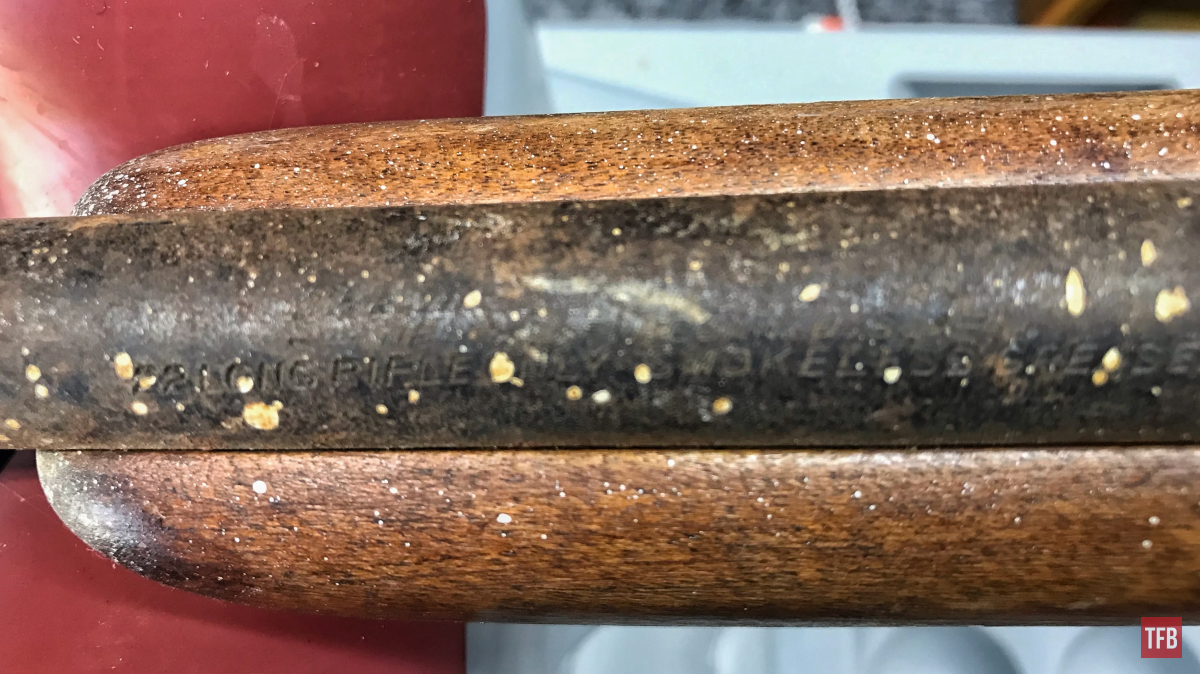
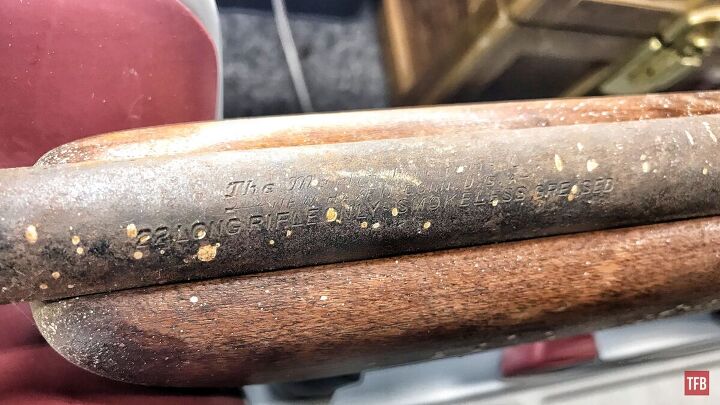
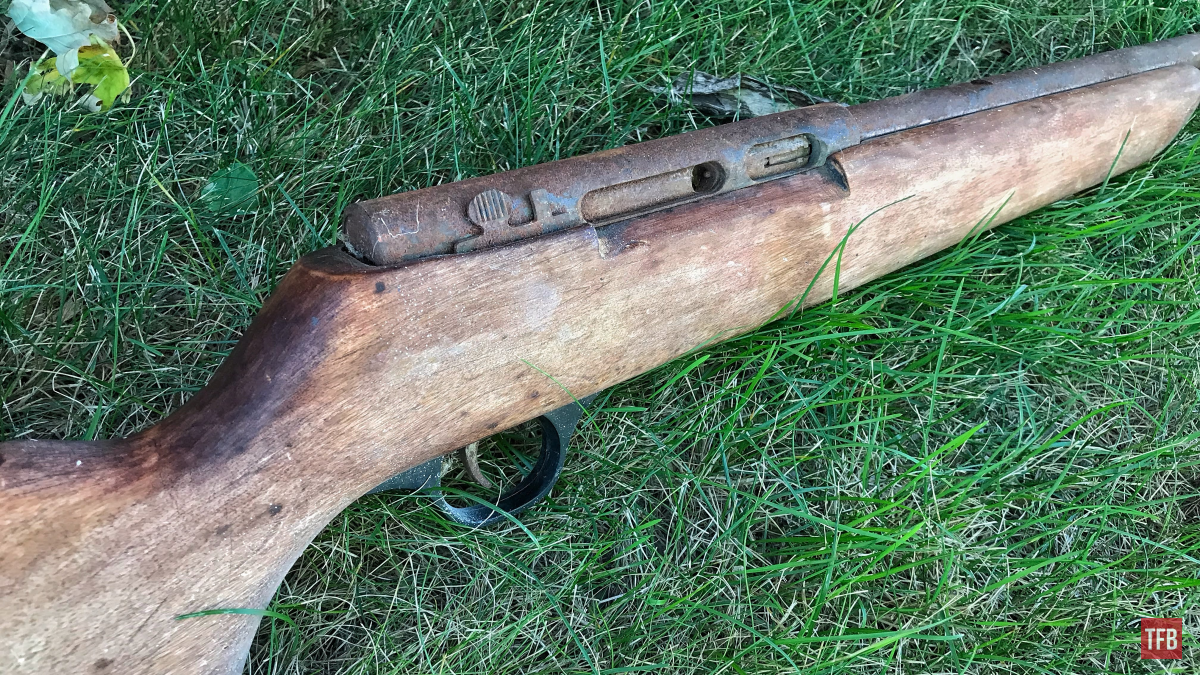
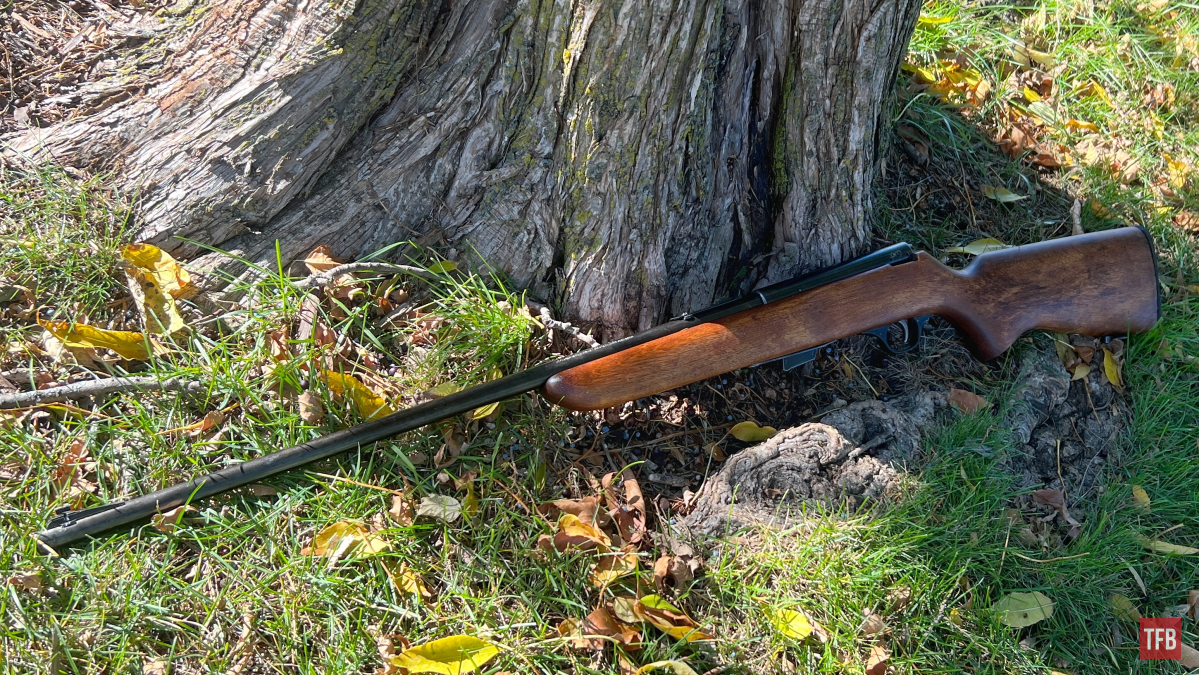
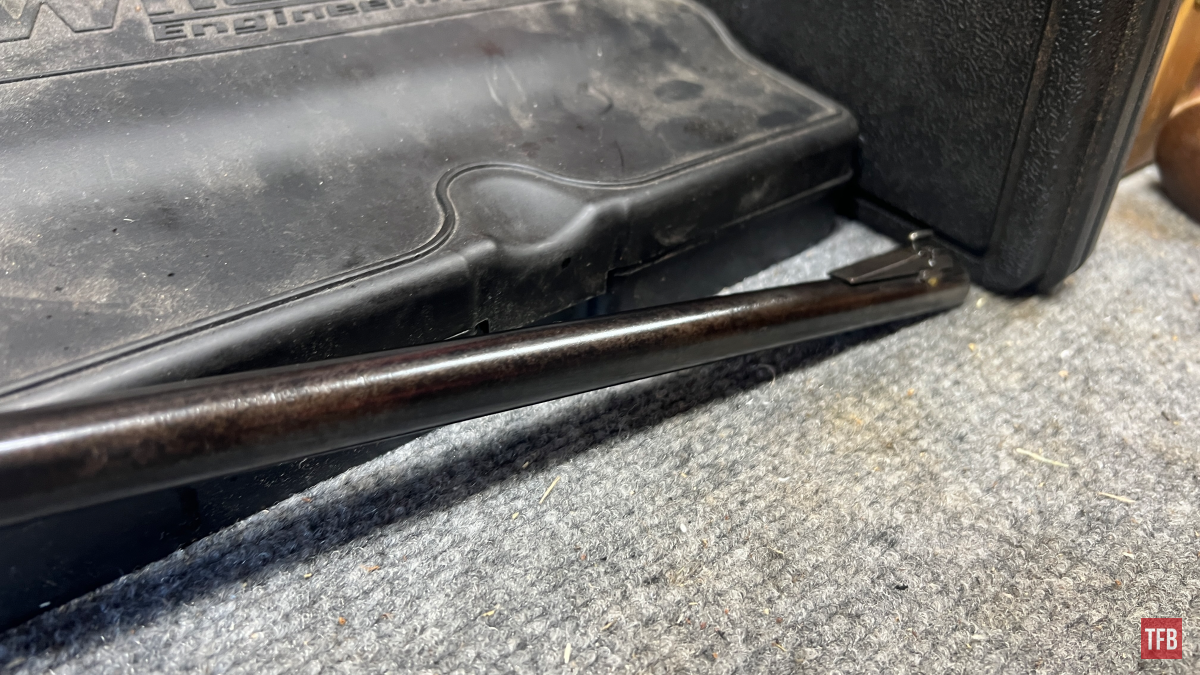
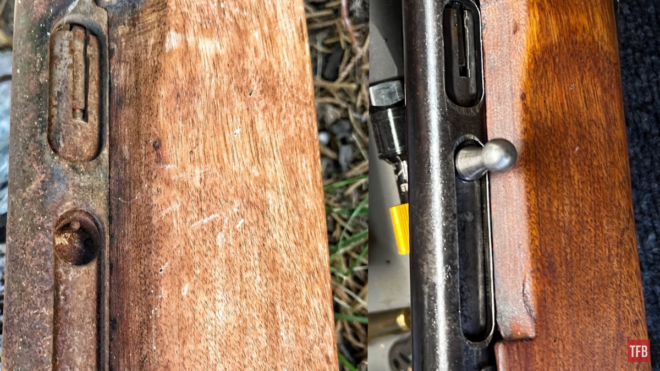
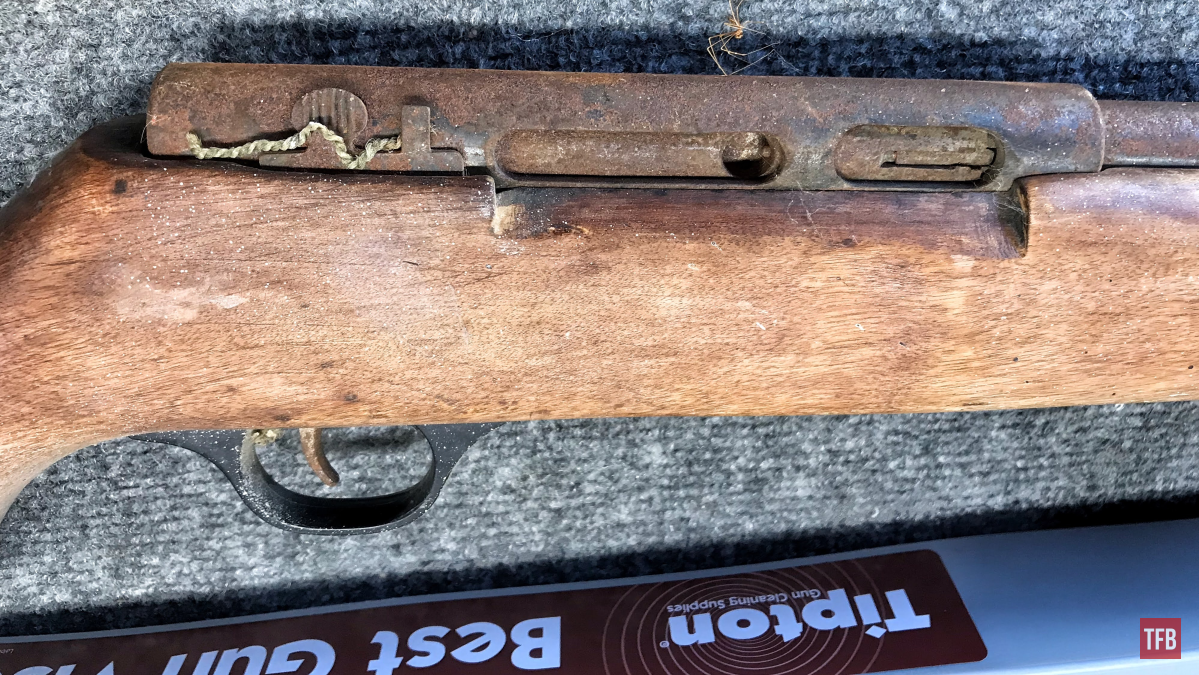
Here we can see an example of long-term rust mixed with a gun that was simultaneously stored and kept dry in a corner of a garage. The rust only ever appeared from a lack of routine maintenance and the moisture in the air over the years. Sealed away under the stock was the underside of the barrel. This is the original bluing and it gives us an idea of what all the metal parts once looked like.
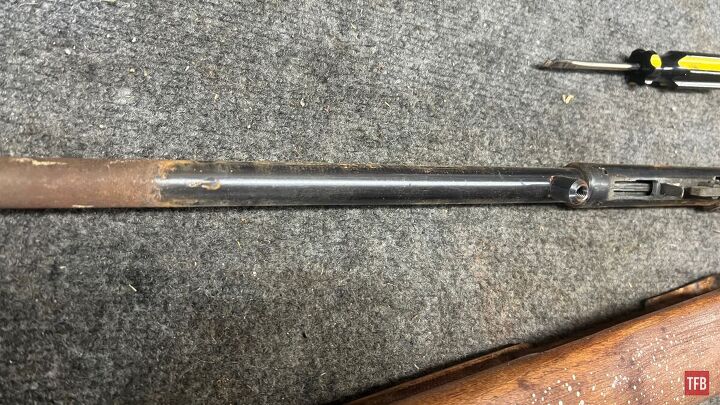
The only part that needed any real persuasion was the bolt. It like the rest of any screws and pins was soaked in penetrating oil for a good bit before a cleaning rod was put down the barrel and wrapped hard once with a hammer. It moves with little issue.
The Process: Firearm Conservation
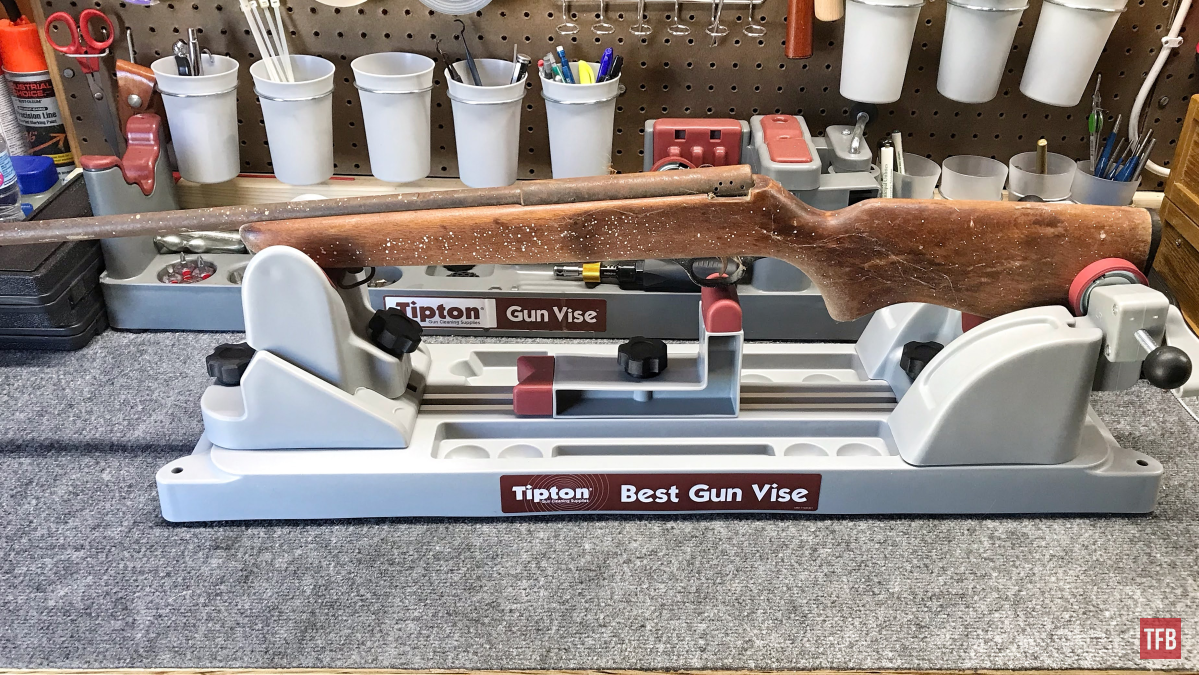
With all the metal parts disassembled and accounted for we can take the small parts and put them in a basket (a basket is not vital) and the even smaller parts into a tea infuser. These guys, apparent rust or not, go into a pot of boiling water. I use a deep fryer that I picked up at a thrift store on the cheap. Parts can boil for a good bit of time but 45 minutes was all these needed.
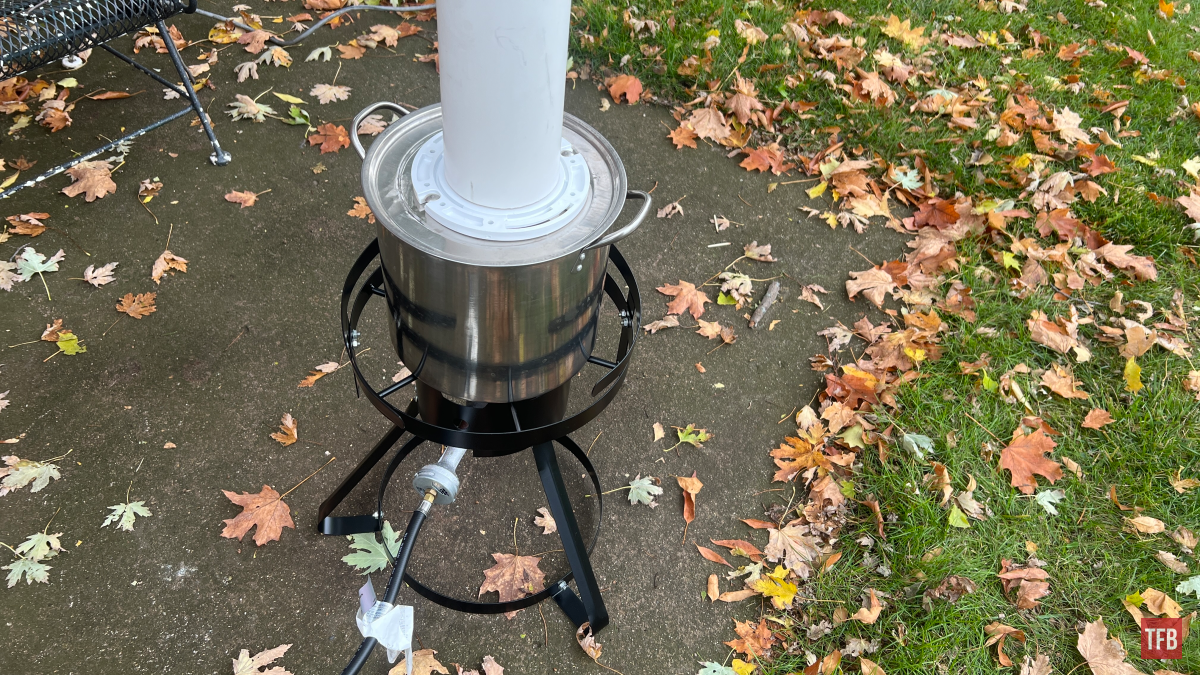
Meanwhile, the barreled action goes in the same steam pipe that I use for rust bluing. Steaming is far faster than boiling and only takes around 15 minutes at a time. The boiling/steaming converts the existing rust and makes it soft. In a way, it detaches itself from the metal underneath.
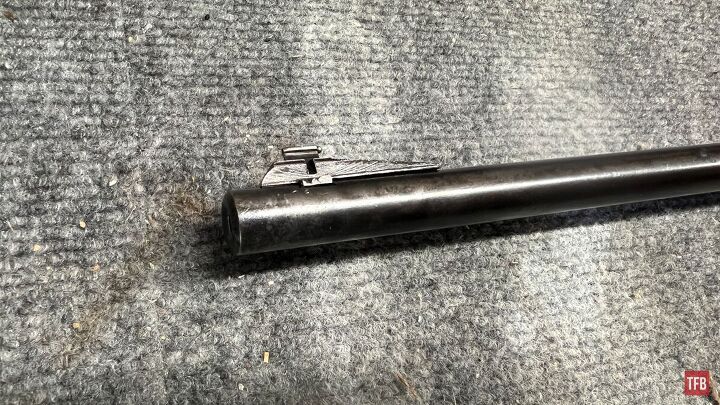
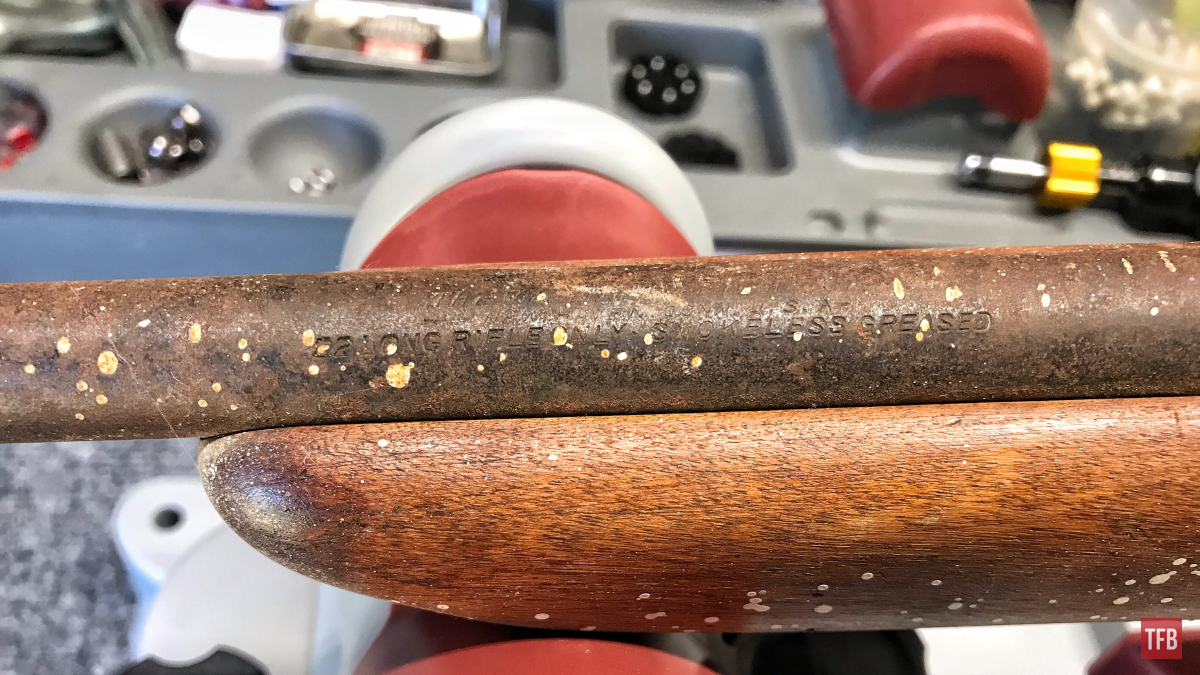
The same subsequent process of rust bluing applies. The parts with freshly converted rust now need to go under a carding wheel. Carding wheels are extremely fine wire wheels. So soft that you can touch it while it is running. Alternatively, a degreased very fine 000 or 0000 steel wool can be used.
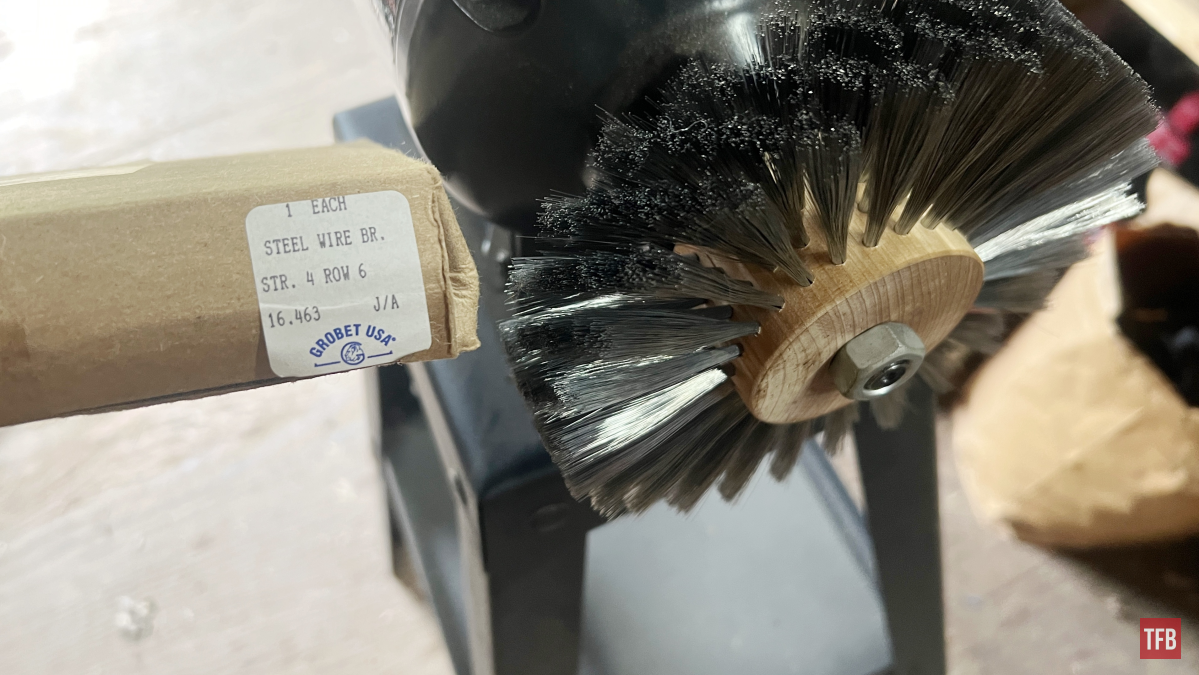
These two methods are used to lightly brush off the now loose rust. It really is like magic. Underneath, thankfully for this old Marlin, is still the original bluing. Any thicker pockets of rust can be reconverted and carded over and over again until it is gone.
In the event we have some stubborn speckles of rust sealed up tight a flat piece of brass can be used to score the top of it and agitate it enough so when the steam hits it, it can penetrate and work its magic. Who would have predicted that a bit of hot water could aid in the ridding of rust?
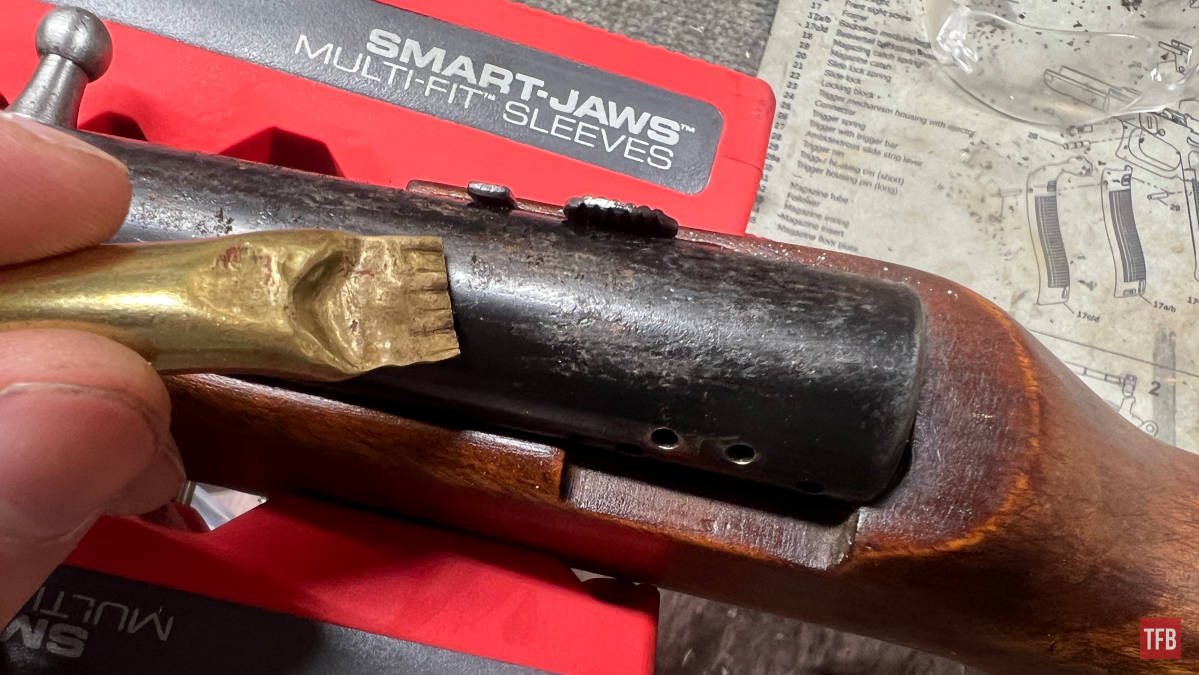
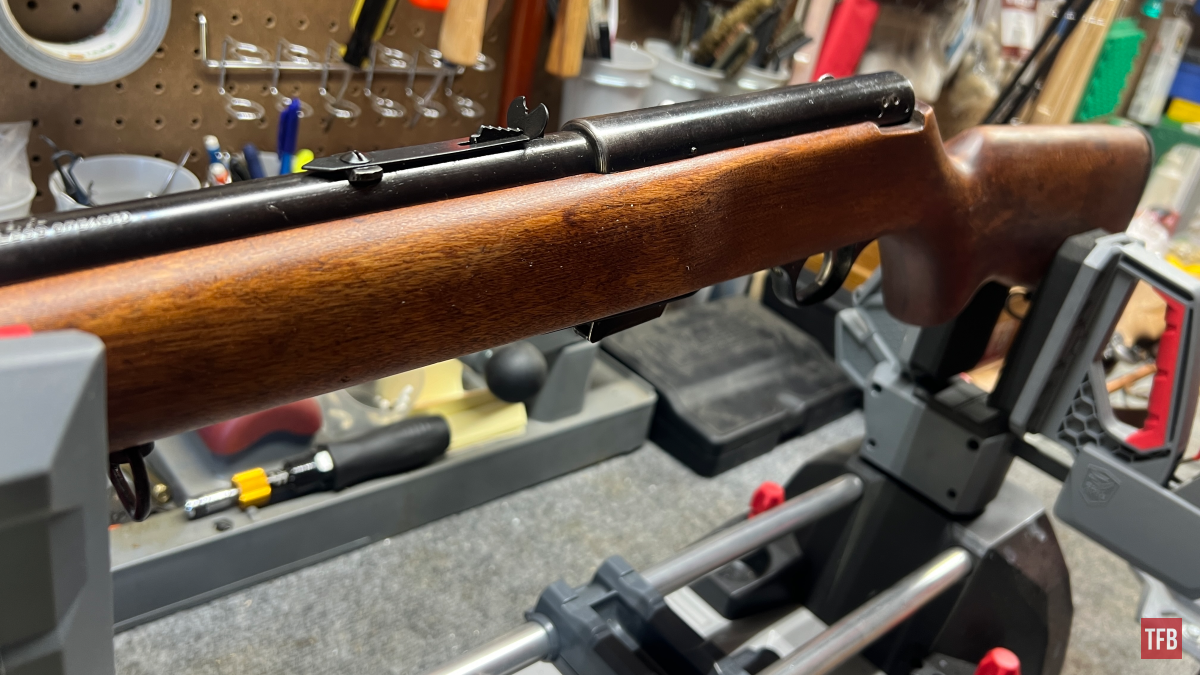
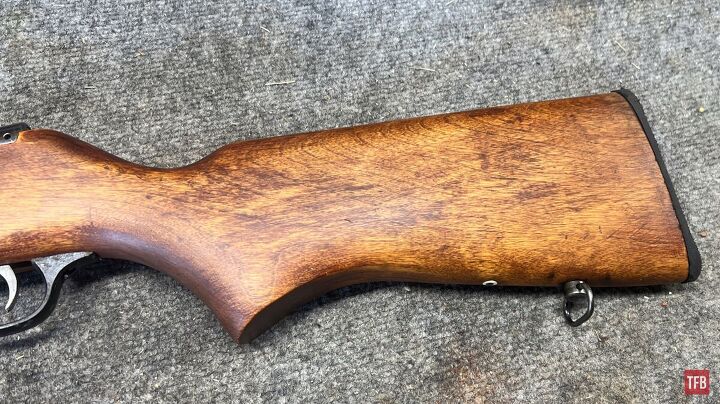
I should mention that the stock took little effort in bringing it back to life. Soapy water and some very fine sandpaper took off the years of molding, fading, and speckles. A coat of Danish oil and a final wipe-down with some feed in wax did it well.
The Ridding of Rust: Firearm Conservation
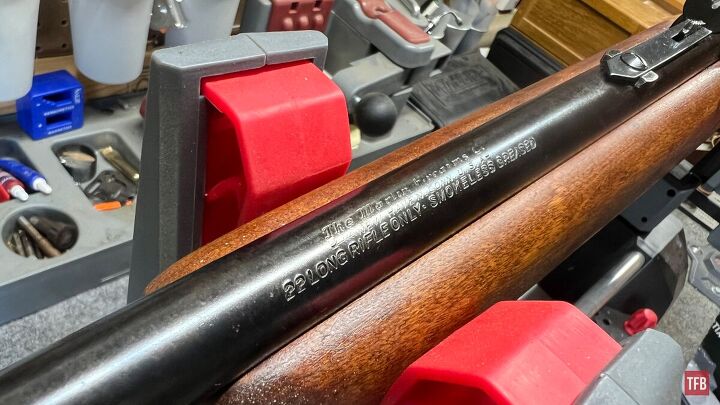
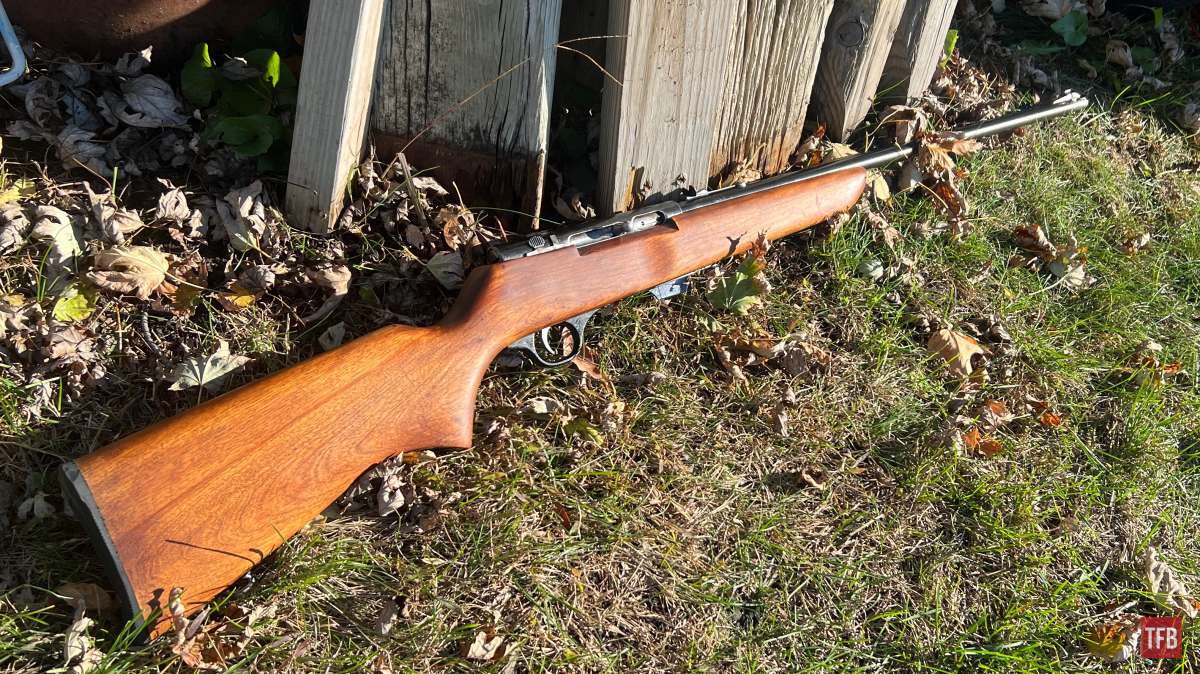
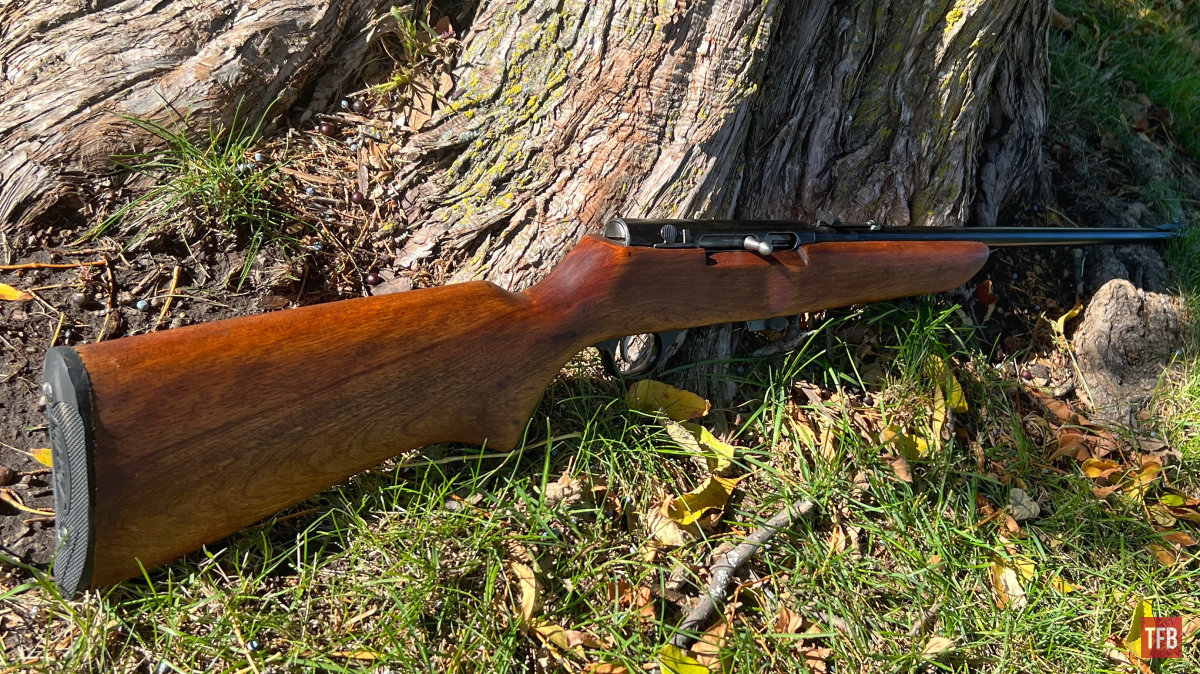
With all rust removed, the barrel can be cleaned as you would normally, parts wiped down with gun oil, and assembled and lubricated. There you have it. No chemicals or rebluing. Sure, it is not brand new again but it sure isn’t a boat anchor anymore. I am happy to report that she runs just fine.
As always, thank you for reading TFB! Be safe out there, have fun while shooting, and we will see you next time for the TFB Armorer’s Bench! Also, let us know what you think in the comments below! We always appreciate your feedback.