 Your Privacy Choices
Welcome back to another Friday Night Lights where I review night vision, thermal and related accessories. Last week we took a look at one of the latest digital night vision devices coming out of the commercial market from DuskEagle. Well, today we take a look at a thermal monocular that was seen used in the movie Sicario. Alejandro dons a FLIR RECON M24 thermal monocular near the end of the movie when they go into the tunnels. I got my hands on one so we can take a closer look at it.
More Thermal @TFB
- Friday Night Lights: AGM Voyage LRF TB75-640 Thermal Fusion Biocular
- Friday Night Lights: Hacked JIM LR – Thermal Magnifier, See More Farther Away
- Friday Night Lights: BAE Oasys RED-I Thermal Monocle HUD
Sicario Thermal

Screenshot from Sicario
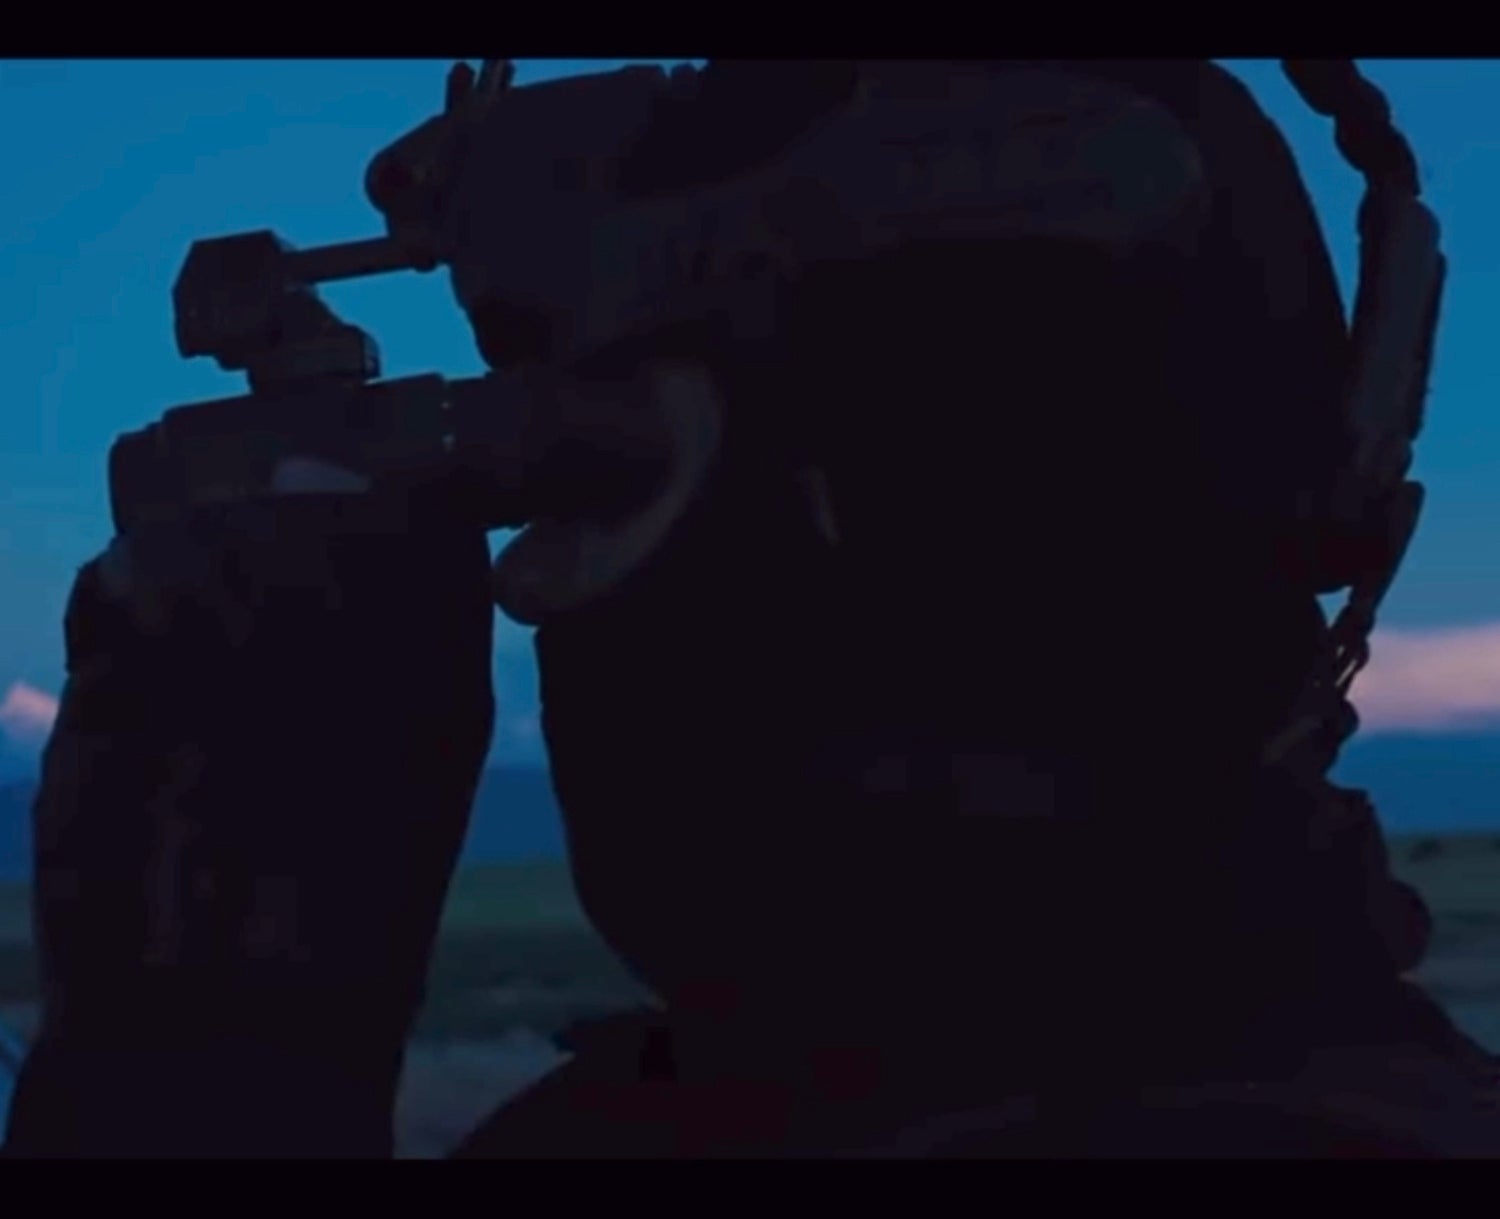
Near the end of Sicario, Benicio Del Toro’s character, Alejandro, is entering a tunnel to be placed into Mexico. Everyone else appeared to be using PVS-14s but he put on a FLIR thermal monocular and upon closer inspection, it appears to be a FLIR RECON M24. I wrote about it in my last Hollywood Night Vision Myths article.
You can see that scene in this YouTube clip.
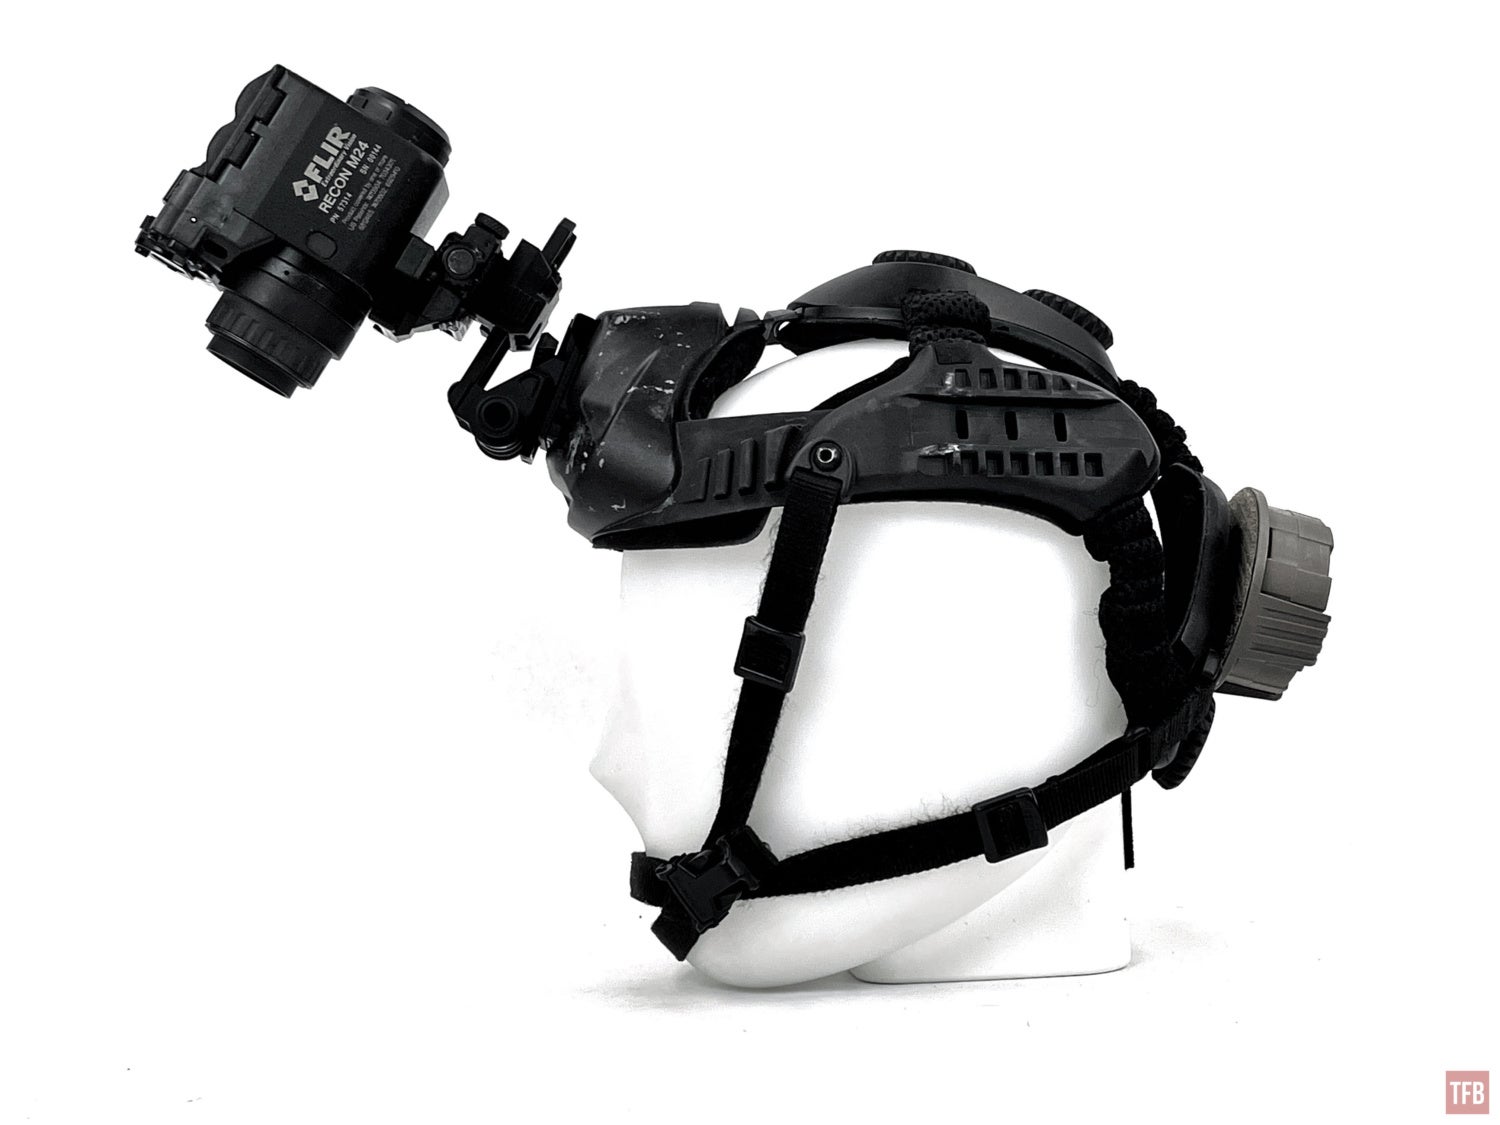
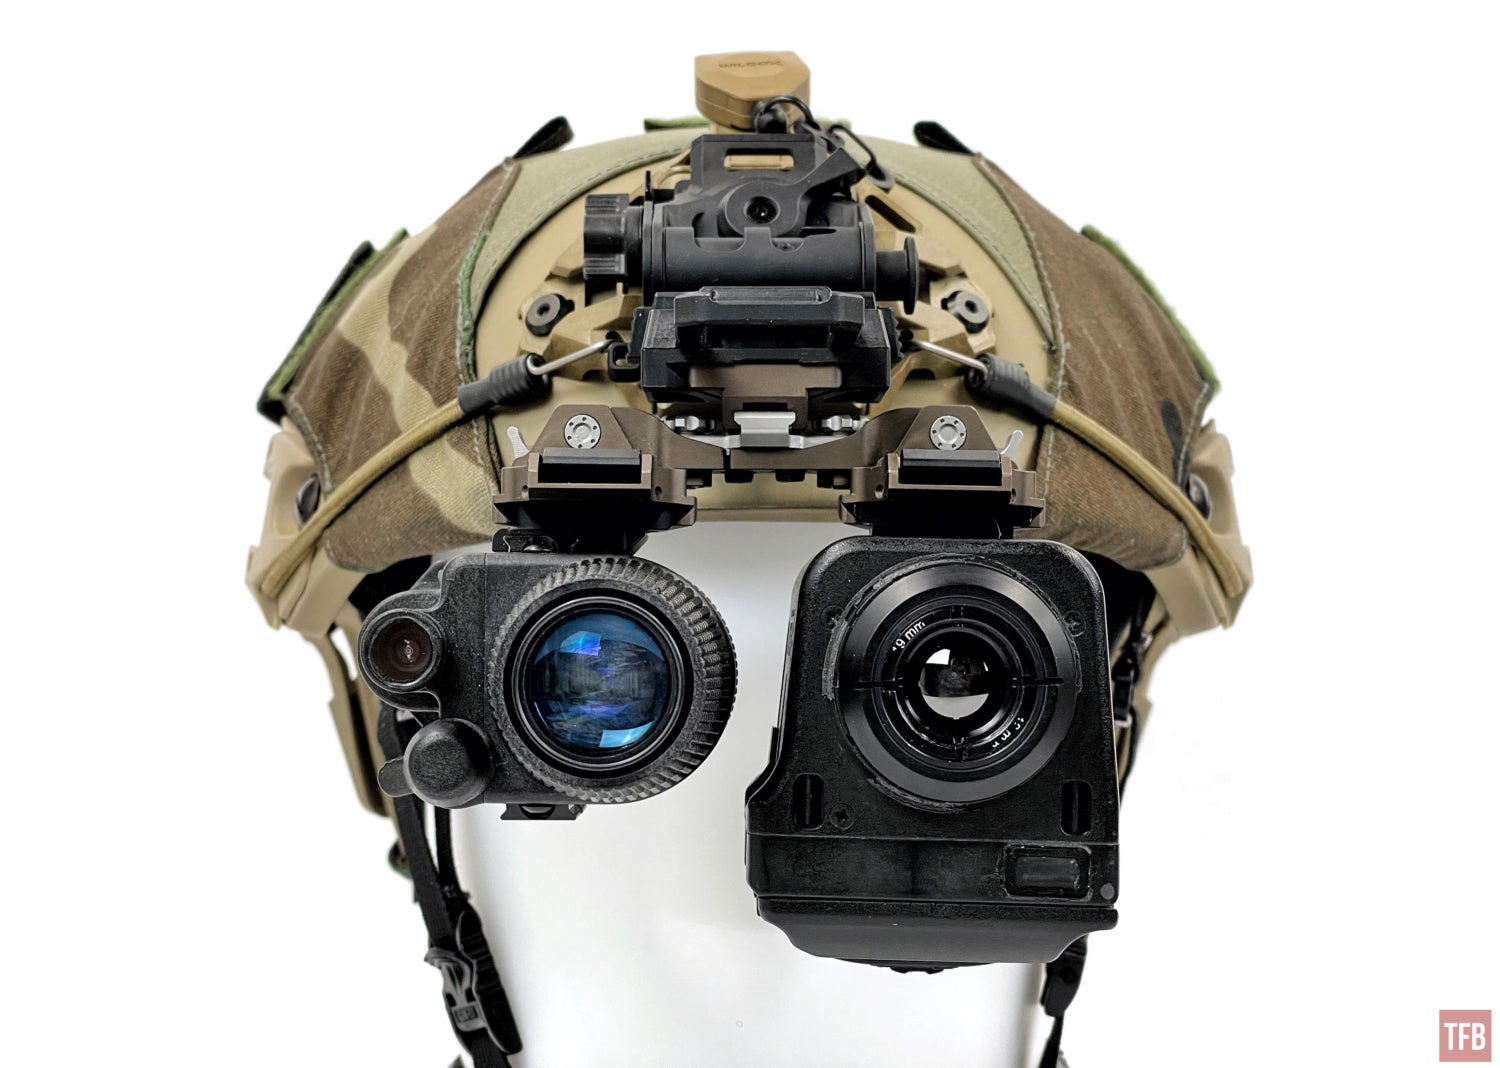
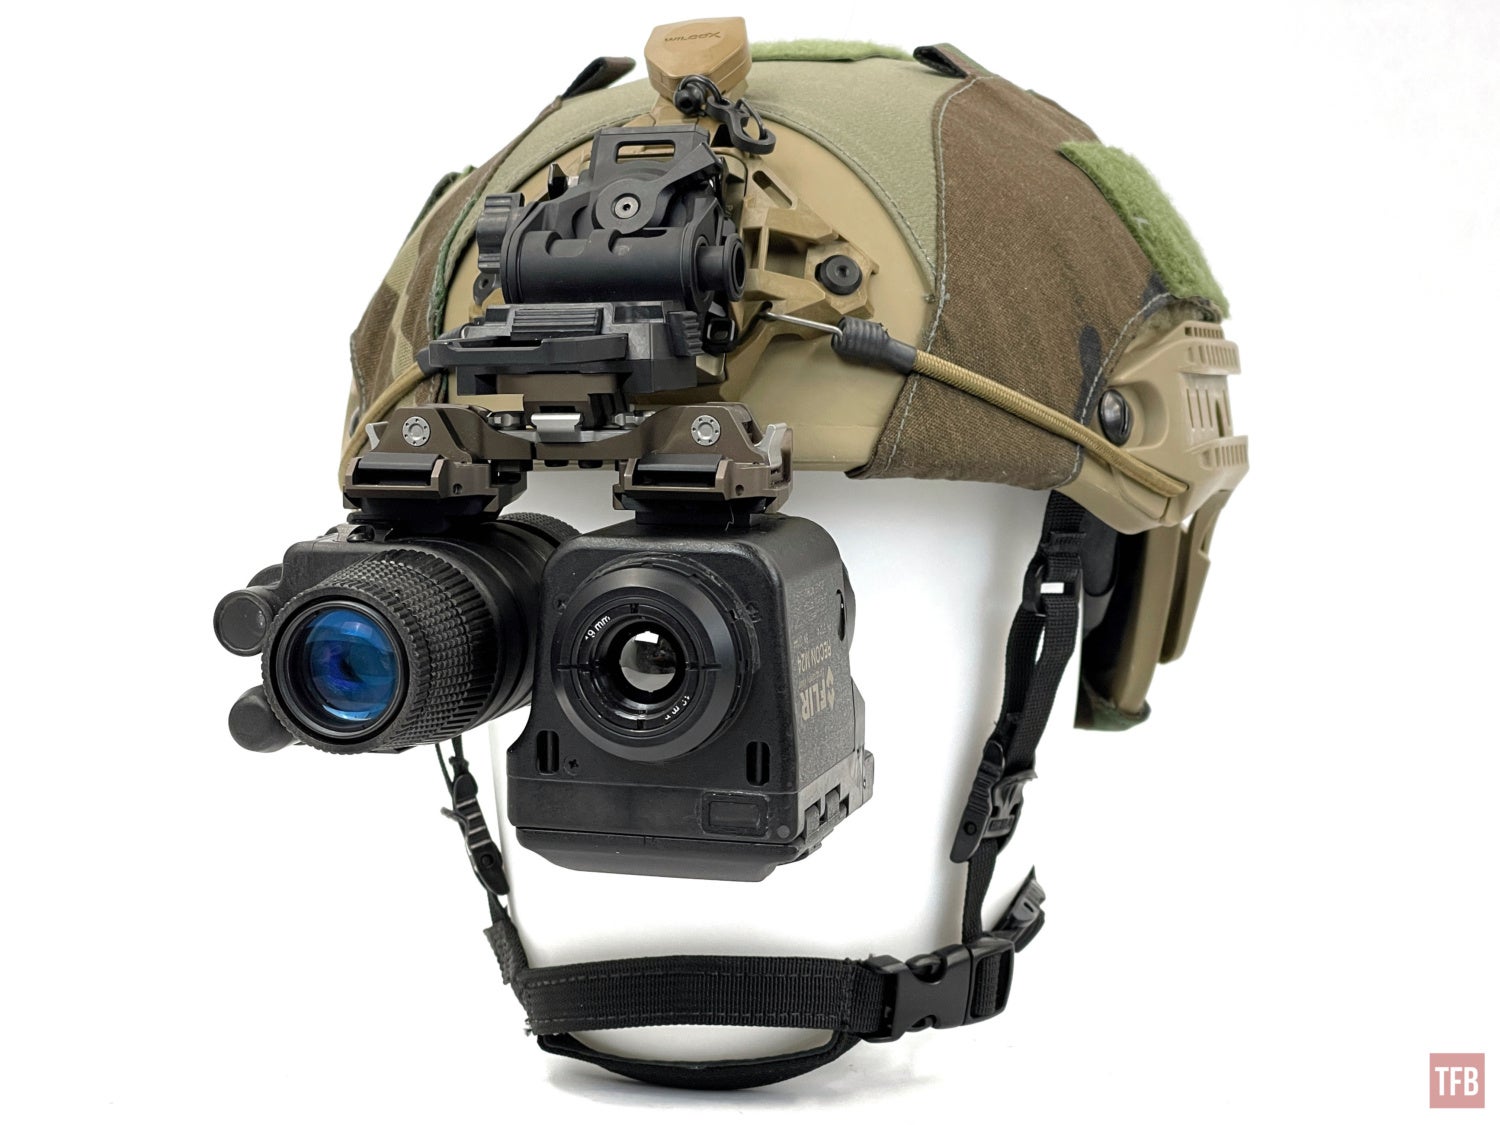
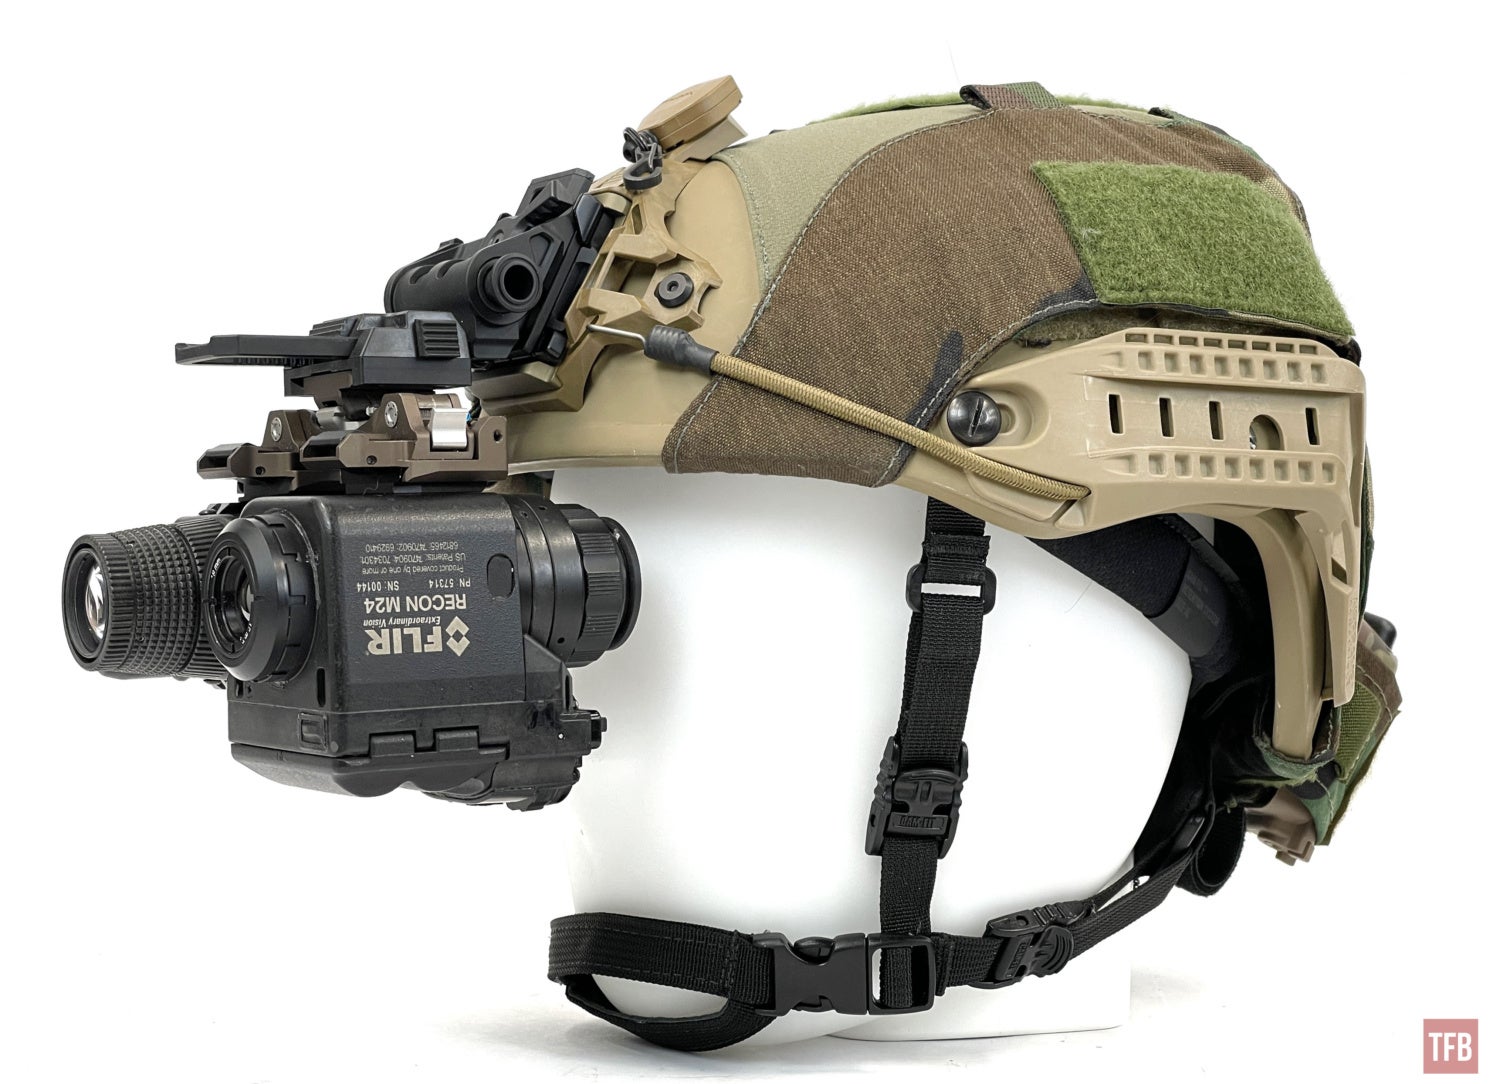
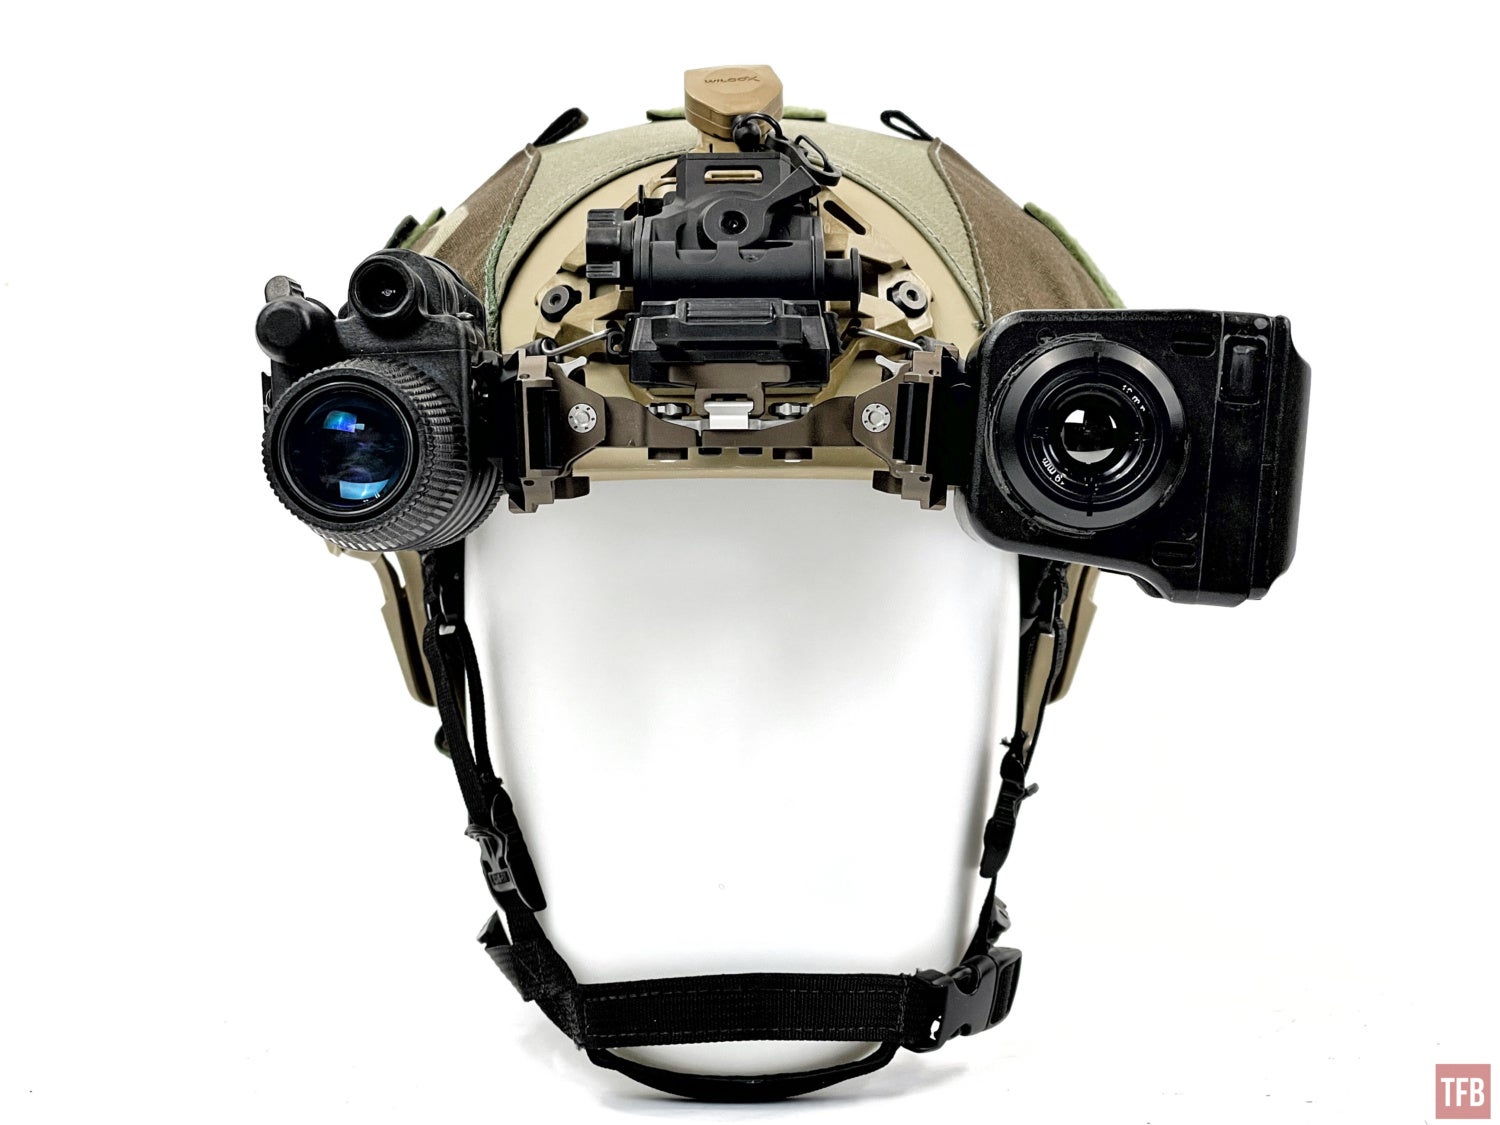
Well, I found a used FLIR RECON M24 and I bought it so I could review it here on Friday Night Lights. The M24 has long since been discontinued. I am not sure when it was discontinued but it is not currently available through FLIR. When I got it, I immediately set it up like Alejandro in Sicario. The movie used an Ops-Core Skull Crusher instead of a helmet for mounting the FLIR RECON M24.
Screenshot from Sicario
The scenes where Benicio Del Toro puts on the RECON M24 are brief and in low light. From the screenshot above we can see the silhouette of the mount and I believe it is the same Wilcox arm that I have. You can see a distinct slope under and behind the mount and above the RECON M24.
Due to the simplicity of the arm, the RECON M24 sticks out
One minor difference is that Alejandro used an eyecup in the movie while I prefer not to use them so my peripheral vision can see around the RECON M24.

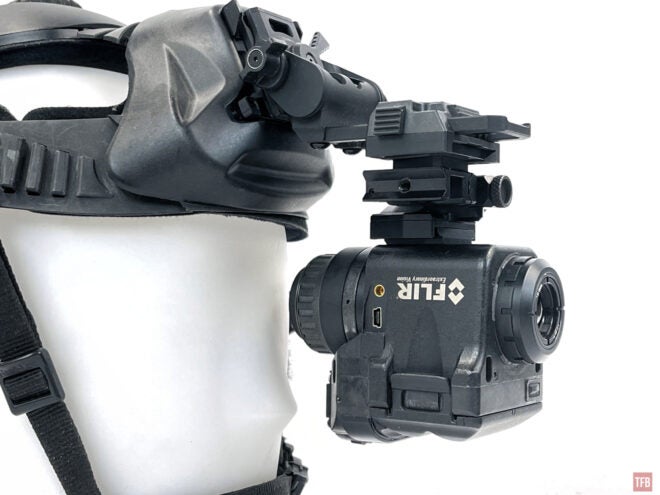
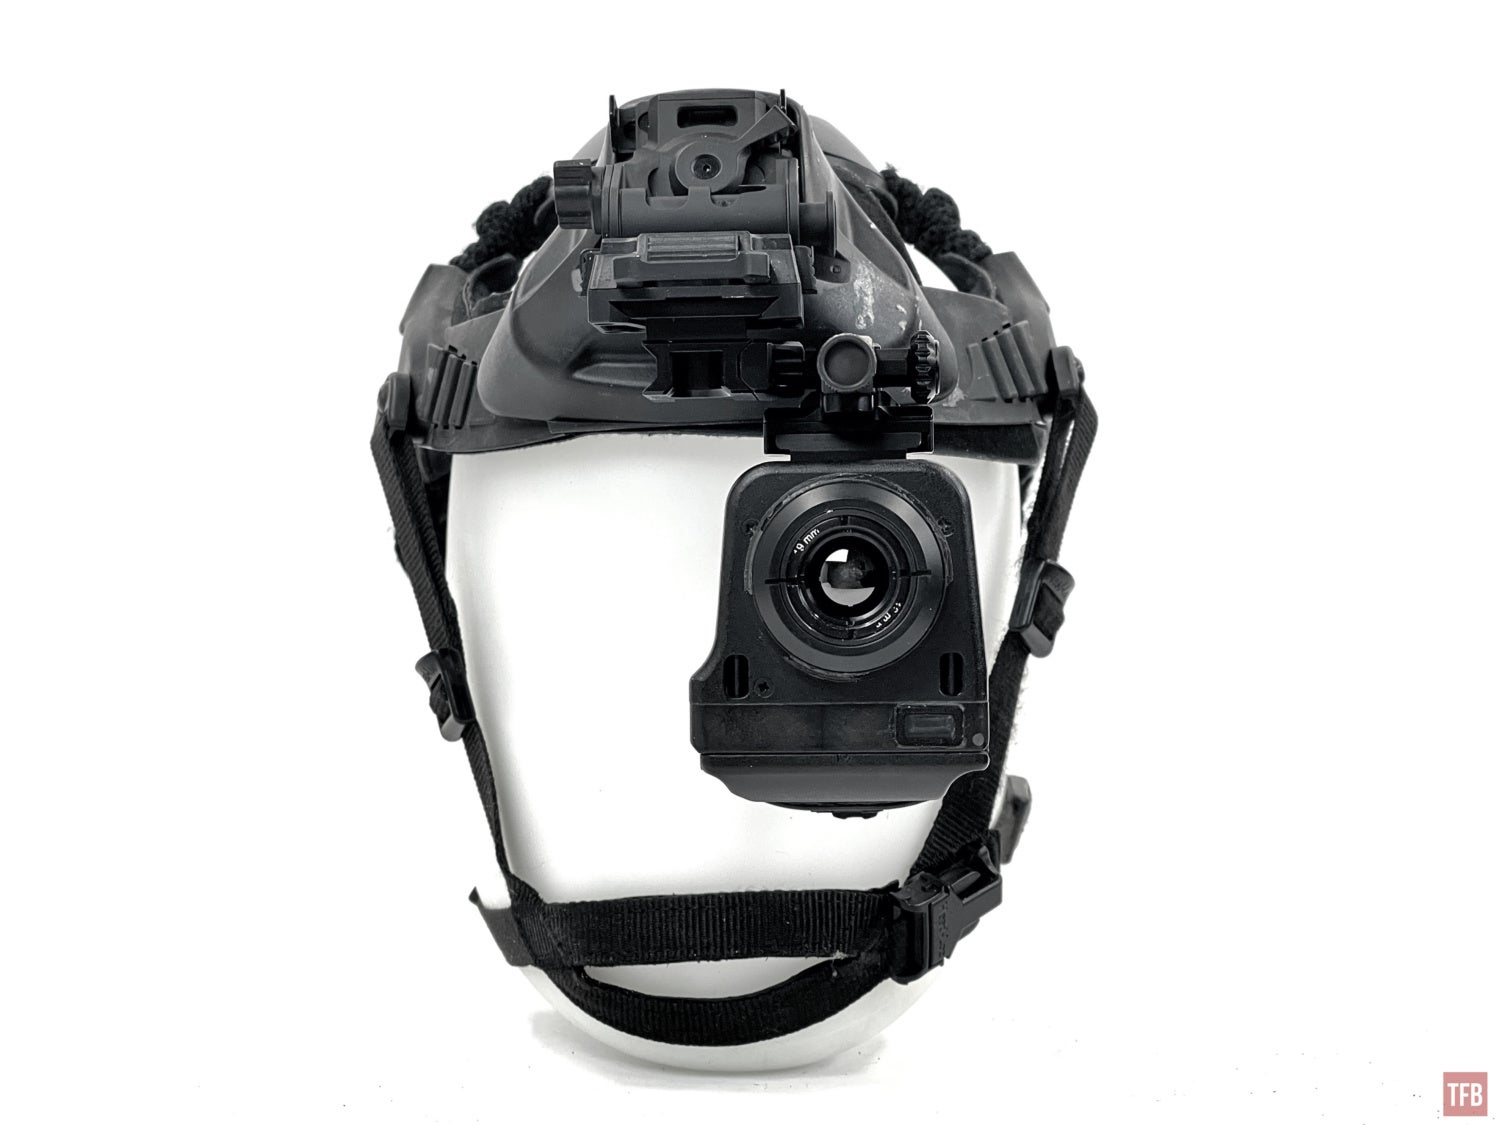
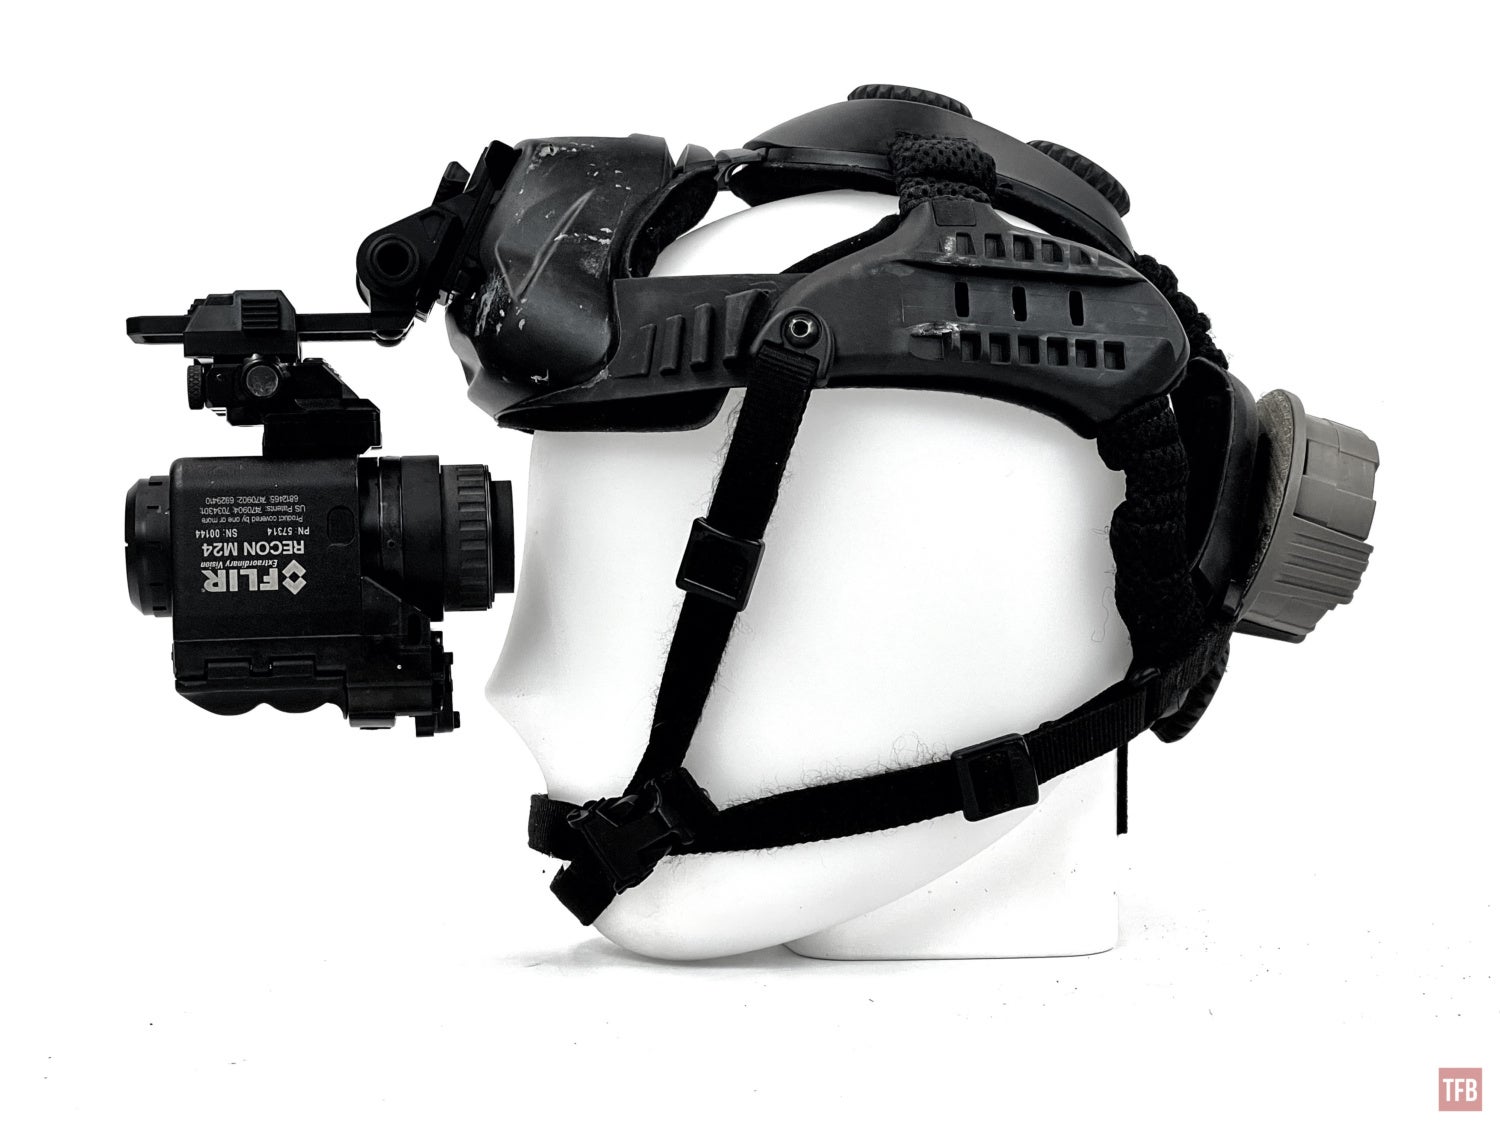
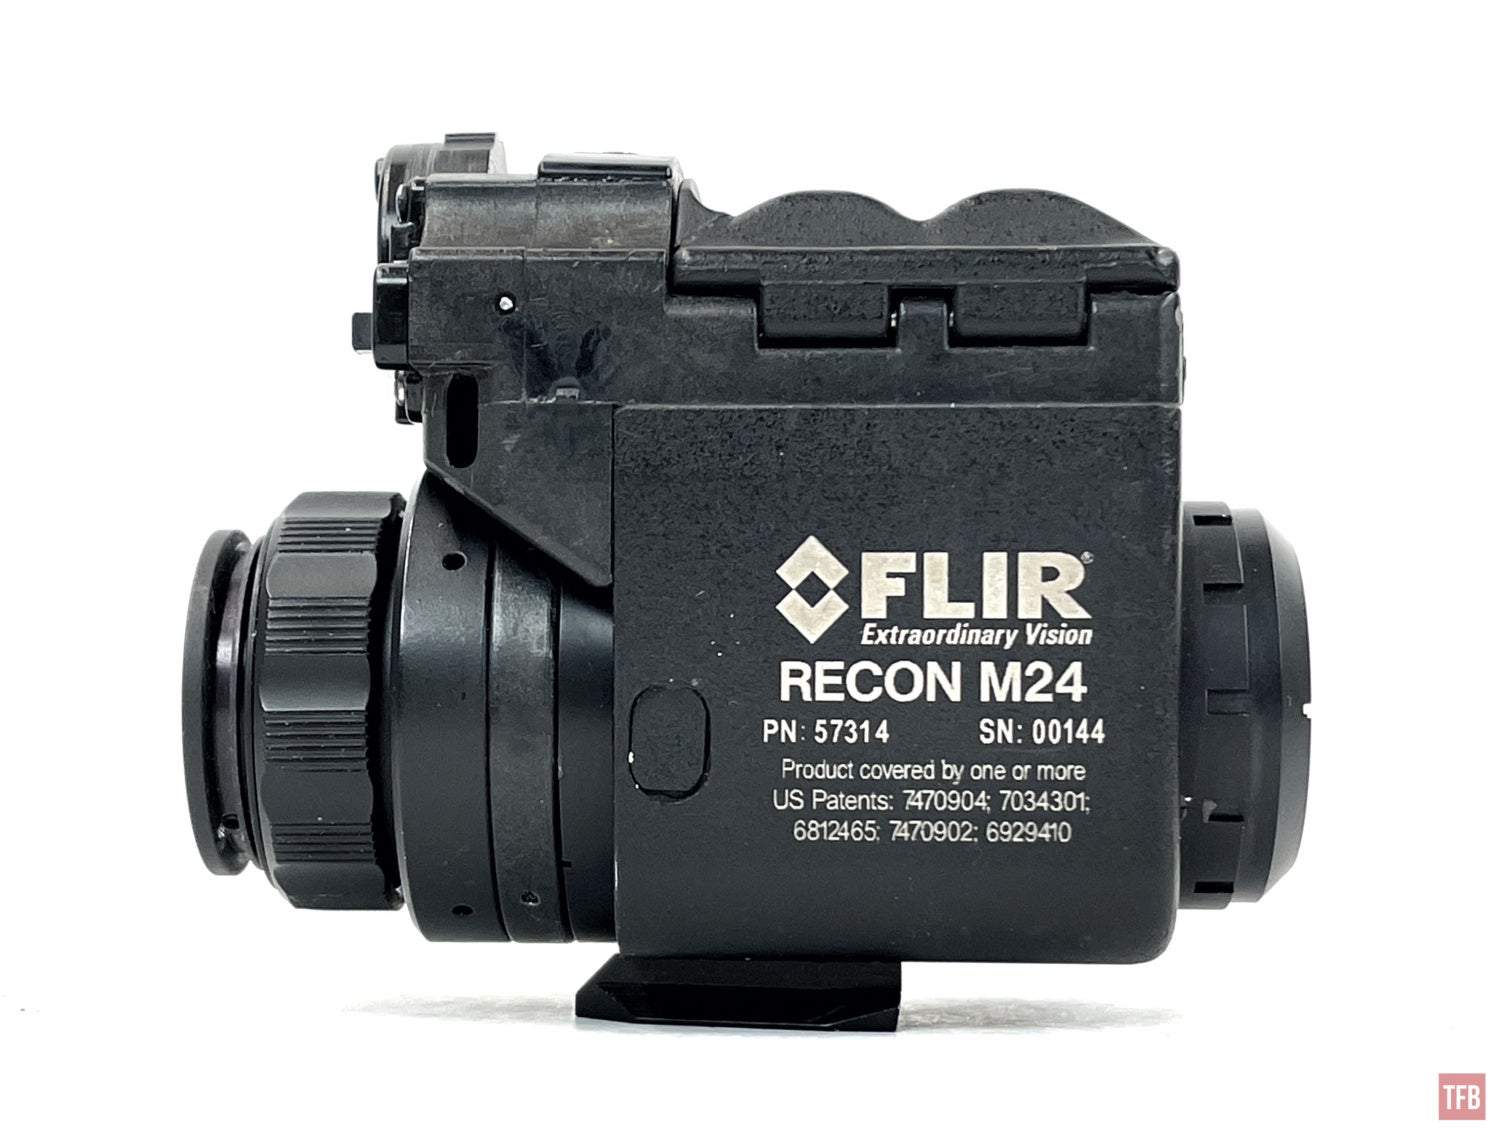
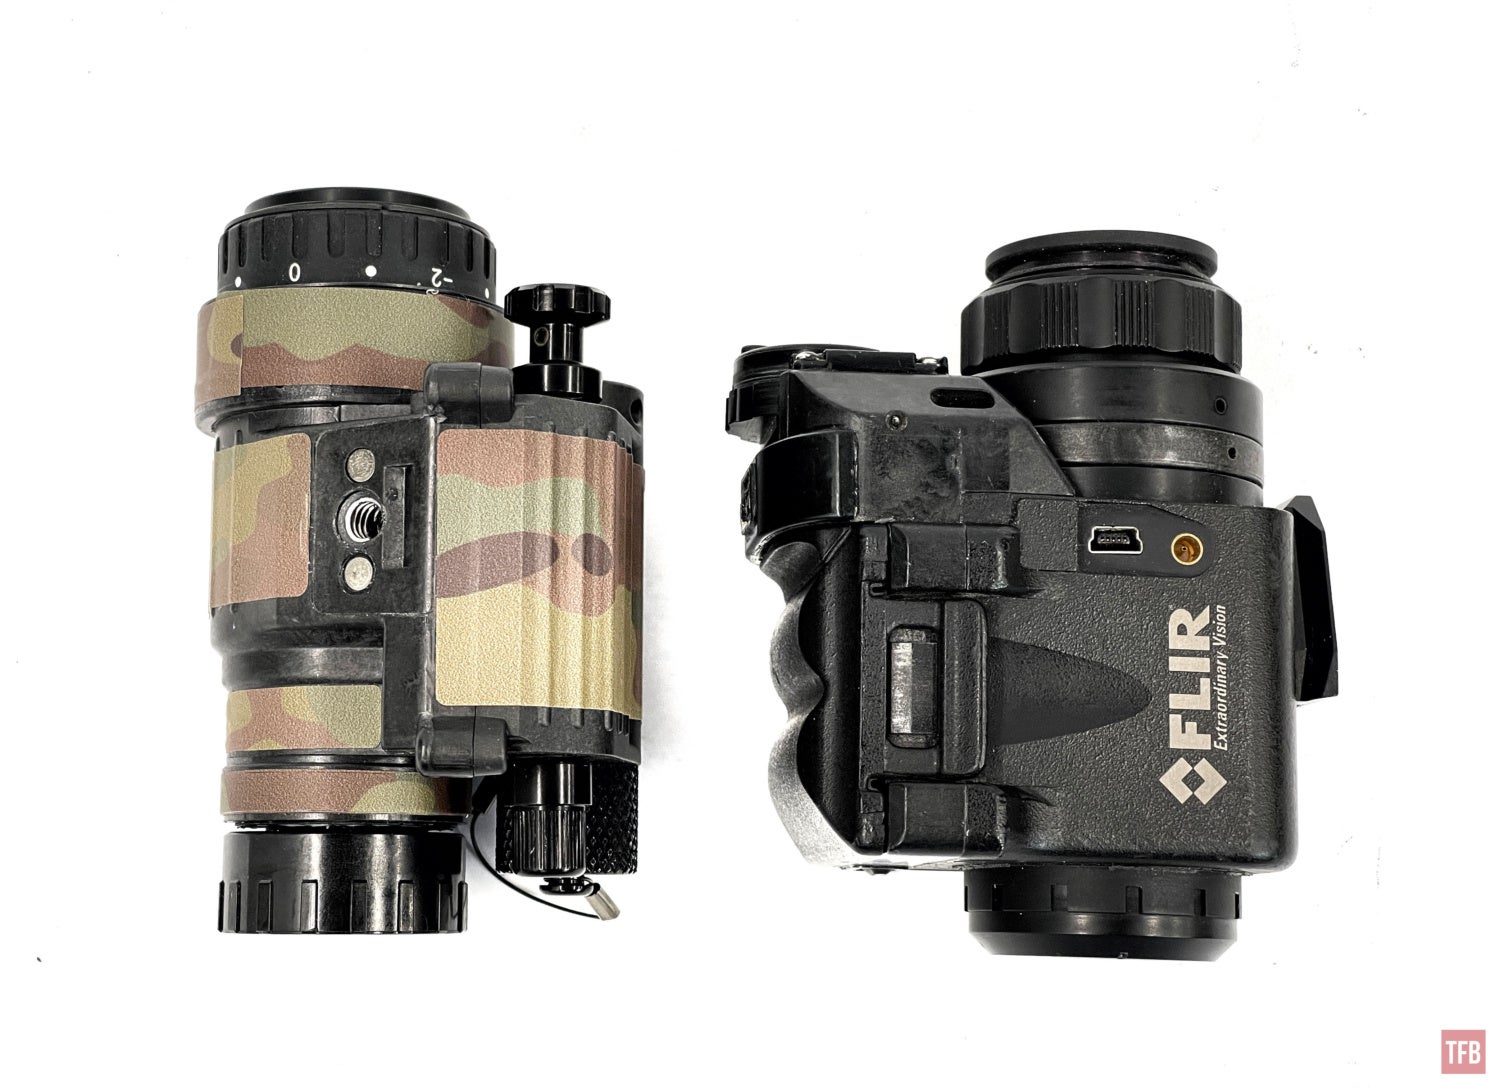
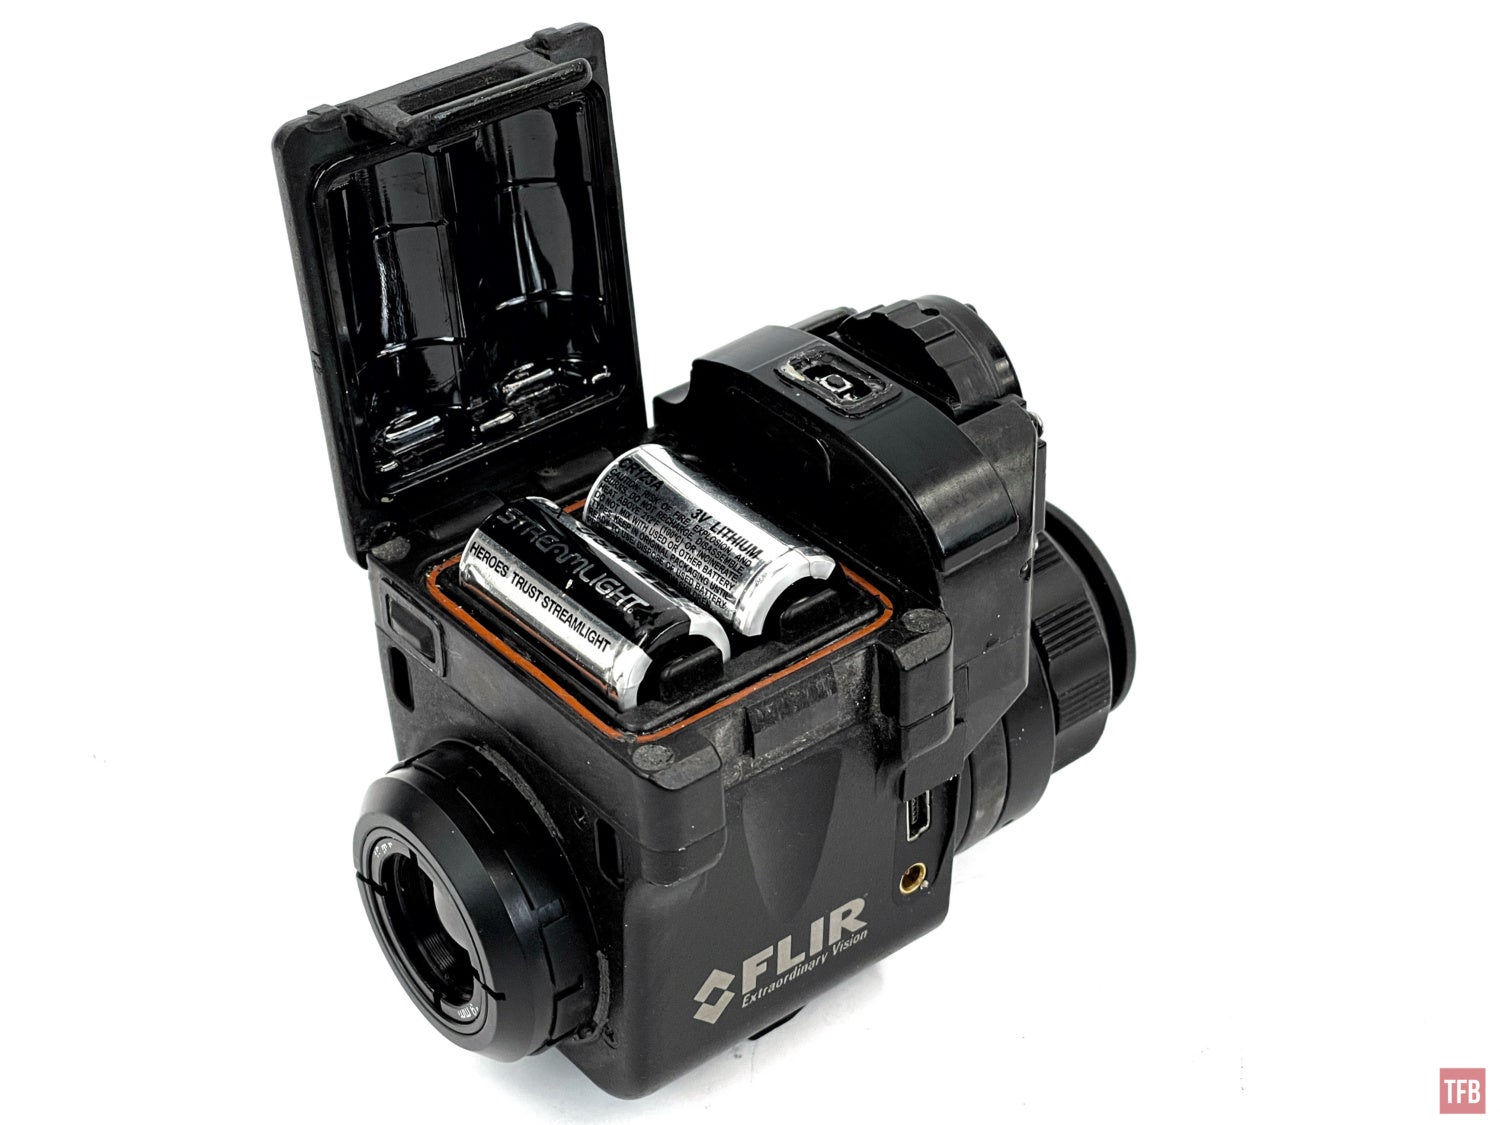
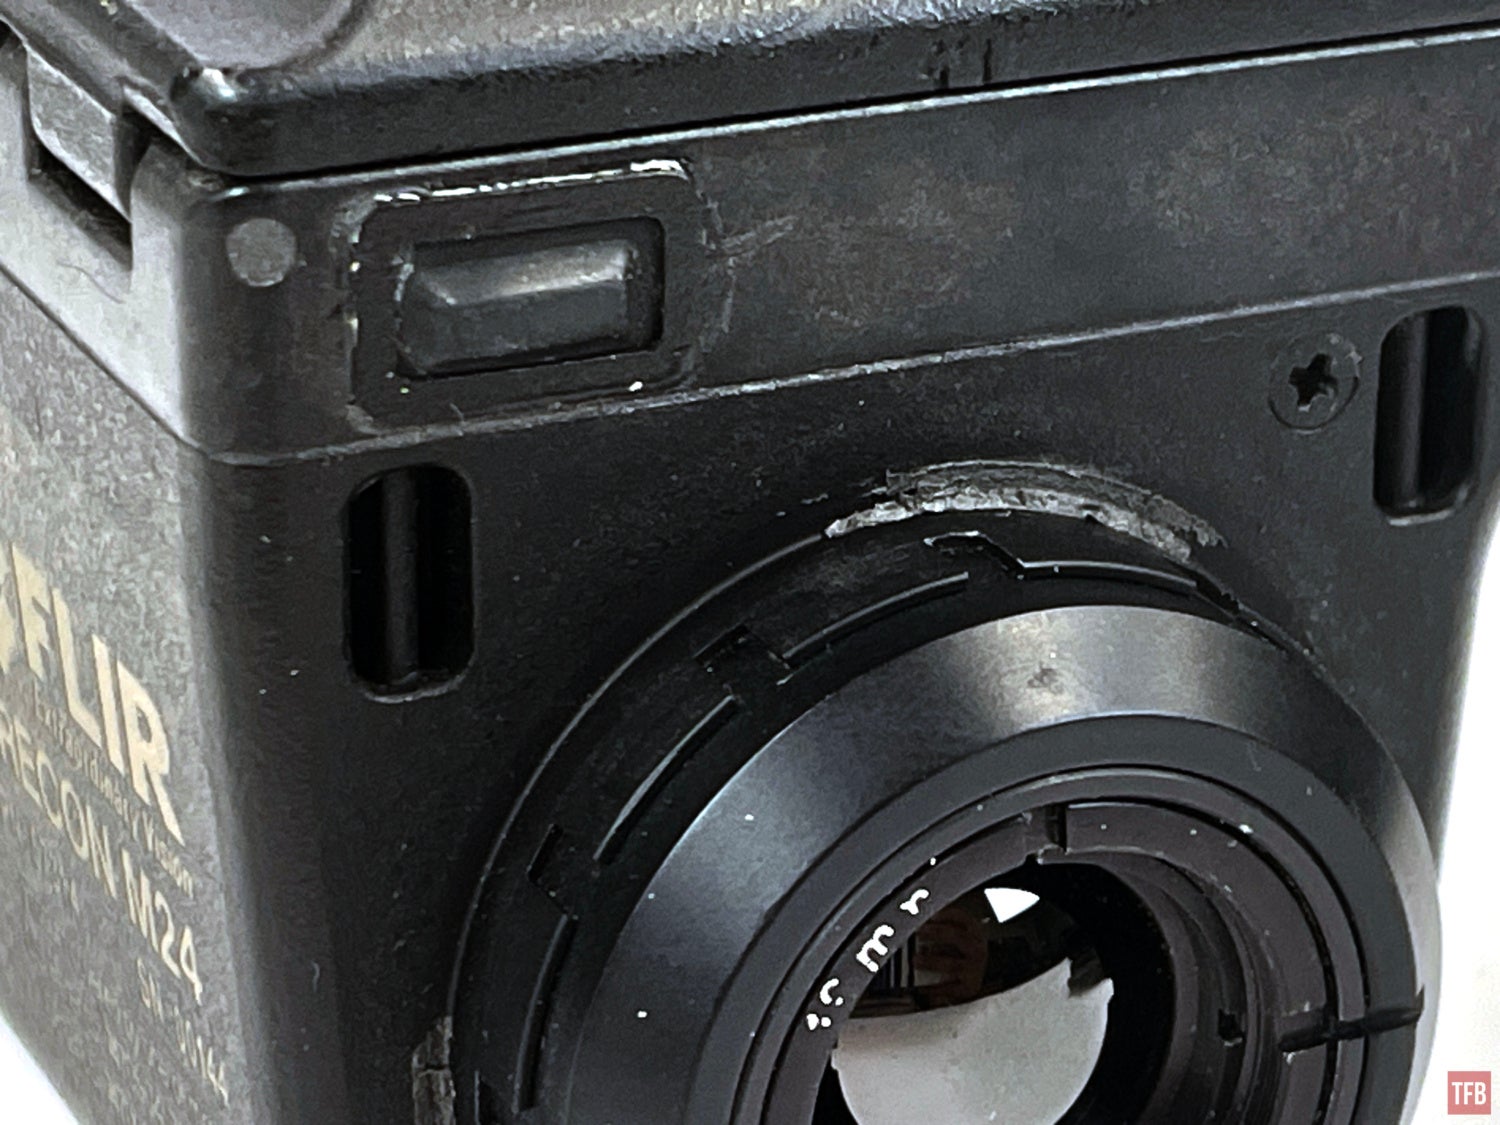
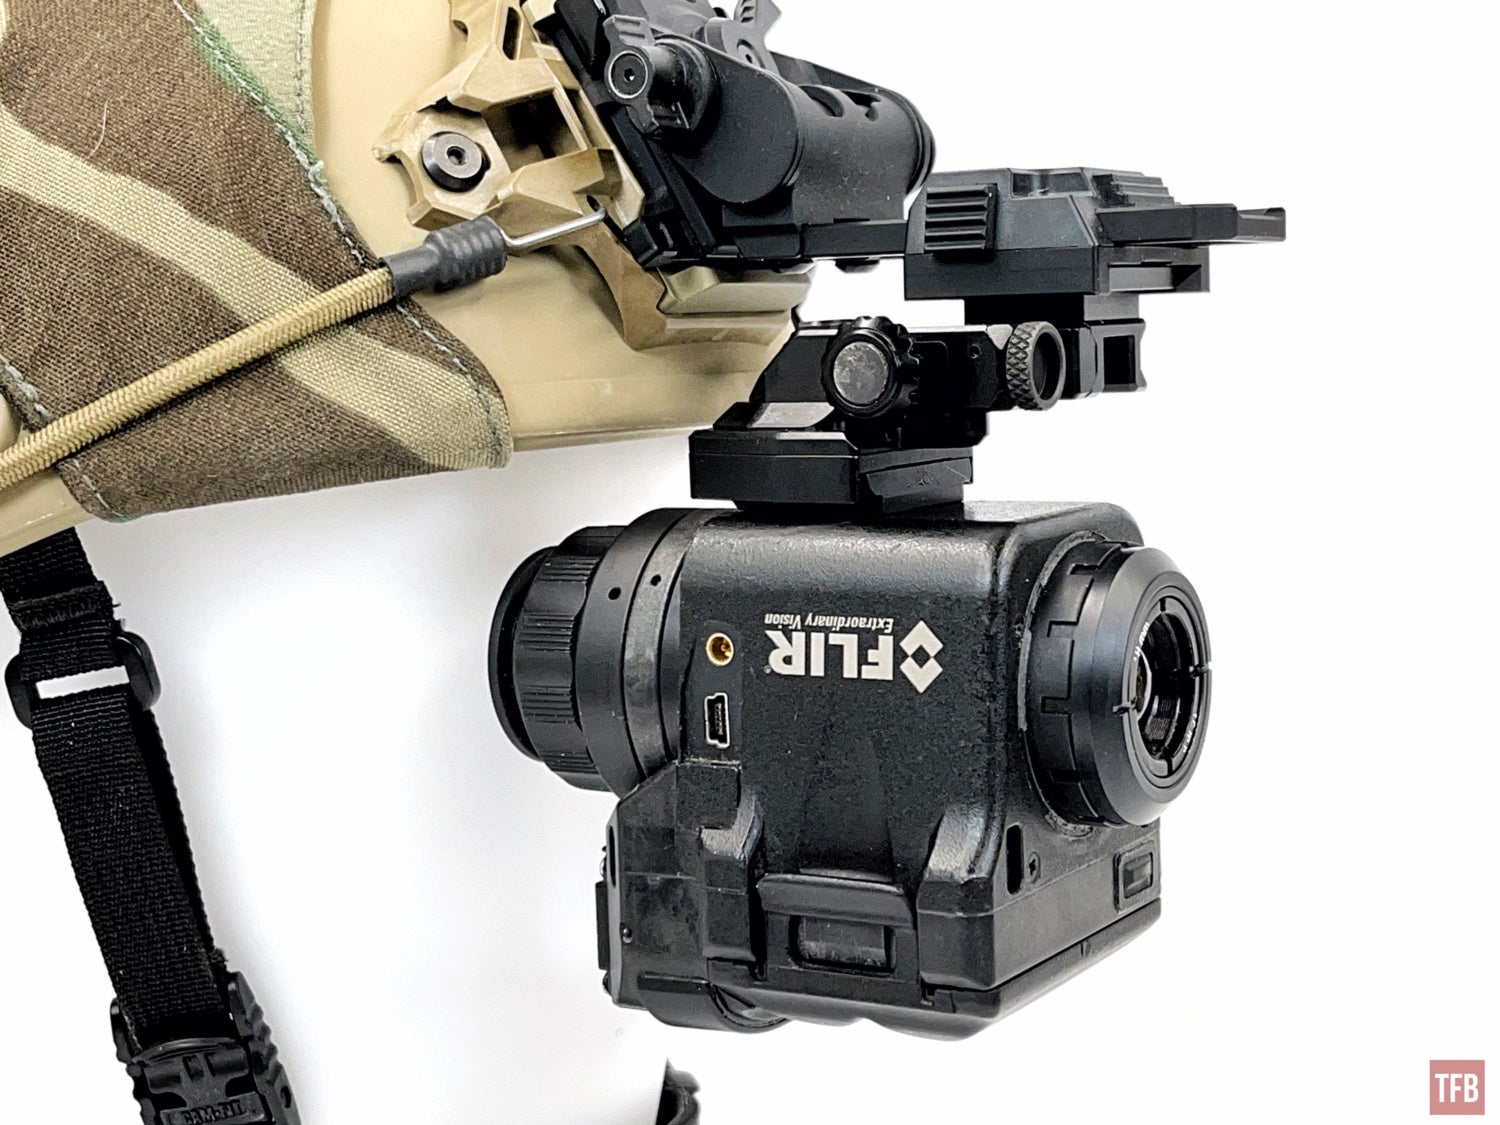
FLIR RECON M24 Thermal Monocular
The RECON thermal monocular is a chunky device. You can see how thick the housing is.
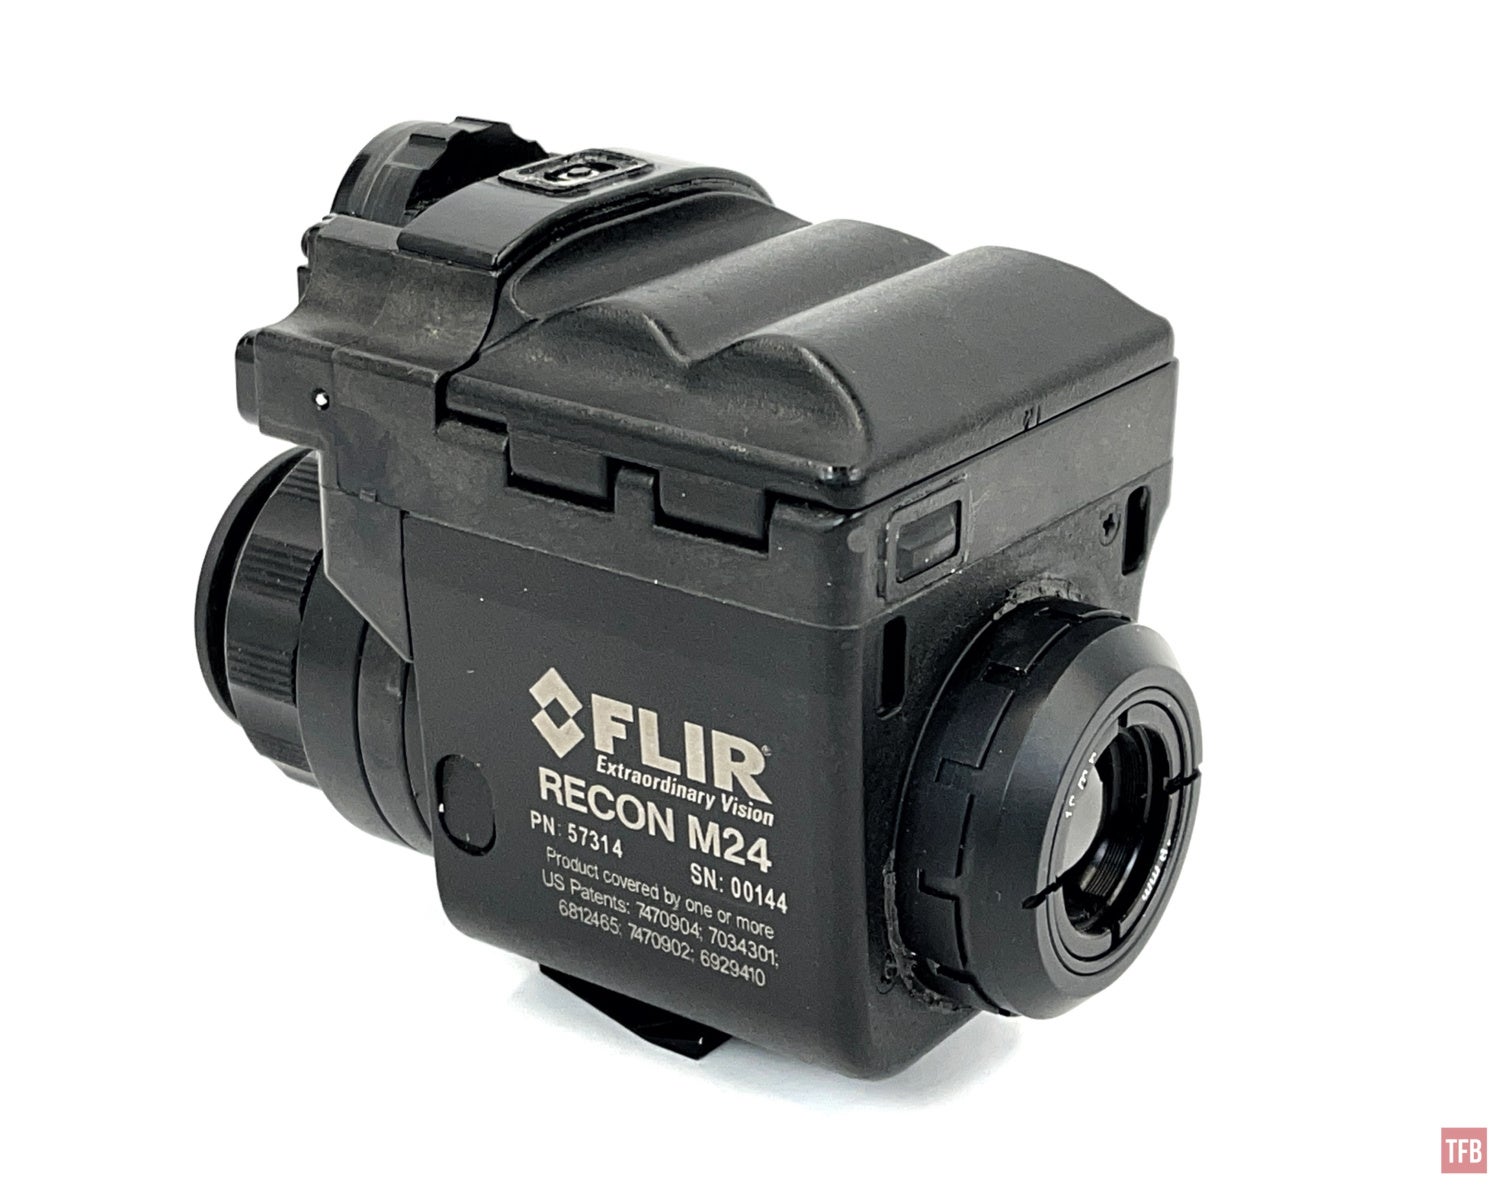
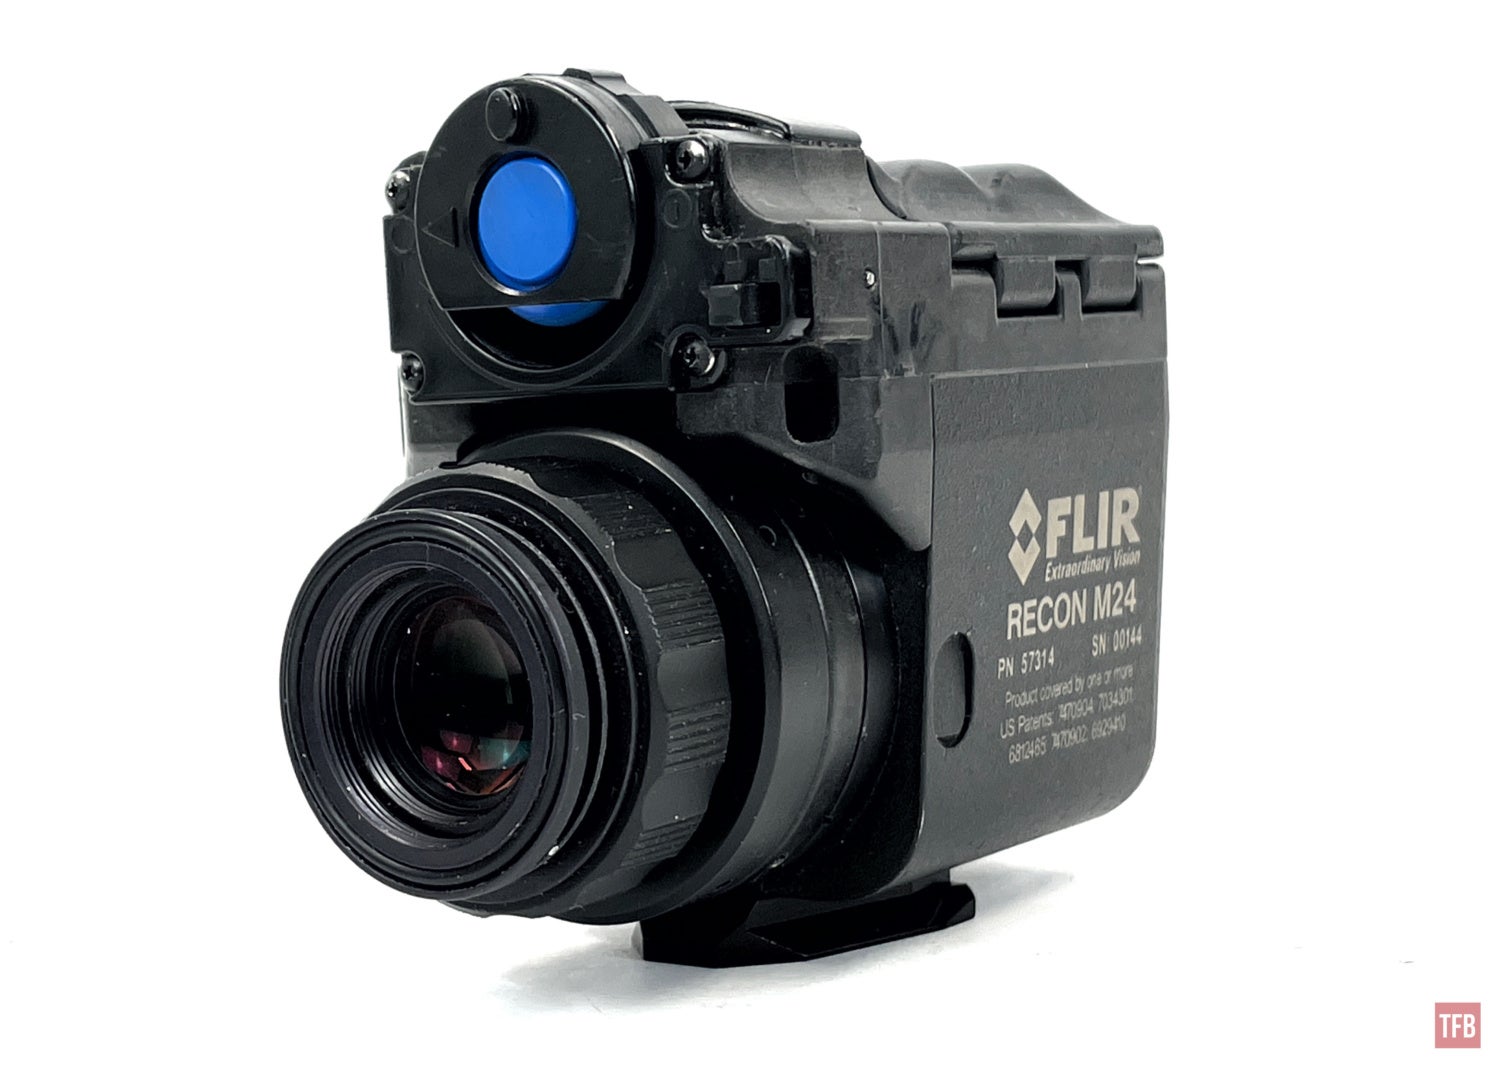
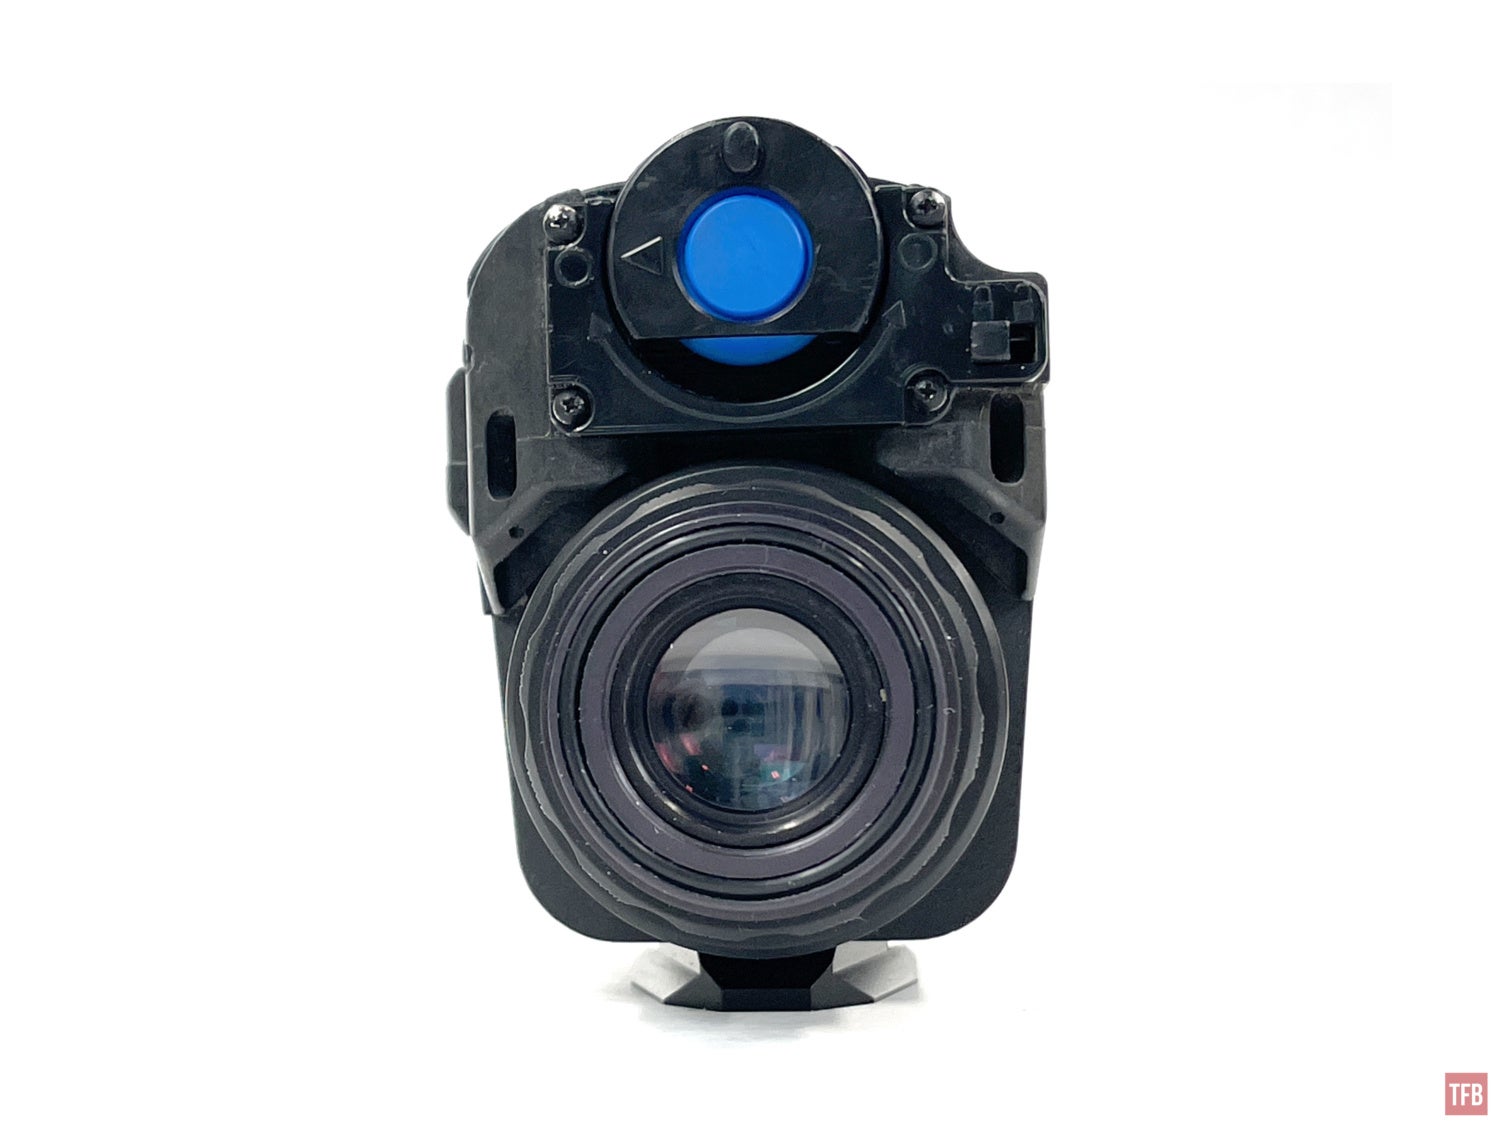
The M24 uses a PVS-14 eyepiece. I have a 50º FOV eyepiece which helps magnify the thermal image in the display.
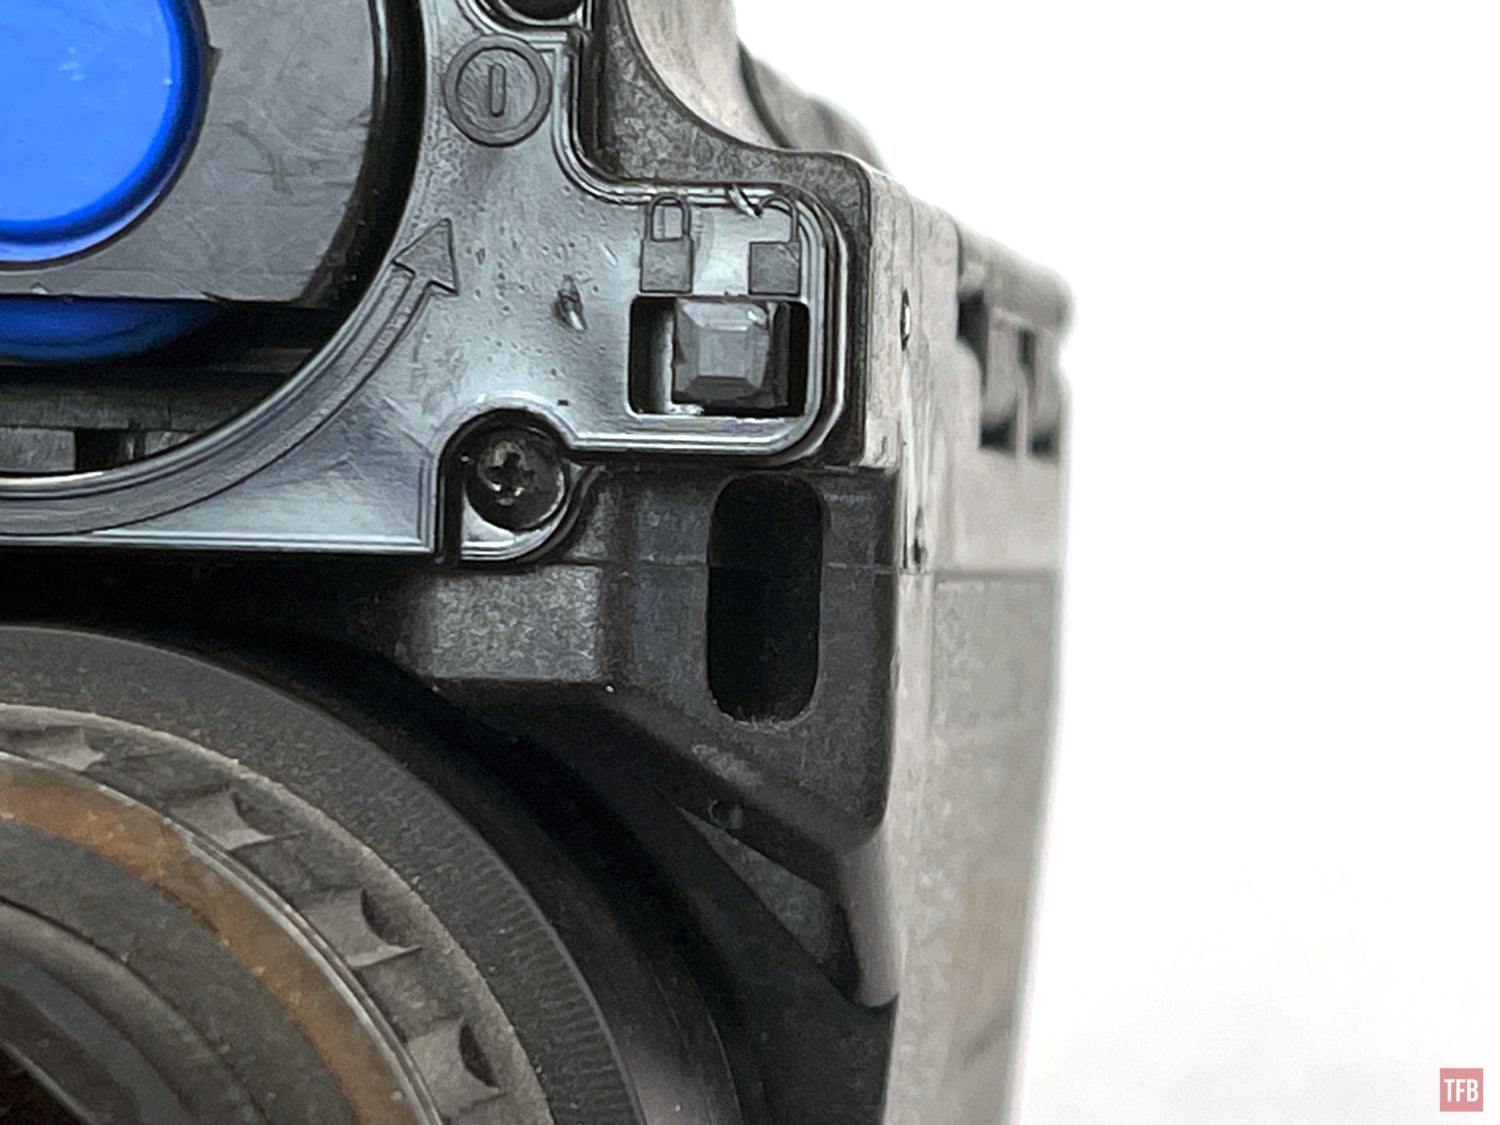
On either side are lanyard loopholes.
You can see the oven-shaped hole for looping a lanyard onto the M24.
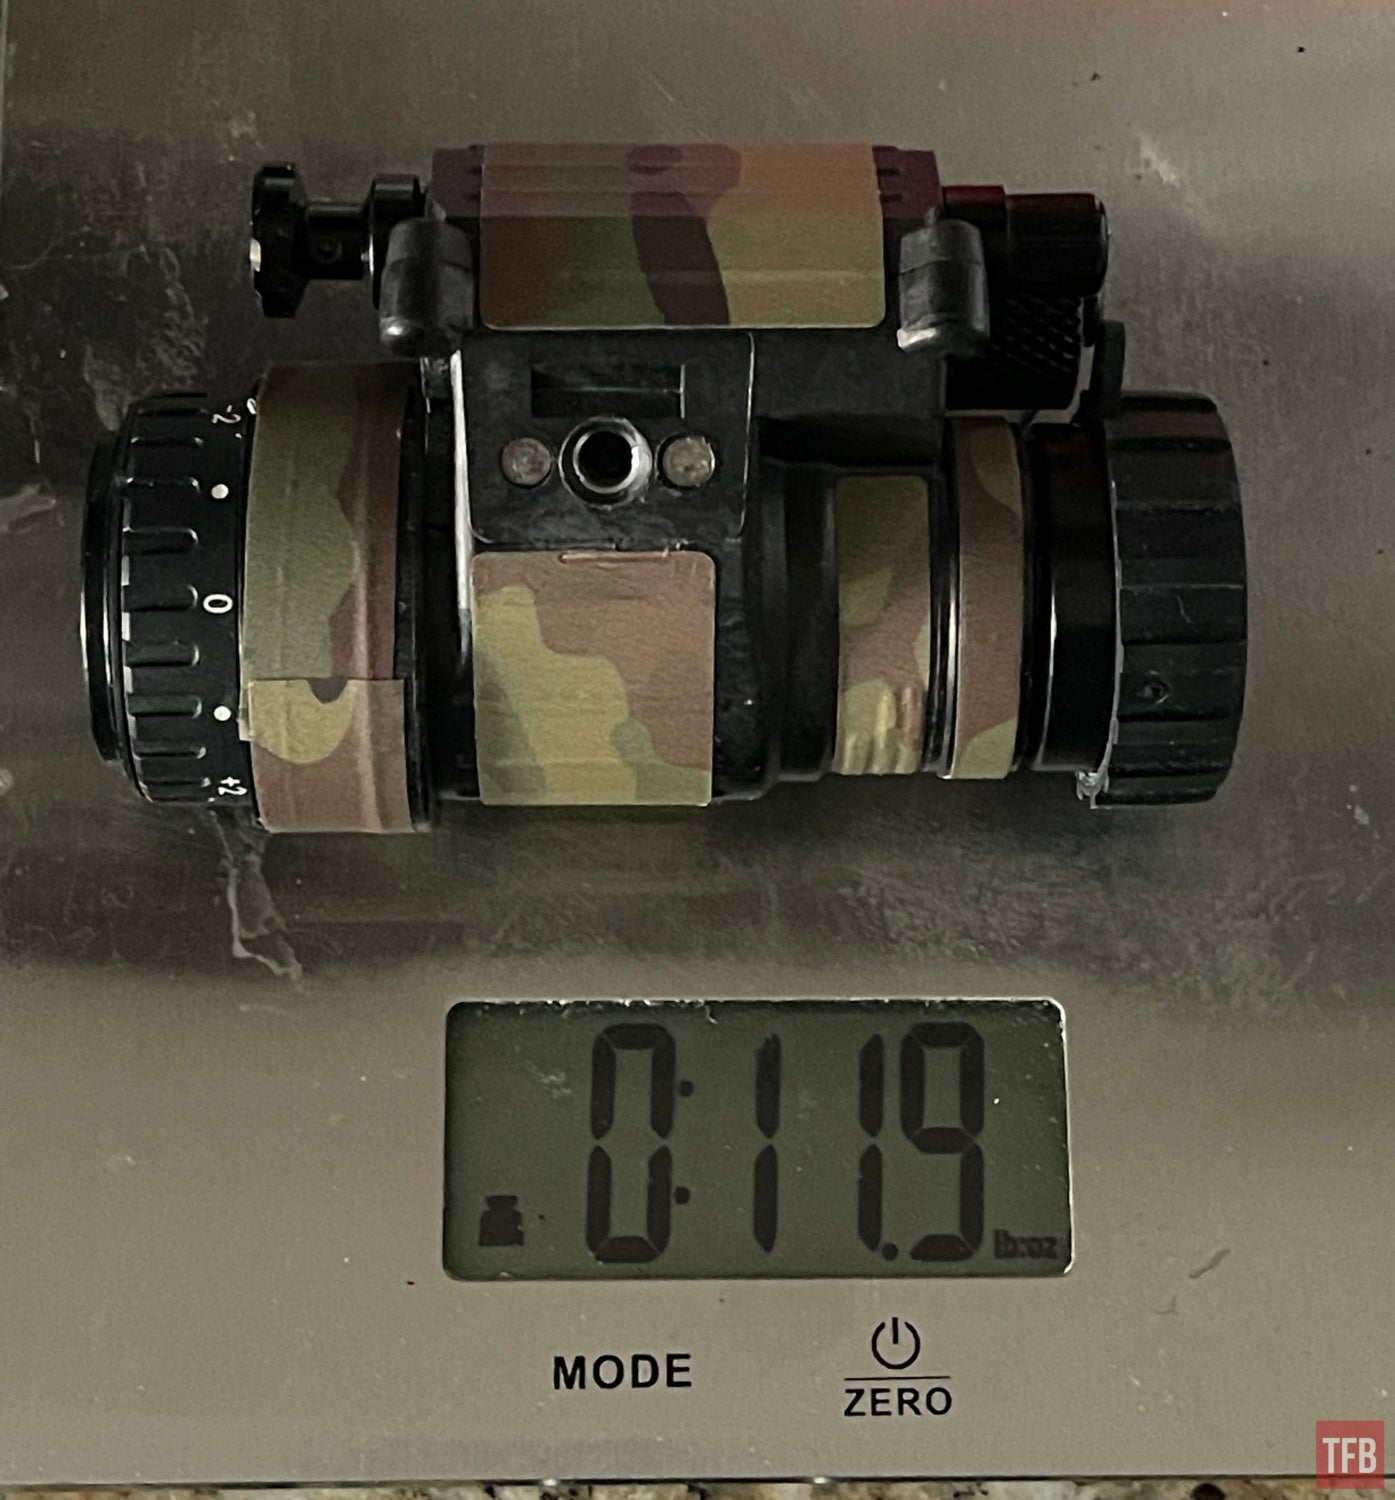
Length-wise, the M24 is shorter than a PVS-14.
The M24 is a bit heavy weighing in at 14.9 ounces.
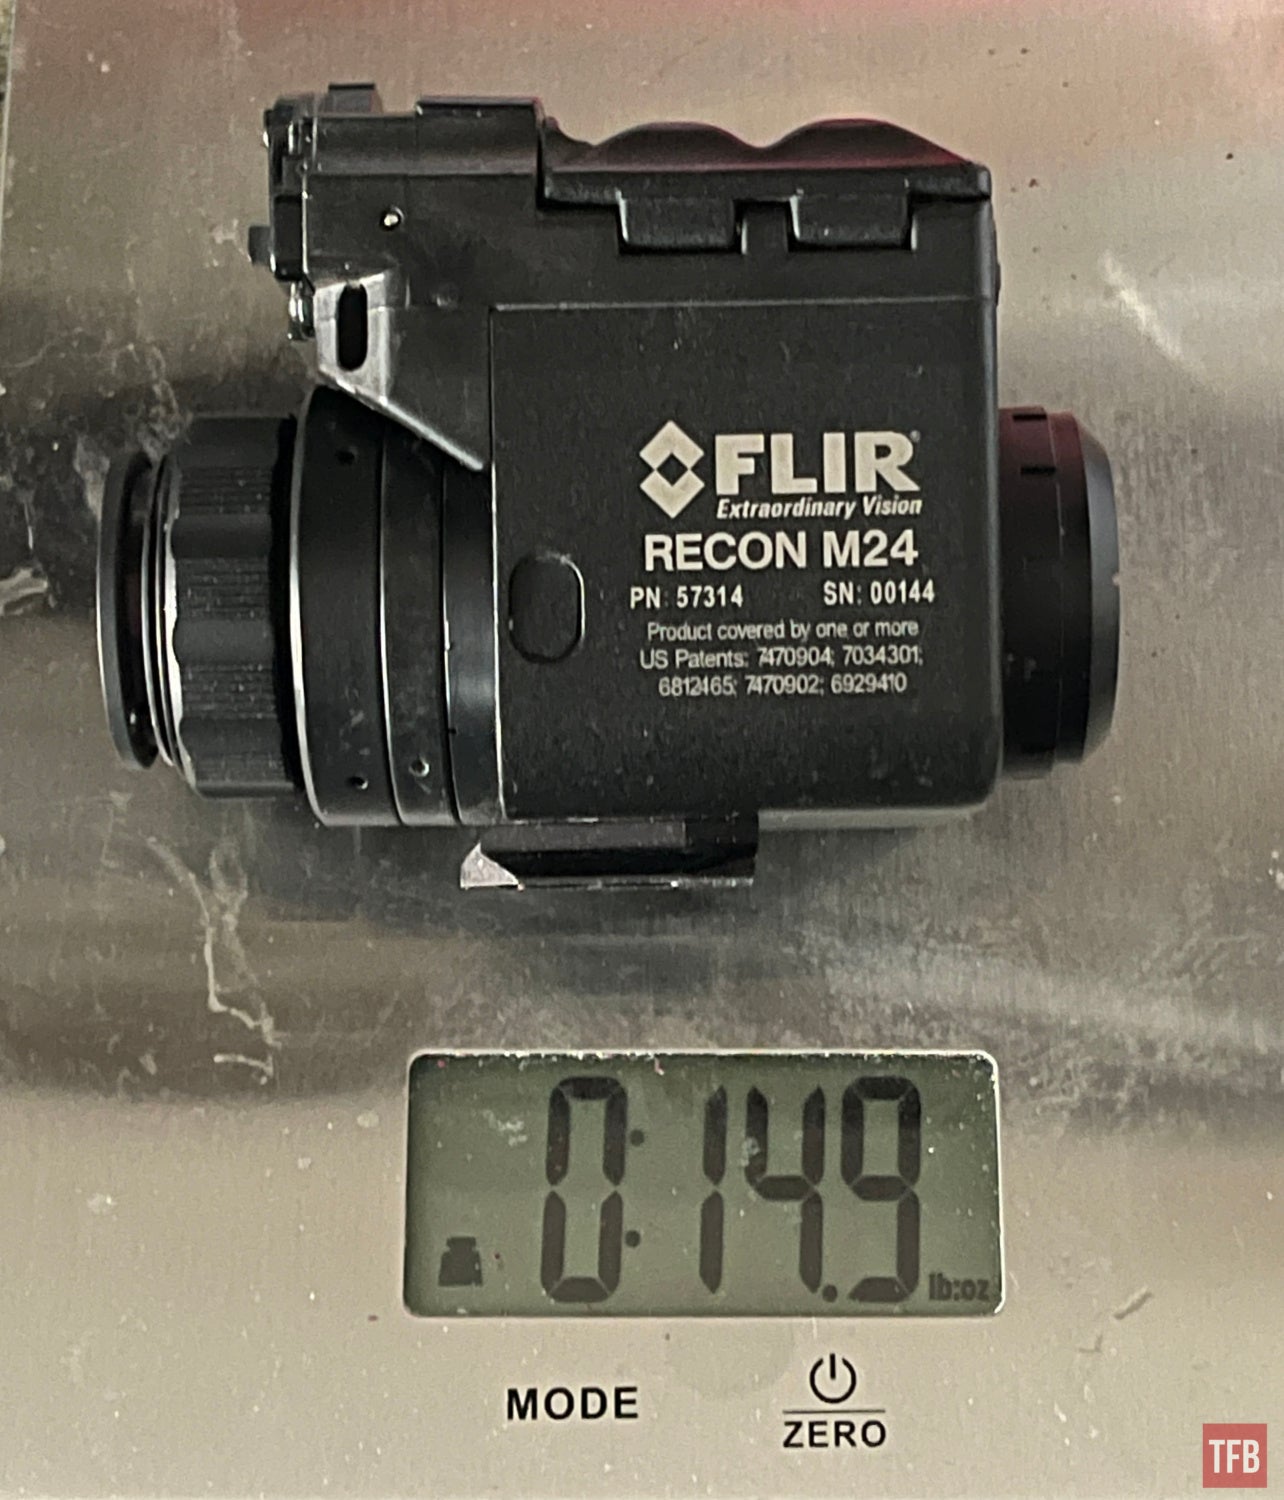
That is heavier than a PVS-14.
The M24 is taller than a PVS-14 due to the batteries and internals. The batteries sit on top of the M24 and it uses 2xCR123 batteries.
There is a large flip-open battery door to get access to the battery compartment.
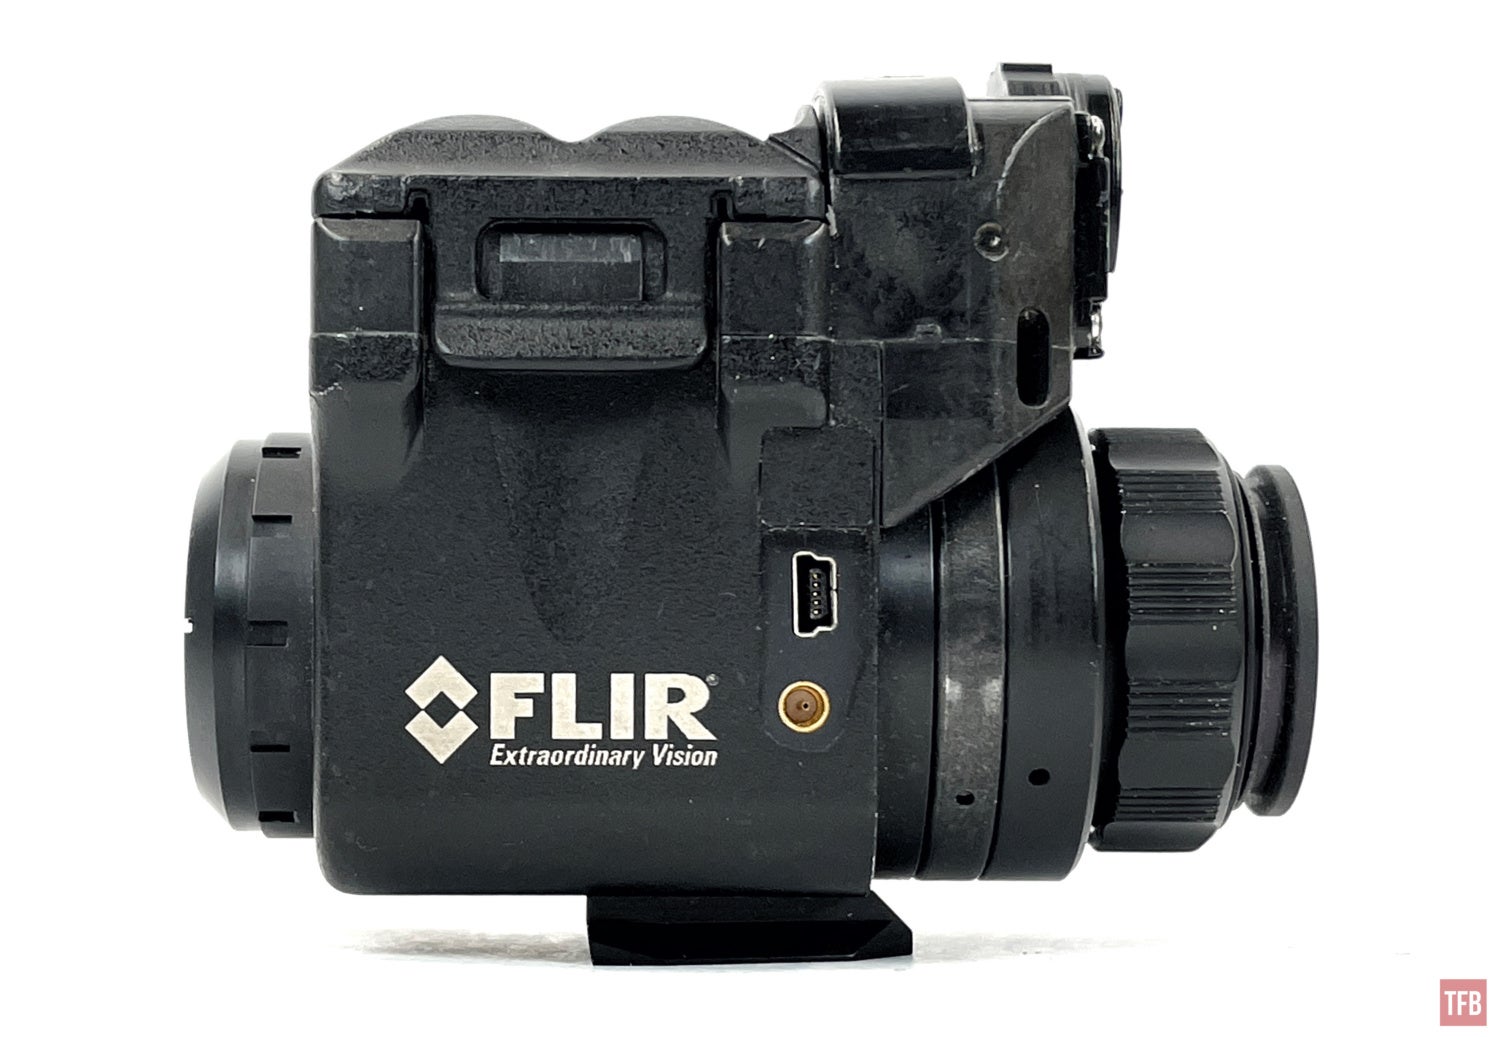
The controls of the M24 are a bit odd. There is a large black wheel that you spin.
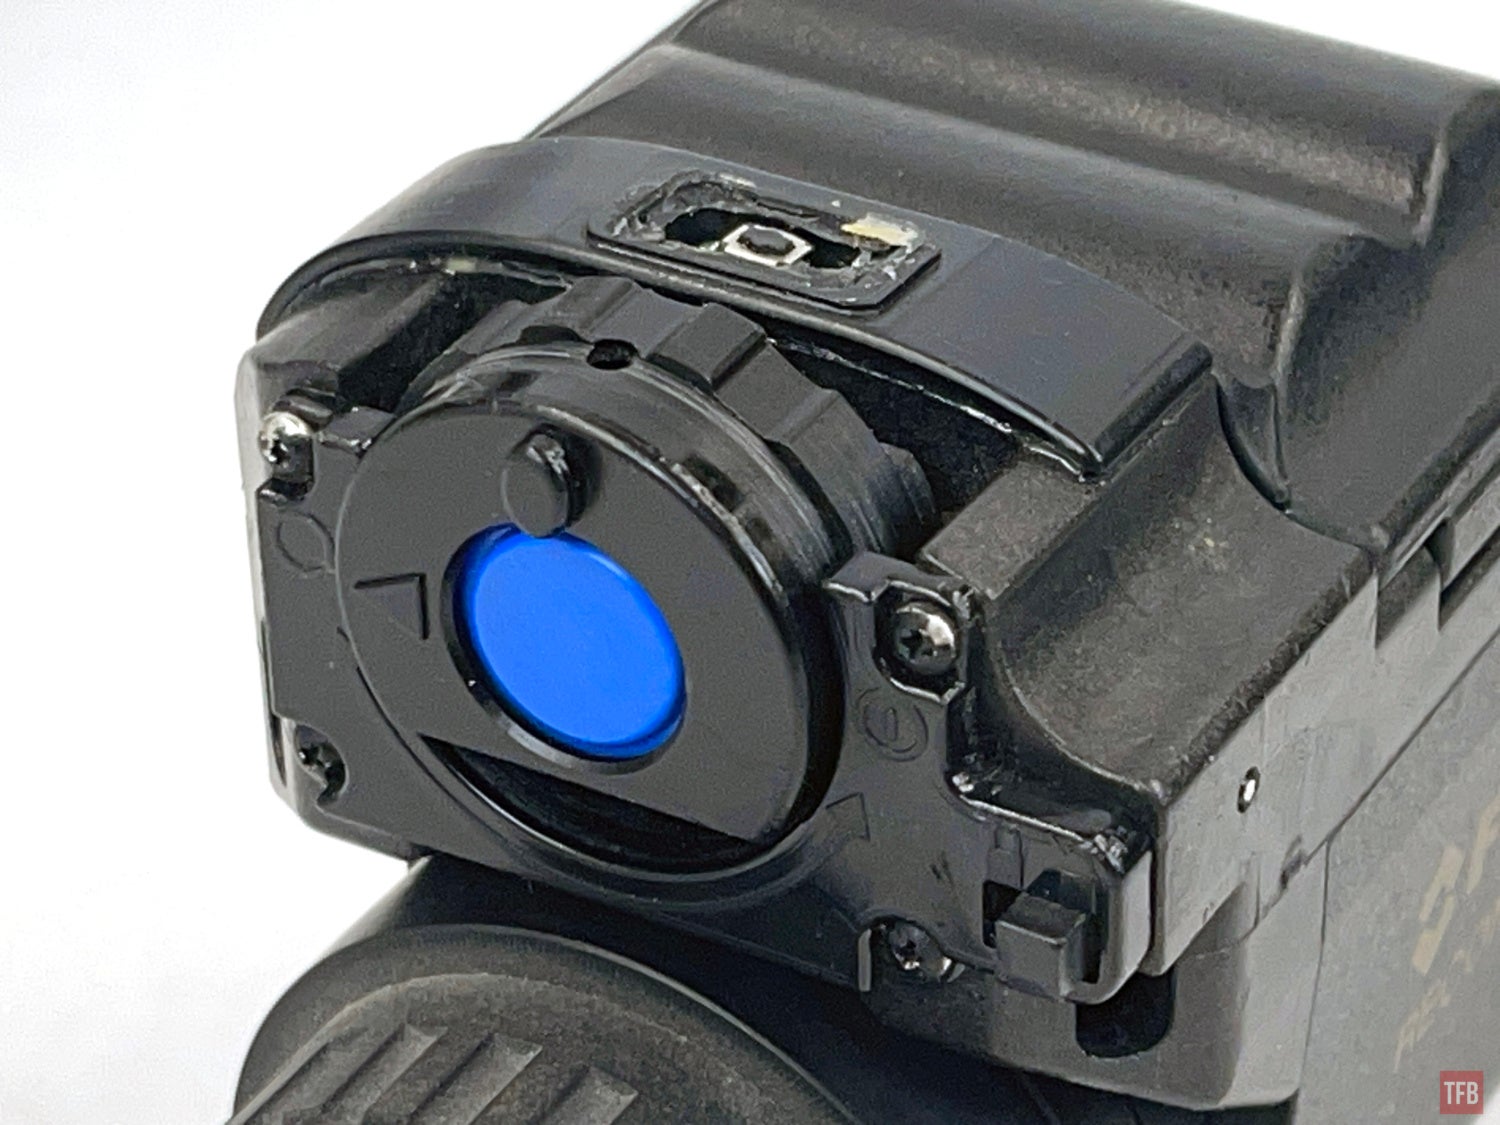
There is a lock-out sliding button that keeps the wheel from turning. You can lock the wheel from turning on the thermal or you can lock it when it is on so the device cannot be turned off.
The black circle has a cut at the bottom of it. See the triangle pointing to the open circle? That means the OFF position. You can turn the black circle with the ridges on the circumference or use the oval-shaped nub to rotate it.
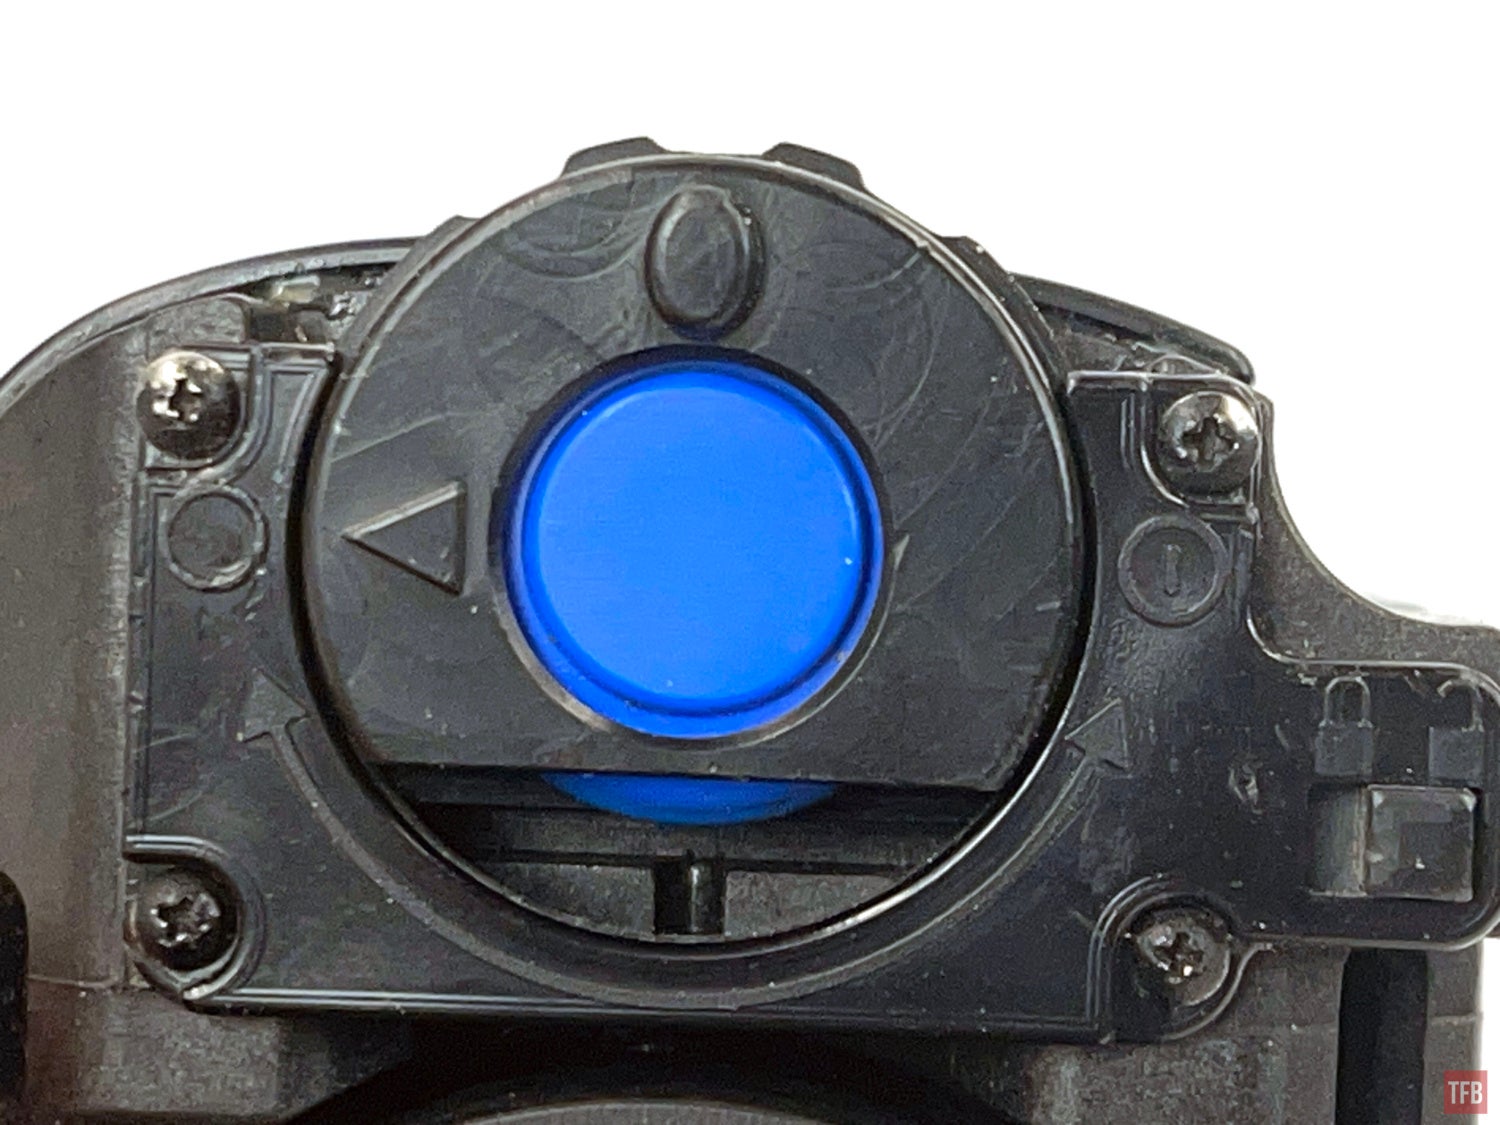
Once rotated 180º, the triangle points to the circle with the line in the middle. This is the ON position. There are no other positions. However, the unit turns on the moment you move the black wheel away from the off position. See how the open circle is at 9 o’clock? If you move the black wheel to 10 or 8 o’clock, the M24 will turn on. Not the case for turning it off. The black wheel has to be rotated all the way so the triple points to the open circle.
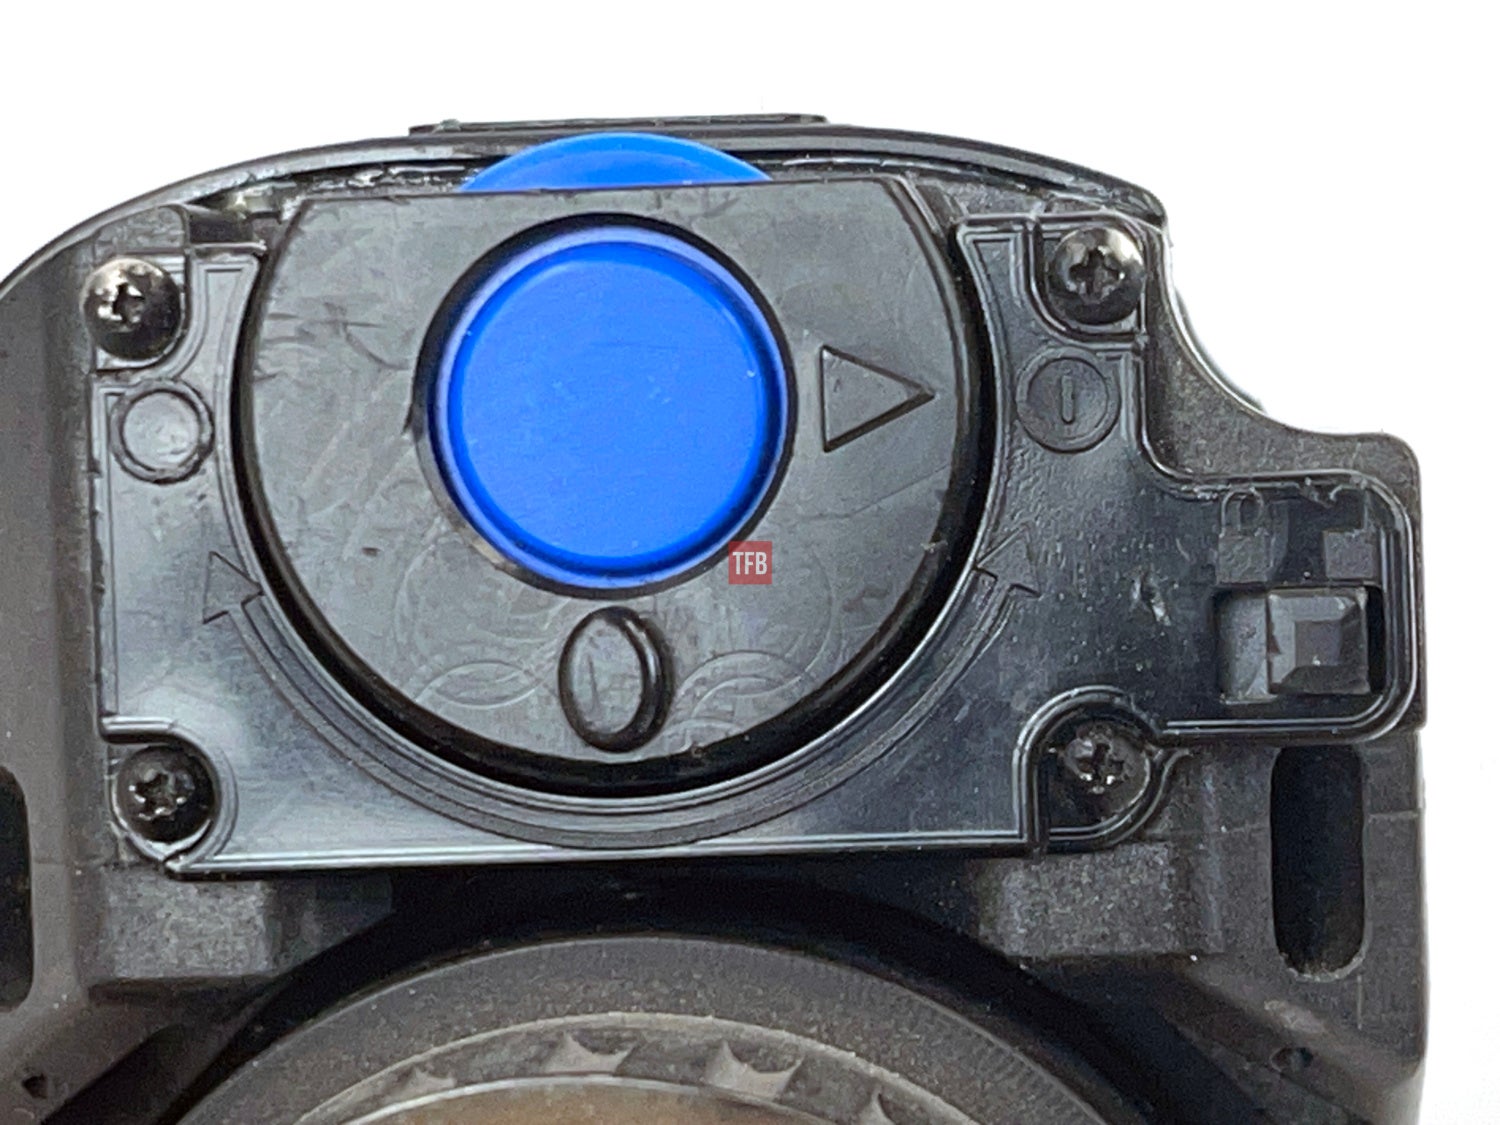
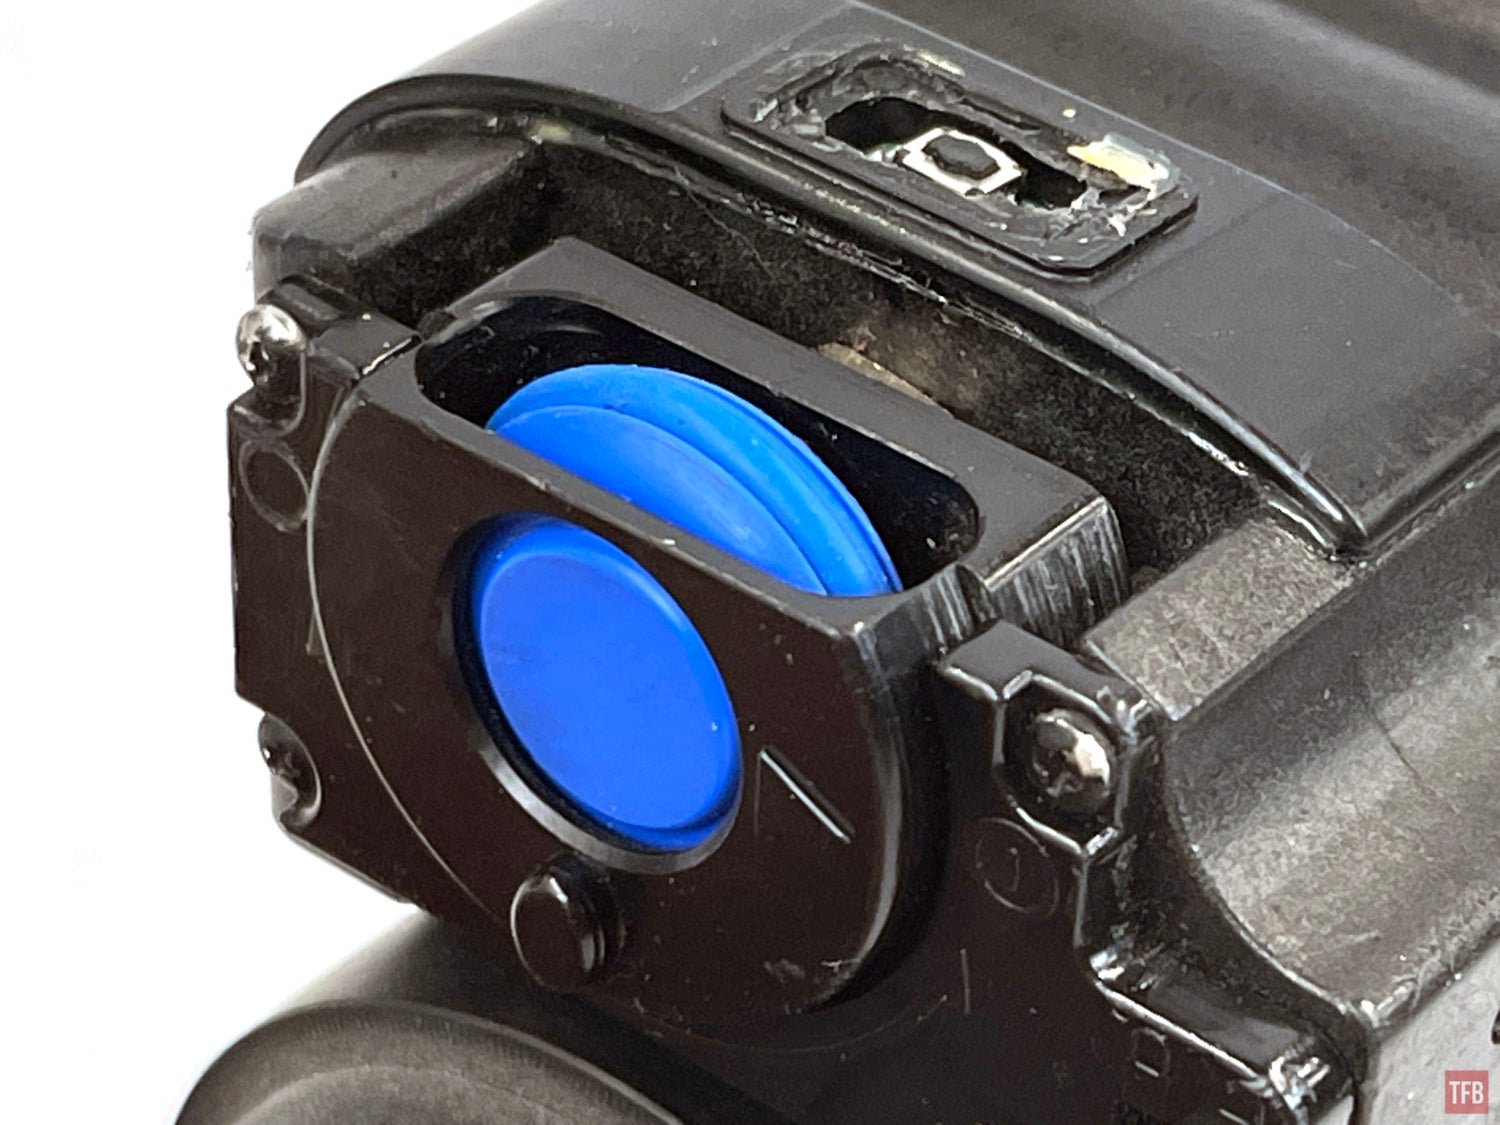
The bright blue wheel inside the black wheel is for adjusting the brightness of the screen. You can press the blue button for digital zoom. It has 2x and 4x digital zoom. The button in front of the wheels is missing the rubber shroud but that is for switching color palettes from black hot to white hot.
I am not sure what FLIR was thinking with this control design. The wheel sticks rather far out from the housing and there is a noticeable gap between it and the housing.
While this unit is used and is missing the rubber shroud on top for the palette button, the power wheel and brightness wheel seem like something cobbled together with broken printer parts to make something that fits the M24 housing.
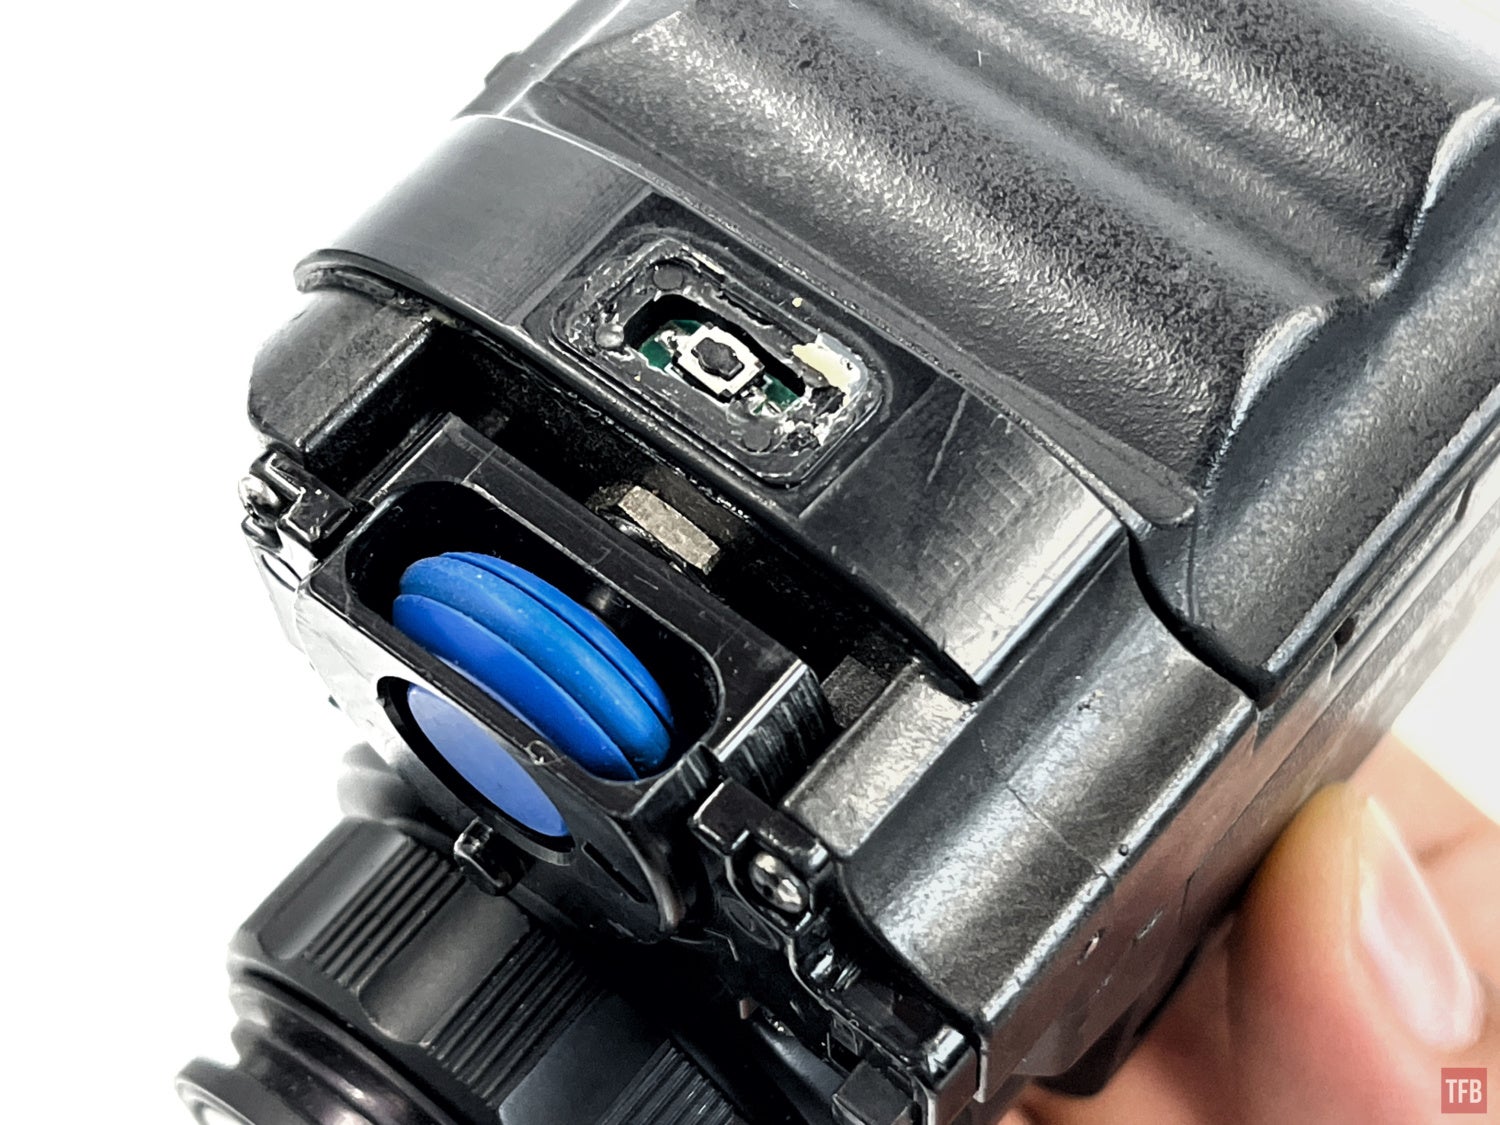
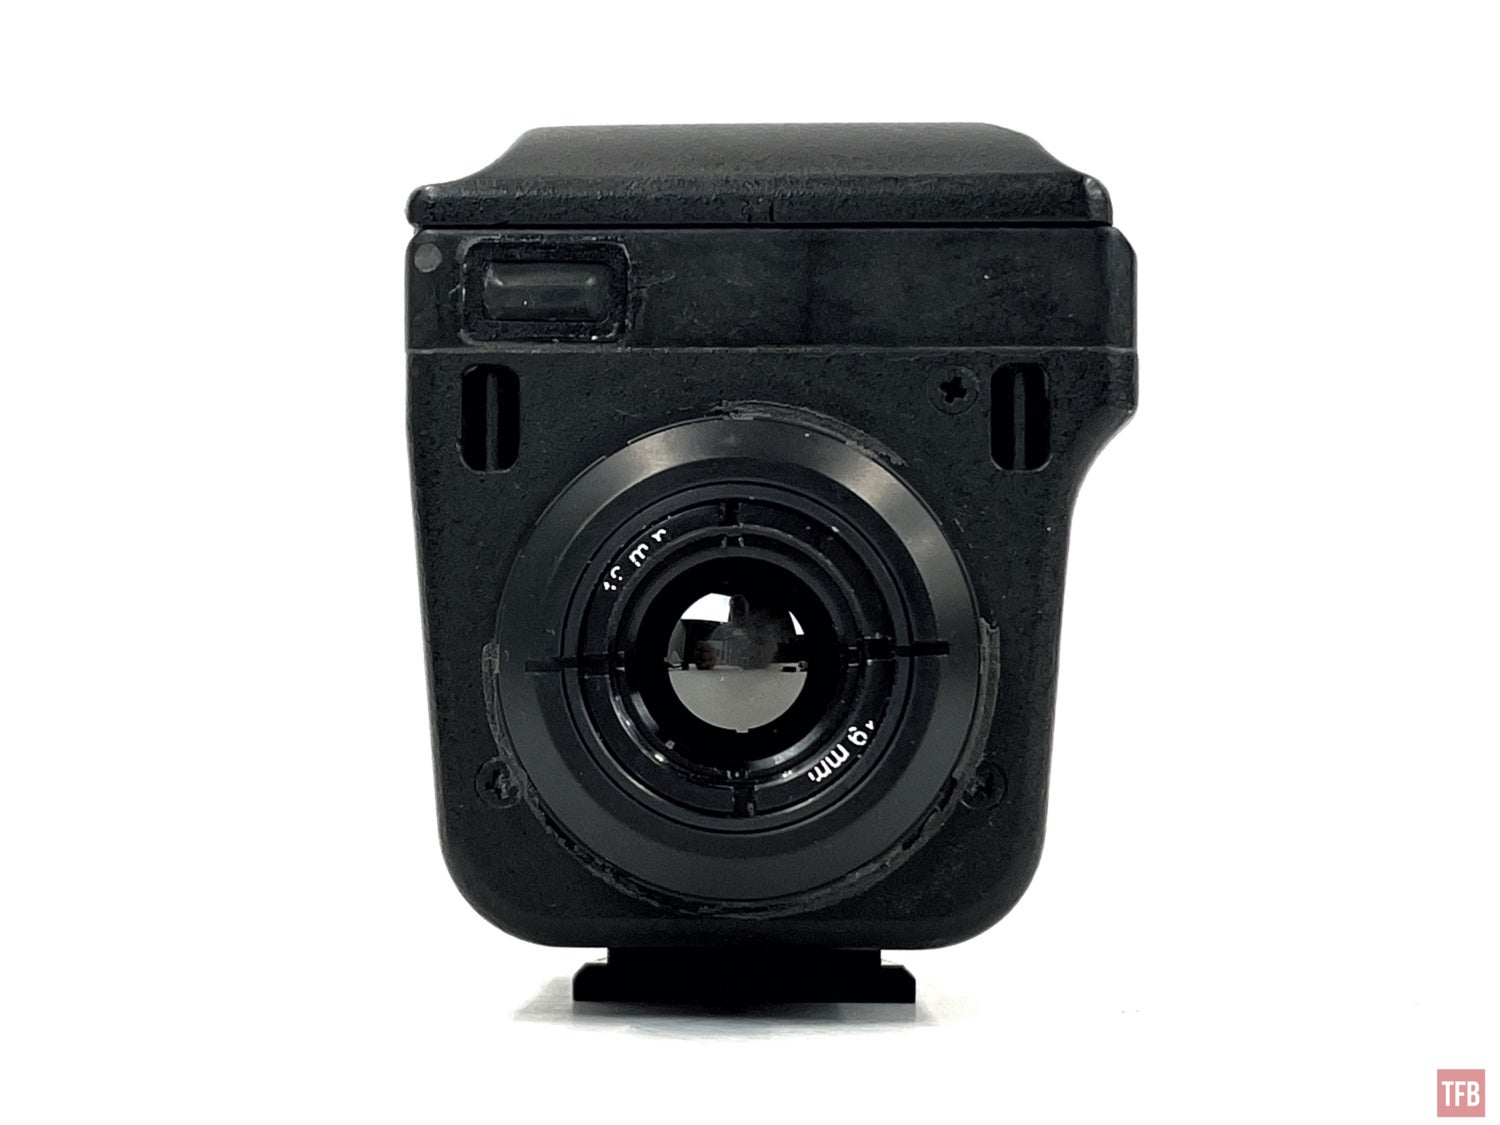
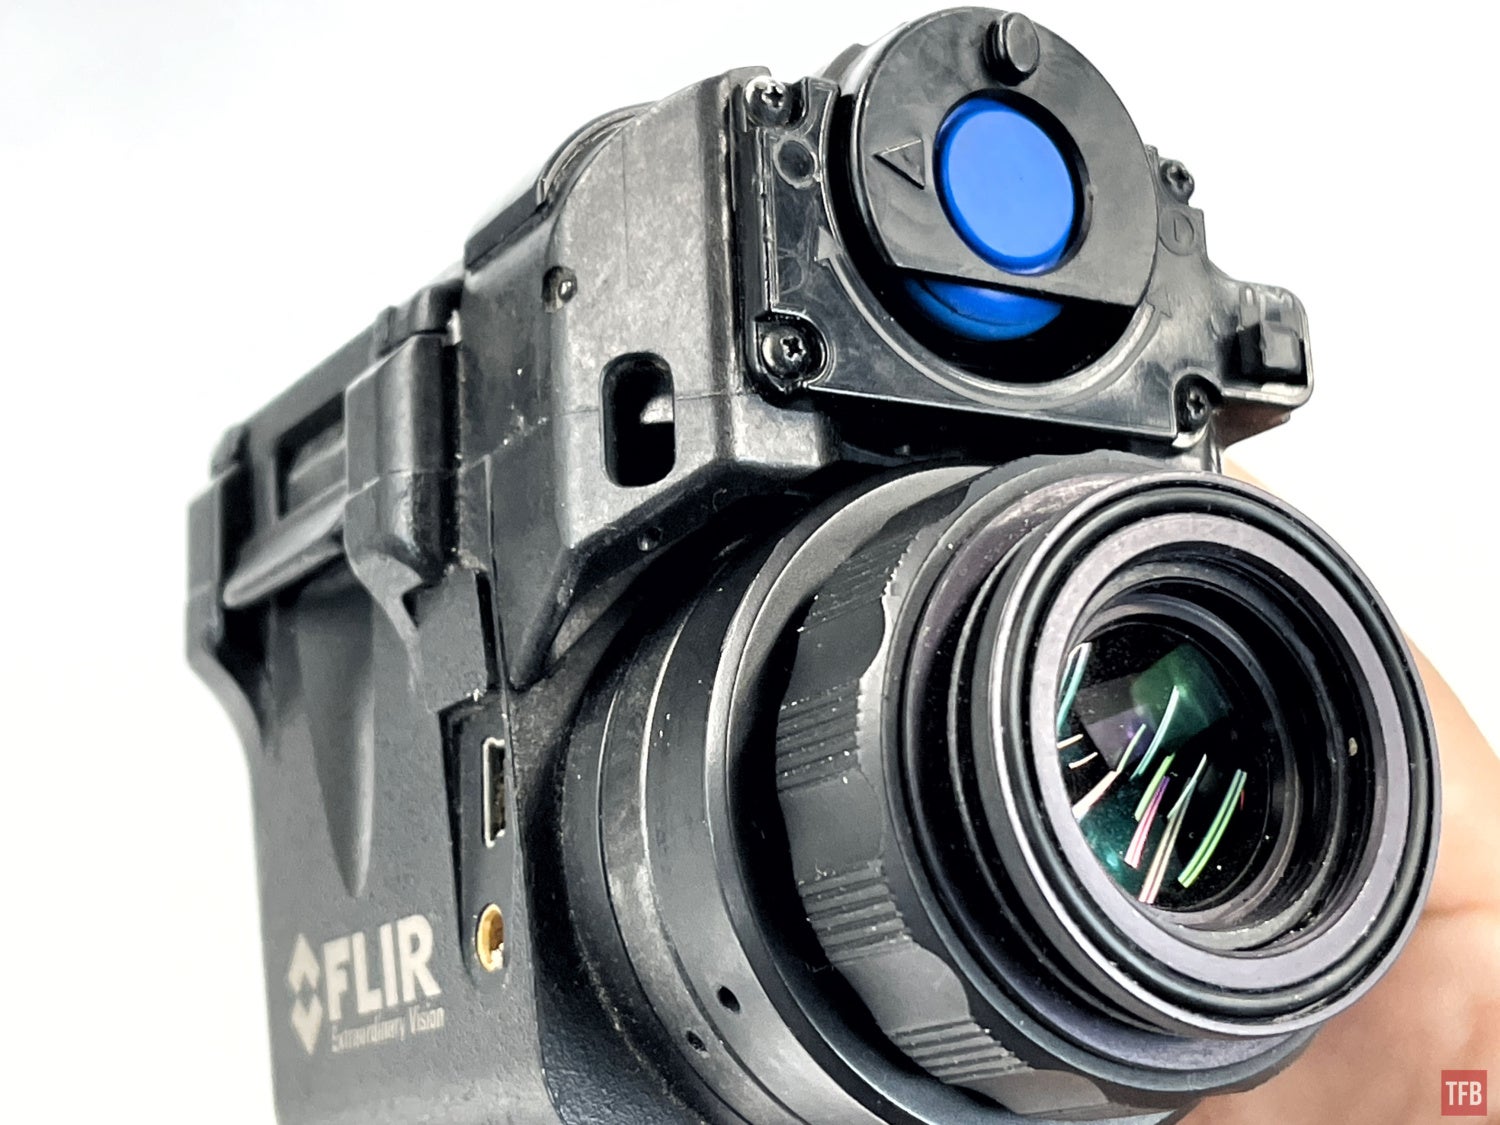
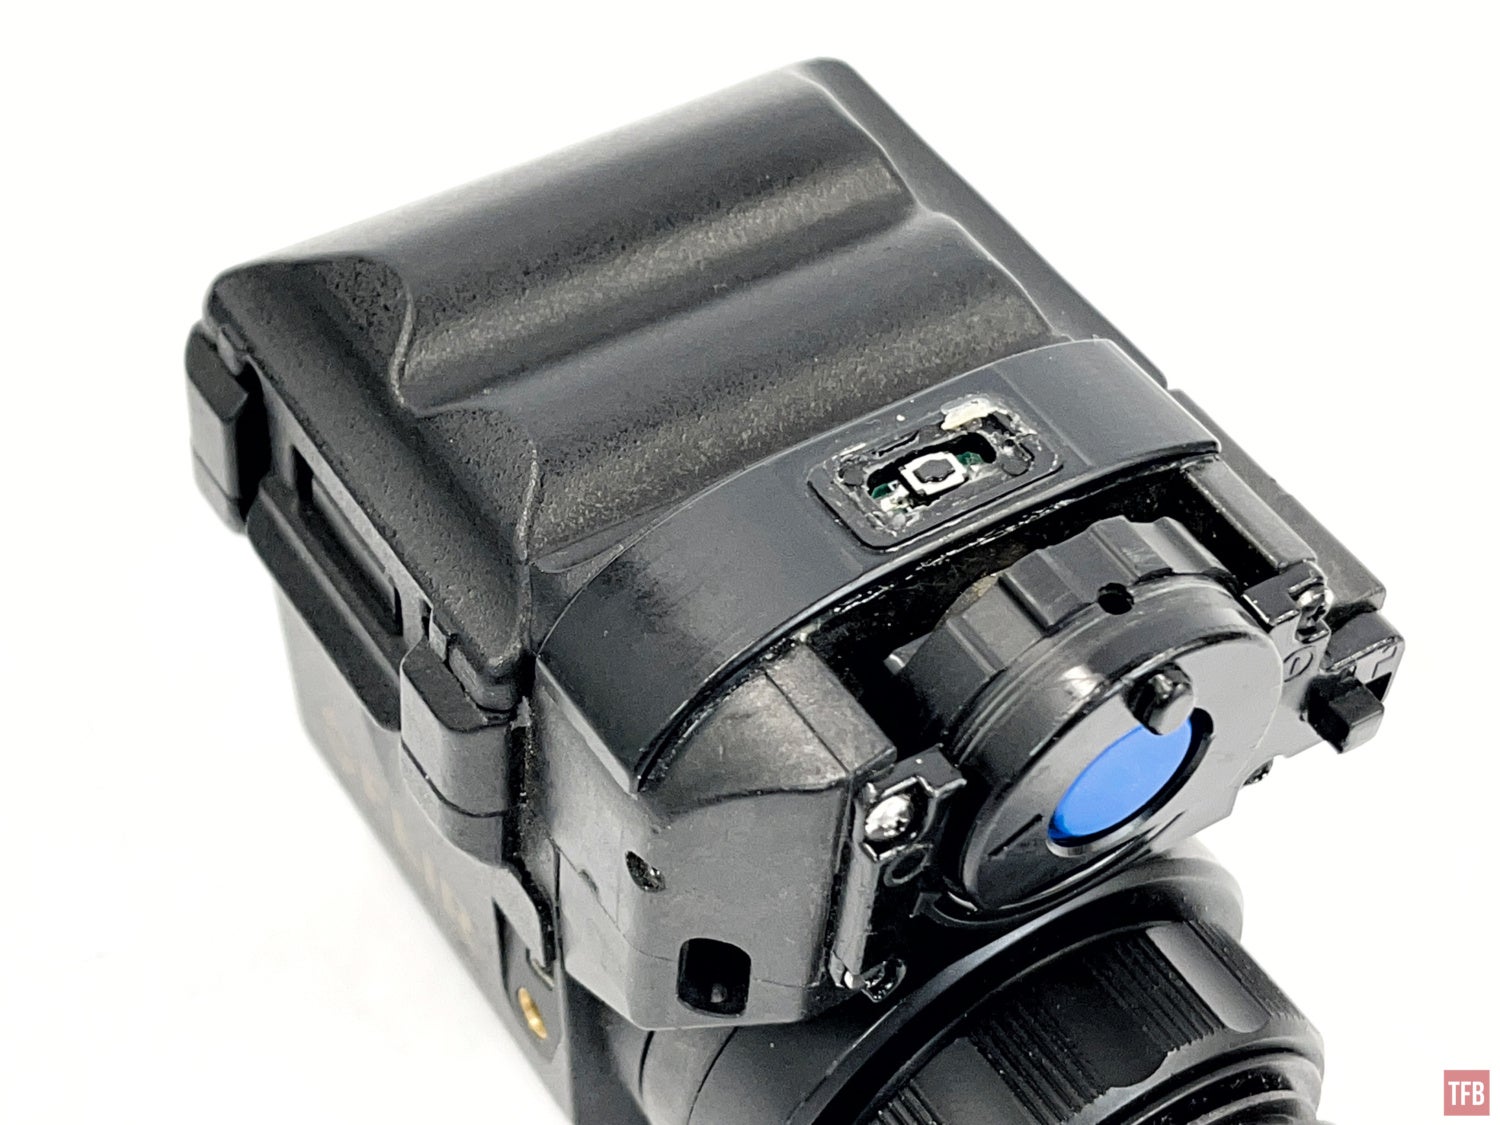
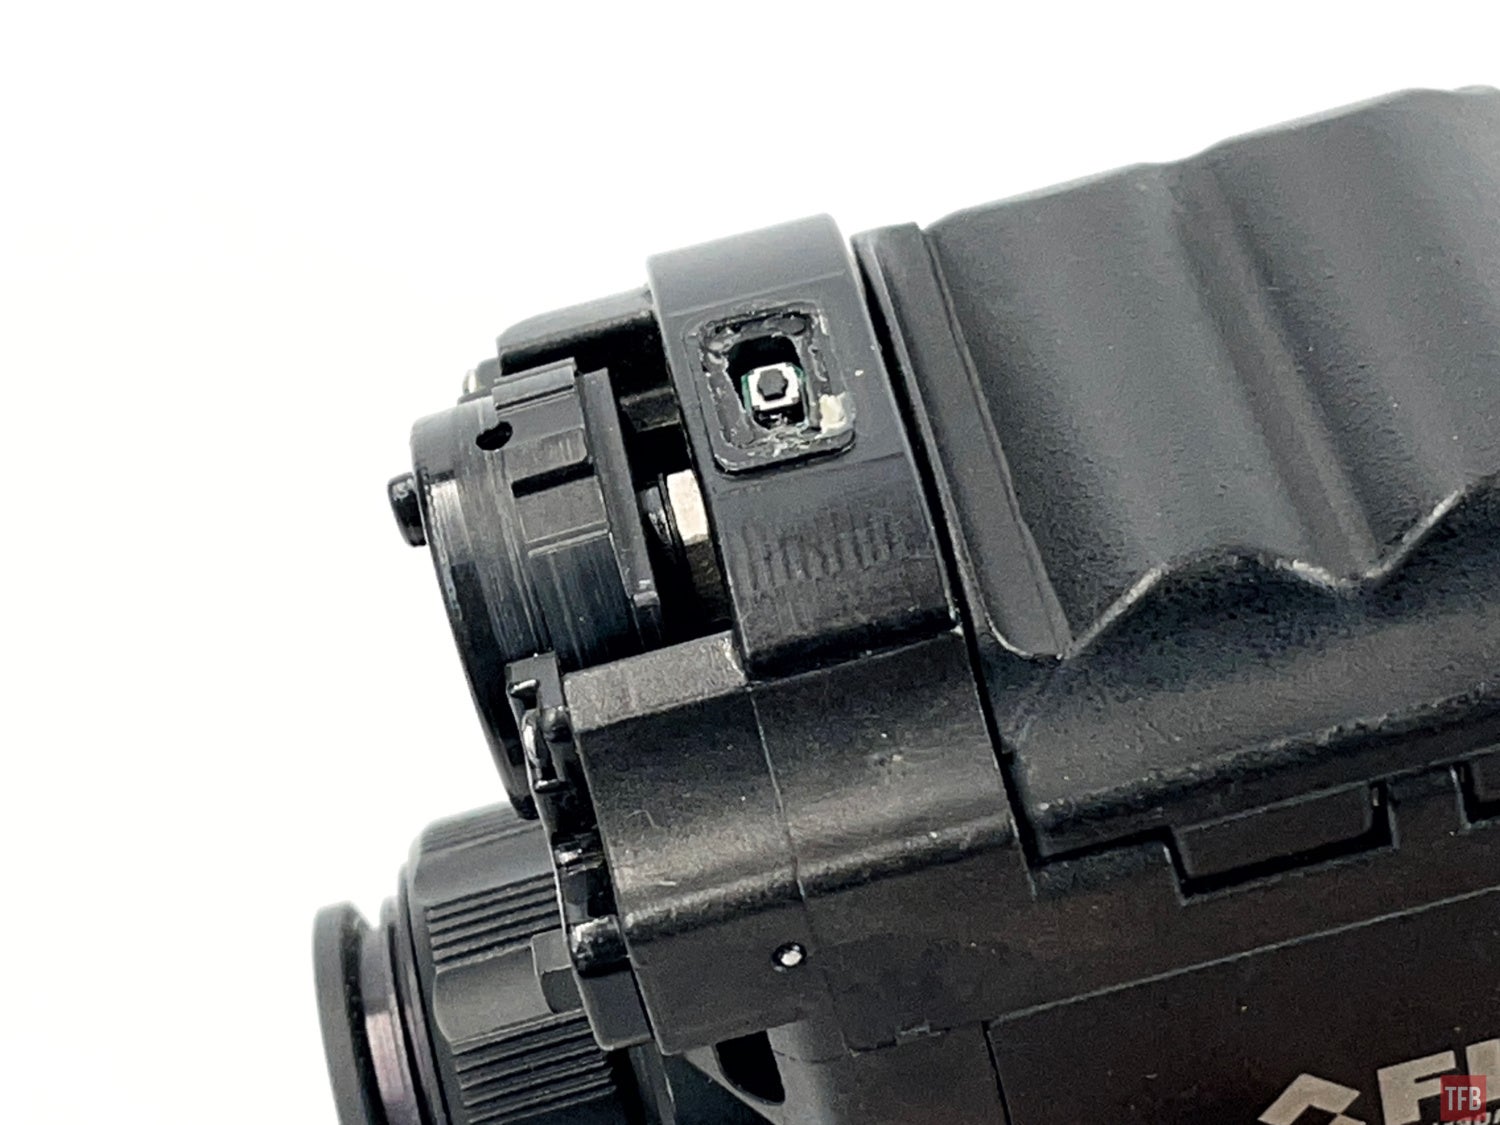
There is another rubber-shrouded button at the front of the M24 housing, just above the objective lens. This is for manually performing an NUC. There are more lanyard attachment points on either side. The objective lens is not focusable.
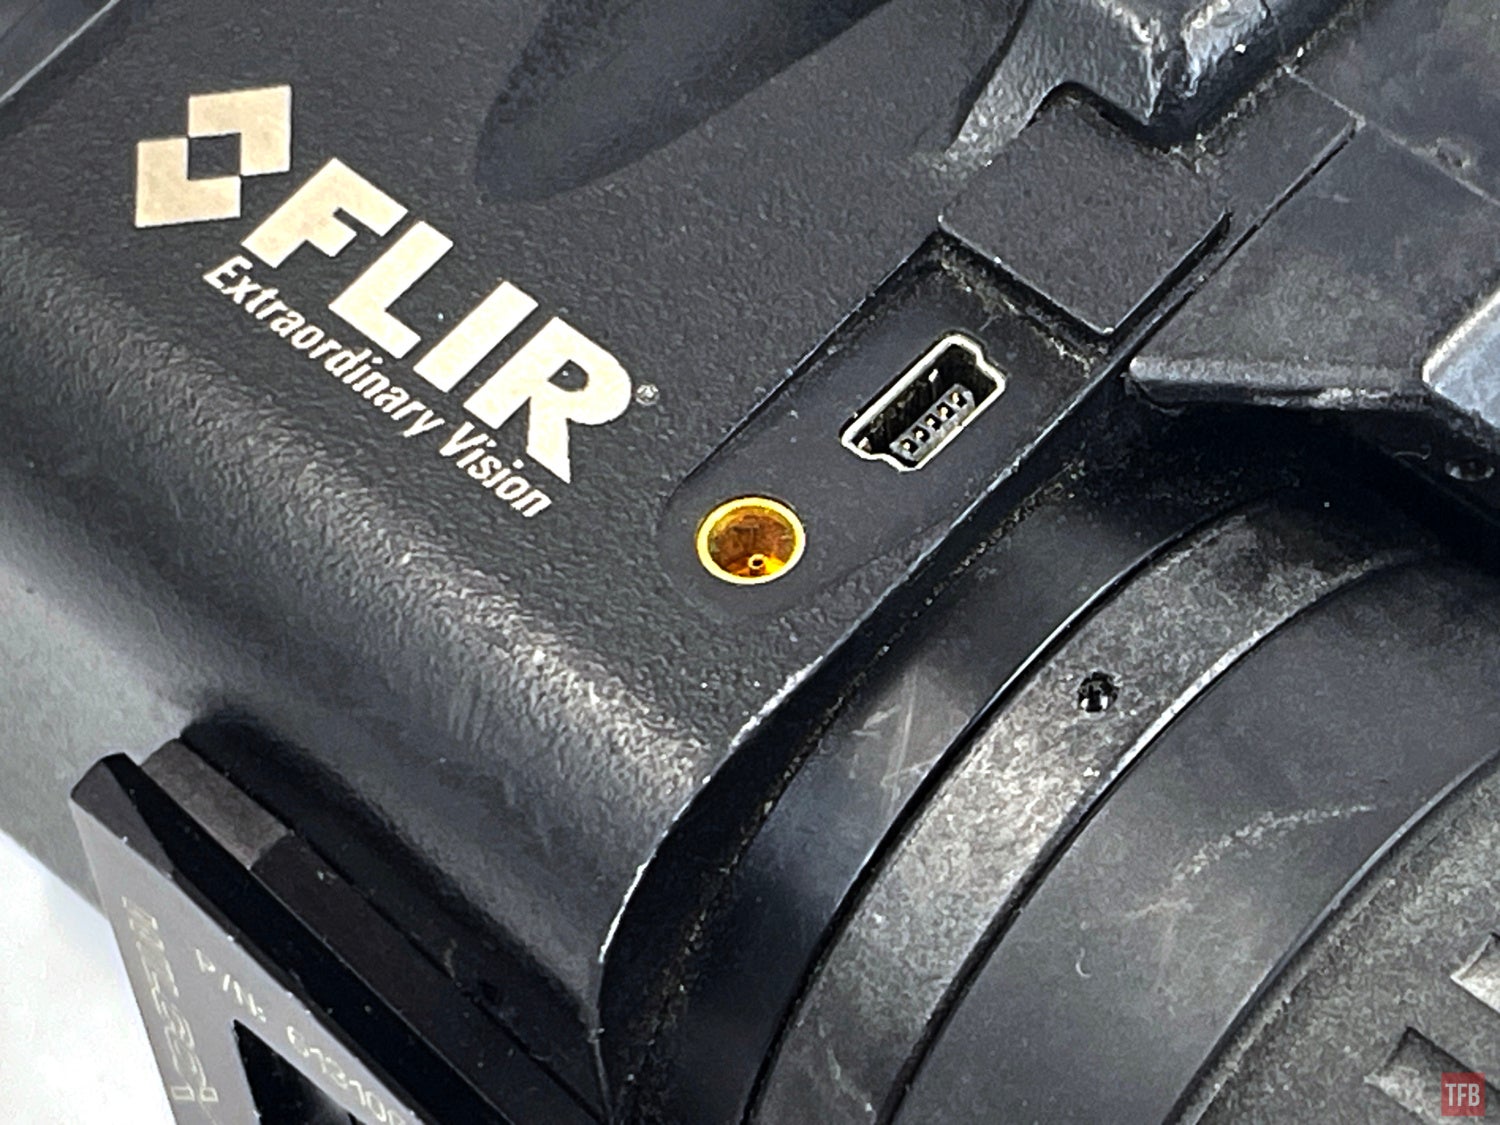
On the side of the M24 is a Mini USB port and video out port.
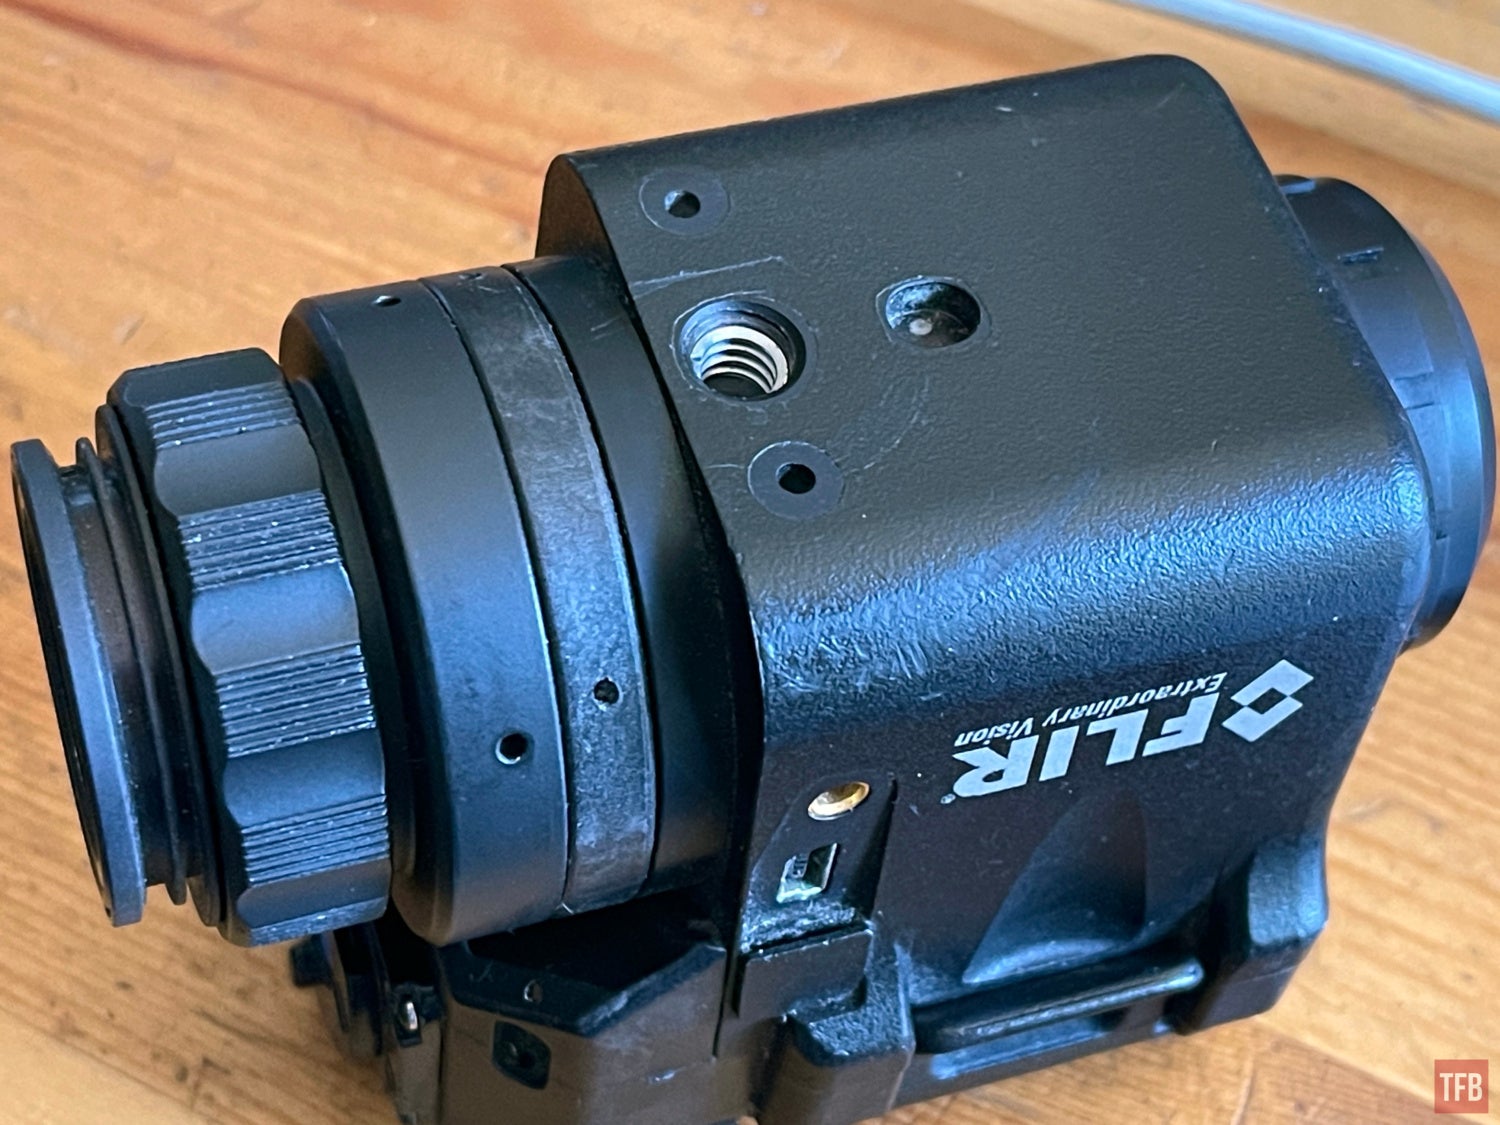
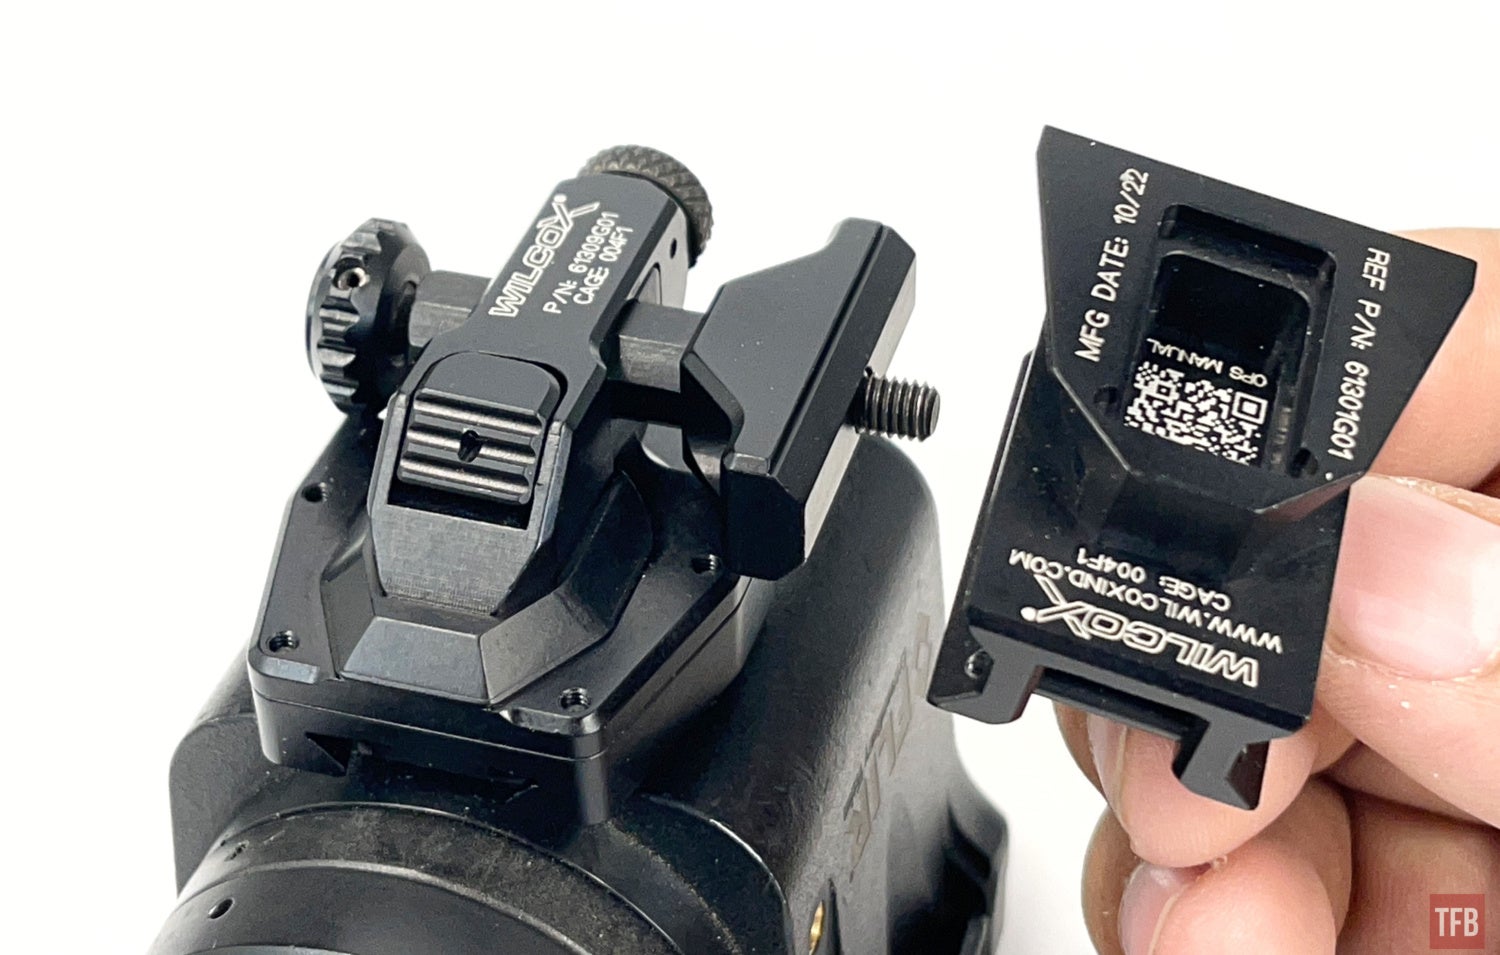
Here is the Wilcox M24 dovetail.
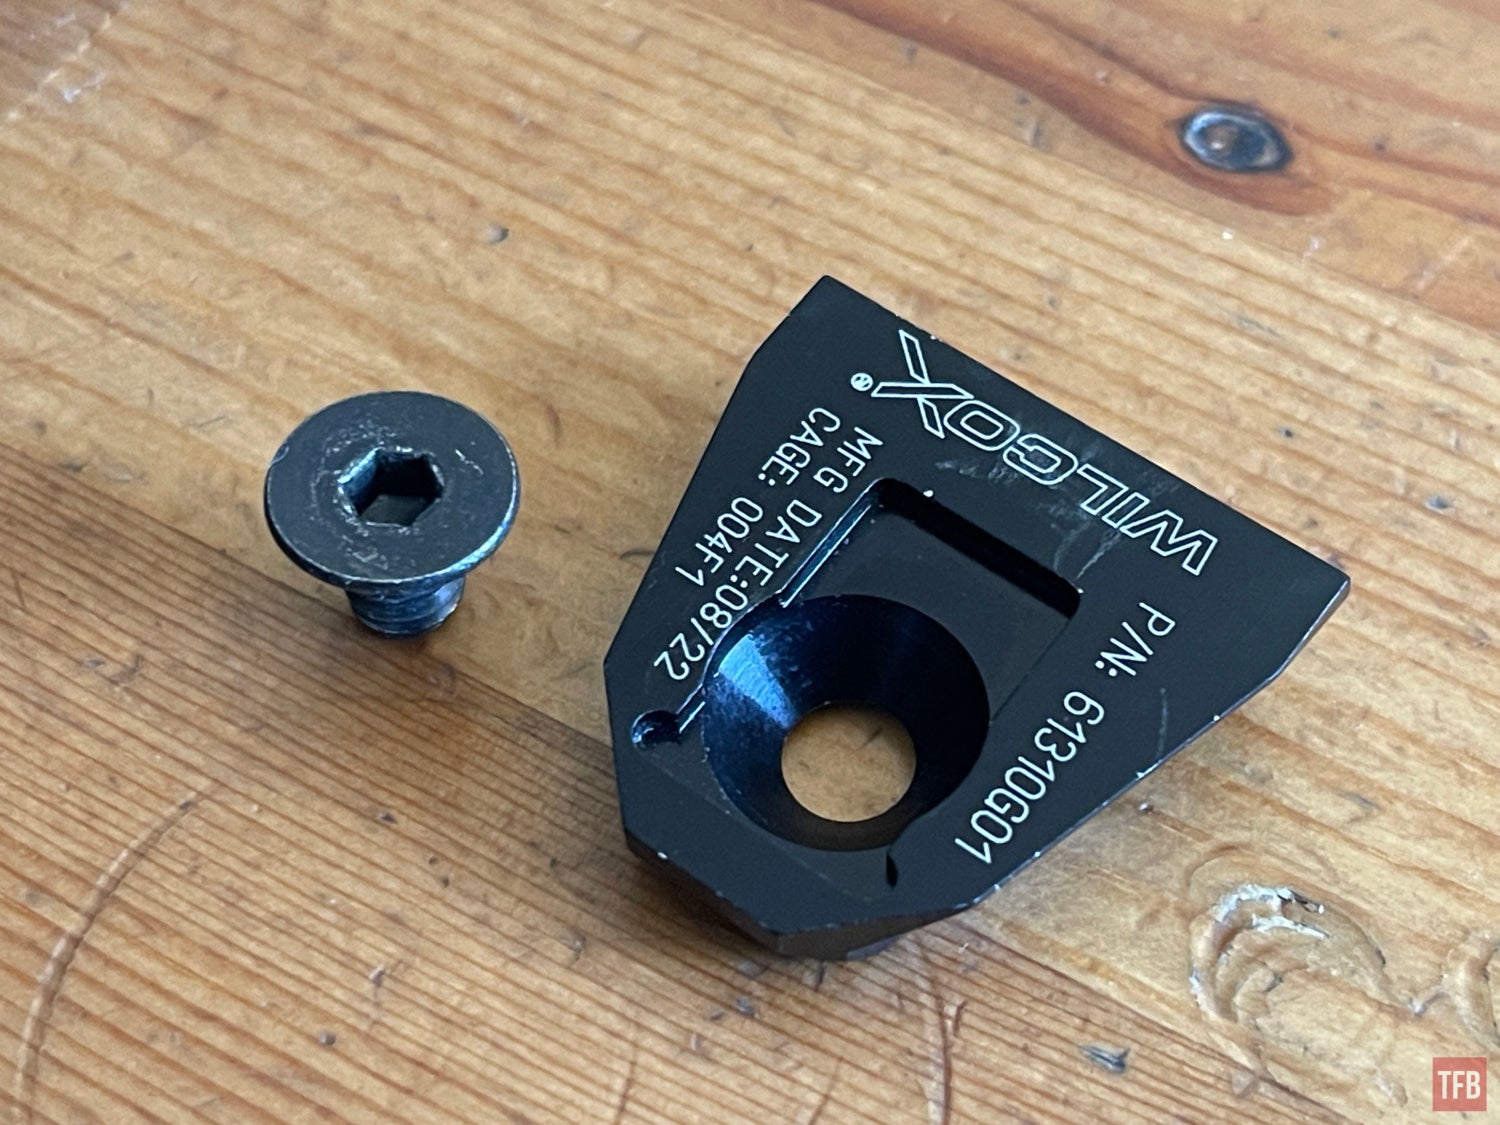
Wilcox M24 dovetail
The dovetail has an anti-rotation pin that interfaces with the M24 housing.
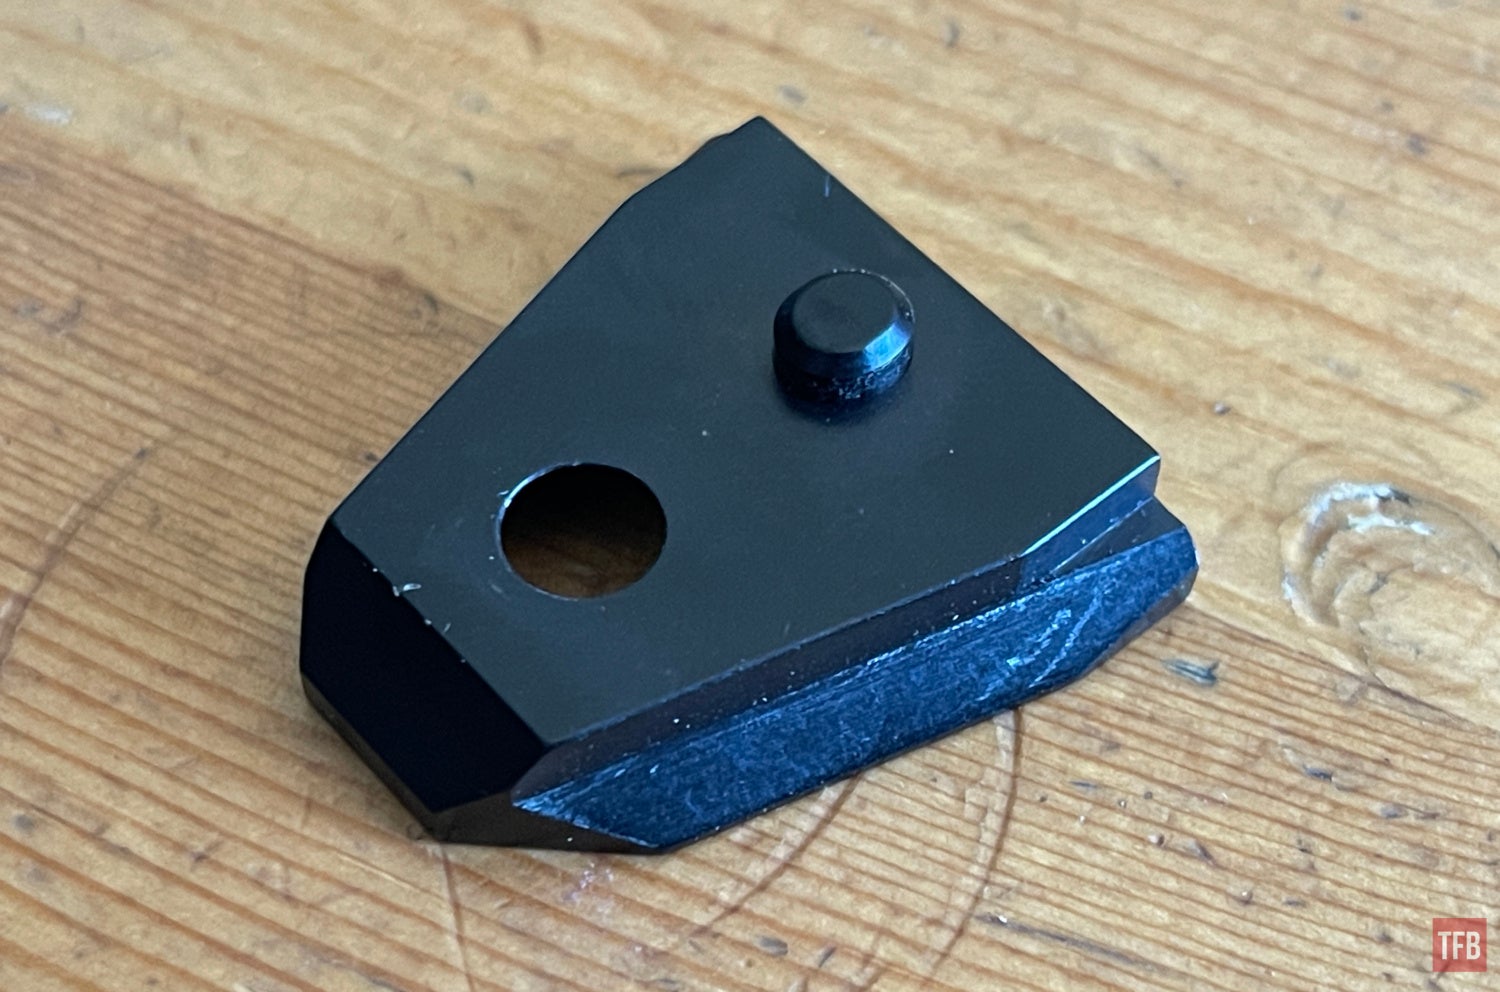
The threaded hole is the industry standard for tripods which is 1/4-20.
Mounting The M24
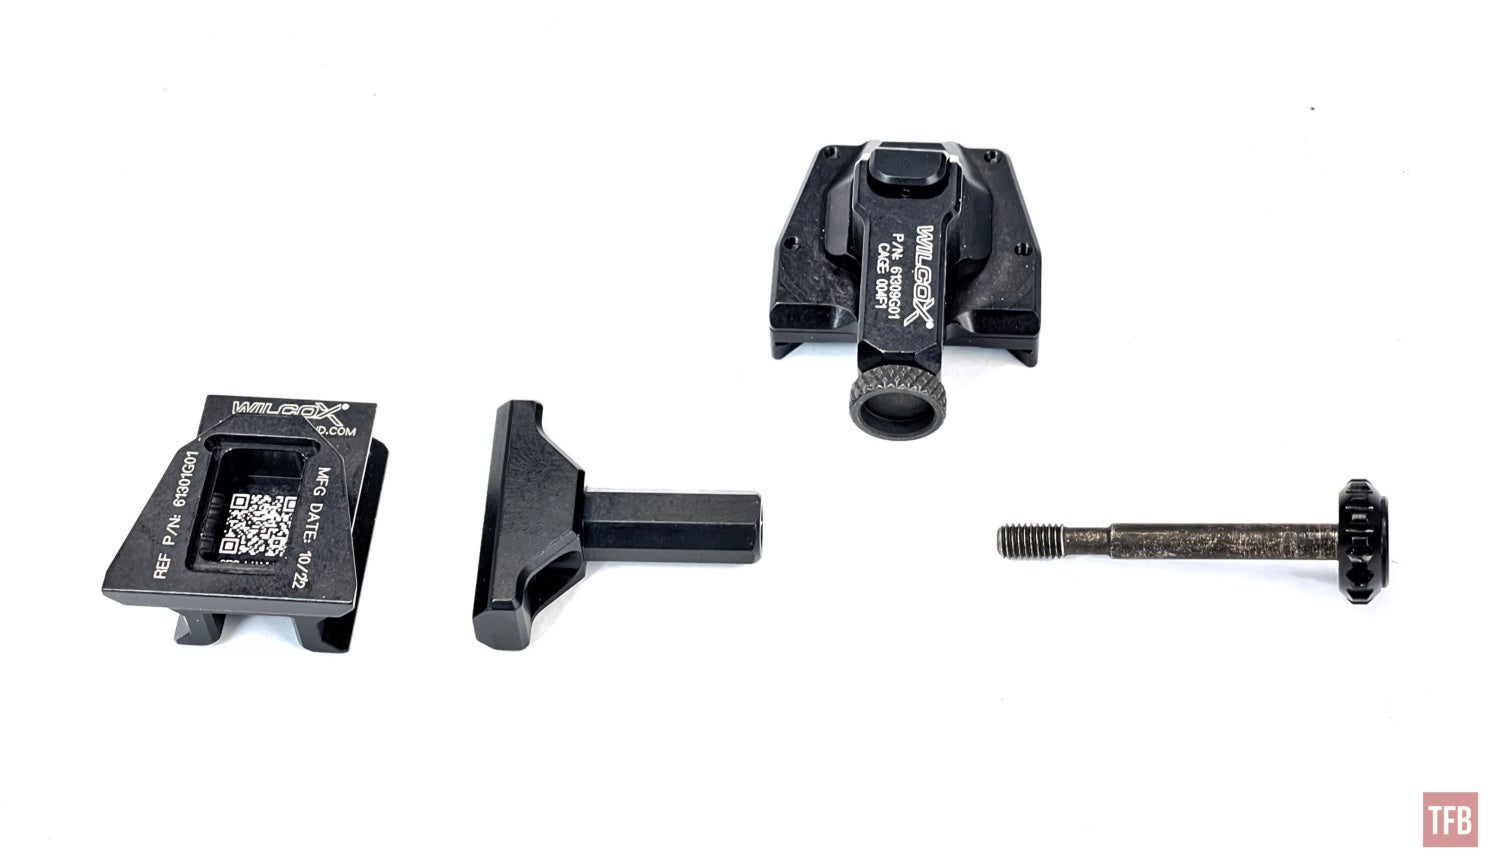
Here is the Wilcox monocular bridge system. This one was specifically designed for the RECON M24. It has a tension knob on the front. Loosen it and you can slide the thermal monocular left and right to line up the eyepiece with your eye. The knob on the side is to remove the arm from the dovetail. You can swap the dovetail section of a bayonet if you do not have a dovetail mount. You can also flip the arm around to mount the RECON M24 over your right eye.
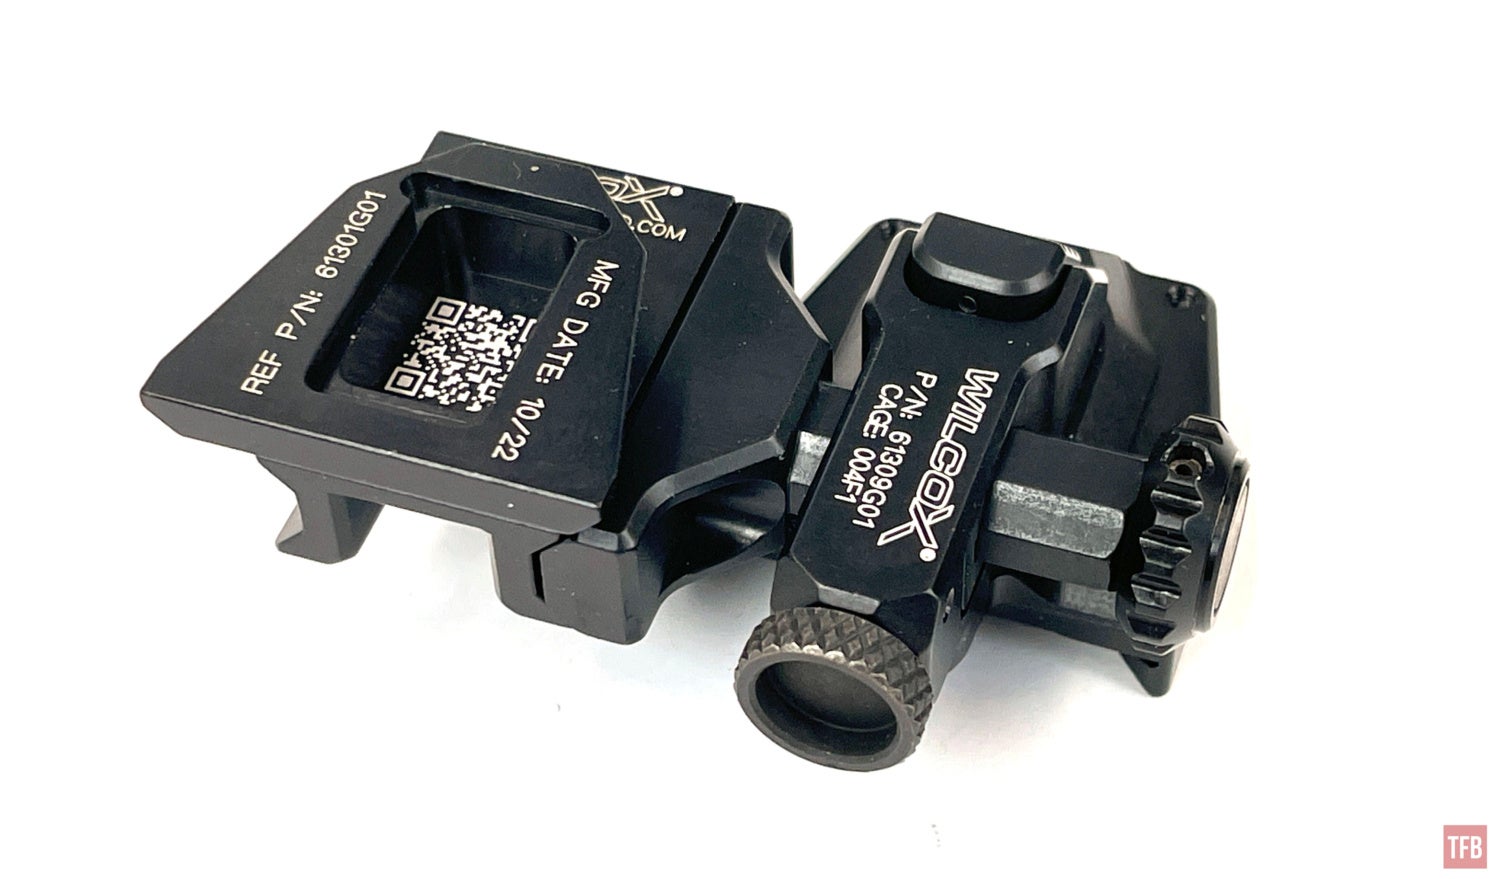
This bridge system is simpler than the SKEETIR-X setup. This does not allow for articulation but it is very rigid and robust. Due to the IPD tension knob being in the front, the dovetail release latch button is in the back of the M24 arm.
If you unscrew the arm mounting screw, the dovetail can be removed from the bridge.
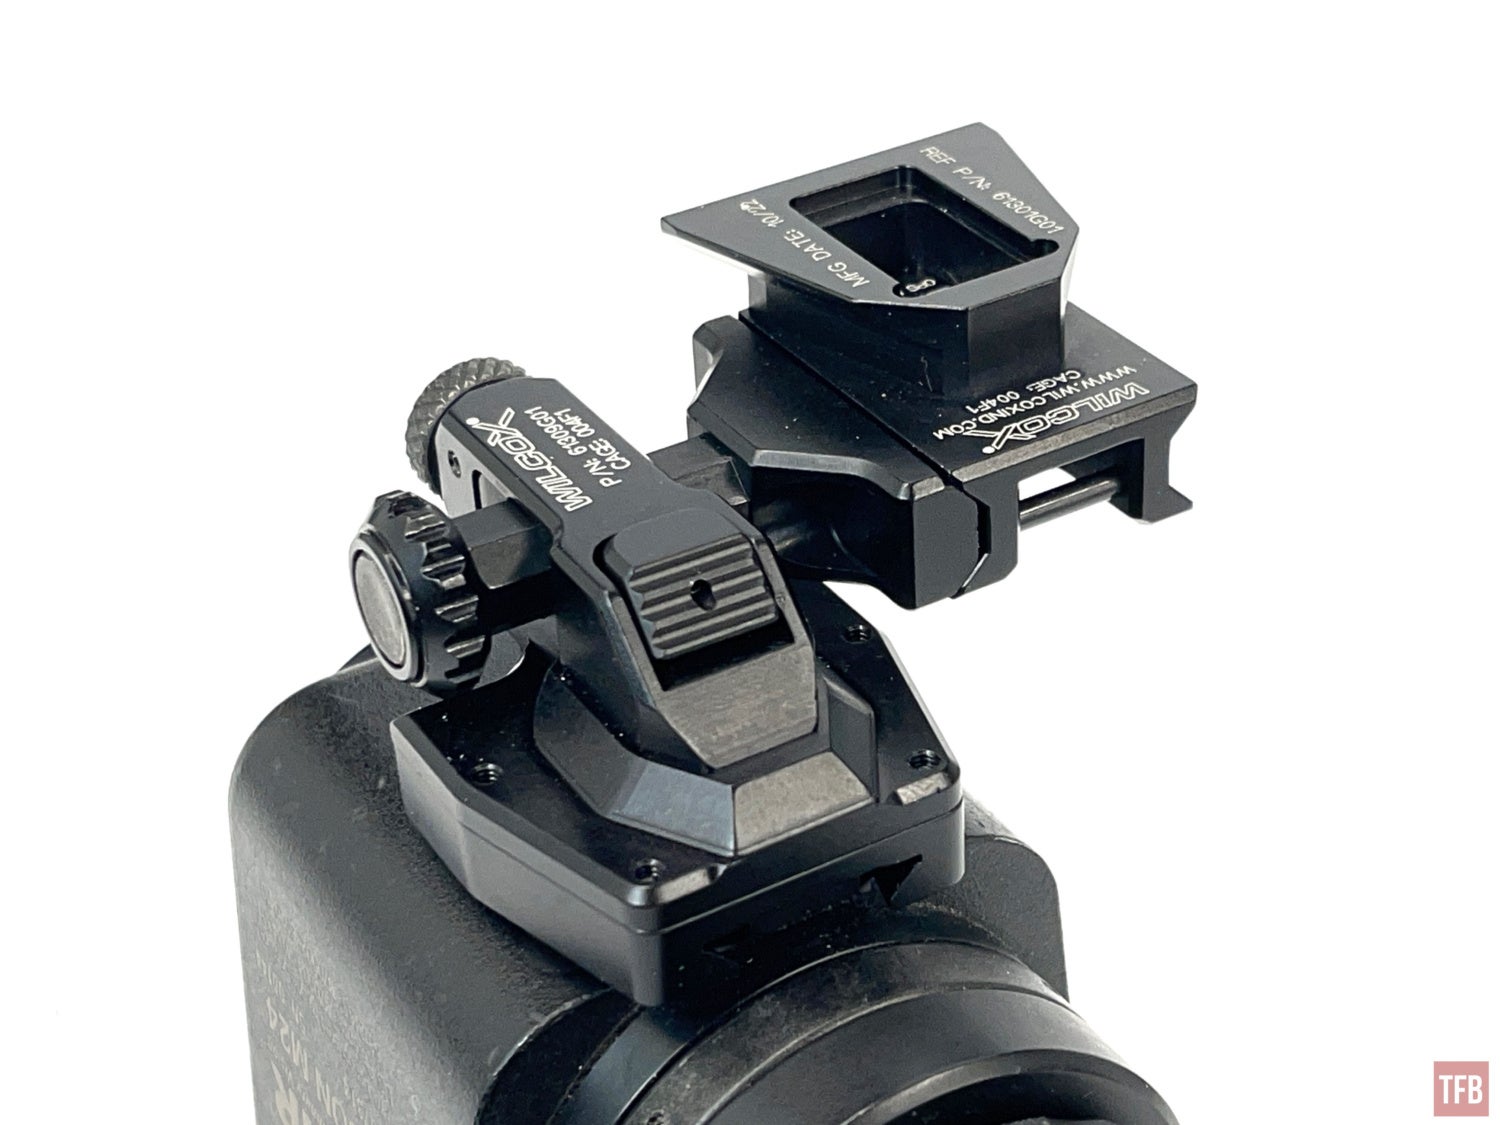
Switching from left to right eye requires a near complete disassembly of the arm. You need to unscrew the mounting screw from the IPD bar. Then slide the dovetail shoe off.
You can see how the IPD tension knob presses back onto the IPD bar.
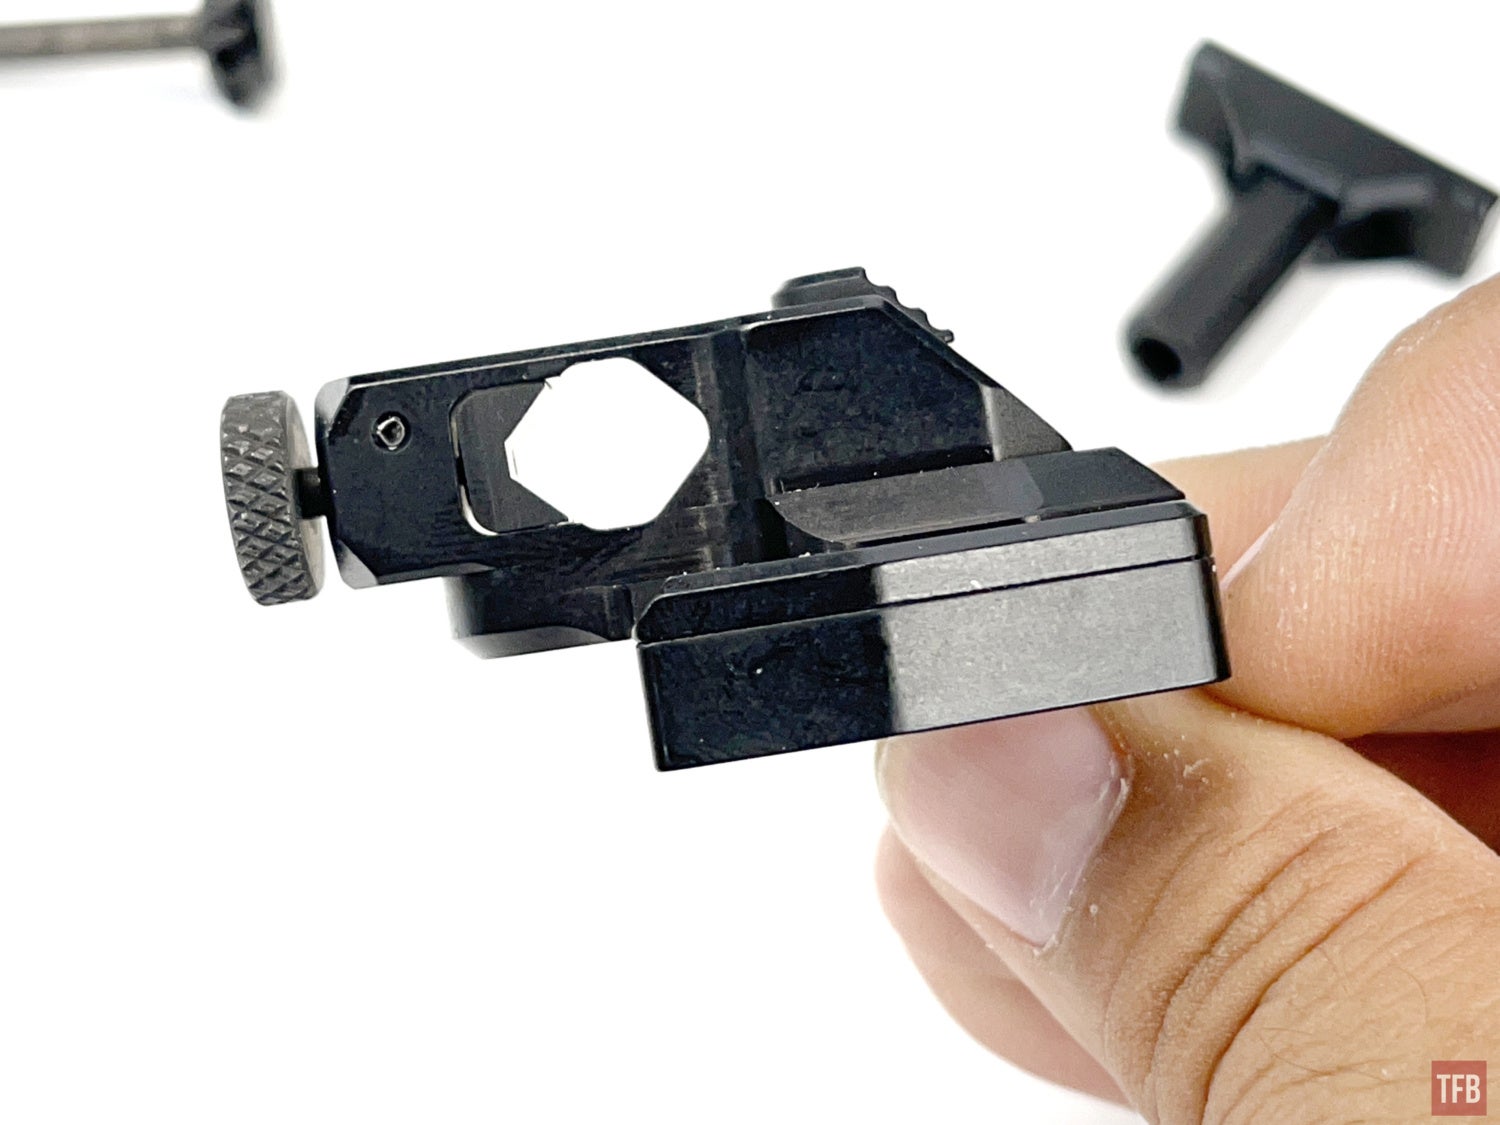
Then you flip the bar and insert it through the left side of the dovetail shoe and reinstall the mounting screw and dovetail.
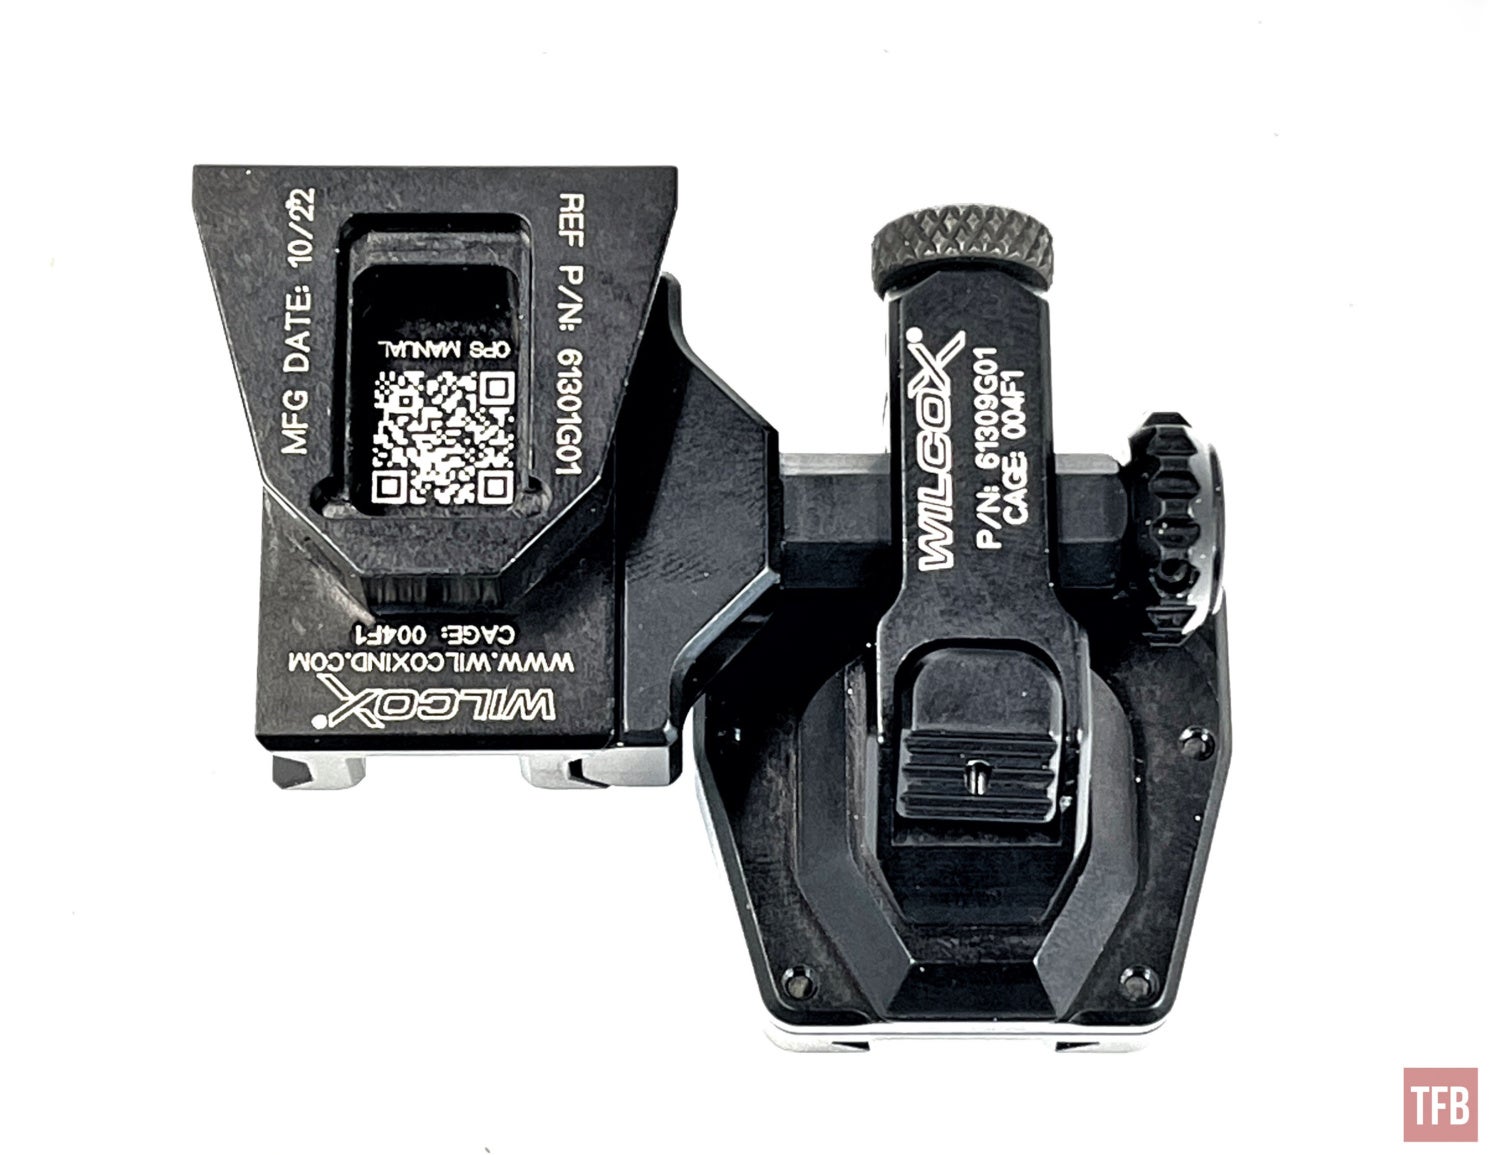
Now you can have the RECON M24 over your right eye.
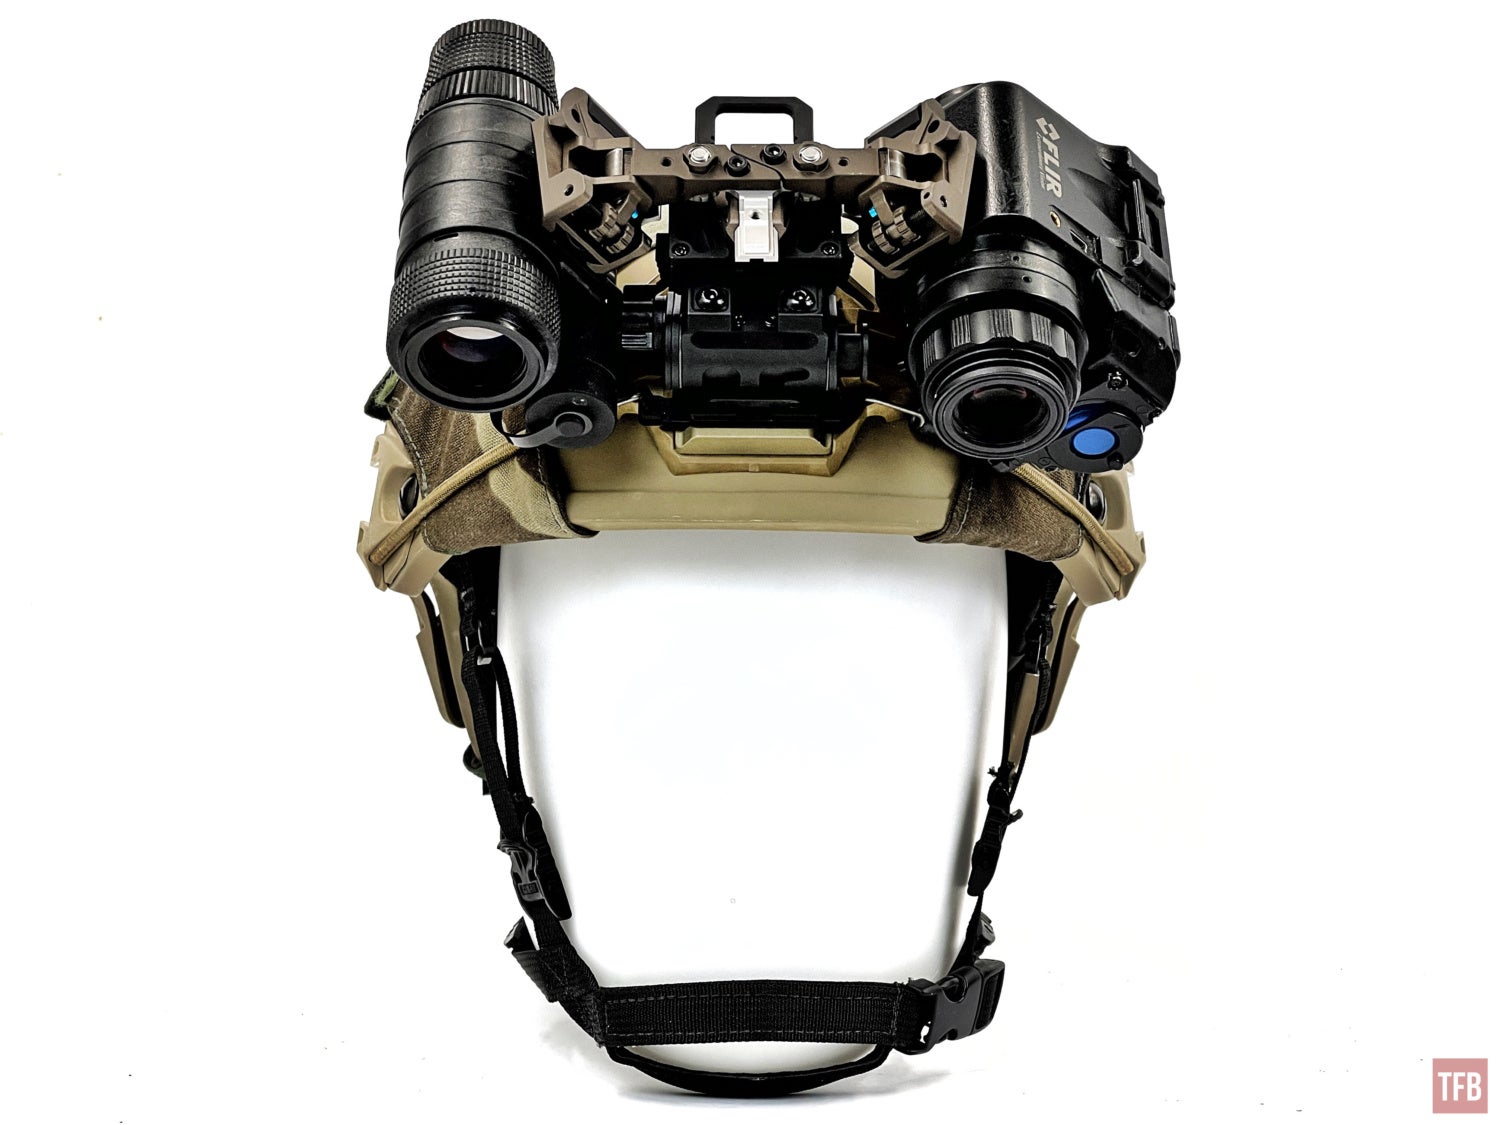
Bridging The FLIR RECON M24
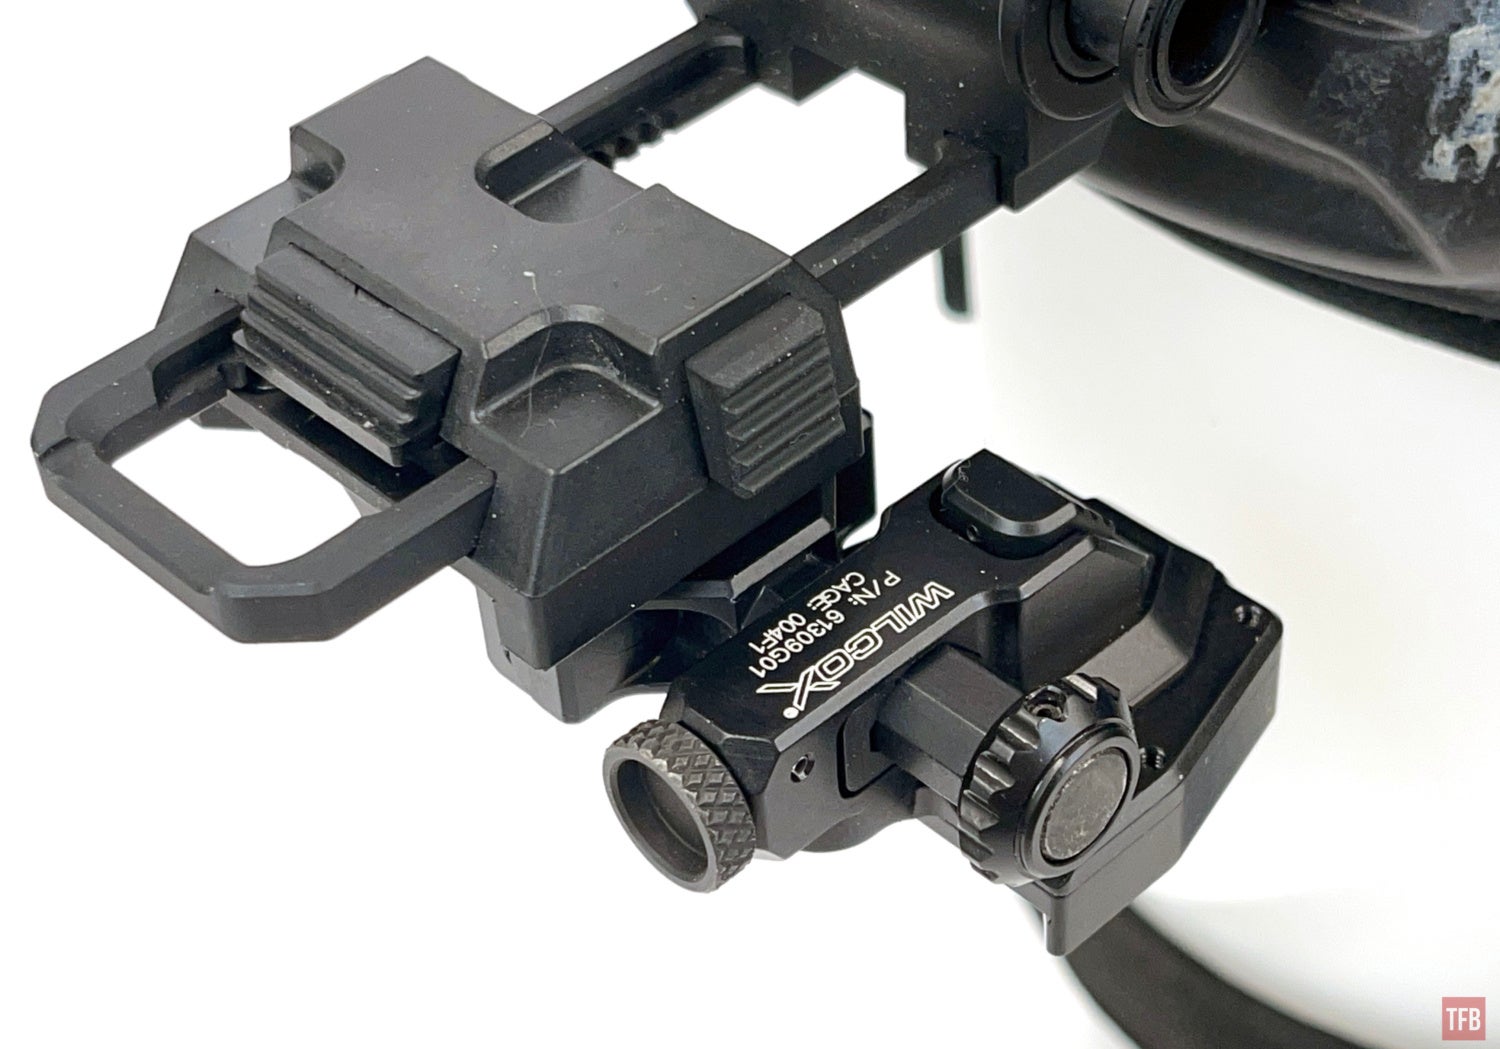
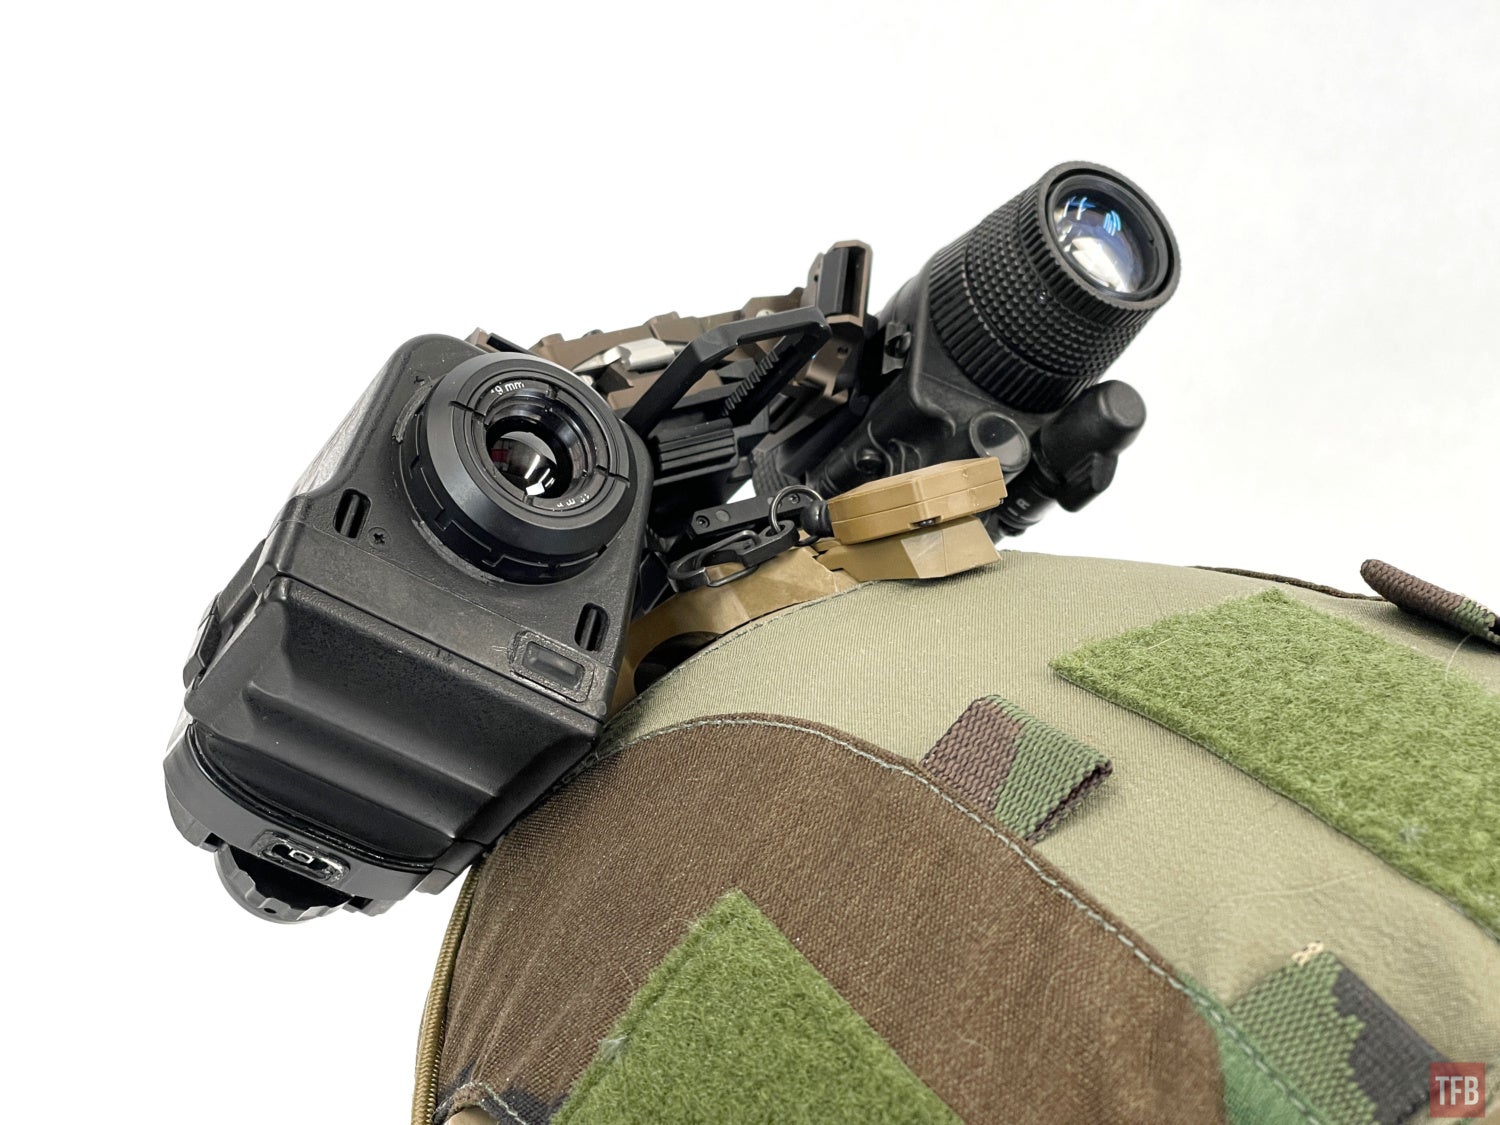
While the Wilcox M24 arm is great, I prefer articulation. Since Wilcox made a dovetail for the M24, you can use other bridges like their SKEETIR bridge or the RQE/KAC bridge. Here I bridged it with my MUM-14. I prefer the MUM-14 since I can orient the battery housing off to the side so it does not interfere with the thermal.
I am not sure if the M24 was ever designed to be bridged but you can see how the battery compartment widens below the MUM-14 and does not interfere with the pupillary distance.

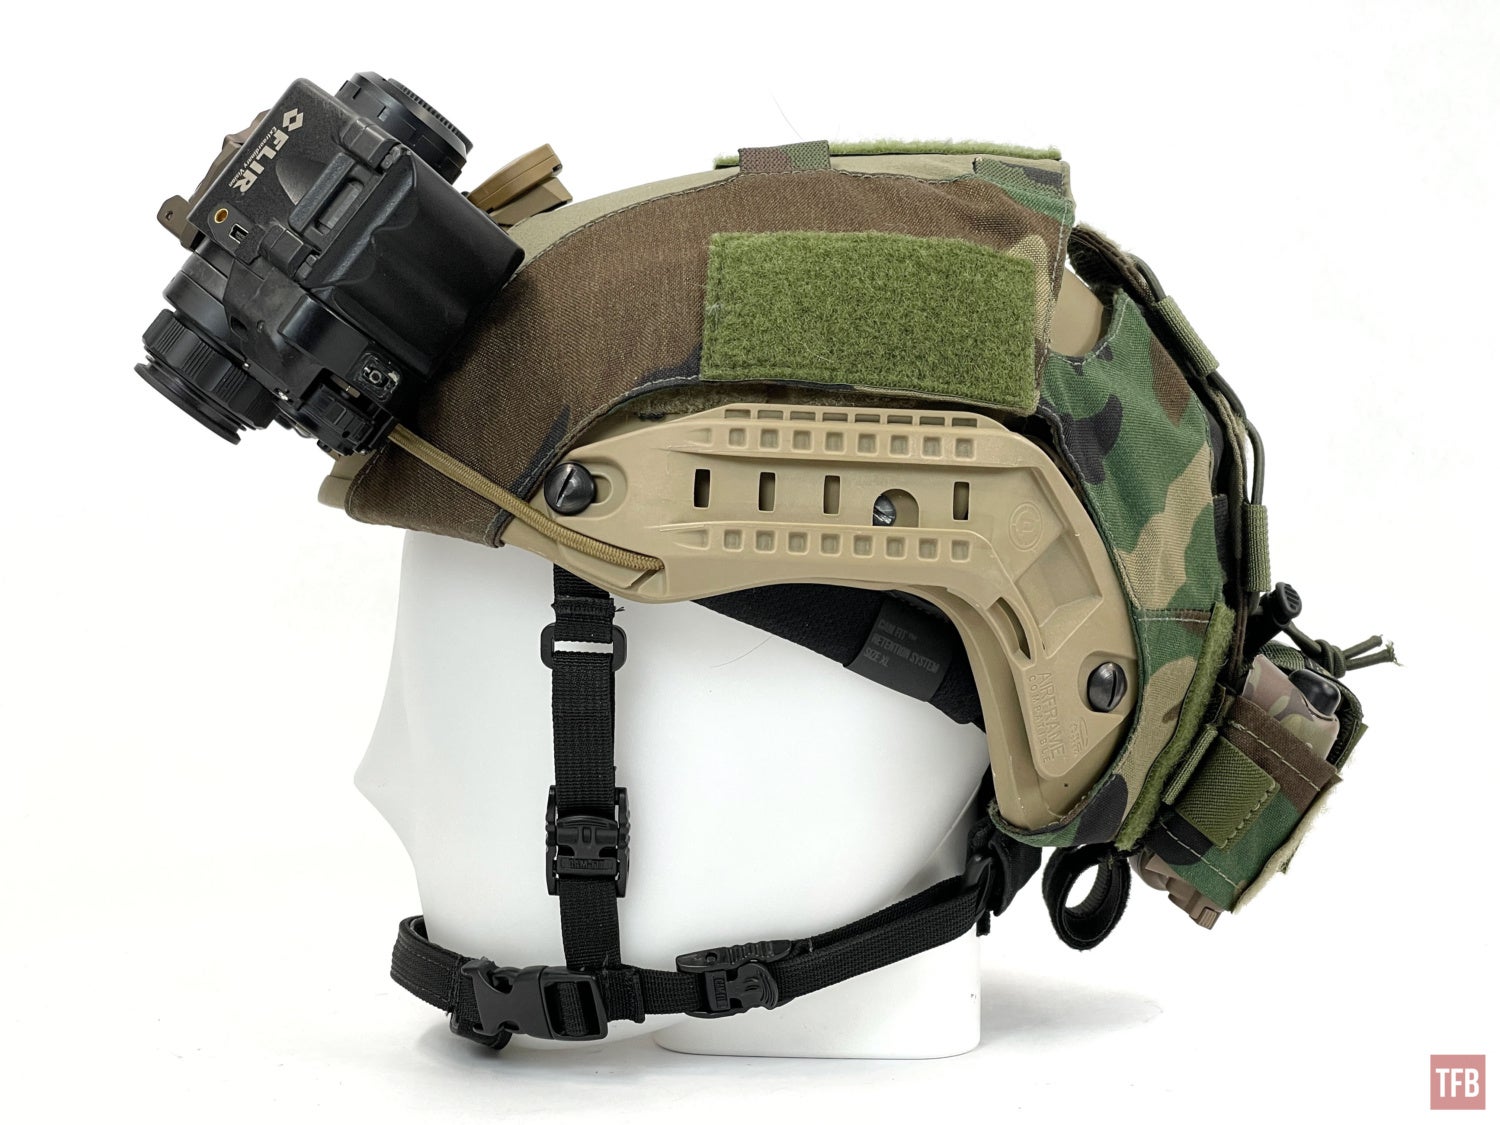
Articulating/folding bridges are the best. They add so much more versatility than simply flipping the device up and sticking out like a rhino horn. Below I have the MUM-14 and FLIR RECON folded up out of the way. I have not even folded the Wilcox mount.
Since the RQE bridge can articulate past 90º, when the mount is folded up, I can position the MUM-14 and FLIR RECON M24 up against the helmet.
This makes them feel a lot better for extended periods of time if I am not using them.
Using The FLIR RECON M24
The FLIR RECON is an ok thermal device. The objective lens is not adjustable so this one seems like it is focused for objects within 30 yards.
I was able to record the analog video through the video out port. It uses a MCX male plug and I found one that has a BNC cable on the other end. I used this to input the video into my tablet and record the video you see below.
Screenshot from Sicario
In Sicario we saw what was supposed to be the POV of Alejandro walking through the tunnel. He sees hot bootprints on the tunnel floor. This has already been revealed to be Hollywood magic. They used a cooled MWIR industrial thermal camera and heated up the boots of someone and had them walk through before filming it with the thermal camera. I wanted to replicate this with the FLIR RECON M24. In the video below I had my kids help me demonstrate footprints under thermal. Bare feet on a carpet will show up but boots do not. Not unless they are heated up above ambient temperature. So I used a hair dryer to warm up my daughter’s boots and had her walk across the carpet.
Wrap Up On RECON M24

Screenshot of the M24 splash screen.
The M24 uses a sensor core by a company called Indigo. According to Jason of Ident Marking, they were once a part of Raytheon but FLIR acquired them. See the splash screen screenshot above? It is in color but the LCD display in the RECON M24 is black and white. It is only when you output the video does it shows in color.
The RECON M24 is obsolete. It is neat because it was used in Sicario but other than that, there are better thermal devices that are smaller and produce a better image. And some of them have adjustable objective lens to adjust focus.
Thanks for reading all the way through. Hope you enjoyed this in-depth look at an obsolete thermal device.