 Your Privacy Choices
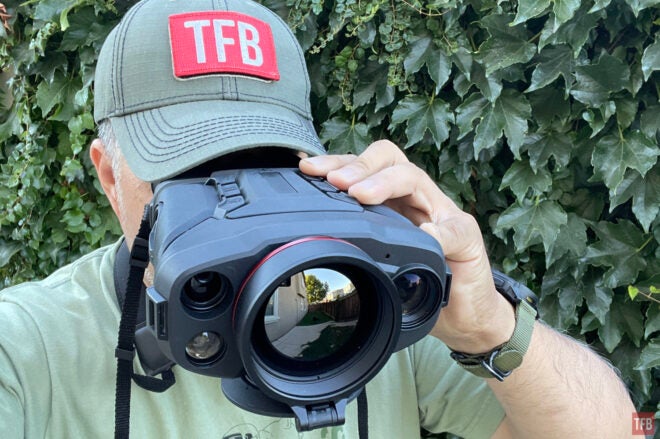
Do you hunt? Are you looking for that all-in-one device that doesn’t suck? Well, on tonight’s Friday Night Lights, the AGM Voyage LRF TB75-640 may be the device you are looking for. It is a thermal biocular with a built-in laser rangefinder and a digital night vision channel that can be fused with the thermal for thermal fusion! To my surprise, this device works better than expected. Let’s take a closer look.
More Thermal Biocular @ TFB
- Friday Night Lights: El-Op (Elbit) CORAL-SD MWIR Thermal Spotter
- Friday Night Lights: Thales Sophie – Cooled LWIR Thermal Biocular
- Friday Night Lights: Oasys Universal Thermal Binocular (UTB)
AGM Voyage LRF TB75-640
AGM night vision has not been accepted with open arms due to the quality of their lenses but their old binocular housings were a great way to have dual tube binos for less at the compromise for quality. But their thermal devices have always impressed me. Ever since I got their handheld monocular TM384, I have kept an open mind, and their Rattler weapon sight series has always been well received. So I was curious how good can their thermal get and I asked to review their thermal biocular TB75-640.
Yes, it is a biocular even though they call it a binocular on their website. Binoculars have two distinct images and give you stereopsis (depth perception). That is not the case with the TB75-640. Like other thermal bioculars, the TB75 has a single thermal sensor. It doubles the thermal image into two OLED displays so each eye sees the same image.
This is not a bad thing. Devices like the TB75-640 are used for stagnant observation. While stereopsis would help with judging distances, the TB75 has a built-in laser range finder that can range up to 1km. However, in my testing I have not been able to get returns past 900 yards.
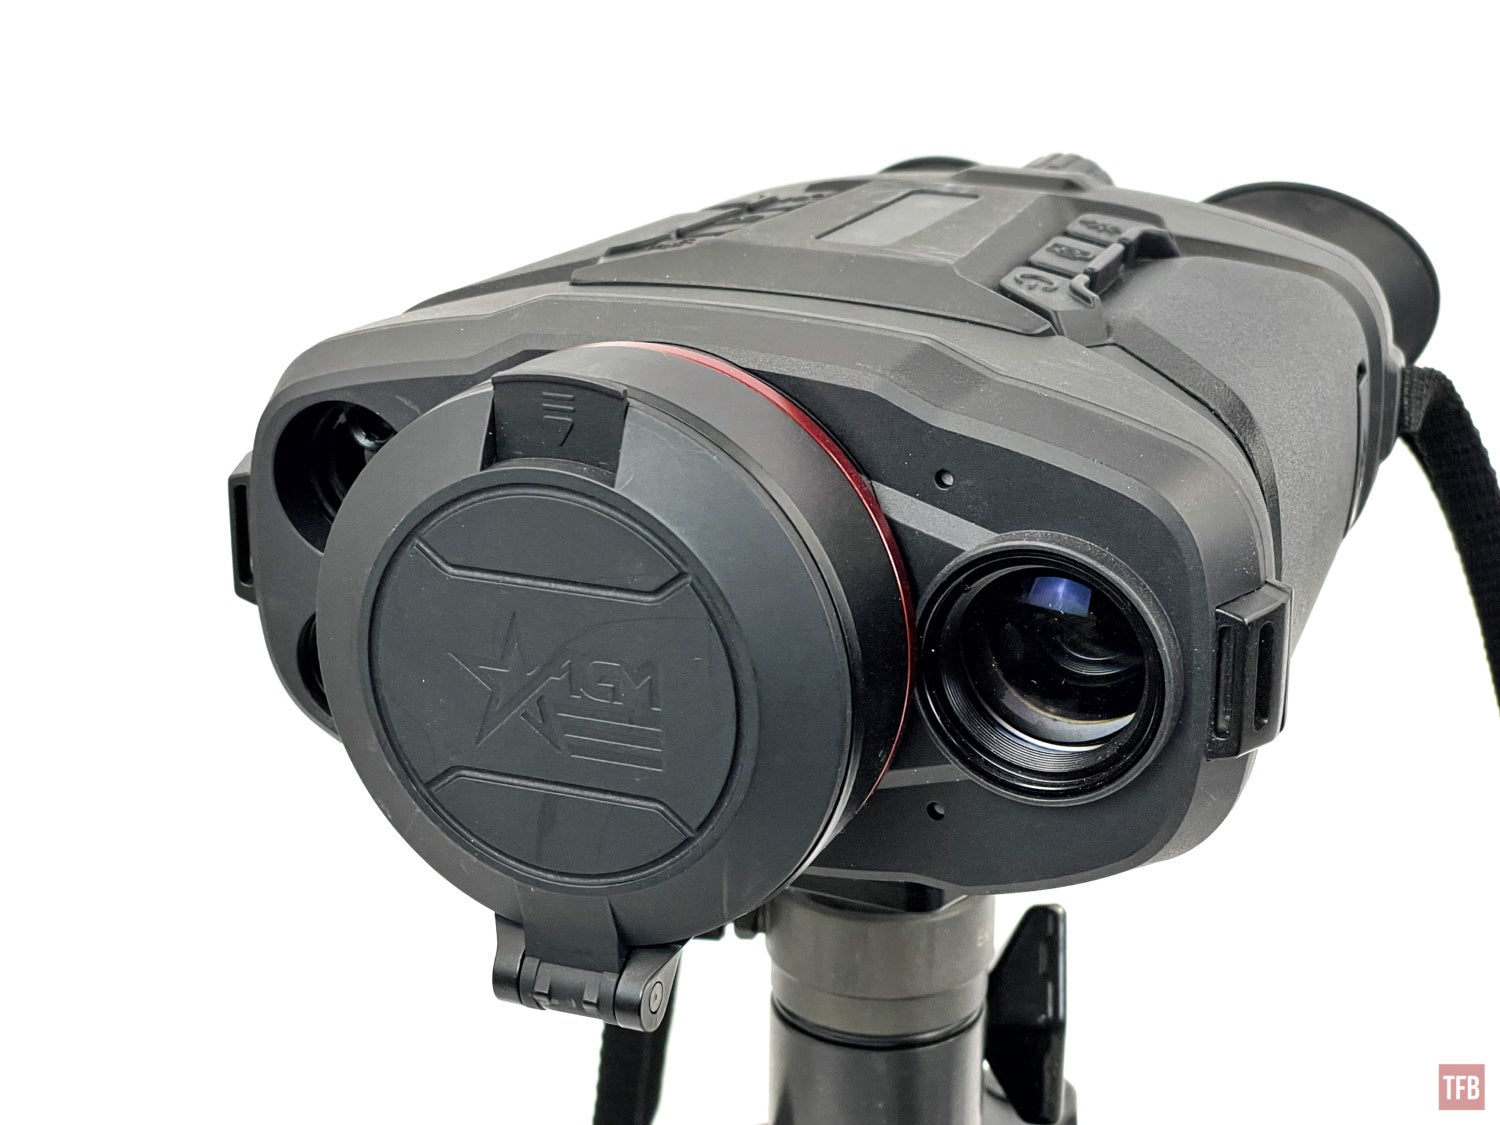
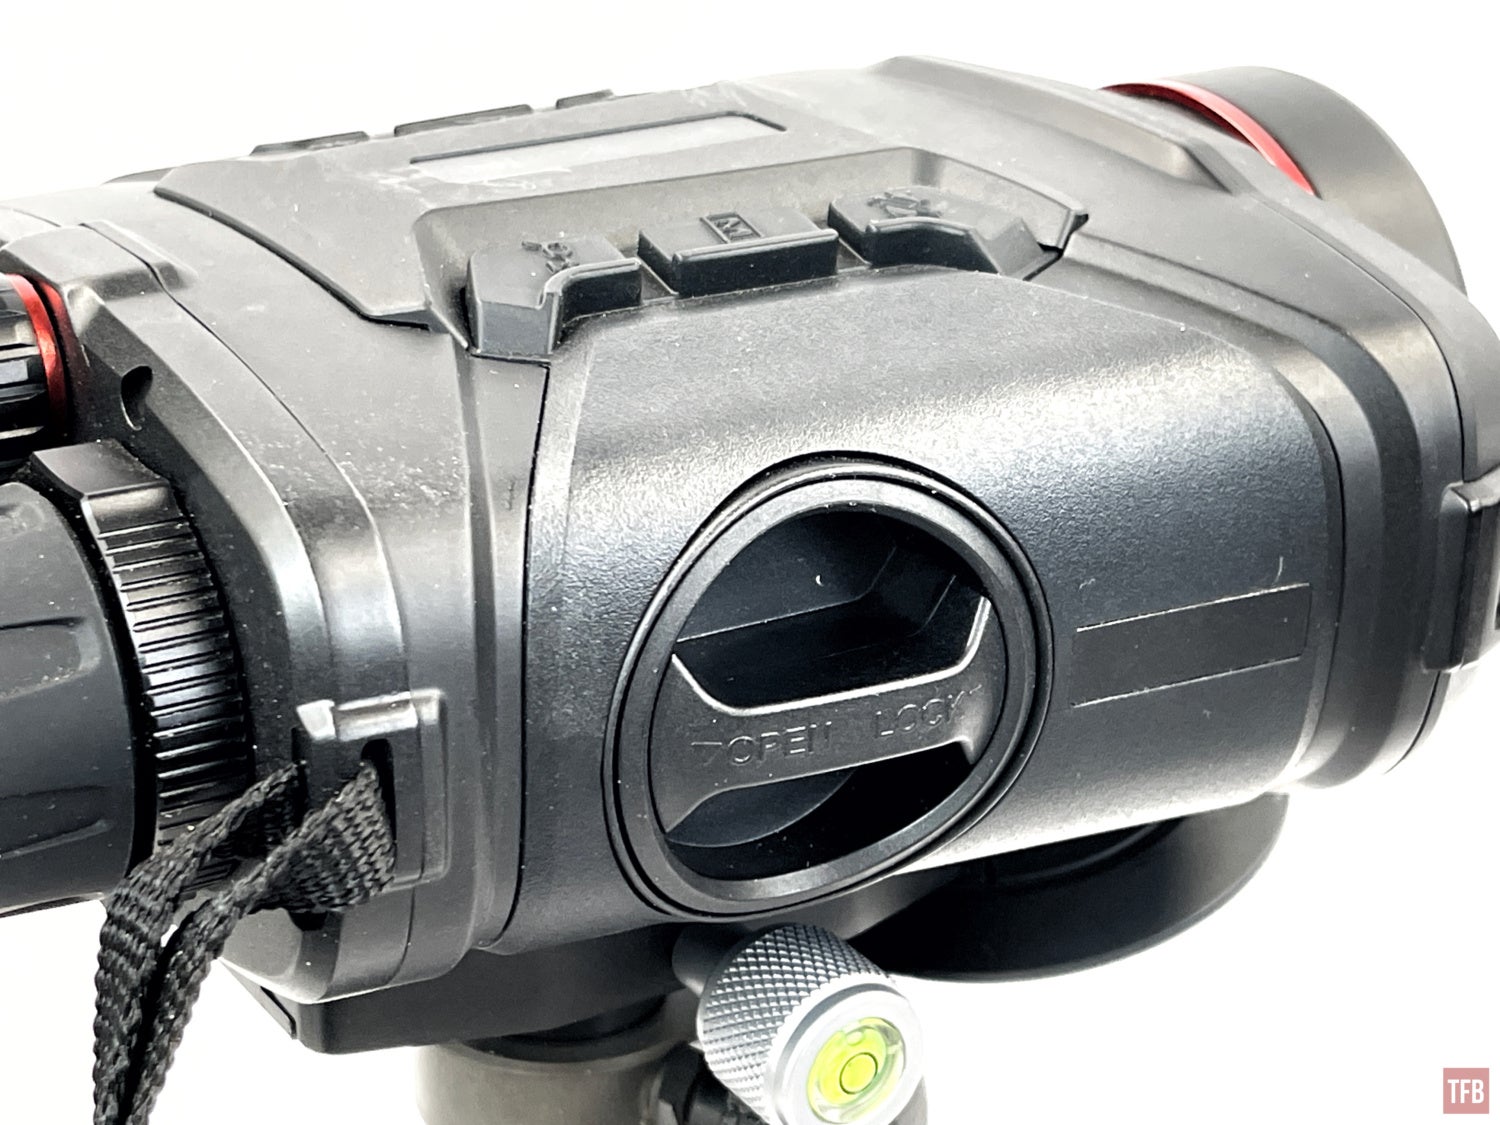
The TB75-640 has a large flip cap. It folds under the housing and stays flat up against the bottom.
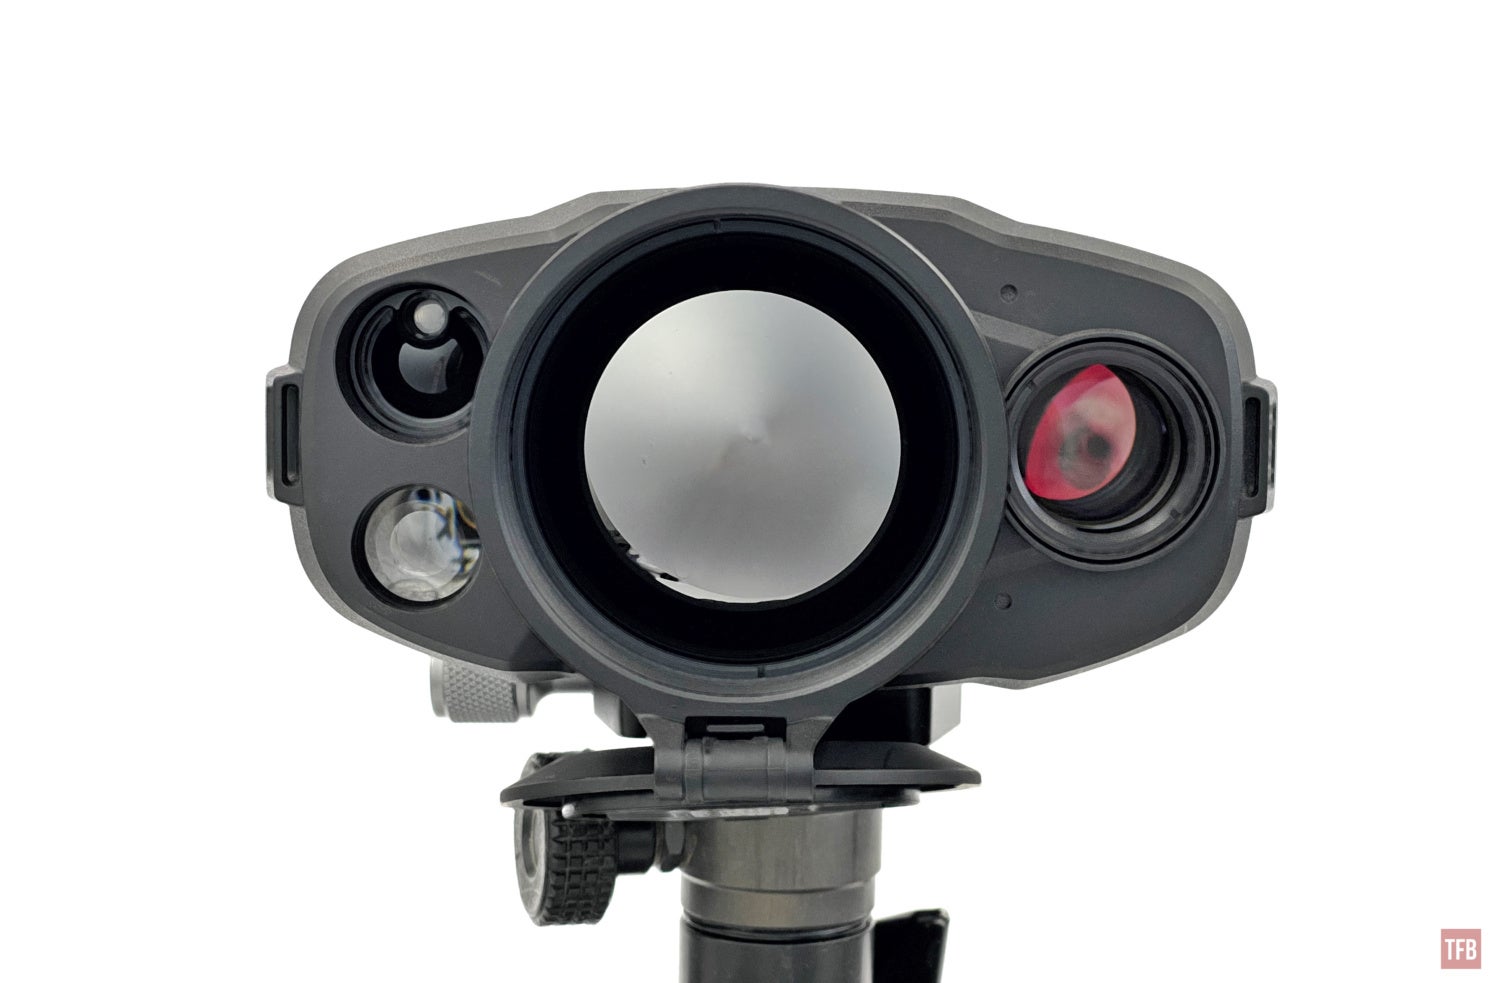
The large lens in the middle is the 75mm thermal lens. The red lens to the right of it is the optical lens for the day channel (Digital Night Vision). On the left side of the thermal lens is the laser range finder on top and infrared light on bottom.
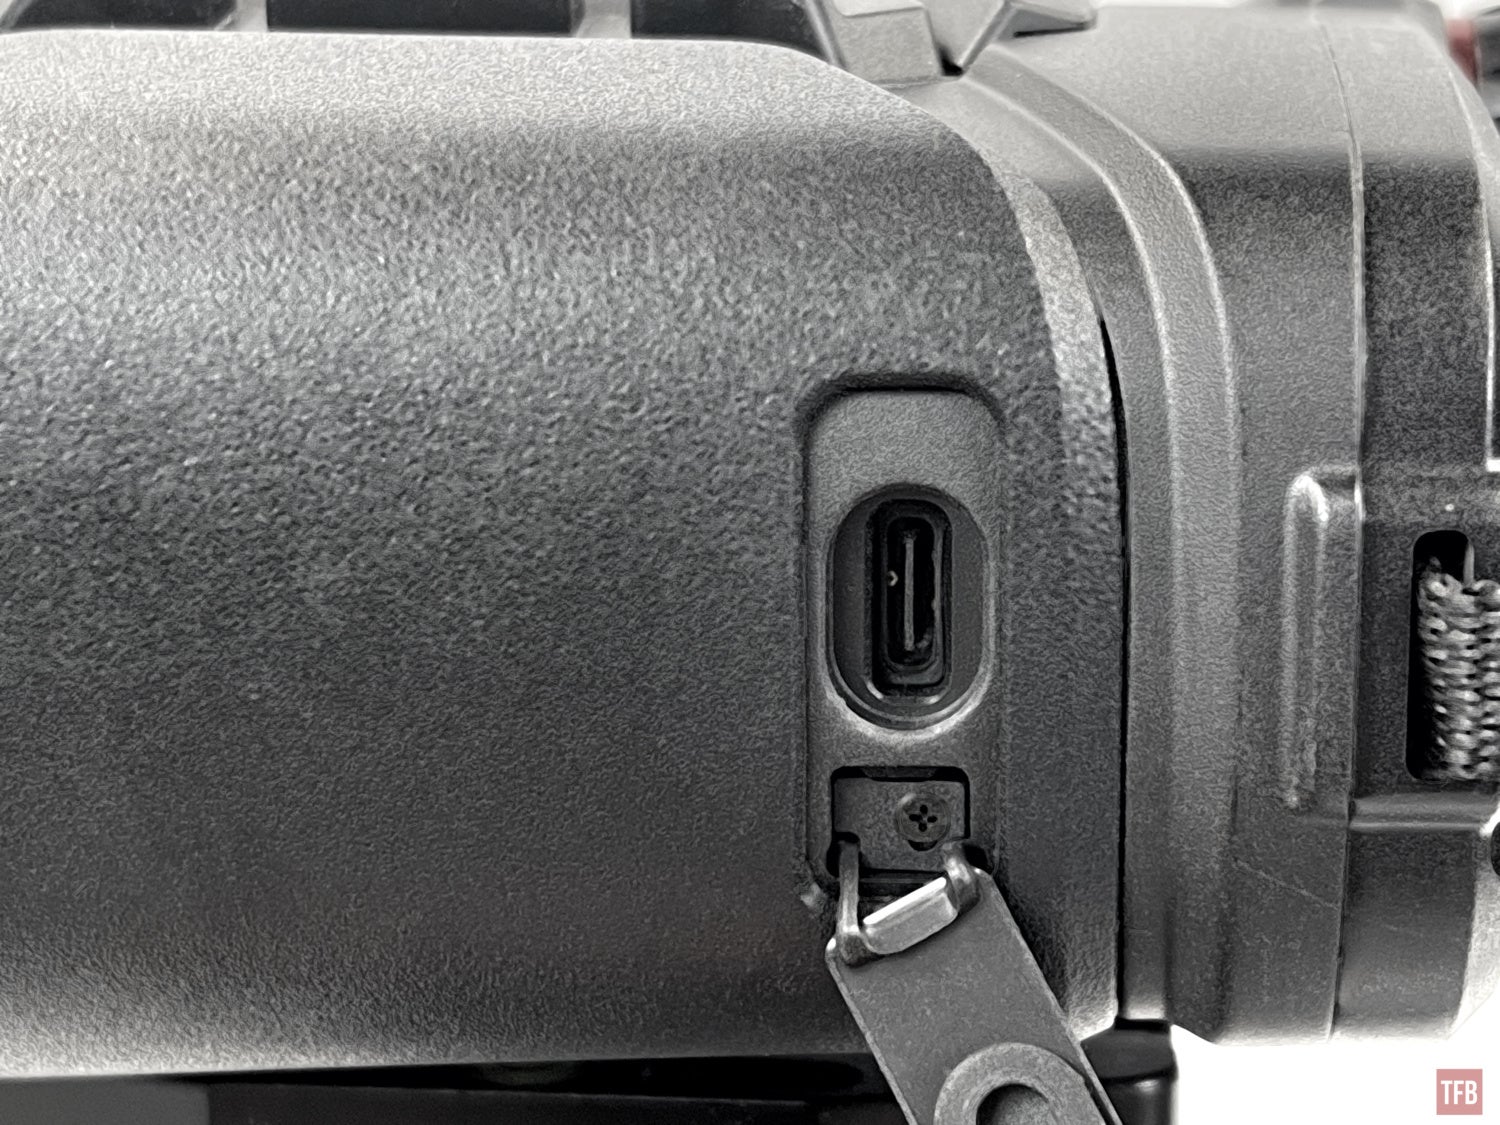
On the left side is the USB-C port. This is for powering the TB75-640 on a USB power supply as well as downloading images and videos.

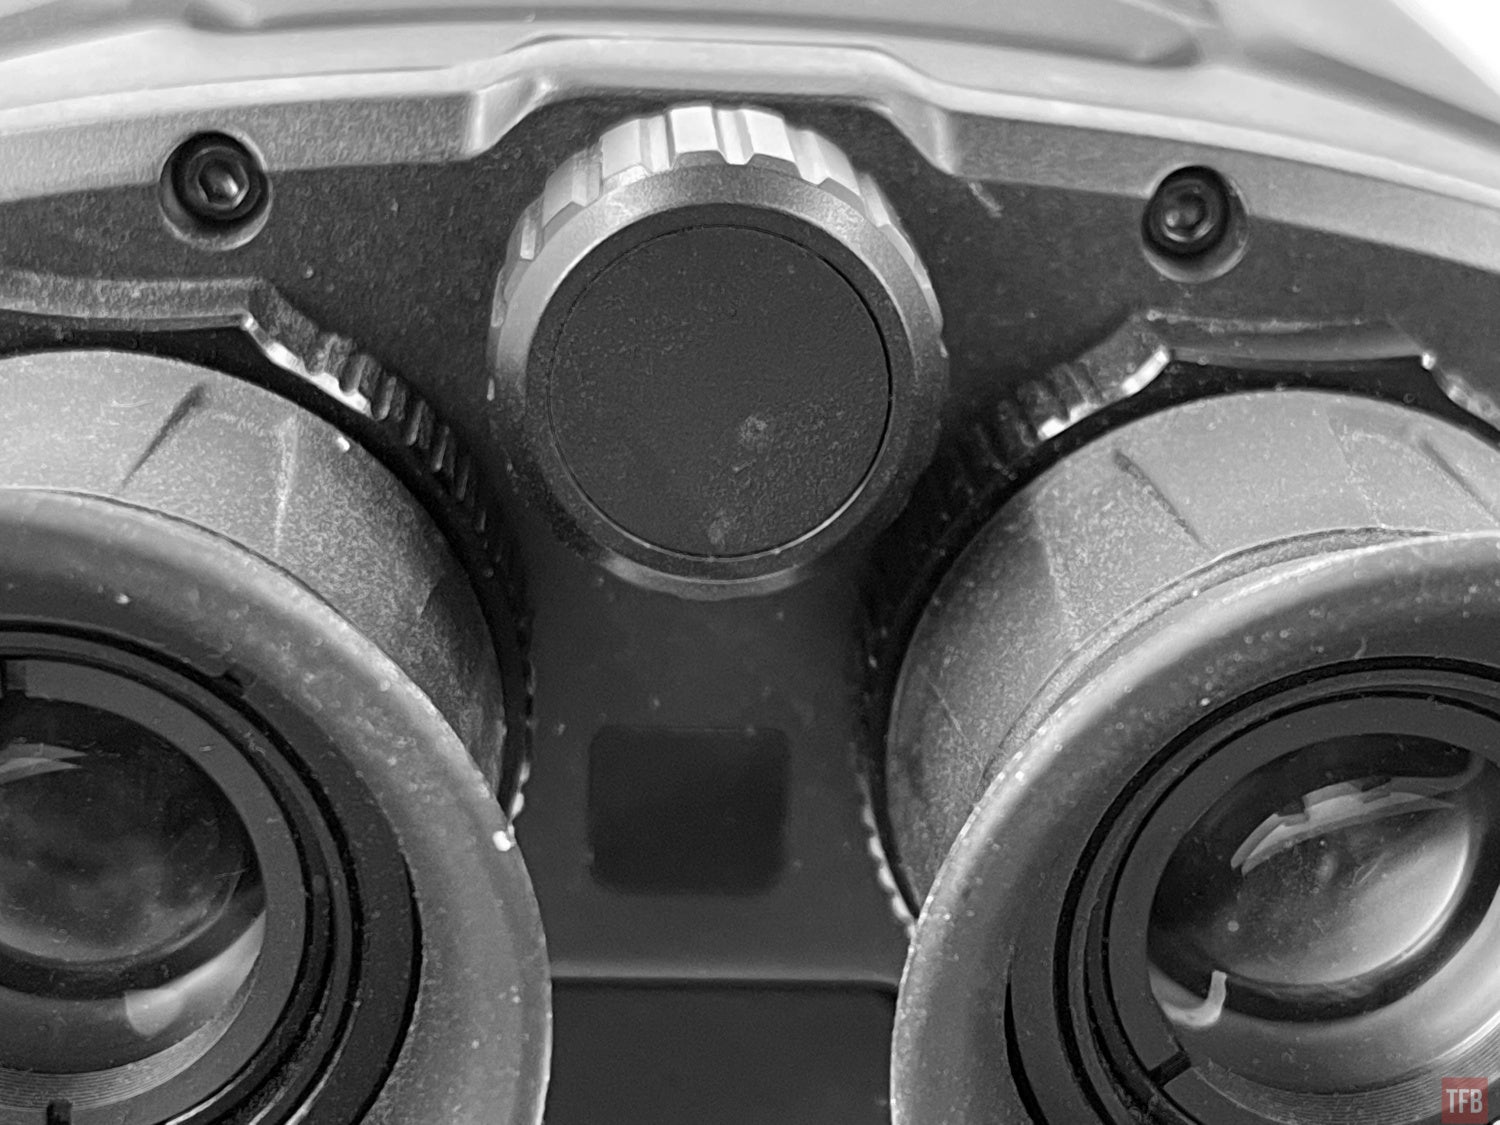
The back of the TB75-640 has two eyepieces with rubber eyecups. They are a bit stiff and I would prefer if I could remove them and use PVS-14 eyecups but that is a personal preference. Above and in-between the two eyepieces is the focus knob for the thermal lens. This does not focus the optical channel for digital day or night vision.
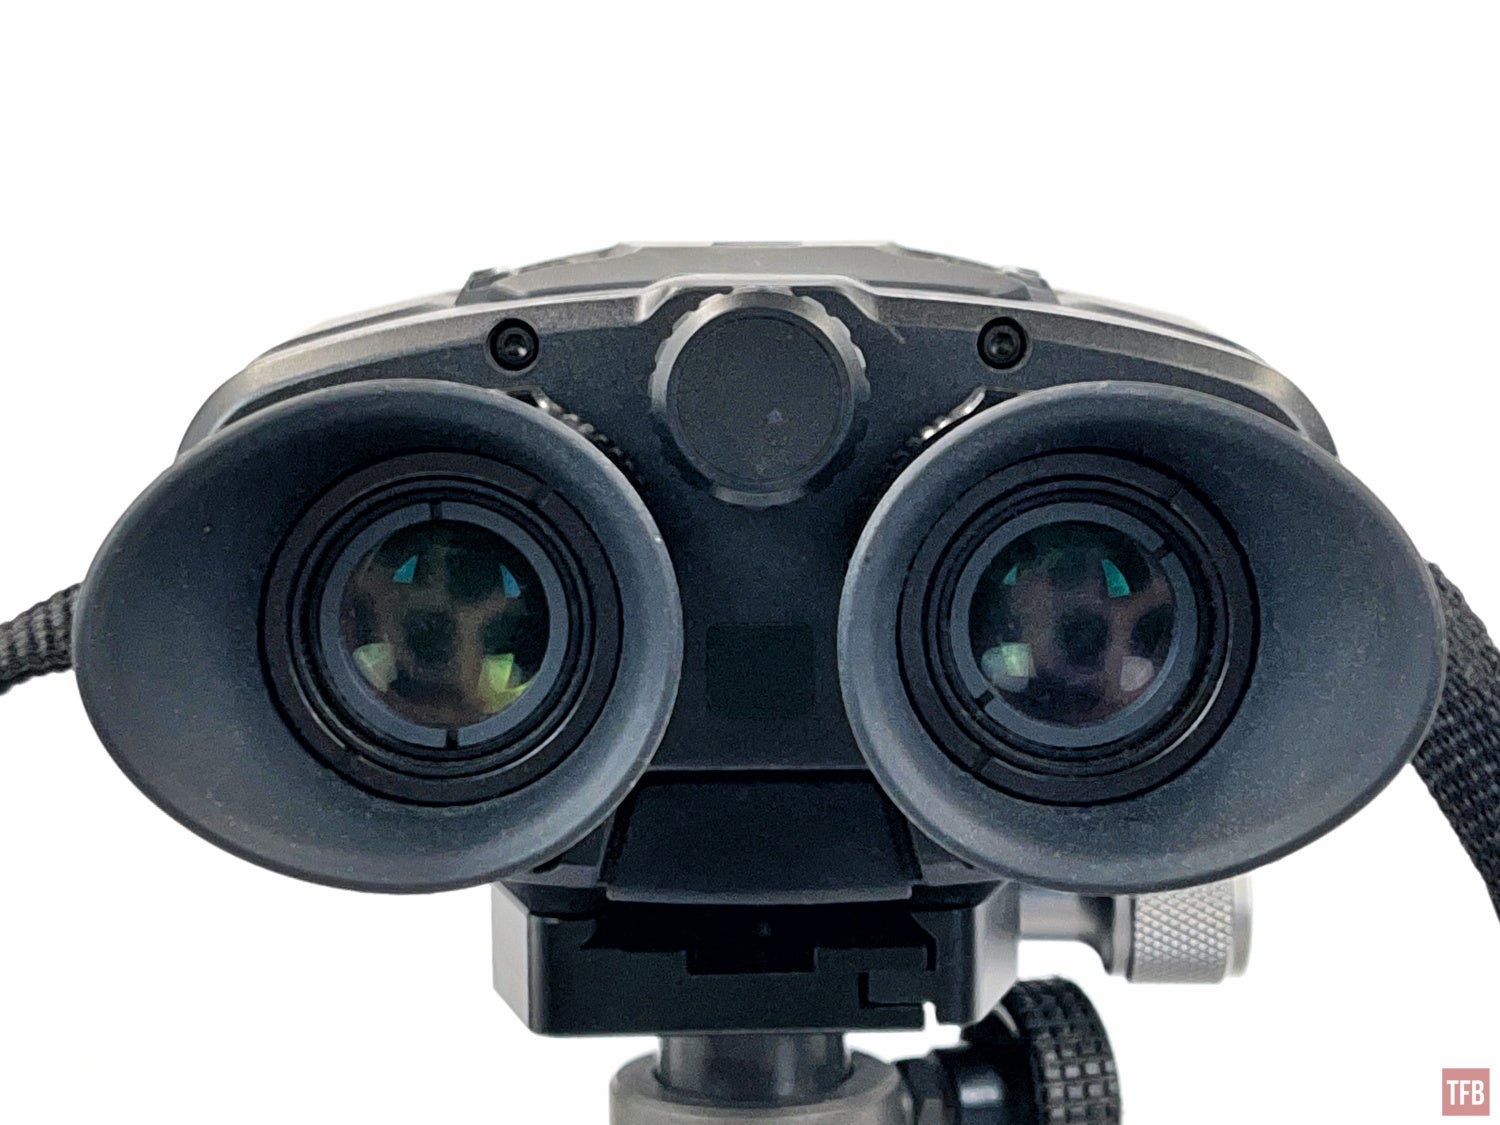
Below the focus knob is an infrared sensor. This is to turn the OLED displays in the eyepieces on when you bring the thermal biocular up to your face. When you bring the biocular back down, the infrared sensor turns the OLED displays off saving battery life.
On top are six buttons, three on each side. They are easily within reach of your fingers.
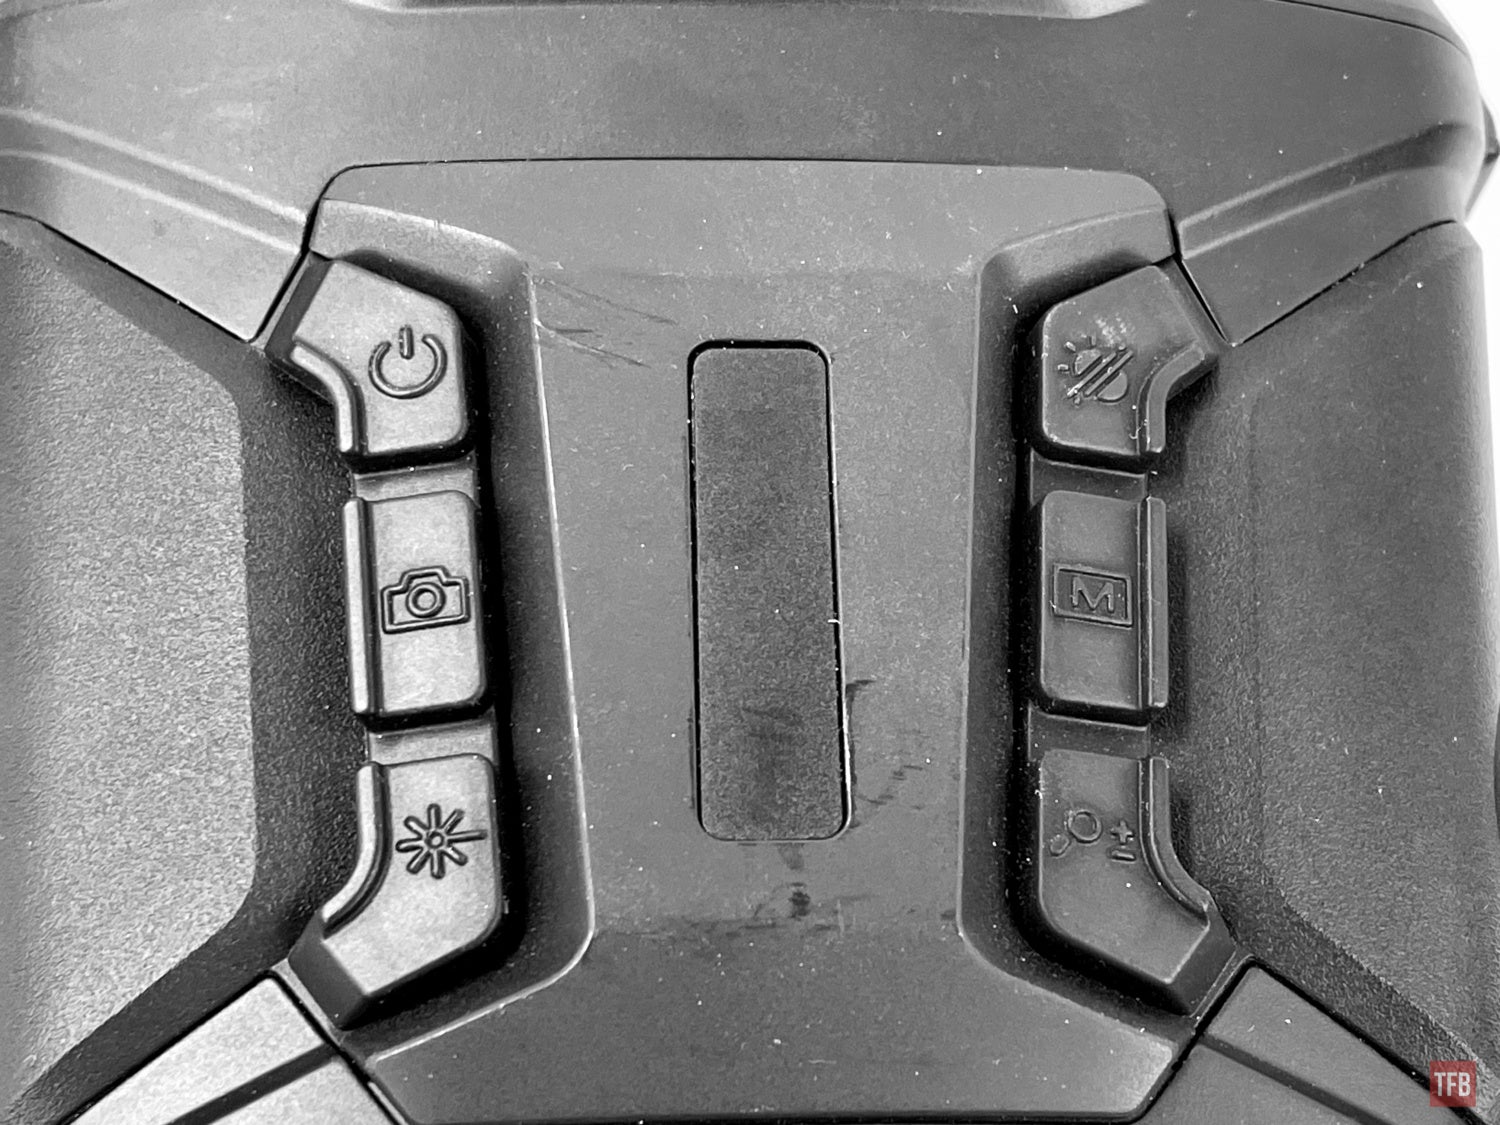
Left side buttons starting from the top:
- power
- image/video capture
- laser range finder
Right side buttons starting from the top:
- mode button
- menu button
- zoom button
These buttons have dual functions. Pressing them performs one function while holding the button down enables the secondary function. Like the image capture button. Pressing and letting go will capture a still image. Pressing the button and holding it down will turn on the video recording.
The mode button cycles through the optical modes: day/night/defog/auto. If you hold the button down it will force a flat field correction (FFC). The menu button cycles through thermal palettes while holding it down will enter the menu system.
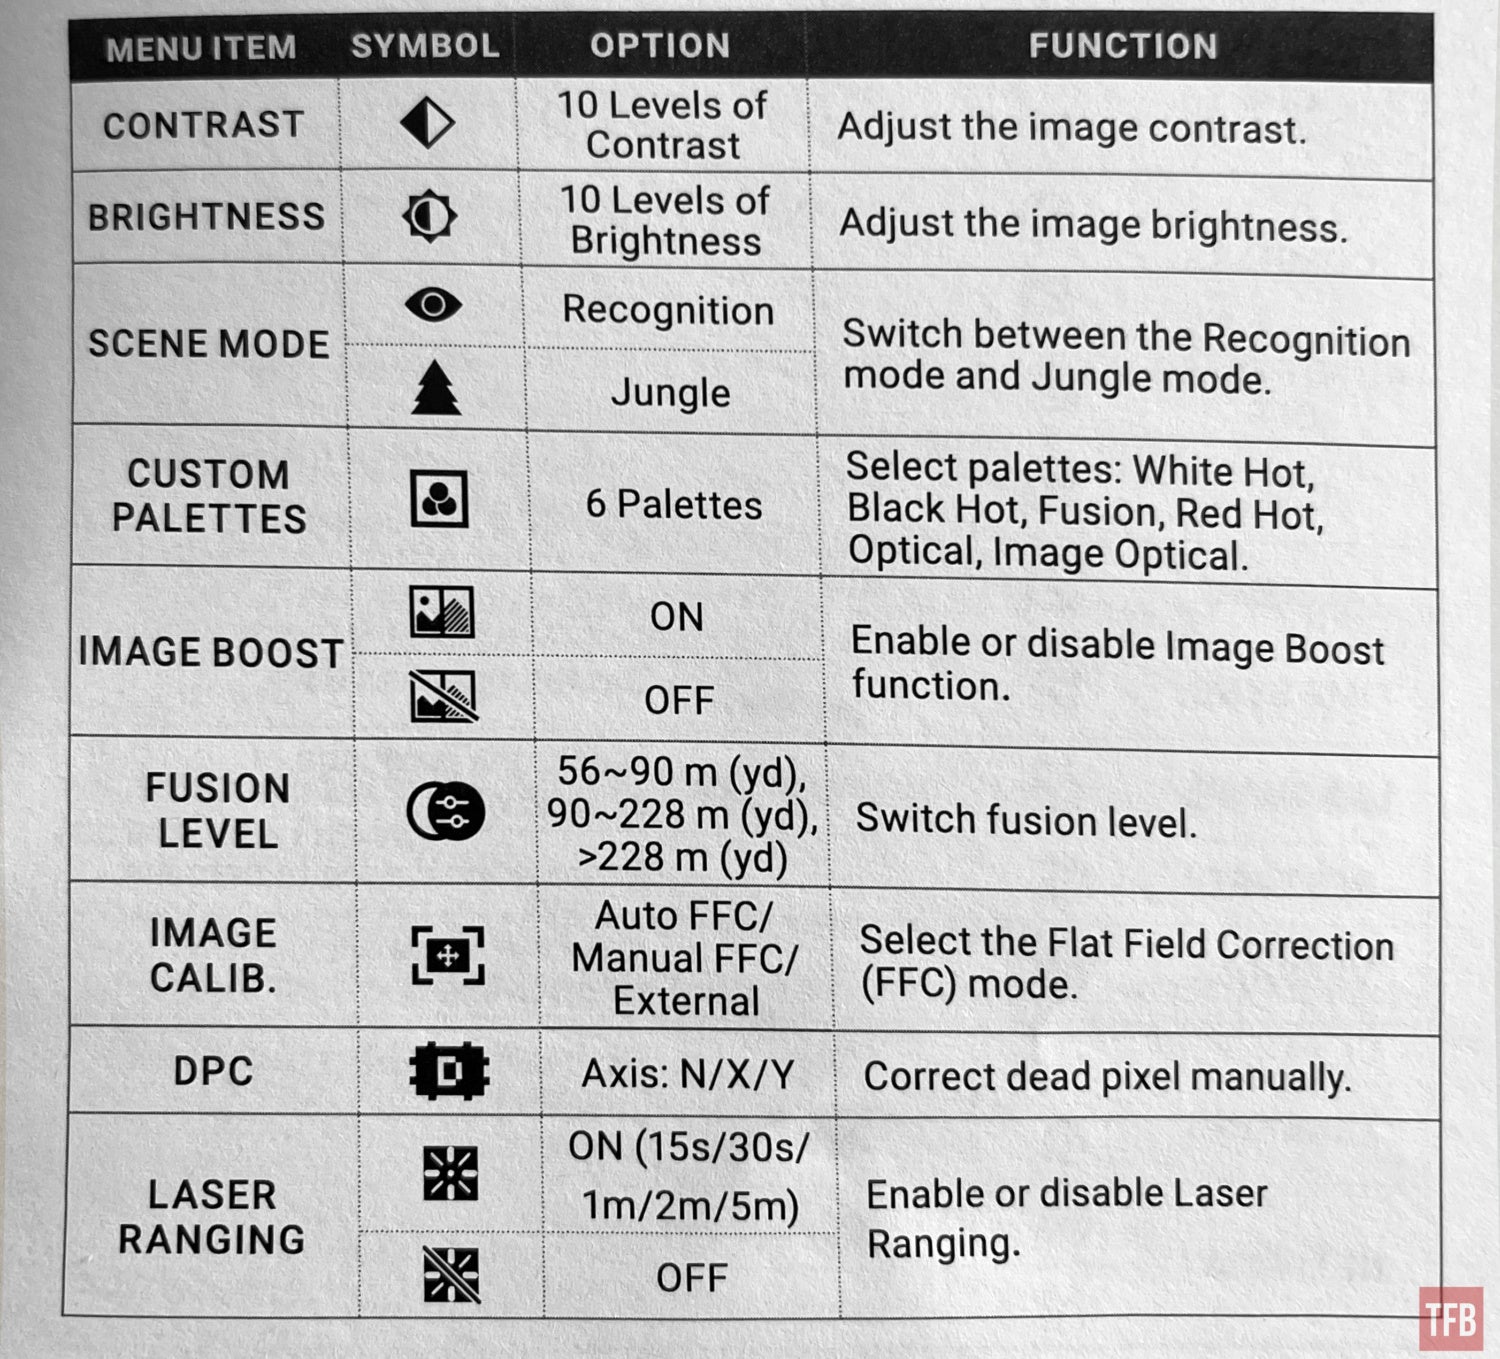
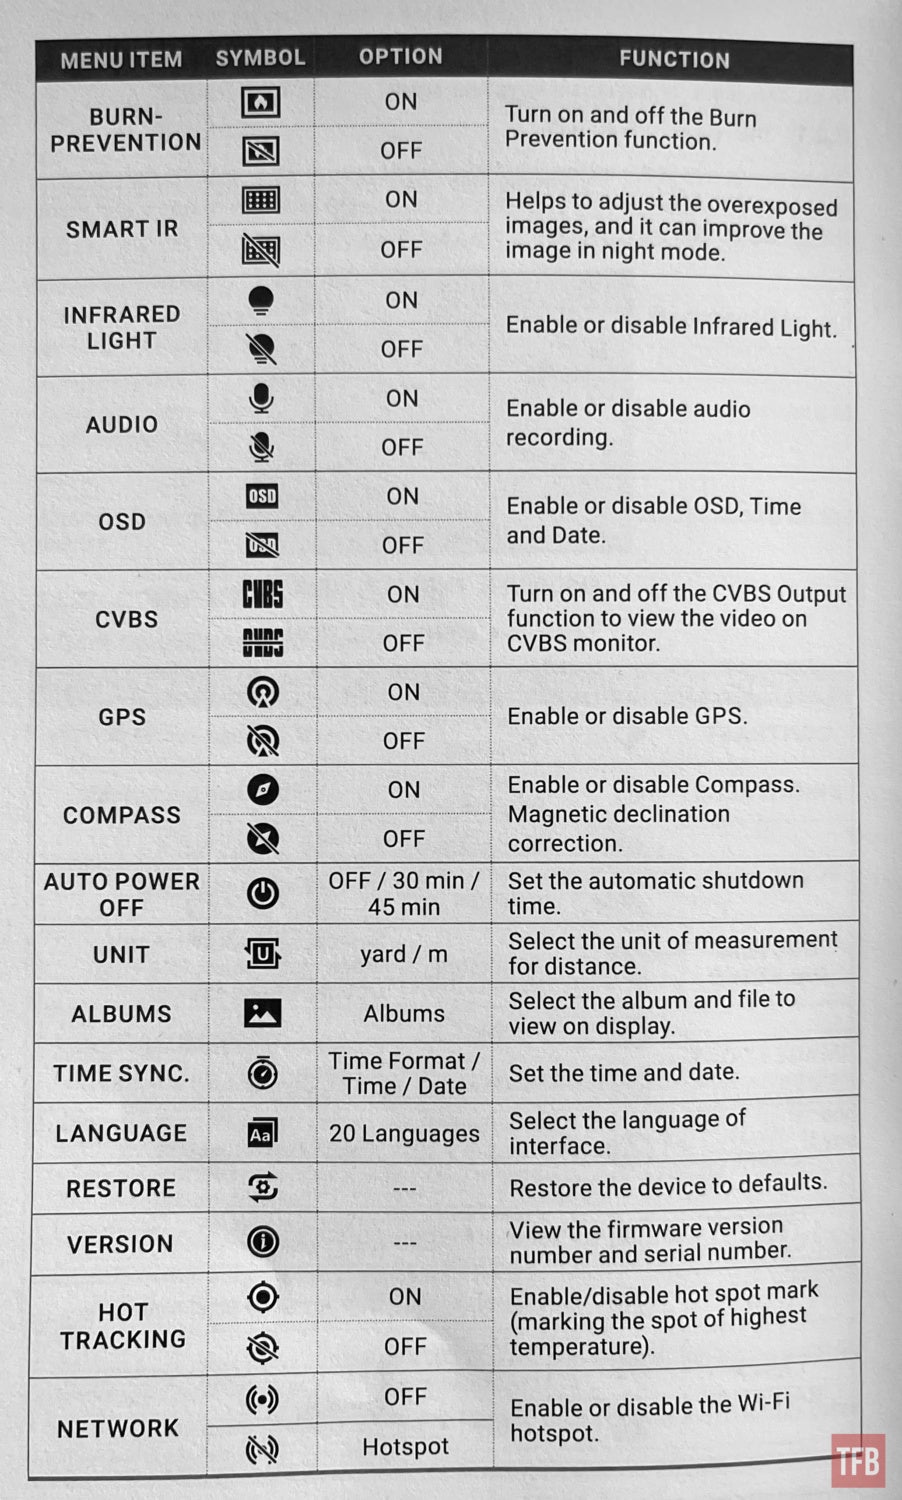
The menu allows you to change the settings like enable compass, GPS and audio recording. There are a lot more options but those are the big ones. I honestly thought the TB75-640 did not have audio recording like other AGM thermal devices until I went into the settings in the menu. Here is a list of all the menu options you can adjust in the TB75-640.
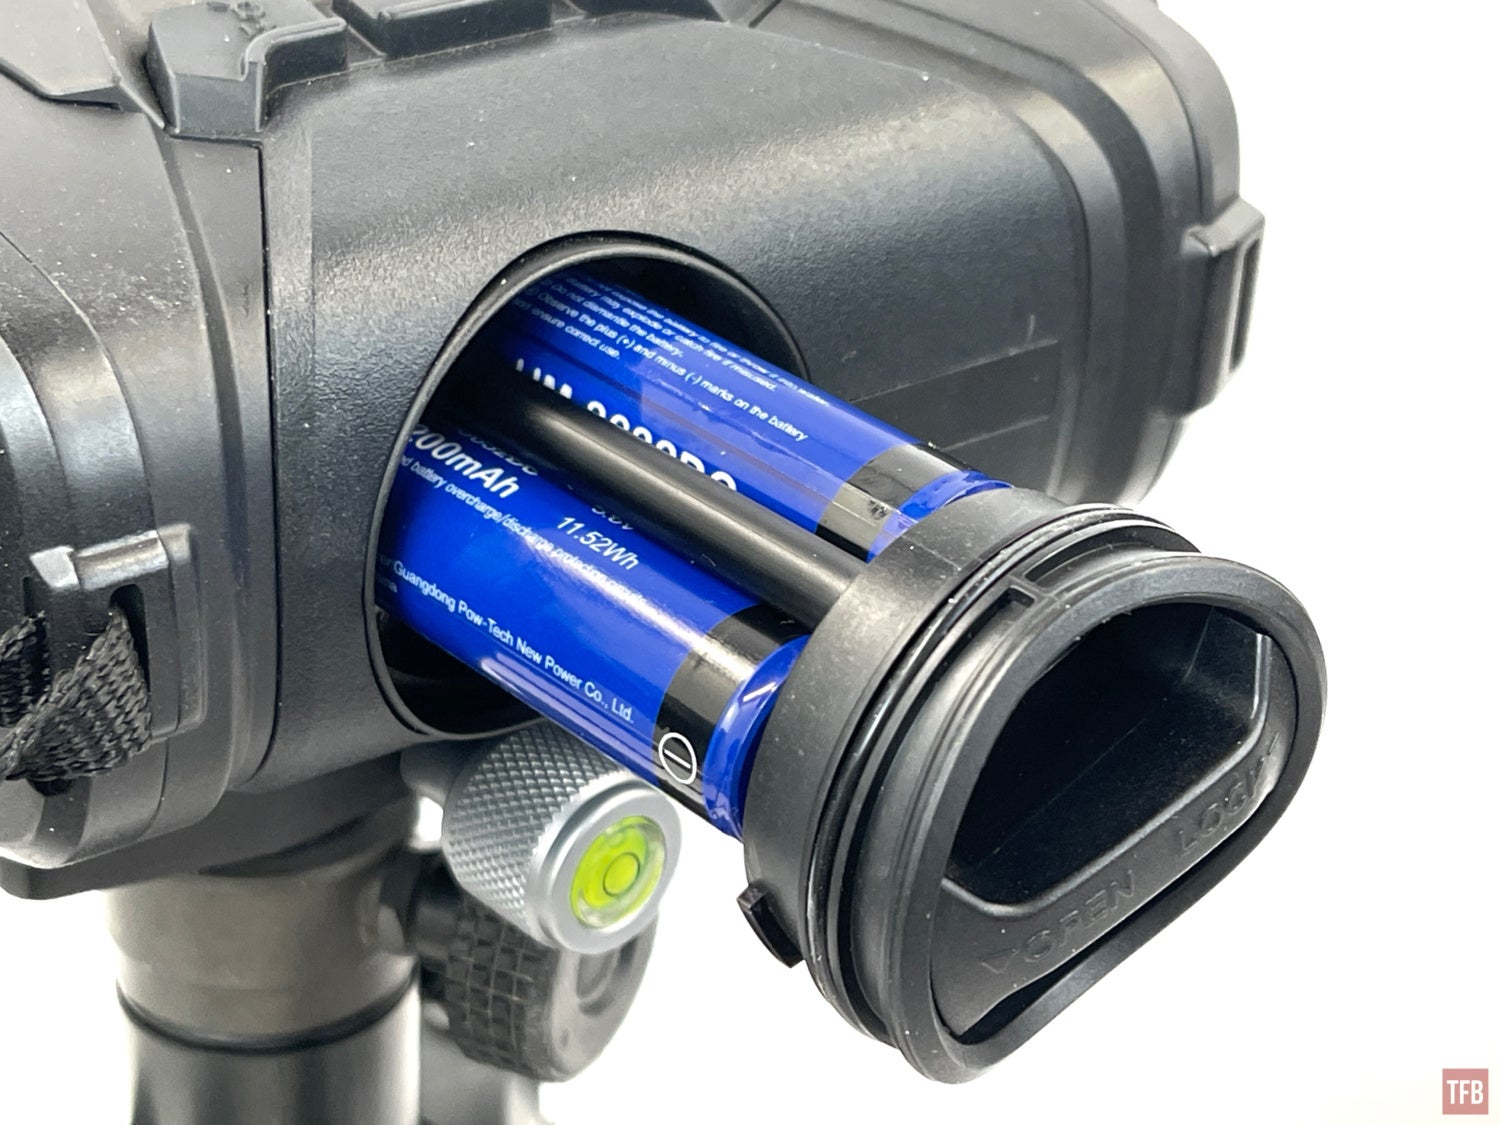
On the right side of the device is the battery compartment. Twist the battery cap from 3 to 2 o’clock and gently pull the battery caddy out.
The TB75-640 runs off three 18650 batteries. You need to use the protective button top cells. Flat-top unprotected cells are too short.
Using The TB75-640
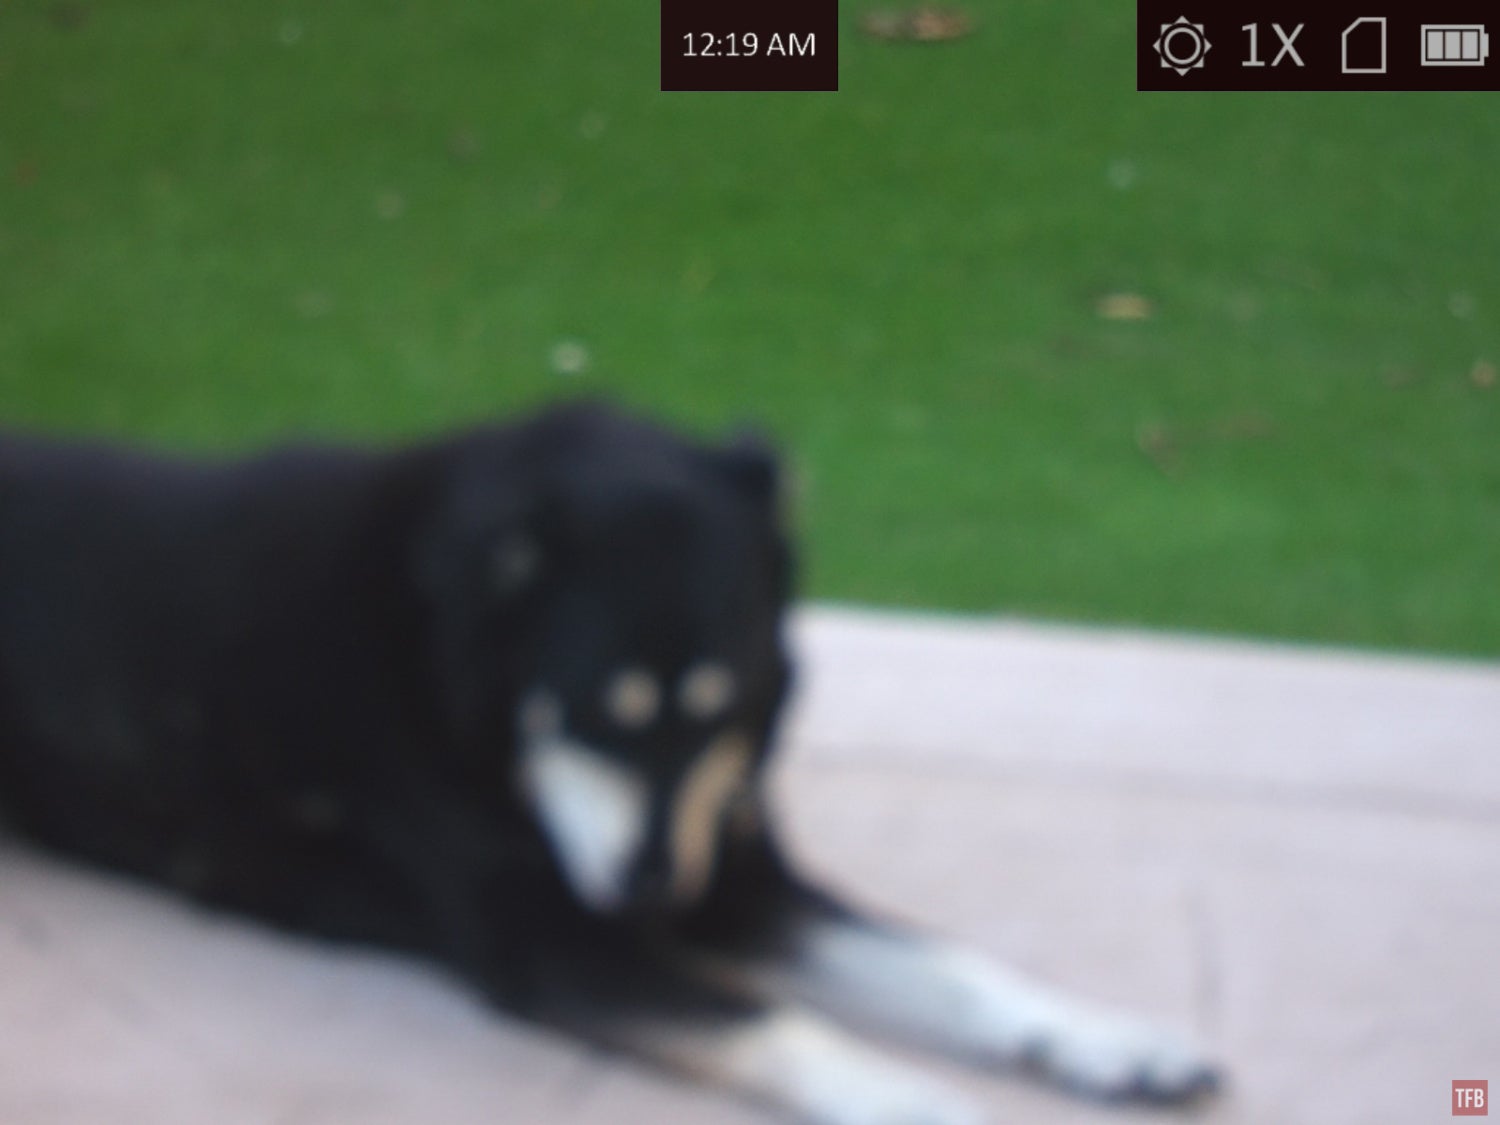
The optical channel has a variety of modes. In day mode, you get full color. Here is a picture of a target 100 yards away.
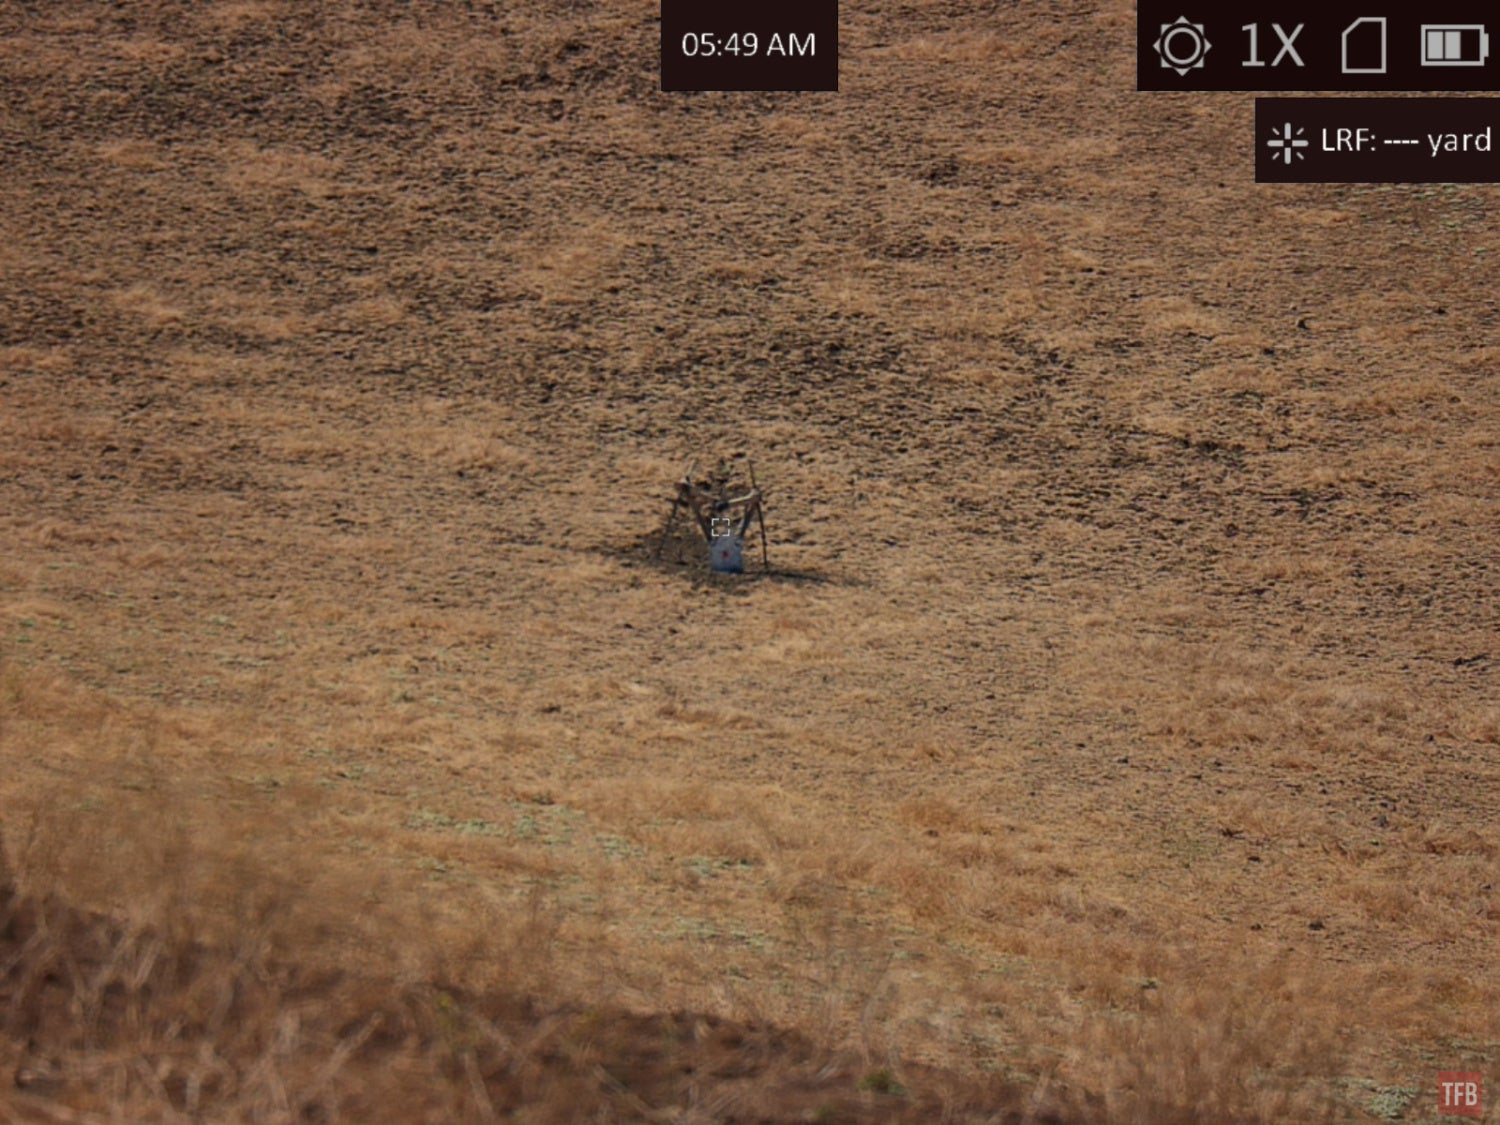
When you switch to night mode, the image switches to black and white. Also, an infrared filter is removed so it can see infrared lights and lasers. However, the field of view is wider than the thermal image.
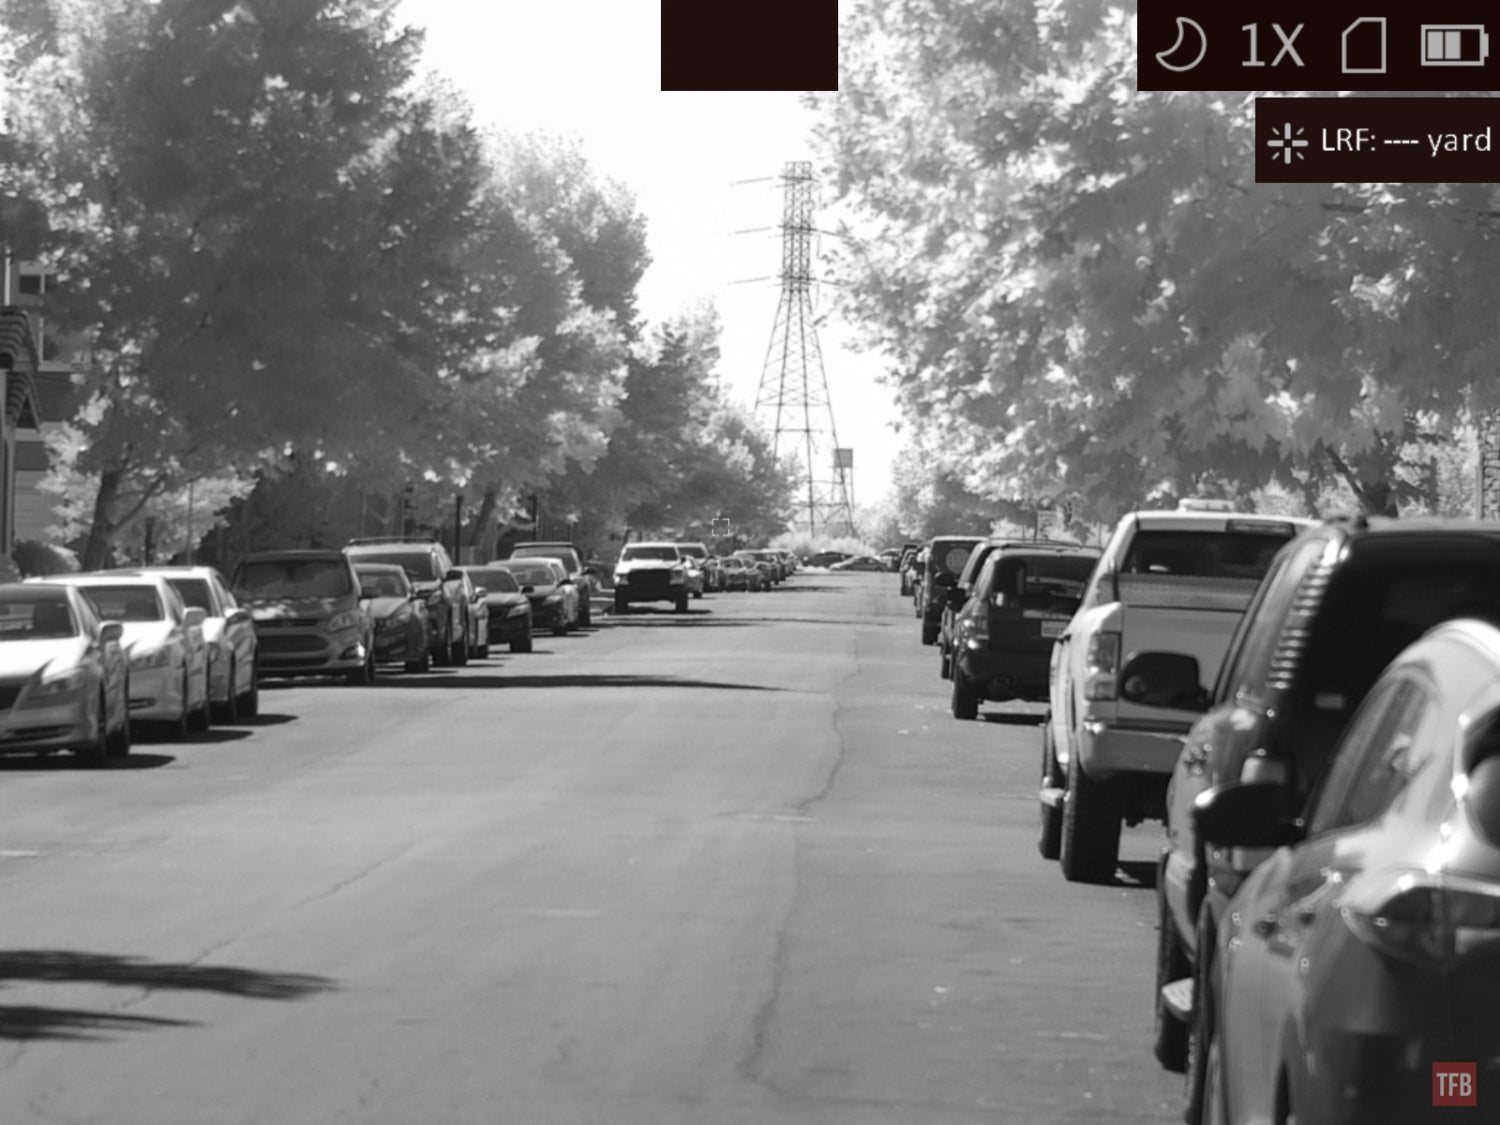
Day time image photographed under “night mode”.
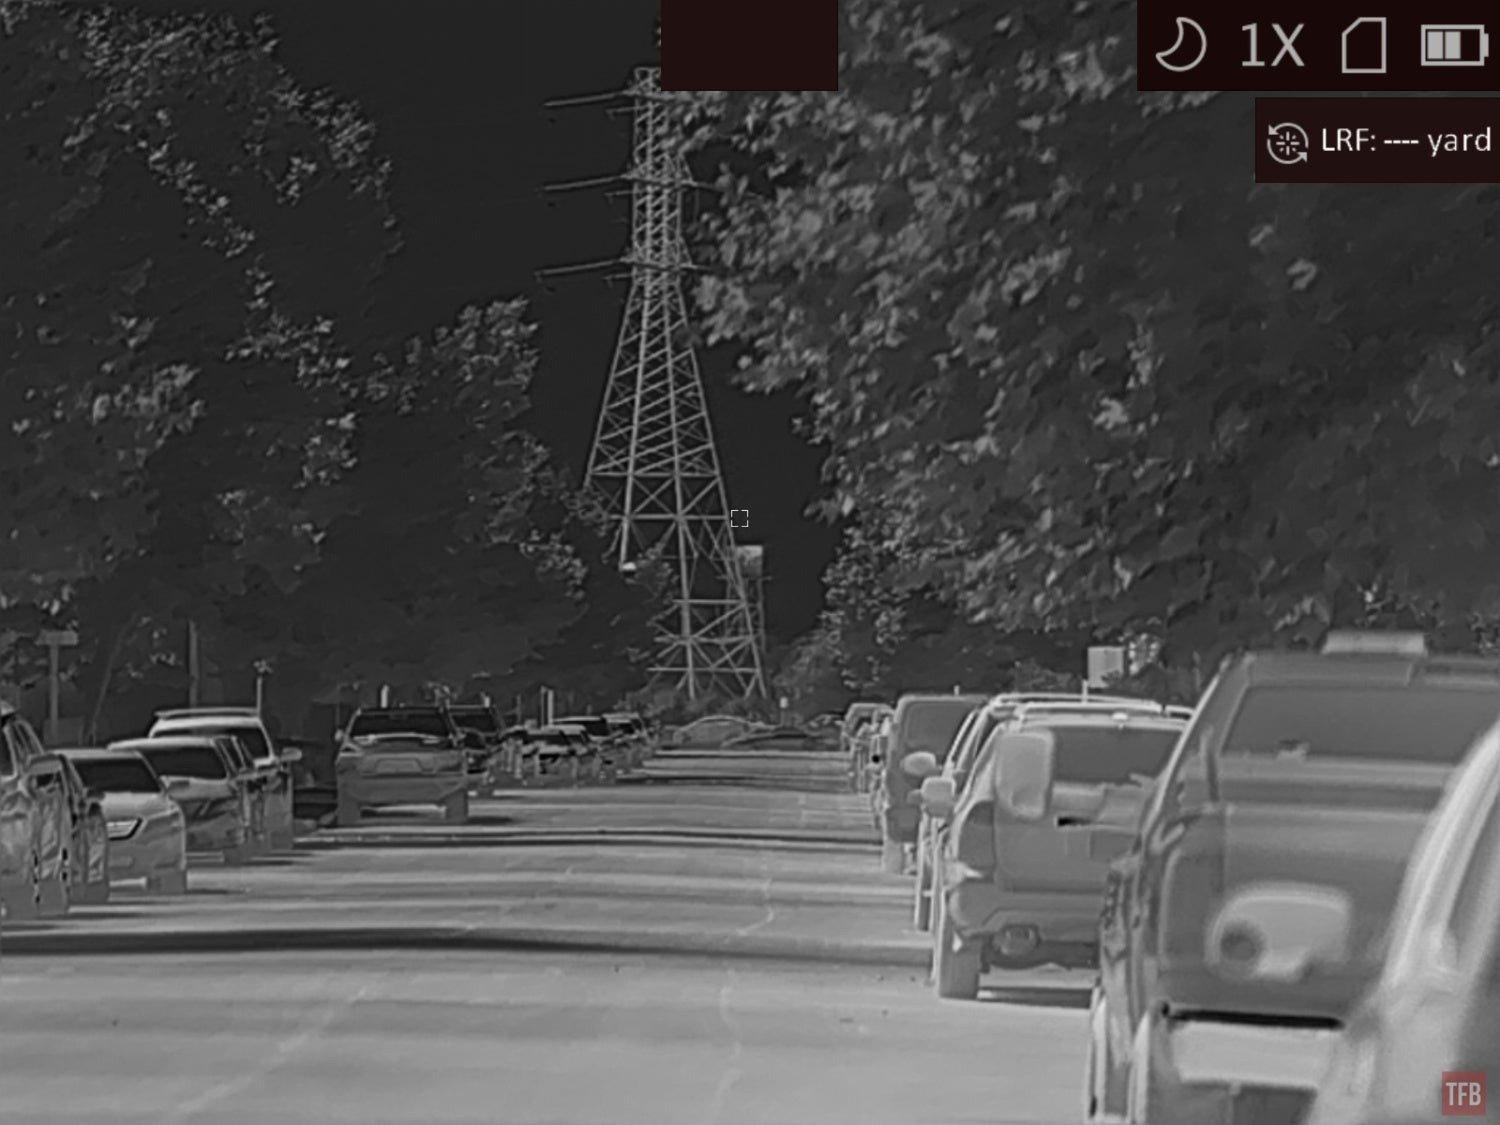
Here is the same scene captured with the thermal sensor in the TB75-640. You can see the field of view (FOV) is tighter. According to the manual, the FOV is 5.9ºx4.7º. This is very close to my UTBx with a 120mm lens which is 5.3ºx3.9º. I was surprised at how tight the FOV is even though both thermal bioculars are 640 resolution sensors.
As I mentioned earlier, the focus knob only focuses the thermal image. It does not adjust the optical channel. So if you try to look at something close, it will be out of focus.
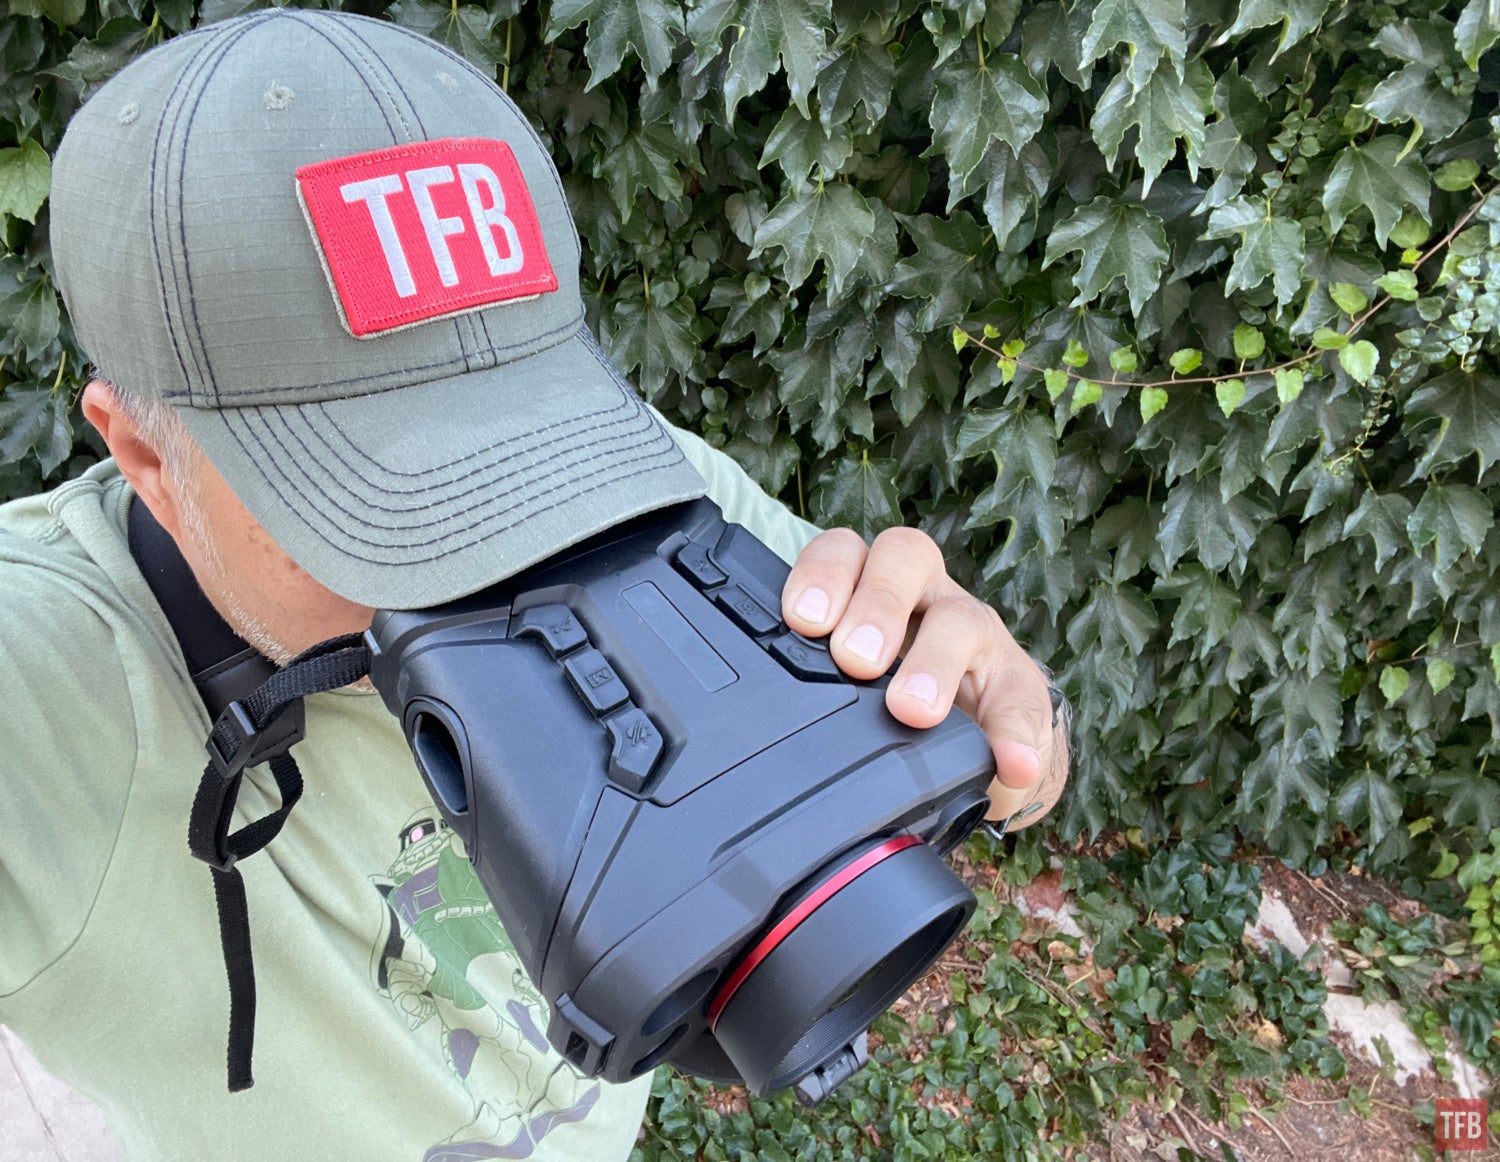
One minor issue I have is the position of the focus knob. It is near the top of the TB75-640 and it sits between the eyepieces.
If I wear a hat with a brim, it covers the focus knob. Yes, I could reach under the brim of my hat, but it is not ideal. The UTBx has the focus knob underneath the housing so I can use my thumbs to adjust the focus.
The high base magnification is almost too much for comfortable scanning. But since it has such a high base magnification, it is easier to recognize and identify game further away. Here is a video of some of the images I captured with the Voyage 75.
Here is another video showing the benefits of image fusion a bit better.
Final Thoughts About The AGM Voyage TB75
This thermal fusion biocular really amazed everyone who tried it. After using it, they always ask “How much is this?”. And when I tell them it retails for $8k they nod in approval. It is not too expensive like the Trijicon Oasys UTBx and produces a decent image plus it has a built-in laser rangefinder, it can record videos, take screenshots, still images and it has a built-in microphone. What really surprised my friends and me was how decent the optical channel was at night. It rivals a Sionyx Aurora in terms of light sensitivity.
There are a couple things I would like to change but they are not deal-breakers. First, I want to replace the eyecups with softer ones like the ones used for PVS-14s. I would also like the focus knob to be at the bottom so my thumbs can manipulate the focus and the bill of my hat won’t get in the way. I would also like to have an option to adjust how much thermal image and day channel I see in image fusion. Right now it is more biased to show more thermal than VIS/NIR. When I first tried image fusion, it was underwhelming but I was looking out at nature. It was when I looked at printed signs and trucks did it made sense. You can also look through glass with the NIR channel in image fusion. But the image is too subtle. The Voyage TB75 FOV is a little bit too narrow. I would prefer a wider FOV with the sacrifice of magnification just to make scanning easier and faster. But other than those few preferences, I really liked the Voyage TB75-640. It makes scanning for animals a lot easier and more comfortable for the eyes. Check out their website for more information.
We are committed to finding, researching, and recommending the best products. We earn commissions from purchases you make using the retail links in our product reviews. Learn more about how this works.