 Your Privacy Choices
If you have been following along with my Friday Night Lights series of articles, you will know I have been using cooled MWIR thermal to help spot long-range and even ELR shots at a mile and further away. Well, thanks to the recent August Blue Super Moon, I managed to unlock even more capabilities out of my hacked JIM LR thermal spotter.
More JIM LR Content @ TFB:
- Friday Night Lights: SAFRAN JIM LR – Cooled Thermal Biocular LRF
- Friday Night Lights: Dark ELR – 2,200 Yards At Night
- Friday Night Lights: The Dark Mile – Shooting A Mile At Night
Thermal Magnifiers
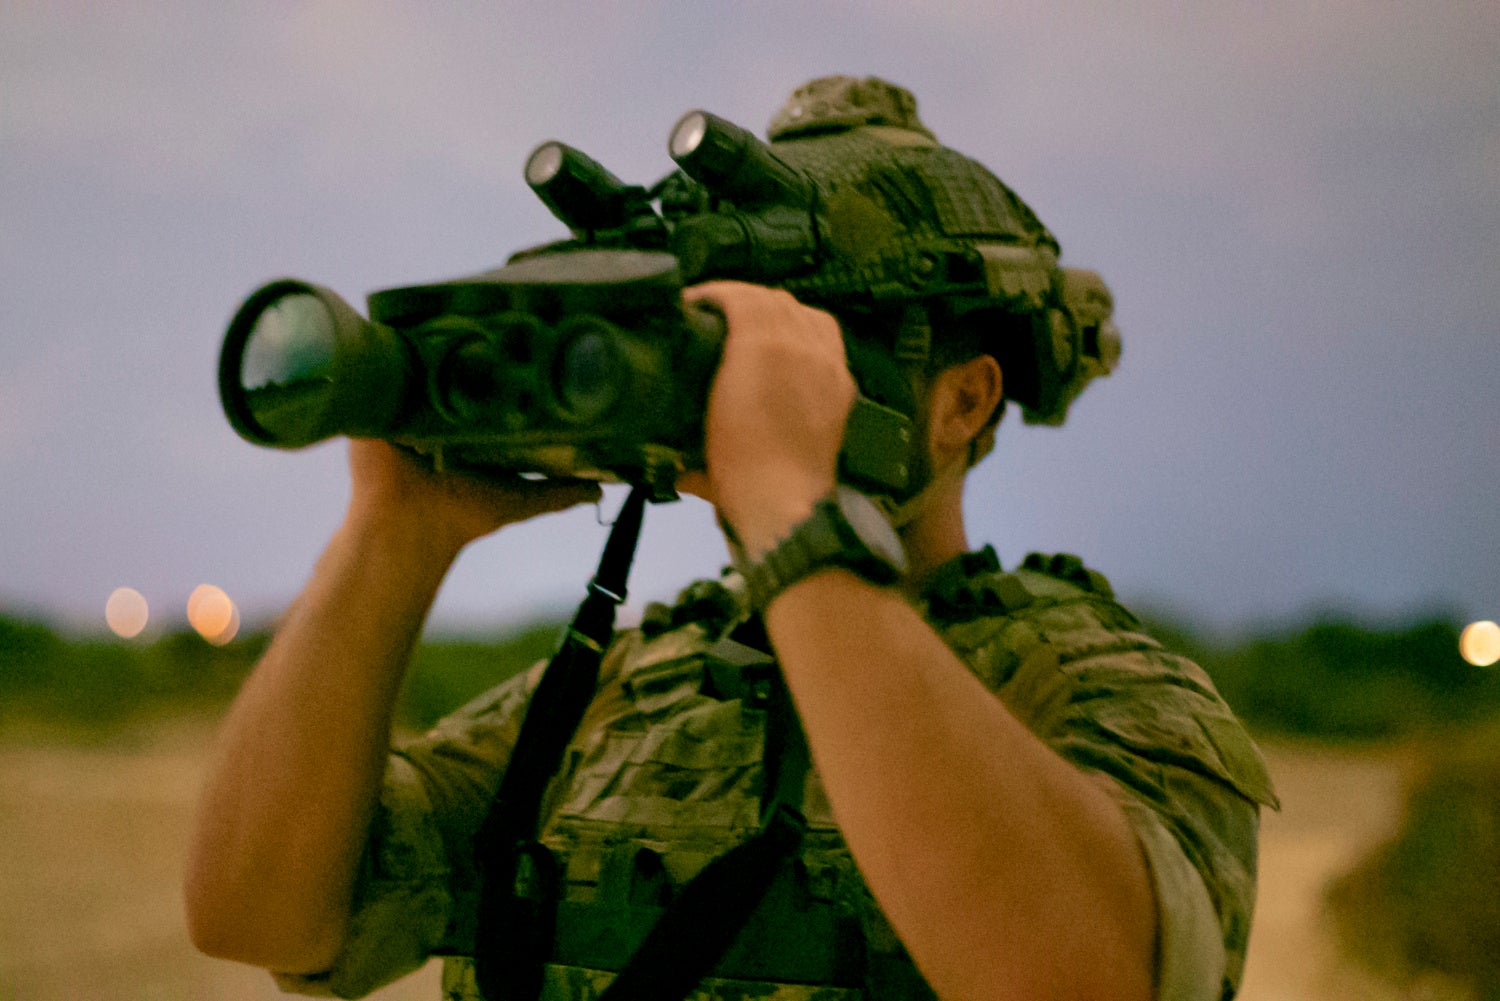
Aaron using my JIM LR w/ 2x afocal magnifier.
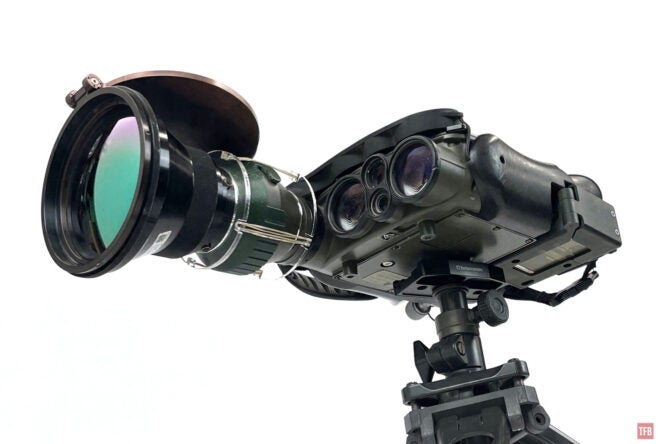
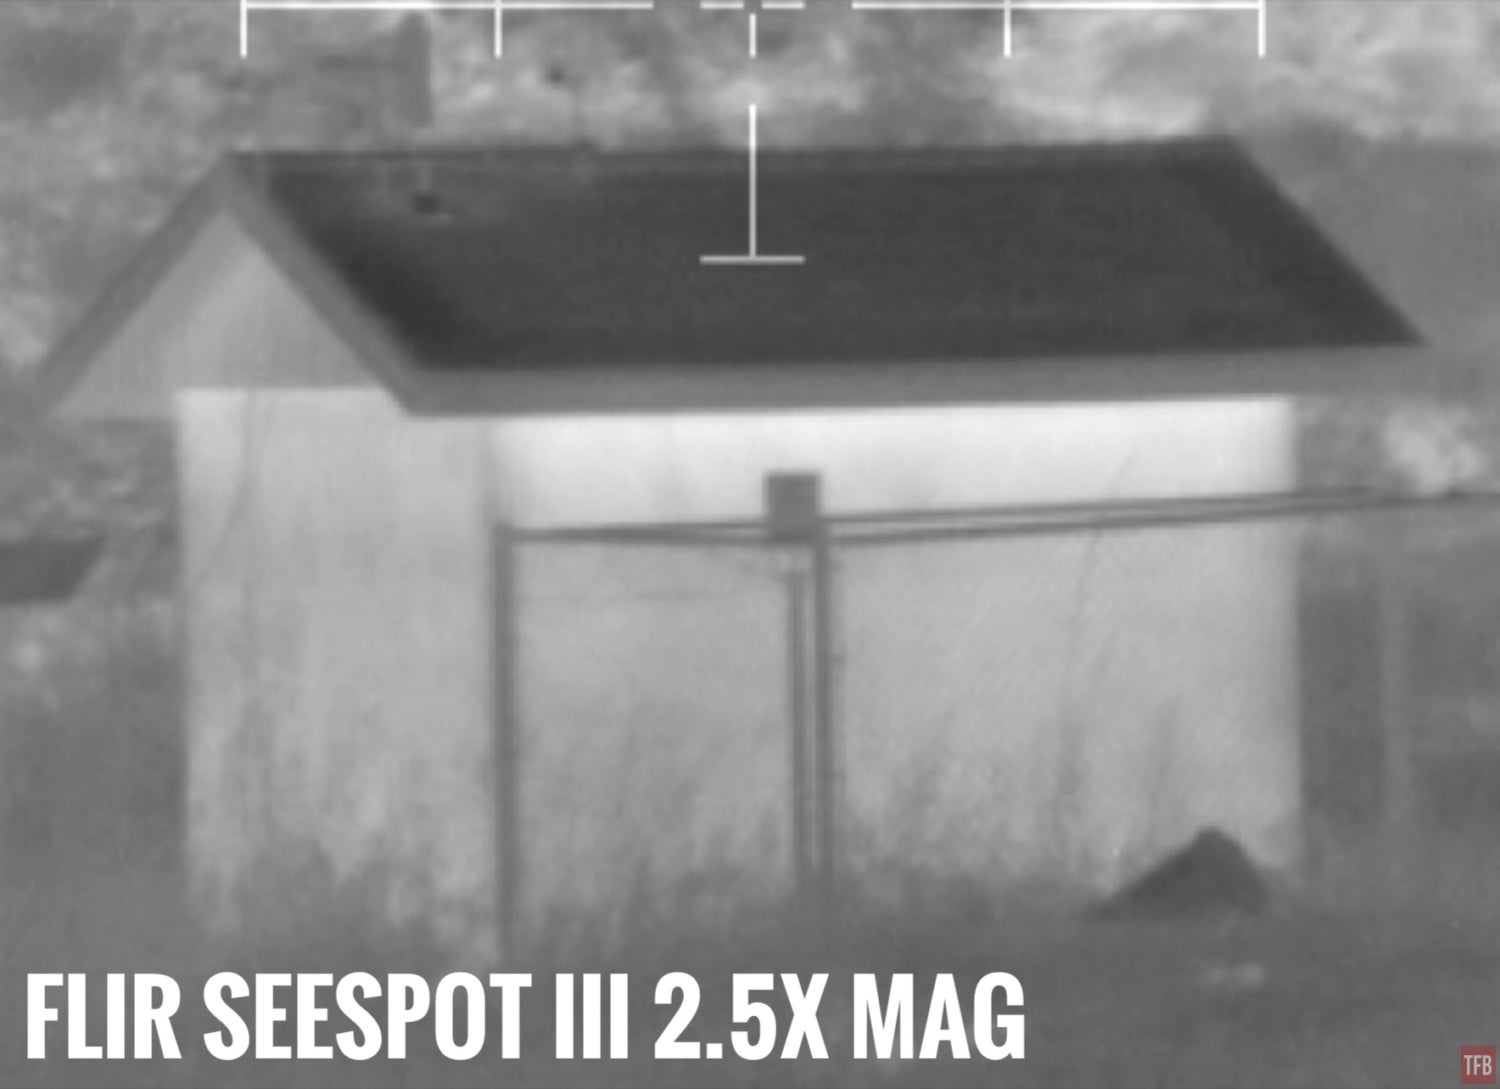
The JIM LR is a magnificent thermal spotter. But it was only when I got the 2x afocal magnifier for it did we unlock its true potential. You can see the magnifier sticking out of the JIM LR in the photo above. With this magnifier, the JIM LR was the greatest thermal we have ever used. However, when I got my FLIR SeeSpot III, it had a very narrow FOV, similar to the JIM LR with afocal magnifier and set to NFOV. It was when I hacked the SeeSpot III with a FLIR RECON MWIR 2.5x afocal magnifier did the See Spot III knocked the JIM LR off its throne as king of the thermals. See the photo below.
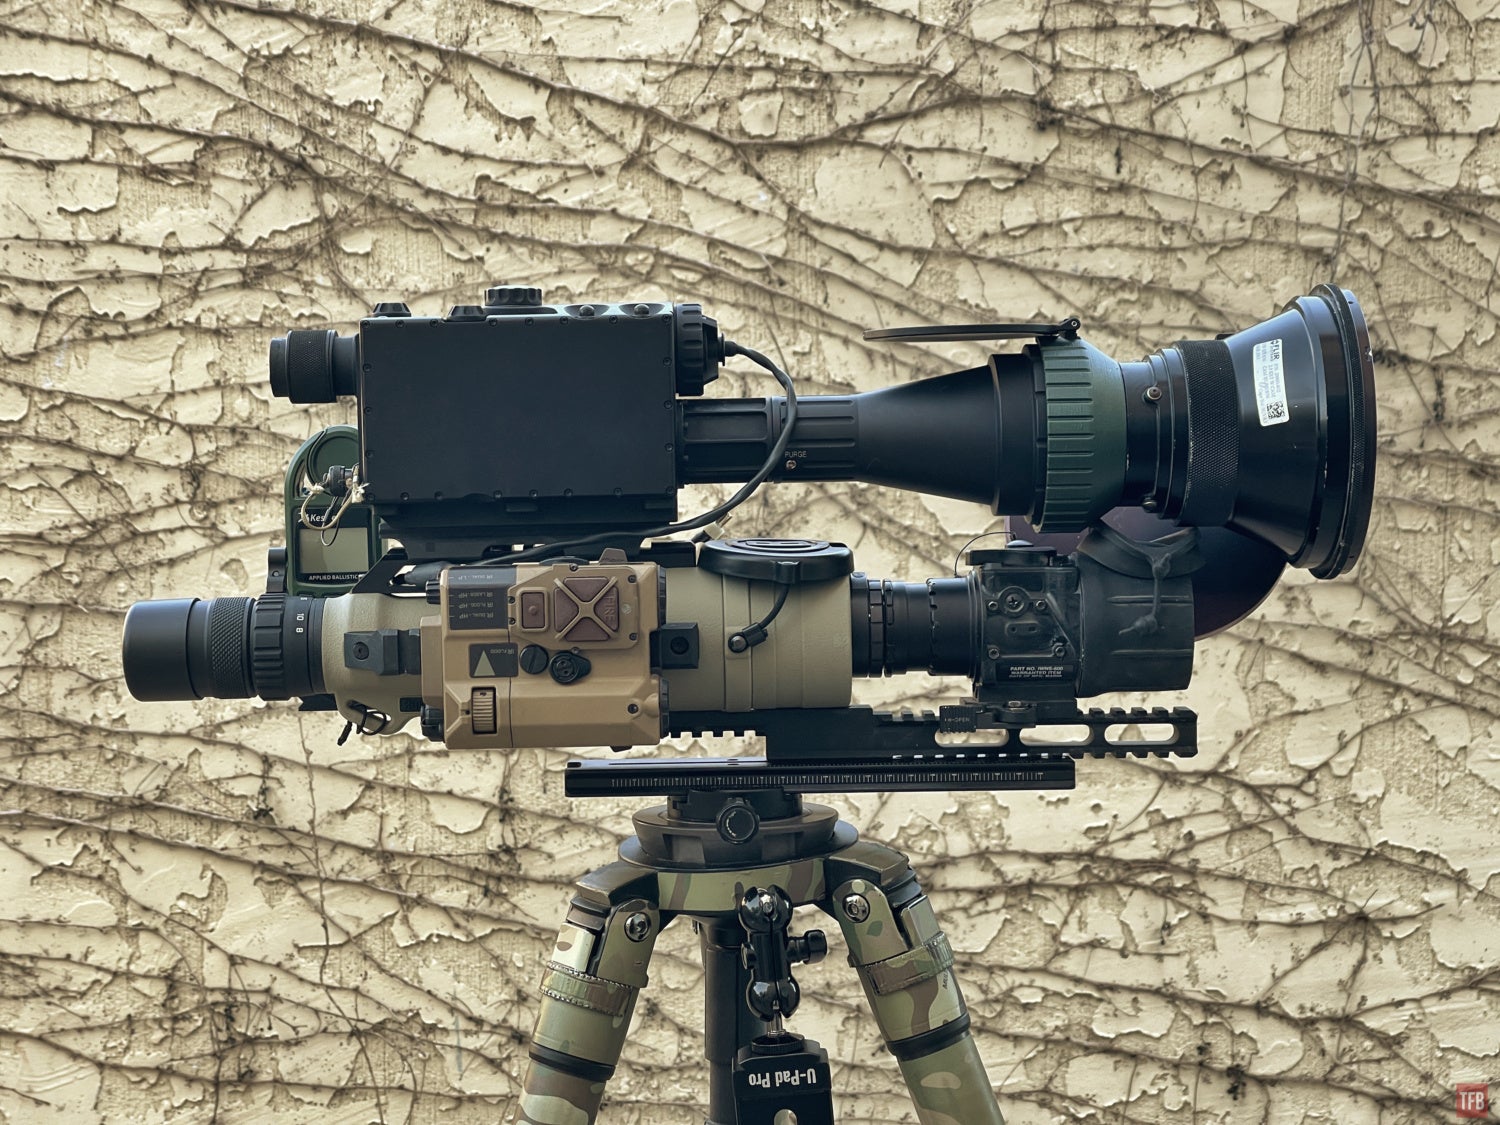
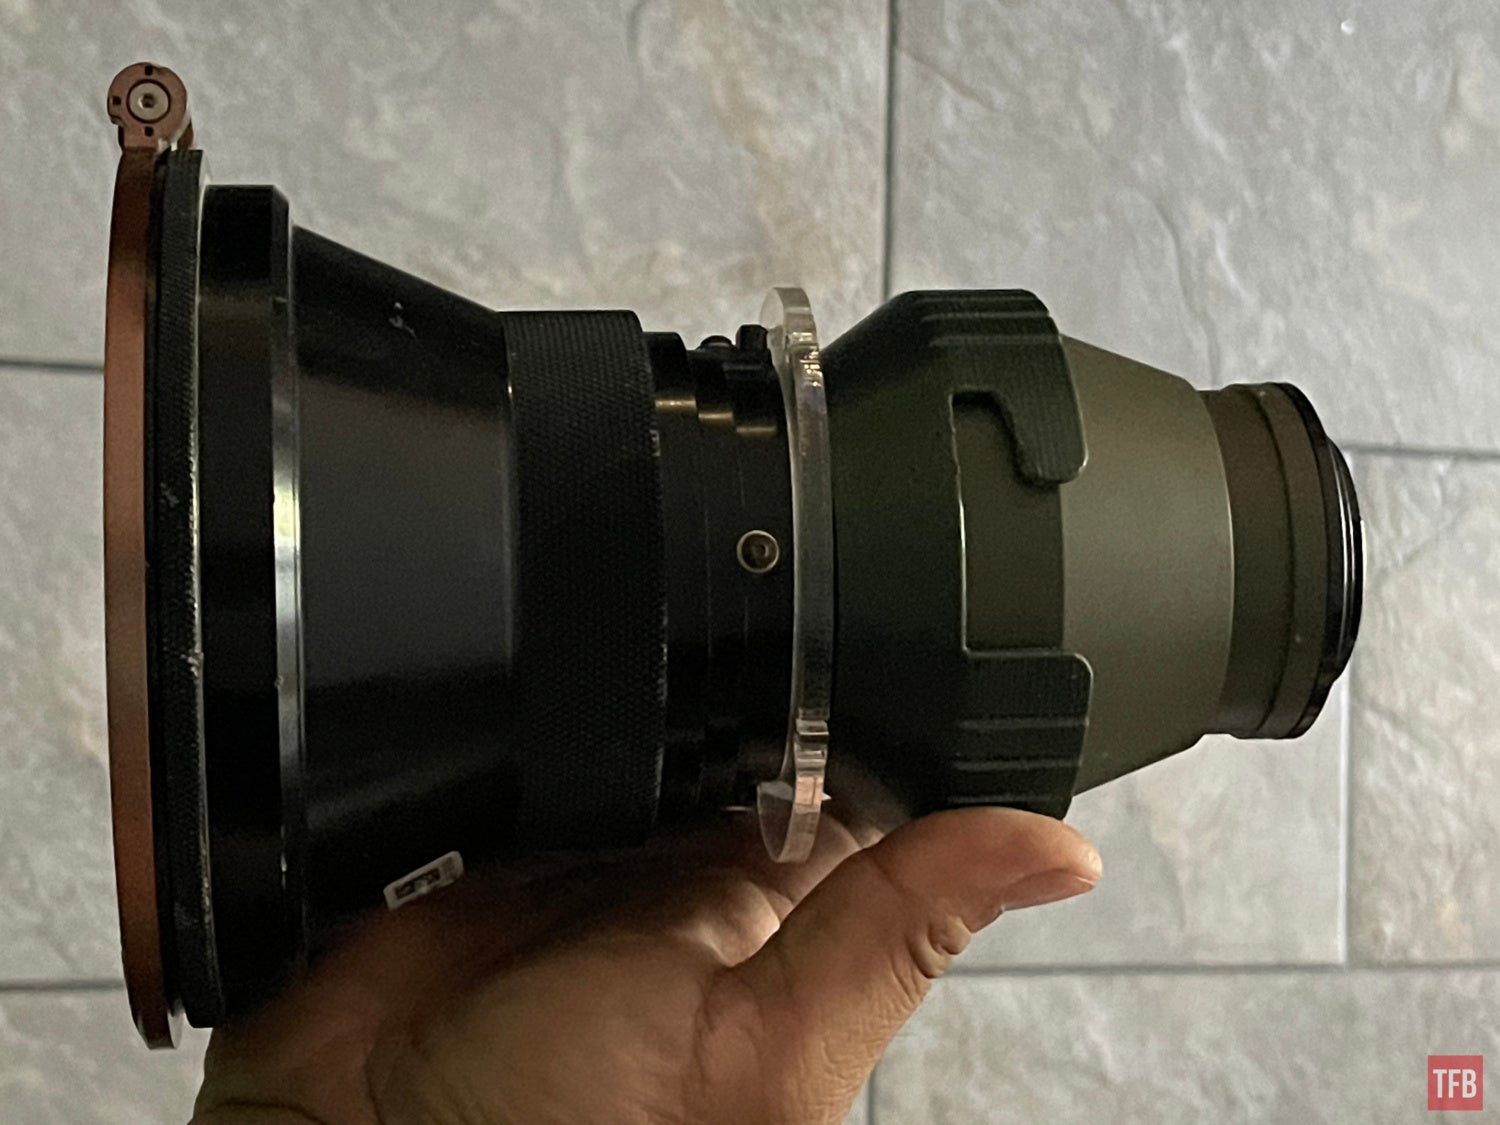
FLIR RECON magnifier mounted in front of the SeeSpot III
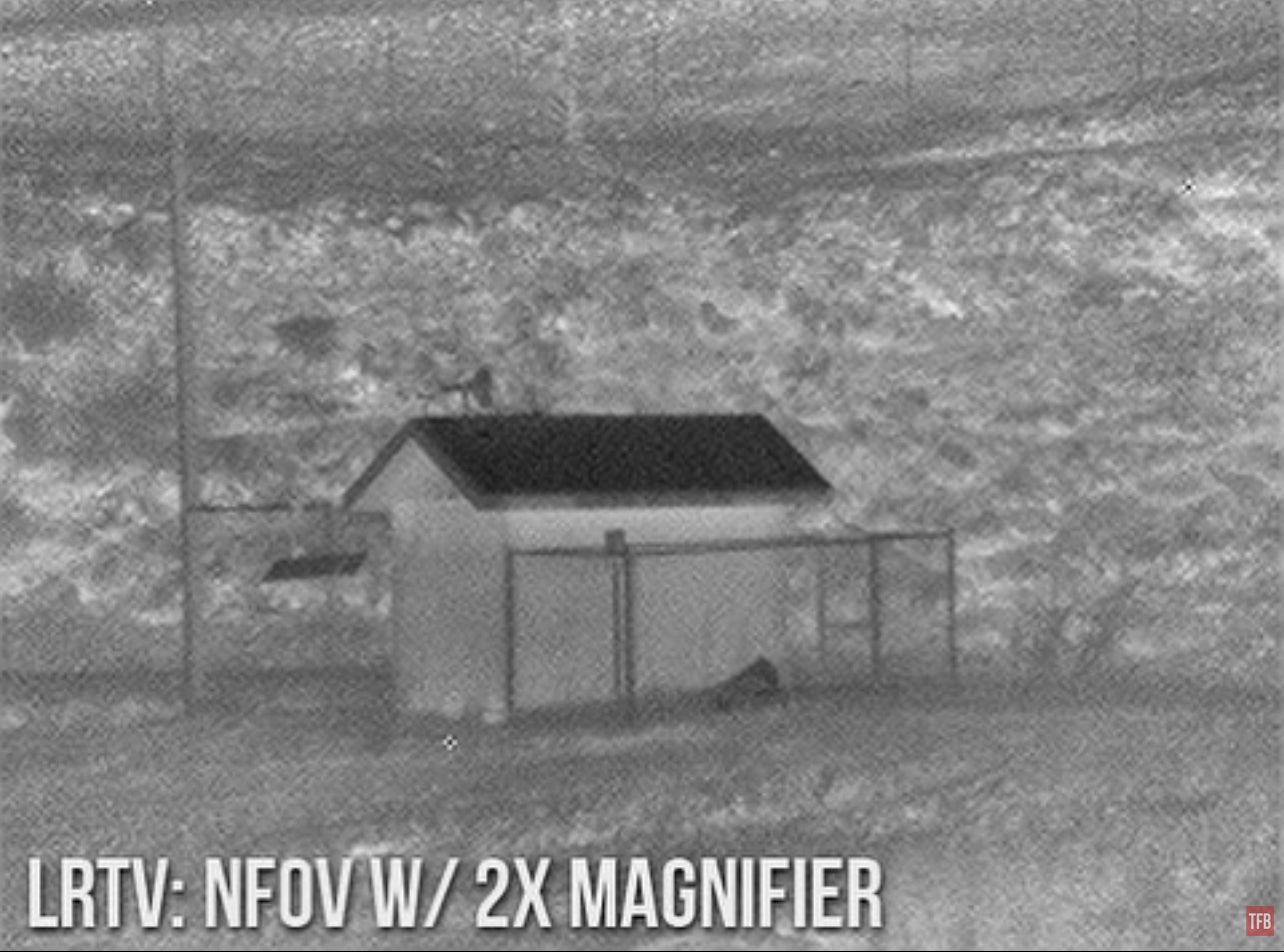
There is a shed I use to test night vision and thermal devices that is 530 yards away. Below is how close I can see it with the JIM LR using the factory 2x magnifier and setting it to NFOV. No digital zoom has been used.
Compare that to the hacked FLIR See Spot III using the FLIR 2.5x magnifier.
Hacked JIM LR
As I said earlier, it was thanks to the blue supermoon we had last month that I tried to hack the JIM LR. At first, I used the FLIR SeeSpot III to take a thermal image of the moon.
This is a screenshot out of the hacked FLIR SeeSpot III.
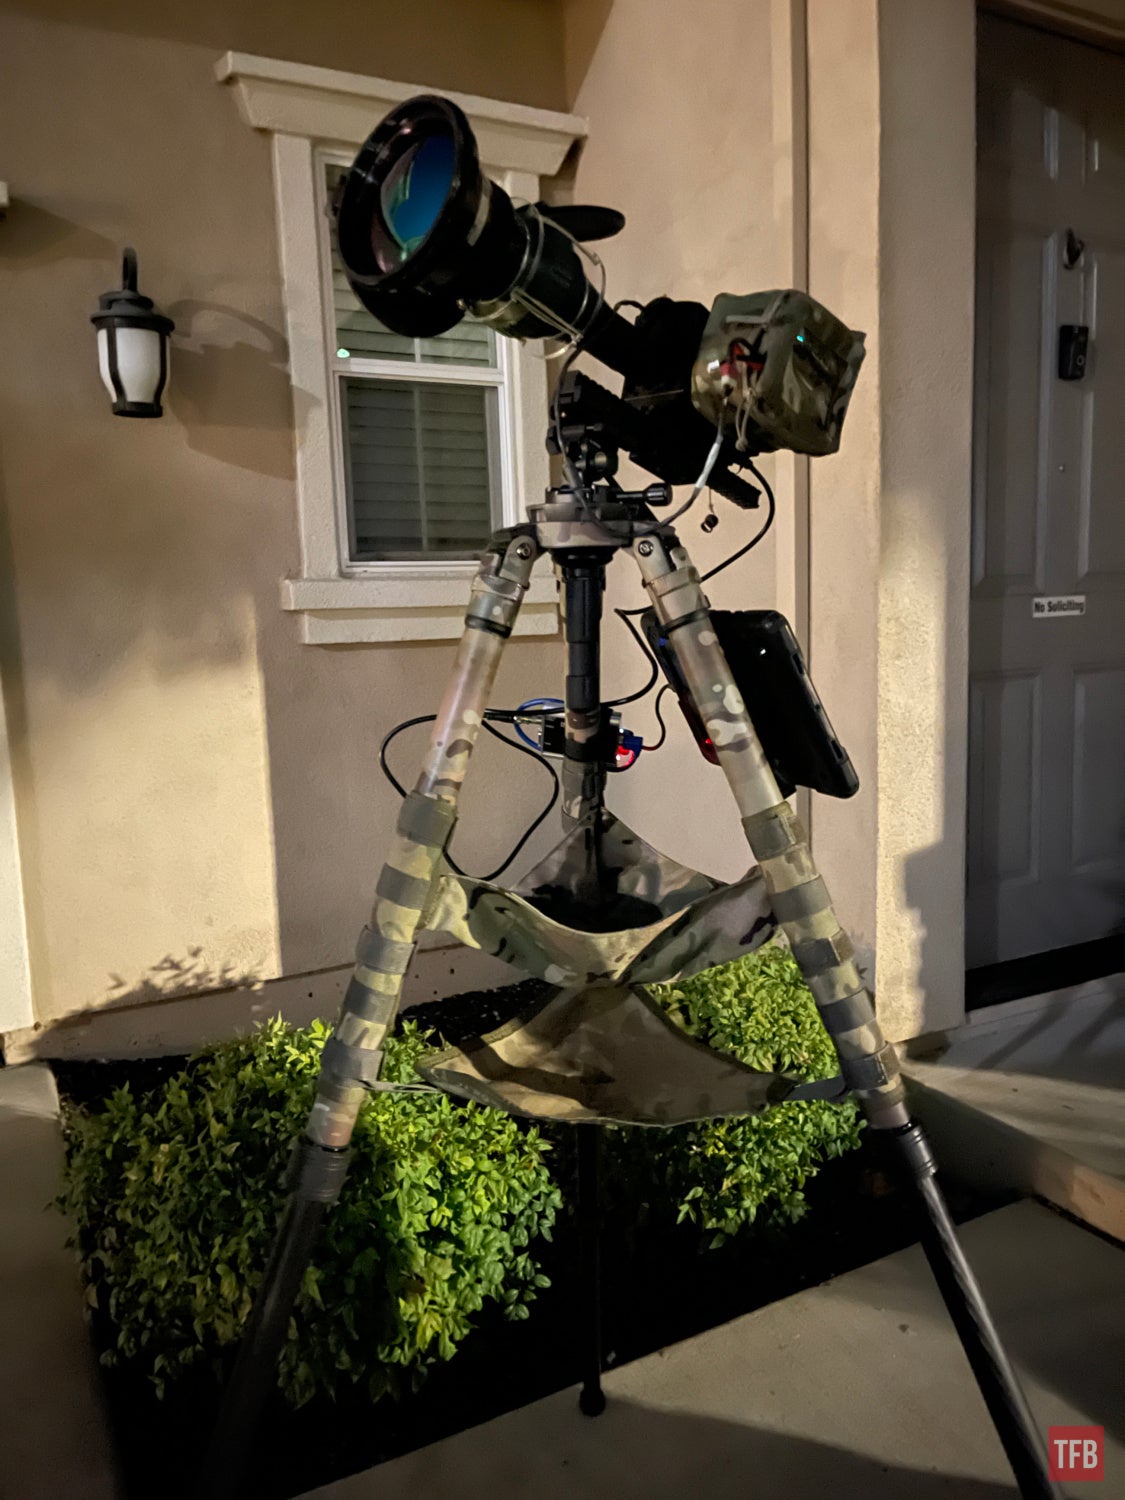
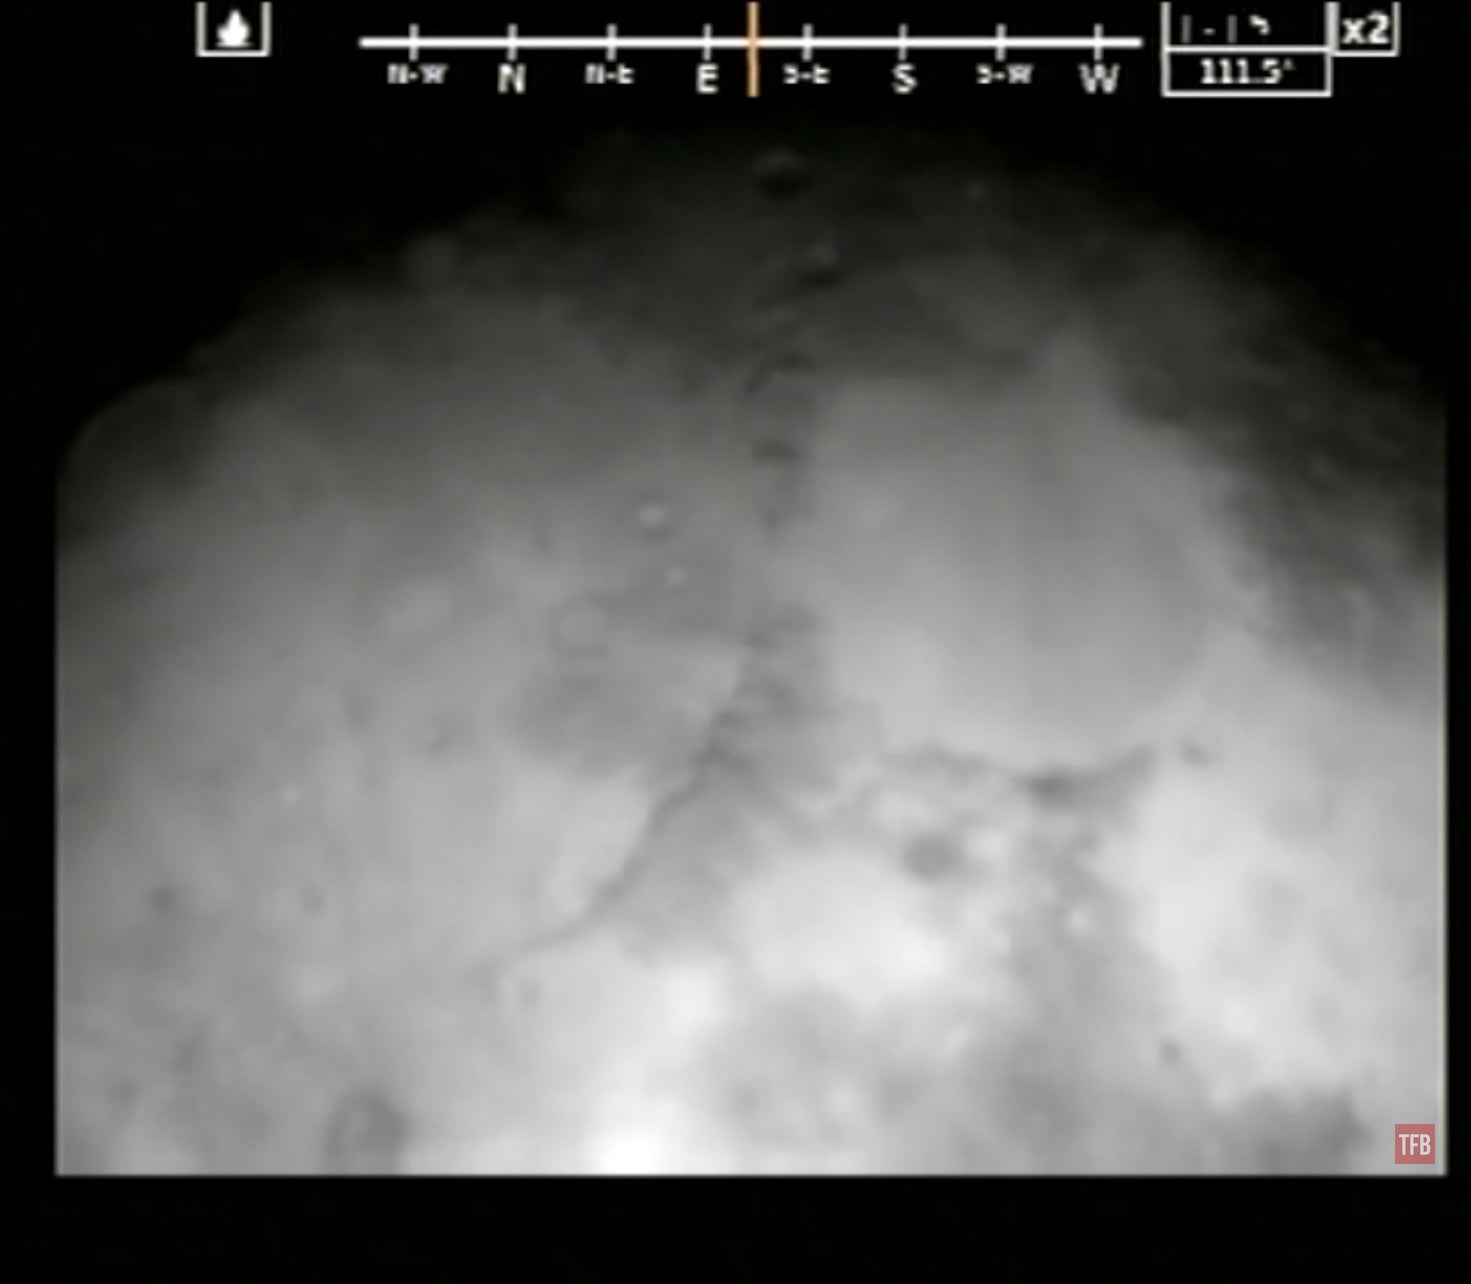
On a whim, I decided to try the JIM LR. I took the 2.5x magnifier off the SeeSpot III and held it over the JIM LR factory 2x magnifier. The custom adapter my friend Thomas designed and printed for me to use with the SeeSpot III, just happened to fit over the Vectronix magnifier. The only issue is it just slips over. Nothing holds it in place. Due to the weight, it can easily slide back off.
To my surprise, it worked! I was able to get a similar FOV as the SeeSpot III by holding the 2.5x magnifier in front of the JIM LR magnifier. I made a spreadsheet to compare the FOV of the JIM LR to the SeeSpot III. Based on the math the JIM LR has a narrower FOV which means a higher magnification but only just so.

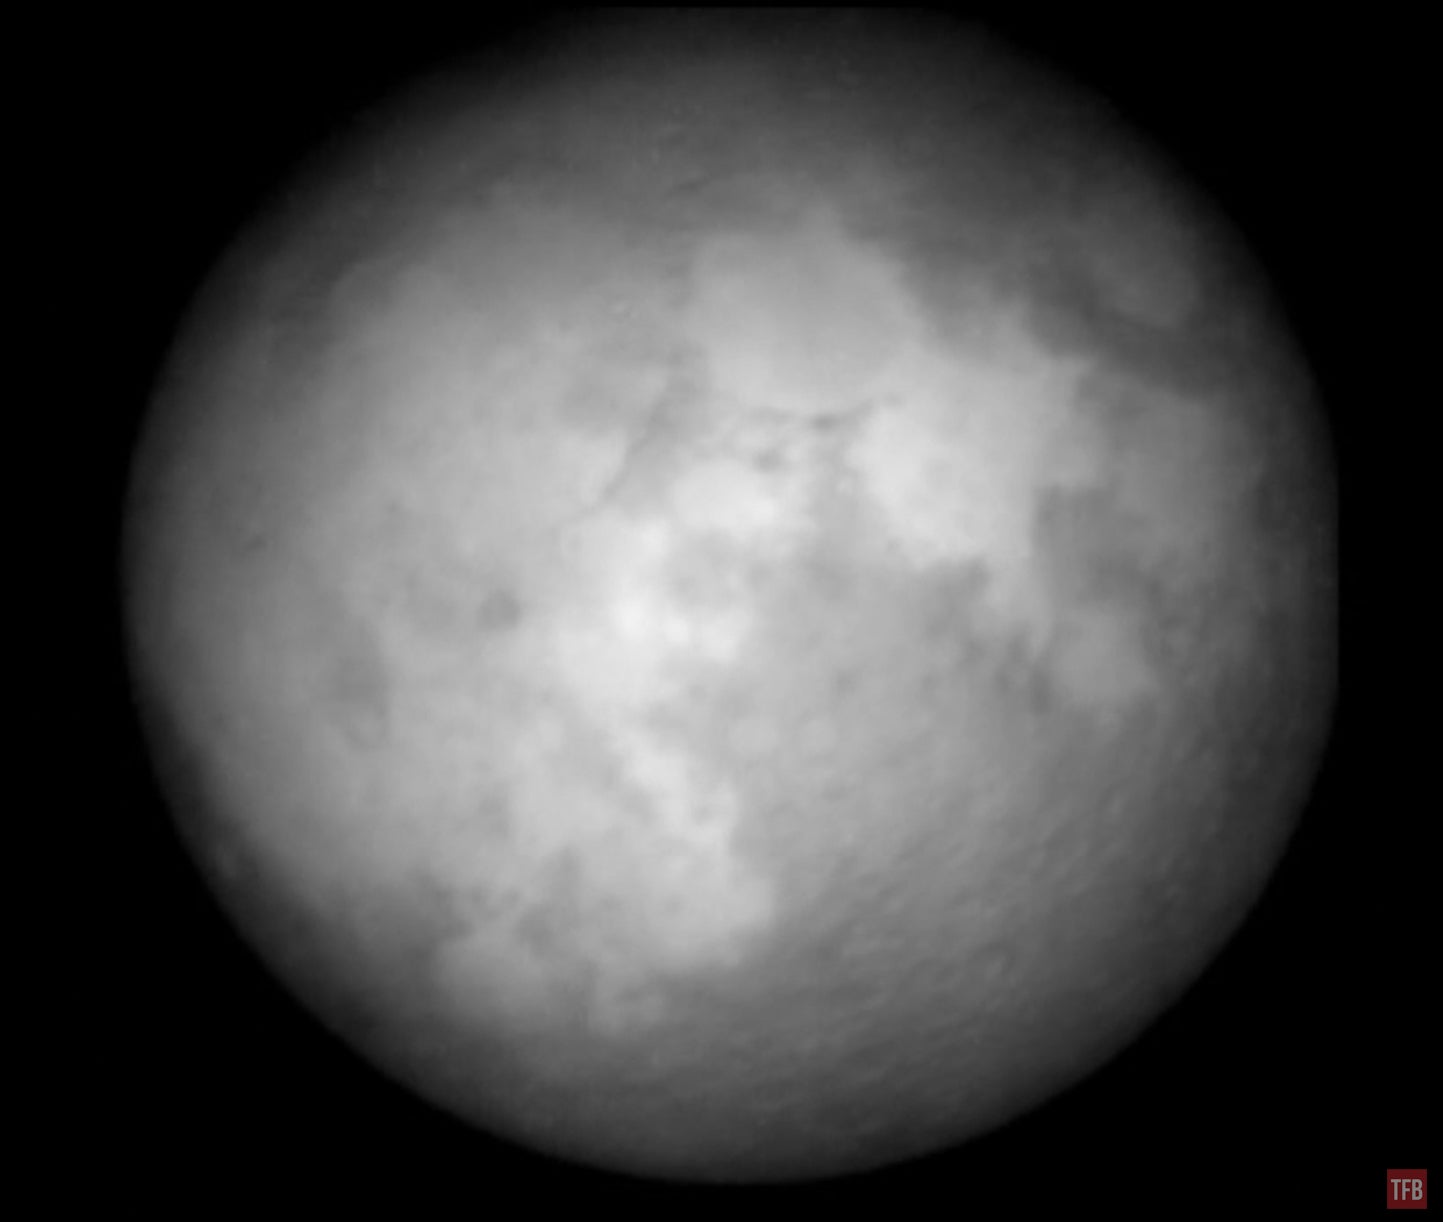
Here are images of the moon using the hacked JIM LR.
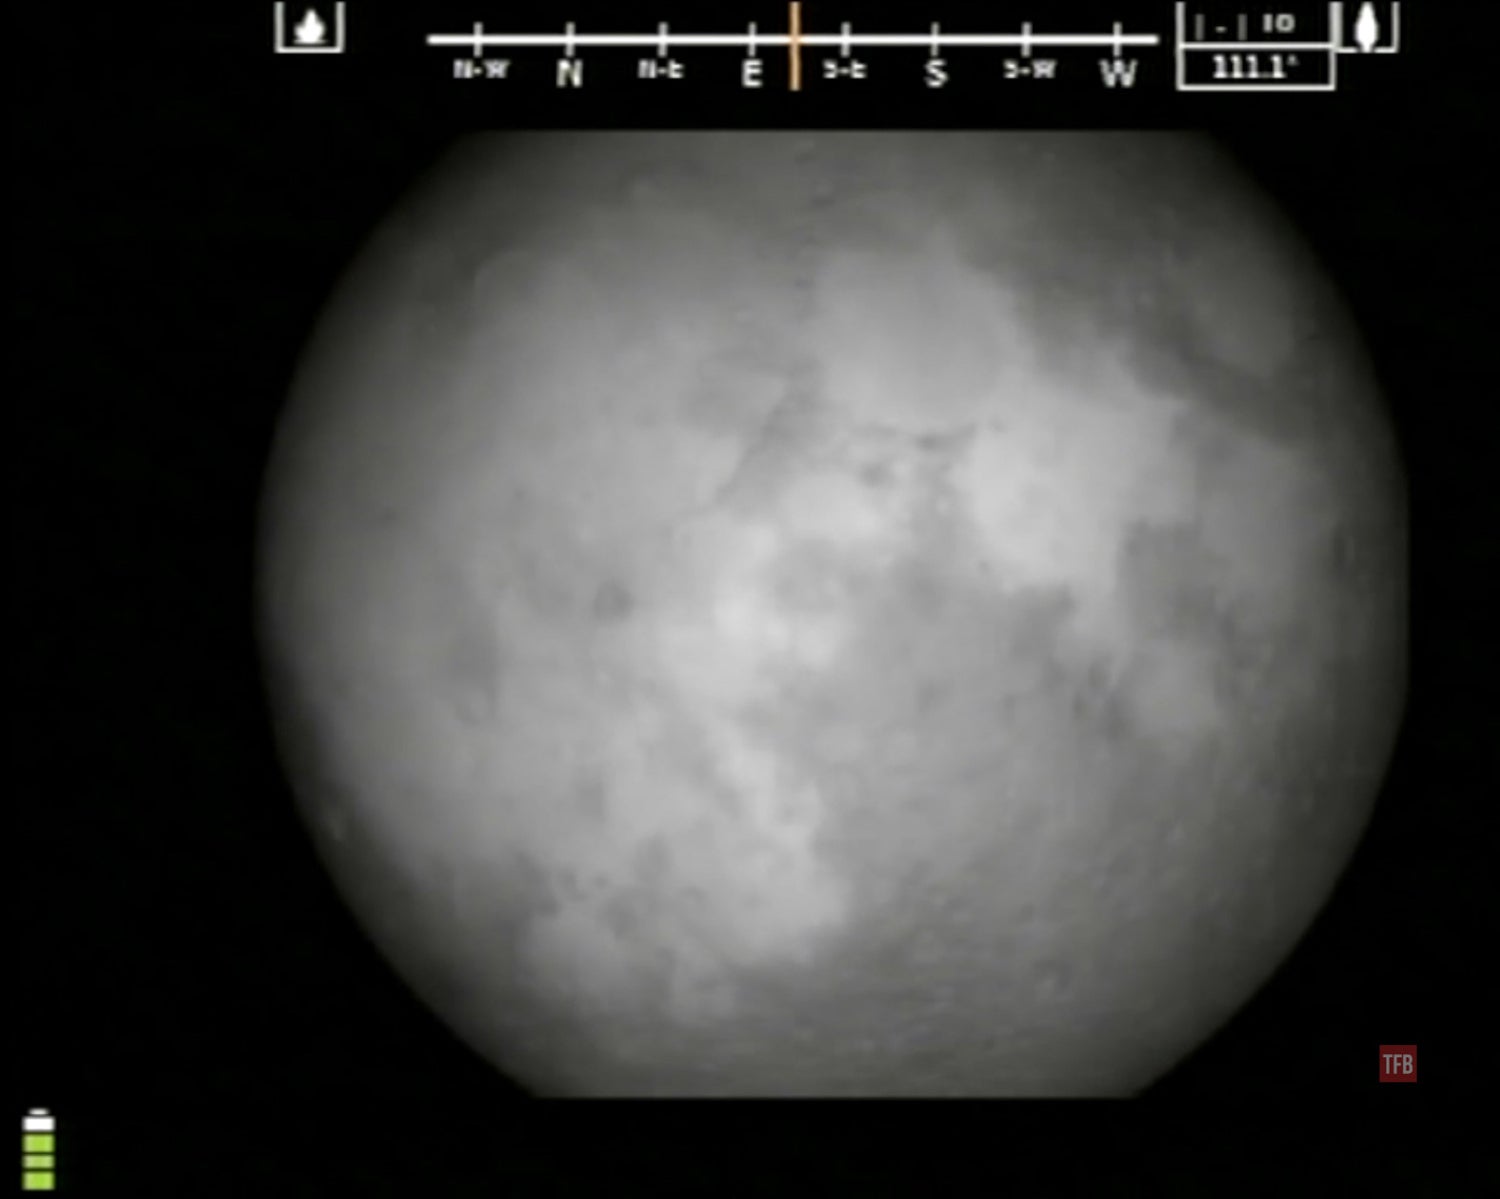
Sure enough, the math is correct the moon gets cropped a little bit. The JIM LR has a 320×240 sensor while the SeeSpot III is 256×256. The JIM LR is slightly higher resolution and it has digital zoom. I pushed in on the moon using the 2x digital zoom. You can see the two giant craters below.
Here is a video I made from the hacked SeeSpot III and hacked JIM LR.
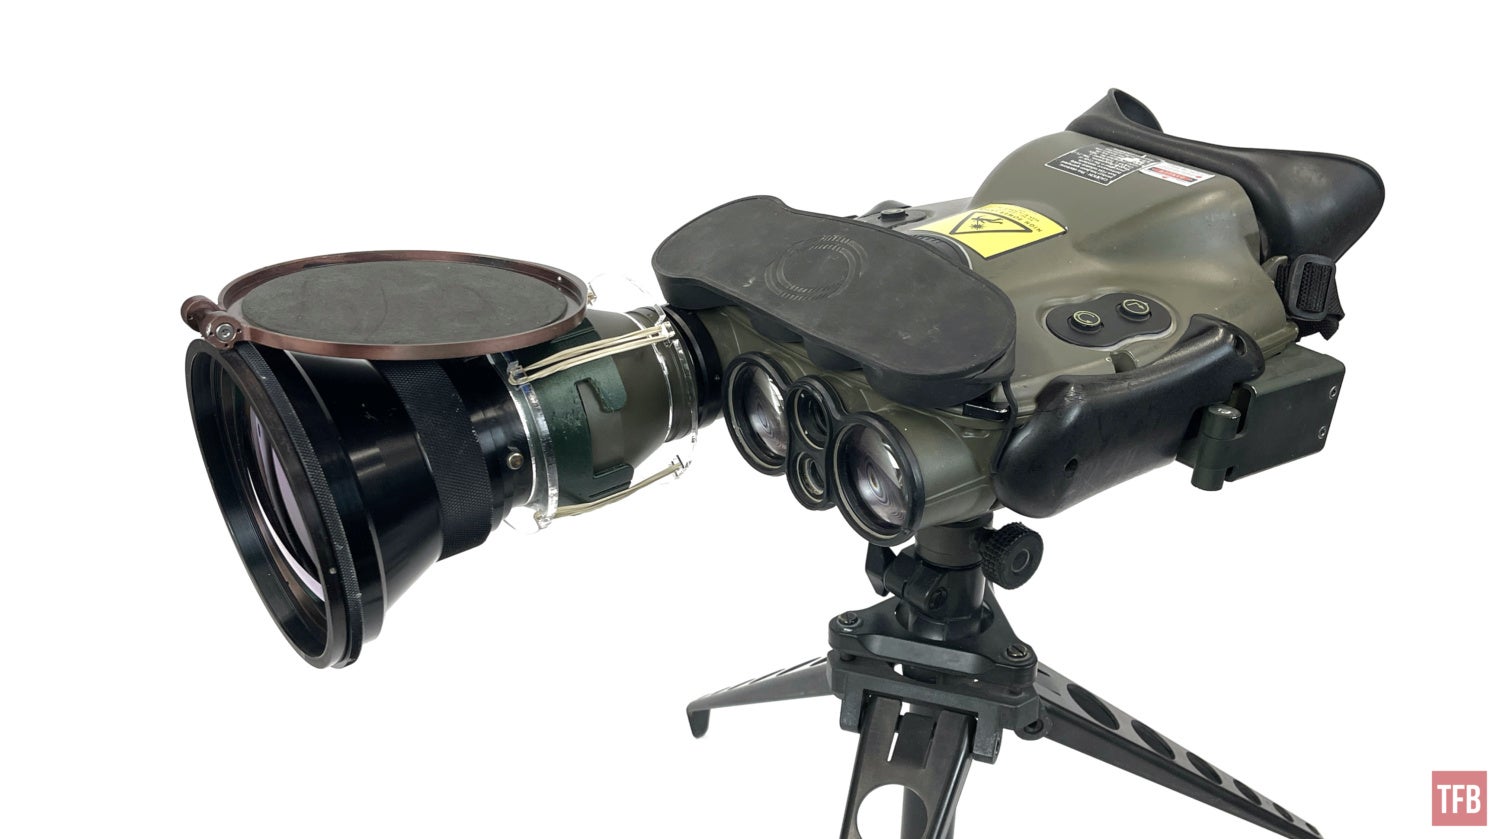
Since my FLIR SeeSpot III article, I upgraded the magnifier and SeeSpot III with some custom-cut acrylic circles that have notches in them. I use four rubber bands to pull the two circles together which holds the FLIR RECON magnifier on more securely. So I had another acrylic circle cut to fit the JIM LR magnifier. Now I can use the hacked JIM LR hands-free.

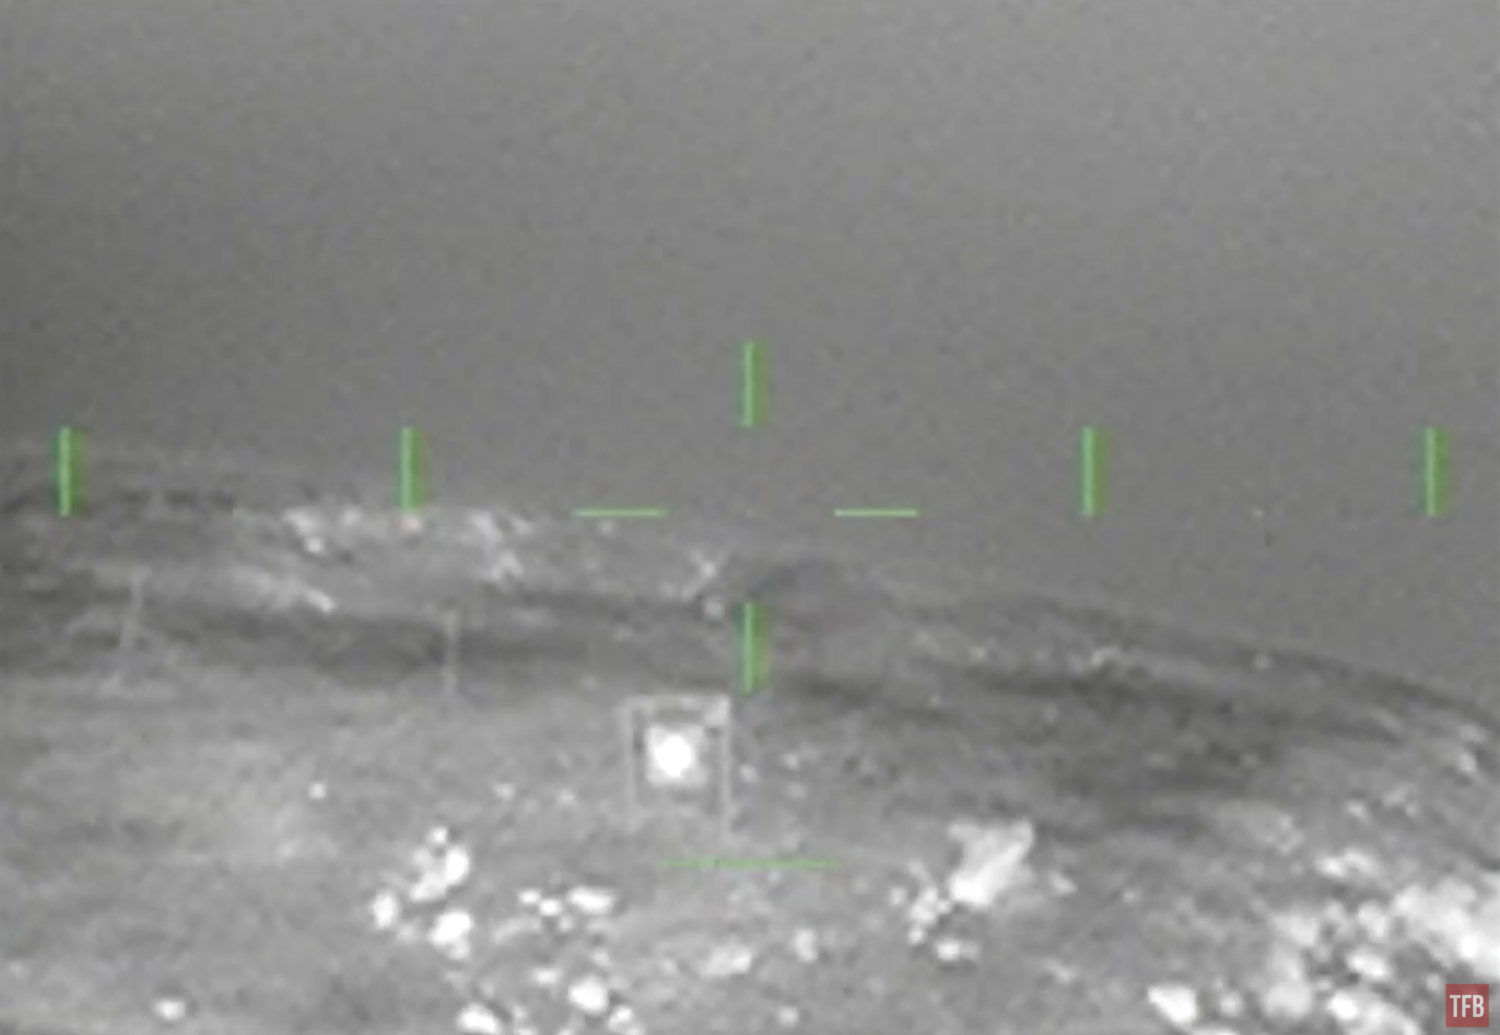
Looking at the moon is great and all but what does it look like at practical distances? I brought the hacked JIM LR out to the range, and my friend Kythe and I were blown away. Below are screenshots from when we used the JIM LR to spot a mile in the dark last year. This was the best we could achieve at the time.
2x magnifier NFOV
2x magnifier NFOV w/ 2x digital zoom
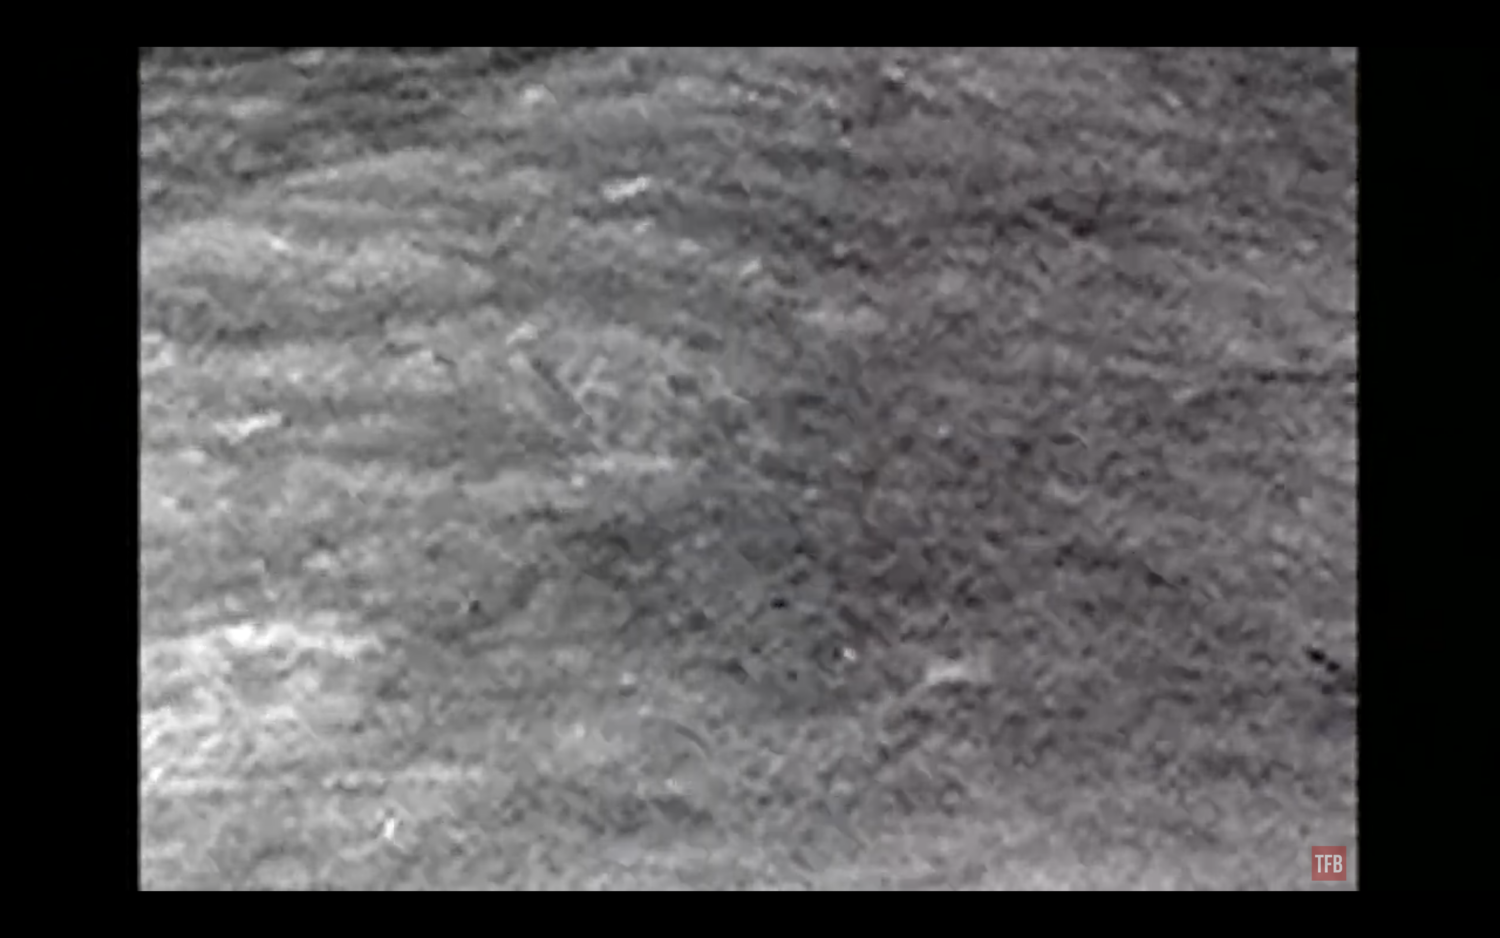
Now look how close we can see the mile target with the hacked JIM LR!
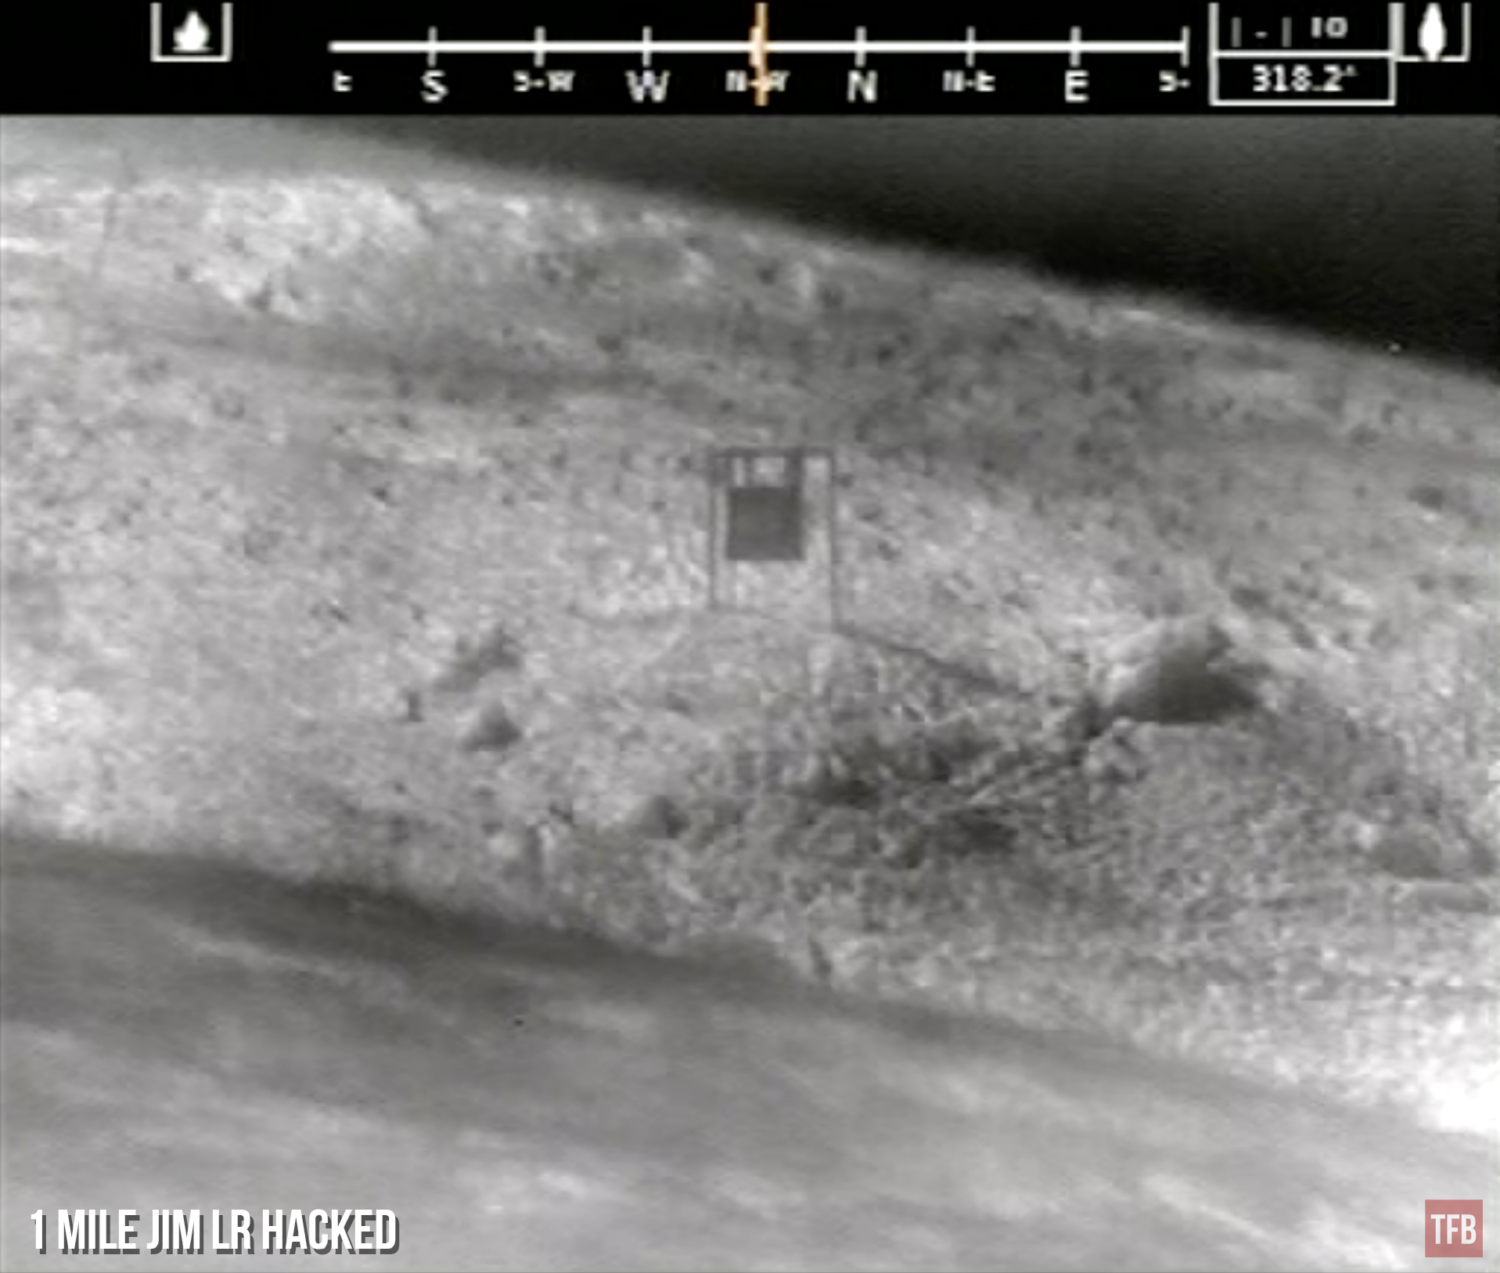
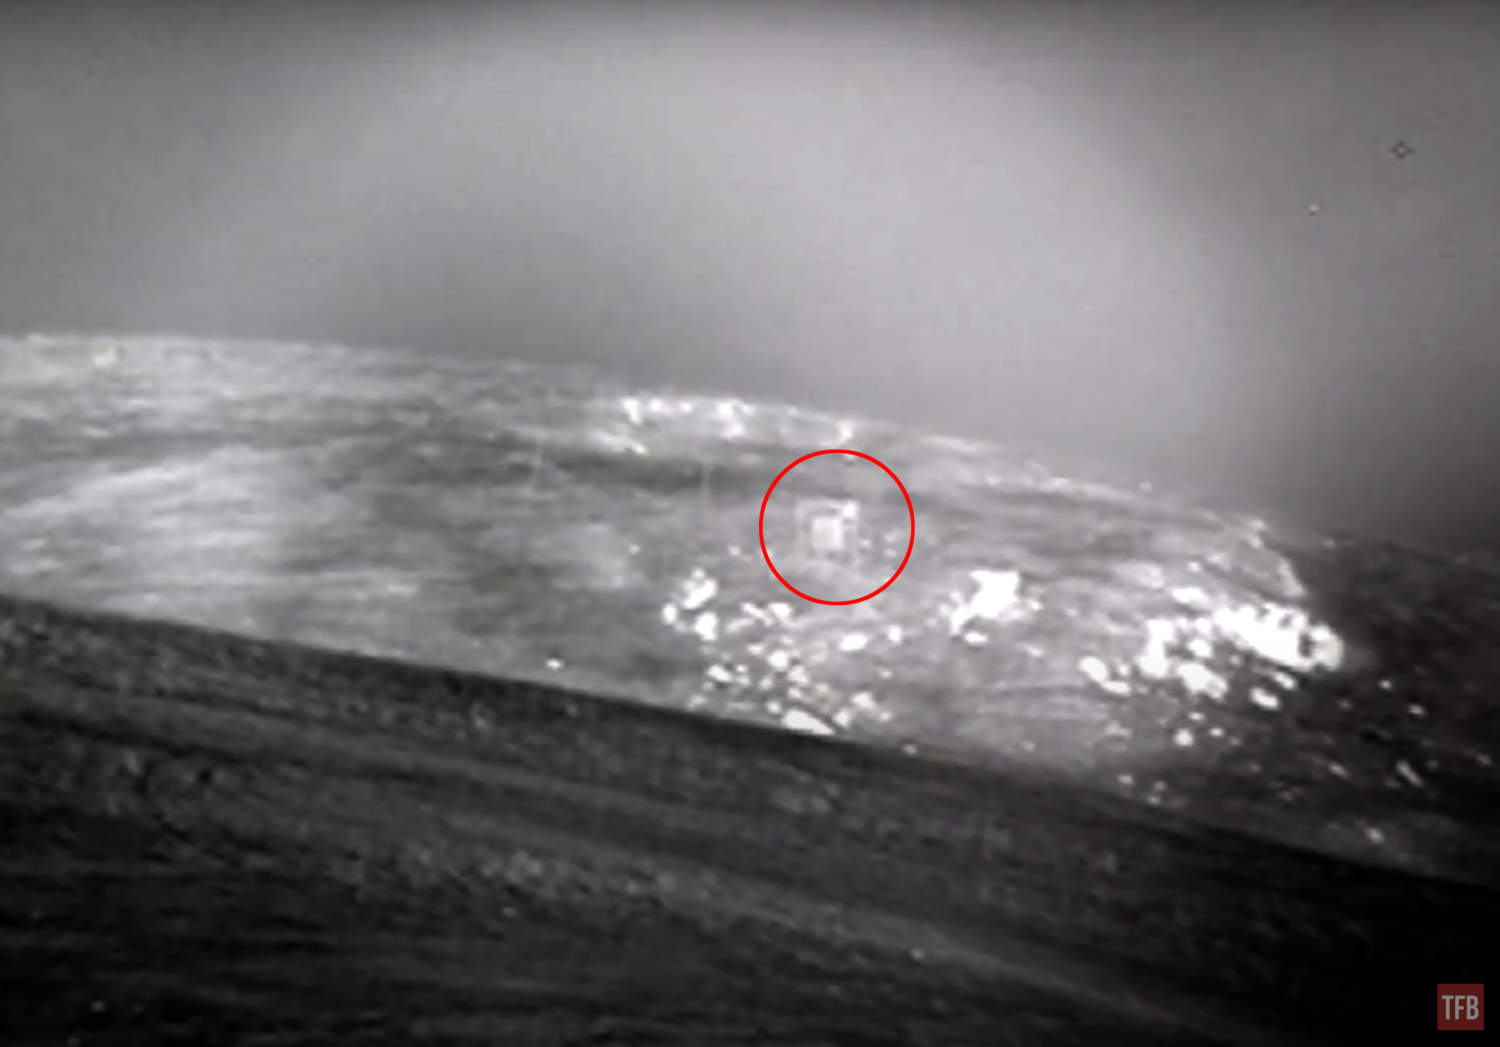
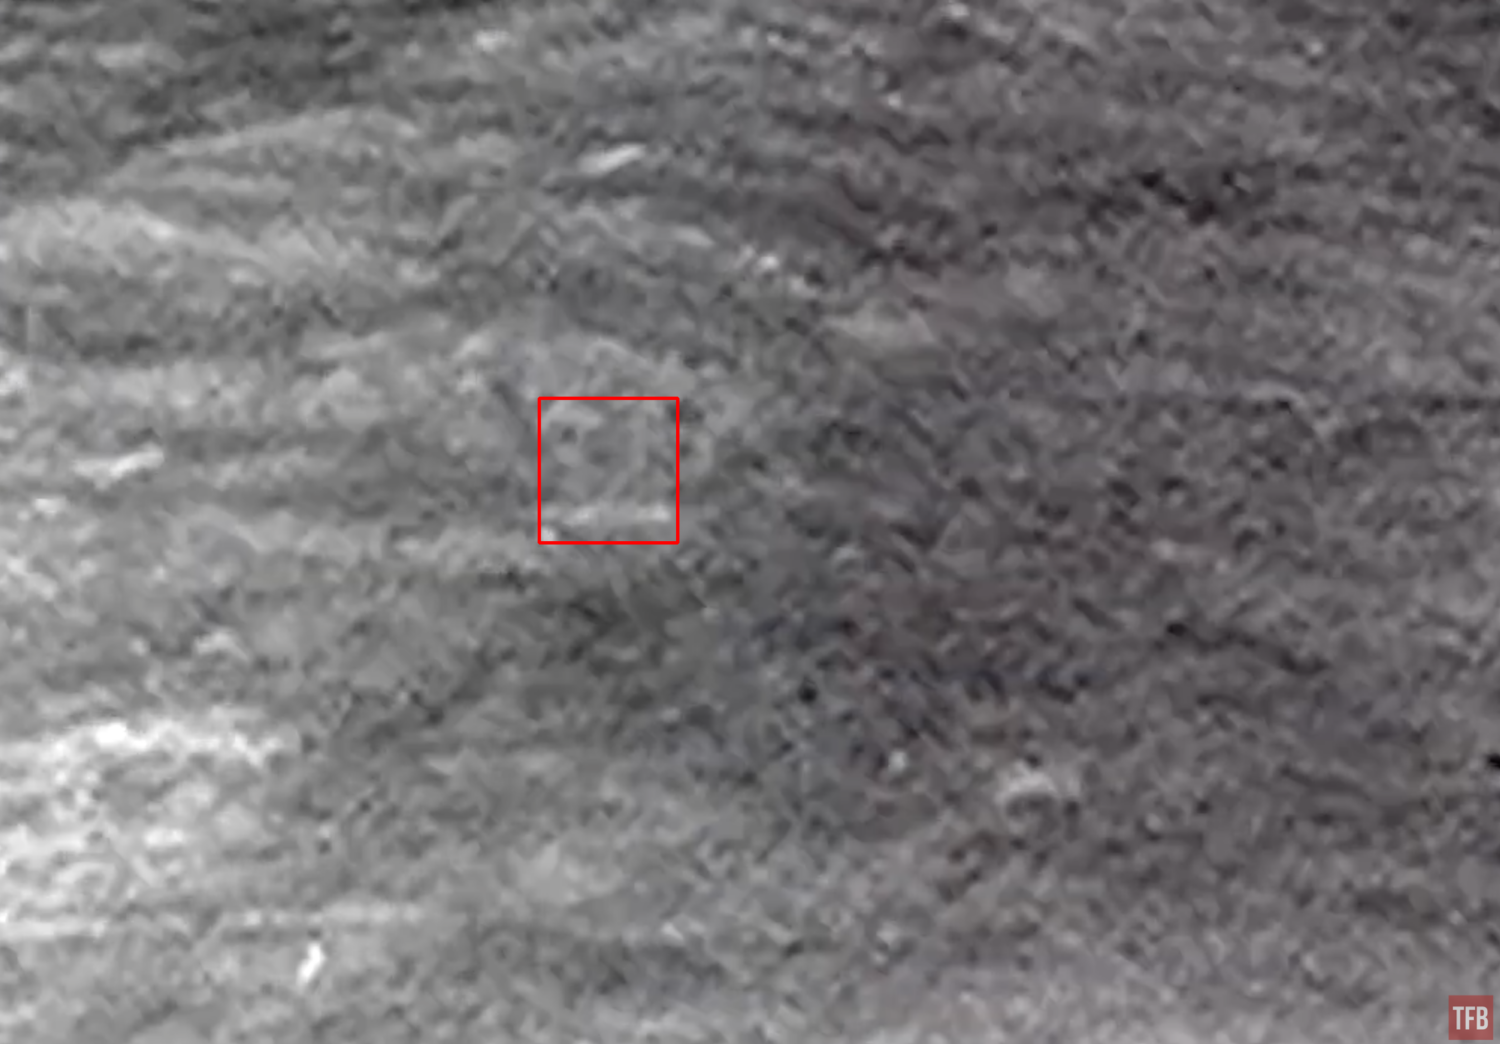
We used the JIM LR last April to spot the Dark ELR where we shot 2,200 yards at night. We had a hard time seeing the target since we did not heat it up. Can you see the target below?
The 2,200-yard target is in the red box below.
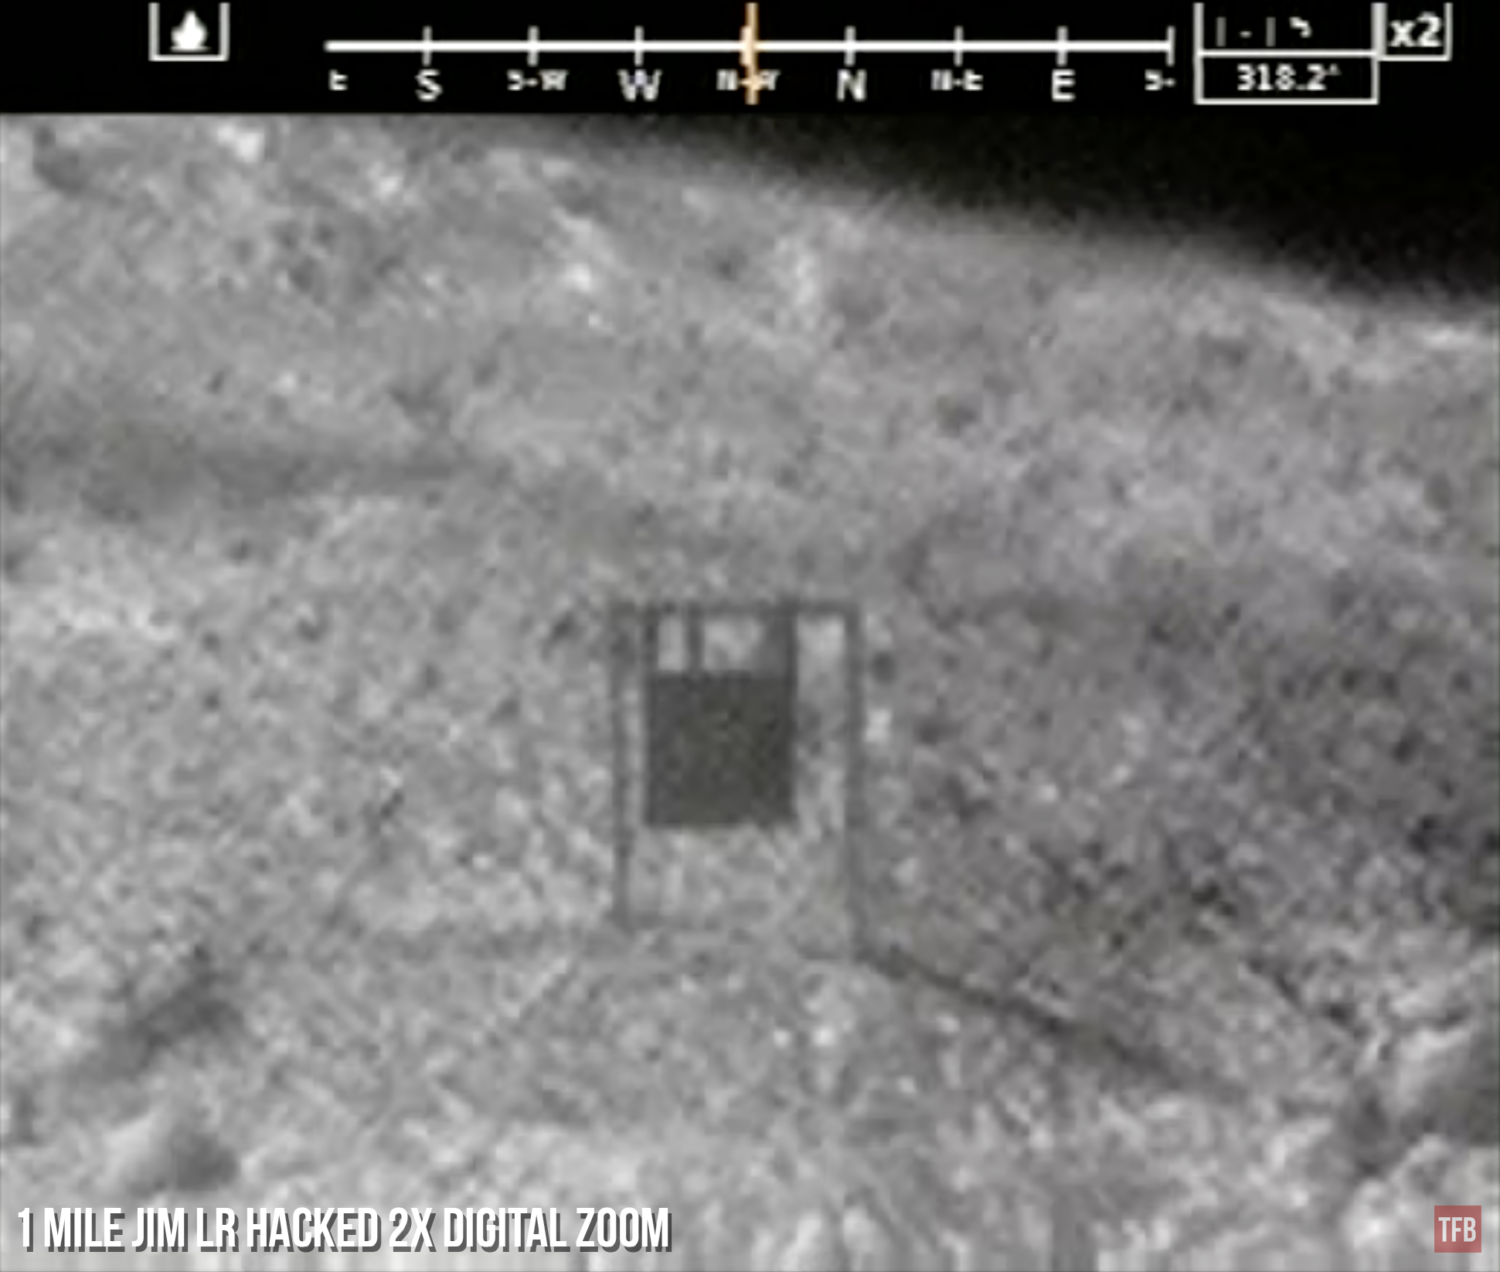
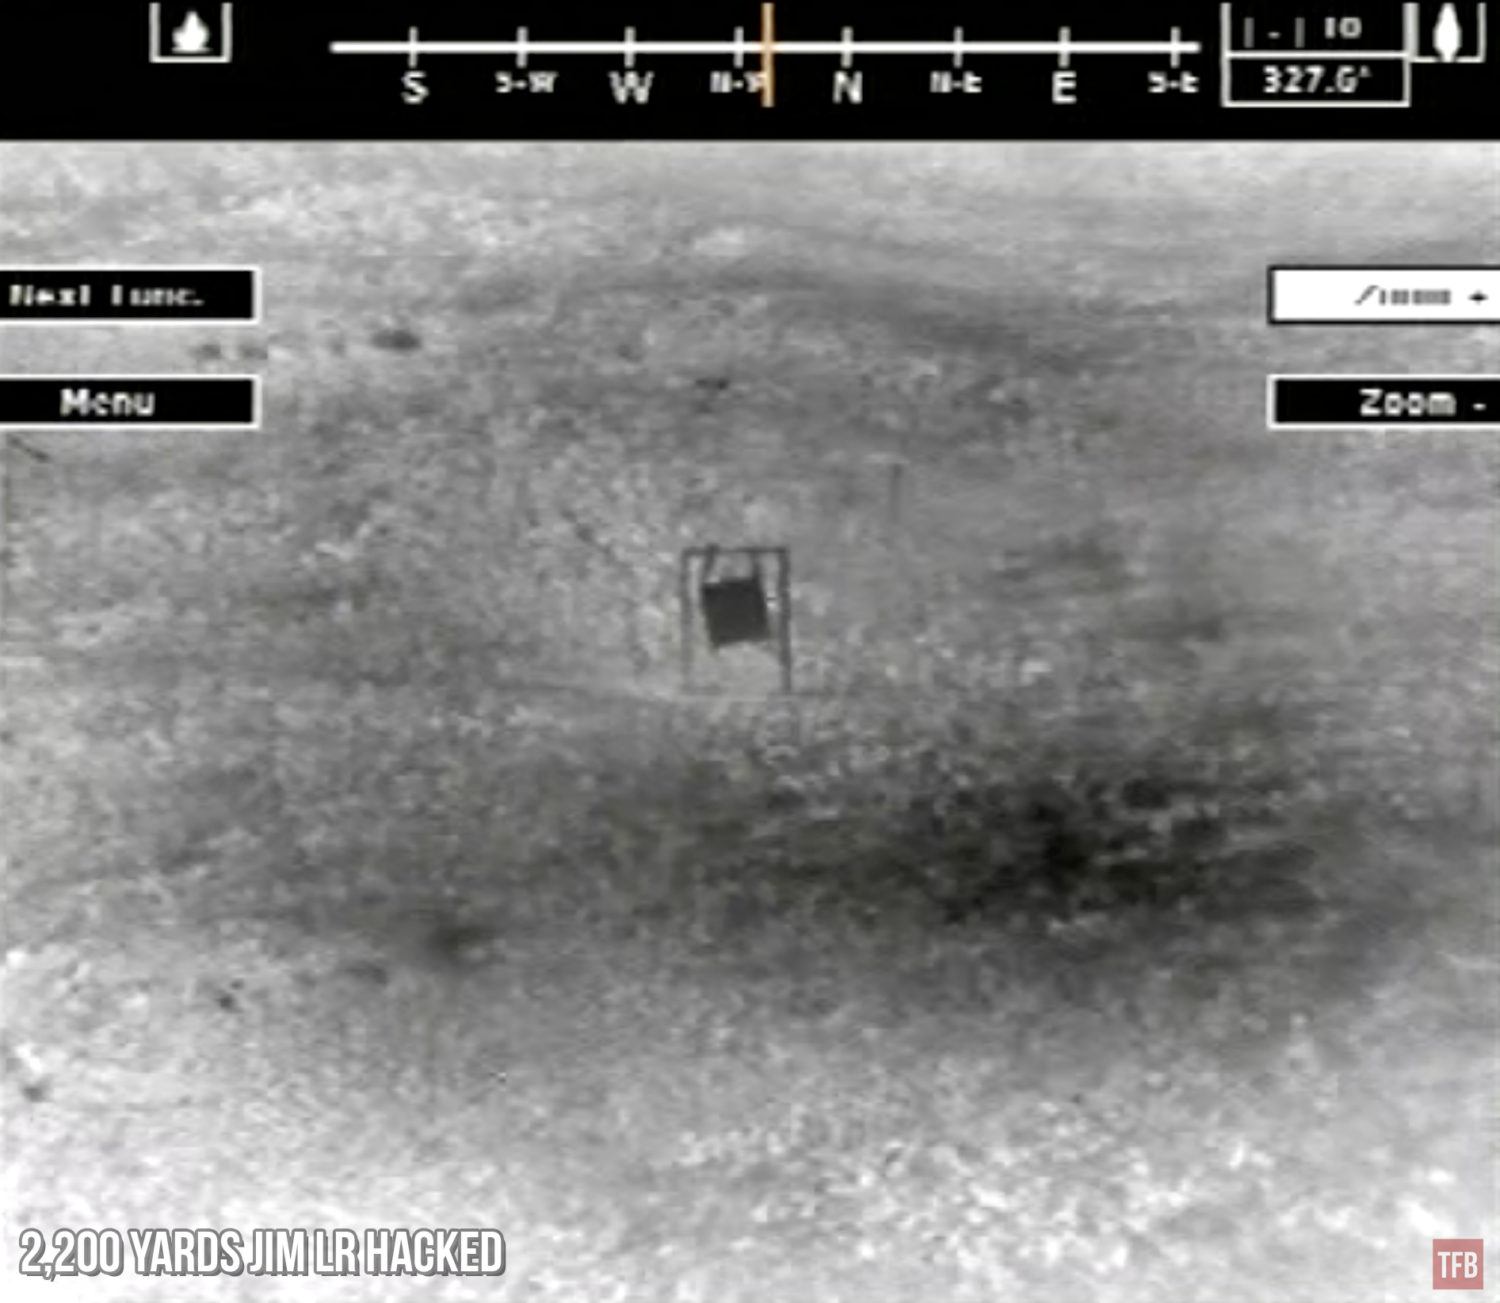
Well, this is what the hacked JIM LR showed us in the daytime, 2,200 yards away. We can clearly see the target stand, target hangers and of course the target itself.
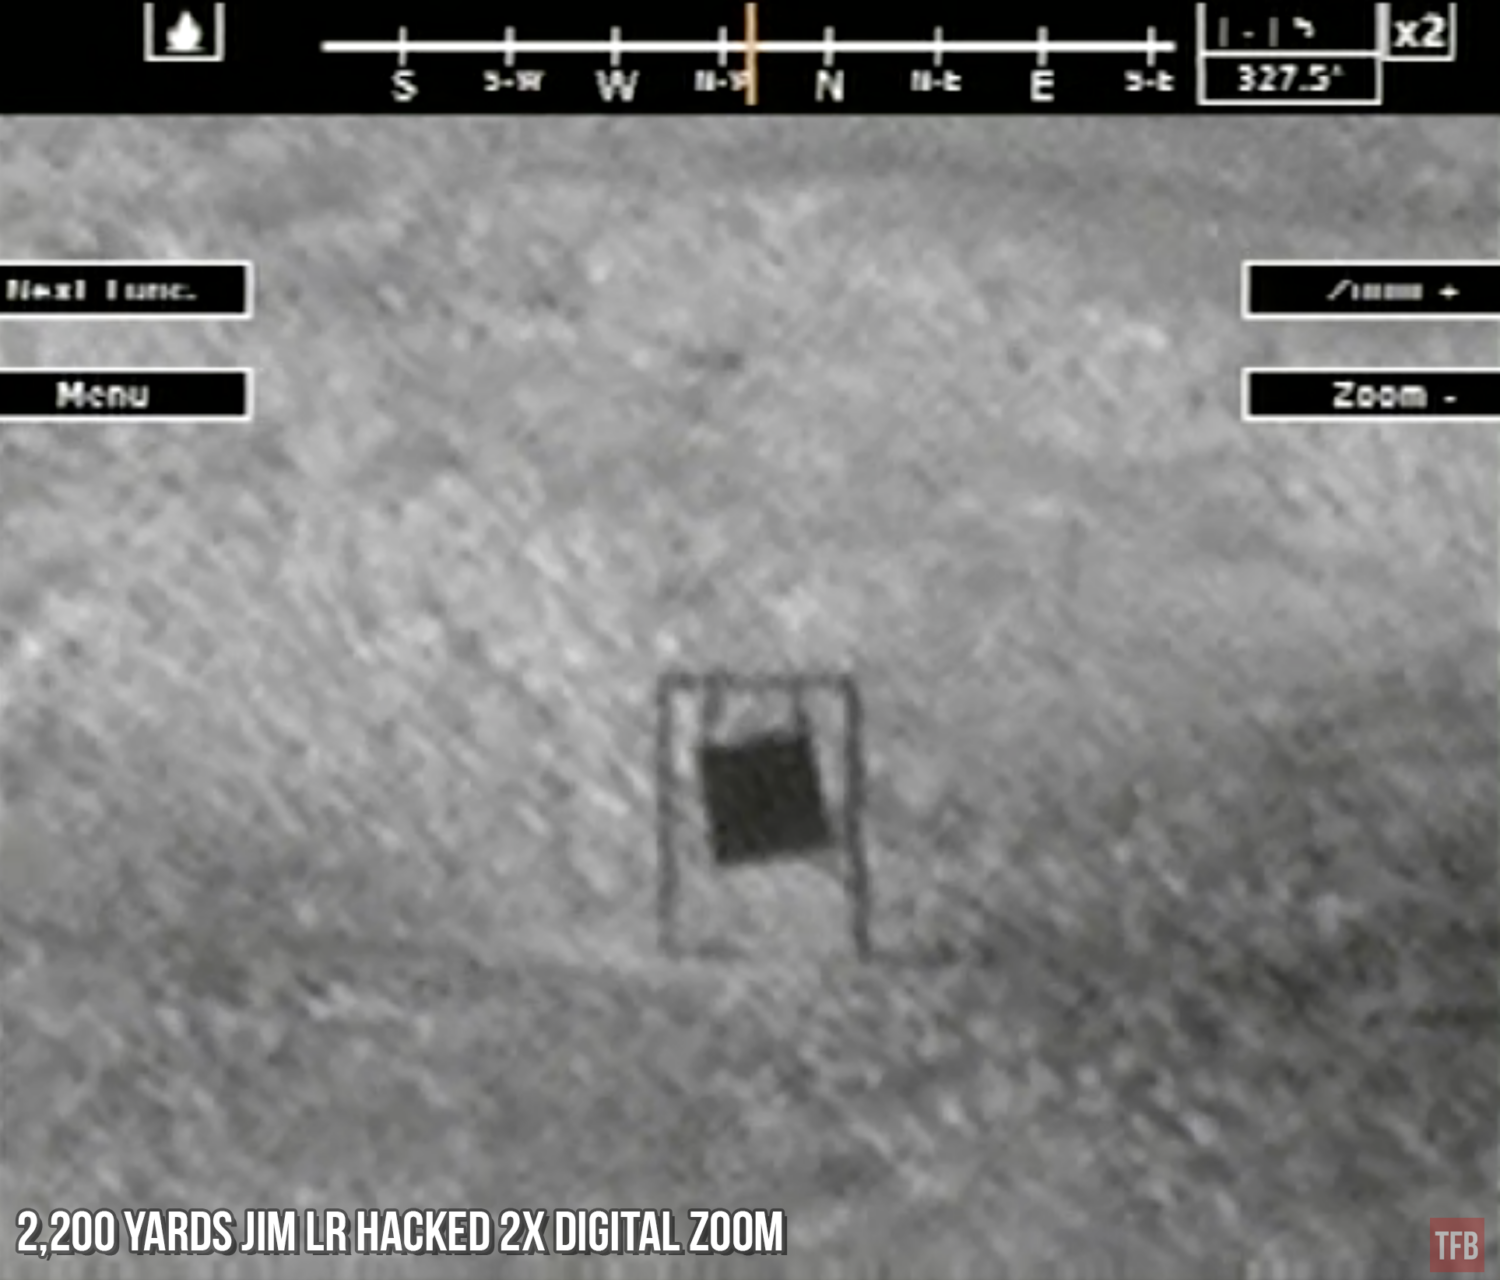
And here it is with 2x digital zoom.
Final Thoughts On the Hacked JIM LR
The Hacked JIM LR is just awesome. While I love the FLIR SeeSpot III for its price/performance, it has its compromises. With the JIM LR I can use the optical zoom and switch to WFOV quickly. This makes it much easier to redirect the massive lens stack and then zoom back in to look at it close up.
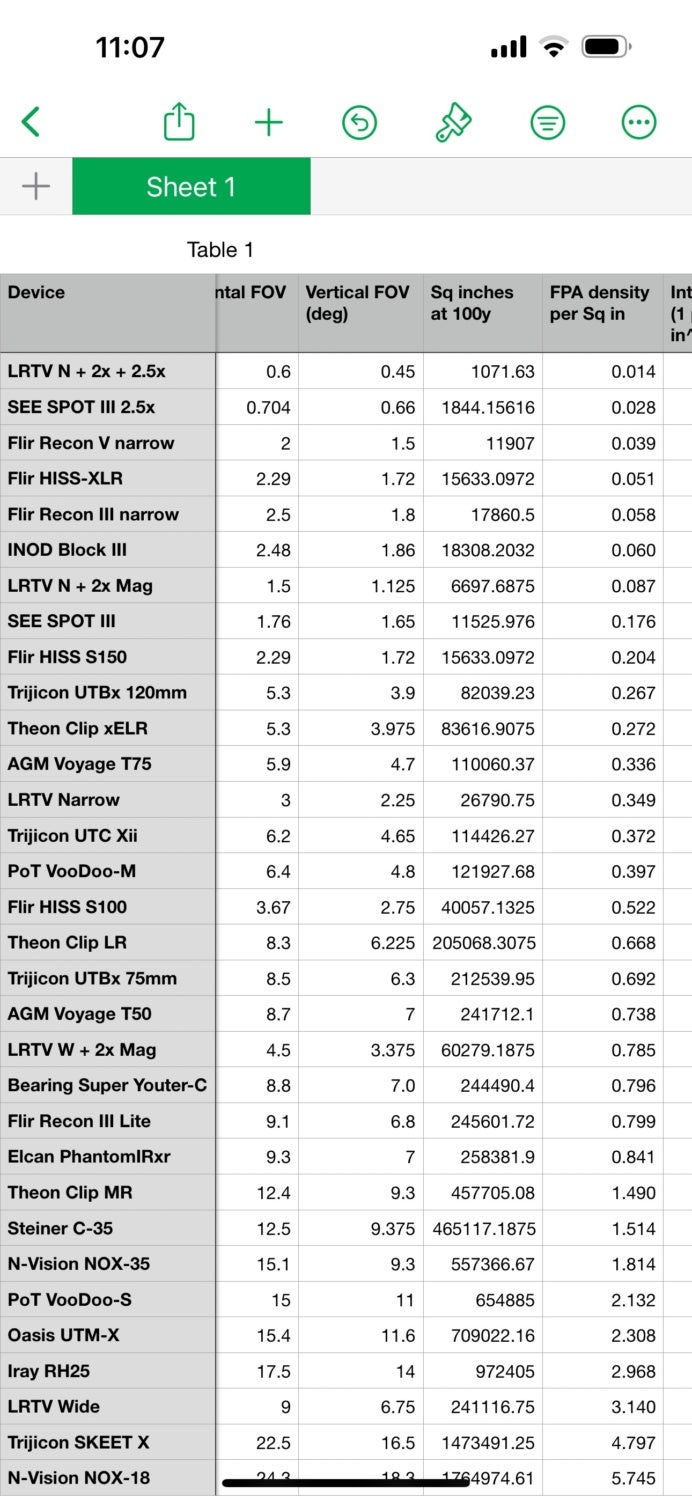
My friend Kevin, the guy who shot and hit all the targets we have challenged ourselves with such as Dark Mile, Dark ELR and all the soda can challenges, has been keeping a spreadsheet that lists and compares the performance of all the best thermal devices on the market and ones that we have played with. Based on the data, the hacked JIM LR aka LRTV is the king.
So far we have exhausted the 700-yard soda can challenge. No need to waste ammo trying to lob a standard .22LR out of a 10/22. Kythe found a new challenge for us to try and cross off the list. Long-range shooters of Utah posted up a 1-mile milk jug challenge. We plan to try this in the daytime and if we are successful, we will try it at night. We will definitely be using the hacked JIM LR to help spot at night and possibly in the day.

Thanks for reading all the way to the end.