 Your Privacy Choices
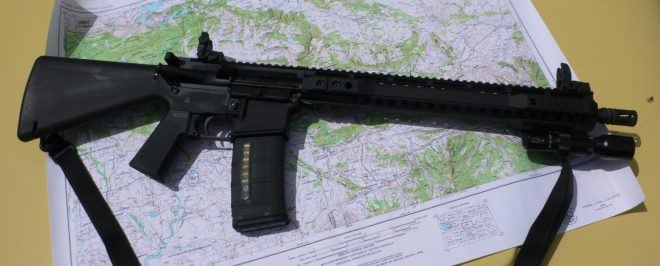
Welcome to the TFB Field Strip series. The AR-15 pattern of rifles hardly needs any introduction. While Eugene Stoner’s iconic design may sometimes be the focus of unwanted attention, this sometimes spurs a newly-acquired desire for people to learn more about it. Thus, I have put together this edition of field strip, looking at the AR-15. This is for the newbies, who will be starting from an experience level of zero – maybe having held one in a video game once, or not even having held one virtually.
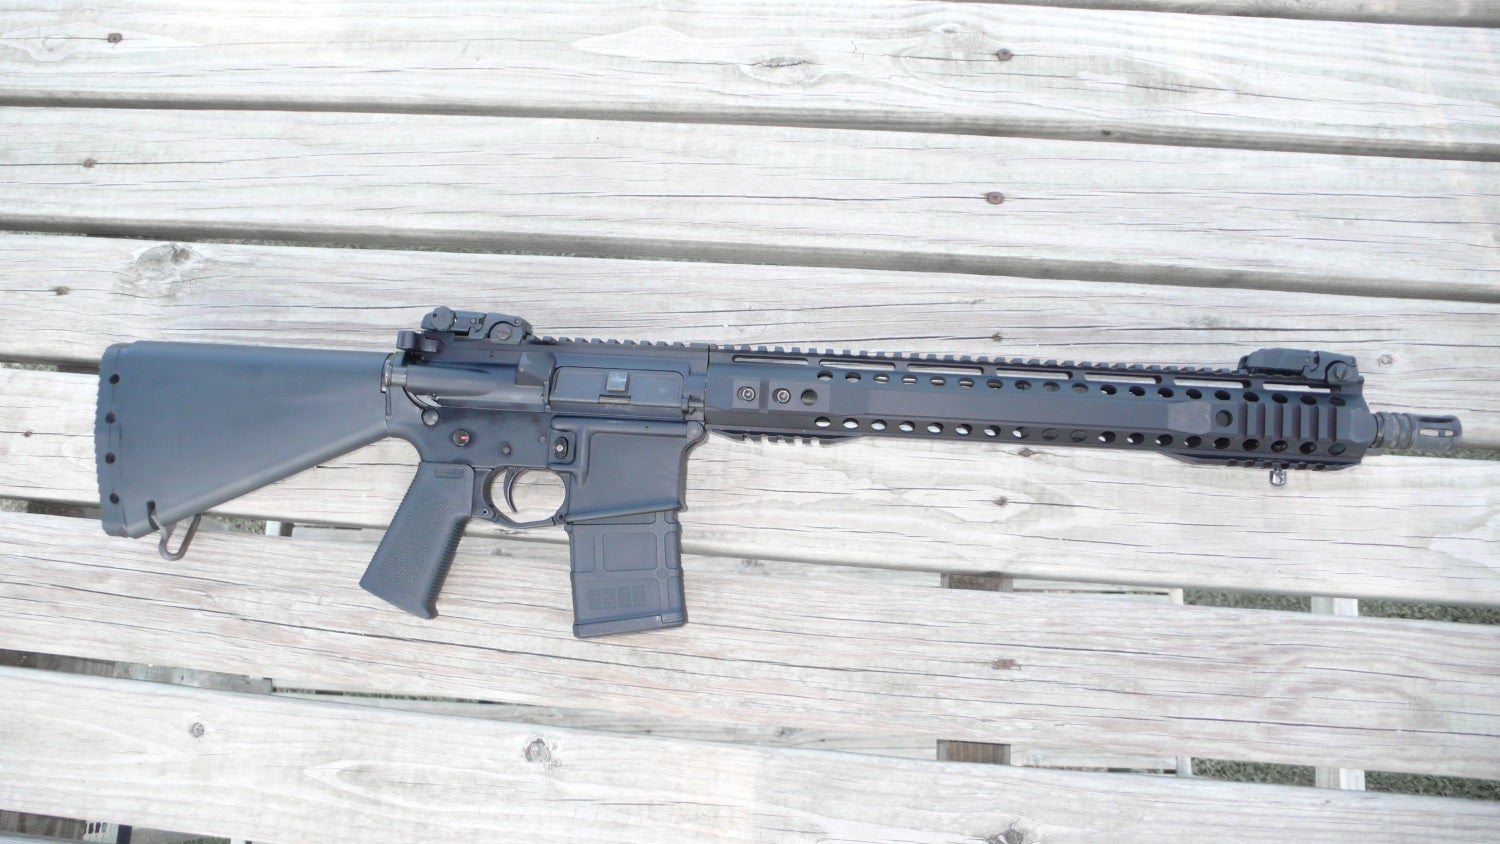
The AR-15 is a semi-automatic rifle, traditionally chambered in 5.56x45mm or .223 Remington. Although, in recent years, the AR-15 has lent itself well to a whole host of intermediate cartridges. Stoner’s design was adopted by the United States Armed Forces in the 1960s and has seen an evolution and improvements ever since. The civilian semi-auto versions have become the most popular rifles in the United States and see usage in hunting (yes, you really can hunt with an AR-15, check your local regulations though), competitions, plinking, and self defense. There are also plenty of examples of AR-15 pistols currently on the market as well. There are so many different looking stocks, handguards, grips, sights and accessories available that give each one a customizable feel of its own according to the tastes of the owner.
Since the AR-15 is so loved, there are loads of articles and videos about the history of the AR-15 all over the interwebs that I won’t carry on about it here. Let’s field strip the much loved (and just as much mistakenly hated) AR-15.
BEFORE YOU FIELD STRIP ANY WEAPON, REMEMBER the four rules of gun safety:
- All guns are always loaded.
- Never let the muzzle cover anything you are not willing to destroy.
- Keep your finger off the trigger until your sights are on the target.
- Be sure of your target and what is beyond it.
TFB FIELD STRIP: AR-15 RIFLES AND PISTOLS
Step 1.
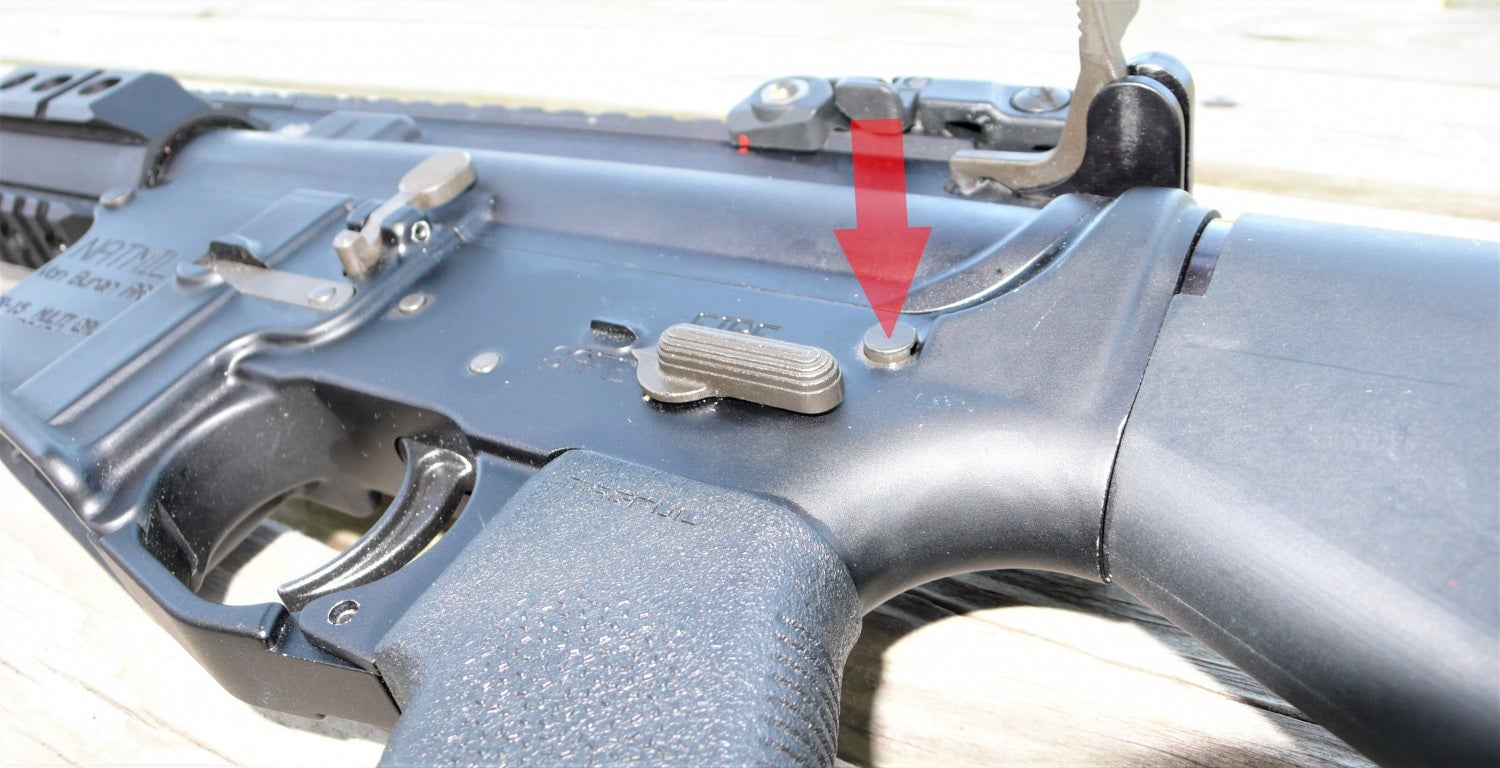
To make sure there’s no ammunition inside the rifle, pull the charging handle to the rear (red arrow) and lock the bolt to the rear by pressing on the bolt hold-open (red circle). You can then look in the chamber to make sure that it’s clear. If the magazine is still inserted, press the magazine release button (red oval) to remove the magazine. Once the rifle is cleared of all ammunition, press the bolt release button (red circle) to send the bolt forward for the next step.


Step 2.
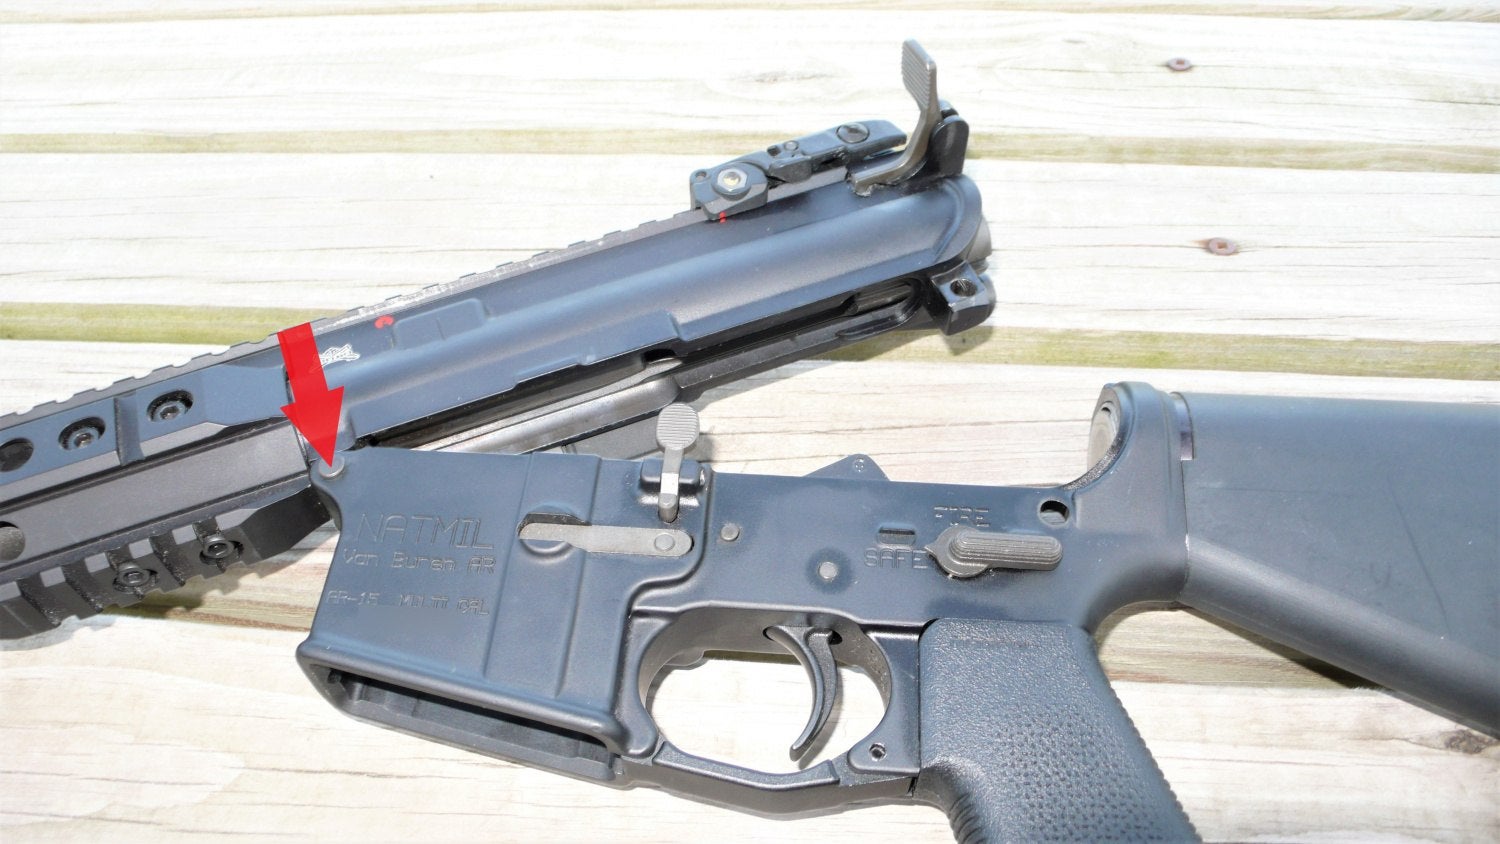
The “upper” receiver (outlined in red) needs to be separated from the “lower” receiver (outlined in yellow). Begin by pressing on the takedown pin just above the grip on the left hand side of the gun. The pin can be gripped on the right side and pulled when it’s out far enough. The pin is captured and is not meant to be pulled out completely. Once the takedown pin is out, the upper receiver can pivot upward. The upper is still attached by the pivot pin on the front of the lower receiver. Just as the other pin, push it from the left side of the rifle, then pull on it from the other side. The pivot pin is also designed to stay in the lower receiver. The two receivers are then separated from each other.


Step 3.
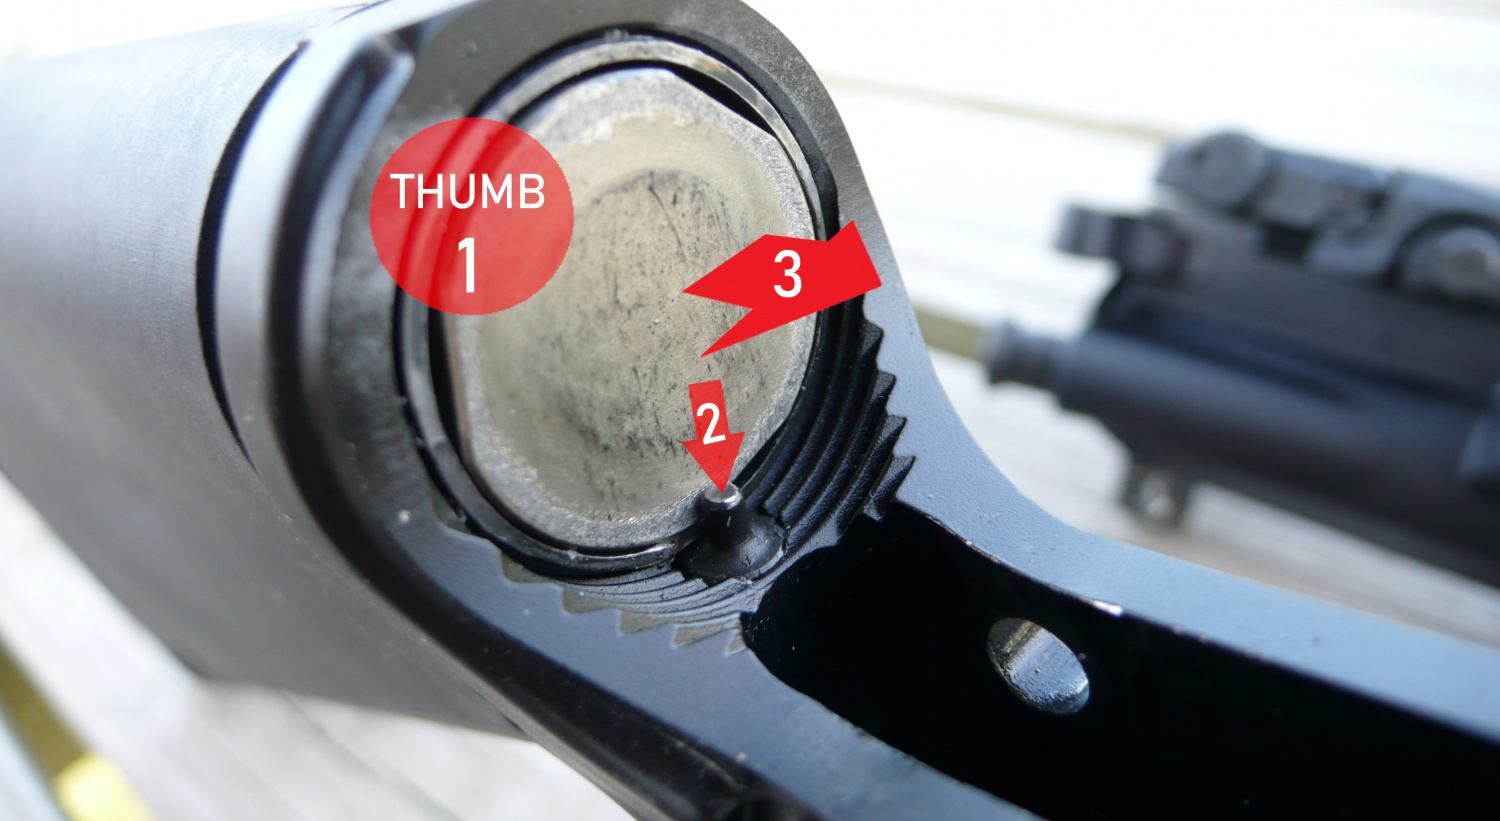
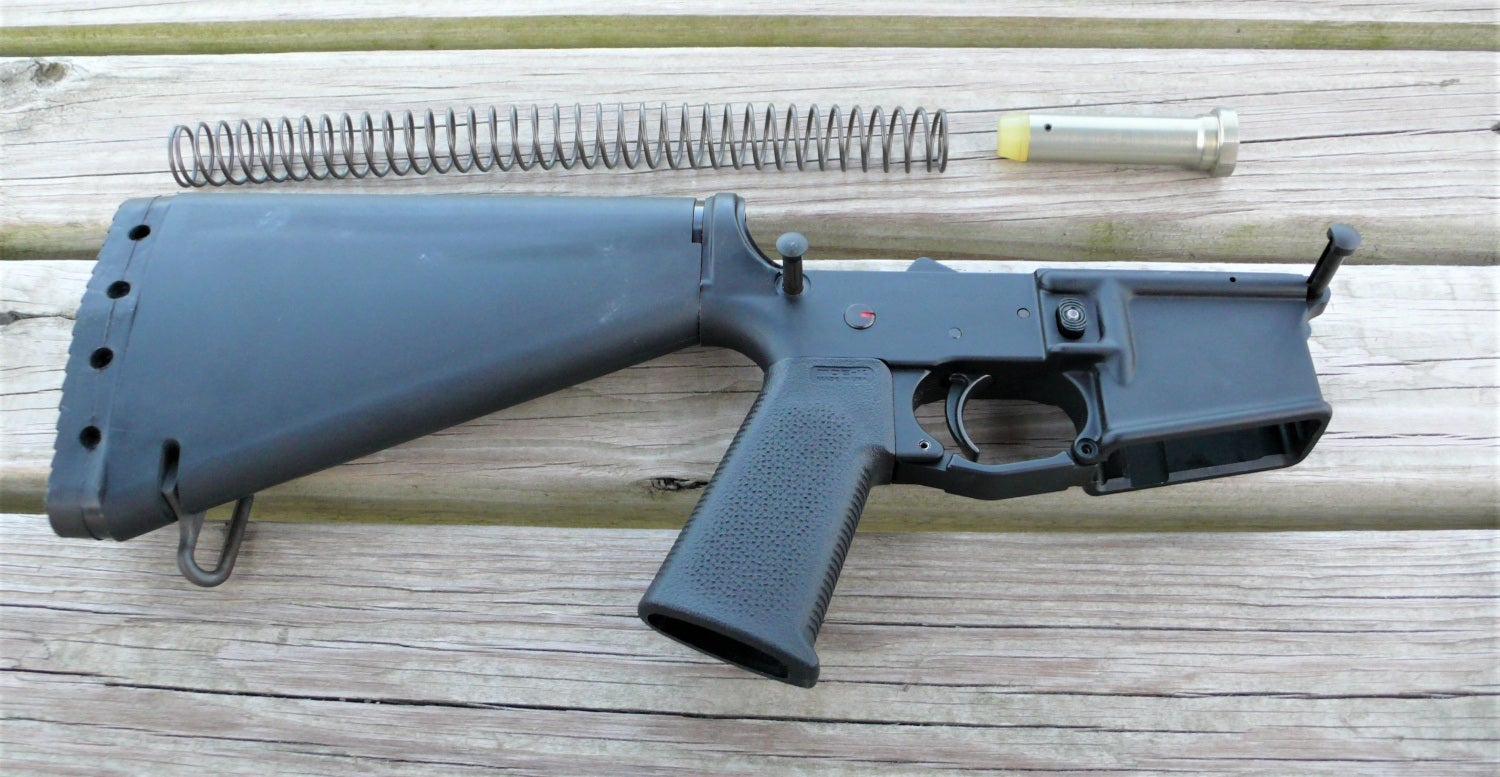
Field stripping the lower receiver is extremely easy and only two parts need to be removed. The large circular object facing forward is the buffer. The buffer is under spring tension, so you’ll need to place your thumb on it and slightly press the buffer rearward to relieve its tension on the buffer retaining pin (2). With the buffer slightly pushed in, push down on the retaining pin and slowly release the pressure on the buffer and assist it, and the buffer spring out of the stock.

Step 4.
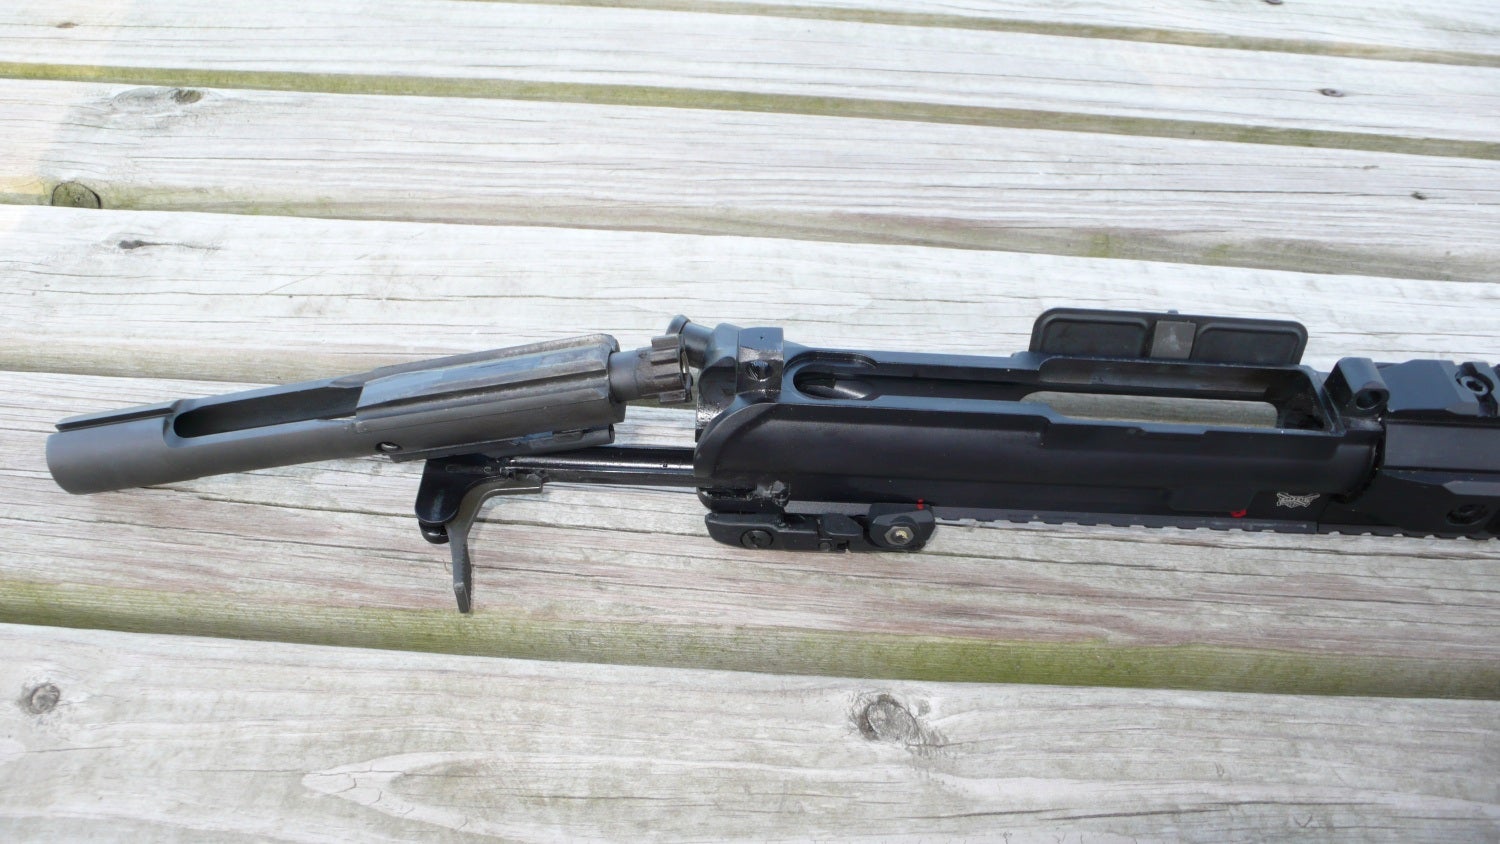
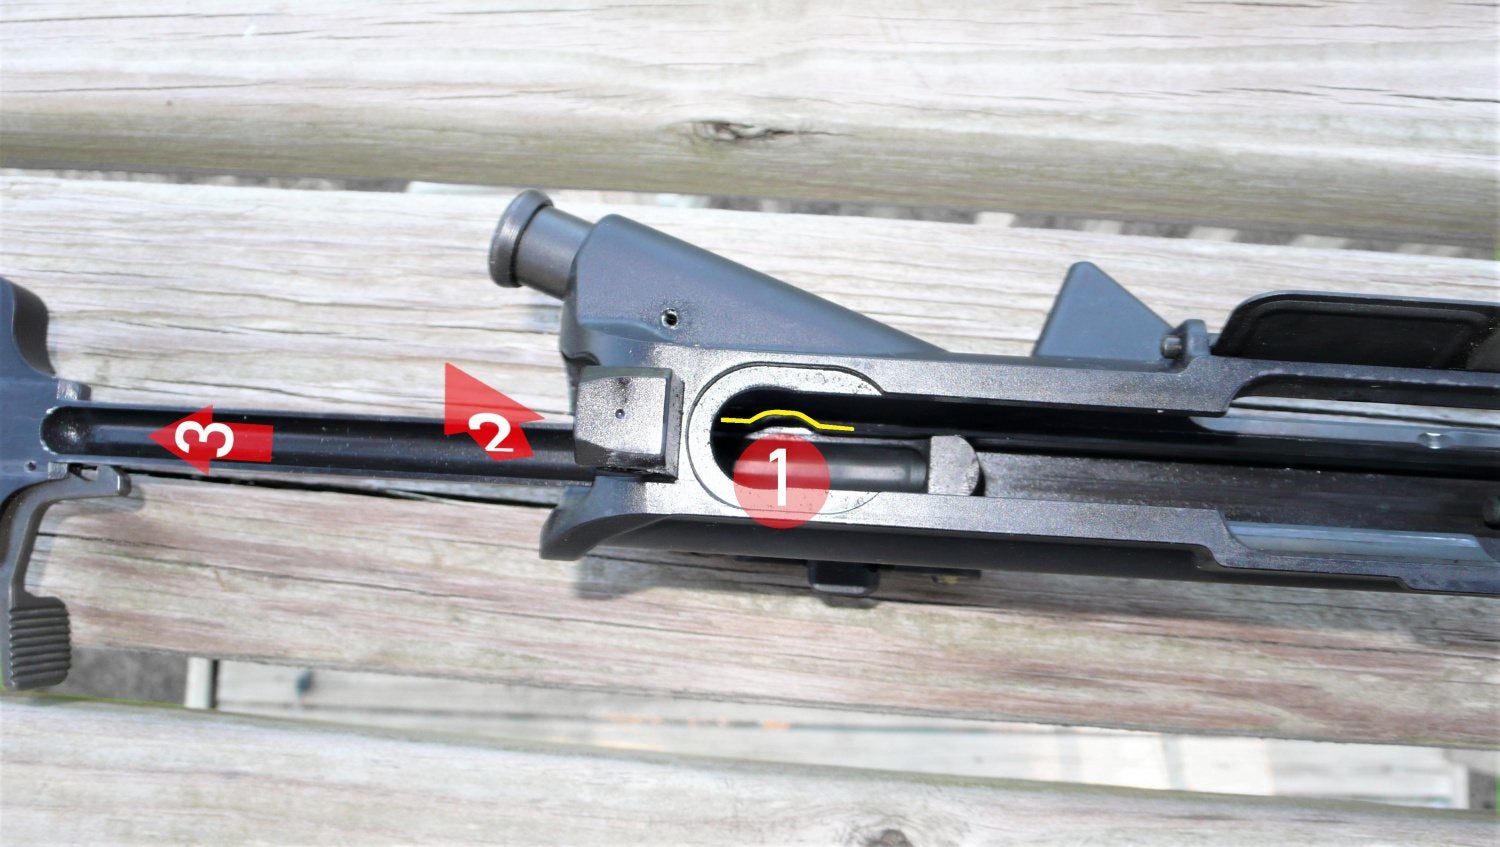
Moving to the upper receiver, start with it facing upside down. Pull the charging handle (highlighted red) rearward about two inches. The bolt carrier group can then be pulled out. Next, the charging handle can be removed. To remove the charging handle, pull it rearward (1) to align with a widened recess in the receiver (highlighted yellow). Once aligned, the charging handle can be pulled upward (2), then out (3).


Step 5.
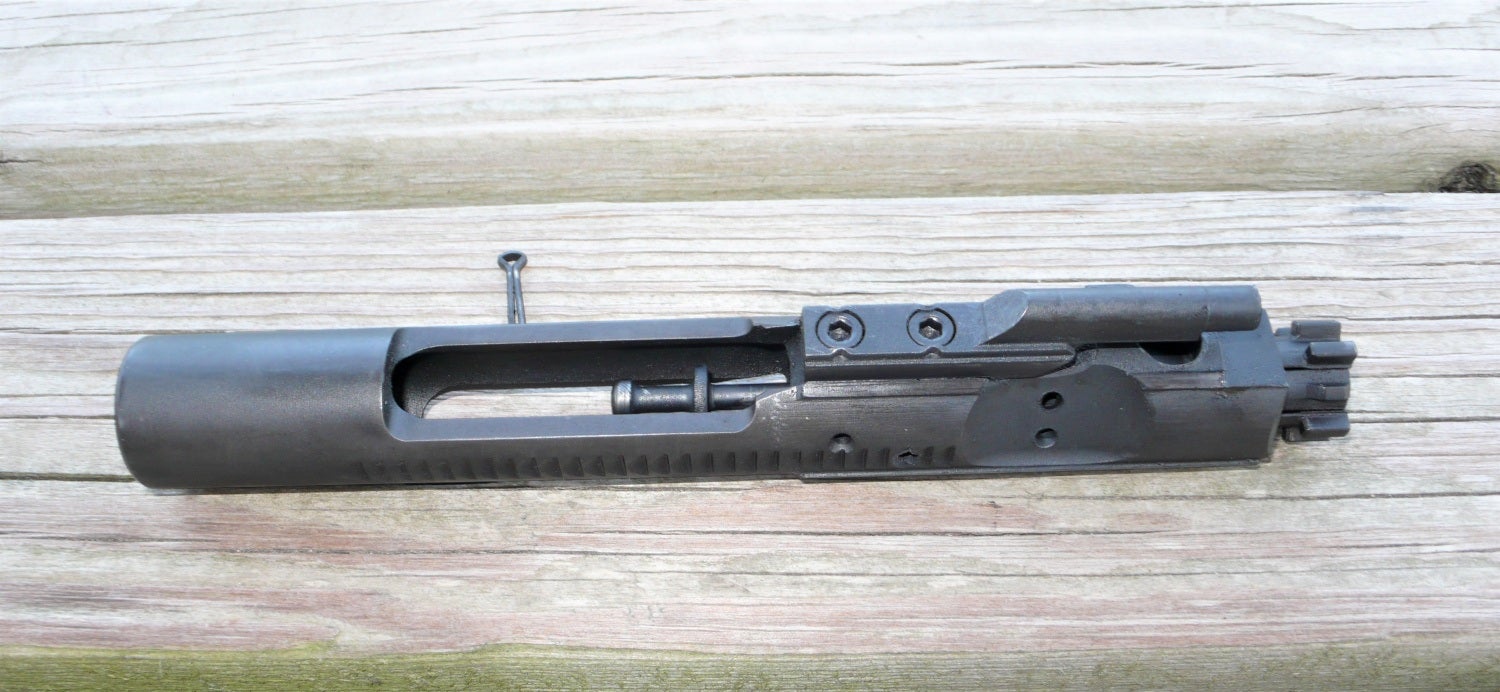
In this step, the focus is on the bolt carrier group (BCG). To begin field stripping the bolt carrier group, look on the lefthand side to find a recessed hole for the firing pin retainer pin (highlighted in red). I usually use my pocket knife to slightly pry out the retainer pin, then pull it out with my fingers. Once that’s out, you can tip the BCG with the bolt facing upward to let the firing pin come out. You may have to shake it a bit to assist it.


Step 6.
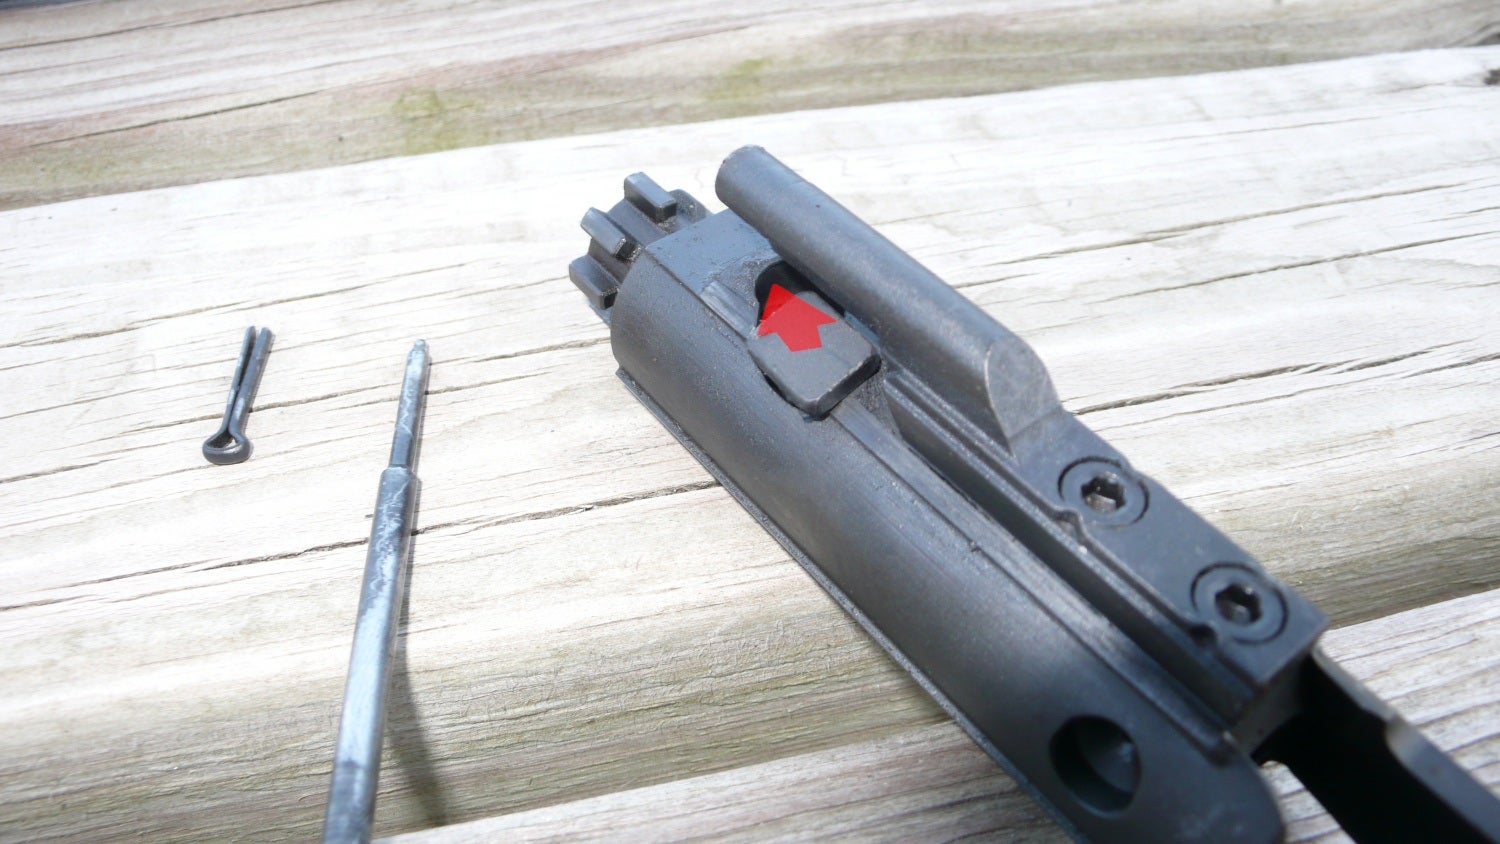
Again, we stay with the BCG to remove the bolt from the carrier. The cam pin keeps the bolt retained in the carrier. To remove the slightly rectangular cam pin, turn it in line with the BCG and pull it up and out. The bolt can then be pulled from the front of the BCG.


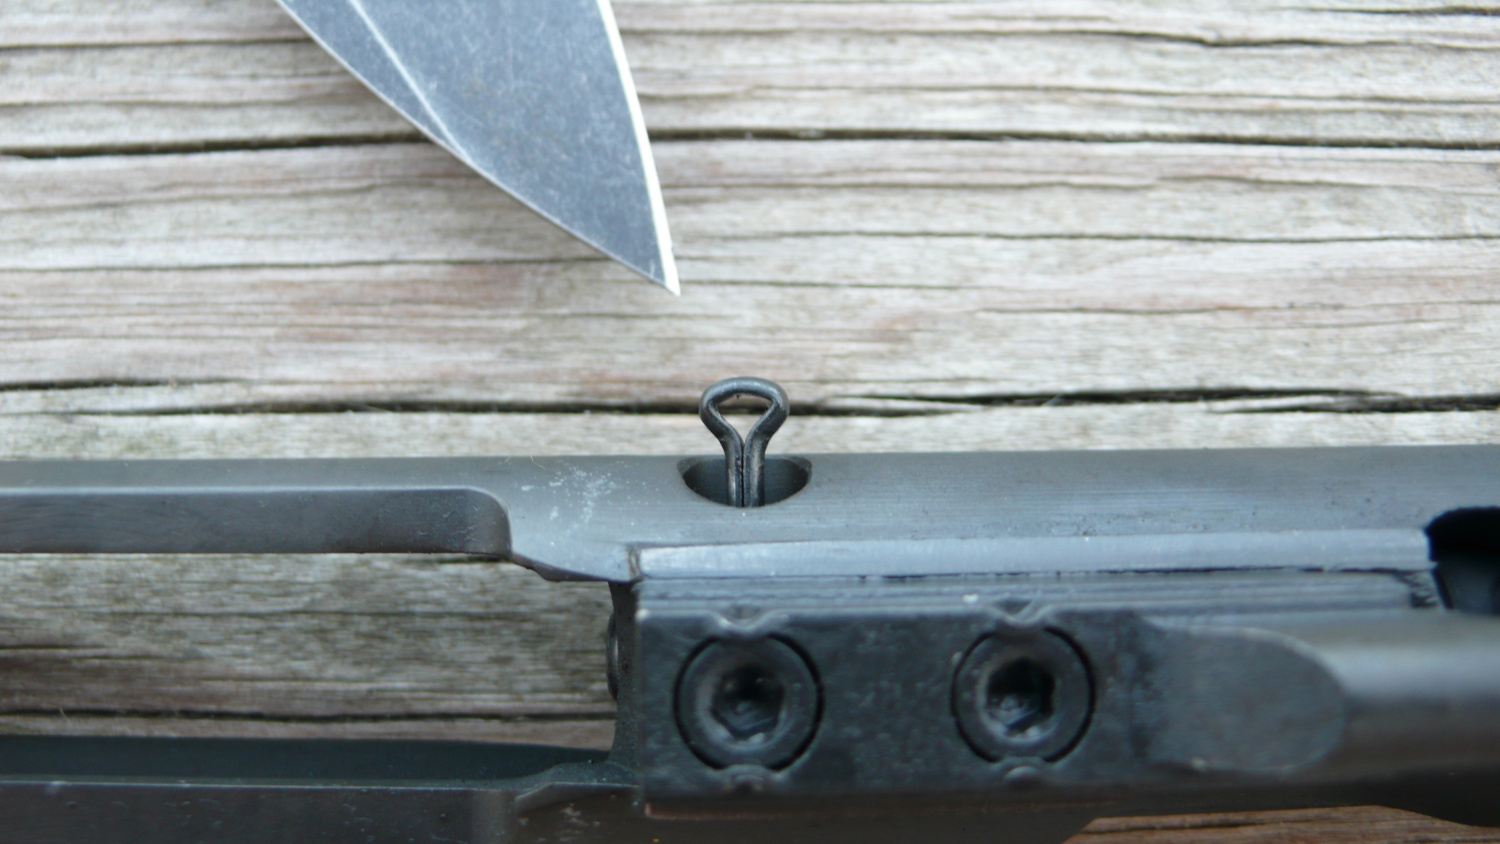
Step 7.
The last step we’ll cover today is the removal of the extractor. There is an off-center pin on the bolt that holds the extractor. You can begin pushing it with the firing pin or another thin tool. Each pin I’ve worked with was never tight, but you can apply slight pressure on the back of the extractor to relieve any tension if needed.


This ends the field strip process. There are some handy tools designed specifically for cleaning AR-15’s that you can check out HERE and HERE. There’s a good lube point resource HERE. Reassemble in reverse order.

We are committed to finding, researching, and recommending the best products. We earn commissions from purchases you make using the retail links in our product reviews. Learn more about how this works.