 Your Privacy Choices
Disclaimer: This article will discuss the process of completing an AR-15 80% lower with common tools found in most hardware stores. A provision in the Gun Control Act of 1968, 18 U.S.C, Chapter 44 states that an unlicensed individual can make a firearm for personal use, but not for the intent of sale or distribution. Said firearm must conform to N.F.A standards and you must be legally able to be in possession of a firearm. Should you desire to create a Short Barreled Rifle or a Machine gun the BATFE is going to require additional paperwork. If down the road you desire to sell your rifle you will have to put a serial number on it and transfer it via a Federal Firearms License holder. If you never intend to transfer or sell the firearm it must be destroyed upon you giving up possession of the firearm. Granted this is the generally accepted translation of 18 U.S.C, Chapter 44 you should still check local and Federal laws before attempting to build your own personal firearm. Technically you can sell a rifle you have made but you cannot simply make a rifle then immediately decide to turn around and sell it.
Machine, etch, anodize, Cerakote, assemble and shoot.
Now that we have the disclaimer out of the way! Should you desire to build your own AR-15 rifle you have several options. The first, if you have lots of time, money, and technical expertise is to buy a lower parts kit and stock, fabricate your own barrel, and mill out your own receiver. Due to the time and cost involved this would be a very long and expensive process. You could also buy a complete upper receiver assembly, lower parts kit, and stock, and contact your local gun shop to purchase a stripped lower receiver. Another alternative would be to bypass the Federal Firearms License/background check process, purchase an upper receiver assembly, lower parts kit, stock and buy an 80% lower receiver. An 80% lower receiver is an unfinished AR-15 lower receiver that requires the end user to mill out and drill the last 20% percent to make a functioning receiver that can accept a lower parts kit. The first section that the end user must mill out is the pocket that will contain the hammer, trigger, and disconnector, as well as the slot for the selector. The end user also drills out the holes for the hammer pin and the trigger pin. Having milled out the last 20% you can etch, anodize, and assemble your rifle.

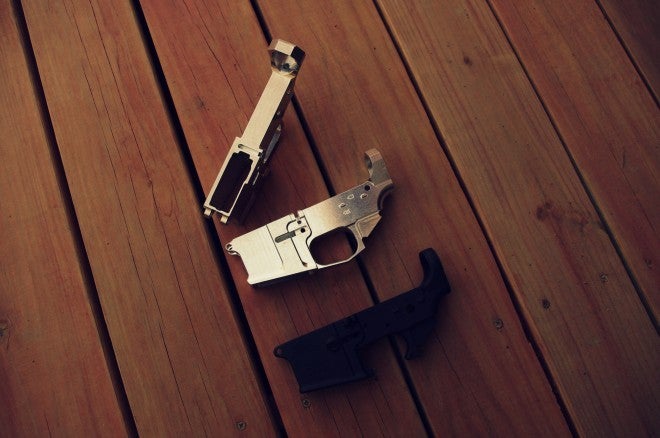
80% lower compared to 100% lower. Notice the aluminum that must be milled out.
A lower receiver completed beyond 80% is considered a firearm by the BATFE, hence the name 80% lower. Given the rise in 3-D printed firearm components and “do it yourself” firearms, I was interested in the process of completing an 80% lower. As previously mentioned I wanted to complete an 80% lower with tools commonly found in hardware stores. The 80% lower that I chose to review/finish for this project was the Billet Rifle Systems 80% lower receiver.
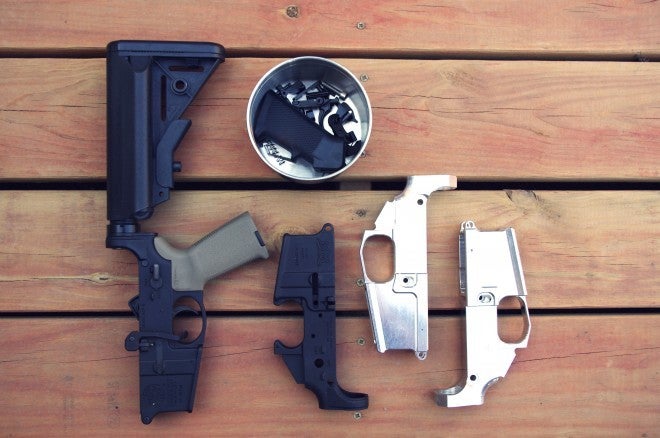
Billet Rifle Systems, of Carson City, Nevada is a relatively new company. Started by Chris Garrison in the latter part of 2012, the company has a nice catalog of accessories and parts for the AR-15 family of rifles. At present the company’s flagship products are its AR-15 lower receivers. Billet Rifle Systems holds a Type 7 Federal Firearms License and manufactures both 80% and 100% completed lower receivers. When I queried Chris about his company’s core values, without missing a beat he responded “Customer Service and Quality Control.” Chris sent me a “blemished” 80% lower to practice on as well as one in mint condition. I really had to look close to find the “blemish.” Aside from a minor tool mark in the magwell, the lower receiver met size specifications and should serve fine as a complete functioning lower receiver. Billet Rifle Systems manufactures both 6061 and 7075 aluminum receivers as well as the corresponding jig set that is necessary to complete an 80% lower.
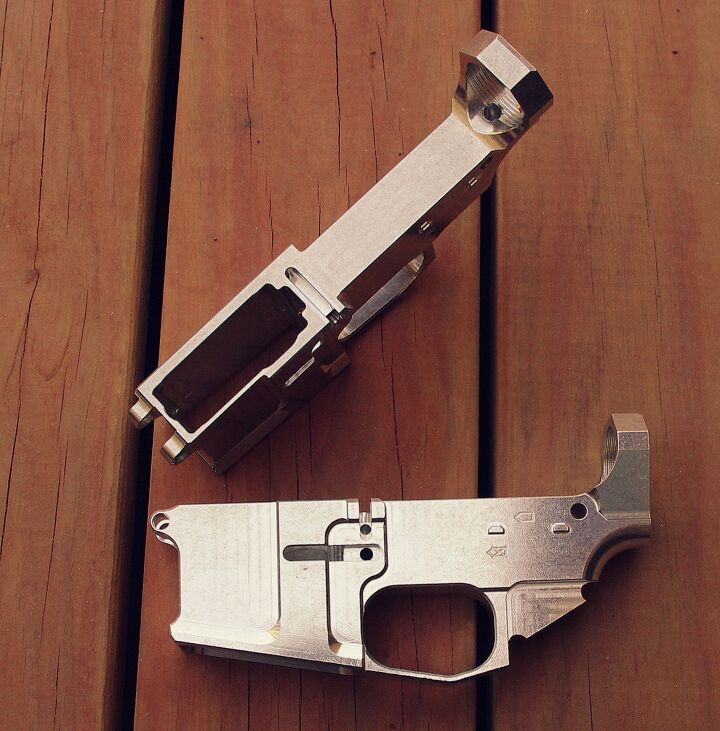
Billet Rifle Systems manufacture a beautiful lower receiver.
We have a lot of necessary material to cover in regard to building your own AR-15 lower, so I have broken this presentation into several articles. The first article is going to cover the tools and parts necessary to complete your lower receiver. This is a do-it-yourself type build, so I will use equipment and techniques that are logistically feasible to the general population. I will be using common tools found in most hardware stores. I will discuss tips and tricks I discovered during the builds. The second article will talk about the actual process of milling out the lower receiver and assembling one from a lower parts kit. The third article will address anything relevant and important not addressed in the previous articles, and show a complete AR-15. The overall process is time consuming but not overtly difficult.
In order to complete your build you will need the following…
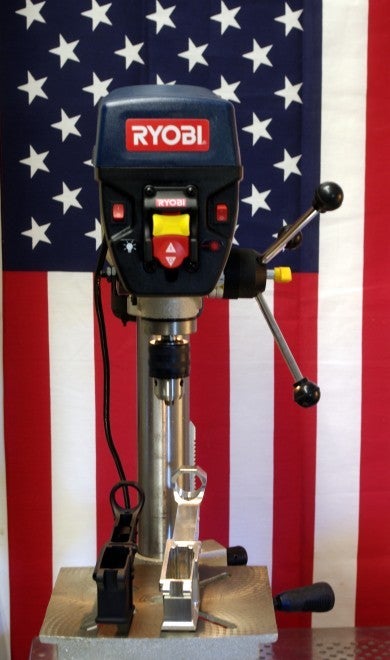
Drill Press. This is a 10 inch Ryobi that has so far worked out superb. Granted a milling machine, lathe, or CNC machine would be much better: I wanted to approach this project with common tools and equipment. While working on the 6061 aluminum lower receiver I had the RPM set 3050. I have read that I may have to slow things down when I start milling out the 7075 test lower
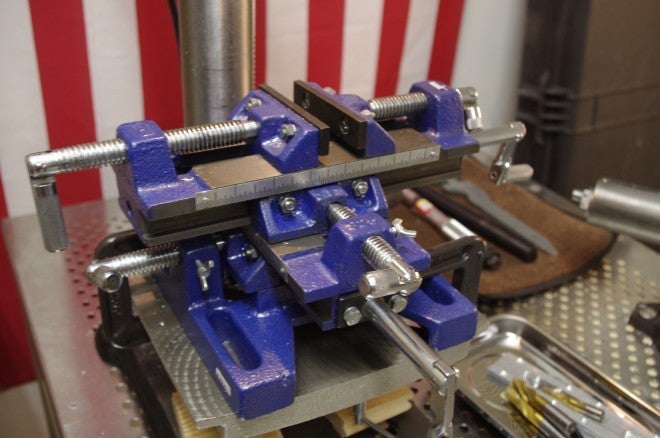
X – Y Drill press milling vise. This tool is invaluable. Notice the C – clamps that are holding the vise to the drill press table. This has become one of my favorite tools in the shop. I strongly recommend you get a vise like this should you undertake an 80% project.

Hobby vise, oil, 80% lower, Jig set, diamond files, calipers, end mills, eye protection, 5/32 drill bit and brushes for removing aluminum chips. If you cannot afford a complete end mill set all you need are 2 and 4 flute 3/8 end mills to machine out the last 20% and the slot for your selector. You will need a 5/32 drill bit to drill out the hammer pin and trigger pin holes, as well as a 4 flute 5/16 end mill, to machine out the slot for the trigger.
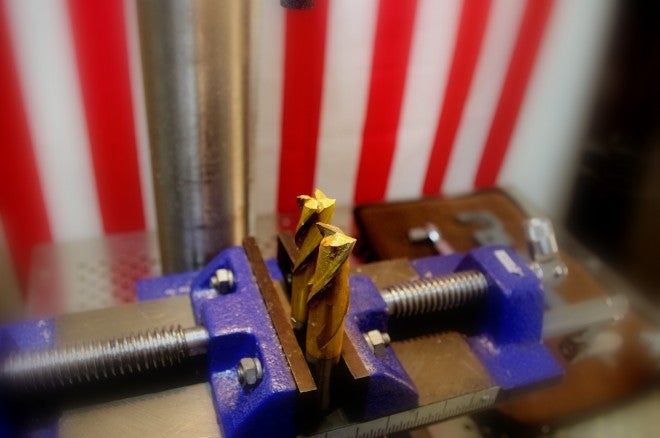
4 Flute and 2 Flute 3/8 x 3/8 end mills.
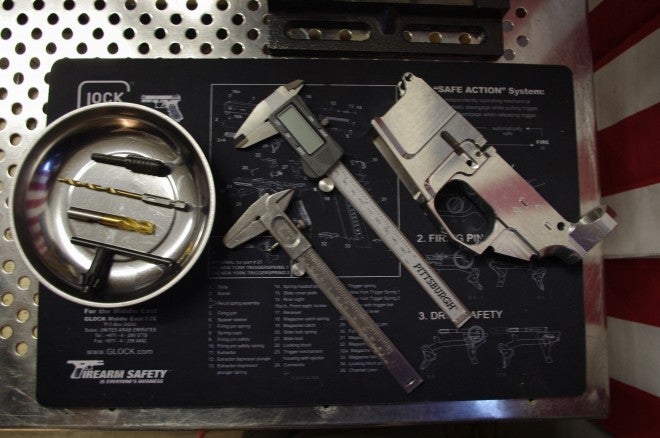
You will learn to love your calipers. One can get spoiled with digital calipers!
As of writing this I have completed work on the practice lower but I have yet to assemble it. According to the blue prints I am working with, and compared against a spare lower receiver in the safe, all the measurements look good. I have learned a lot of tips and tricks that I will pass on in the next article.
Before I finish I would like to thank VaderSpade over at Ar15.com as well as USMCDOC14 on Youtube. Their tutorials are excellent and I learned a lot. Thank you Gentlemen!
Read Part II here.
We are committed to finding, researching, and recommending the best products. We earn commissions from purchases you make using the retail links in our product reviews. Learn more about how this works.