 Your Privacy Choices

Disclaimer: This article will discuss the process of completing an AR-15 80% lower with common tools found in most hardware stores. A provision in the Gun Control Act of 1968, 18 U.S.C, Chapter 44 states that an unlicensed individual can make a firearm for personal use, but not for the intent of sale or distribution. Said firearm must conform to N.F.A standards and you must be legally able to be in possession of a firearm. Should you desire to create a Short Barreled Rifle or a Machine gun the BATFE is going to require additional paperwork. If down the road you desire to sell your rifle you will have to put a serial number on it and transfer it via a Federal Firearms License holder. If you never intend to transfer or sell the firearm it must be destroyed upon you giving up possession of the firearm. Granted this is the generally accepted translation of 18 U.S.C, Chapter 44 you should still check local and Federal laws before attempting to build your own personal firearm. Technically you can sell a rifle you have made but you cannot simply make a rifle then immediately decide to turn around and sell it.
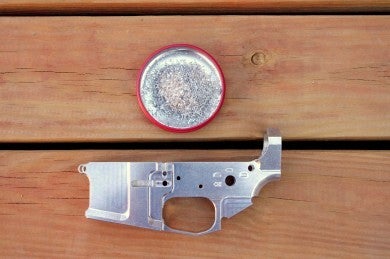
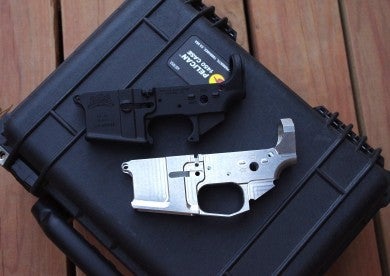
Billet Rifle Systems 6061 lower receiver.
If you have not already, read Part 1 here.
Welcome to Part II of the Billet Rifle Systems 80% build! This article will discuss the actual milling process of an 80% lower as well as some tricks, tips, pitfalls and general observations in finishing an 80% Ar-15 lower receiver. Once again I would like to stress the use of eye protection. I would also like to mention that if you are using a drill press I do not advise using it like a milling machine. Once the mill bit is making contact and cutting the metal it is generally not considered a good idea to put lateral stress on a bit (Moving along the X and Y planes). If you plan on using a drill press to finish an 80% lower you are simply going to be making hundreds if not thousands of cuts along the “Z-axis”. Even though I am not using a milling machine I will be using the words “mill”, “drill” and their derivatives interchangeably. When I mention to “go slow” this does not pertain to the speed (RPM) of the drill press. It pertains to how fast the end mill bit is sunk into the aluminum. Due to the size of the pictures if you need to see something in greater detail simply click on the picture. The host will load a more detailed picture. Let us get started!
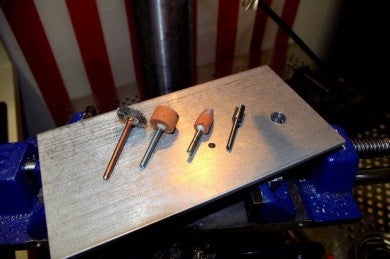
In order to complete an 80% lower receiver you are going to need a jig set. The jig will securely hold the receiver in your vise as well as provide a template showing where to mill, drill, and cut. As soon as you start milling away aluminum you will get a lot of aluminum flakes and chips. You will want to vacuum them up or blow them away. You will also need to experiment with the RPM speed of your drill press. I found that my mill bits cut the best when my drill press was turning at 3050 RPM.
A “100%” lower receiver. This is the pocket that will need to milled out in order to have a functioning lower receiver.
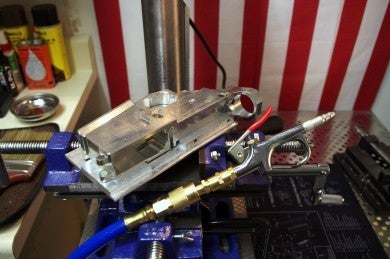
Billet Rifle Systems does an excellent and very precise job machining out their hardware. A drop of MPro 7 was used to help mate the jig plate to the receiver.
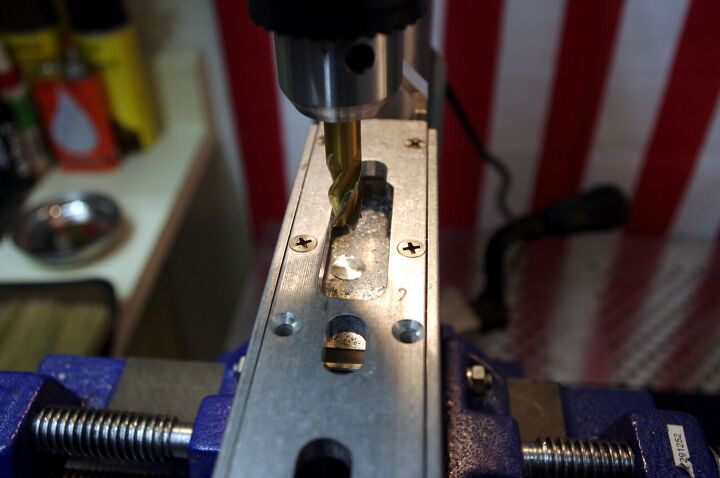
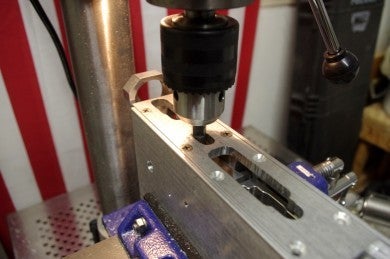
After mating the jig set to the lower receiver and tightening the top plate, the jig/receiver group is tightened in the X-Y vise. Using a 4 flute 3/8 x 3/8 end mill I slowly machined out the outline of the fire control pocket. You don’t need to drill too deep…you will be simply creating an outline that will show what needs to be milled out. While the drill press is off grab the chuck and rotate it by hand. Make sure the end mill is not making contact with the jig. The jig is relatively soft aluminum and can easily be marred.
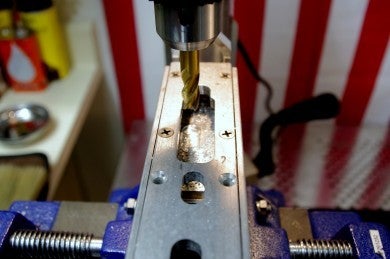
After you make the first cut manipulate the vice and continue to cut out the outline of the pocket.

Quick tip. If you see aluminum on the side of your mill bit at this stage you are accidentally cutting into the jig. A quick way to avoid this is to manually spin the chuck while the press is off. You should be able to tell if contact is being made.
After cutting out the outline you can remove the top plate of the jig and clean the receiver of aluminum chips.
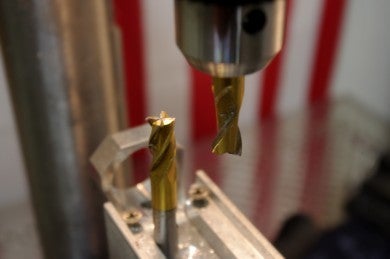
At this point it is time to start removing a lot of aluminum! For this you are going to switch from the 4 flute mill bit to the 2 flute. The 2 flute allows you to drill a little bit faster and allows aluminum shavings to bypass the flutes and be vacuumed or blown out easier.

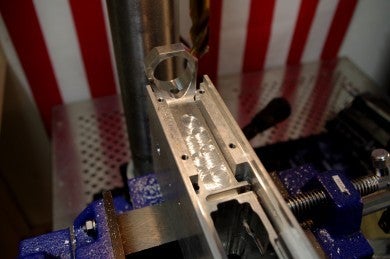
Using the 2 flute mill bit I retraced my original outline and removed about a 1/4 inch of aluminum. Using the mill bit I slowly drilled a hole to the desired “bottom depth” of the pocket. I used this hole as a guide and I milled off aluminum from it.
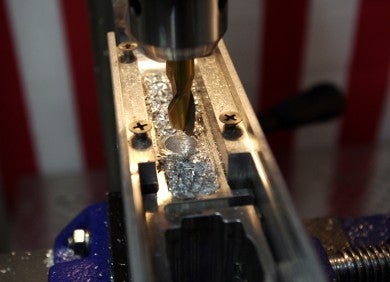

Measure twice and cut slow. Continue to mill out the pocket until you have the correct width, depth, and length. At this point you may see machine/mill bit marks on the receiver walls. We will address these marks later.

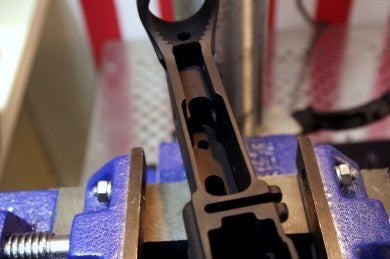
After you finish milling the pocket for the trigger and hammer, rotate the top plate of the jig 180 degrees. This will provide a template for the rear take down pin and the hole for the trigger.
Like the pocket for the hammer and trigger…mill out an outline for the rear pocket and the trigger hole. Remember to use a 4 flute end mill bit for this procedure. Remove the top plate and mill out the appropriate amount of aluminum with a 2 flute end mill bit.

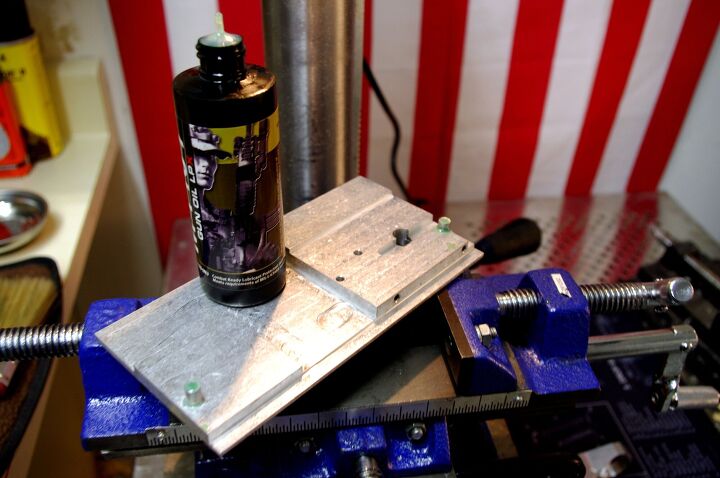
After you finish milling out the rear takedown pin pocket and the hole for the trigger, turn the jig on its side. Slowly mill out the hole for the selector switch. Unlike milling machines and lathes, drill presses have a lot of mechanical vibrations. If you are milling too fast the drill will vibrate and this will reflect in a larger then necessary hole. If this hole is too big your project may come to a premature end! Go slow!
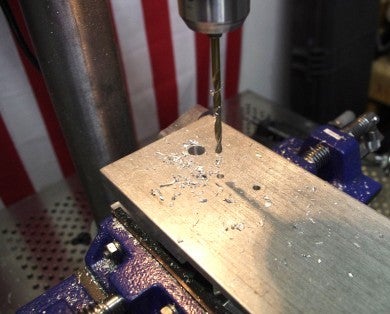
After you mill out the hole for the selector, attach a 5/32 drill bit. Slowly drill out the holes for the trigger and hammer pins. Turn the jig over and repeat the process for both the selector hole and the trigger and hammer pins.
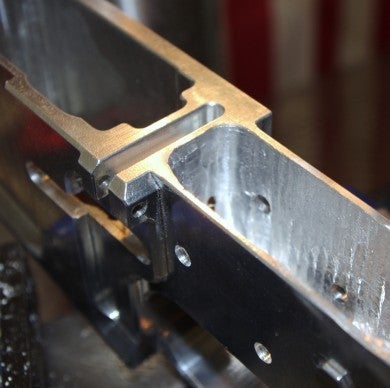
Since neither a milling machine nor lathe were used for this project, machining marks are inevitable. The marks themselves should not affect function; granted the areas that interface with the hammer and trigger are completely flat. The hammer should not make contact with the sides of the receiver…I have seen some triggers make slight contact with the sides of the receiver.
If the machine marks on the sides of the receiver truly bother you, I found several Dremmel attachments that do a decent job smoothing out the sides of the receiver. If you use a milling machine or a lathe you might see some very minor tool marks at the bottom of the receiver but none on the sides.
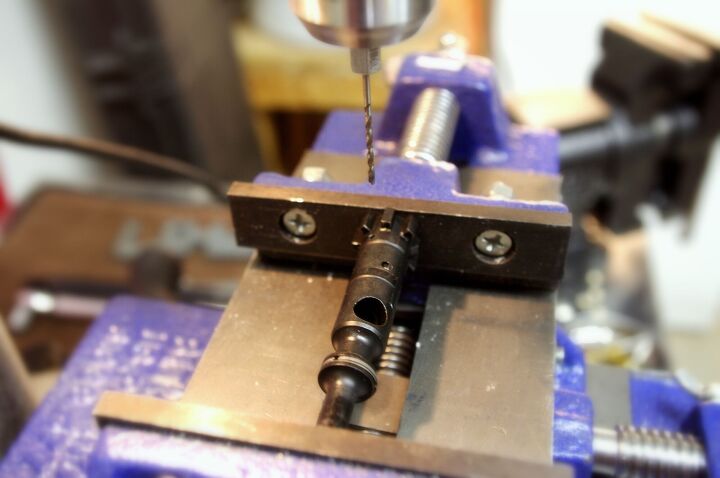
Since purchasing my drill press I have used it for several interesting side projects. Buyer beware! This bolt came out of a @#$%^# rifle. The ejector pin hole was partially drilled and the hole for the ejector and spring had terrible burrs inside of it. The rifle was failing to extract because the ejector spring was binding to the burrs in the hole. I re-drilled the holes and the rifle now functions fine. I have a feeling the bolt I rebuilt was not military grade 158 Carpenter steel. I will not give away the rifle brand but I can tell you this bolt did not come out of a Colt, BCM, Noveske, Spikes, Daniel Defense or LaRue rifle.
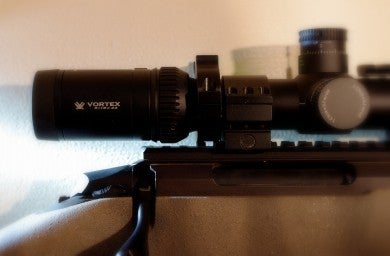
Due to the fixed comb height on this Tikka T3 Lite, my brother and I installed very low scope rings.The magnification ring was making slight contact with the Evolution Gun Works rail. Using an end mill bit I was able to mill off several sections of rail. I touched up the metal with Alumahyde II. This rifle is ridiculously accurate. It can be seen in this article.
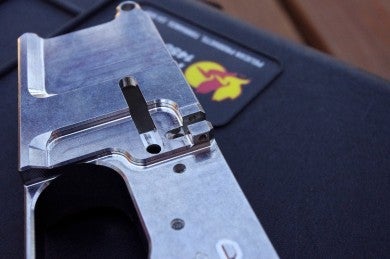
A unique feature on Billet Rifle Systems lower receivers is the pin for the bolt catch. The bolt catch no longer requires a roll pin to be held in place. Billet Rifle Systems uses a small “free floating” pin and a tiny set screw to hold the bolt catch in place.
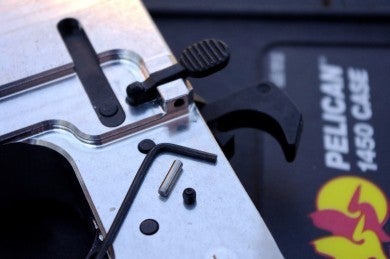
Pin and set screw for the bolt catch. Billet Rifle Systems supplies the appropriate Allen wrench.
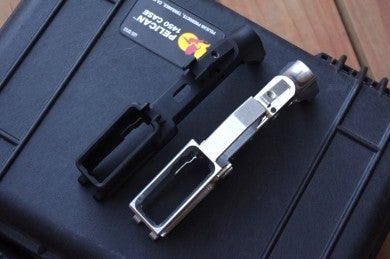
The Billet Rifle Systems receiver has a slightly flared magwell.
Milling out the last 20% of the Billet Rifle Systems lower receiver was very challenging. There is no question that an 80% lower can be successfully completed using a drill press. If I were to undertake this project again I would invest in a milling machine or a lathe. A milling machine would allow cleaner work, mitigate tool marks, and generally speed up the process. If you intend to finish an 80% lower using a drill press look for a steel jig set. Due to the vibrations of a drill press I made unwanted contact with my jig and my lower receiver several times removing a fair amount of aluminum. I don’t believe this would be a problem had I used a milling machine or a lathe. When drilling, try to position the aluminum as close the the mill bit as possible. This will shorten the area the mill bit has to travel and it will mitigate vibration from the drill press. I intend to get the receivers hard coat anodized in the very near future. Since there are a lot machine shops that cater to the Defense Industry here in Albuquerque, it should prove easy to find a local shop to do a Type III, Class 2 hardcoat anodizing that conforms to MIL-A-8625 specification.
At present I am working on the third part of this article set. Part III will post in several months and will feature a complete rifle build. Many of my readers can surmise that as an Armorer I am a slave to technical data packages. A technical data package is a large set of data that specifically states how a rifle should be made. Every military firearm ever procured by the United States government in recent history has a technical data package or manual. Granted the Colt technical data package is Colt property, the military has leaked it on several occasions. A quick Google search will give you an idea concerning the proper material and processes necessary to build a military specification/military grade rifle. I believe that guns should be built to a military grade of quality. Due to recent market and political trends there are a lot of poorly made rifles flooding the market. Said rifles are being built with substandard materials. These rifles will further proliferate the myth that the Ar-15 platform is unreliable. My fellow armorers and I are seeing trends concerning broken bolt lugs due to improper metallurgy as well as carrier tilt, broken disconnectors, bent trigger and hammer pins due to piston retrofit kits. As suppressors become more common, guns that do not have a method for adjusting gas flow are being prematurely worn out. Billet Rifle Systems manufactures military grade 7075 aluminum receivers…I was given a 6061 lower receiver to test…which is not military grade. I only trust my life to military grade weapons; however, I may build a training rifle or a hunting rifle with my test lower and run it hard. As long as consumers value form over function there will continue to be sub standard rifles; however, these rifles will still need to be overhauled, maintained, fixed, and upgraded. Maintenance schedules are common for military spec/military grade rifles, but my fellow armorers and I are in desperate need of data concerning maintenance and part longevity of rifles that are not military grade. It’s safe to assume that Part III will feature a non military grade rifle that I will use to gather data concerning parts ware and maintenance schedules. Who knows….Eugene Stoner’s design, even when not built to The Standard, may surprise me!
Thoughts, comments, gripes and humor are welcome in the comments below! Feel free to contact me if you have a question!
We are committed to finding, researching, and recommending the best products. We earn commissions from purchases you make using the retail links in our product reviews. Learn more about how this works.