 Your Privacy Choices
Welcome everyone to the TFB Armorer’s Bench! As mentioned in the little blurb below, this series will focus on a lot of home armorer and gunsmith activities. In this article, I am going to relay my experience working with silicon carbide and the process of applying it to a grip. This is something I have no experience in, have heard of, have seen it done, but never attempted until now. I did some stippling in gunsmithing school and honestly, it was not for me. I can do it but I am not a patient person so the time/steadiness aspect involved in actual stippling is unattractive to me. Silicon carbide-ing grips however presents itself as being not only user-friendly for a beginner but also forgiving. So how’d it go and how’s it feel? Let’s dive right in!
Recent TFB Armorer’s Bench Content:
- TFB Armorer’s Bench: New Tools I Saw at SHOT 2024
- TFB Armorer’s Bench: Commentary on The Savage 1907 Pistol
- TFB Armorer’s Bench: 2023 TFB Armorer’s Bench Wrap-Up
- TFB Armorer’s Bench: C96 Grip Fit & Stock Repair
- TFB Armorer’s Bench: Box Full of Gun Parts – What to Do
TFB Armorer’s Bench: Silicon Carbide a Pistol Grip
Here, we at TFB hope to inform, entertain, and even inspire any would-be gunsmith or armorer out there. Ideally, with the information I provide and with the help of our sponsors, you can have some useful knowledge about the conservation and improvement of firearms technology while at the same time sharing experiences and teaching each other new tips and tricks along the way in the comments. Digging deep into what it is to be an armorer or gunsmith has significance but what is important is what those people do to show they’ve earned that title. I am happy to share my experiences and knowledge and hope it is informative!
Make your personal safety a priority:
- Practice proper gun safety. Always make sure before the firearm hits your bench that it is unloaded and safe to be handled.
- Wear the proper safety equipment. The main one would be safety glasses (decent ones) since parts are often under spring tension and you may work with high RPM tools. Other honorable mentions would be latex gloves or a respirator when working with potentially harmful solvents and oils. Also hearing protection when working with loud machinery or test-firing firearms.
- Modifications, alterations, and customizations will void your firearm’s warranty 9.5 times out of 10. Please take that into consideration before attempting any at-home gunsmithing.
- If you are unsure about proper safety practices, disassembly procedures, or warranty standards, stop, put down the tools, and consult a competent gunsmith.
Silicon Carbide Grip Kits
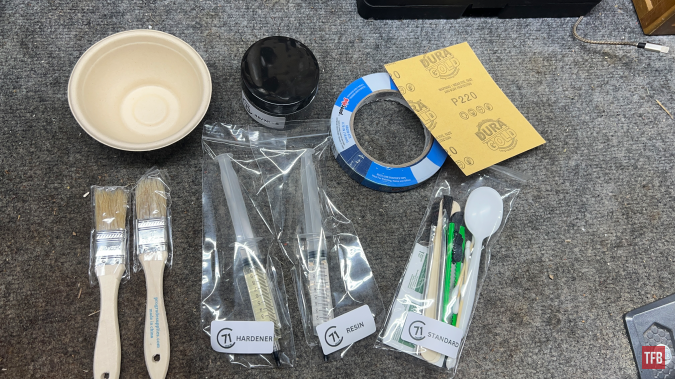
There are kits available out there or you could probably DIY this fairly easily it would just take some time to gather all your materials. I opted for a kit because knowing me, I would forget something. Besides 71 Creative has affordable well put together kits. Yes, it’s very simple and affordable stuff crammed into this kit but it’s presented well, is a fair price, and I did not have to go source everything myself. On top of that the instructions are thorough and there are even video instructions for those of us who learn by watching. The 71 Creative kit that I bought was $40 and contained:
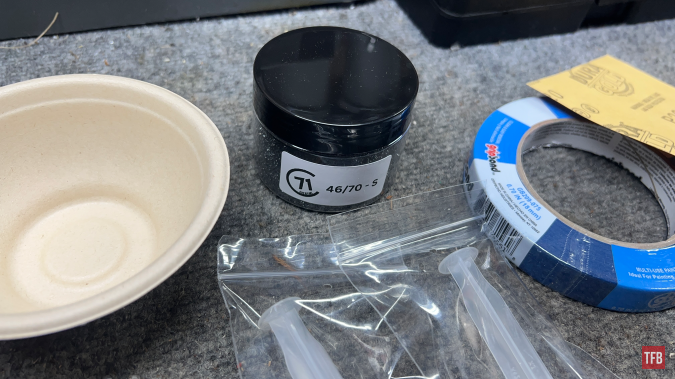
- 46/70 Grit Silicon Carbide
- Slow cure 30 minute epoxy
- Dura Gold 220 grit sandpaper sheet
- Pro Blue masking tape
- Alcohol prep pads
- Chip Brushes
- Acid Brushes
- Mixing sticks
- Snap off utility knife
- Dusting spoons
- Catch bowl
- Wood stick cotton swabs
- A 71 Creative patch, sticker, wristband, and instructions.
- There are other grit options too: 20 – Mega Uber Grip, 24 Mega Grip, 36 – Uber grip, 46/70 – High grip, 80 – Medium High grip, 60/90 – Medium grip, 120/220 – Gentle grip
These grip kits come in two sizes: standard and multi. Standard is the one I received and it is good for two pistol grips. Multi I assume would be more like four. Even though this is not a review of these kits, I do want to jump ahead a bit and say that I am impressed with the care, quality, shipping time, and price of these kits. I recommend them if it is something you are interested in trying out!
How-To: Silicon Carbide Grips
The first thing is preparation. Lay everything out, make sure all of your materials are there, and make sure things can be done on a surface that can be cleaned or covered. The instructions specified a minimum room temperature of 70 degrees Fahrenheit for applying the epoxy. I live in Minnesota, it’s winter, and my workshop is not insulated. I do have a heater and placed the resin/hardener near it while I prepped just in case that made a difference. I suspect the temperature would mess with the viscosity and curing speed. I did not have any problems but setting everything out and prepping will alleviate any time crunch.
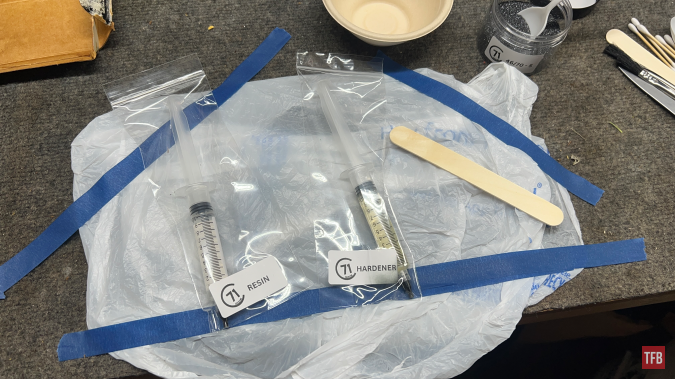
Having a work surface to mix the epoxy is ideal. The instructions mentioned something nonabsorbent and disposable like a plastic bag taped down. It worked fine for me although the fabric covering my bench prevented a tough hold and the bag eventually wrangled loose.
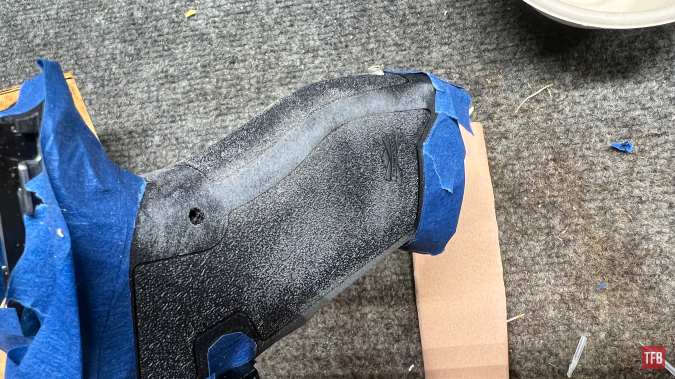
Before mixing up the epoxy and painting it on the grip we need to do two things. One, we need to tape off our grip in areas where we don’t want grit. There are no rules here but I tried my best to stick to some sort of pattern similar to some on Google images.

After getting a couple of layers down it was time for the second step in this portion, sanding. Sandpaper is used to rough up the surface so the epoxy has a better anchor. The Dagger frame already has some texturing so I focused my sandpaper endeavors (sounds like a punk band name) on the smooth areas.
With the smooth areas abraded and then wiped down with the included alcohol wipes, it is time for the epoxy. The instructions said to do a one-to-one ratio of 5ML of resin and hardener. I did this and mixed it with the included mixing stick. After that, I painted it onto the grip as evenly as I could. To my surprise, it sort of evened out itself. There were a couple spots that revealed the grip beneath so I touched those up. I did not need to use the acid brushes for any finer touches.

I plugged the pin holes with chunks of plastic.
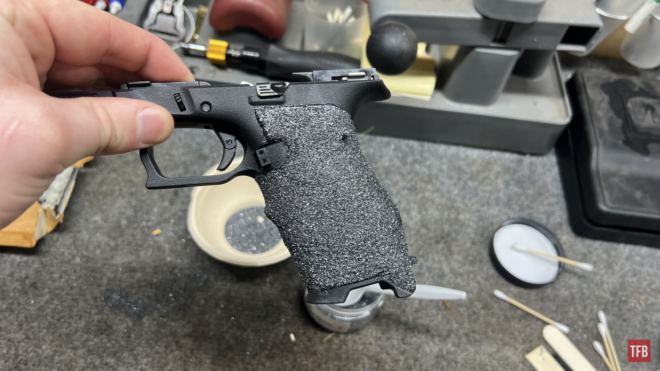
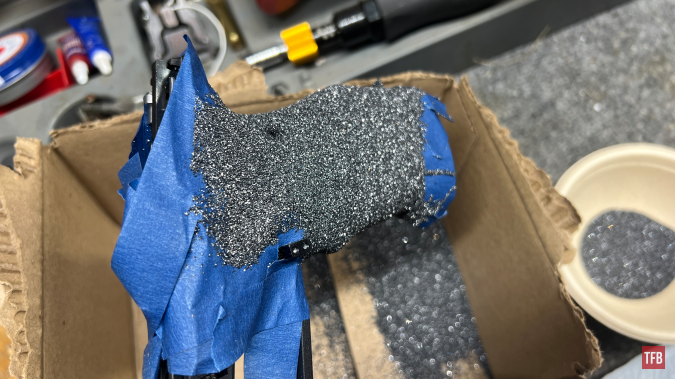
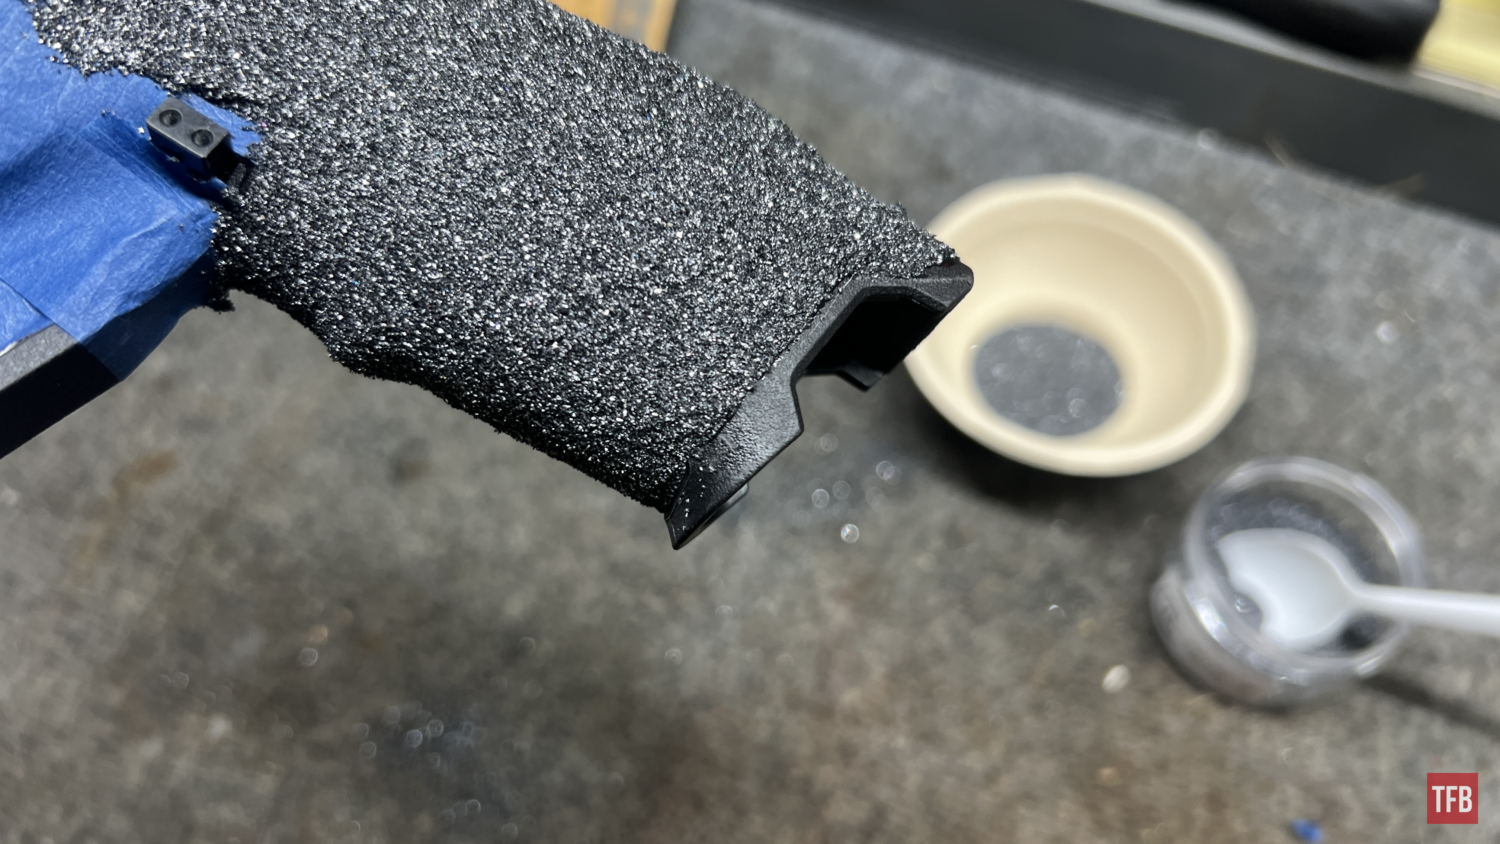
With the epoxy applied, it was the moment of truth. Holding the frame at an angle that would negate any silicon carbide from entering the frame I used the included spoon to sprinkle the silicon carbide over the epoxy. I did this over the included bowl and then a larger box just for the sake of spillage. I repeated this around three times. Basically, you just need to make sure that if the silicon carbide is “wetting” you should continue to sprinkle more on. I did this and let things sit for 5 five minutes.
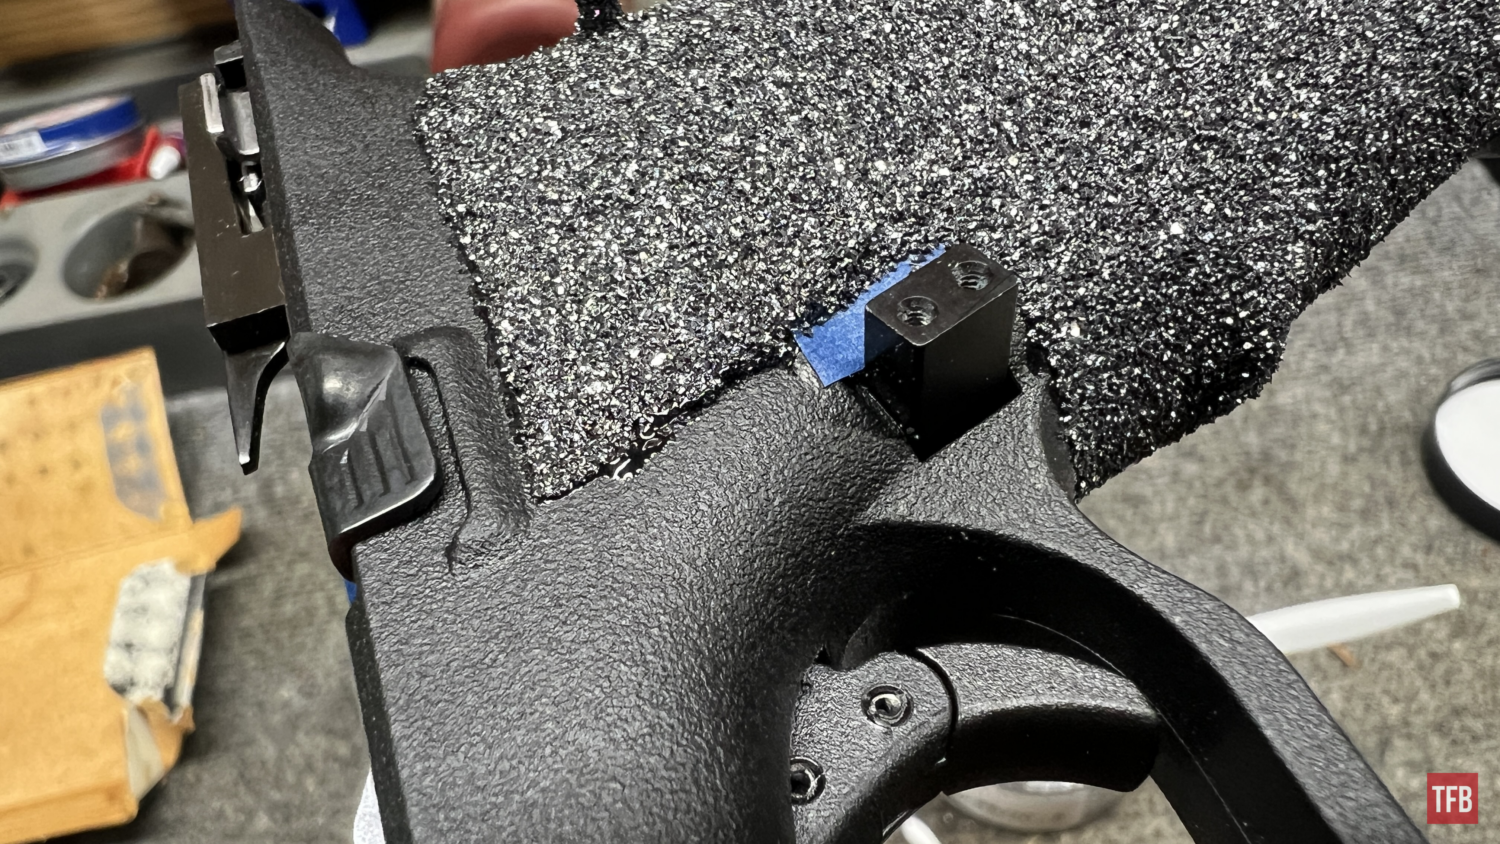
After five or ten minutes it is safe to touch but not to grip. You can manipulate it for lack of a better phrase. There were a couple spots that seemed to wrinkle and I was able to dab those away with a fingertip. This is when you want to remove your tape as well.
Removing the tape will reveal small leakage spots that can be swiped away or mushed in with a cotton swab. After all this, it is supposed to be left alone for six or eight hours. It all depends on the amount of epoxy and the temperature. I left mine for a whole 24 hours because I’m a busy guy.
Final Thoughts: Silicon Carbide Grips
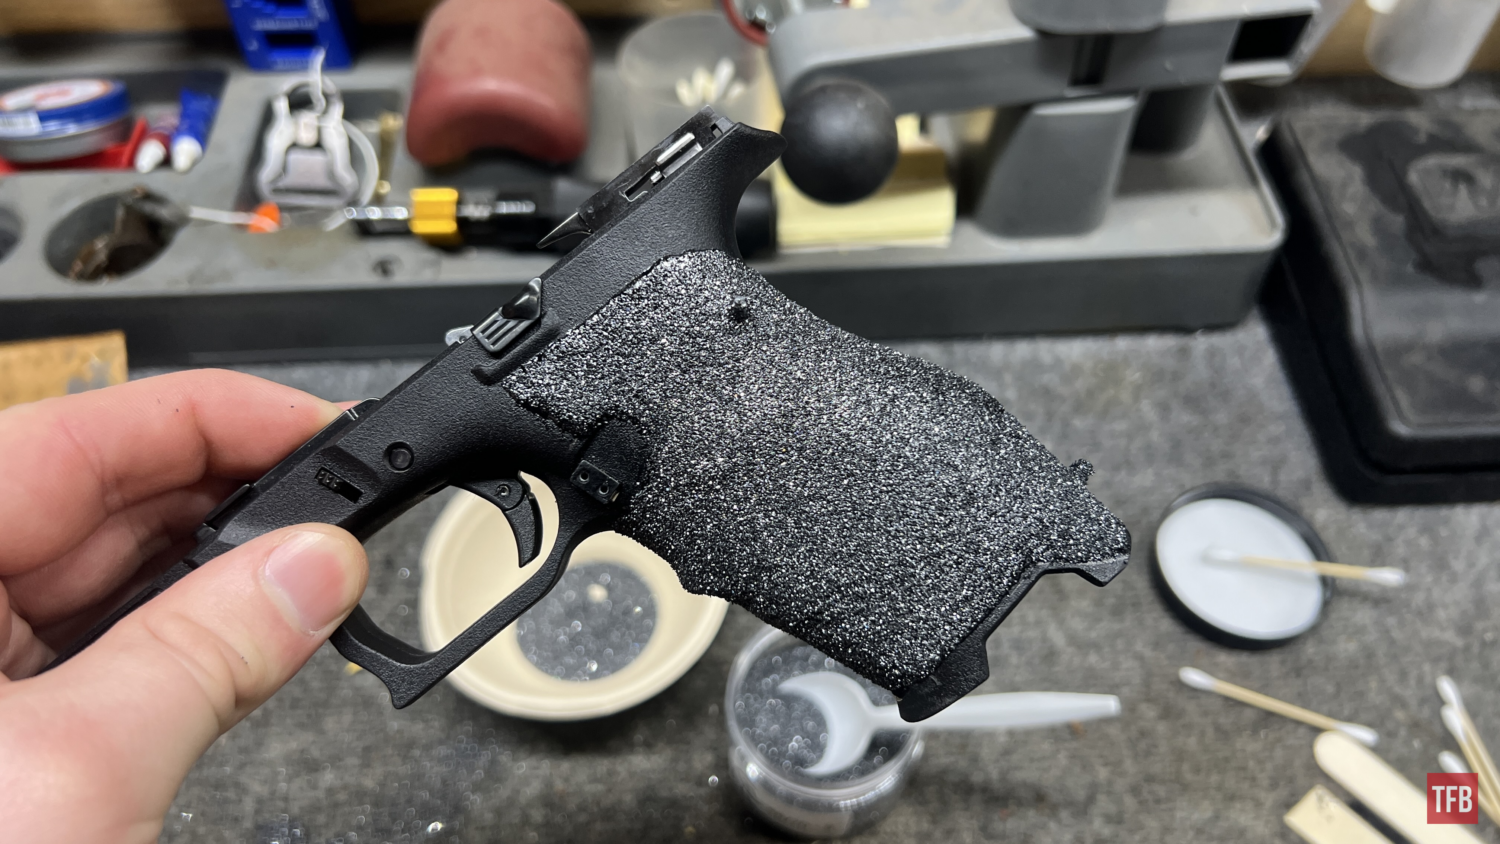
So how did it turn out? I actually am genuinely impressed. The grit level appeared a little too fine for my taste but turned out to be just right for my preference. I do wish it wasn’t so gray or sparkly. This is no fault of 71 Creative and their kits. I believe this is just how most silicon carbine comes. Things could be done to potentially darken it but it would be a terrible and eventual hand blackening idea. All in all, this was a super user-friendly experience, and if the time, patience, and steadiness of stippling are not your thing I would recommend giving it a shot. Not every day I get to try something new in the world of gunsmithing but it’s always a pleasure. See you all next time!
As always, thank you for reading TFB! Be safe out there, have fun while shooting, and we will see you next time for the TFB Armorer’s Bench! Also, let us know what you think in the comments below! We always appreciate your feedback.