 Your Privacy Choices
A short while back I was challenged by fellow TFB Staff member James Reeves (you may have heard of him), to build an SPR as cheap as possible. Well, myself being an unapologetic “poor”, I, of course, took him up on the challenge and started the project Special Poverty Rifle.
More AR-15 Content @ TFB:
- M1AR15: M1 Garand Iron Sights On An AR-15
- Vickers Guide: AR-15 (Volume 2) Second Edition Now Available
- New Retro Lower Receiver From Unbranded AR
The Special Poverty Rifle Concept:
I could have just bought a PSA or Del-Ton kit and threw a cheap scope on it, making the modern definition of an SPR. But no, that’d be too easy! I decided to mimic the most famous of all SPR rifles, the Mk 12 Mod 0!
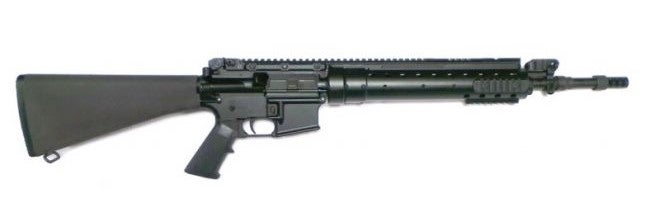
A current Mk 12 Mod 0 Rifle from Precision Reflex (PRI). Image from the PRI website.
Alas, just the upper assembly is currently going for $1,700 on the Precision Reflex Website, and that’s a lot of money for a working-class hero like myself. So if the Special Poverty Rifle is going to be the trailer park Mk 12, I’m going to have to search for deals and make some sacrifices.
Sourcing the Parts
So I put the word out to a few knowledgeable folks on the TFB discord that I was looking for cheap as possible AR parts. One of the boys led me to my first set of parts via Righttobear.com.
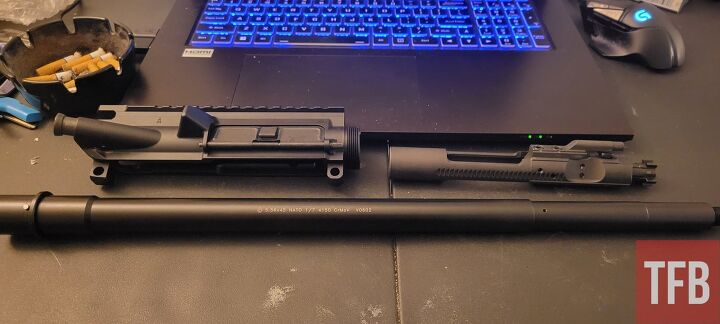
- AO Precision Gov’t overrun BCG – $64.99
- Ramlin stripped A4 upper receiver w/ plain completion kit – $60.90
- Ballistic Advantage 5.56 18″ SPR Rifle-Length Barrel w/ Ops 12, Modern Series – $166.25
I was also able to buy some slightly used parts from fellow user Ciph3r:
- YHM Flip up front sight gas block – $100
- Ergo Grip Pistol grip – Free because fren
Next, I needed the handguards. I wanted the PRI look for the Special Poverty Rifle but not the PRI price. In this case, the first truly bad decision was made. I went to a popular Airsoft website and ordered the finest in Chinesium copycat parts:
- CYMA Mk12 handguard – $70
- Madbull Mk12 top rail – $65
Scope, mount, lower parts kit, muzzle brake, gas tube, stock and buffer tube were all sourced from PrimaryArms.com:
- Vortex Crossfire II 3-9x40mm scope – $149.99
- Primary arms Premium cantilever 1″ scope mount – $49.99
- Strike Industries Warhog Comp – $15.37
- Anderson Lower Parts kit with SS trigger and hammer – $52.99
- Anderson AR-15A2 stock and buffer assembly – $99.99
- Expo Arms Rifle Length Gas Tube – Stainless Steel – $7.96
That’s all the parts right!? Yep definitely didn’t totally derp out and forget to order anything. Totally didn’t do that. Time to go to Amazon and Harbor Freight for tools and some cheap accessories.
- Upper receiver clamshell vise block – $19.99
- AR armorers wrench – $19.99
- Chinesium Harris bipod clone – $24.99
- AR roll pin punch set and tool set – $29.99
- UTG flip up rear sight – $24.49
- Harbor Freight tiny vice – $22.99
- Strap wrenches – $5.99
- 6″ C-clamp – $2.99
- 1/2″ Drive Torque wrench – $24.99
Awesome! I have everything and definitely didn’t forget to order anything, time to assemble this rifle!
The Build
So to kick off the cavalcade of wasted time and money that is the Special Poverty Rifle, I better get this upper assembled. And I’m going to go ahead and say the best purchase from Amazon was the roll pin punch set. It doesn’t matter if you’re building a “Special Poverty Rifle” or an exacting clone replica of the Mk 12 Mod 0, this cheap little set of tools will save you much lamenting and gnashing of the teeth. In the following section are some highlights from an otherwise normal upper build.
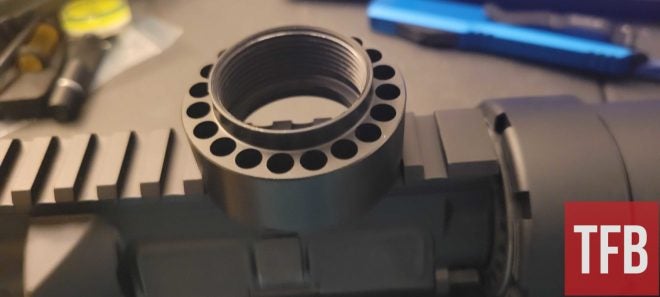
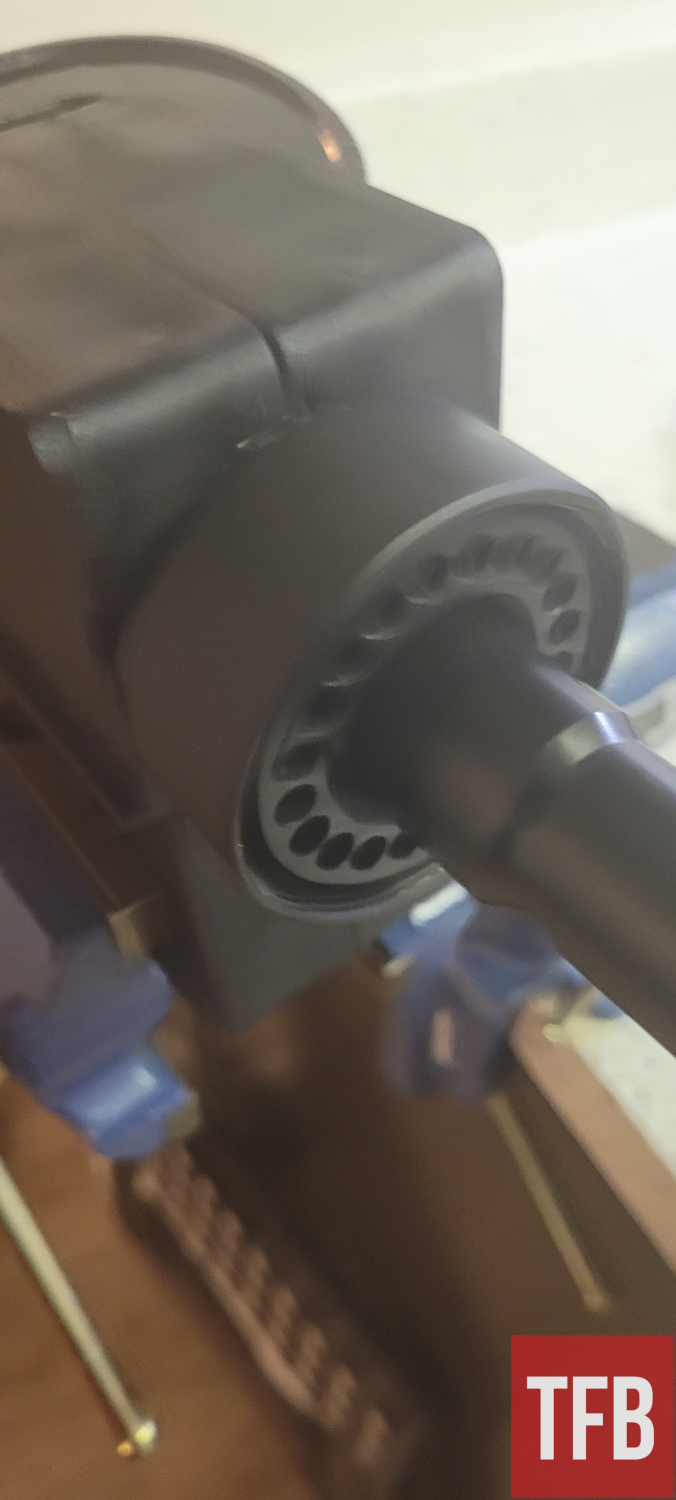
When I opened the box for the handguard, I was greeted by the finest cheese-grade aluminum copy of a PRI handguard that my money could pay for. It came with a barrel nut and a full set of rails! Oh, what a lovely special poverty rifle this will be let’s just mock it up and take a look!
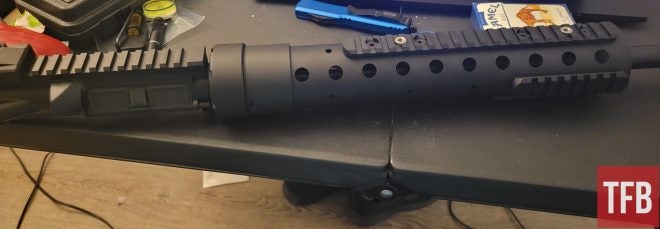
Not bad, right? Well, there’s one problem, the barrel nut. The threads were surprisingly correct, and it screwed onto the receiver extension just fine. The problem was as I held it in my hand an overwhelming sense of dread came over me. This hunk of unknown “Aluminum” alloy would be holding the entire front of the rifle on…
Ummmmmmm no…
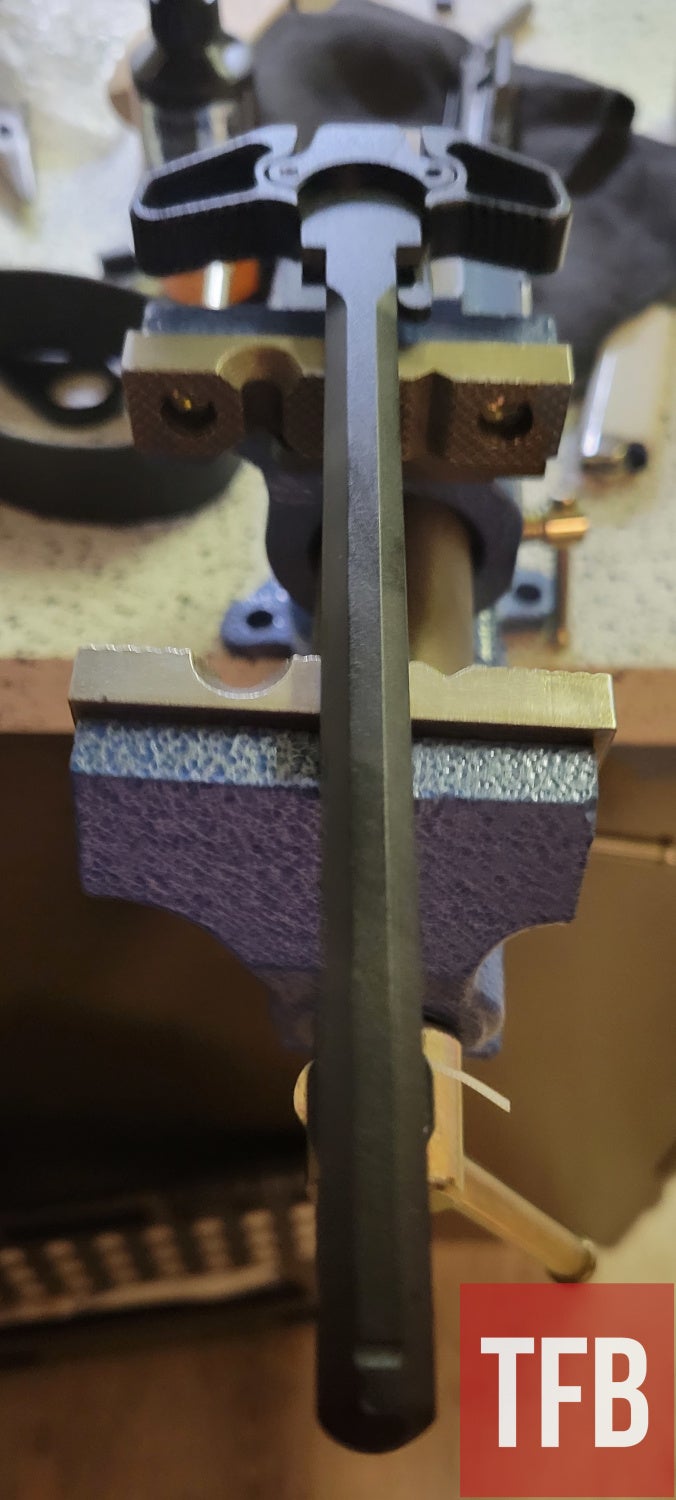
Off to the PRI website for a legit barrel nut and the hope that it’s going to fit in this handguard. Add $31 to the running total for this build, by the way. After it showed up, I continued on. Here’s a quick shot comparing the two.
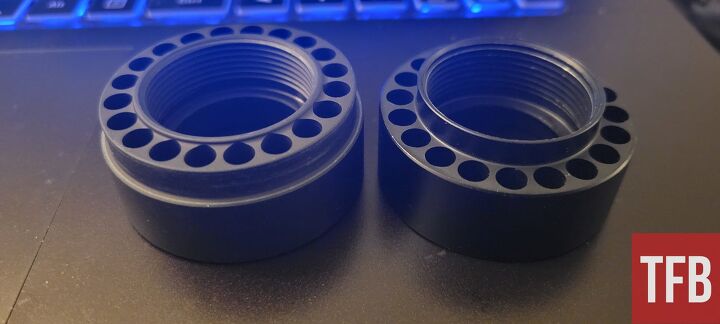
Real on the left, fake on the right.
The real deal product not only was beefier but it also didn’t illicit the pucker response the fake one did. Oddly enough, it not only fit the handguard but fit it better than the one which was provided.
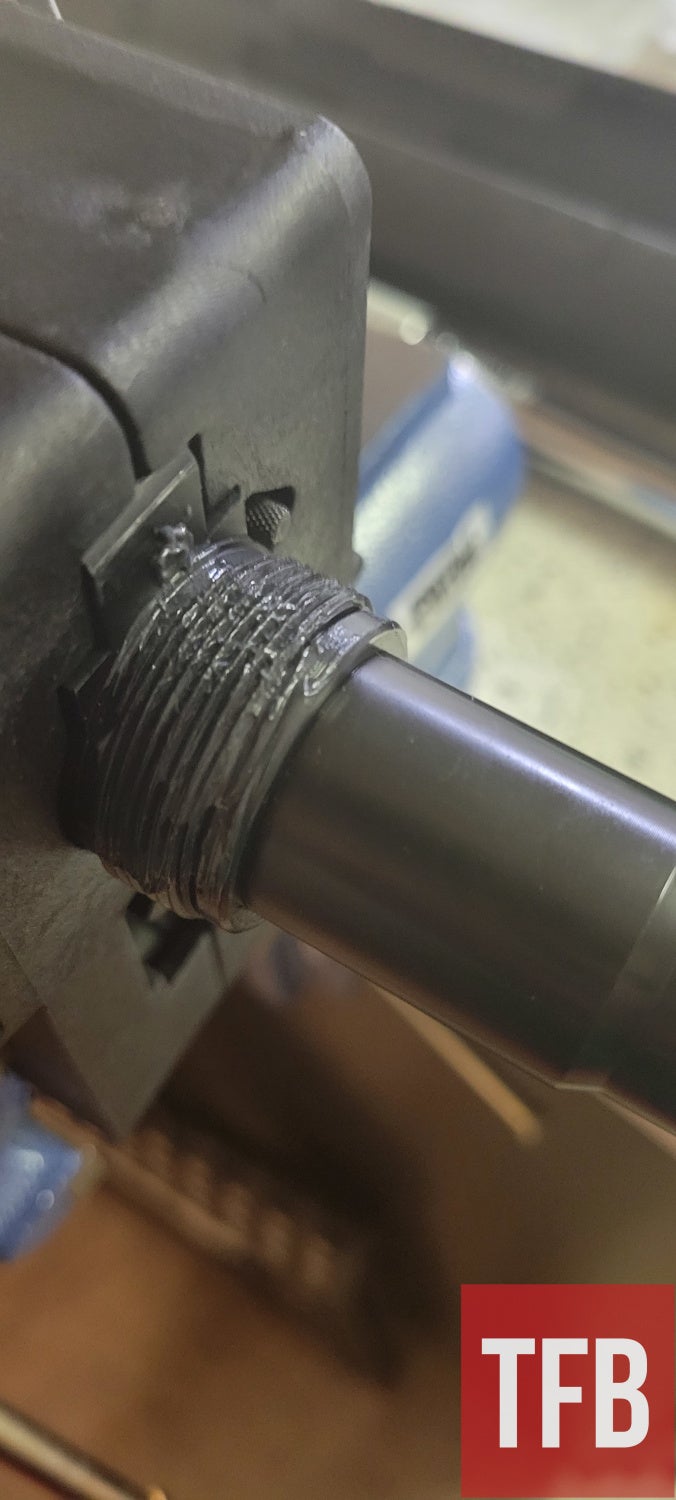
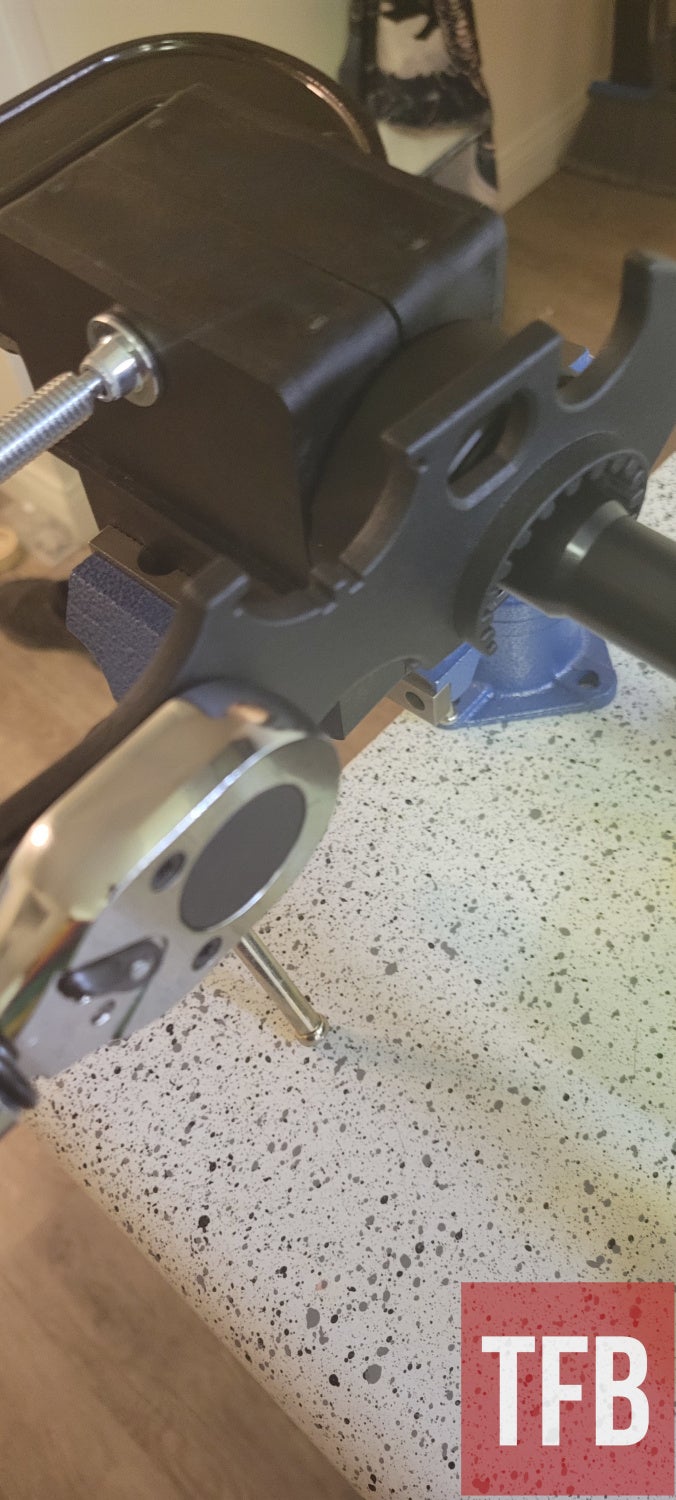
Alrighty let’s continue, I’ll just grab my moly grease and… ugh. I don’t have it here with me in Vegas. Alrighty, add another $8 bucks for a tiny tub off Amazon. Now then, the barrel install went pretty normal after this. I torqued the barrel nut to 30 ft/lbs three times and then just went a tiny bit past to get a hole in the barrel nut to line up. Sweet! Have a few pics of my greasy nut.
The smell of aeroshell.
Clicky, clicky!
Done!
I already knew the handguard wouldn’t fit over the flip-up gas block so I decided to install it first. Nothing too bad there, it slid over the barrel and I tightened the locking collar on as much as possible with a strap wrench. Okay cool, let’s get the riser rail on and then put the gas block on…
Of course, none of the holes line up. Why would they? I loosened the top rail on the handguard as one would do with the legit unit and noooope, still no go. I don’t have any pics of this part because I was more annoyed than a hungry baby at a topless bar. Screw it, I’ll just run it without the top rail. I installed the gas tube in my gas block and then fished it through the right hole in the barrel nut after 8 tries. After torquing on the flash hider, I was ready to call this upper finished. Just need to install the scope, rear sight, BCG, and charging handle… Dammit.
So I ran to Ventura Munitions (a great group of people there btw) to pick up a cheap charging handle and decided on one of their Radian Raptor copies. Add $25.99, kids.
Here’s the upper completed.
Yes, that is my kitchen counter. And no, I didn’t get my security deposit back when I moved out…
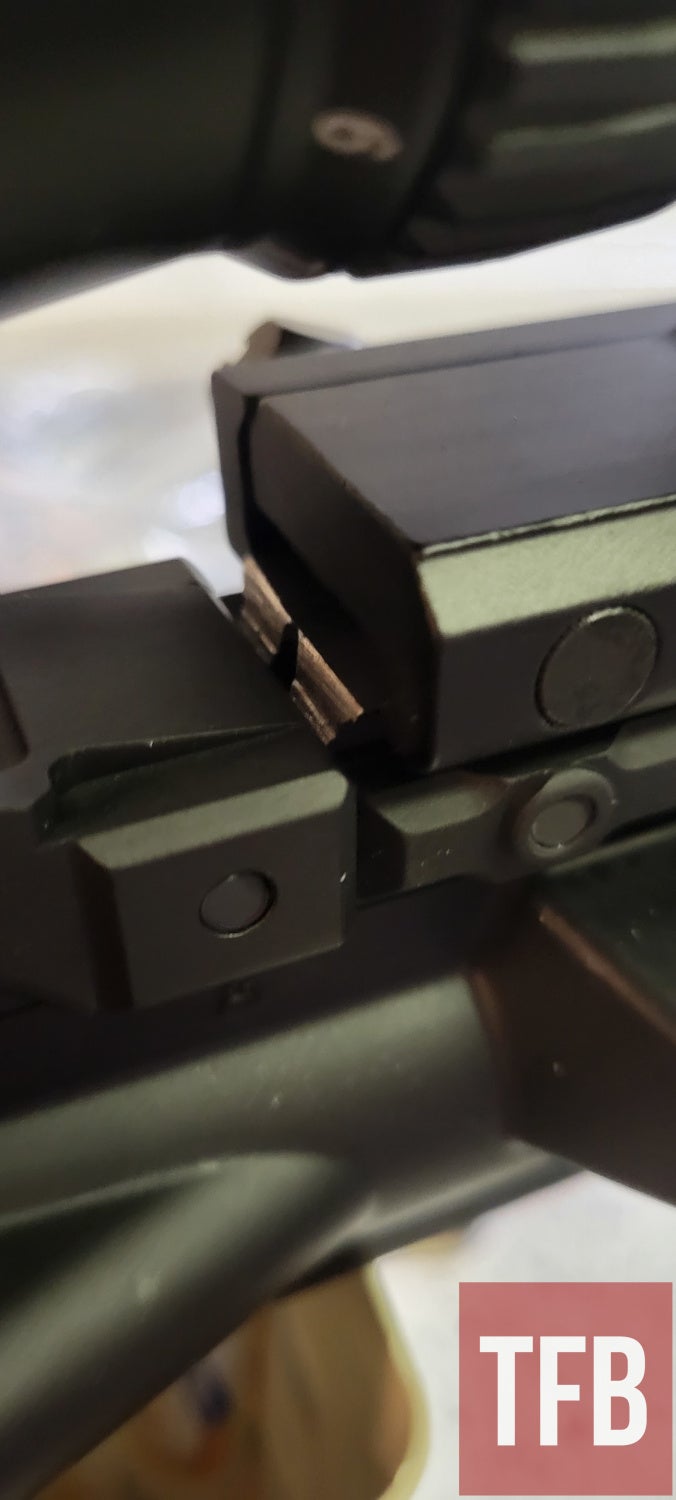
Alright, just need to get a cheap lower and build that up with the normal parts and I can test this abomination out! Guess I’ll just return the Mk12 riser rail to the airsoft store… NO! I wanted it on there for a reason, it just won’t look right without it. Time to do some experimenting to see if maybe I can make it fit. So I removed the top rail and flipped it around. Sure enough, the mounting bosses for the riser rail lined up a lot better. The only problem is now the top rail section is only held on by two screws instead of four. Oh well, not like I’m going to be running any rifle courses with this thing. Also, there are no screws to secure the riser to the handguard included. A trip to Lowe’s for some M5-0.8 flat cap screws later ($0.95) and it’s attached! But the last section of Picatinny hangs off the back and interferes with the UTG flip-up rear sight… Where’s my hacksaw?
Good ol’ WECSOG
If the hacksaw and harbor freight tools didn’t clue you in already I learned my trade from the good ol WECSOG (Wyle E. Coyote School of Gunsmithing), take that Sonoran institute! In all seriousness, I think most of the fun of the Special Poverty Rifle is not actually giving a crap about if it’s truly pretty or perfect because let’s face it, it’s a thought experiment usually left to rot in online shopping carts brought into the real world.
The Lower
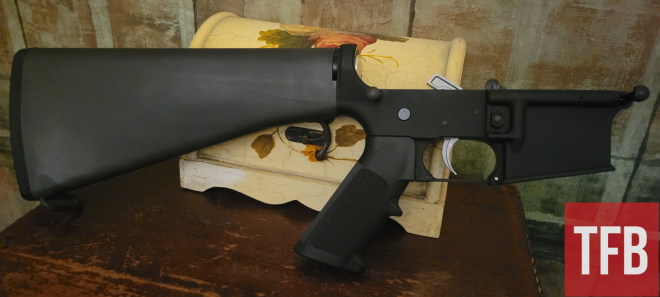
So I completed this part in a completely different state as I was actually in the middle of transferring back home to Pennsylvania. For the lower, I went to my favorite LGS and picked out the cheapest one I could find. This of course was a standard forged lower from Anderson Manufacturing. Let’s just add $49.95 to this build and carry on then.
The lower build process was quick and relatively painless. I’m not going to go into extreme detail here because you can literally watch any of a million videos on how to assemble an AR lower. Either way, big surprise, an Anderson lower parts kit fits an Anderson lower without issue. Who’d have thunk?
I made a quick change to the rifle at the last minute. The Primary Arms cantilever mount had the scope a bit high. When I checked for eye relief after the final assembly, I had more of a chin than a cheek weld. So I did what any normal human would do. I ordered a set of aluminum medium-height scope rings off Amazon. So drop the $49.99 from the build cost and add $11.99. It was actually a set of high and medium rings so I got an awesome 2 for 1 deal!
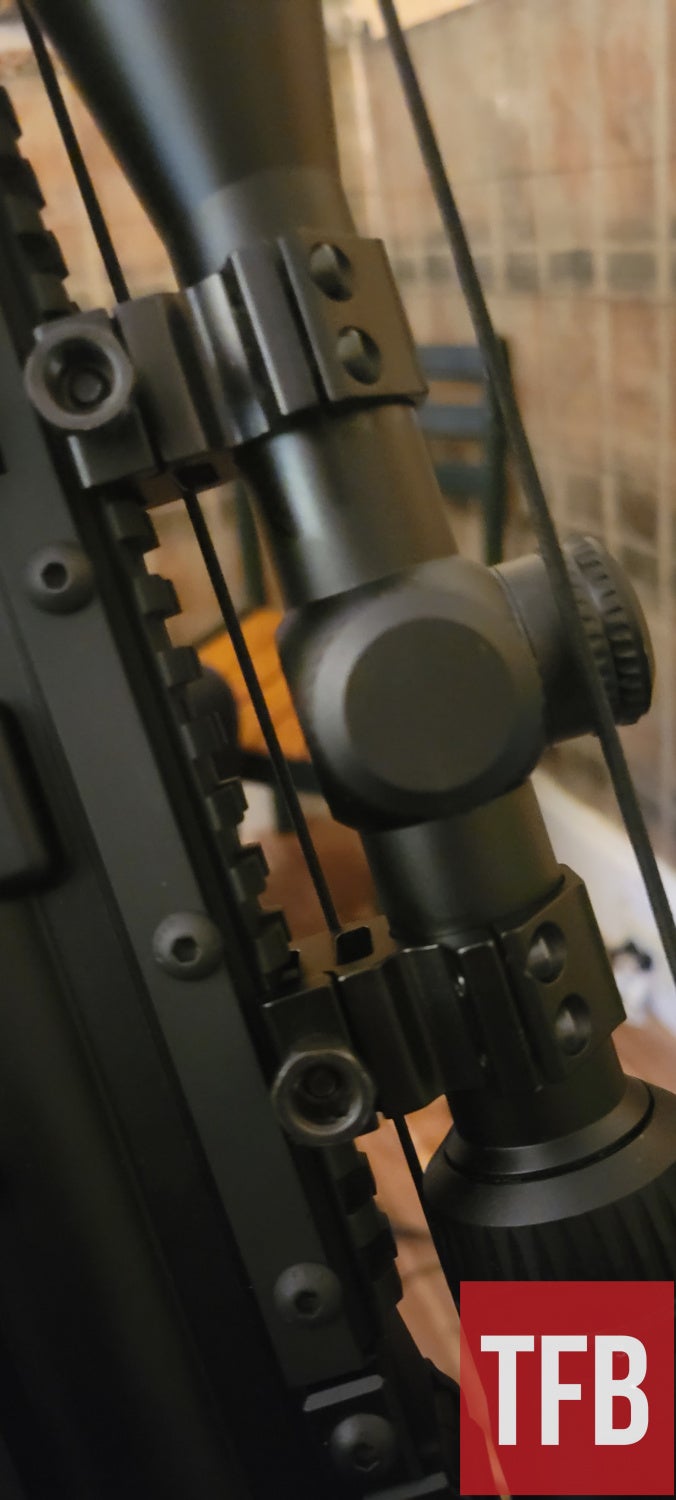
Much better. Oh Gawd why am I doing this? Please forgive me!
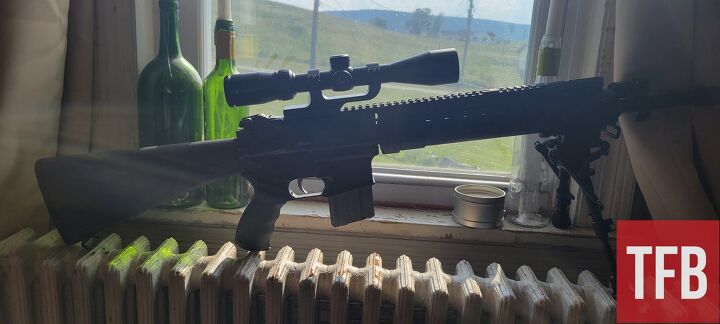
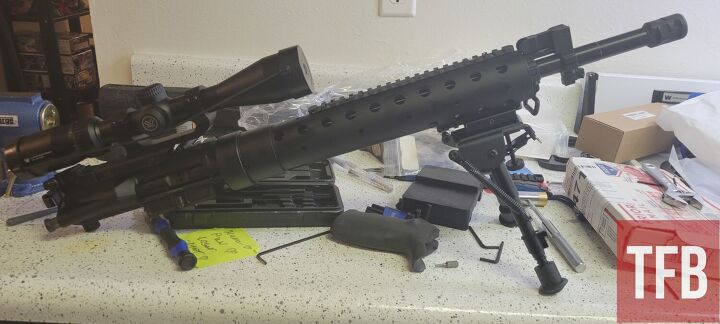
Finally Complete
So here it is! After a month of waiting for parts, forgetting critical components, using a hacksaw, and moving across the country. Gaze upon its glory and know that honestly, it’d have been faster and easier to just buy the Precision Reflex upper build kit for a grand and install it than do what I just did.
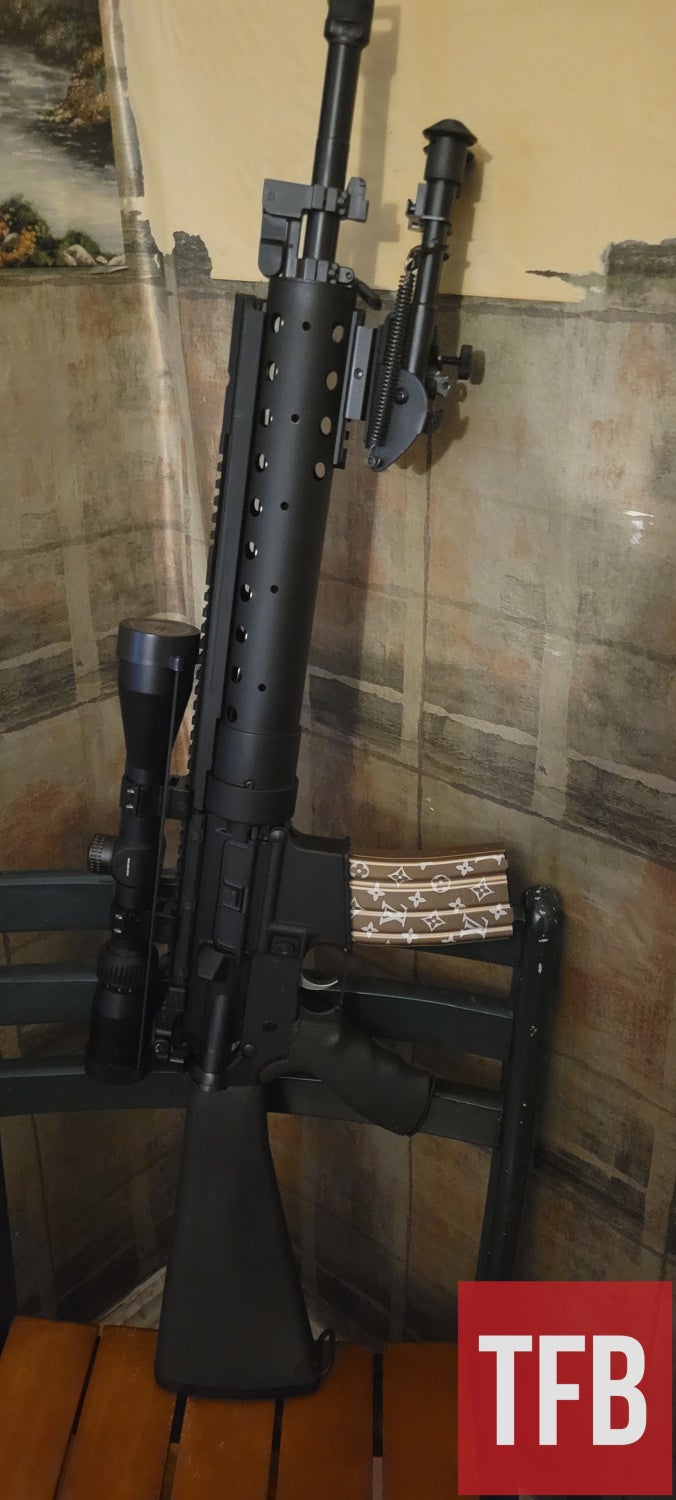
The Louis Vuitton magazine lets you know it’s a classy rifle for classy people.
Also, I could have REALLY gone cheaper with this build but even I have my limits.
Final cost? Well, just for parts, the total comes out to $1022.80
Please feel free to call me a moron who just wasted both your and my time in the comments below! Also, keep an eye out for Part 2 where I put overpriced ammo through it to test its accuracy at 100yds.