 Your Privacy Choices
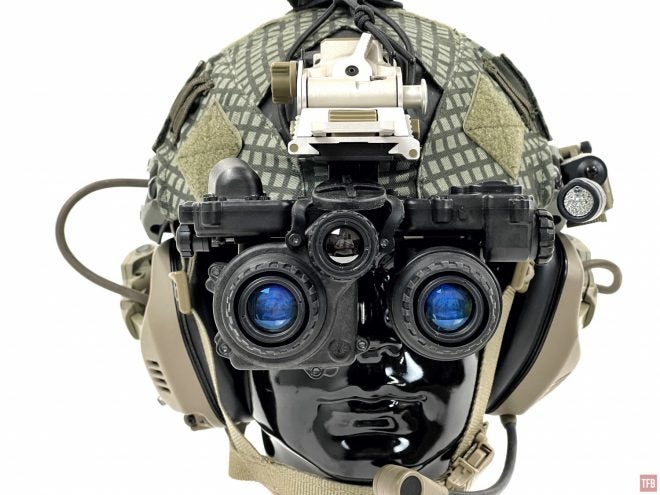
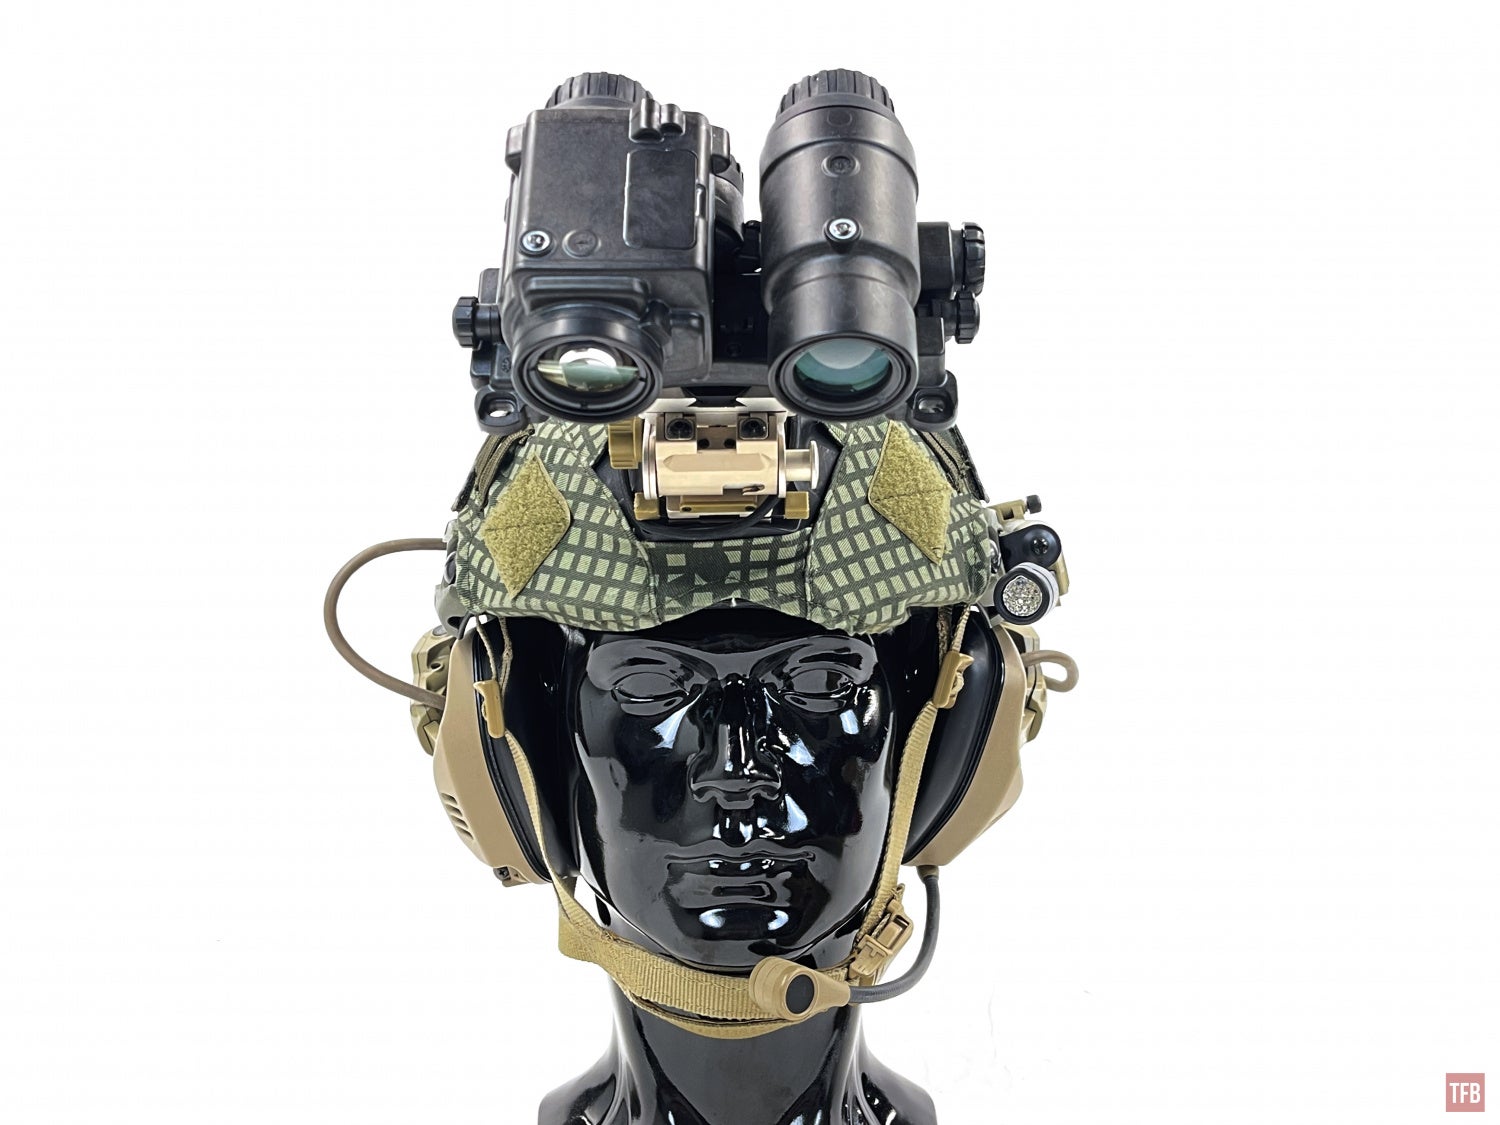
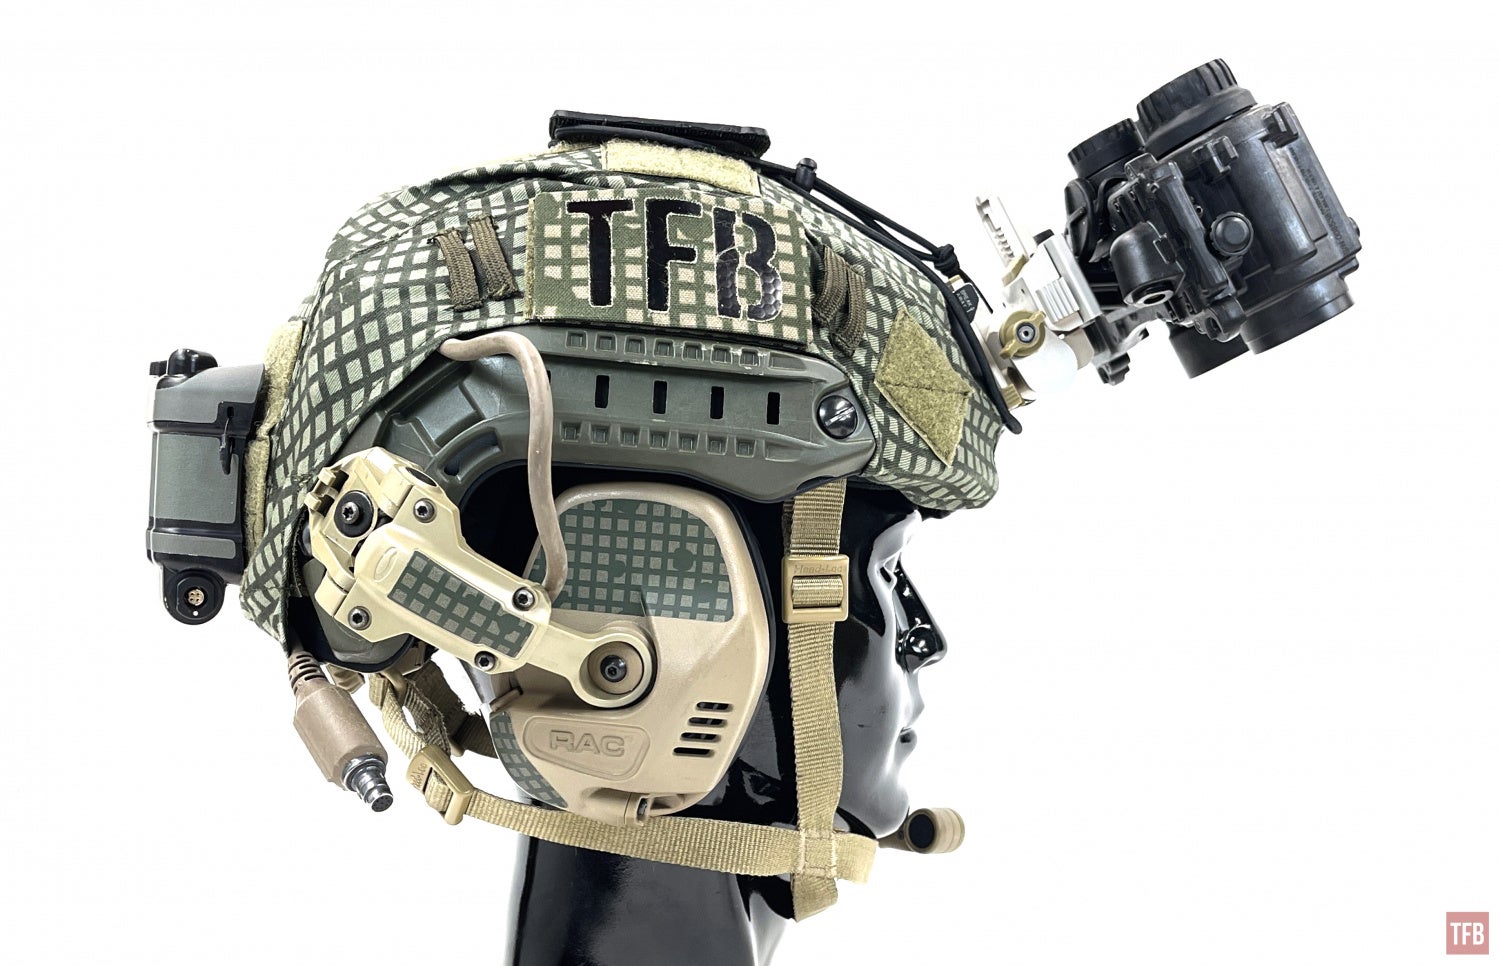
Well, this is another night vision bucket list item for Friday Night Lights. I assume you recognize the featured image and the name. Yep, that’s right, we get to take a deep dive into an L3Harris FGS (Fusion Bino) aka PSQ-36. Thanks to some very nice people for lending these for us to check out.
Fusion @ TFB:
- Friday Night Lights: PSQ-20 vs InfiRay JerryF – Fusion Monocular Duel
- Friday Night Lights: ITT Exelis PSQ-20A – Thermal Fusion Monocular
- Friday Night Lights: Enhanced Night Vision Goggle (ENVG) PSQ-20 B Thermal Fusion Monocular
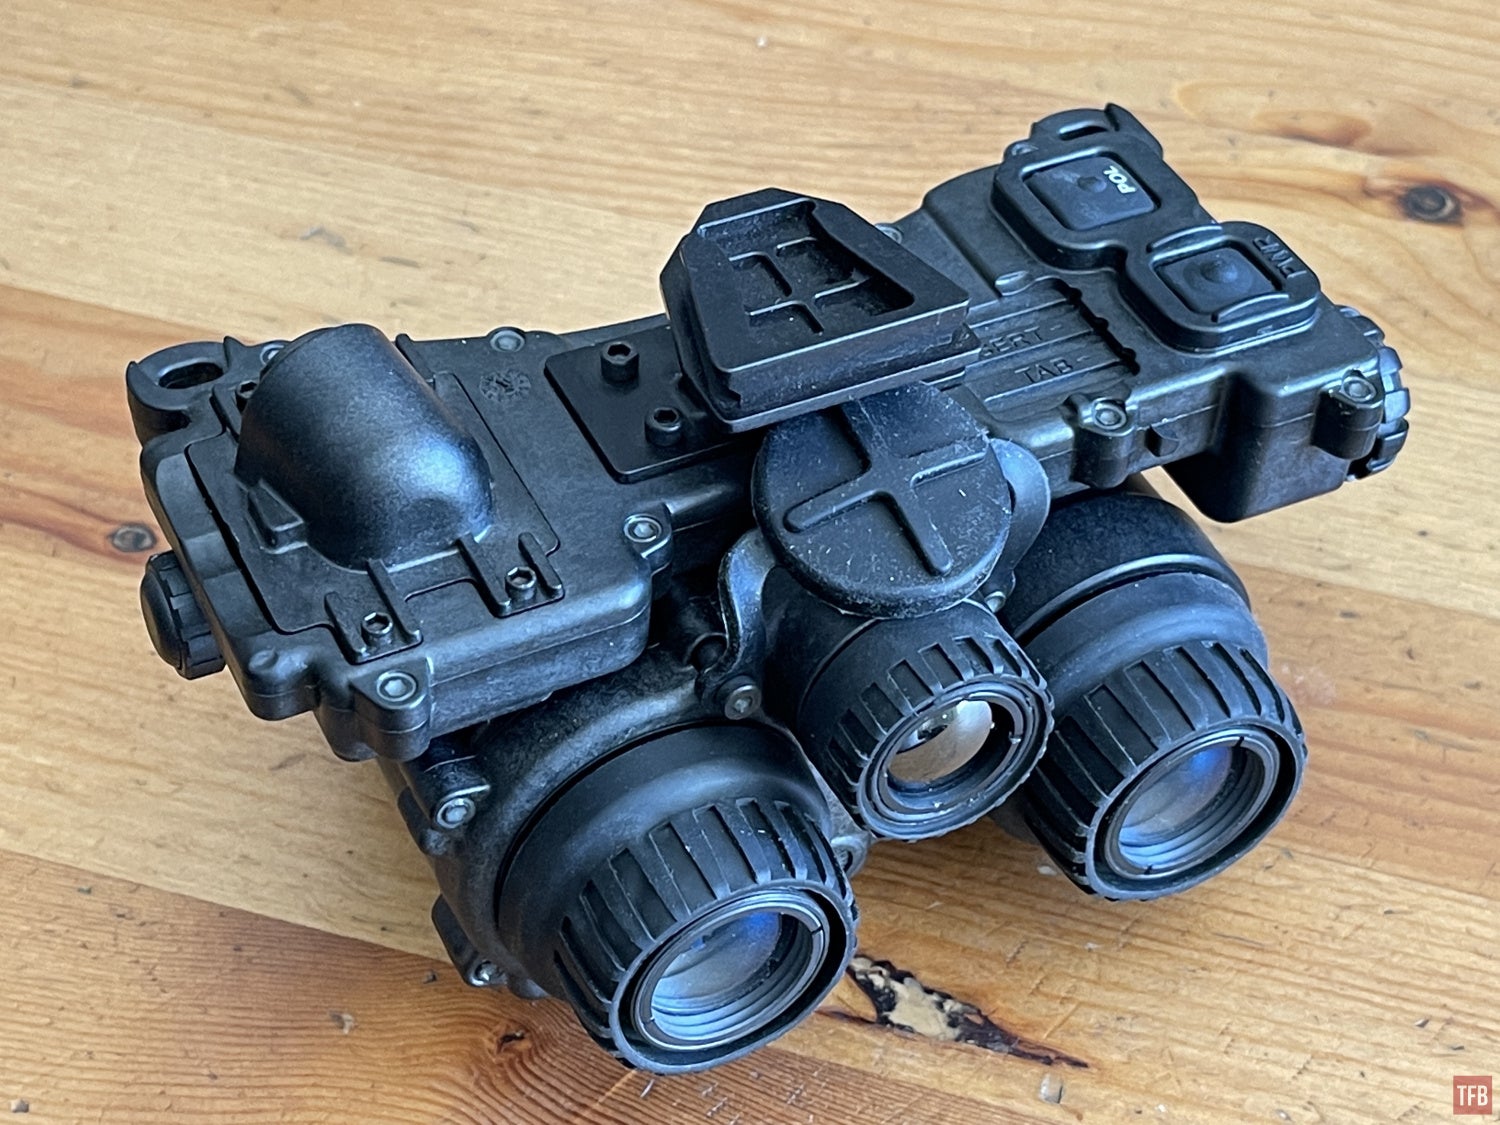
PSQ-36 Fusion Bino NVGs
The picture of the FGS up top and this FGS are not the same goggles.
We have had the opportunity to check out PSQ-20s in the past, all three variants, but now we get to check out the PSQ-36 fusion binocular. Rewind to last December. A friend acquired a bunch of PSQ-36s that were demilled. He asked if I could Frankenstein the parts and possibly make a working unit. I have never seen a PSQ-36 in person before but since these were demilled, I knew I could not make them worse.
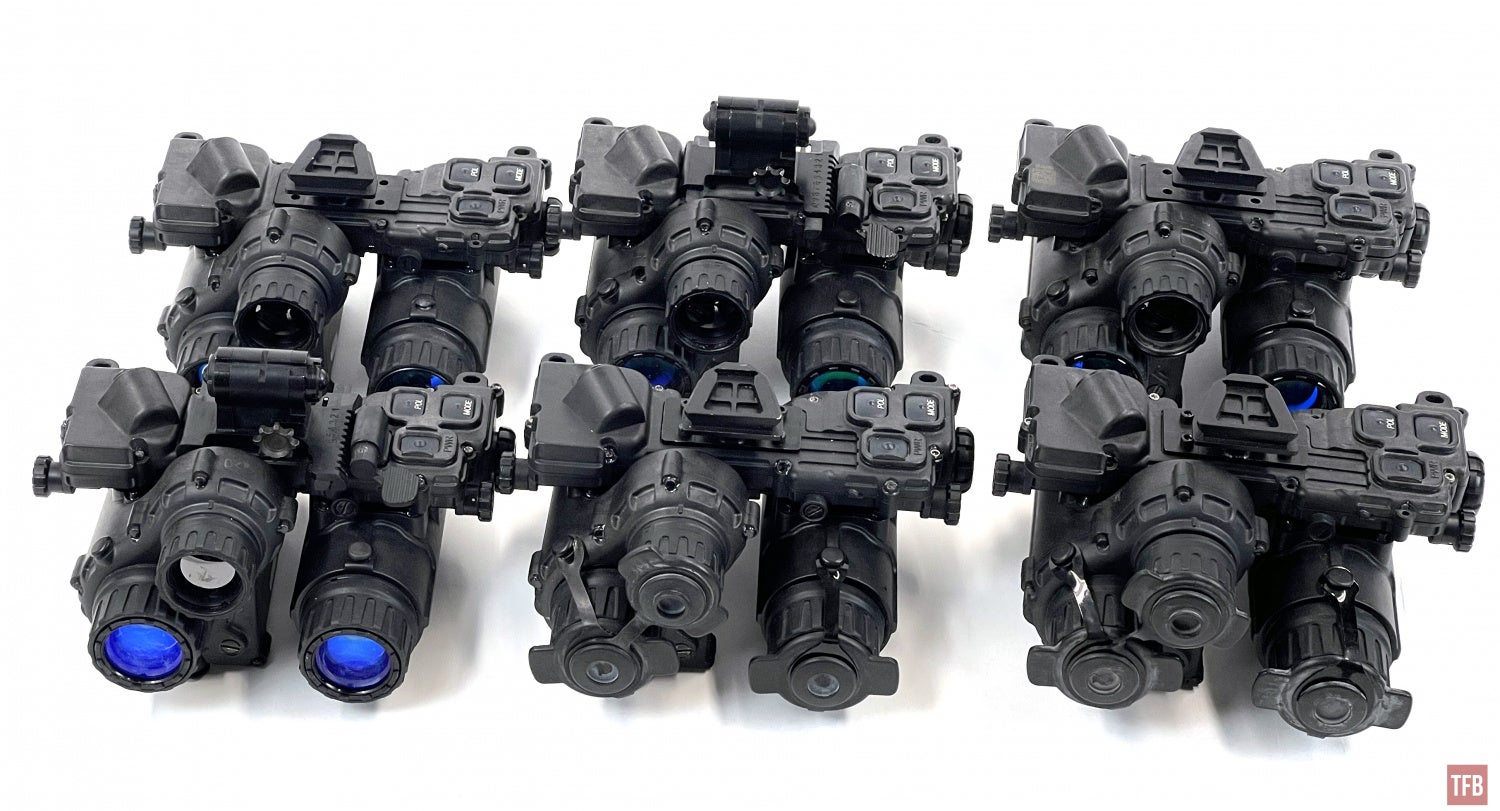
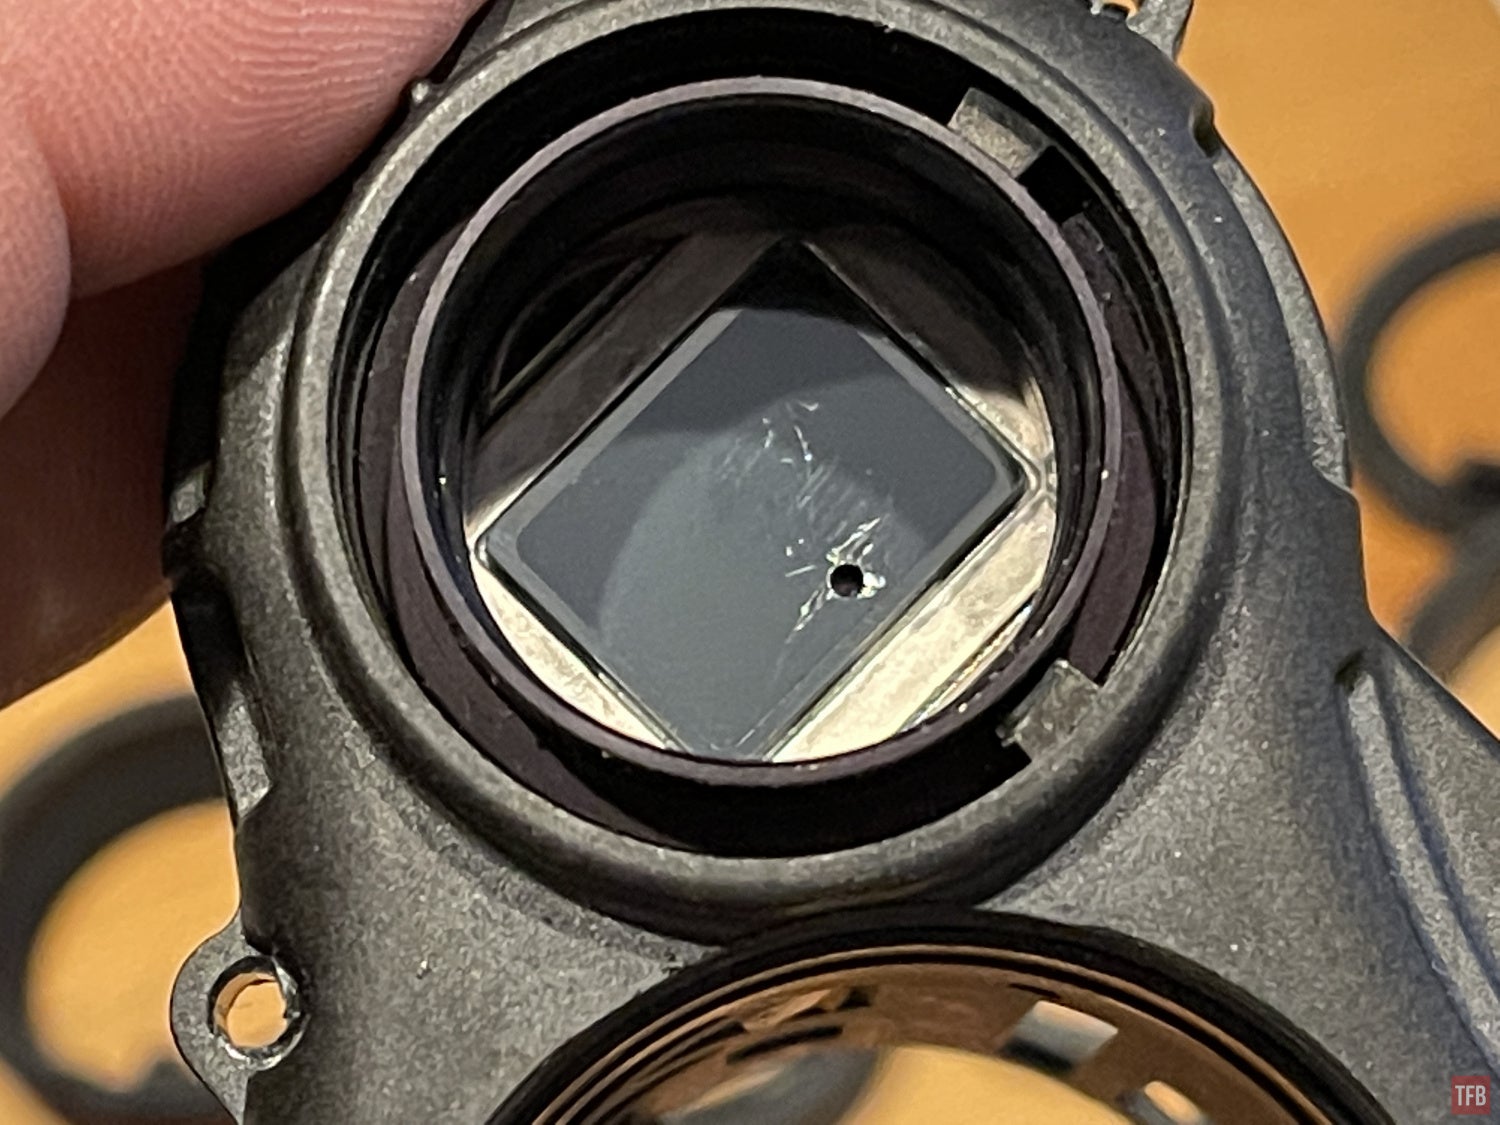
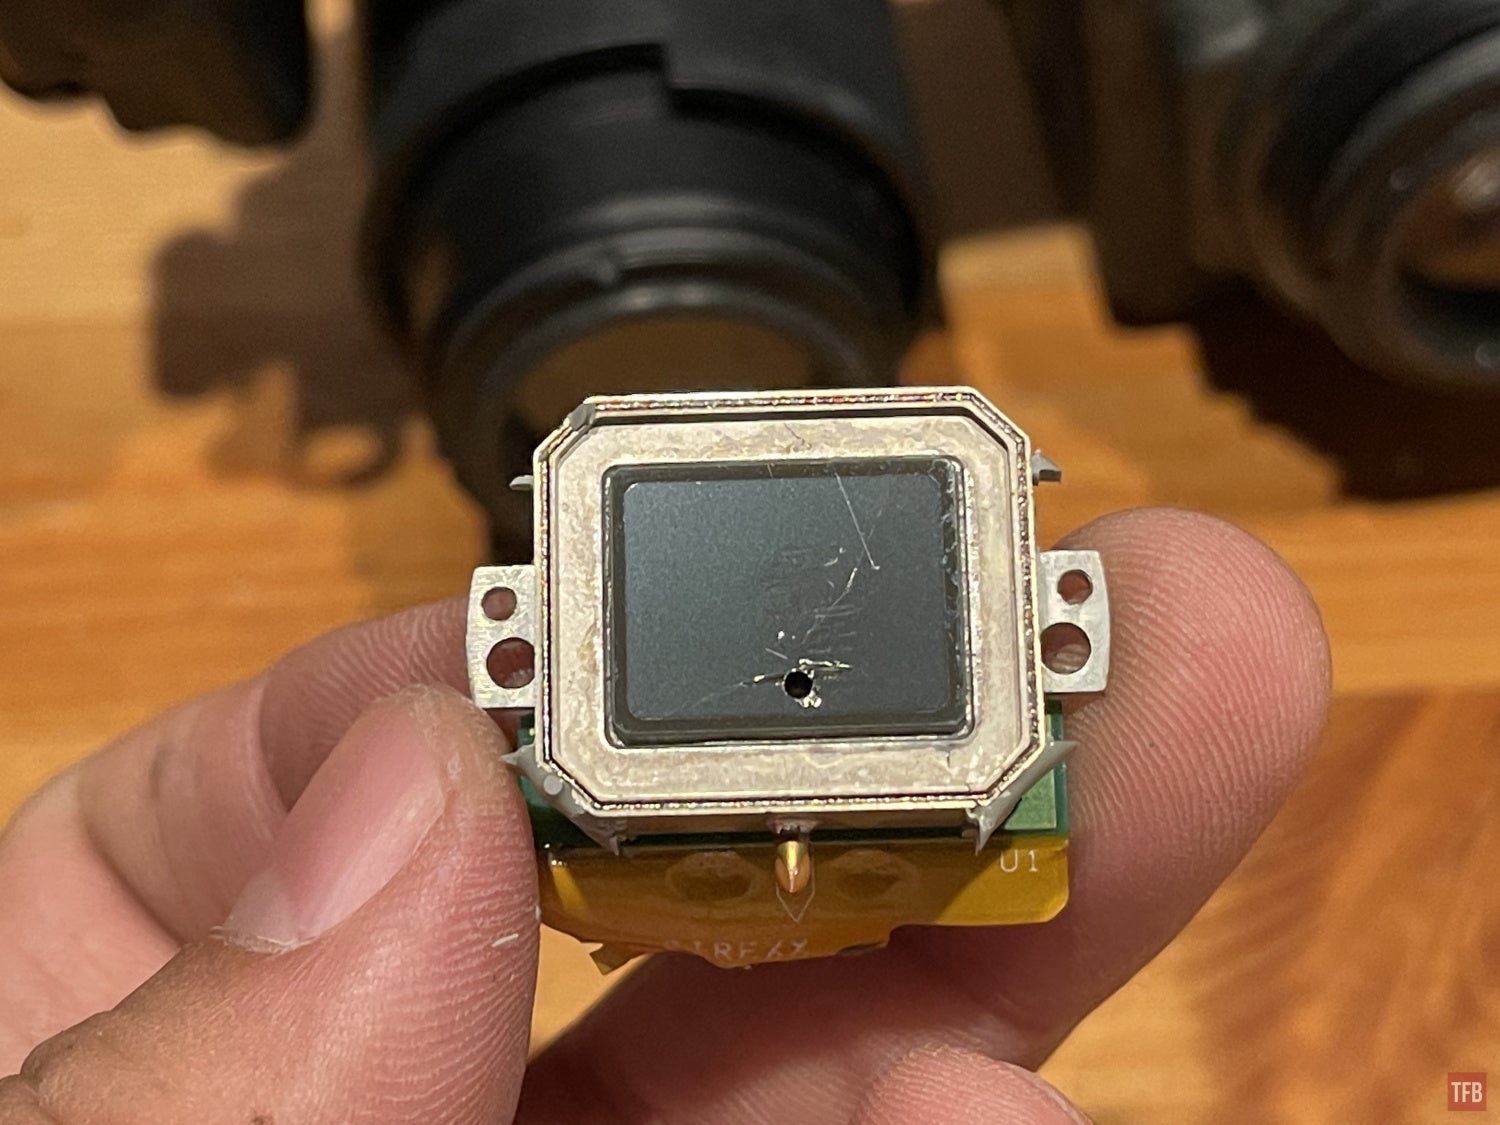
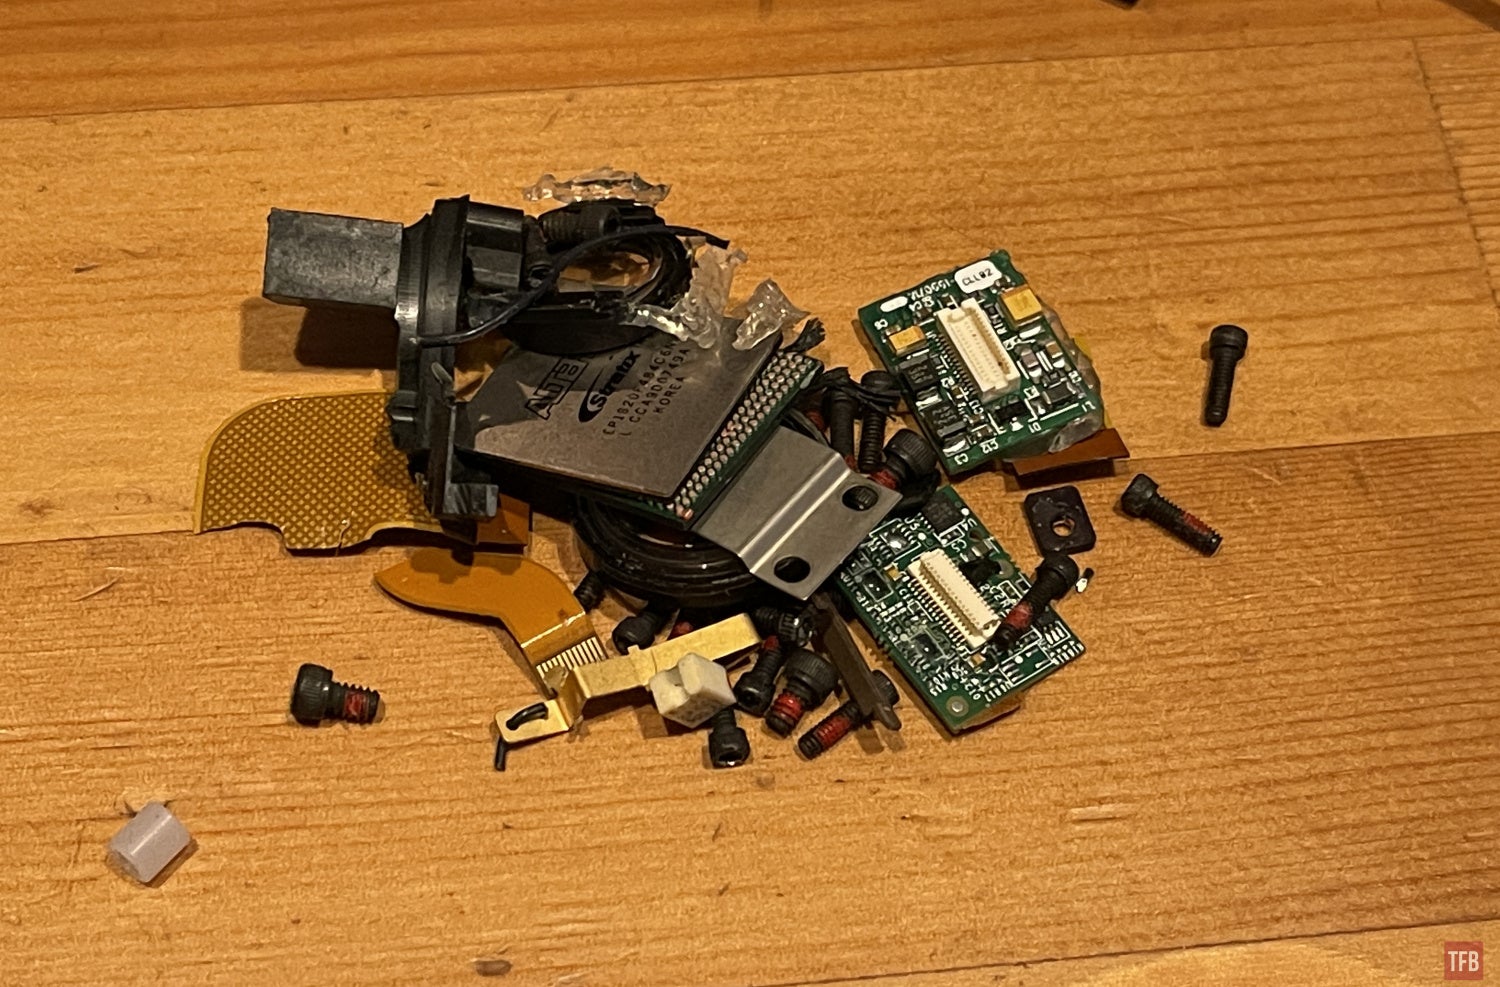
There were six PSQ-36 FGS. However, they were literally a pile of trash. The image intensifiers had been removed and the demilling process involved drilling a hole through the thermal sensors.
Well, that’s not going to work. Each fusion bino came in a large ziplock bag with all the parts of that particular goggle in the bag. These were not assembled at all. In some cases, there were bits of detritus in the bag.
I reassembled two PSQ-36 FGS as best I could and put image intensifiers in them. They fired up!

However, turning on and functioning are two totally different animals. The problem was the objective lenses would not focus properly. In fact, they would not install properly. They are held in by a tube retaining ring of sorts but that ring acts like a collar for the objective lens. The problem was the objective lens felt loose. I had a sneaking suspicion that the objective lens was missing some intermediate component between it and the image intensifying tube.
L3’s PVS-31A BNVD have a top hat-looking sort of protrusion that is epoxied to the input side of their image intensifiers and that is part of the objective lens focusing and attachment method. Without that top hat piece, the objective lens would not attach properly.
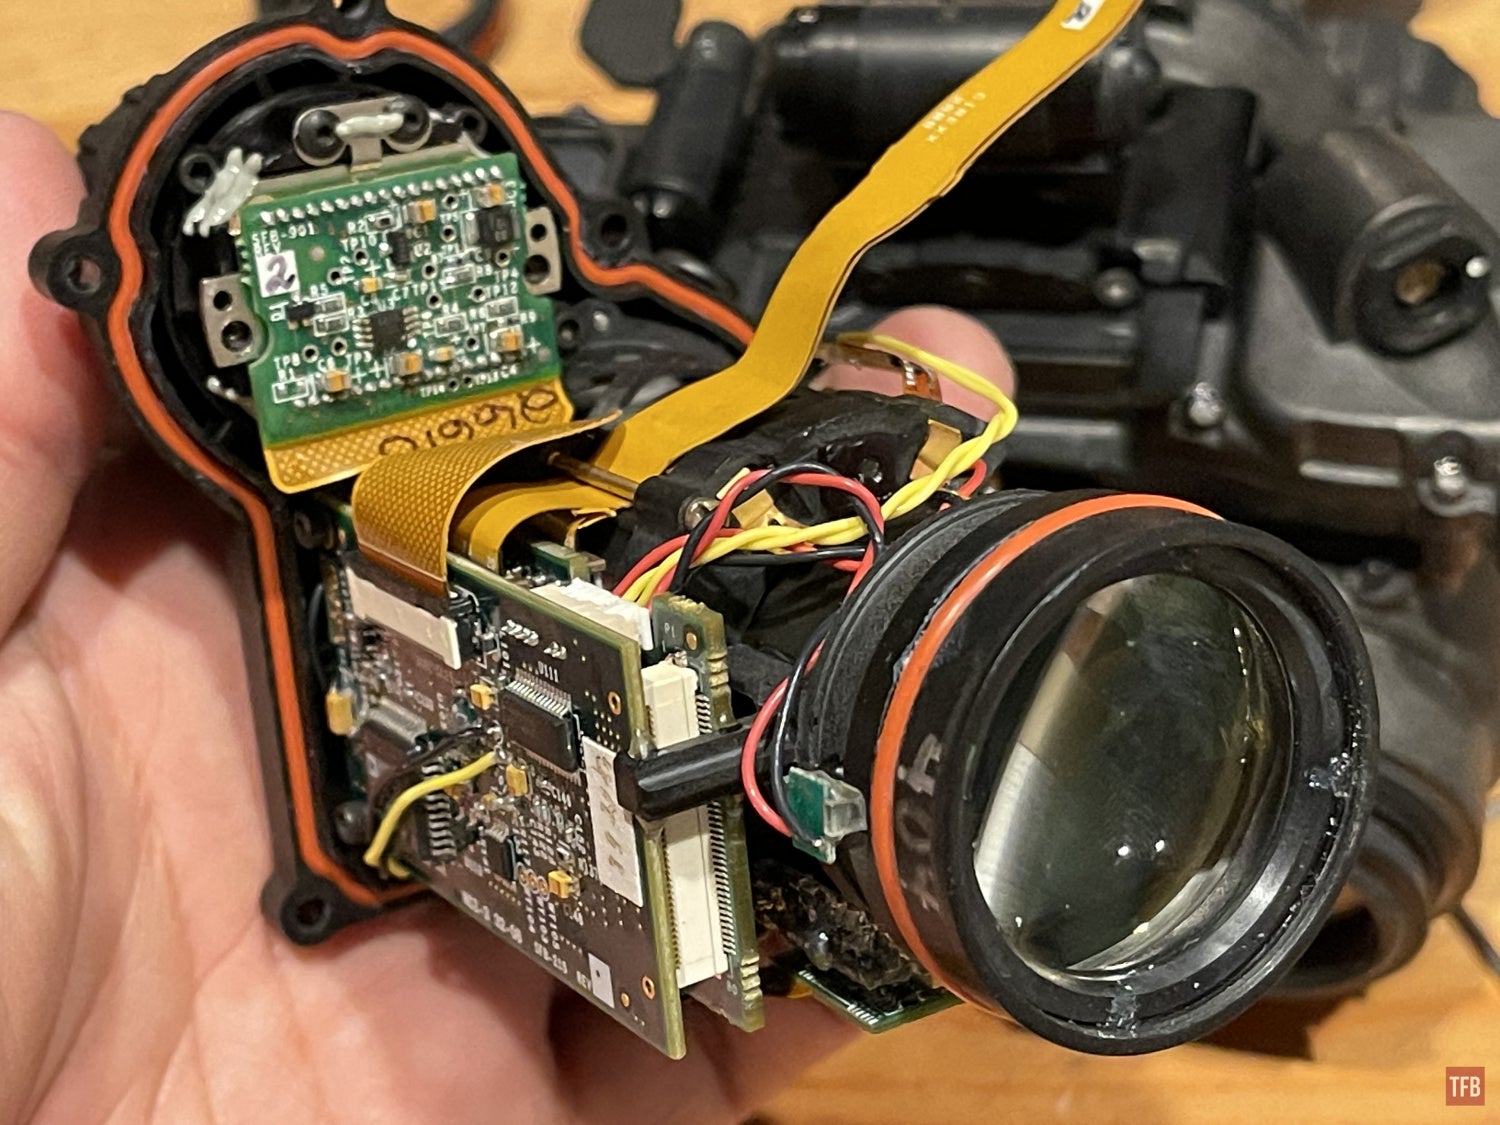
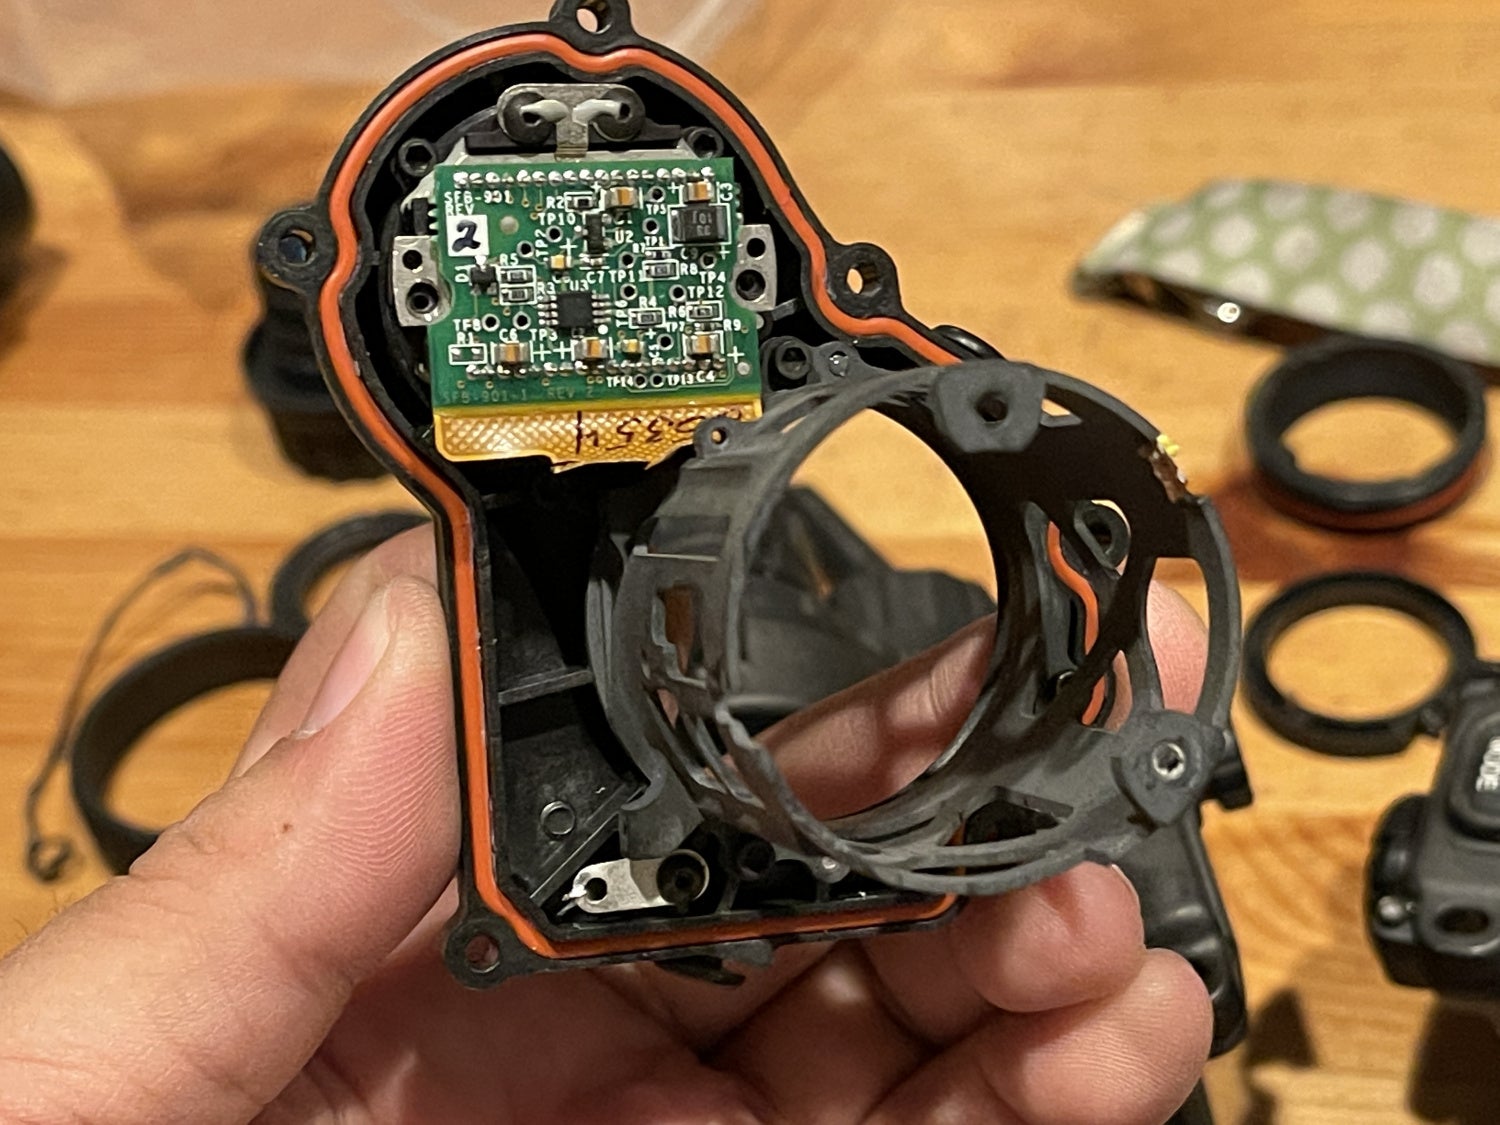
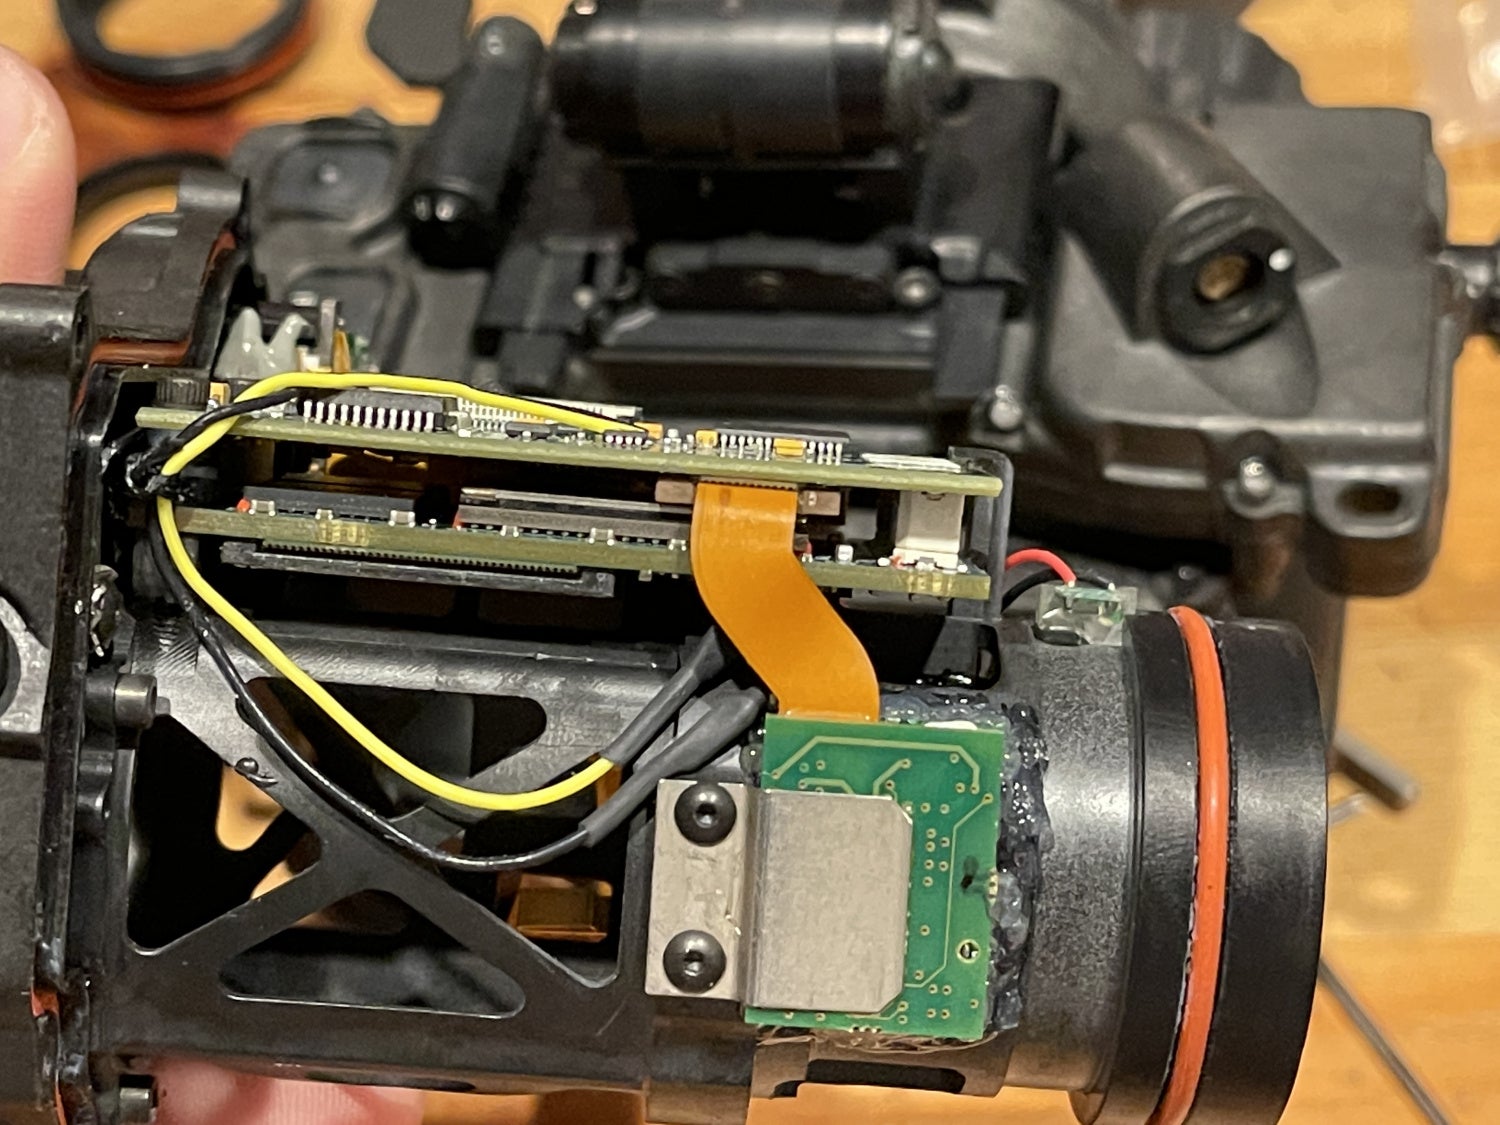
Getting power to night vision tubes is really easy as long as the electrical circuit has not been interrupted. But since I could not do anything about the objective lenses, I focused on the internals of the PSQ-36. I found that there are a few variations even though they look the same on the outside.
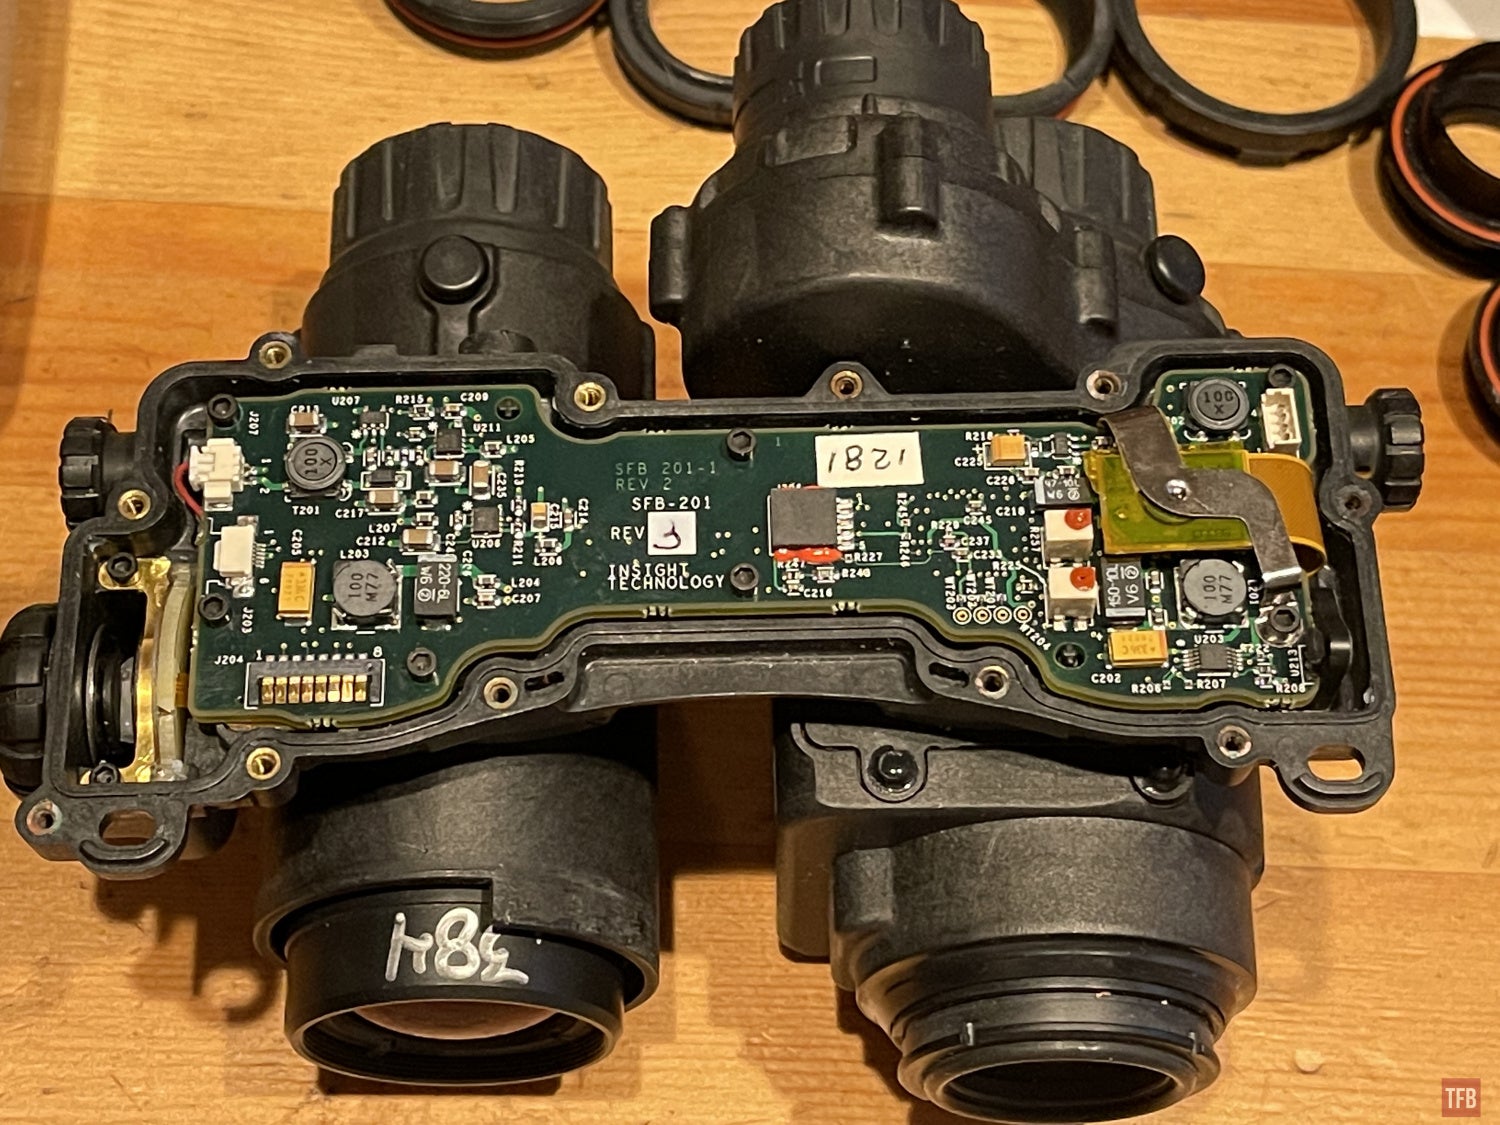
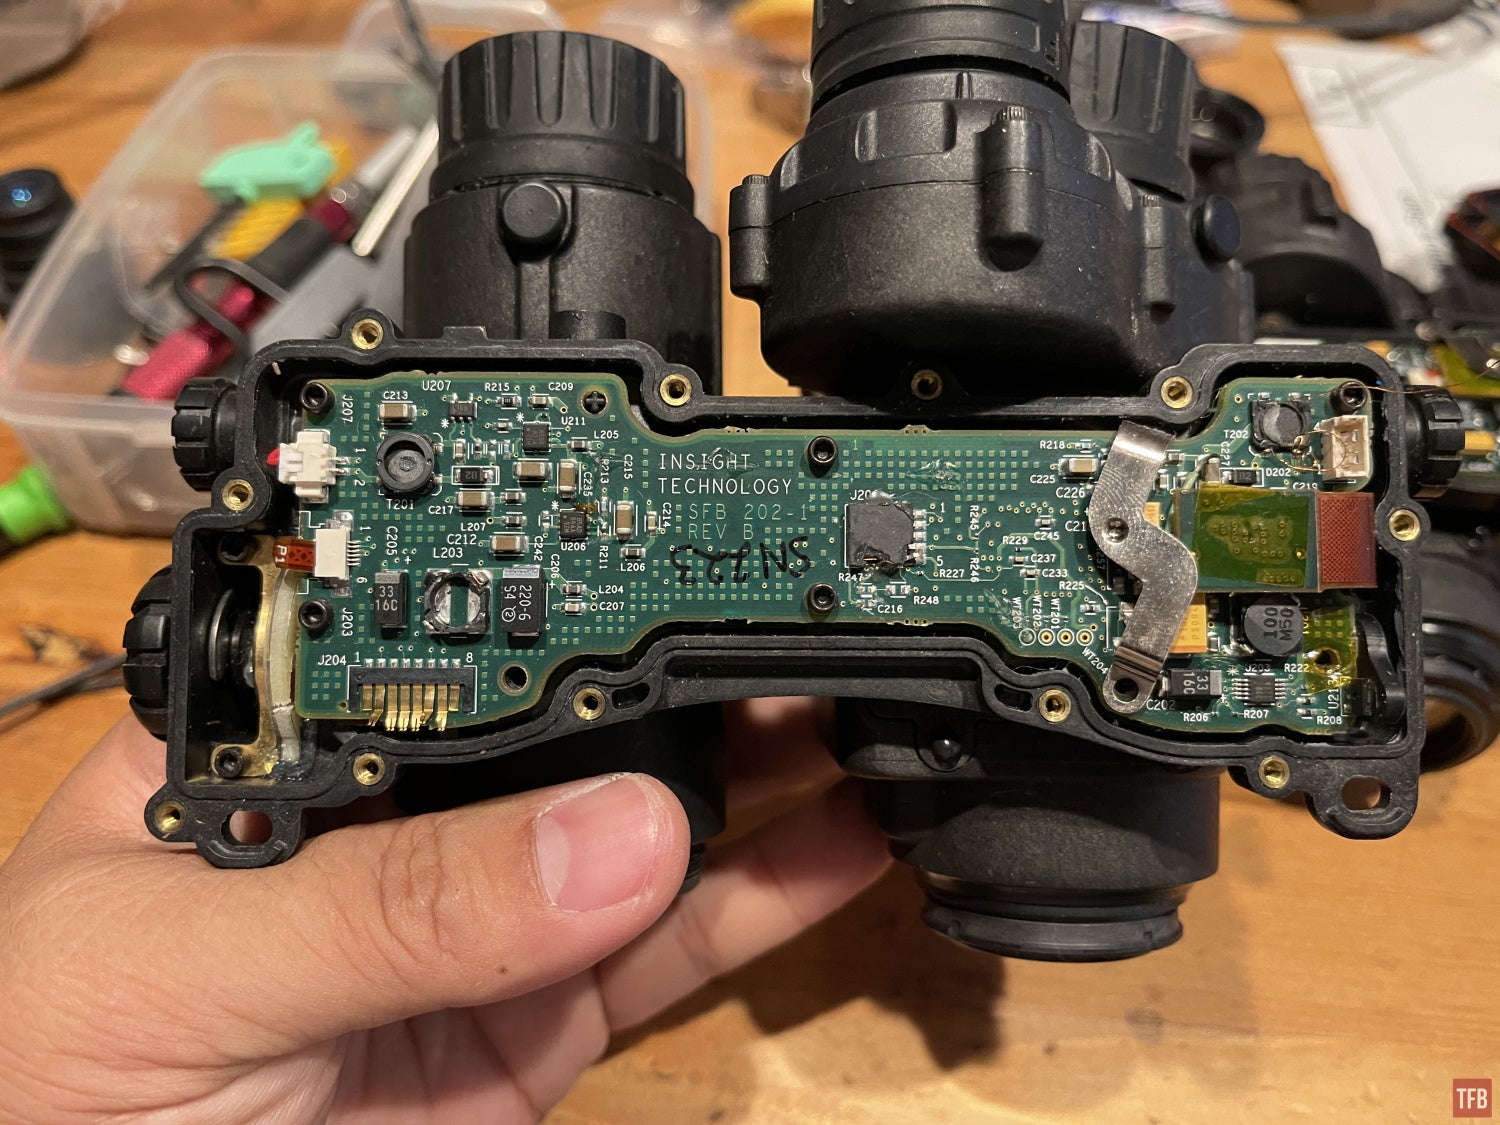
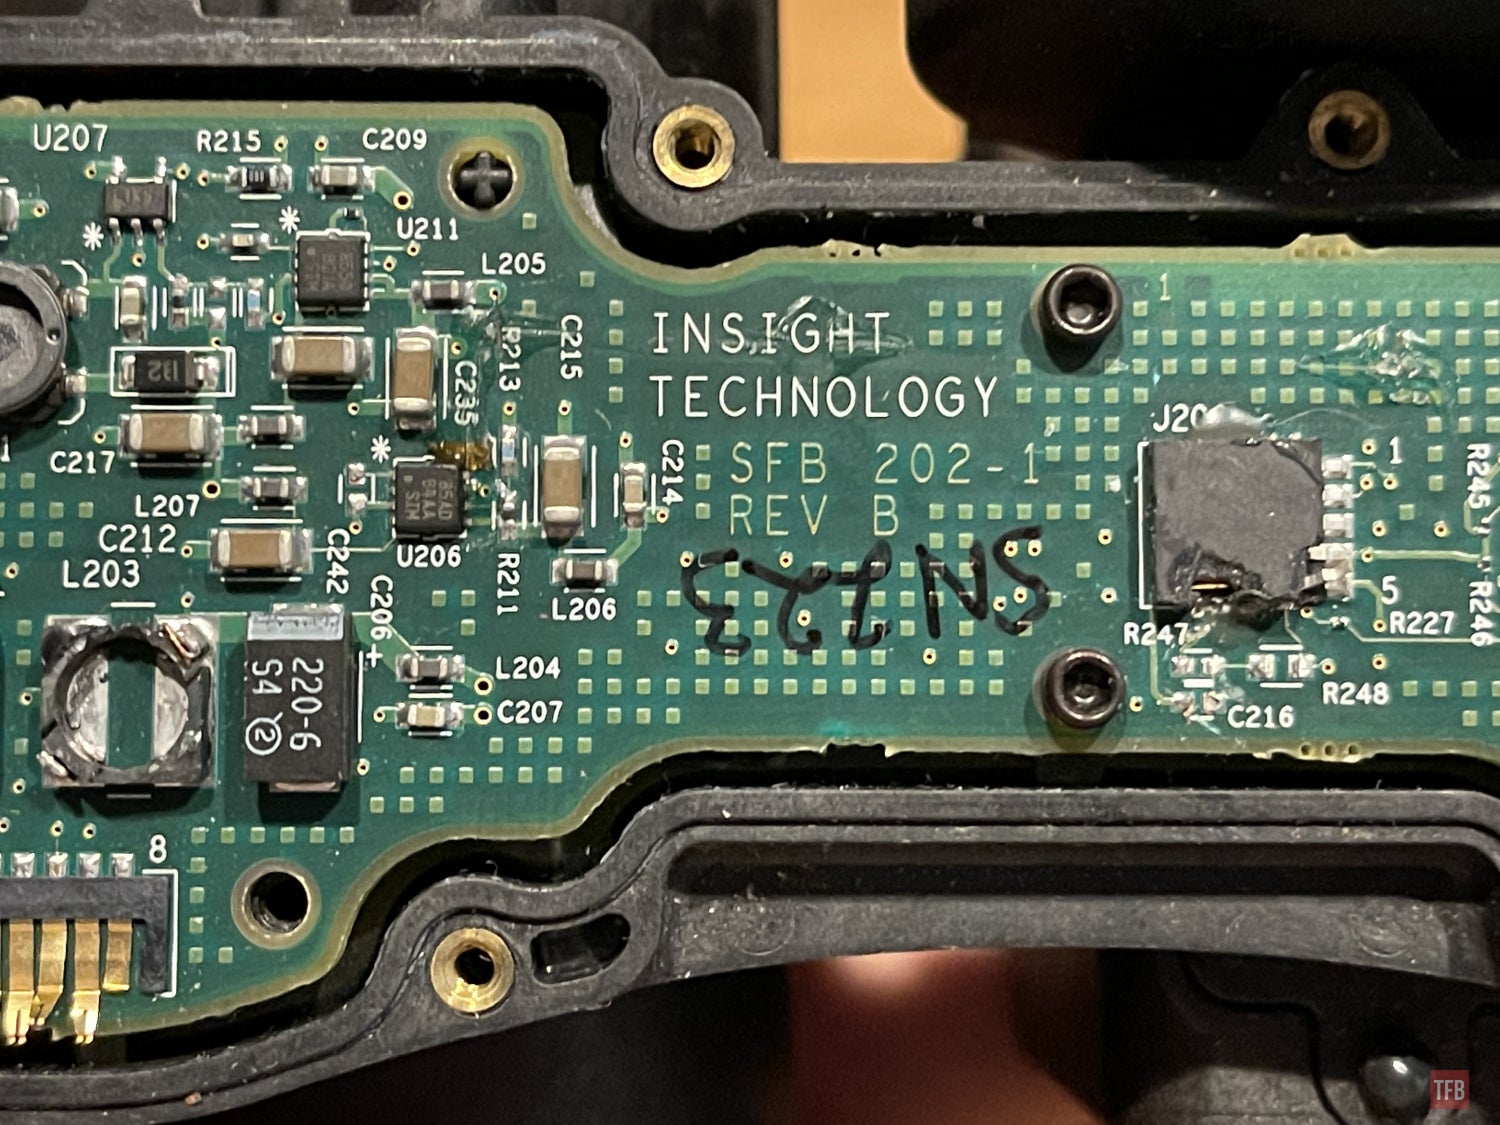
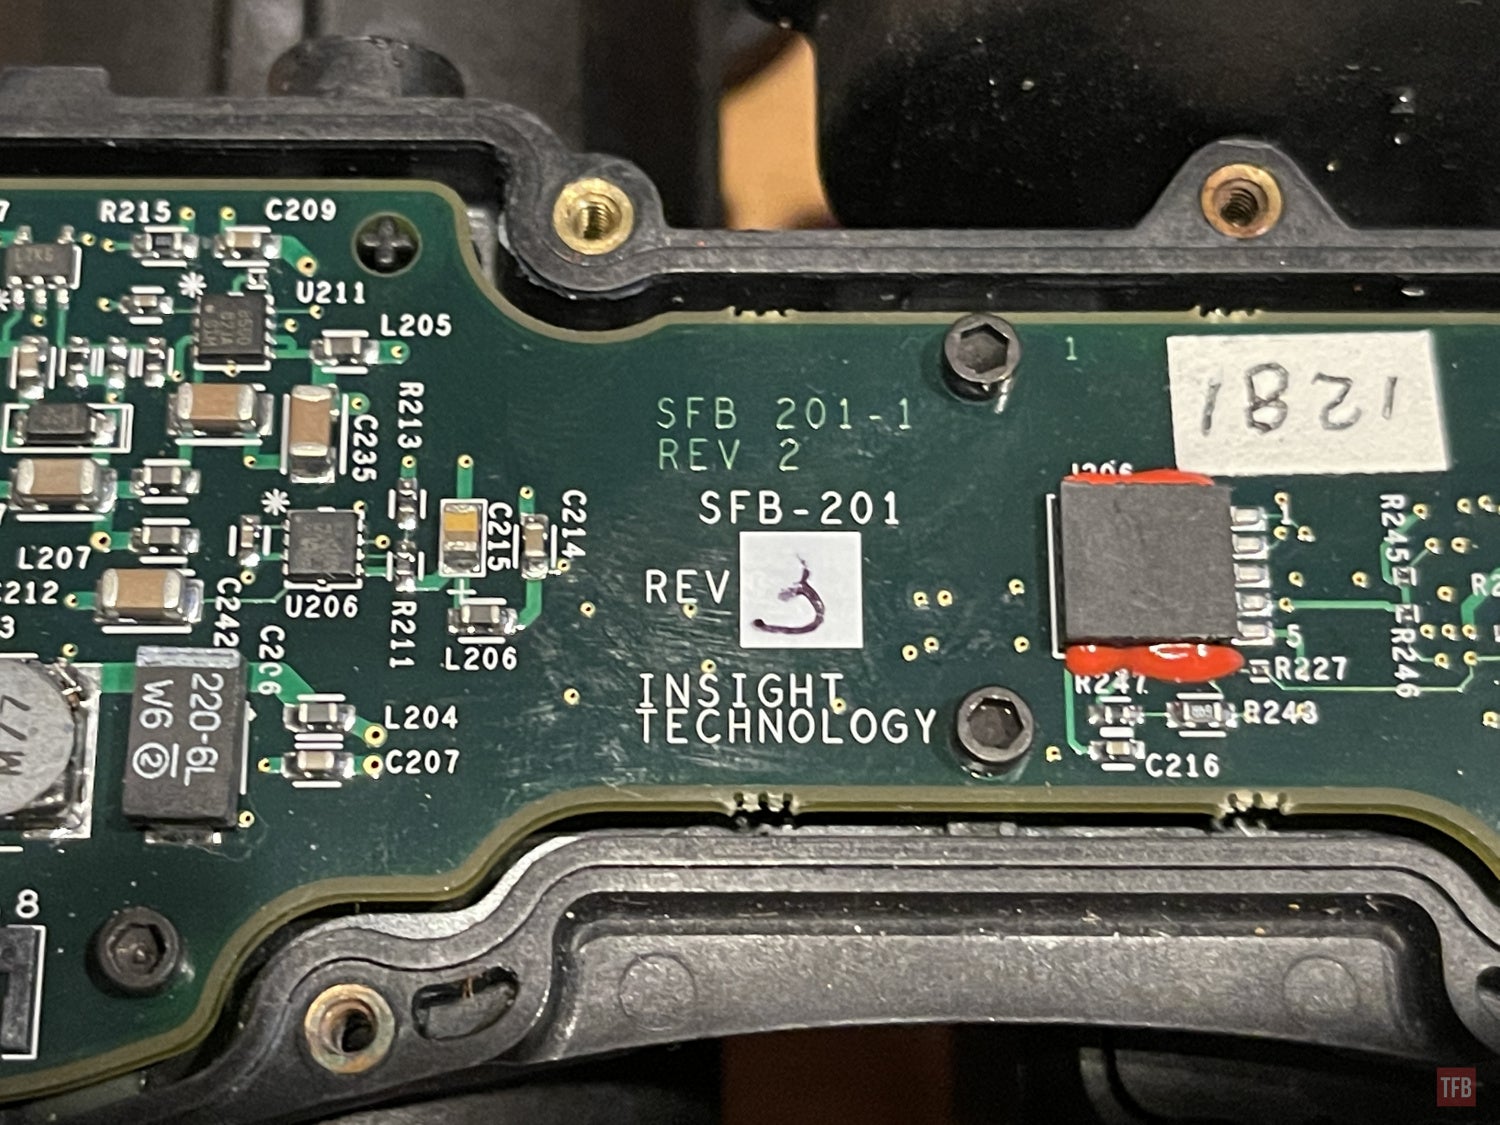
Look at the chipboard above and below. You will see parts and wires are missing. They went as far as to remove components from the boards. There is no way I can fix that.

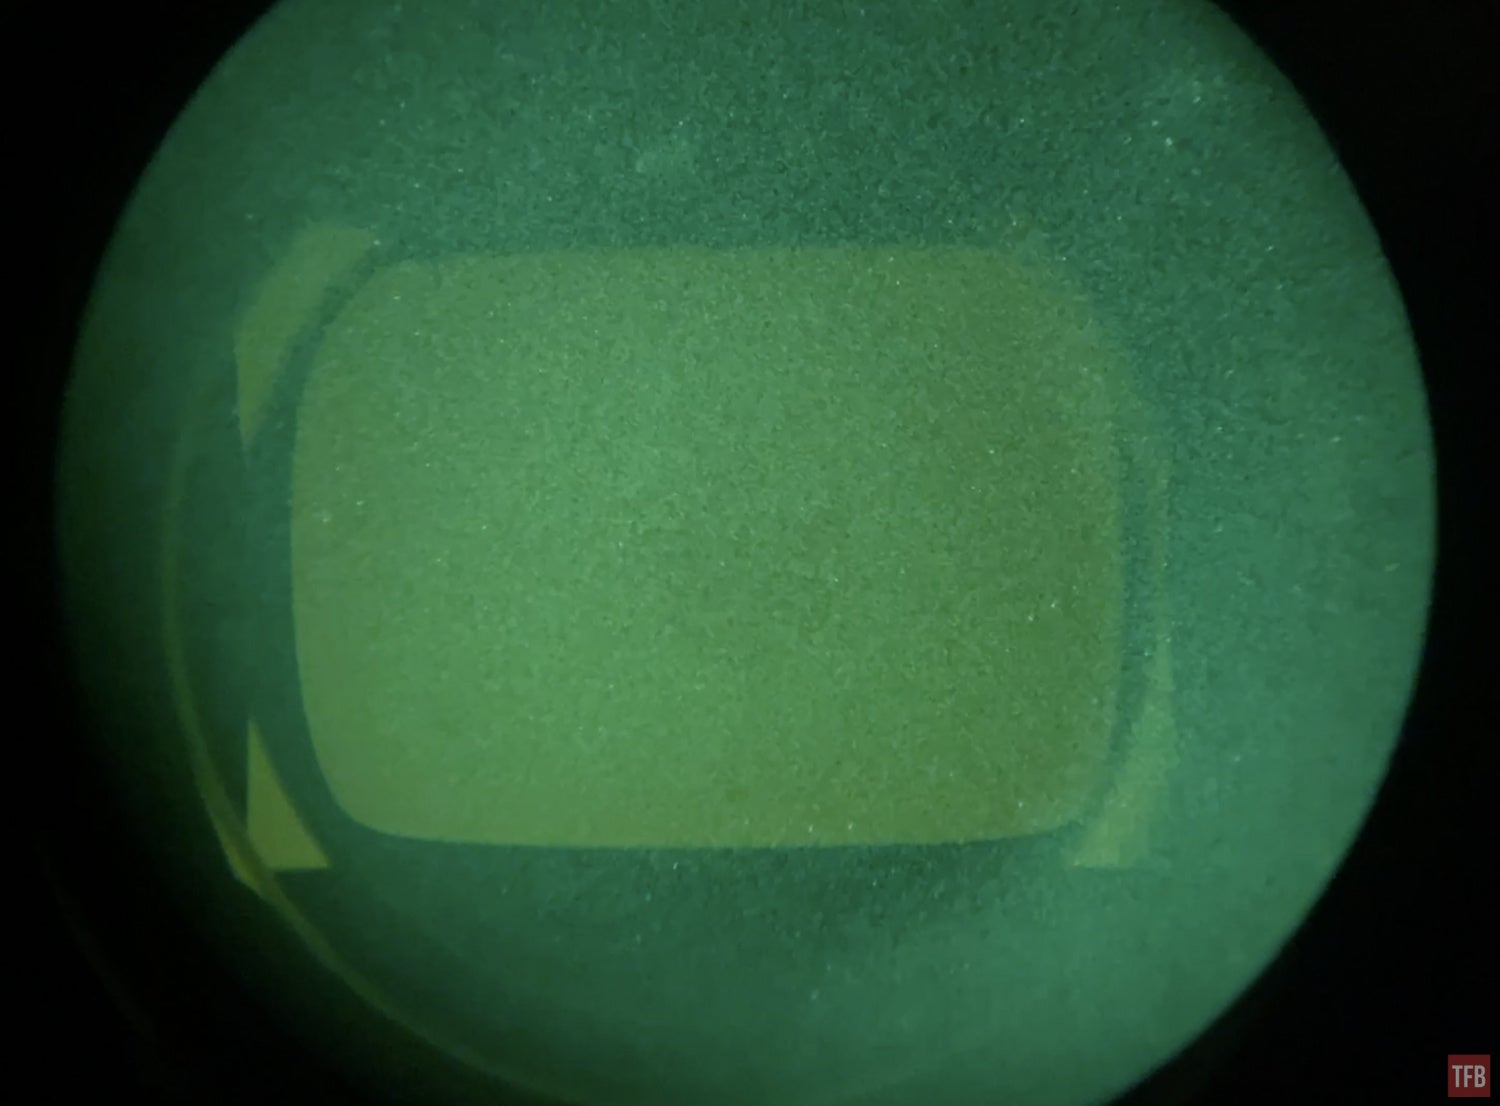
One of the FGS had a thermal sensor that was not drilled out, when you booted it up, it would glow a faint yellow rectangle but no thermal image.
So I tried to pull it out to see if there was anything noticeable about the thermal fusion monocular pod. I tried installing it in another bridge in hopes that maybe that was the reason it did not work. Nope. That did not do anything.
At least I can take some pictures of the PSQ-36.
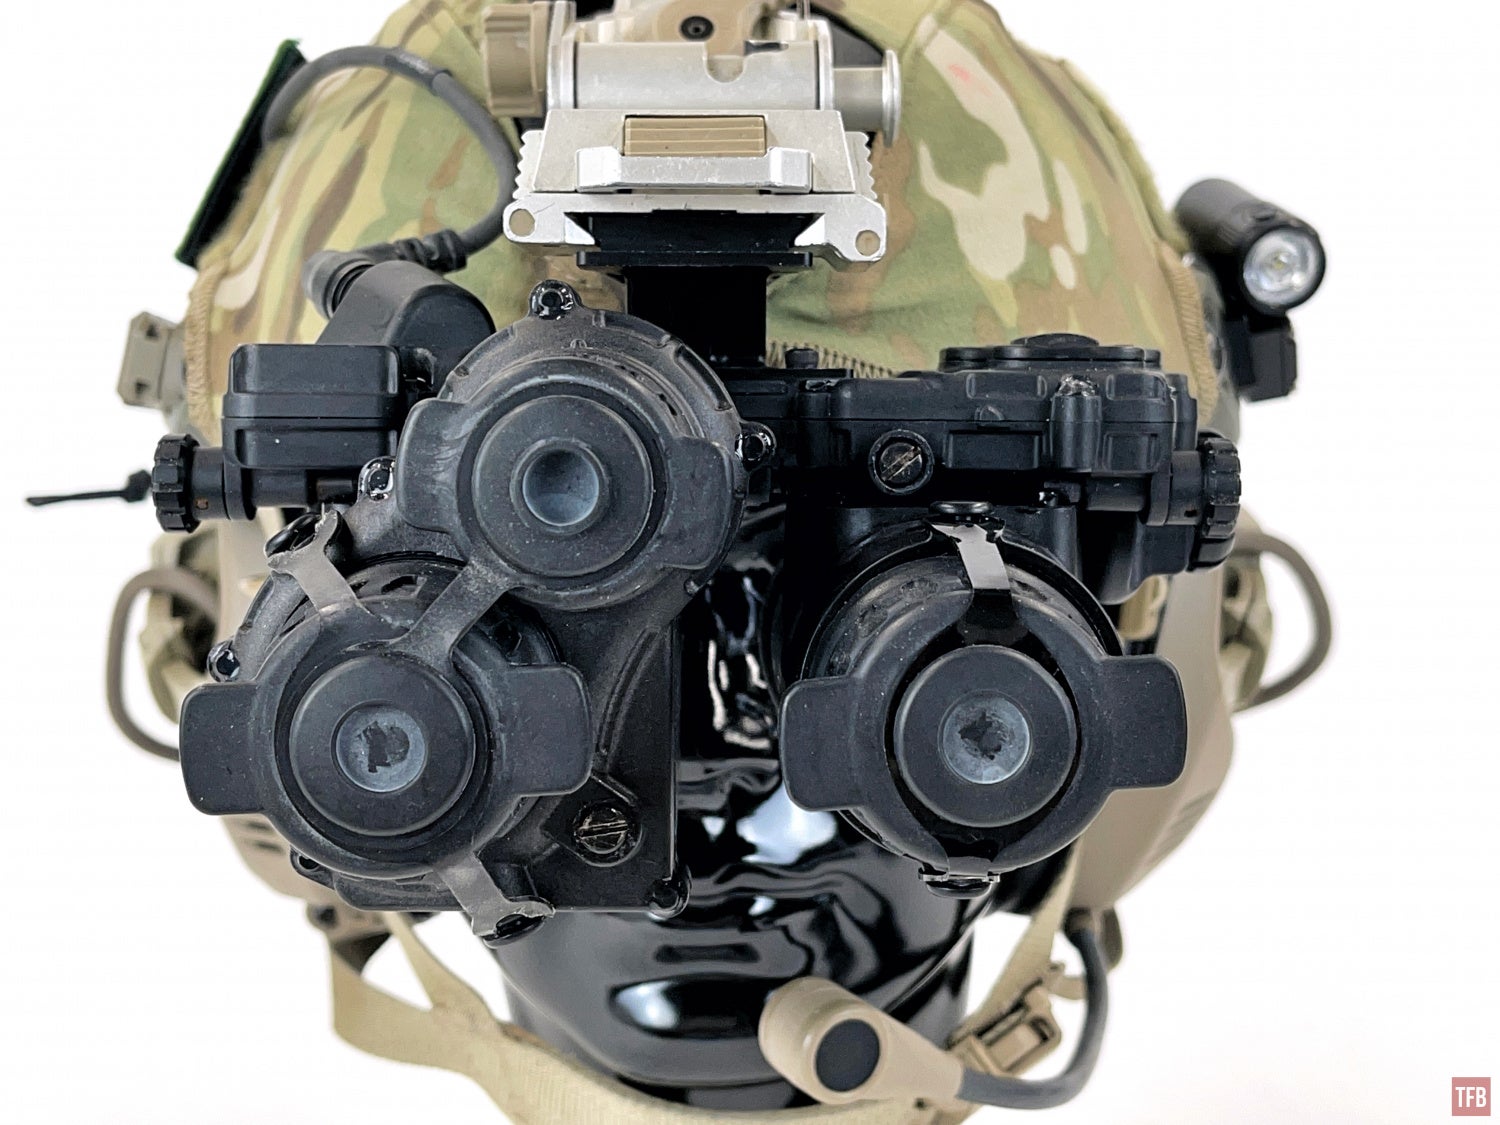
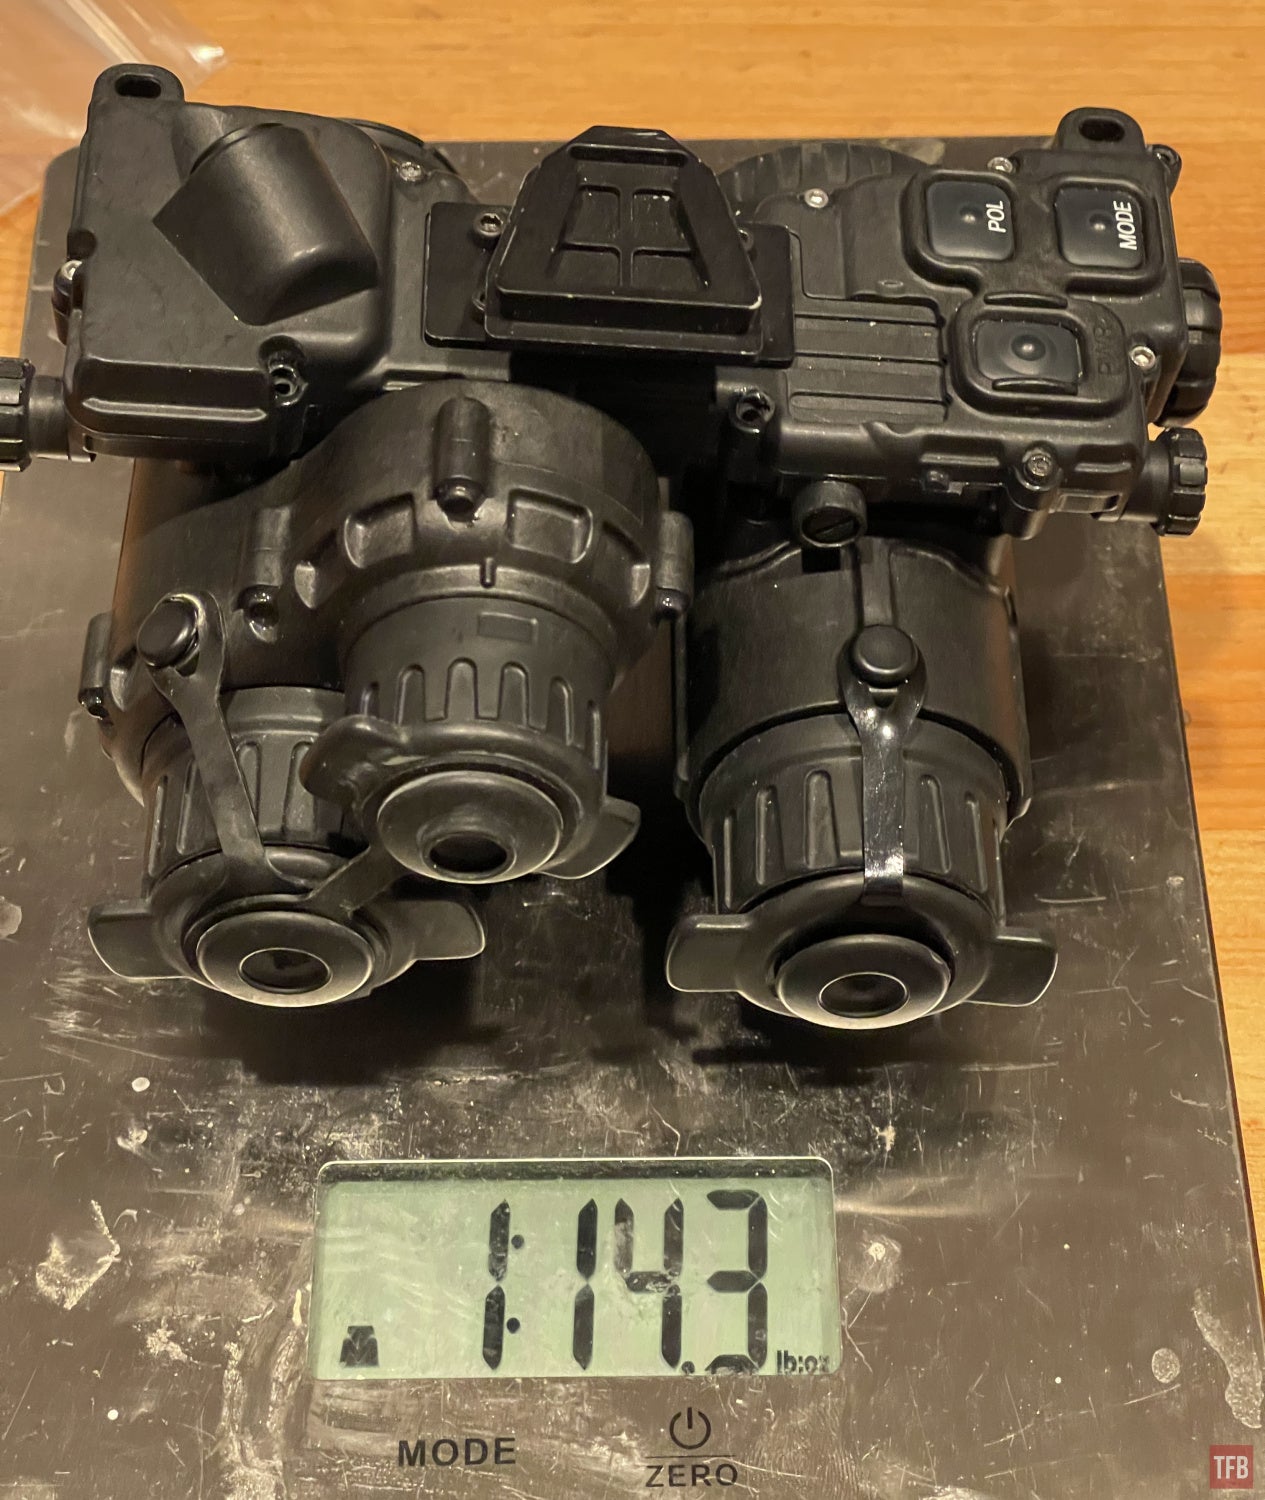
This PSQ-36 has three buttons. Since these did not have a manual with them, I am not sure what the MODE button does. I thought these might be the Enhanced Night Vision Goggle Binoculars but I do not see any way to input data like augmented reality. The small knob, just below the power button, is for pupillary distance adjustment of the left pod. The larger knob is for manual gain adjustment.
The PSQ-36 does not have onboard power. Instead, it uses a Fischer port connector like the GPNVG and PVS-31A. I used my BNVD cable and ARGUS 1431 battery backpack to power the PSQ-36.
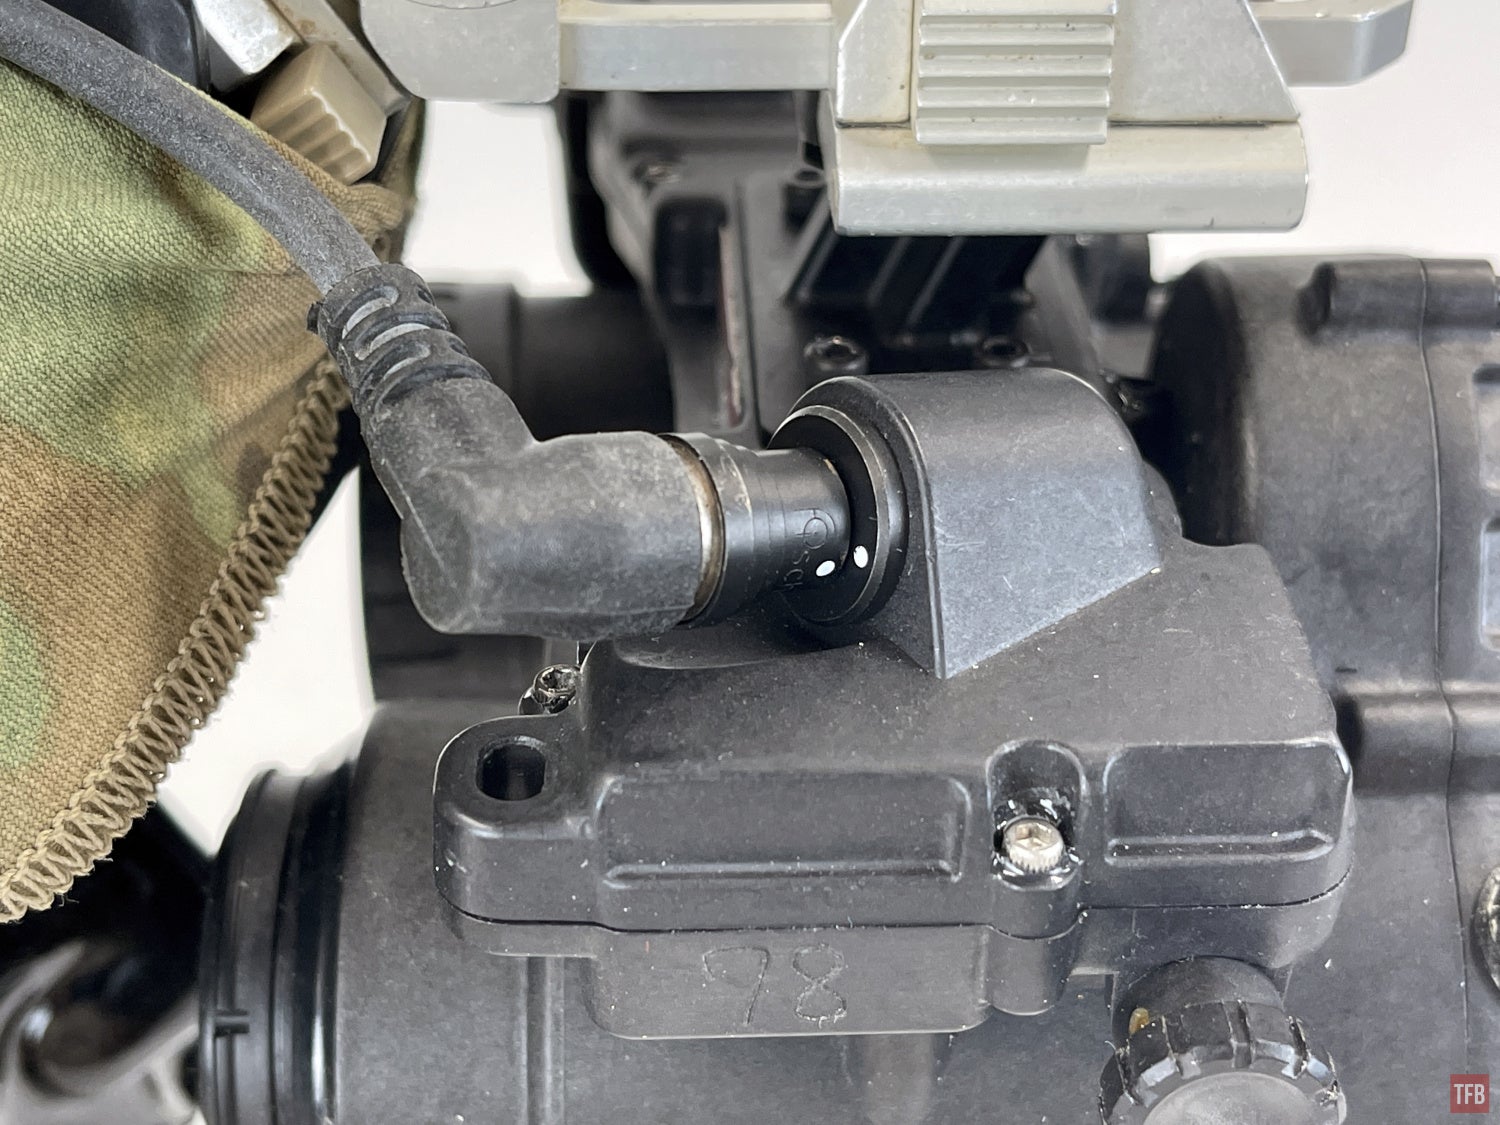
Fortunately, the Fischer port is oriented 90º so the angled cable for the BNVD still works.
With my image intensifiers, the PSQ-36 is rather hefty – over 30oz without battery pack or cable.
Will The Real PSQ-36 Please Stand Up?
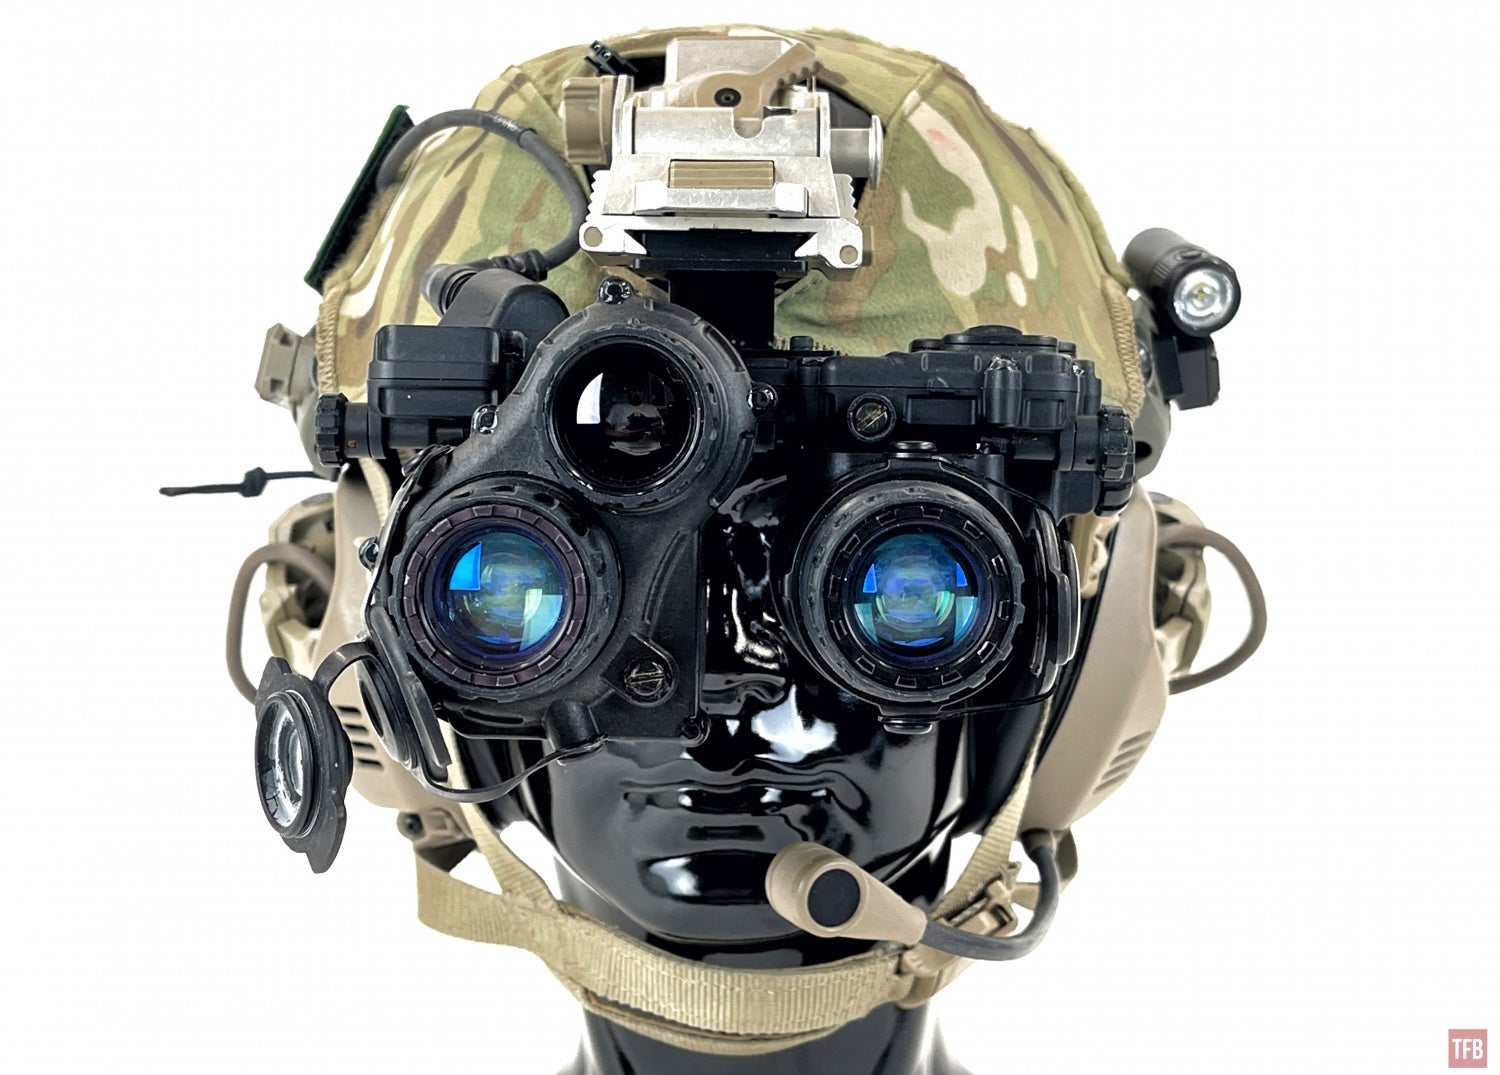
While it looks similar, this is not the same as the previous PSQ-36 goggles. This was sent in for some maintenance work but it was fully functioning when I received it. So now we can really test it!
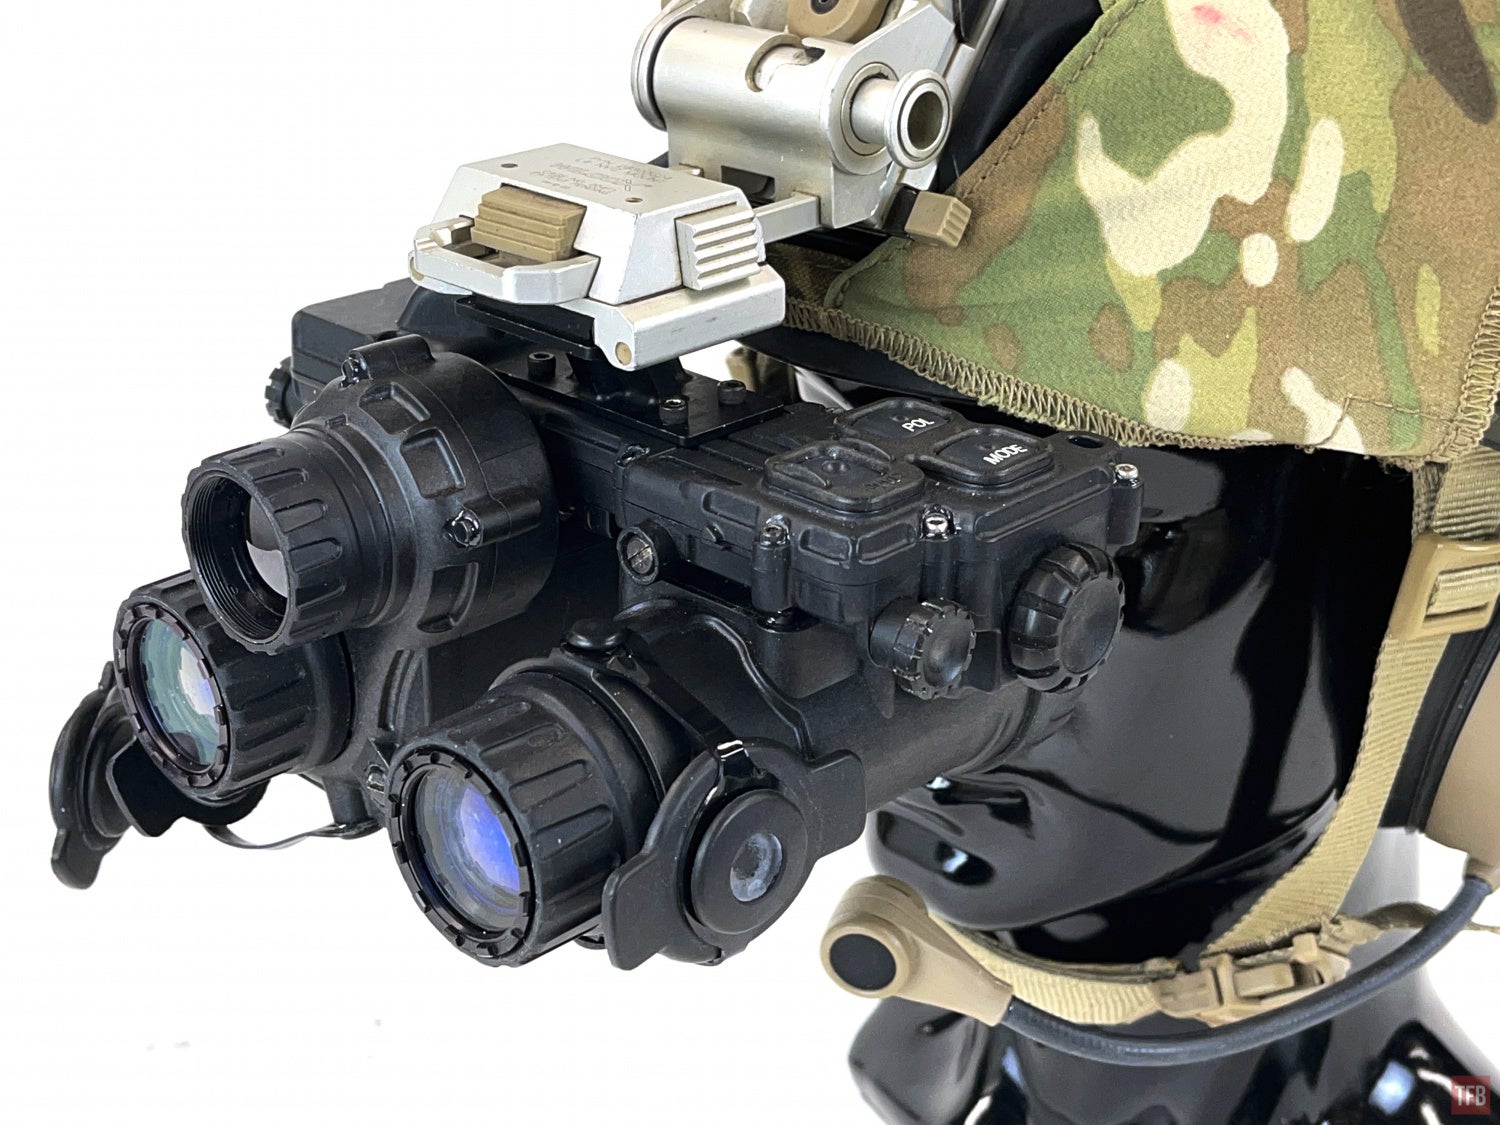
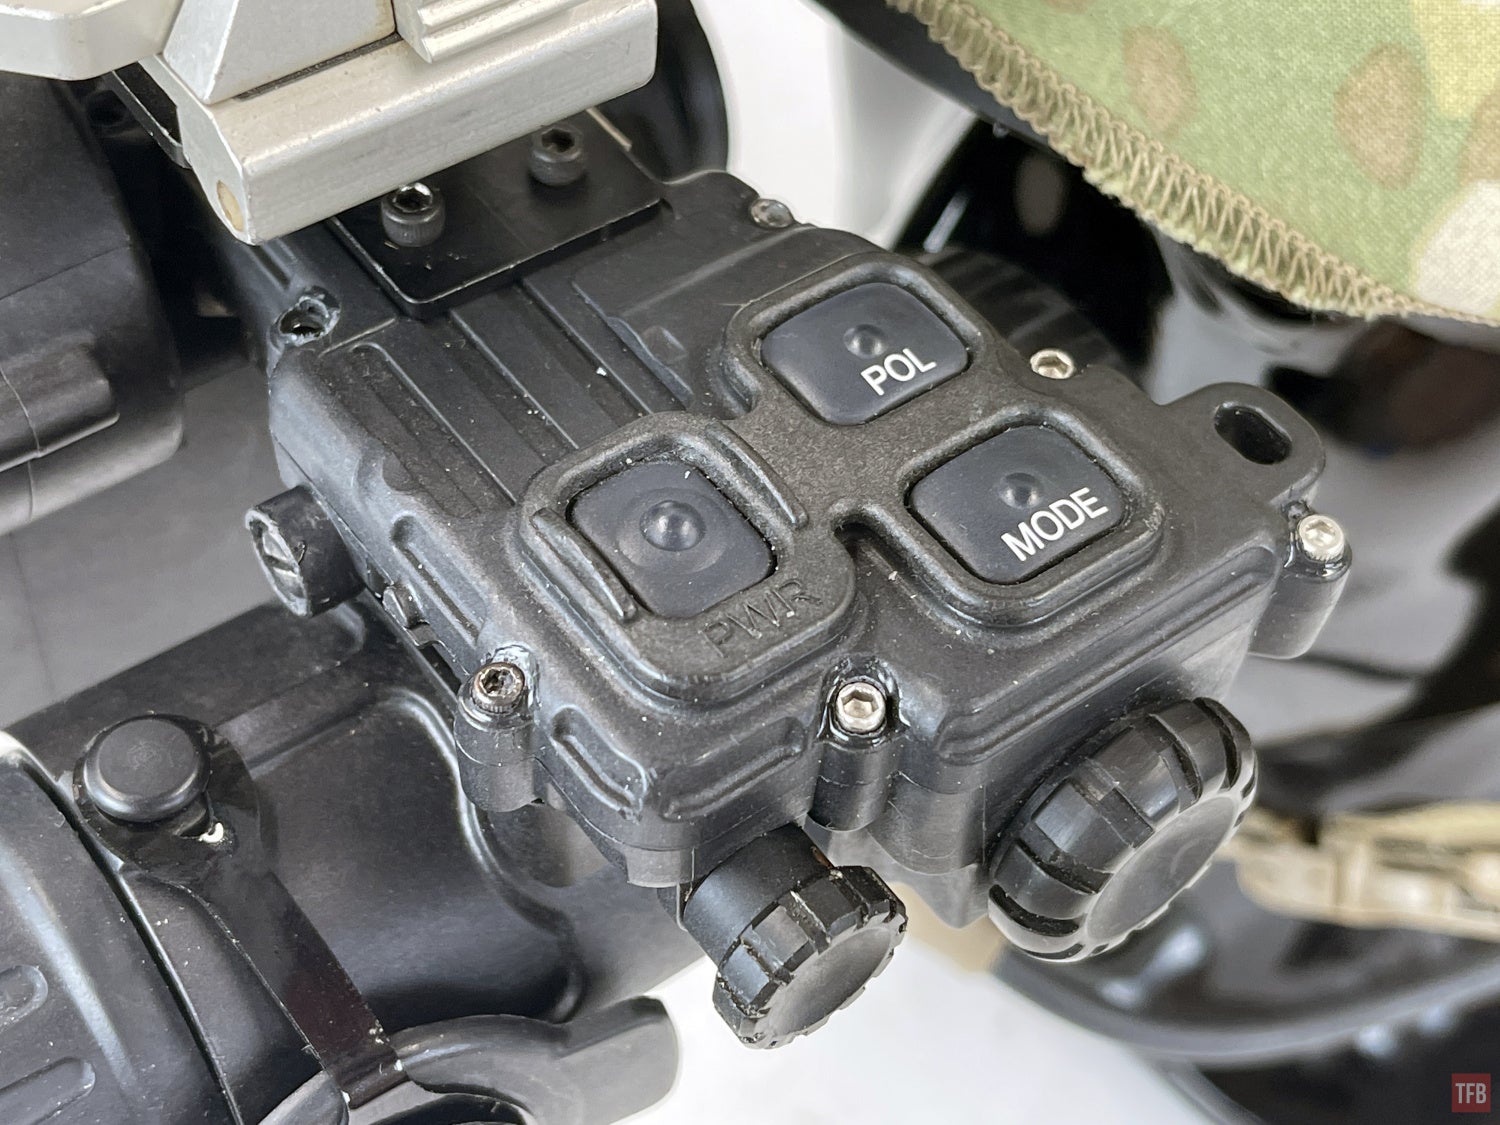
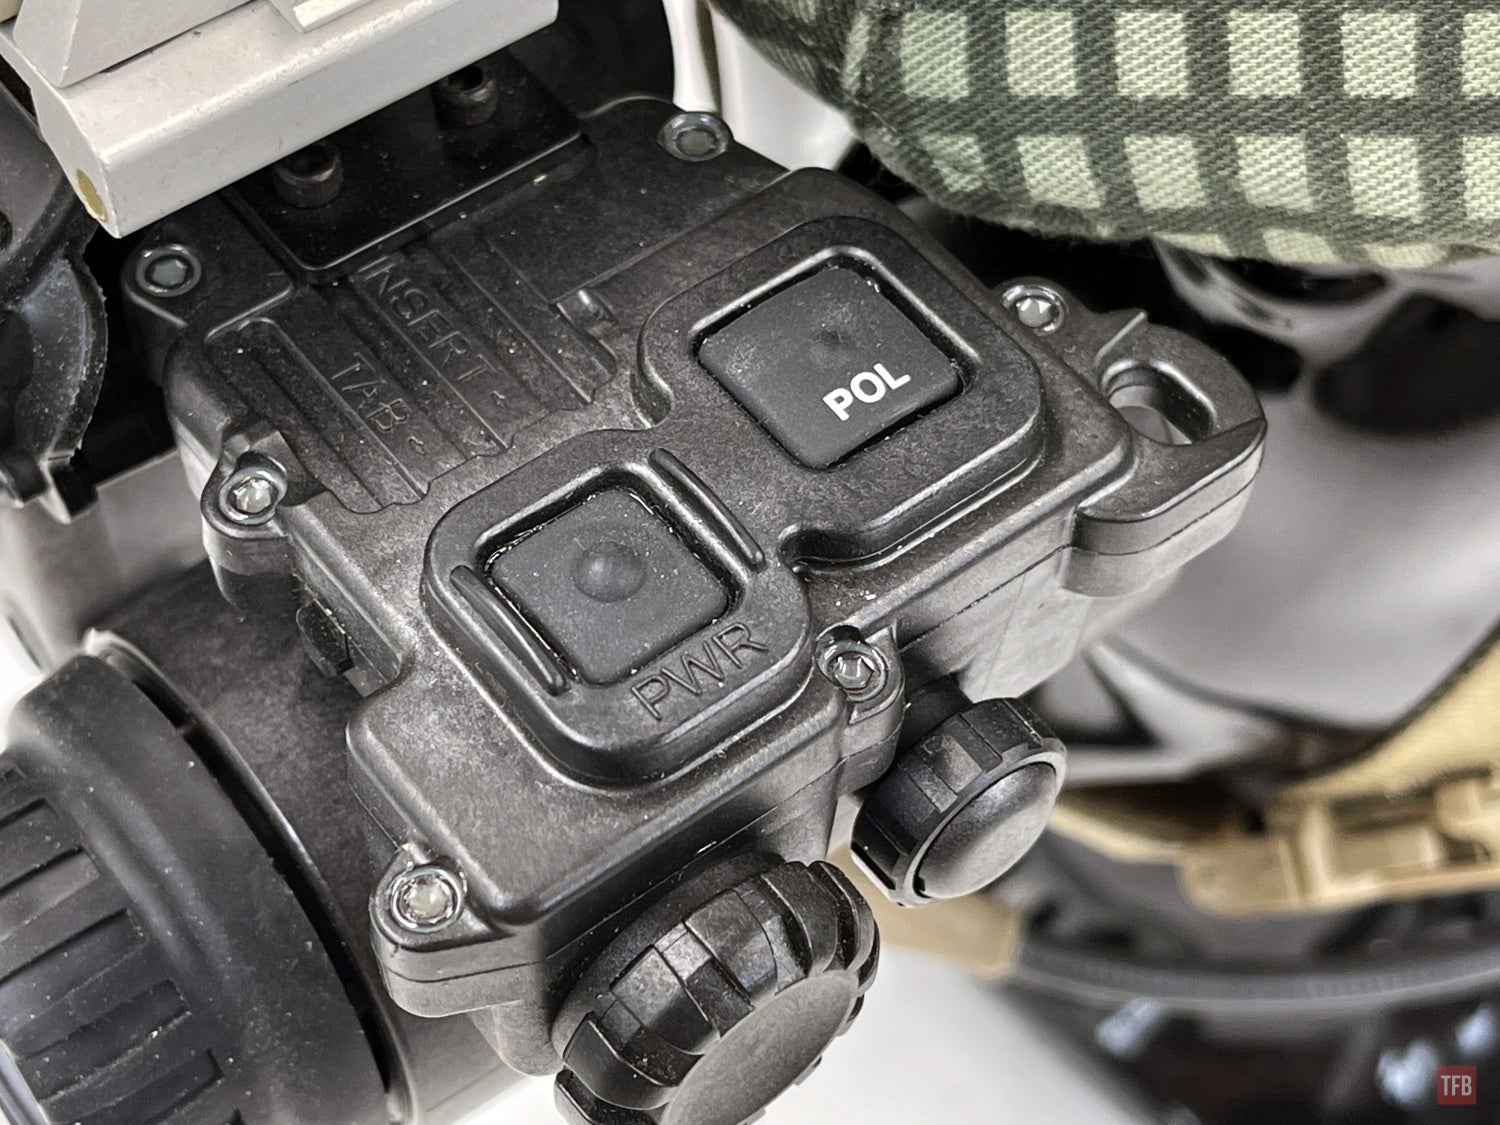
One of the first things I did was weigh this PSQ-36. OK, that is much better. 22.6oz is much more manageable. But do you notice any other differences? It only has two buttons.
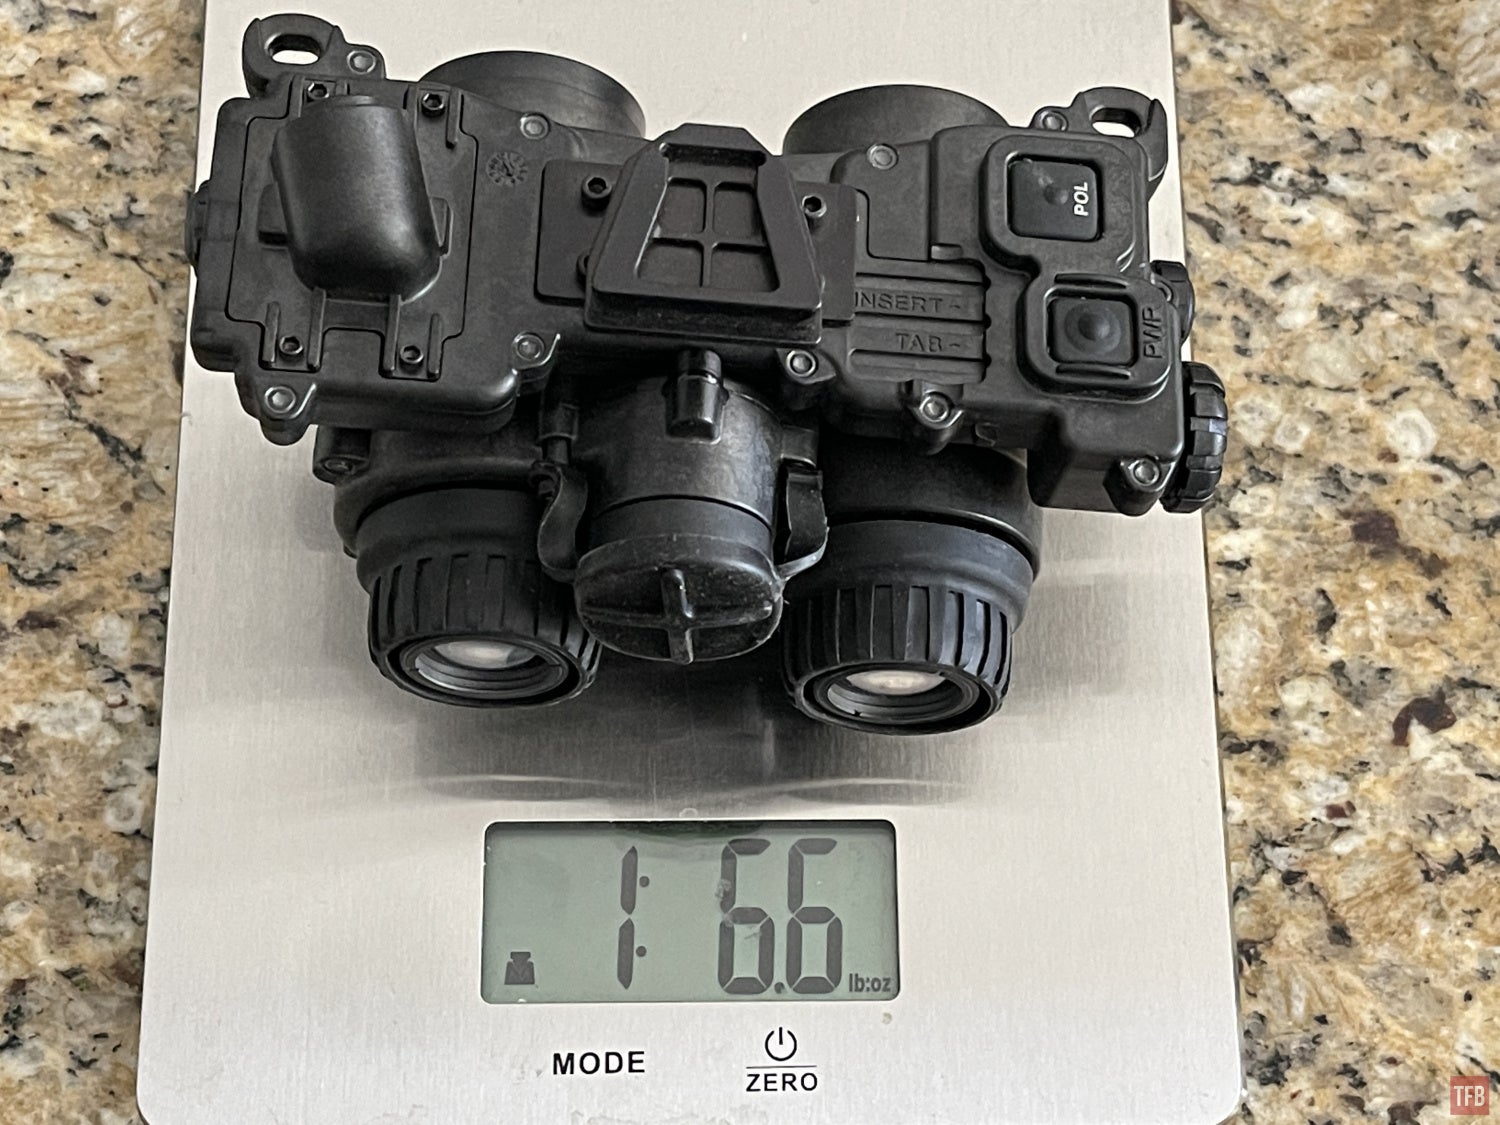
This PSQ-36 only has a power and polarity button.
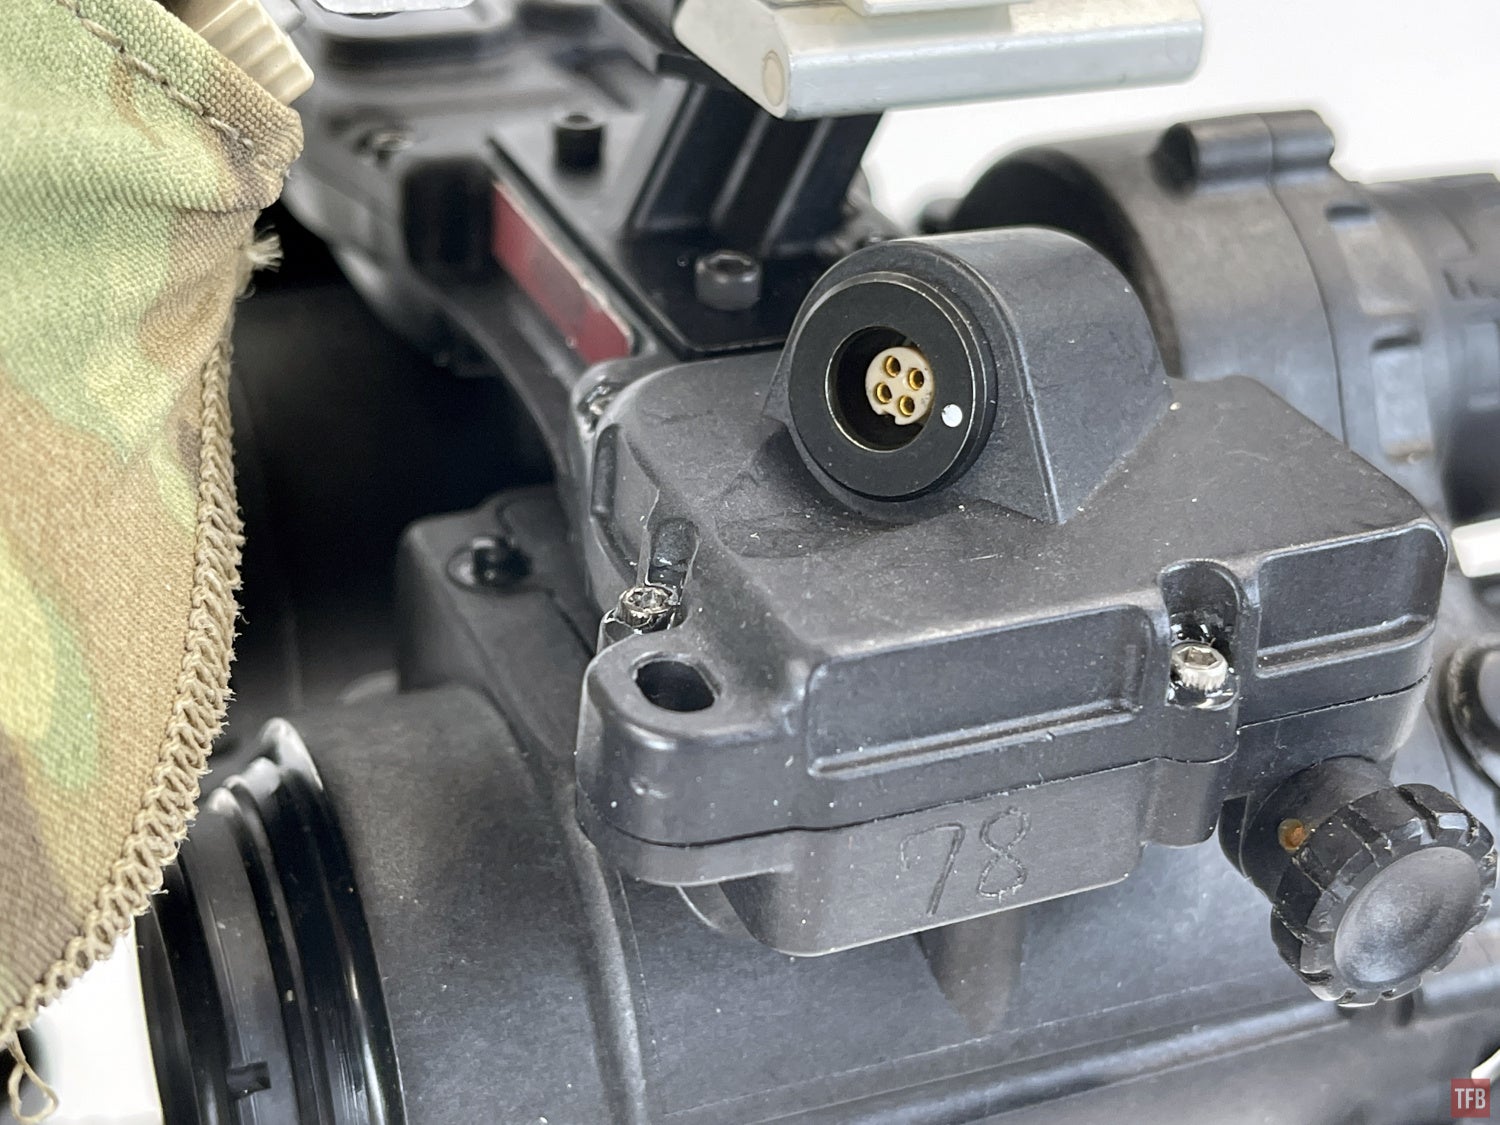
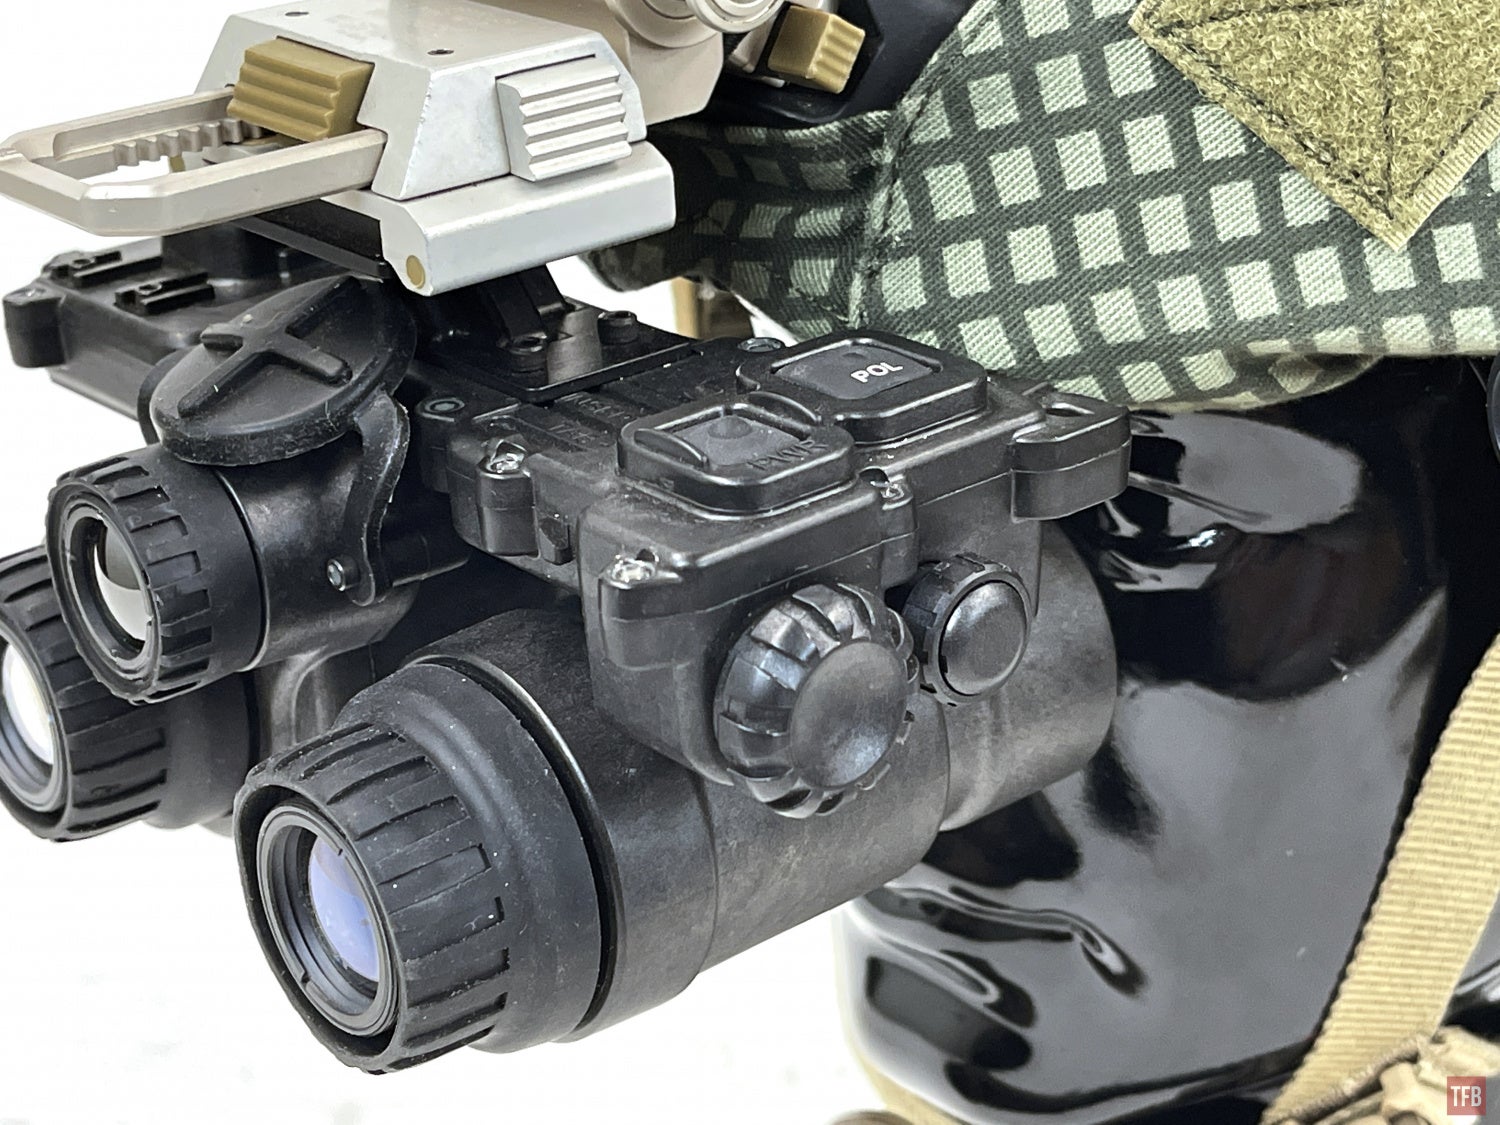
The battery cable port is oriented top dead center so while 90º angled plugs will still work it is not ideal.
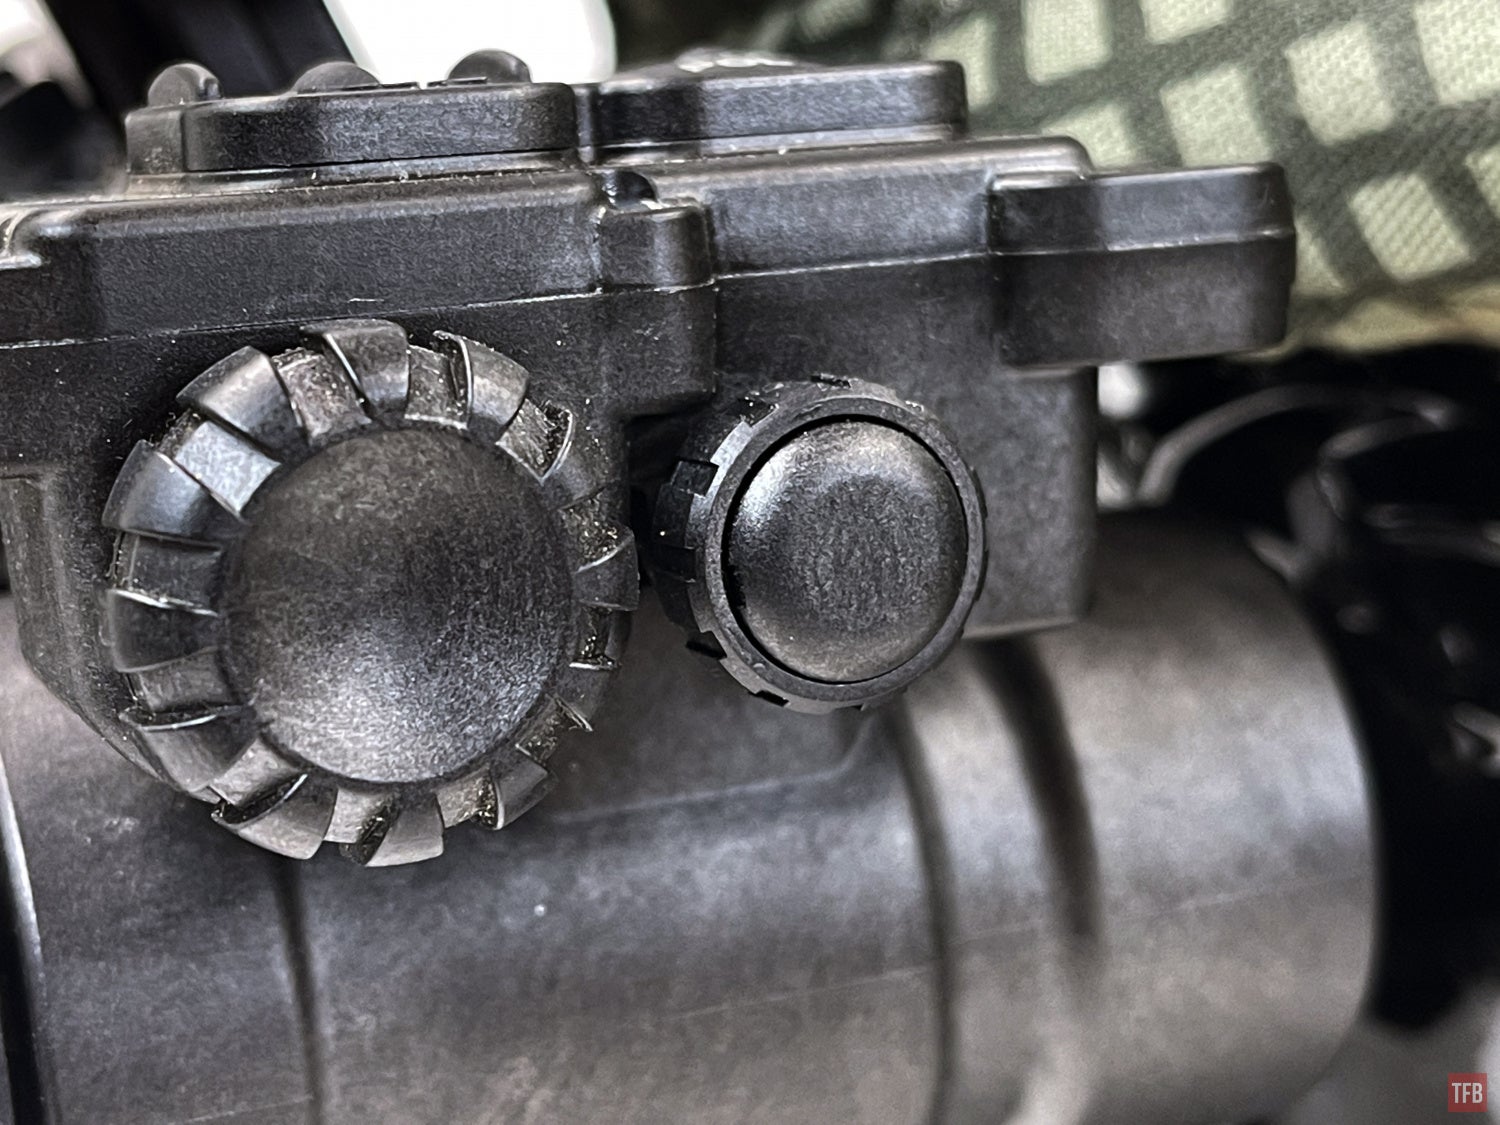
Similar to the other PSQ-36, this one has a PD adjustment knob but it sits behind the larger manual gain knob. When the FGS is turned on, it starts in I2 mode (night vision only). The gain knob will adjust the brightness of the image intensifier. When you turn the thermal imager on it defaults to medium brightness. Often I find this to be to dim for my preference so pressing the gain knob will bring up a brightness meter for the thermal image and rotating the knob will adjust the thermal image brightness.
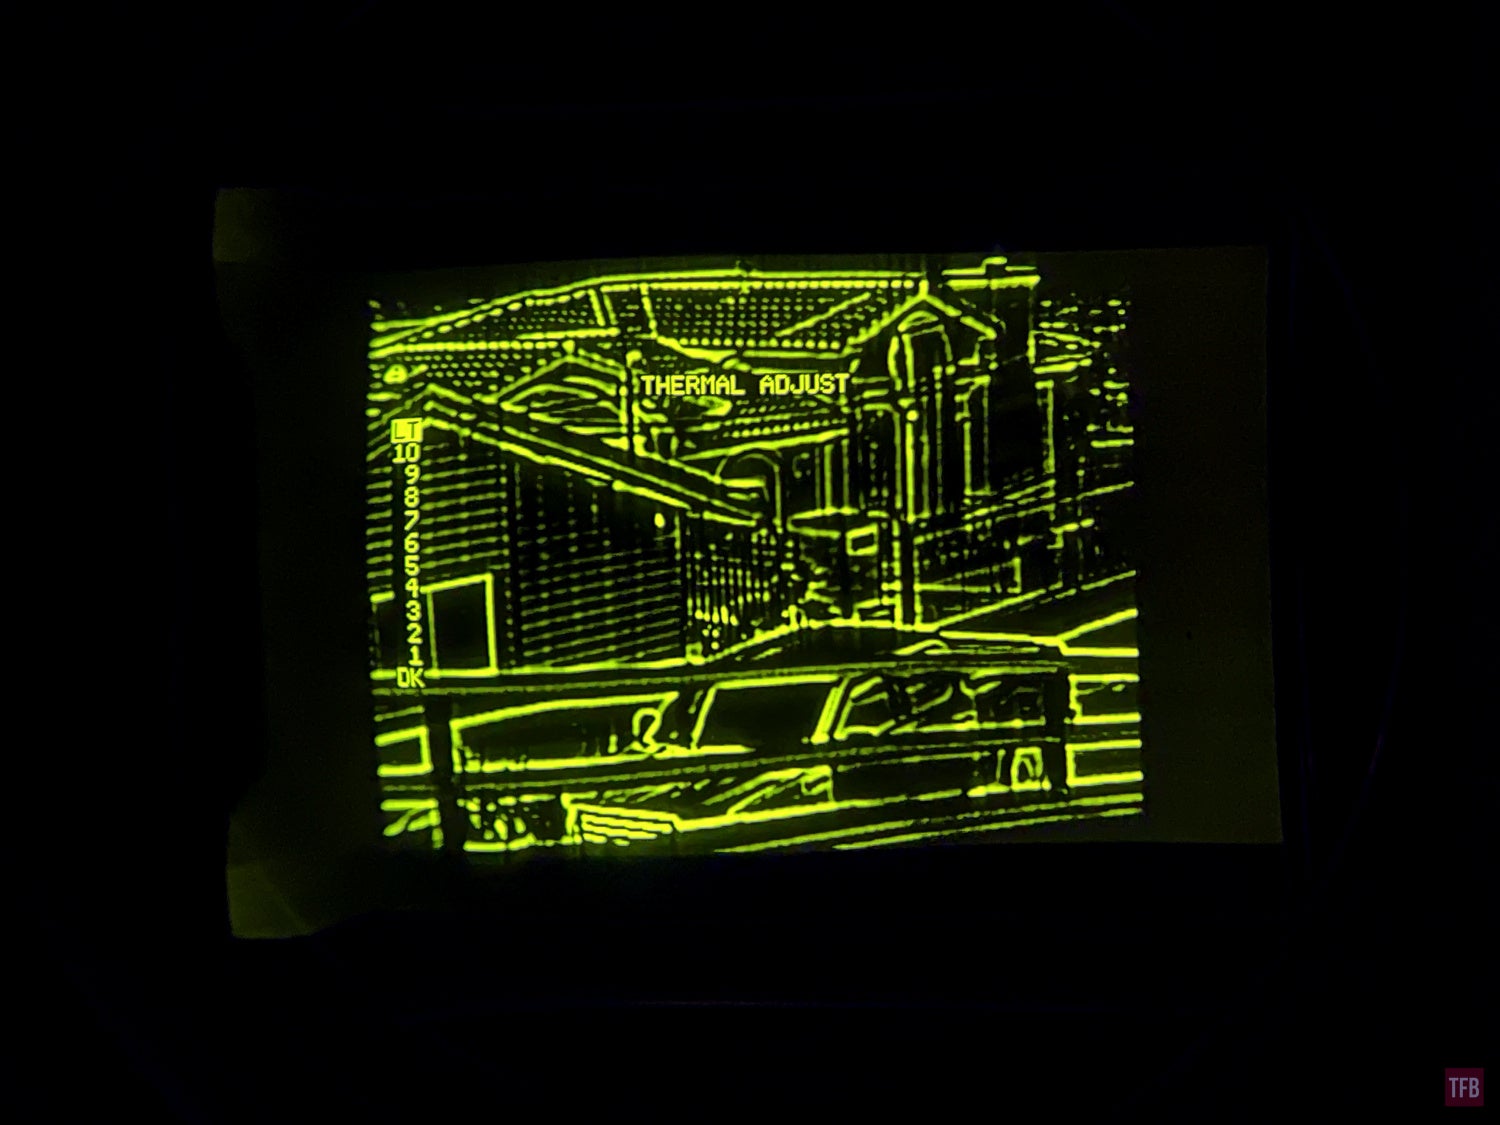
Thermal brightness adjustment menu
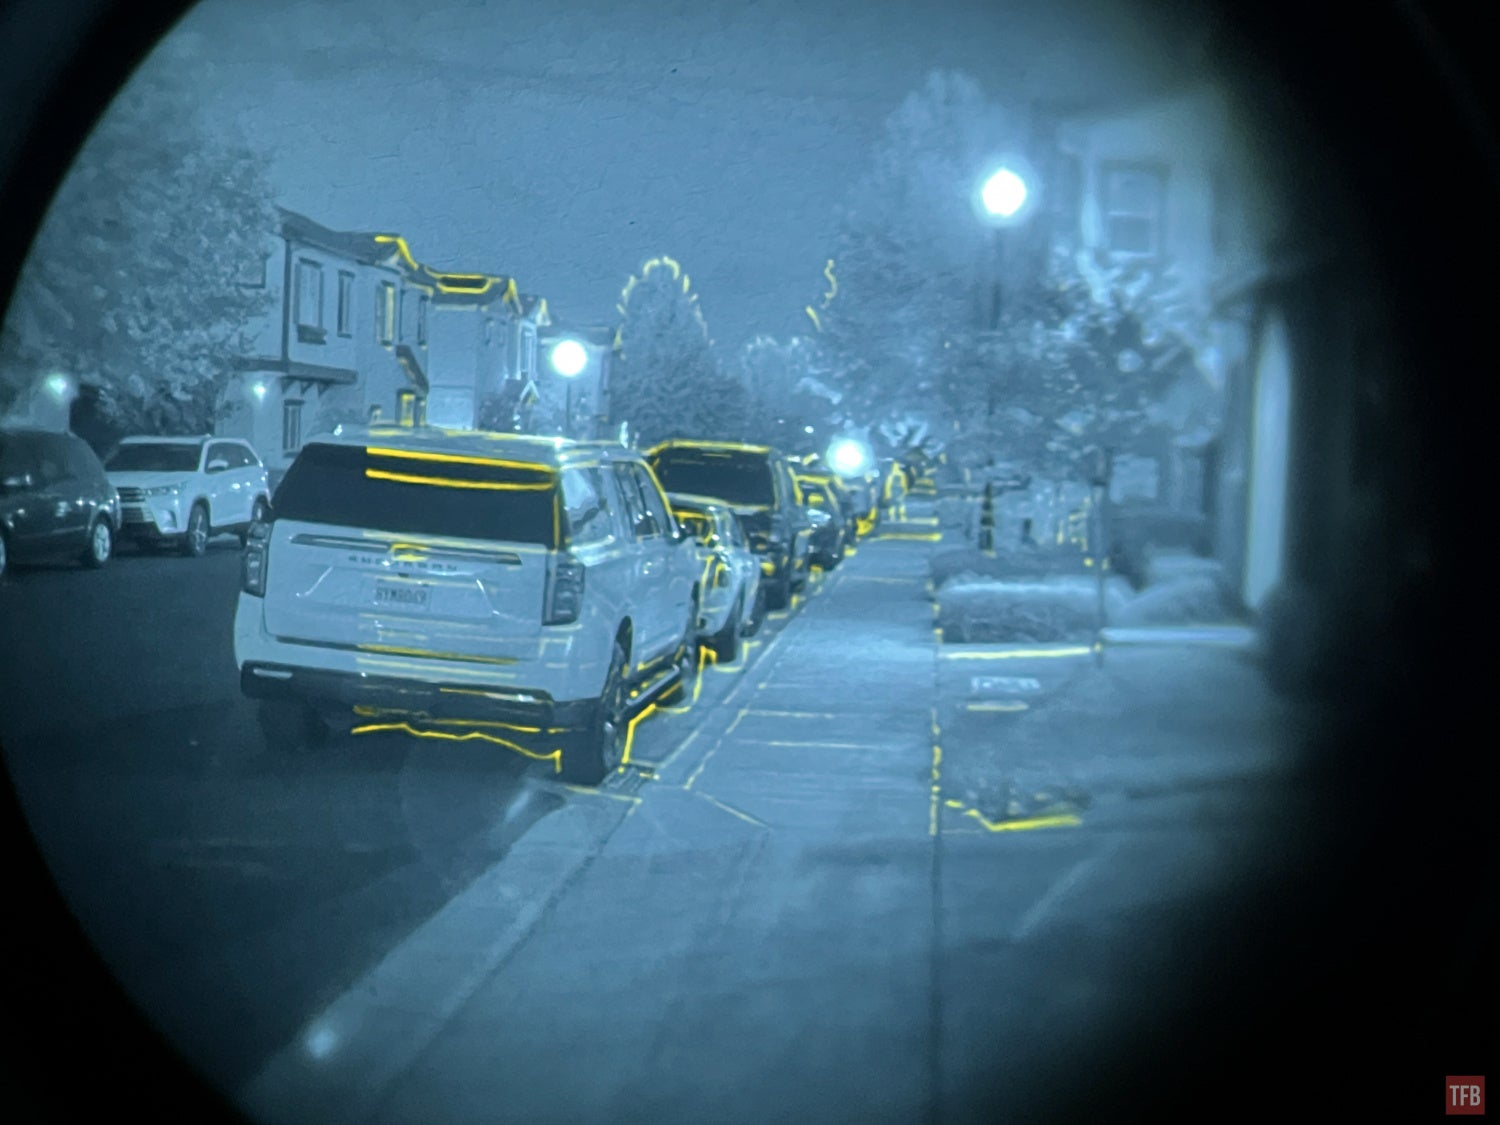
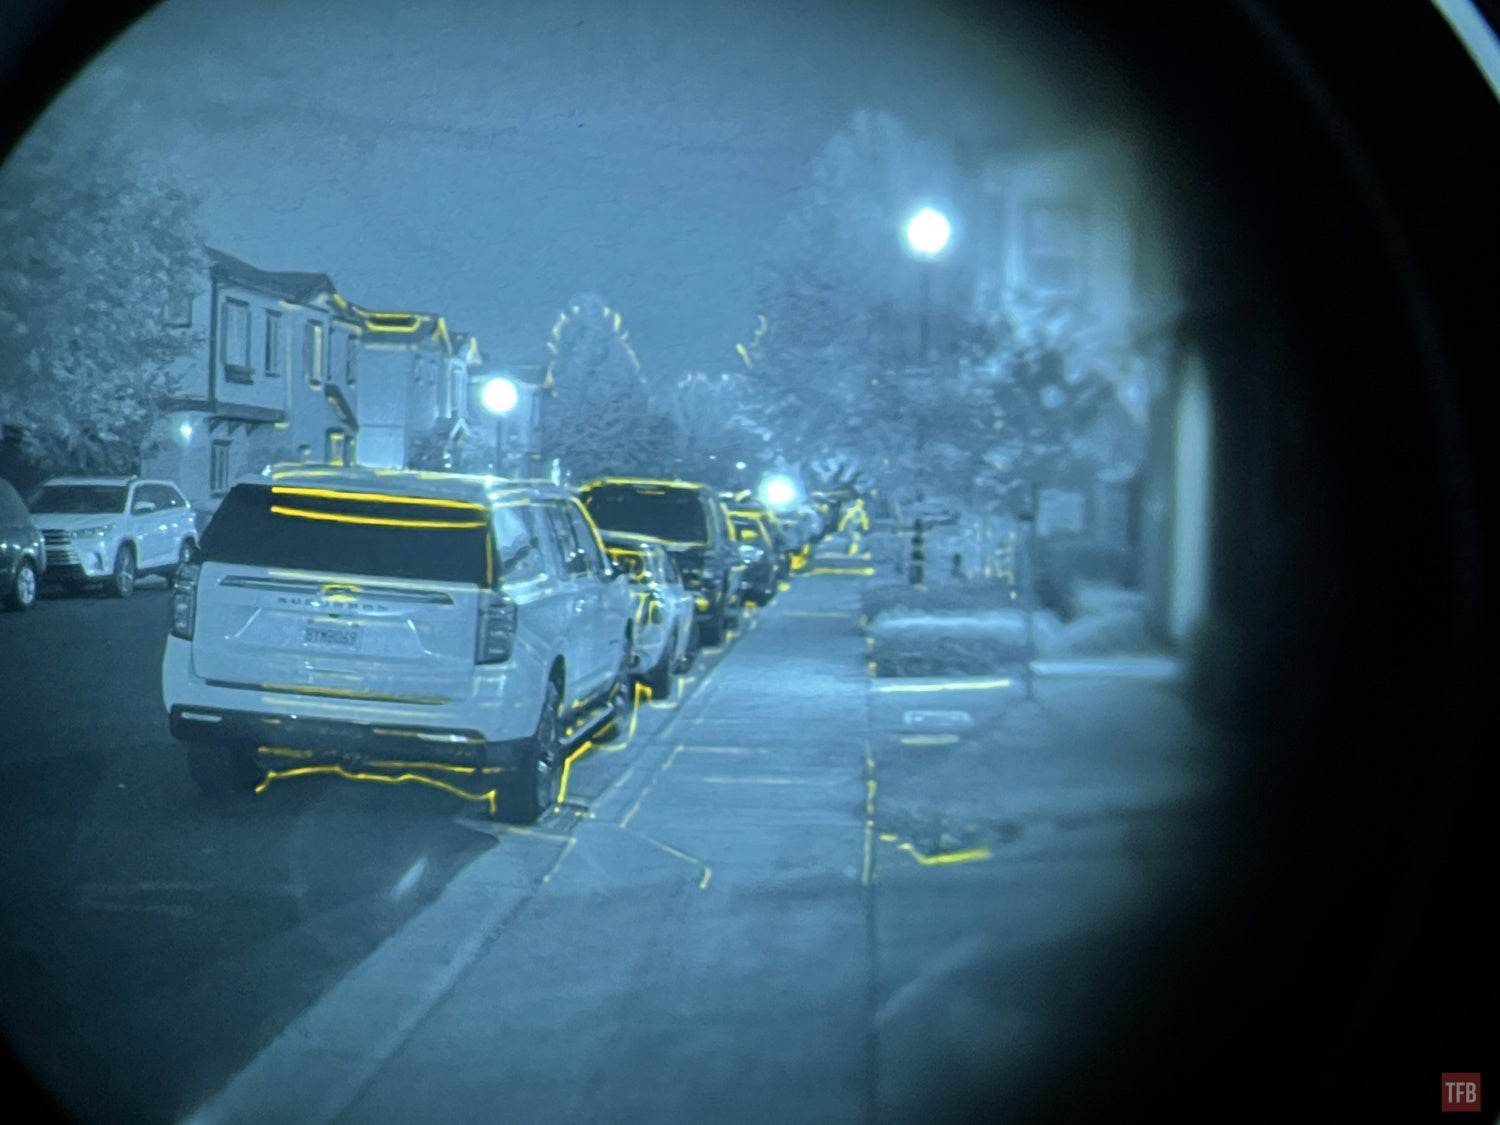
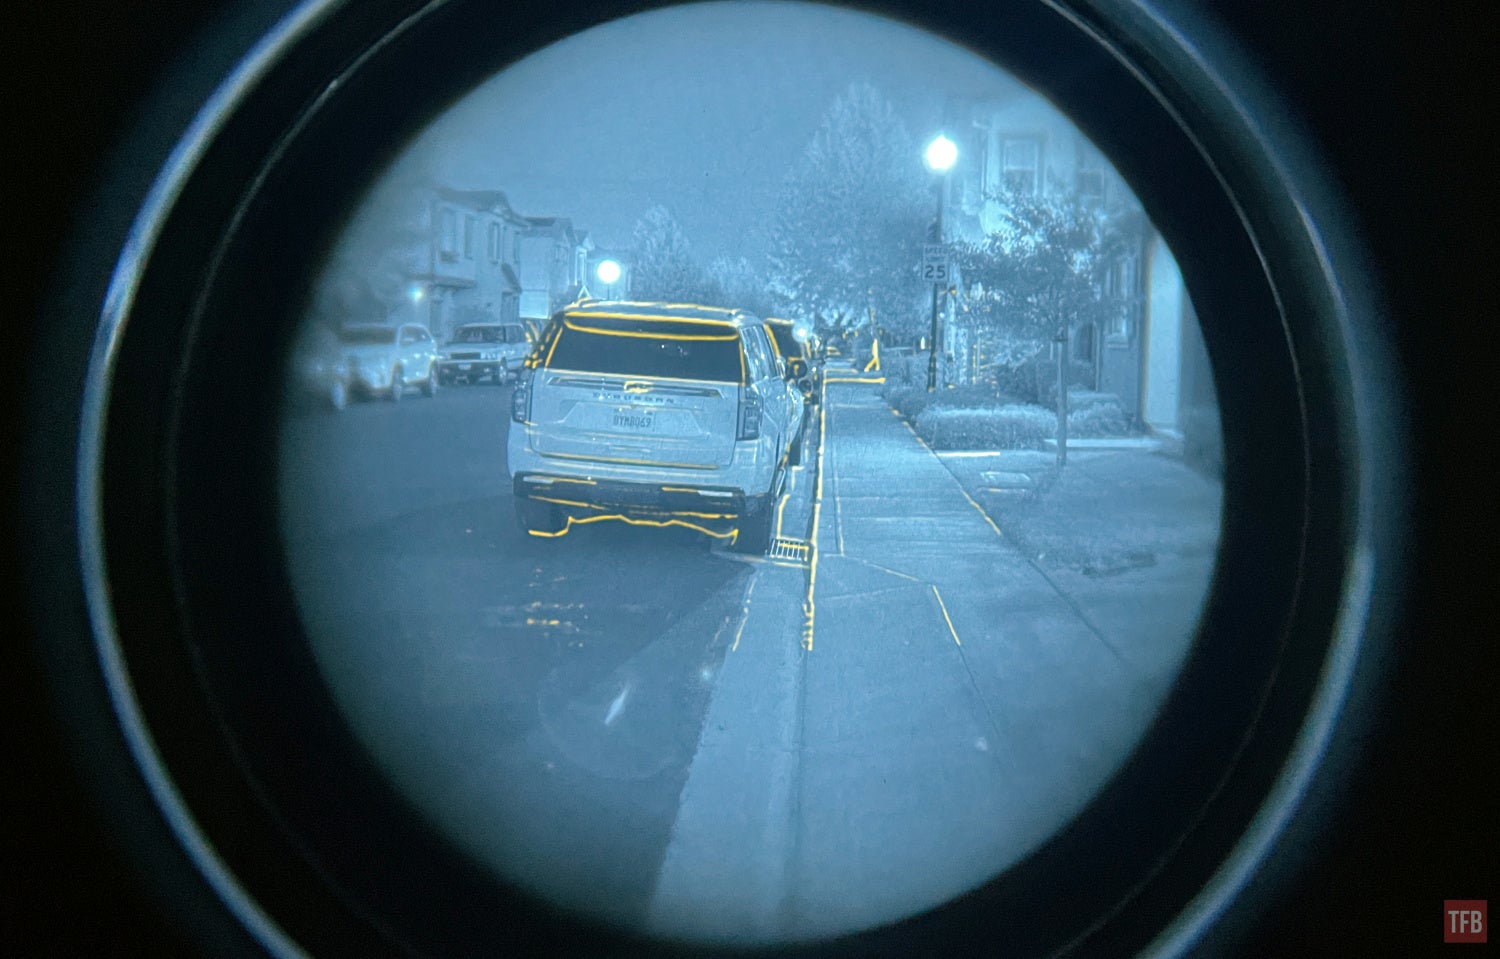
When the thermal brightness menu goes away, the knob reverts back to adjusting the I2 image brightness. If you rotate it all the way, you can turn off the night vision tubes and just have the thermal image. See image above. The PSQ-36 has three thermal modes: White Hot, Black Hot, and Outline. The outline mode produces nice thin lines. At first, I thought it was defective when I tested it by looking at my outstretched hand. It was only when I looked at something further away did I notice the thin lines.
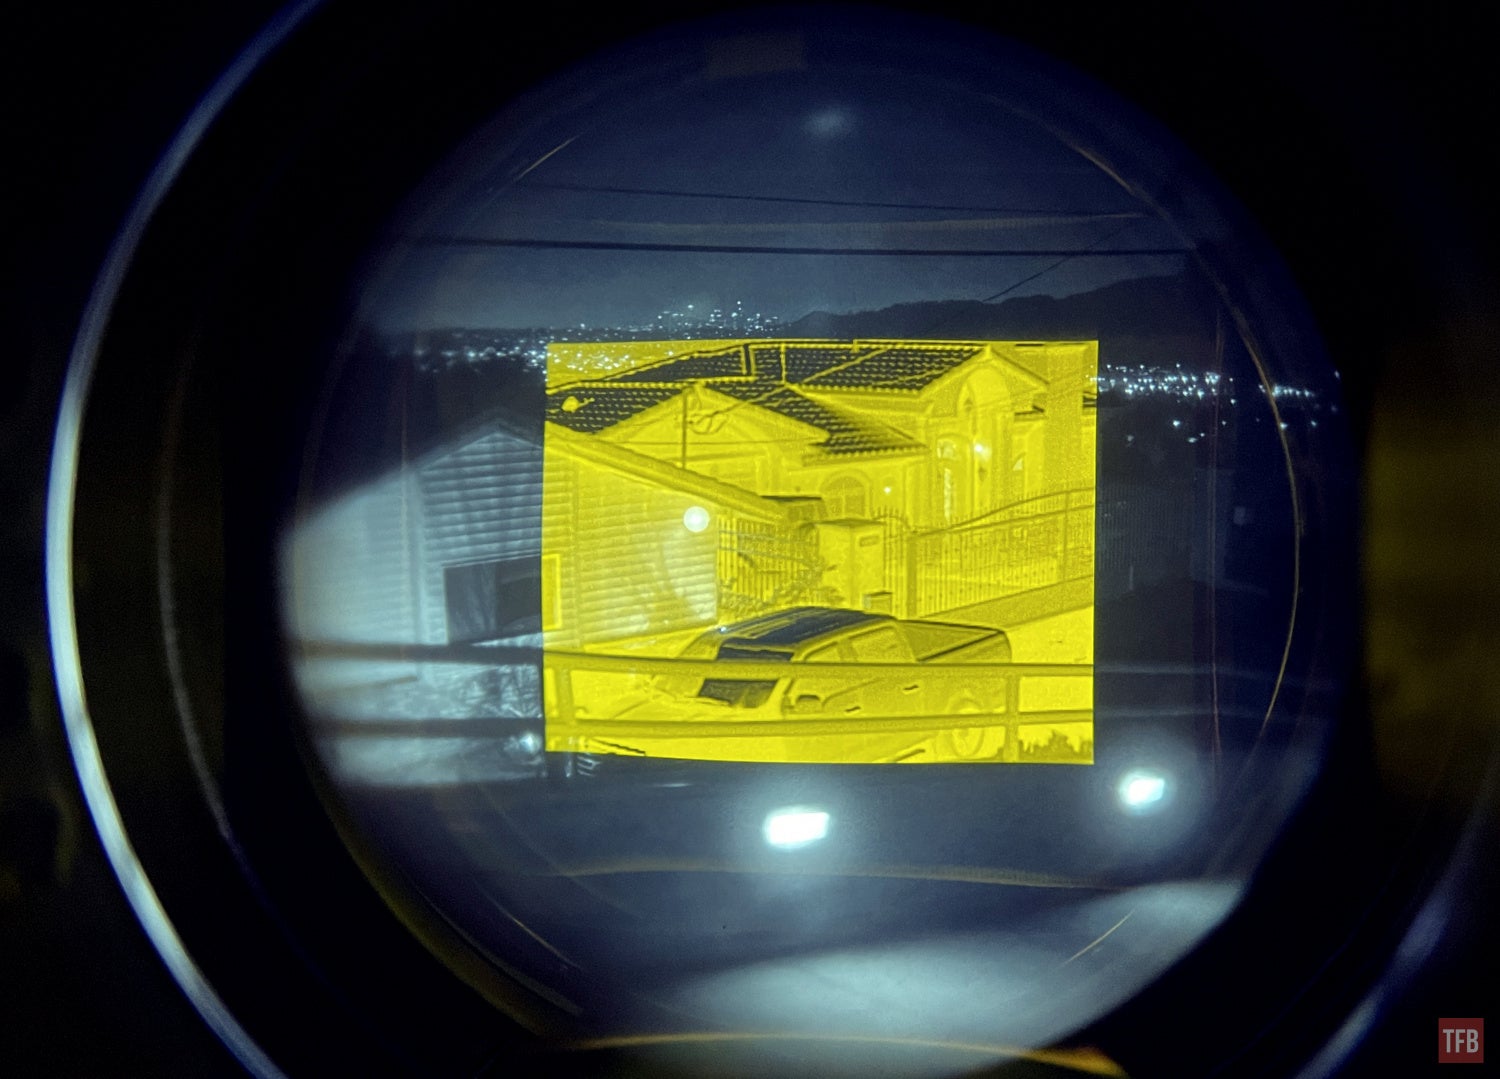
White Hot
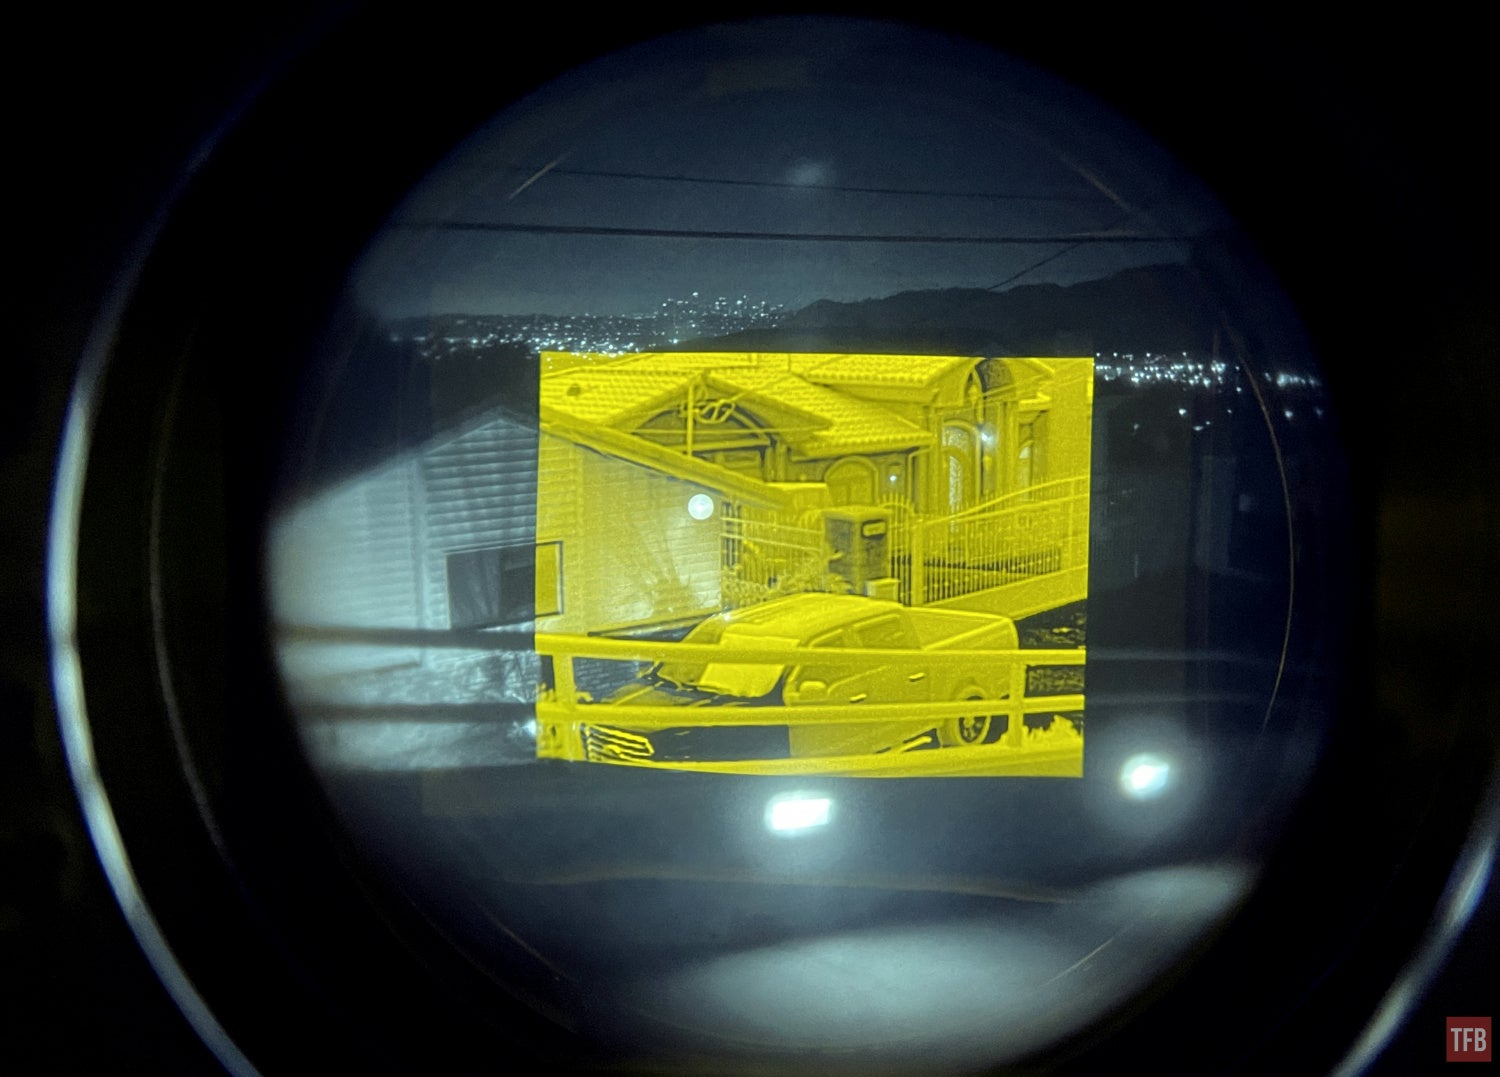
Black Hot
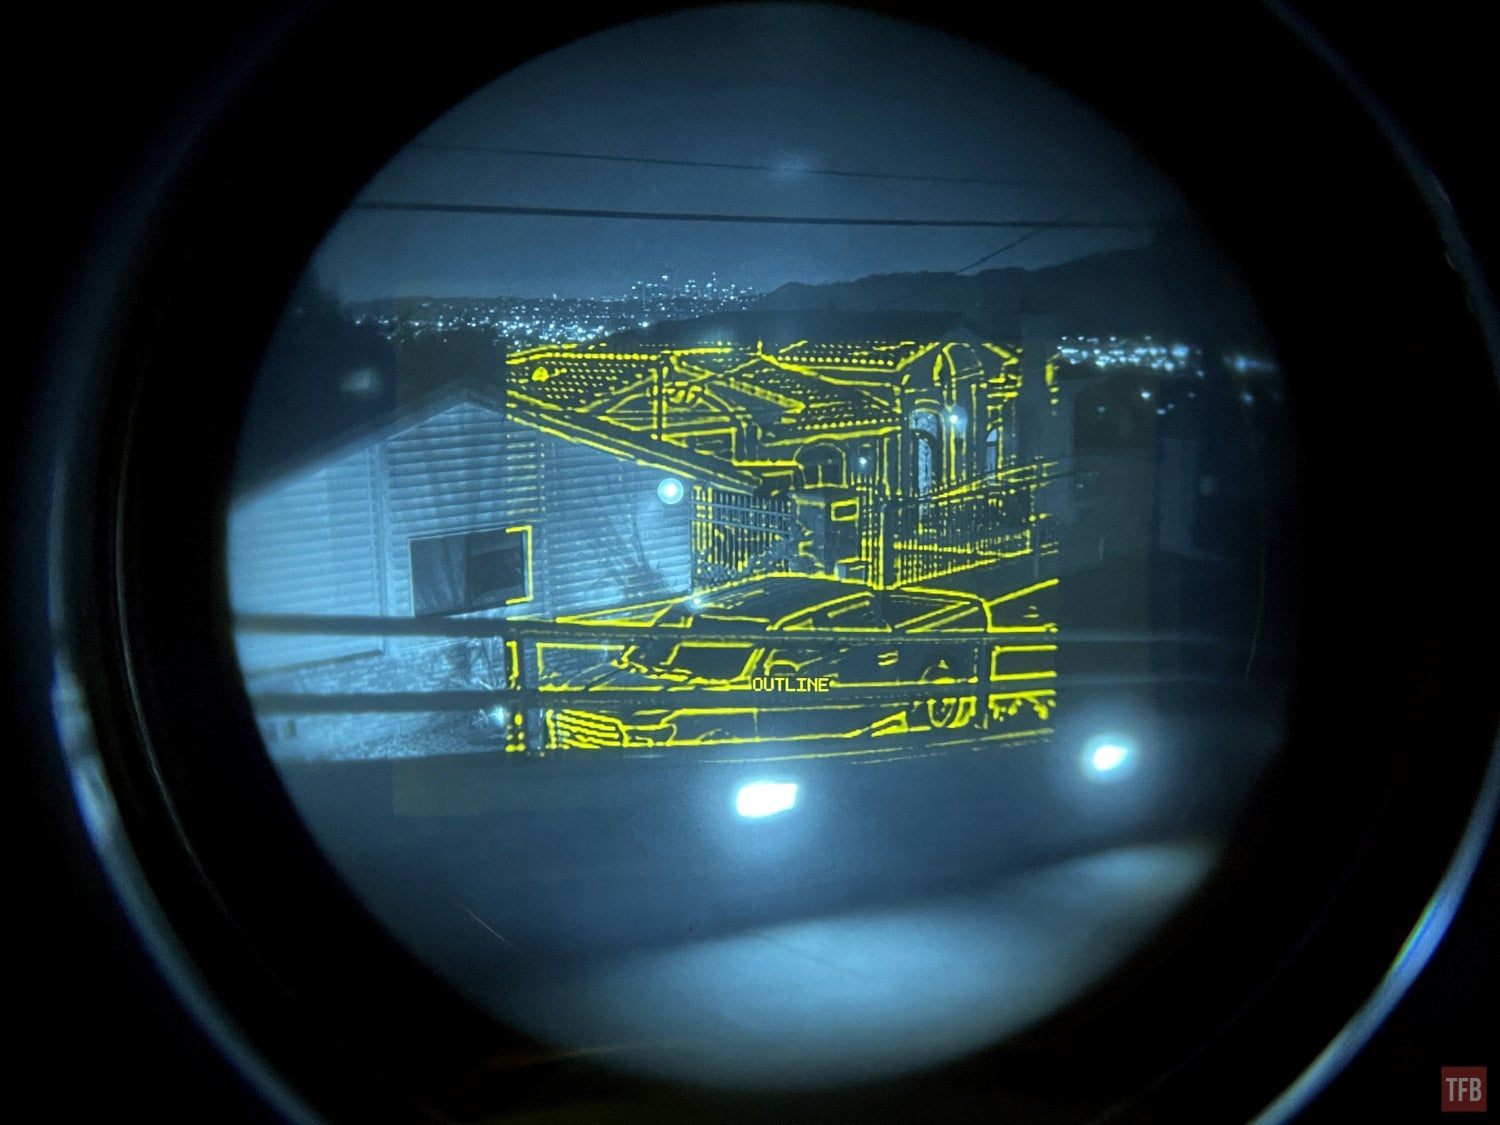
Outline
Take a look at the image below. See the person?
Remember the PSQ-20B? The thermal fusion is very similar to the PSQ-36.
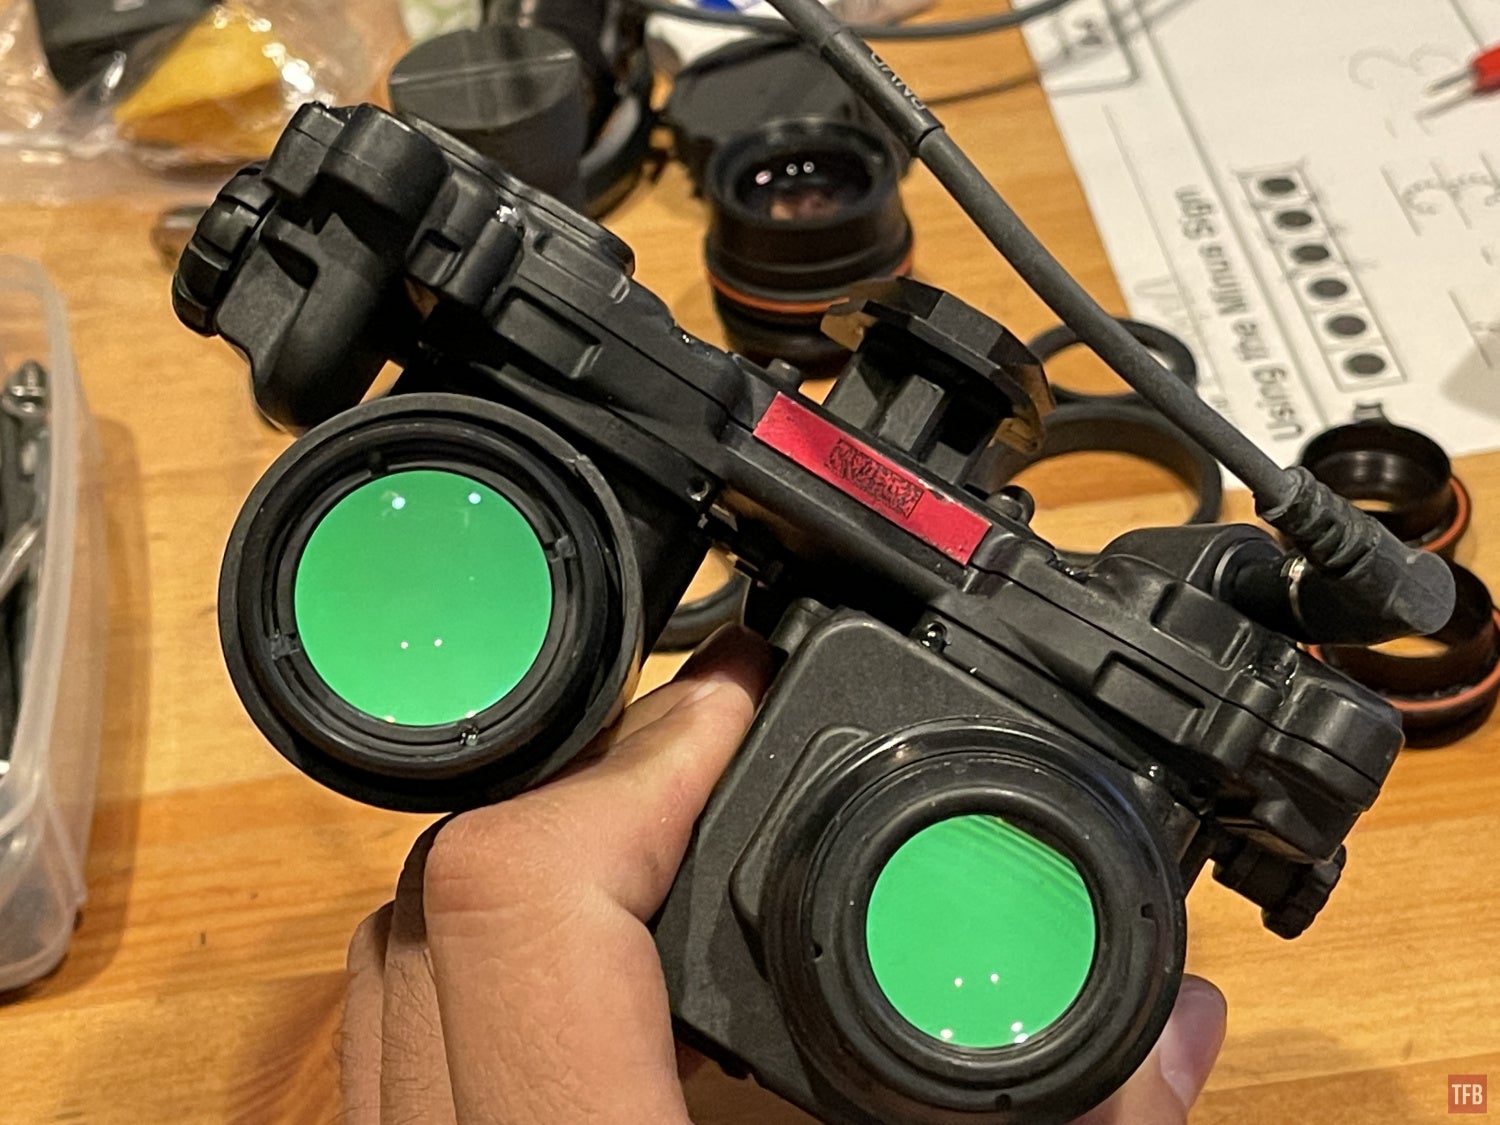
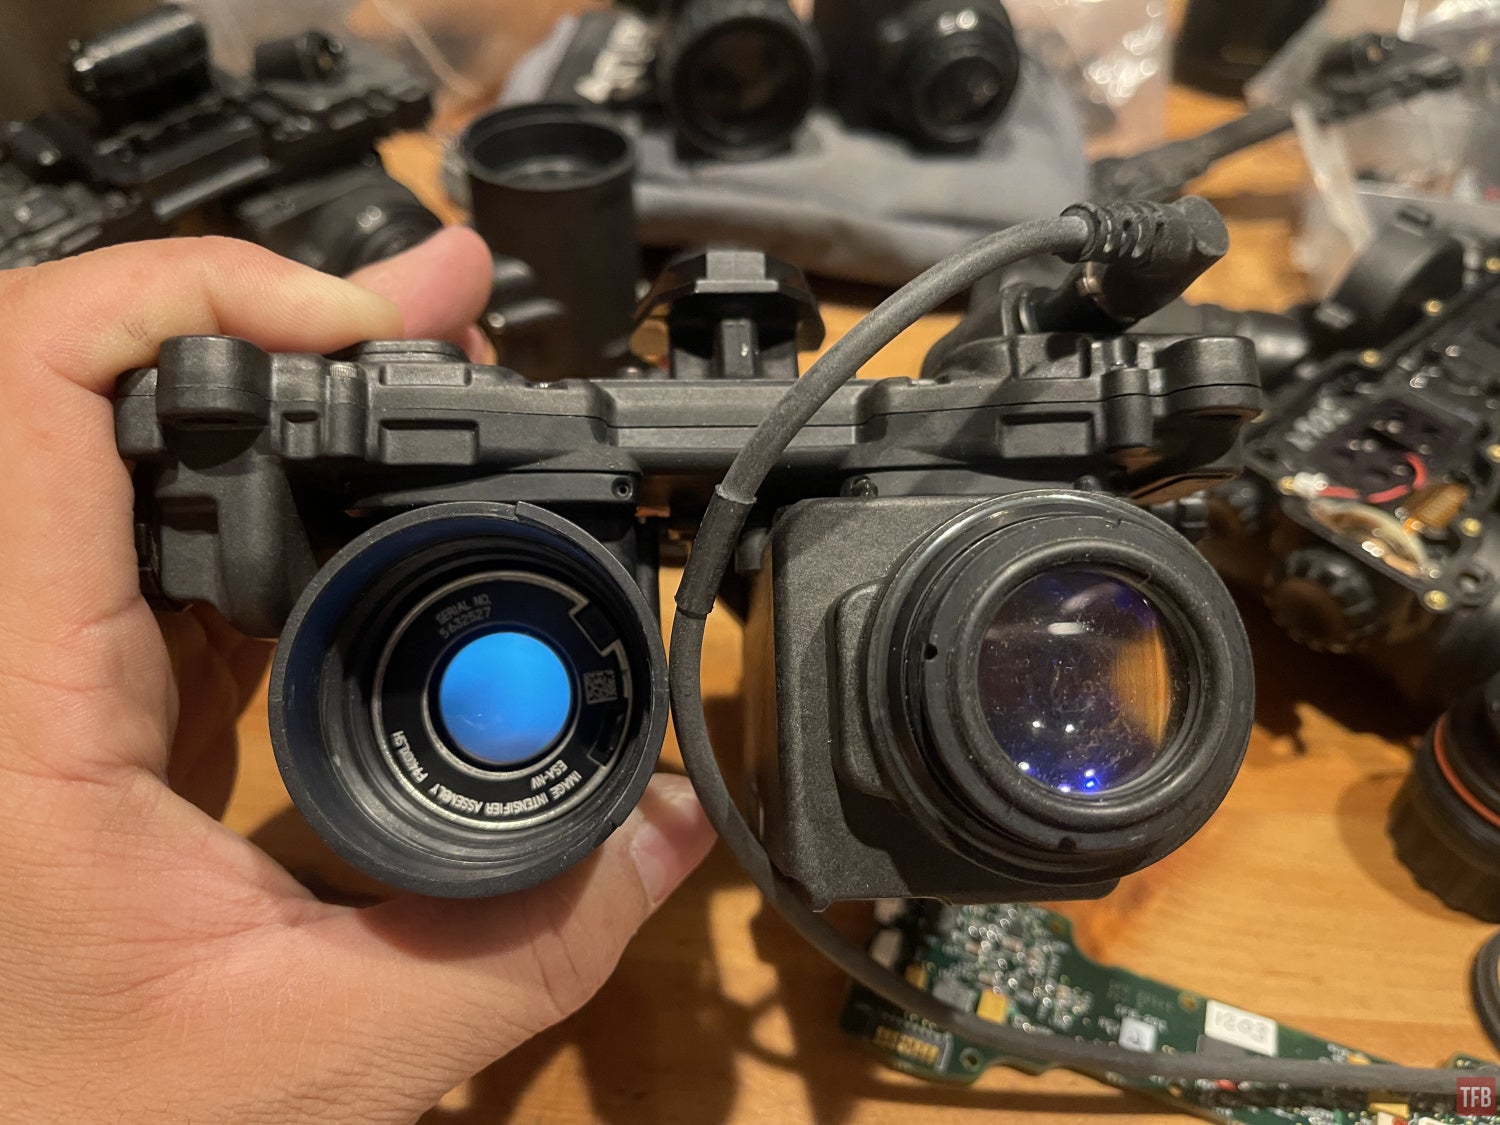
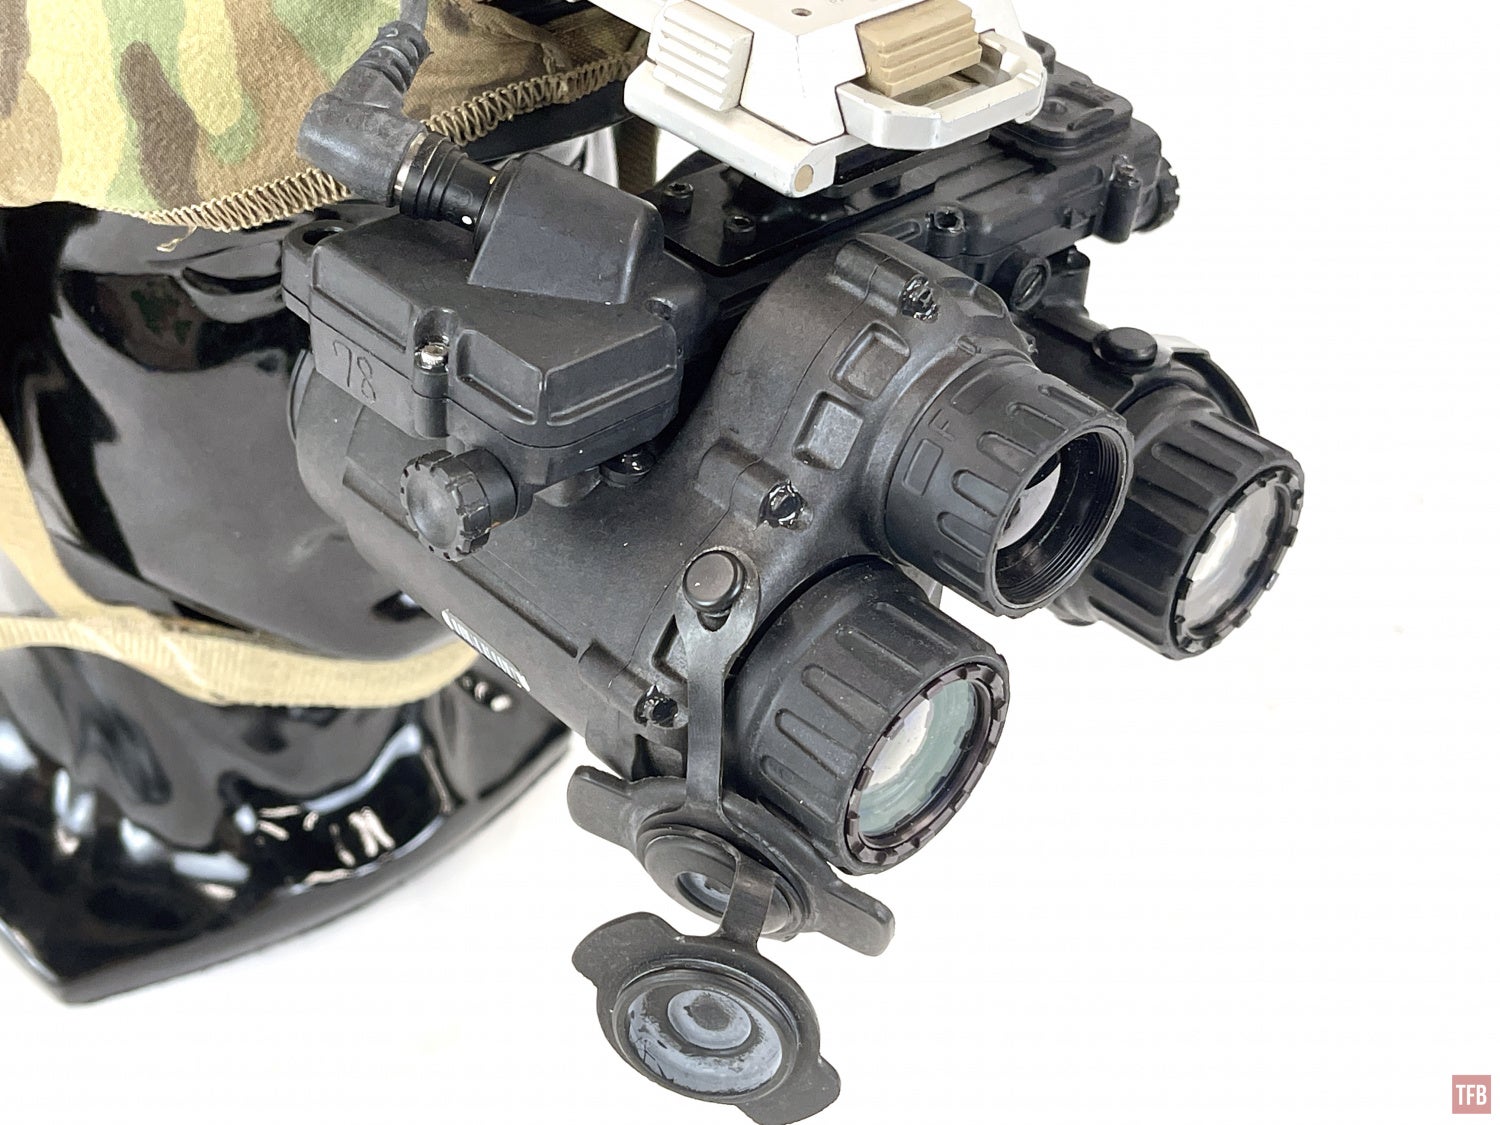
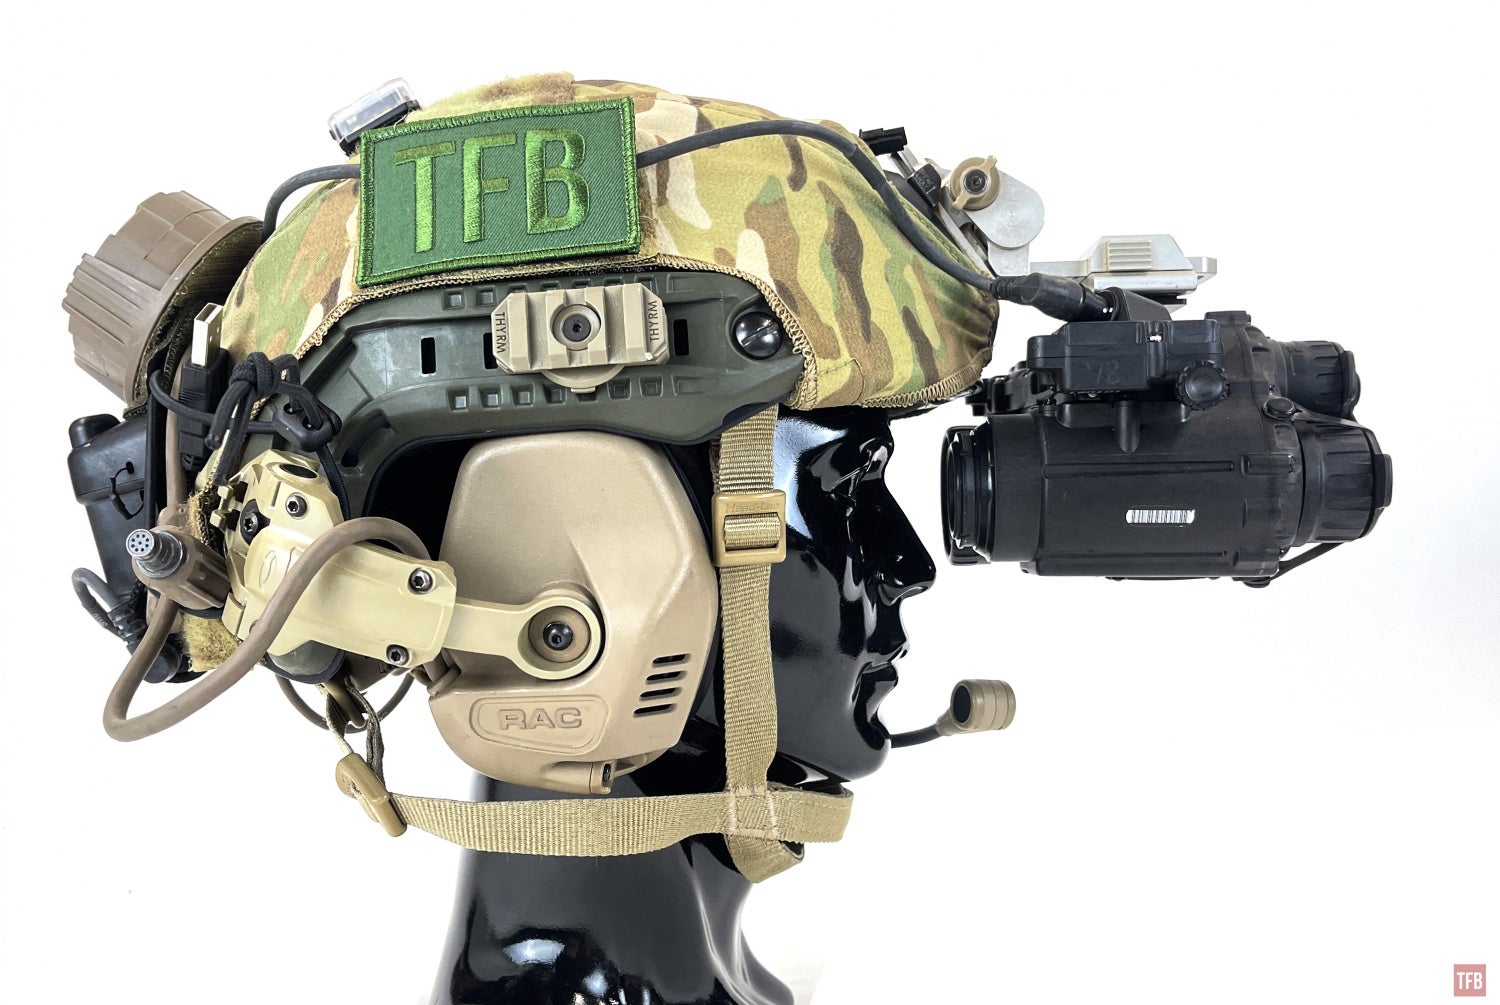
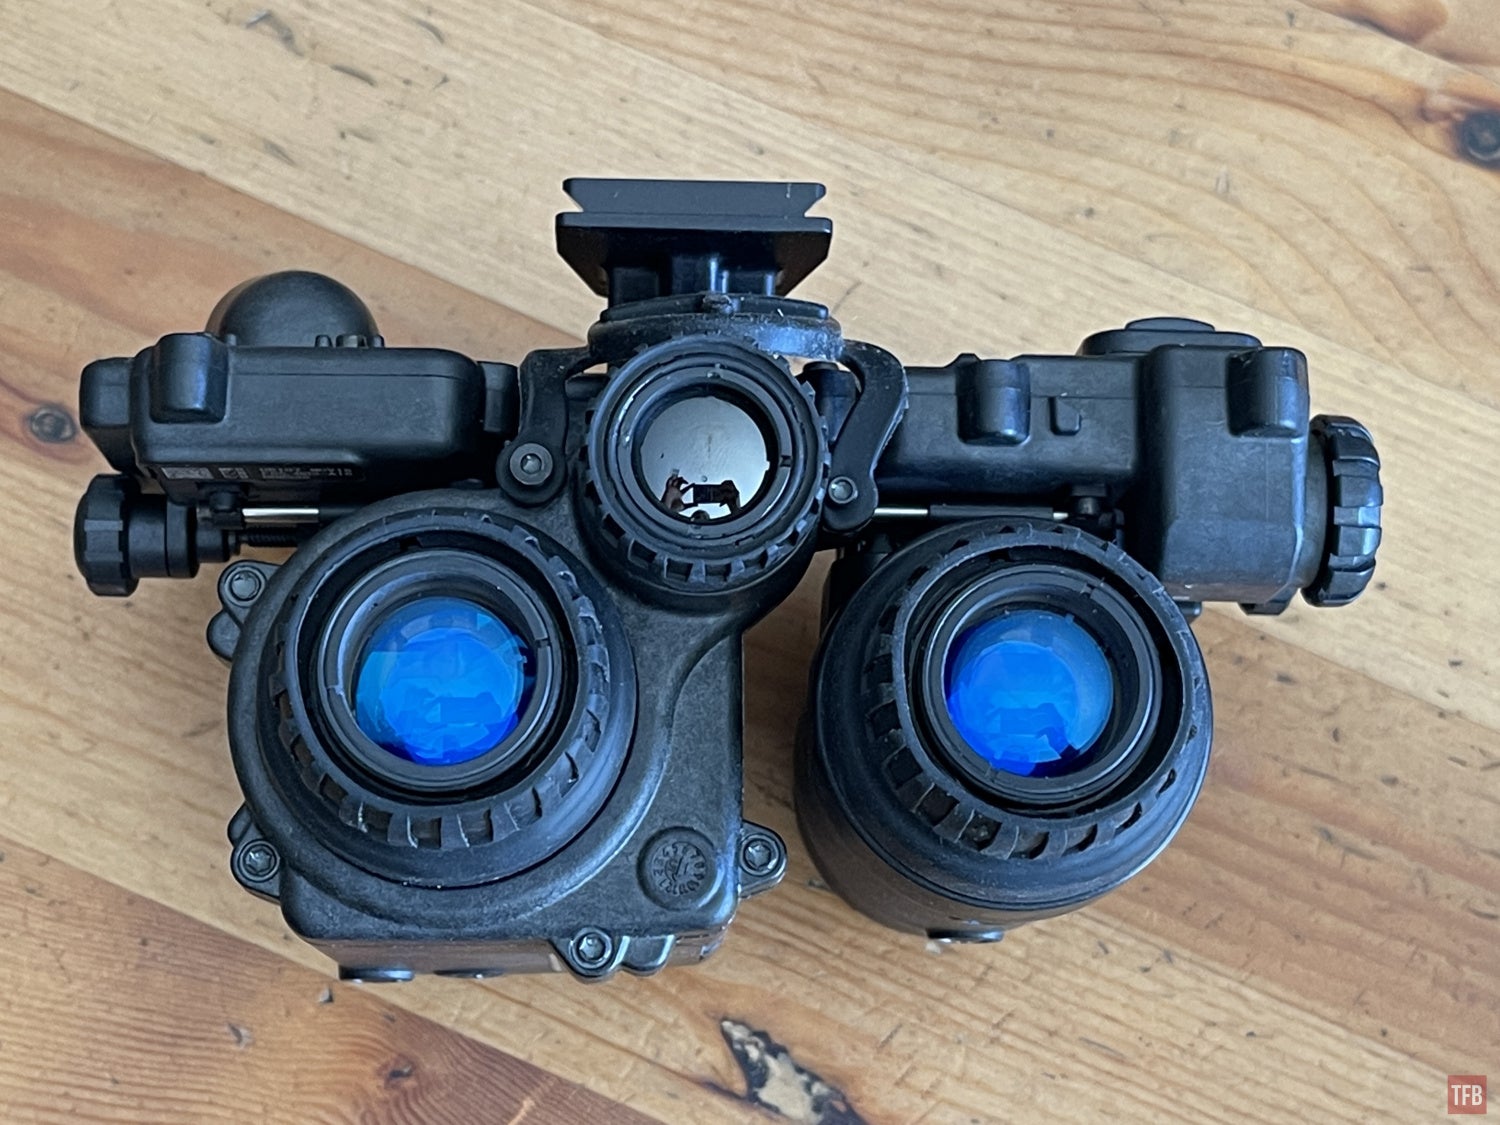
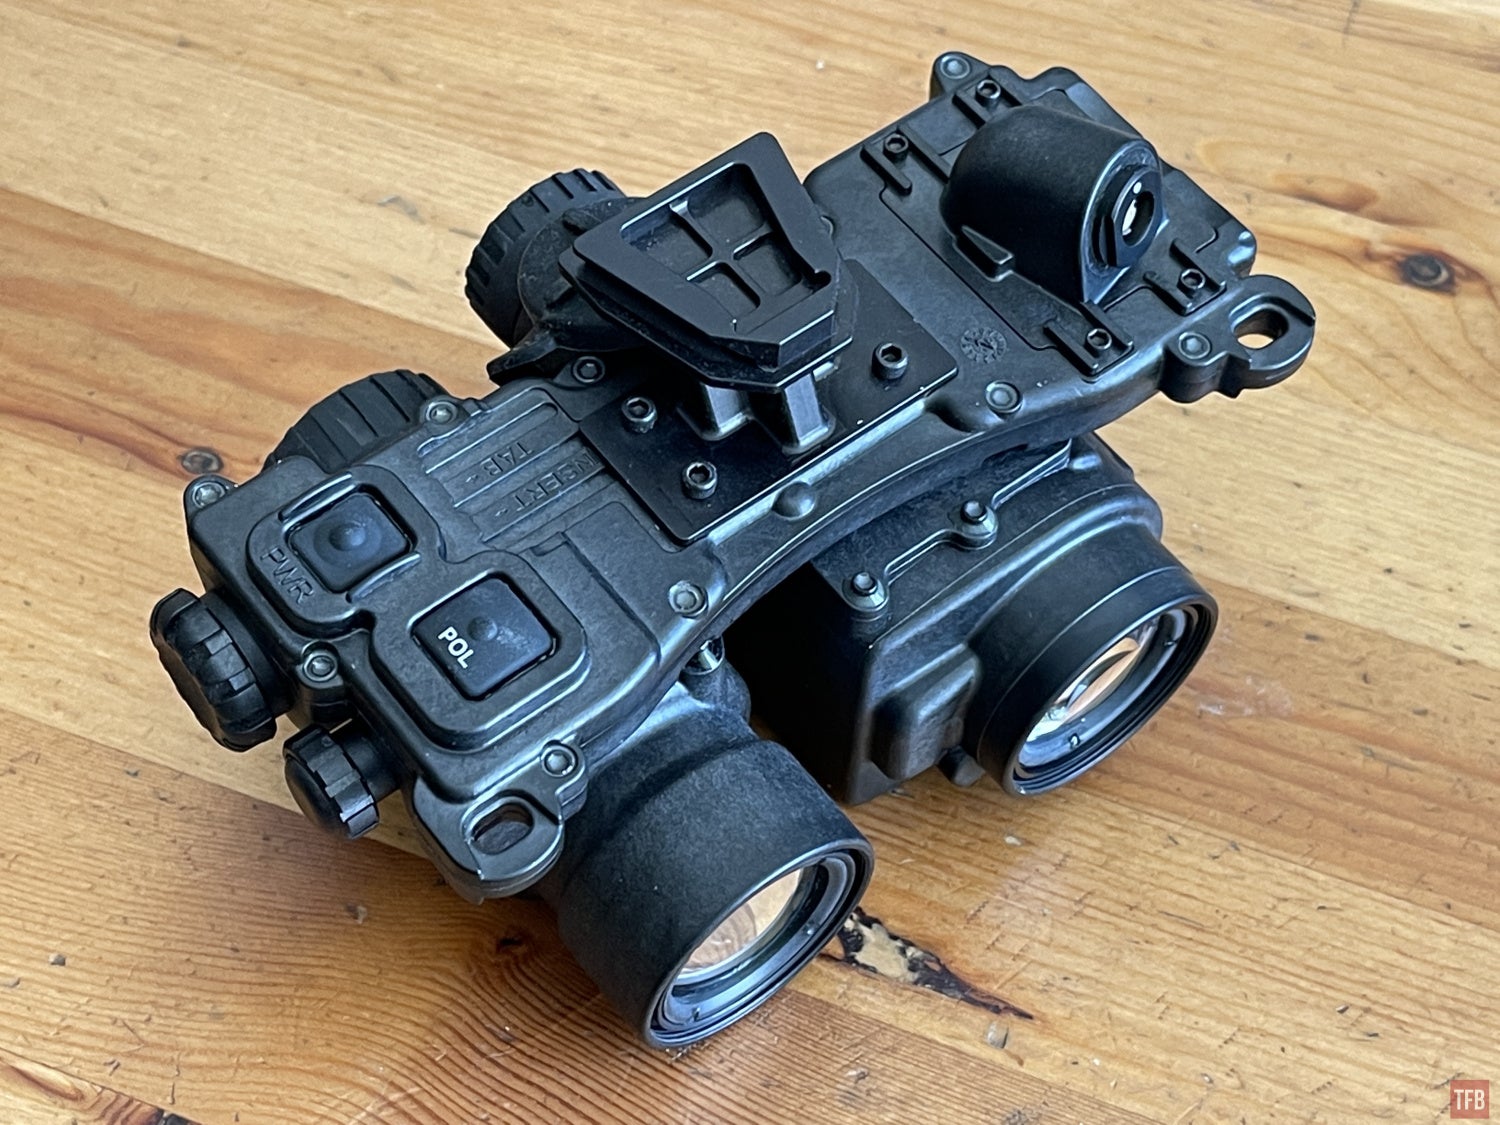
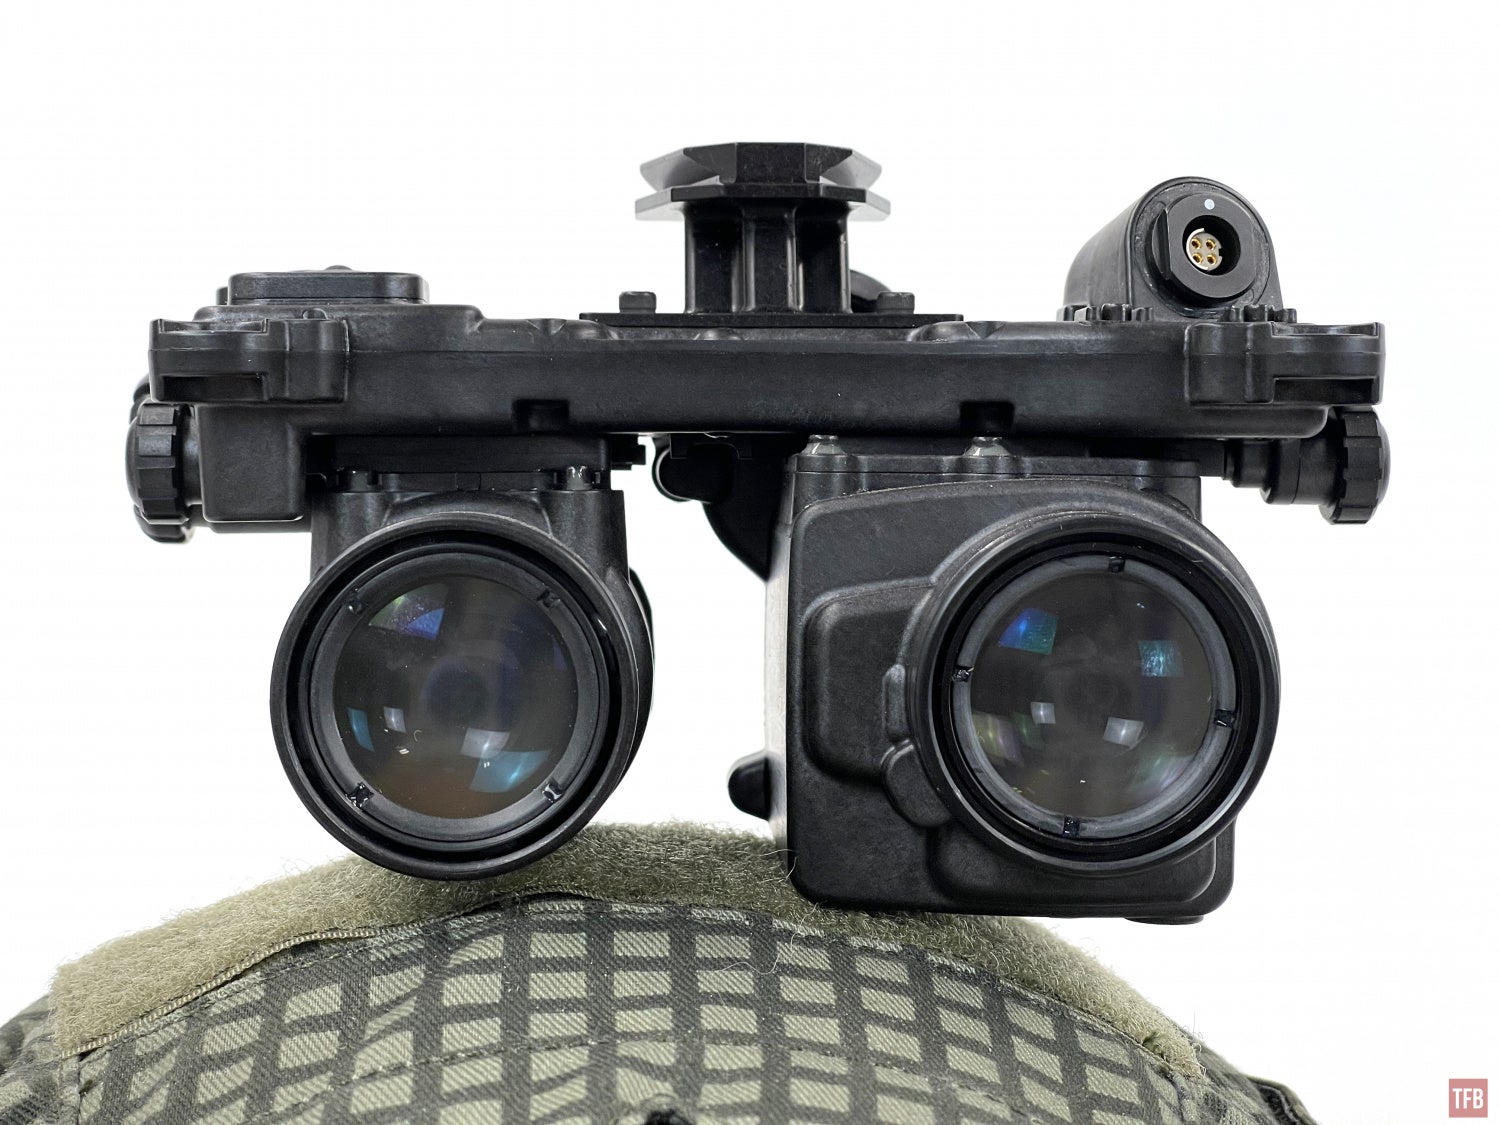
The PSQ-36 is a fixed bridge bino so the pods only translate left and right for pupillary adjustment.
You can see how blocky the right monocular pod is. Also, there is no rear diopter adjustment that I can find.
Remember I mentioned earlier about the objective lenses requiring some intermediate device to properly be installed? I was right, only it isn’t a black top hat, it is a trilug ring.
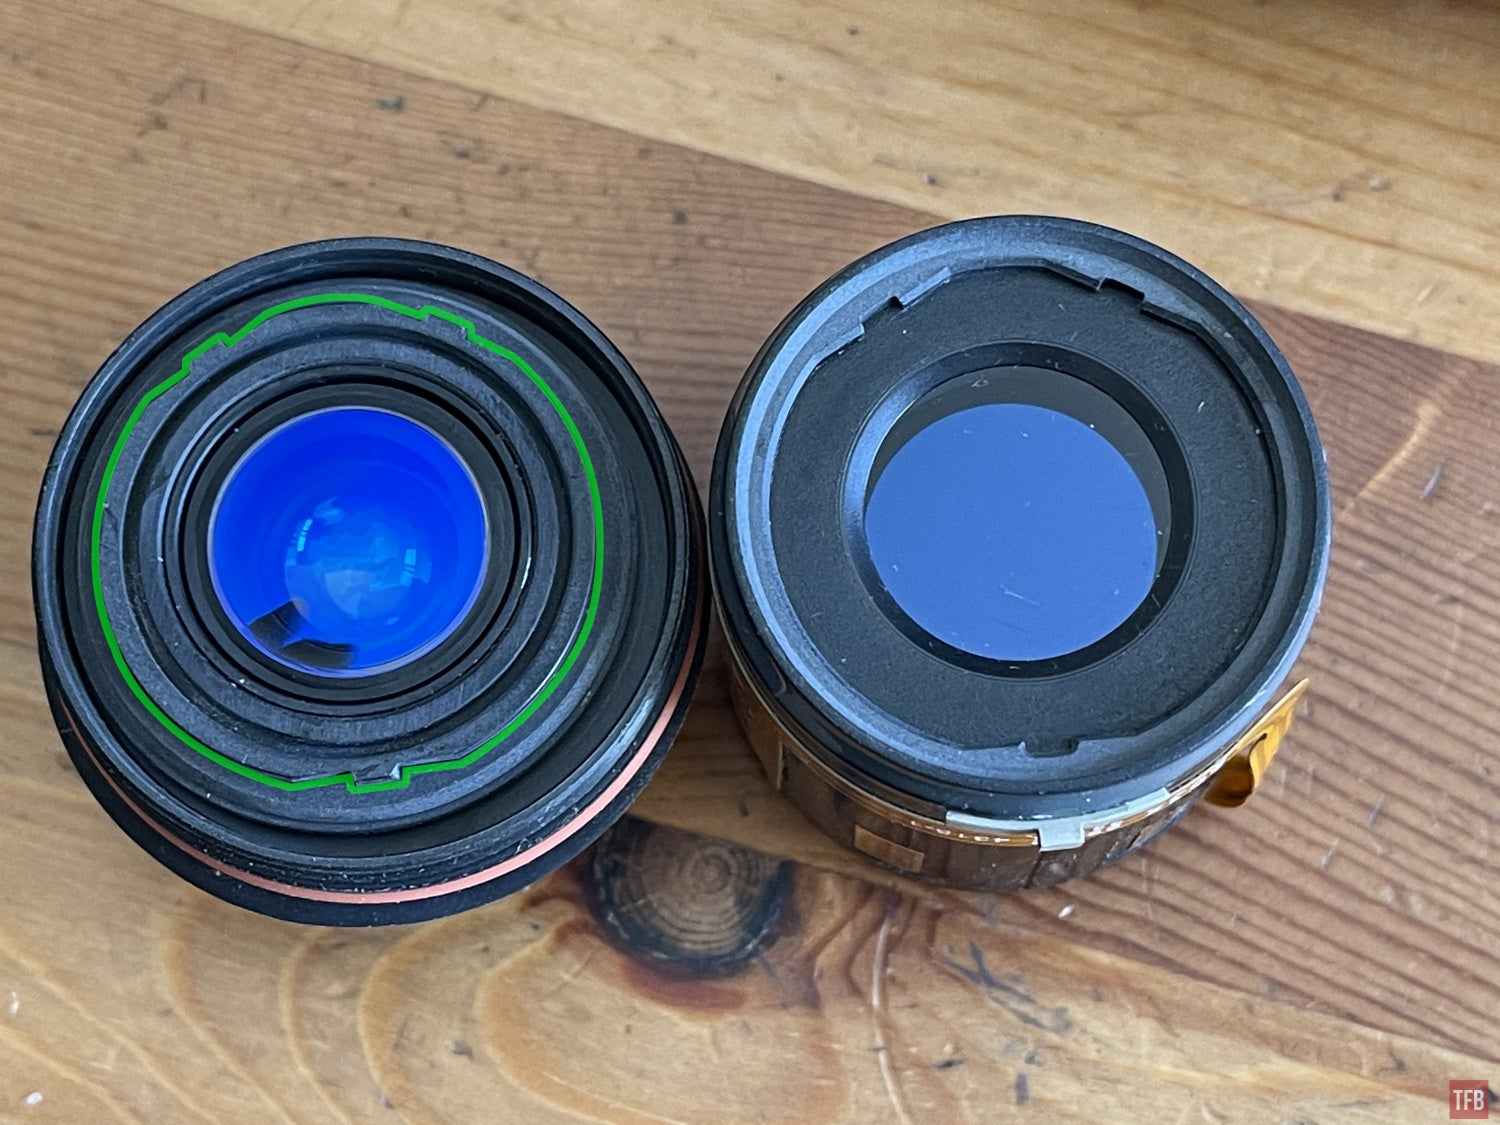
Objective lens on the left with trilug highlighted in green. ENVG image intensifier on the right with matching trilug ring.
Final Thoughts On The PSQ-36
The fact that you have rear projection of your thermal image is neat. You can independently adjust manual gain of the night vision and the thermal image. You can set the night vision brightness as low as possible and crank up the thermal brightness. When you do this lights will be amplified by the night vision and leak through the thermal image. IR lasers and bright illumiantors will shine through the thermal image. But to be honest, I am underwhelmed. These binos have no added features like the PSQ-20B. At least the 20B has a thermal image shifting mode to better align the thermal image at different distances the PSQ-36 has no adjustments other than brightness. Also there are no adjustable diopters for the eyepieces
Sure, it is neat to have rear thermal projection and the color difference of the thermal image is awesome but at what cost? Retail on a PSQ-36 is around $40,000! That is the same as a GPNVG. At least with GPNVG, you get four image intensifiers and panoramic 97º FOV. The PSQ-36 functions like a normal dual tube night vision goggle with an ECOTI. A PVS-31A will set you back around $13,000 and you have manual gain. An ECOTI is just over $8,000 and weighs just 3.2oz. If you buy both a PVS-31A and an ECOTI you have only spent less than half the cost of one PSQ-36 and you will get similar performance, only your thermal image will be projected through the front and not the rear. In fact, for the cost of one PSQ-36, you can have twin PVS-31A/ECOTI setups. Weight wise you save a bit, you are roughly at 18oz combined weight with a PVS-31A and ECOTI. Another added benefit is that the ECOTI will not use up the battery from the PVS-31A. The FGS with the thermal activated will power for only several hours. That is terrible when a run-of-the-mill dual tube on a CR123 will have around 25 hours of run time. Another issue, according to the local Para Rescue guys, the thermal on the PSQ-36 lags too much especially when they are in a helicopter searching for people. Not exactly a problem most people have but that is an interesting case use and while they have them, they rarely use them over their PVS-31A dual tube goggles.
Yes, the rear projection of the thermal image is great. Nothing like it. But is it worth paying $40,000 for this functionality? I do not think so. Also, everything in the PSQ-36 is proprietary except for the image intensifiers.