Your Privacy Choices

If you have been following my Friday Night Lights series, I have written about the PSQ-20 before but didn’t realize the generational changes until I acquired the final and older PSQ-20. Today we will take a look at the first PSQ-20 and compare it against a newcomer from China. The same people who made the JerryC, InfiRay, have made their own take on the PSQ-20 and call it the JerryF. Let’s do another deep dive into some thermal fusion monoculars. The Friday Night Lights series is sponsored by ATN Corp, manufacturers of night vision and thermal optics like the THOR LT. As with all of our sponsored series, Friday Night Lights will continue to bring you unbiased news and reviews from a variety of companies.
Thermal Fusion @TFB:
- Friday Night Lights: ITT Exelis PSQ-20A – Thermal Fusion Monocular
- Friday Night Lights: Enhanced Night Vision Goggle (ENVG) PSQ-20 B Thermal Fusion Monocular
- Friday Night Lights: Jerry-C AKA Chinese ECOTI
Will The Real PSQ-20 Please Stand Up?

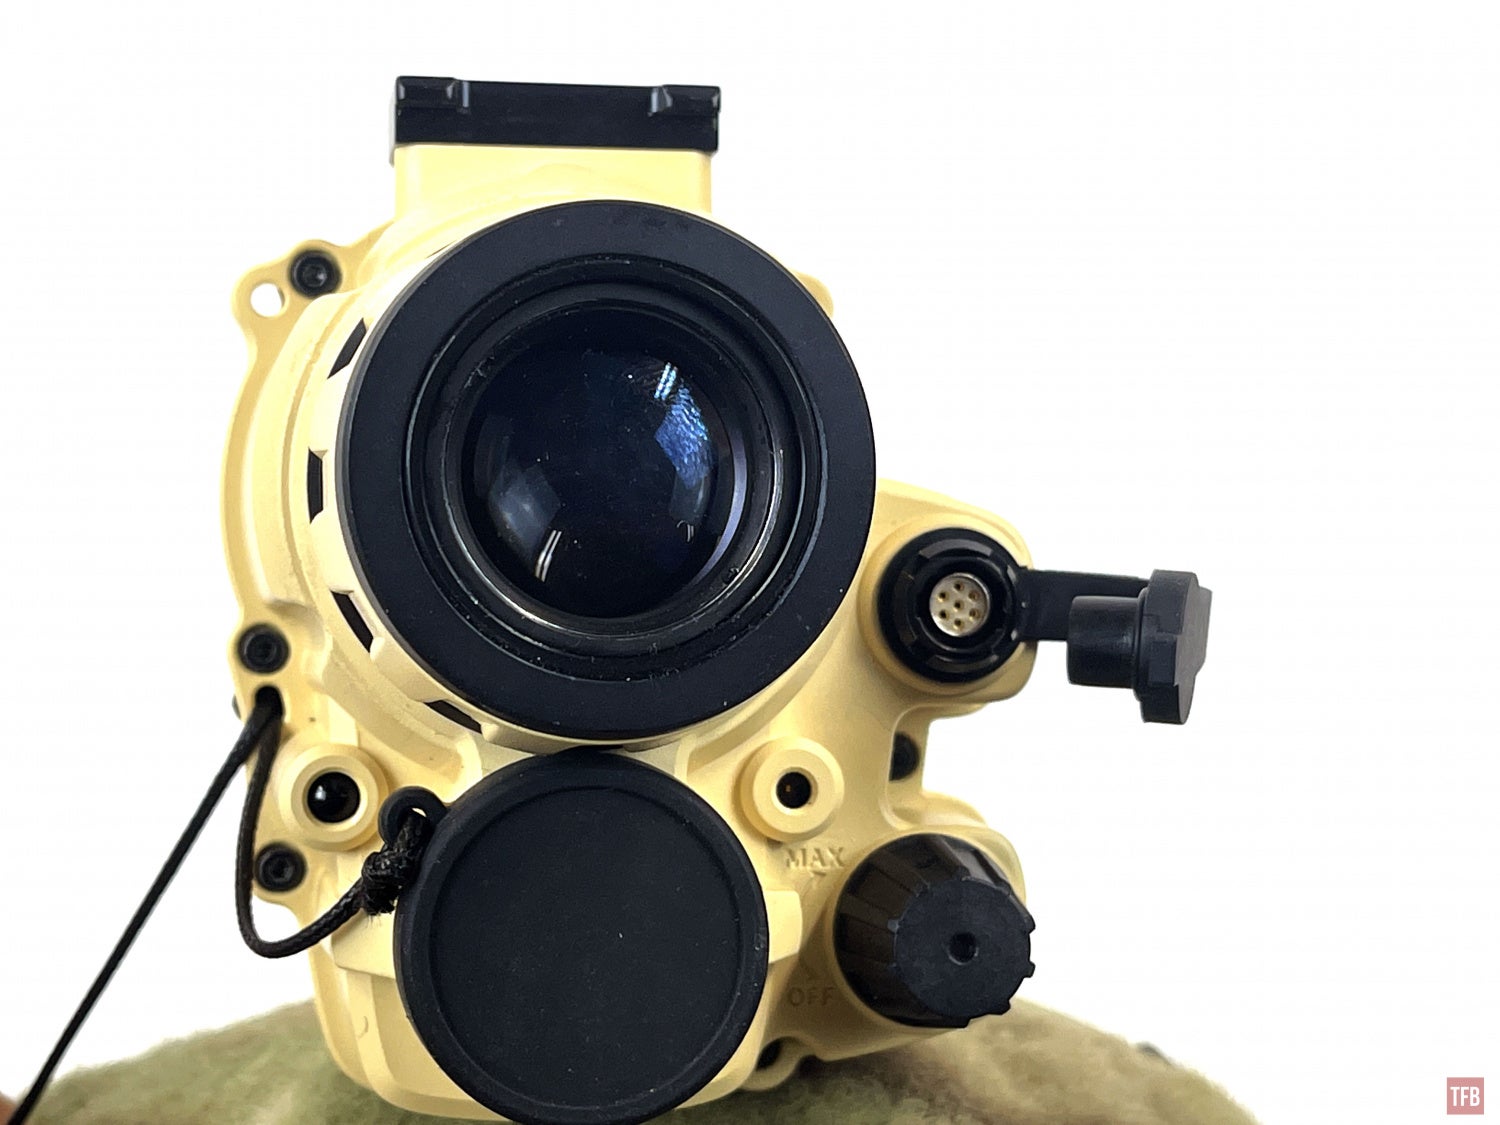
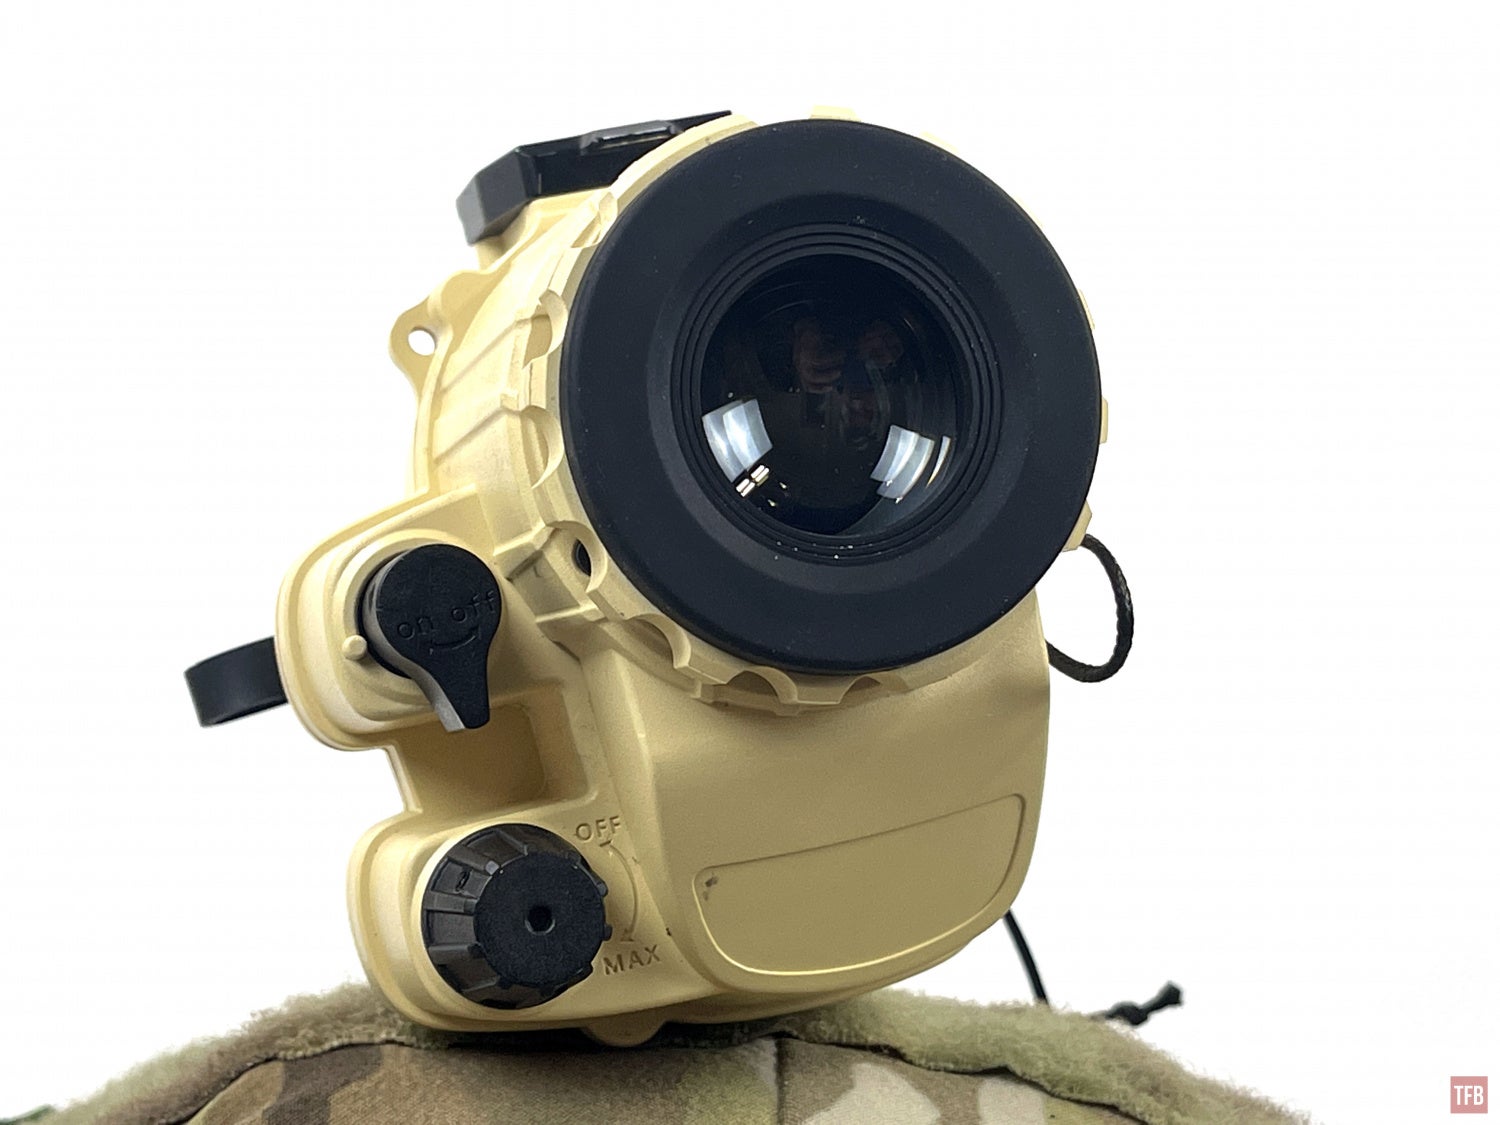
This all started last year when my friends Jason lent me his PSQ-20B. At the time I just called it the PSQ-20. It was only until I got the PSQ-20A did I realize that the L3 thermal fusion monocular had the B at the end of the designation. In my PSQ-20A article, I was not quite sure if it was the original or the tan PSQ-20 was. It was when I got the tan PSQ-20 with a manual that I can put this to rest. The tan PSQ-20 does not have a letter suffix and the manual is dated 2008.

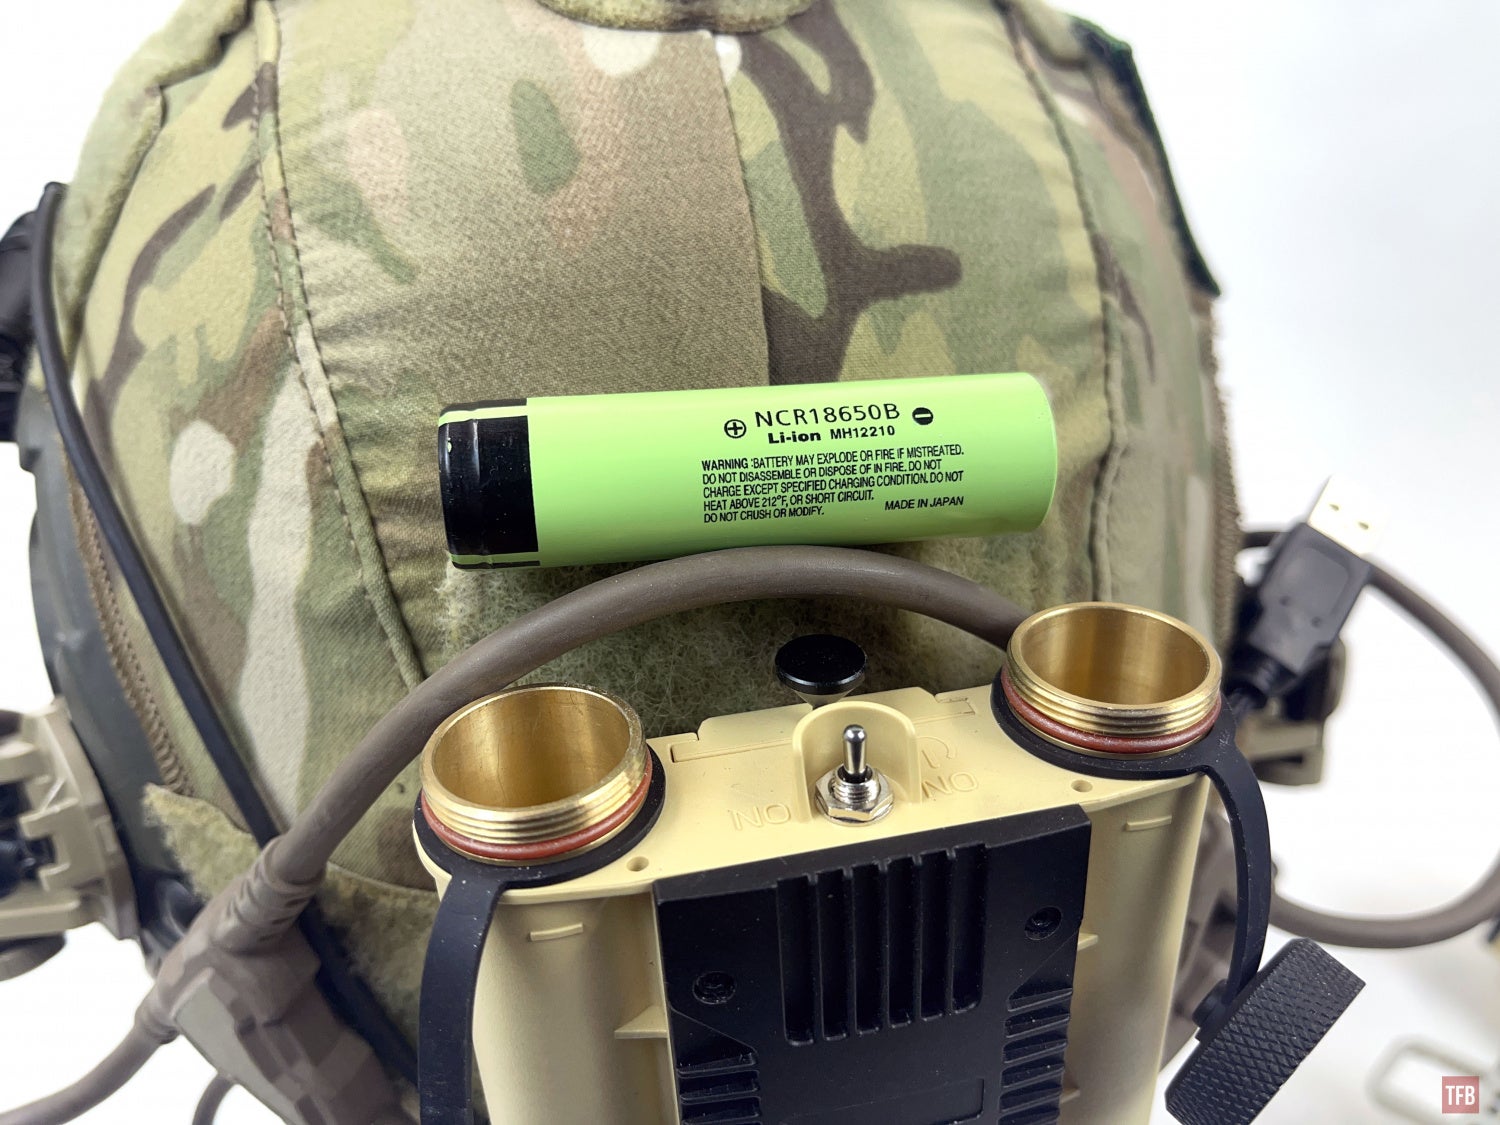
Function-wise, there is not that much difference from the PSQ-20 to the PSQ-20A. The only major difference is how the thermal image looks and the PSQ-20 needs lithium AAs to work whereas the 20A could use alkaline and it even has a smaller 3xAA battery pack. I tried using the smaller battery pack with lithium AA batteries for the tan PSQ-20 but it did not work.
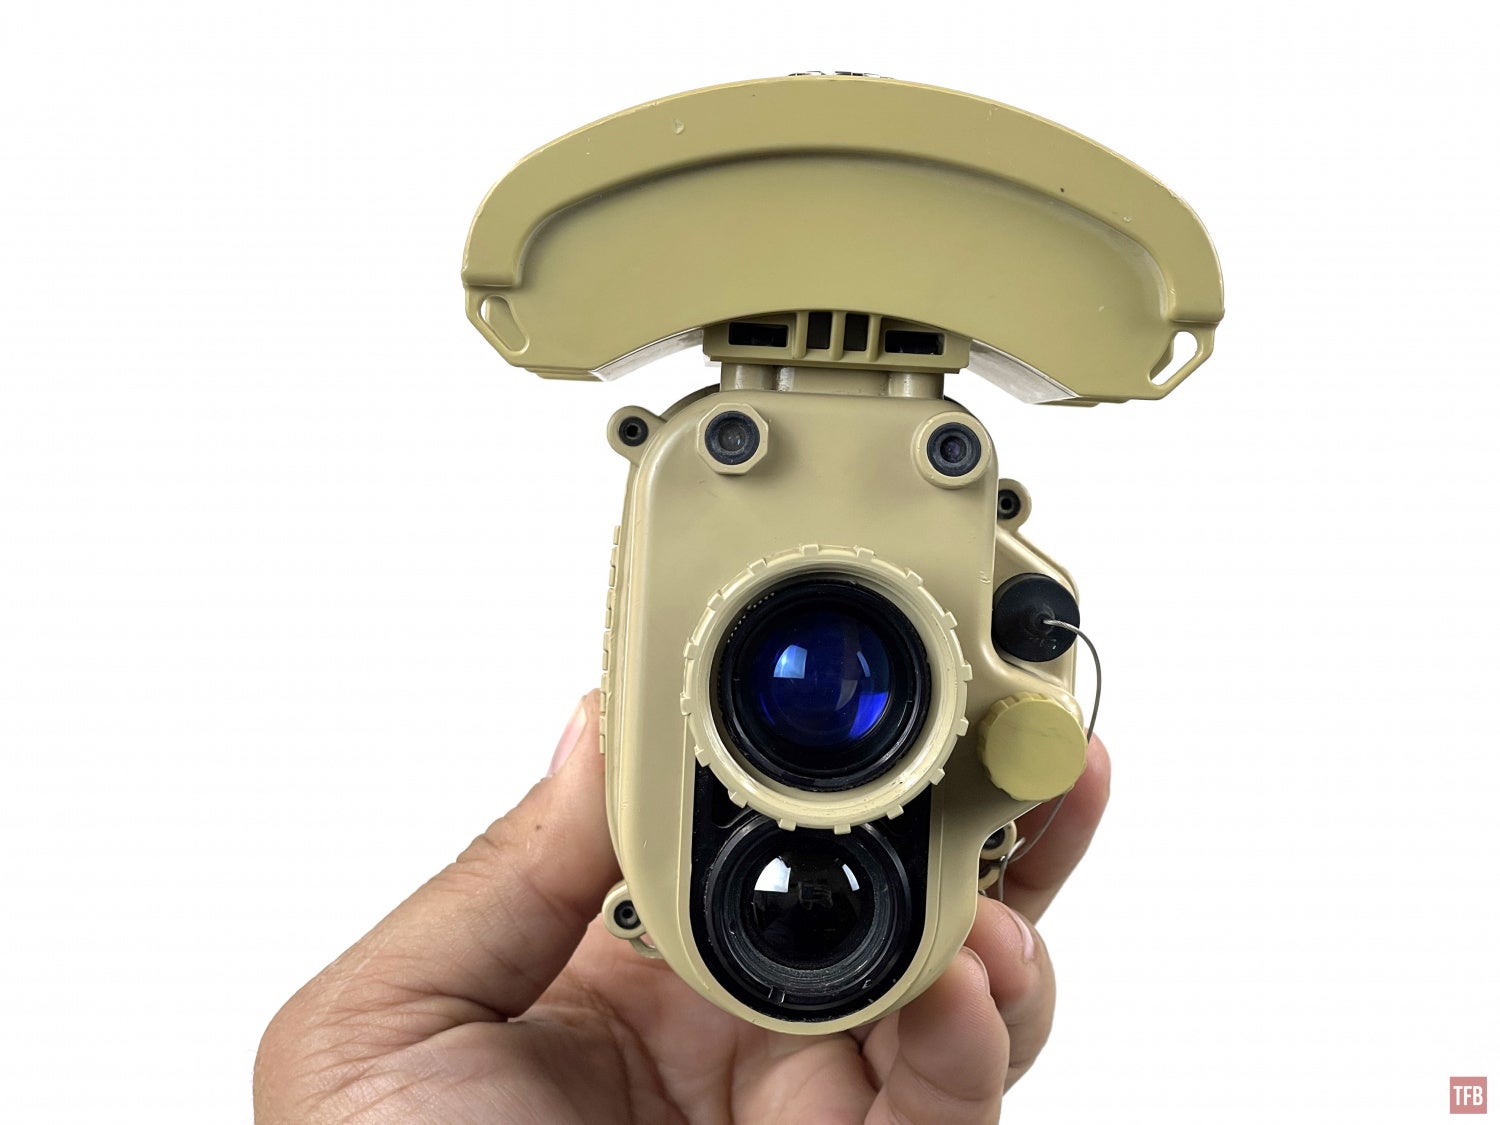
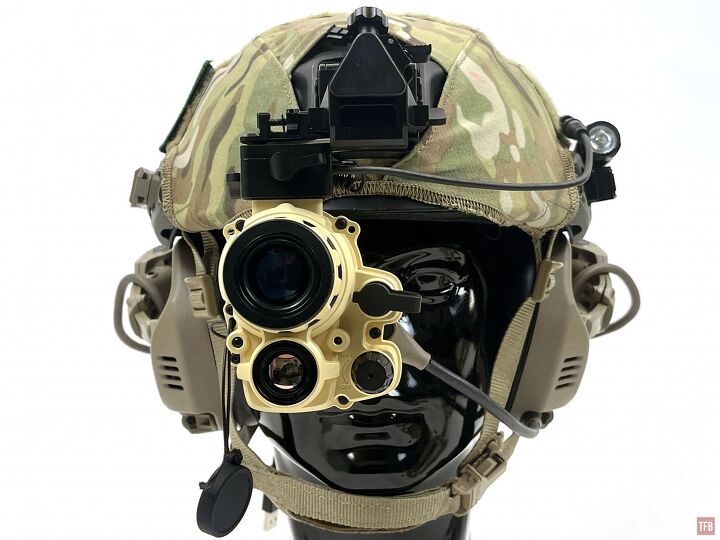
The PSQ-20 looks a little different than the 20A.


The knob on the front is for night vision. Turn the knob to control manual gain for the image intensifier. It is also a button to switch between full thermal, overlay and outline when you turn the thermal on. The port just above the knob is for input and output but I have yet to see a system and cables for this.
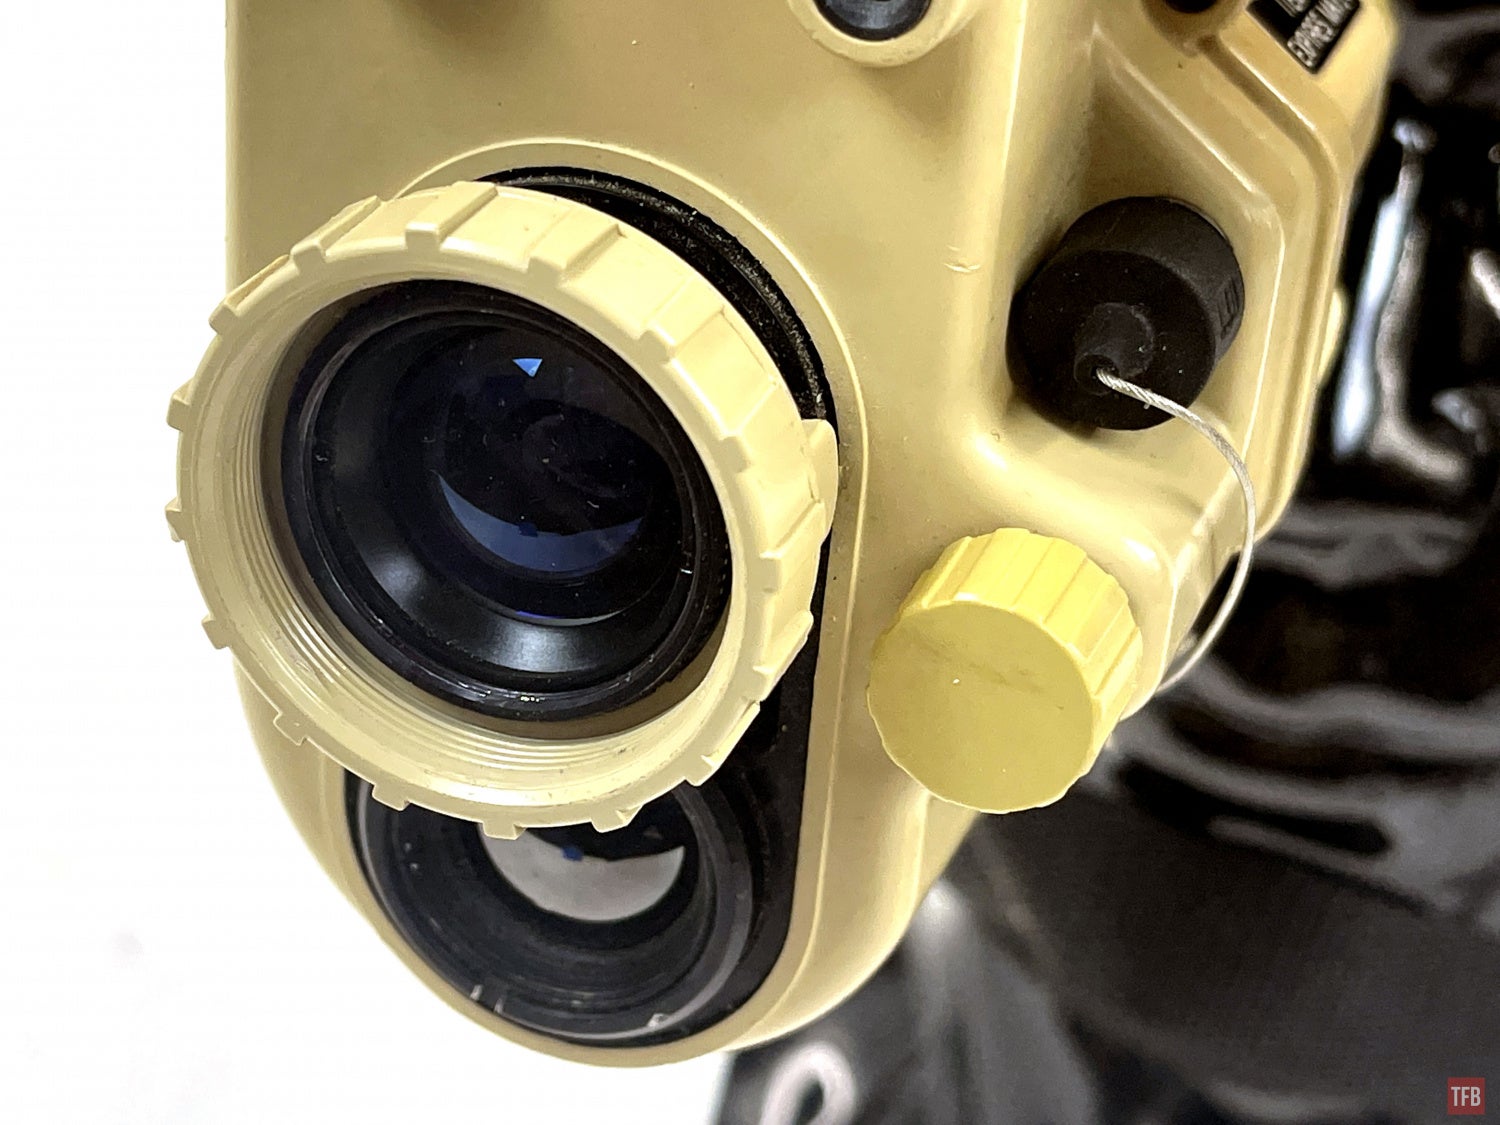

At the back is the knob to turn the thermal on. Just like the night vision knob, this knob rotates to control gain for the thermal. Pressing it in switches between white hot and black hot.

The comma-shaped switch is for the IR illuminator. Press it in counterclockwise and that is for momentary activation. Rotate it out clockwise and it clicks for constant on.
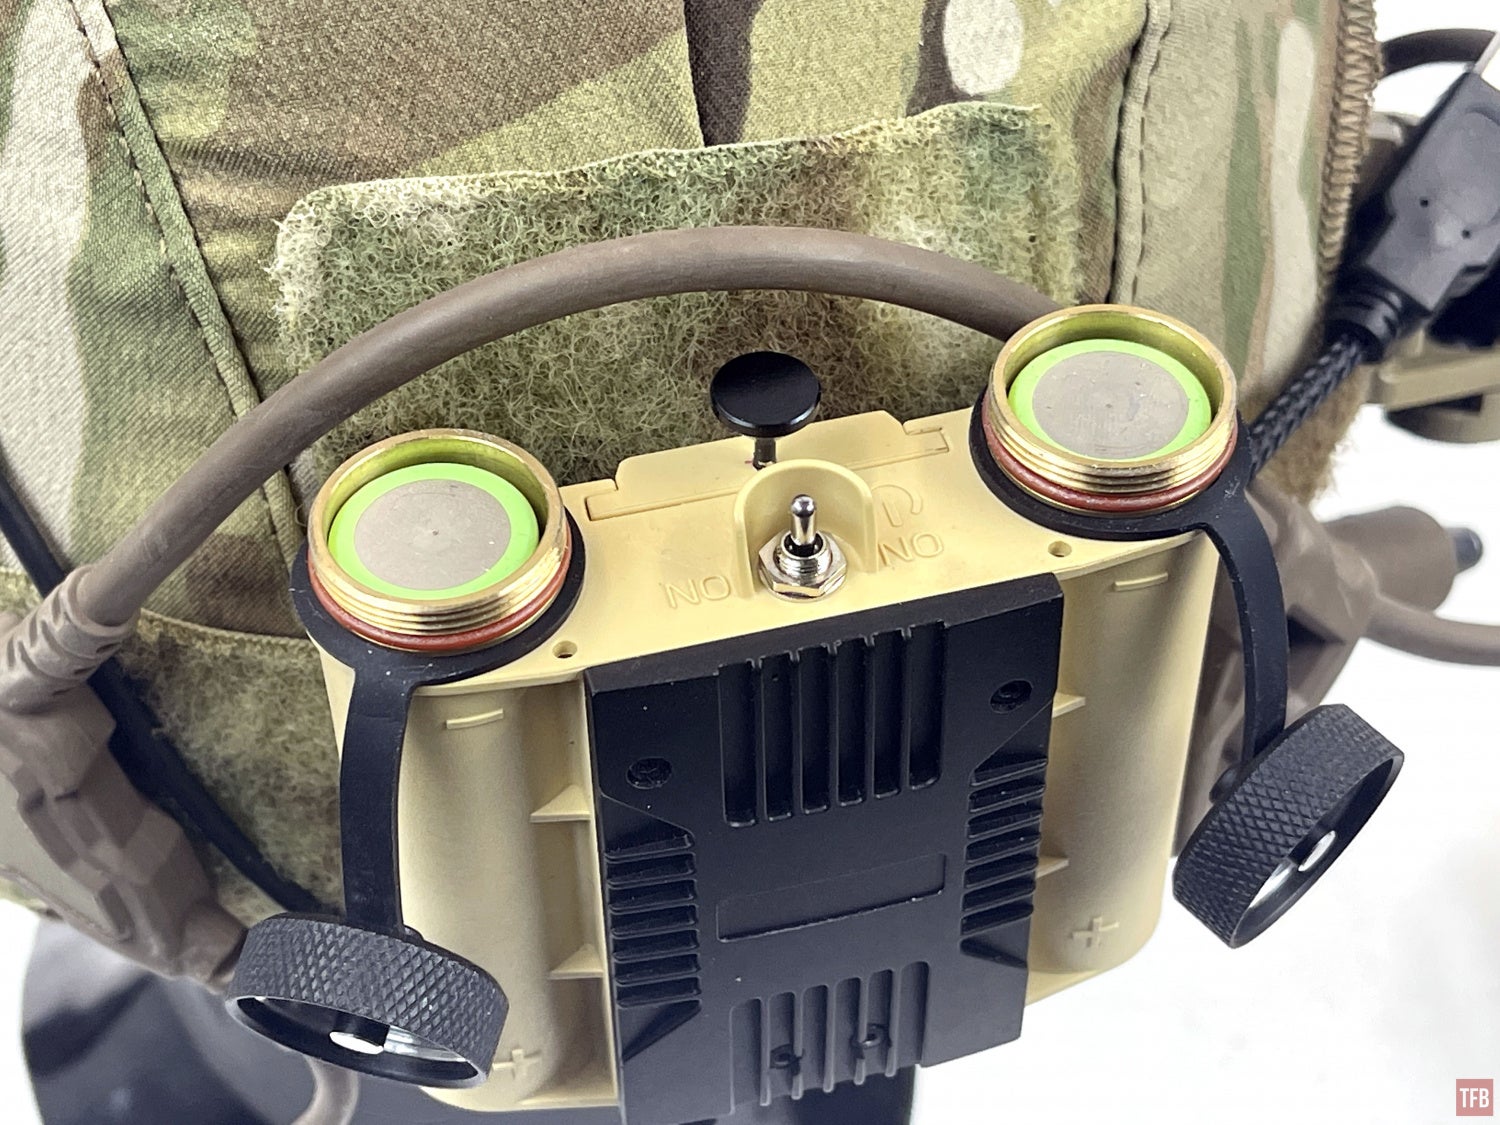
Just like the 20A, the 20 can have the battery pack directly mounted to the monocular.

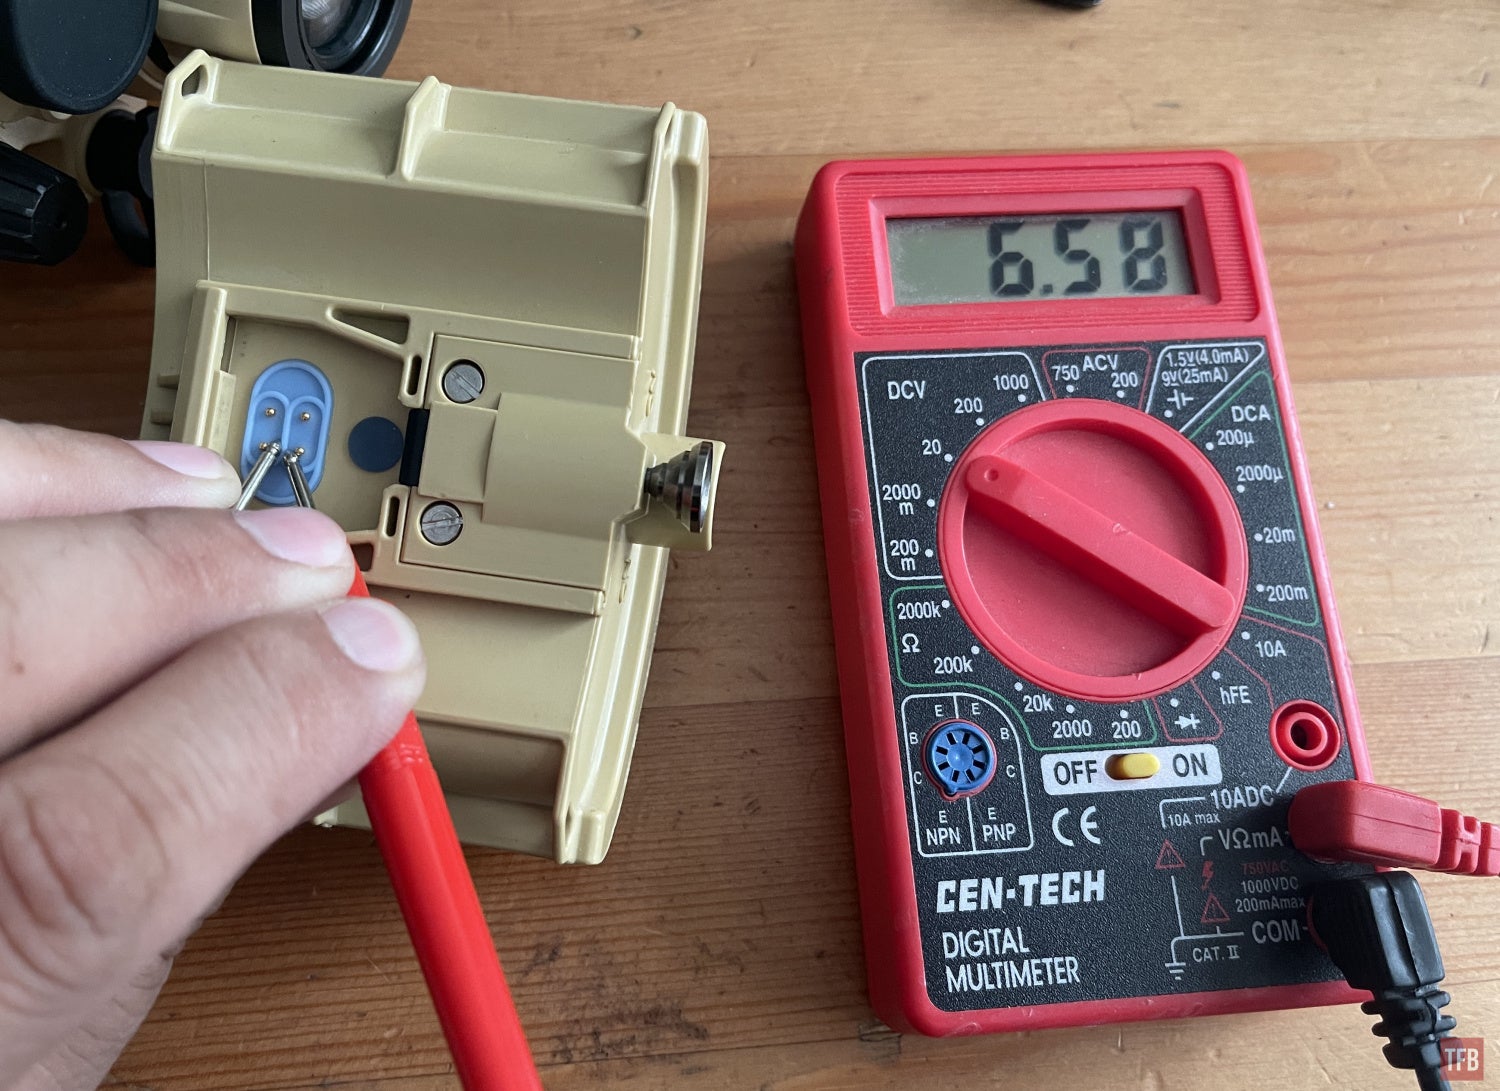
To my surprise, the battery pack produces 6.58v with li-ion 4xAA
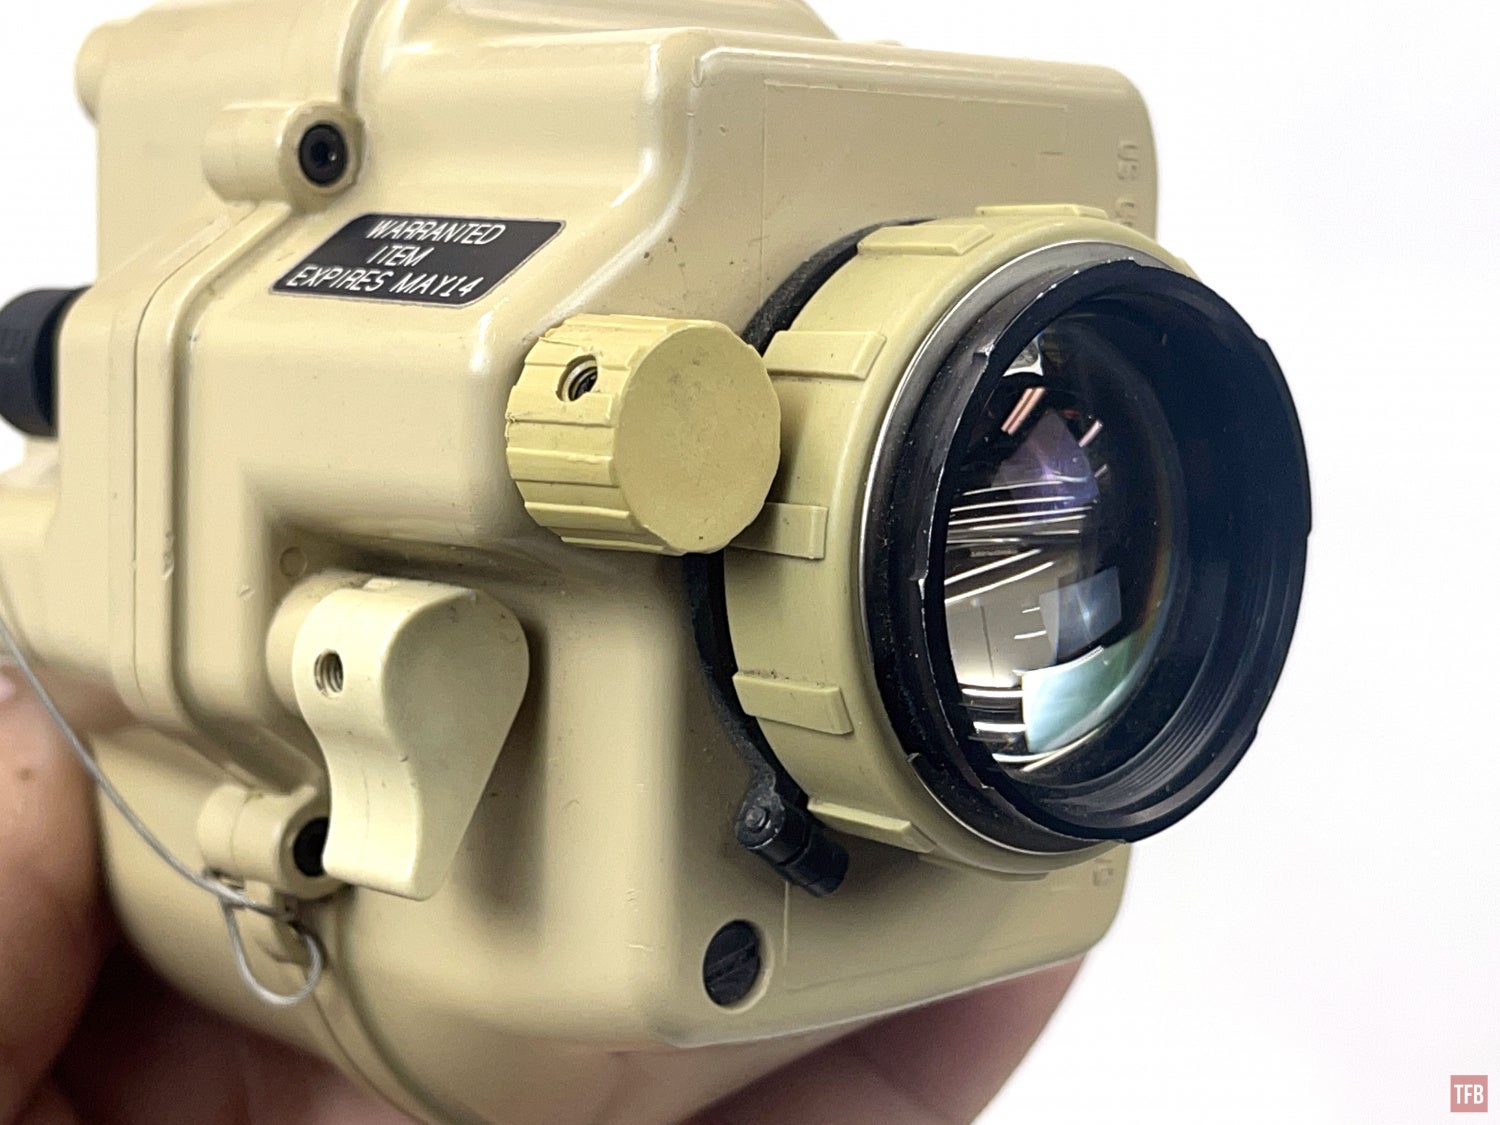
Internally, the PSQ-20 is a lot more complicated looking than the PSQ-20A.


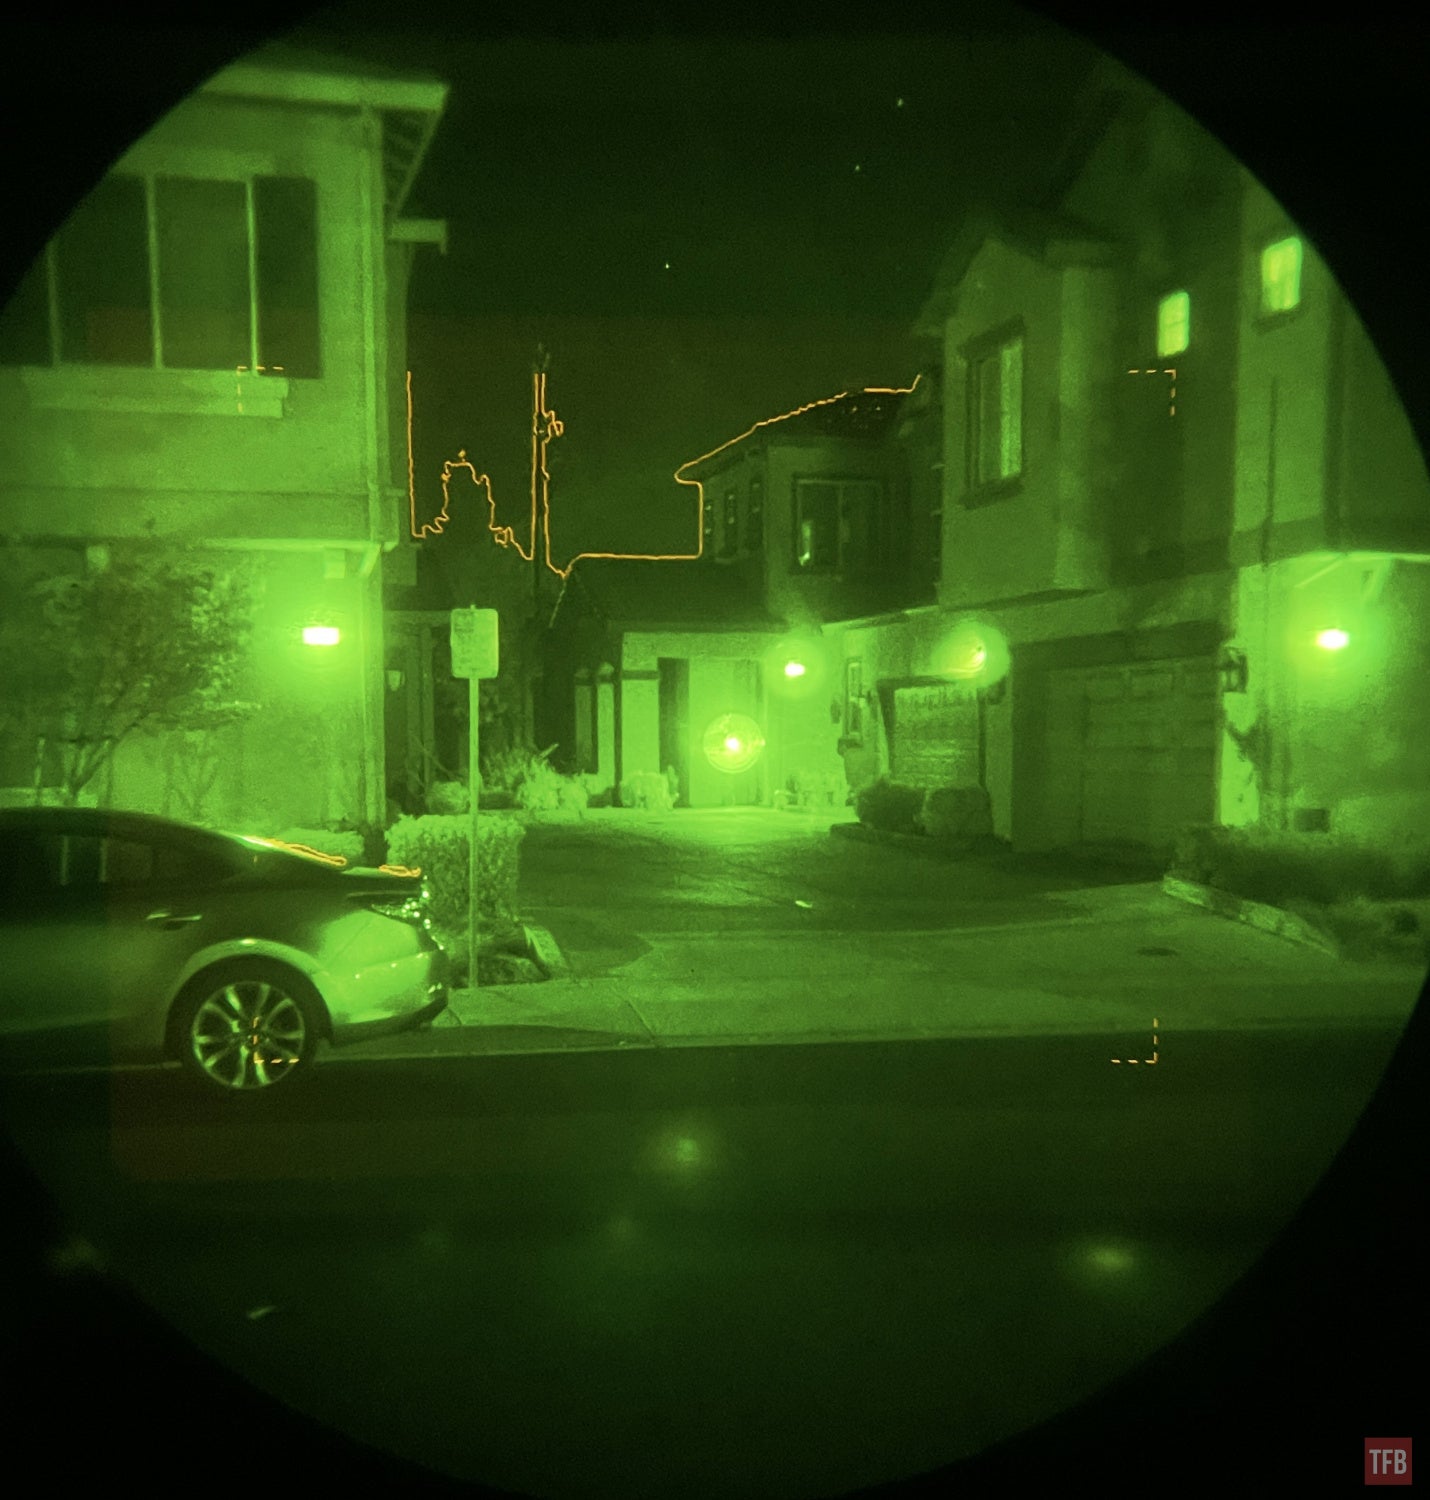
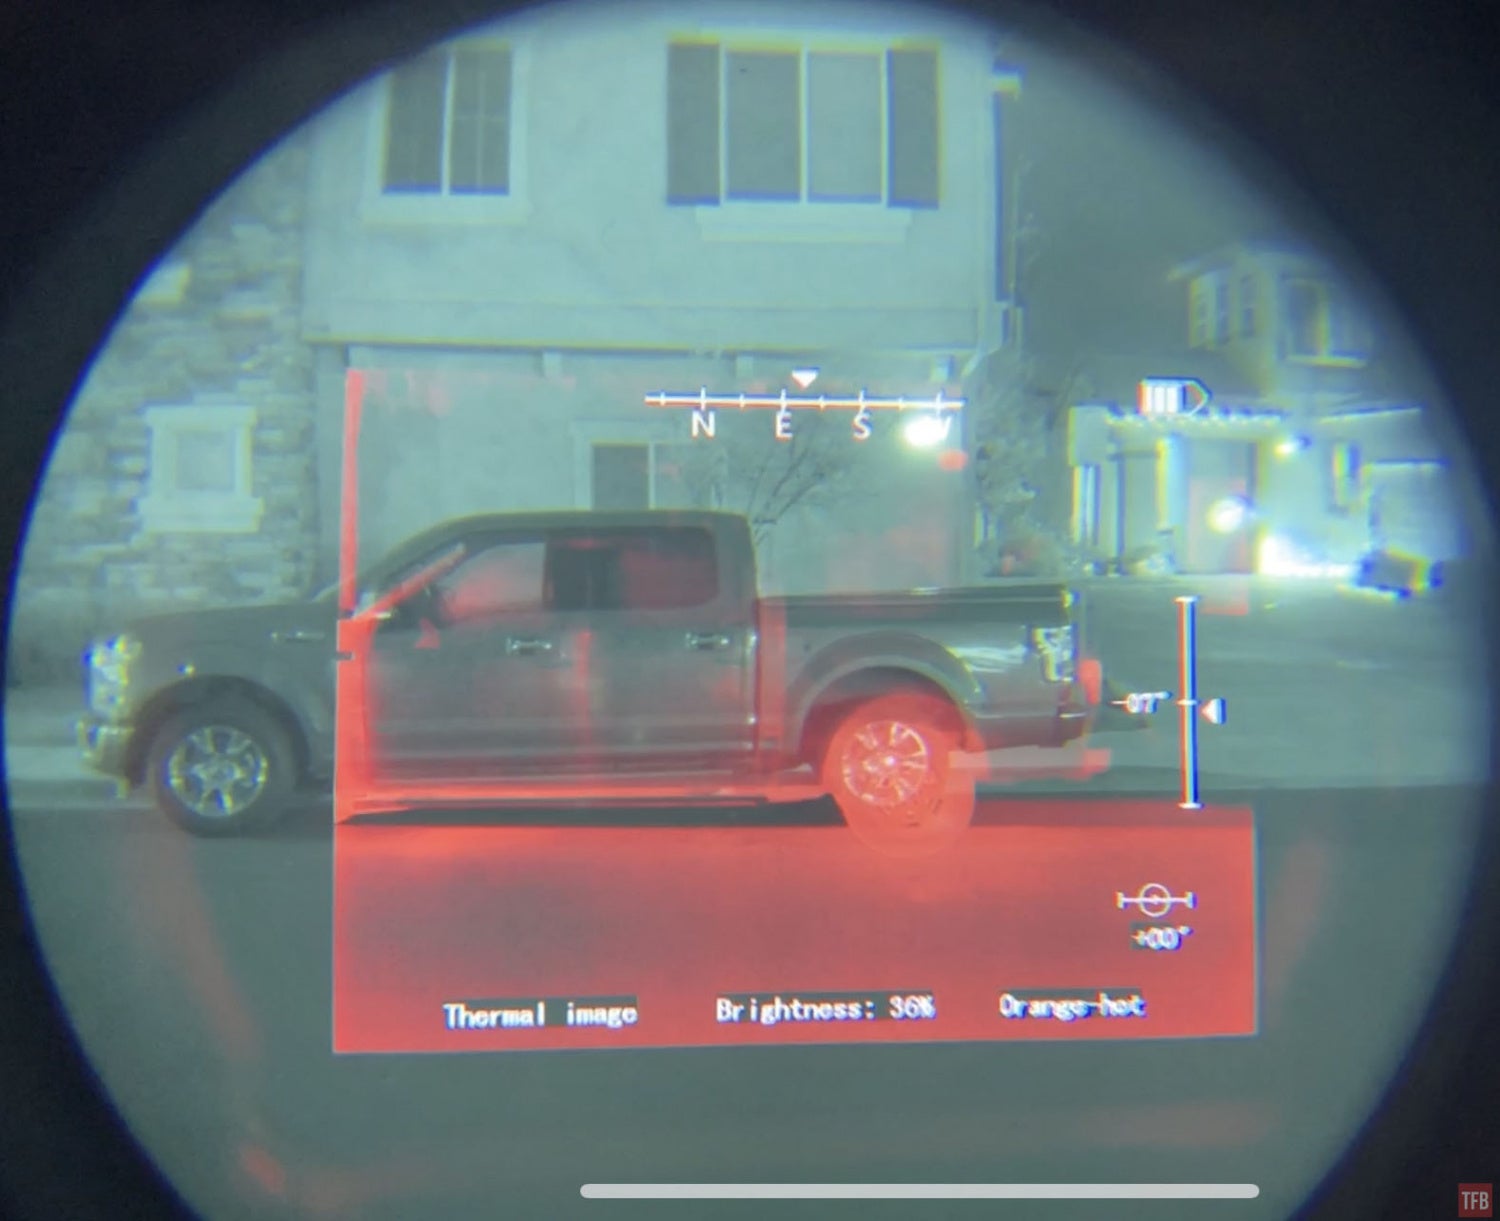
PSQ-20 Thermal Imagery
The PSQ-20 thermal image is what I expected to see in the 20A before I knew there was a difference.


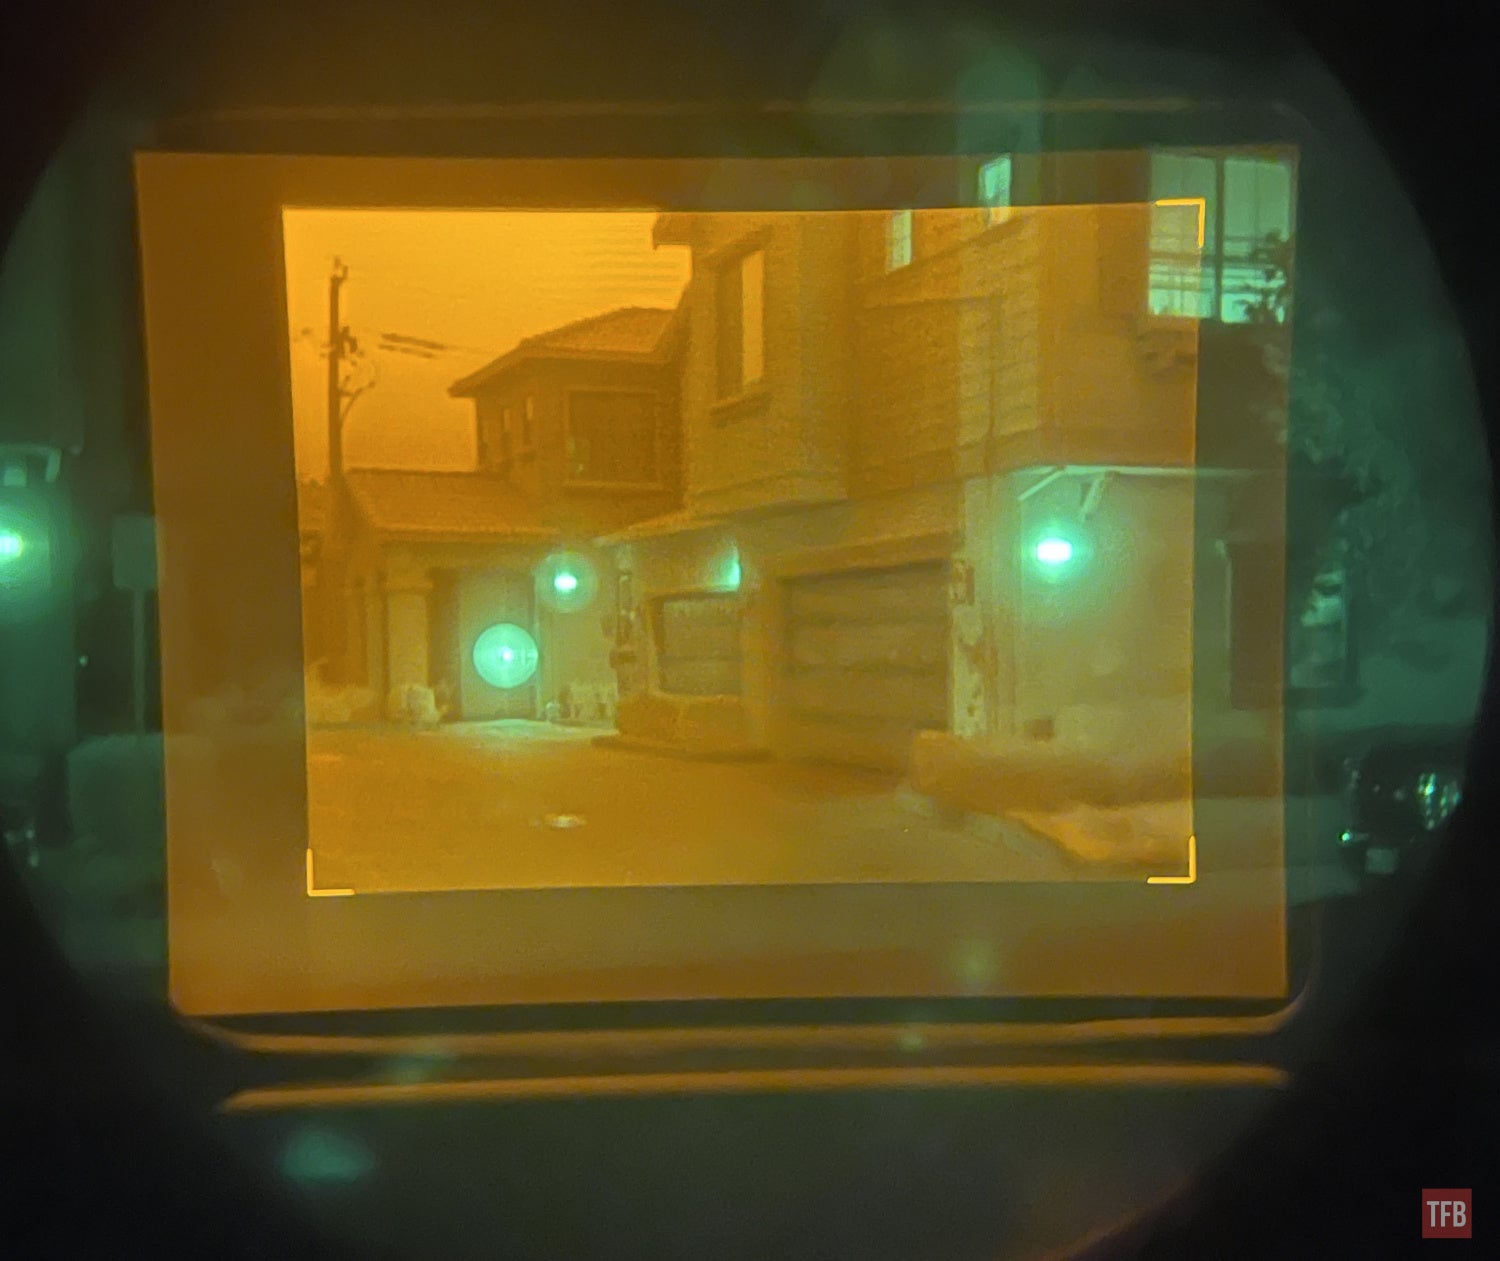
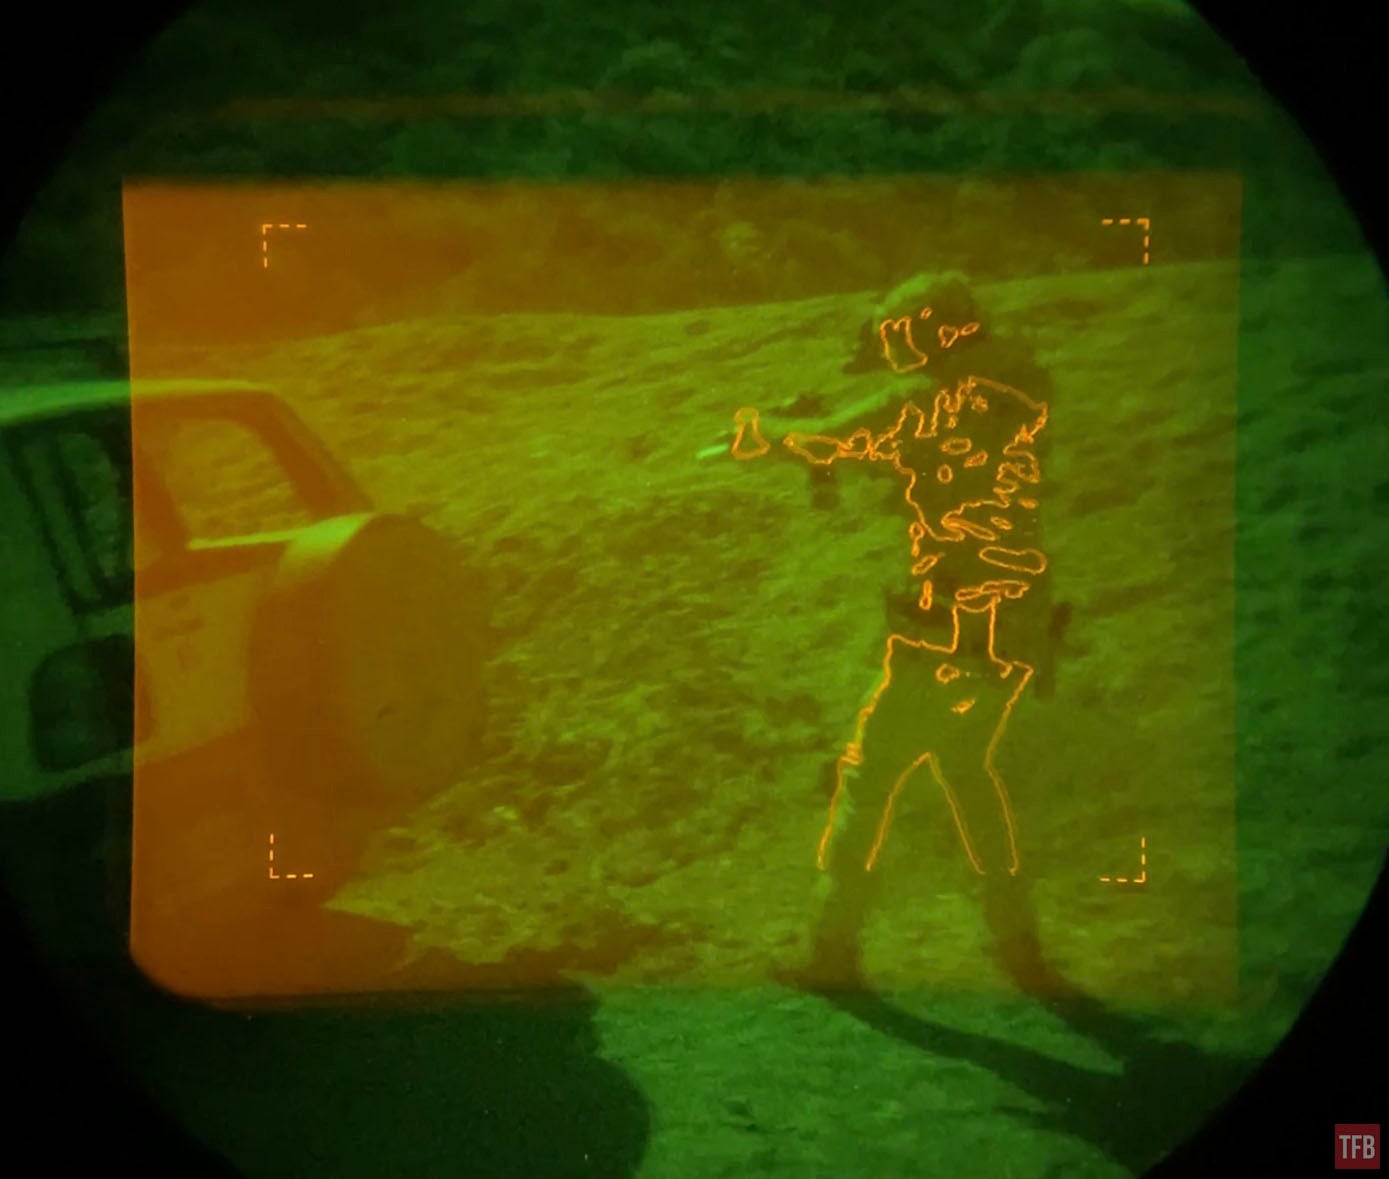
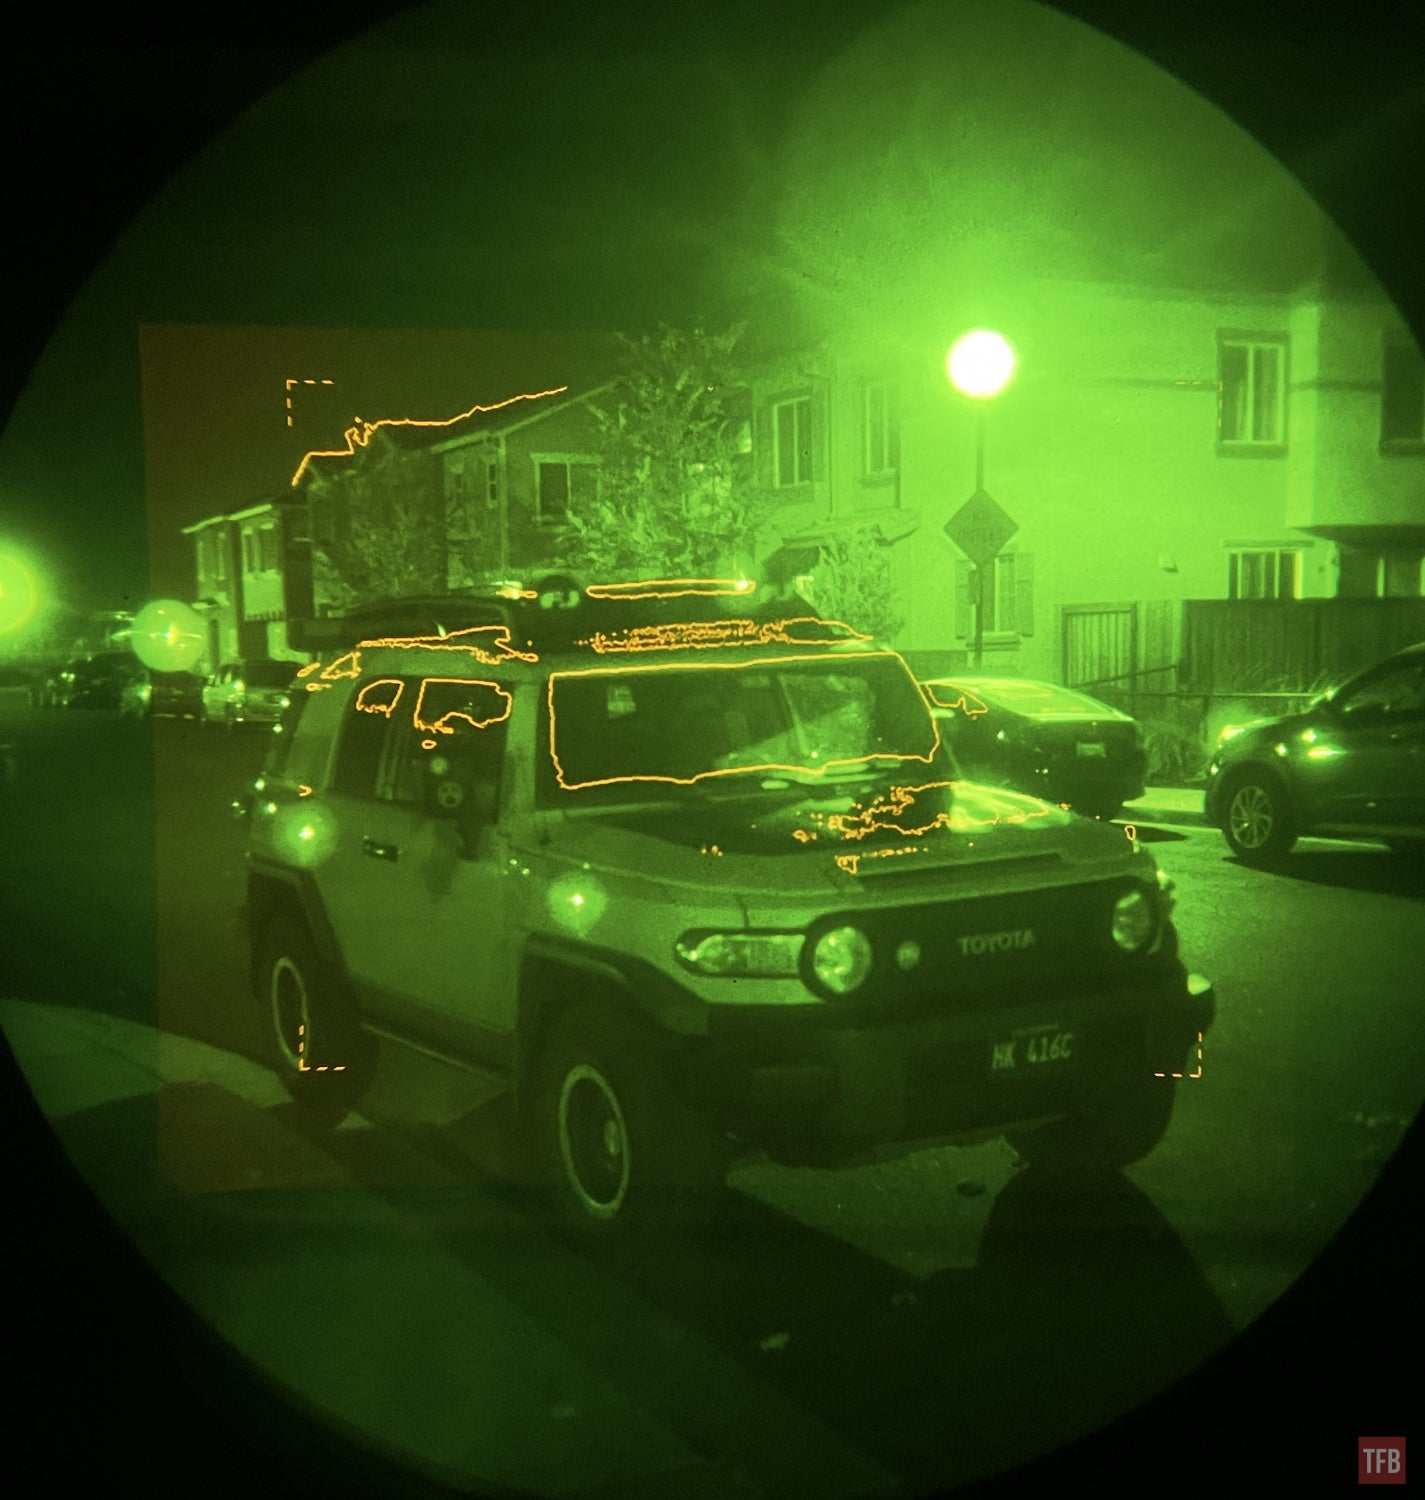
All of the screenshots above are on full thermal black hot. I prefer black hot because it looks like a black and white positive image to me. Below are some action screenshots with half/patrol mode and outline modes. The outline mode is the best I have seen. The lines are very thin and fine. Other thermal devices’ outline modes look like it was drawn with a fat dull crayon.


My only criticism is that outline mode shows me things I do not care about. I wish it just drew a line around the person and not all across the body.

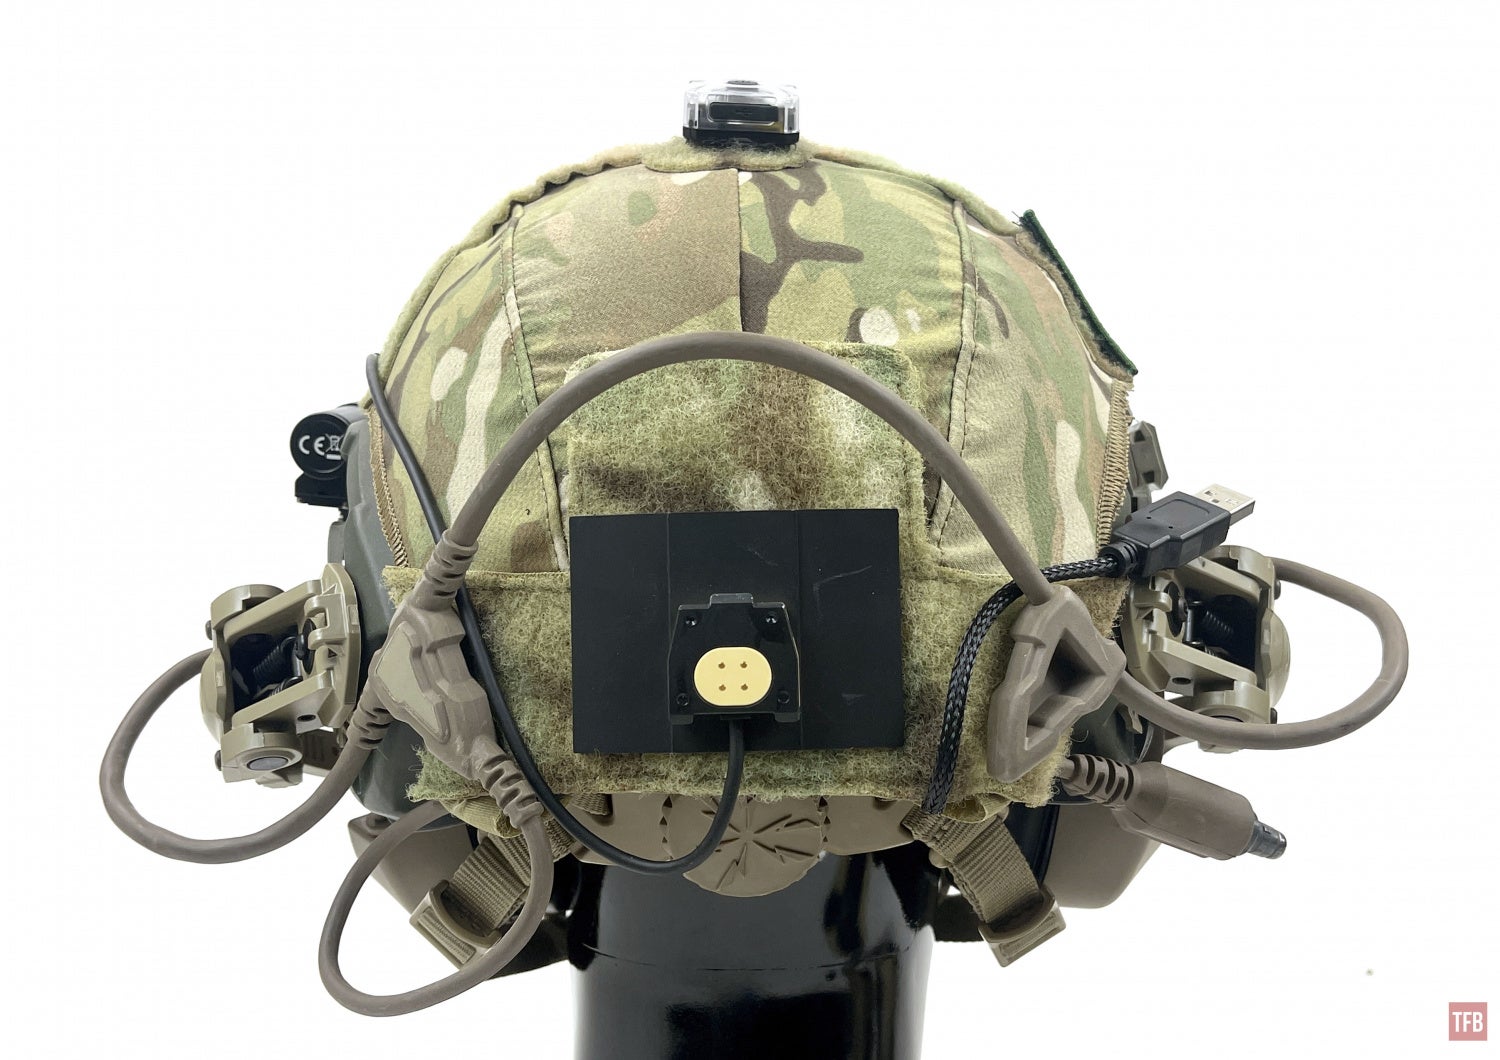
Helmet Cover For PSQ-20
I stumbled across this ACH helmet cover specifically for the PSQ-20.


It has a special flap that is tailored to accommodate the battery pack of the PSQ-20.


Dual PSQ
I modified a spare PSQ-20 mount so I could bridge two PSQ-20s. There is no power running to the other side so it is a cold shoe.


The 20A has a dull gray mount whereas the 20 has a light tan mount.

I plan to make a custom arm for a PVS-14 that will attach to the left side cold shoe so I can have bino PSQ-20.
InfiRay JerryF
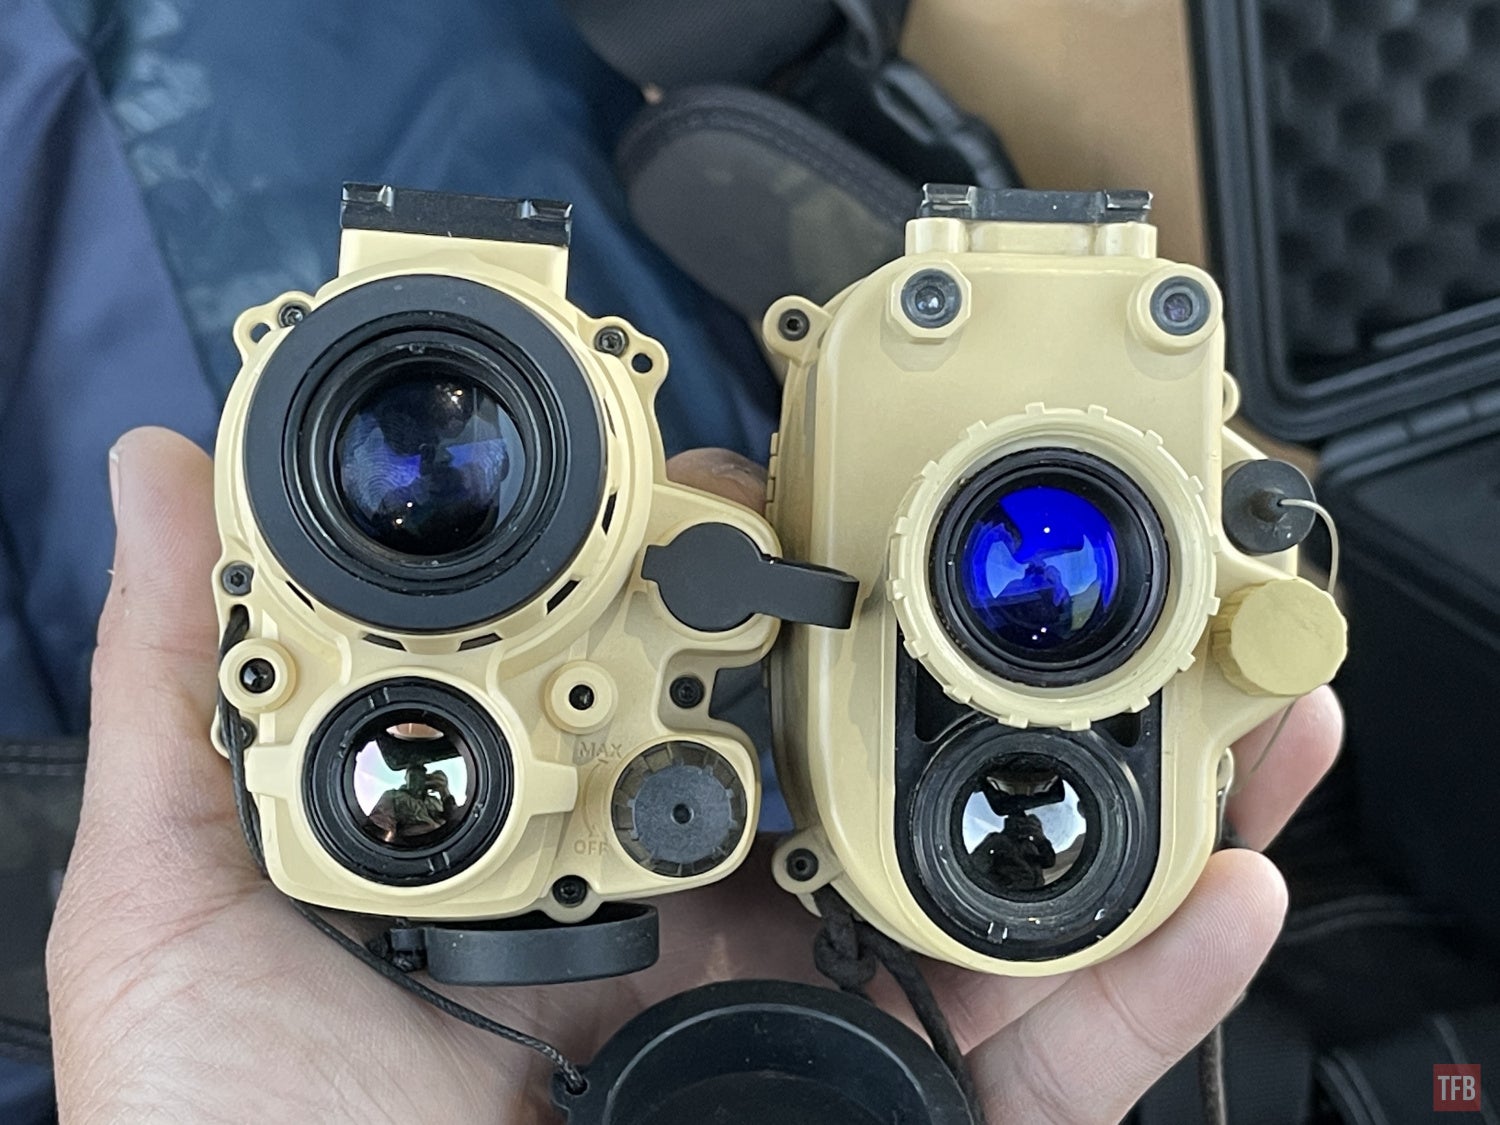
InfiRay has come out with their JerryF. They are the manufactures of the JerryC. The JerryF is a replica of the PSQ-20. It is a thermal fusion night vision monocular with a better thermal sensor.
The eyepiece is a little bit smaller and the eye relief is really shallow.

You can see how close the eyepiece has to be to my eye. If I move the JerryF further away the eyepiece housing starts to crop out the image.


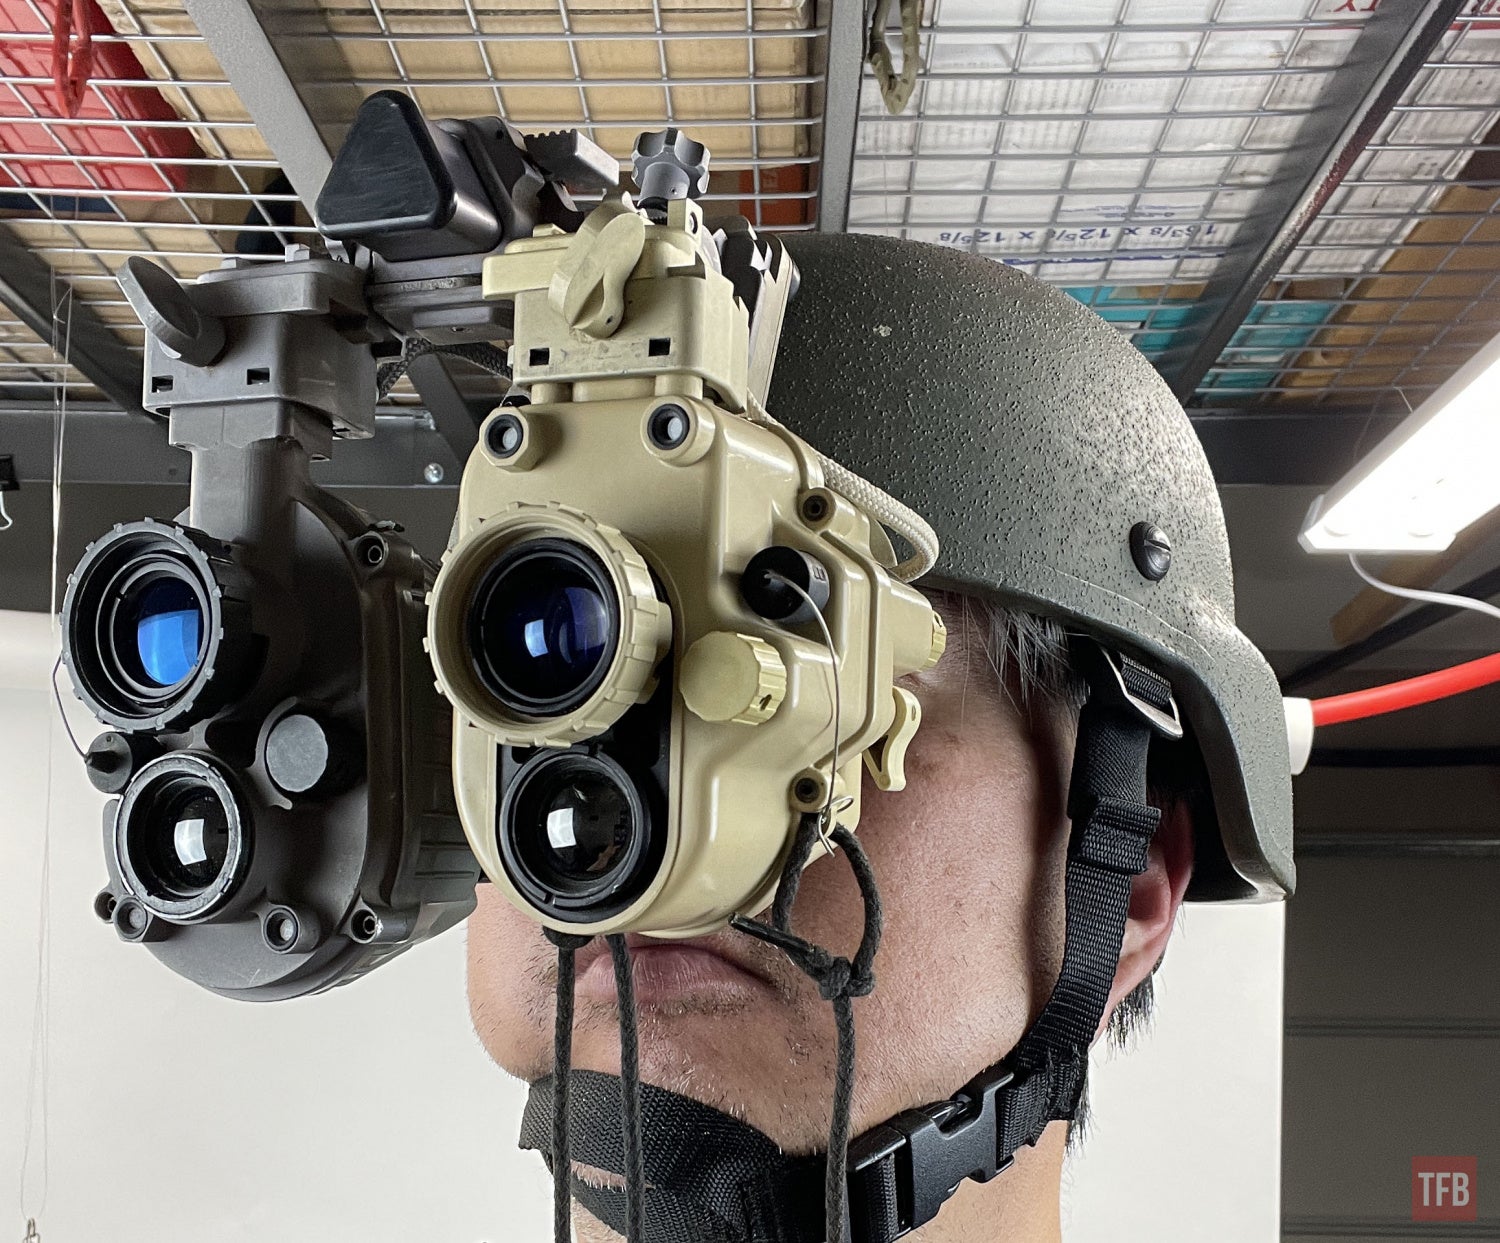
JerryF Helmet Mounted
The JerryF shares a lot of aesthetics with the PSQ-20 but they are not cross-compatible. I could not fit the JerryF onto the PSQ-20 mount. InfiRay made their mount more universal. While it is a powered mount that delivers power to the JerryF monocular, it does not rely on a powered shroud. Instead, they opted for a cable somewhat like an ANVIS system which plugs into a mount for the battery pack.

The InfiRay mount looks very similar to the Norotos ENVG mount but there are some strange changes. The threaded screw that holds the shoe in place is positioned towards the front of the shoe. This positions the shoe more rearward compared to the Norotos ENVG. Perhaps this is due to the short eye relief of the JerryF? Other than that, the mount works similar to the ENVG. There is one more change. The ENVG shoe swings around the front of the mount whereas the JerryF mount swings around the rear.

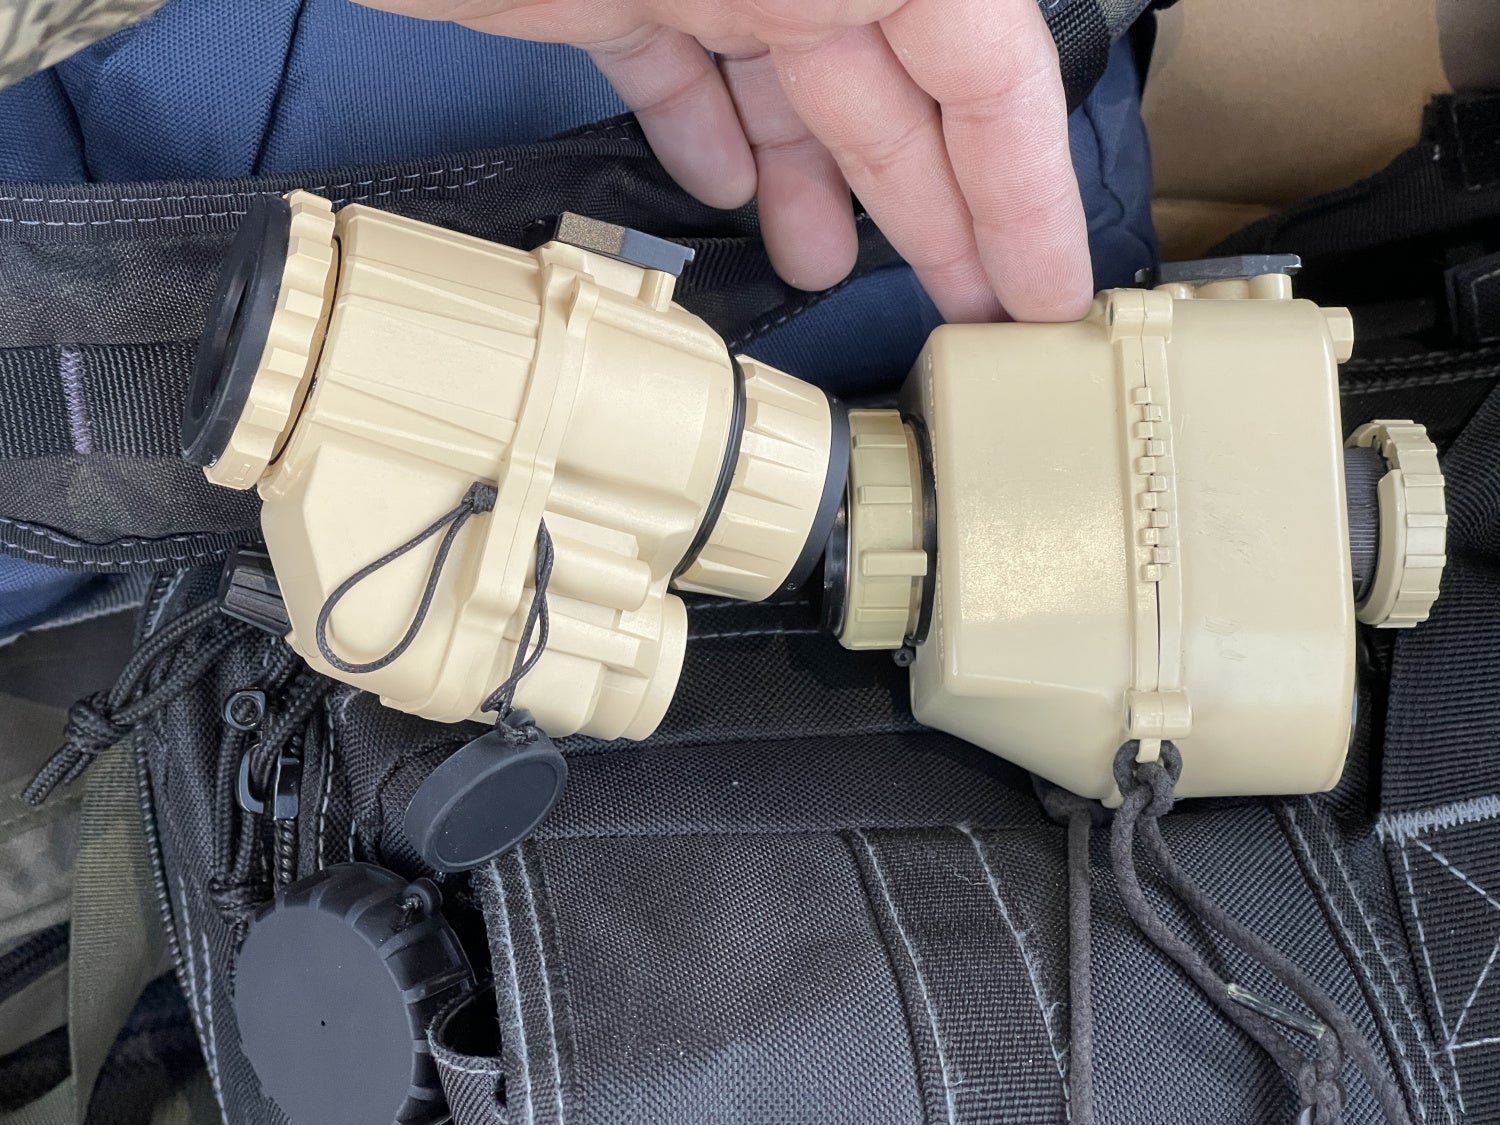
The JerryF battery pack is a bit different from the PSQ-20.


Similar to the PSQ-20 design, the battery pack attaches to a pseudo dovetail which delivers power to the mount via a wire.

The battery pack mount is held on with hook velcro.

What sets the JerryF battery pack apart from the PSQ-20 is that it uses 2×18650 batteries.
Not surprised, the JerryF battery pack generates 7.71v.

Another difference is that the JerryF battery pack has two switches. On the bottom is a video in/out port along with a switch to turn this on. There is a WiFi looking icon position but I have not been able to make this work.

On the other side of the battery pack is the ON switch to power the JerryF. 
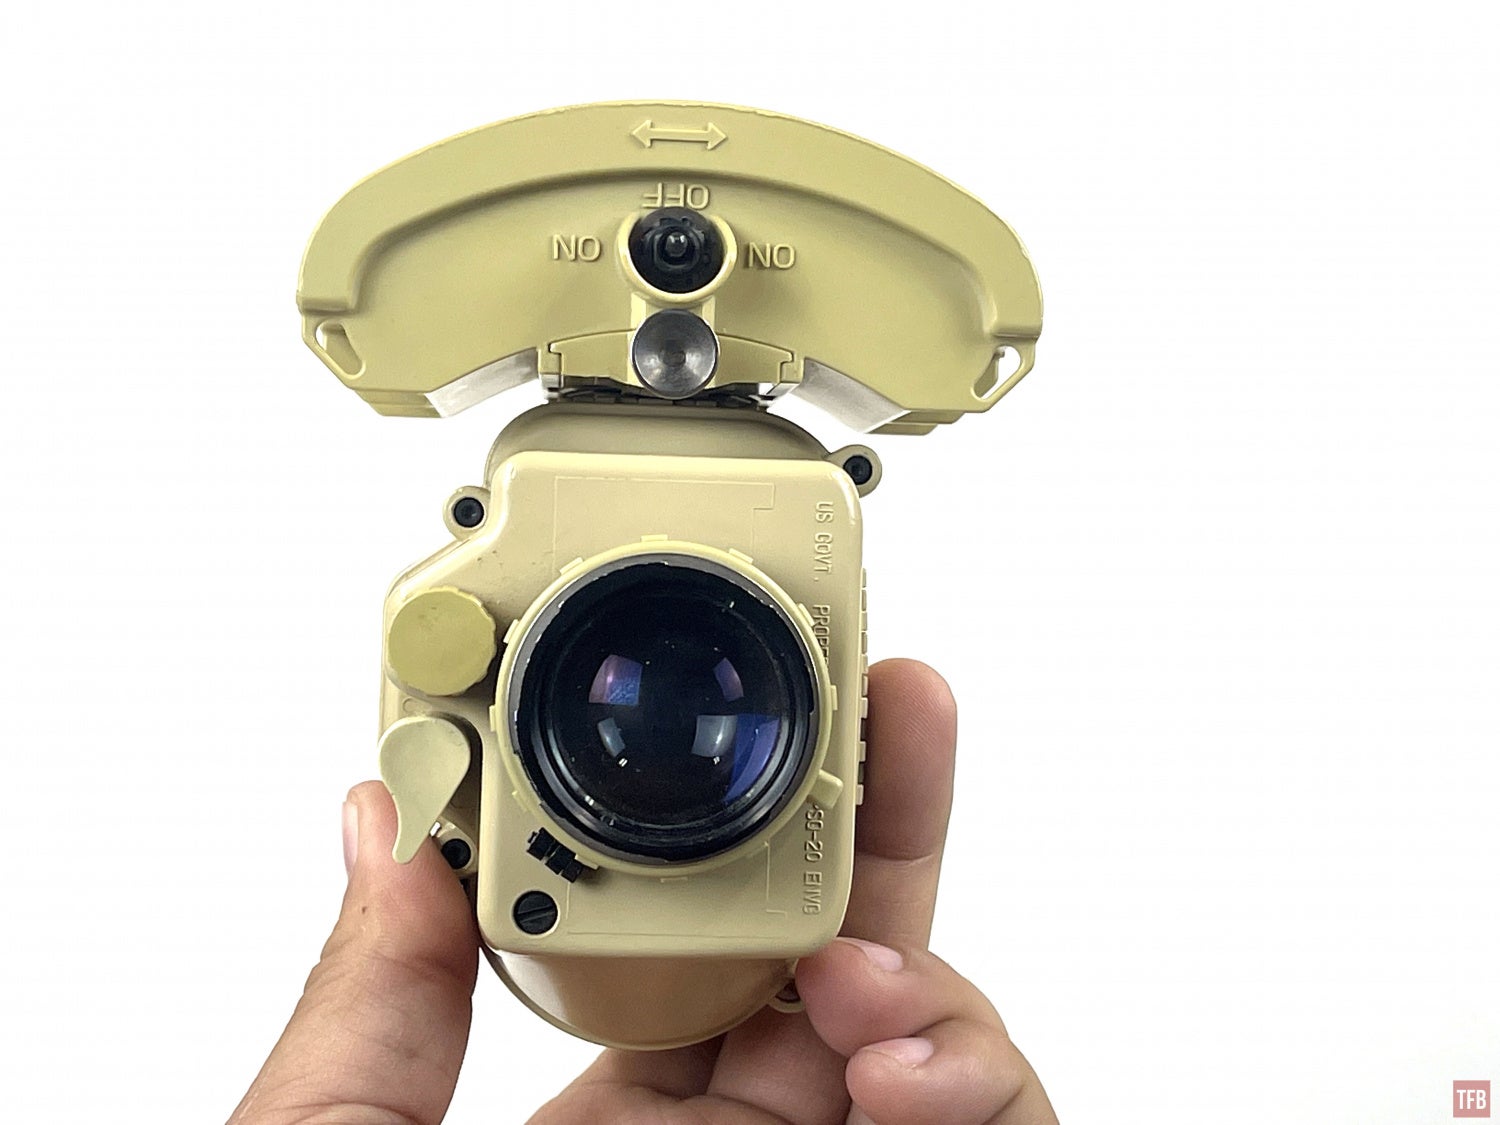
Controls are switched on the JerryF. The front knob is to turn on the thermal as well as manual gain control. Pressing the thermal knob switches from white hot, black hot and orange hot. There is another I/O port just above it and the IR illuminator between them as well as the ambient light sensor on the other side.
At the back, you have the IR illuminator switch but it is only constant on. It is also a button but I have not found out what that does. Below that is the power switch for the night vision, Turning it controls manual gain and pressing it in switches from Thermal Image (full thermal), Highlight (patrol overlay), Outline and Breathing (pulsing thermal image).
If you press and hold the thermal button in it will bring up an on-screen menu. There are only 4 options. The first is how thick the outline mode lines look. The second option is to turn PAL video on or off. The third option is to calibrate the compass. This is performed similarly to calibrating a DJI drone. You spin the JerryF around different axis. The last option is to turn off the on-screen widgets which are the compass, battery indicator, inclinometer and roll angle meter.

Full Thermal

Highlight mode

Outline mode
You can see that the thermal image is not in sync with the night vision image. Fortunately, you can adjust this manually. You have to open the housing. There are 6 hex screws holding the two halves of the housing together. There are also three Philips screws just behind the rear diopter.

Once you remove those last three screws you can remove the rear half of the JerryF housing. Inside, the JerryF is rather simple looking compared to the PSQ-20.

My friend installed his own tube. He used an L3 White Phosphor tube and soldered it in.

In order to adjust the thermal display, you need to physically shift this circuit board assembly shown in the photo below.

There is a screw on either side you need to loosen.


Once the screws are loose, you should be able to shift this assembly up, forward, backward, left and right when looking through the JerryF. A little tip. If you attach the battery pack directly to the housing, it will block your access to those screws. So I recommend using the mount and connecting the battery pack remotely. Once you find the right position for the thermal display, retighten the screws to hold it in place.

Final Thoughts On The JerryF and PSQ-20
The PSQ-20 is a cool piece of gear but it is obsolete. Just like the 20A and 20B, it relies on proprietary parts. The tube, as far as I can tell because I don’t want to try removing it to see, looks to be proprietary. The lenses are also proprietary. Add to the fact you have to use lithium AA and the obsolete mounting system is not ideal for regular use. I prefer to attach the battery to the PSQ-20 and use it as a handheld monocular. The cost for a PSQ-20 is all over the place. You can find some websites asking $14,000 for one. The second-hand market is around a price for mid-level dual-tube bino. I do like the outline mode on the PSQ-20, it is the best looking out of all the other thermal devices I have tried that have an outline mode.
Now that brings us back to the JerryF. It is Chinese-made and cost-wise is not where I was expecting it to be. My friend bought his for $7k and that was without a tube. Another source says he can get them for $7k with a photons tube inside. This seems a bit pricey to me but then the JerryC retails for $5k. Add another $2k for a night vision monocular and you have rear projection thermal fusion? Then the price starts to make sense. The thermal image produced by the JerryF is nice. Lots of detail and clean. Outline mode has 5 different threshold settings which end up changing the thickness of the lines. The compass, inclinometer and roll indicator are neat widgets but not necessary for my use. The two-tone thermal display is nice in the JerryF. I still feel that a COTI and binos are the better route or bridge a thermal like the SKEETIRL with a PVS-14 for better thermal capabilities.
Huge thanks to my friend Haining W. for lending me his JerryF for this review.
TFB’s Friday Night Lights series is brought to you by ATN