
Tightening up the fitment on an X300U-A.
Surefire X300 Ultras have been a leader in pistol weapon mounted lights for a long time. Some have experienced fitment issues with the A model lights. This can be annoying, but there are easy solutions to the problem.
Duck Tape Fixes Everything
First, check and see if you have a fitment issue at all. Some I have seen
simply slide on and have no issue at all. If not, you have two choices. It is more of a personal decision. Some purchased the
A model so they can
easily attach and detach the light on different pistols. If this is you, then there is a quick and easy fix. Cut some strips of tape and add it to the frame near the back of where the light will be. Add more or less strips until the light is
firmly in place once attached.

I never thought I would be adding Duck Tape to a gun but it does work.

The thickness of the tape is easily adjusted by the number of layers.
You can tape on the light itself, but by taping on the pistol you can individually adjust how much tension you need to add on each pistol you plan to mount the light with more or less layers of tape. I have heard some people use Velcro with an adhesive on the back to get the same result.
Included Hardware
Surefire also included added hardware for those wanting a little more permanent solution. Your x300U-A comes with a universal bottom plate installed. As you have noticed by now, it works well for many setups but is not right for all.
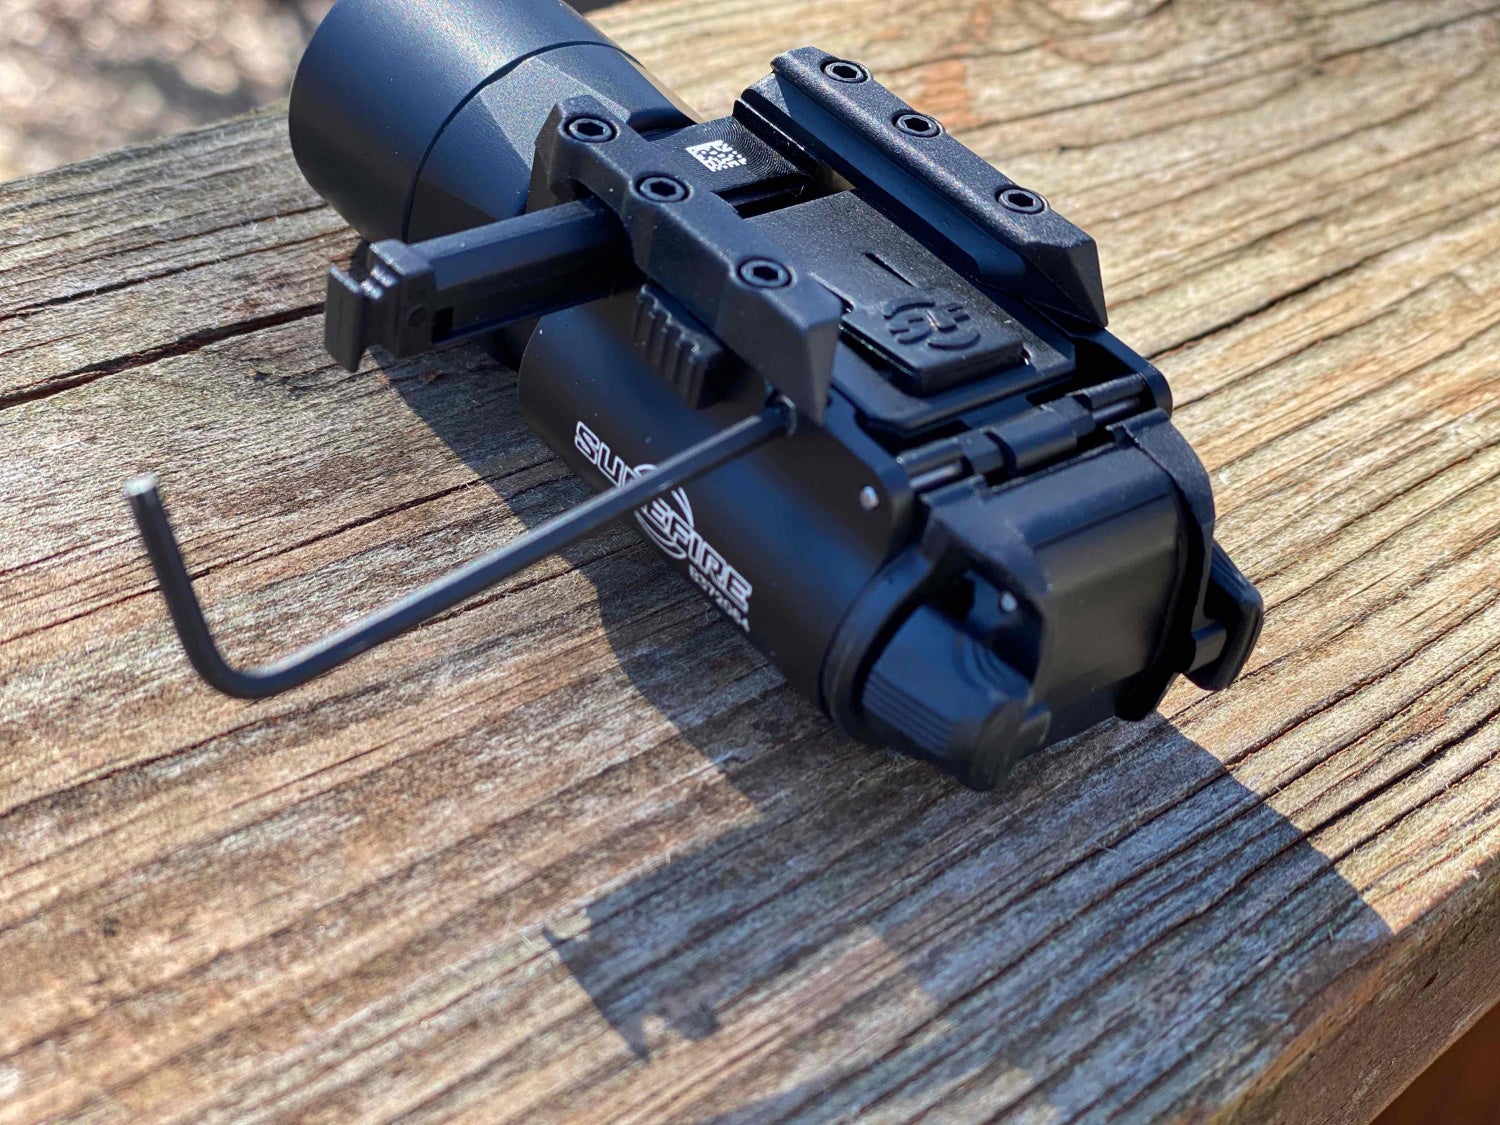
First, choose the proper mount plate. The U mount is what came standard, a P mount which can be replaced for Picatinny rails, and a Rail Lock which we will use for this article. The Rail Lock can be used for the most uses. This is thanks to a tension screw that can be dialed in from the side.

We have the Universal plate on the left, P for Picatinny rails in the center and a Rail Lock plate on the right with a tensioner screw system. The two crossbars in the middle are also part of the Rail Lock plate mount.
Lay the locking piece in the rail lock mount as shown and thread in the side screw a few rotations.

Insert the screw from the side and orient the locking mechanism as shown above.
Notice there are two cross sections that also came with the light marked P and U. P again stands for Picatinny and U stands for Universal. I chose the universal and it worked well for my Glock 19 lower. Add the crossbar as shown and press the mount into place.

Push the back end of the plate with the tension screw in first, then snap the front end with the crossbar in place.
Reinstall the rails with the six screws in their original orientation. Do not over-tighten as they can be easily stripped. Make sure the cross bolt is out to the side as shown before tightening.
Place the light on the rail of your pistol and slide the crossbar over when in place. Finally, tighten the silver screw until there is no play in the fitment of the light. By tightening the screw you will see the Surefire logo is pressed up and into the bottom of the firearm. This prevents unwanted movement.
See how as the tension screw is turned the SF logo presses up to tighten fitment on the firearm.
For easy removal, press in on the right-side push button and the crossbar. Then pull the crossbar from the other side and remove the light from the rail.
Loosen the tightening screw and then press in on the release button and cross section to remove the light.
Conclusion
Whether you decide to add tape or use the included hardware is up to you. Both are simple fixes and improve the fitment of your X300U-A.
 Your Privacy Choices
