 Your Privacy Choices

The Ruger 10/22 rifle (and pistol) has become the quintessential firearm when it comes to shooting .22 LR and has become one of the most common rimfire guns in North America. There are other semi-automatic .22 LR rifles, but it’s clear that the gun owners and the aftermarket have heavily favored the 10/22. First released in 1964, the Ruger 10/22 made a splash in firearms community that would help hunters, plinkers and countless newcomers learning marksmanship and gun handling for the next 55 years and beyond.
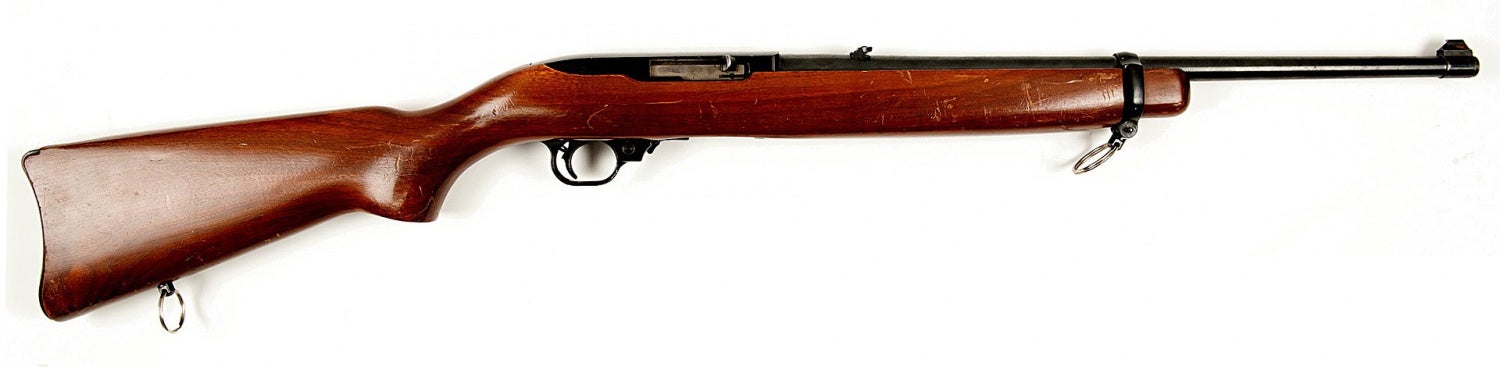
Image from Wikipedia.org
In this edition of TFB’s Field Strip series, we’ll take an inside look at the Ruger 10/22 Charger model, which is the pistol version of the 10/22. My friend happened to have one and showed me the basic field strip process.
BEFORE YOU FIELD STRIP ANY WEAPON, REMEMBER the four rules of gun safety:
- All guns are always loaded.
- Never let the muzzle cover anything you are not willing to destroy.
- Keep your finger off the trigger until your sights are on the target.
- Be sure of your target and what is beyond it.
TFB FIELD STRIP: RUGER 10/22 RIFLES, CARBINES AND PISTOL
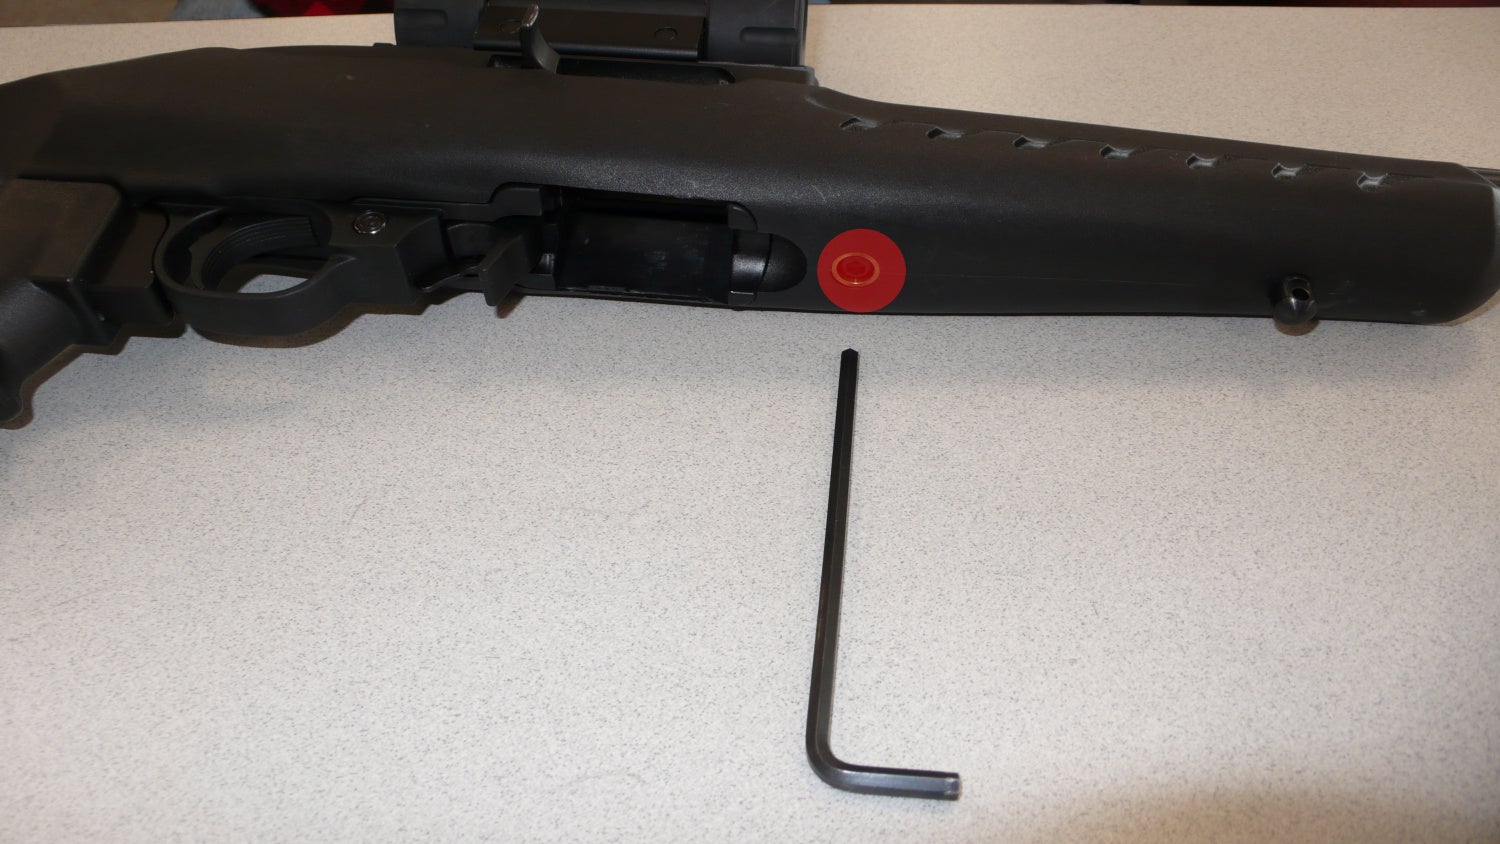
Step 1.
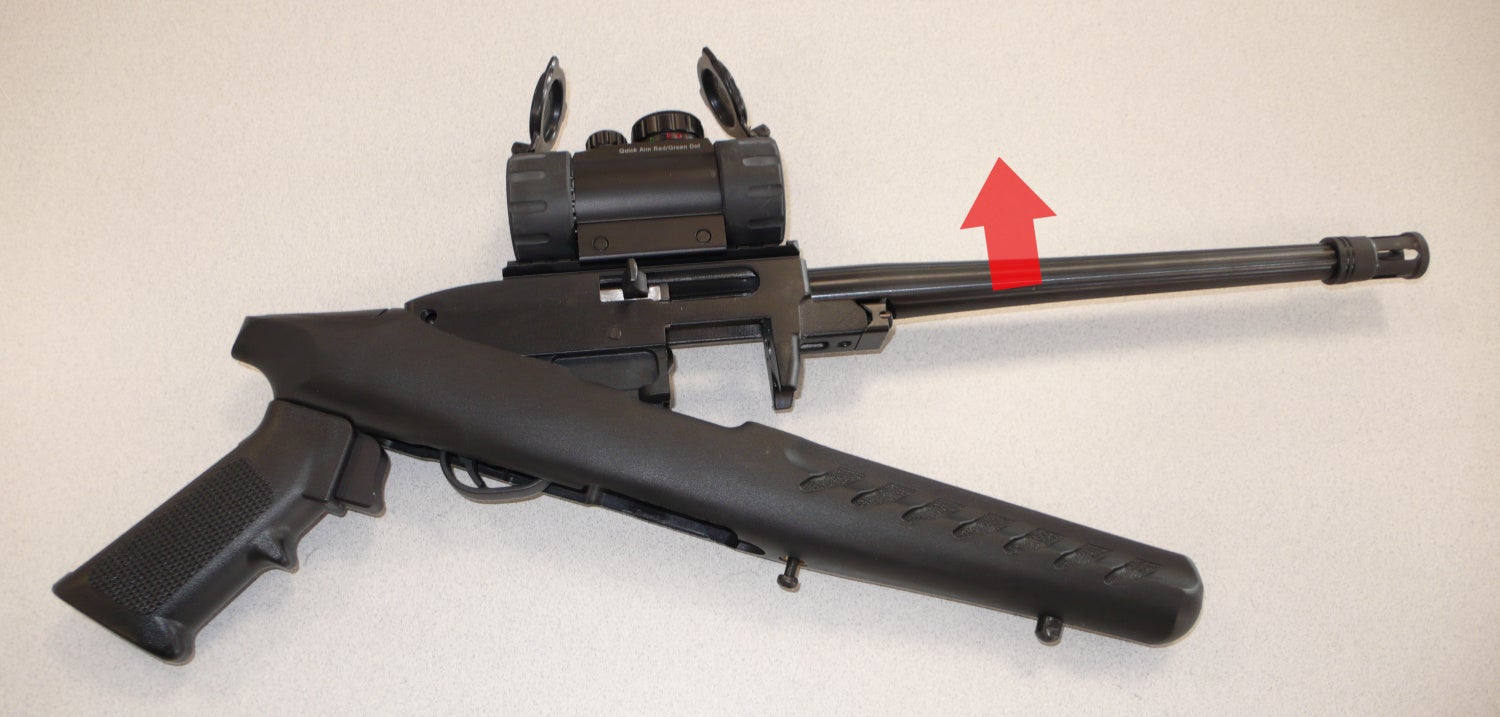
Remove the magazine with the paddle release just aft of the magazine. Then pull back on the charging handle to ensure that there isn’t any ammunition in the chamber. Once you’re sure the 10/22 is completely unloaded, loosen the takedown screw on the bottom of the stock, just forward of the magazine well. For 10/22 Charger pistols, don’t completely remove the screw from the stock. If your 10/22 model has a barrel band, use a screwdriver to loosen it and slide it off the barrel.
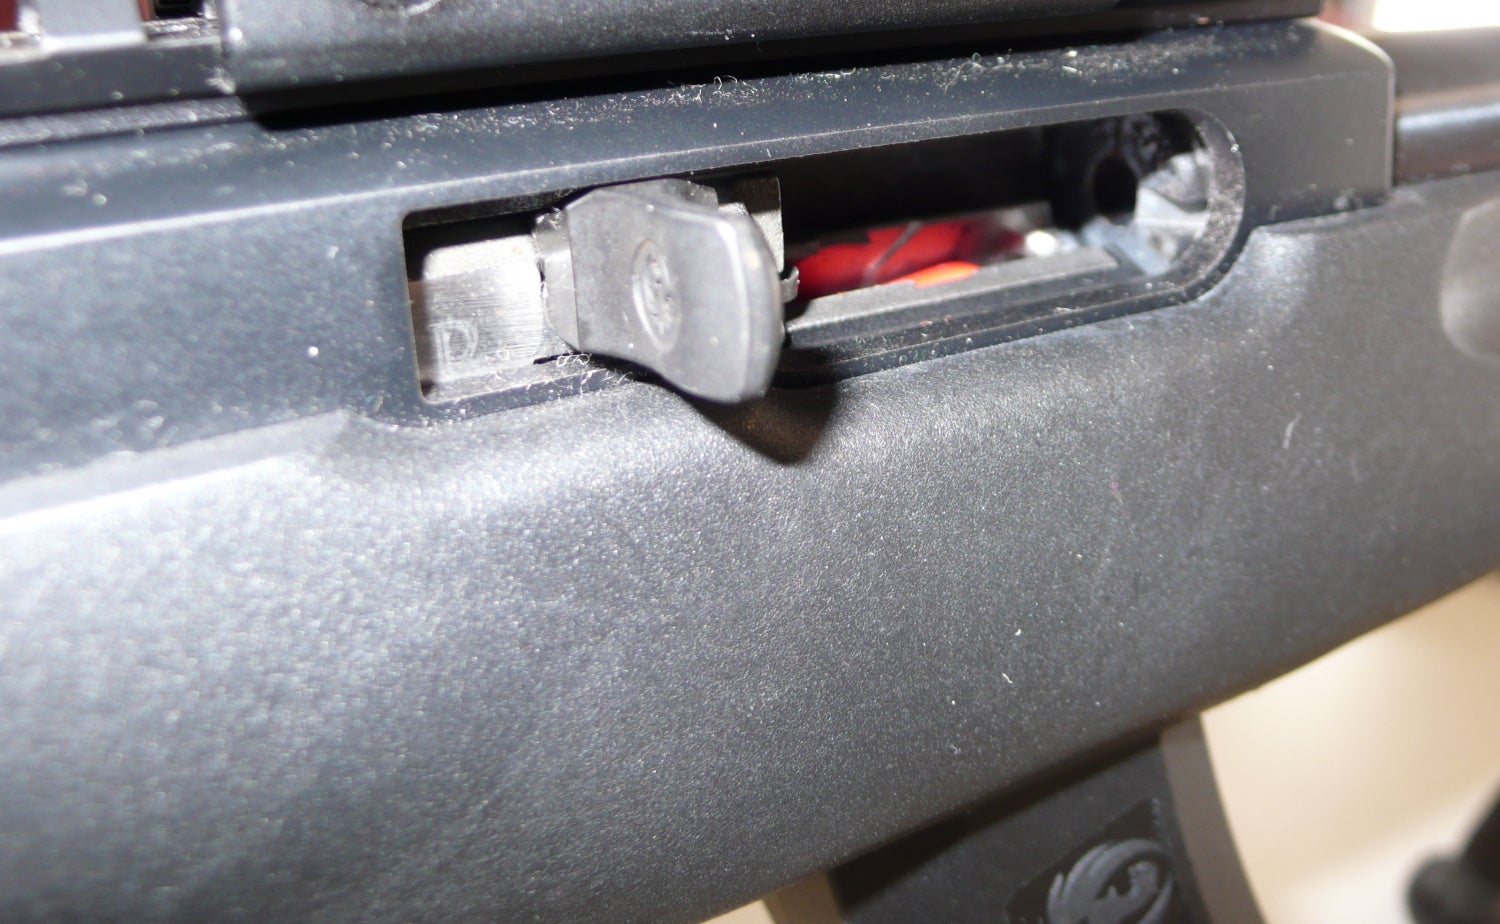
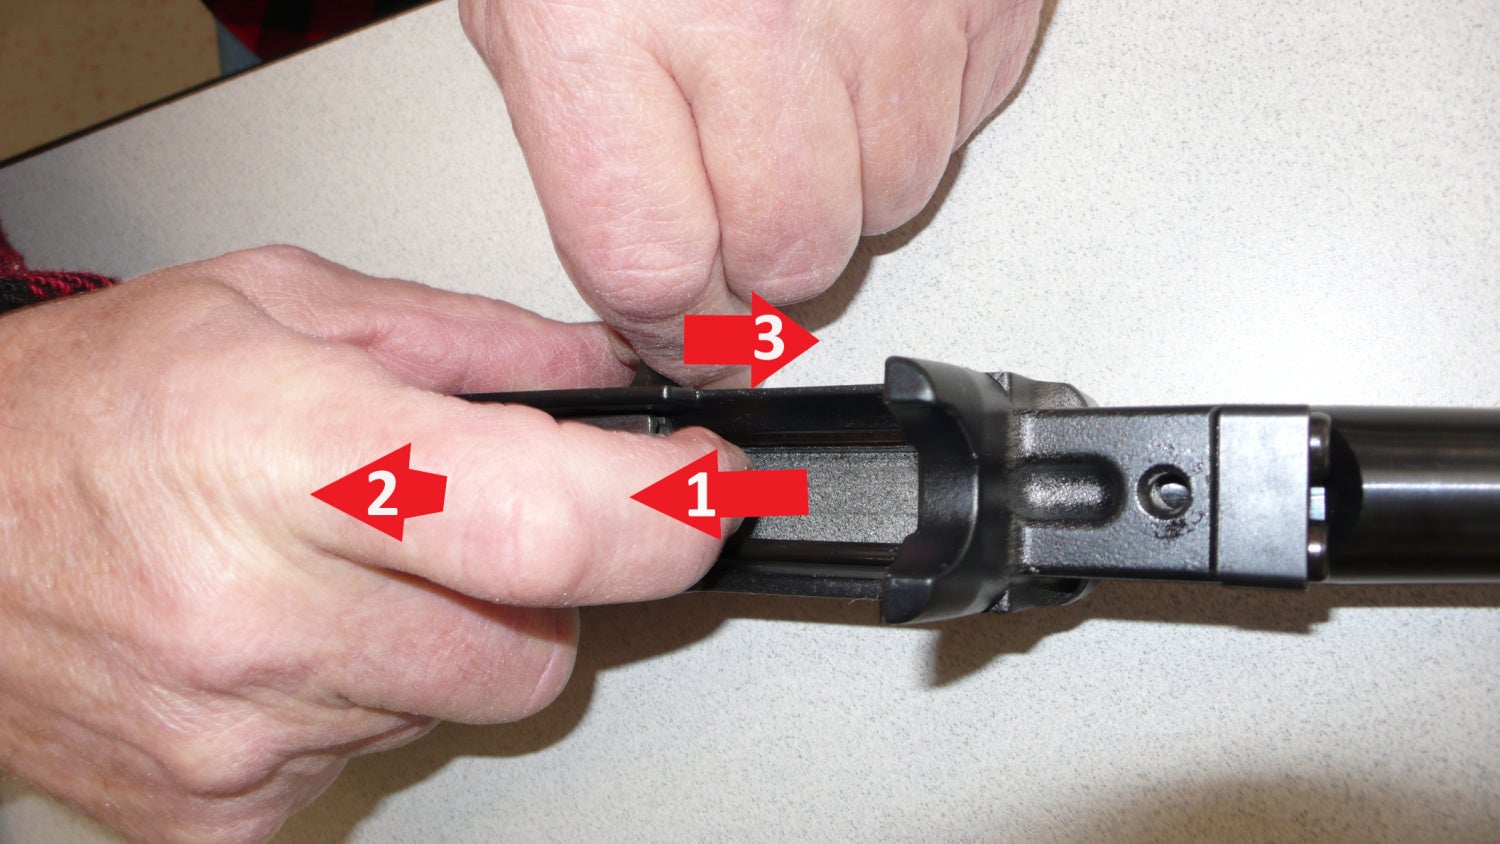
Step 2.
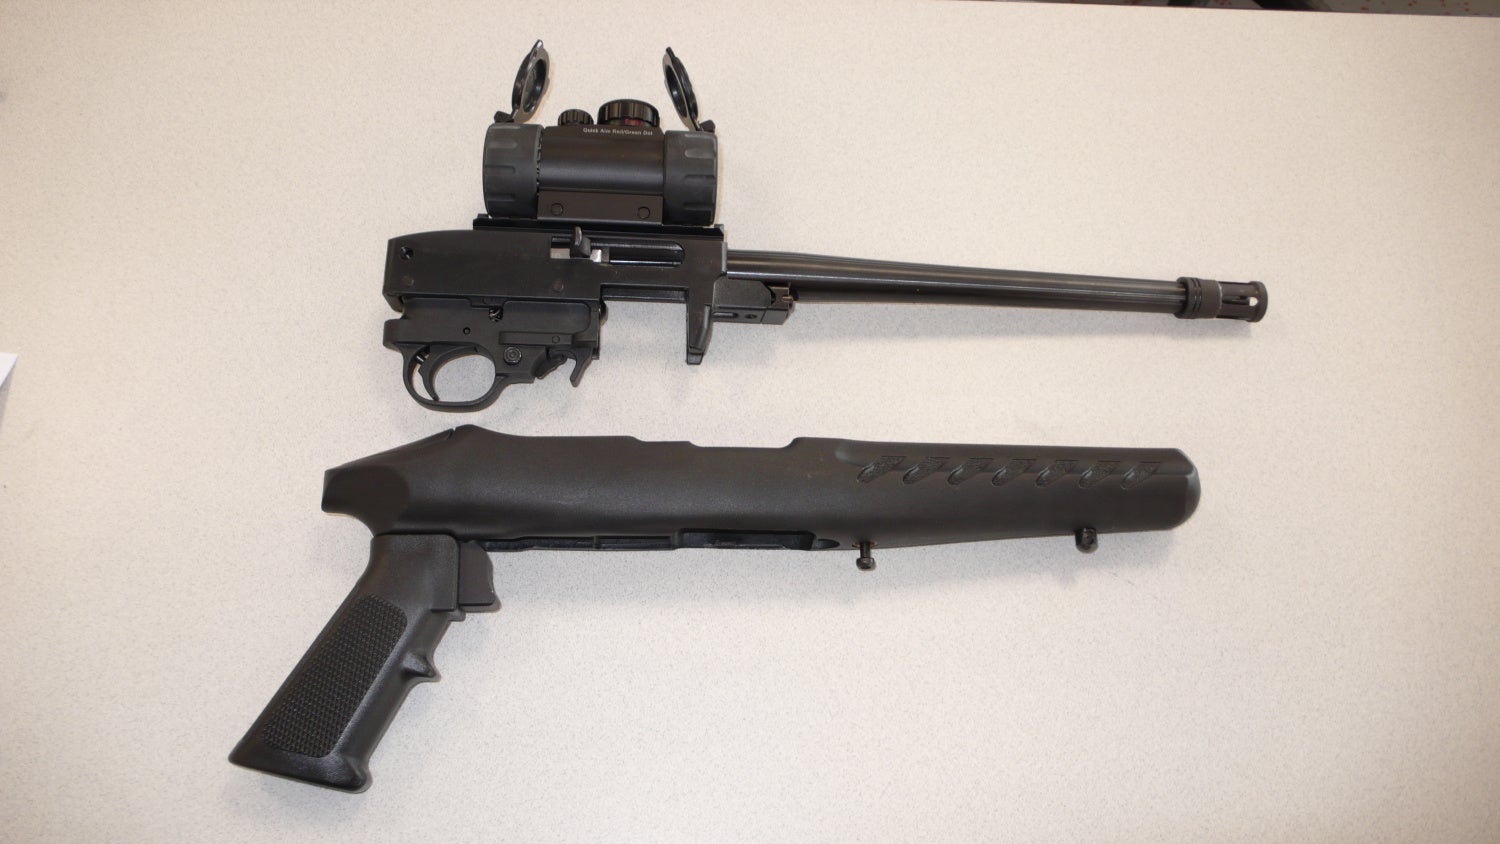
Locate the cross bolt safety just in front of the trigger, then move it so that it protrudes equally on both sides of the trigger group housing. The safety needs to clear the stock (highlighted in yellow) so that the barreled action can be separated from the stock by pulling the two apart.
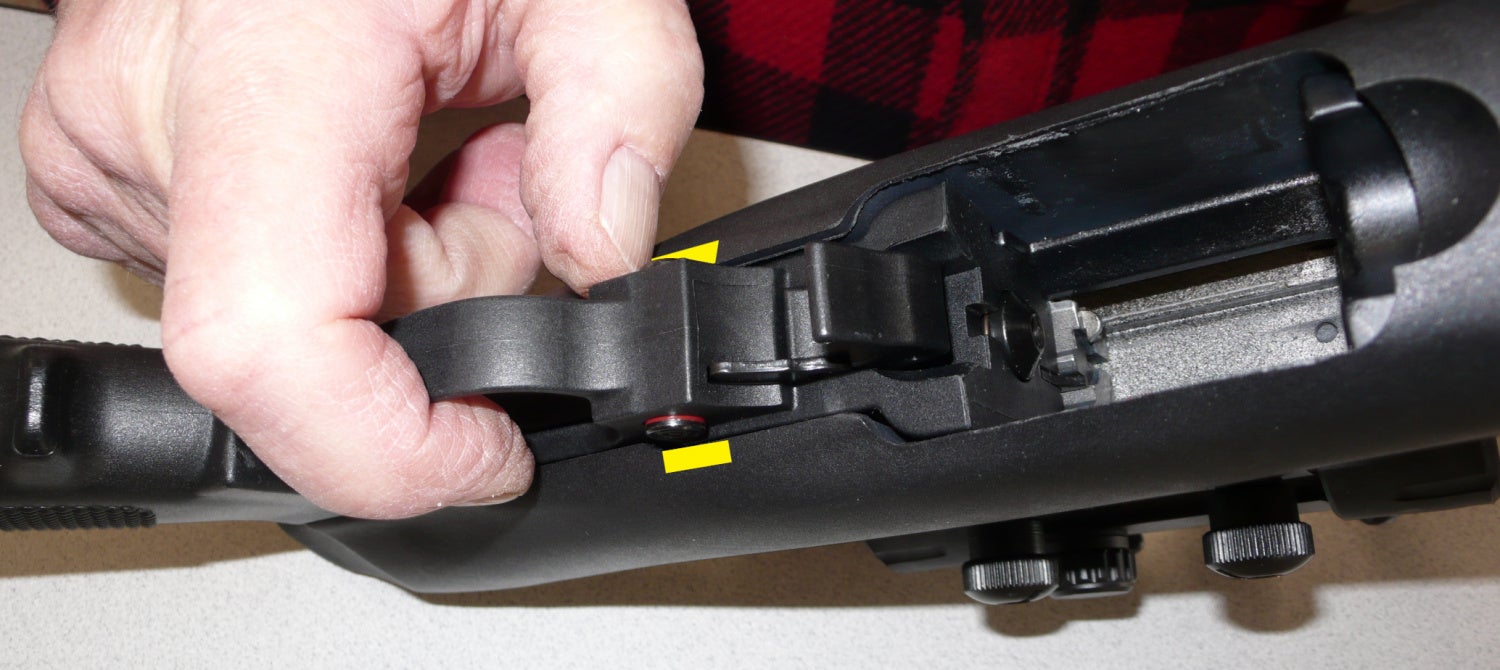
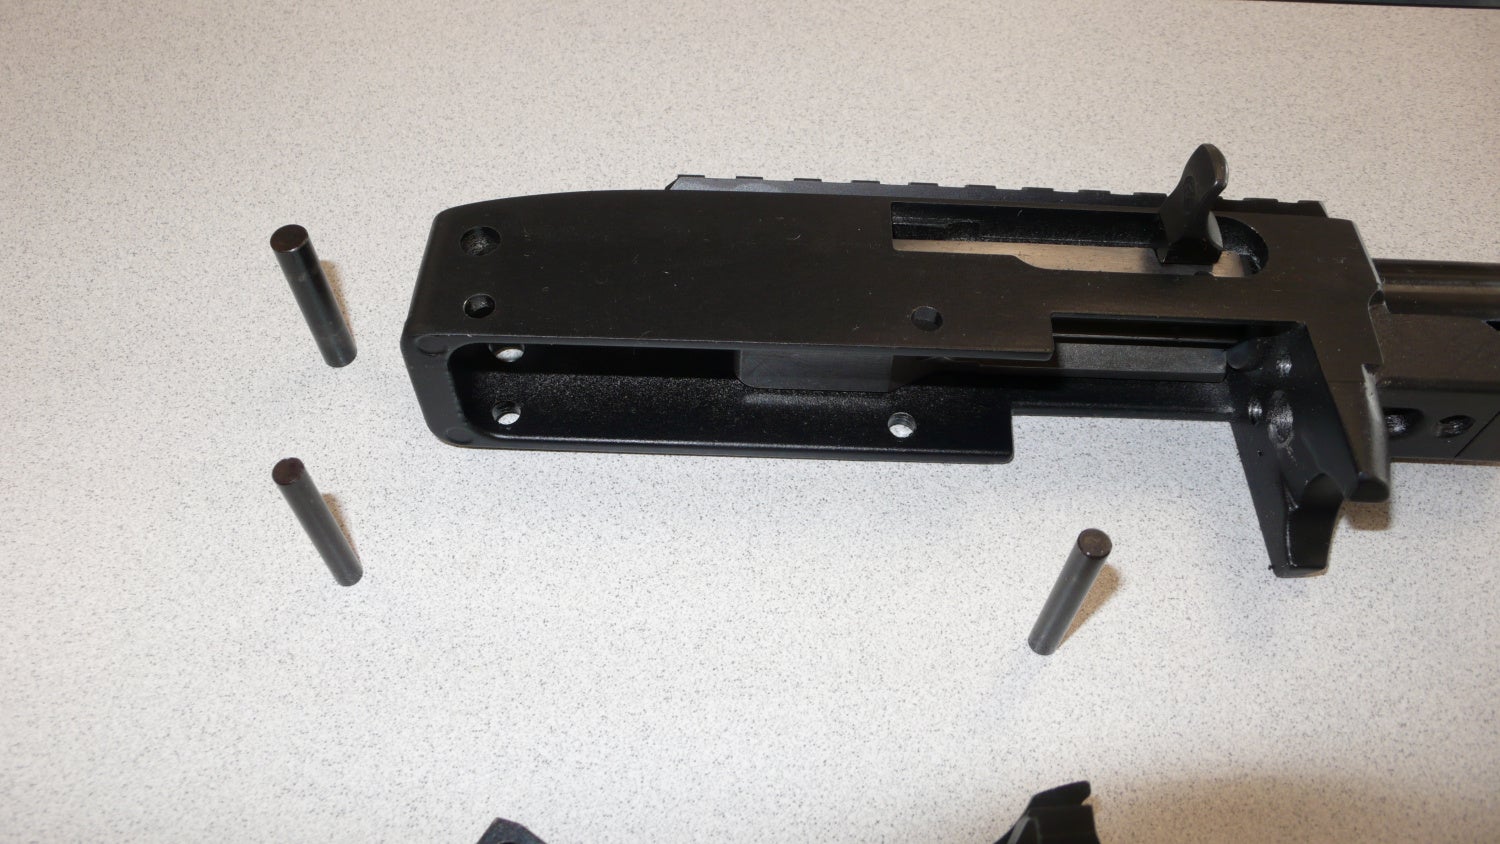
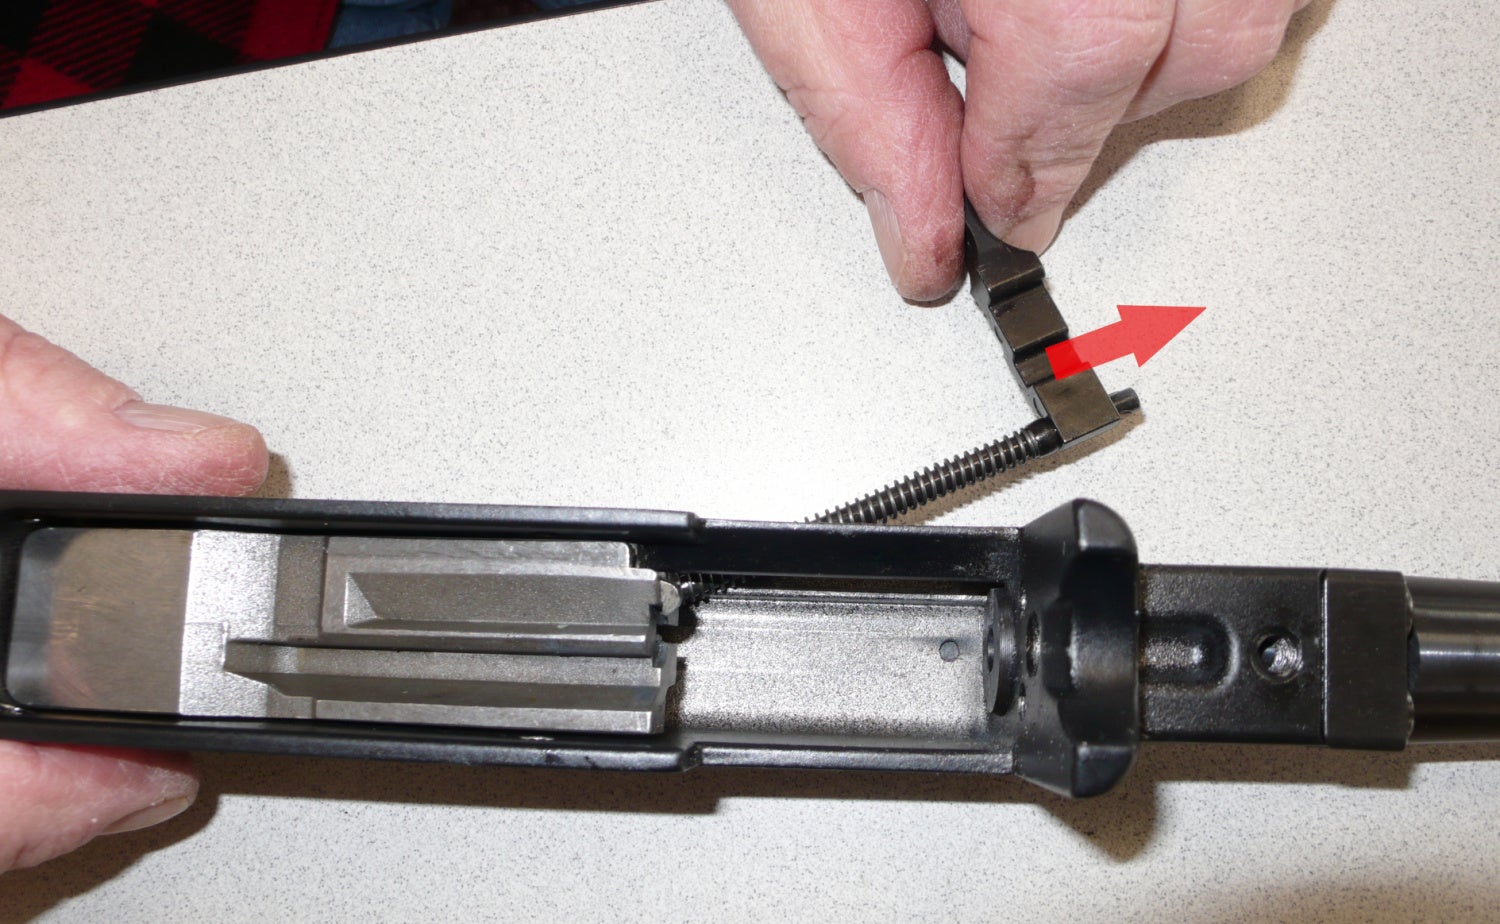
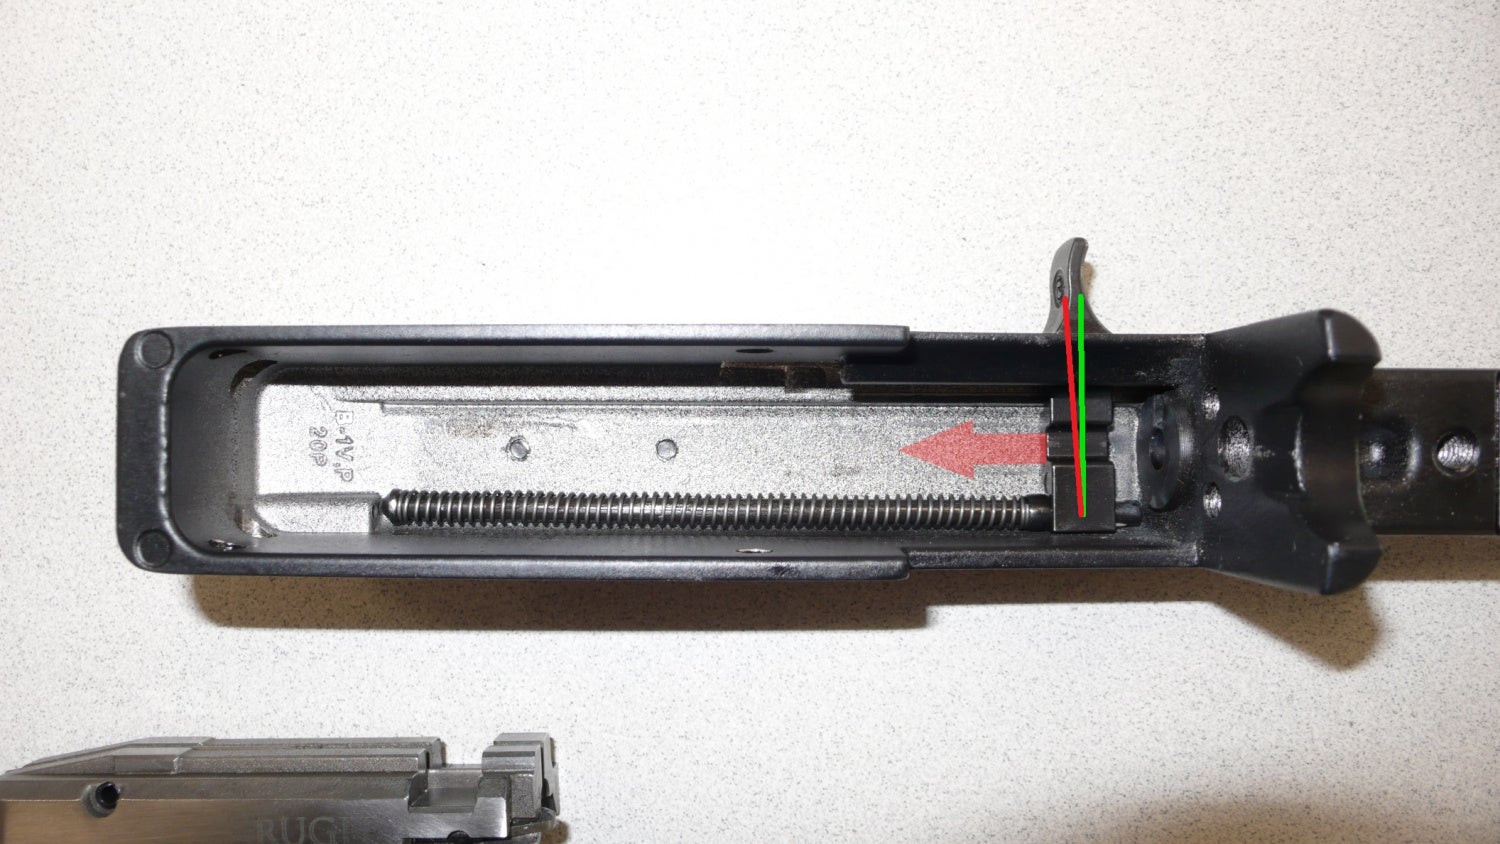
Step 3.
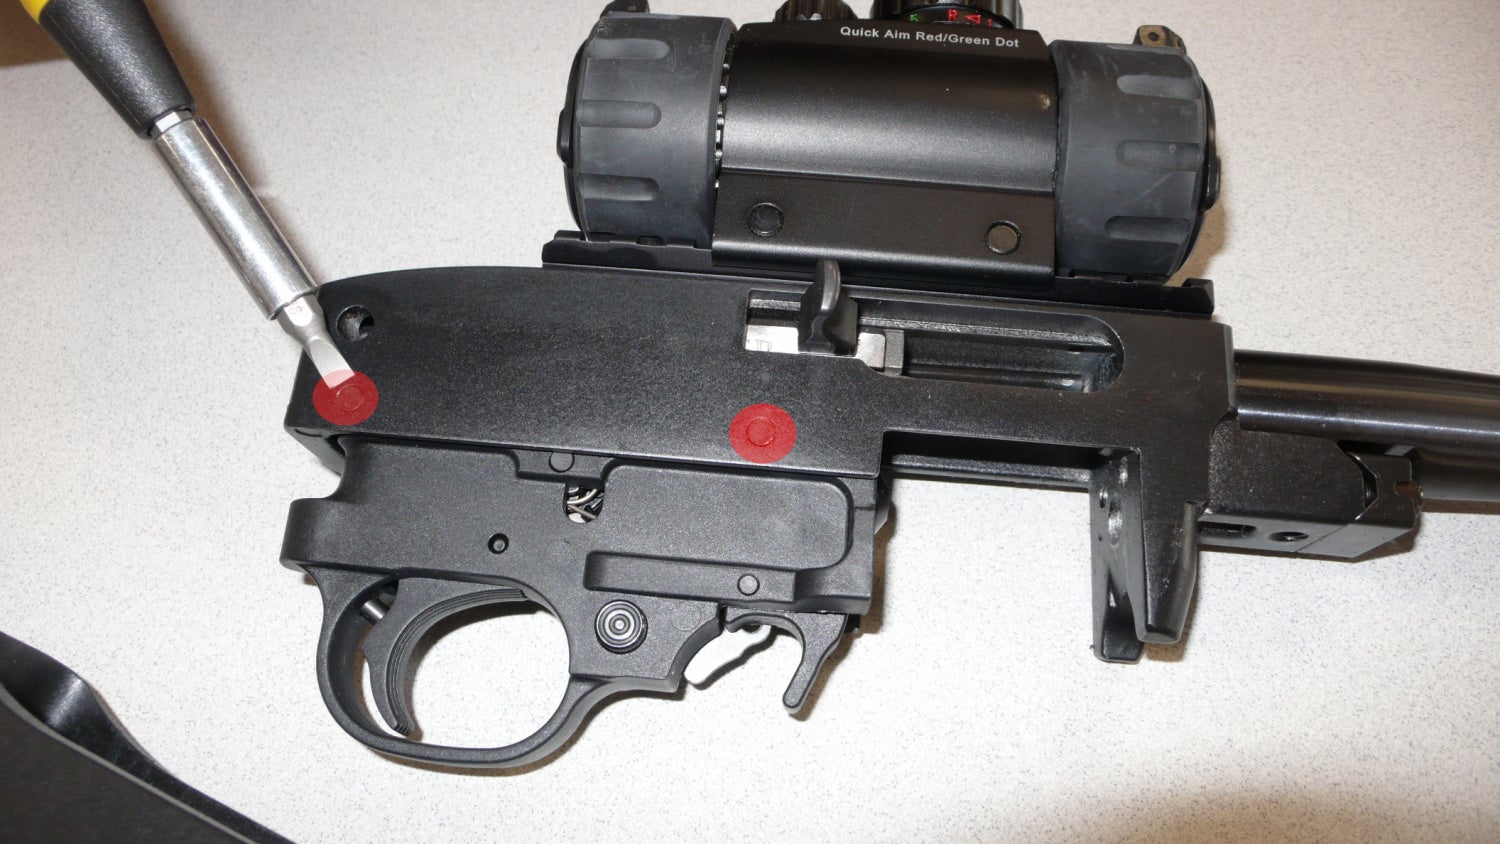
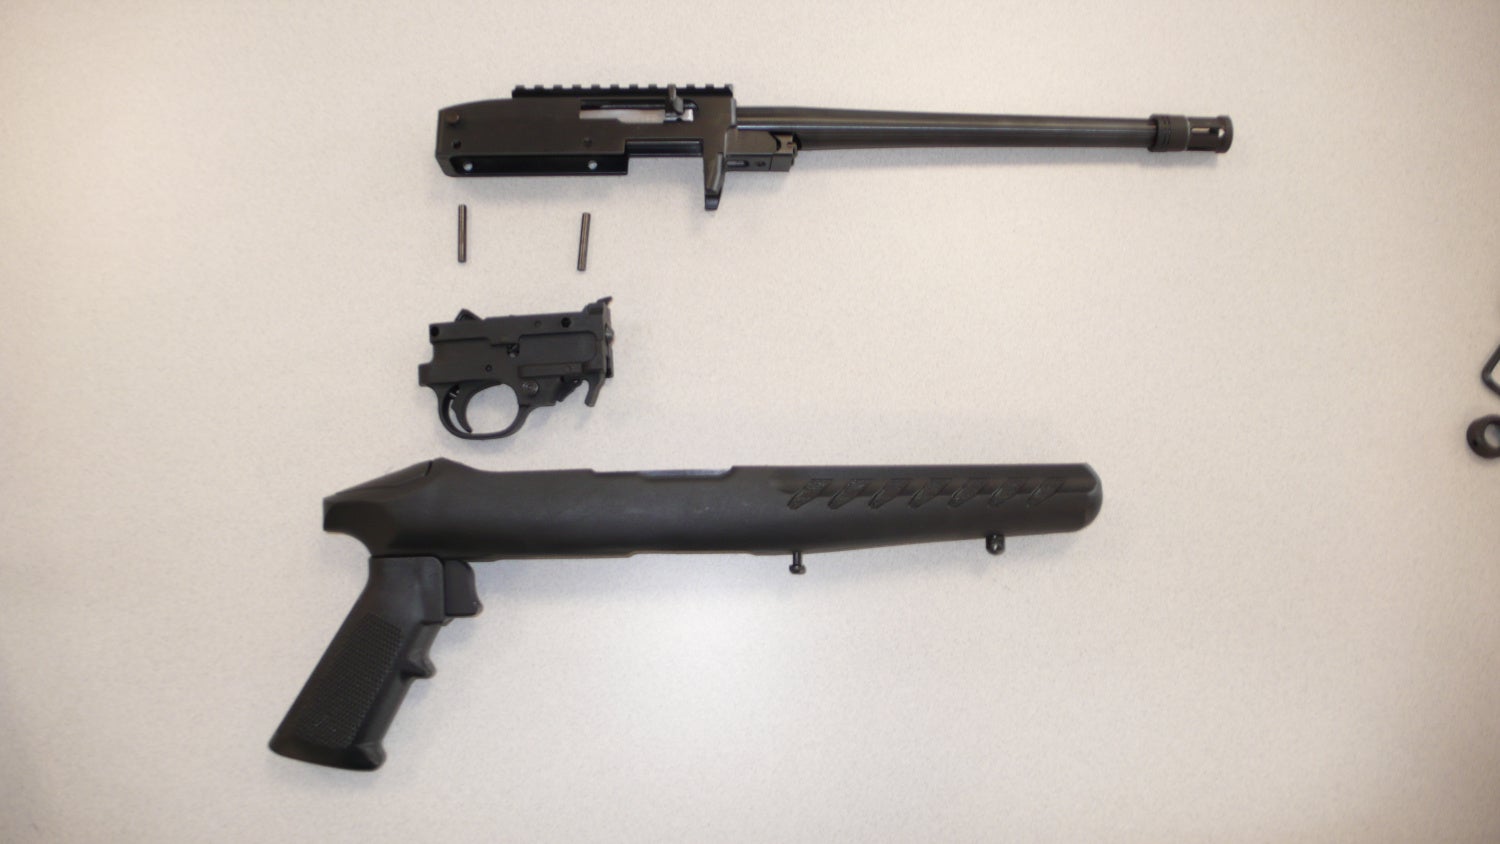
Next, locate the trigger group housing pins (highlighted in red) and push them out either direction. Once the pins are removed, the trigger group can be removed from the action. The manual notes that nothing further should be removed from the trigger group. The bolt stop pin at the rear of the action can then be removed as well.
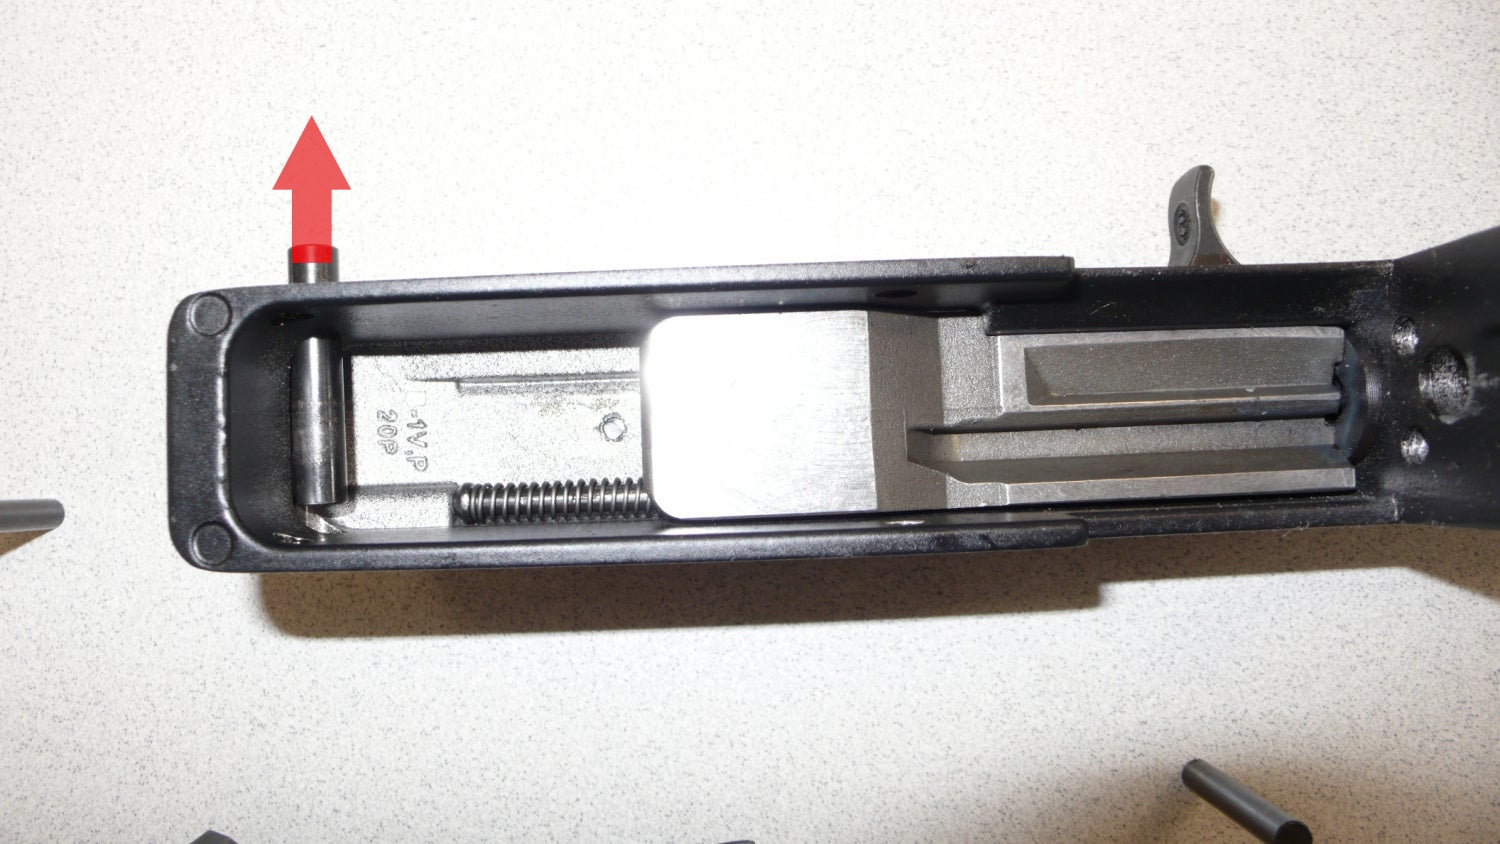
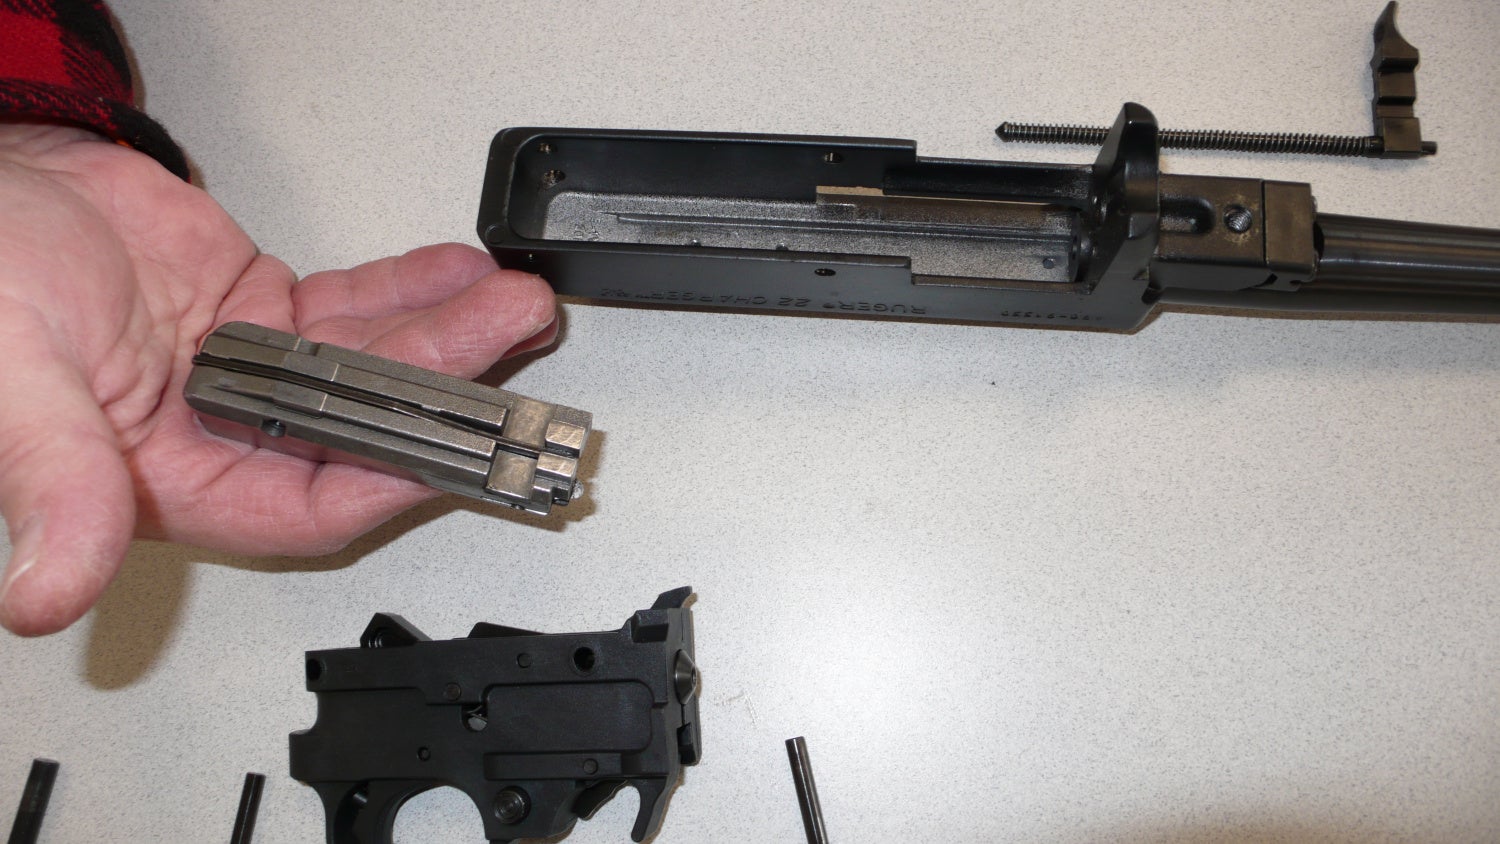
Step 4.
With the trigger group and bolt stop pin removed, turn the action over to remove the charging handle and bolt. Pull the bolt as far rearward as possible, then with the right hand, lift the bolt upward while holding the charging handle with the left hand. Once the bolt is lifted, it releases the charging handle assembly which includes the recoil spring and guide. The charging handle assembly can then be pulled out of the ejection port of the 10/22’s action.
Step 5.
Lift the bolt out of the upside down action. If the bolt seems to get hung-up, you can turn the action upright to see if the bolt will release with gravity.
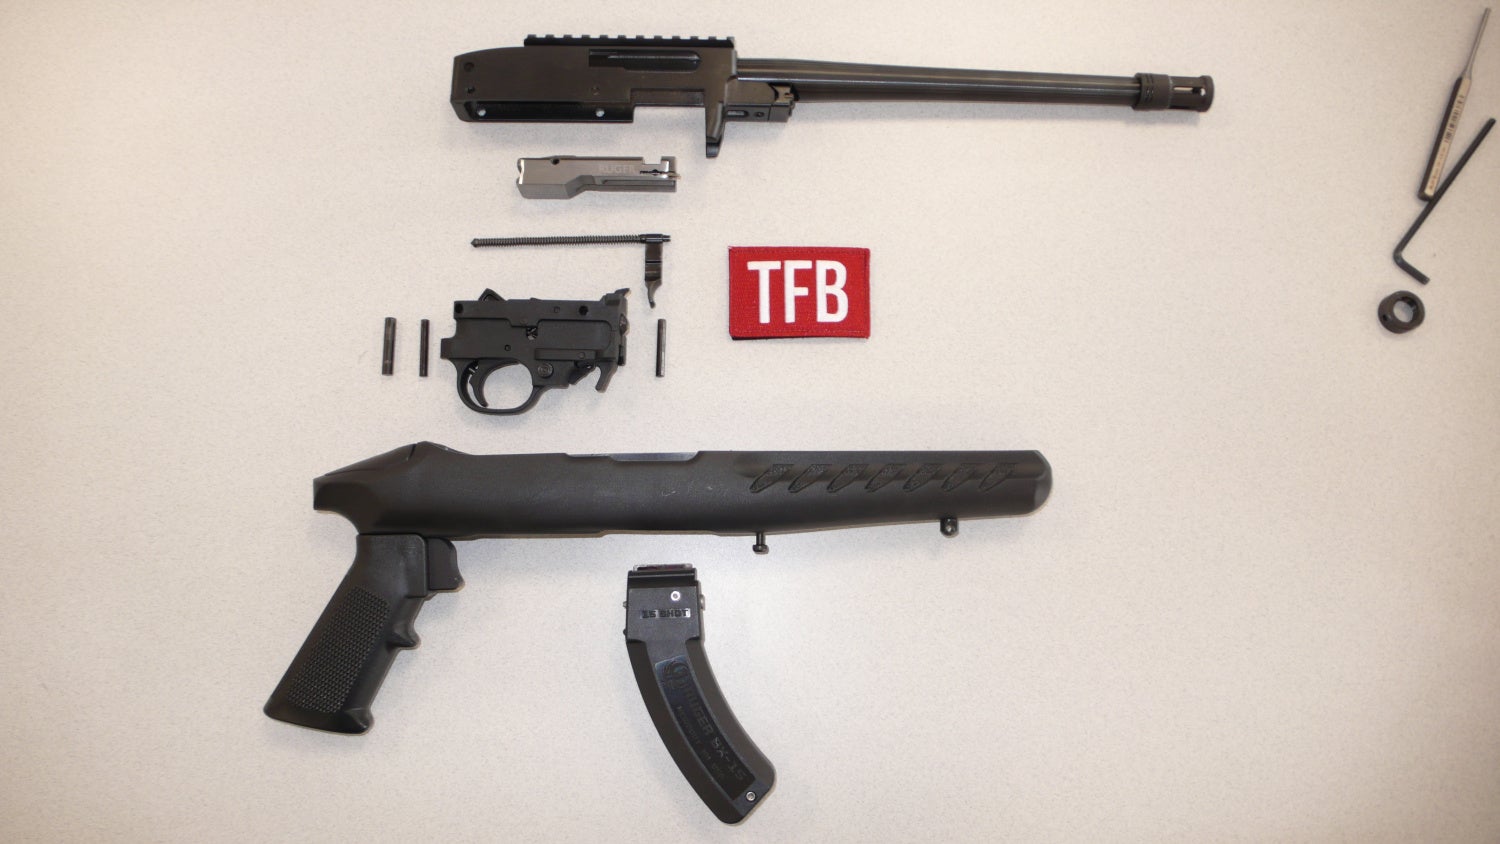
This ends the basic field strip process for the Ruger 10/22 series of rifles and pistol. Reassemble in reverse order. One note on reassembly is that when replacing the bolt, the charging handle will need to be pulled back perpendicularly to the action to allow the recess in the bolt to accept the charging handle.
You can check out all the different rifle versions of the Ruger 10/22 HERE, or the Charger edition HERE.
We are committed to finding, researching, and recommending the best products. We earn commissions from purchases you make using the retail links in our product reviews. Learn more about how this works.