 Your Privacy Choices

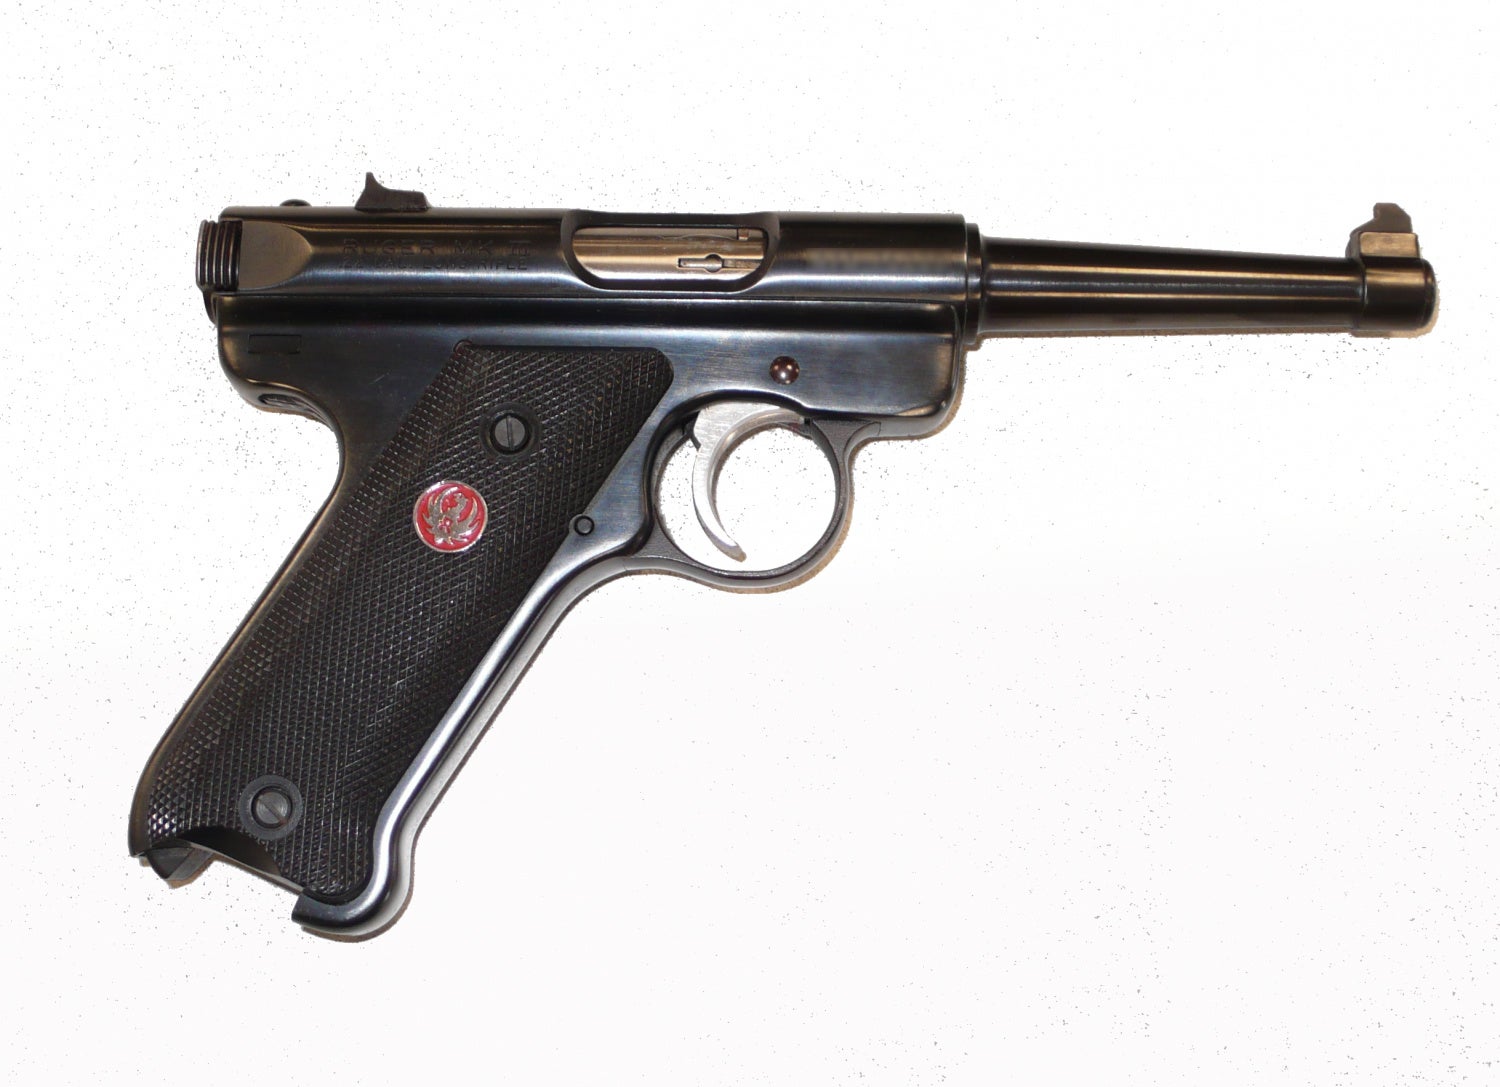
For this edition of TFB’s Field Strip series, we’re going with the famous Ruger Standard, or Ruger Mk III pistol. This pistol, and all it’s derivatives are lauded as a great shooting pistol, but maligned as a terrible pistol when it comes to field stripping. Owners of the Ruger Standard pistol have dreaded and cursed the takedown process since 1949. However, the fact that it remained in continuous production for 67 years suggests that people were willing to overlook the field strip process, or simply ignore it for as long as absolutely possible.
In 2016, Ruger simplified the field strip process for the latest in the series, the Mk IV, which is not covered in this tutorial. Interestingly, I noticed some similarities between the Mk III’s disassembly process, and that of the Colt Woodsman that I covered HERE. Comparatively, I found the Ruger easier to field strip, which also surprised me, having heard the tales. The Ruger Mk III has a magazine safety, which requires that the magazine be inserted each time the trigger needs to be pulled, and thus adds to the complexity of the disassembly as a whole, but each step by itself is easy.
BEFORE YOU FIELD STRIP ANY WEAPON, REMEMBER the four rules of gun safety:
- All guns are always loaded.
- Never let the muzzle cover anything you are not willing to destroy.
- Keep your finger off the trigger until your sights are on the target.
- Be sure of your target and what is beyond it.
TFB FIELD STRIP: RUGER STANDARD PISTOLS, MK I, MK II & MK III
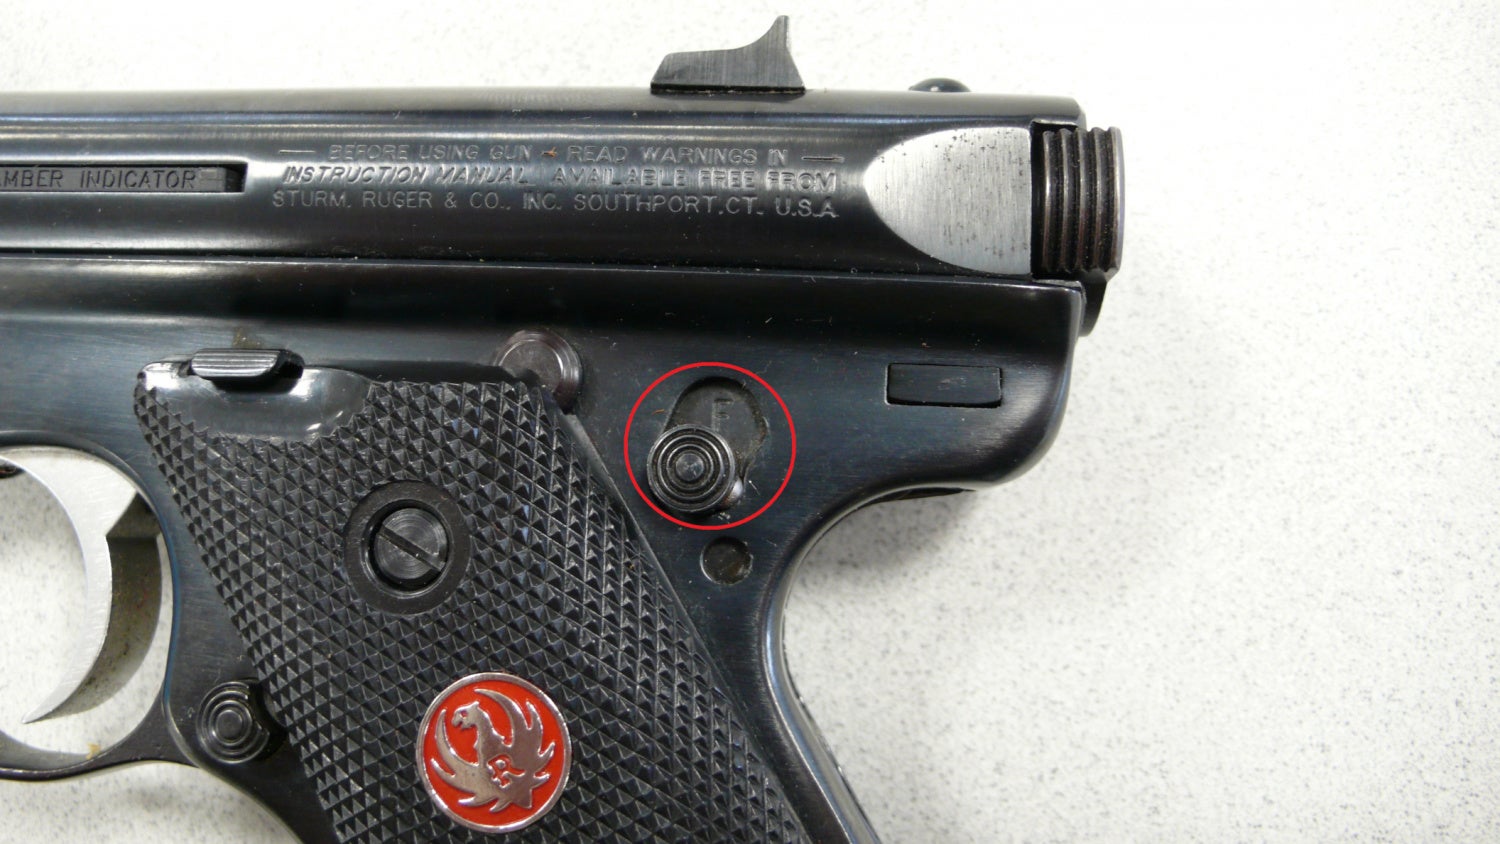
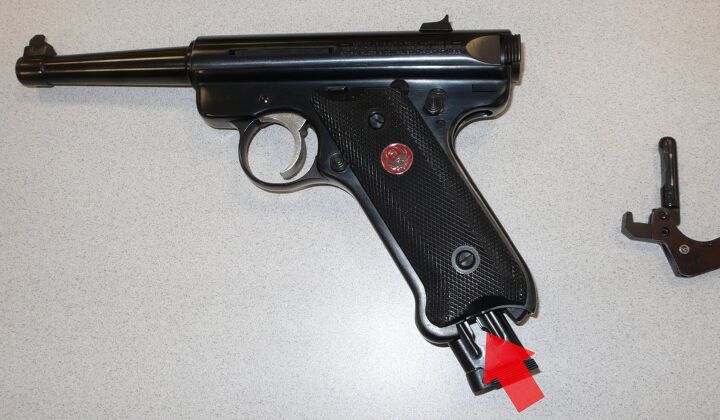
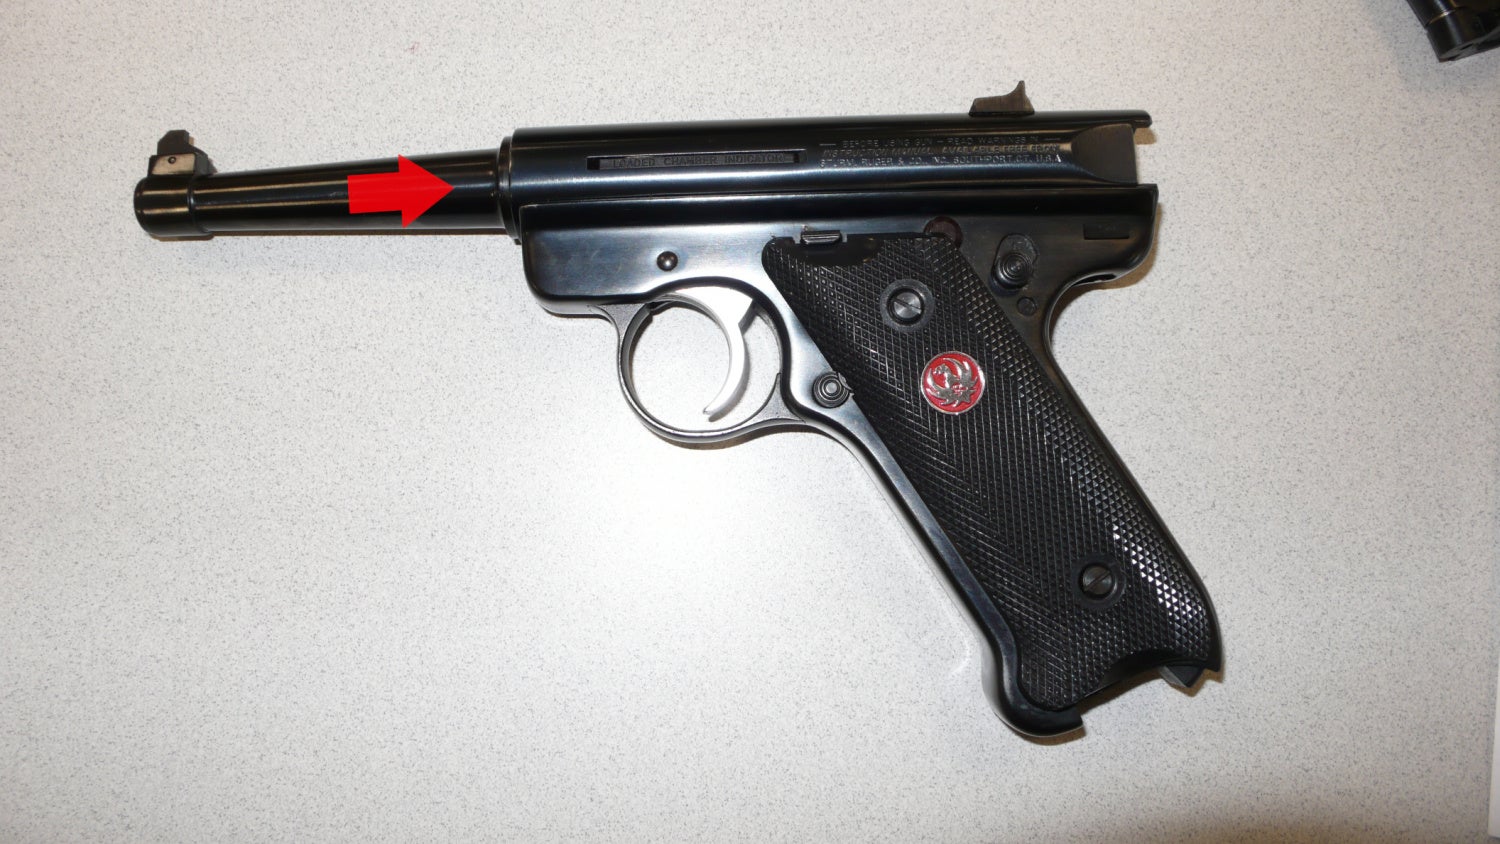
Step 1. As with all field strips, open the action and ensure that there’s no ammunition in the gun. For the Ruger Standard, make sure that the safety is off, which will allow for the trigger to be pulled during the takedown. Insert an empty magazine, point the pistol in a safe direction and pull the trigger. You can then remove the magazine.
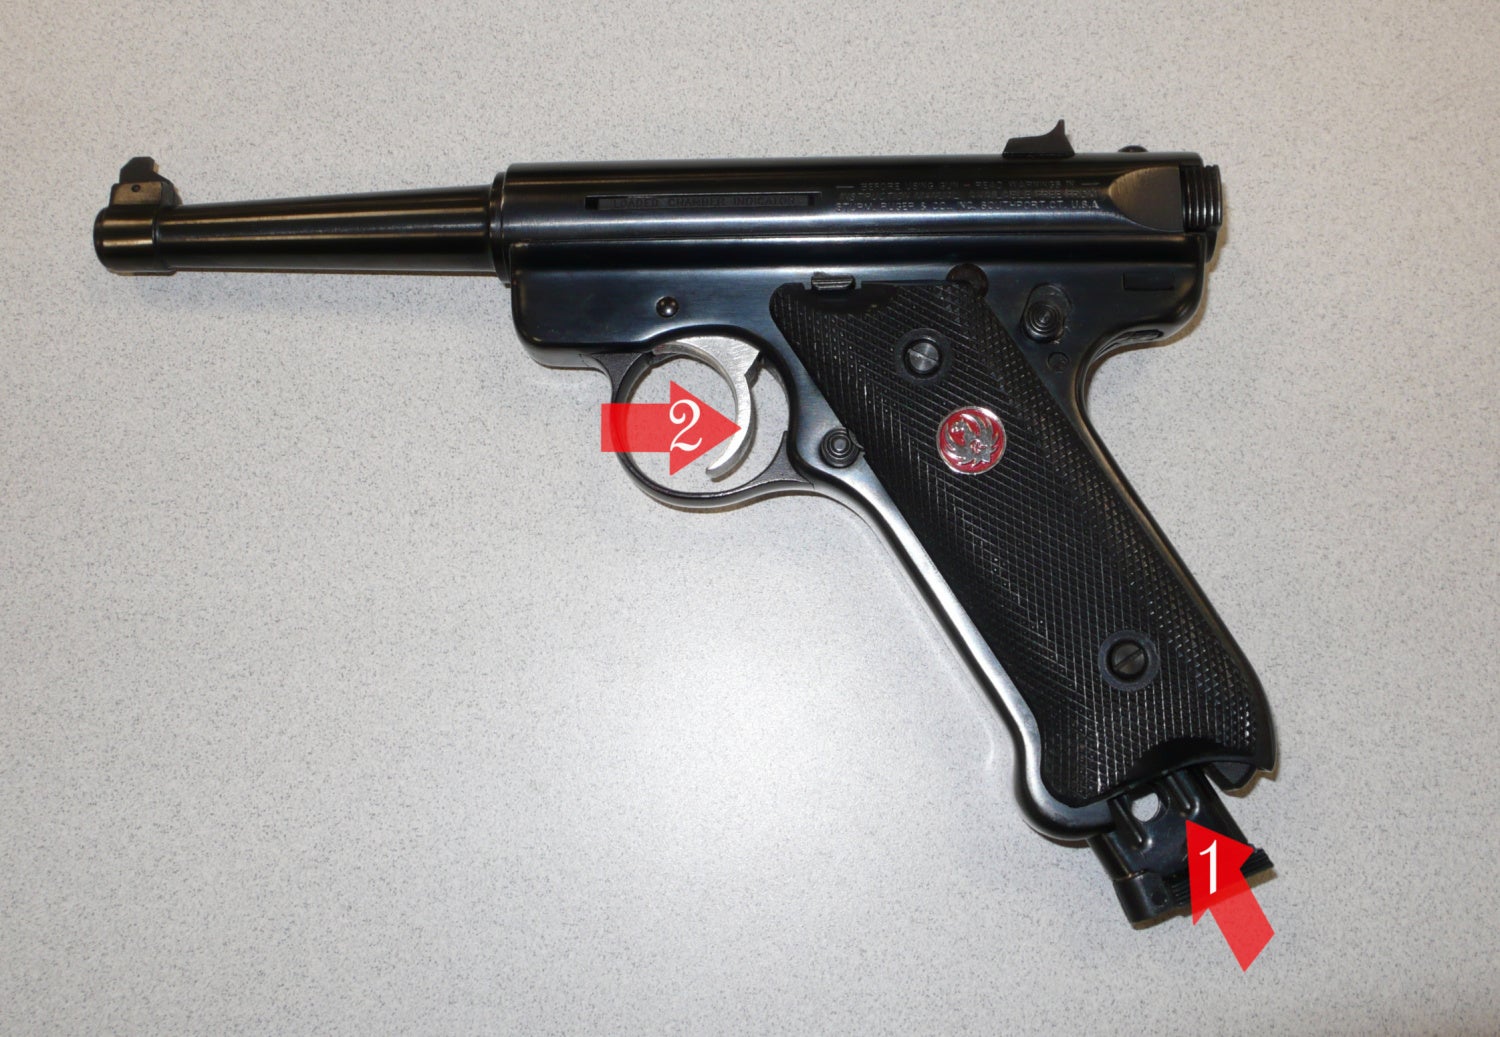
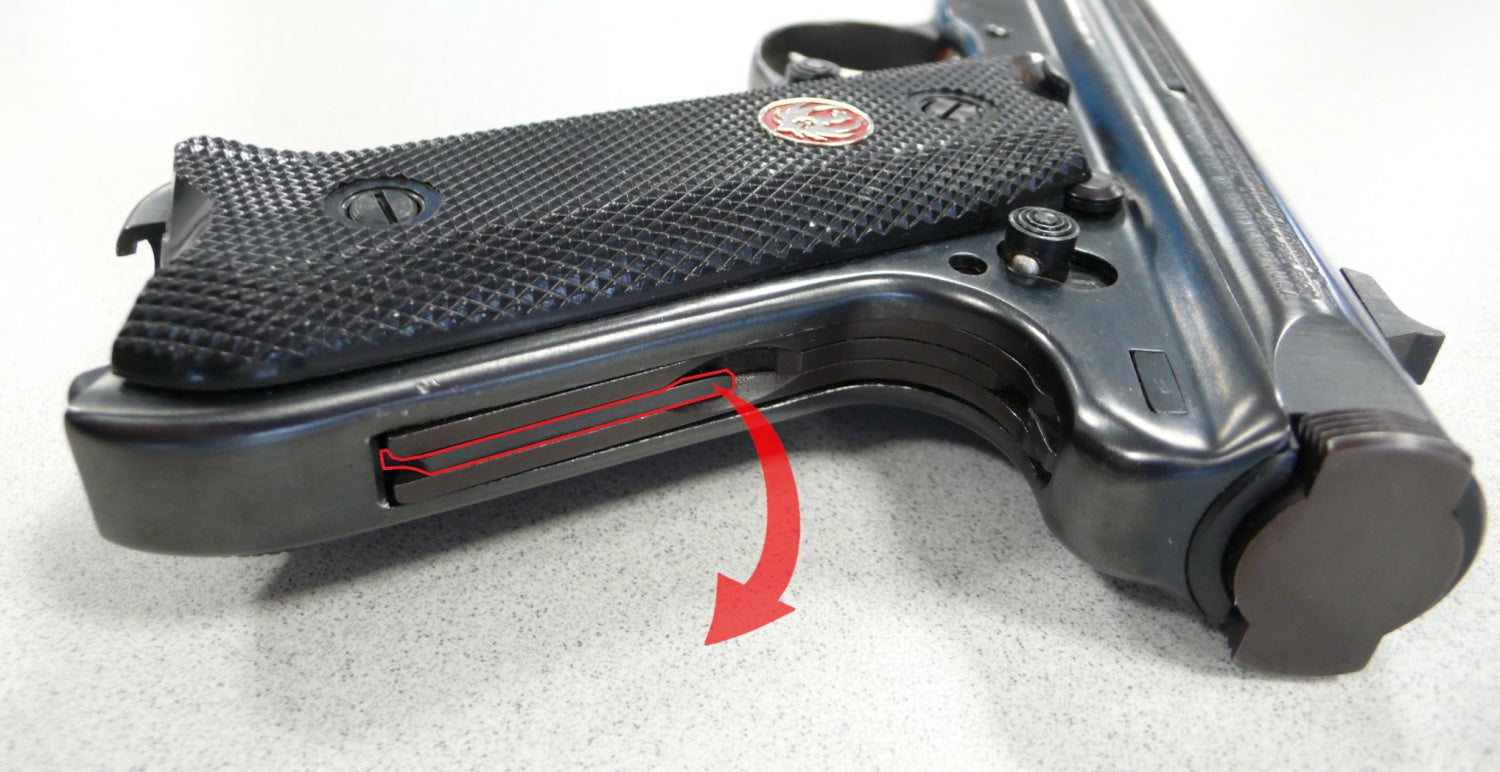
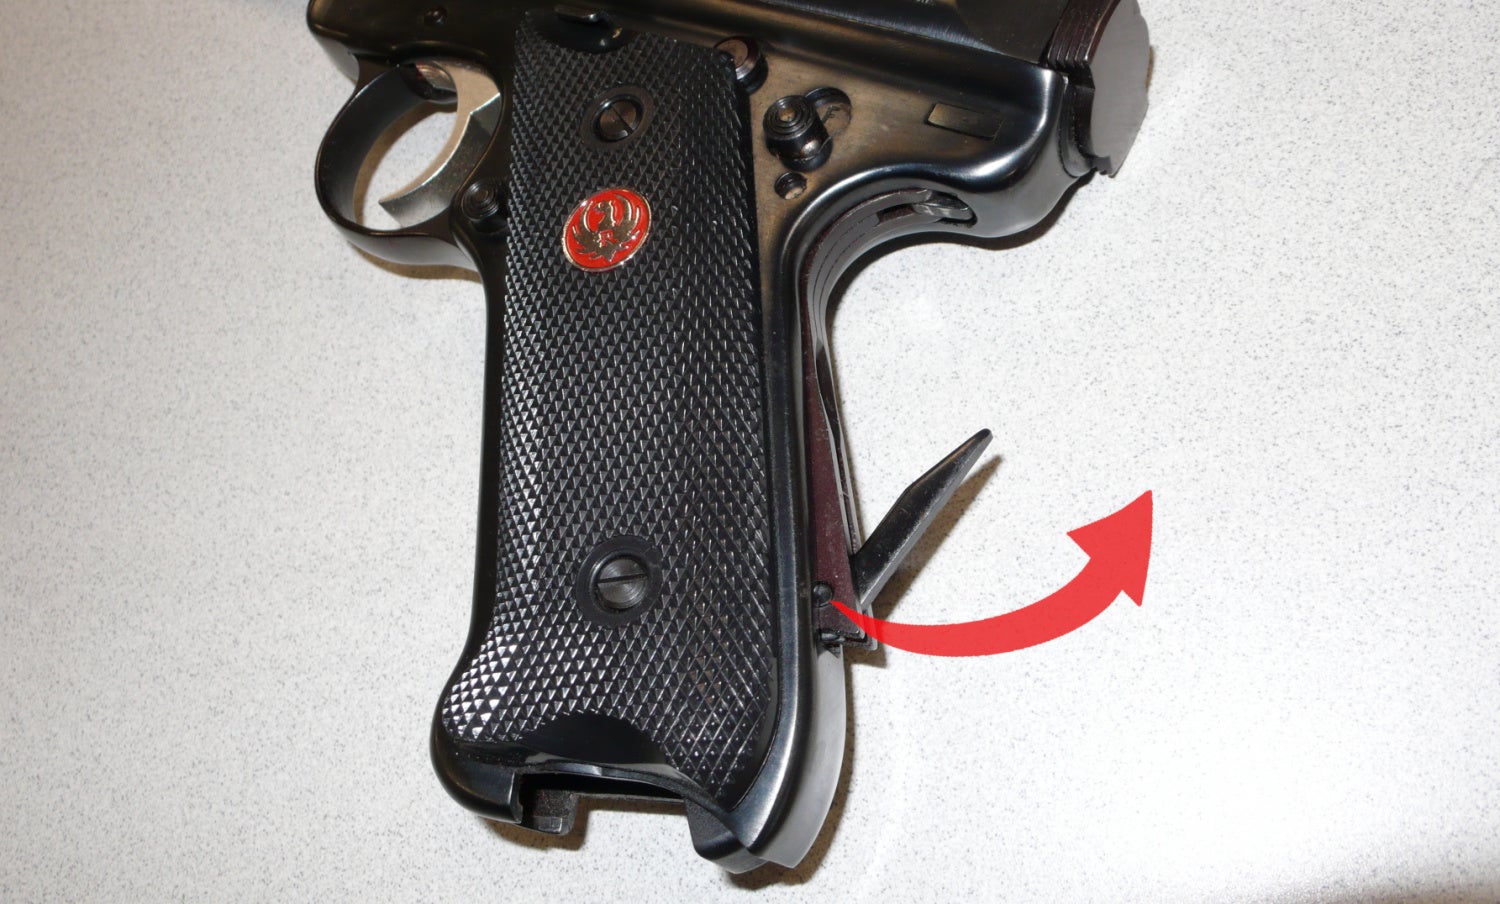
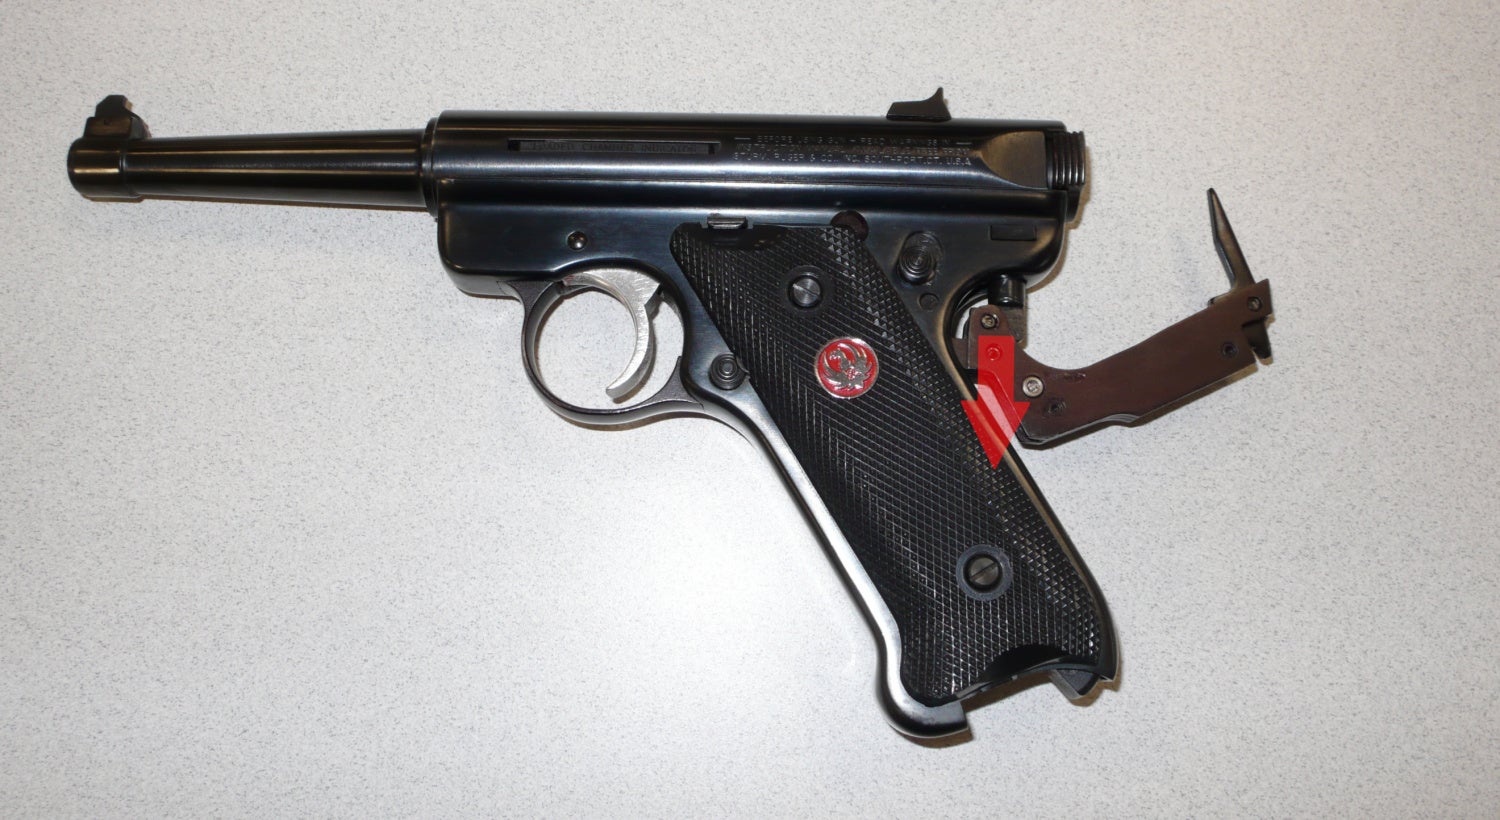
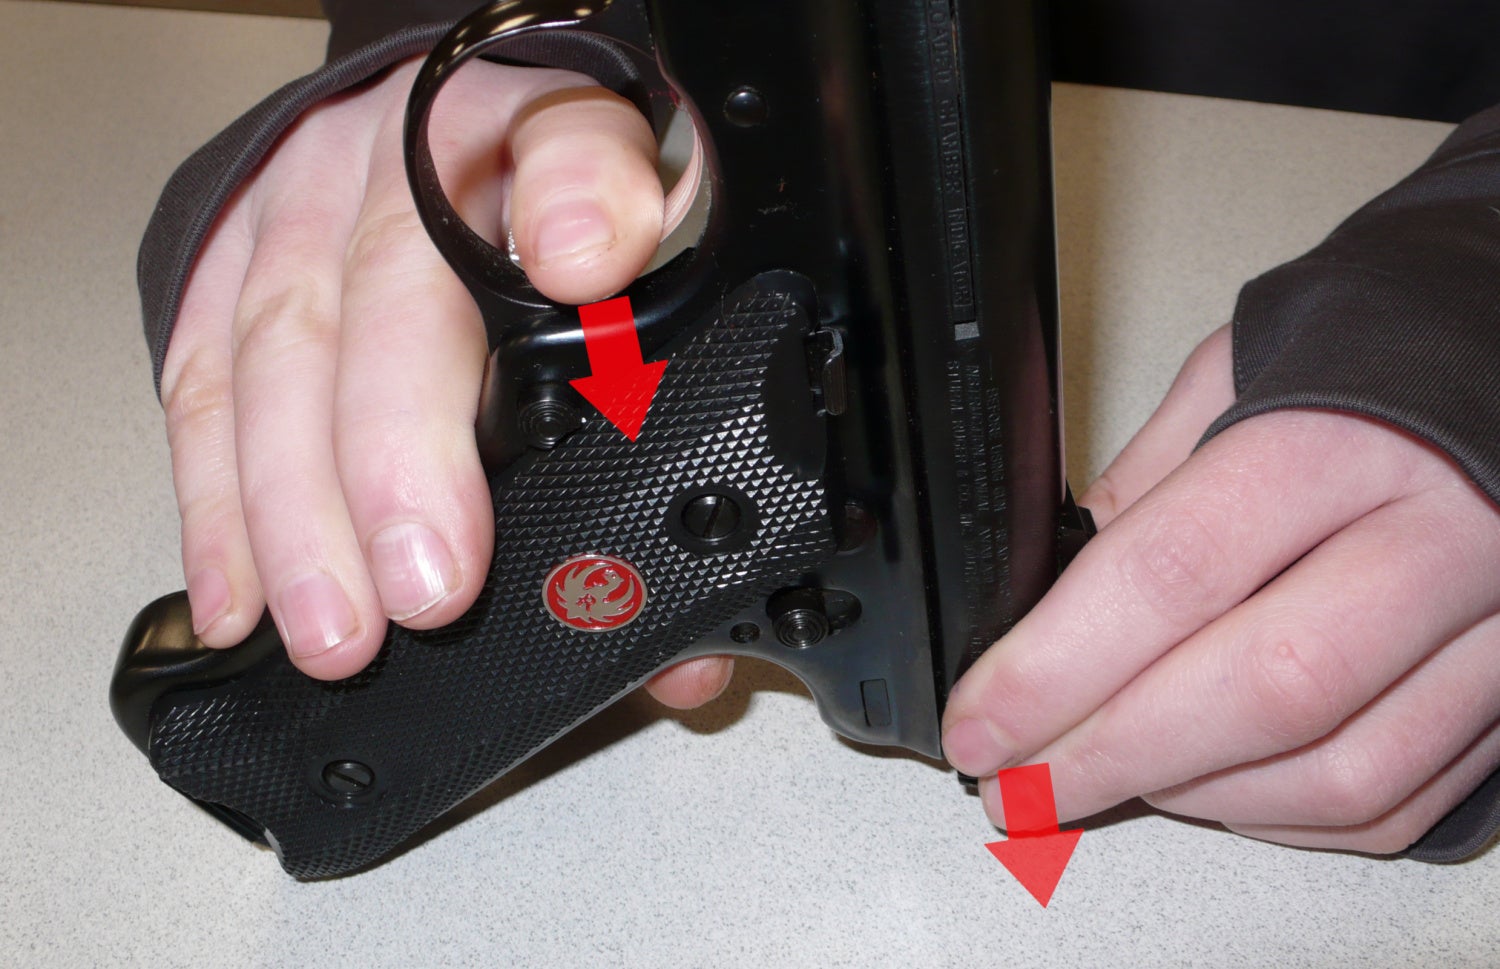
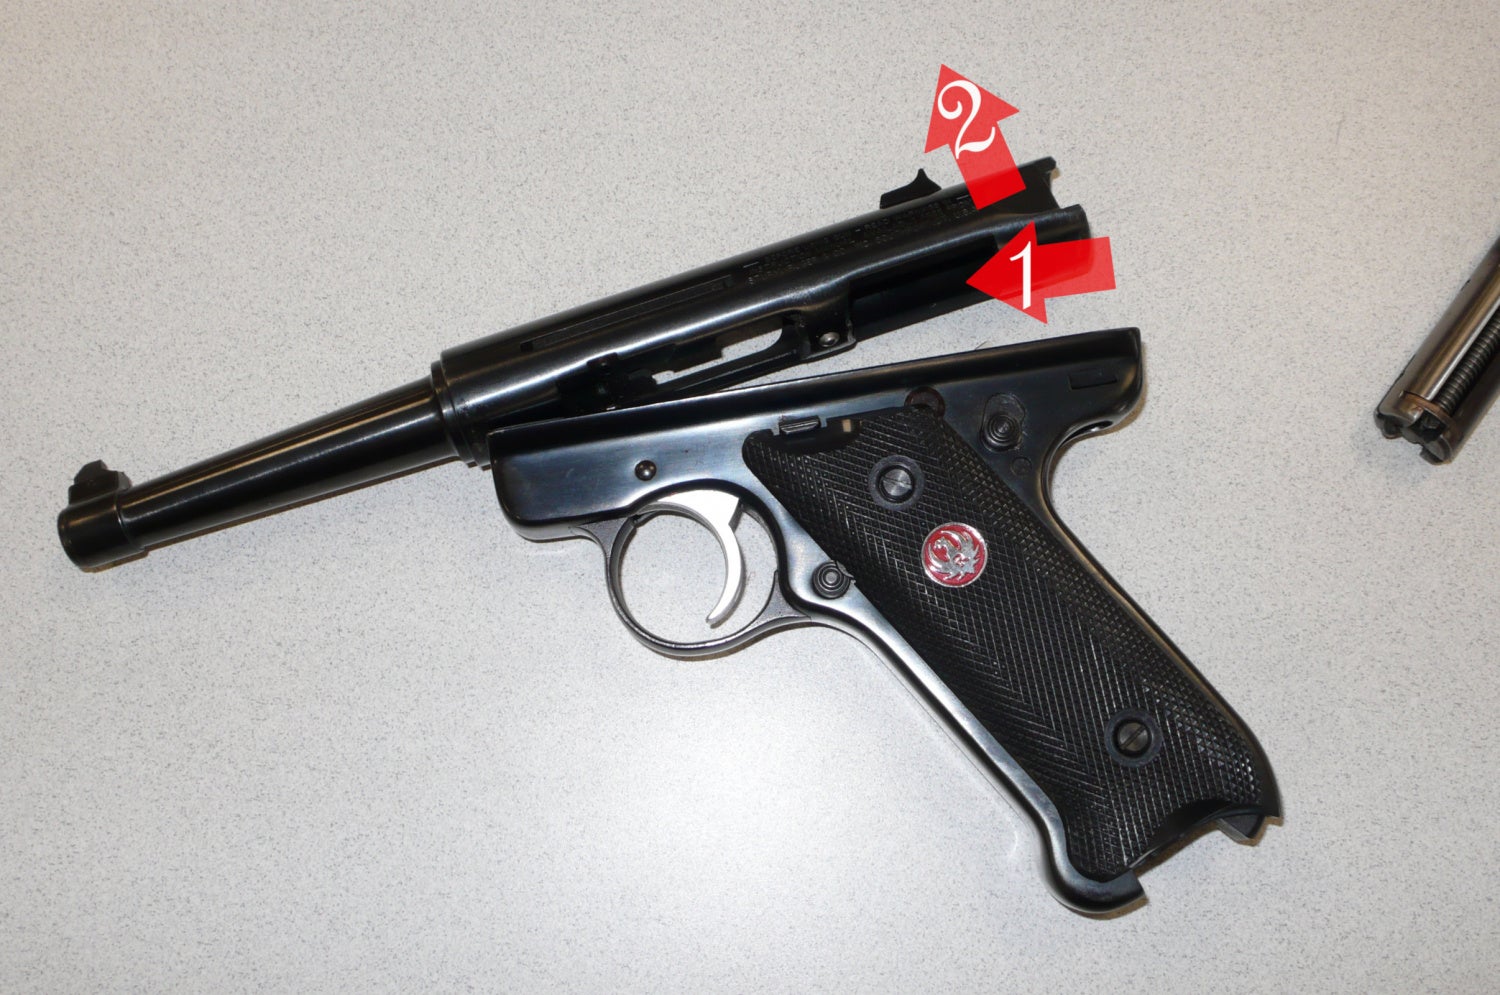
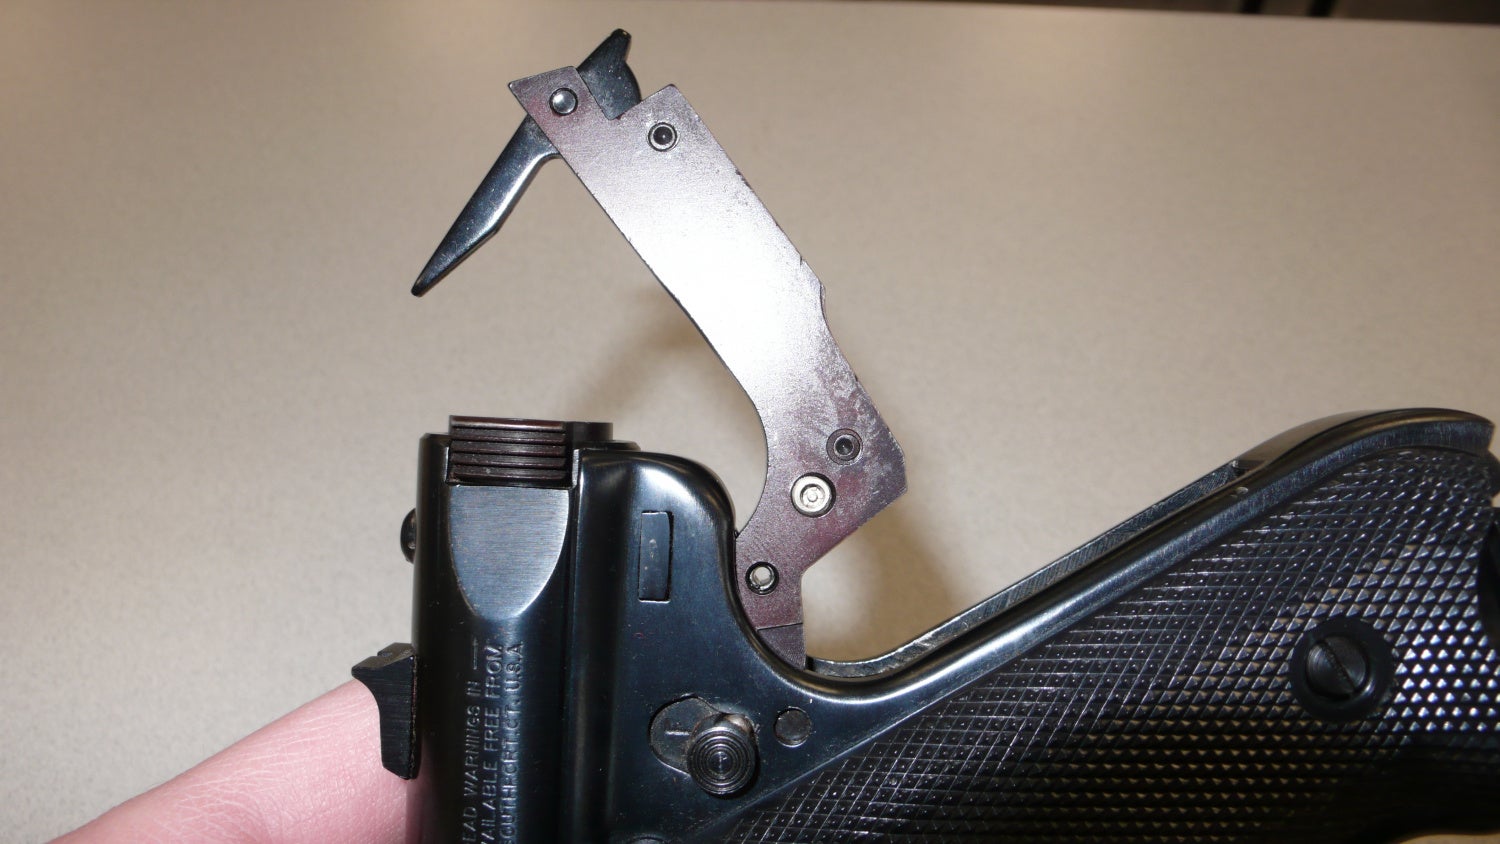
Step 2. Look to the back of the grip and locate the oval-shaped cutout. In the middle of the oval, is a lever protruding into the cutout. Pull the lever out and downward, you may have to use a tool to help pry it out. Once the lever is released, the mainspring assembly can be swung upward. The mainspring assembly is hinged on the bolt stop pin, which will need to be pulled down from the upper receiver. The top of the bolt stop pin can be seen protruding from the top of the gun (just behind the rear sight) in the photos above. You may need to tap on the top of the pin with a plastic hammer to assist in releasing it.
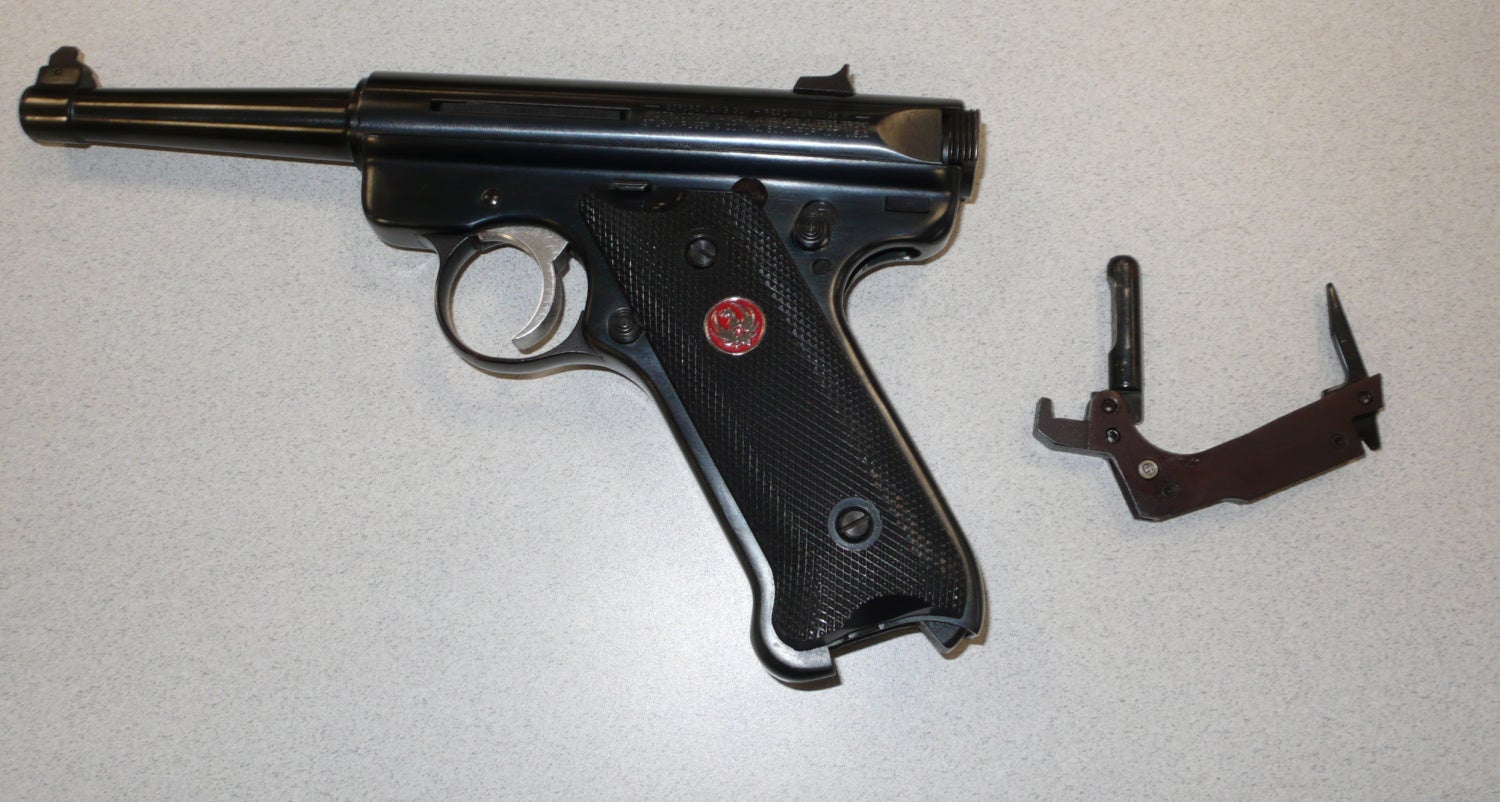
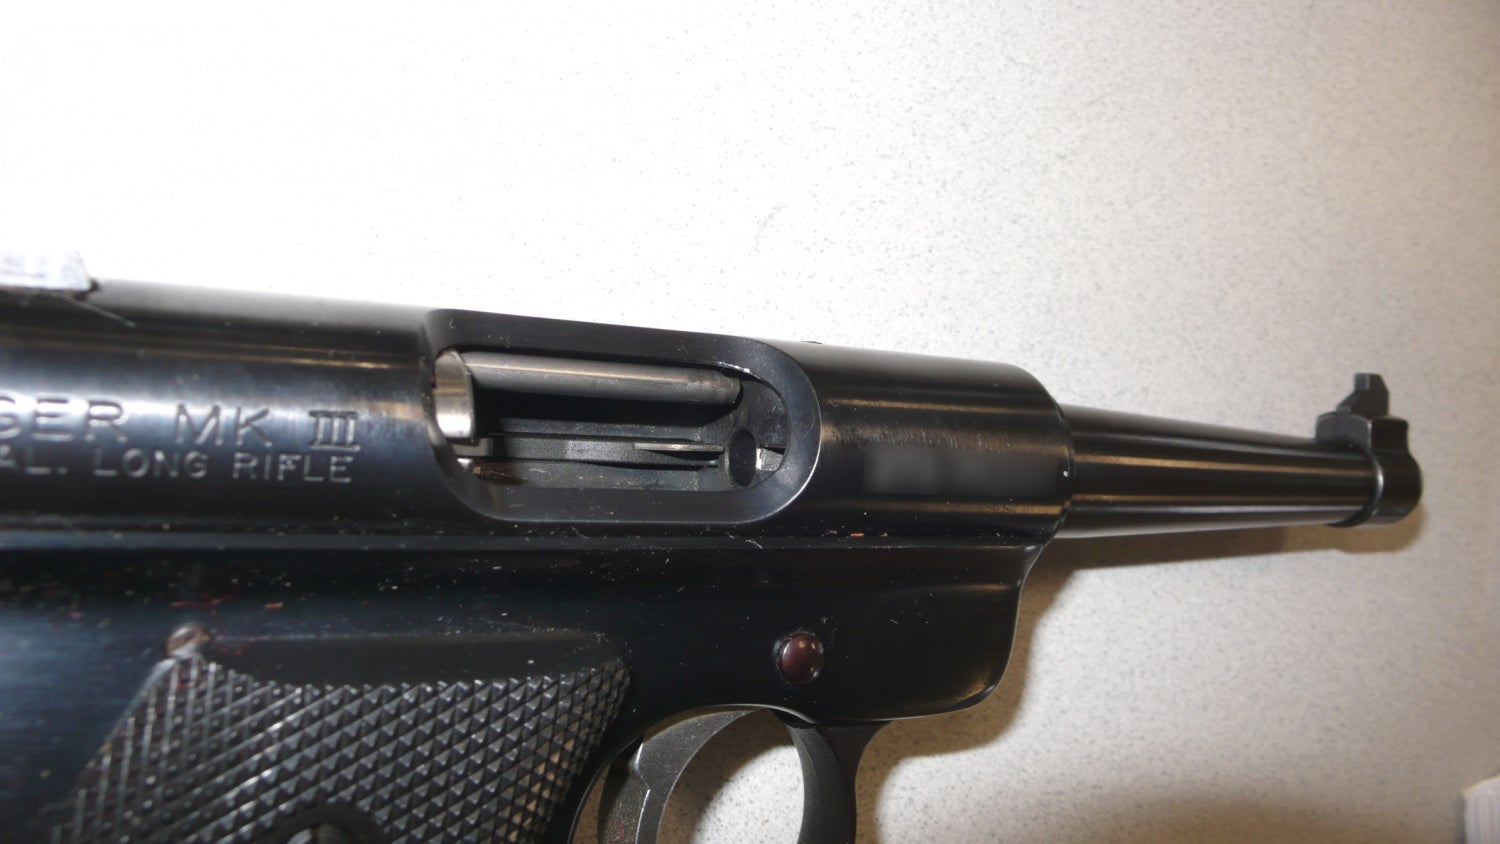
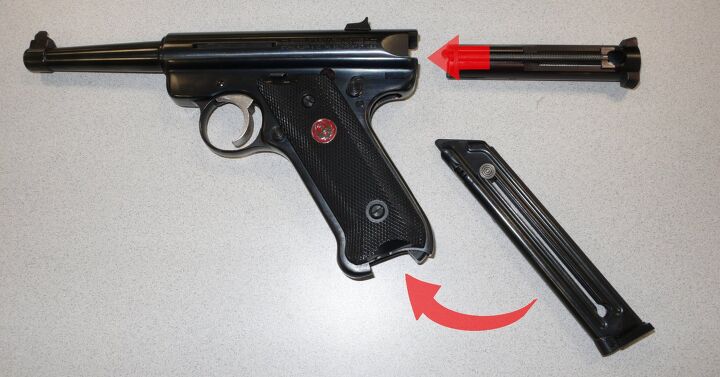
Step 3. Insert an empty magazine again, then point the Ruger Standard pistol up, and pull the trigger. This will release the bolt, which can then be removed from the back of the gun. Remove the magazine.
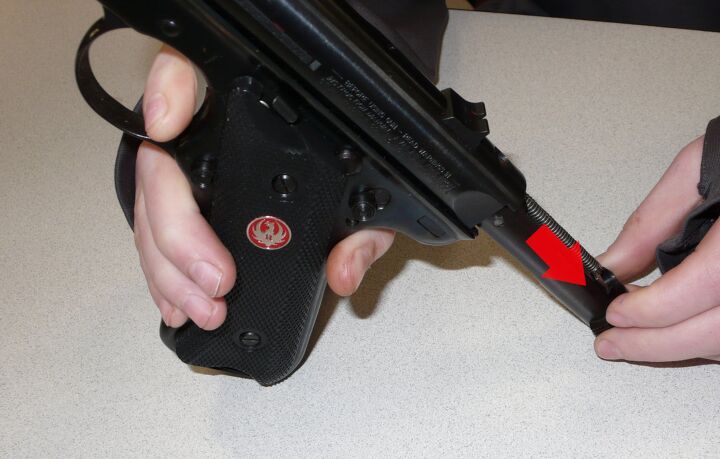
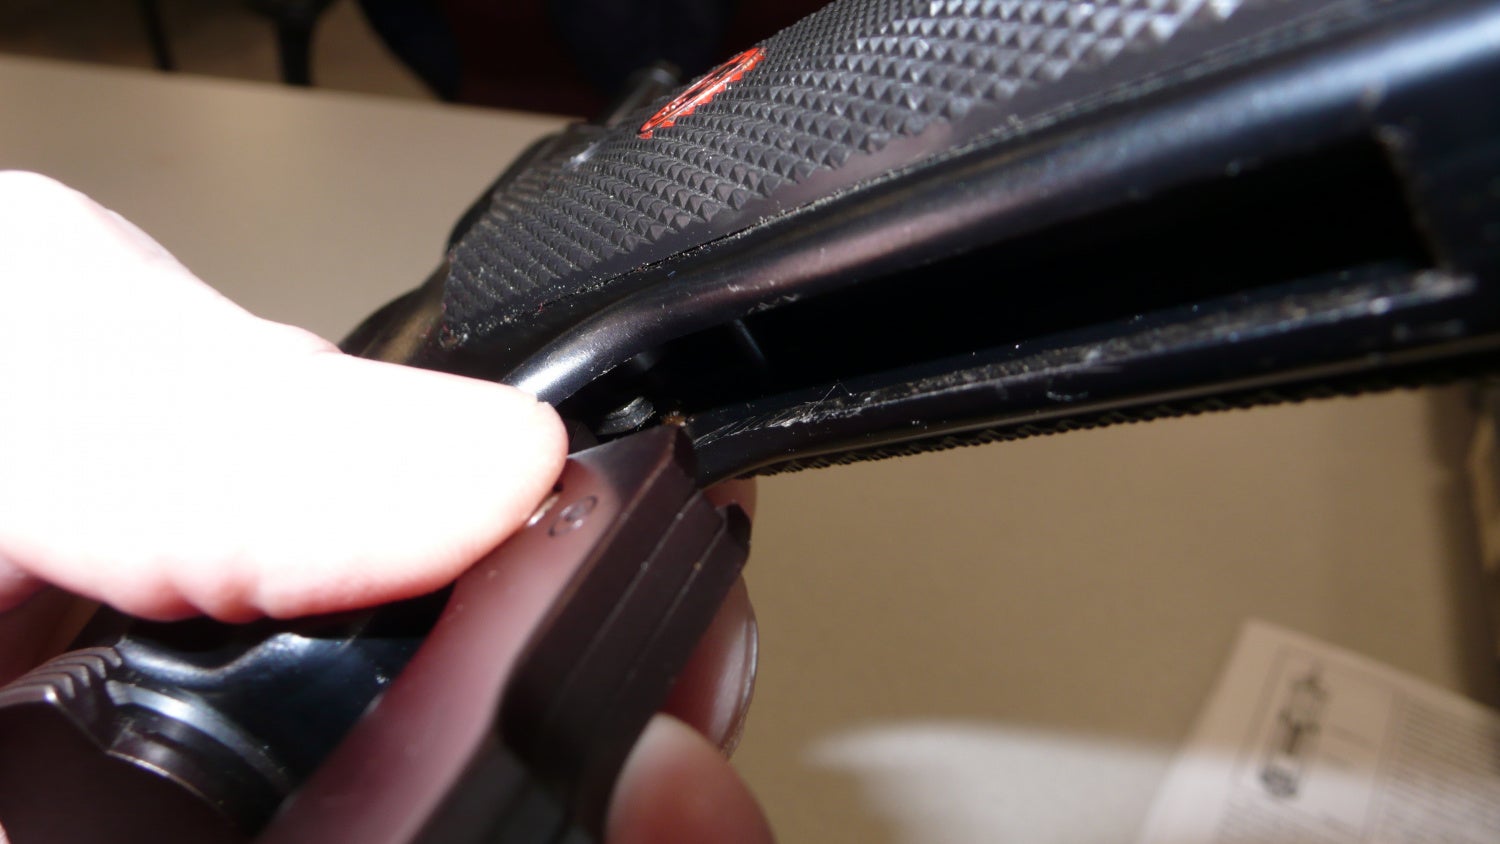
Step 4. The upper receiver now needs to be removed from the frame, which can be done by gently tapping on the back of the upper receiver with a plastic hammer. I was able to do it with the pressure from both thumbs on the Mk III you see pictured. Once you feel it release, then the upper can be lifted off the frame.
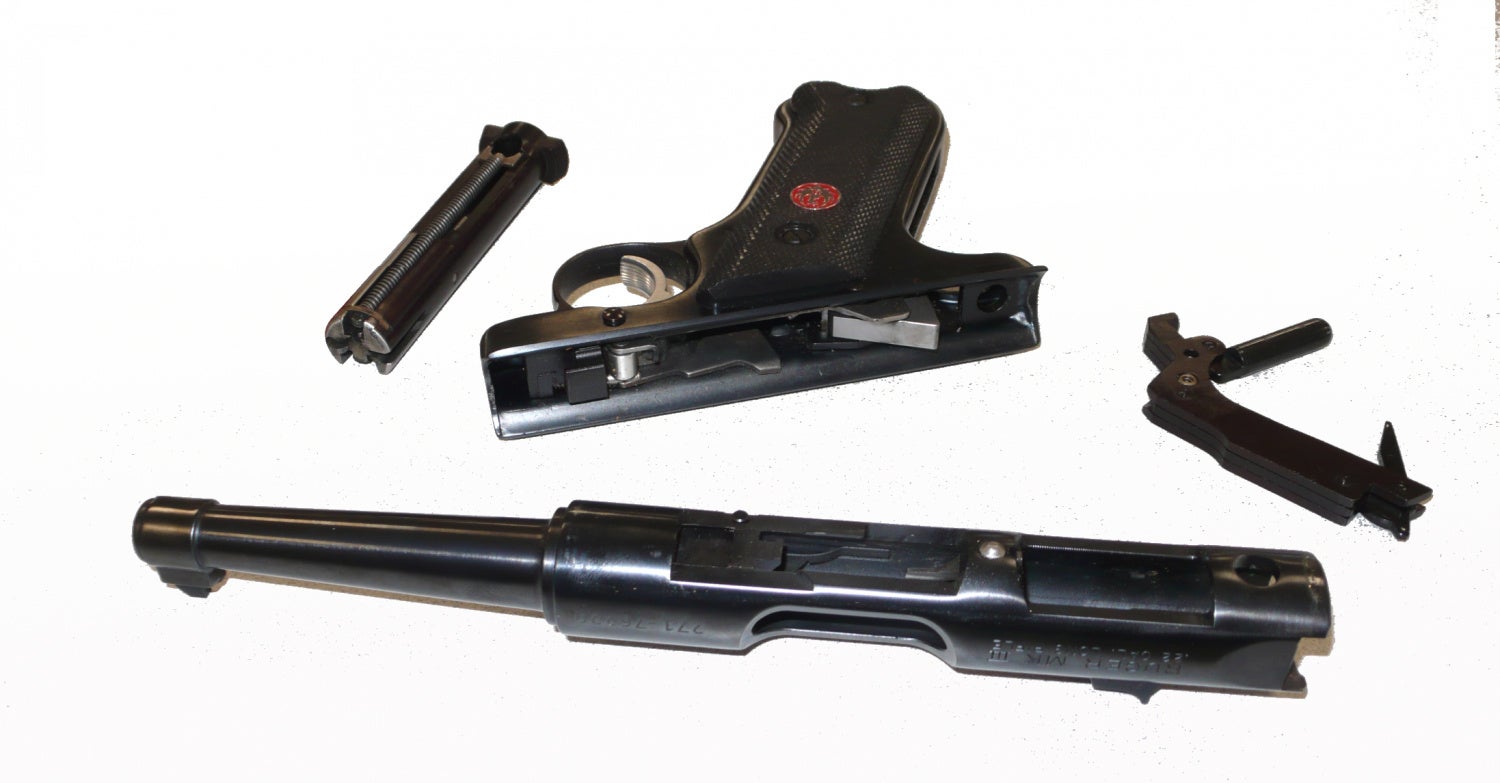
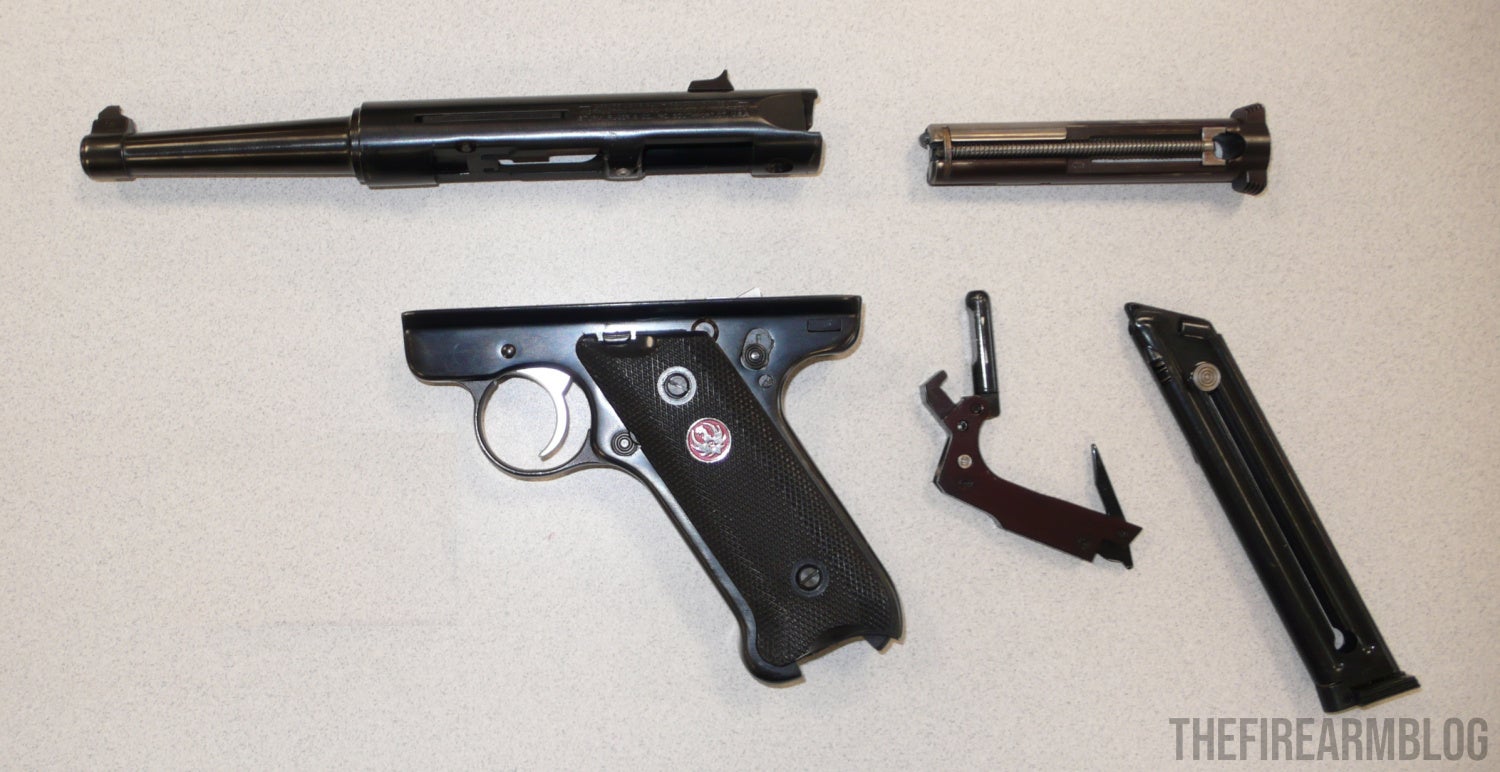
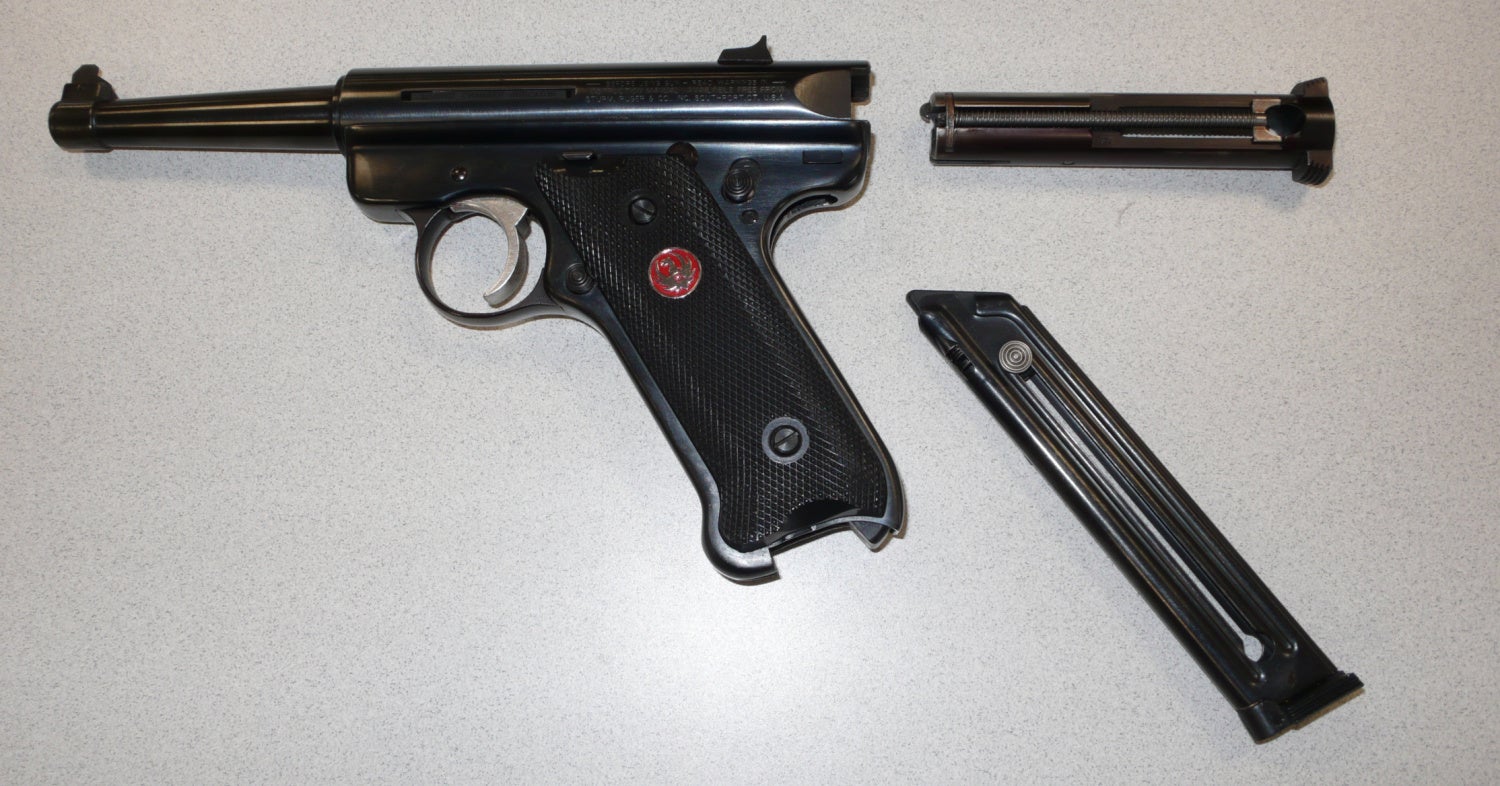
This ends the disassembly process for the Ruger Mk I, Mk II and Mk III Standard pistols. This is as far as Ruger recommends disassembling the Standard .22 LR pistol. Typically, the standard line in this series is “reassemble in reverse order,” however, there are a few extra steps to make sure the pistol gets back together properly.
Step 5. Before reassembly, make sure that the hammer is horizontal to the gun’s barrel if it were present. Then place the upper receiver on the frame and push it rearward until the back of the upper slightly protrudes from the back of the frame.
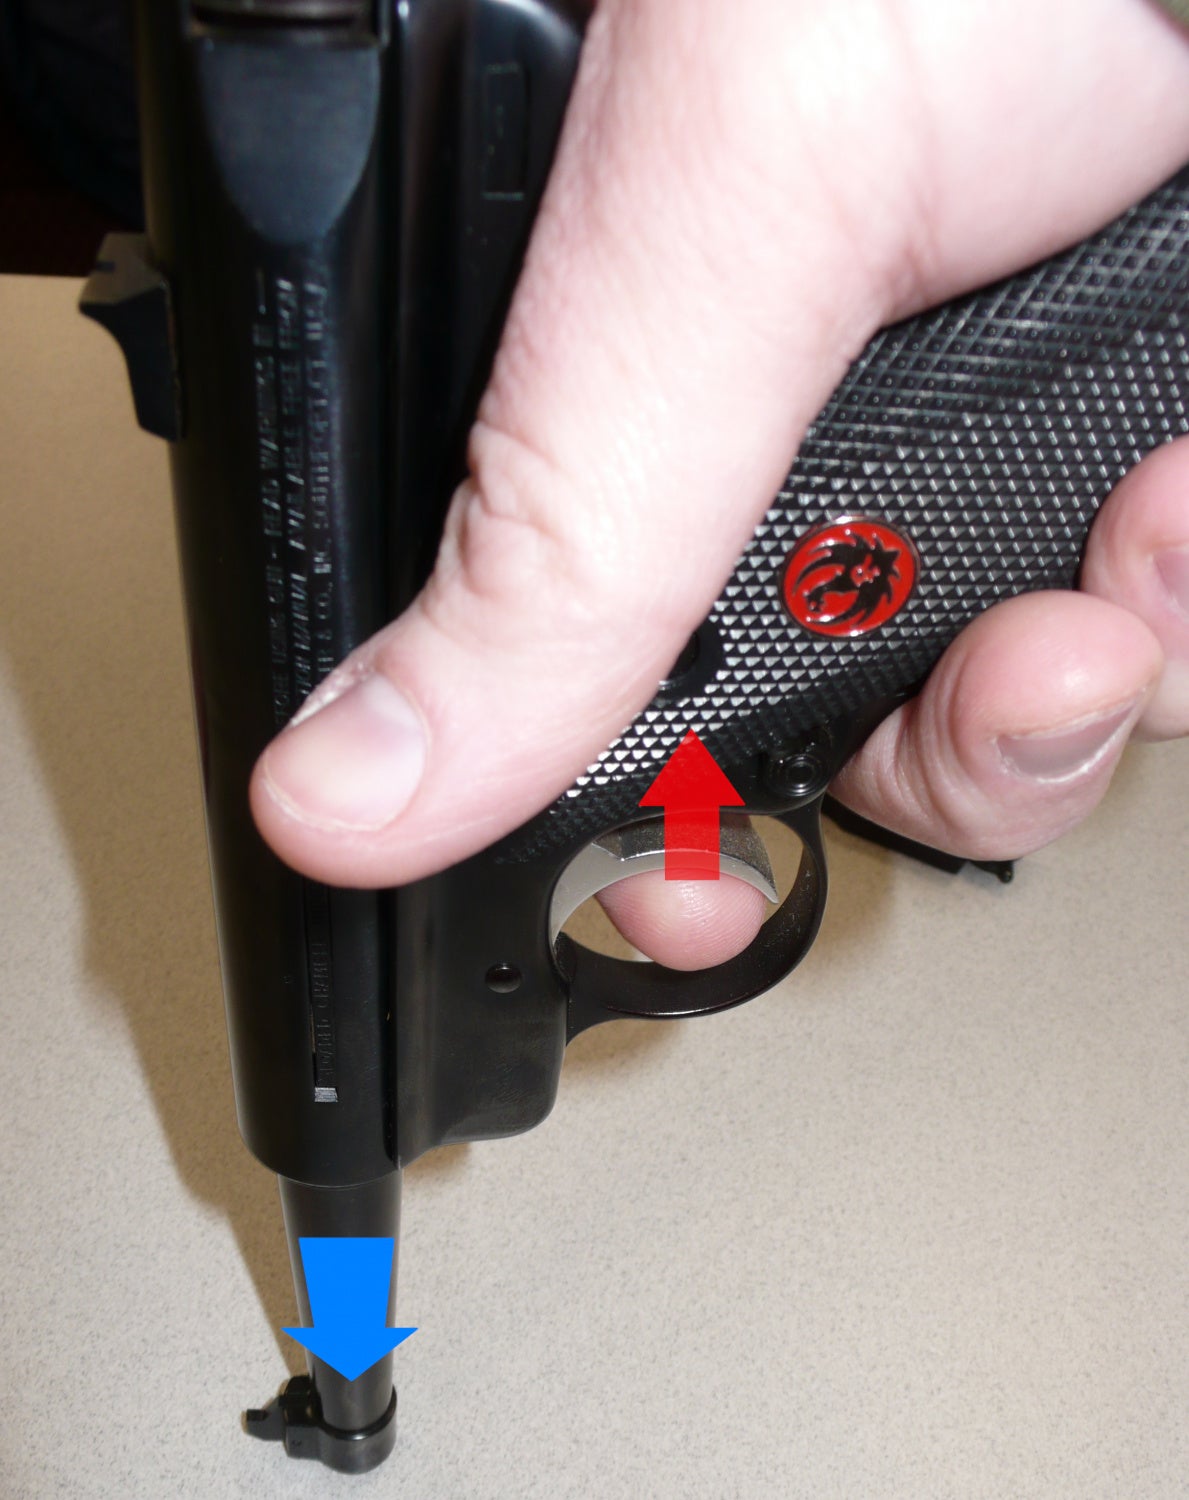
Step 6. Re-insert the bolt, and an empty magazine. Point the muzzle of the pistol down, and pull the trigger. While the pistol is still pointing downward, look into the void left by the absence of the mainspring housing to make sure that the hammer is fully forward. I used an awl to make sure it was in the right position.

Step 7. Take the mainspring and bolt stop pin assembly and install the bolt stop pin. I used a thumb to push the bolt forward while pushing upward on the bolt stop pin.
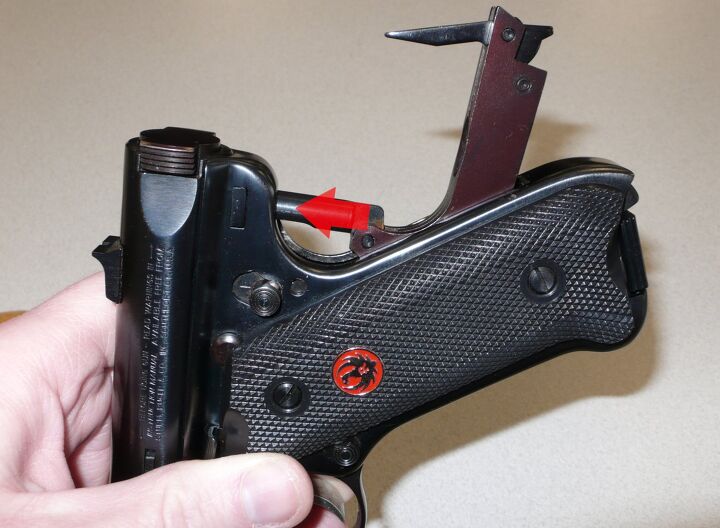
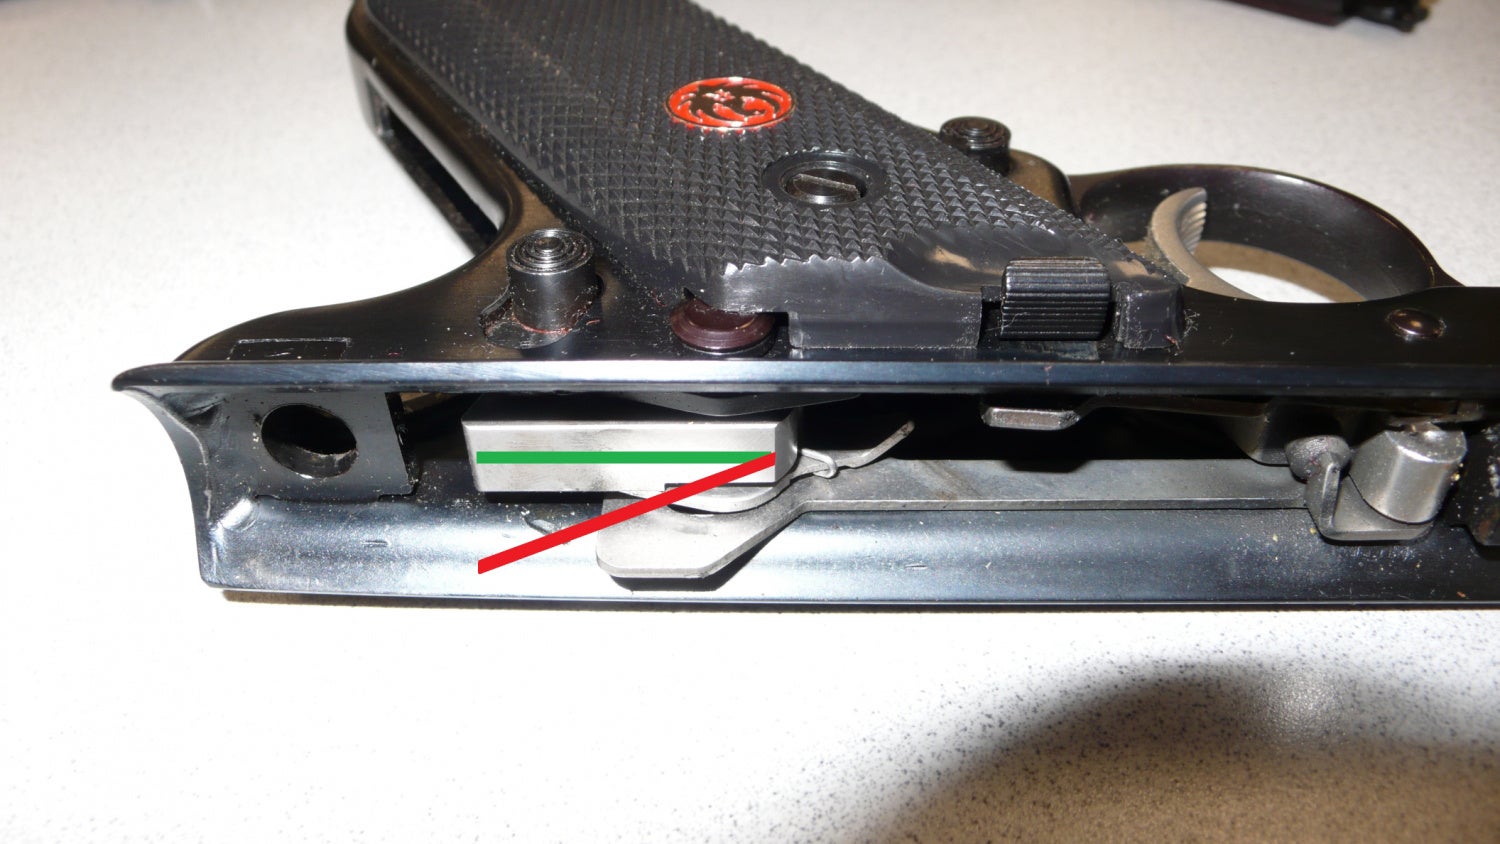
Step 8. Before swinging the mainspring housing back into place, make sure the hammer strut will engage the oval recess (highlighted in green) as the mainspring housing is pivoted back into the frame.
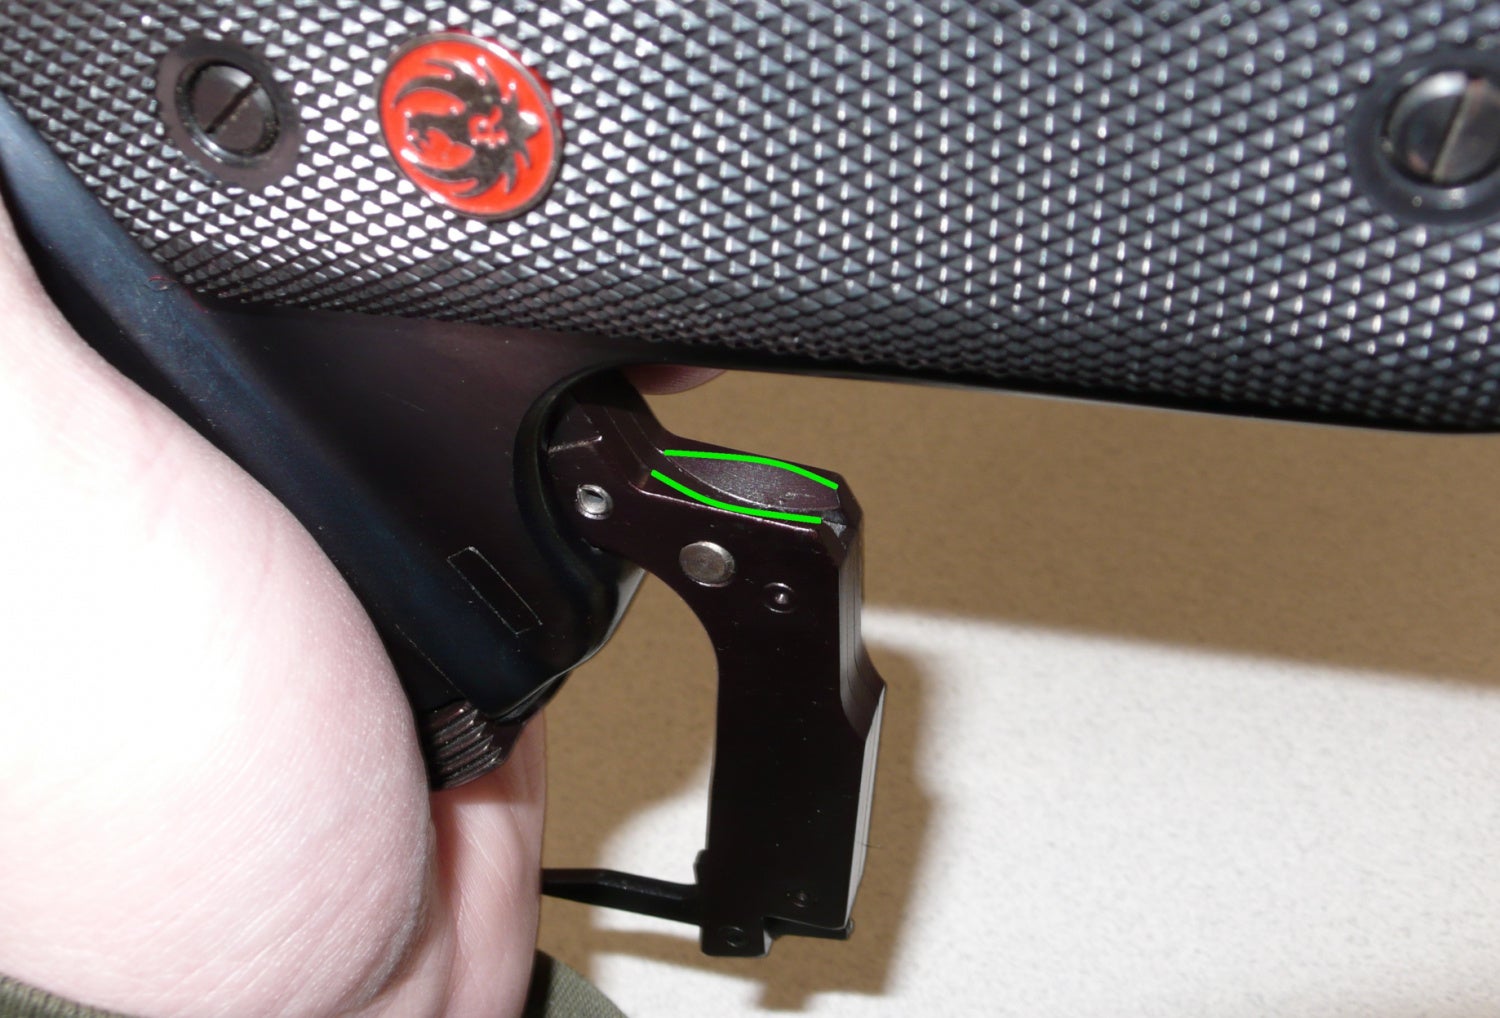
The hammer strut can be seen just above the mainspring housing. Make sure that it is properly aligned to engage the mainspring before swinging the housing back into the frame.

This now ends the disassembly and reassembly process for the Mk I, Mk II and Mk III series of the Ruger Standard pistols.