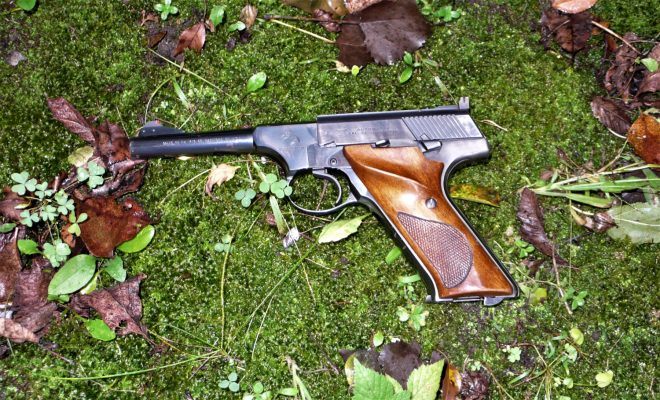
The Colt Woodsman is a semi-automatic .22LR pistol with a ten round detachable box magazine. Notably, it has a heel magazine release. The Colt Woodsman was manufactured from 1915 to the mid-1970’s. The Huntsman was introduced in 1955, and was previously named the Challenger. The name change was due to a dispute between Colt and Browning over the Challenger name, of which Browning already had a .22 pistol named as such. The Colt Woodsman and Huntsman pistols have the same disassembly process. If you’ve played with enough .22 pistols, the disassembly directions can vary widely compared to larger caliber semi-auto pistols. Let’s disassemble the Colt Woodsman on this edition of TFB’s Field Strip series.
BEFORE YOU FIELD STRIP ANY WEAPON, REMEMBER the four rules of gun safety:
- All guns are always loaded.
- Never let the muzzle cover anything you are not willing to destroy.
- Keep your finger off the trigger until your sights are on the target.
- Be sure of your target and what is beyond it.
TFB FIELD STRIP: COLT WOODSMAN & HUNTSMAN .22LR PISTOLS
Step 1. Flip the heel magazine release downward to remove the magazine. Move the slide rearward to check that the chamber is empty.


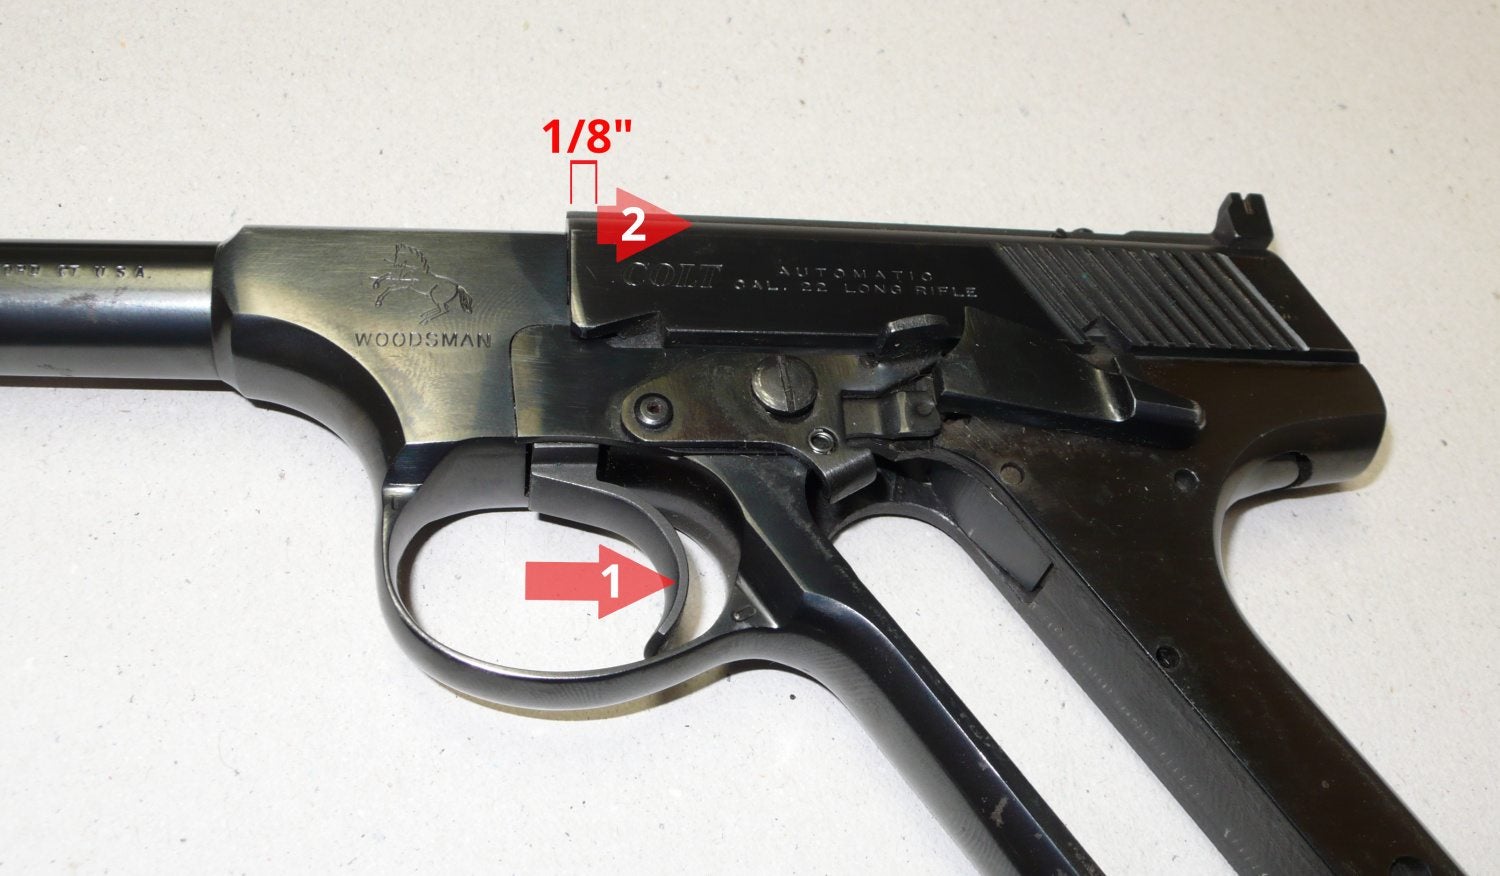
Step 2. Remove the single grip screw. Once the screw is removed, the grip panels can be set aside. With the frame exposed, you’ll notice a pin just under the safety catch on the left side of the Woodsman (highlighted in red). You can use the grip screw or something similarly sized. You may have to apply slight inward pressure on the mainspring housing on the back of the frame.


Step 3. Tip: One aspect of this step requires you to pull the trigger. It’s generally taboo to dryfire on rimfire pistols as the firing pin could strike the barrel and break or wear quicker. You may decide to insert a spent (NOT LIVE) casing to cushion the firing pin.
Grasp the gun by the barrel with your left hand. While holding the gun with your left hand, use your right thumb and middle finger to pull the slide back as far as it will go. Once the slide is all the way to the rear, use your index finger to press on the slide lock plunger. While pressing the plunger, close the slide to the forward position.
Pull the trigger to release the hammer. Then move the slide rearward about an eighth of an inch to allow the sear to drop into the half-cock position. My bracket in the picture isn’t necessarily to scale.


Step 4. Next, remove the mainspring housing at the back of the frame. Use your right thumb to press the deep curve forward and upward. The bottom of the mainspring housing should release and pop out from the bottom of the frame. You can then pull the housing down and out of the frame. You can now pull the slide off the frame.


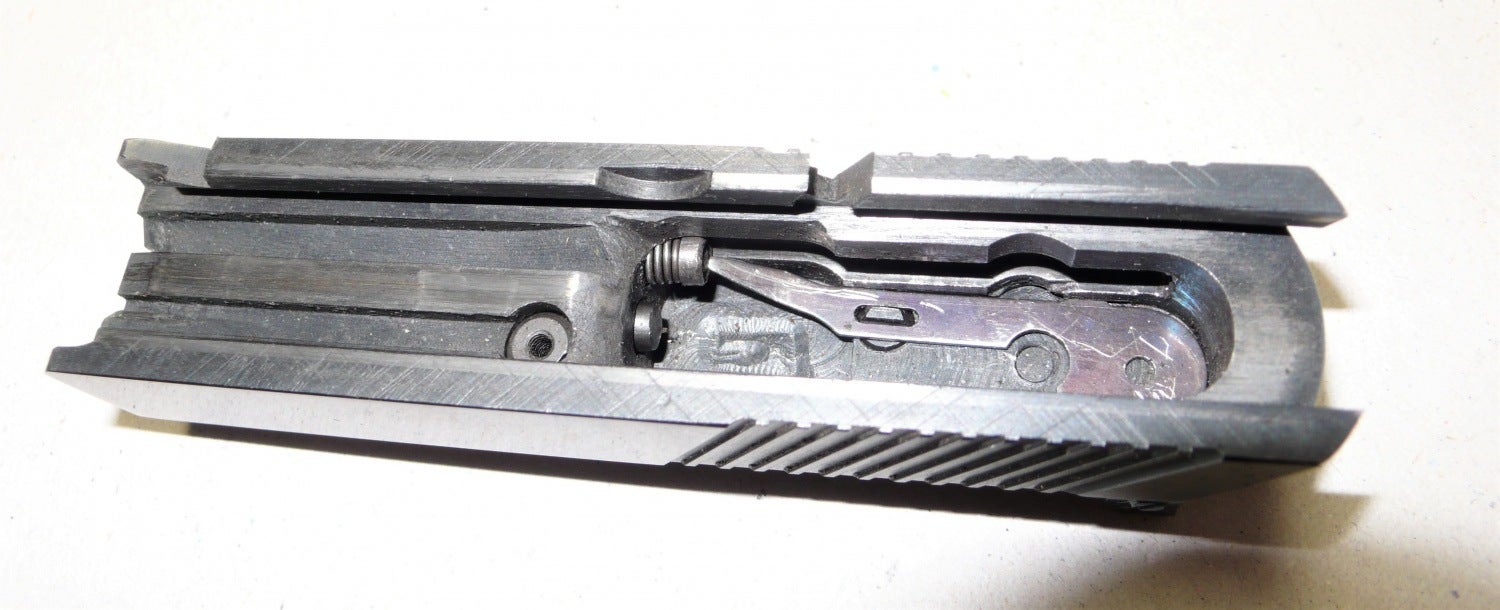
Note: The recoil spring inside the slide should look like the photo below. If the plunger didn’t engage the recoil spring properly, you’ll need to use a screwdriver to get it into the compressed position as shown.


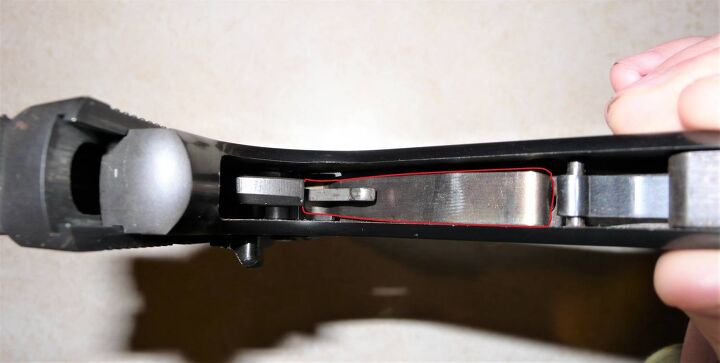
This ends the field strip process. You can find the Colt Woodsman manual HERE. You can also check out Colt22.com as well for more detailed information between the different product runs. Reassemble in reverse order. One important note before reassembling the mainspring housing, make sure the sear spring is in position as shown below first. The bottom of the sear spring is slightly curved with a narrower tab. Place the top of the sear spring under the hammer strut, and the tab end in the oval (or diamond) shaped hole.

 Your Privacy Choices
