 Your Privacy Choices
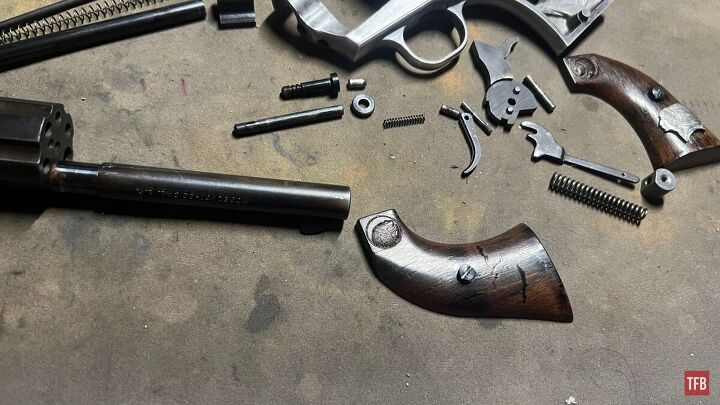
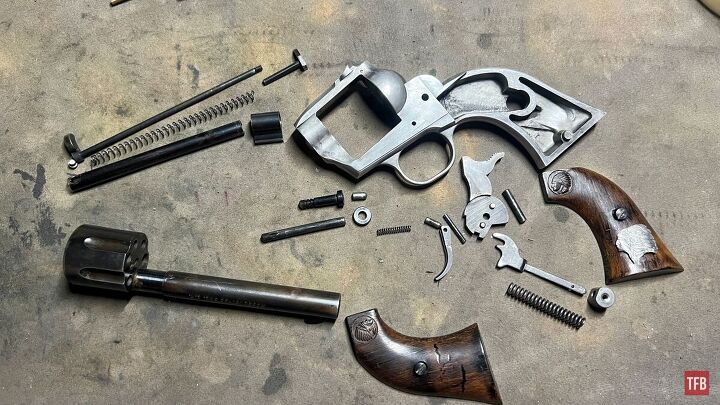
Welcome everyone to the TFB Armorer’s Bench! As mentioned in the little blurb below, this series will focus on a lot of home armorer and gunsmith activities. In this article, I am going to explain how the Savage Model 101 is disassembled but more importantly, caution anyone against doing it. It is nothing like a Single Action Army or Single Six. I realize that is no fun but it should be known right off the bat that there is a step in disassembly that could literally lock up the gun so that it cannot be further disassembled or reassembled. It’s a pretty needless flaw and I will explain why. Without much more jibber jabber, let’s dive into something y’all requested, some Savage Model 101 disassembly!
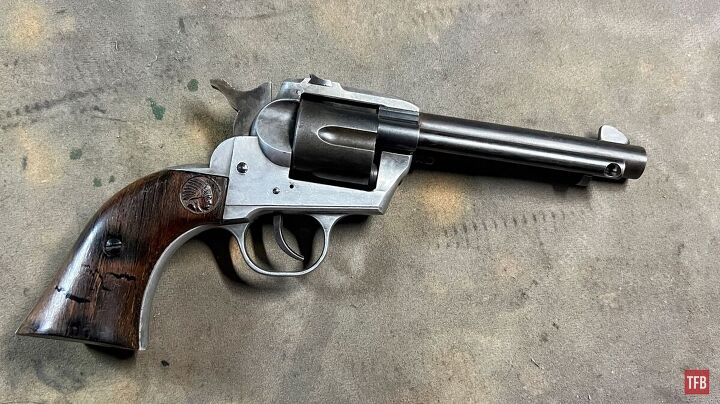
Note: This is not an actual revolver. Check out this article here for more context.
More Savage 101 Content:
- TFB Armorer’s Bench: Barrel Threading Without a Lathe
- TFB Armorer’s Bench: Diagnosing and Assessing a Savage Model 101
- The Rimfire Report: Single Shot “Revolver” – The Savage 101 Story
- Curious Relics #086: Love at First Sight – The Savage 101
- Curious Relics #087: A Pistol Full of Mysteries – The Savage 101 Part II
- Curious Relics #088: Decidedly Difficult Dating – Savage Model 101 Part III
TFB Armorer’s Bench: Savage Model 101 Disassembly
Here, we at TFB hope to inform, entertain, and even inspire any would-be gunsmith or armorer out there. Ideally, with the information I provide and with the help of our sponsors, you can have some useful knowledge about the conservation and improvement of firearms technology while at the same time sharing experiences and teaching each other new tips and tricks along the way in the comments. Digging deep into what it is to be an armorer or gunsmith has significance but what is important is what those people do to show they’ve earned that title. I am happy to share my experiences and knowledge and hope it is informative!
Make your personal safety a priority:
- Practice proper gun safety. Always make sure before the firearm hits your bench that it is unloaded and safe to be handled.
- Wear the proper safety equipment. The main one would be safety glasses (decent ones) since parts are often under spring tension and you may work with high RPM tools. Other honorable mentions would be latex gloves or a respirator when working with potentially harmful solvents and oils. Also hearing protection when working with loud machinery or test-firing firearms.
- Modifications, alterations, and customizations will void your firearm’s warranty 9.5 times out of 10. Please take that into consideration before attempting any at-home gunsmithing.
- If you are unsure about proper safety practices, disassembly procedures, or warranty standards, stop, put down the tools, and consult a competent gunsmith.
Savage Model 101 Disassembly
First thing is first! Practice all the rules of gun safety. When disassembling a firearm, you should always wear safety glasses due to multiple parts being under spring tension. Triple-check that the firearm is unloaded. All set? Let us jump right into it!
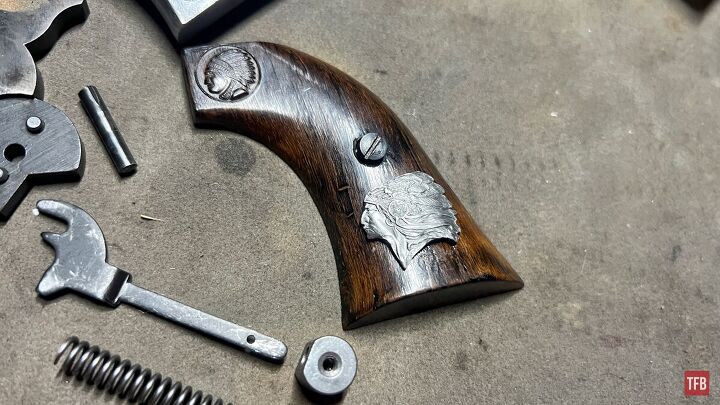
First, we have to take our grips off. There is a screw on both sides. Make sure you have a correct-sized flathead screwdriver so we don’t bugger up the screw head.
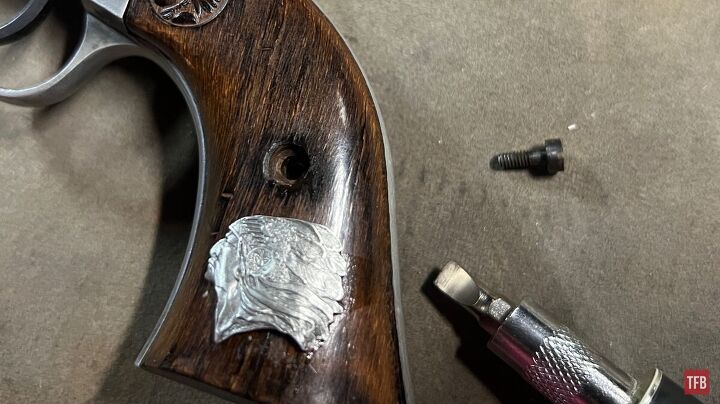
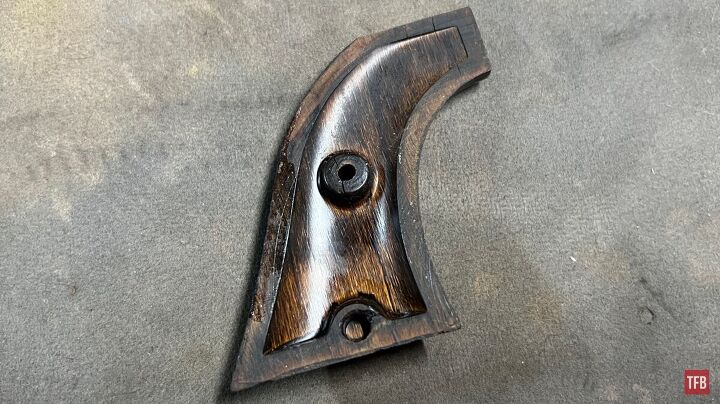
The panels are basically fake wood. Savage once advertised it as a high-quality “compressed wood”. In their old age they are prone to cracking and as a result, can be fragile and should be handled with care.
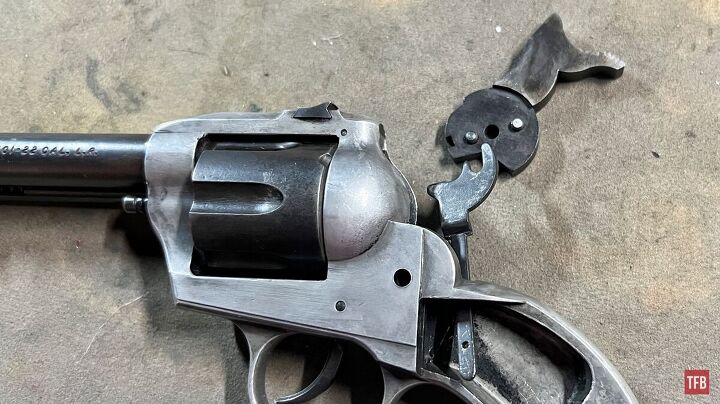
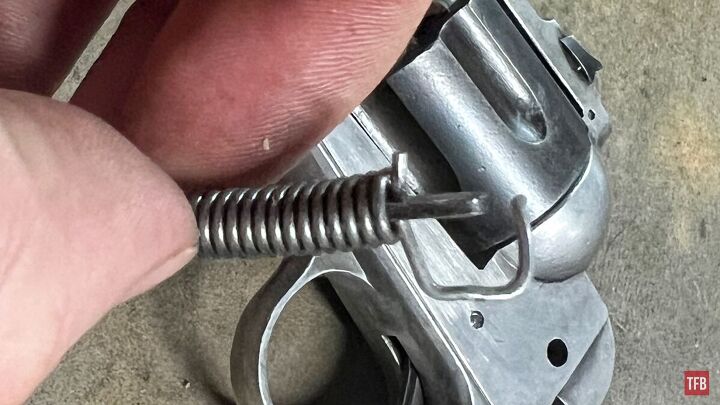
Under the grips, we have our hammer strut, hammer mainspring, and mainspring trunnion. The mainspring trunnion (the round part that the grip screws screw into) is an independent part that would fall free if it didn’t have the hammer strut poking into it and the mainspring pushing against it.
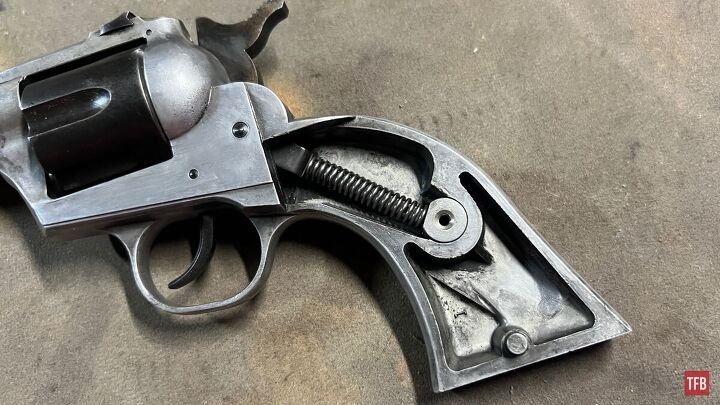
On the opposite side, we can see the trunion and a spot where the frame is peened along with the trunion. This is to help align in reassembly later on so the flat portion of the trunion faces the hammer strut and spring.
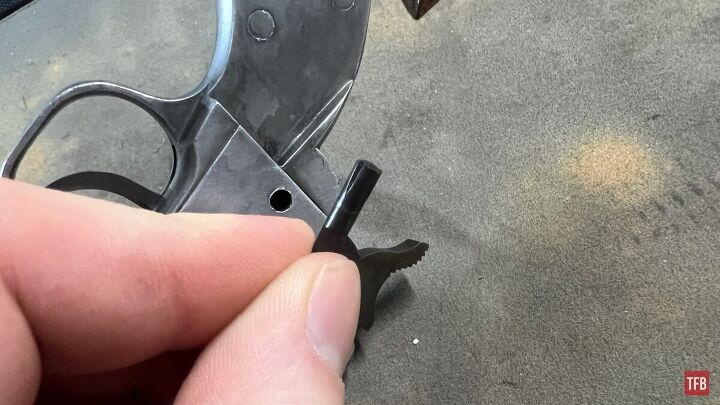
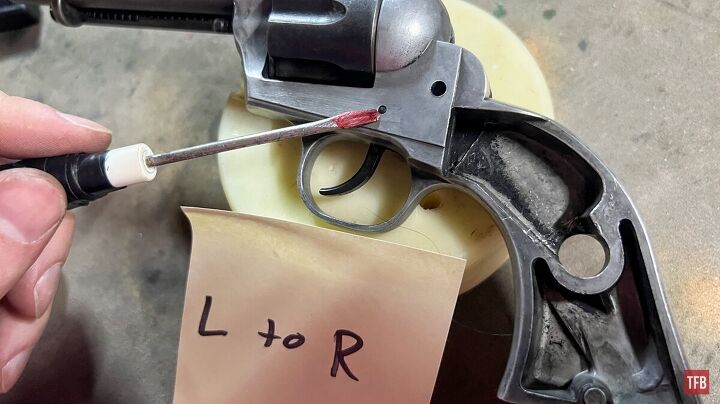
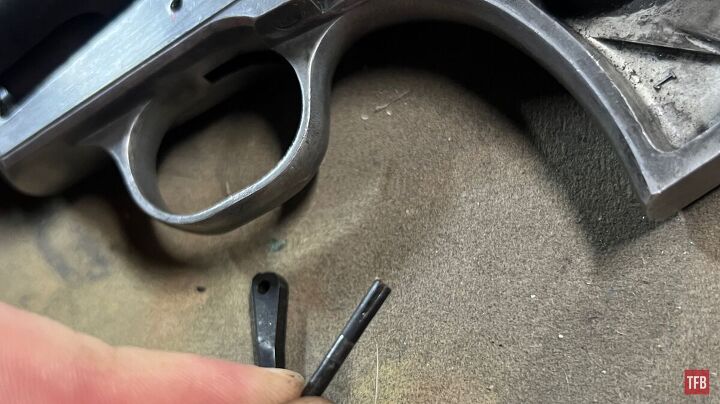
Now, taking care we drive our pins out left to right (this is according to an old pamphlet I came across). The hammer pin is first.
As you can see one side is in fact wider.
With the hammer pin driven out, the trunion can be pressed out with a thumb or a large punch if you are worried about your fingers. This will relieve pressure on the hammer and hammer strut.
With the pressure relieved on the strut and hammer, we can lift the hammer up and out, pivoting however we need to wriggle it free from the strut hooks.
With the hammer free, the strut can be slid out the top or the spring can be removed and the strut slid out the bottom.
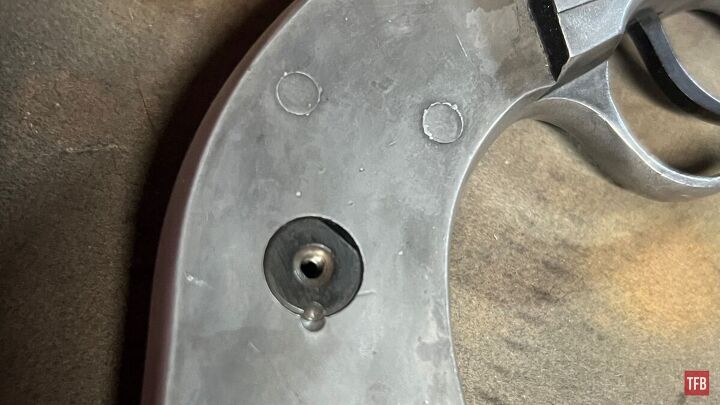
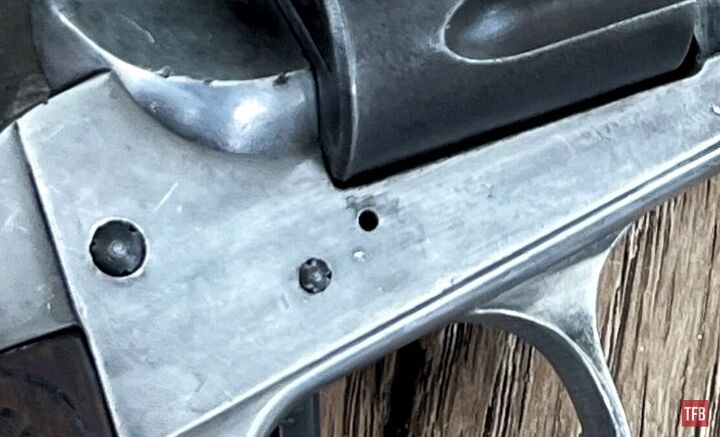
Next, the trigger pin can be removed. I want to mention that there appears to be a small hole on the right side of the frame where a paper clip can be inserted. This is obviously meant to keep the trigger spring plunger captive but I am honestly unsure if it is meant to keep the plunger from shooting out when going through disassembly (that does not make sense cause it is a fairly slack spring and a pretty deep hole) or for reassembly (equally confusing because it does not depress the plunger enough to get the trigger in comfortably).
The trigger pin is done from left to right again. Be careful about how the gun is oriented here. There is a spring and plunger that provide spring tension in order for the trigger to return forward.
The wider side of the trigger pin is also easy to see.
At this point, if they have not already fallen out, the trigger spring and plunger can be removed.
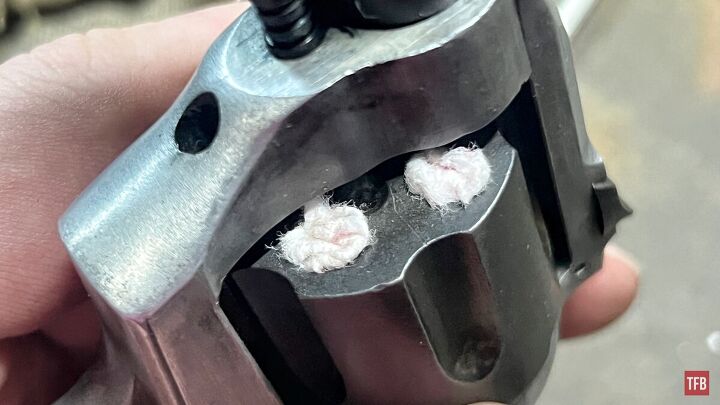
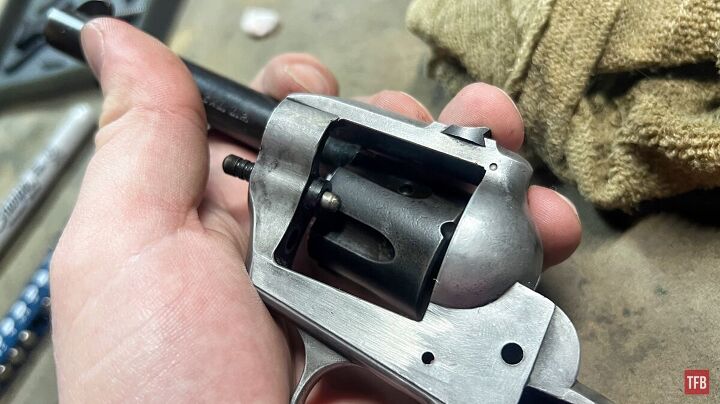
Now comes the part that could literally lock up the gun so that it cannot be further disassembled or reassembled. Do you know the chambers with faux bullets in them? I plugged them each with a tight wad of paper towel. Making sure nothing can get into them. I can remove the paper towel with a pick tool later.
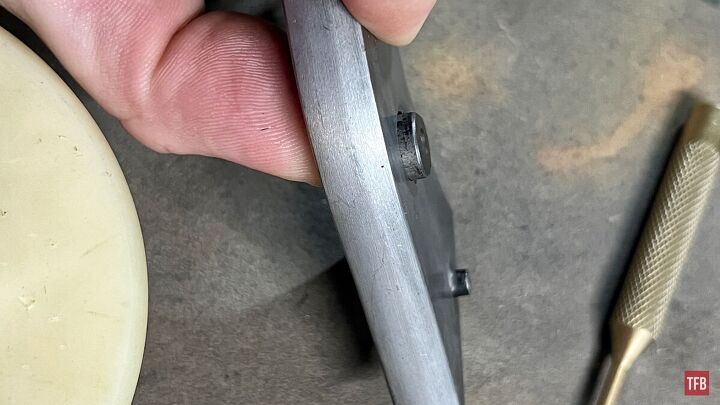
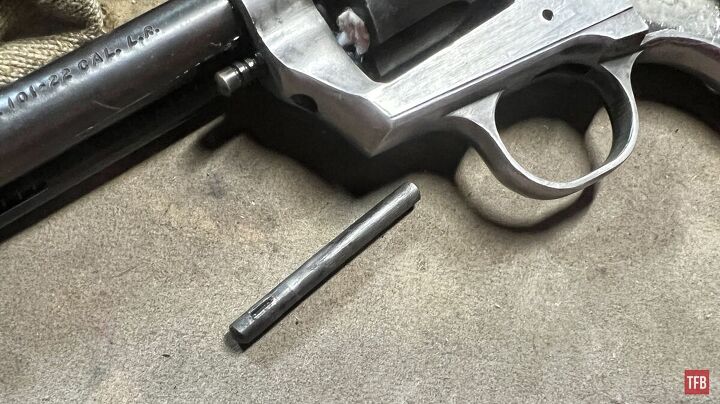
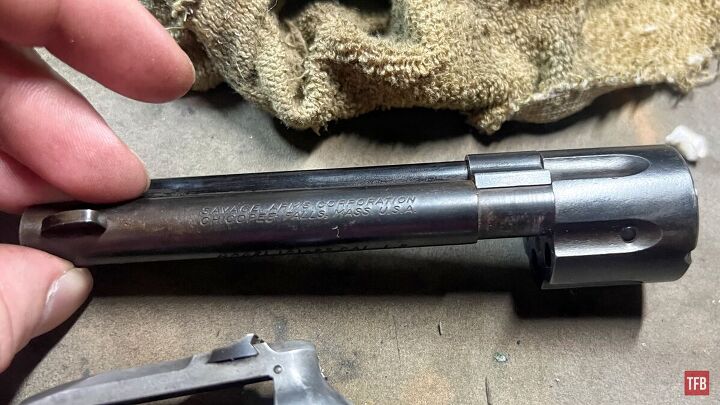
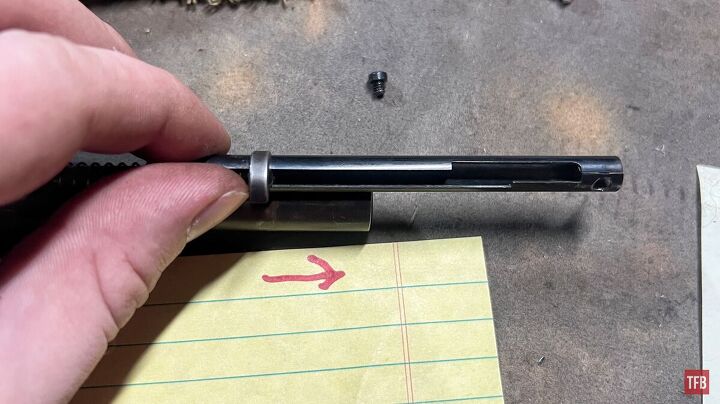
This pin is not fake and it does not go out front to back. It holds the barrel/cylinder assembly in place.

The pin is accessed from the back where the hammer normally hides it. It can be punched out with a long punch.
As you can see it also is a one-way pin.
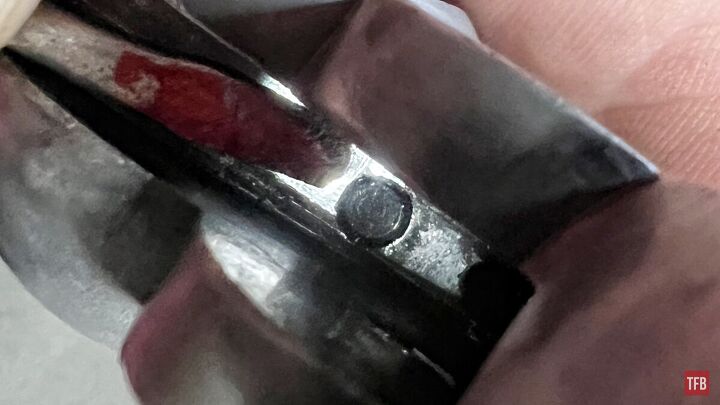
With the cylinder pin removed, the pin bushing that lays in the gap is able to fall free or be tapped out.
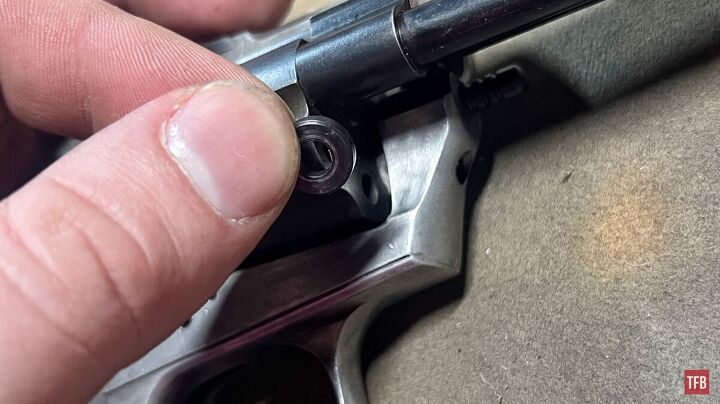
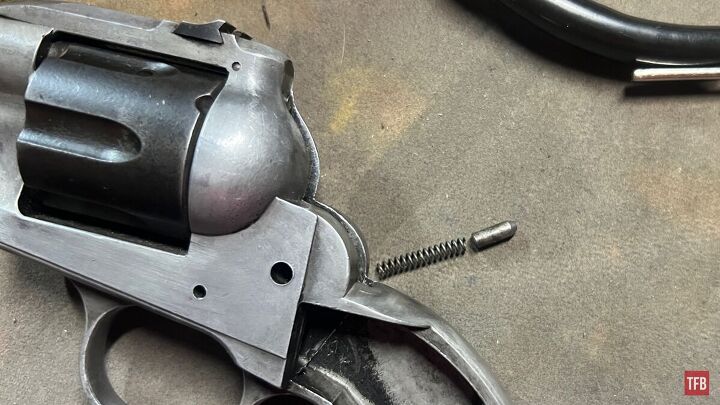
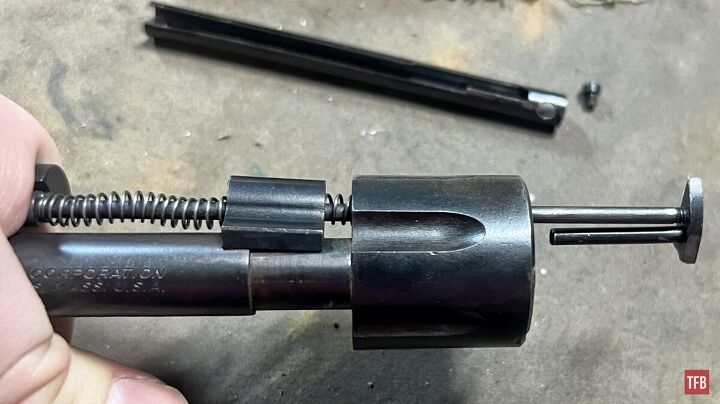
Now those plugged holes come into play. The center pin (just below the barrel) appears to be a normal cylinder pin like on a SAA. It is not, however. It is a hollow faux pin that holds a spring and plunger that act in divots of the fake cylinder when it pivots side to side. There are two indents that it locks into.
The fake cylinder chambers need to be filled because if the cylinder/barrel assembly is pushed out to the right and the plunger and spring shoot into the empty chamber it will lock up and remain as such unless you were to take a drill to it and drill it out.
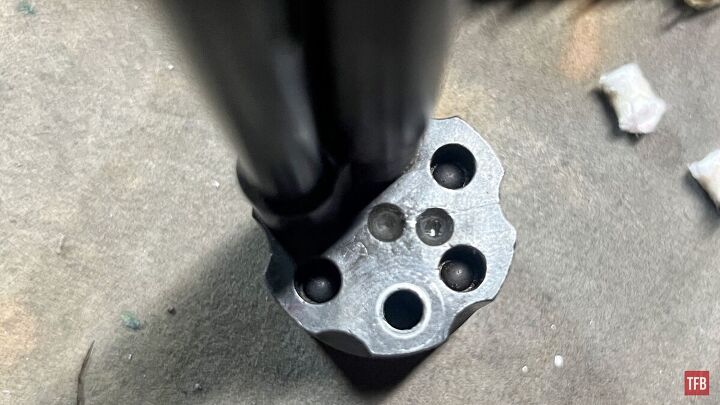
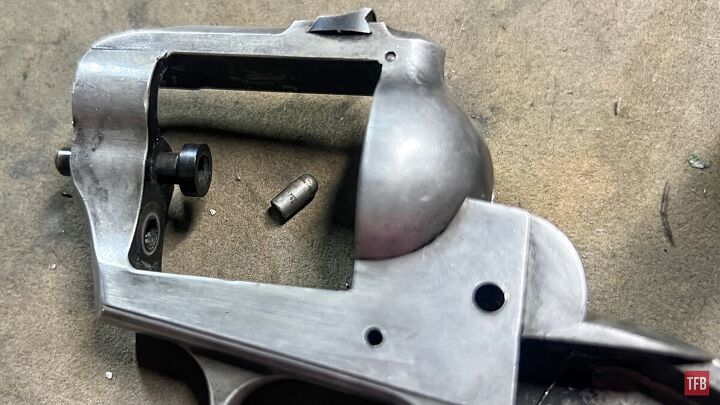
Here is the cylinder and all of the menacing holes with fake bullets.
I personally think this is an insane flaw that only exists because they wanted it to fully look like a six-shooter. A necessary evil maybe but still ridiculous. I suppose average Joe probably would not be taking his extremely user-serviceable gun apart.
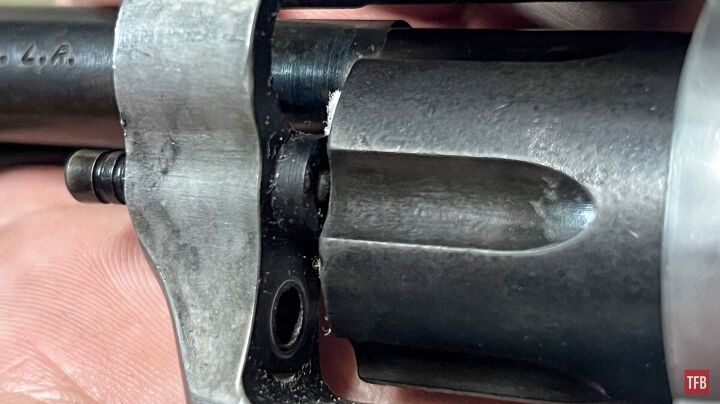
With the chambers properly protected the barrel/cylinder assembly can be pushed out to the right. BE CAREFUL not to let the plunger and spring shoot across the room.
A rag placed over the top of the gun can keep the spring and plunger from going into orbit if you don’t want to cup your hand over it.

Here is the sketchy plunger.
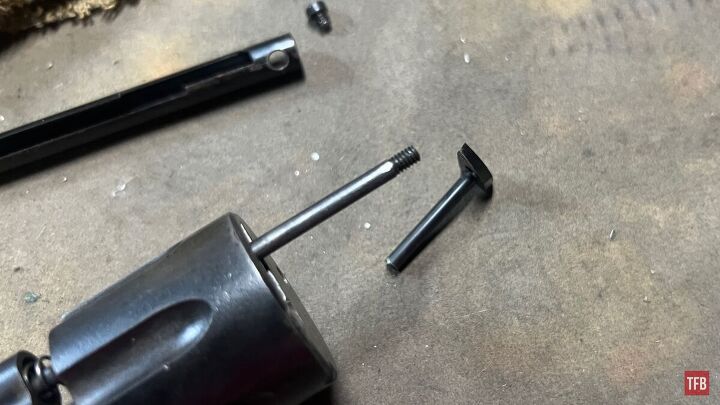
Now the fake pin that holds the spring and plunger can be tapped out from front to back. This is not really necessary for literally anything.
A similarly unnecessary disassembly would be the ejector assembly but for the sake of being thorough, this is what the ejector looks like when it is depressed. We will need to do that later but much further.
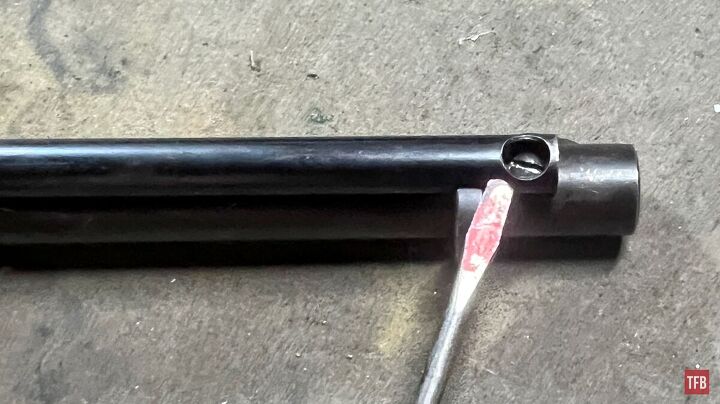
First, we start by unscrewing the screw located near the muzzle. This will free not only a screw but also an ejector tube plug which is not present in my example (the previous owner lost it and then shortened the screw).
Next, the tube itself can be slid forward and off.
Now we must depress the ejector rod until the shorter alignment rod of the ejector is above the cylinder.
From here the ejector can be unscrewed from the rod.
The remaining assembly will come apart when the ejector is unscrewed and pressure on the rod is relieved.

Savage Model 101 Reassembly
Reassembly as per usual is the same steps in reverse. Make sure to keep or replug the holes in the cylinder for reassembly.
One portion that will take you forever is the hammer, hammer strut, and mainspring assembly.
You may notice the strut has a small hole in the tail end. This is placed there to assist with reassembly.
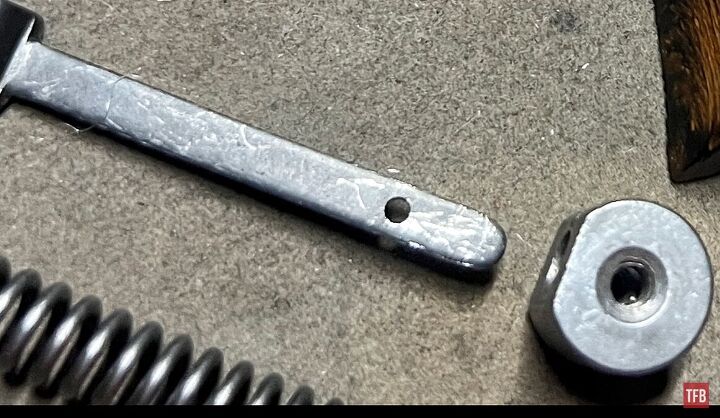
A paper clip or rod of some sort is intended to be placed there as a slave pin.
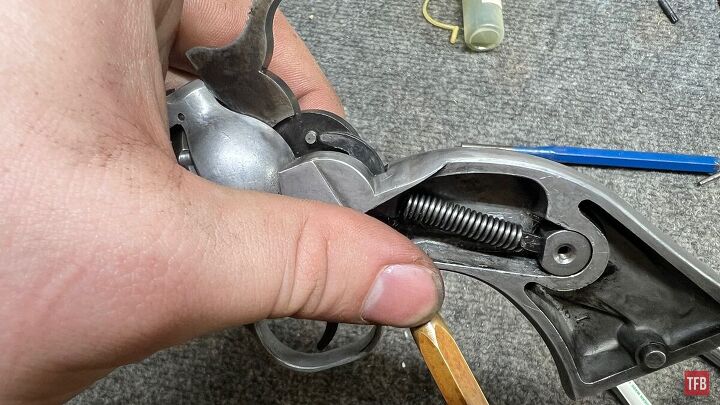
A tip for depressing the strut and spring enough is to carefully place the hook end into a vise and depress the spring with a fork (thanks to my friend Charlie for the idea!). While depressing the spring, we can insert a paper clip into the hole over the spring and fork. You only need to clip the right side of the paper clip so it is flush with the spring. Leave some meat on the other side so you can grip it with pliers.
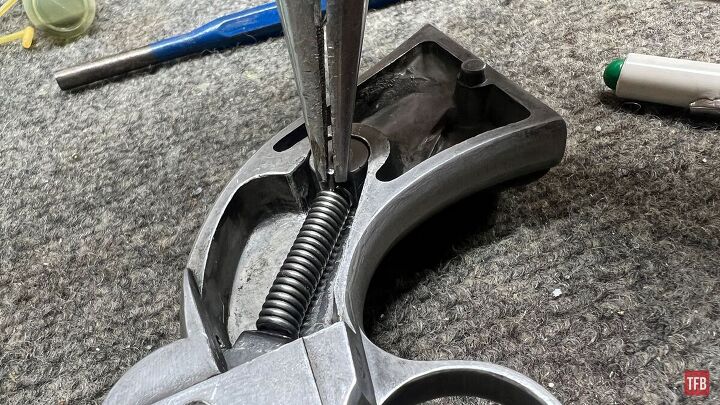
From here the strut/spring can be inserted from the bottom into the frame along with the trunion so it is aligned with the flat face facing the strut.

The REALLY tricky part is getting the hammer in so that the pin intersects with the highest hook. It’s difficult because the strut does not want to stay in the position shown and further the hammer does not want to line up with this extremely narrow amount of space. It is the littlest sweet spot and it’s hard to find. I have taken this gun apart and back together probably 10 times as of writing this and this part takes me a minimum of 15 minutes to get each time.
With the hammer back in, the pin can be replaced and the paper clip removed.
Final Thoughts: Savage Model 101 Disassembly
Yeah, don’t do this if you can help it. Savage Model 101 disassembly is no joke and things can go bad real quick if you aren’t careful. Getting the hammer back in turns into a sweaty nightmare and the risk of getting the pivot detent into the cylinder is a scary prospect. Kind of crazy how different this is to take apart from the revolvers it is made to look like.
As always, thank you for reading TFB! Be safe out there, have fun while shooting, and we will see you next time for the TFB Armorer’s Bench! Also, let us know what you think in the comments below! We always appreciate your feedback.