Your Privacy Choices
Just as it is with power tools, each type of firearm has its own purpose. With the modularity of platforms like the AR-15, one type of gun can be configured in many different ways, covering different kinds of tasks. In my personal collection, I have a shorty AR for close range, a standard 16” do-it-all gun, and a large void that needs to be filled with a long-range, precision rifle. Adding the word “precision” to anything basically triples the cost of an off-the-shelf gun, so I decided to build one instead and gather parts over time. Join me on this journey, as I put together an AR-15 upper, part after part, expletive after expletive.
Step By Step: The Barrel
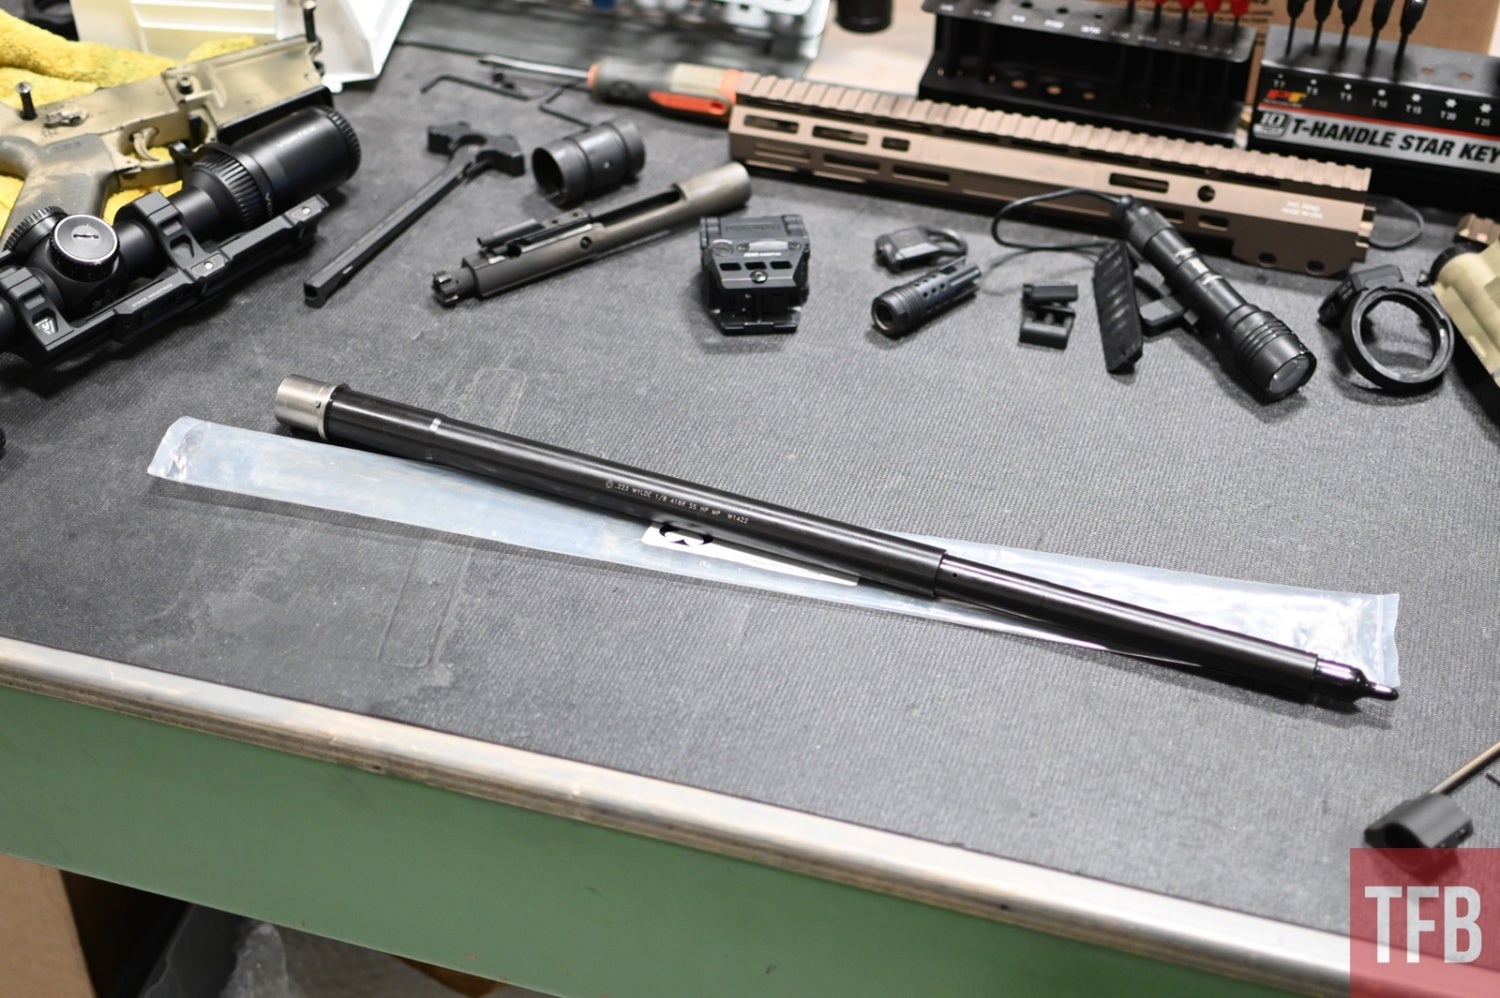
You can do a lot with a 16” barrel. Hell, you can make good hits out to 300 plus yards with a 14.5”. I’m looking to push the 5.56 cartridge to its maximum, though, so I went all the way. There are plenty of capable barrels, but I went for this 20” Ballistic Advantage barrel. It’s chambered for .223 Wylde and uses a 1:8 twist. This will be my first rifle that uses a rifle-length gas system and I’m excited to see how it feels to shoot. The barrel is really the heart of this build.
Step 1: The AR-15 Upper Receiver
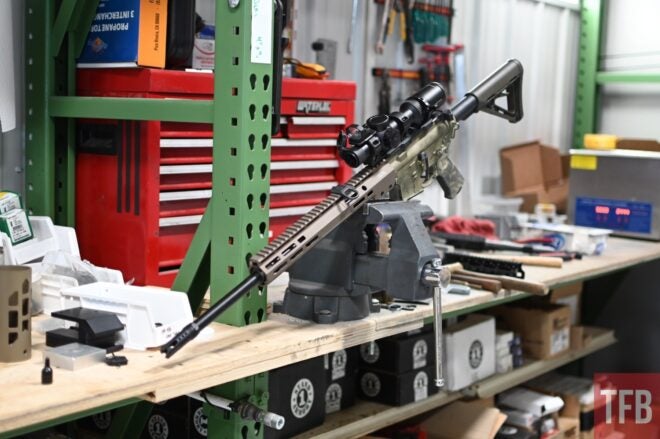
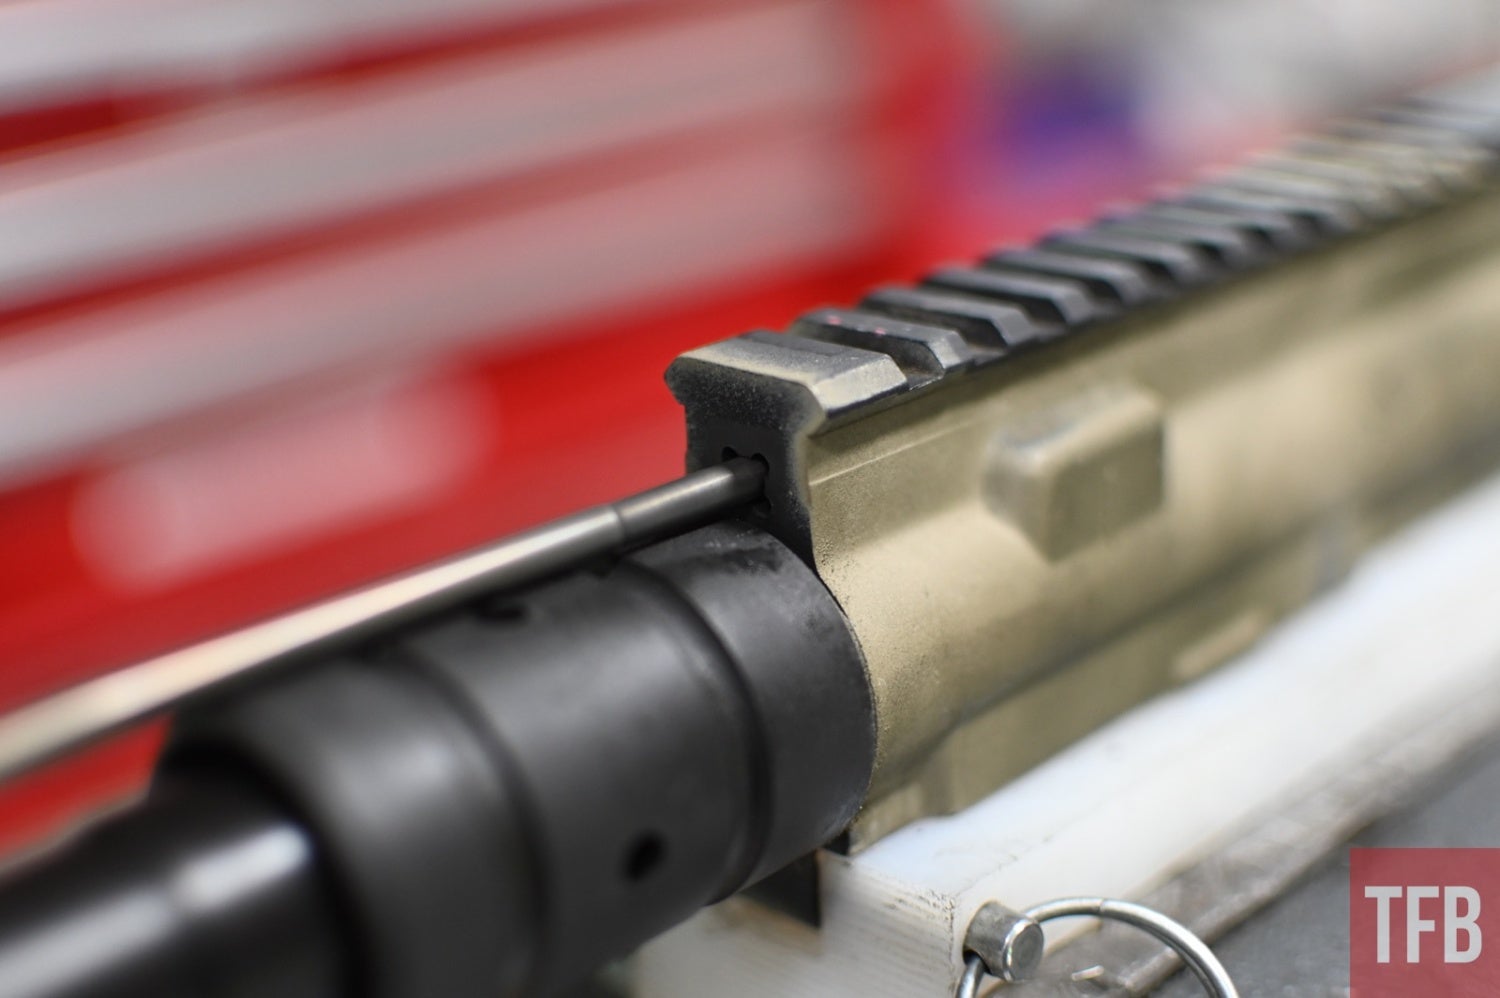
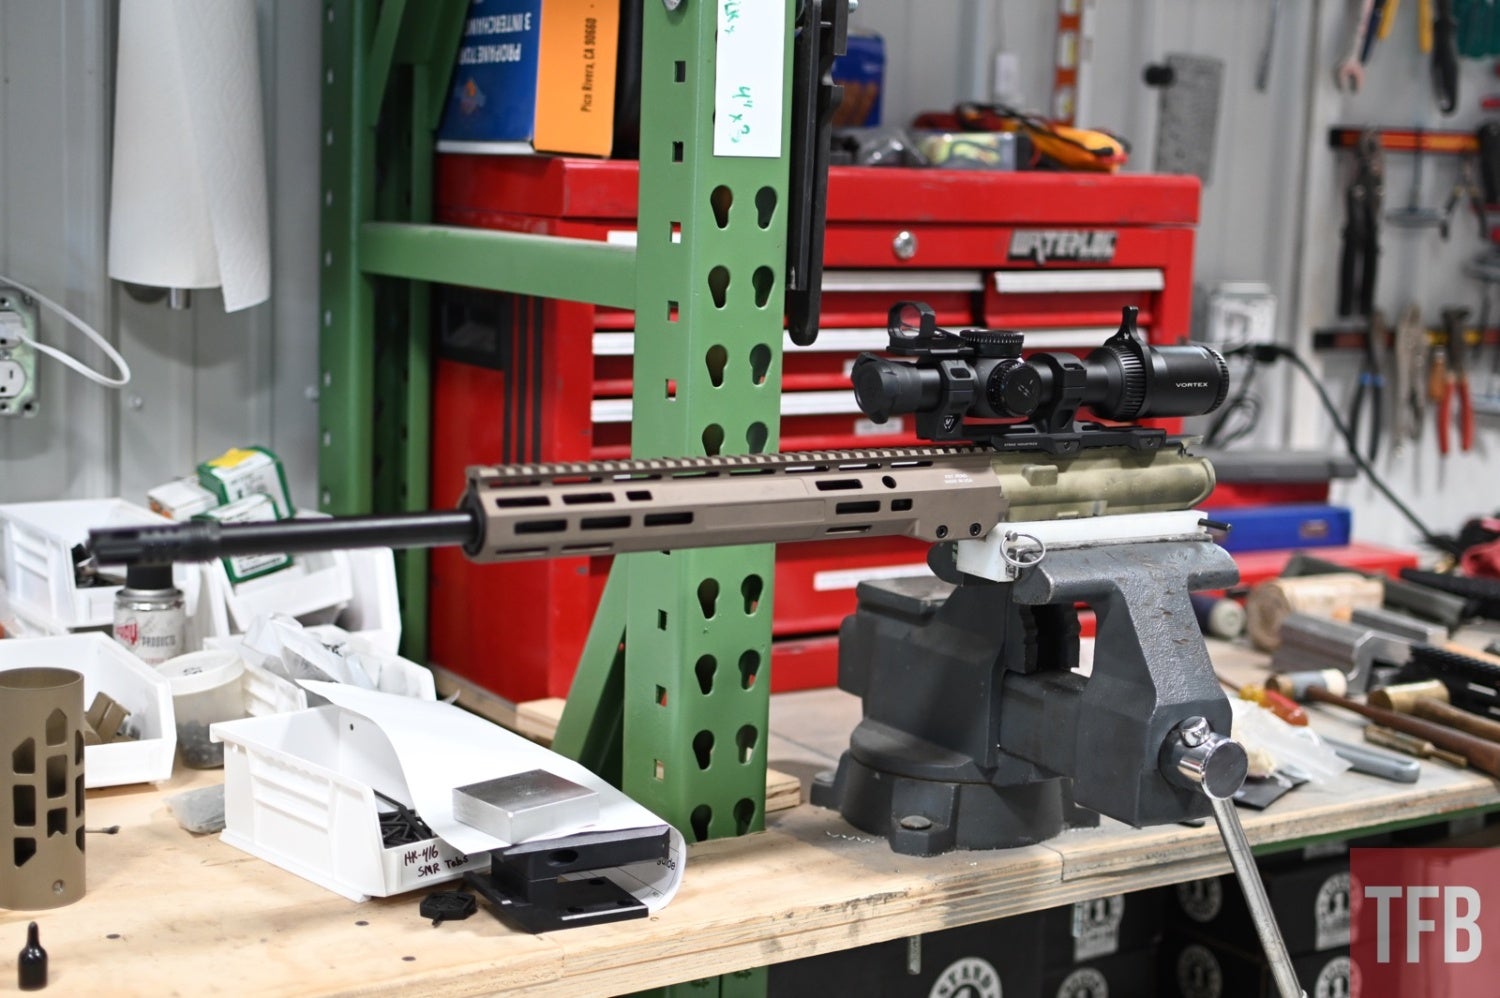
The upper receiver needs to be locked down for this, so I placed it in the vice. For anyone who thinks KeyMod is dead, check out the shelving unit!
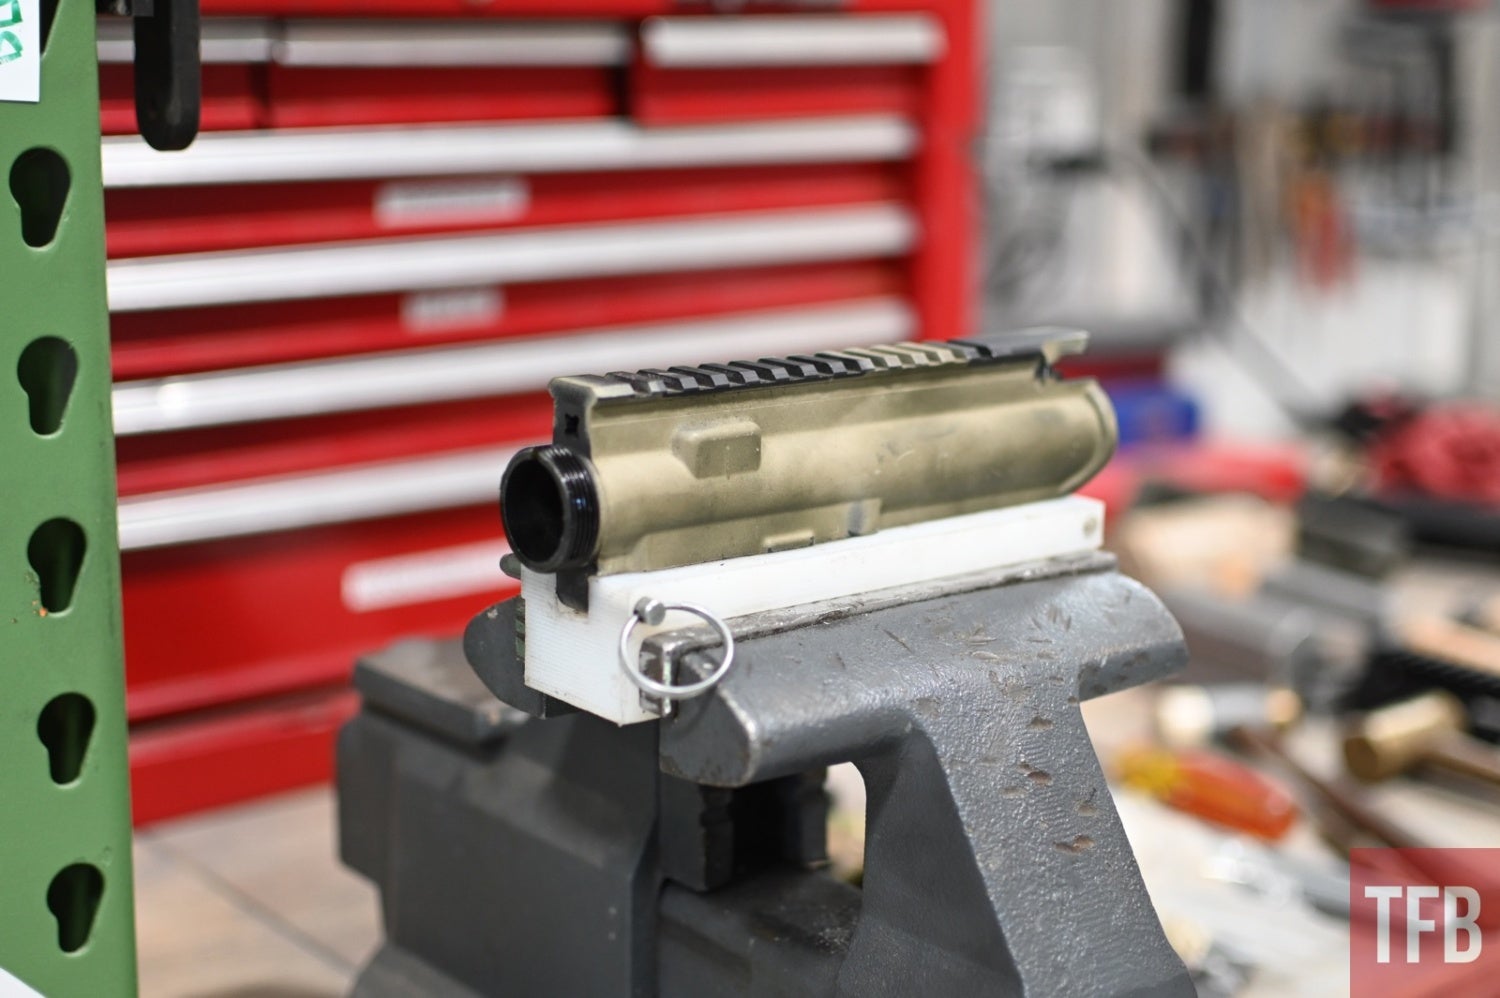
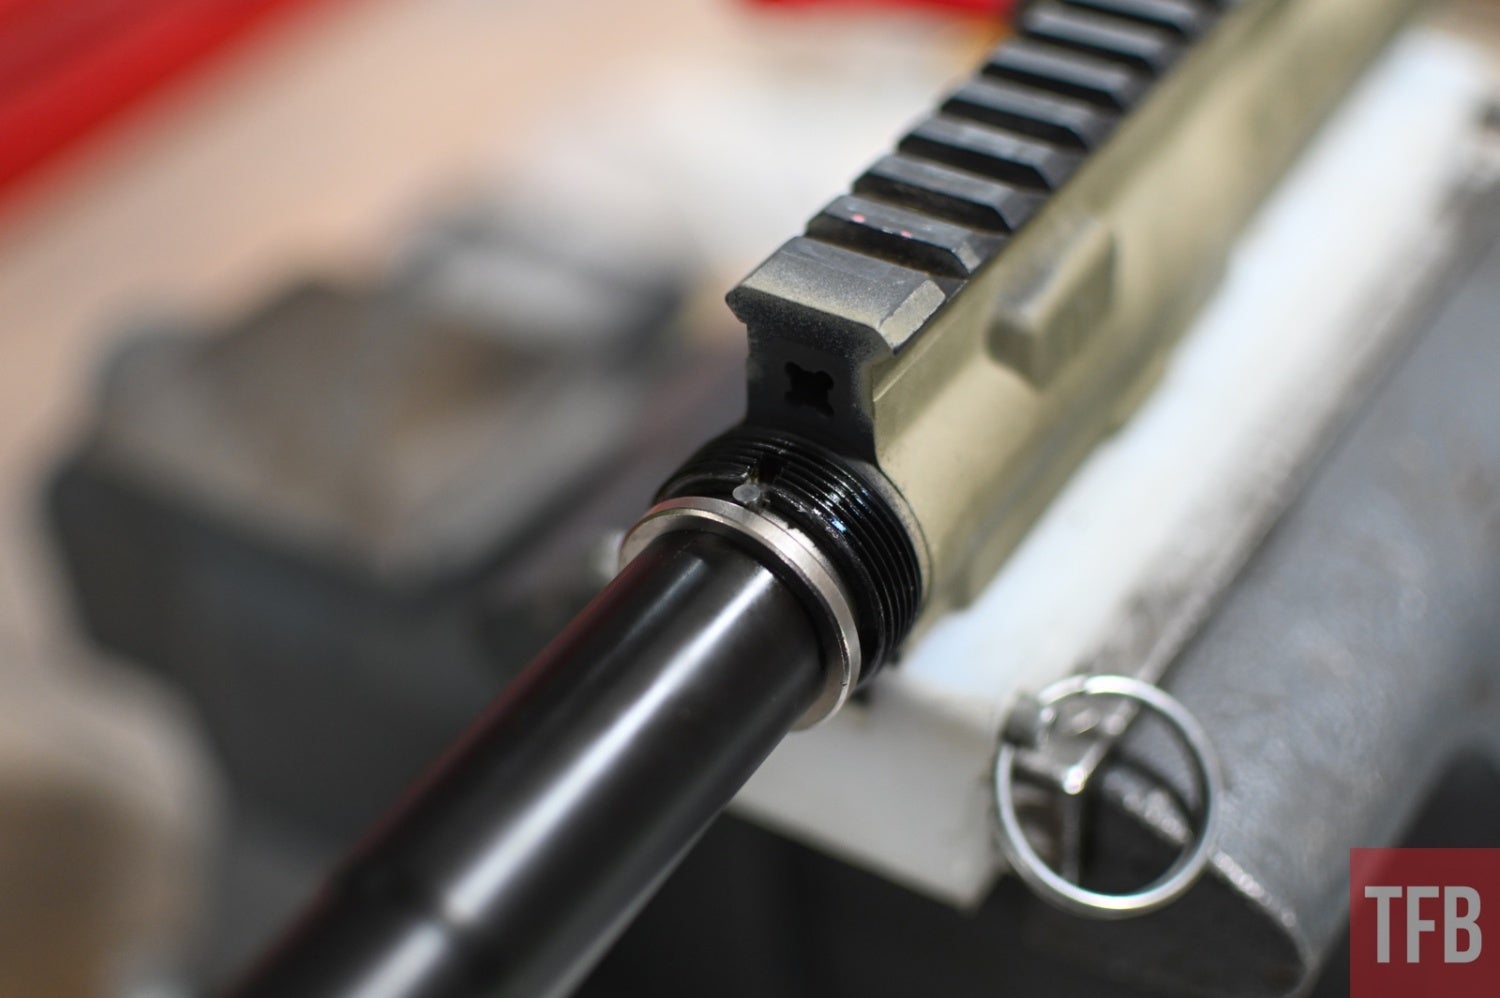
The barrel extension (the part of the barrel that integrates with the receiver) slides right on, with the index pin fitting inside of the small cutout in the receiver’s threads. This old Stag Arms upper (and I mean old) seemed to have some pretty tight tolerances, but it was nothing a little violence couldn’t fix.
With the barrel installed, it’s time for the gas system and handguard.
Step 2: The Gas System
Installing the gas system is pretty simple. First, slide the barrel nut onto the barrel, and tighten it down with a barrel nut wrench.
Insert your gas tube into the gas block, and slide it onto your barrel with the tube facing your receiver.
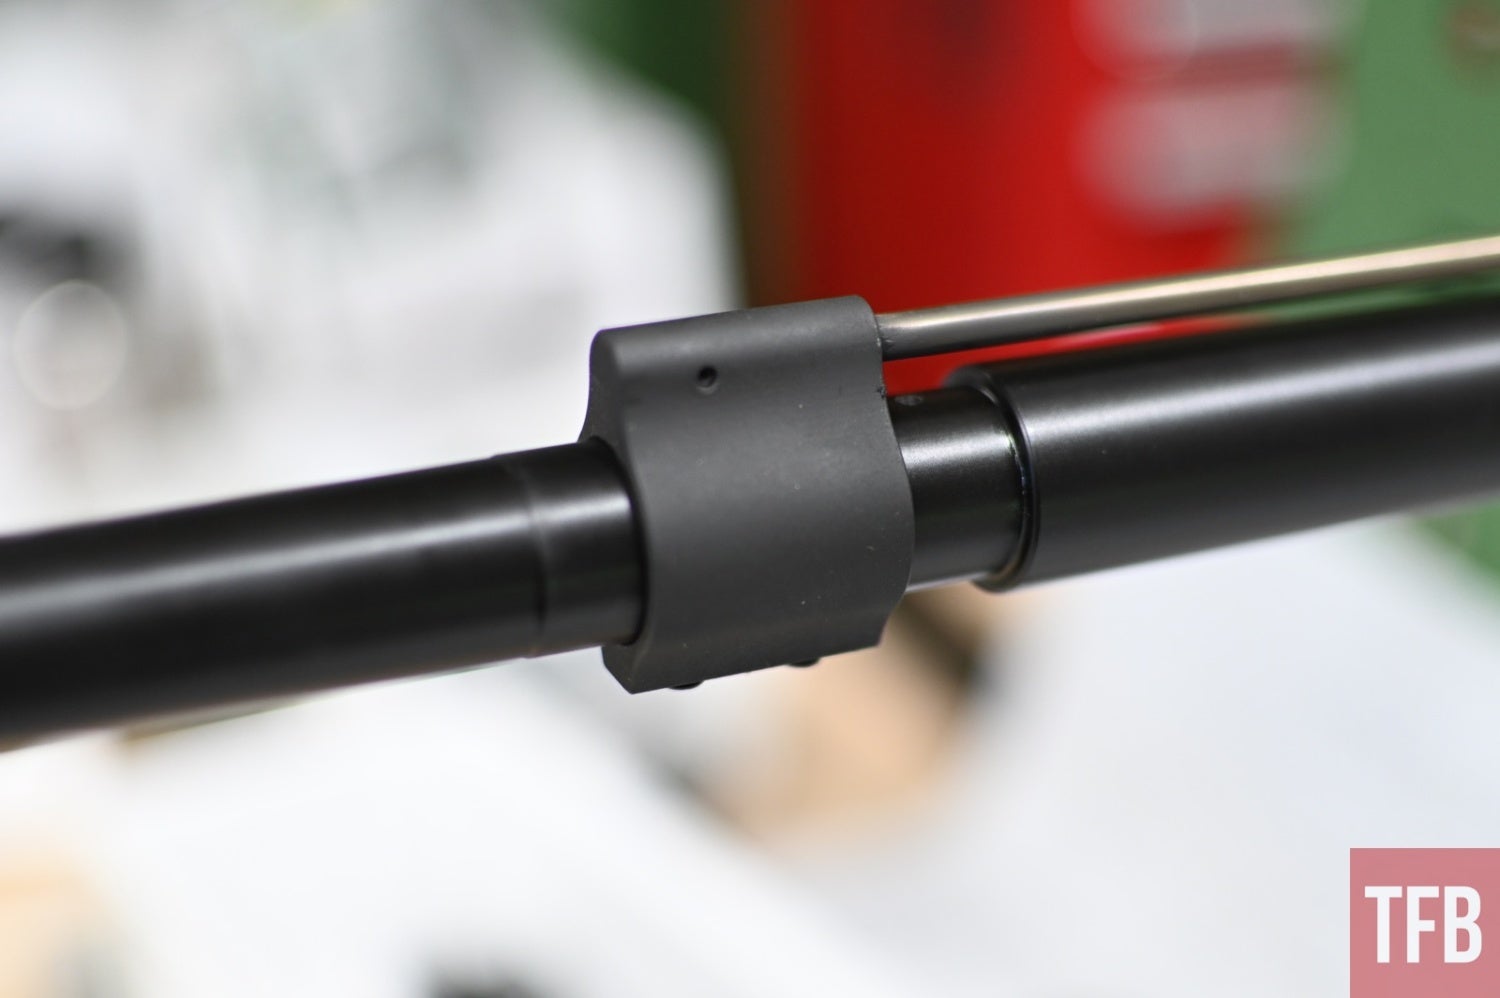
The other side of the gas tube goes into the opening at the front of the receiver. X marks the spot!
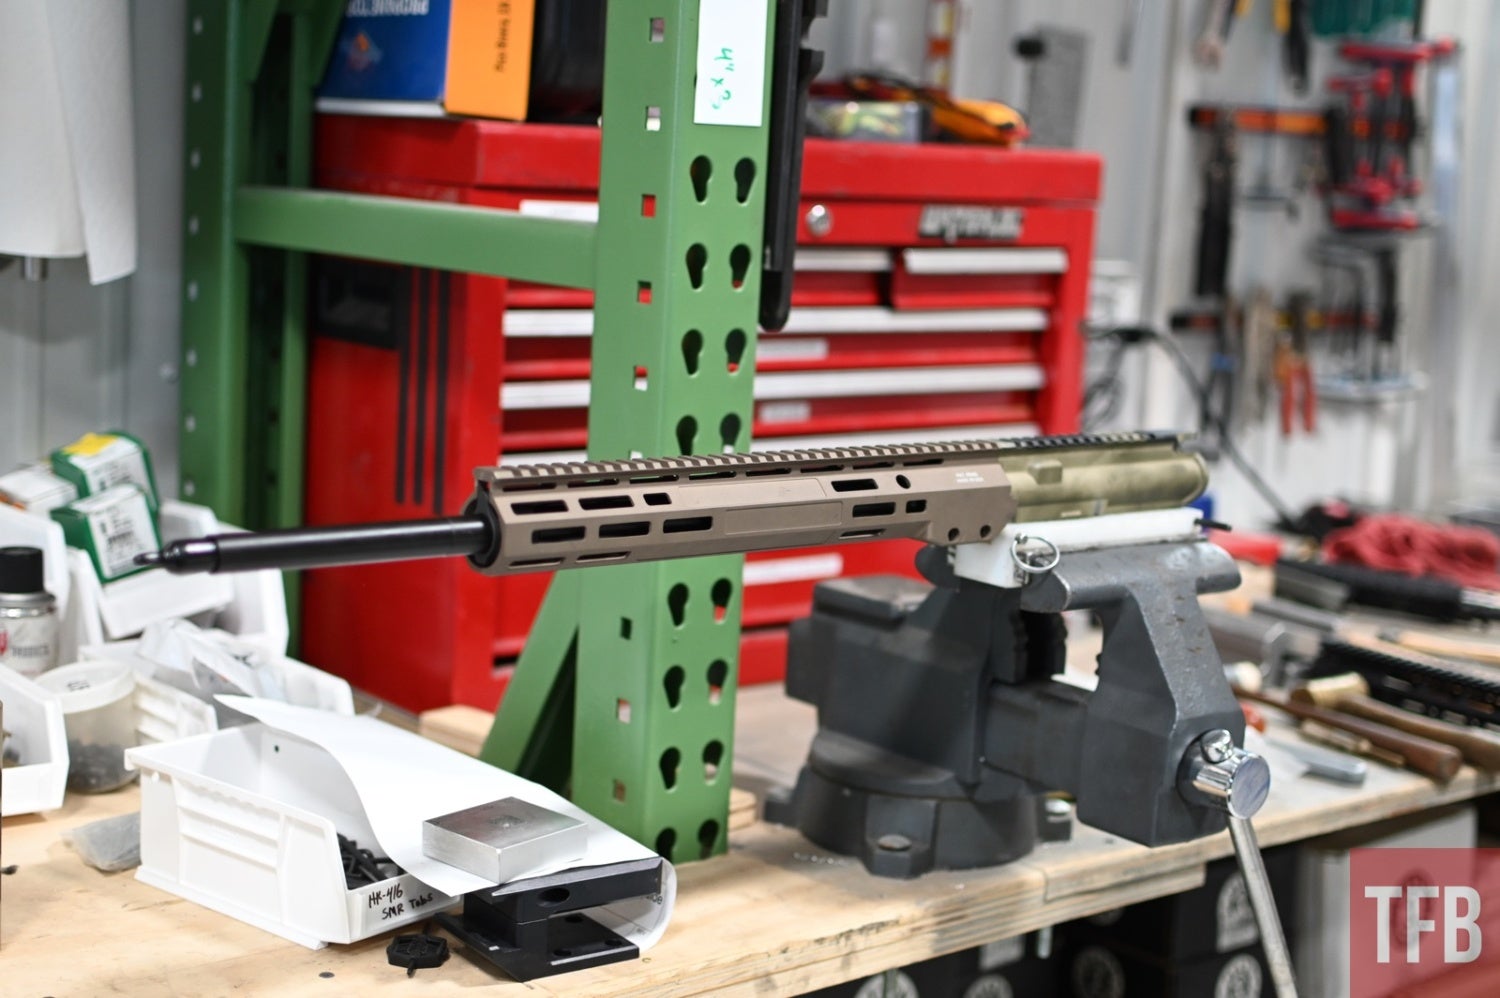
Step 3: The Handguard
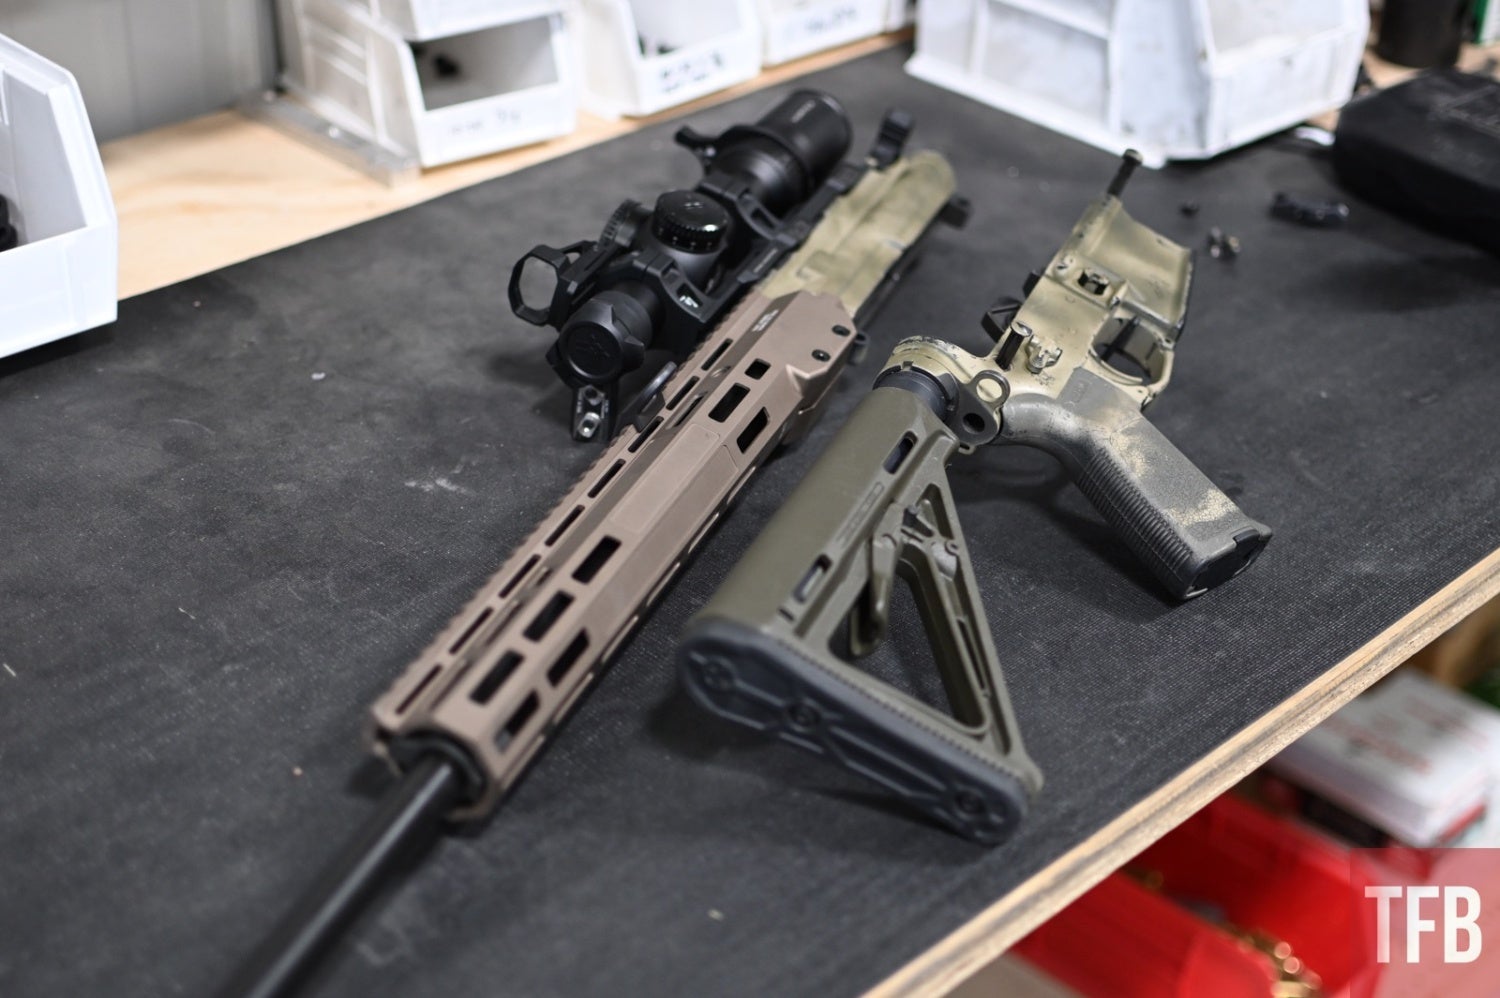
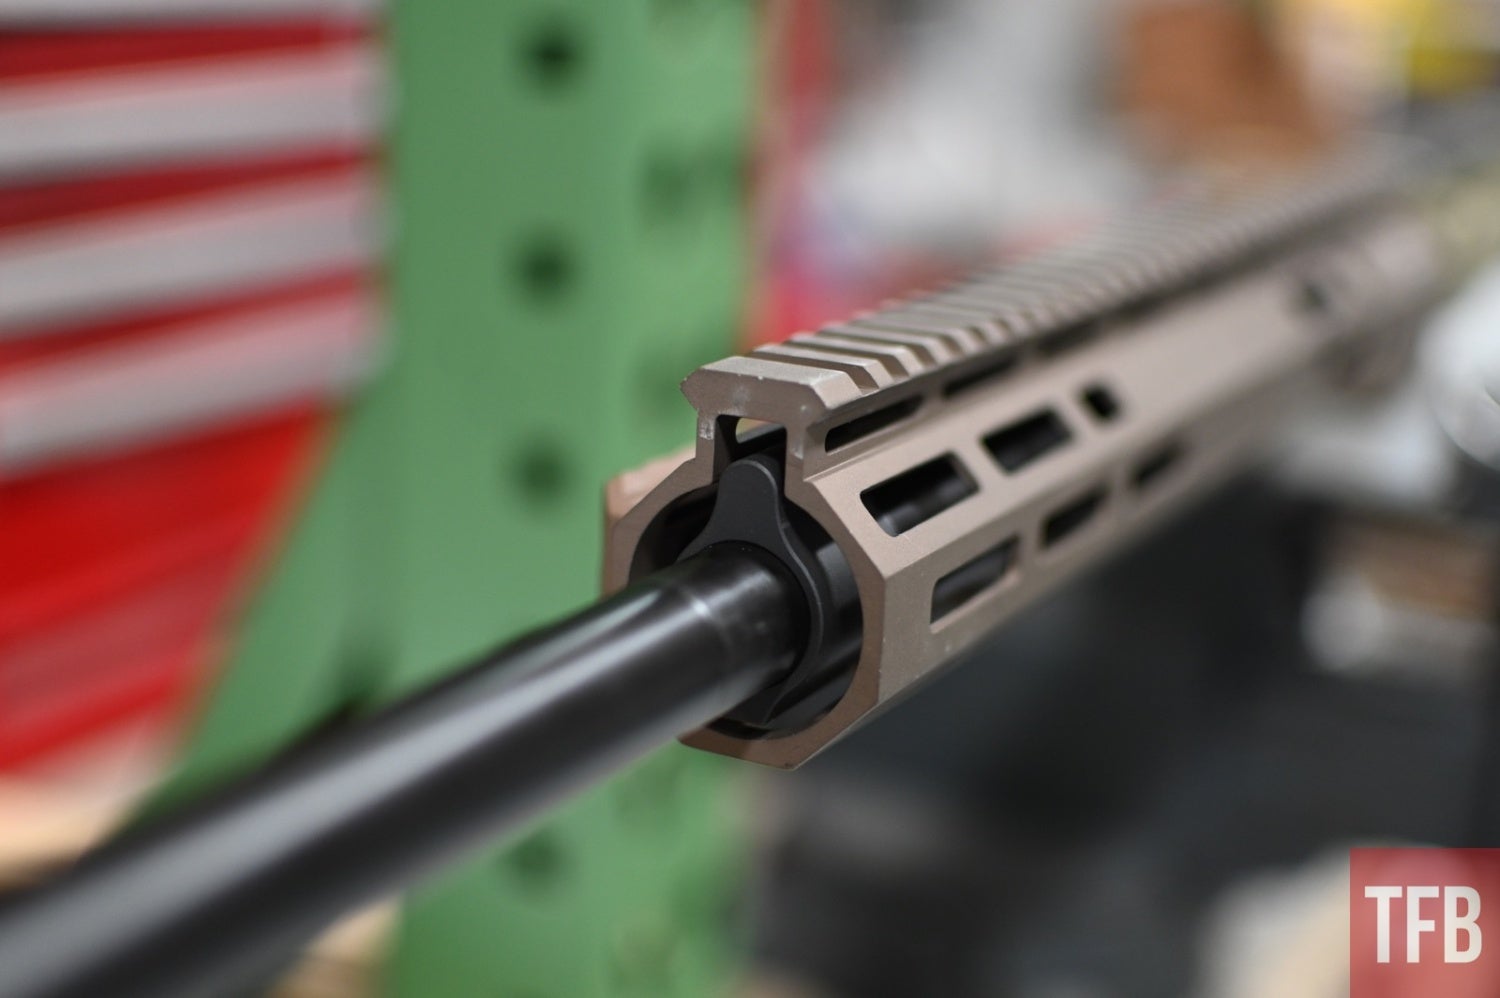
Probably the easiest step is installing the handguard. Slip it over the barrel and tighten it down. This is a Ripcord Industries LDR1.5, which gives me plenty of M-LOK options, as well as a great-looking gun. It secures to the rifle using two T27 mounting bolts
Be sure ahead of time that the handguard will clear your gas block. While thin rails are great, things can get pretty tight in there.
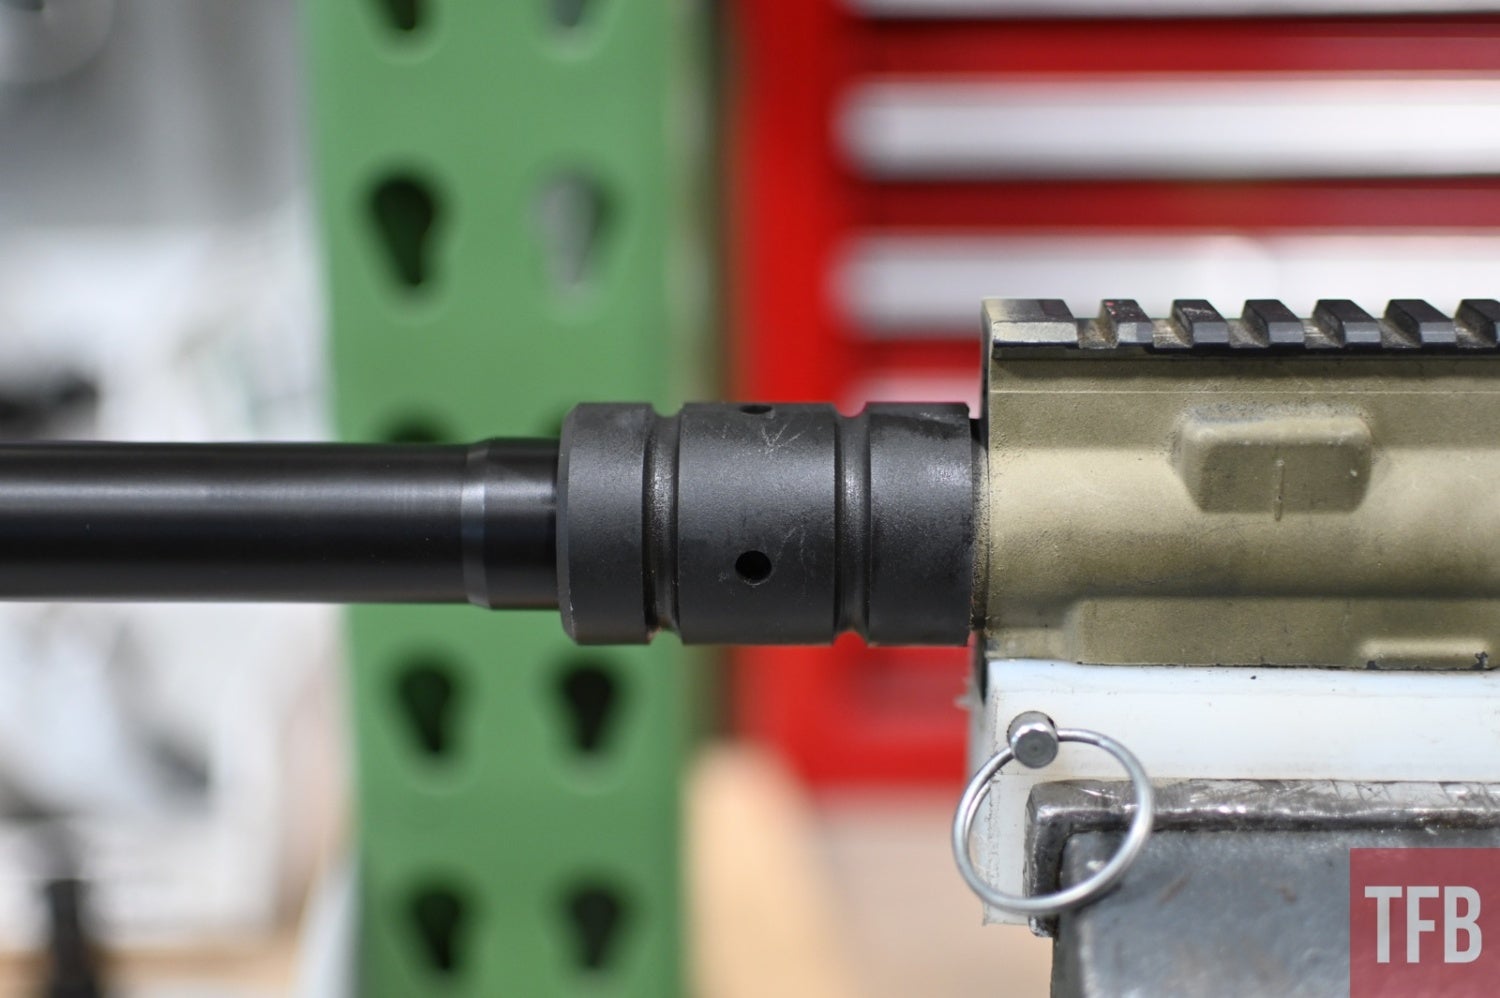
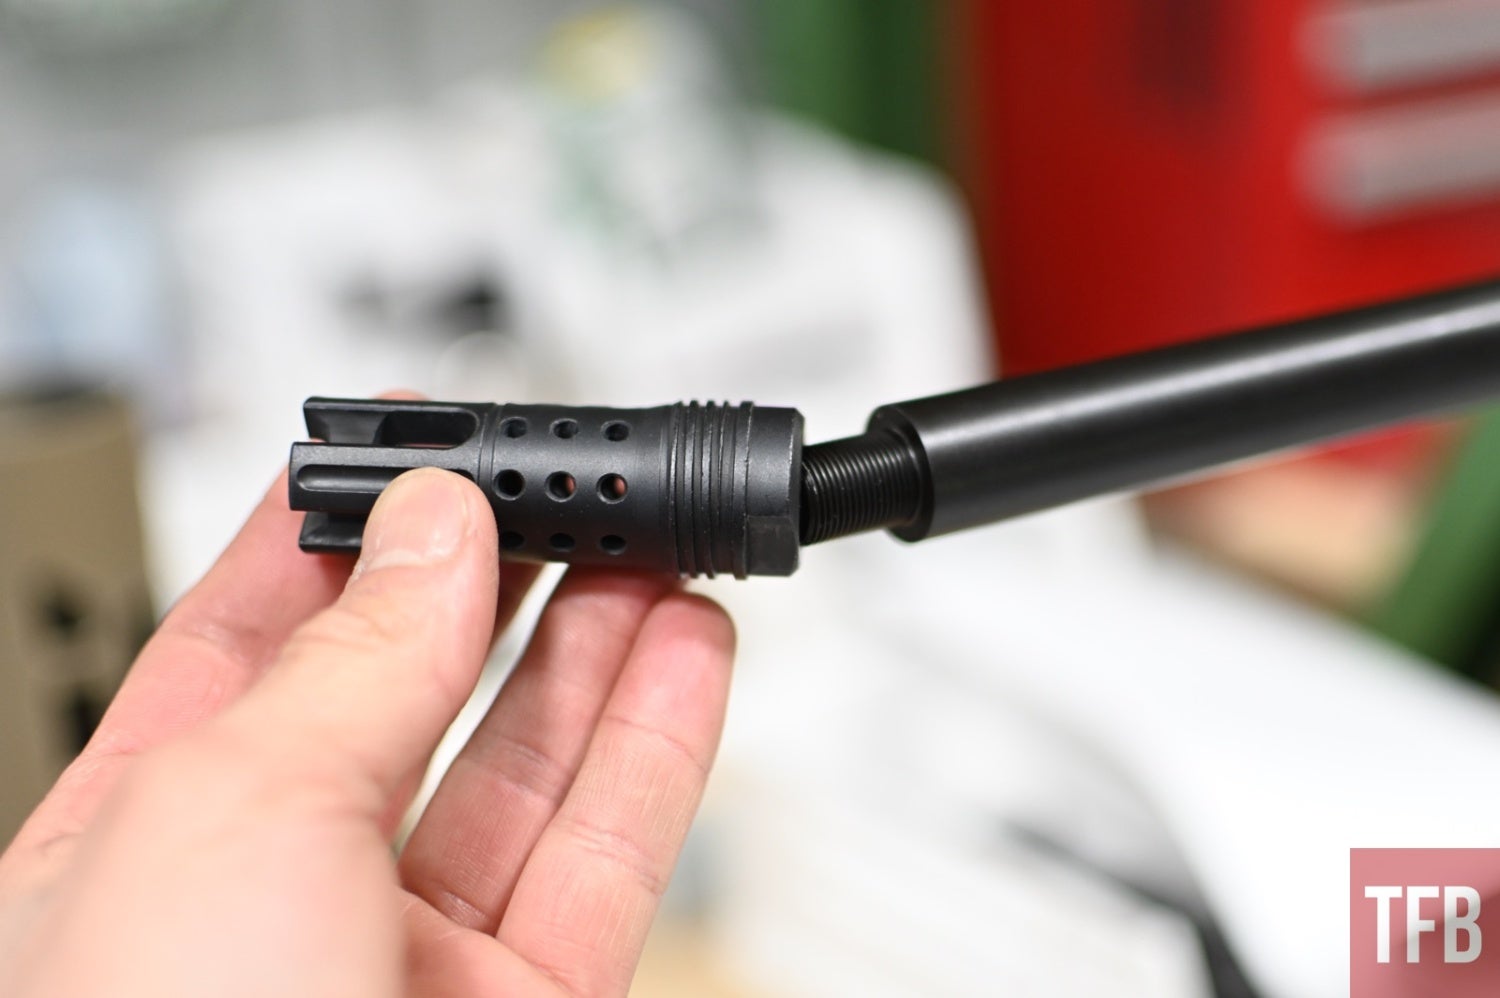
Step 4: The Muzzle Device
This will probably end up with a can on it at some point, but for now, a brake will be the finishing touch on the barrel. This is the one that comes with the Radical Arms Sinter suppressor, but can be ordered on its own, too.
Step 5: Optics
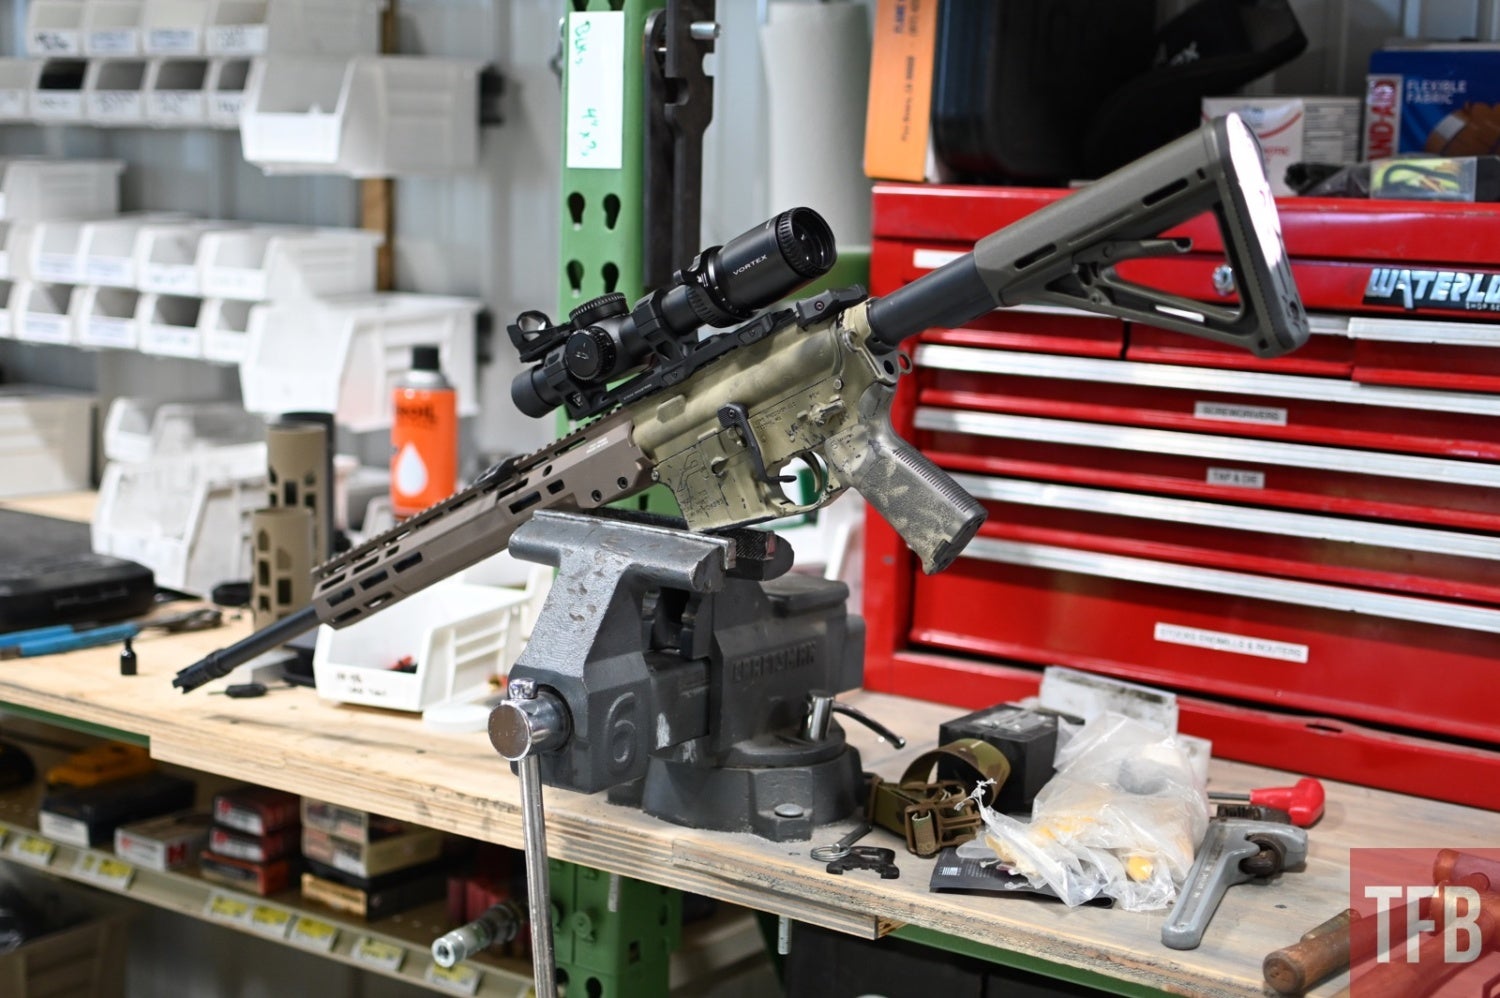
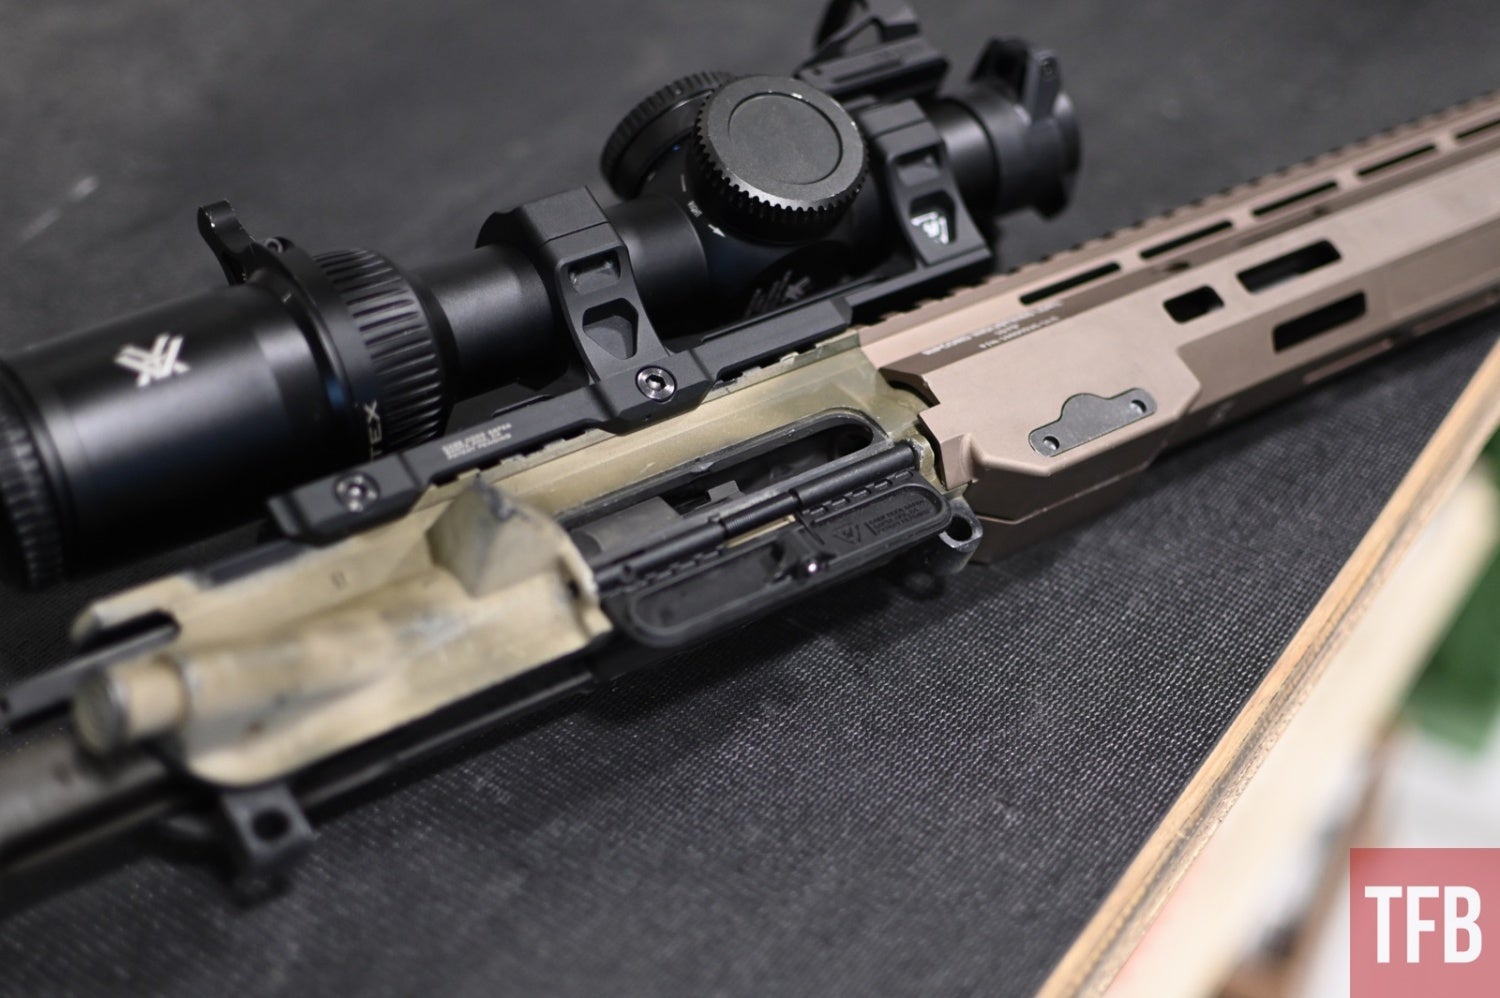
What’s the point of a long barrel if you can’t see anything? First to go on was the Adjustable Scope Mount from Strike Industries. I’ve yet to really dive into this mount, but first impressions show that it’s sturdy and I really like the adjustment feature.

The glass is a Vortex Strike Eagle 1-8x FFP. First focal plane is the best focal plane. I might throw on the 3-18x Strike Eagle, but the 1-8x is still very capable. Up top, the Strike Adjustable Scope Mount gives you the option of a dot mounted at 12 o’clock. I had a Shield Sights RMSx lying around, so on it went. I like the large window, though I wish the auto brightness feature favored the brighter side.
Step 5: Finishing Touches
This bolt carrier group is the original one that came with the gun. It’s dry as a bone and has more than a few rounds on it, but it just keeps kicking. It’s topped with a Strike Industries Latchless Charging Handle.
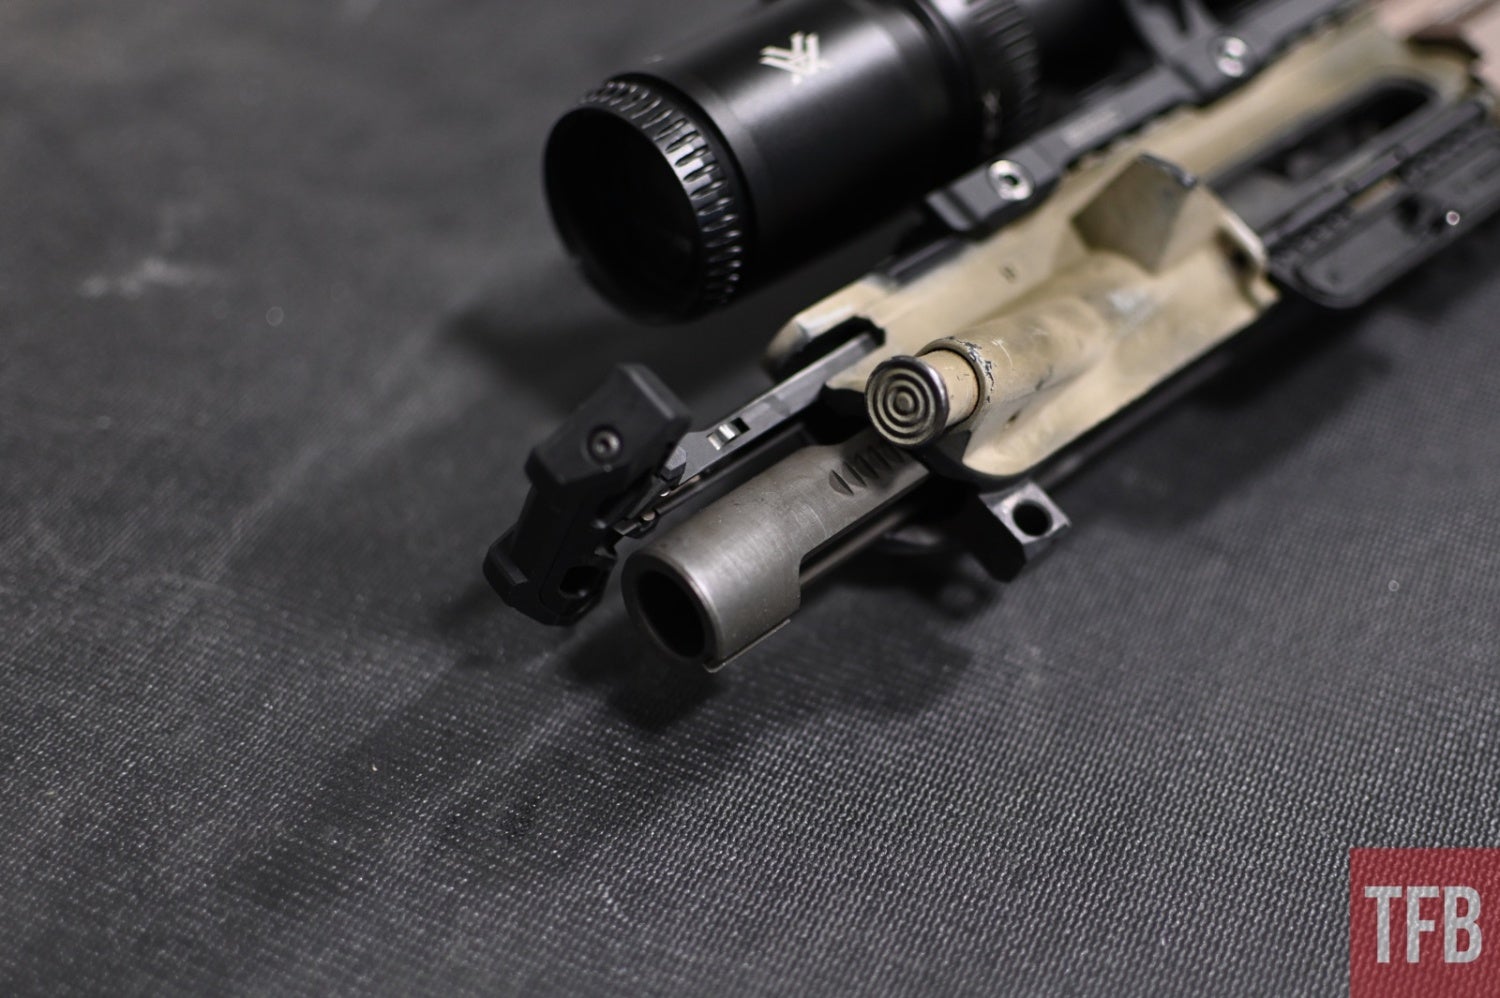
I also swapped out the original metal dust cover with a Strike Ultimate Dust Cover.
All Dressed Up
With those final details in place, the upper is complete. There will definitely be some changes moving forward, but I’m going to start running it just like this. This upper will live on this Aero lower. It has a Magpul MOE grip. I’ll be swapping that for a Die Free Co Kung Fu Grip once it arrives. The CTR stock is good enough to party, and will probably find itself altered, as well. A cheek riser would be a big help.
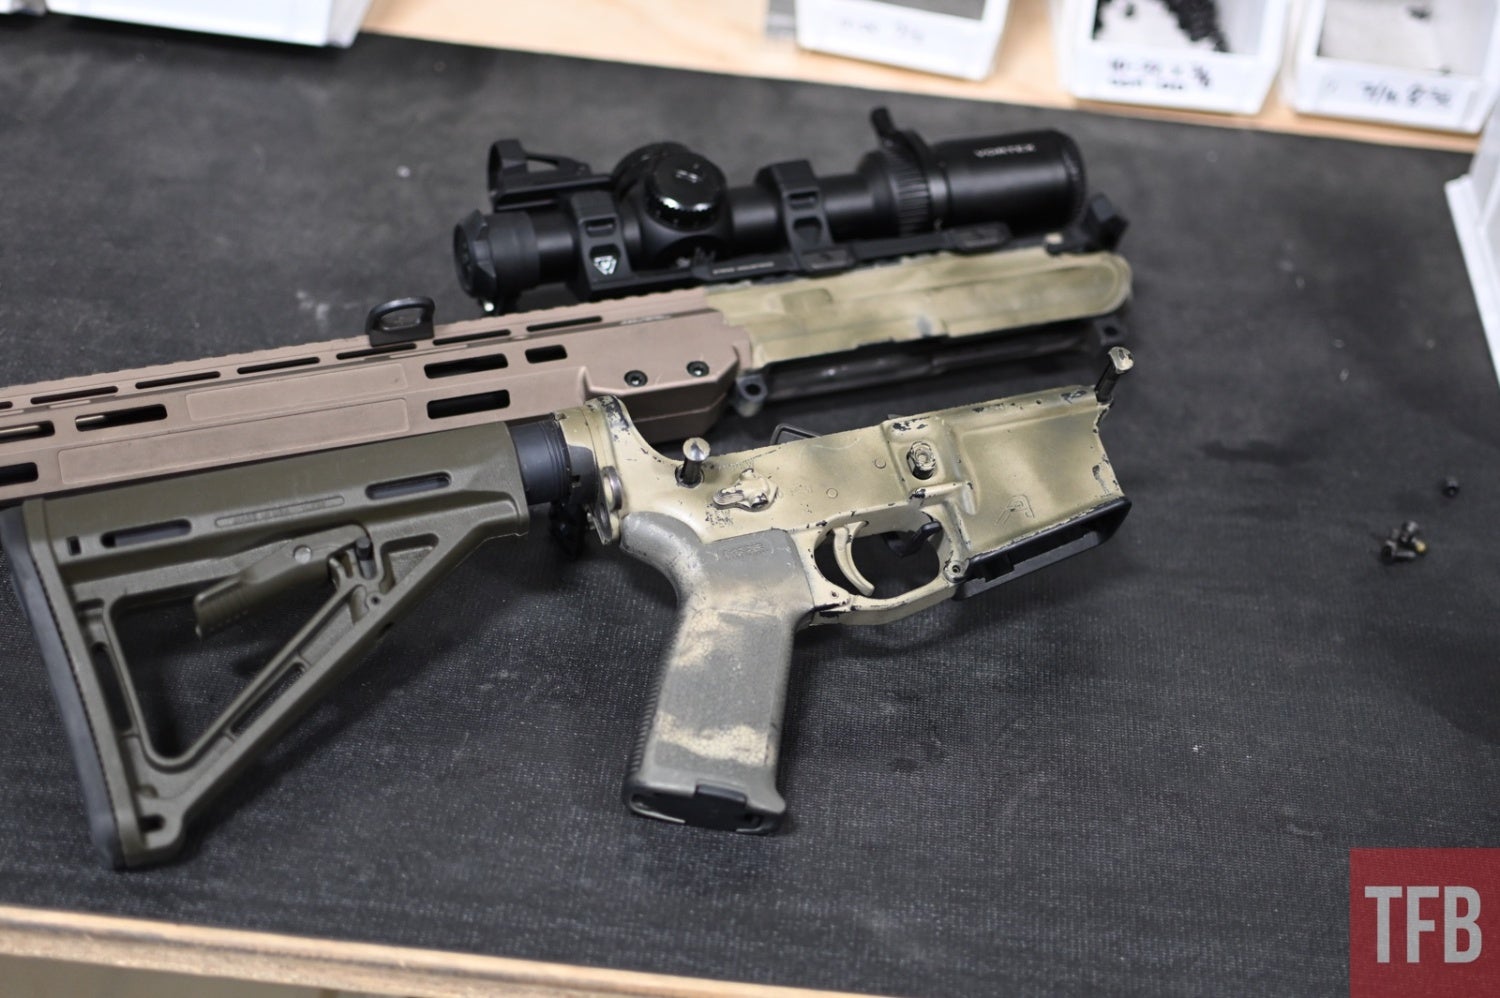
At this point, all she needs is a bipod and a magazine.

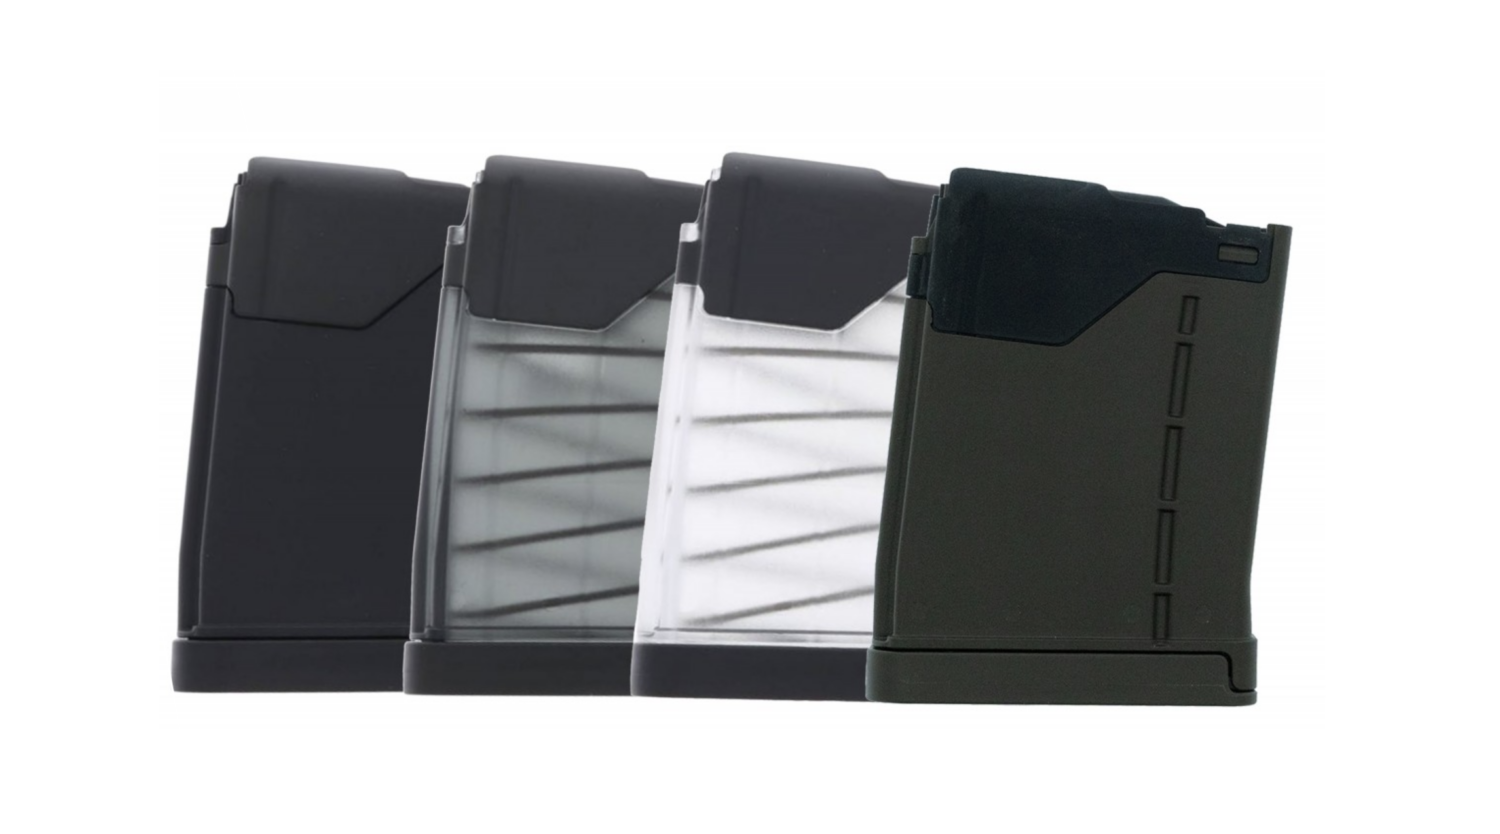
I live in Colorado, so legal magazines are limited to 15 rounds. On a precision gun, I care a lot less about standard capacity. I picked up one of the GunMag Warehouse exclusives Lancer magazines. This one is the L5 AR-15 .223 / 5.56 10-Round Advanced Warfighter Magazine. I like having additional clearance when lying prone.
I’m very excited to put this gun through its paces. On top of that, there is some custom paint happening soon, so keep your eyes peeled for part two. Thank you for reading.