 Your Privacy Choices
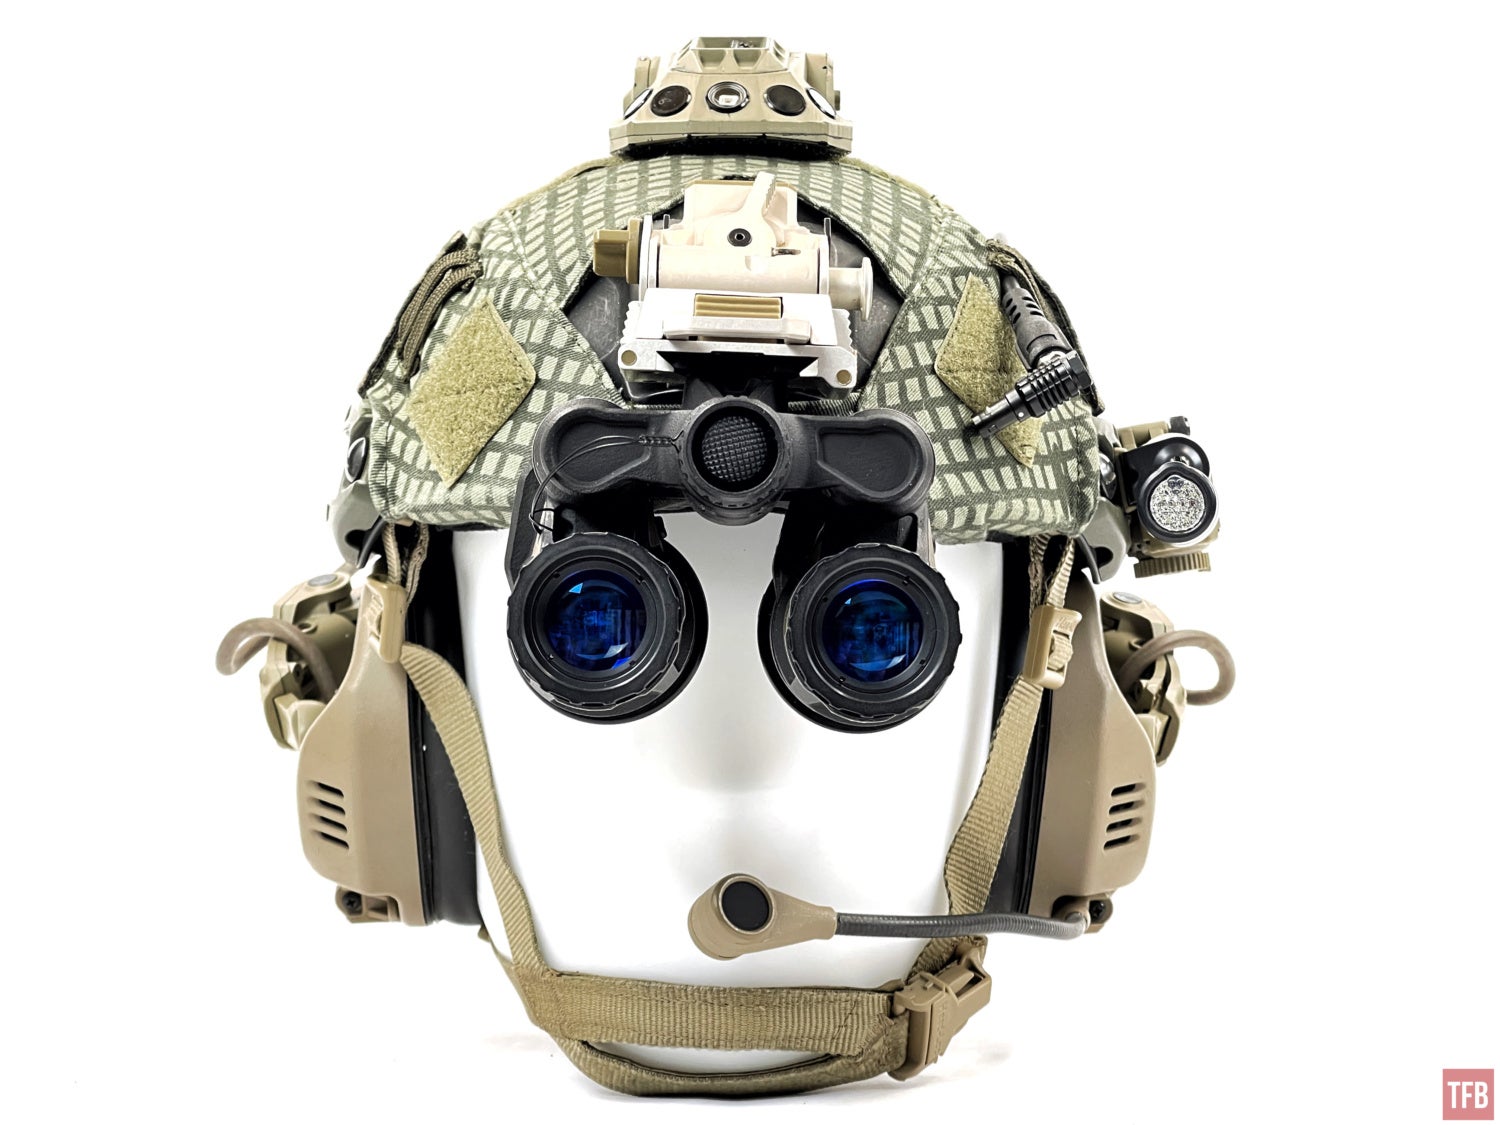
Salutations and a warm welcome on this Friday night. Last week we took a look at the Wilcox RAPTAR S. Well, today we have something that has been long awaited from Nocturn Industries, their TAPB (Tanto Articulating Powered Bridge) aka Daisho bridge.
More From Nocturn Industries @TFB
- Friday Night Lights: Nocturn Industries Chimera-10 Articulating ANVIS-10 Bridge
- [SHOT 2023] Nocturn Industries Is Going Metal – Manticore and Samurai
- Friday Night Lights: Nocturn Industries UANVB-OC and Micro
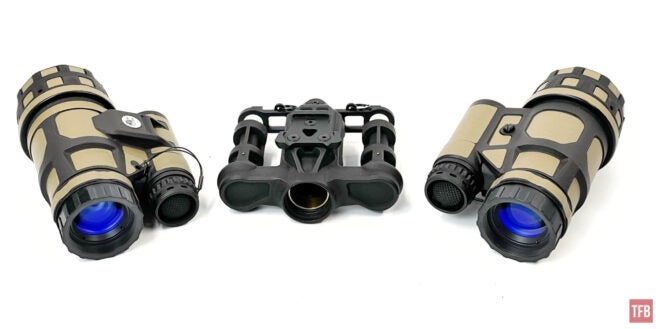
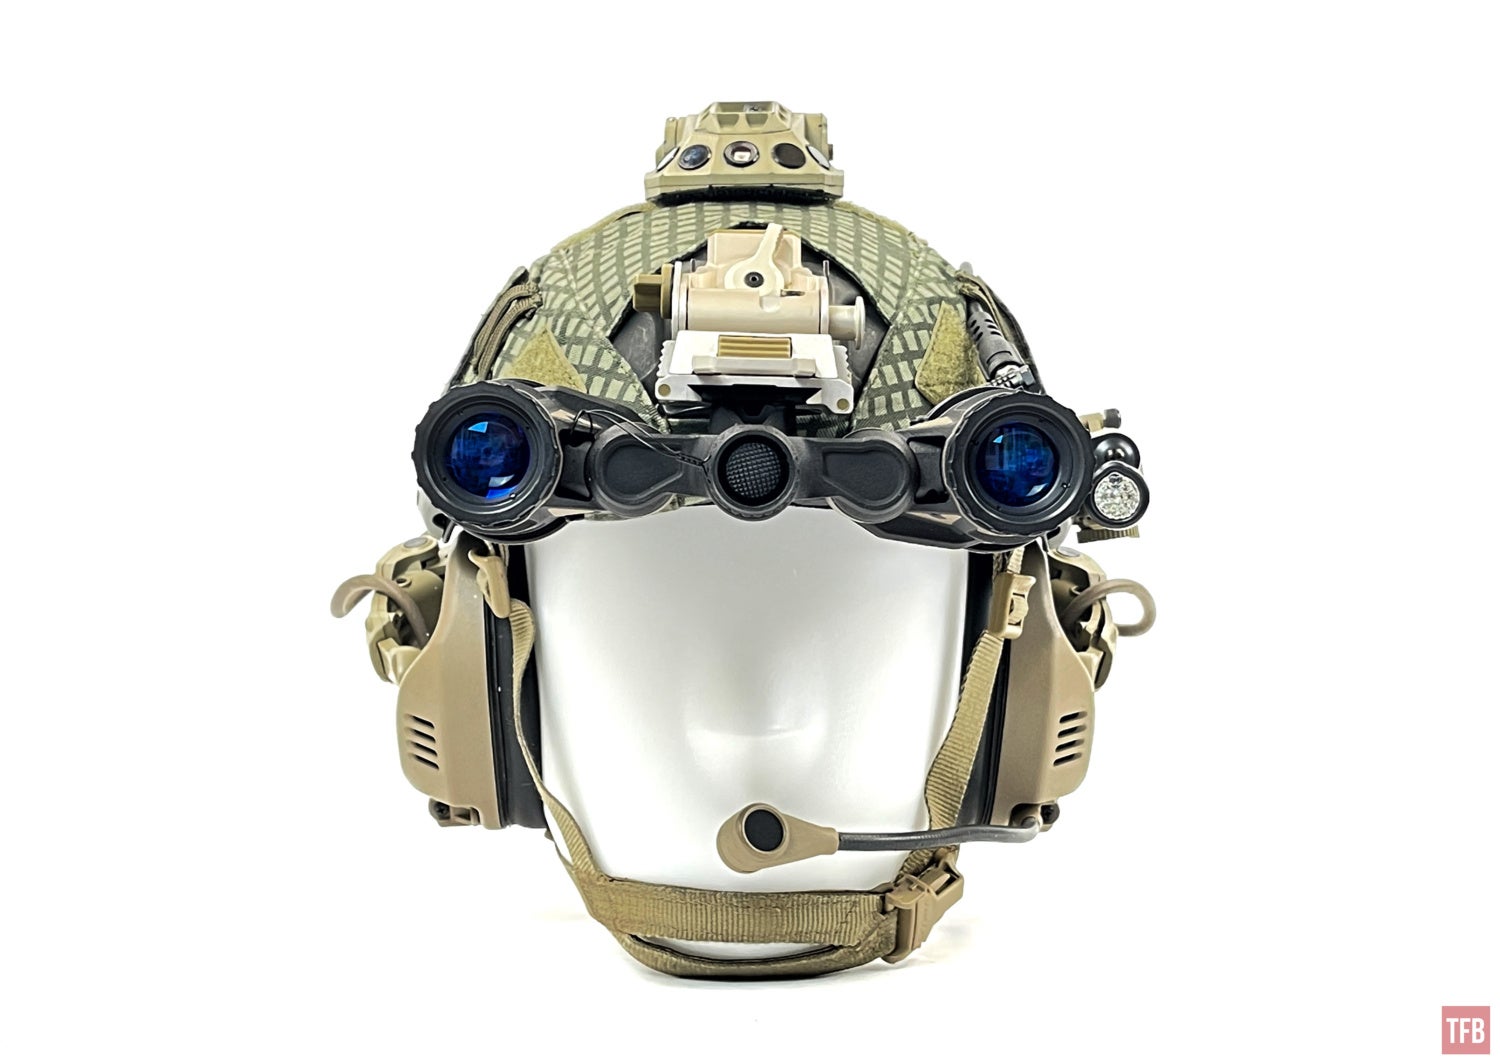
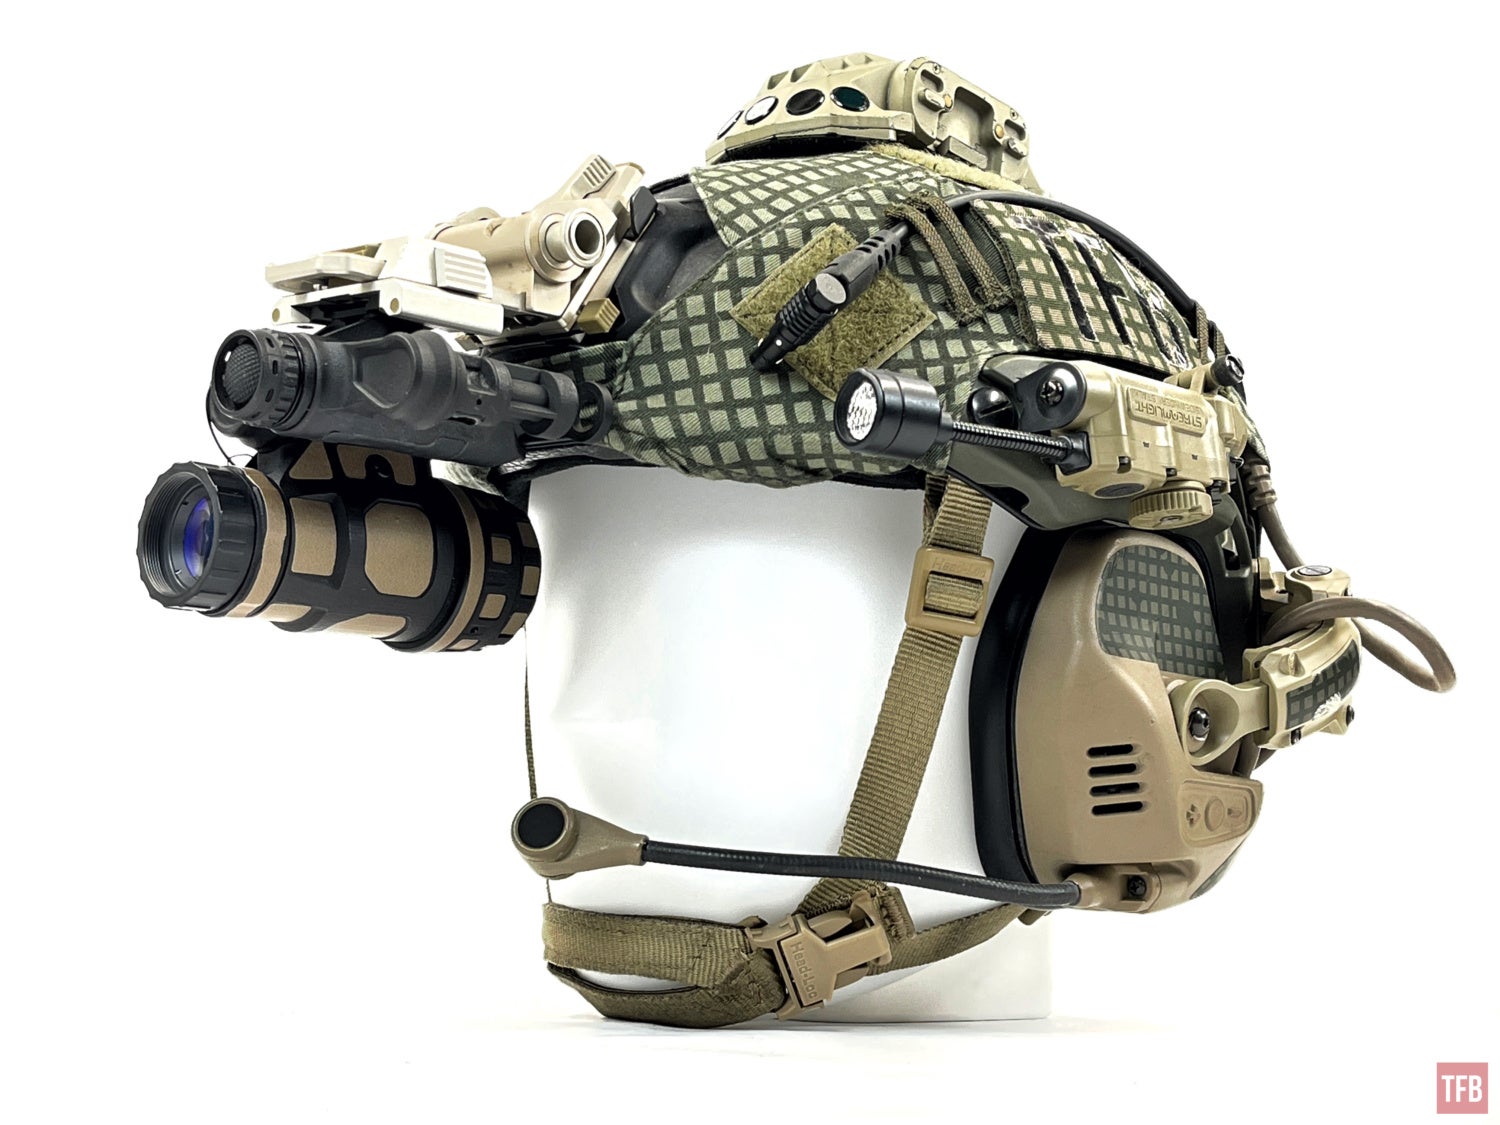
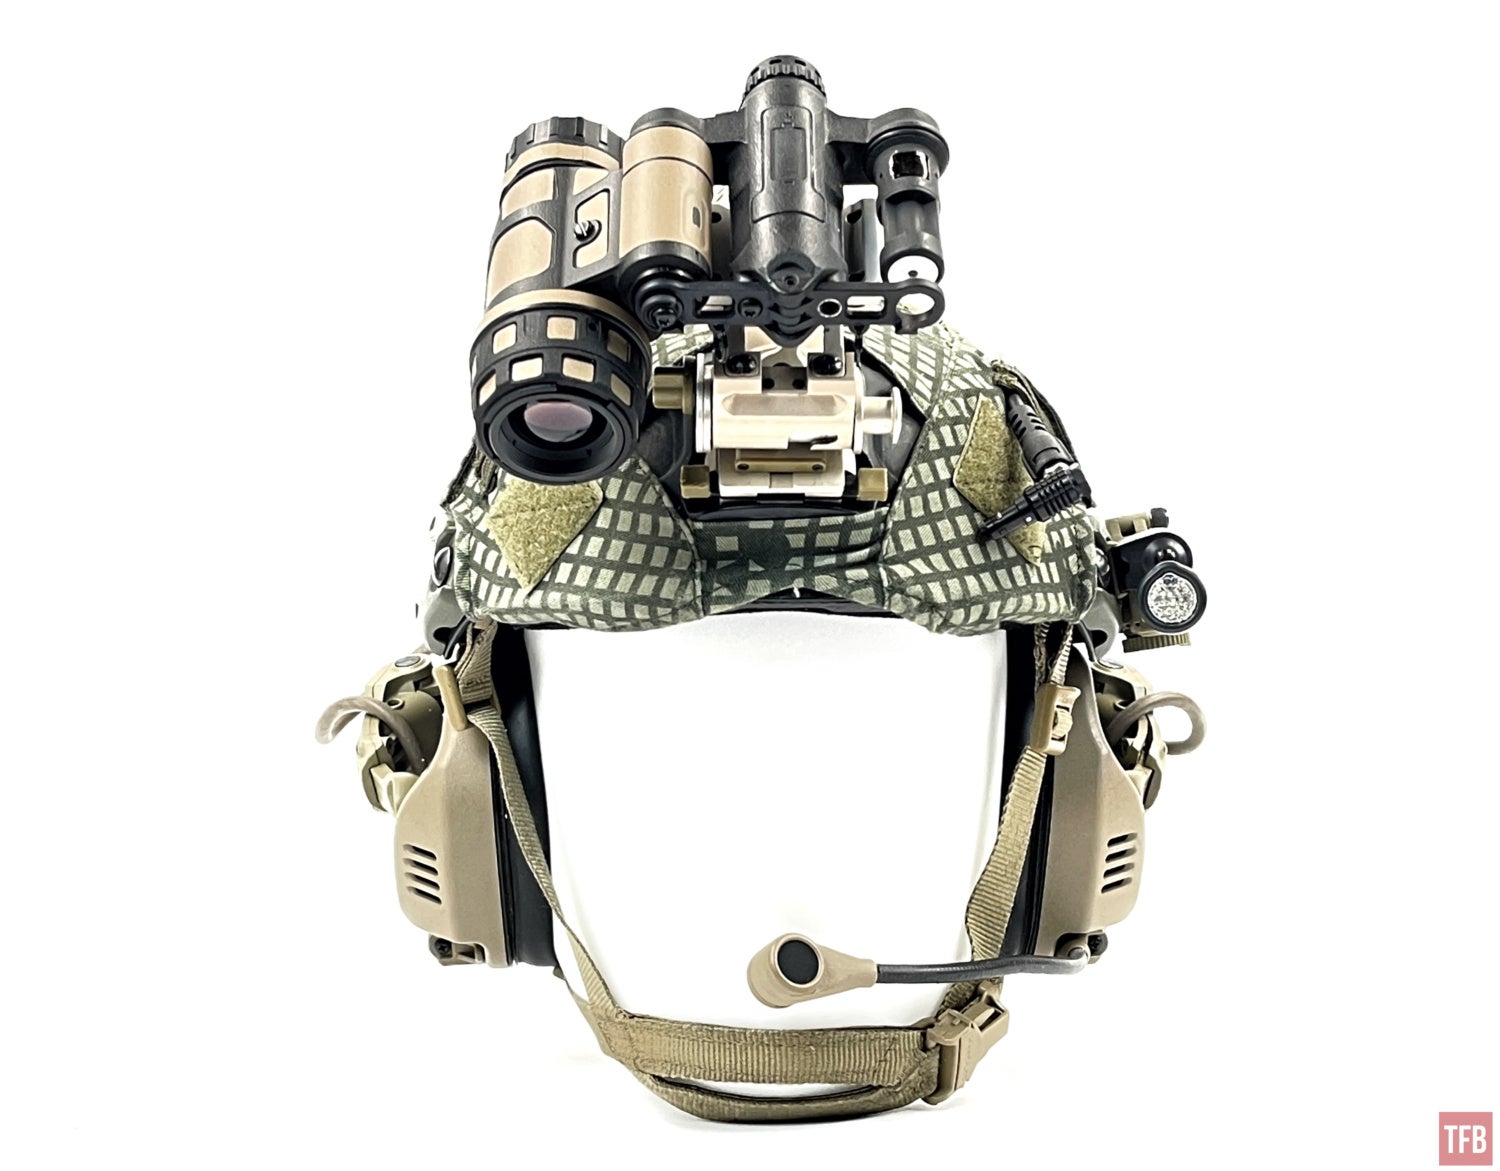
Tanto Articulating Powered Bridge AKA Daisho
When two Tanto Monoculars love each other very much, they want to join in blissful harmony.
I reviewed the Nocturn Tanto monocular over a year and a half ago. Back then Jeff at Nocturn told me he was planning on a powered bridge for dual Tantos that could convert them into a pair of binos. He called it the Daisho. Well, it is here now and worth the wait.
Before the Daisho, the only way to bridge dual Tantos was with a third-party PVS-14 bridge. Most monocular bridges simply attach two PVS-14s, or in this case, dual Tantos, using the 1/4-20 screw hole for the J-Arms. They are simple but lack power. You still have to run a battery in each monocular and have dual switches. The only powered bridge that I can think of is the TNVC powered bridge mount (PBM-A). It bolts two PVS-14s using their respective J-Arm screw holes and has leads that act like dummy batteries to deliver power to each monocular. However, the TNVC PBM-A uses articulating arms whereas Jeff of Nocturn is using the battery compartment of the Tantos as the articulation point. The TNVC PBM-A is also rather heavy at 28.3 oz built with regular single AA battery PVS-14s.
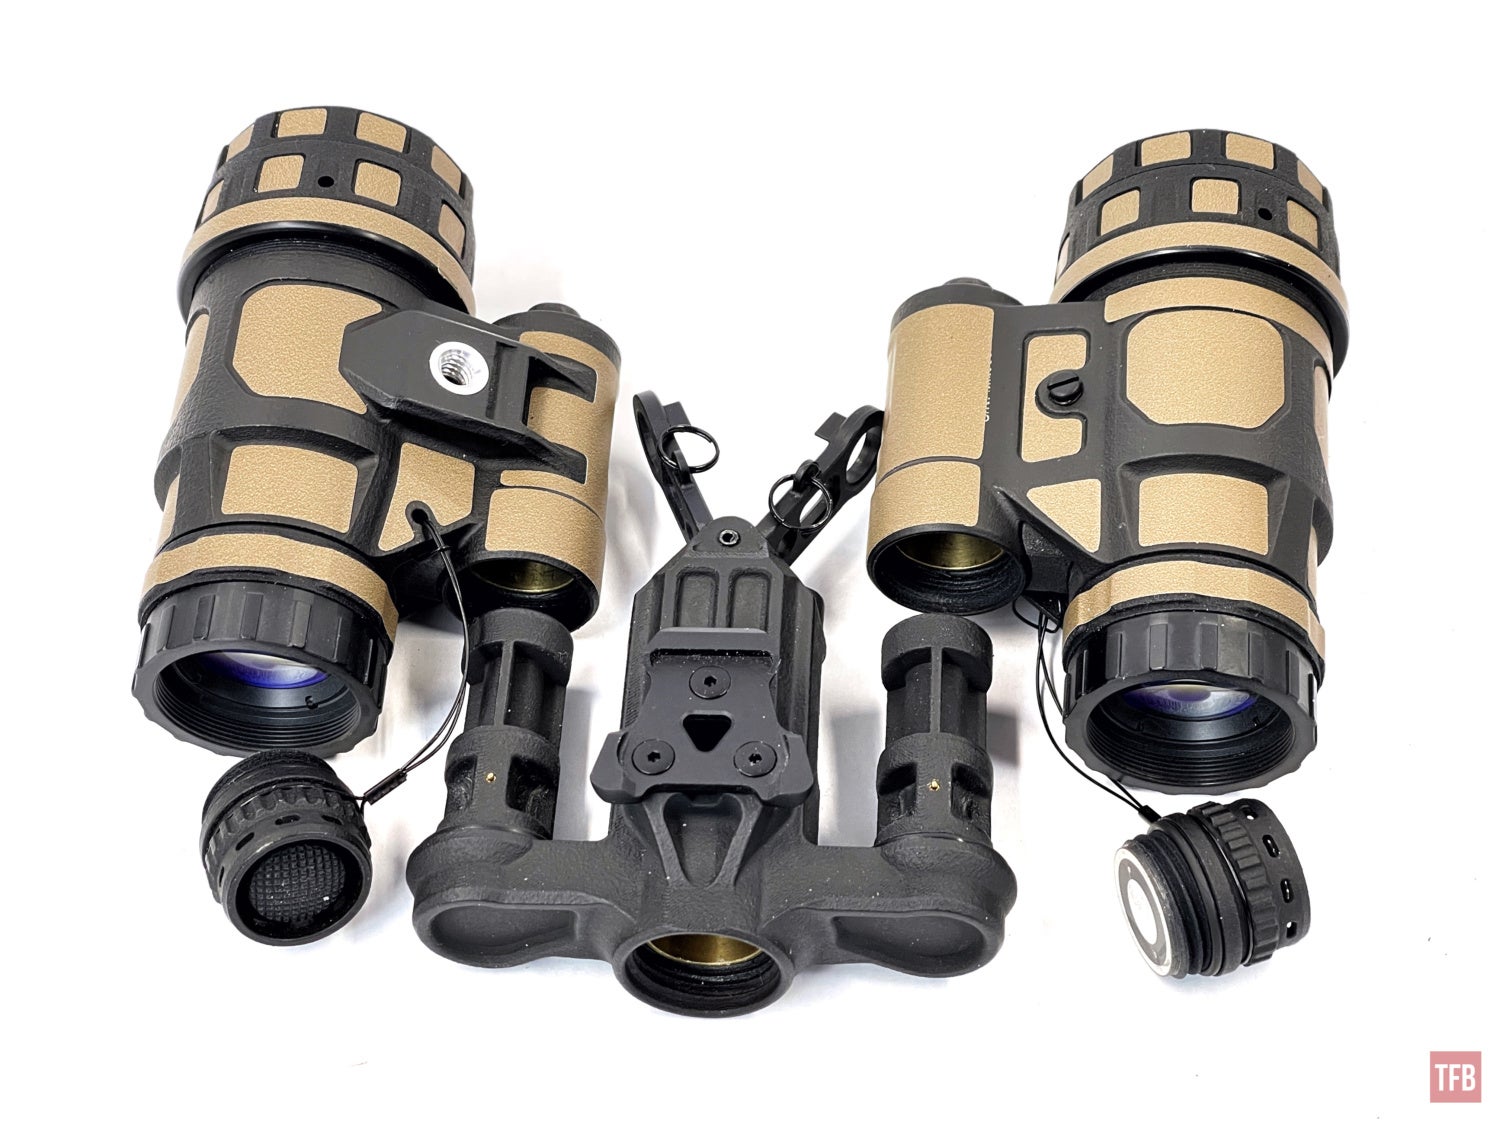
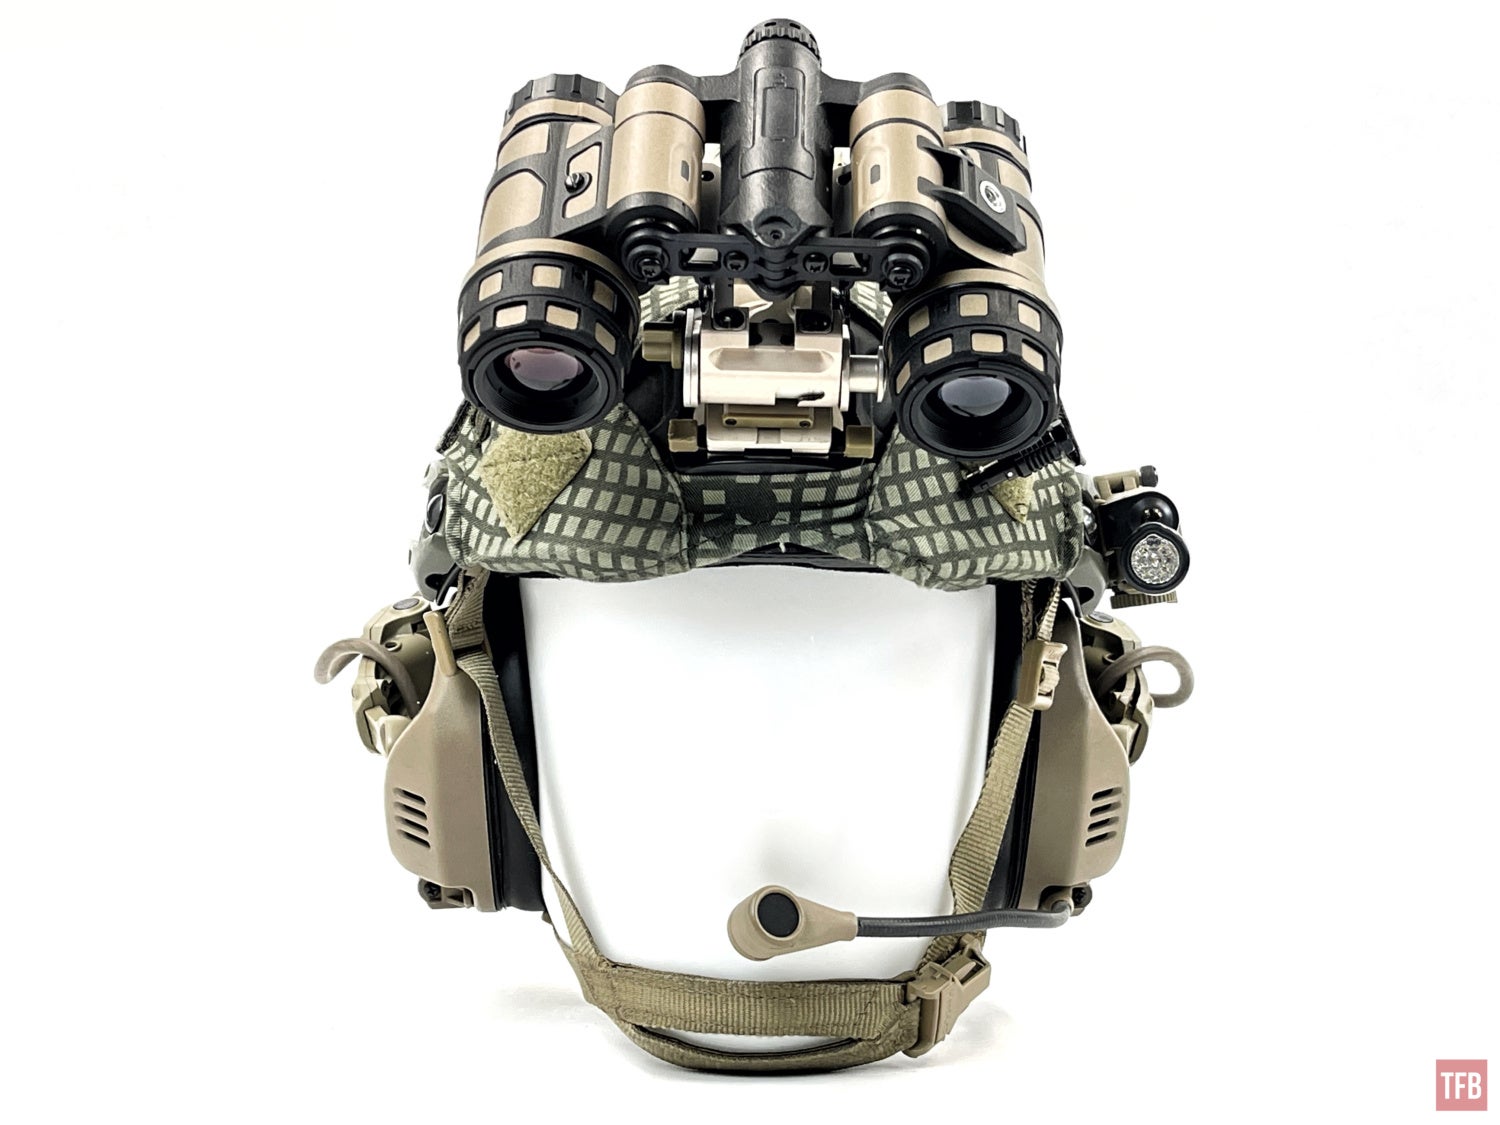
The Daisho bridge is pretty straightforward. Jeff designed this differently than any other dual monocular bridge that has been made before. The Daisho converts two Tantos into a single battery-powered binocular system.
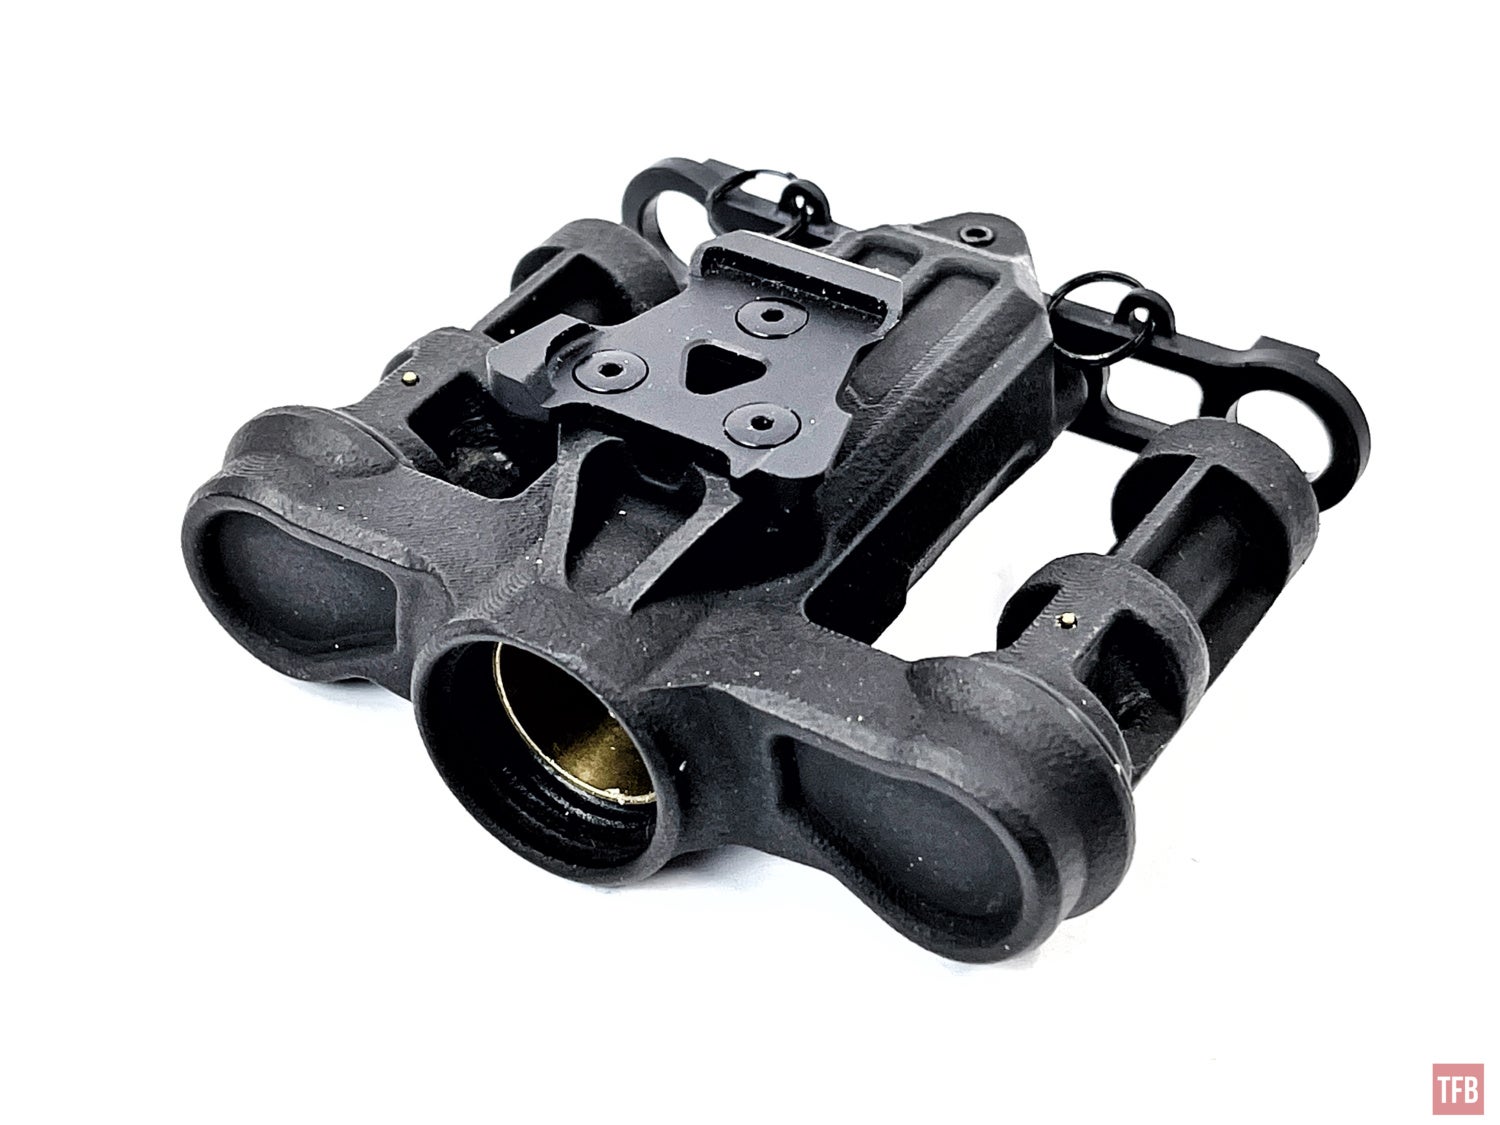
The Daisho shares some design elements with other Nocturn designs. The middle section and pupillary distance brackets are just like the ones found on their UANVB Katana housing. The bulk of the Daisho is MJF 3D printed while the dovetail and PD brackets are machined aluminum. 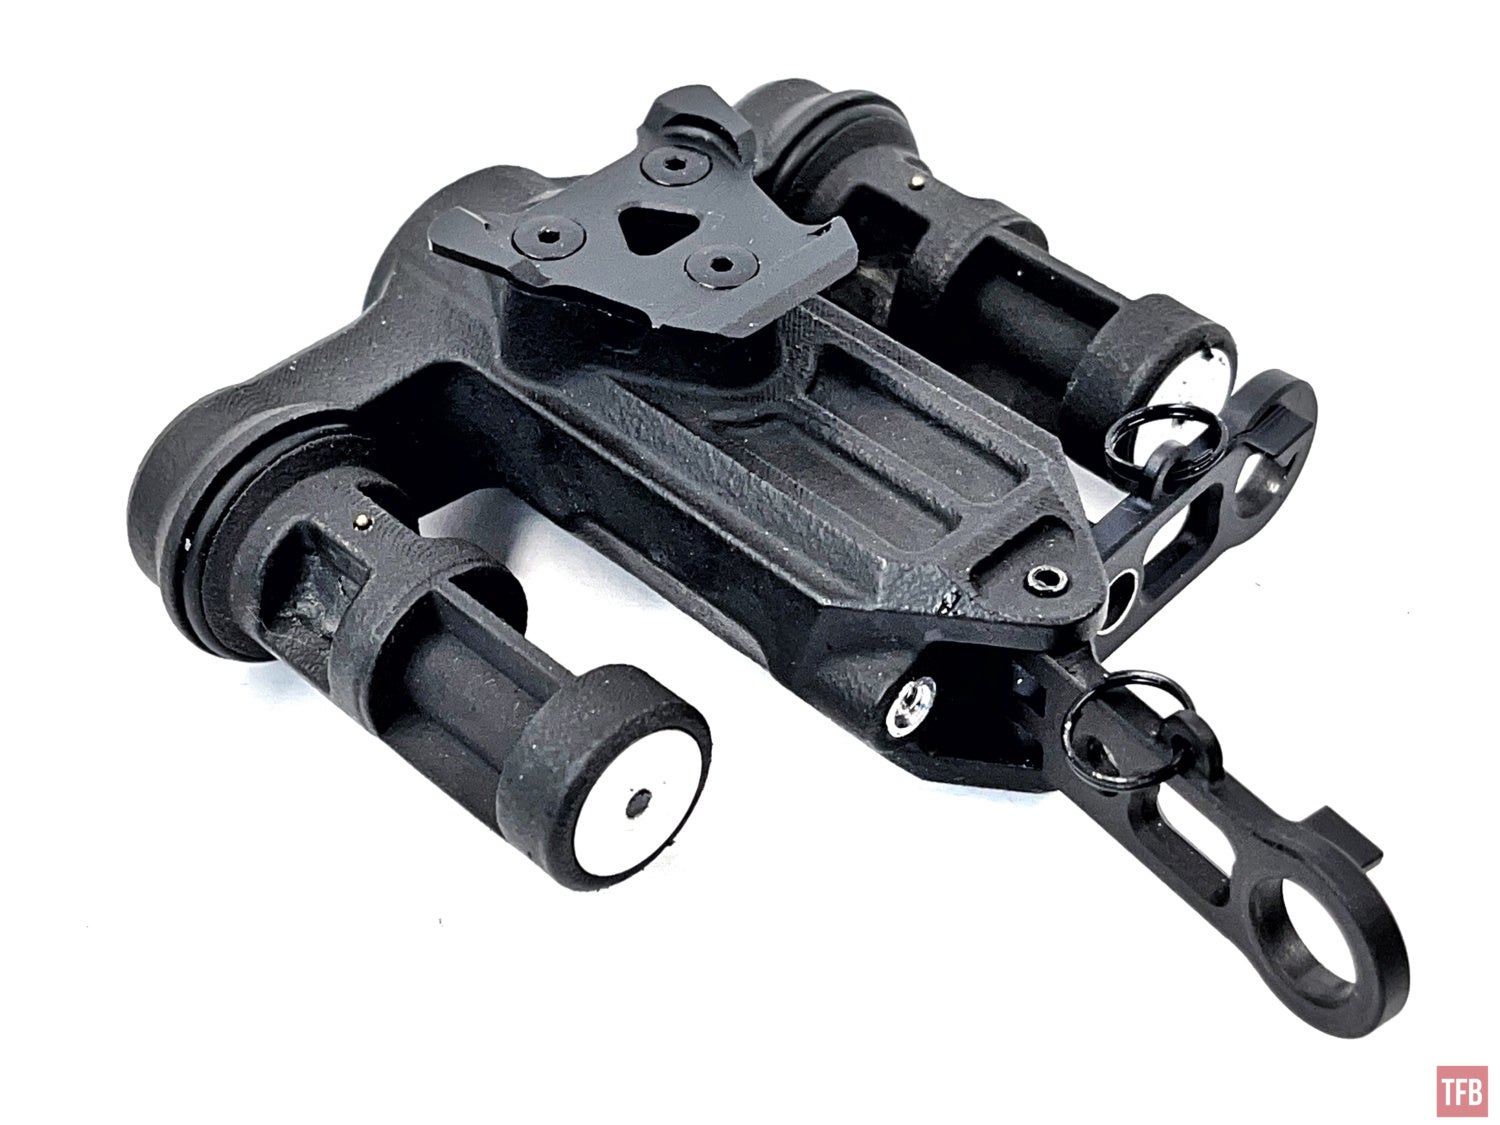
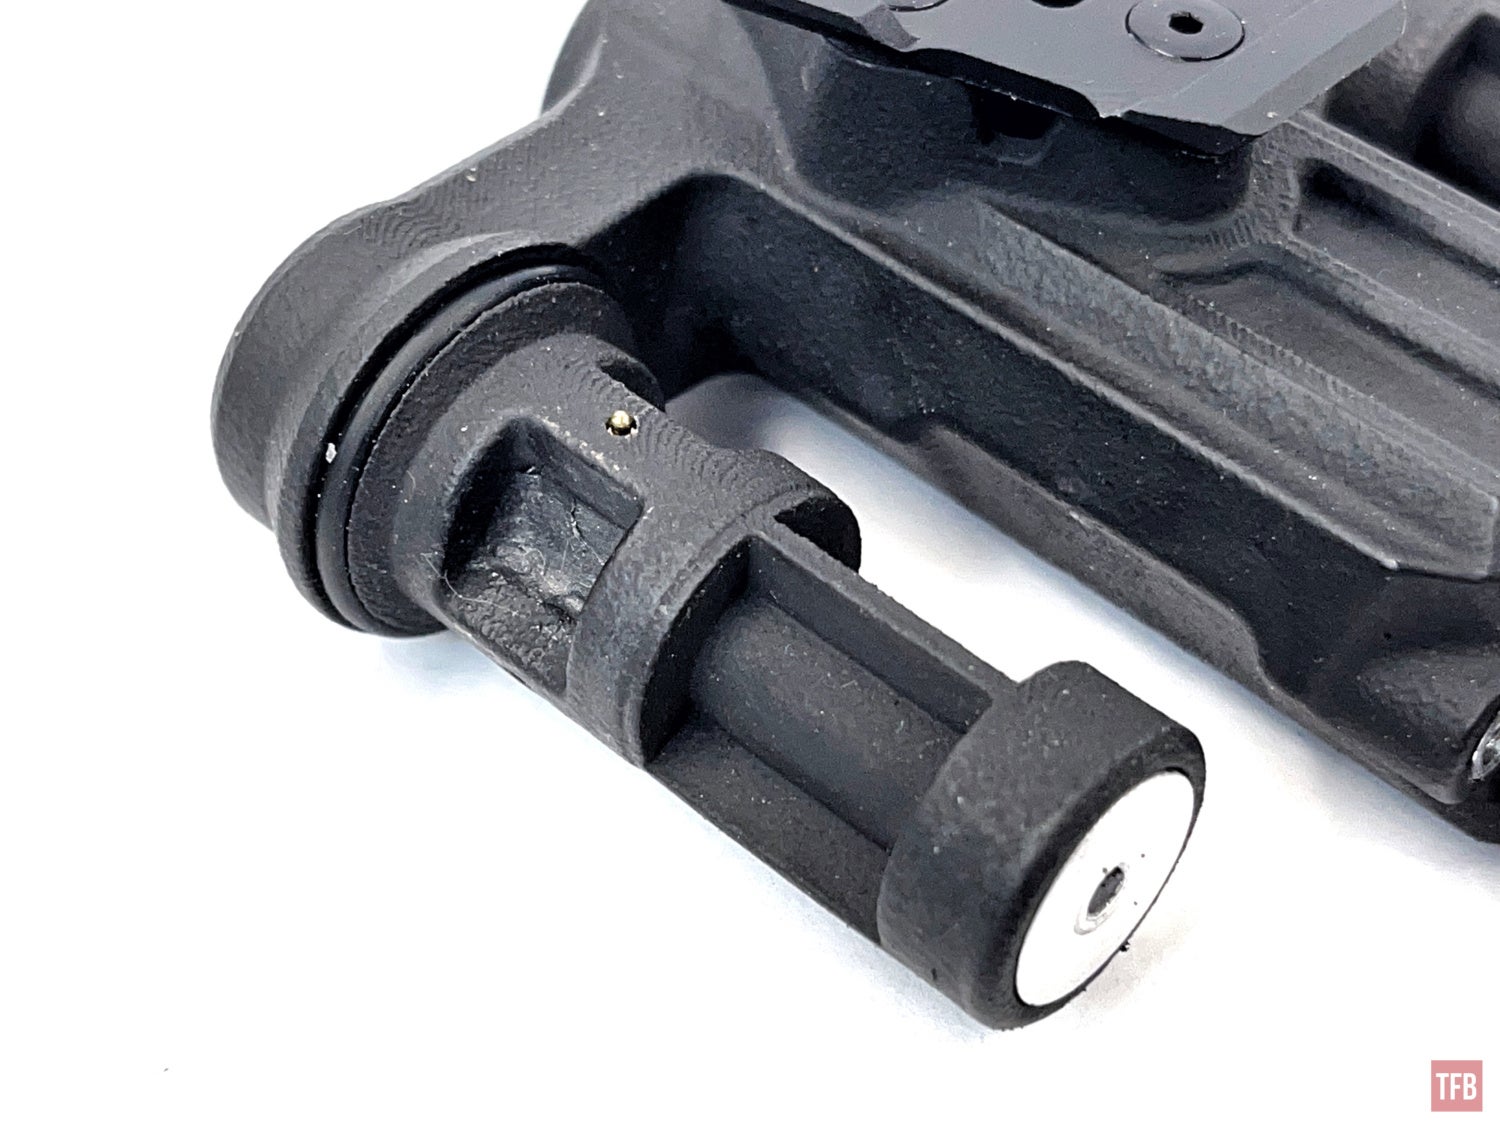
The articulation axle acts like a dummy battery delivering power to the Tanto monoculars. The rear of the axle has a conductive circular plate that acts as the negative side of the battery. Normally the battery cap of the Tanto monocular completes the circuit. Since the Daisho axle is a battery insert that plugs into the Tanto battery compartment, there is no battery cap to complete the circuit. Instead, you can see the brass pogo pin at the 12 o’clock position on the articulation axle. This touches a brass contact inside the battery compartment of the Tanto.
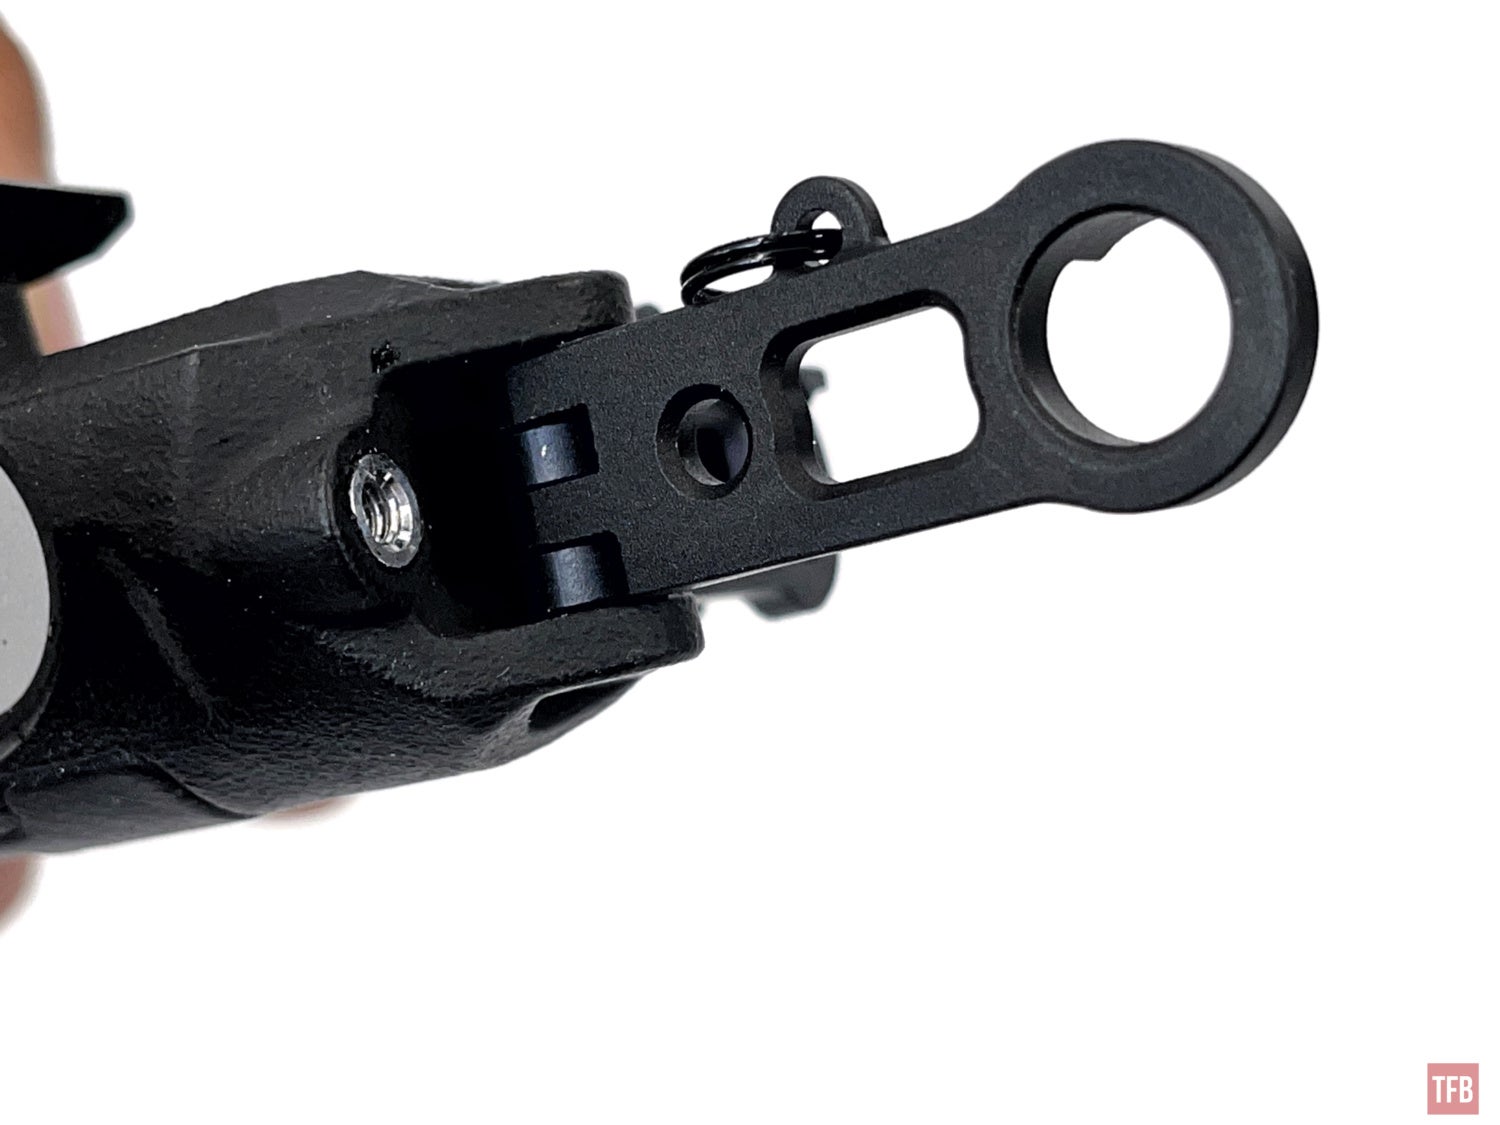
The PD brackets are hinged in the middle. Open them up and this allows you to install and remove the Tanto monoculars from the Daisho bridge.
The Daisho bridge installation requires tools. You need a Torx bit and driver or a Torx wrench. Unscrew the battery caps from the Tantos and insert the Daisho bridge axles into each battery compartment.
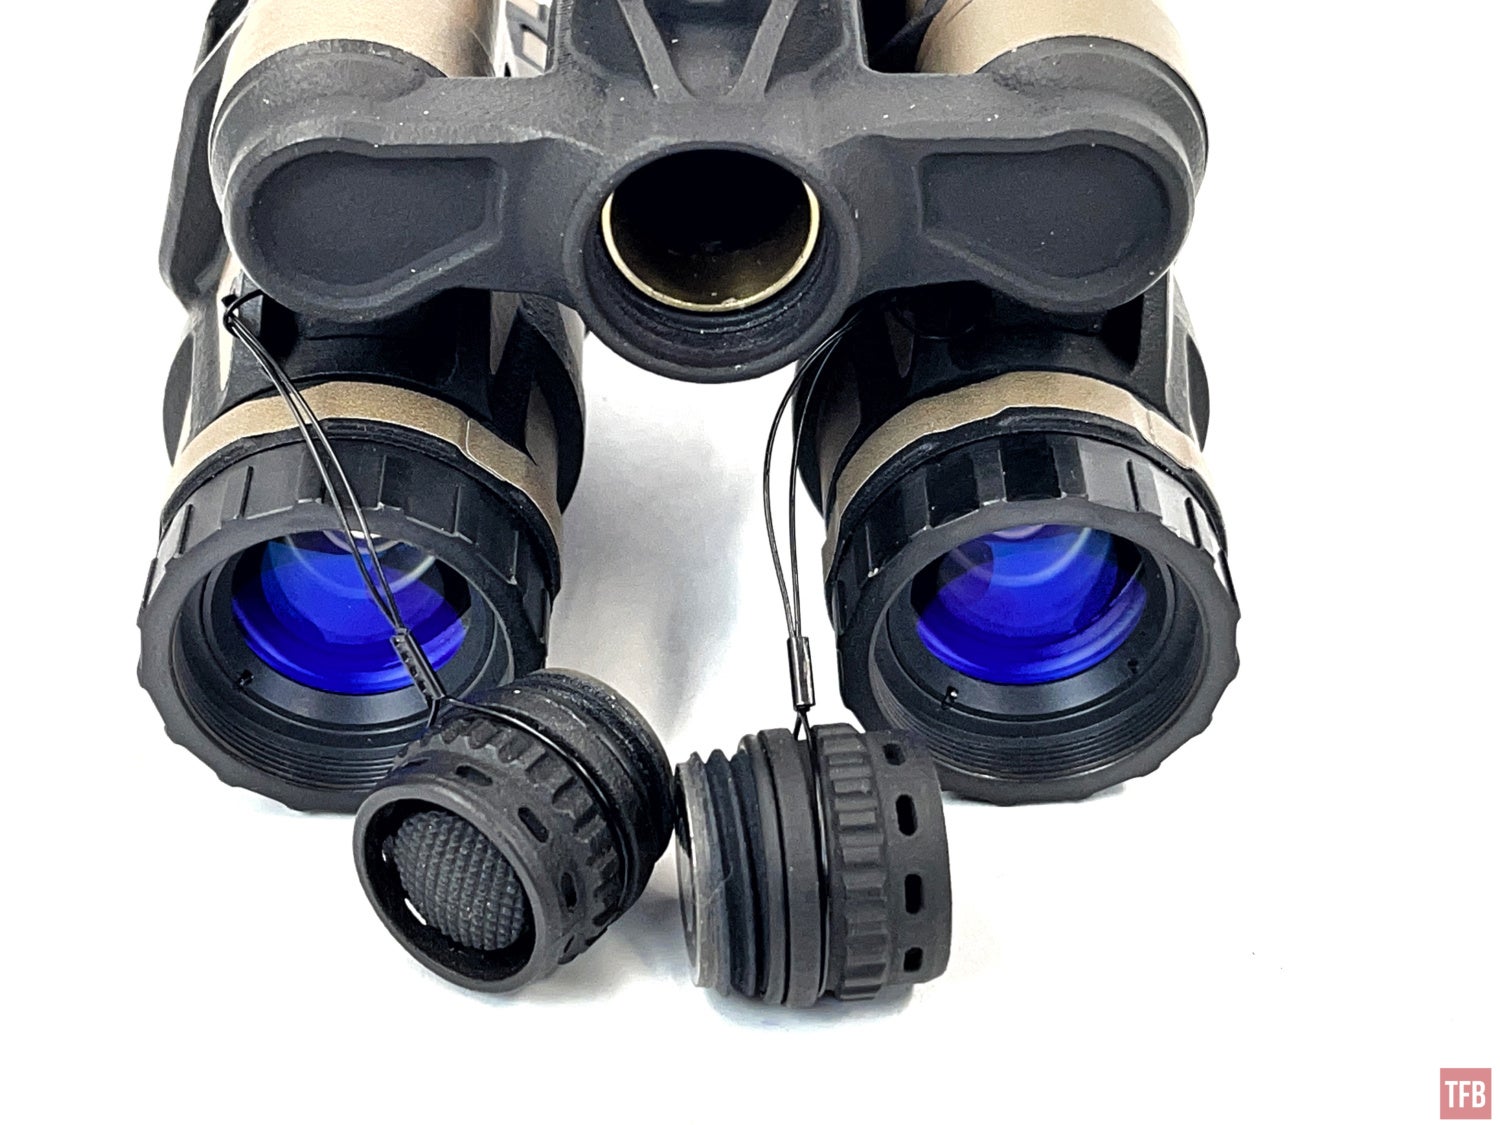
One of Tanto’s battery caps will be used as the battery cap for the Daisho bridge. I prefer to keep the one on the right side installed on the Tanto. That way if I remove the left Tanto, I can still use the right one on the Daisho bridge. You could keep the other battery cap tethered on but there is no way to store the battery cap safely. I would not want the elements to possibly damage the exposed battery cap so I rather remove it from the left monocular and store it in my NVG case.
Choose your own adventure. Which battery cap will be selected to serve and which one will be put into storage?
Removing the battery cap is rather simple, just loosen the retaining wire loop so you can loop it back over the battery cap and remove the battery cap from the Tanto. 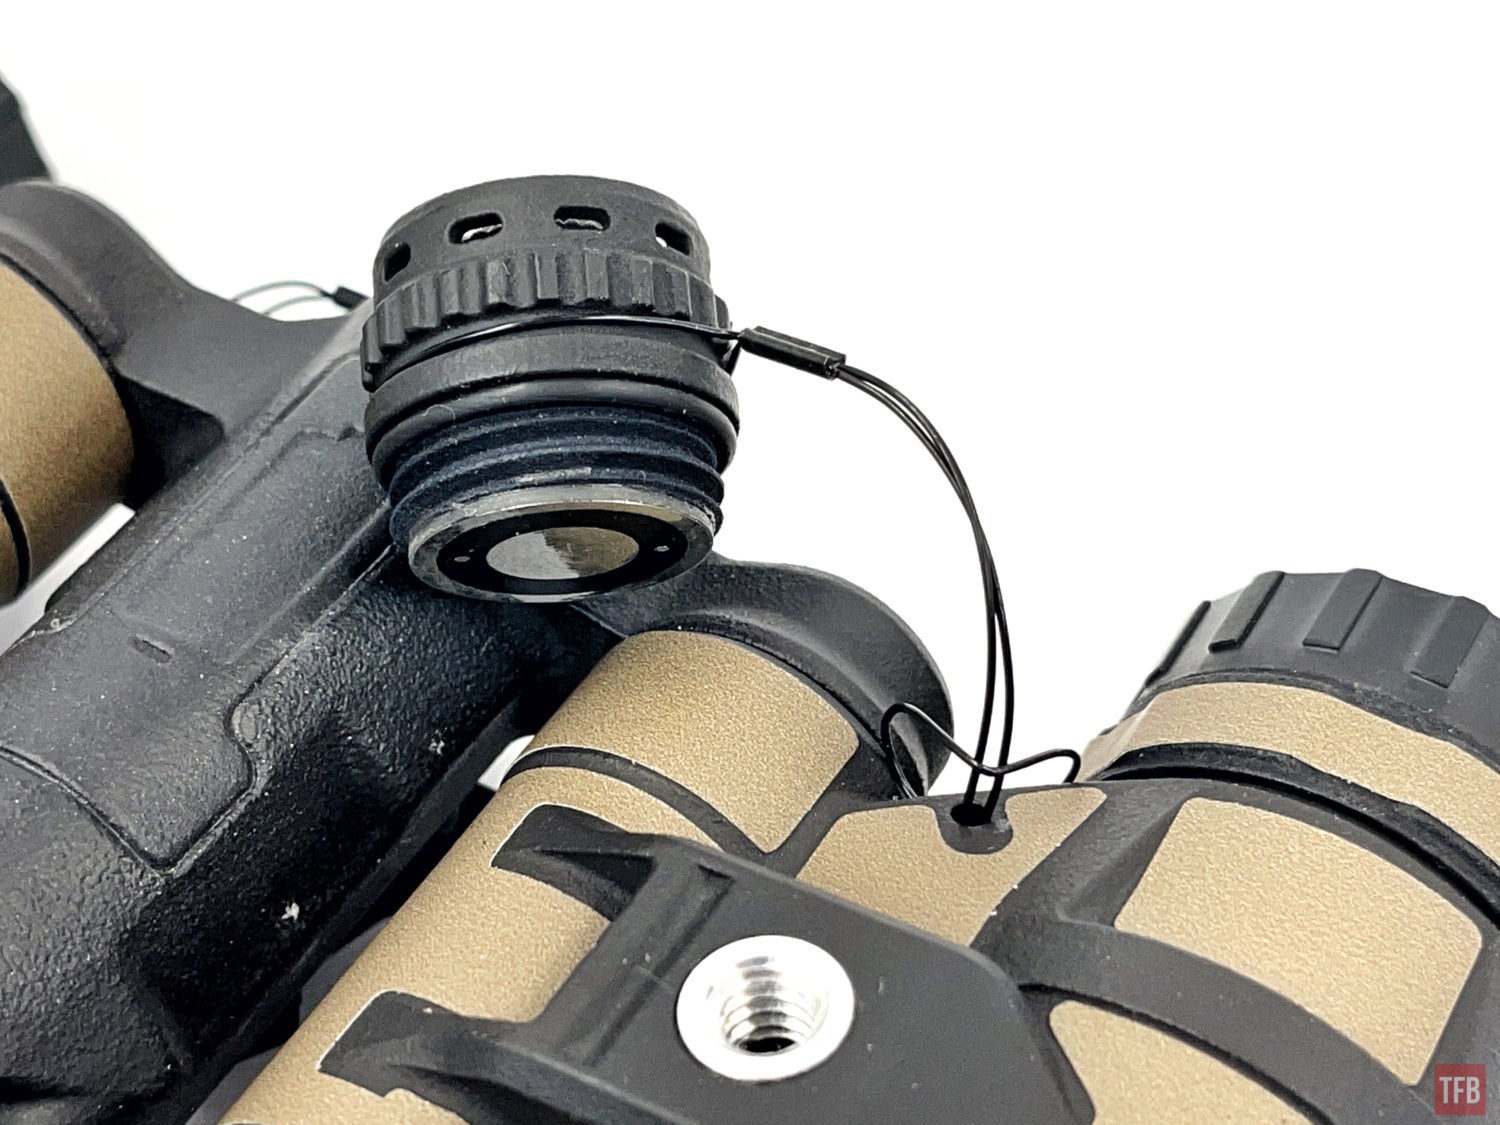
Once the Tanto monoculars are installed onto the powered axles, you need to close the PD brackets and install two screws on each side. The back of the Tanto has a threaded post. Nocturn provides a polymer washer that you need to install over the threaded post so the PD bracket closes onto it.
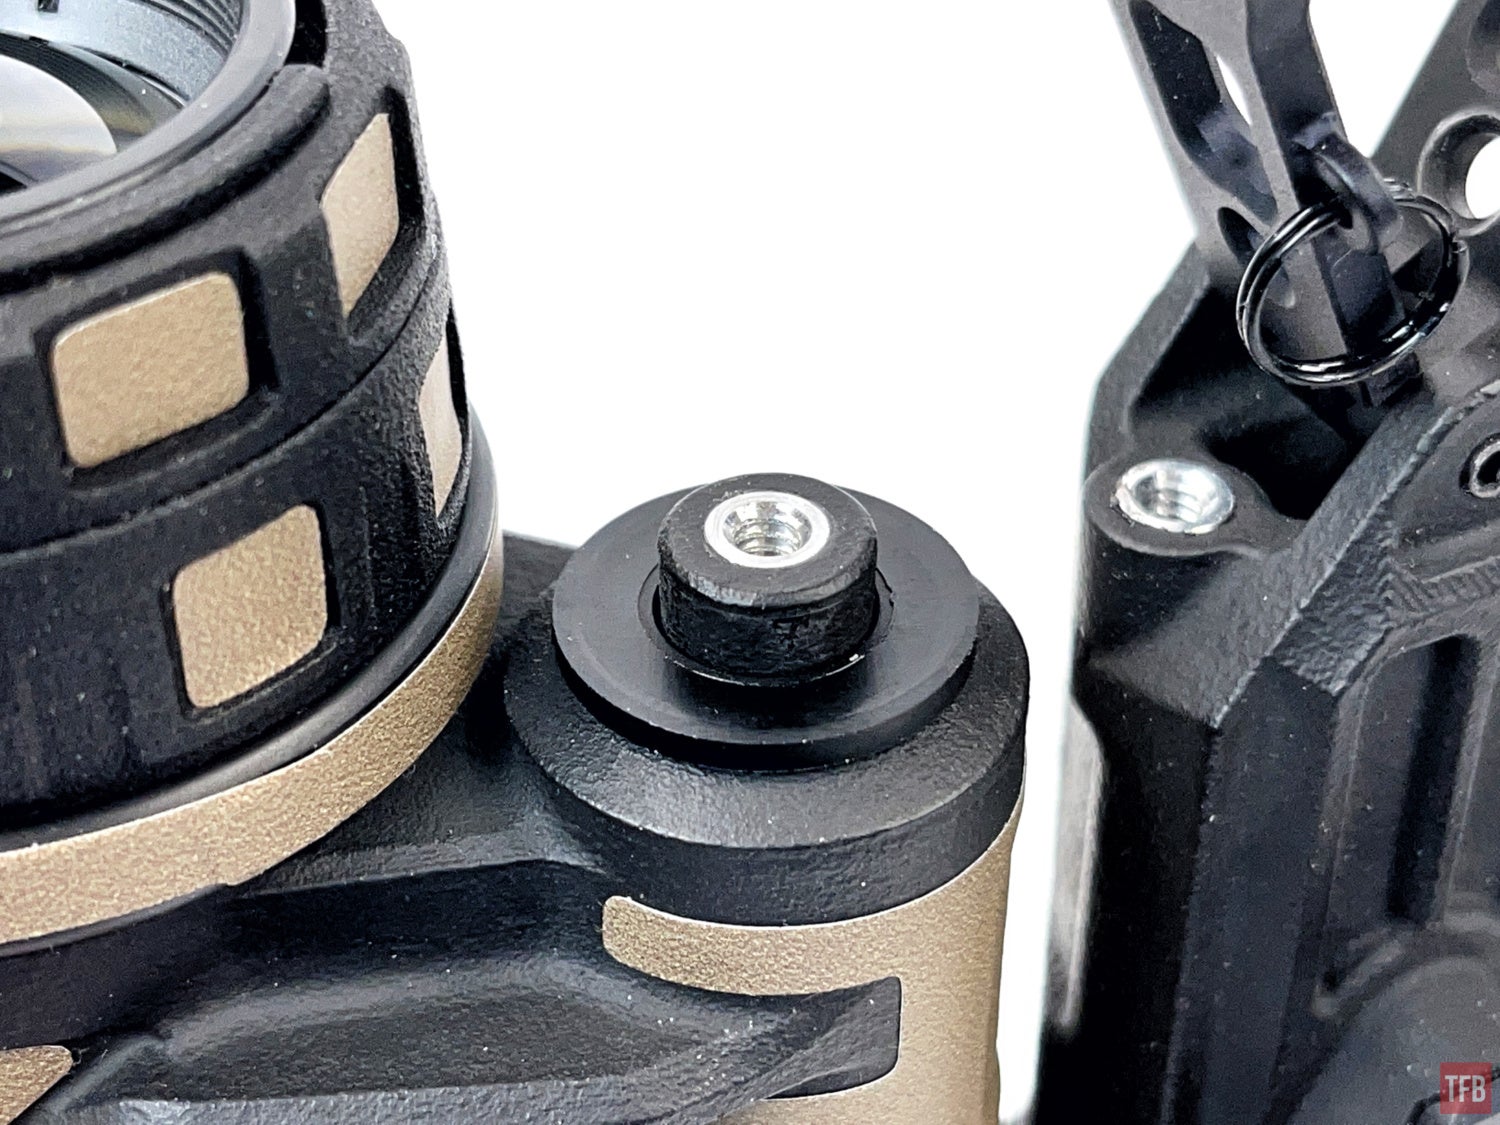
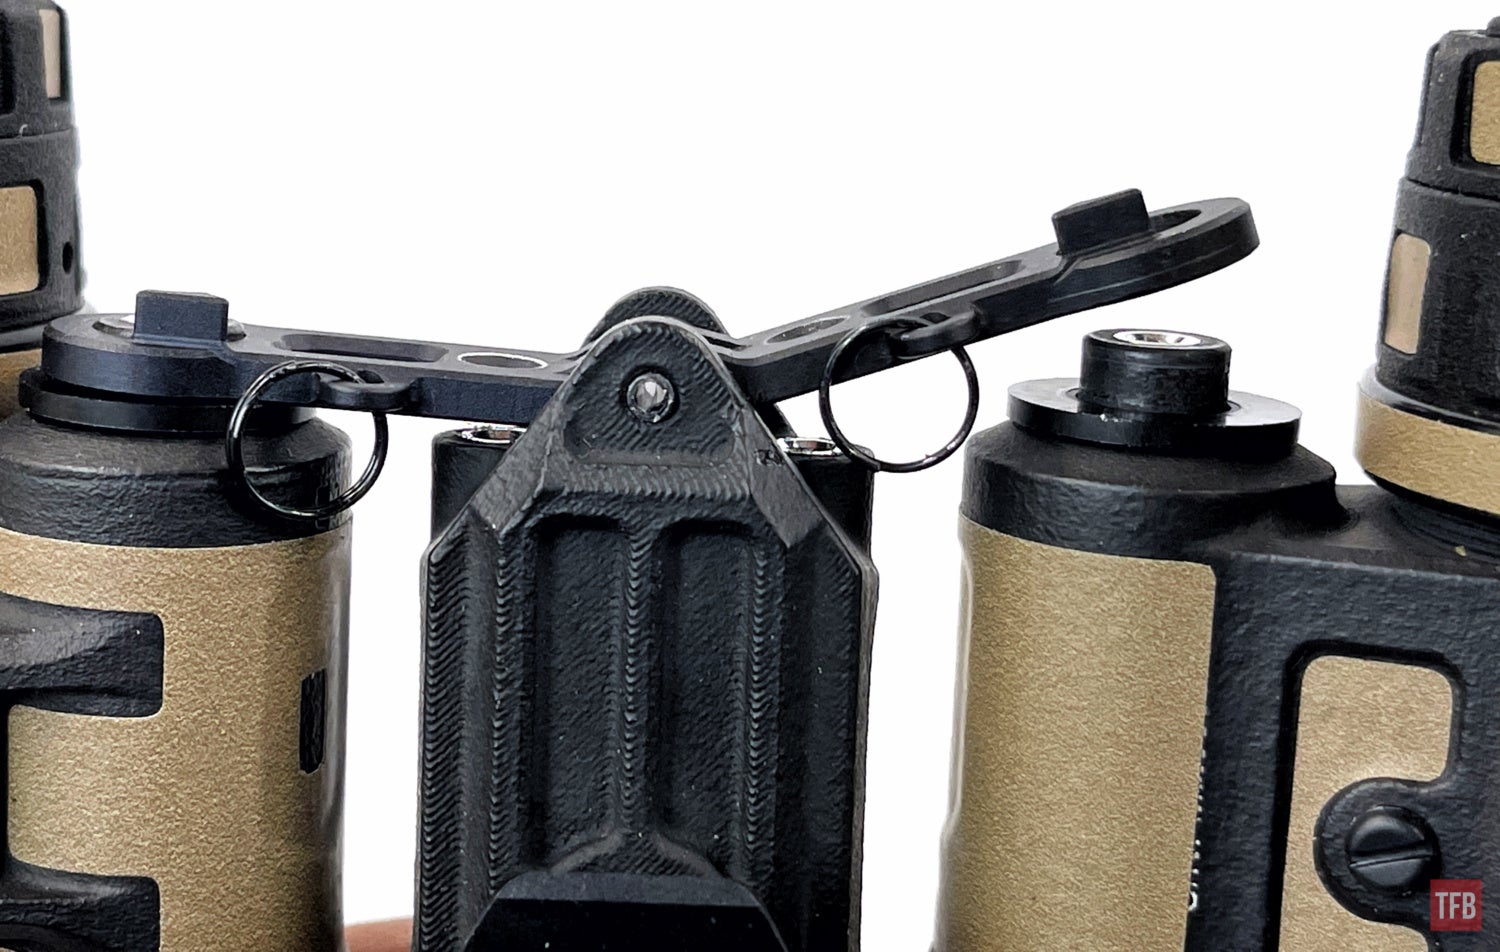
The outer screws on the back of the Daisho are also the IPD stops. The IPD stops are optional. The Daisho comes with washers on the PD screws. I found that this causes the screws to back off when articulating the pods. So Jeff recommended I remove the washers. Once removed I was able to tighten the PD stop screws and they stayed in place even when I manipulate the pods to articulate back and forth. There are two more screws on either side of the PD bracket hinge. Tighten the screws to 8 in-lb each if you have a torque wrench handy. The two inboard screws are actually the important ones. Those provide the clamping force and are for adjusting articulation force. 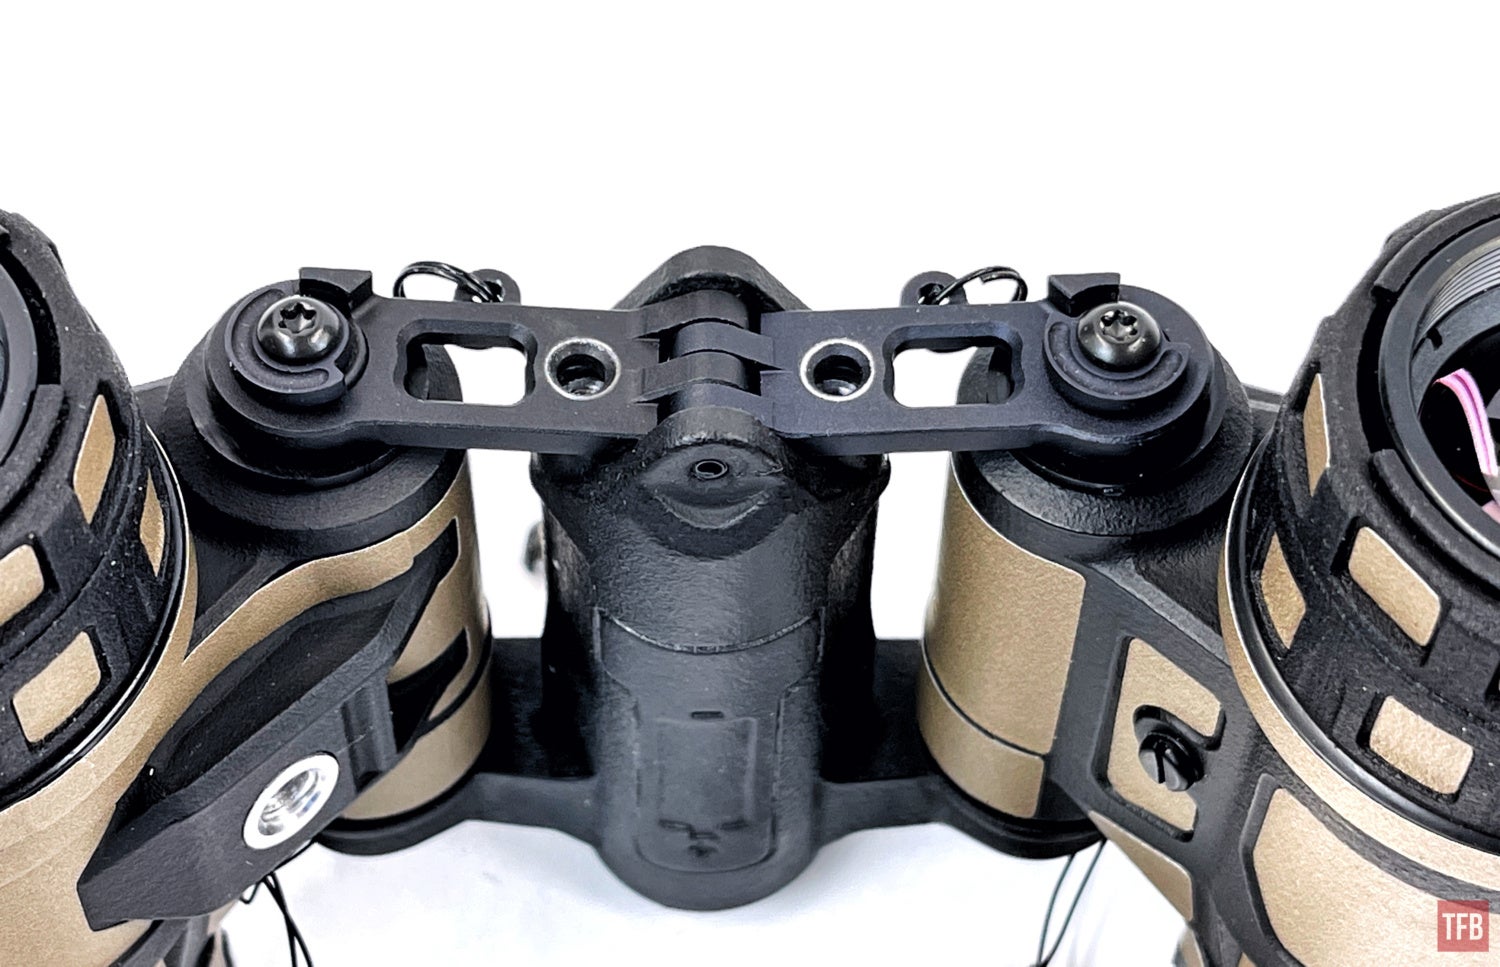
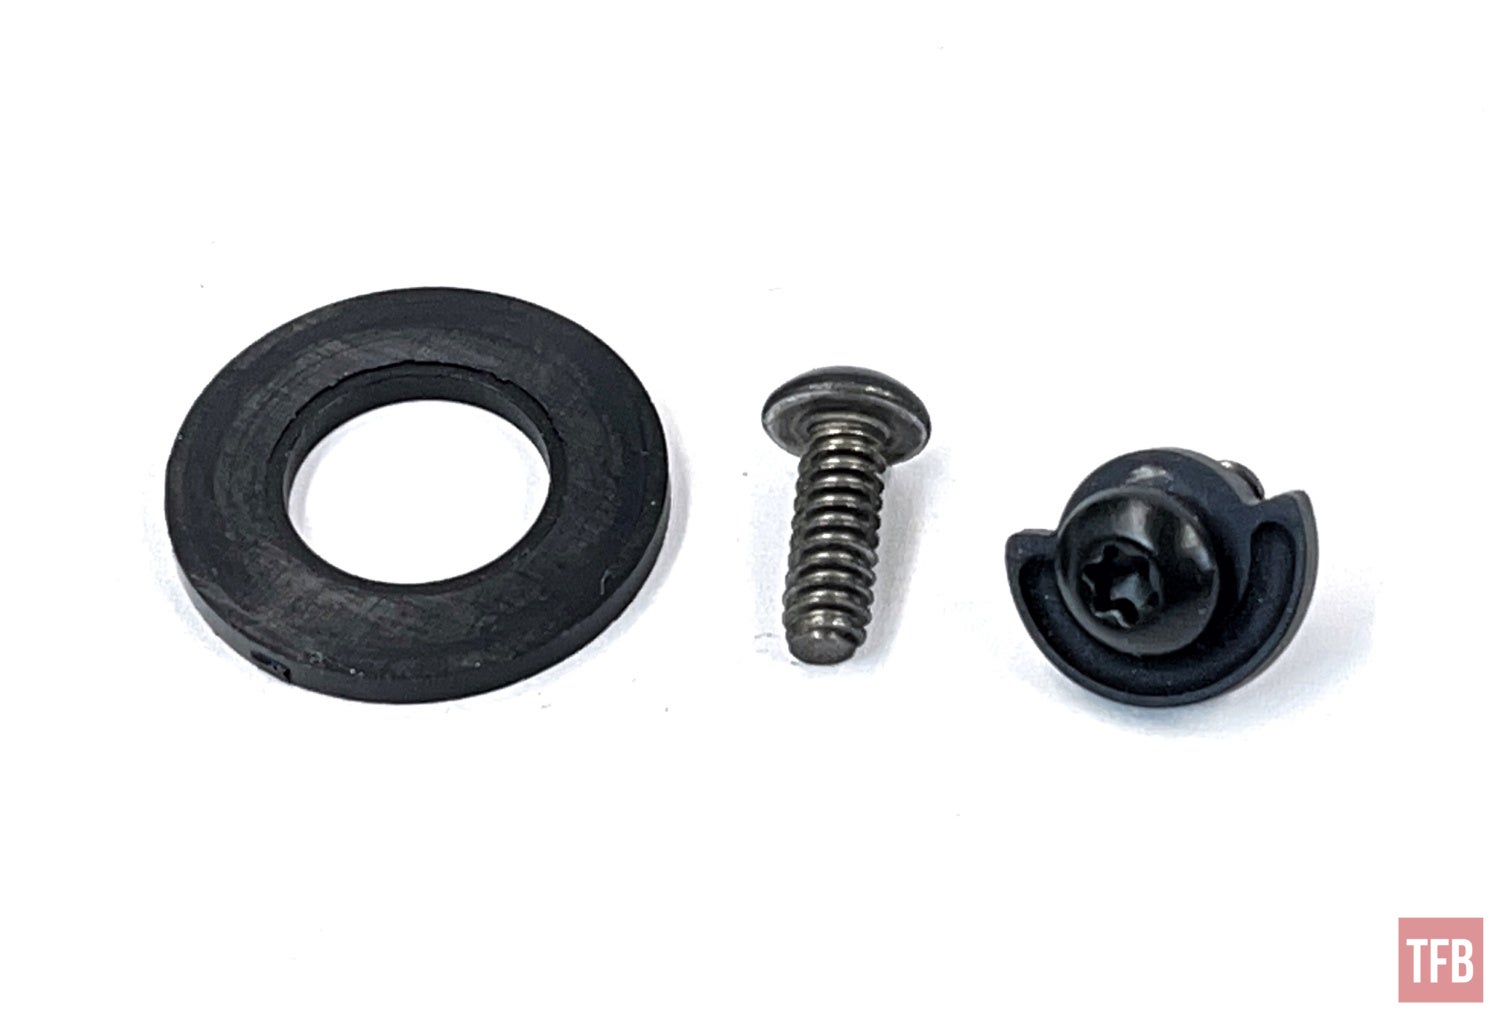
When you pull a Tanto off the Daisho, you are left with these small parts.
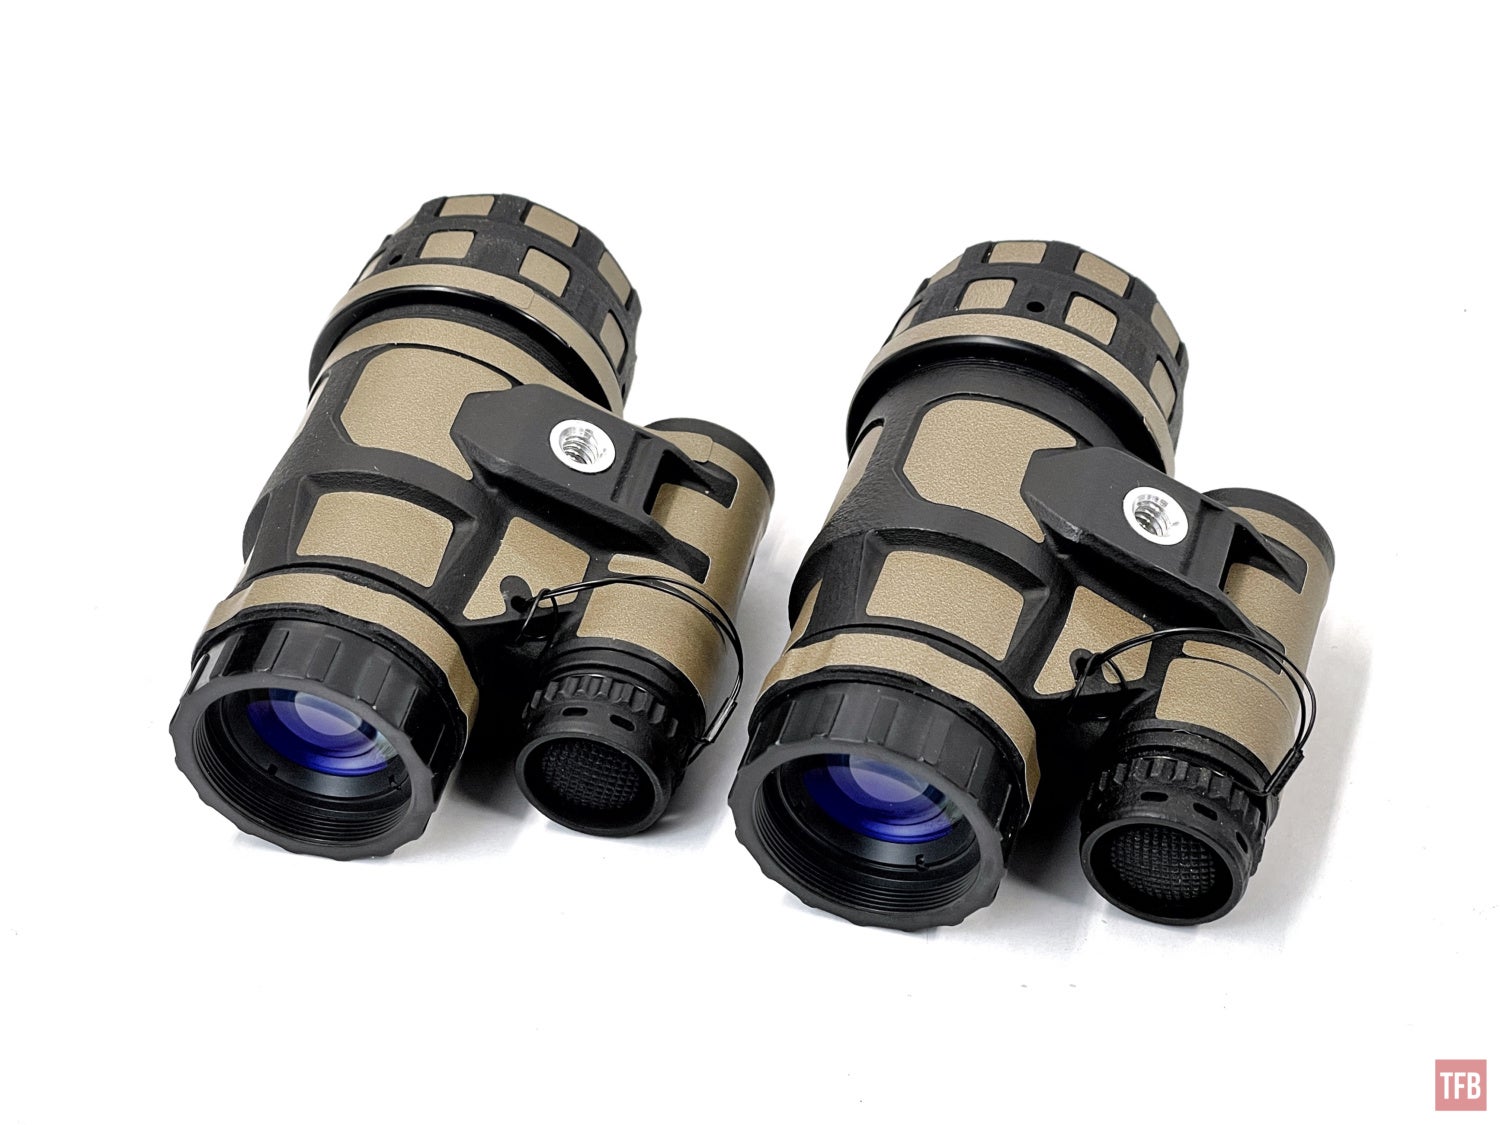
The Daisho is very practical. They look like bulky katanas.
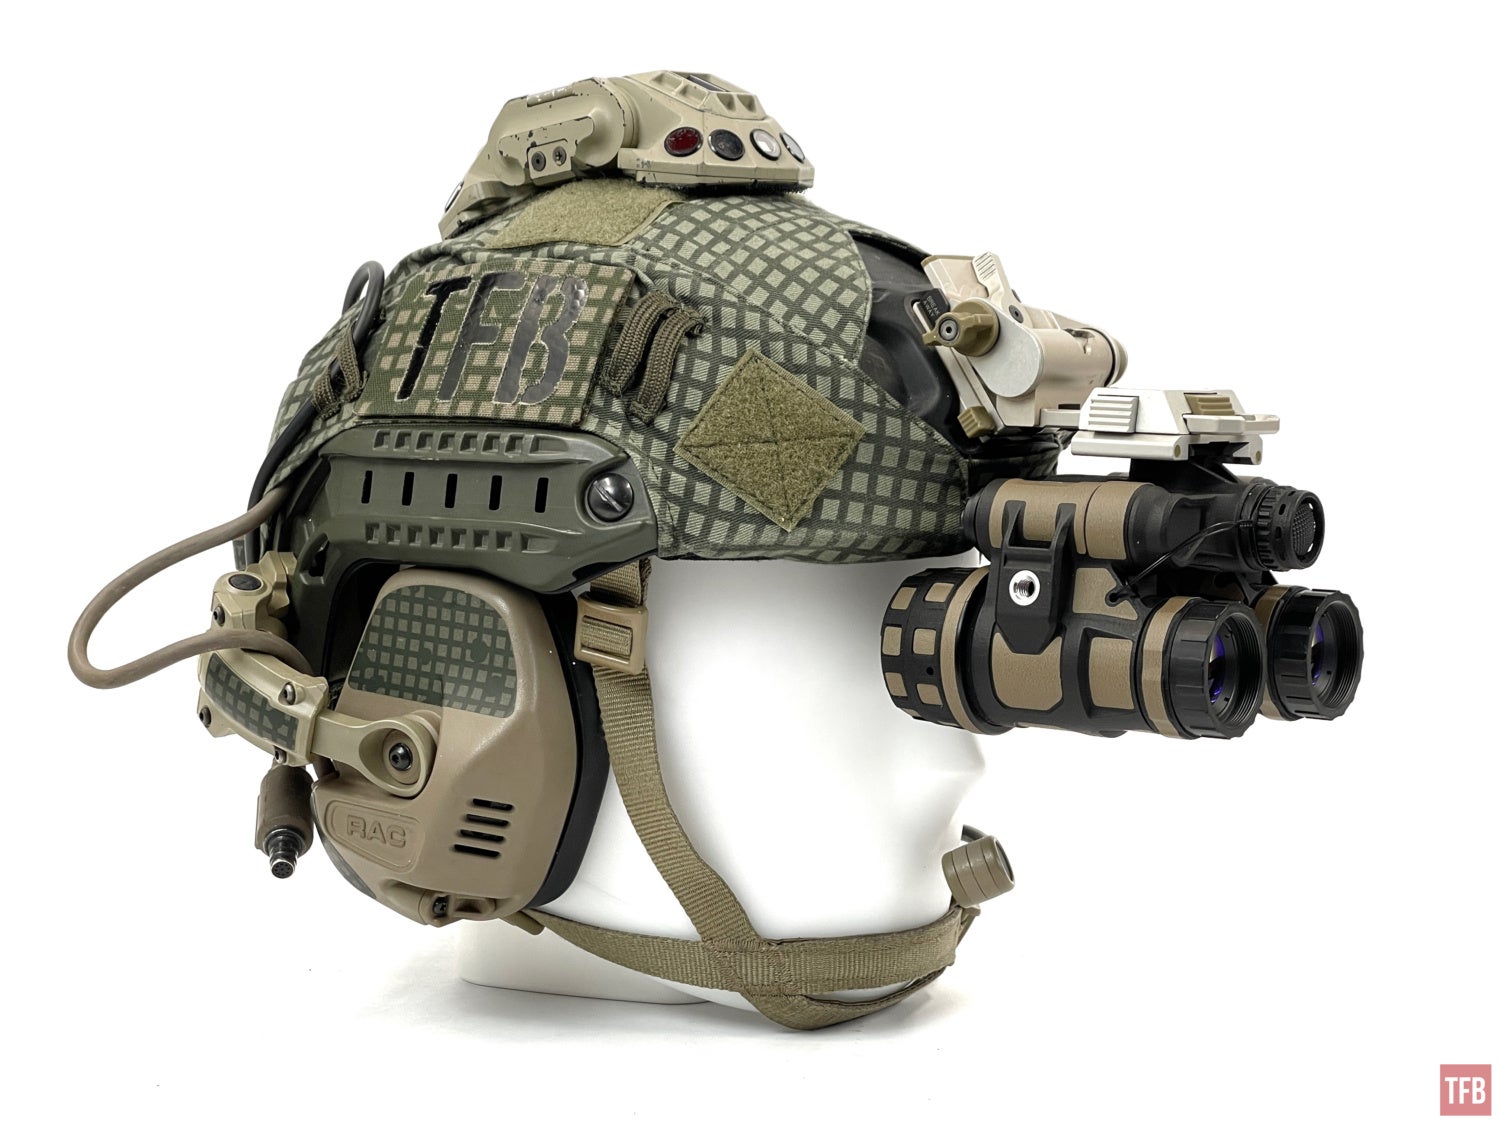
The articulation hinge is beefier since they are also the monoculars’ battery compartments.
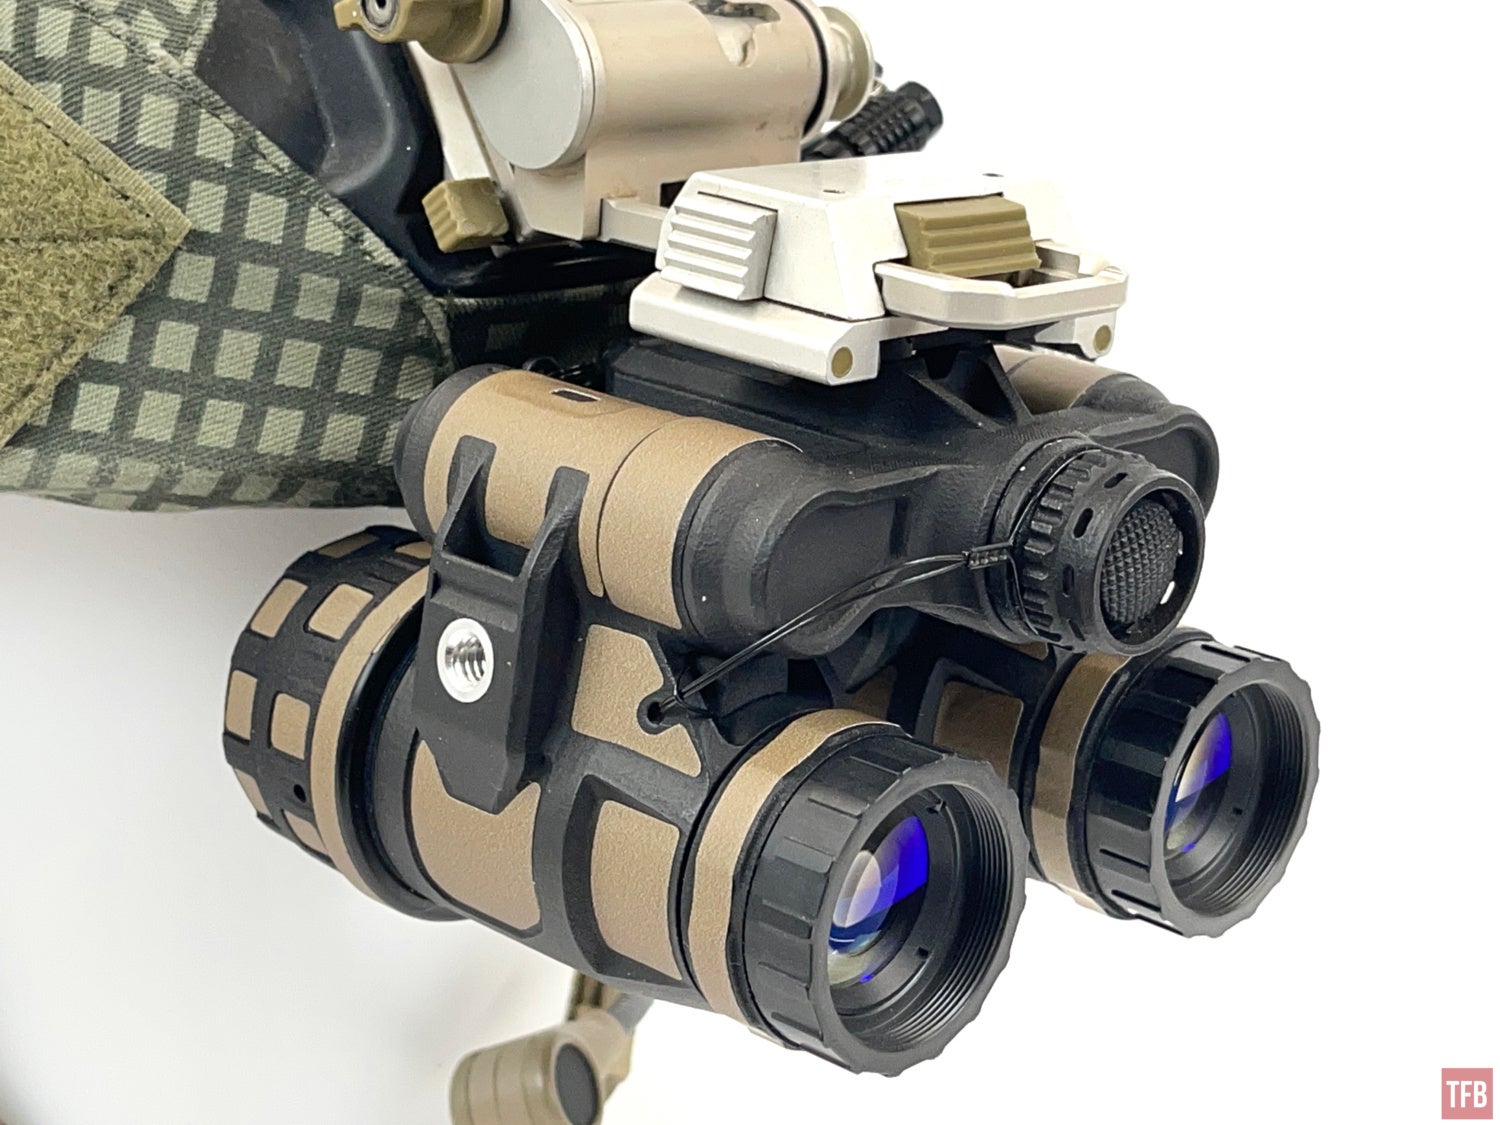
The Daisho articulates in a similar fashion as the Nocturn UANVB Katana. It has magnetic reed switching, just like the UANVB Katana, so a Tanto is rolled up away from the bridge, the power is cut off to that monocular.
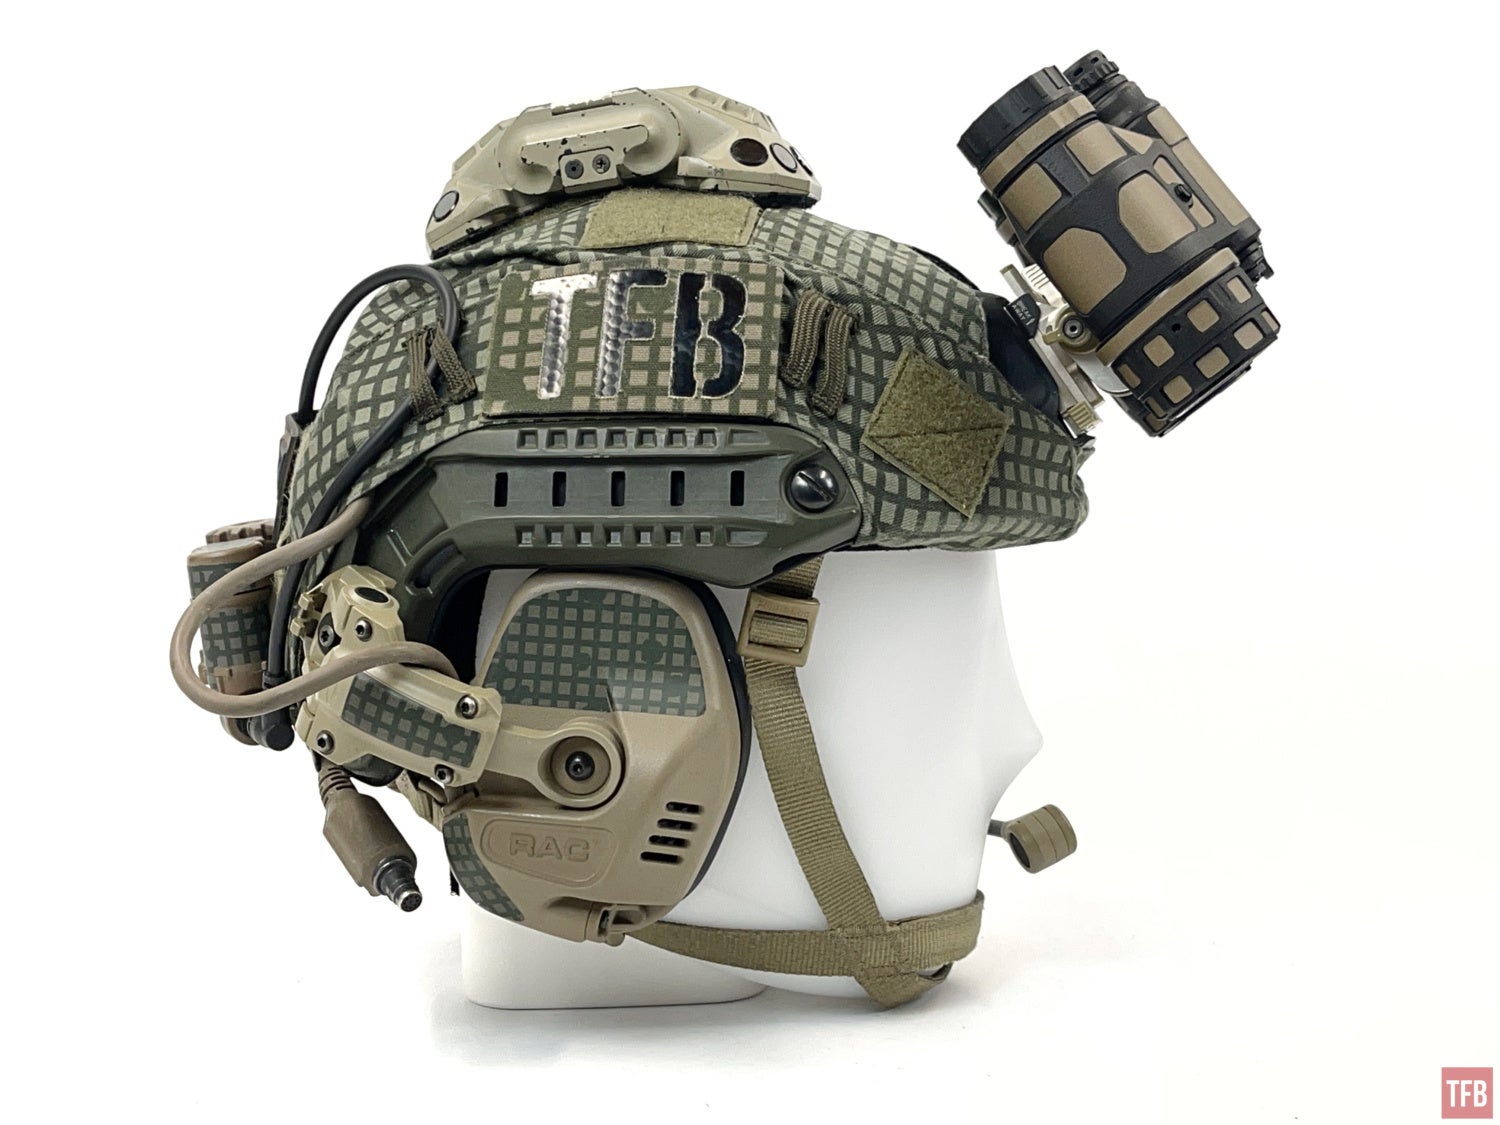
Due to the threaded hole on the side of the right eye Tanto, it touches the Wilcox mount making it not articulate as far as the left eye monocular.
Can you run a single Tanto on the Daisho bridge? Yes, you can.
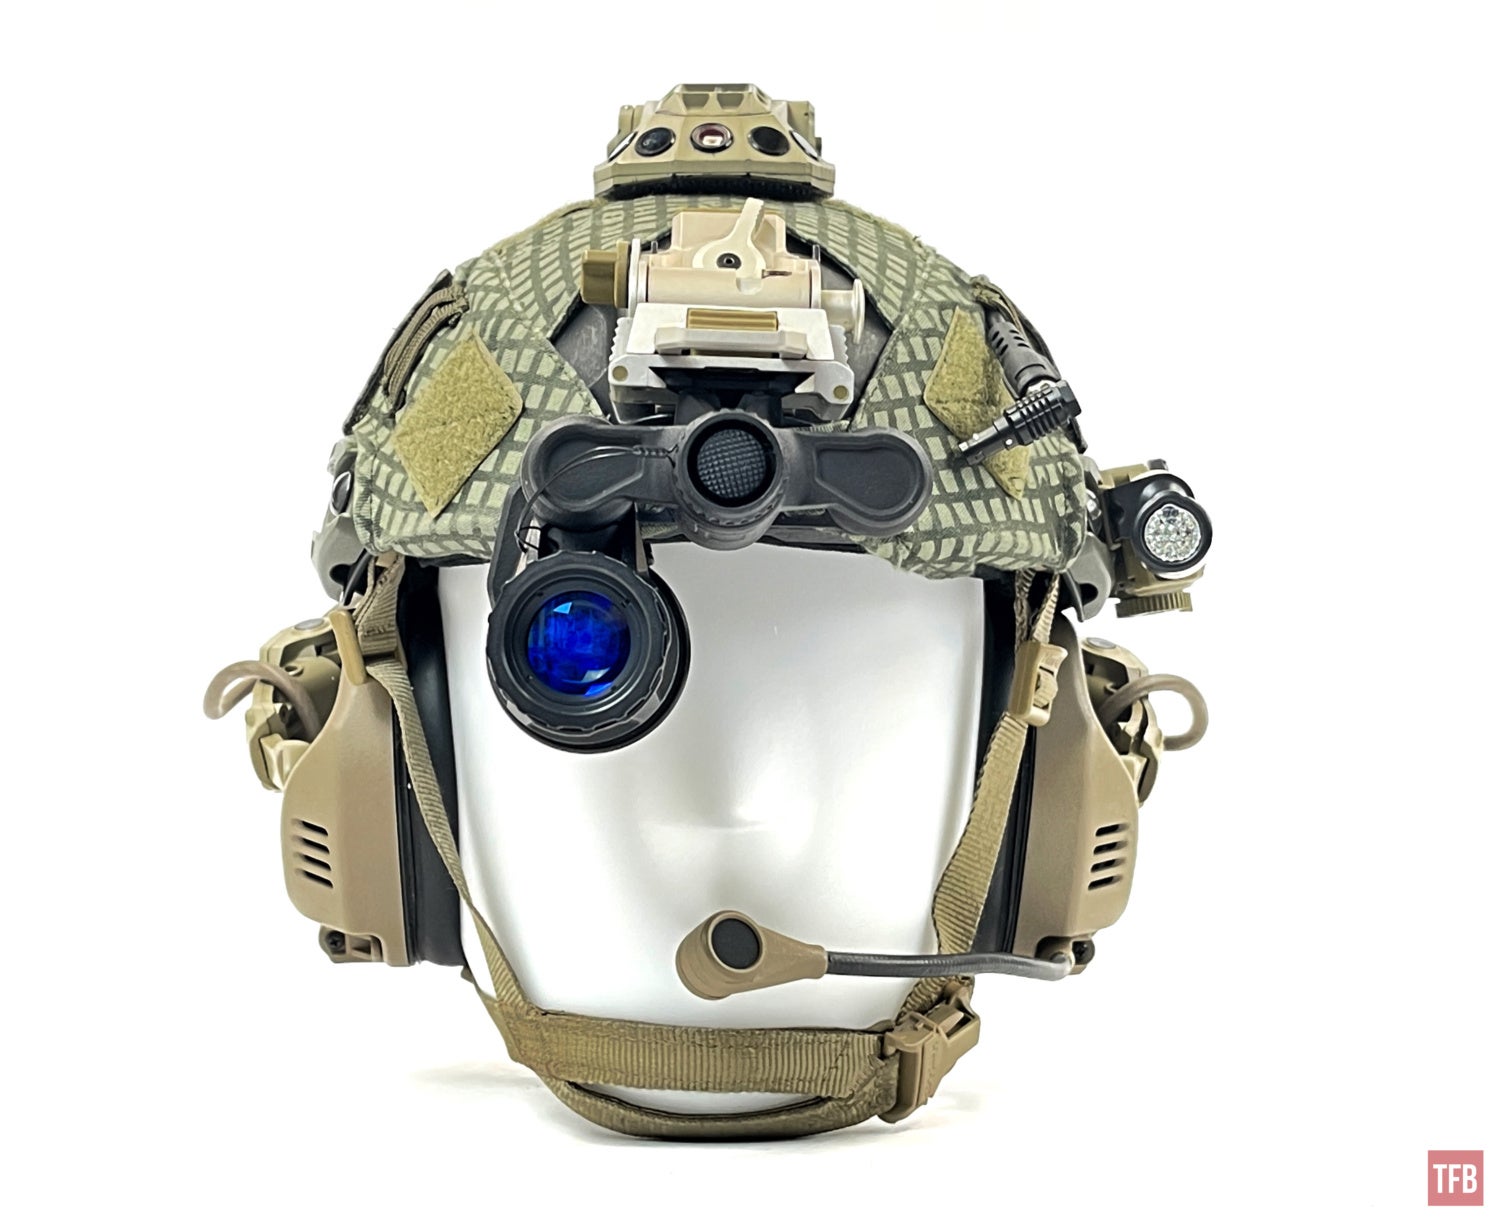
The downside is that you have exposed contacts on the side you do not have a Tanto. Nocturn is looking into making a dummy sleeve to protect these contacts when you are not using the Daisho bridge.
Final Thoughts On The Daisho Bridge
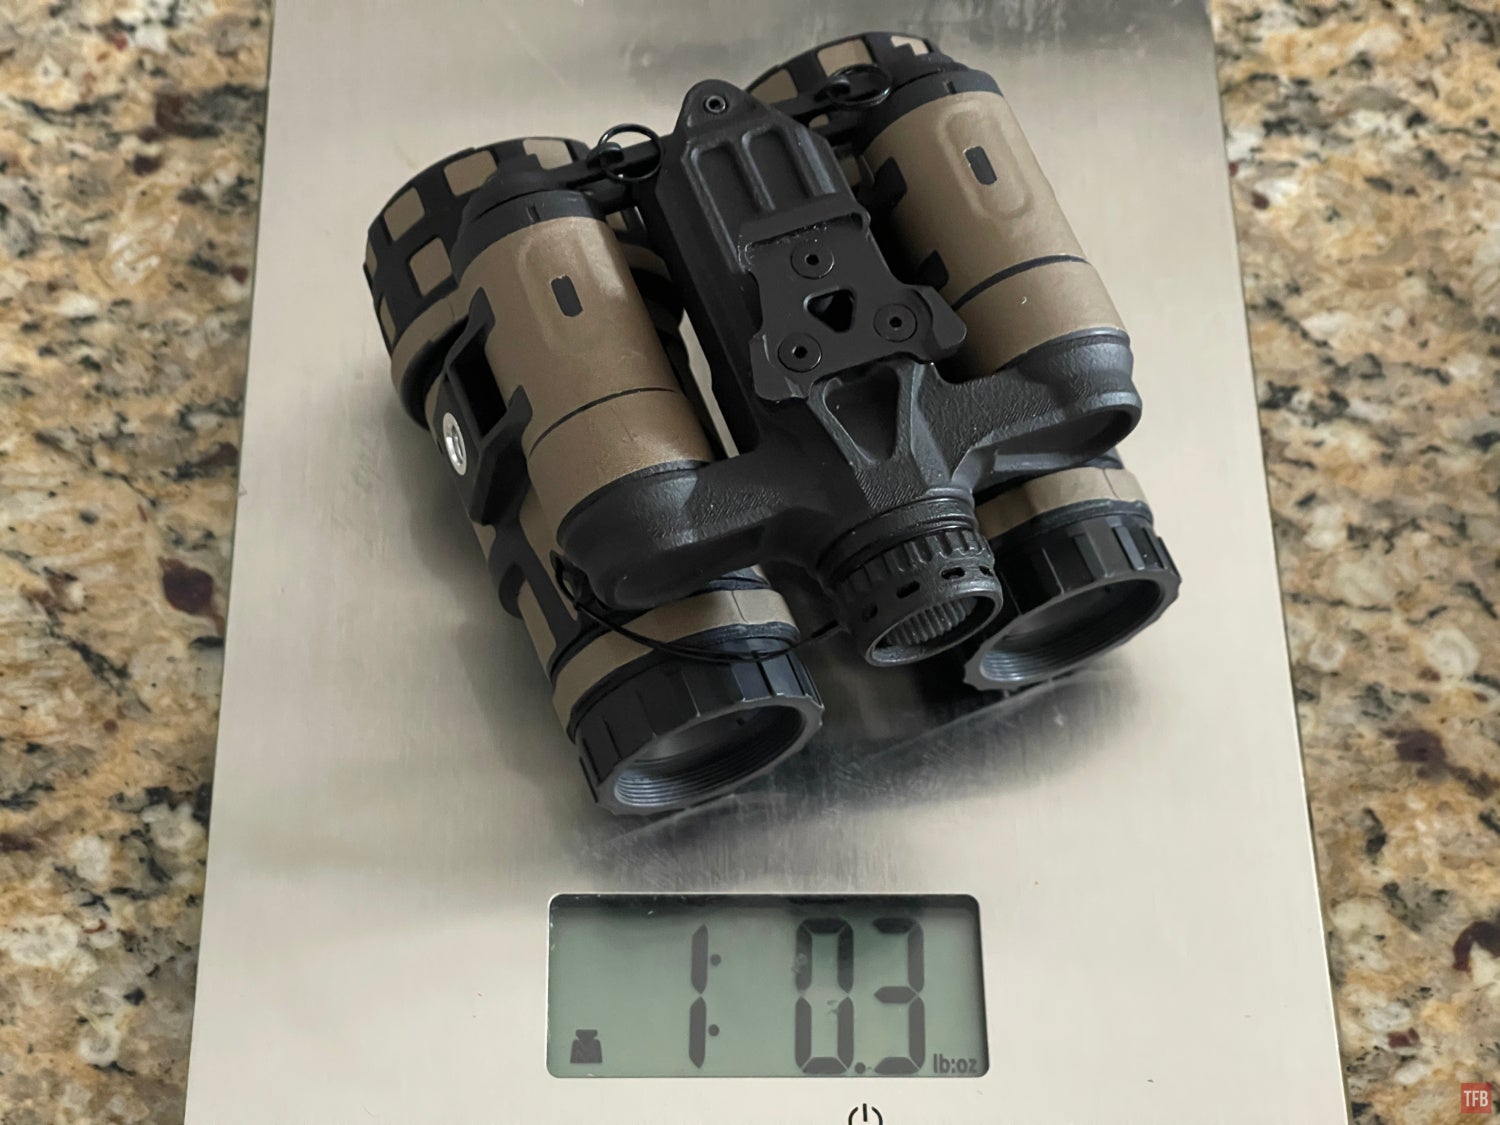
To my surprise, bridged Tantos on a Daisho only weigh just over 1lbs. This is using lightweight objectives and eyepieces like the RPO lenses. The Daisho bridge starts at $650. You can have them make a Daisho with a remote Lemo port that will allow you to also run a remote battery pack for longer run times. If you order one, know that it takes a bit of time to manufacture them. They are made to order and the estimated time is 8-10 weeks after the customer has paid. You also need to send your Tantos to Nocturn Industries so they can collimate the two Tantos together. Nocturn will also swap the battery cap tethers for a looped version. Normally they are clipped and clamped and you cannot remove them without cutting them off. They also install the magnets for the magnetic switching to work with the Daisho. Just like all their other products, the Daisho is covered by their no questions asked lifetime warranty.
Bridged monoculars are nice to have. You can separate them and lend one to a friend. There are added complications though. The person you are lending night vision to will need all the accouterments that go along with night vision. He or she will need a helmet with eye pro. If you want to try shooting under night vision then you need to bring a spare gun that is setup for night vision. Add to that the need for a tool every time you want to remove or install a Tanto. You can keep a Torx driver in your night vision case since you will need to store the spare battery cap when you have bridged Tantos. Just keep them in a small plastic baggie which you can use to keep the screws, PD stop and washer when you separate a Tanto.
Thanks to Nocturn Industries for sending their Daisho bridge in for review and I am using Nocorium wraps on my Tantos. Nocorium will be patterning wraps for the Daisho bridge soon. For more information check out Nocturn’s website.
Edit: Nocturn plans to stock the Daisho Bridge. So initially it will take 4 weeks give to take a week. If demand increases where they stock more then it will be a couple days turn around when you send in your Tanto monoculars. Of course you can always order a complete Daisho from the ground up.