 Your Privacy Choices
Lately, I have been on a thermal device kick. Last week we took a close look at a BAE RED-I which allows the user to remotely view a video signal in a wearable microdisplay HUD. It was used with thermal weapon sights like the PAS-13. Well, today we take a look at an older PAS-21 aka the See Spot III by FLIR. It is a MWIR thermal imager, which is pretty . . . cool. Get it? Cause it is a cooled thermal. Sigh.
Thermal @ TFB:
- Friday Night Lights: PAS-28 MRTB Elcan Raytheon PhantomIR
- Friday Night Lights: Oasys Universal Thermal Binocular (UTB)
- Friday Night Lights: SAFRAN JIM LR – Cooled Thermal Biocular LRF
Cooled Thermal Is . . . Cool
I will always reuse that pun. Anyway, my first foray into cooled thermal was thanks to my friend Vic and his FLIR HISS. It was super old and the resolution was pretty low but the cryogenic cooler makes the FLIR HISS a lot more sensitive than any other thermal device I had tried before. It could see the heat of bullets flying through the air! The only way a normal thermal can do that is if you use tracer rounds. Well, last year I got the JIM LR and that is an awesome cooled thermal imager but a FLIR See Spot III popped up for pretty cheap so I bought it. I got it from the same guys that sold the ANVIS-10 DIY kit. I knew if I had issues they would take care of me and they have a provenance that their items are not stolen government property.
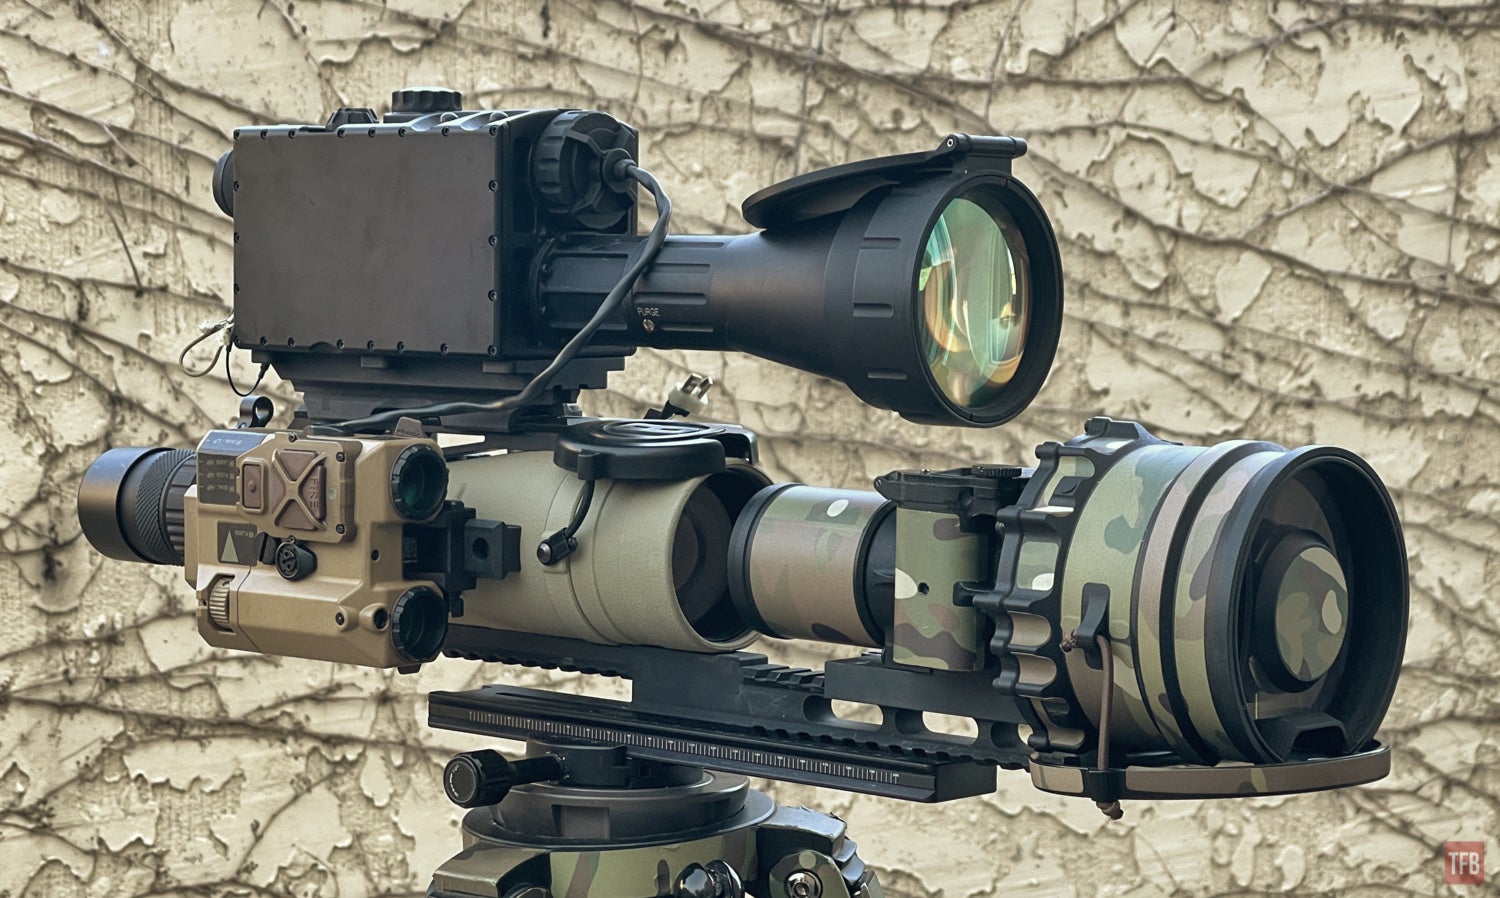
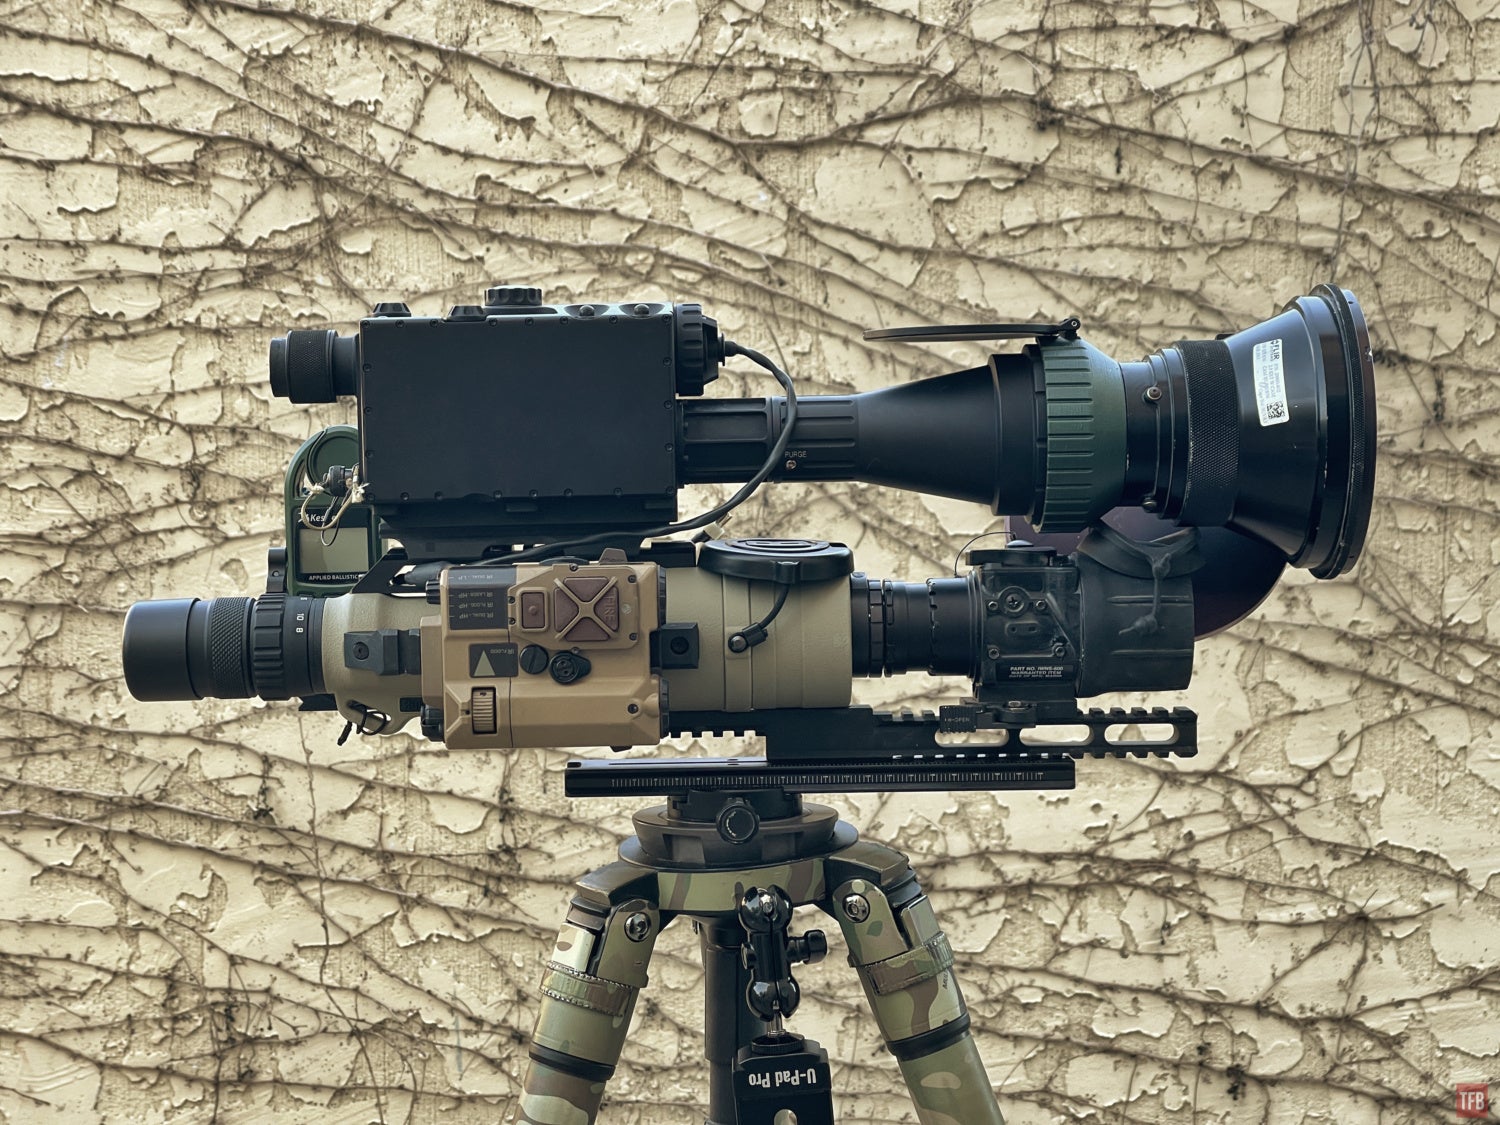
The FLIR See Spot III is not much to look at. It came out a year after 9/11, so very early days of GWOT.
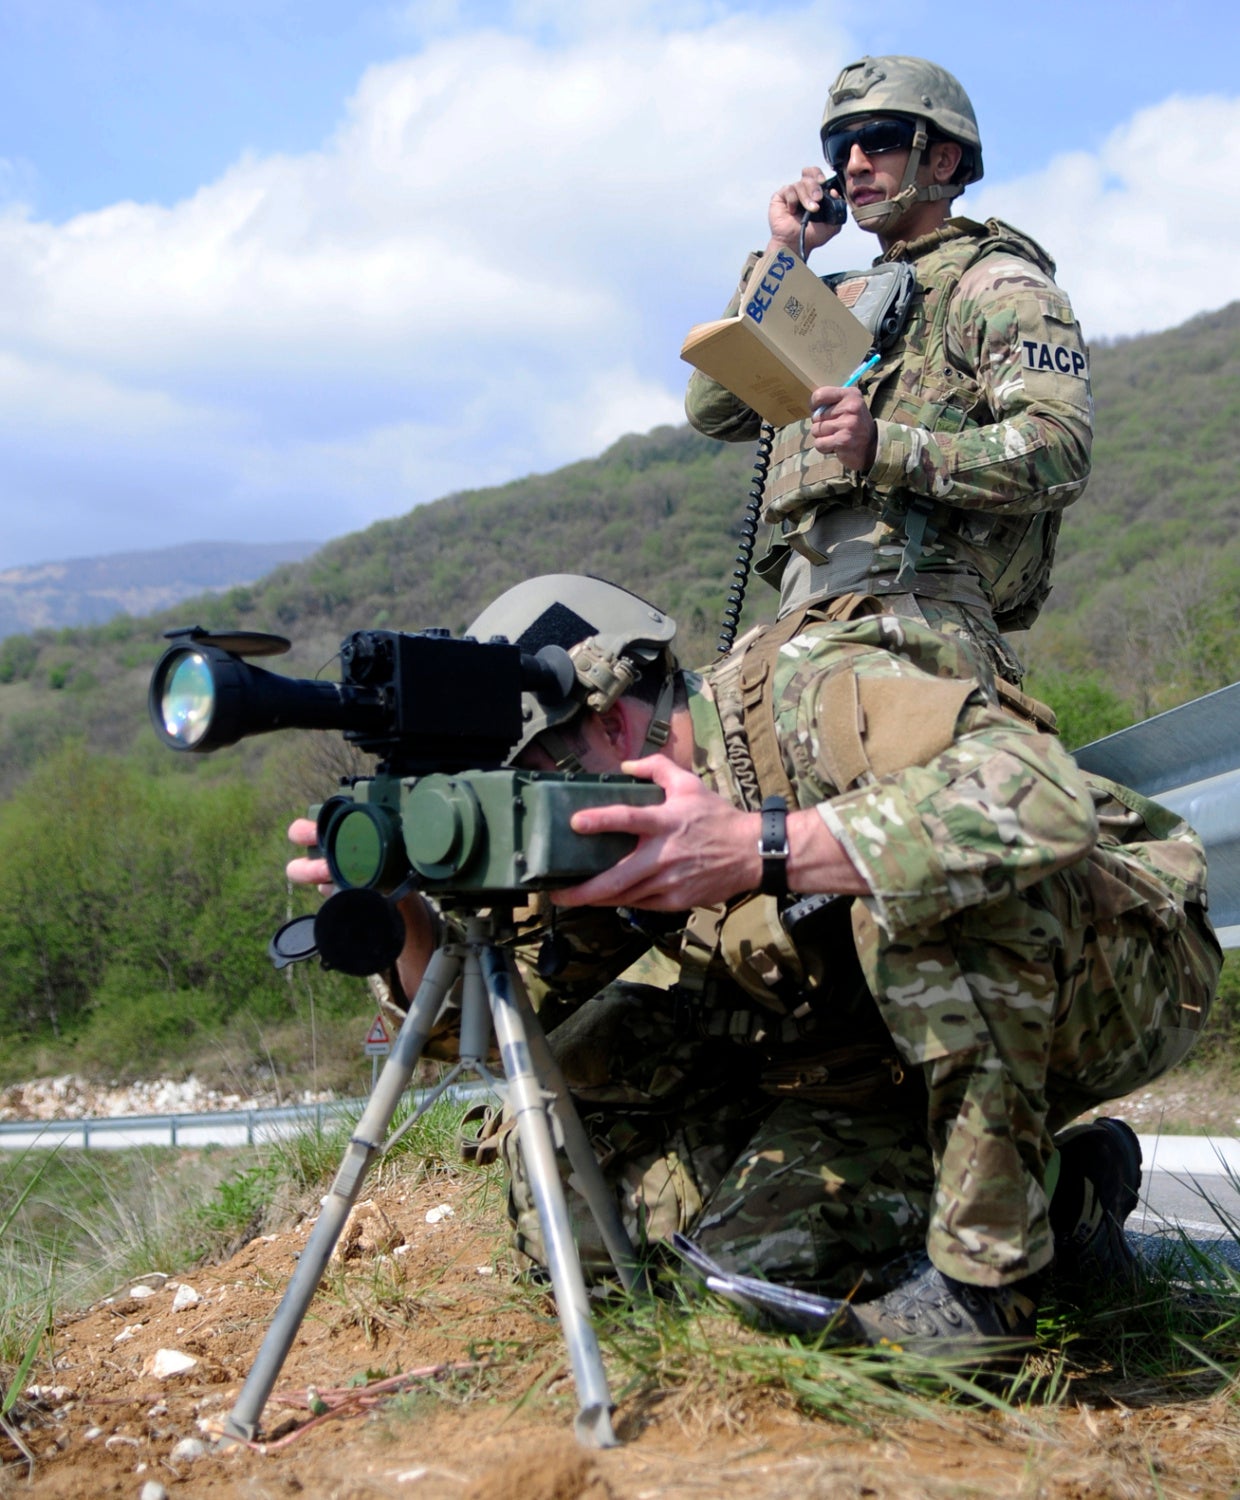
Senior Airman Nathaniel Robie and Airman 1st Class Andrew Beediahram participate in a training mission April 18, 2012, in northern Italy. These routine training missions are designed to help tactical air control party members develop combat-related skills such as map reading, compass usage, enemy target location, and survival, escape and evasion techniques. The Airmen are TACP members assigned to the 8th Air Support Operations Squadron at Aviano Air Base, Italy. (U.S. Air Force photo/Airman 1st Class Briana Jones)
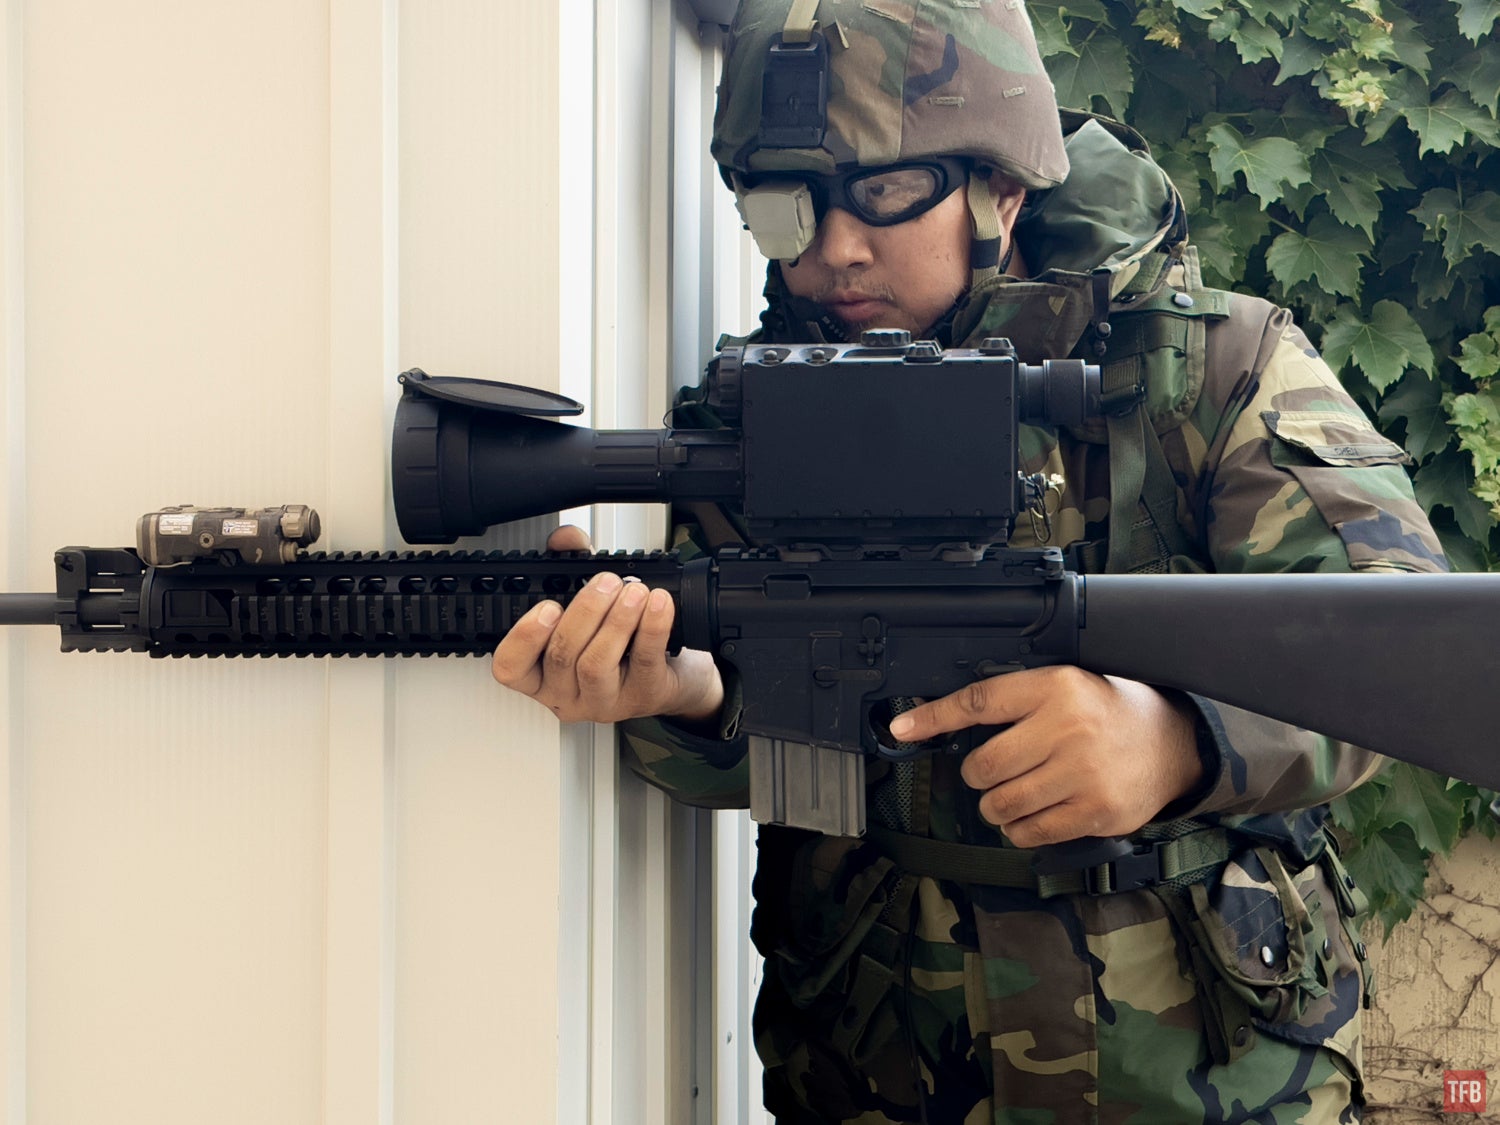
As you can see in the photo above, the See Spot III is mounted on top of a PEQ-1B aka SOFLAM (Special Operations Forces Laser Acquisition Marker). The green suitcase-sized thing is a laser designator and when combined with a GPS, it can generate coordinates. I don’t have a PEQ-1B but according to Wikipedia, it has an 80 mW IR laser designator that is 1064 nm. This is out of the band for most night vision. What does this have to do with the FLIR See Spot III? It is a thermal imager that can see very far and has a special dual-band objective lens. The See Spot III is MWIR and sensitive to 4,500 – 4,800 nm wavelengths. Normal analog night vision operates in 850-940 nm. LWIR, like your off-the-shelf thermal imagers, sees 8,000-14,000 nm. Totally different while MWIR and LWIR are both thermal, they do not see the same wavelengths. So why did I bring up the 1064 nm laser designator? Apparently, the See Spot III can see that laser. This is huge. Thermal does not see VIS or NIR light. And while 1064 nm can be considered SWIR, the fact that the PAS-21 can see it and show it in the thermal image is mind-blowing.
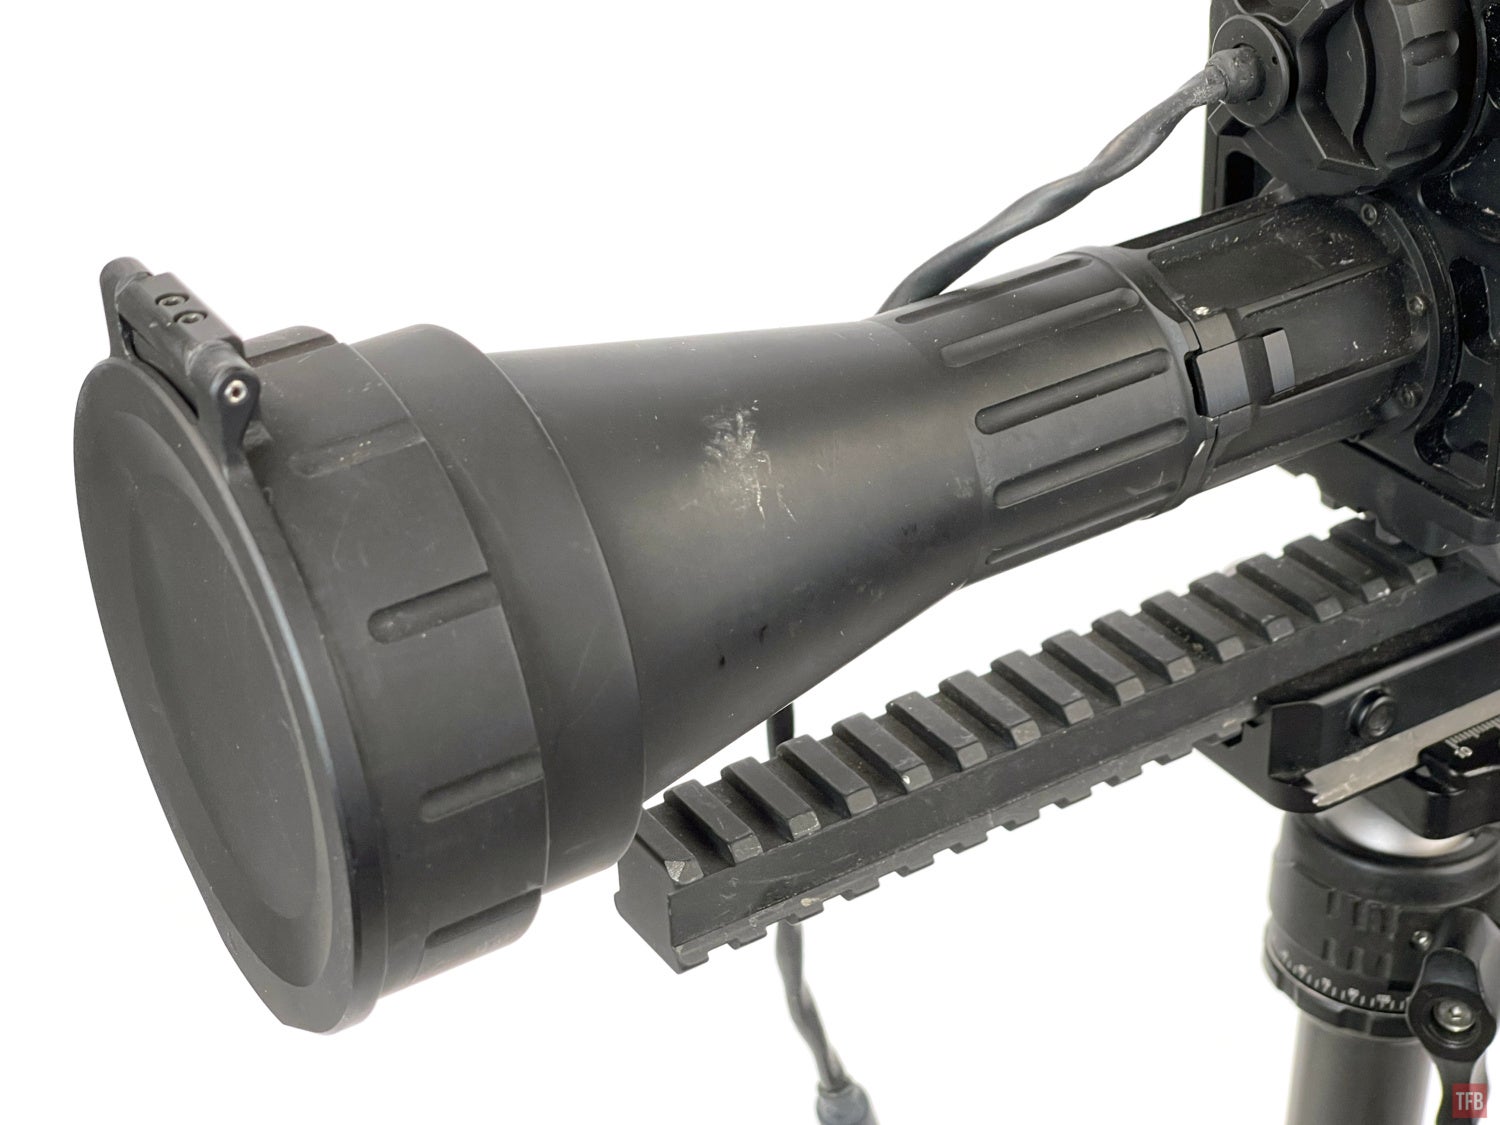
The PAS-21 (See Spot III) is rather crude looking. It is a large box the size of a box of Pop-Tarts, on its side, with what looks like a funnel shoved into the top (front of the housing).
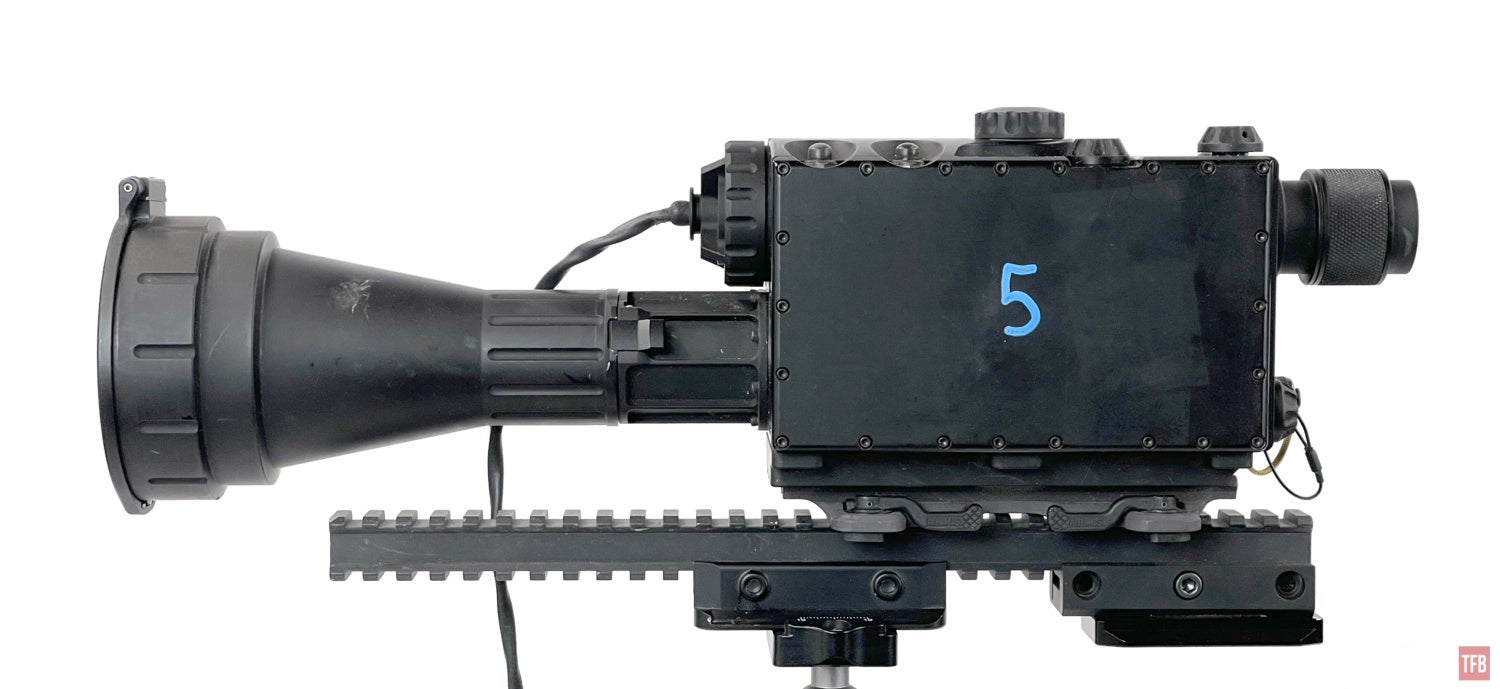
The PAS-21 looks more like an old commercial video camera than a thermal device.
The objective lens is not your typical germanium glass like you see in other thermal devices. I think it is Zinc Sulfide like the JIM LR. The lens is partially transparent. Germanium has a metallic mirror-like finish and vis light does not pass through it.
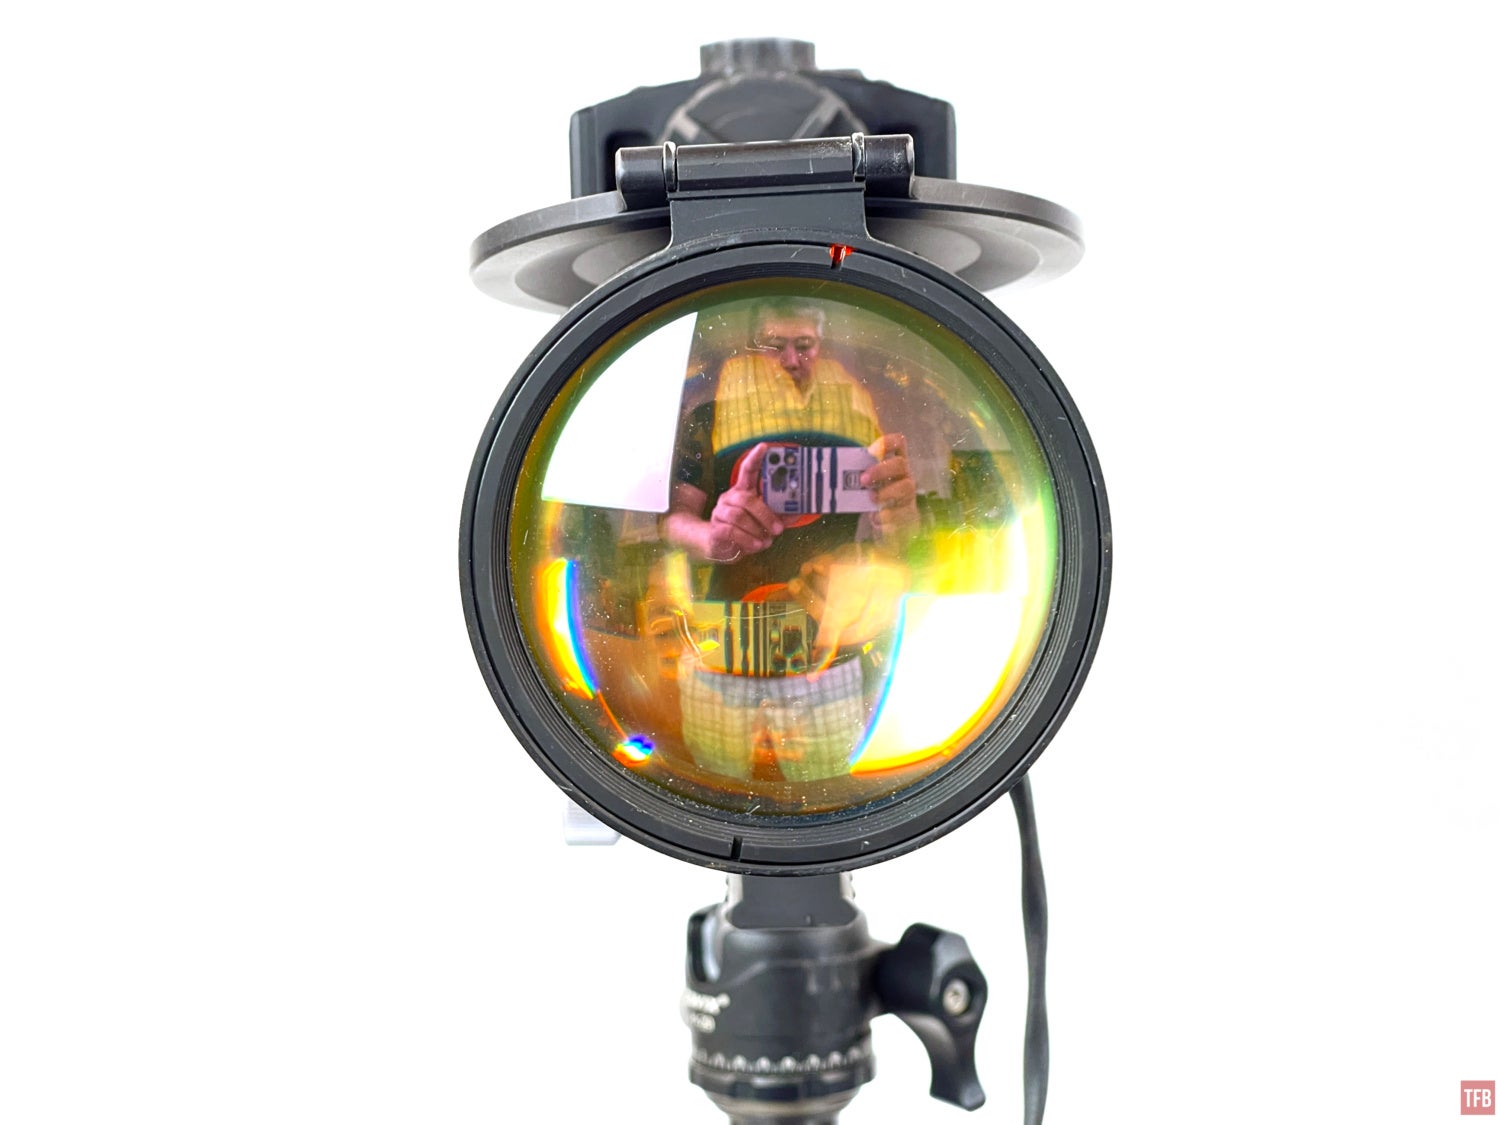
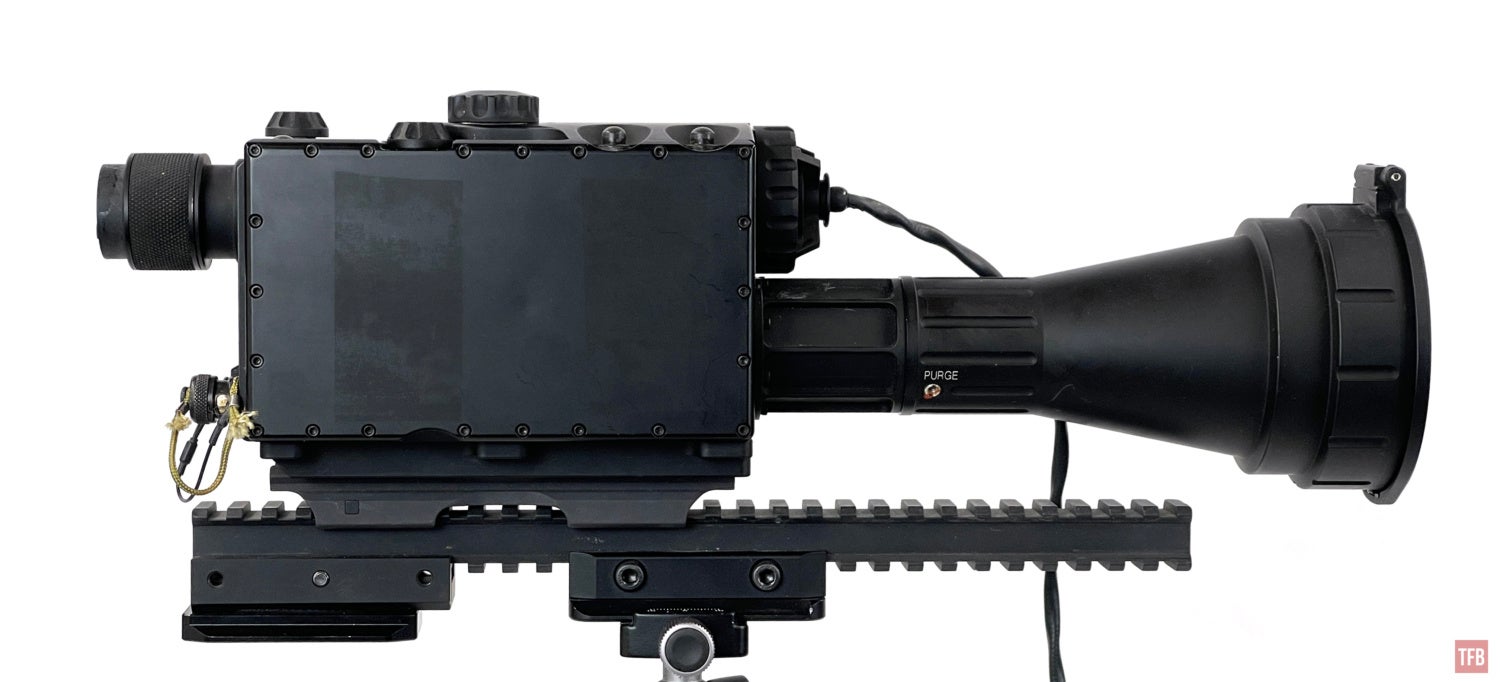
The See Spot III objective lens has a metal lens cap but what is most interesting is the latch at the rear.
Press the latch and rotate the lens counterclockwise and you can remove the objective lens.


It is remarkably easy to remove the objective lens and yet the instruction manual tells you that if you do this, the camera loses its purge. Why would FLIR design this then when it takes little to no effort to remove the objective lens? Luckily the actual See Spot III lens has its own sealed purge.
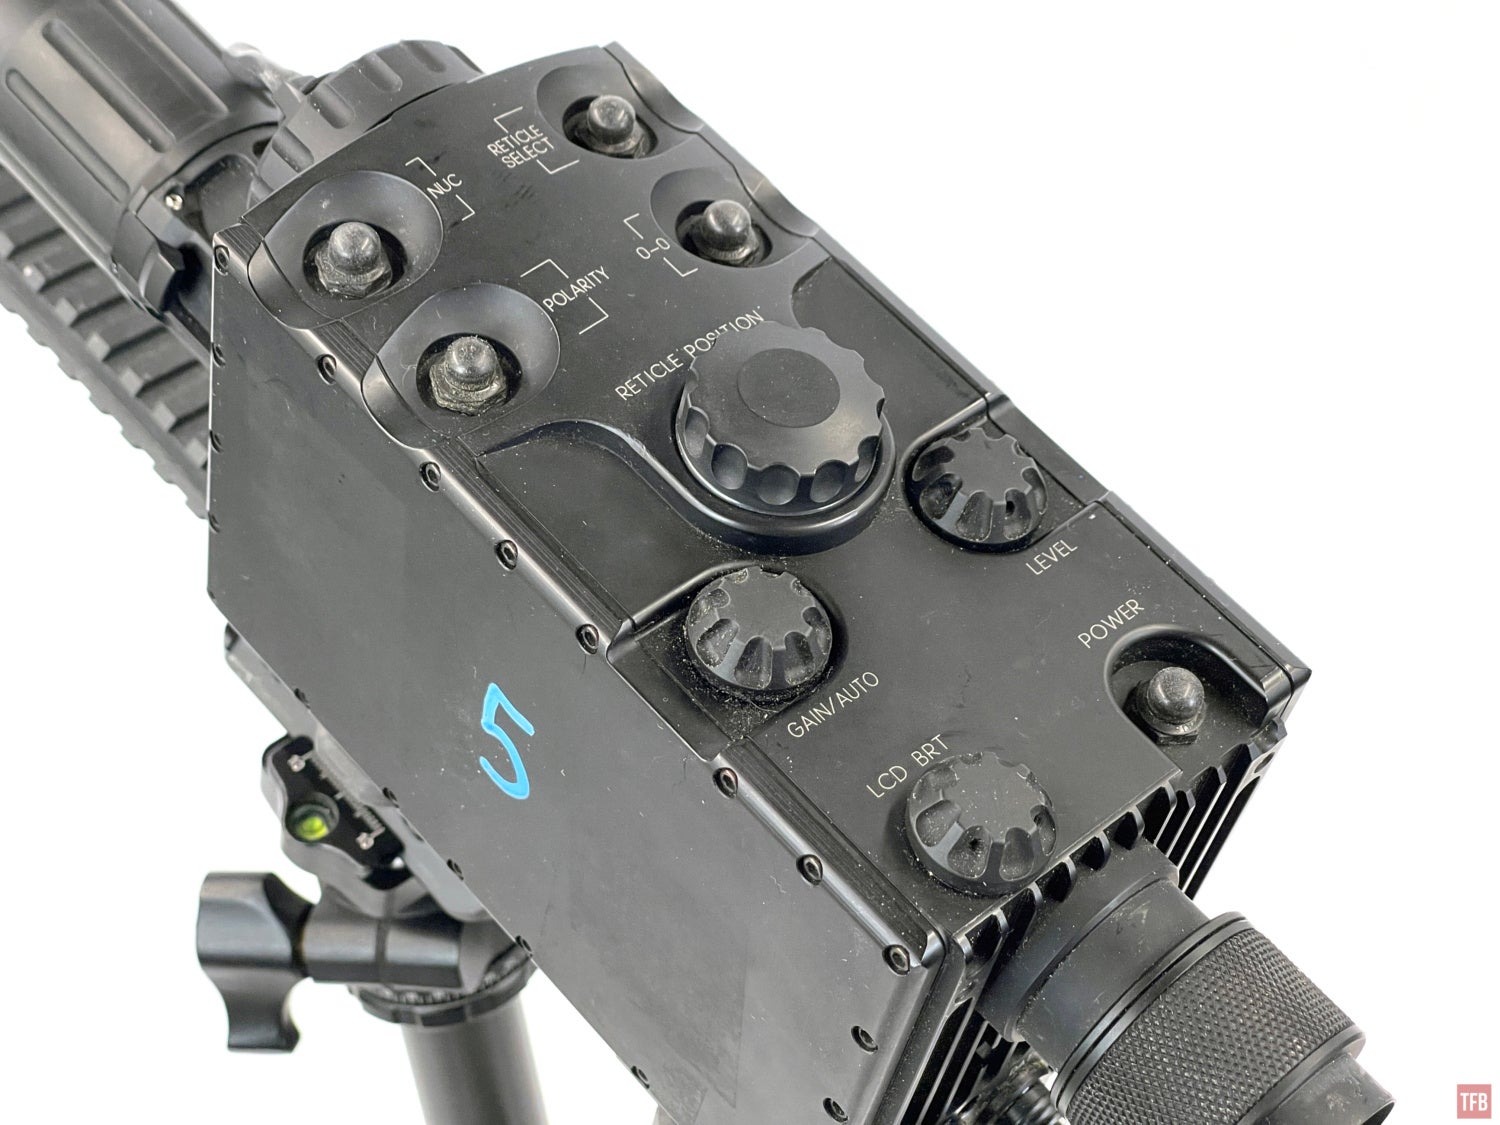
Almost all of the controls are at the top of the See Spot III. The controls are pretty self-explanatory. The only ones that are a little confusing are the Reticle Select and 0-0. You have to press the Reticle Select button down for two seconds and then the reticle can change. You have two different crosshair reticles or you can have no reticle. The reticle is zero-able. You need to unscrew the large knob which is actually a threaded cap. Underneath is a small joystick. You move it in the direction you want the reticle to move. So move it back to move the reticle down, and move the stick forward to move the reticle up. Once you zeroed the reticle, you need to press and hold the 0-0 button for 2 seconds to save that position as the new reticle zero.
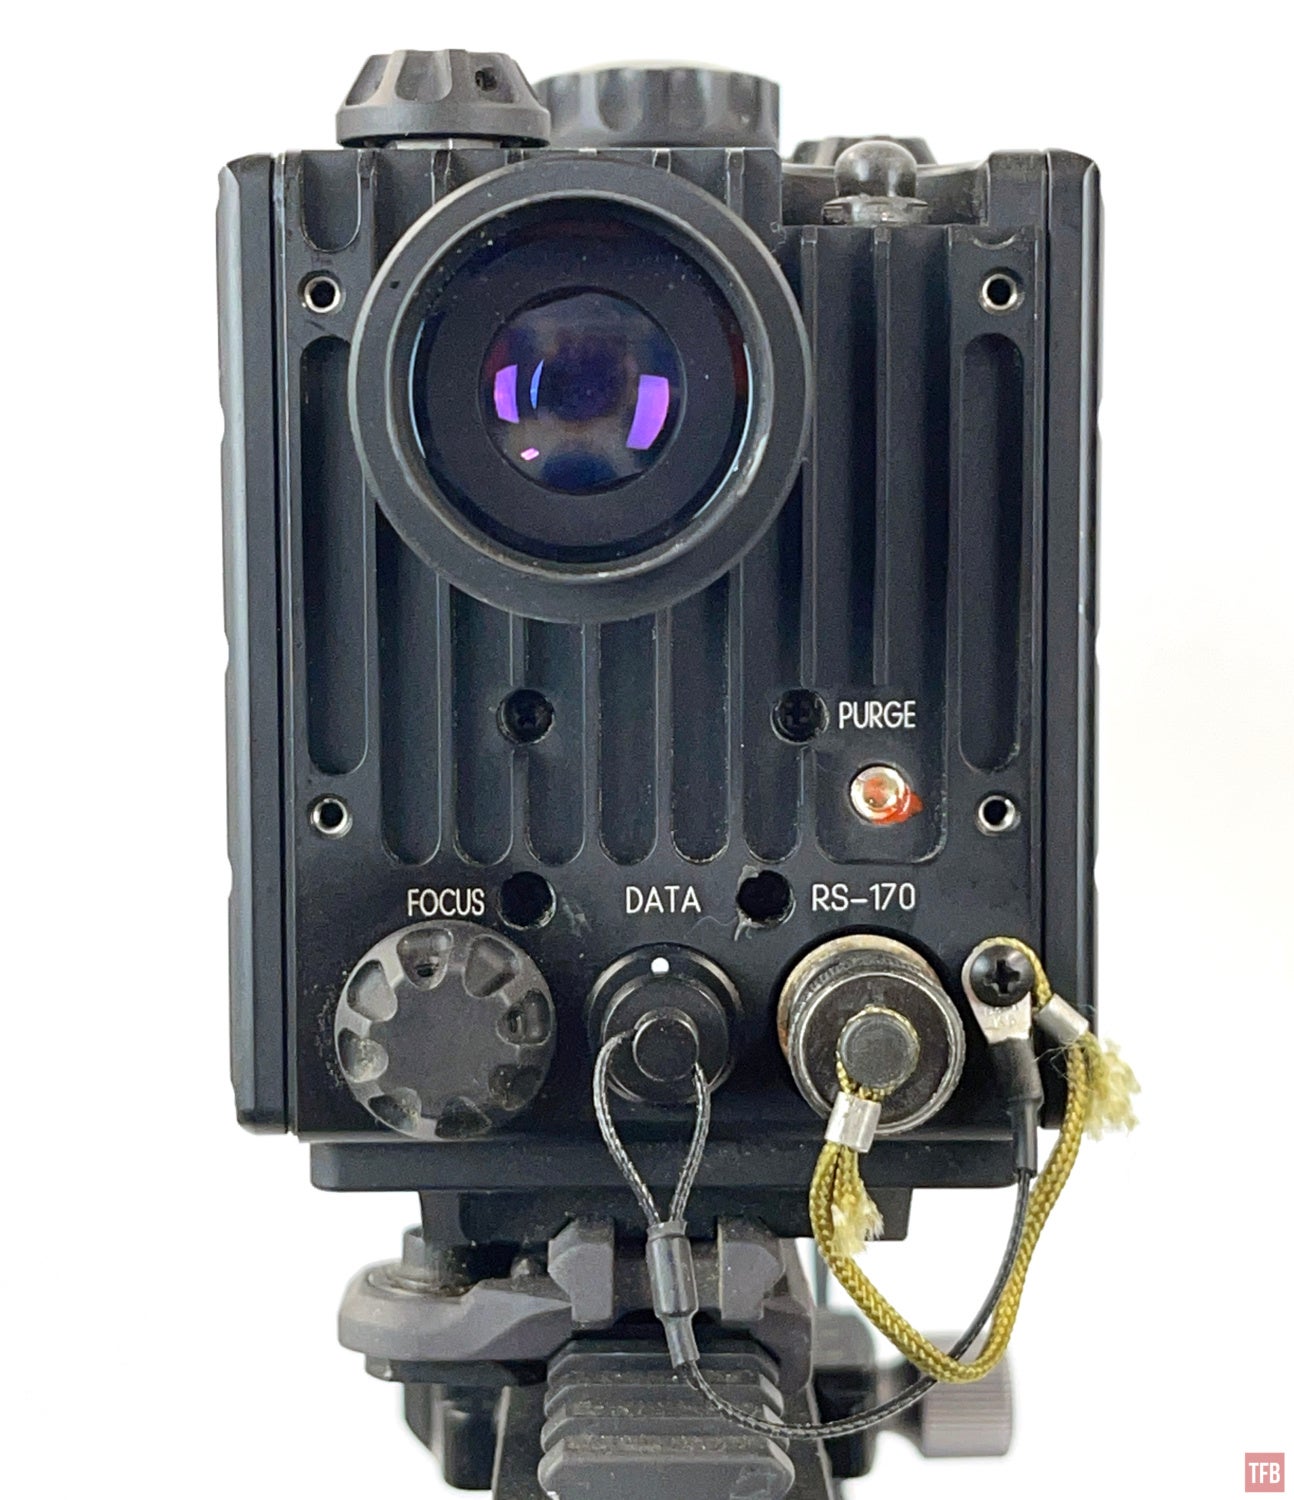
At the back of the See Spot III is the focus knob, at the bottom left corner. Next to it is the data port to plug the thermal into the PEQ-1B. And next to that is the RS-170 video out port which is a BNC connector. If you notice, the eyepiece is not centered.
Since the See Spot III has a BNC video out, I can input the image into my Android tablet and record the image with audio recording.
Using The See Spot III
Specs-wise, the FLIR See Spot does not sound all that amazing. It is a 256 x 256 InSb Focal Plane Array. That is even less than the JIM LR which is a 320×240 sensor. All the “good” LWIR thermal imagers are 640 resolution but the JIM LR proves that that is not the case since it can see much further and it is more sensitive. The See Spot is the same type of thermal imager which is a cooled MWIR thermal. Of course, there are 640-resolution cooled MWIR thermal sensors but they are astronomically expensive. The Vectronix HRTV is allegedly $100k. I do not have that kind of money. Hurray for military surplus.
There is a minor issue with the See Spot III and that is power. FLIR designed it to run off of lithium D-Cell batteries that are not rechargeable. They cost around $30 and up and only last for 5.5 hours.
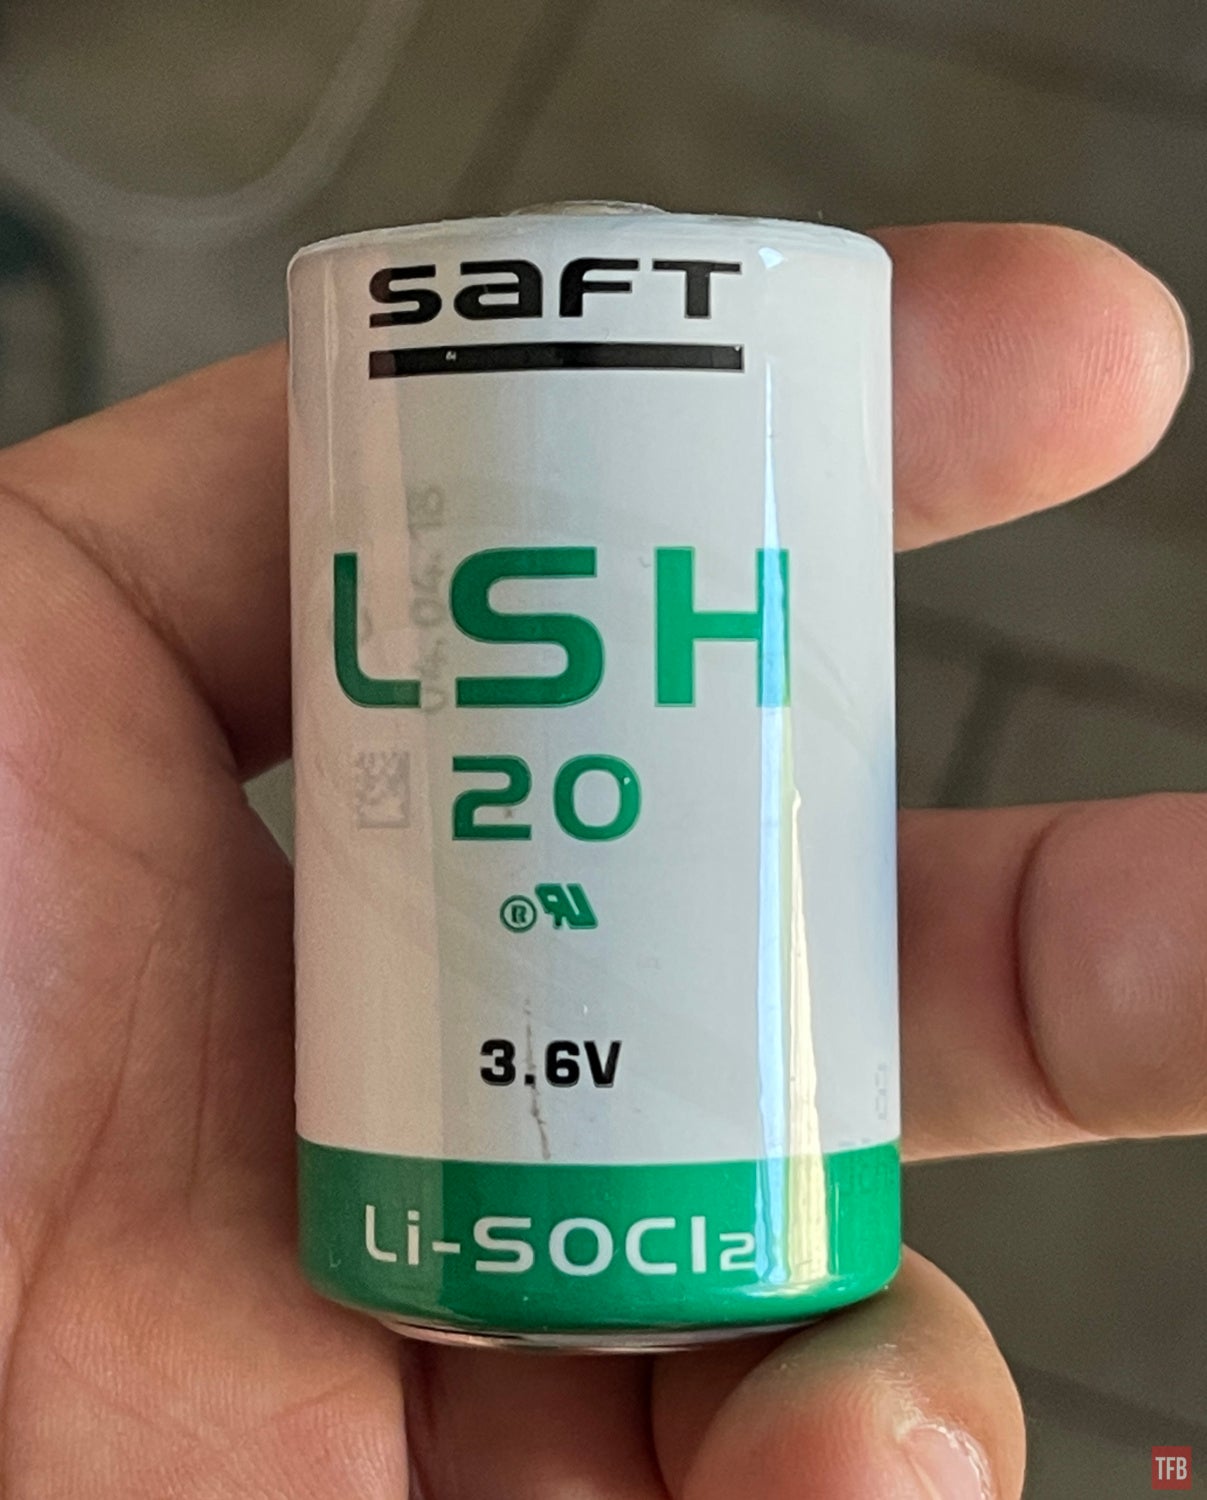
Fortunately, FLIR made alternate power options. The manual mentions some sort of power connector to use BA/5590 batteries but no pictures of how that setup looks like or how it works. FLIR did make this battery eliminator. It replaces the battery cap and has a dummy cell with a wire sticking out of it.
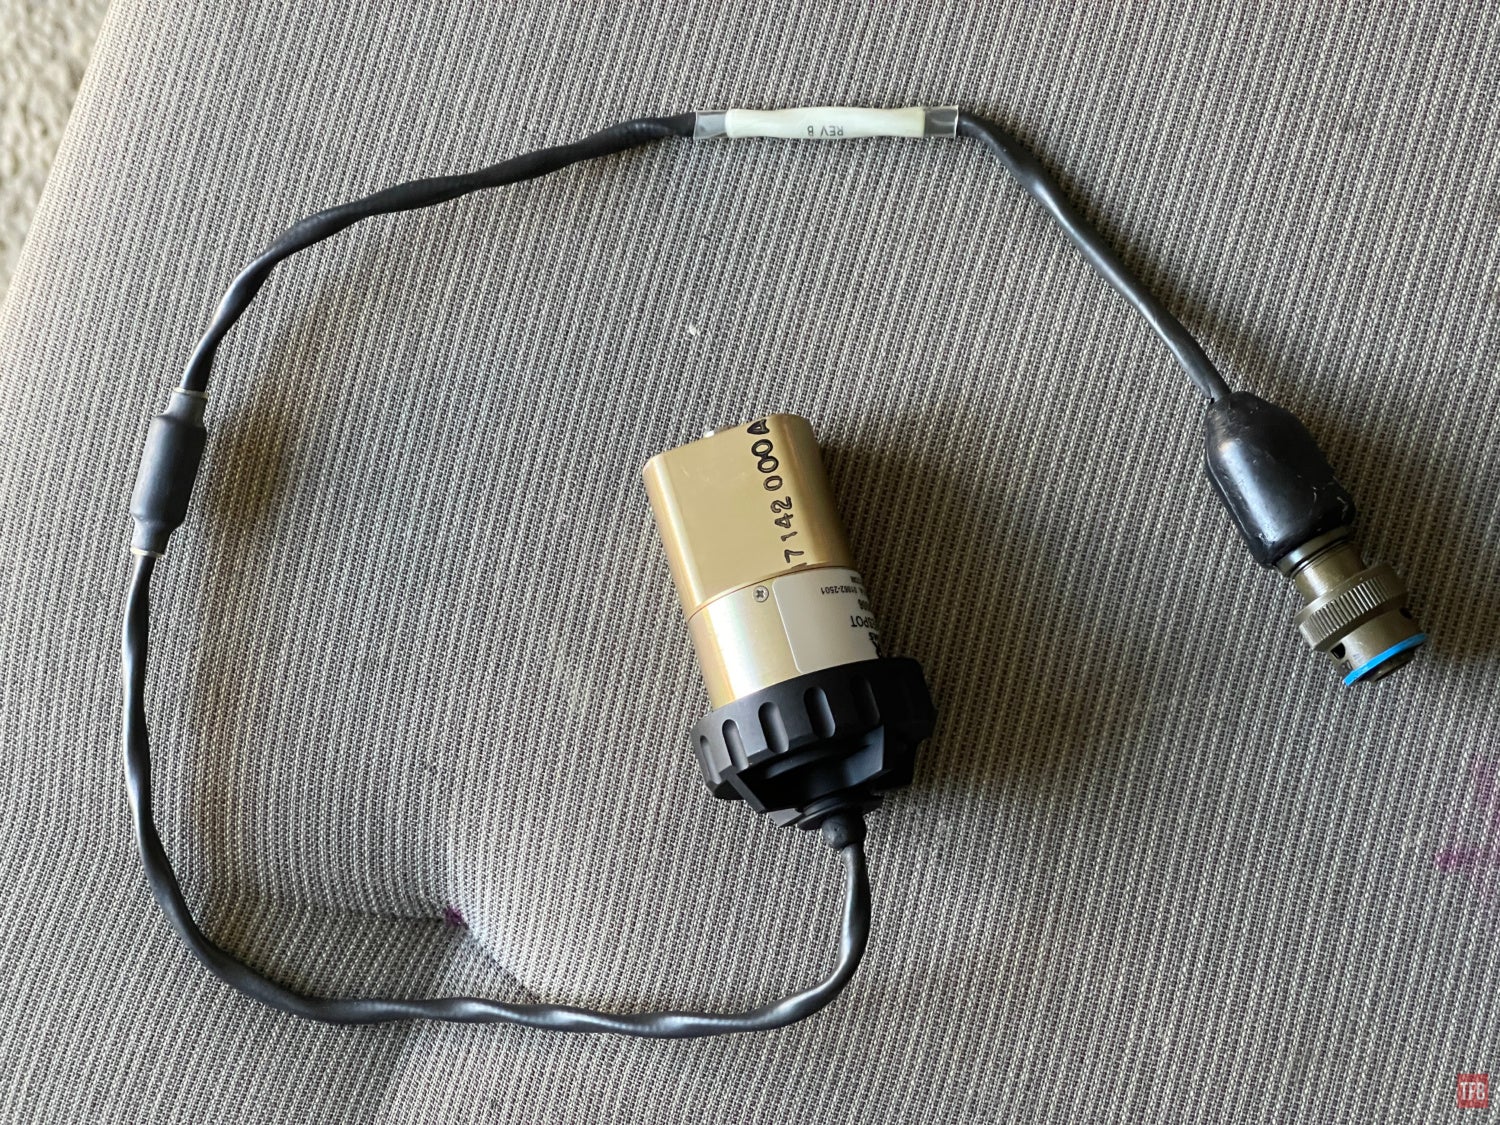
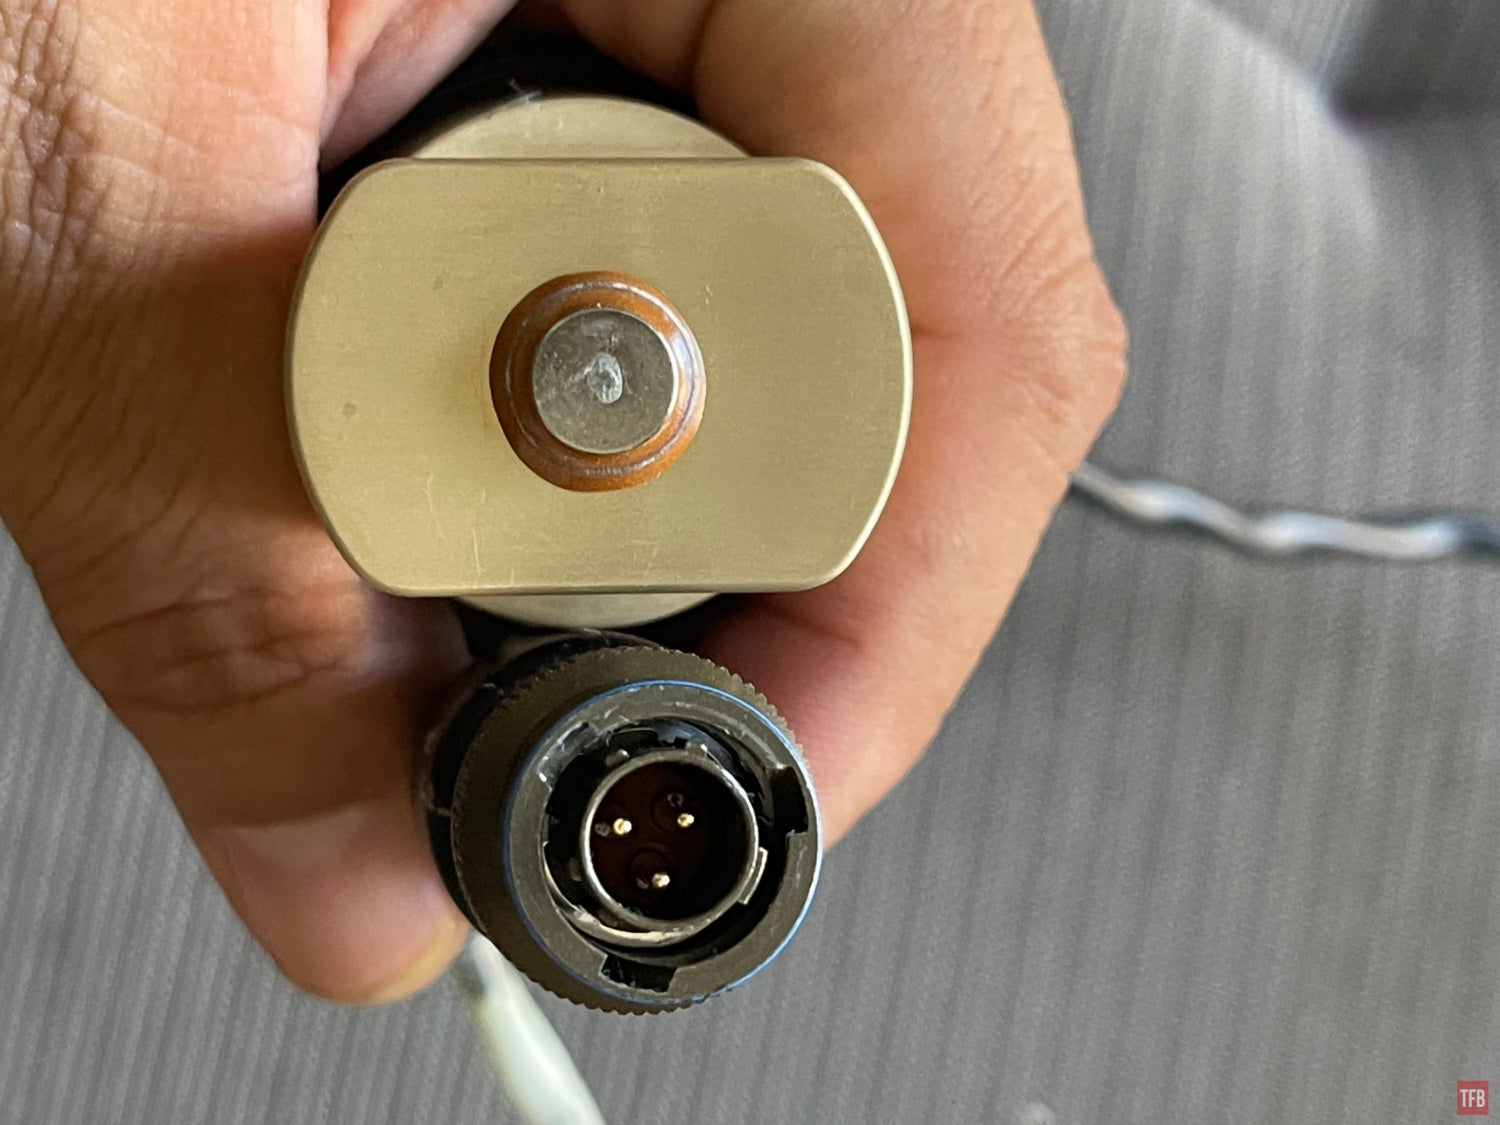
The battery eliminator is supposed to plug into a splitter and then into the PEQ-1B. I could not see any other way for a BA/5590 battery to be plugged in so it must somehow plug into this battery eliminator. The problem I see is the SAFT battery is only 3.6v. A BA/5590 is 12v or 24v. The battery eliminator should down-convert the voltage. So I decided to test this. I cut the Amphenol connector off and wired the battery eliminator to a pair of 9v batteries plugged into each other to make 18v.
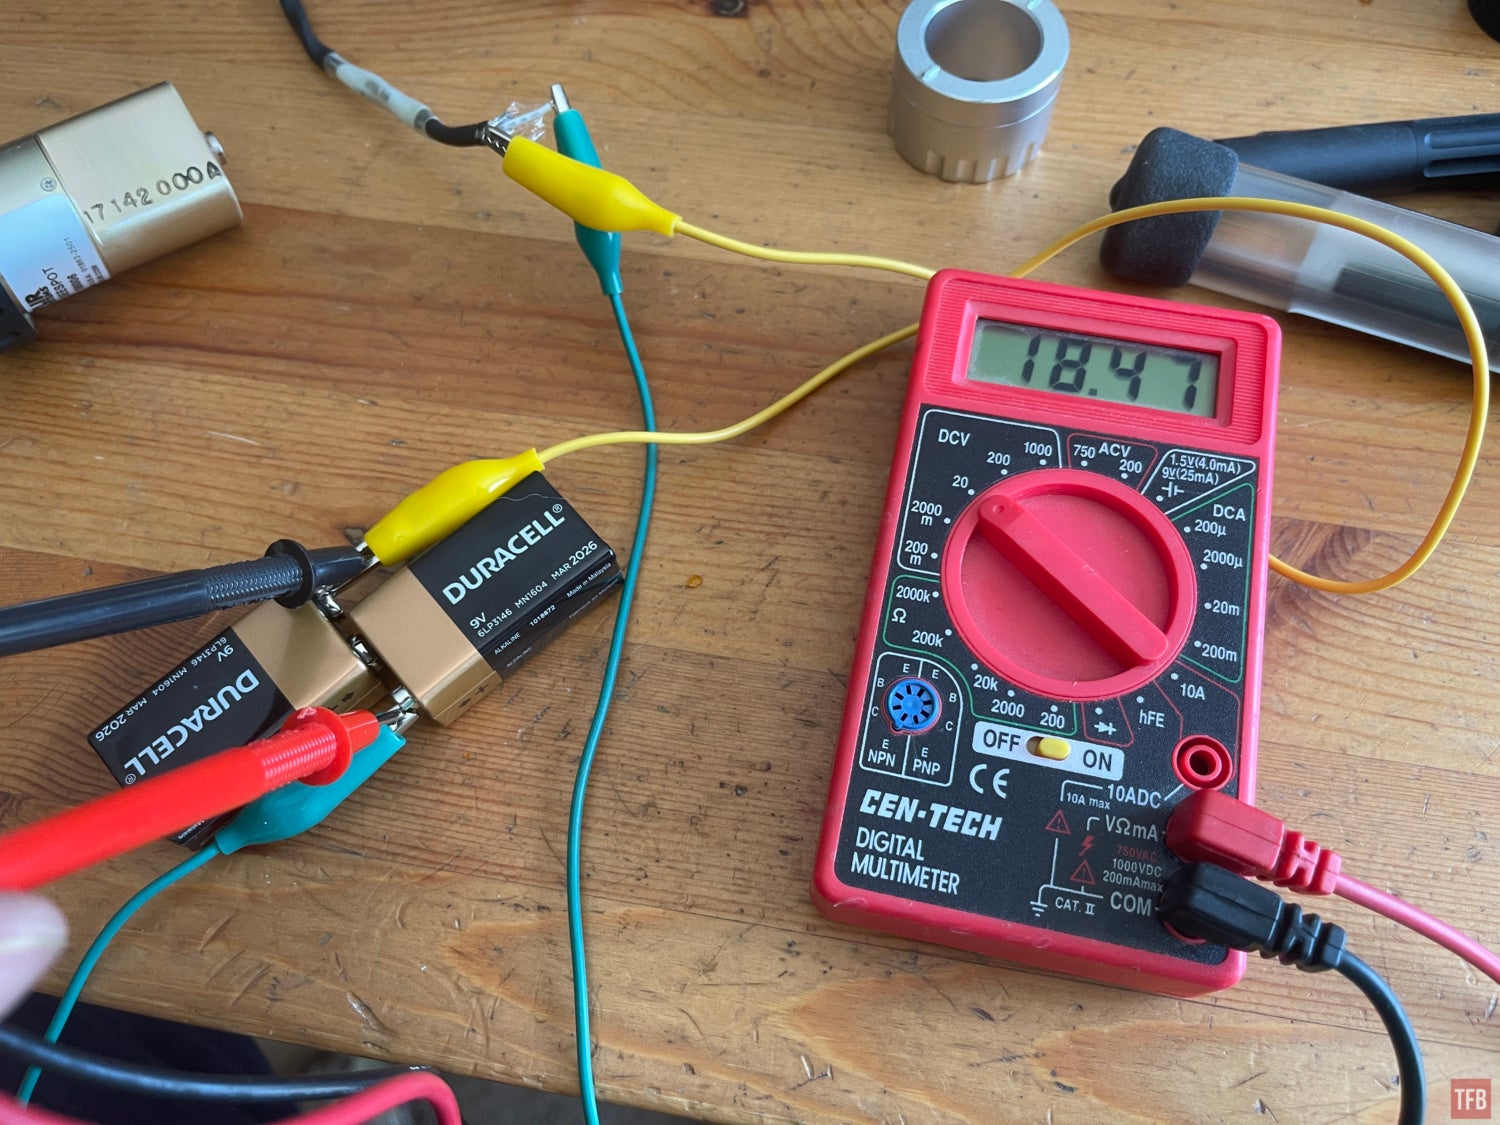
2x 9v make 18v.
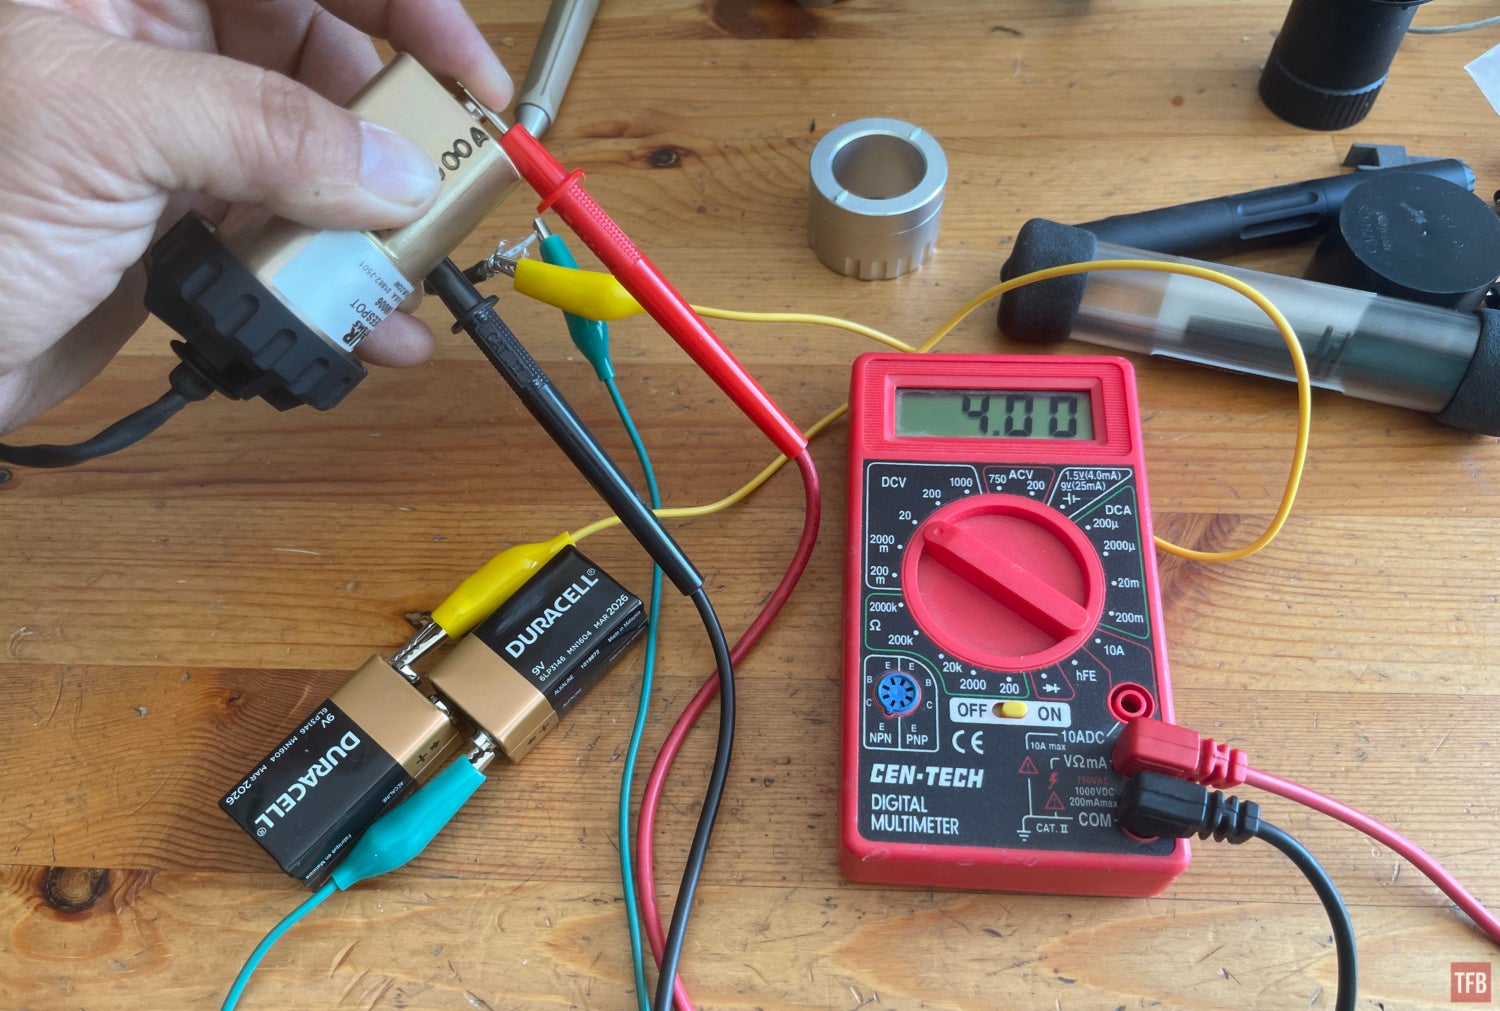
18v gets converted to an even 4v. Success!
So my experiment worked. However, I never planned to run the See Spot III on 9v batteries. Instead, I will run it off a LiPo RC battery. I got a deans connector soldered to the battery eliminator cable and now I can plug RC car batteries into the See Spot III.
Images Produced By The See Spot III
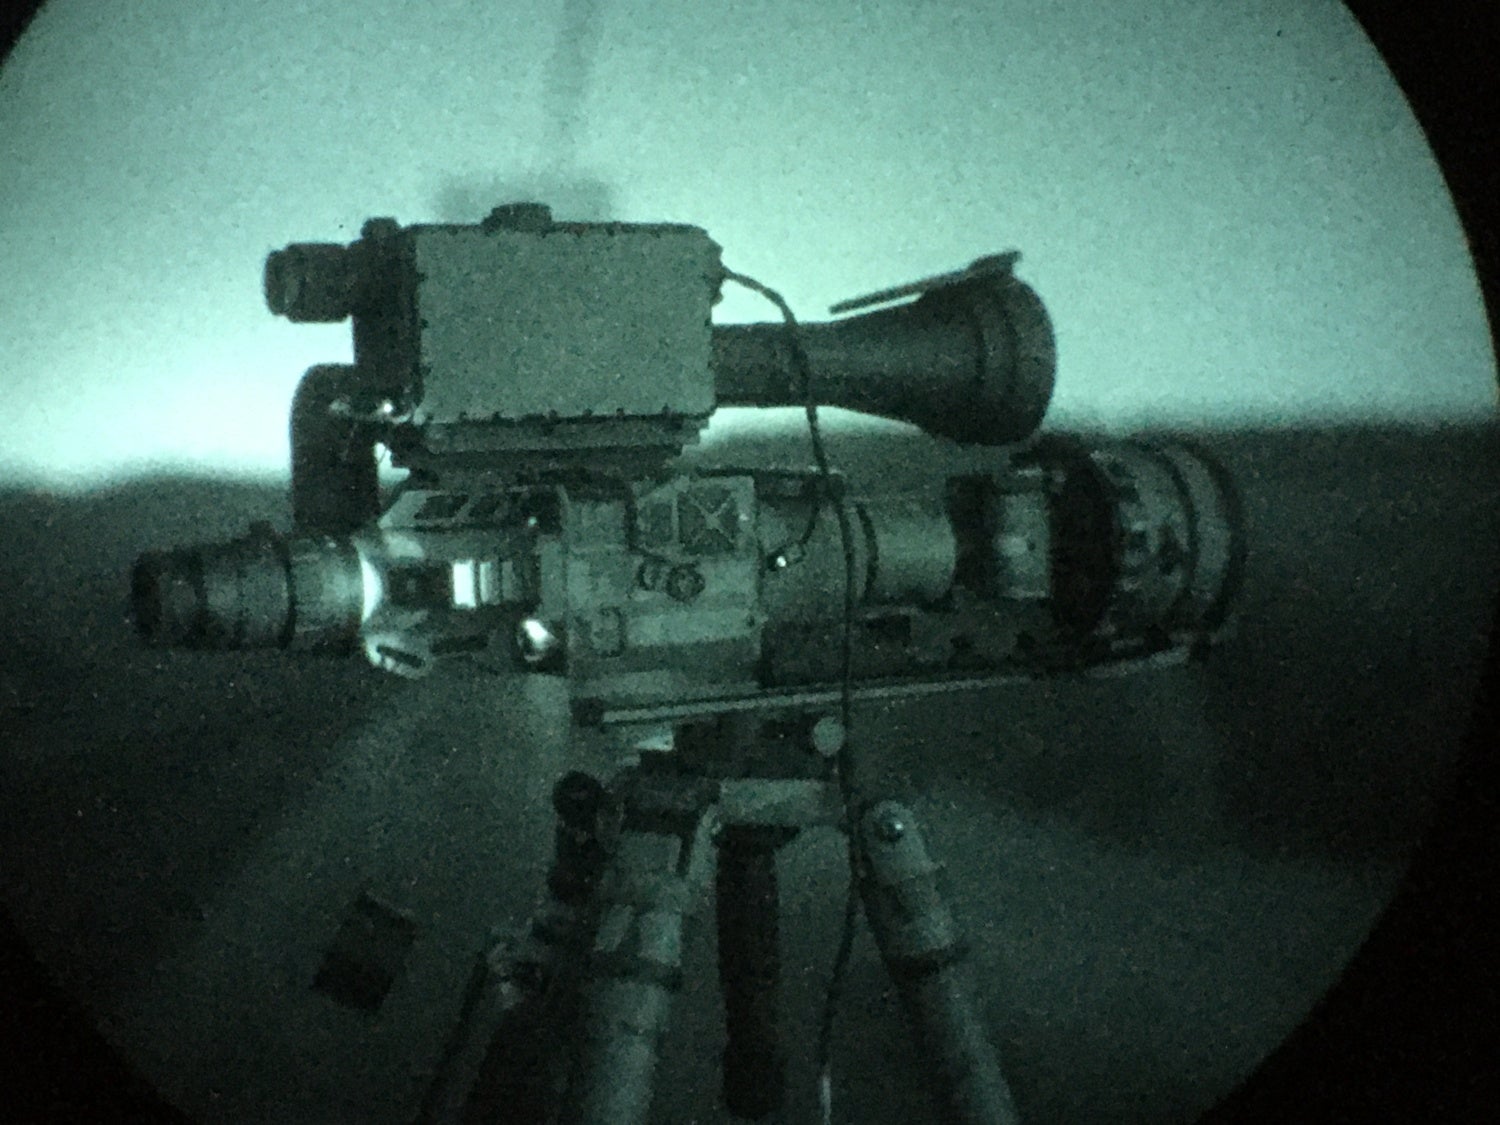
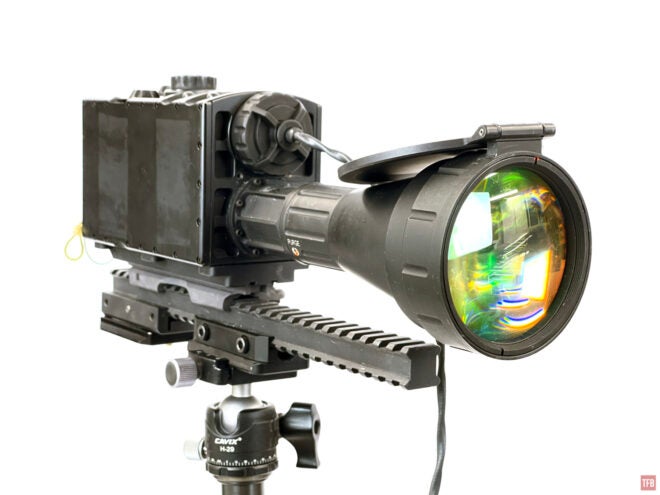
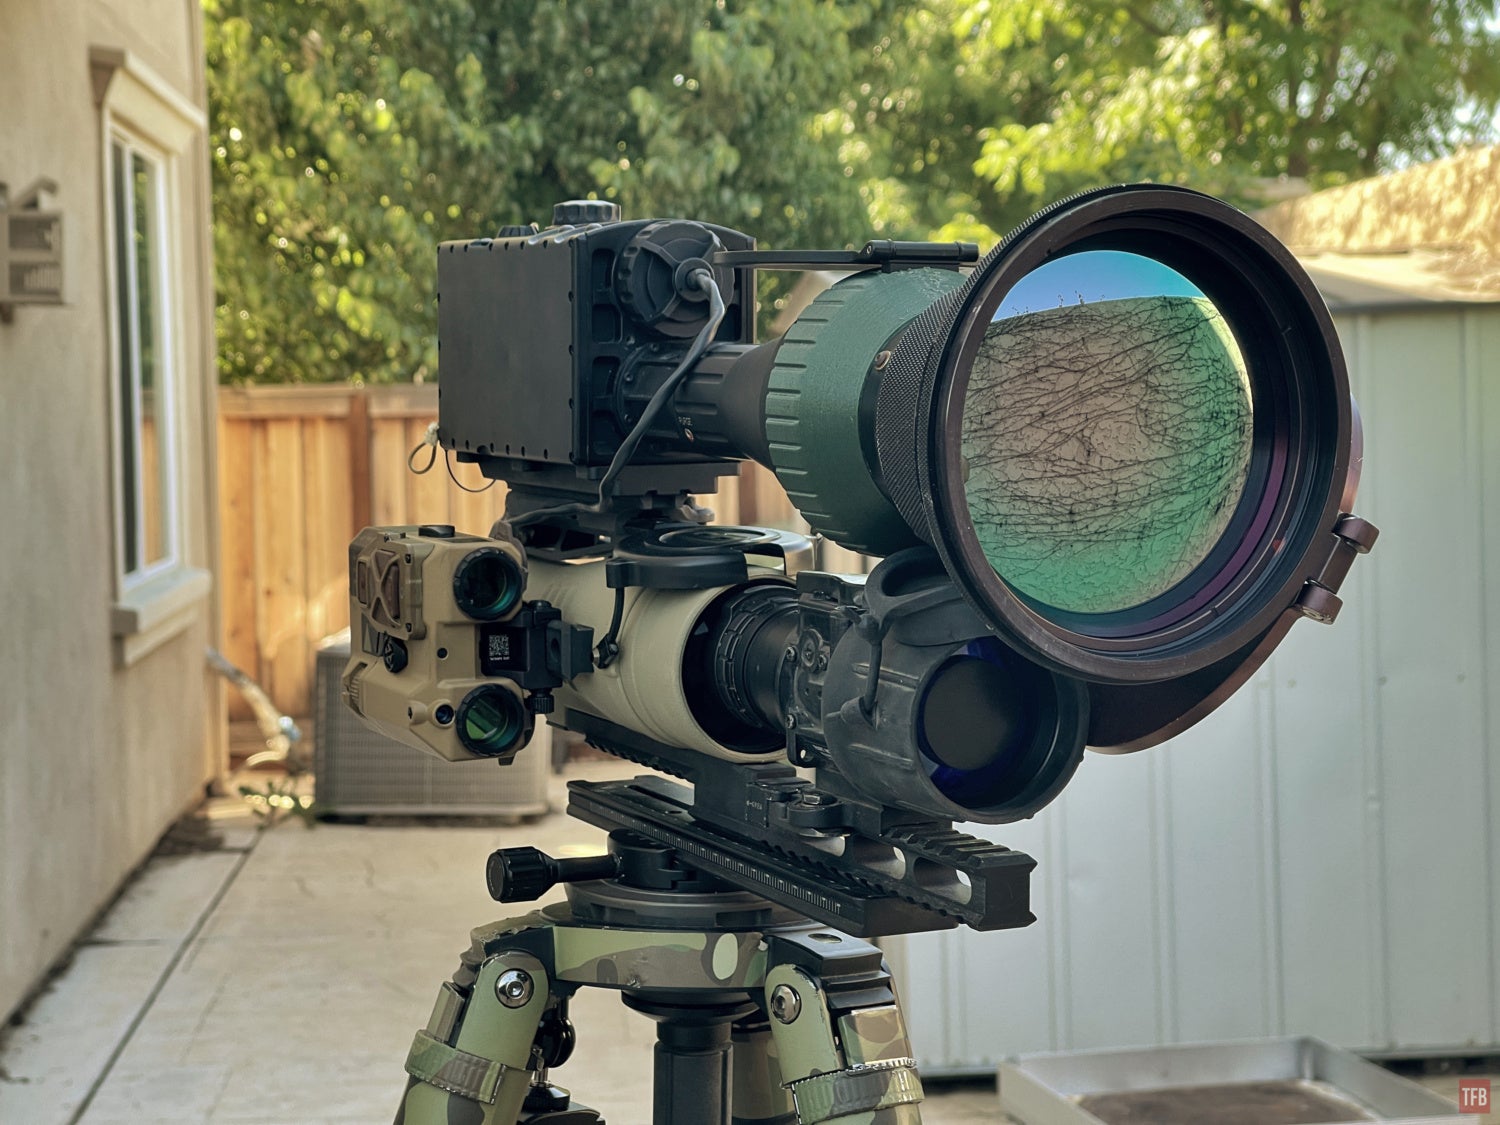
See Spot III mounted on my tripod.
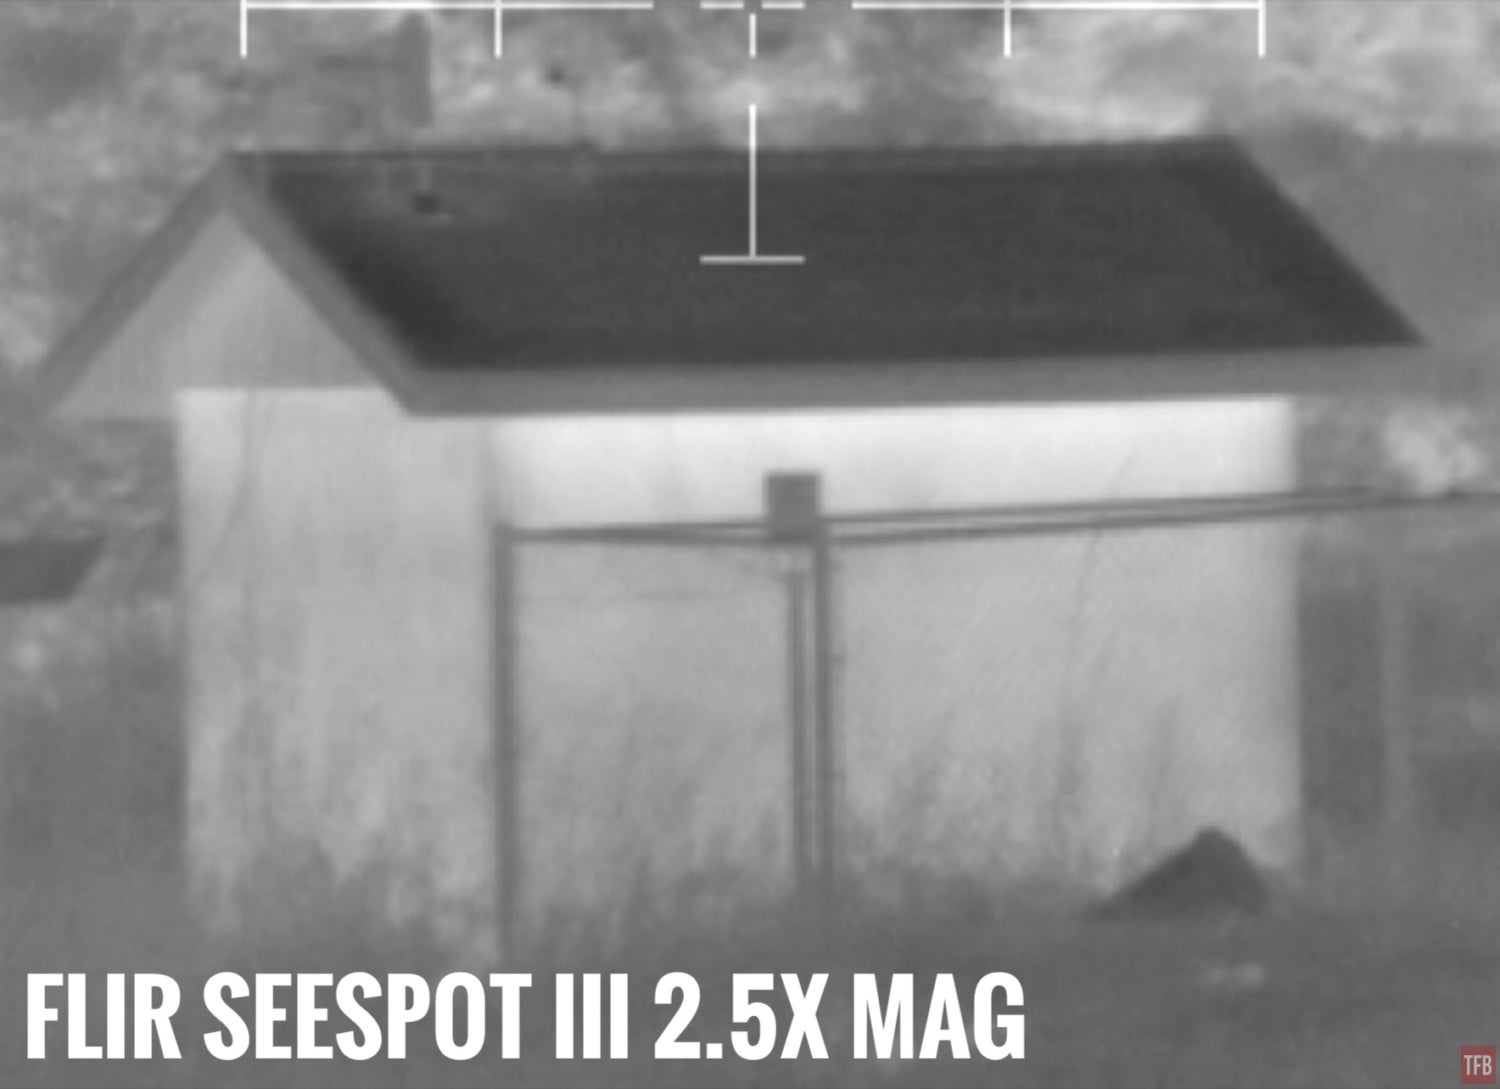
To my surprise, the See Spot has a very narrow FOV. 1.76º x 1.65º. In comparison, the JIM LR, with a 2x afocal magnifier is 1.5° x 1.13º. Very similar. Here are some screenshots I took of the infamous shed that is 530 yards away.
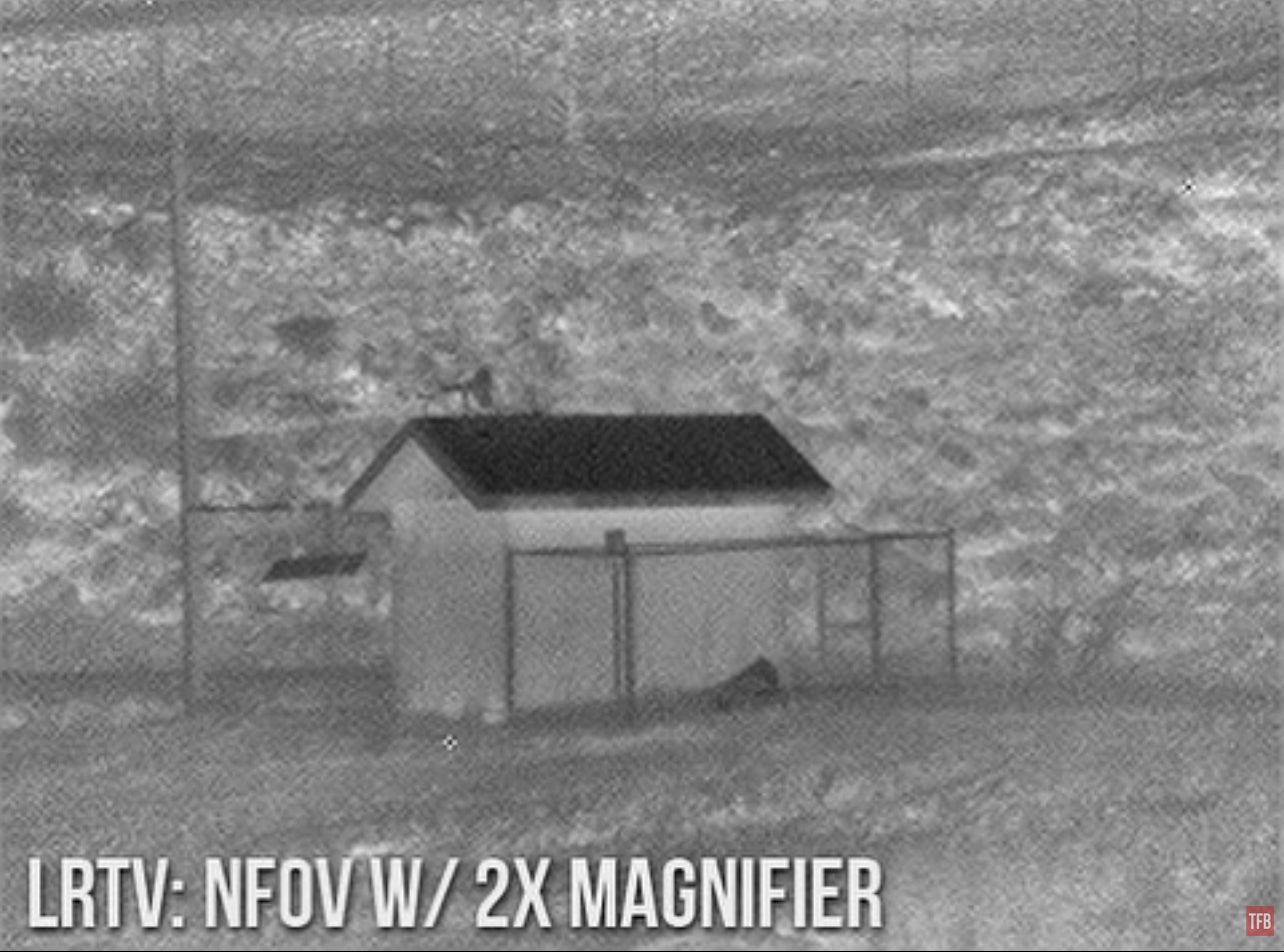
This is the maximum optical range of the LRTV aka JIM LR.
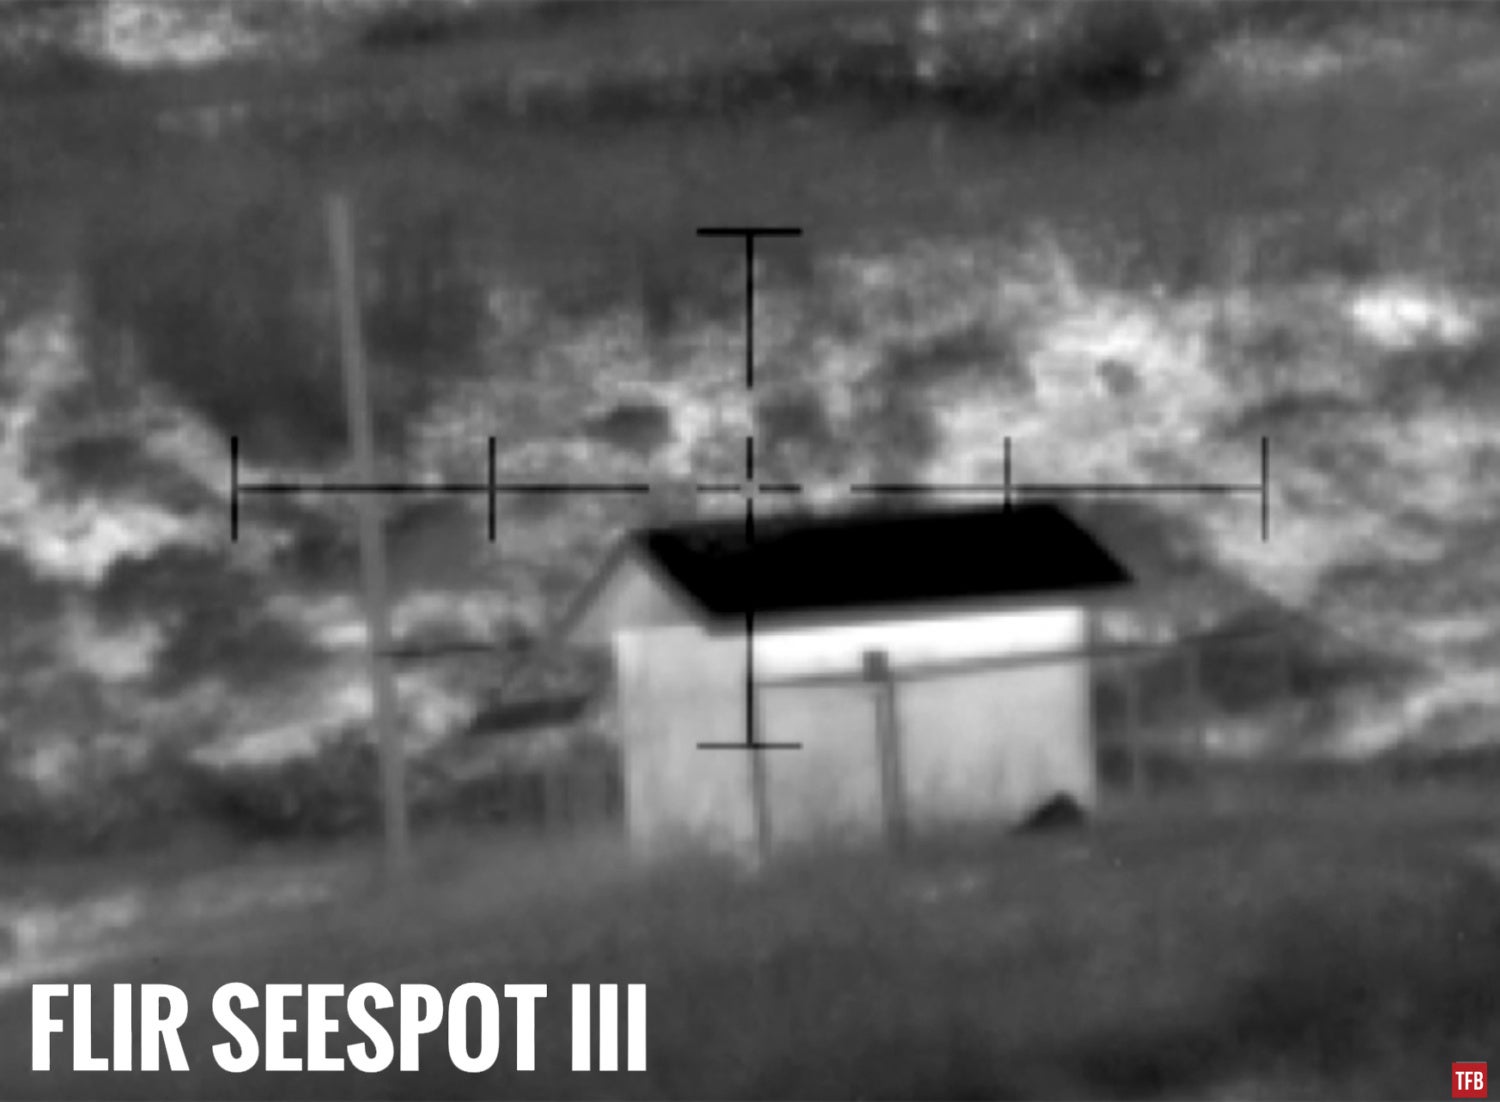
Here is the FLIR See Spot III. There is no digital zoom. It starts with this high of a magnification.
The See Spot does not seem to get that sharp of a focus but you can still make out some amazing detail like the weeds and the fence as well as the small solar panel to the left of the shed.
You saw earlier that I like to mount the See Spot III on my Bushnell LMSS spotting scope. So I can look with night vision and then augment it with thermal. The See Spot III can actually see a lot further to a certain degree. I can only magnify so much of the night vision clip-on image and it is dependent on the amount of ambient light or an IR illuminator.
Like my other thermal devices, I managed to find a MWIR thermal magnifier that works with the See Spot III. The magnifier is the biggest thermal magnifier I have and it was designed for a FLIR Recon B2. The Recon B2 is another cooled thermal device similar to the JIM LR. However, I tried to use this magnifier with the JIM LR and it was not as good as I had hoped. The focal length is fine when I use the JIM LR at WFOV but when I switch to NFOV the focus is out of whack. Not the case with the See Spot III PAS-21. The image is usable. Due to the massive size of the magnifier, I cannot fit my PVS-27 or PVS-30 underneath unless I use a riser. So I had to use a PVS-24.
The See Spot III was never designed to have a magnifier so I got the help of my friend Thomas A. to design and print me a coupler. Now I don’t have to hold the magnifier in front with my hands.
Here is the 530-yard shed as seen through the FLIR See Spot III with a 2.5x magnifier. Look at the weeds along the wall! I have never seen the shed this large and in such detail from 530 yards away with a thermal device before.
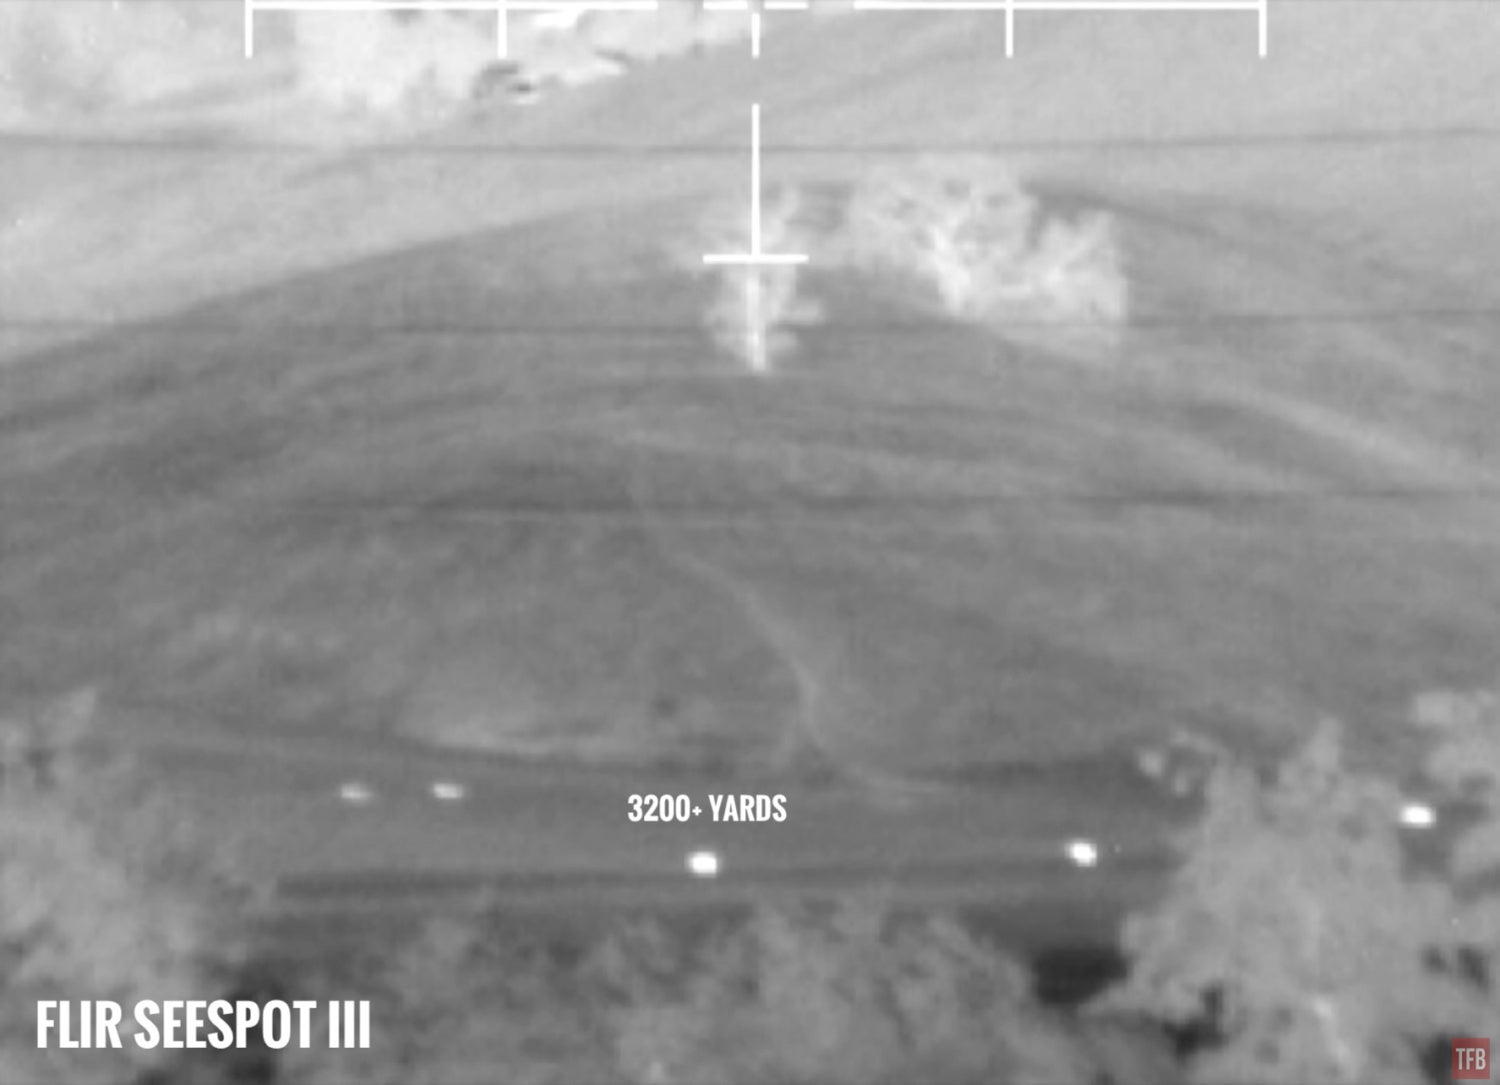
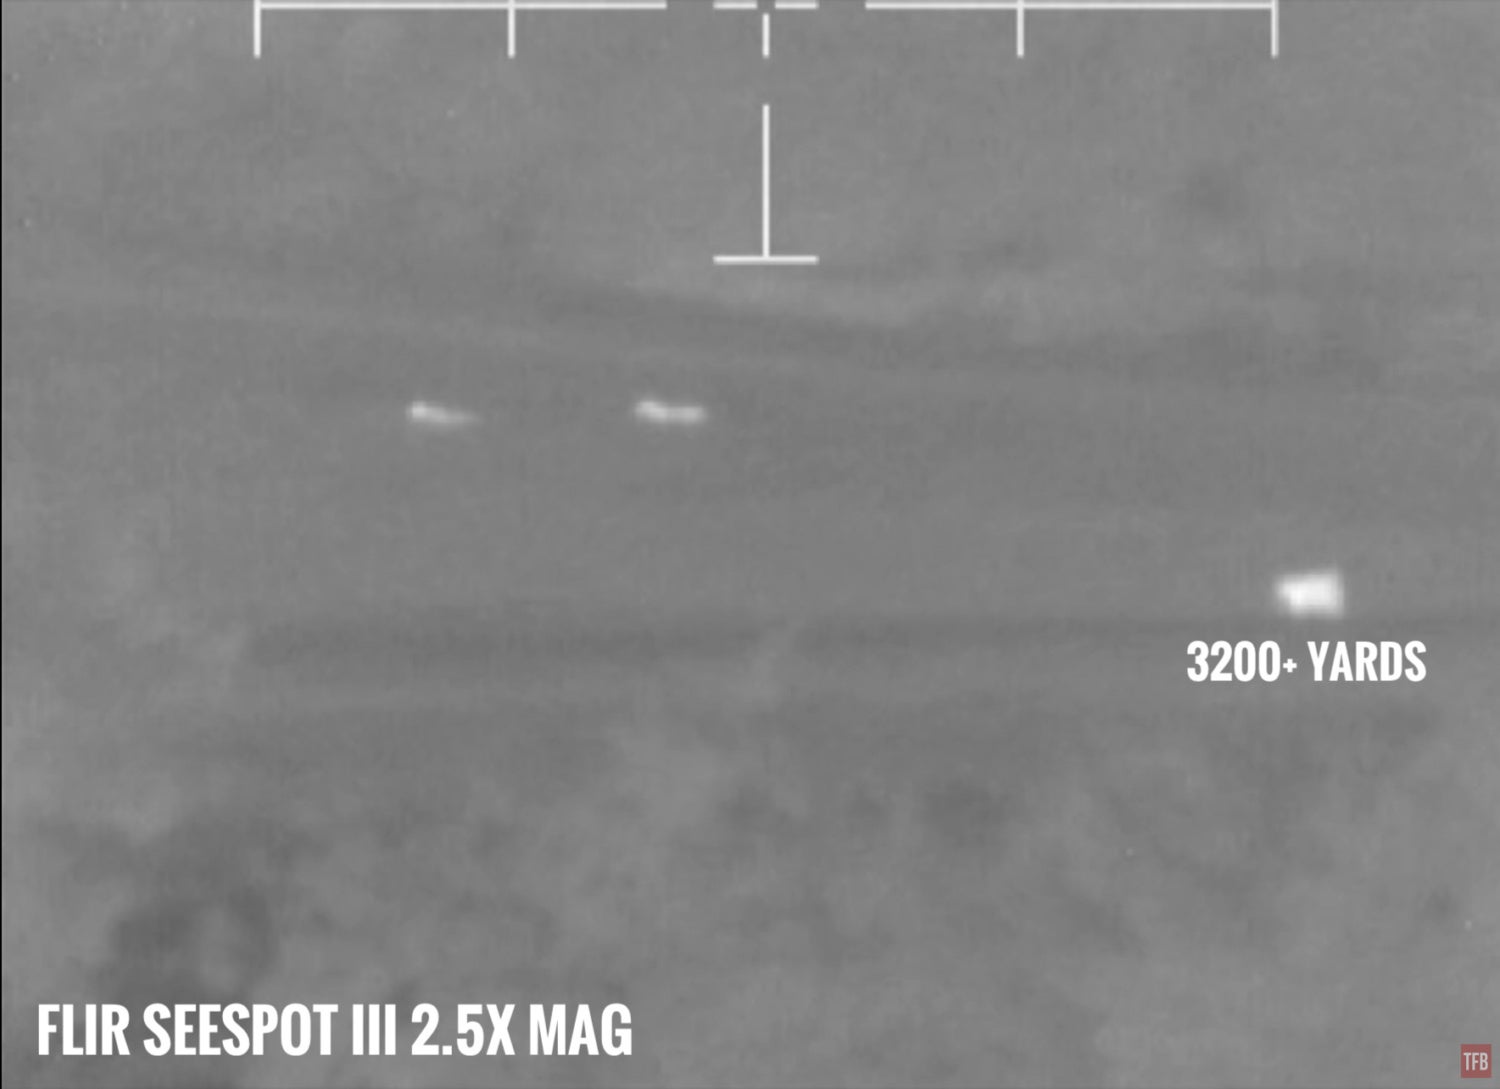
In my testing, I saw some animals that were over 3,200 yards away. Without the magnifier, I could only see misshapen blobs. But with the magnifier, I see the shape of a cow.
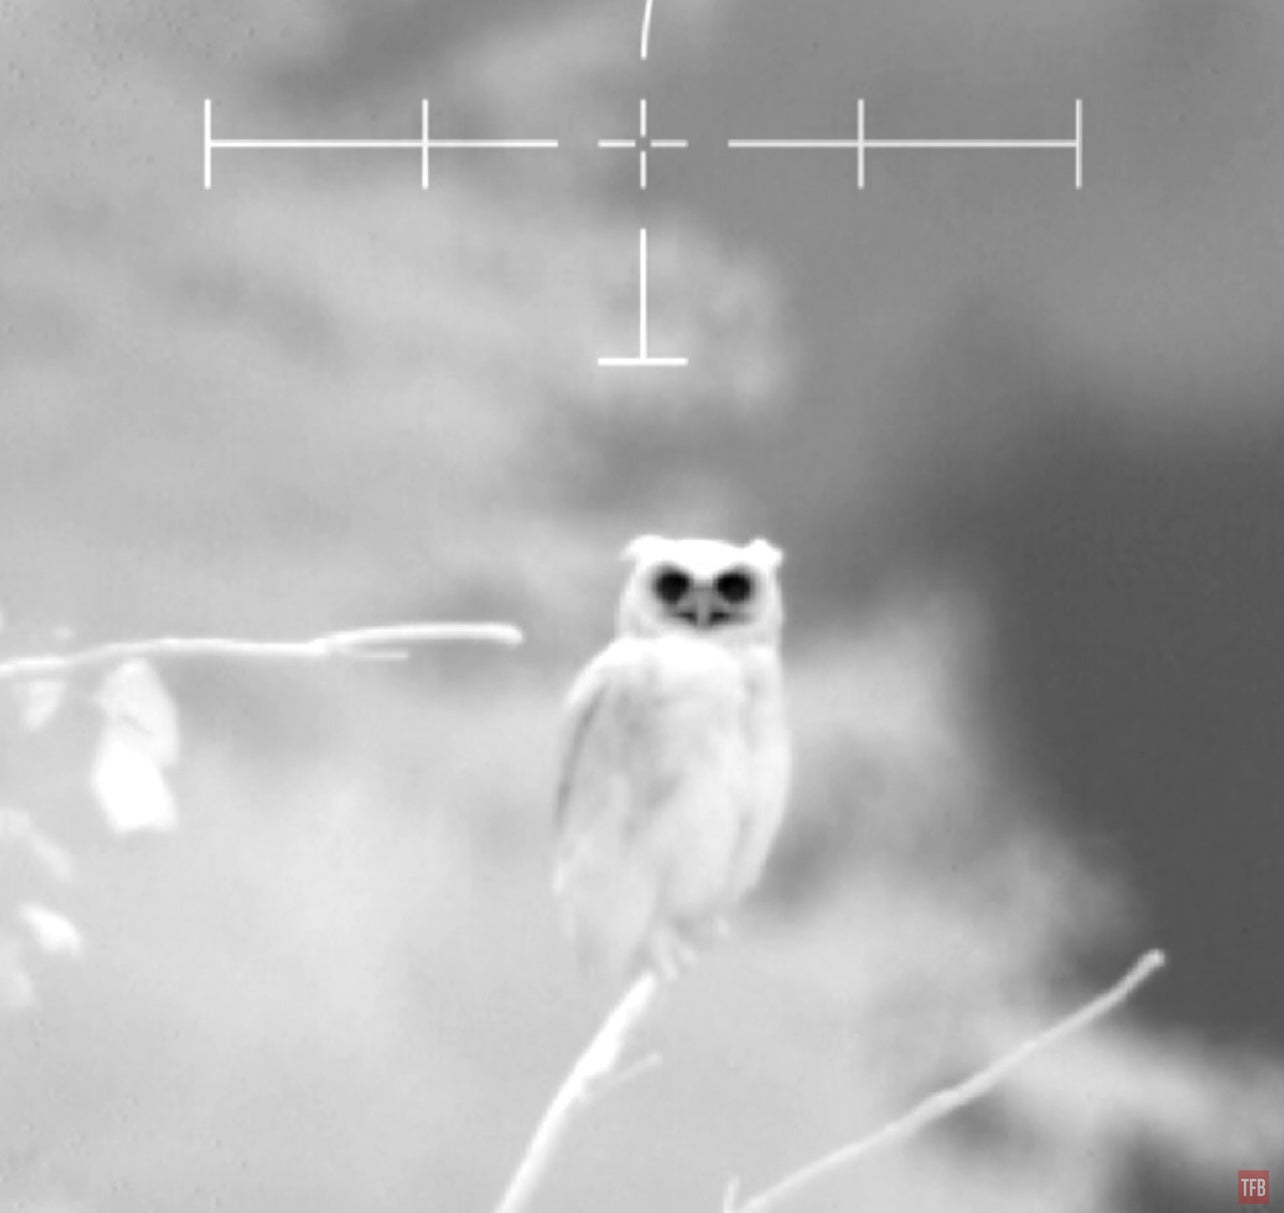
Here is a great horned owl I saw 72 yards away.
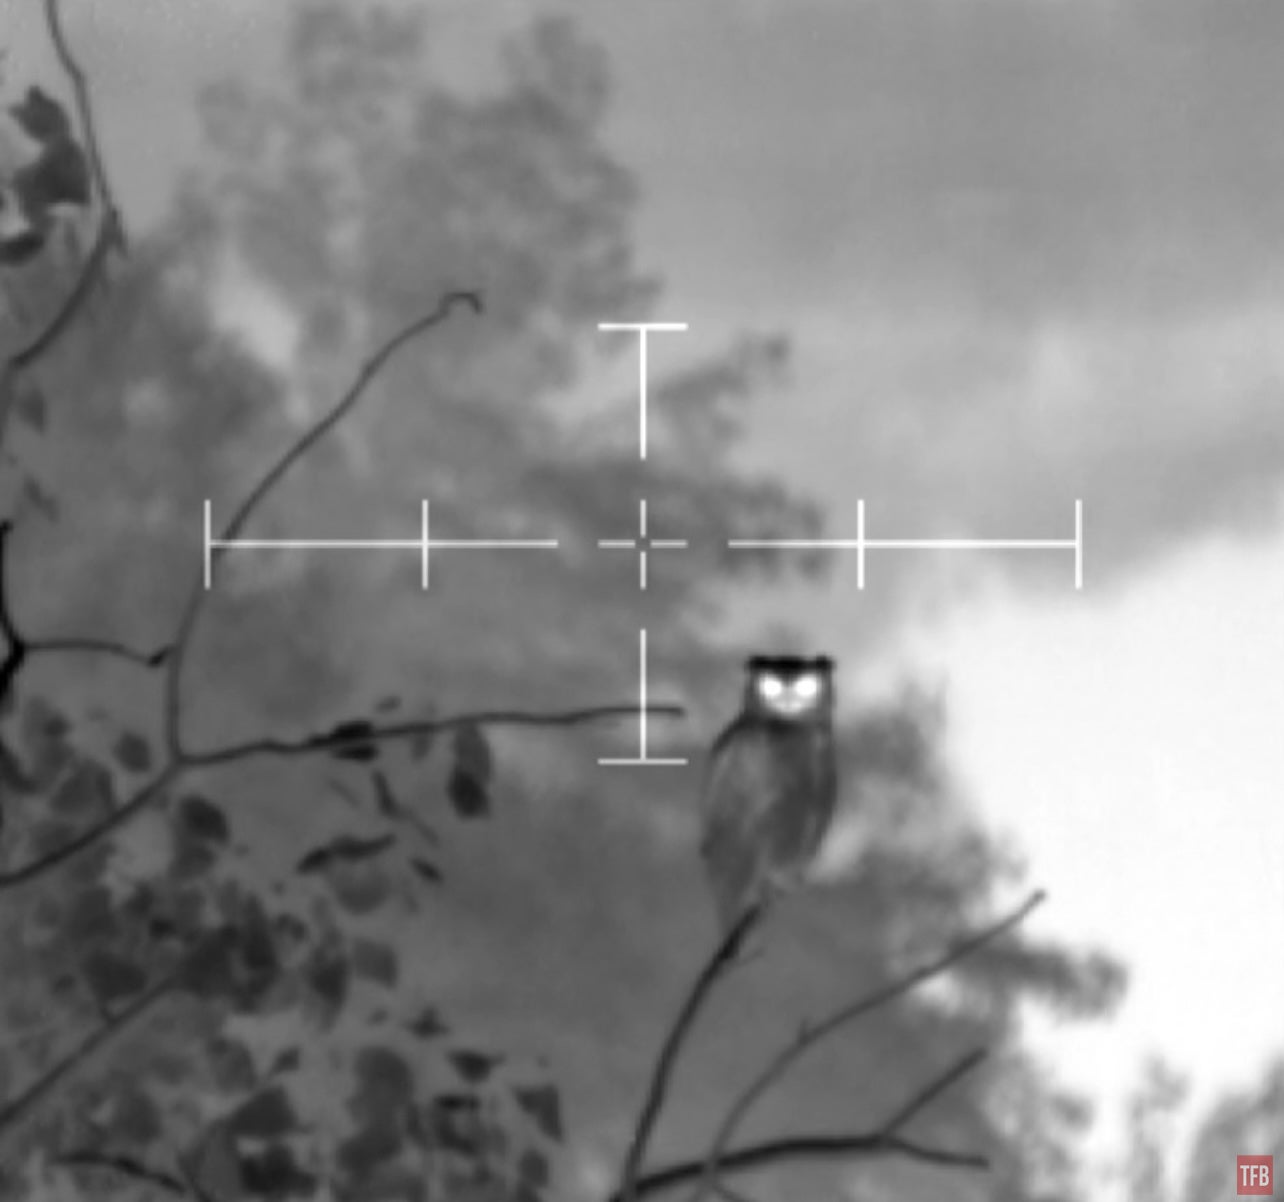
Un-magnified.
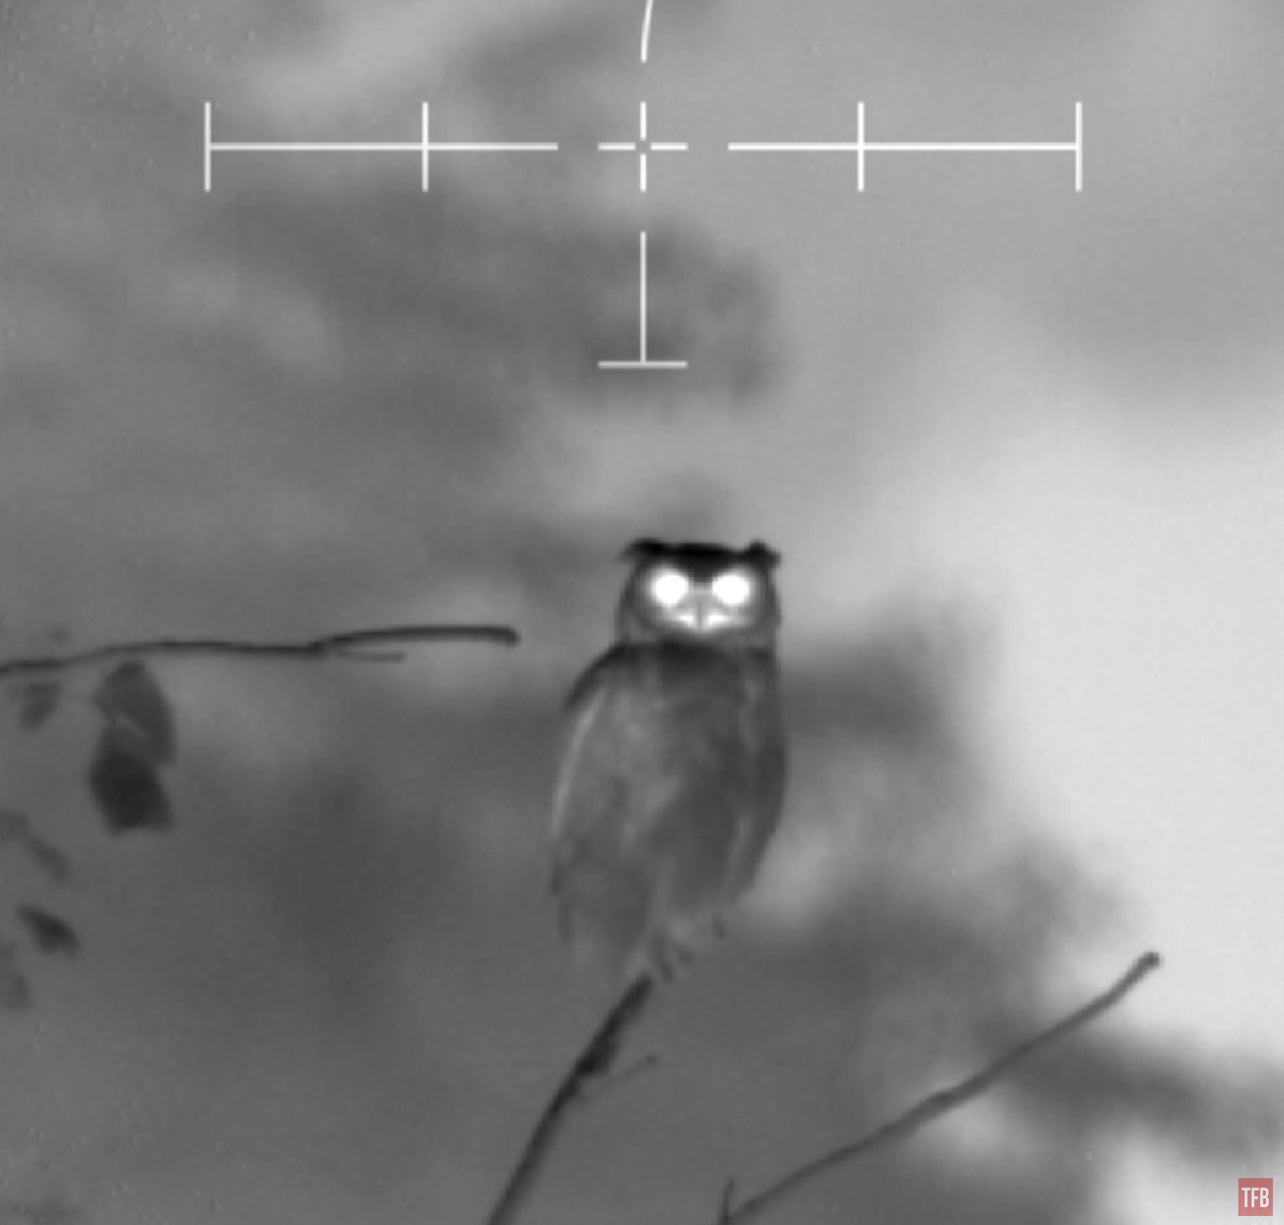
w/ 2.5x magnifier
w/ 2.5x magnifier
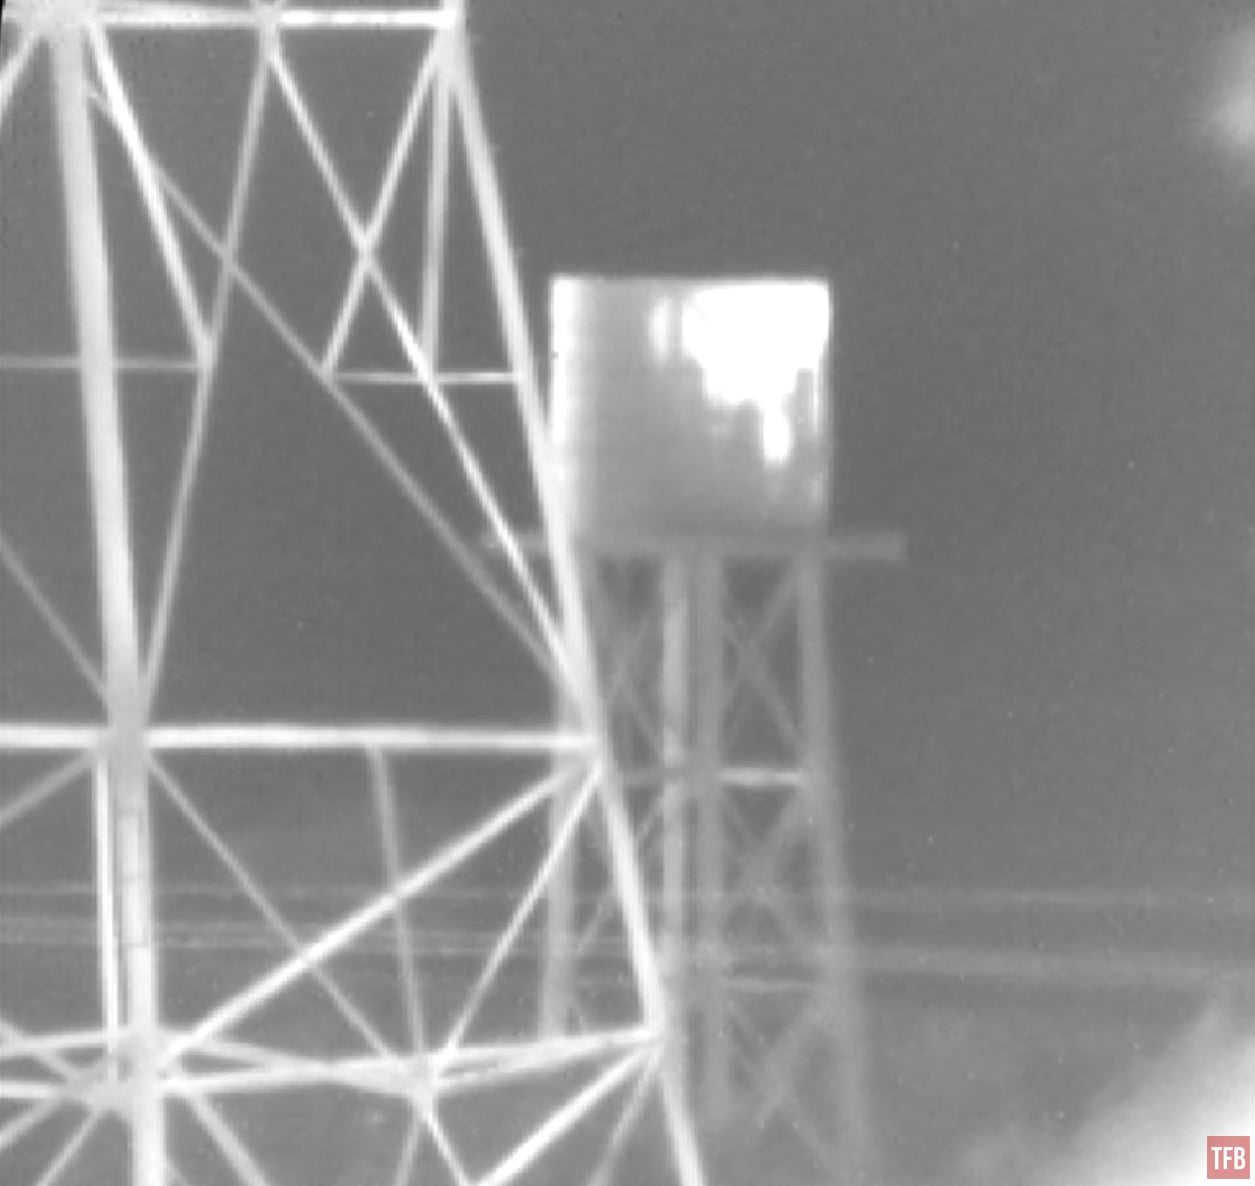
Here is a water tower that is just shy of a mile. According to Google Maps it is 1,620 yards away or 1,500 meters. The tank is 2.1 mils tall. The transmission tower is 830 yards away.
Edit: Here is a video I recorded off the FLIR See Spot III
Final Thoughts On The See Spot III
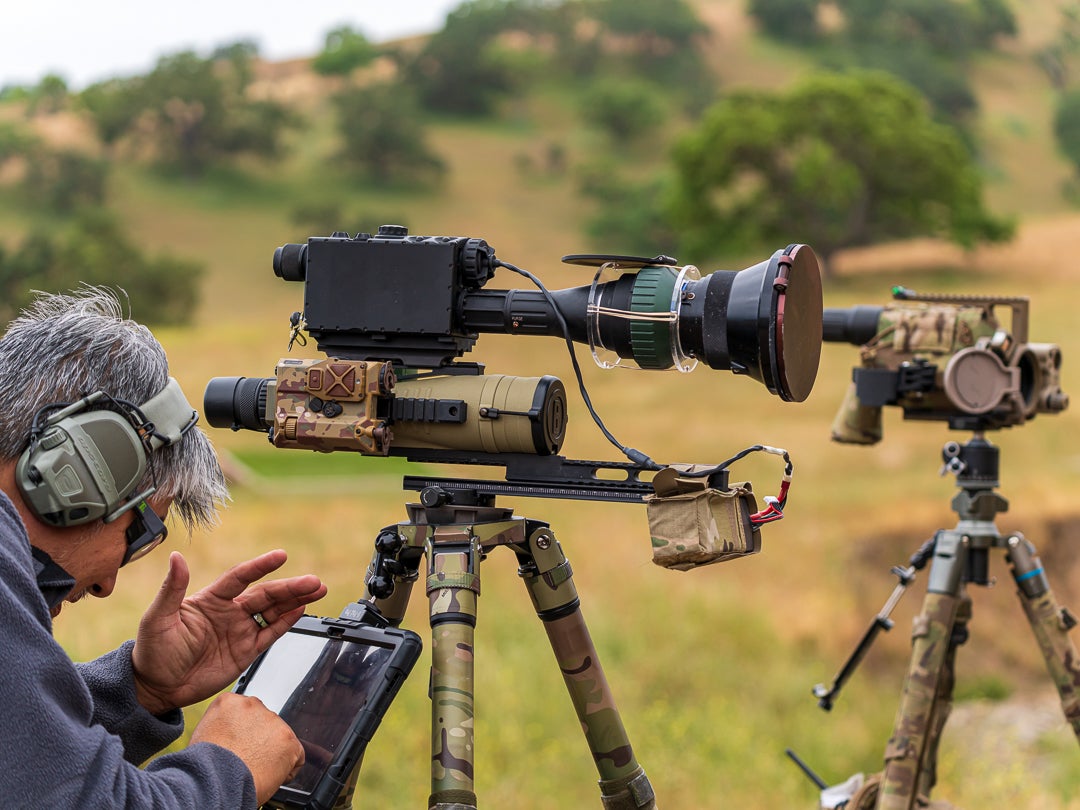
Photo by Vic M. of me setting up the See Spot III and tablet to record the images it produces. #trickedoutspottingscope
The See Spot III exceeded my expectations. However, like the JIM LR, its performance is seriously increased with a good magnifier. My friend Kevin has been making a chart that shows thermal performance against one another. The See Spot III with a 2.5x magnifier is now the best thermal imager. Of course, the Recon V and HISS XLR would surpass the See Spot if they were boosted with a thermal magnifier like the one I used. That goes for any 640-resolution cooled thermal system. Assuming there is a thermal magnifier that they can use.

I tried to connect the See Spot to my BAE RED-I but for some reason, the image doesn’t show up properly.
With regards to the objective lens being able to see 1064 nm, I did a test with the objective lens. I removed it and held it in front of my full spectrum SONY A7S as well as my modified Sionyx Aurora Pro and I was able to get some images.
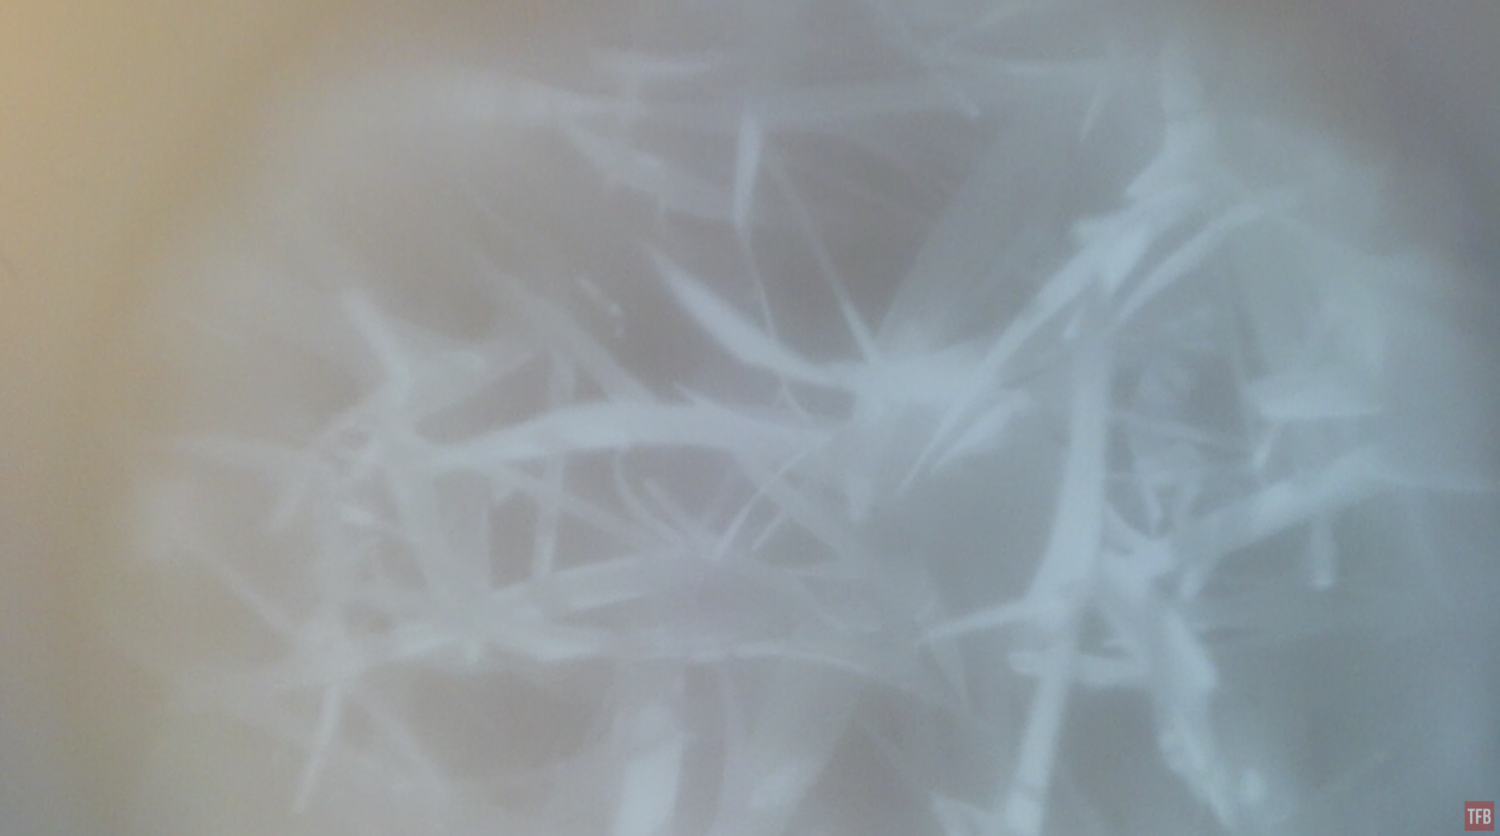
Macro photo taken with Sionyx Aurora Pro and See Spot III objective lens.
Here are some photos I took with my Sony A7S.
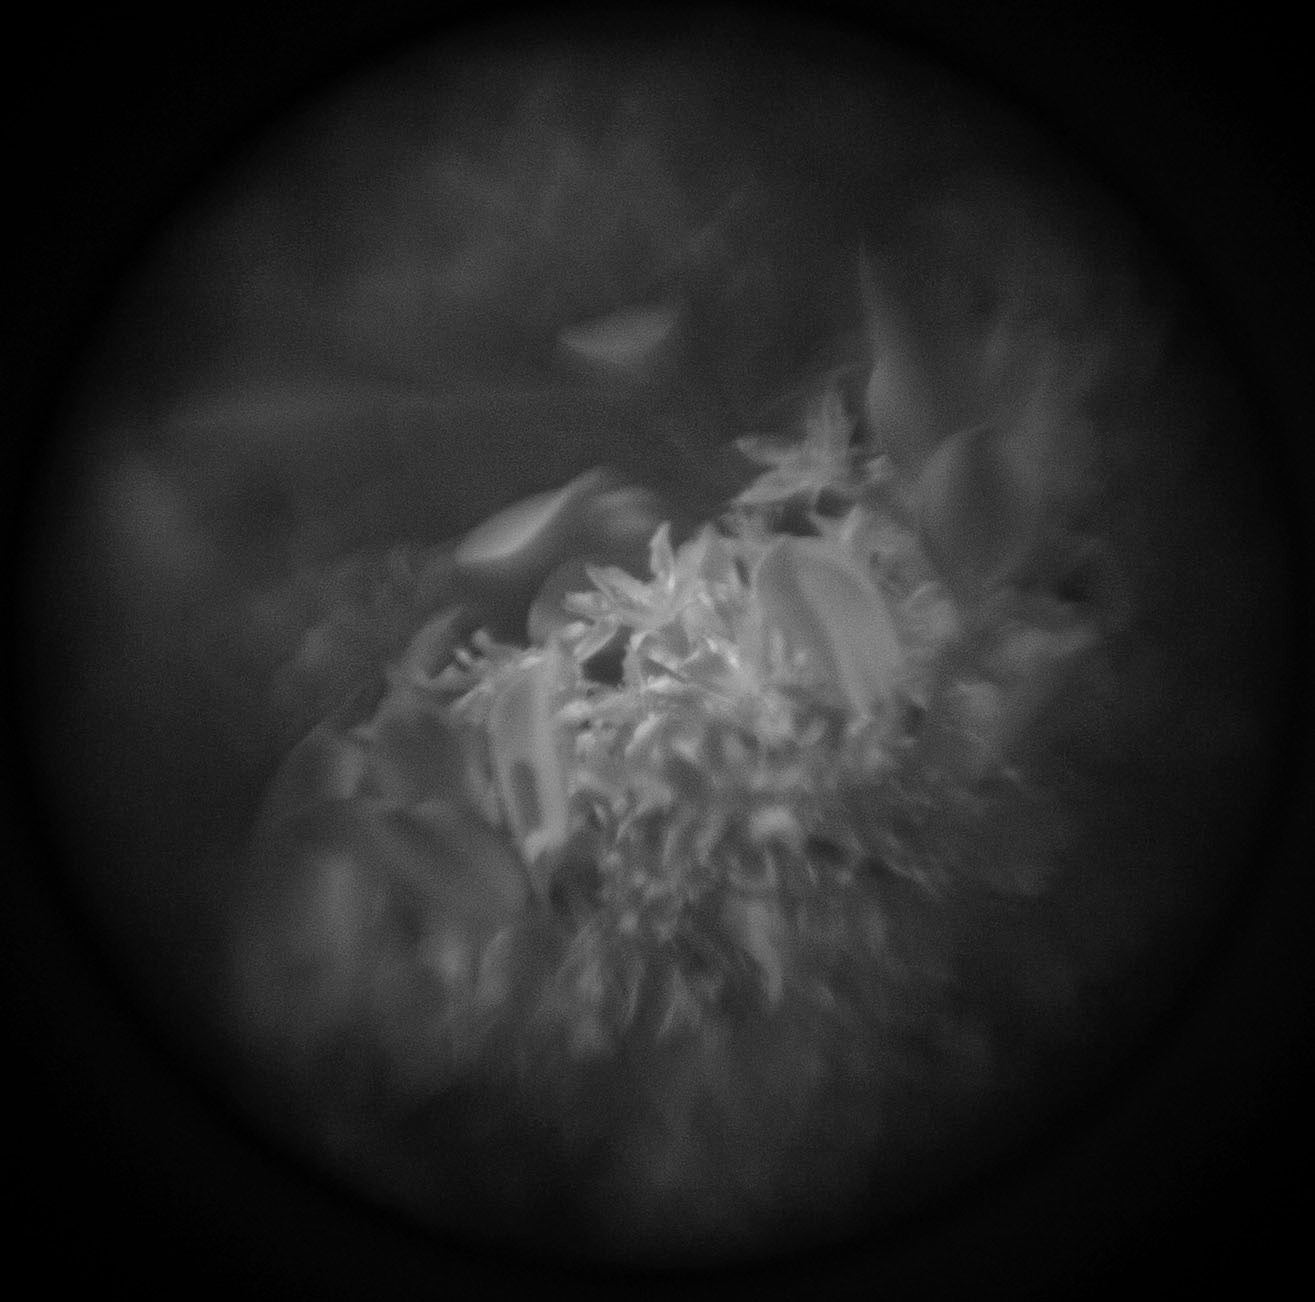
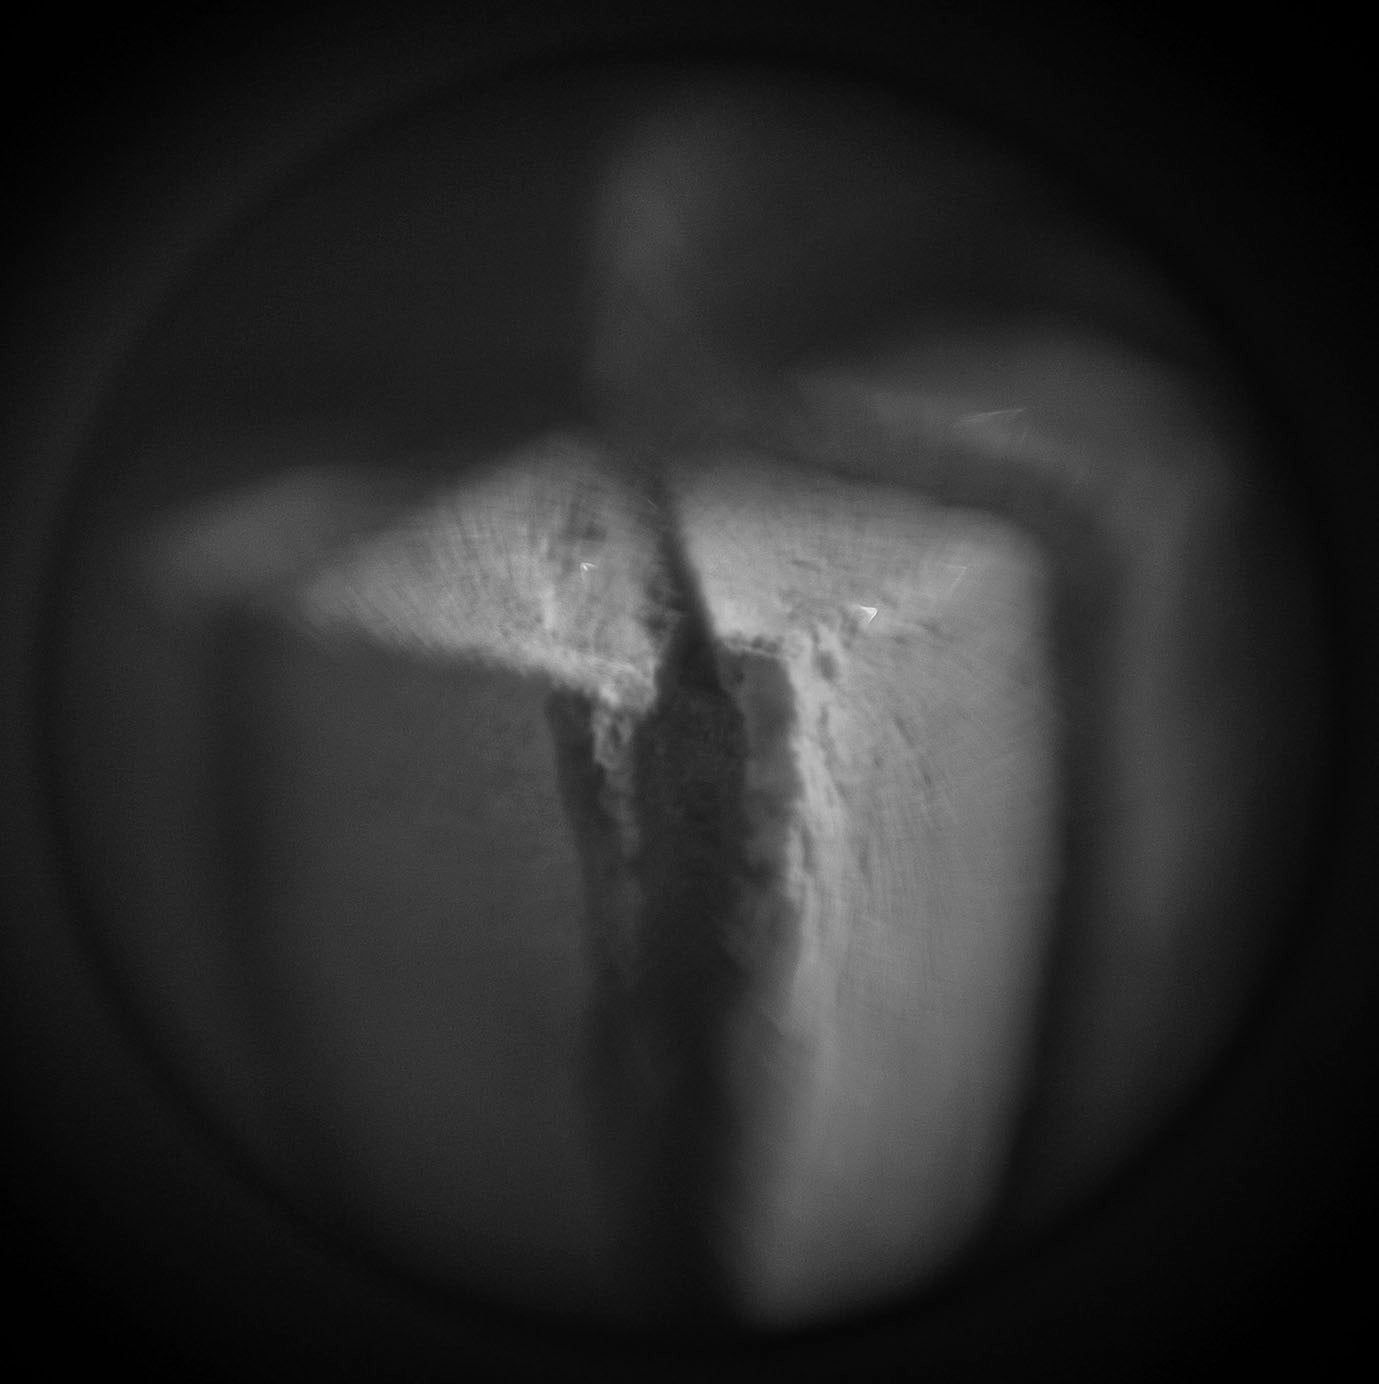
The objective lens seems to block the visible spectrum as well as NIR so it only sees 1064. I do not have a way to test other wavelengths so I cannot tell if the objective lens is sensitive to them as well.

Price wise you can find the FLIR See Spot III pretty cheap. They fetch under $2,000. However, they are old and the closed-cycle Stirling cooler can shut down making a cooled thermal a paperweight. I will try to get a 1064 laser to see if the thermal PAS-21 See Spot III can actually see it. And I will update this article if that happens. Thanks for reading to the end. Have a great weekend.