Your Privacy Choices
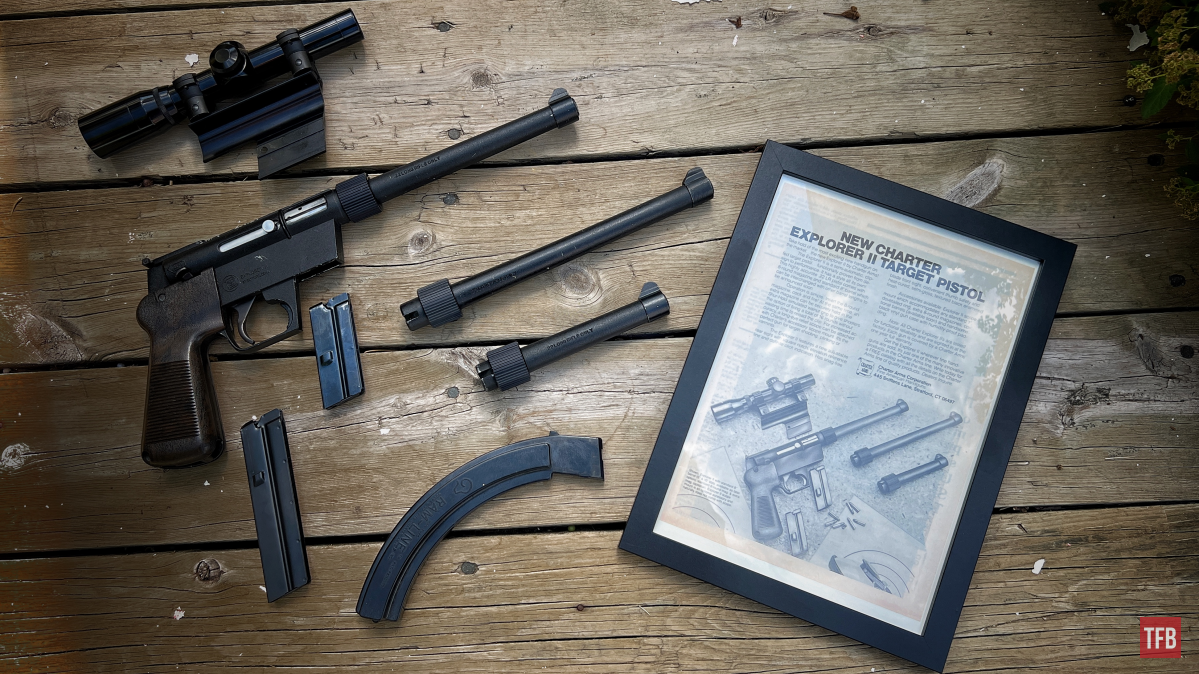
Welcome everyone to the TFB Armorer’s Bench! As mentioned in the little blurb, this series will focus on a lot of home armorer and gunsmith activities. In this article sponsored by Wheeler, Tipton, Caldwell, and Frankford Arsenal, I decided to slightly change it up. Honestly, I ran out of time to do the particular AR15-related stuff I was planning on (thank you folks very much for some assembly/troubleshooting ideas). Today I am going to cover the disassembly and maintenance of an Explorer II pistol and by proxy anything in the AR7 family. The reason I want to particularly go over the maintenance is that these guns have a reputation for being picky and jam-o-matics which I do not believe is wholeheartedly warranted. Do I think they are the best .22LR firearms? Heck no! By today’s standards, the old ones are pretty subpar. However, I will attest that (barring firearms in poor condition) with the proper maintenance and good condition magazines they should be able to work relatively decent for their construction and age. Make no mistake, I have known my personal Charter Arms Explorer II to be a cruel mistress at times but only after I haven’t cleaned it and oiled it after 6 months or so. Long explanations aside, let’s jump right into the disassembly and maintenance of Explorer II/AR7!
Note: I have extensively covered both the AR7 rifle and the Explorer II pistol over on our sister site AllOutdoor.com. If you are interested in the history of these guns please check them out! Those articles can be found at the following links:
- Curious Relics #003: ArmaLite AR7; From Pilots to Cowboys!
- Curious Relics #004: ArmaLite AR7 Part II The Design Survives!
- Curious Relics #005: Charter Arms Explorer II: The AR7 Pistol!
- Curious Relics #045: Surprise! – Charter Arms Explorer II Part 2!
TFB Armorer’s Bench: Disassembly and Maintenance-Explorer II/AR7
Welcome to our recurring series of Armorer’s Bench which is made possible and brought to you by Wheeler, Tipton, Caldwell, and Frankford Arsenal who are our sponsors. Here, we at TFB hope to inform, entertain, and even inspire any would-be gunsmith or armorer out there. Ideally, with the information I provide and with the help of our sponsors, you can have some useful knowledge pertaining to the conservation and improvement of firearms technology while at the same time sharing experiences and teaching each other new tips and tricks along the way in the comments. Digging deep into what it is to be an armorer or gunsmith has significance but what is important is what those people do to show they’ve earned that title. I am happy to share my experiences and knowledge and hope it is informative!
Make your personal safety a priority:
- Practice proper gun safety. Always make sure before the firearm hits your bench that it is unloaded and safe to be handled.
- Wear the proper safety equipment. The main one would be safety glasses (decent ones) since parts are often under spring tension and you may work with high RPM tools. Other honorable mentions would be latex gloves or a respirator when working with potentially harmful solvents and oils. Also hearing protection when working with loud machinery or test-firing firearms.
- Modifications, alterations, and customizations will void your firearm’s warranty 9.5 times out of 10. Please take that into consideration before attempting any at-home gunsmithing.
- If you are unsure about proper safety practices, disassembly procedures, or warranty standards, stop, put down the tools, and consult a competent gunsmith.
Note On Magazines: Disassembly and Maintenance-Explorer II/AR7
One big factor in the proper functioning of any firearm is the magazine. It could not be truer as far as the AR7 lineup goes. This mainly has to do with the fact that the feeding system/feed lips/feed ramp (however you want to describe it) is built into the magazine. The barrel simply has a hole. No helpful contours or ramps. If a magazine is damaged or decaying from neglect, chances are your gun will jam.
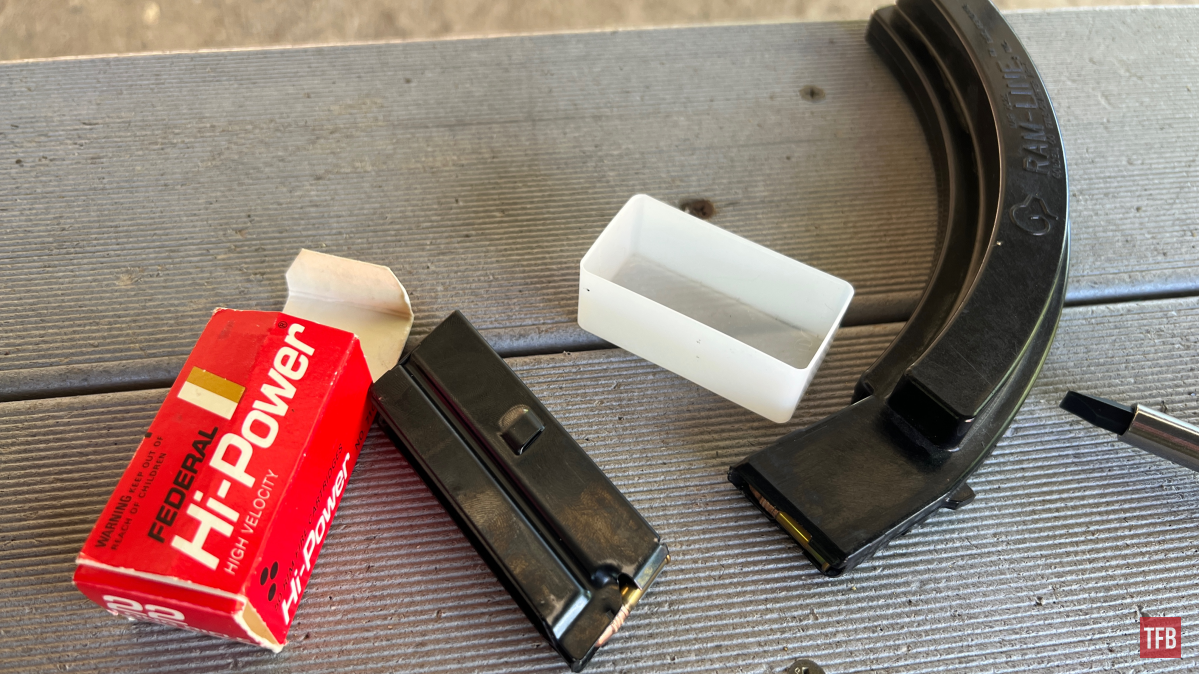
Another extension of this is the type of magazine being used. I have used every magazine under the sun that was made for these guns. All brands, reproduction and otherwise. In my personal experience, they all interchange and there is not really a noticeable difference in reliability. One such exception is the plastic 25-round Ram-Line magazine (no longer in production…thank God) which is notorious for not working. I had a chance to buy and test it and I can confirm they are pretty junky and you are better off spending your money on more 8, 10, and 15-round magazines.
Disassembly: Explorer II/AR7
Disclaimer: It is stating the obvious when I say do not attempt this if you do not have confidence you can. There is no shame in not taking your assembled gun apart. Consult a competent gunsmith/armorer for advice or if they would do the goal you wish to achieve. Refer to the first Armorer’s Bench article So, You Like Taking Guns Apart? where we talk about knowing your limitations.
Step One: Disassembly and Maintenance – Explorer II/AR7
The first thing is first! Safety. Yes, I know safety is boring and sooo mainstream but bear with me. Make sure your ammunition is stored and away from your bench. If starting out with an assembled firearm, make sure to check the chamber, magazine, and space between. Then check again. As far as PPE, I highly recommend wearing safety glasses at the very least. There are a few parts under spring pressure.
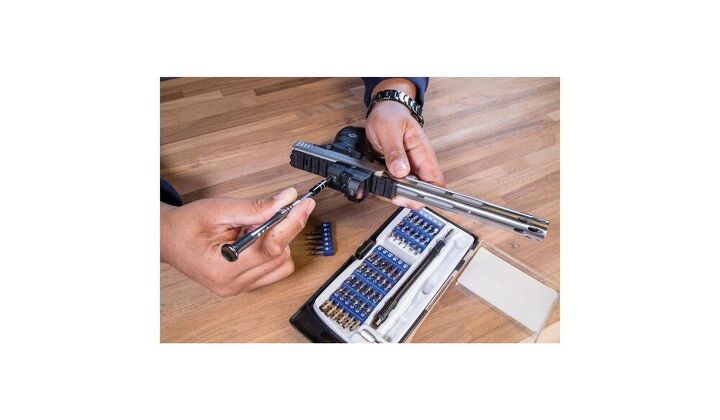
Step Two: Disassembly and Maintenance – Explorer II/AR7
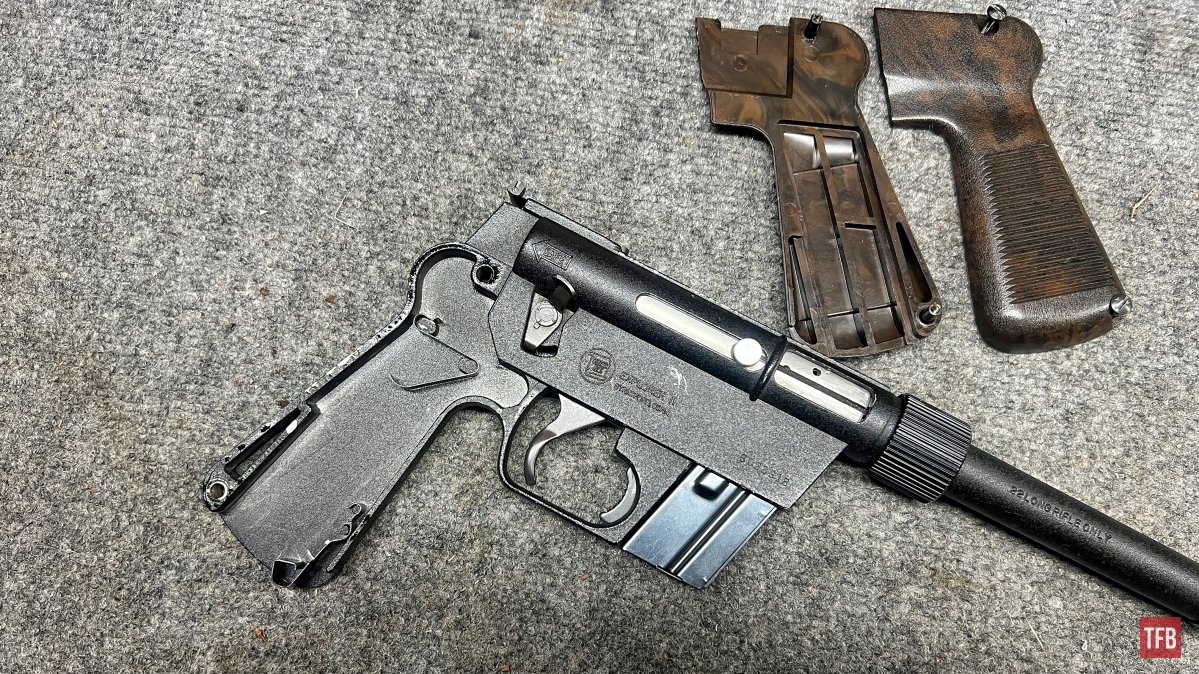
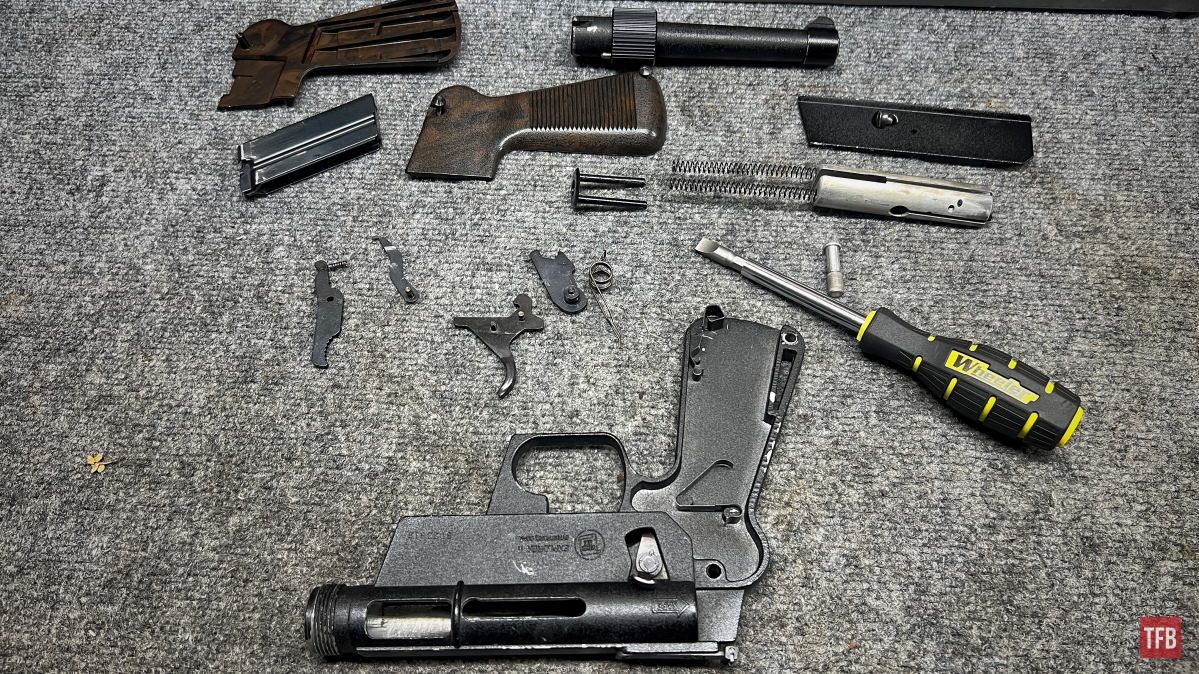
Now that safety is out of the way, let us make sure we have everything we need. In this case, our gun is a Charter Arms Explorer II pistol which is basically the exact same as an AR7 rifle. We will need a screwdriver (torque style preferred). Starting off I always take off the grip panels because I like to apply a protective oil after cleaning.
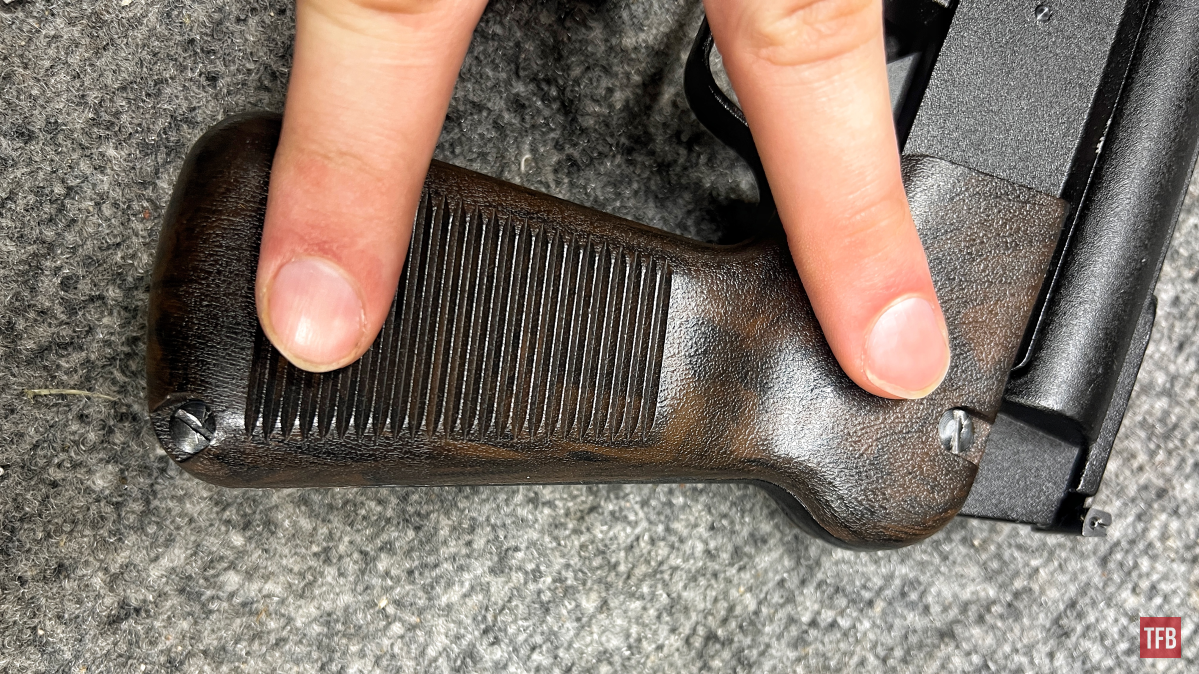
Note: Always maintain the areas under wooden stocks, grips, etc. they are prone to capturing moisture and causing rust.
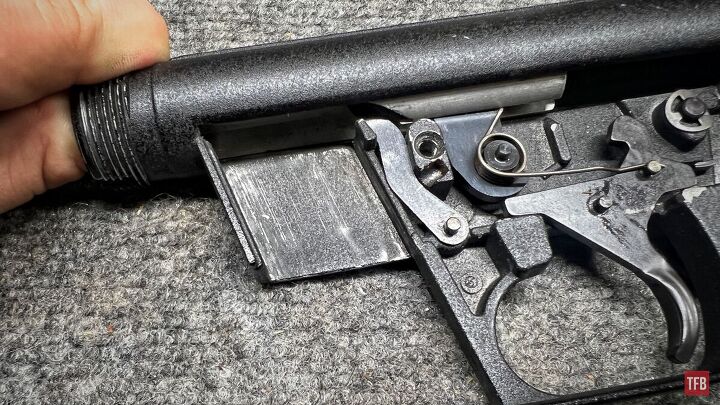
Step Three: Disassembly and Maintenance – Explorer II/AR7
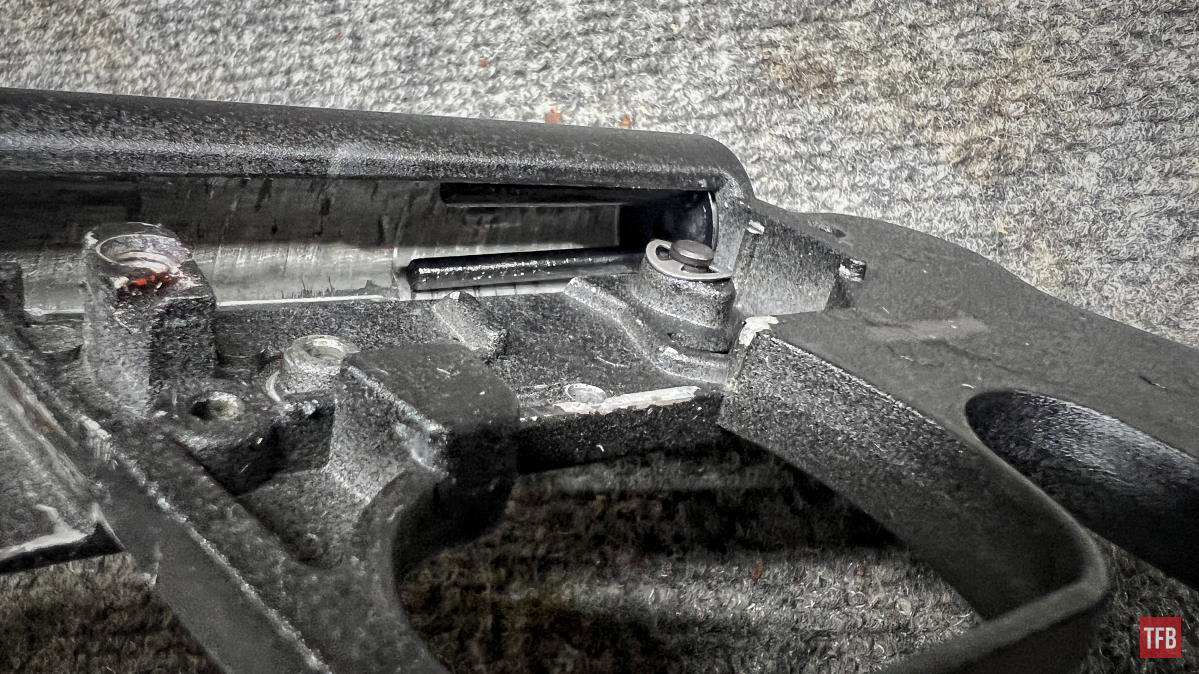
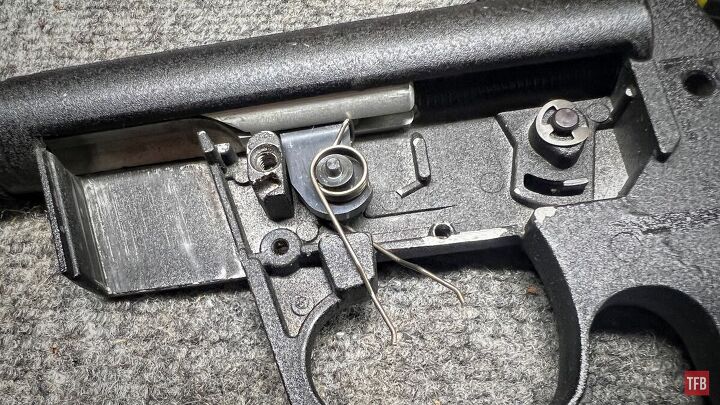
With the grips off, this is a good moment to observe how the inside acts as a spot for a spare magazine.
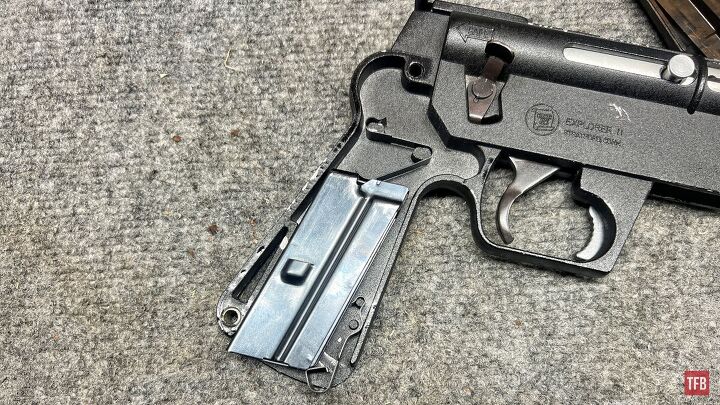
This is how the magazine is captured with a series of bent spring steel. I do not recommend removing these springs unless they are rusted or damaged.
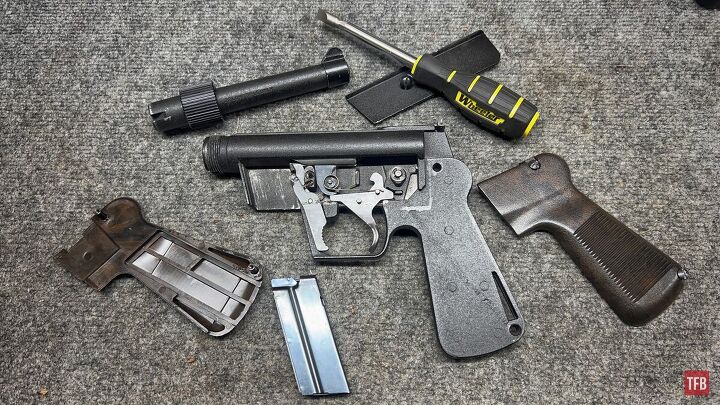
Step Four: Disassembly and Maintenance – Explorer II/AR7
Next, I would remove the barrel by unscrewing it from the receiver. I recommend having the bolt handle side facing up.
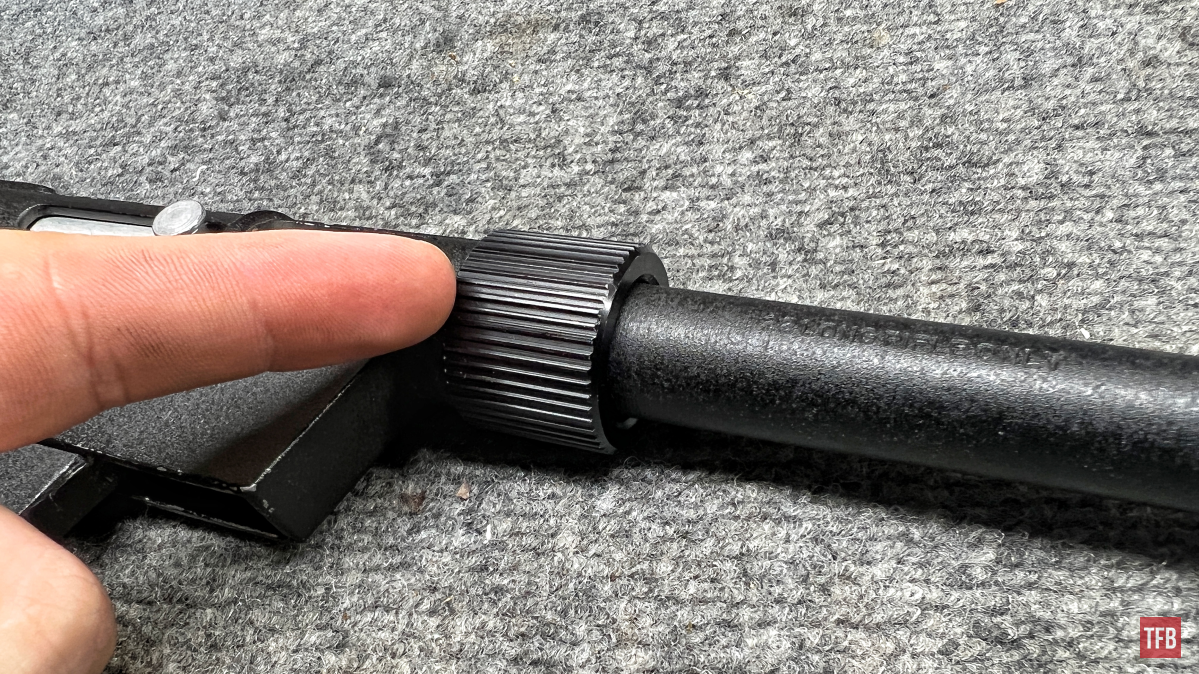
This will ensure that the bolt handle does not prematurely fall out. It can only be removed in just the right spot and that spot is passed while the barrel is removed/loosened.
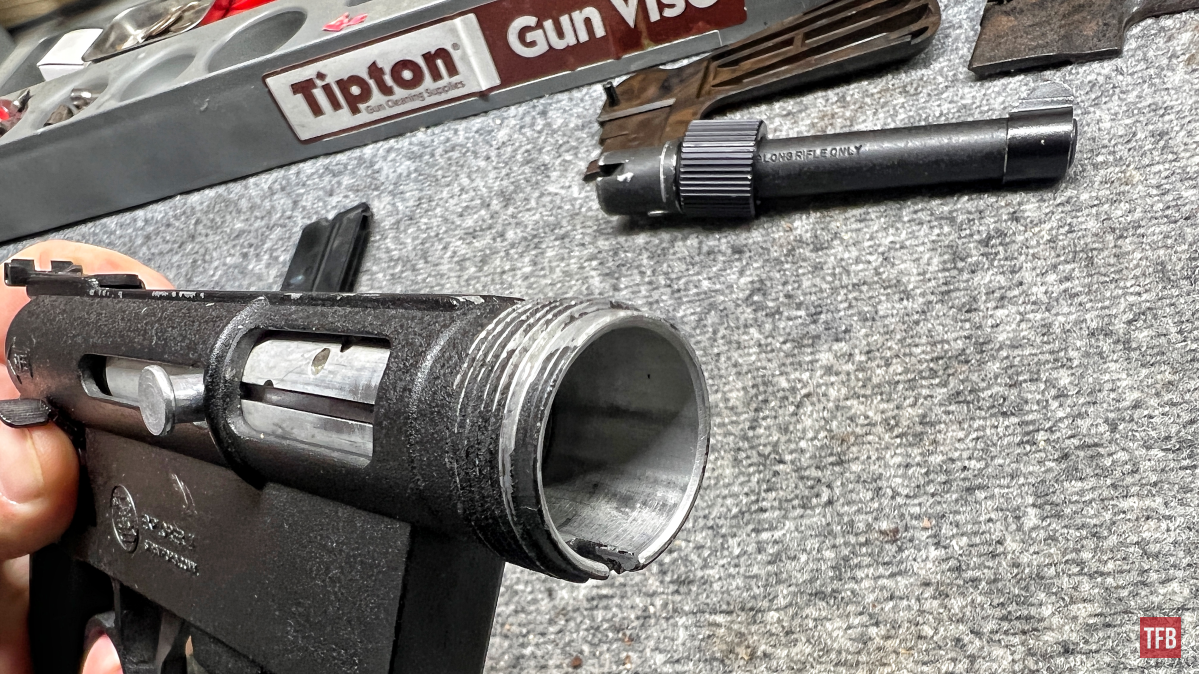
After the barrel is removed, I always pull the trigger in order to decock the hammer.
Step Five: Disassembly and Maintenance – Explorer II/AR7
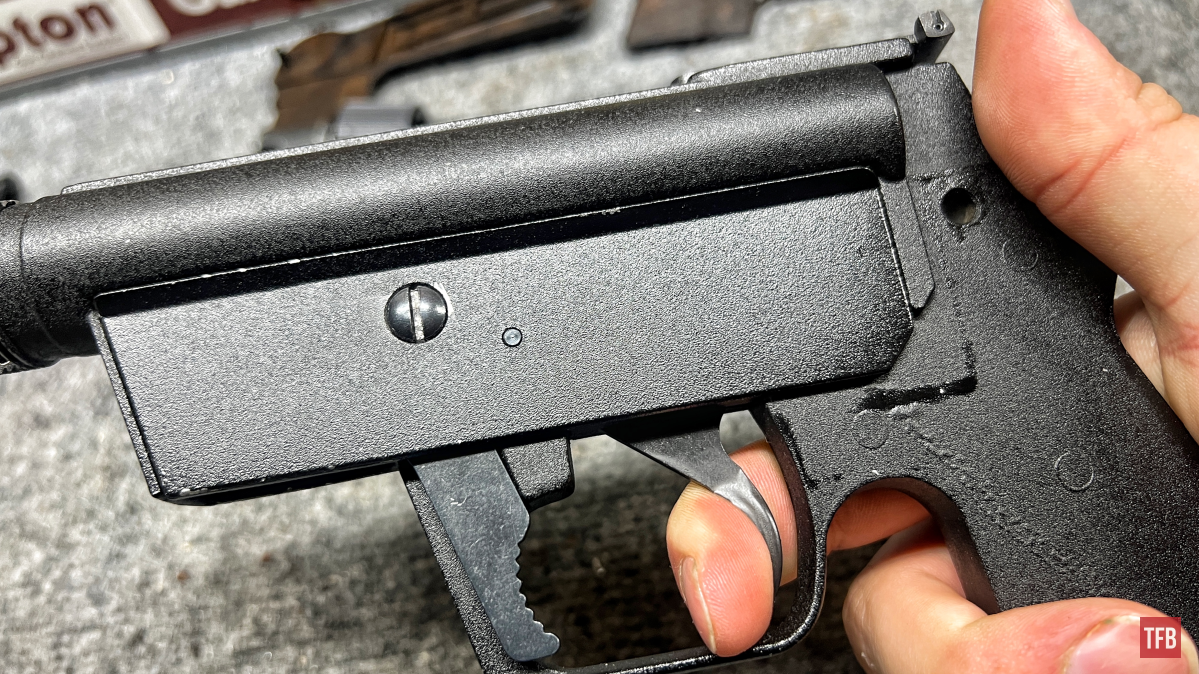
Now we can remove the single large screw on the left side of the receiver. Make sure to use a correct-sized screwdriver bit!
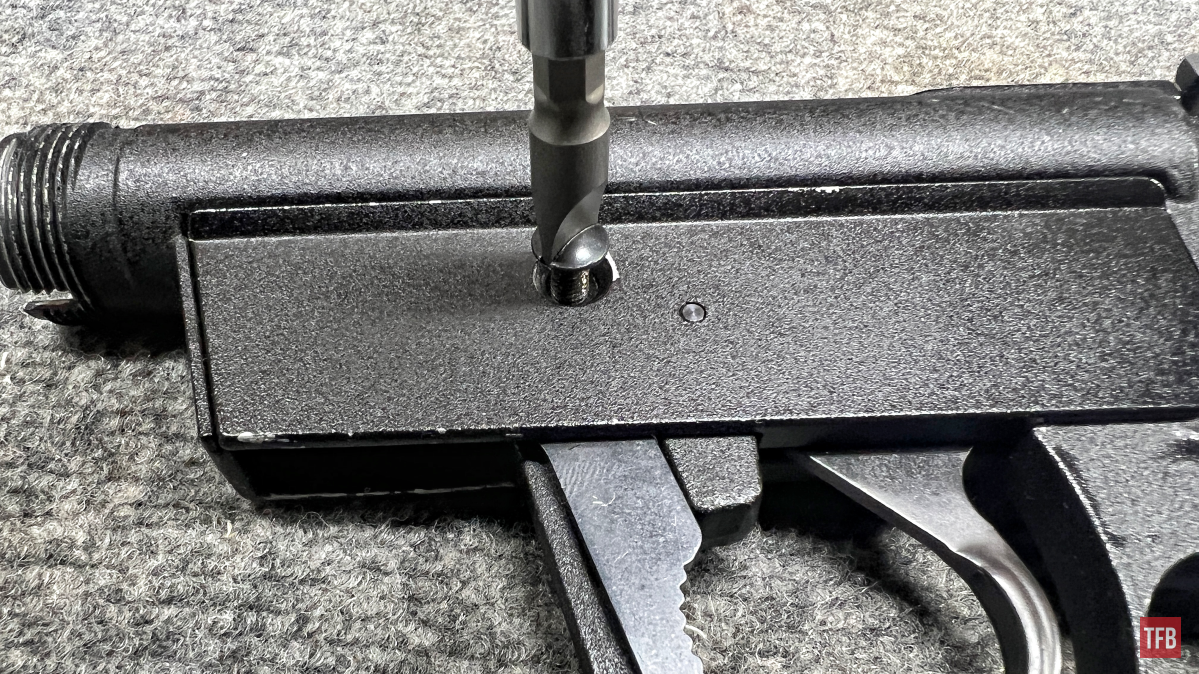
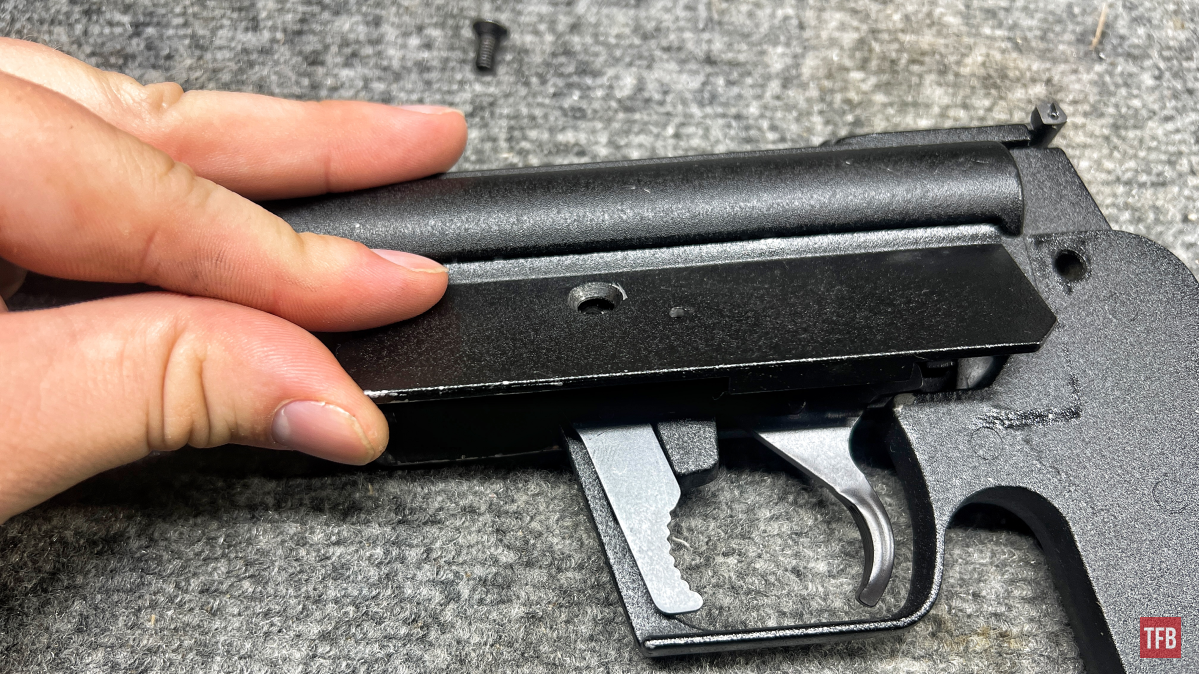
Removing that screw will allow you to tip up the receiver plate. Lifting up and off.
Now we have revealed the internal parts as they should lay. Take note of how everything sits. Especially the springs and pins. The pins themselves are not fixed to the trigger, hammer, magazine release, etc. They may come right out along with a part but make no mistake they will fall free. Keep track of them.
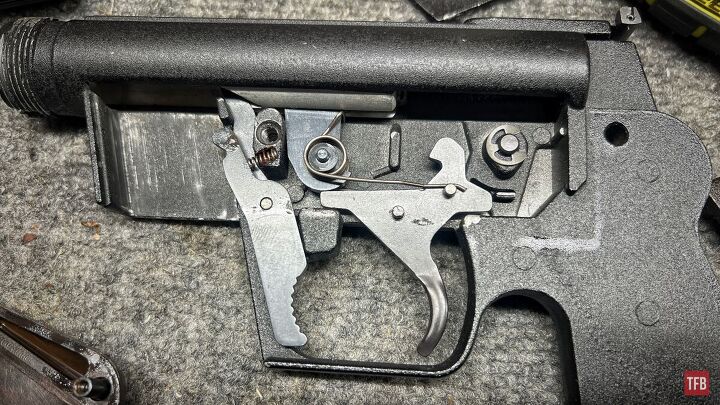
Step Six: Disassembly and Maintenance – Explorer II/AR7
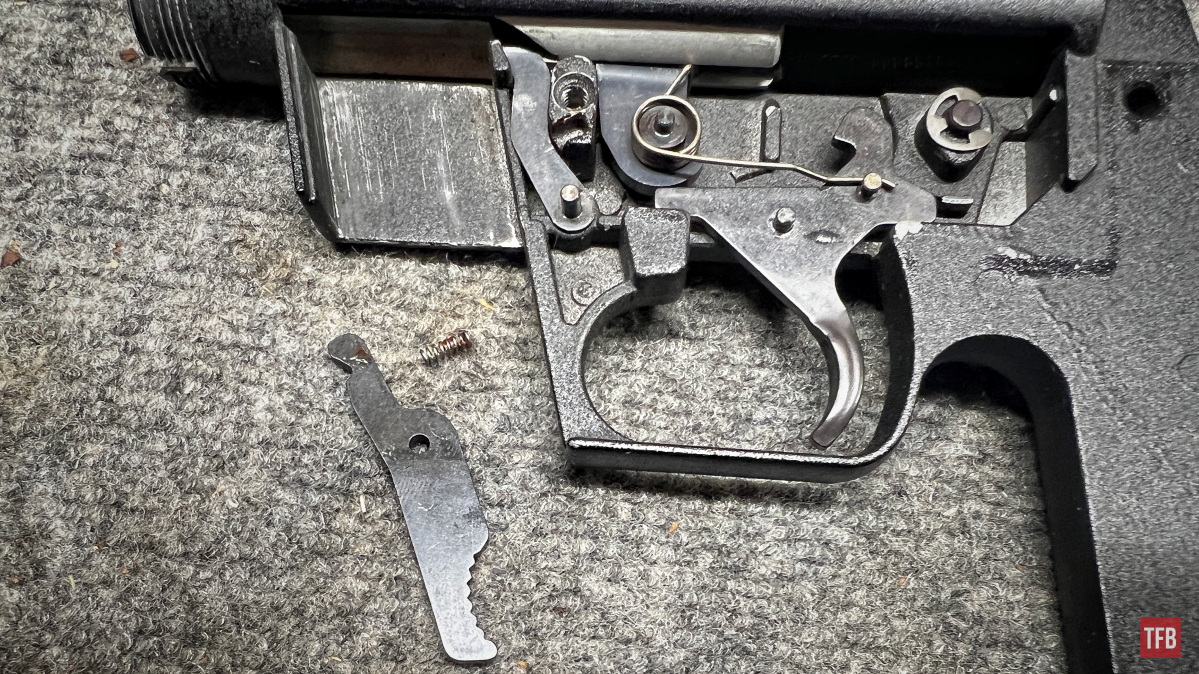
With the receiver plate removed I start by removing the magazine release, magazine release pin, and its very small spring. The release can be lifted straight up and off. The pin can be removed from it or you can keep it in or near.
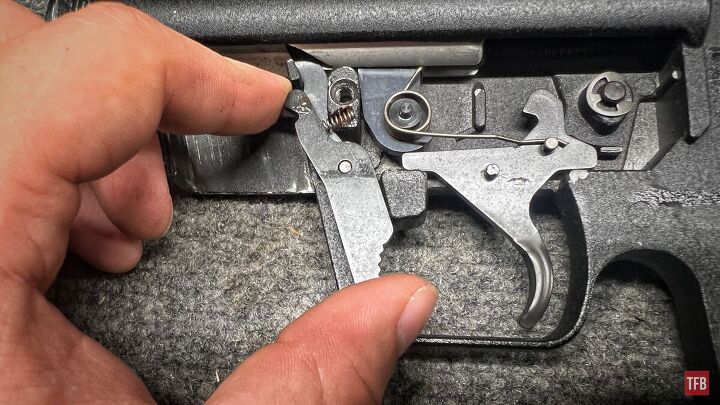
The spring is able to fall free.
After the magazine release components are removed, the ejector can be wriggled out of its place.
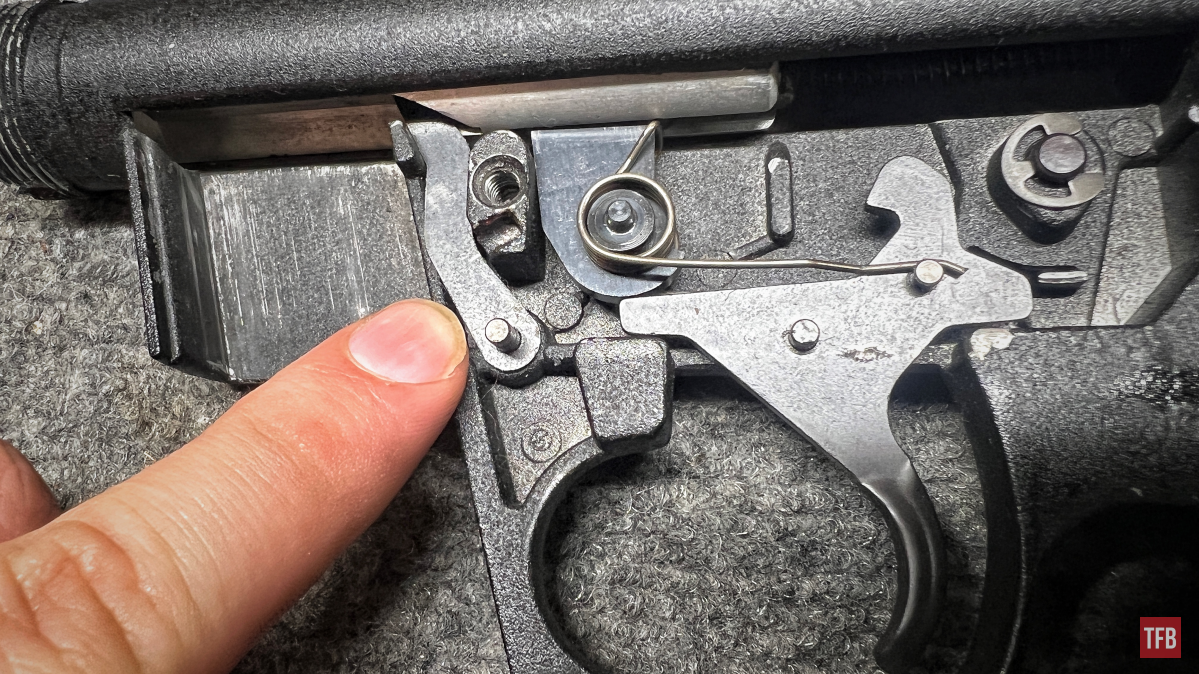
It may help to push the bolt backward with a finger just to free up some tension.
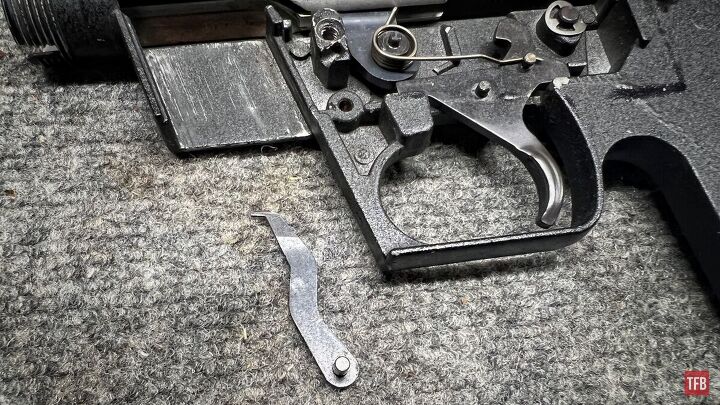
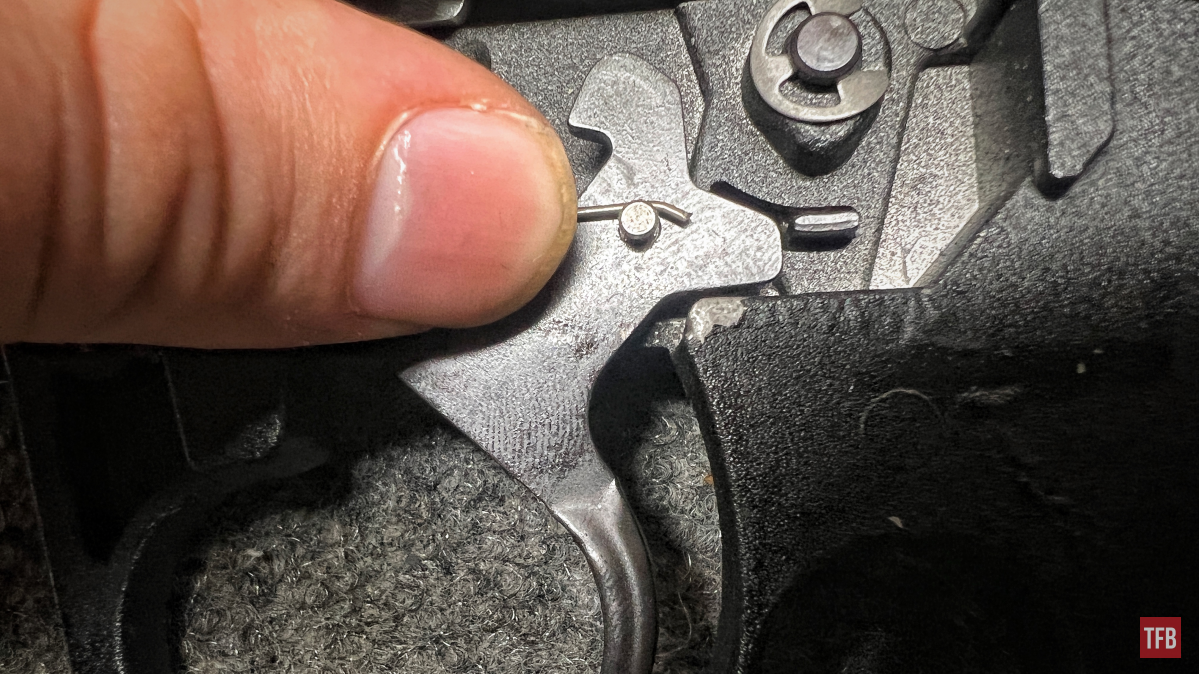
Step Seven: Disassembly and Maintenance – Explorer II/AR7
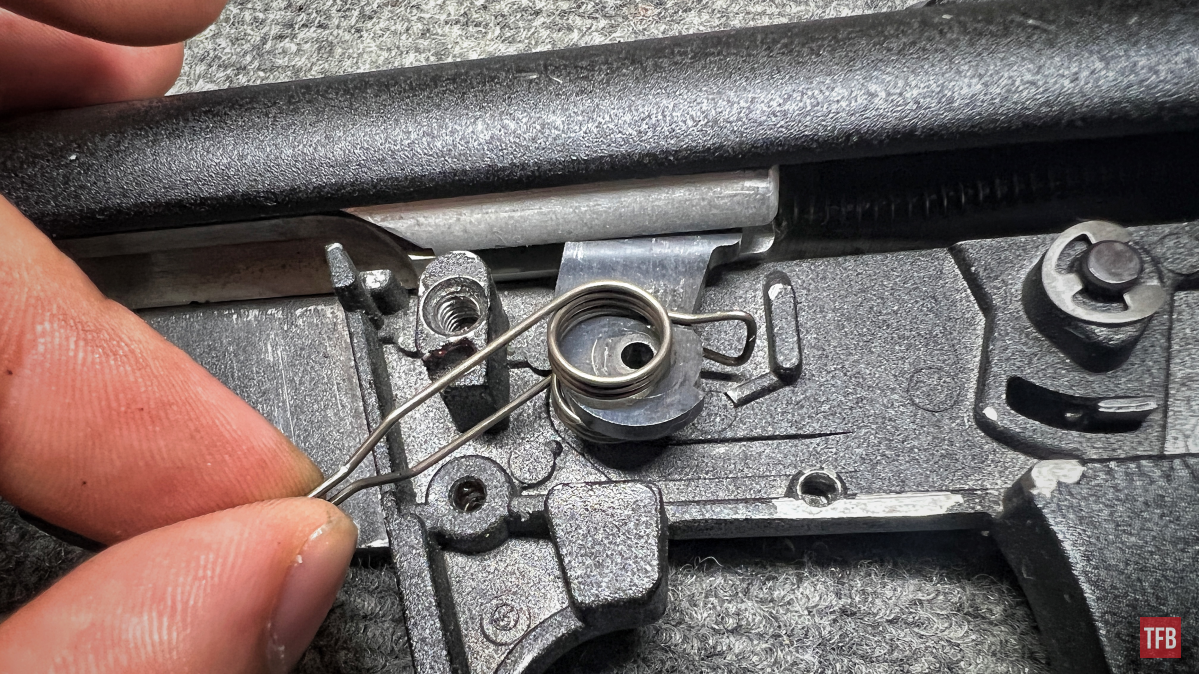
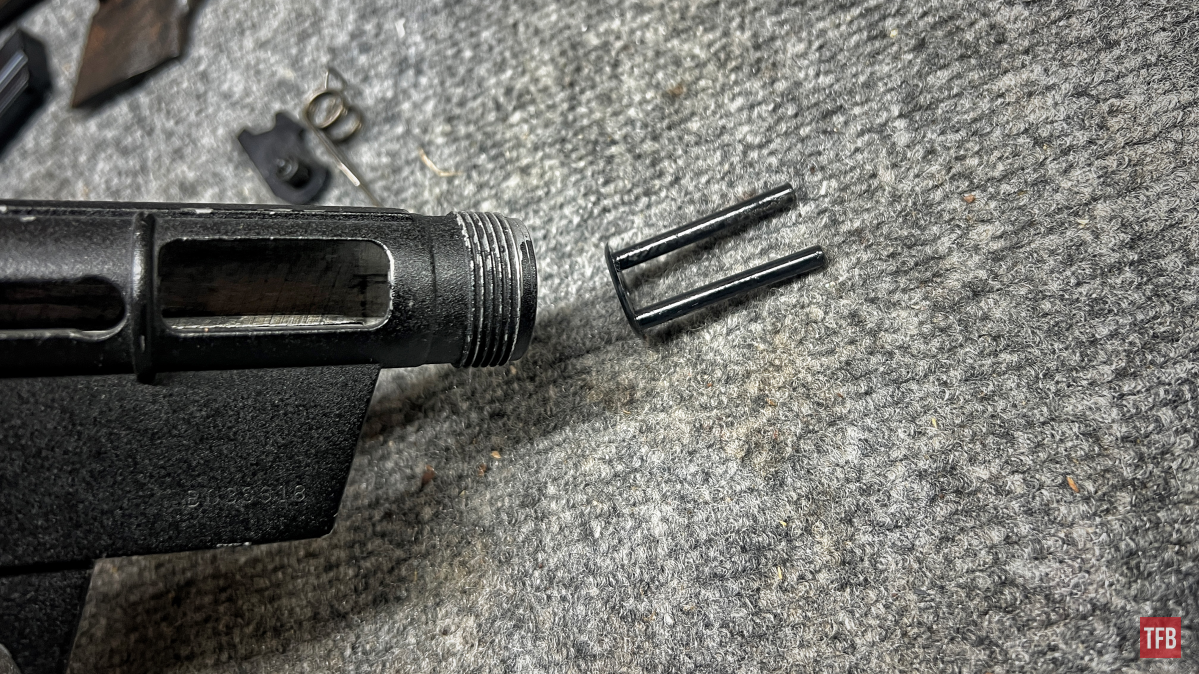
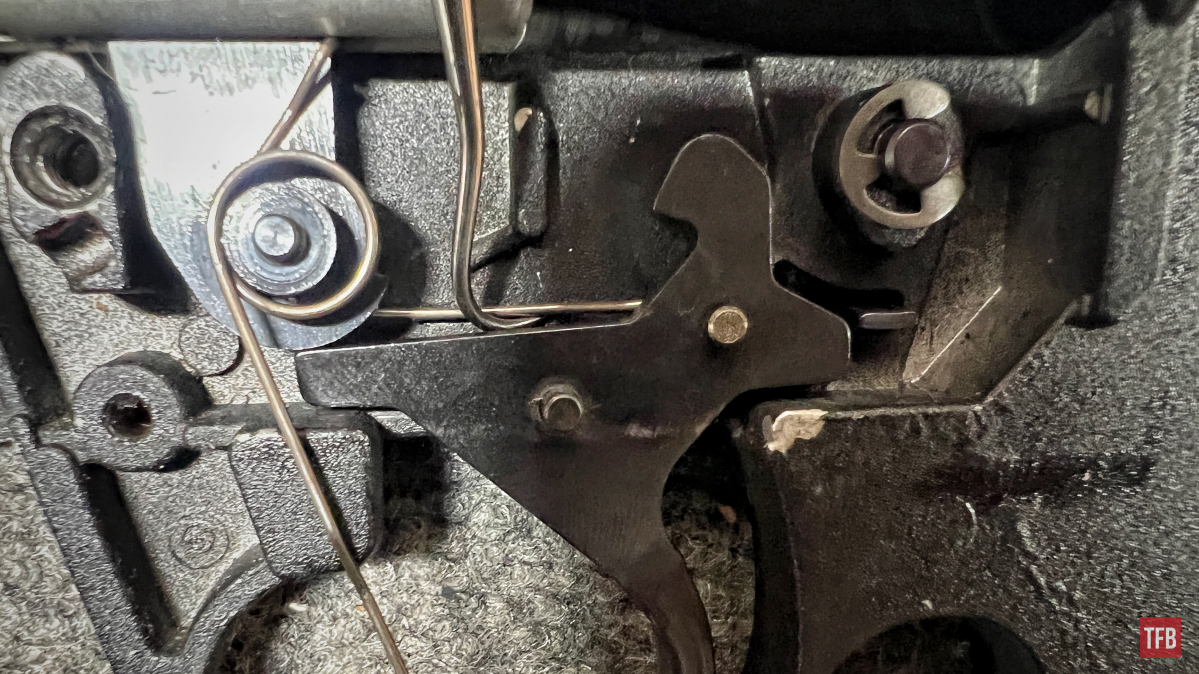
With the ejector removed we can move on to removing the trigger. The trigger has two loose pins. One pin (you will see is much like an AR15 trigger pin) has slots in it for the hammer spring tails to rest on.
Pry one tail up and off of the pin.
Now the trigger can be removed but be aware both pins are loose in it. You can take that aforementioned pin and remove it to release the tension hidden on the other side. The trigger and its pins can be lifted up and off.

Step Eight: Disassembly and Maintenance – Explorer II/AR7
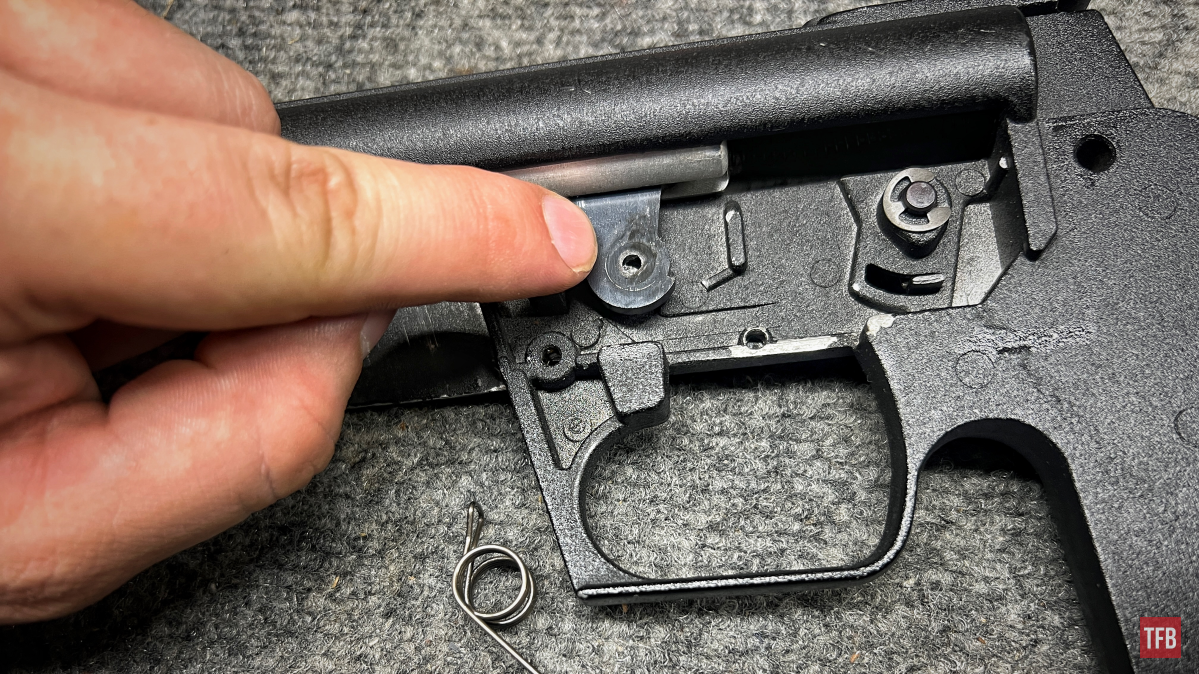
With the trigger removed, the hammer pin can come out. The “hammer pin” is a pin and a cylindrical housing (for lack of a better word) around it. It can be pulled straight out but be aware of the tension from the hammer spring.
With the hammer pin removed, the hammer spring can be slid out from under the hammer.
The hammer can now be removed.
Rock the hammer rearward and down until it releases from the bolt. If you have any trouble try pushing the bolt back.
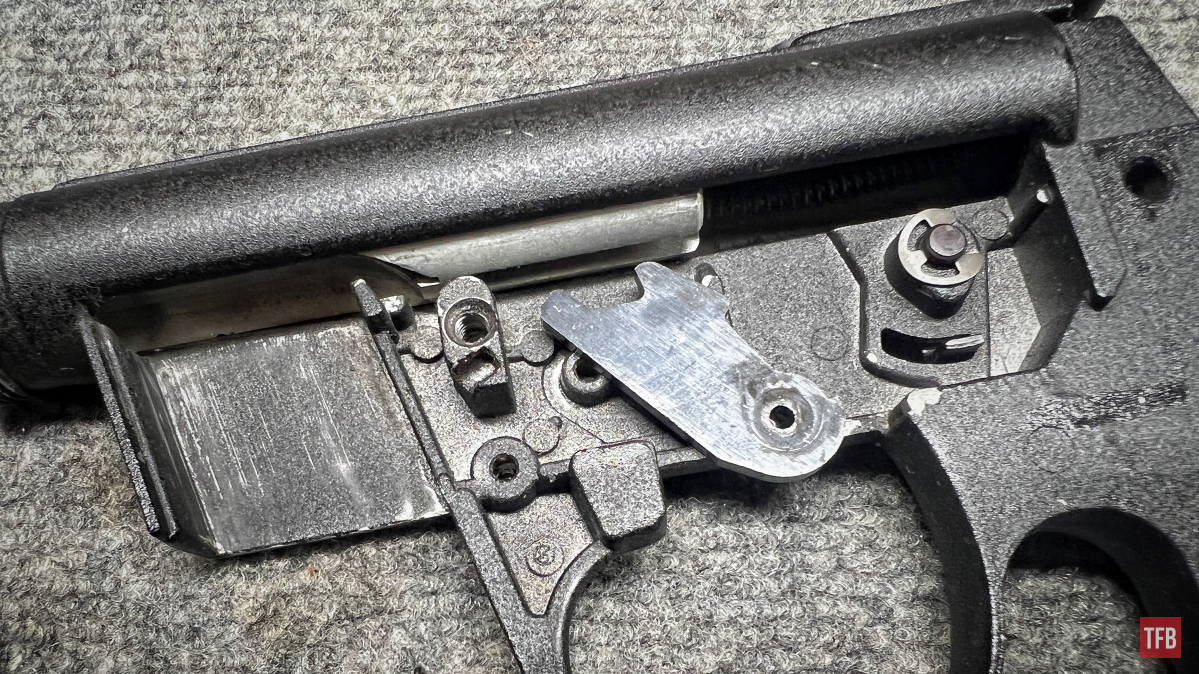
Now the receiver is empty besides the bolt components and the safety mechanism. I do not recommend ever disassembling the safety unless it needs repair.
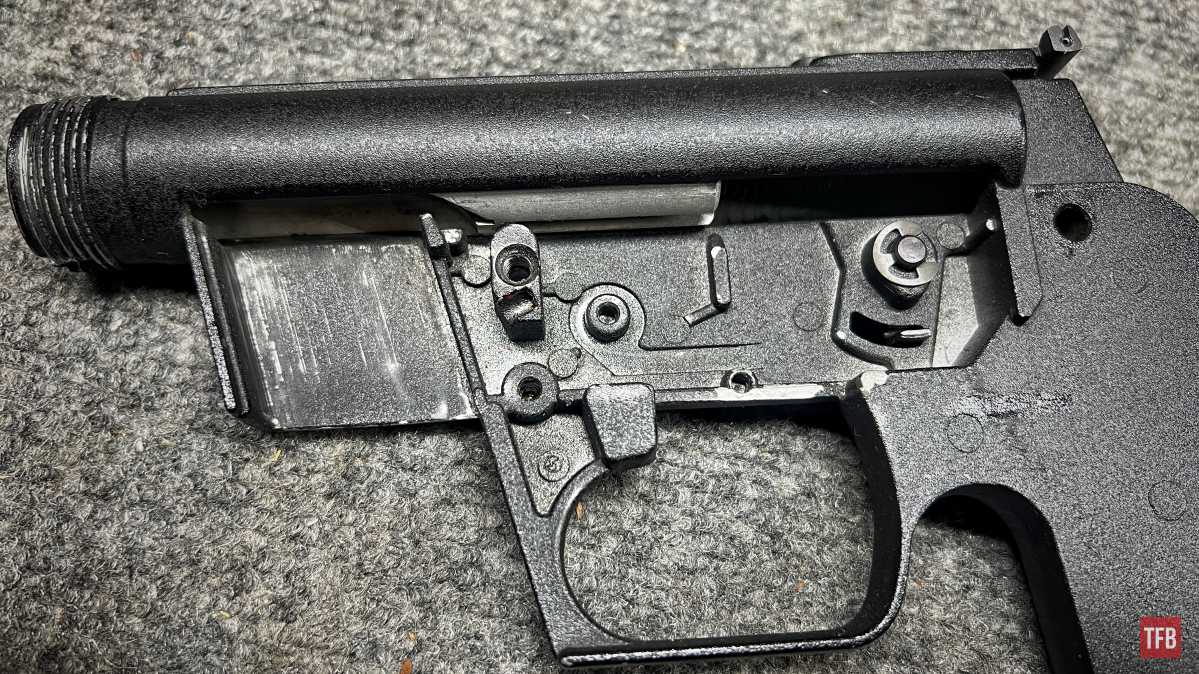
Step Nine: Disassembly and Maintenance – Explorer II/AR7
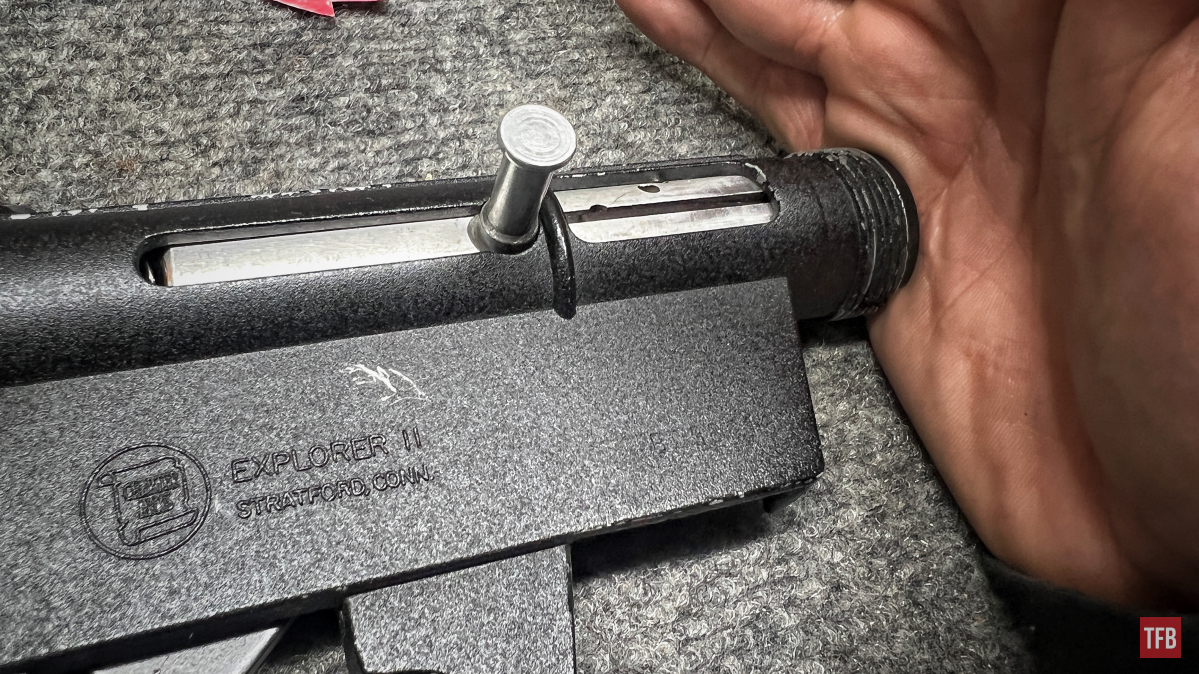
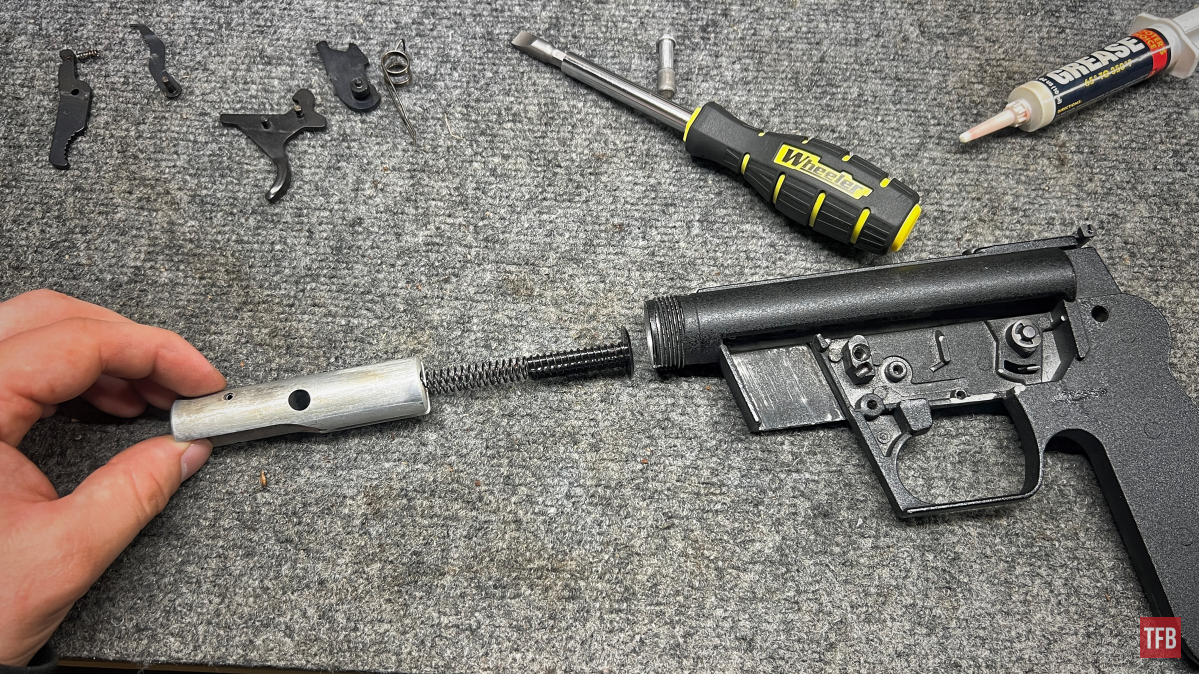
The way to remove the bolt is quite simple. Push on the bolt face slightly until the charging handle lines up with the o-shaped cut.
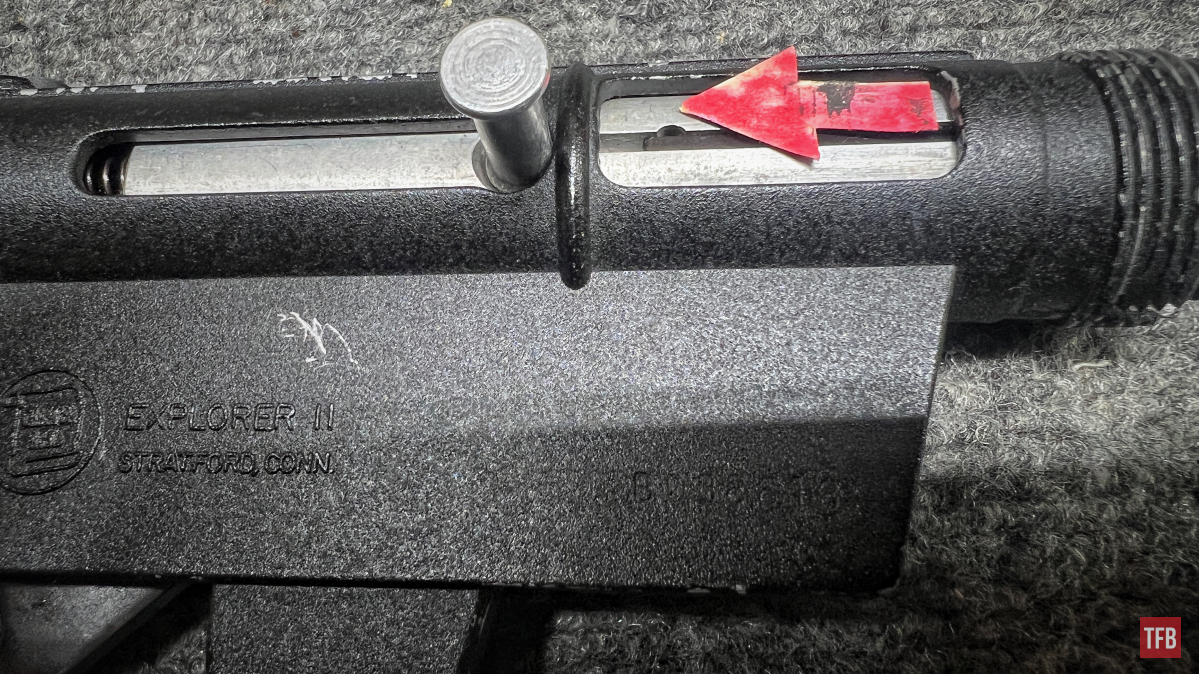
When the handle is in this slot it can be pulled straight out BUT be careful because nothing will be retaining the bolt. If you do not have your finger still holding the bolt I recommend holding a hand or rag over the barrel end of the receiver. The bolt is not under enough spring tension in this position to shoot across the room but it will definitely jut forward.
With the bolt handle removed and the bolt decelerated, it can also be removed.
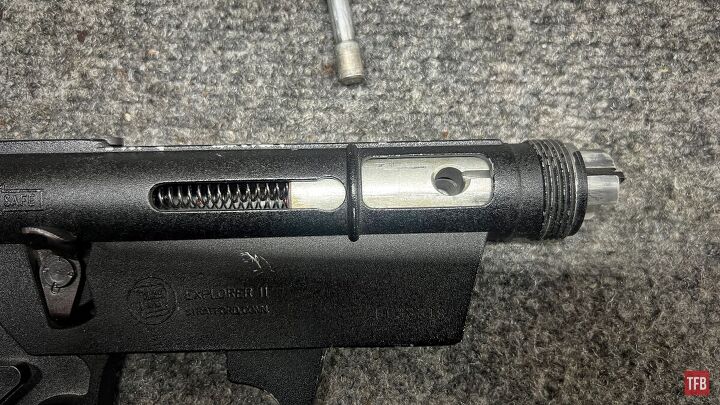
Here we will have the bolt assembly (I will not be taking apart the firing pin and extractor in this article) and the two bot springs.
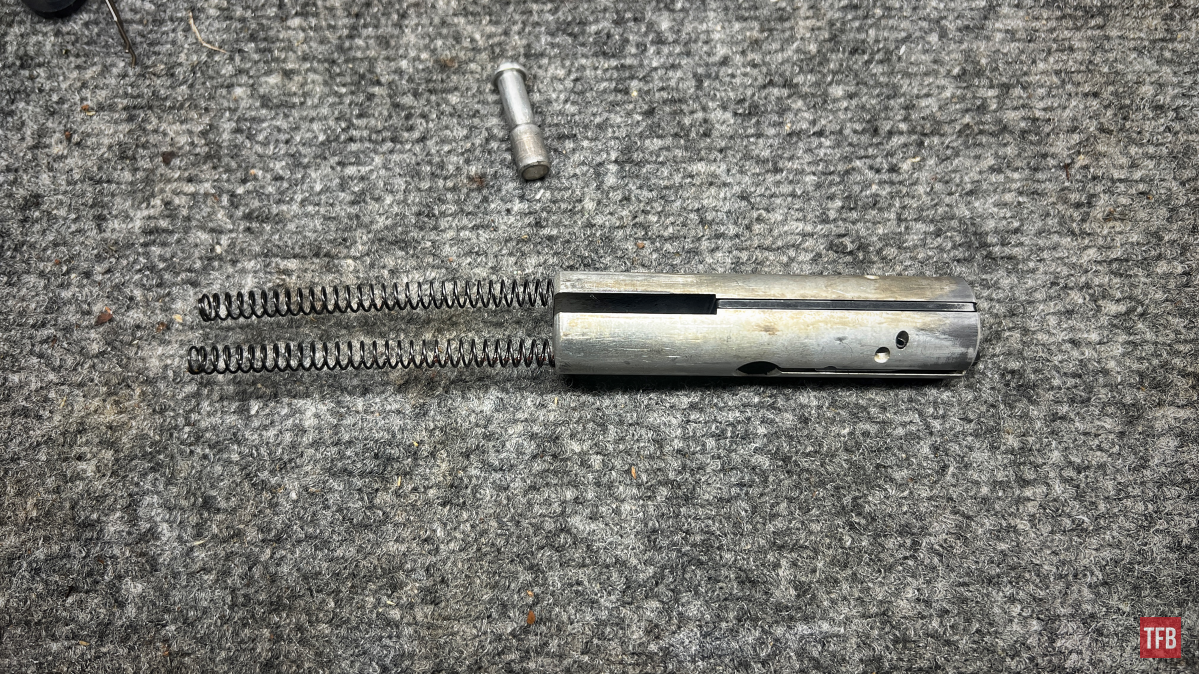
The two bolt springs can be removed at this time but you may wonder “what do they plug into besides the bolt”? Inside the receiver should be a plastic circle with two pegs on it.
This should easily fall free with gravity if it did not come out with the springs.
Maintenance: Explorer II/AR7
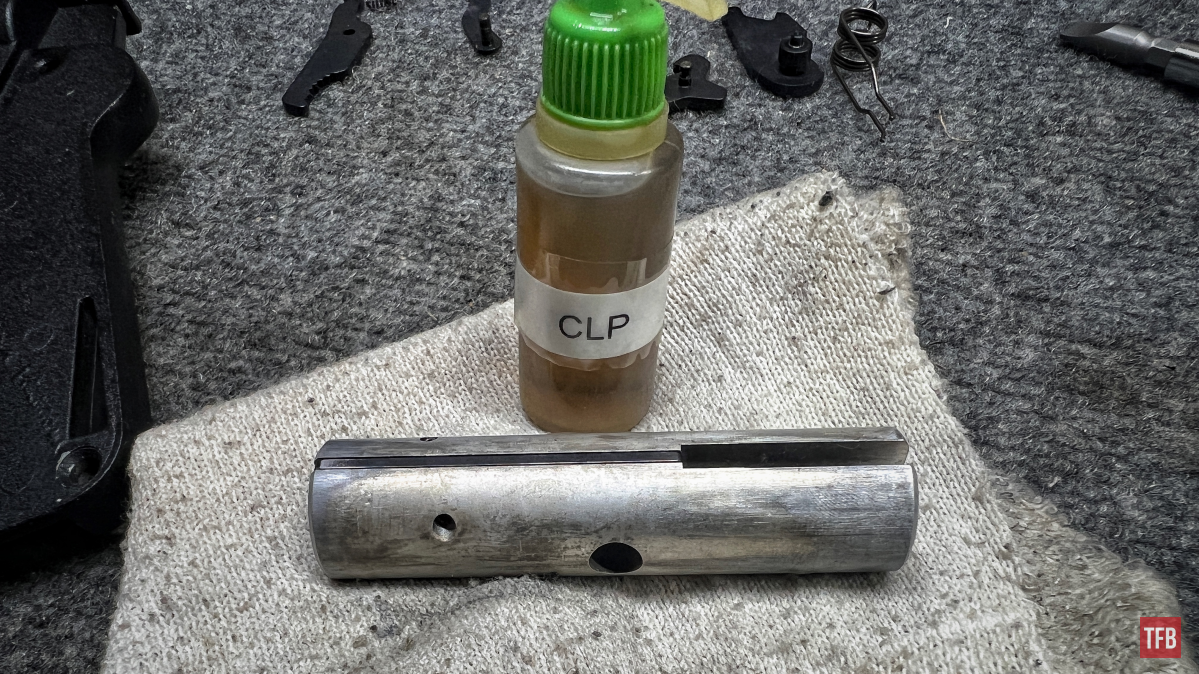
With the Explorer II disassembled, we can do some extensive maintenance. I apologize because I had already cleaned this gun not too long ago so all I can say is to use proper solvents, a nylon brush, and cloth. Clear up any debris, lead, carbon, etc. Wipe it all dry and put a very light coat of oil on all metal parts.
After cleaning, I recommend applying grease to the bolt springs. In the Henry Repeating Arms manual for their AR7 Survival Rifle, they mention the use of grease quite a bit. Do not over-grease them. Just enough to barely coat them.
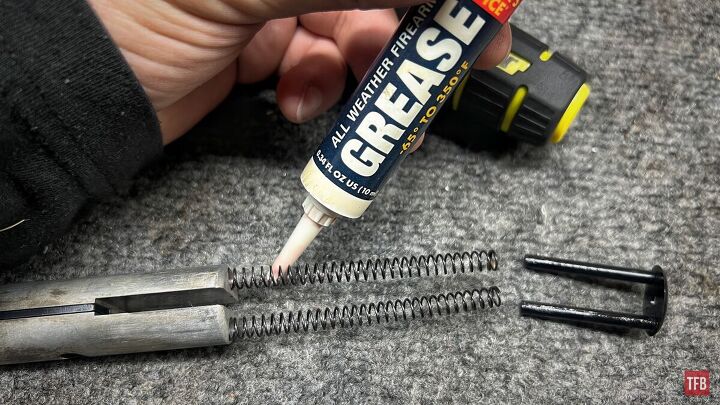
I do not recommend lubing the bolt at all. I have found that a lubricated bolt will actually capture fouling and carbon faster and hinder the functioning of my pistol quickly. At the very least a VERY light coat of oil to prevent rust.
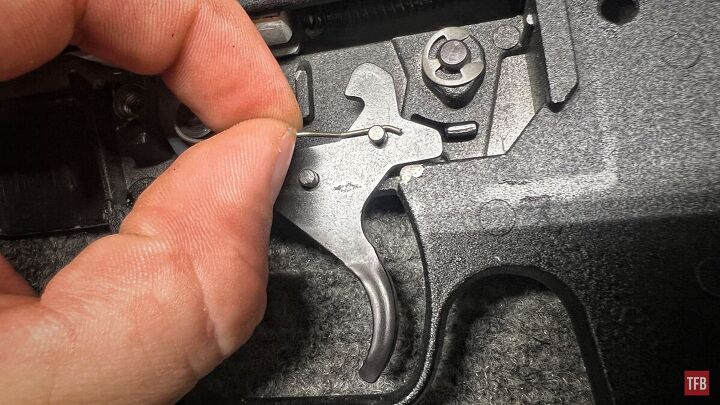
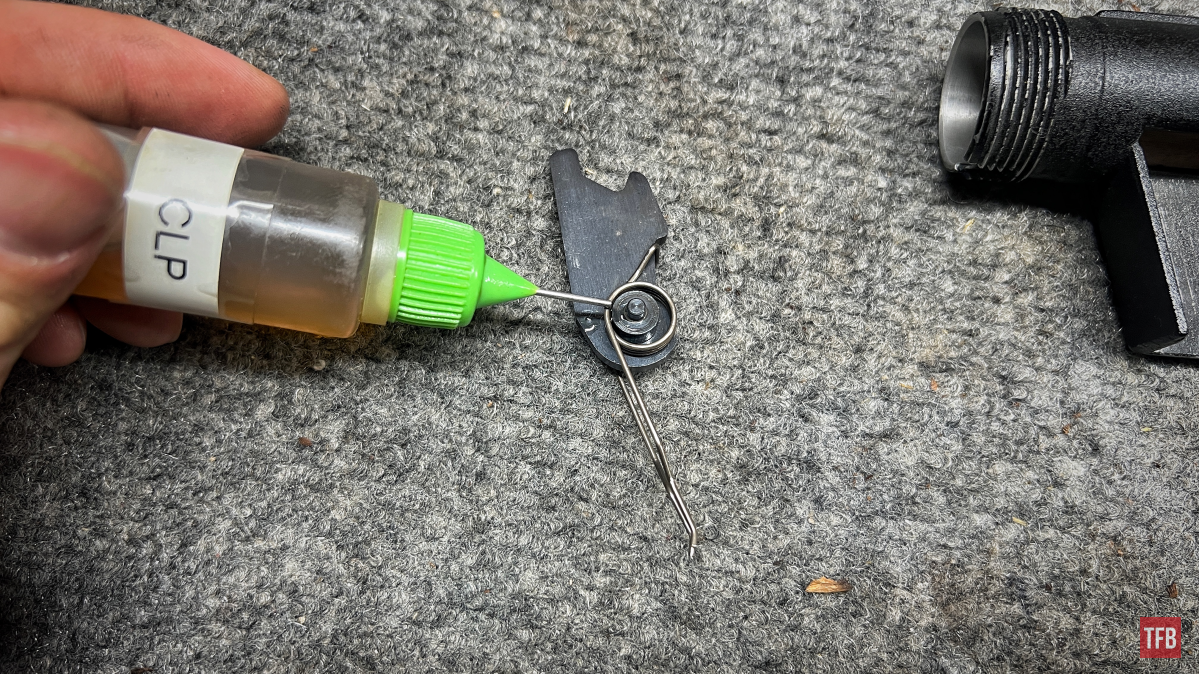
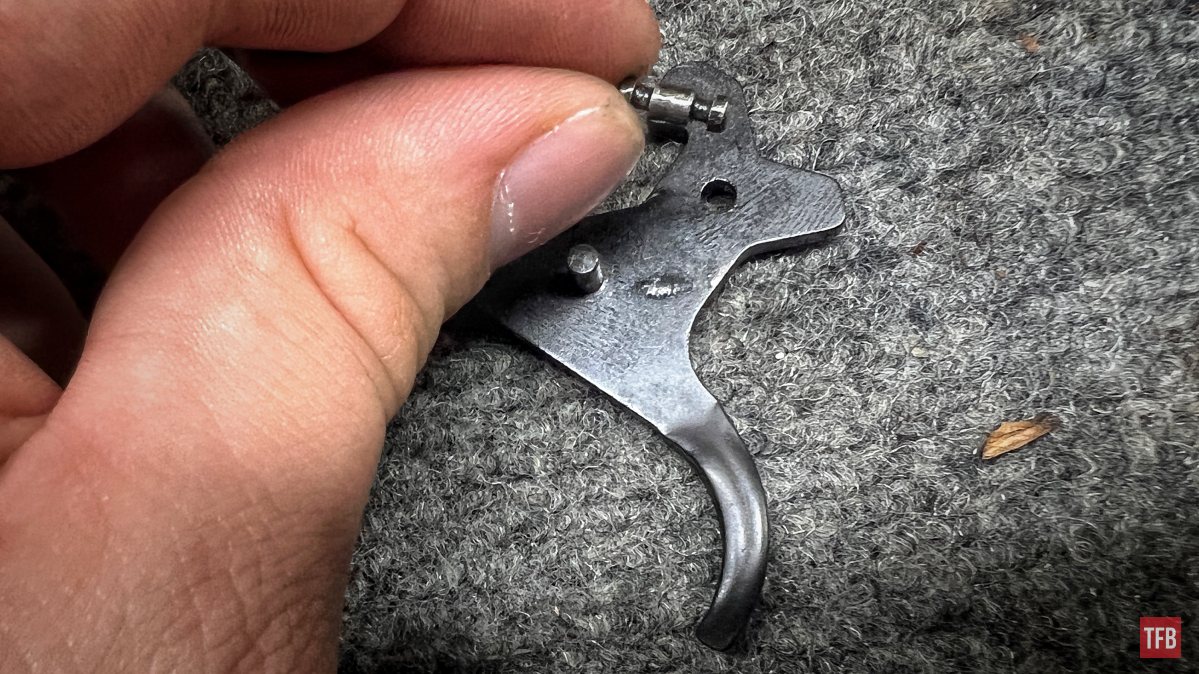
Here is a good example of how similar the hammer is to an AR15 hammer. I recommend applying a few light drops of oil to the spring and where they interface with the hammer pin.
After the trigger is installed I put a small drop of oil on the pin that it pivots on. Put a smaller drop than I did. A third hand would come in handy for taking these photos.
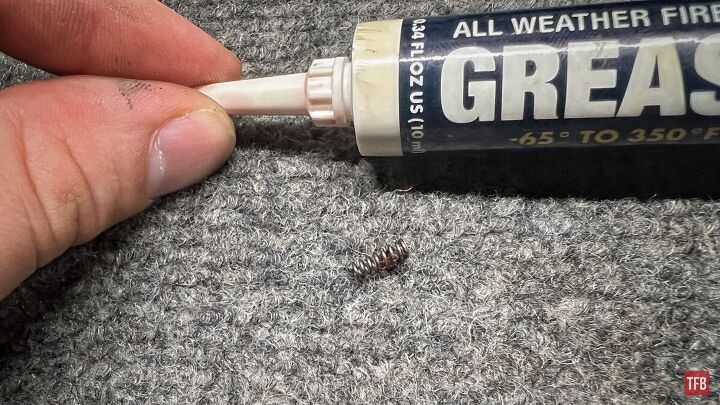
When reinstalling the magazine release, I always put a good chunk of grease onto the magazine release spring. I have seen that brand new Explorer II pistols all had this part in particular heavily greased.
Reassembly Tips: Disassembly and Maintenance – Explorer II/AR7
Another good example to showcase the AR7 design and how it is similar to the AR15. Note the small trigger pin and its recesses for the hammer spring tails.
When reinstalling the bolt, I find it is helpful to have the plastic pegs in the springs and the springs in the bolt. Put it into the receiver until the hole in the bolt lines up with the bolt handle cut and install the handle.
When installing the hammer, I recommend having it all as a complete assembly – the hammer, hammer pin, and spring. It is easier to install it this way than it would have been to remove it in one piece.
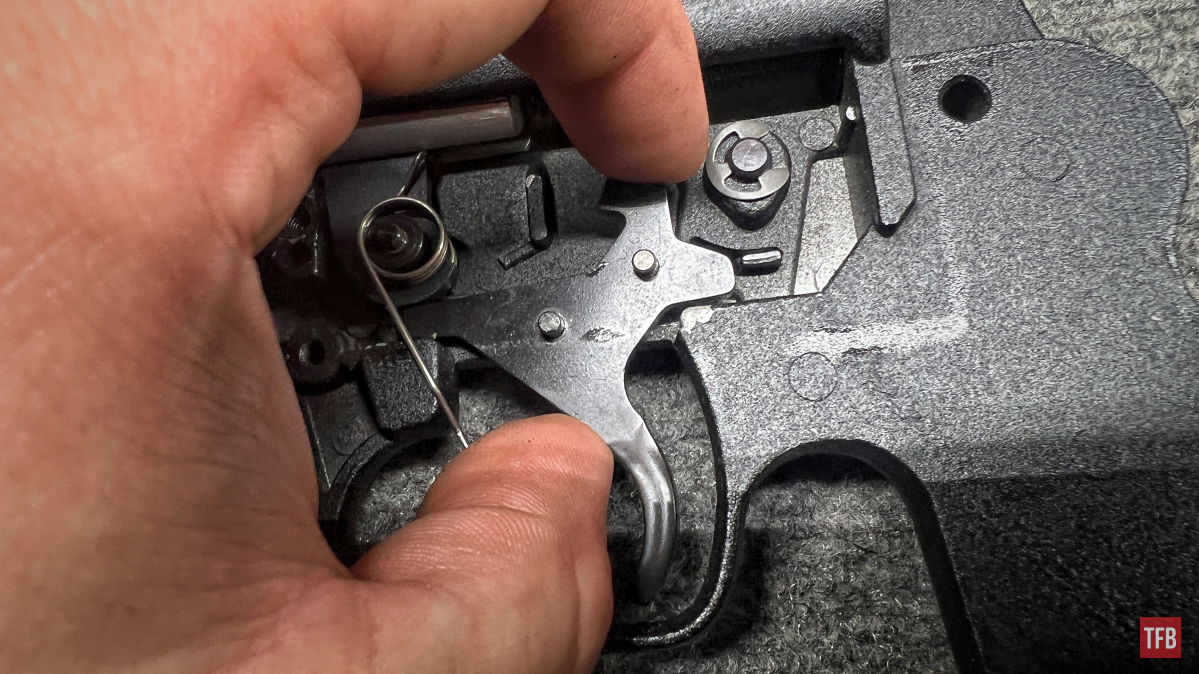
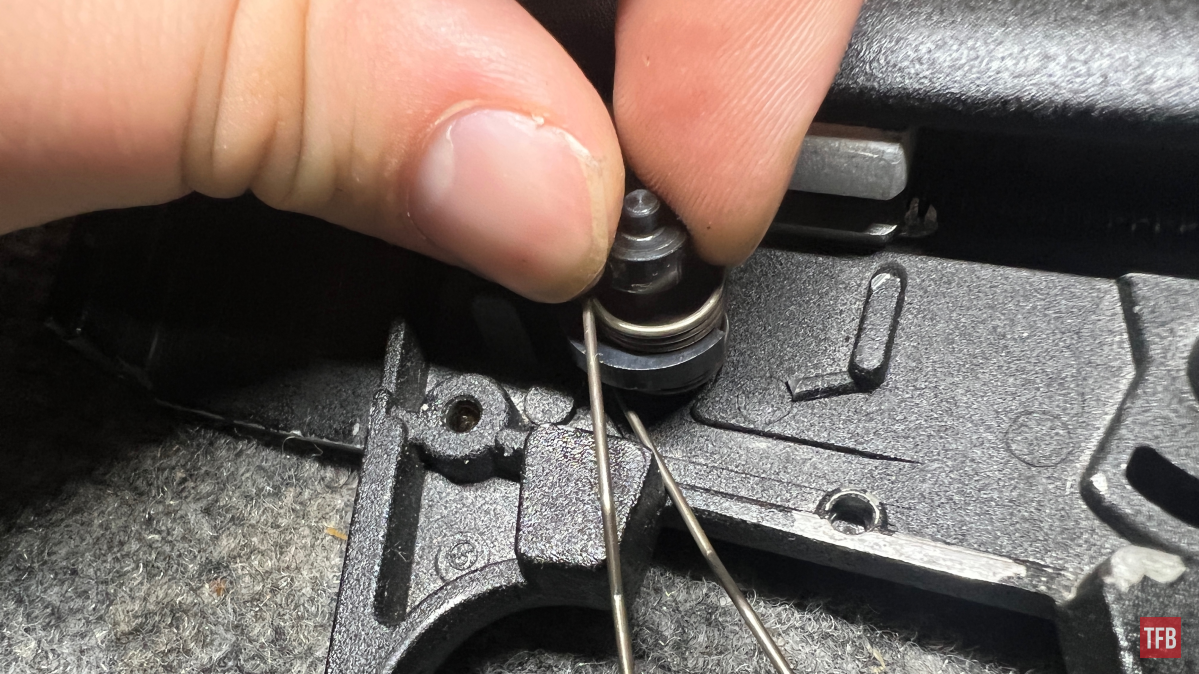
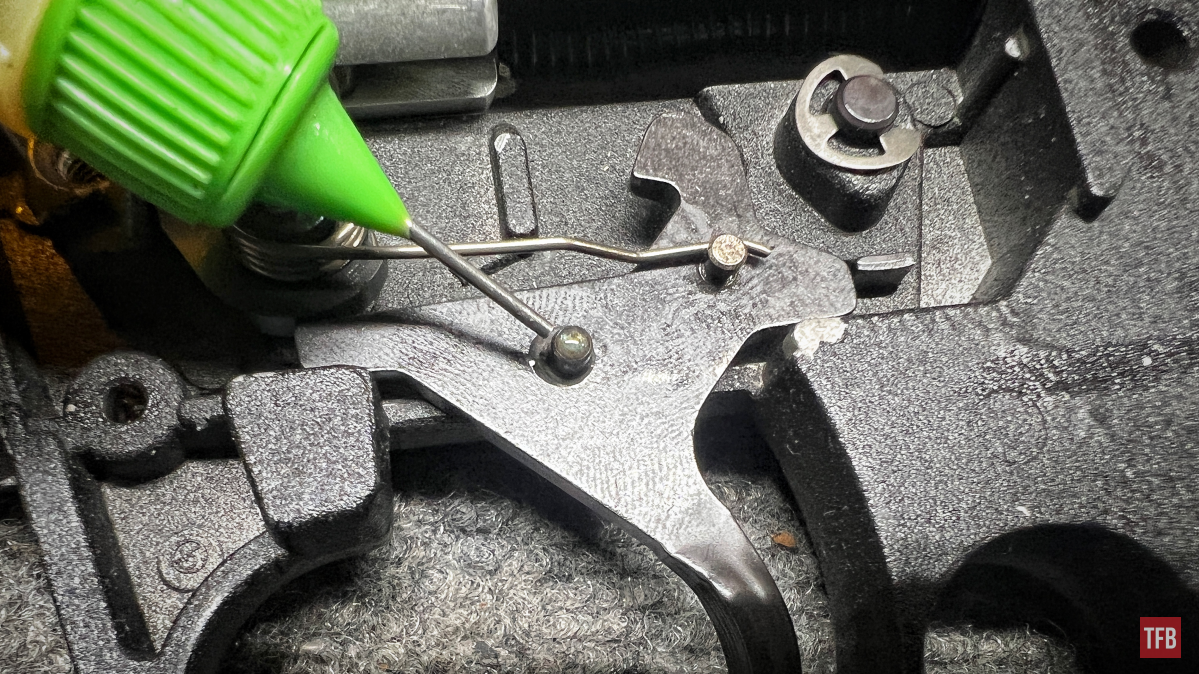
After installing the trigger and its pins, I find it easy to use a hook to grasp the inside tail of the hammer spring and set it on top of the trigger pin.
After that spring tail is set, the outside one can be as well.
Make sure to test the return pressure on the trigger.

In order to install the ejector, you may have to push the bolt back slightly.
When installing the screw that tightens the receiver plate to the receiver, I used 20 inch-pounds.
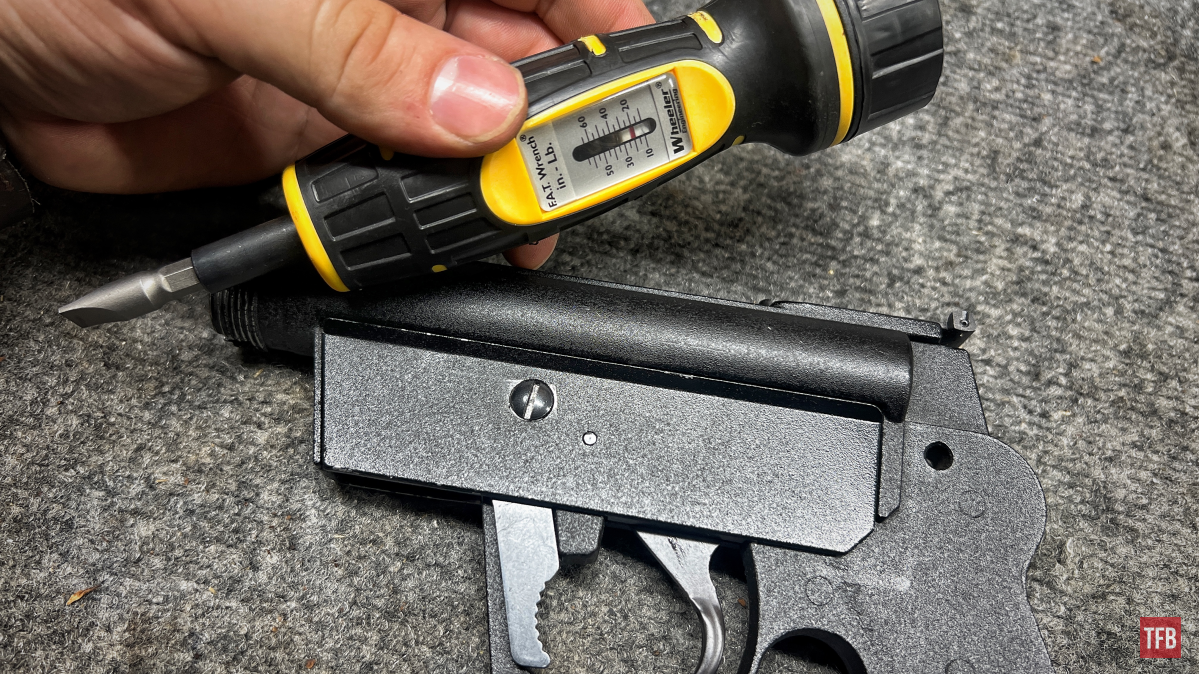
Make sure to apply a light coat of protective oil under the grips. It may be a long while before you are under the hood again. As far as the grip screws, I only used 10 inch-pounds. The Wheeler FAT Wrench is super helpful in this!

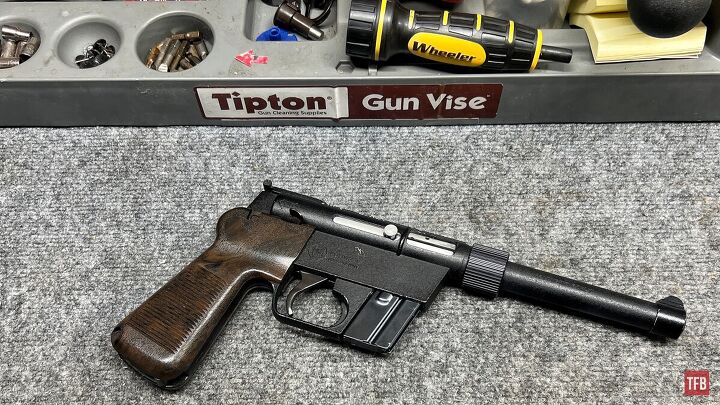
Conclusion: Disassembly and Maintenance – Explorer II/AR7
As I mentioned in the opening blurb I do not think this is a great pistol. A good .22LR handgun should be reliable and not picky and the bottom line is this one is…BUT if you maintain it in the way I described, from my own personal experience, it will be reliable and lovely to work with as long as it stays clean. I have found after around the 300-round mark things start to get dirty enough to start causing issues. Plated bullets will always feed better and typically the higher velocity the better. Hopefully, this was enjoyable information to digest. I apologize that it ran a little long but I like to be as thorough as possible. I look forward to more fun stuff coming this way!
As always, thank you for reading TFB! Be safe out there, have fun while shooting, and we will see you next time for the TFB Armorer’s Bench brought to you by Wheeler, Tipton, Caldwell, and Frankford Arsenal! Also, let us know what you think in the comments below! We always appreciate your feedback.

Pro Range Glasses, Clear

The Caldwell® Pro Range Glasses feature a stylish wrap-around design and are a great choice for all shooters. They feature an adjustable nose piece and temples for all day comfort. The scratch resistant lens meets ANSI Z87.1 standards and offers 99.9% UV protection.
72 Piece Professional Gunsmithing Screwdriver Set
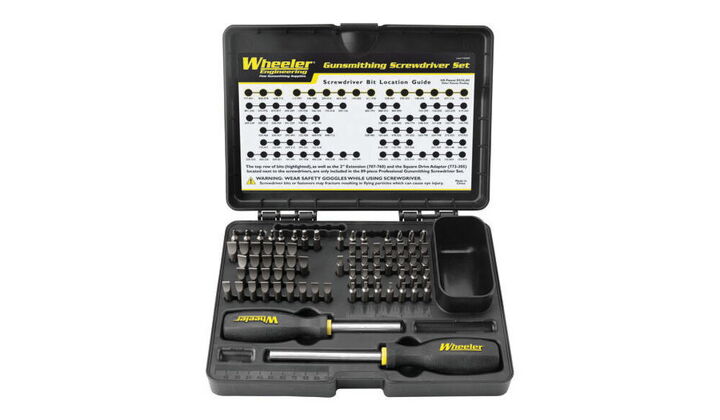
The Wheeler 72 Piece screwdriver set features 54 hollow-ground flat bits, 4 phillips, 3 torx, and 8 specialty bits all made from durable S2 tool steel with a 56-58 Rockwell “C” hardness rating. The precision-engineered bits have a concave shape that allows for insertion all the way into the screw slot of rmaximum contact to prevent burred, buggered, busted up screw slots. The kit also includes 2 non-slip, overmolded plastic handles that come in a convenient hinged storage case whcih includes a bit location guide.
Universal Bench Block
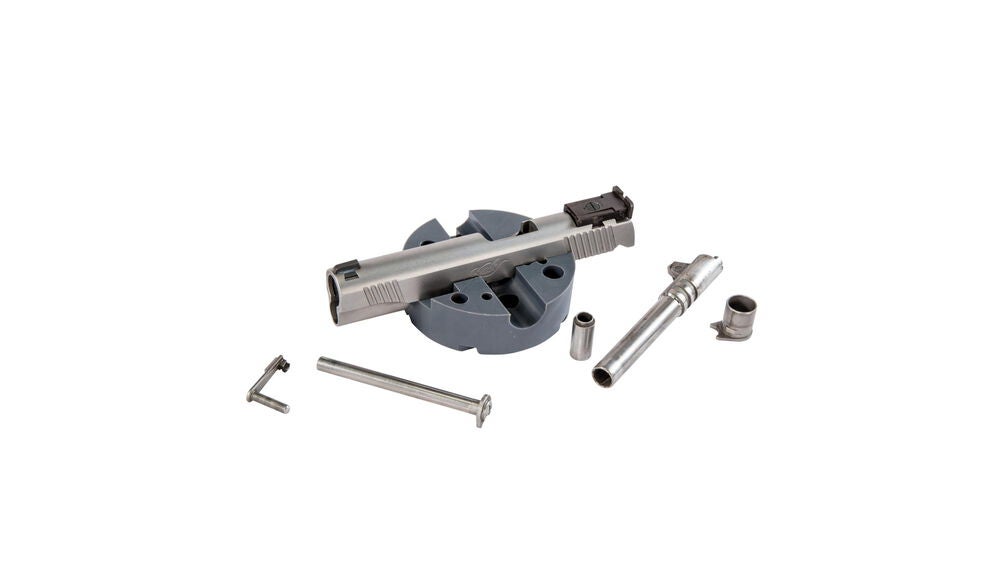
Made of non-marring urethane, the Universal Pistol Bench Block is perfect for use on M1911 pistols as well as other firearms such as 10/22s.
POWER SWABS – PISTOL CLEANING KIT, 500 COUNT
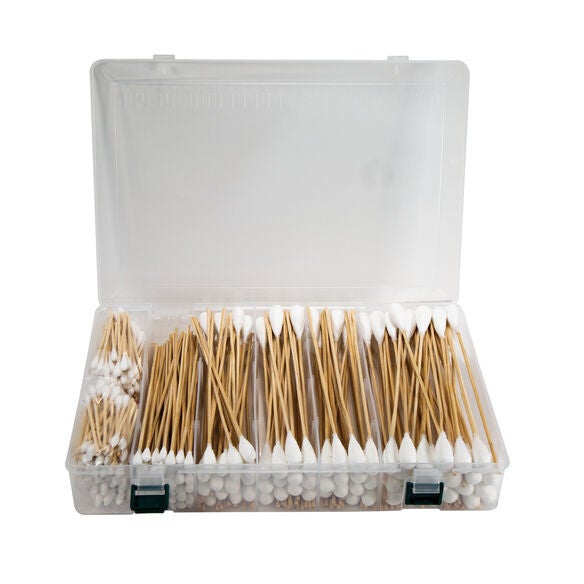
Tipton’s new Power Swabs are an essential part of your cleaning kit. They’re disposable, fast, and easy to use, plus they provide no-mess cleaning with all your favorite solvents and oils. They also fit lands and grooves better than a patch for maximum cleaning.
Universal Bench Block
Made of non-marring urethane, the Universal Pistol Bench Block is perfect for use on M1911 pistols as well as other firearms such as 10/22s.
Tipton ULTRA GUN VISE
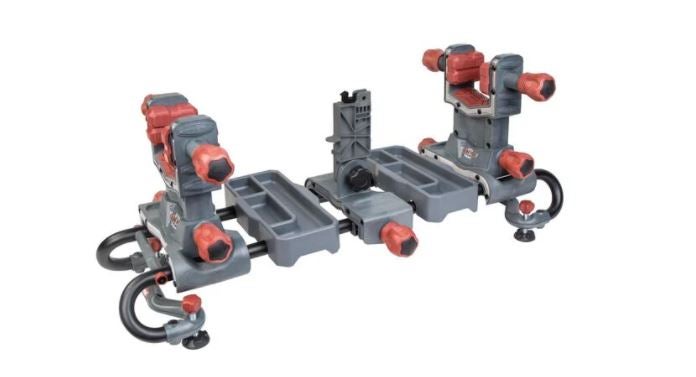
The Tipton® Ultra Gun Vise features a completely modular interchangeable design to allow virtually any shape firearm or crossbow to be cleaned and worked on with ease. The ball and socket articulating clamp pads allow for the pads to adapt to any surface. The dual clamp technology rigidly holds any firearm shape in place, while the rigid steel tube frame structure allows for complete access to your firearm or crossbow. The front and rear clamps are both height and length adjustable, and feature fast-turn knobs allowing for quick clamping. The solvent-resistant accessory and tool trays are movable and removable to stand up to even the toughest jobs.
Precision Micro Screwdriver Set