 Your Privacy Choices
Defense Distributed (DD) came out with the Ghost Gunner to help freedom-loving individuals machine 80% receivers with more precision for a garage builder. Other than buying a HAAS or similarly expensive CNC machine, the Ghost Gunner gets the job done. Well now that 80% are in danger of being restricted and regulated, DD came up with the 0% lower receiver kit. They sent one of their kits in for review so let us dive in and see how the 0% lower receiver build process is and how the receiver works.
Defense Distributed @ TFB:
- TFB Review: Ghost Gunner 3 – Harder, Better, Faster Gun Making Robot
- Ghost Gunner Can Make Zero Percent Receiver!
- TFB Behind The Gun Podcast Episode #18: Defense Distributed Ghost Gunner
Making A 0% Lower Receiver
Here in the U.S., the ATF established that the registered firearm, regarding AR-15s, is the lower receiver. You can google the definition of a firearm if you want more details but basically, since the lower receiver contains the fire control group, they classify it as the firearm. Now that 80% receivers are endangered, DD came up with a way for the people to make an AR-15 lower receiver out of a block of aluminum. However, this is easier said than done. So when DD designed their 0% lower receiver kit they decided to break it up into three components.
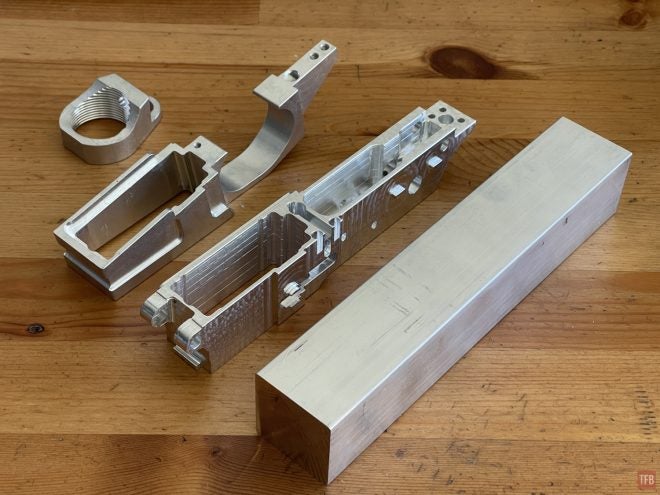
- Upper Lower Receiver
- Lower Lower Receiver
- Buffer Tower
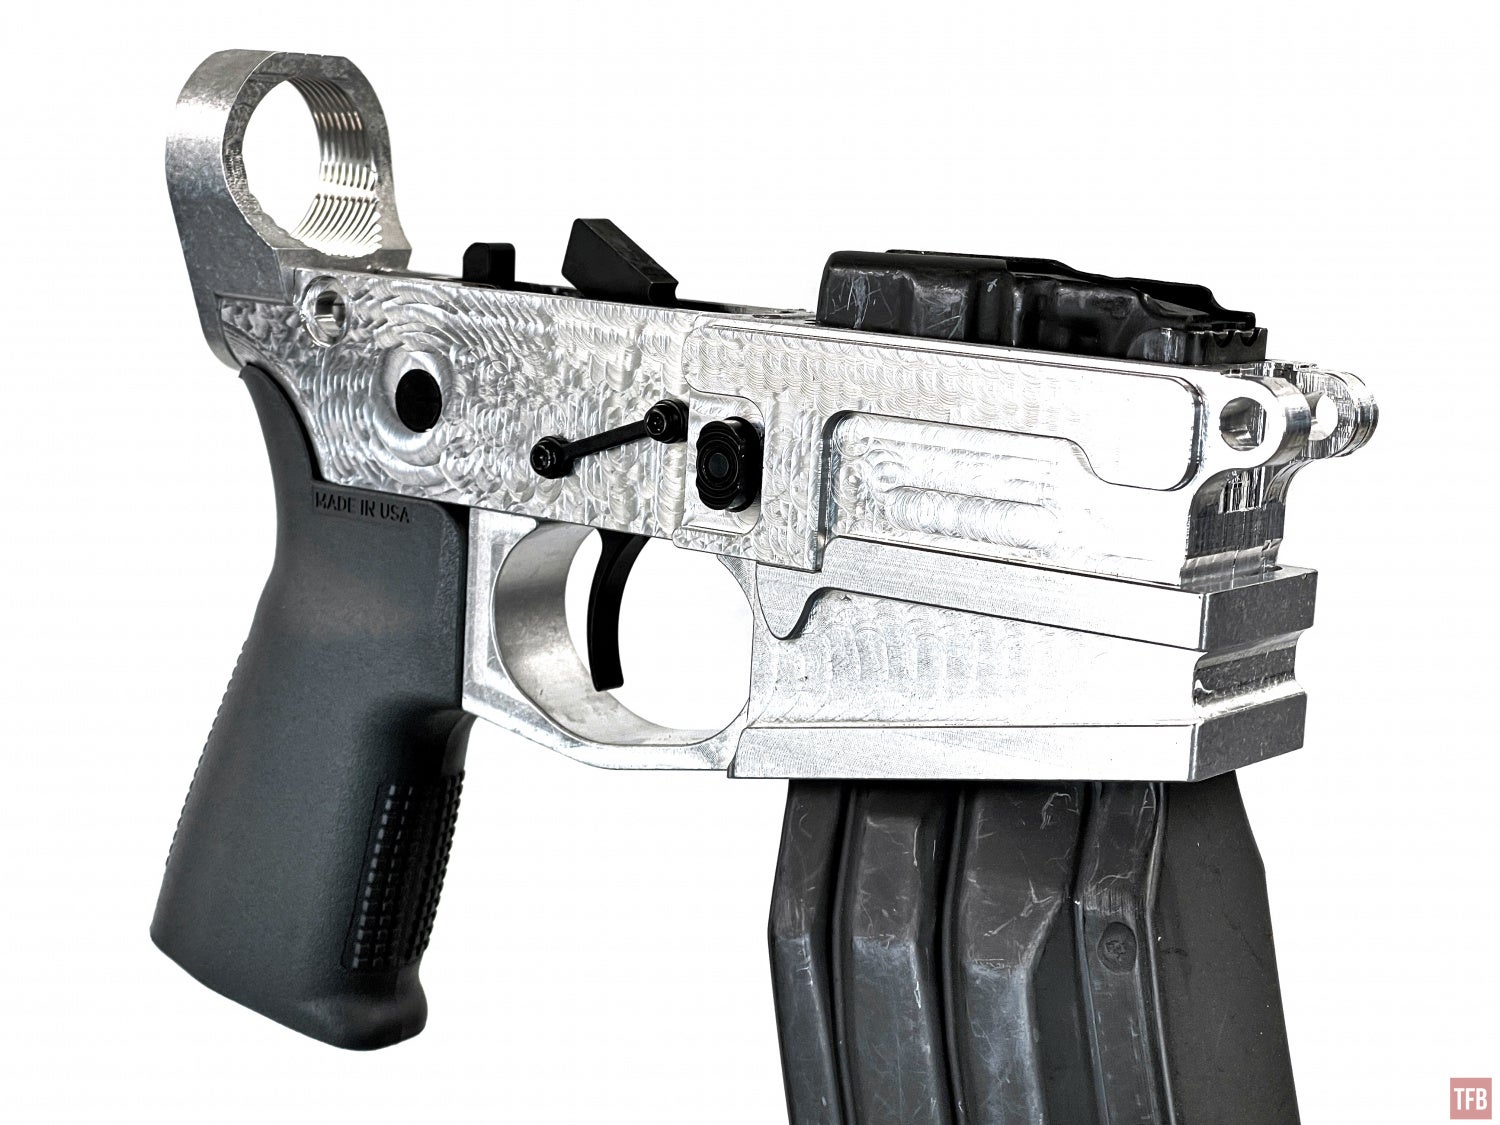
The 0% upper lower receiver is the part that holds the fire control group.
L-R: Lower Lower, Upper Lower, Buffer Tower
DD sent in their 0% lower receiver starter kit, build kit, and 2x non-receiver blocks.
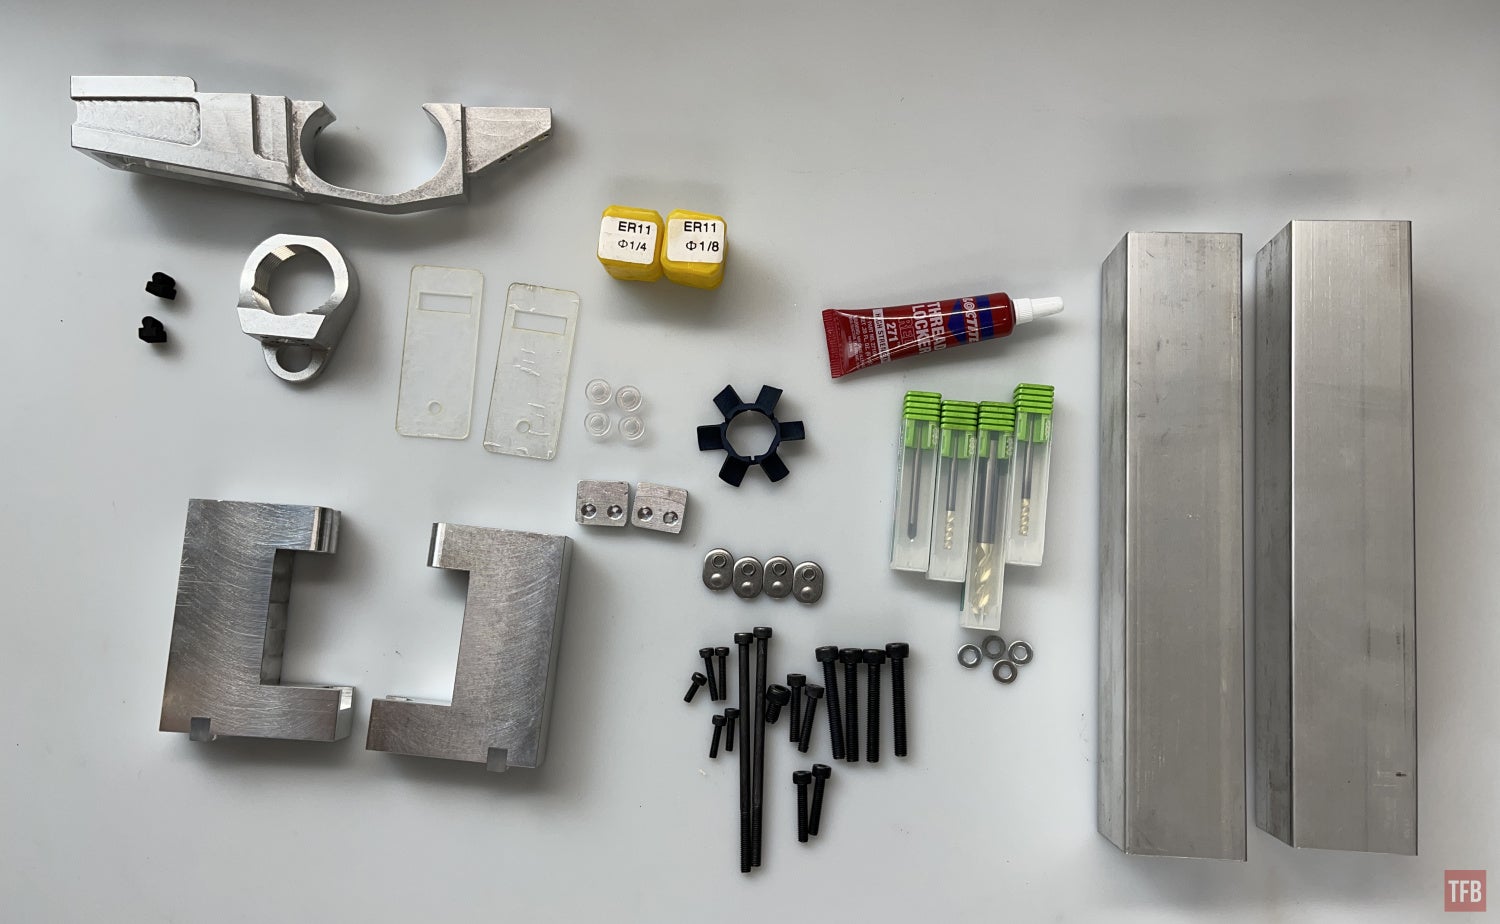
The starter kit consists of:
- C Clamp (x2)
- Soft Jaw (x2)
- Clamp Feet (x2)
- M4x20 (x2)
- M4x90 (x2)
- M5x6 (x1)
- M5x35 (x4)
- T-Slot Nut (x4)
- Insulating Washer (x4)
- M4 washers (x4)
- 1/8″ Collet (x1)
- 1/4″ Collet (x1)
- 1/4″ Endmill (x1)
- 1/8″ Endmill (x1)
- 1/8″ Deburr (x1)
- 6ml Loctite 761 (x1)
The 0% lower receiver build kit consists of the following:
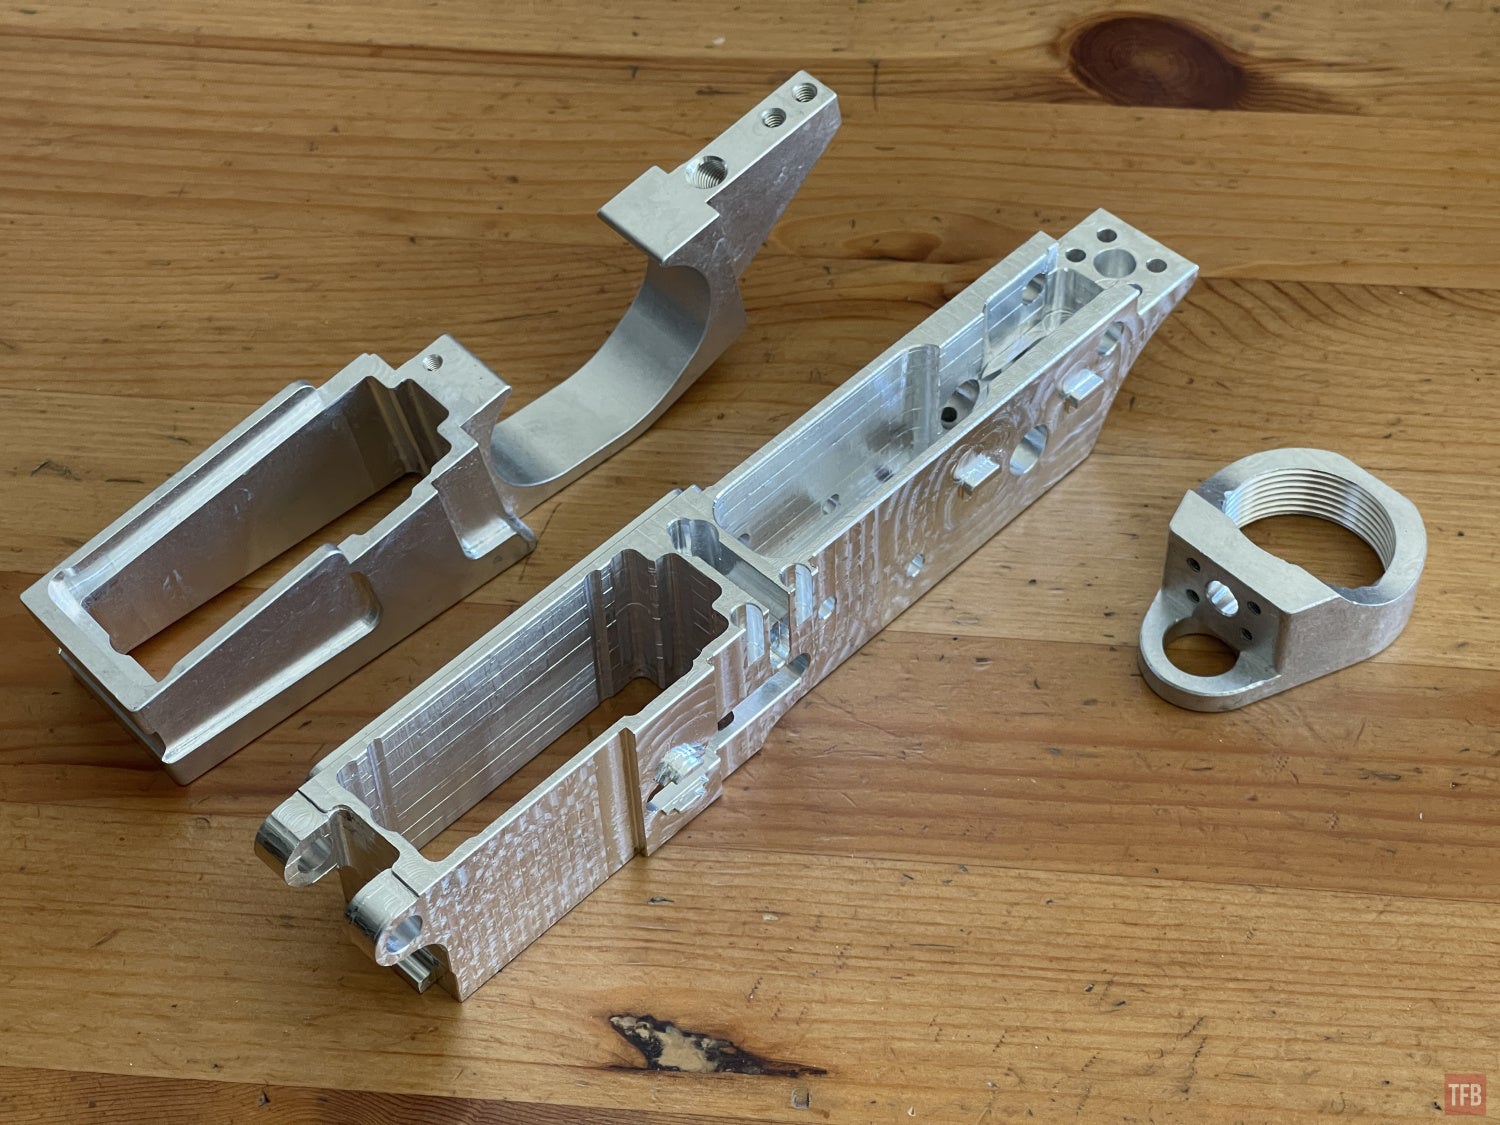
- Lower Lower Receiver
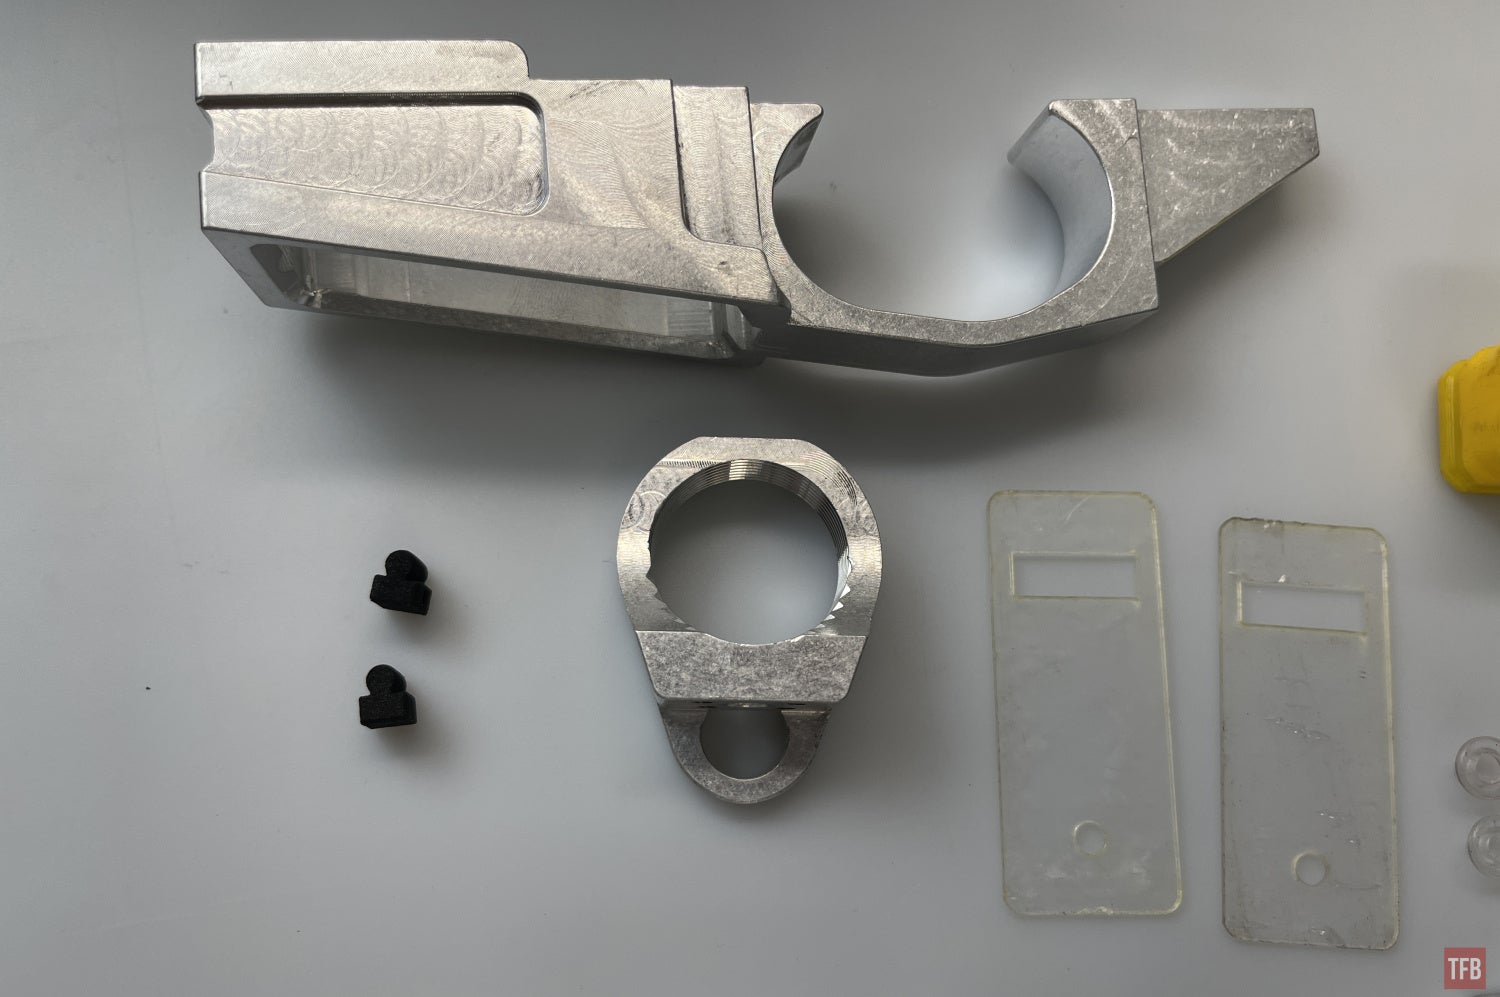
- Buffer Tower Ring
- Bolt Catch Inserts
- 2x M3x12
- 2x M3x16
- 2x M4x20
- 1x M3x8
Lower lower and buffer tower
Unlike their 80% build kit, the 0% lower receiver build requires the use of solid metal jigs or in this case, C-Clamps. These hold the non-receiver block of aluminum as the Ghost Gunner chews away the metal to form the upper lower receiver.
C Clamps

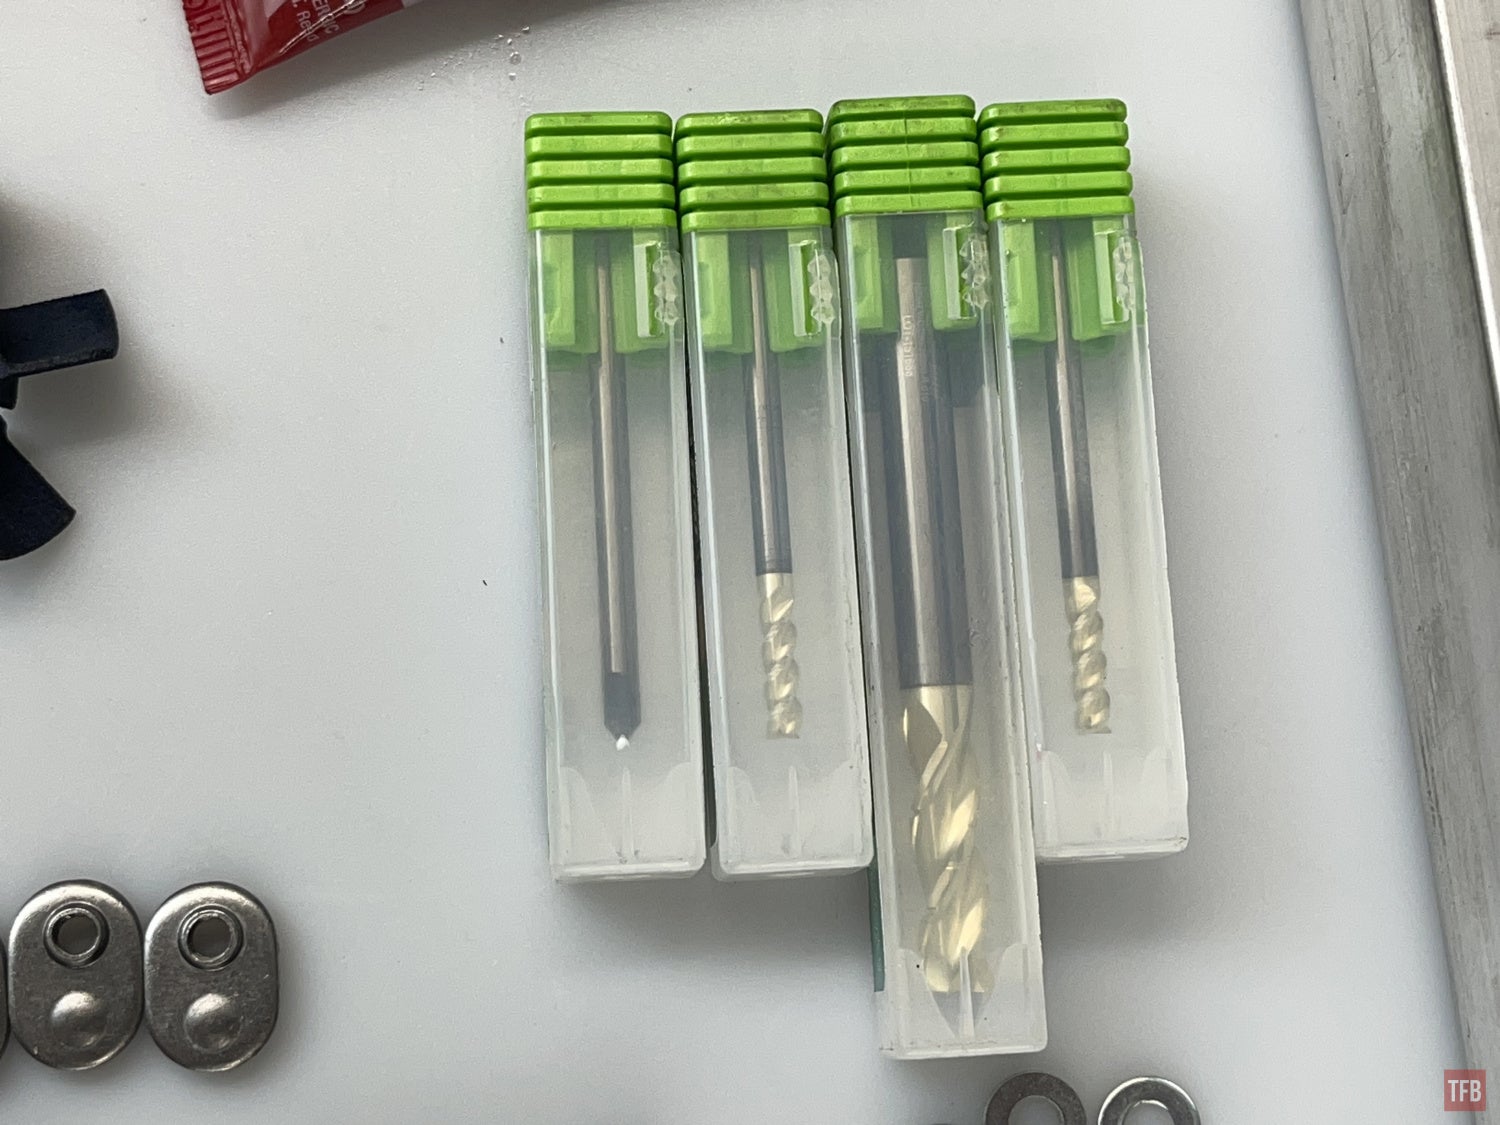
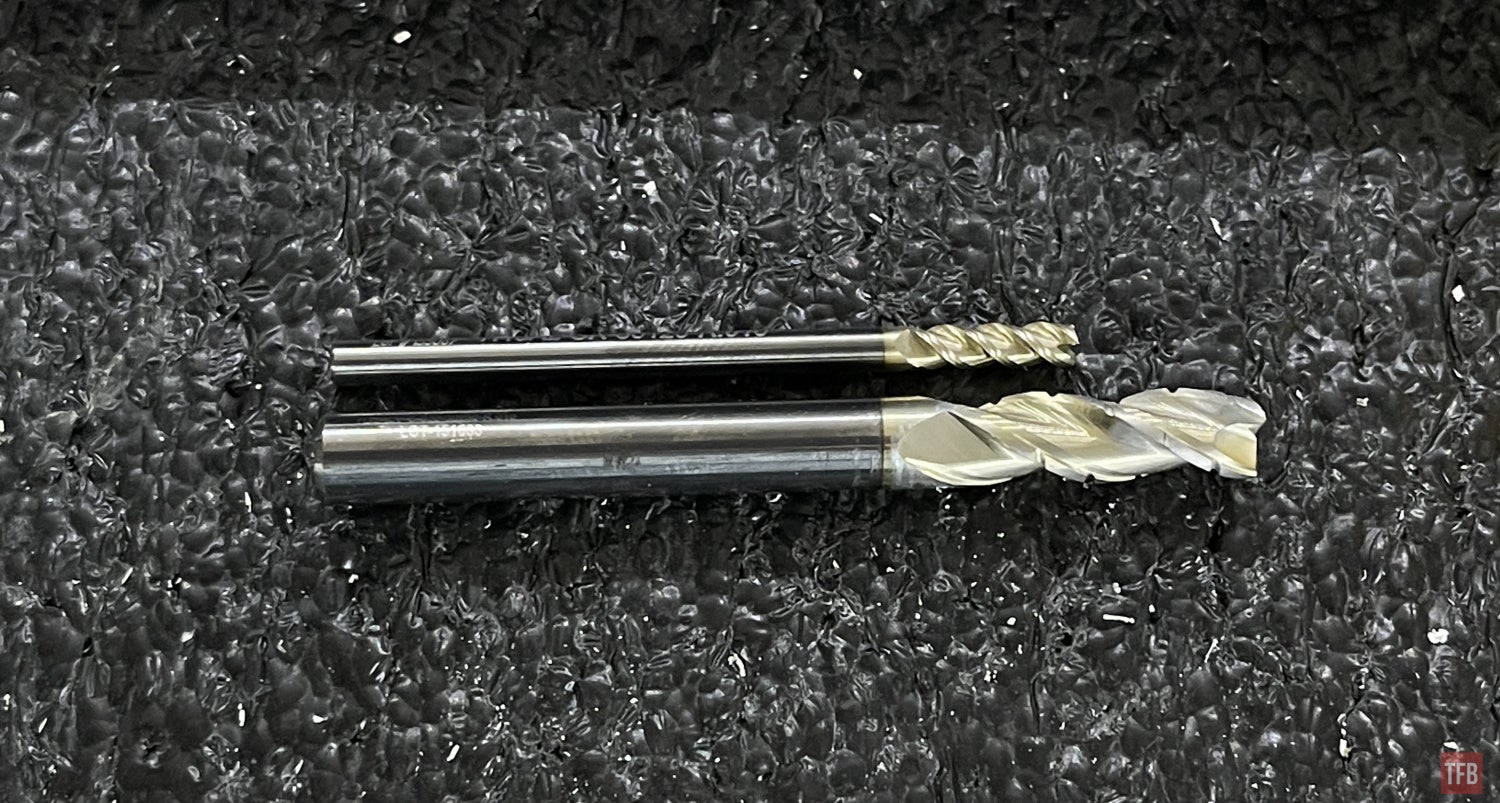
The tool bits that come with the starter kit. They sent a spare 1/8″ end mill.
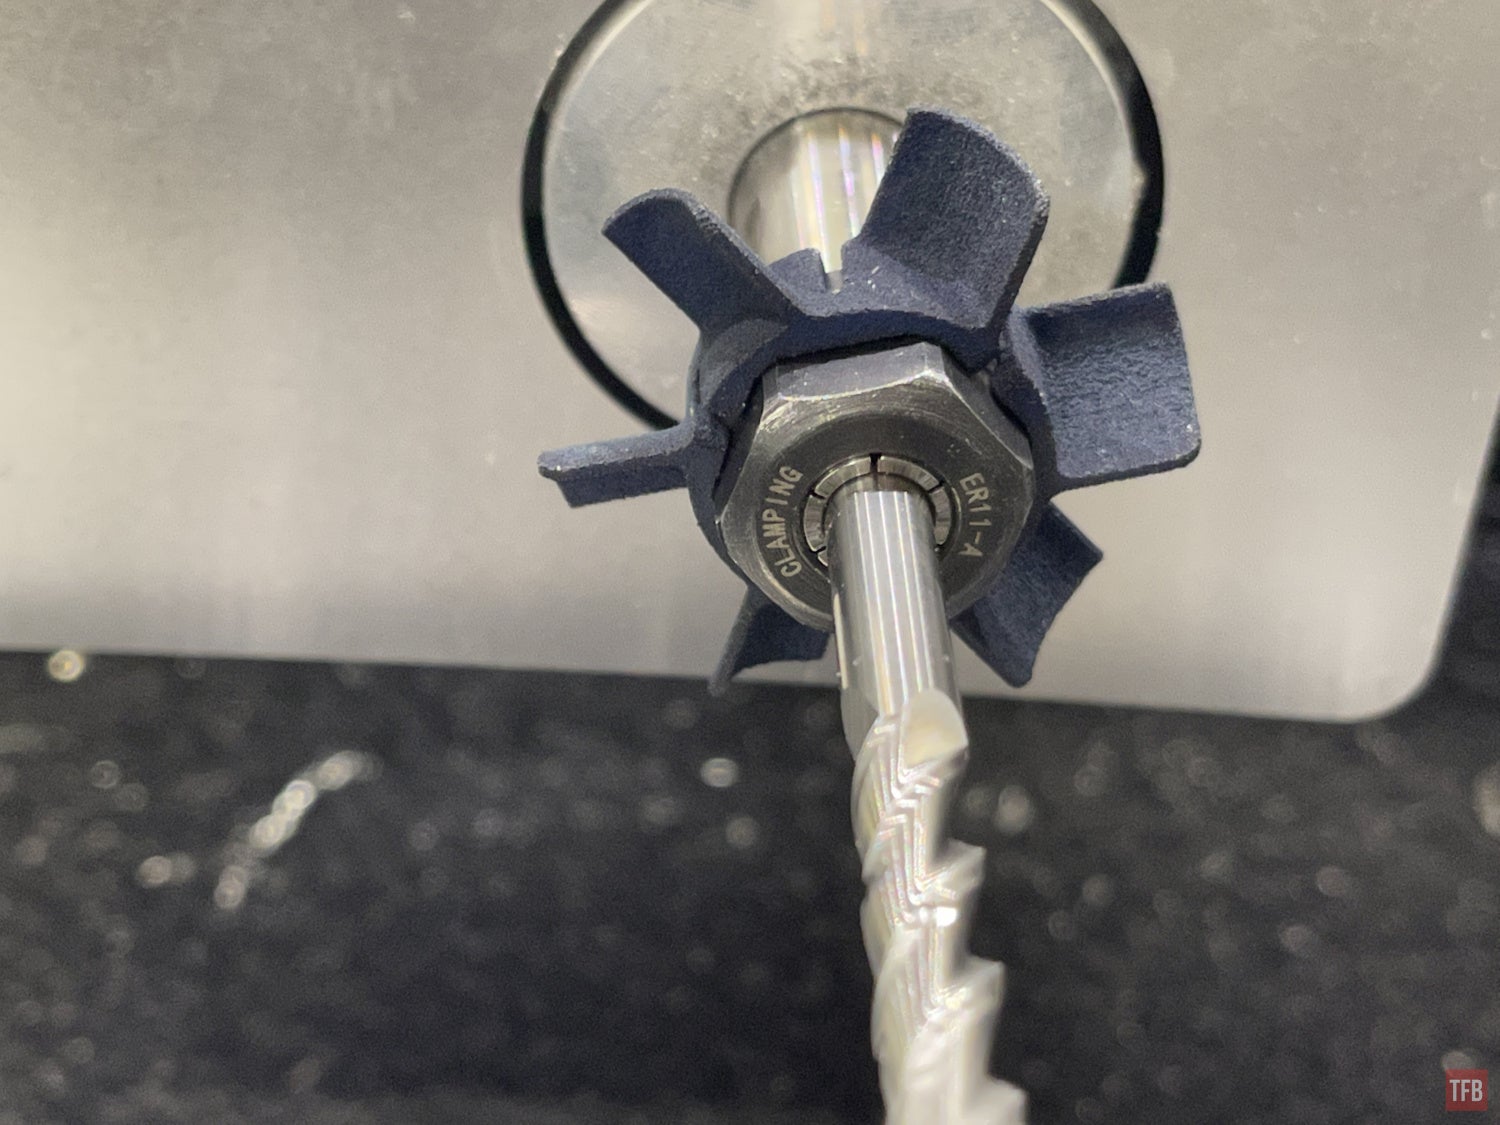
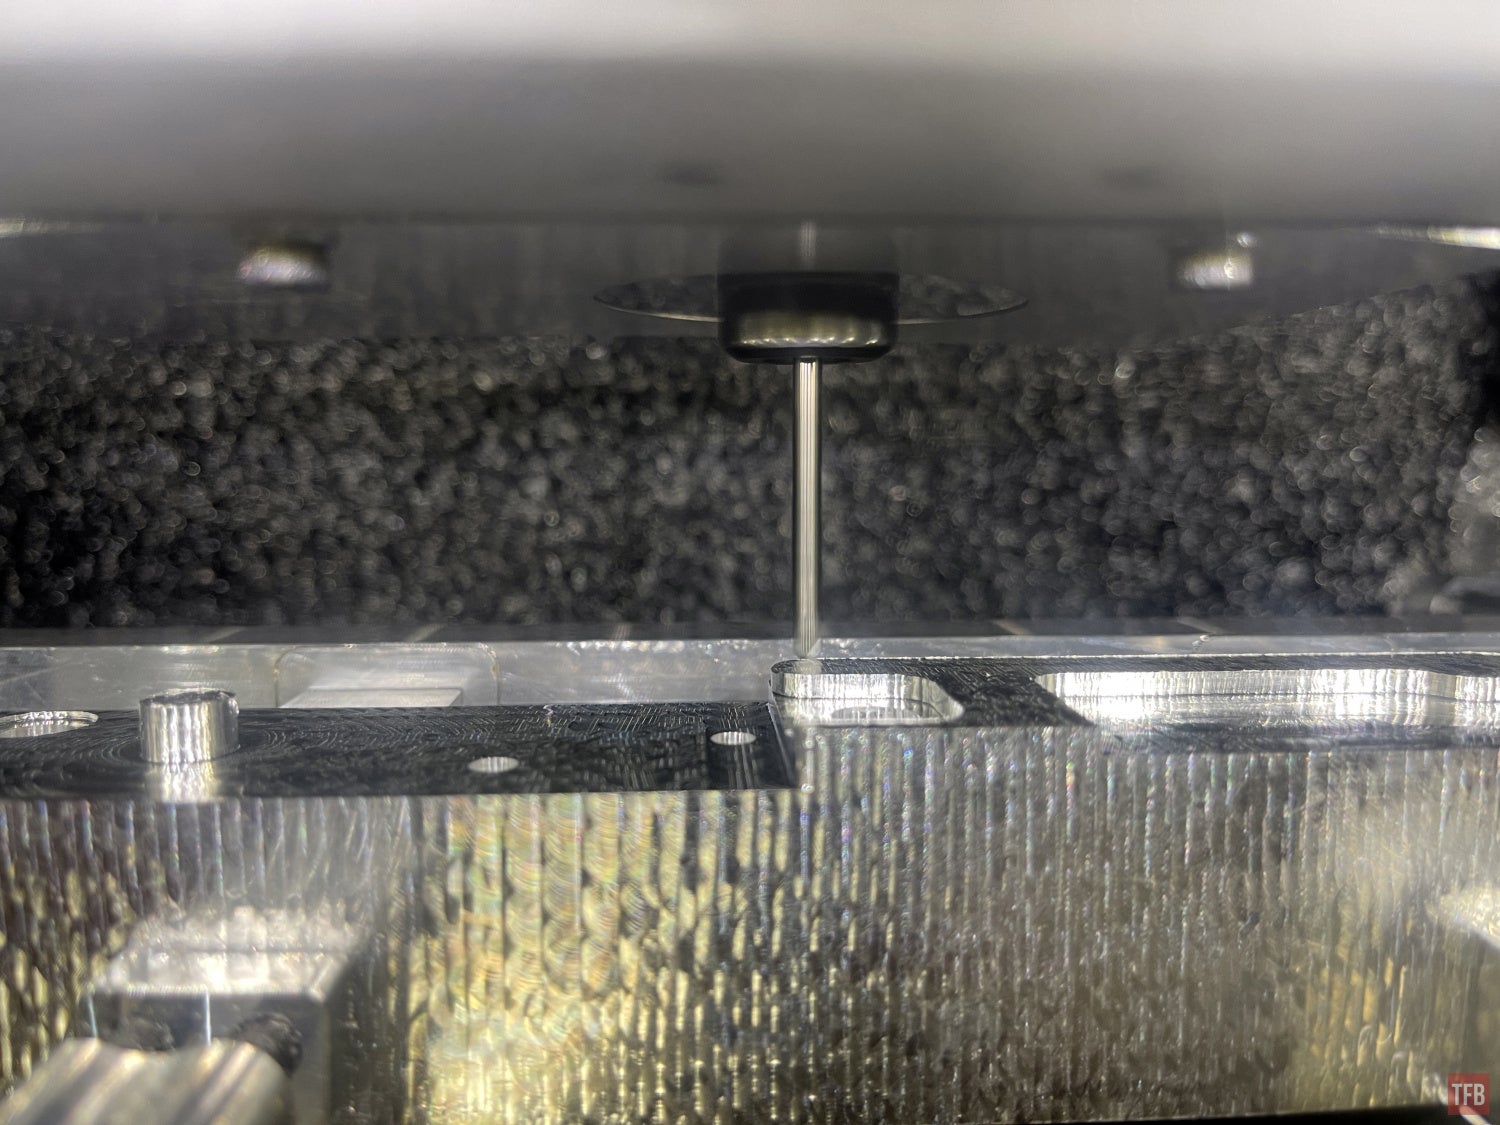
Due to the workload imparted on the Ghost Gunner 3, DD came up with a slip-on 3D-printed fan to help move some air over the 0% lower receiver while it is being machined.
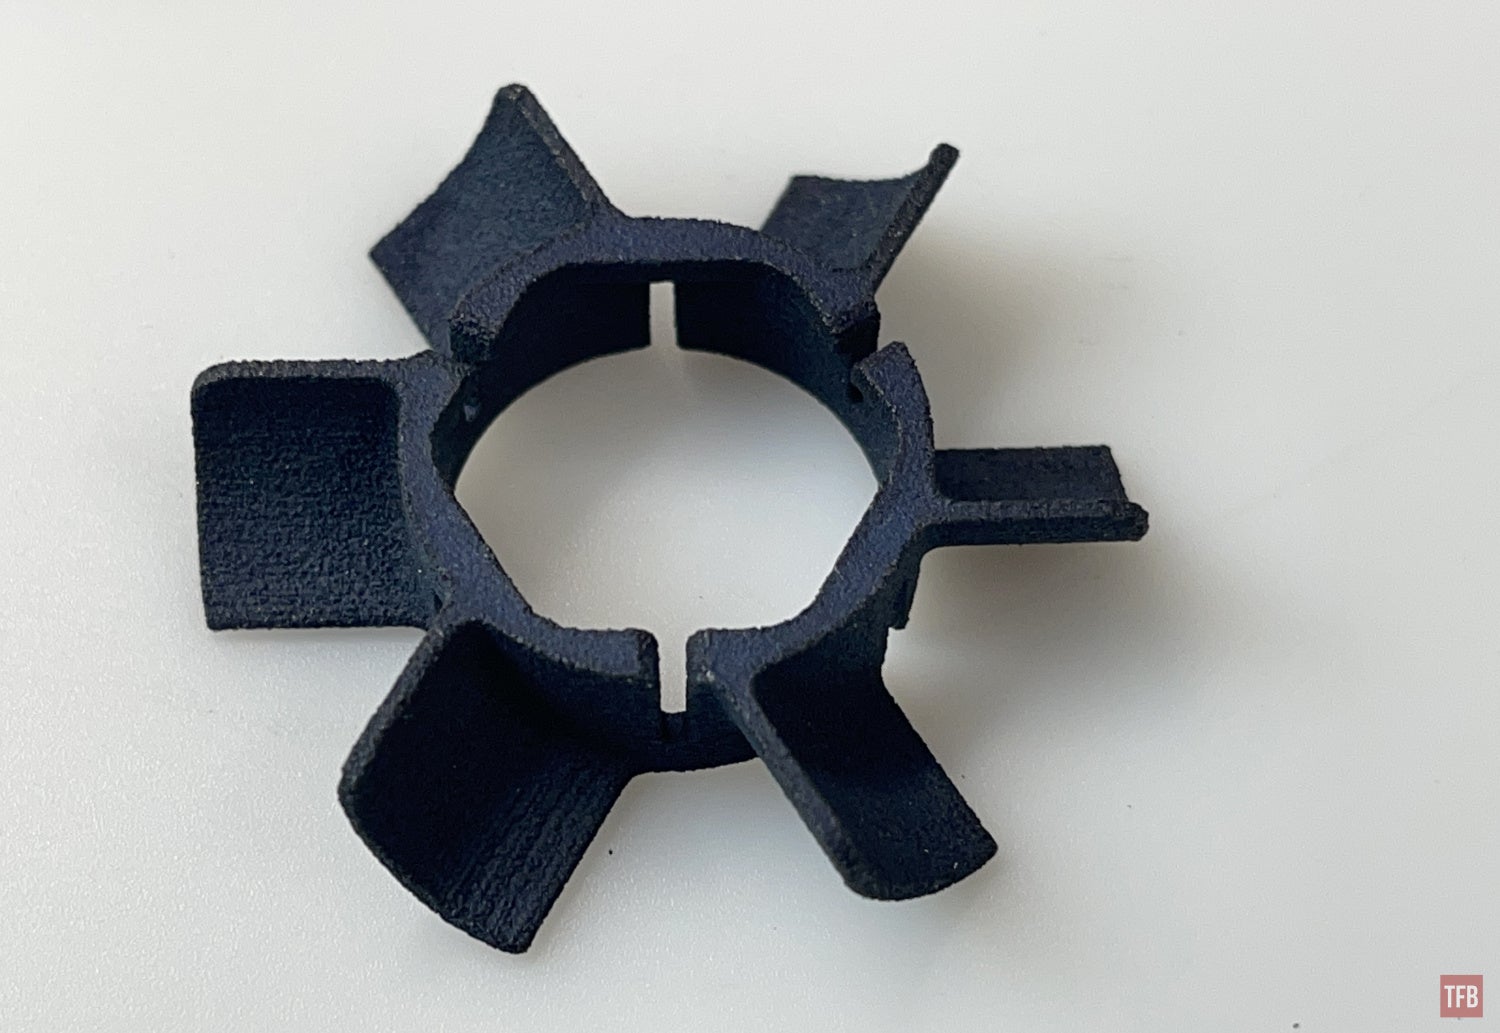
The fan slips over the collet nut.
The Ghost Gunner 3 uses a probe and probe wire attached to the receiver you are machining. When machining an 80% receiver, the jig is made of plastic so the metal does not touch the build deck. It is critical to isolate the receiver from the build deck so that when the end mill probes the part it completes the circuit. If the receiver somehow comes in contact with the build deck, it will complete the electrical circuit and give a false positive during the probe sequence and the GG3 will not know where the part is in 3D space.
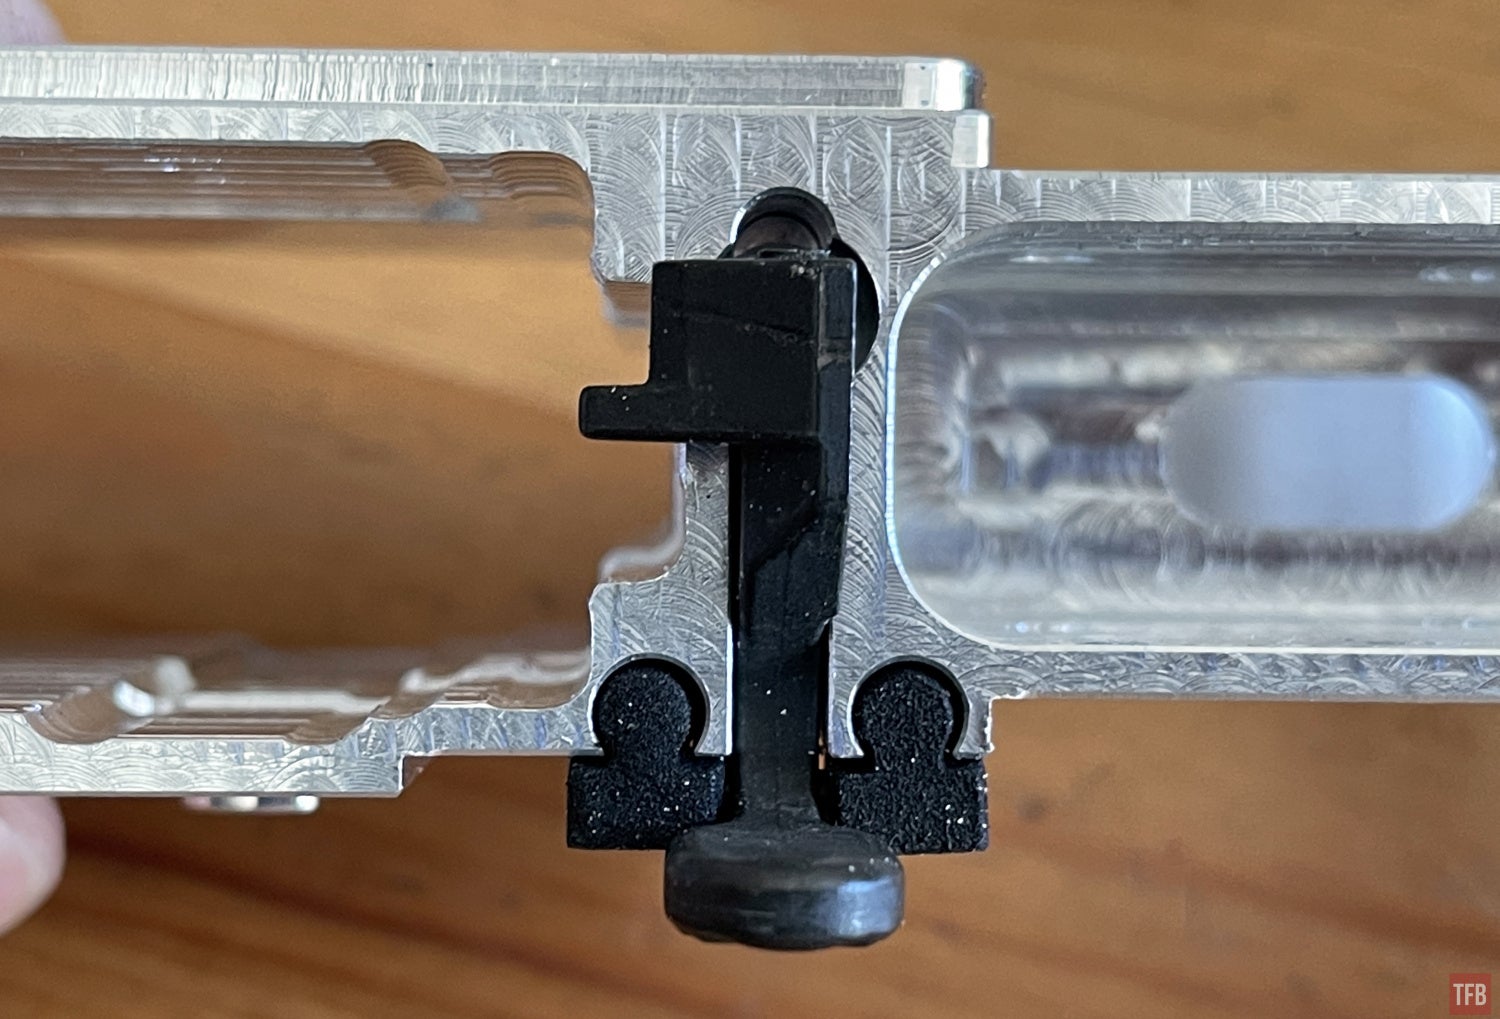
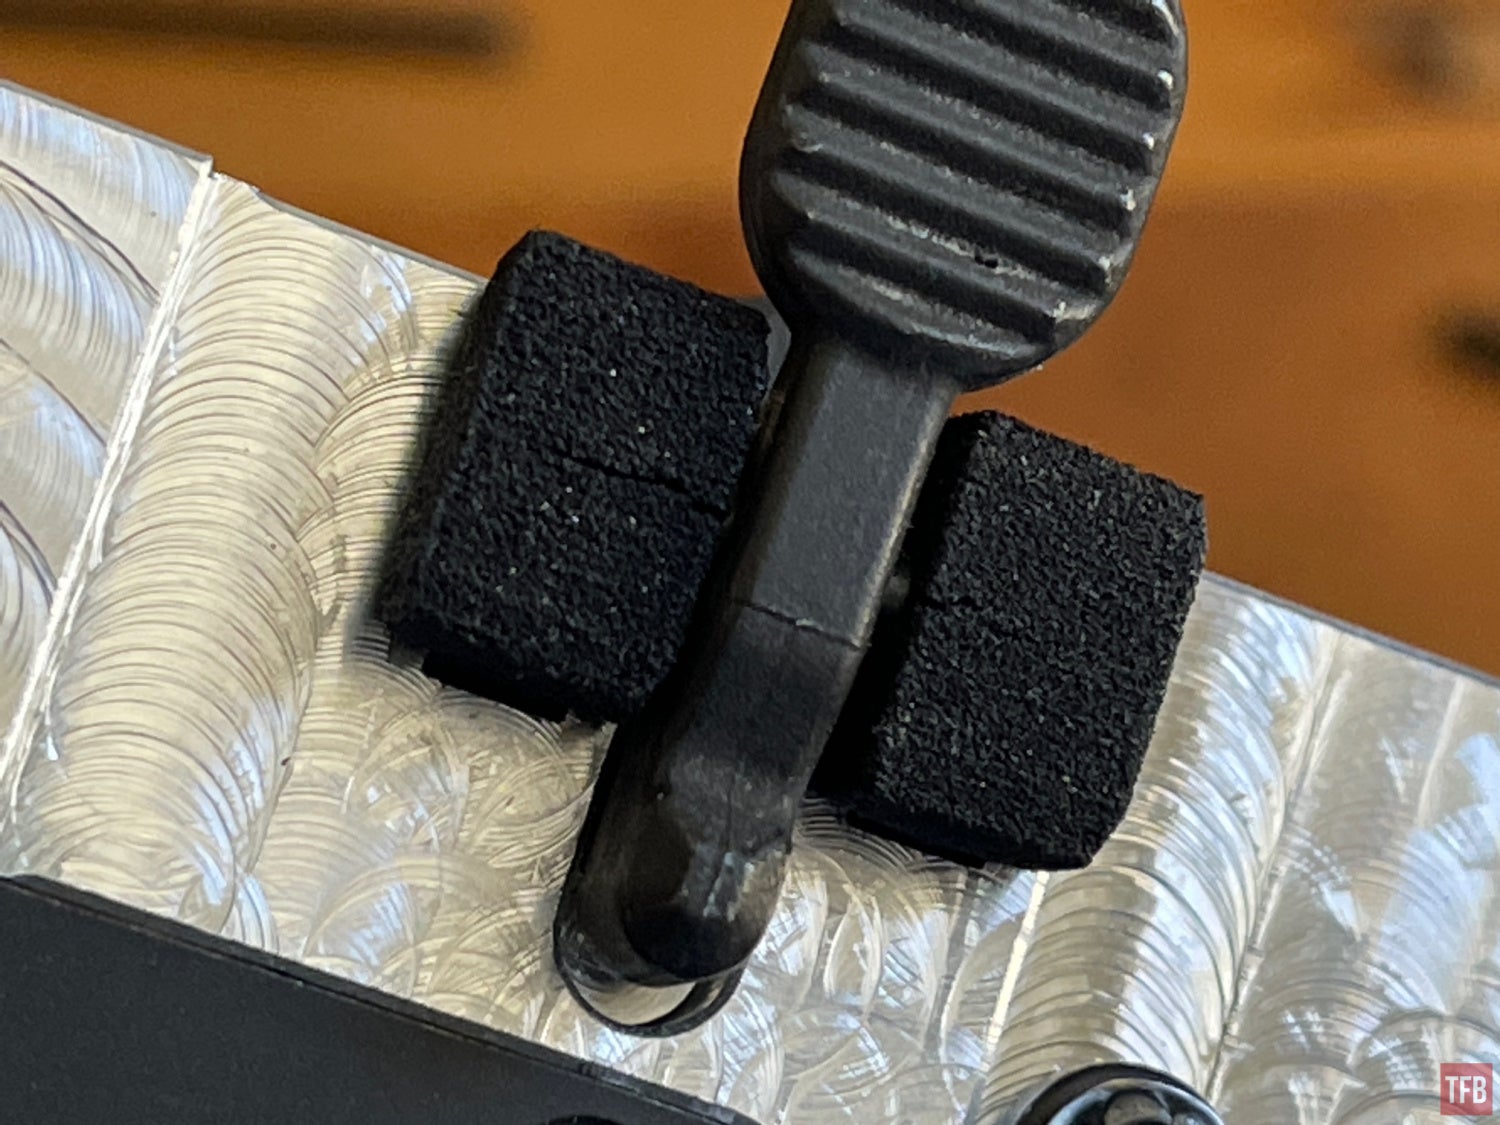
Since the clamps for the 0% lower receiver are made of metal, they will not flex like the plastic jigs for the 80% receiver. However, since they are made of metal, they need to be isolated from the build deck. DD provides two clamp feet. They are clear plastic rectangles that keep the clamps from touching the bare metal build deck.
The clamps have a piece of clear polymer that indexes into the slots of the build deck.

Here is where I came across my first problem. In order to mount the clamps, you install a short bolt at the front of the clamp (the side facing the end mill) then you need to use M4x90 bolts to anchor the back of the clamps. Well, somehow they sent me two M4x80 bolts and they are too short to thread into the T-slot nut. I tried to find the right size bolts locally but I was unsuccessful. I found a set of four M4x90 bolts on Amazon for $12. This was faster than waiting for DD to send the correct size bolts which they did send, I was just impatient.
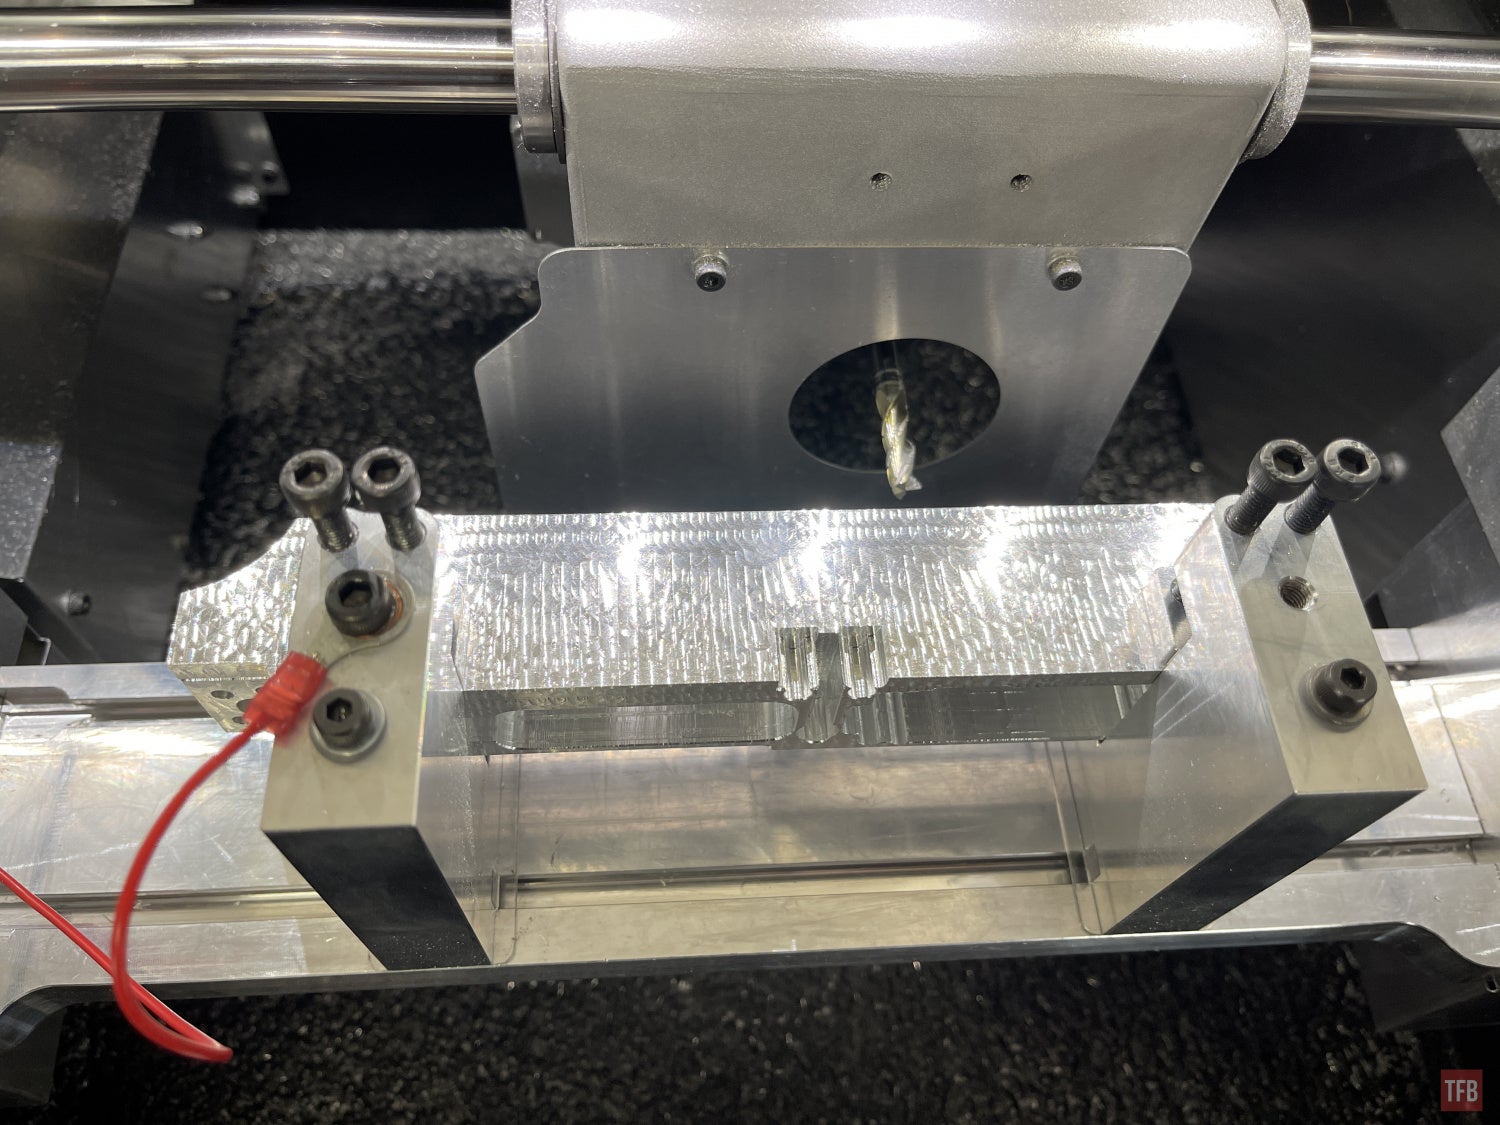
Now that I got the right bolts it is time to make a 0% lower receiver. At least that is what I thought before I came across my second problem. The end mill probes the clamps before you install the non-receiver block. Well, it kept crashing into the front face of the clamp and triggering the GG3’s hard limit.
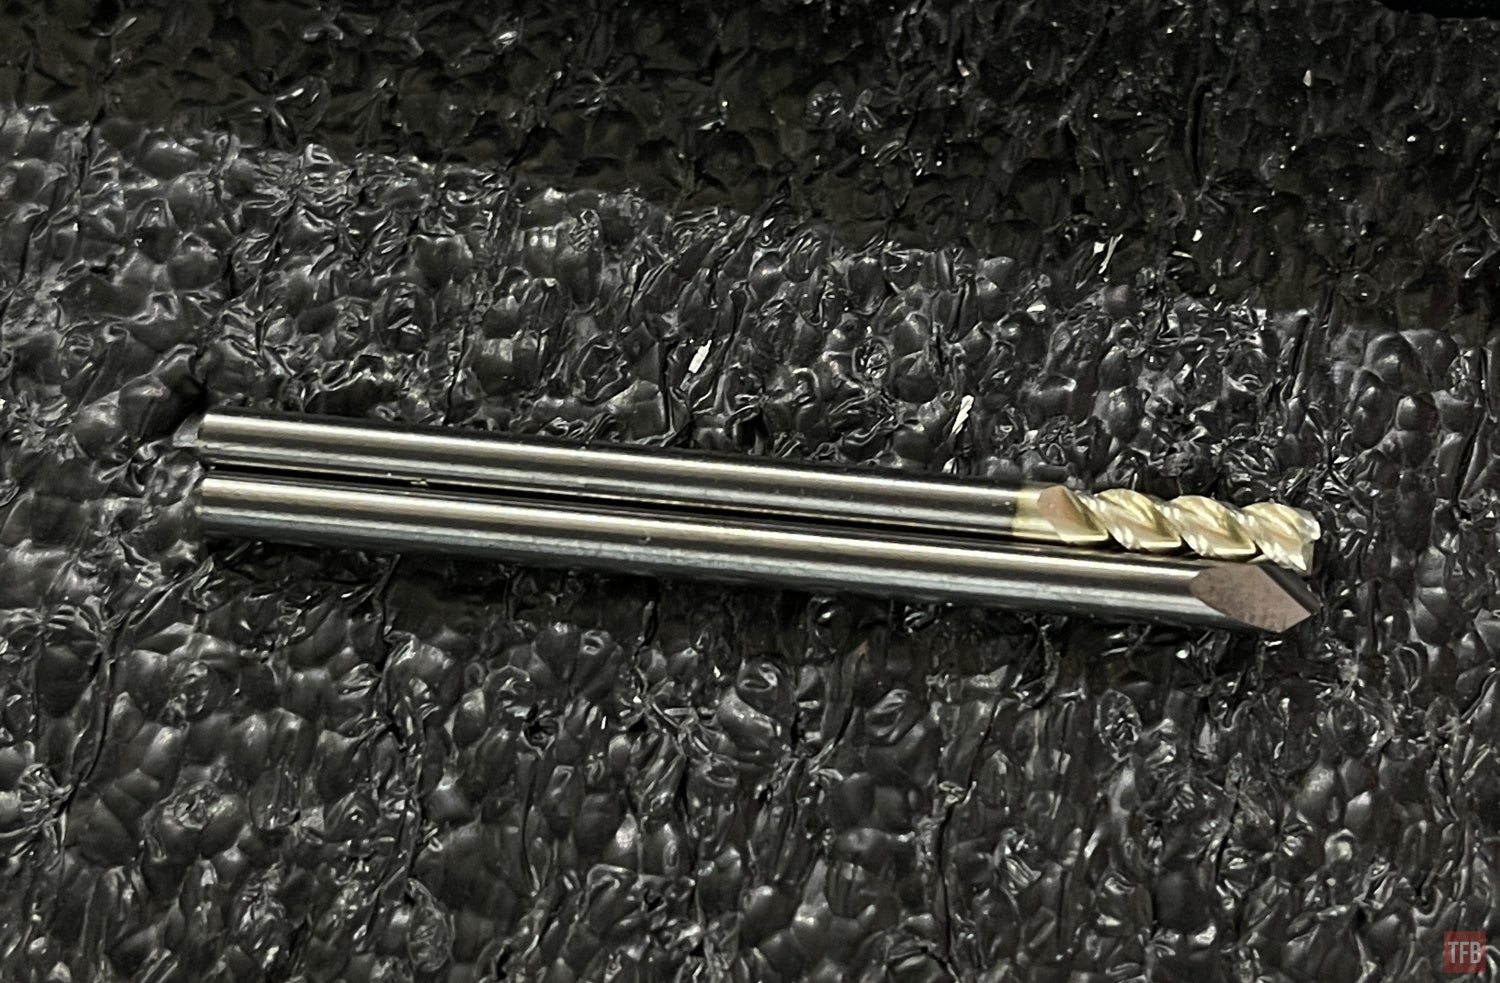
With the help of the Defense Distributed GG group on Facebook, I realized my mistake. The 0% lower receiver requires the use of a 1/4 end mill. I mistakenly assumed I can use the 1/4 end mill that I used for the 80% lower receiver build. How wrong I was. See the 80% versus the 0% end mills below. It would have been a good idea to have the DDCUT software tell you to NOT use the 80% 1/4 endmill for the 0% lower build.

Now that we got that squared away, time to machine the non-receiver block.
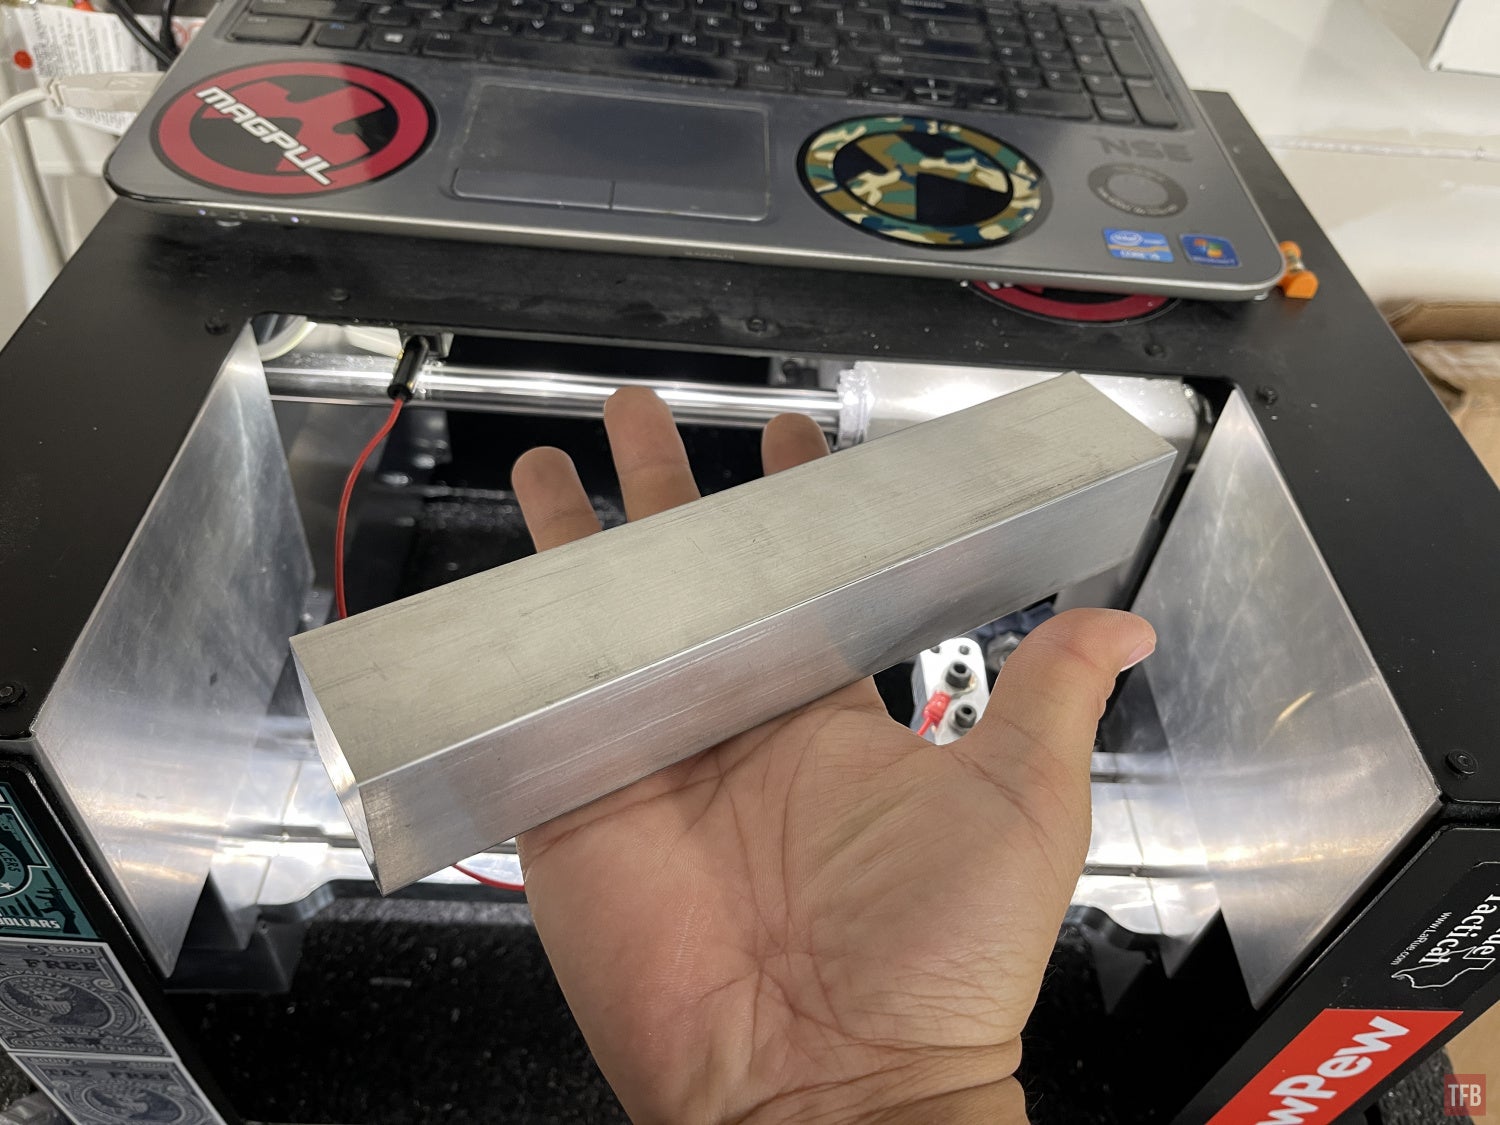
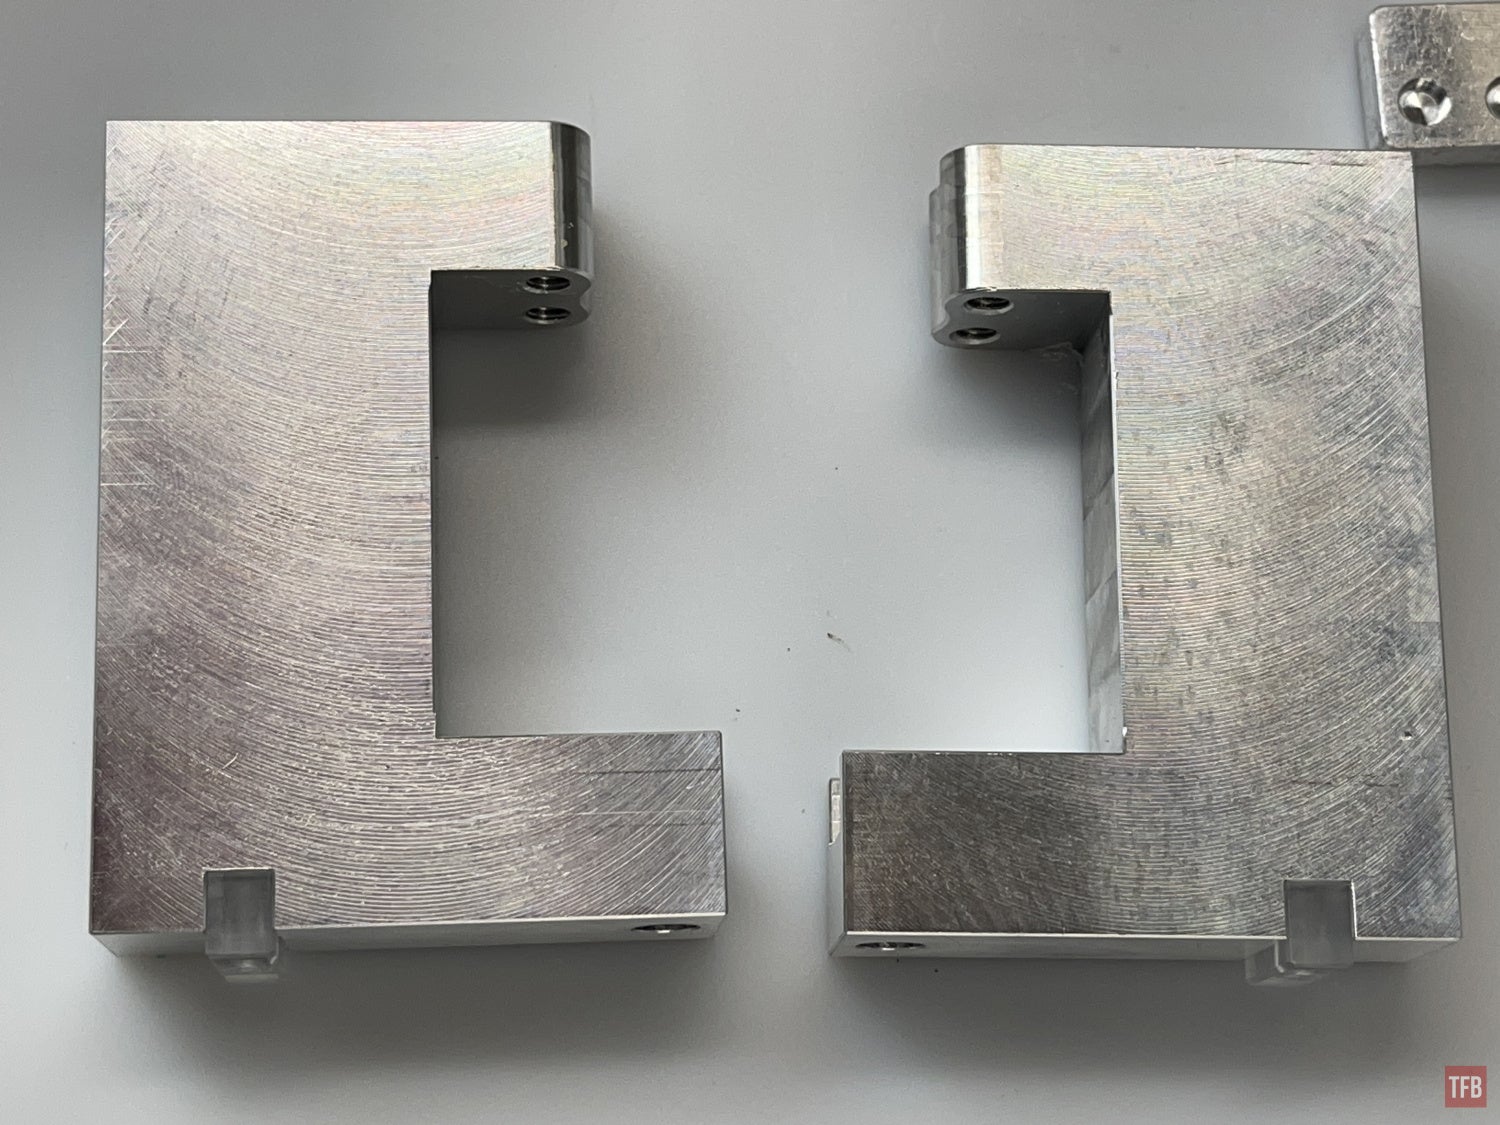
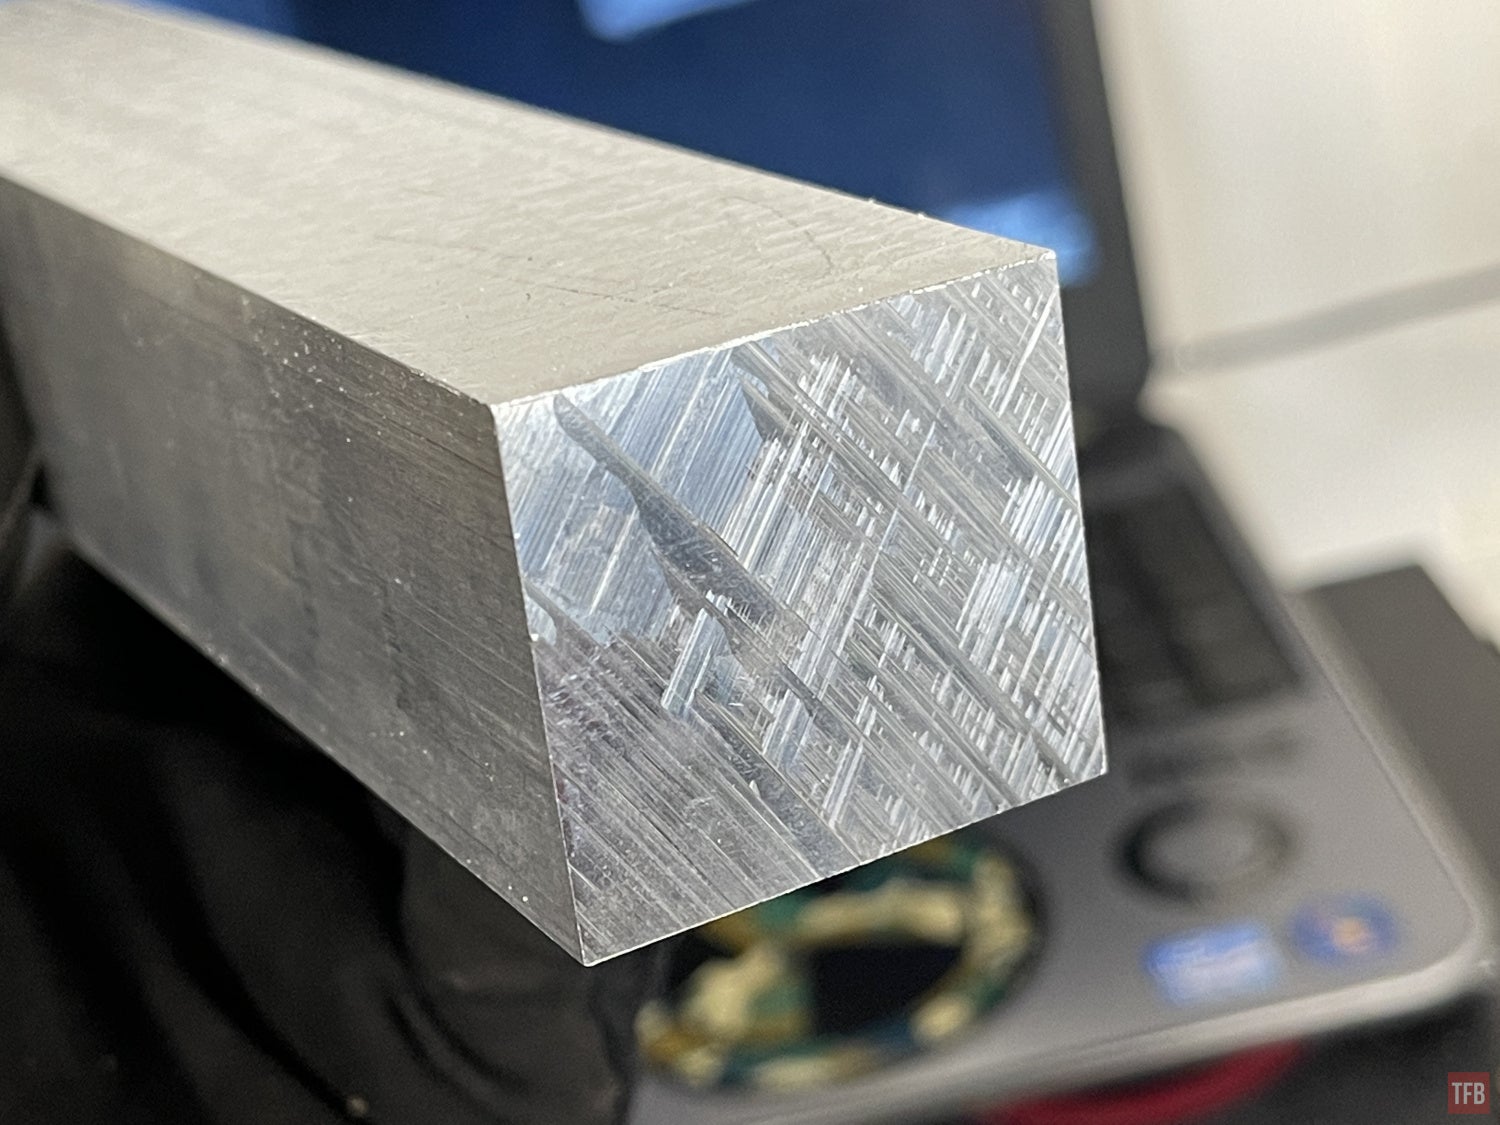
The non-receiver block is 6061 billet aluminum. It is held in the clamps with two soft jaws also made of aluminum.
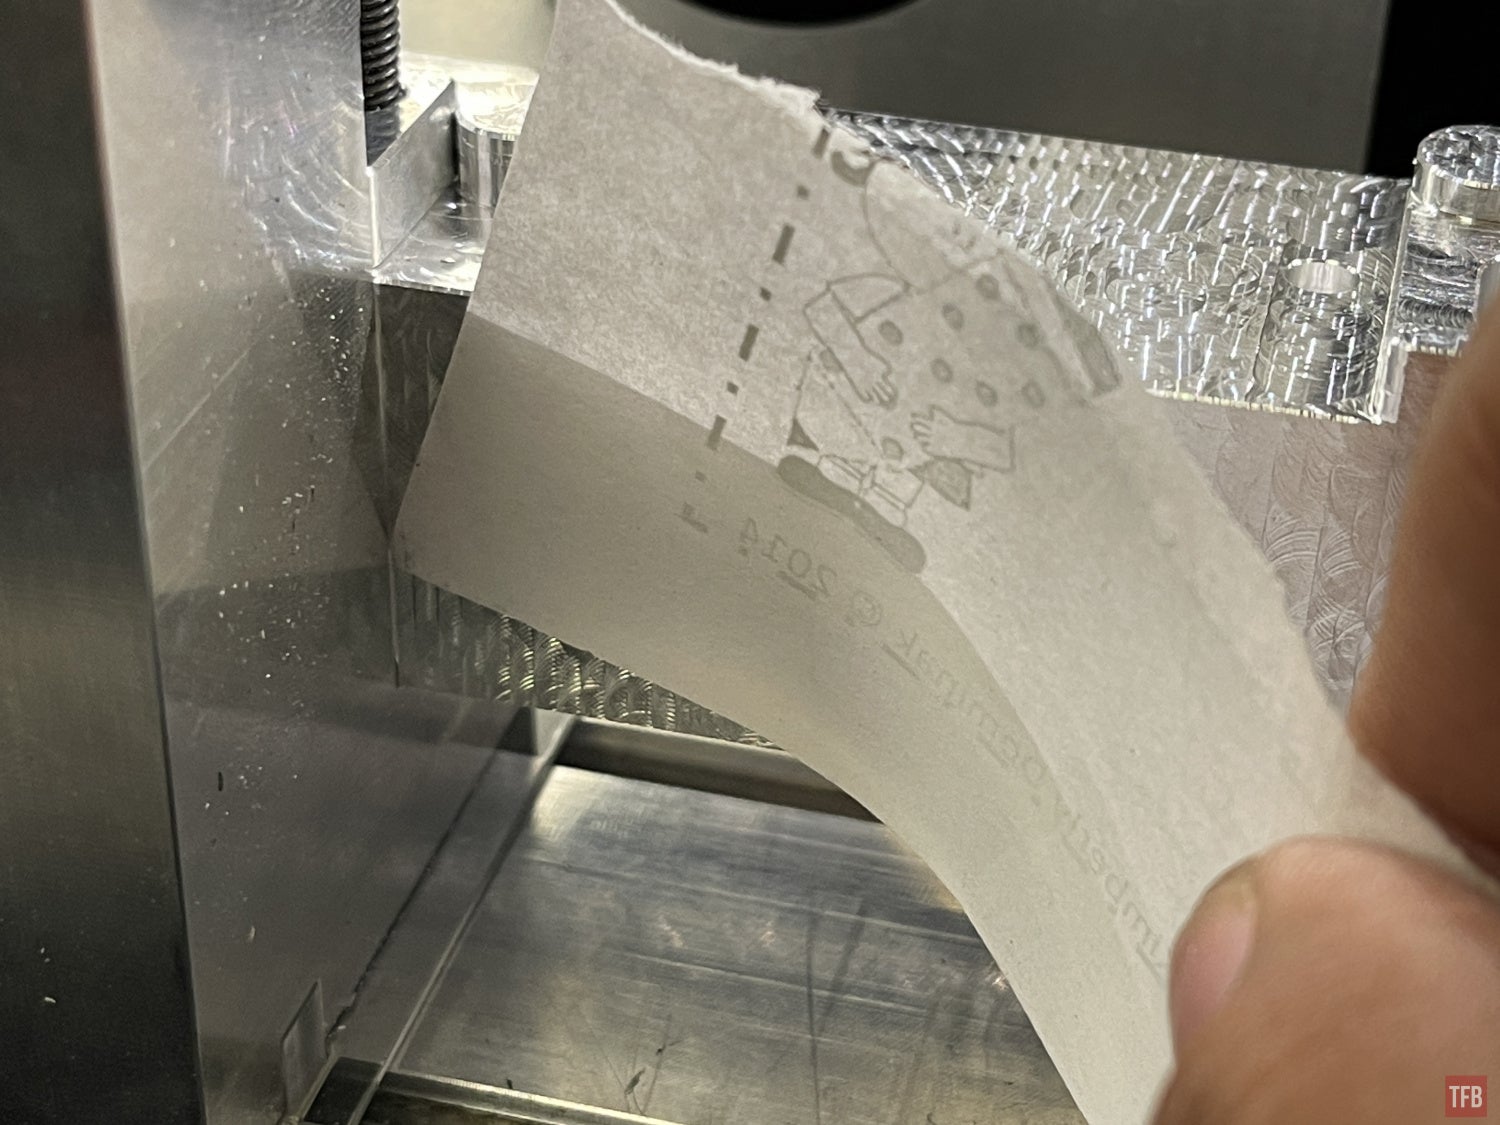
Every time you install the 0% lower receiver to be machined, you need to check for gaps between the workpiece and the metal clamps. The DDCUT software recommends feeler gauges or a piece of paper. The piece of paper should not slide between the clamps and workpiece.
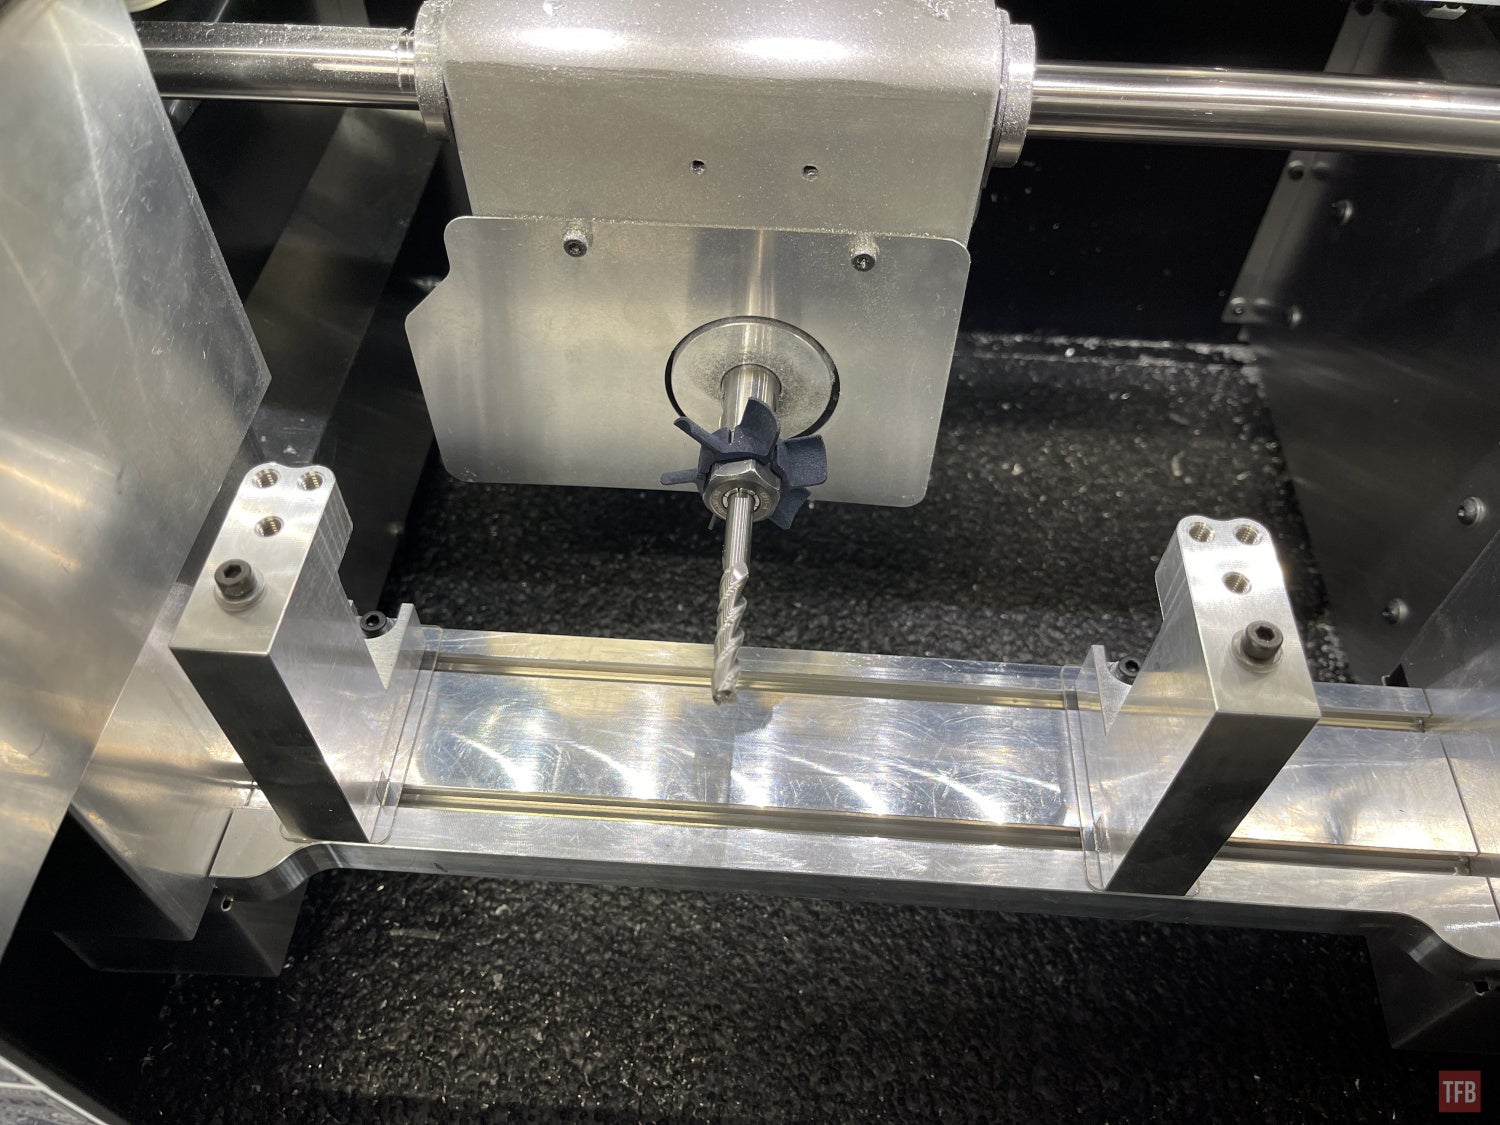
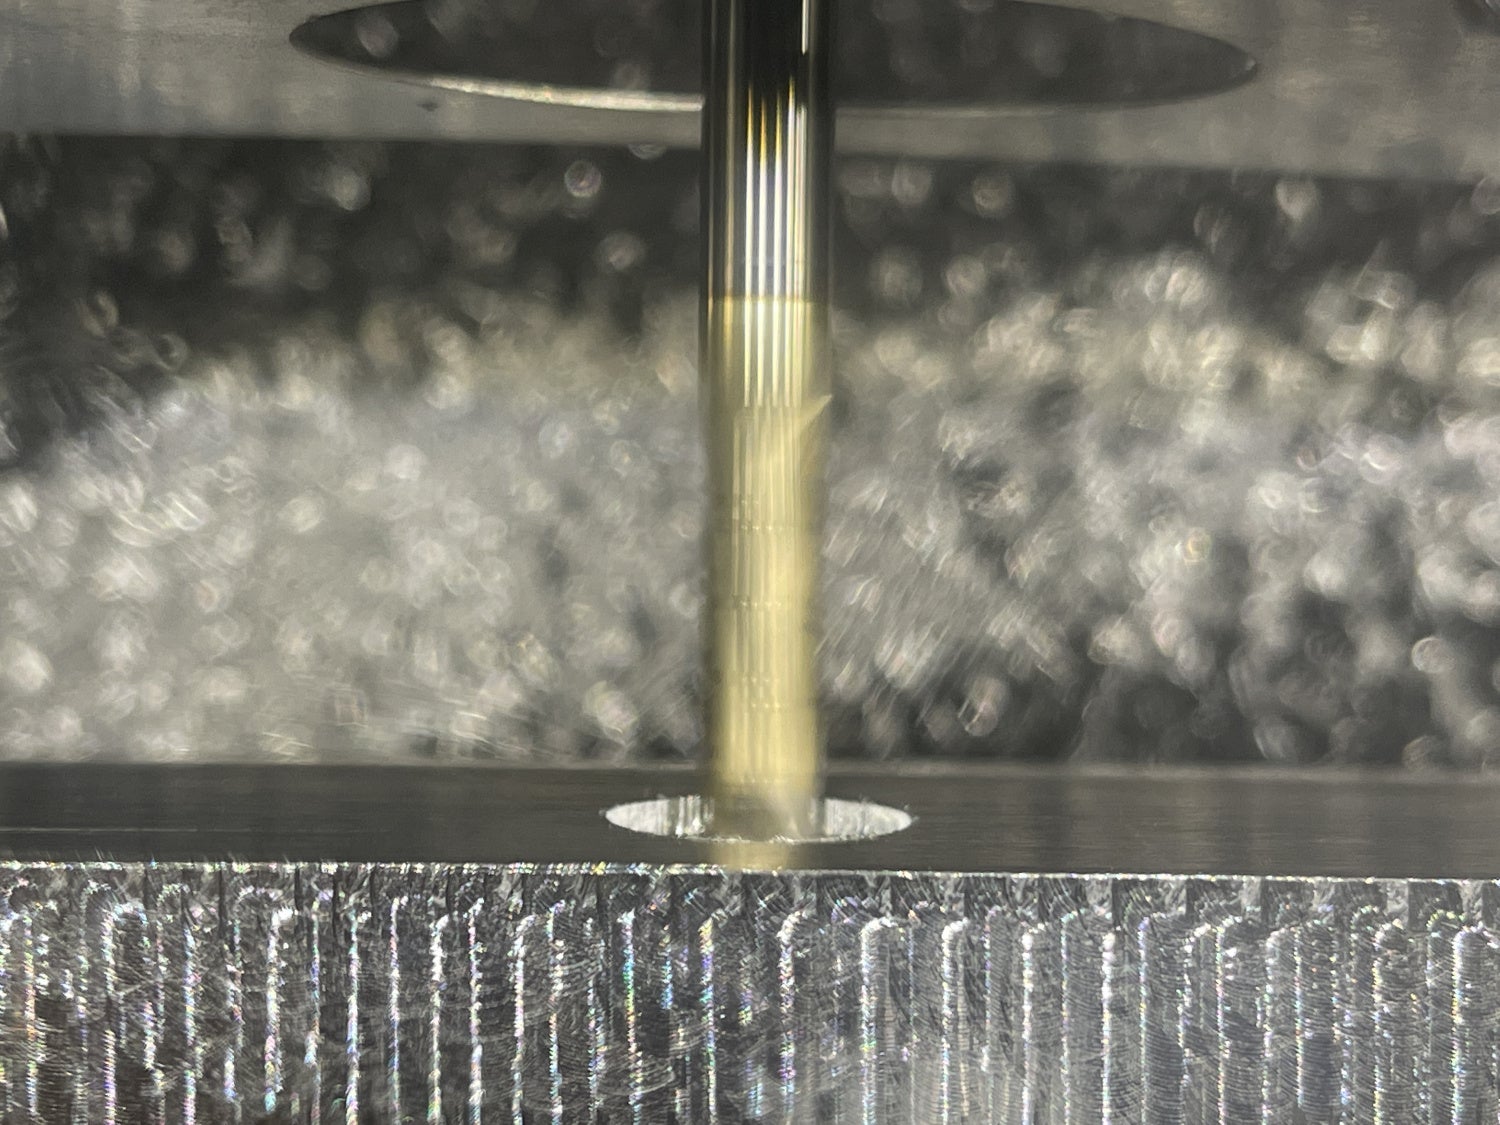
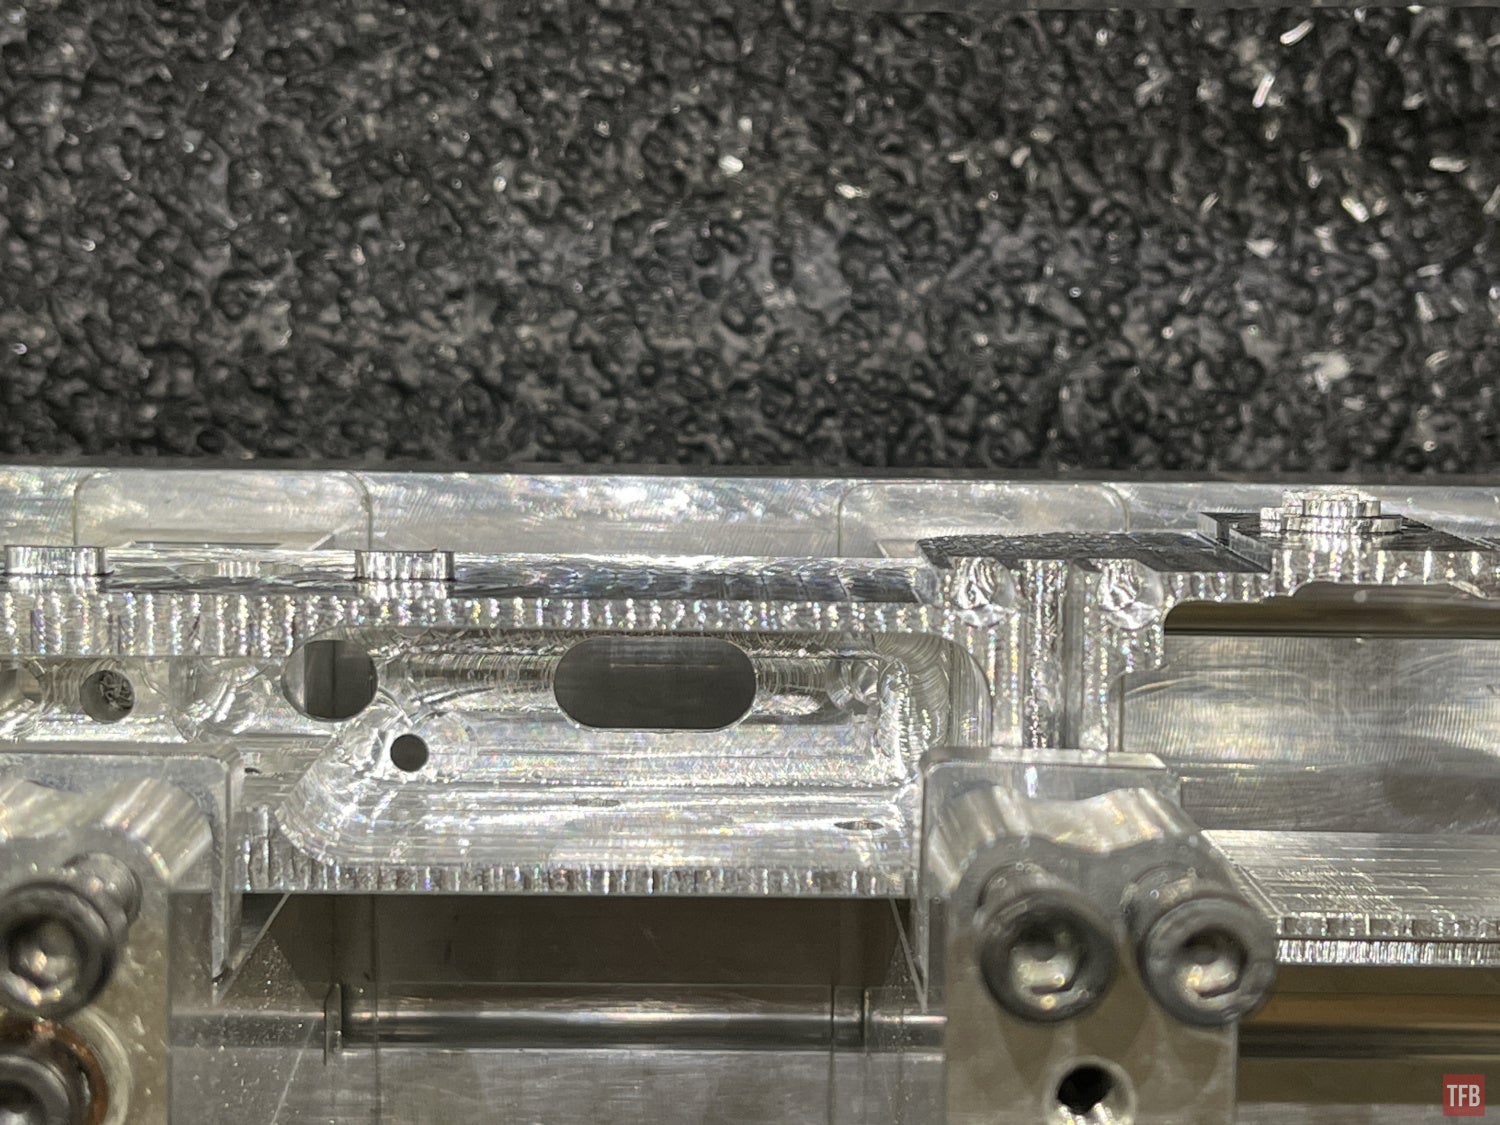
The first thing the GG3 does is to machine the surface to the correct dimension for the 0% lower receiver.
It basically decks the surface and side surfaces.

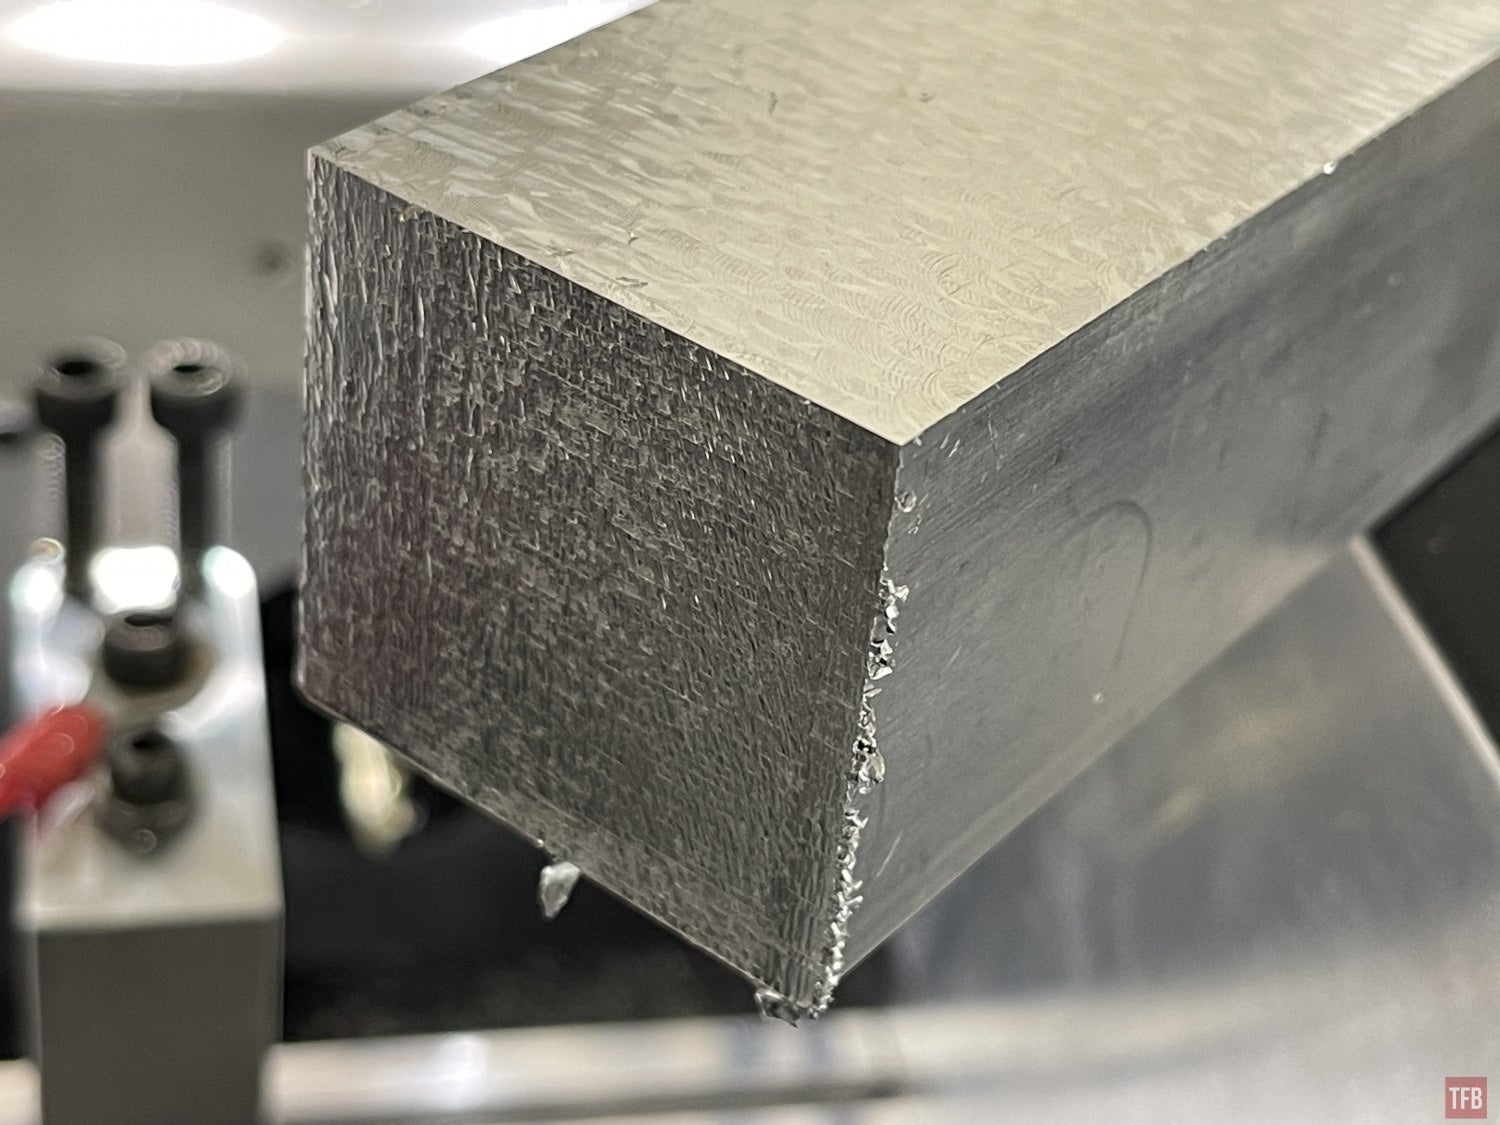
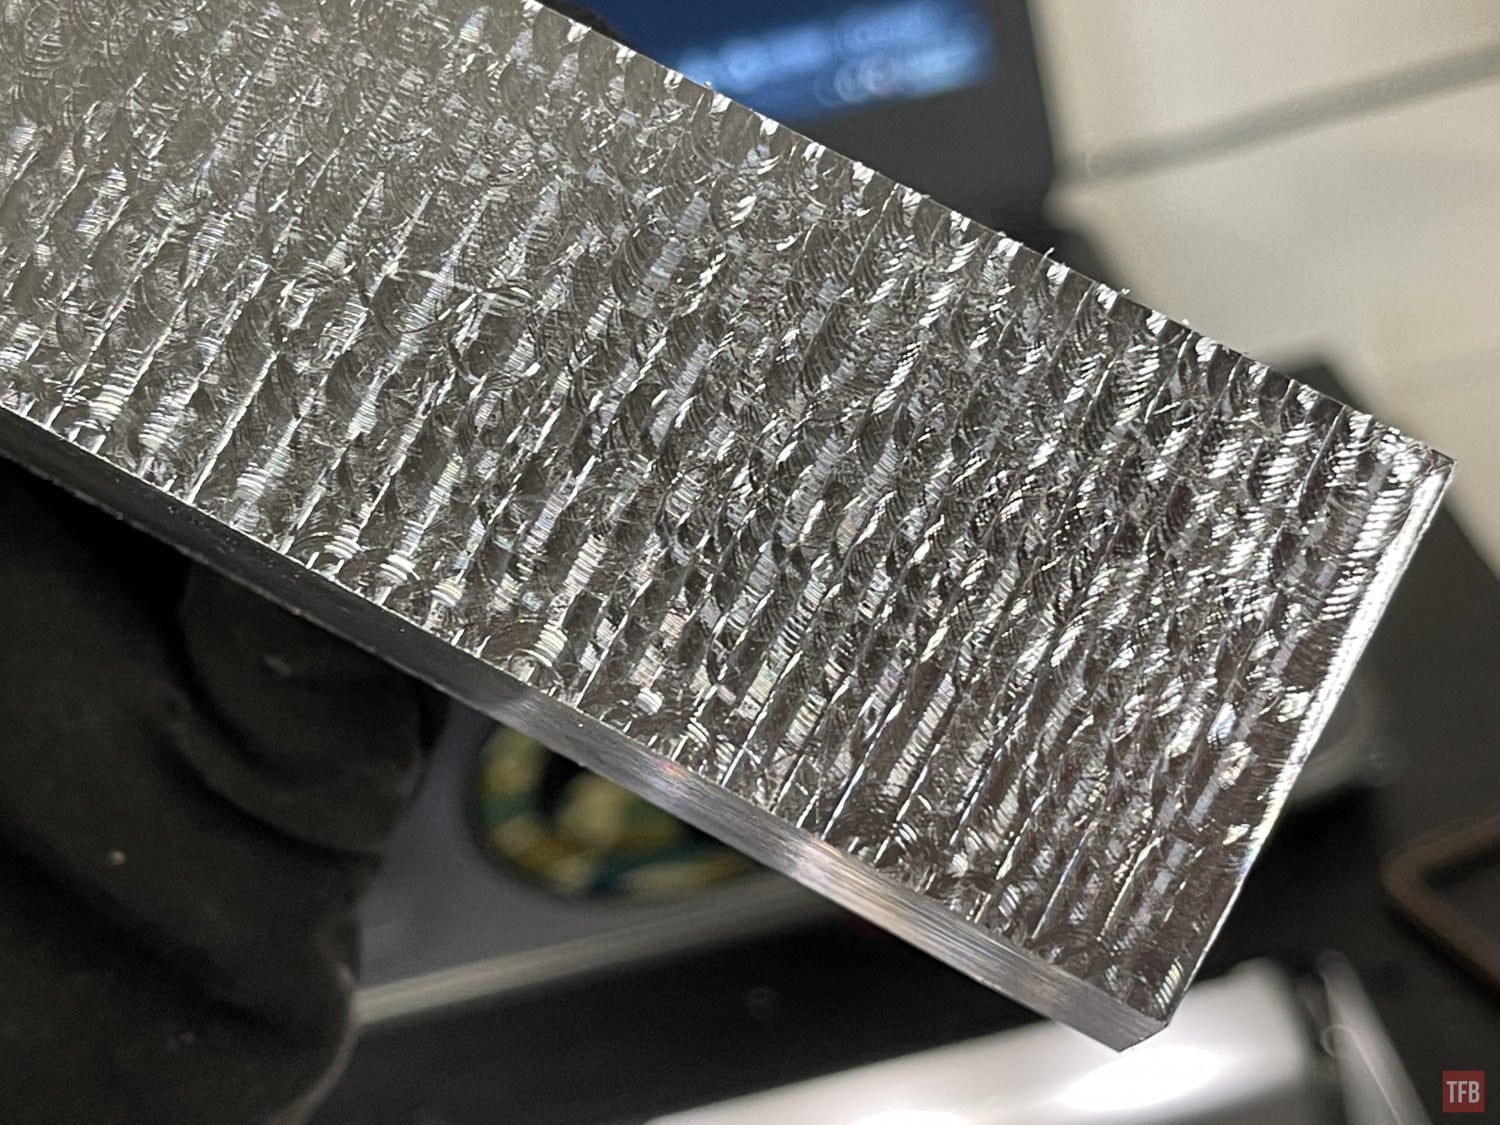
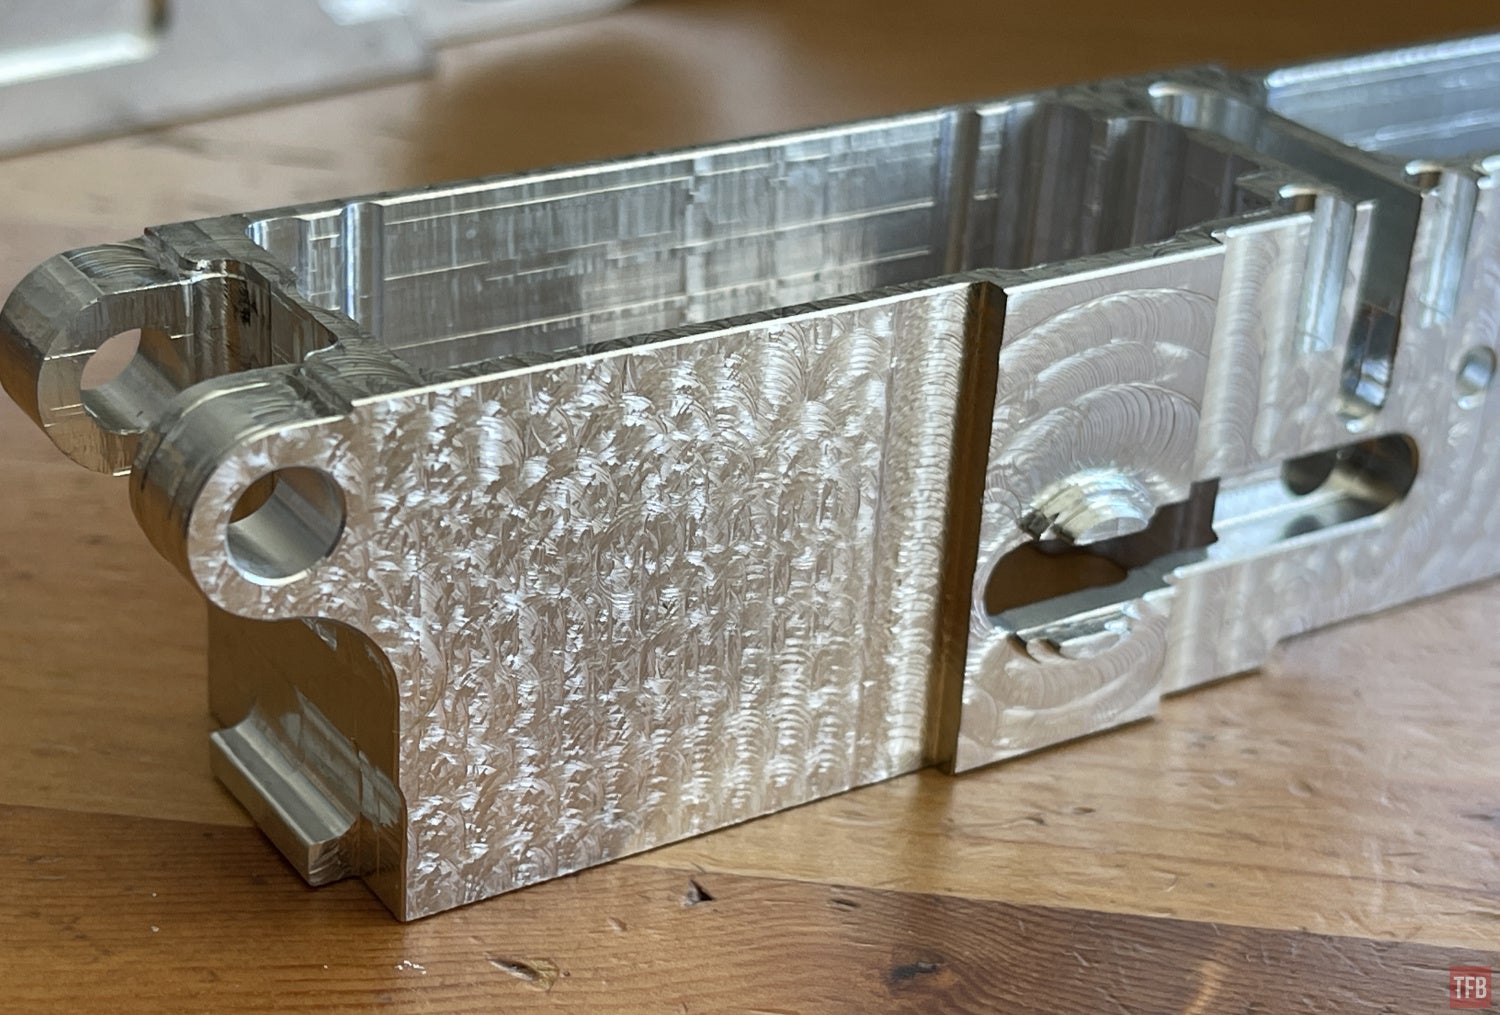
The machine marks almost look like jeweling.
This process repeats for all four sides. Then the DDCUT software starts to machine the sides and drill holes like the safety selector and magazine release button holes.
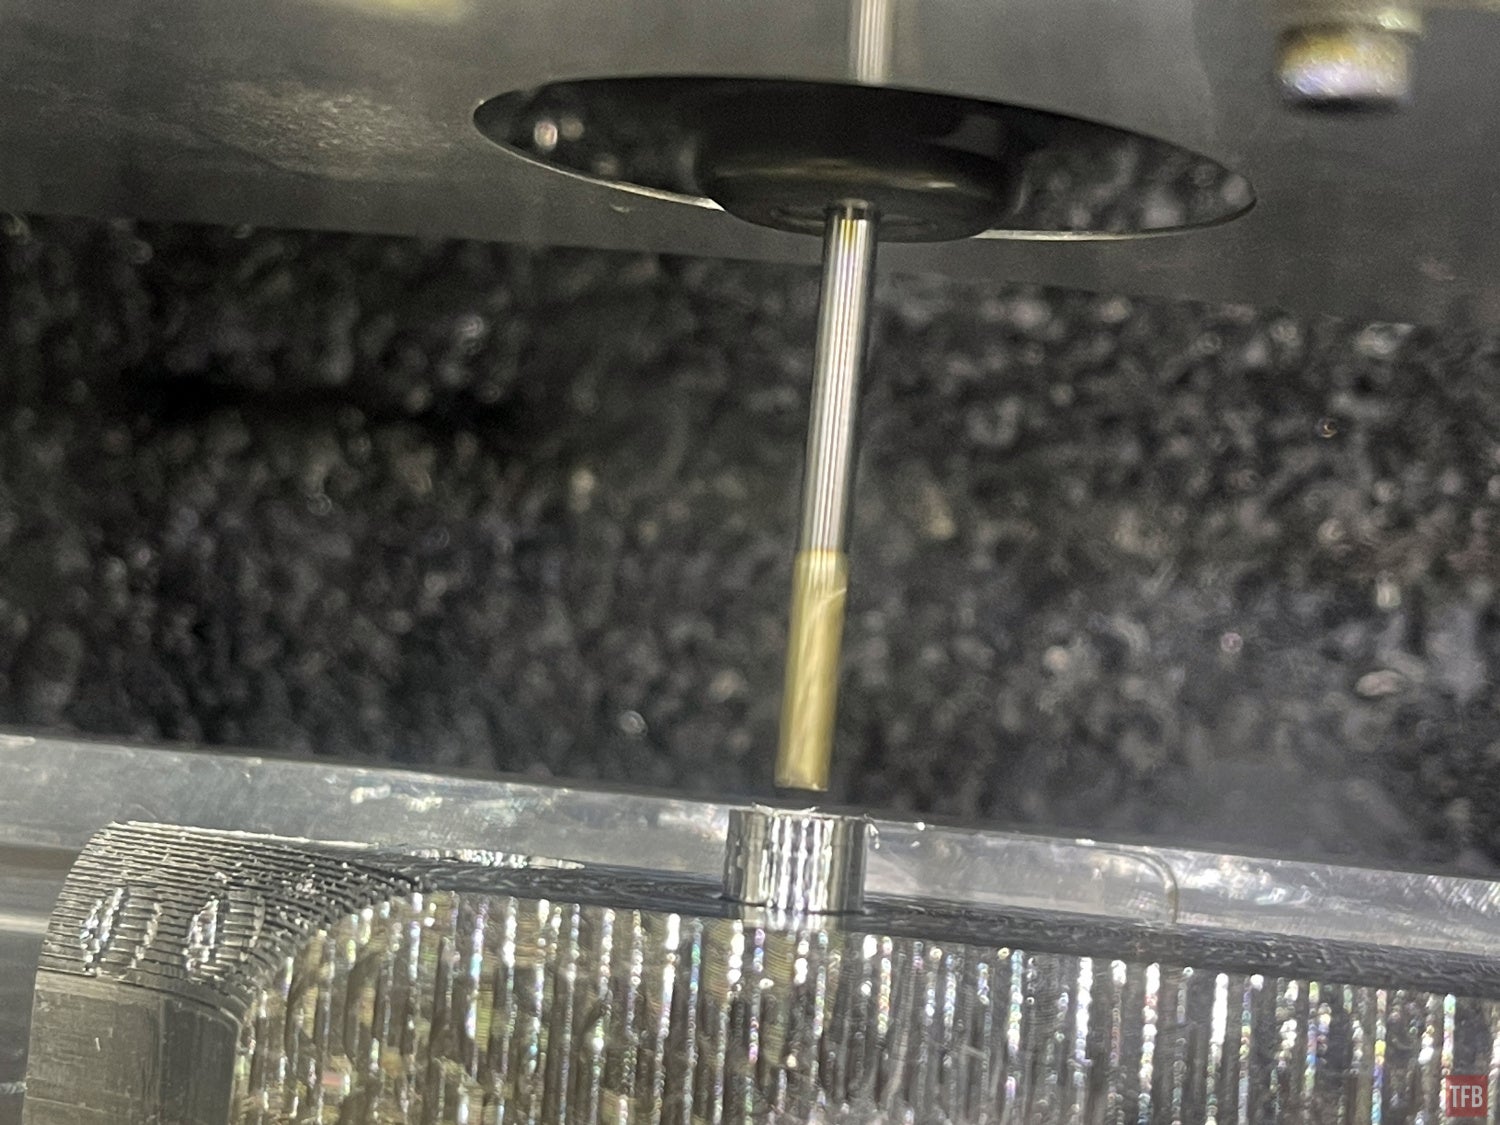
Partway through, you need to switch to the 1/8″ end mill for finer machine work like trigger and hammer pin holes.
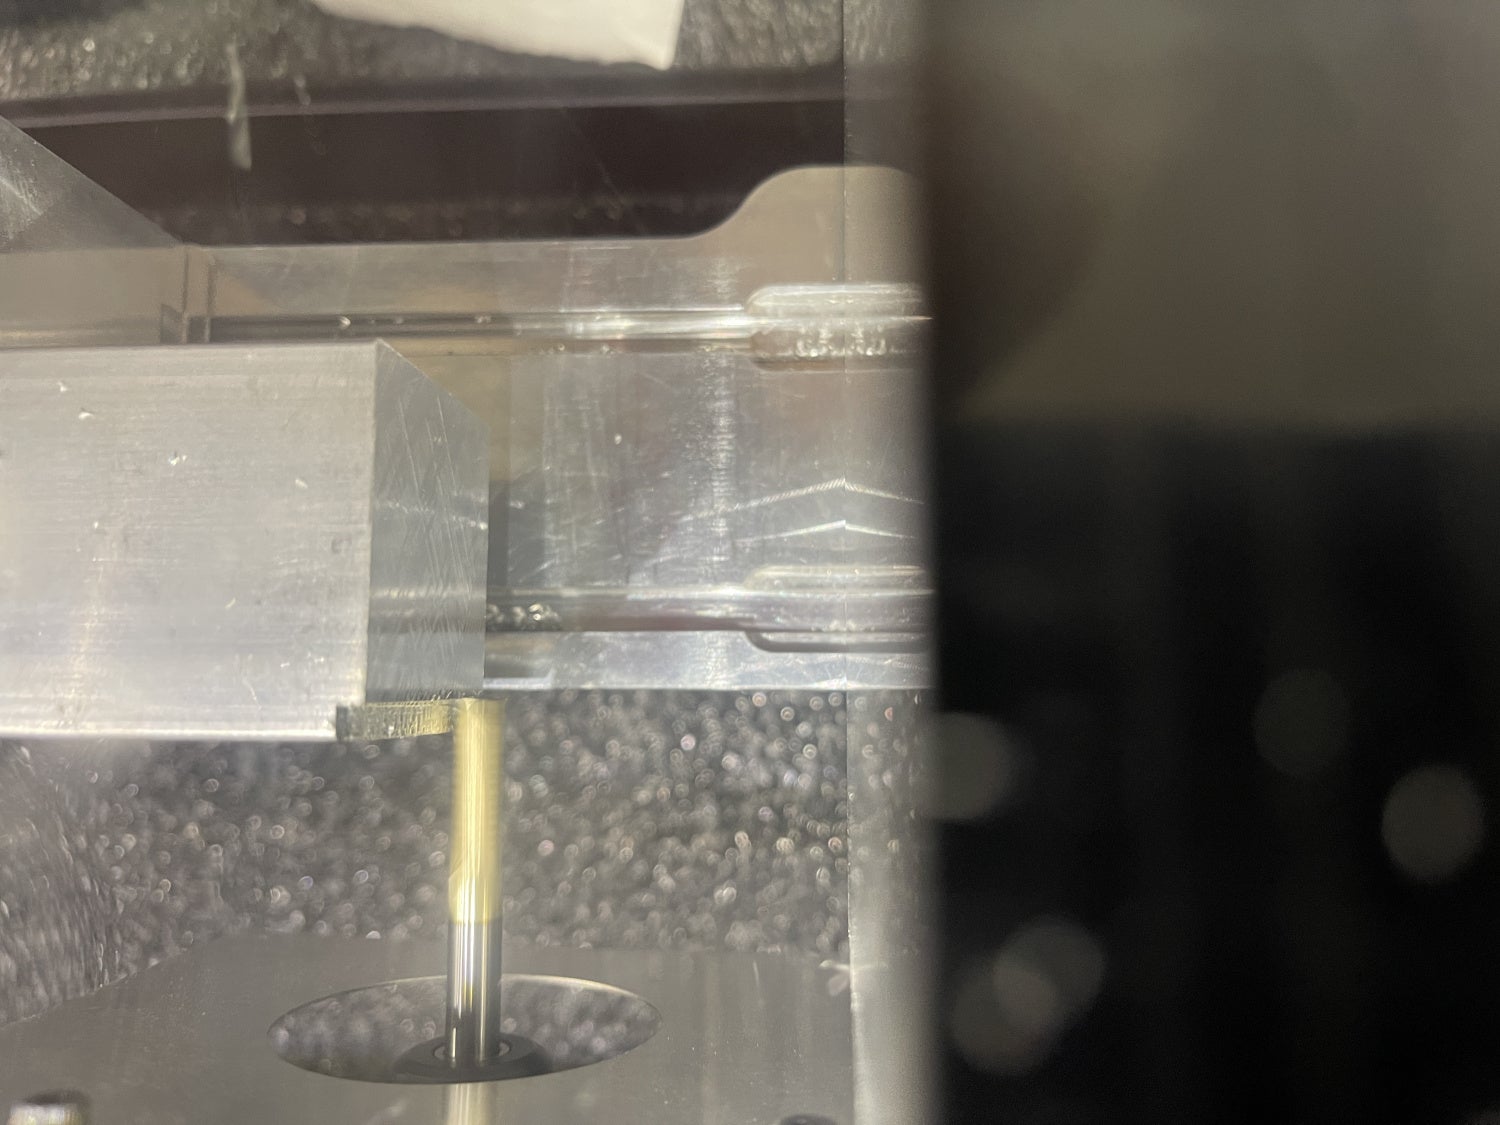
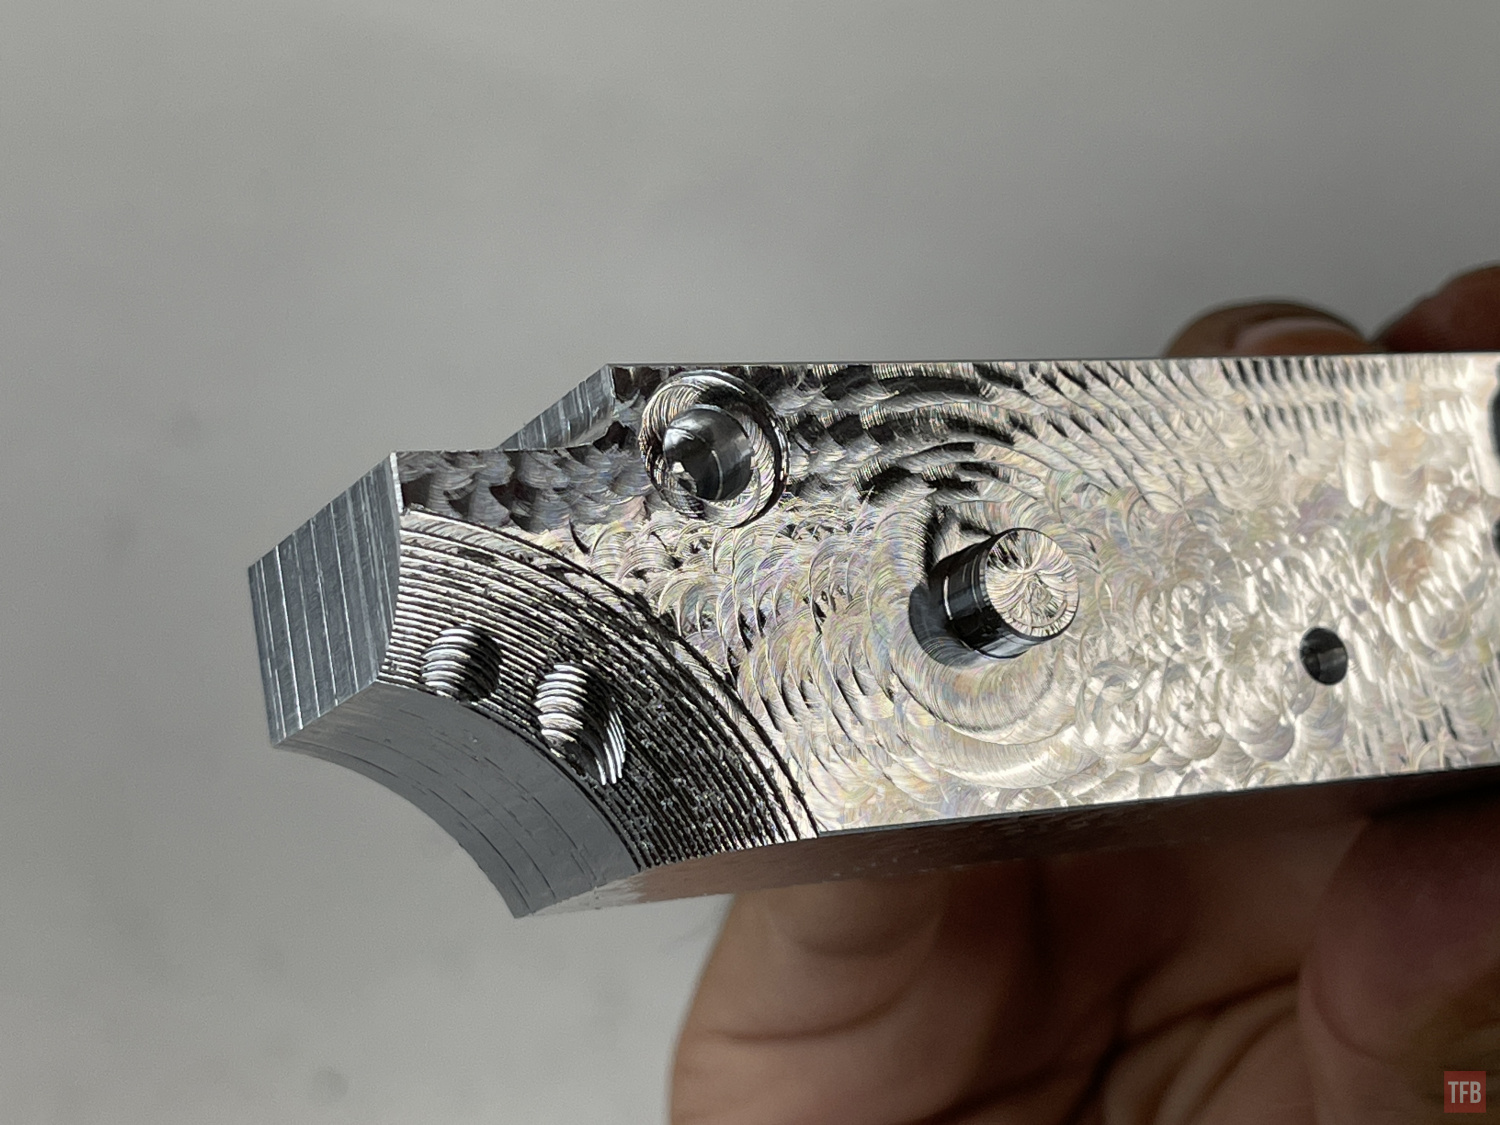
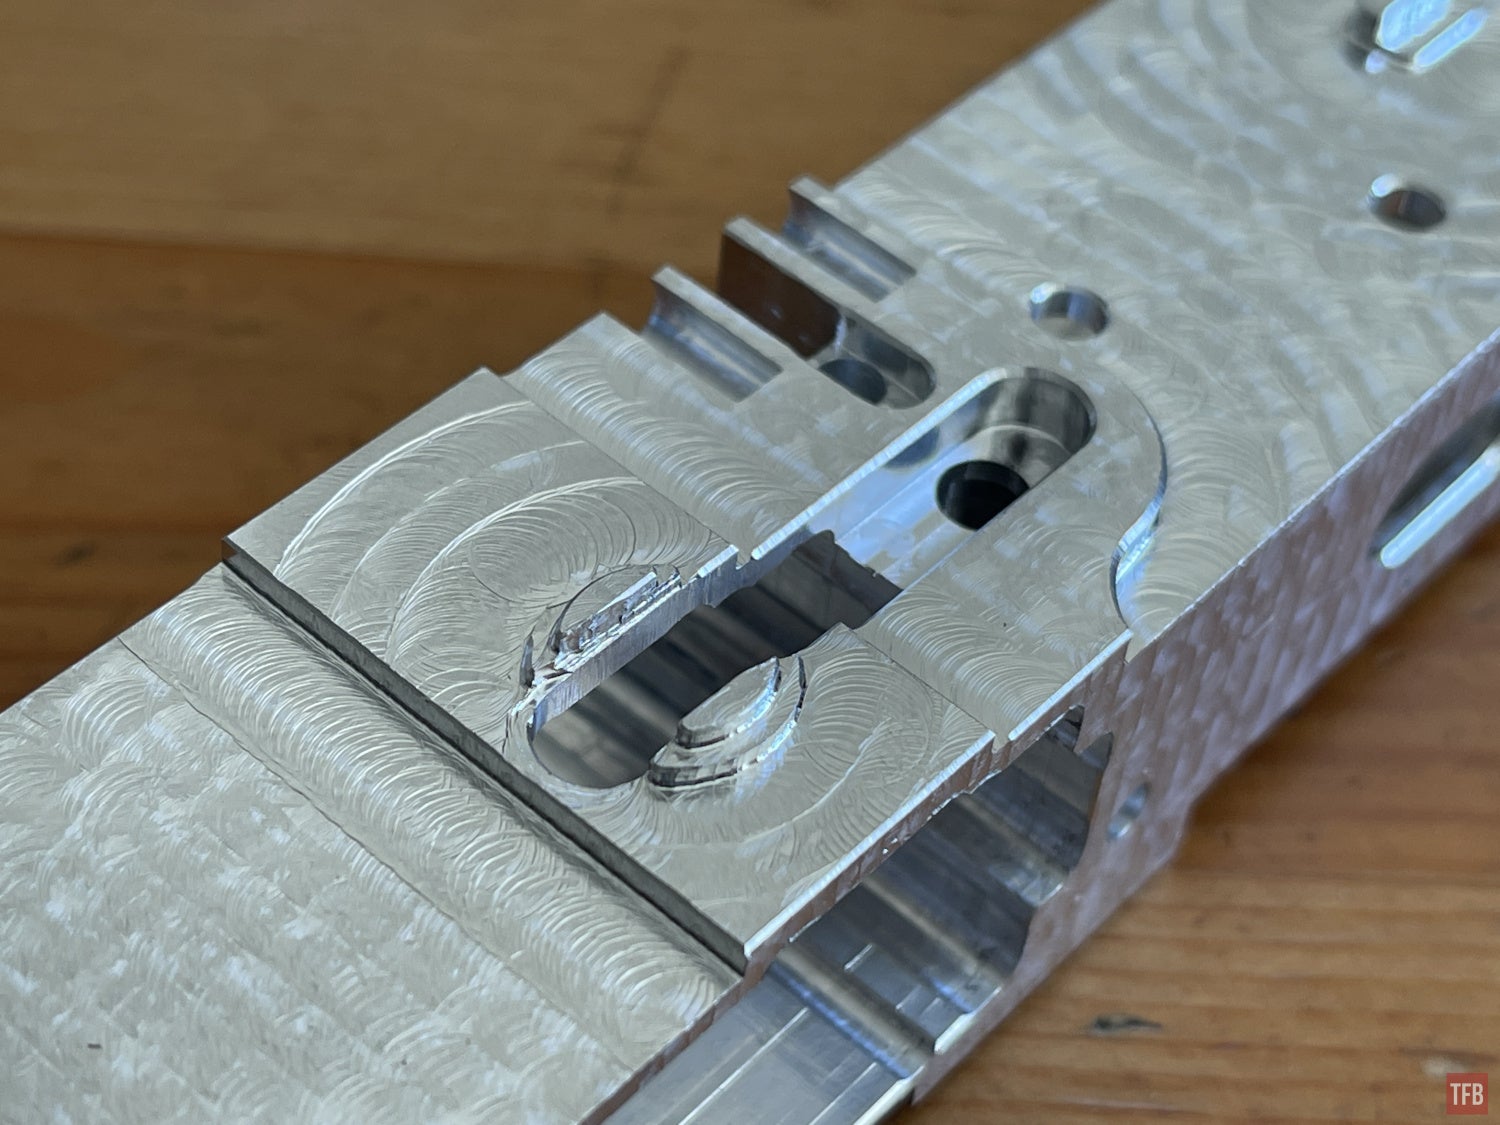
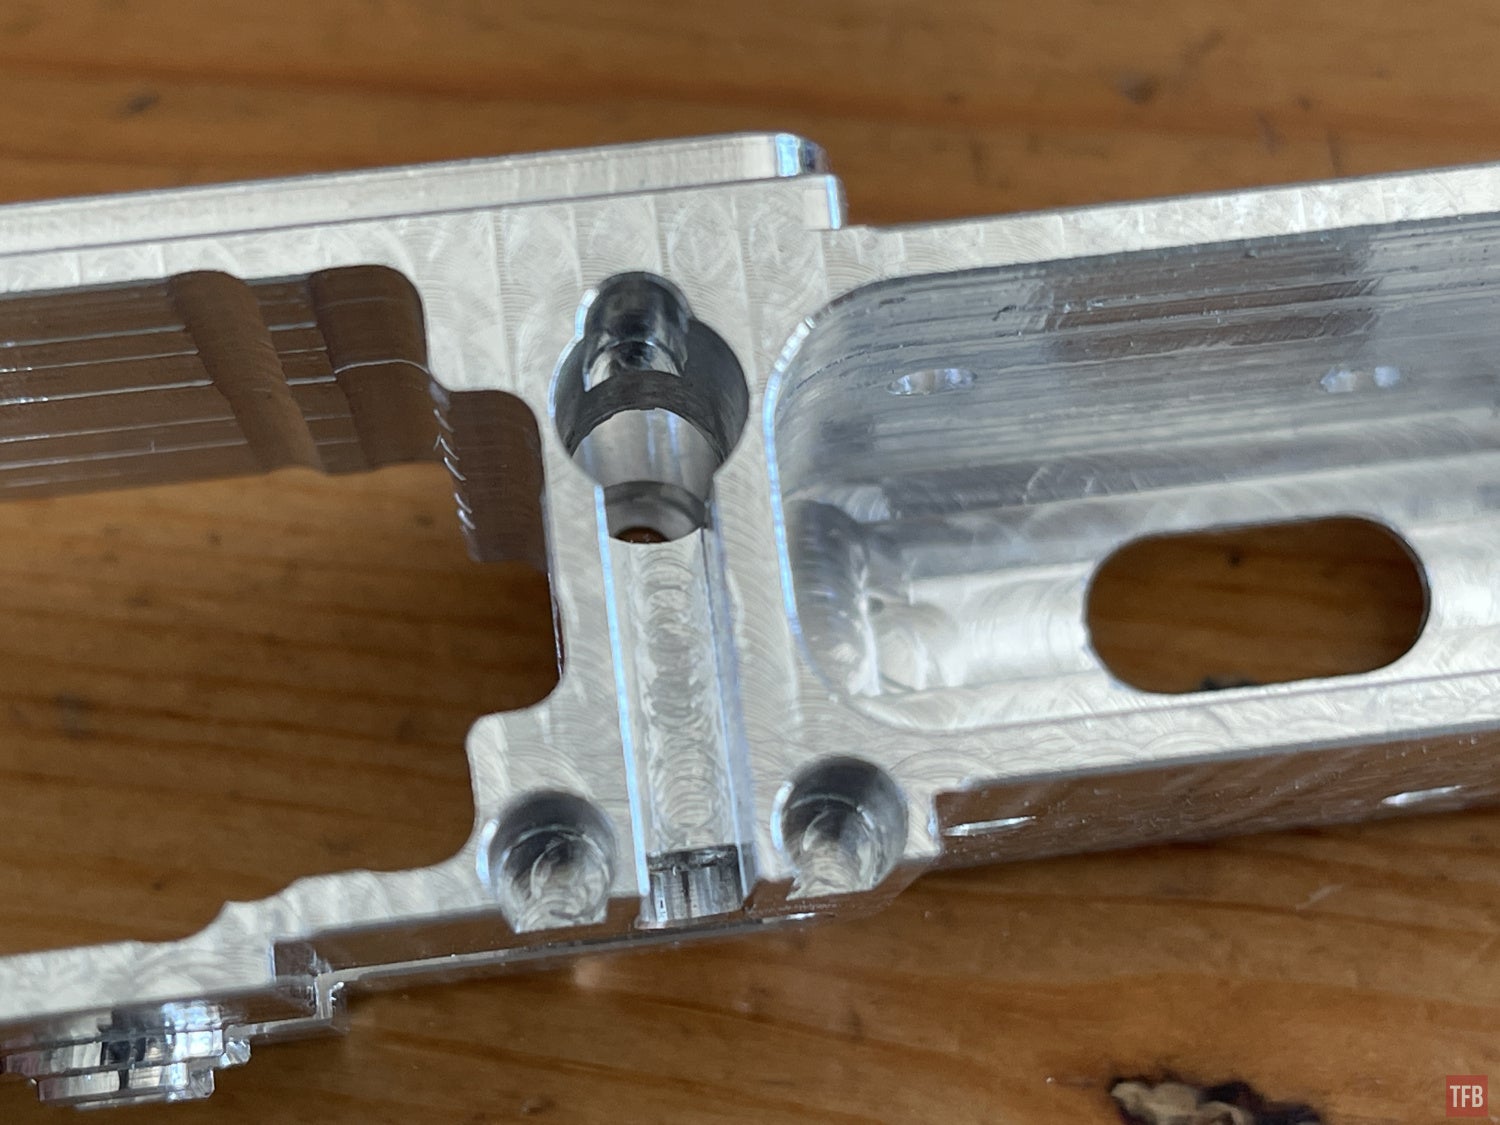
That cylinder is left sticking out during most of the machining as it will be used as a stand-off device to press up against the clamps and maintain proper distance to the end mill.
Some processes require you to use the 1/8″ deburring tool.
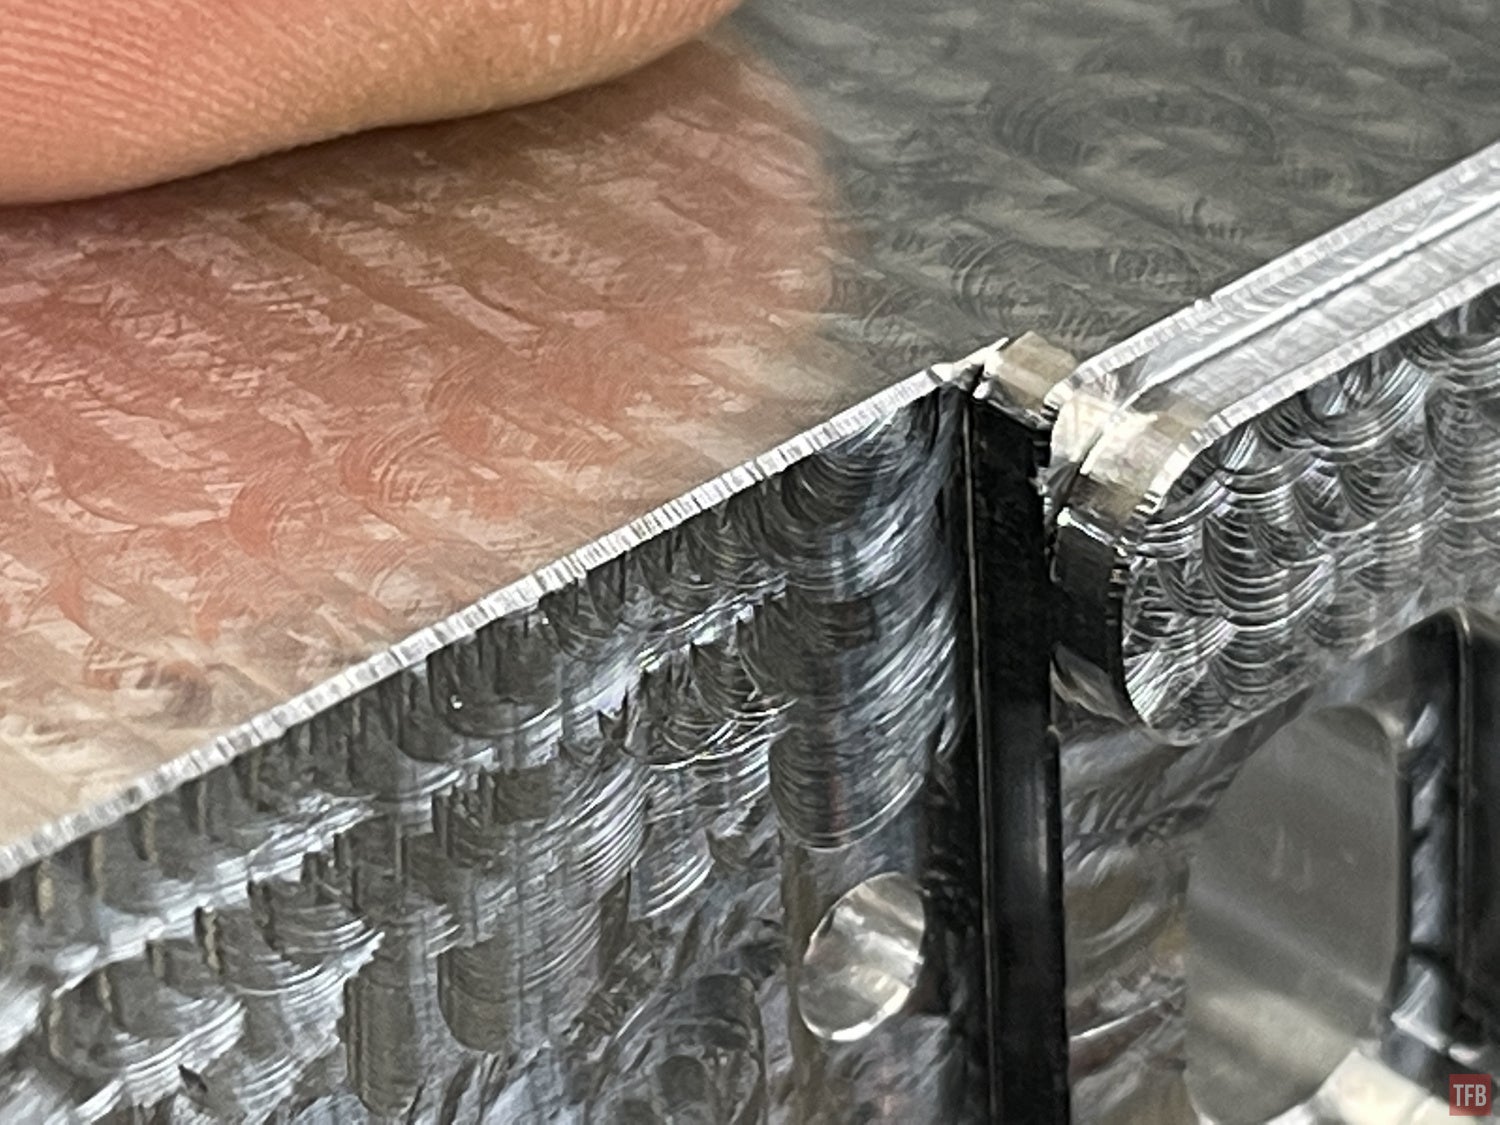
The deburring tool helps to chamfer some of the corners of the 0% lower.
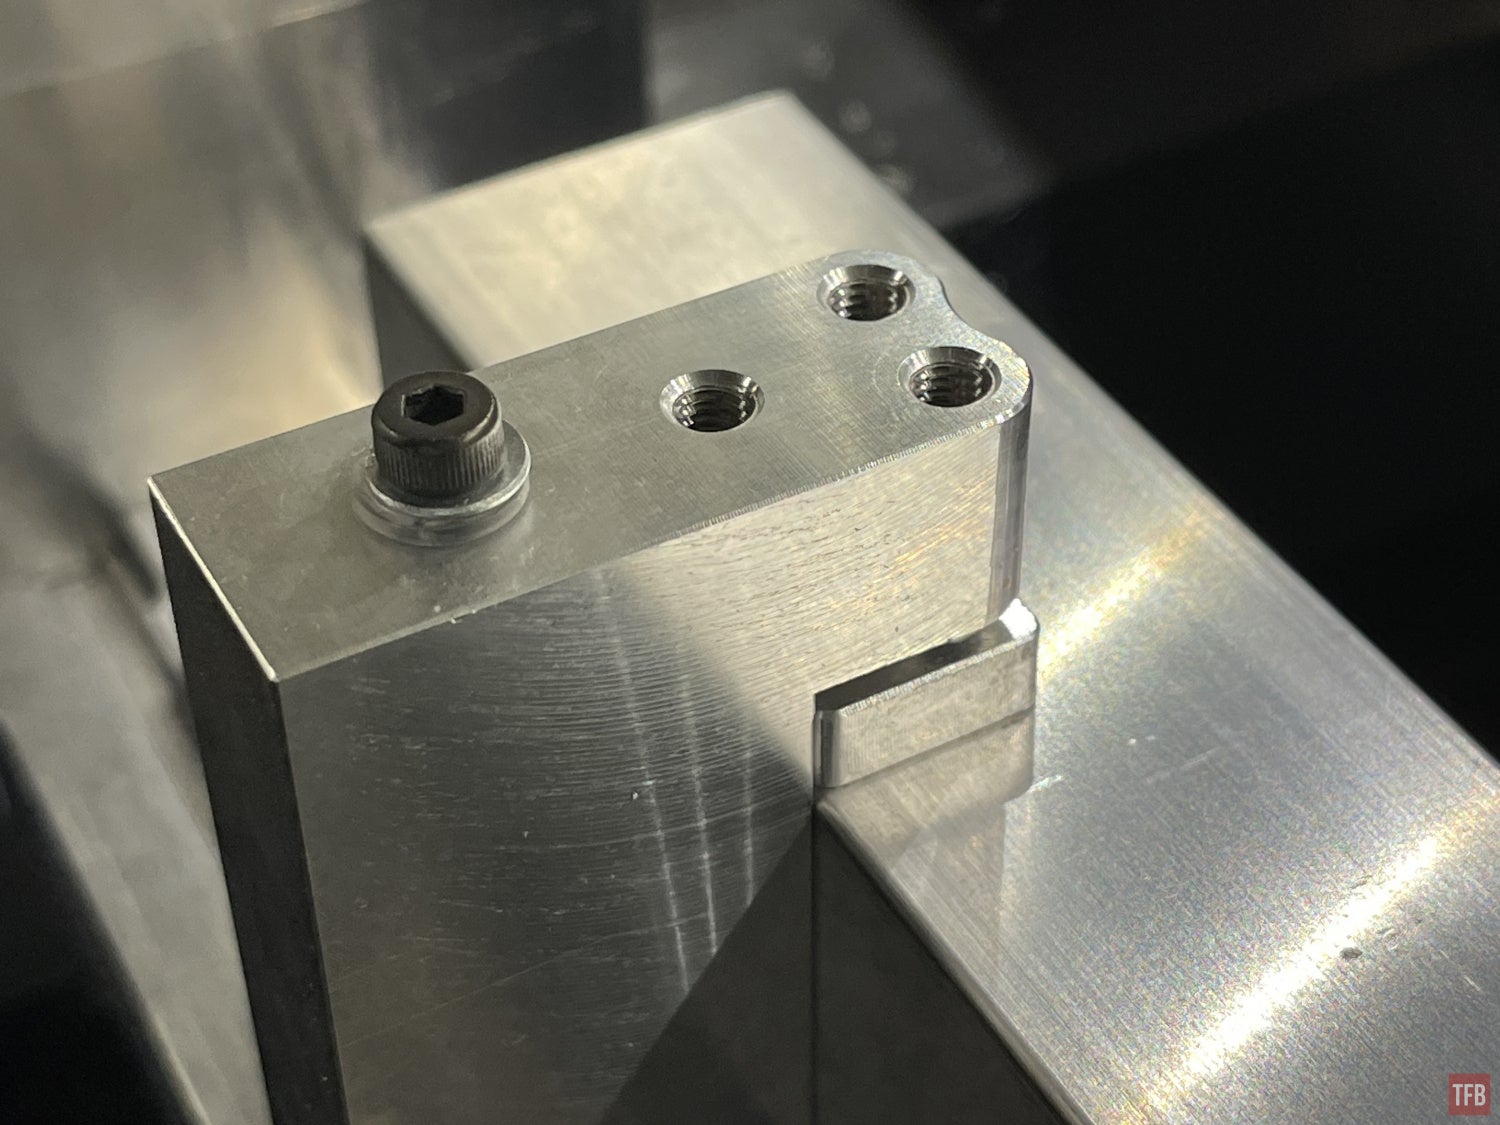
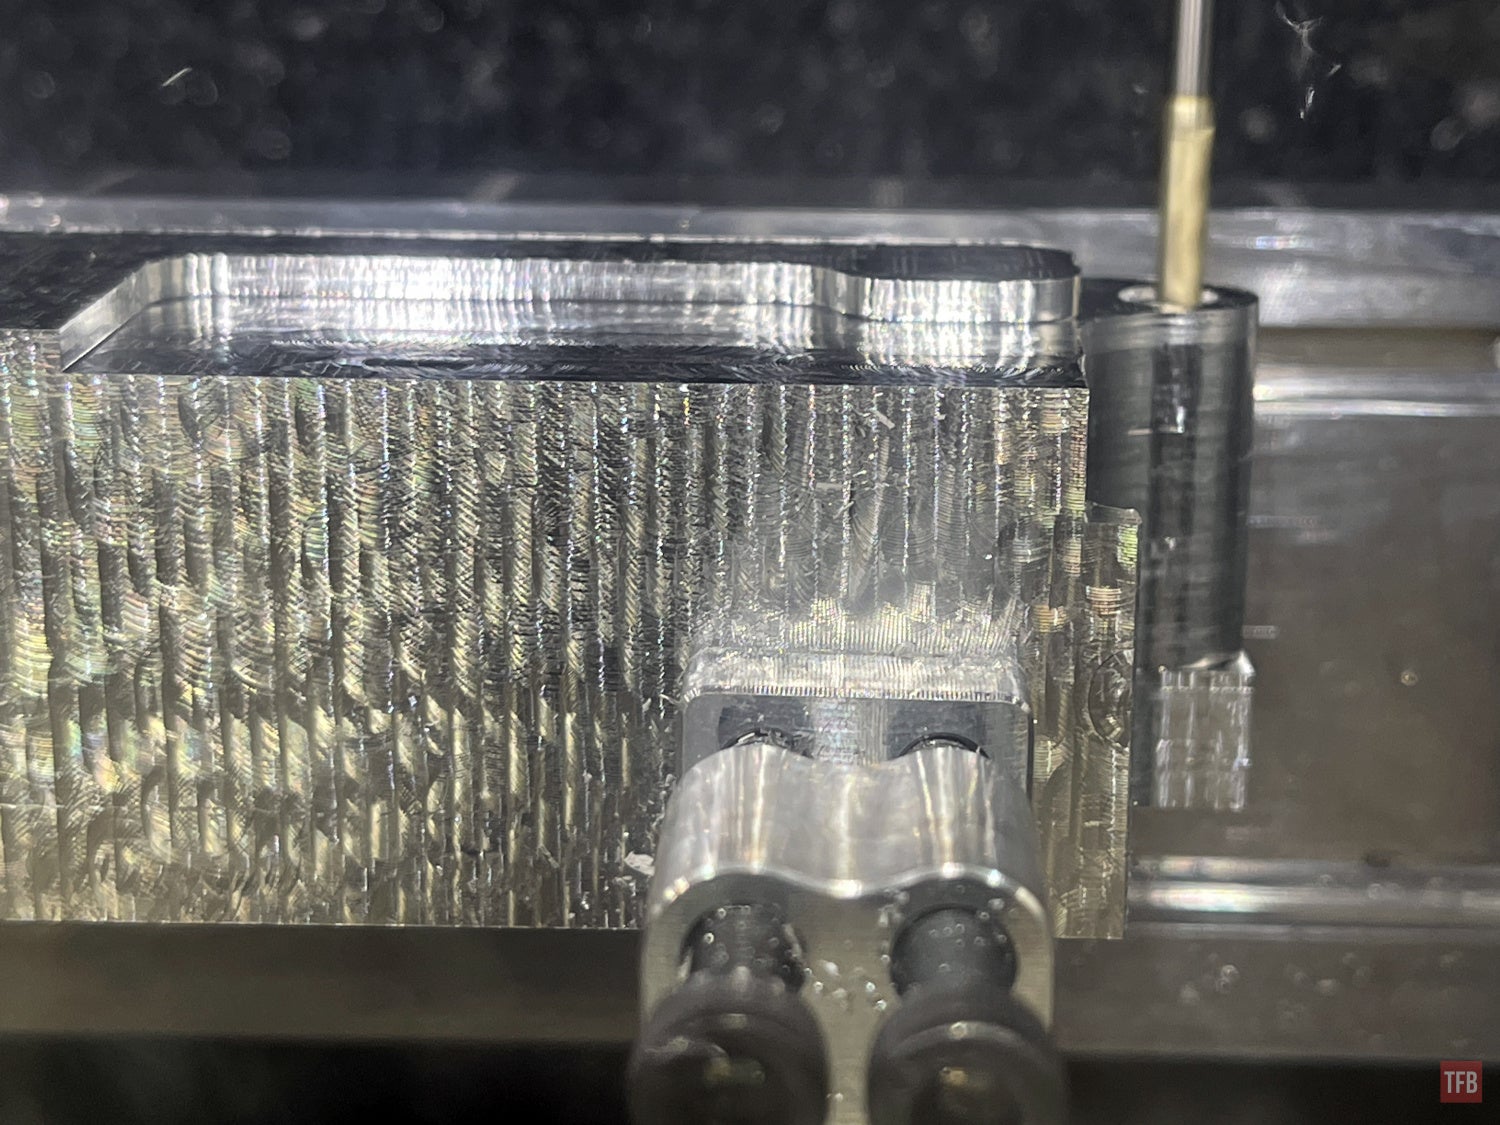
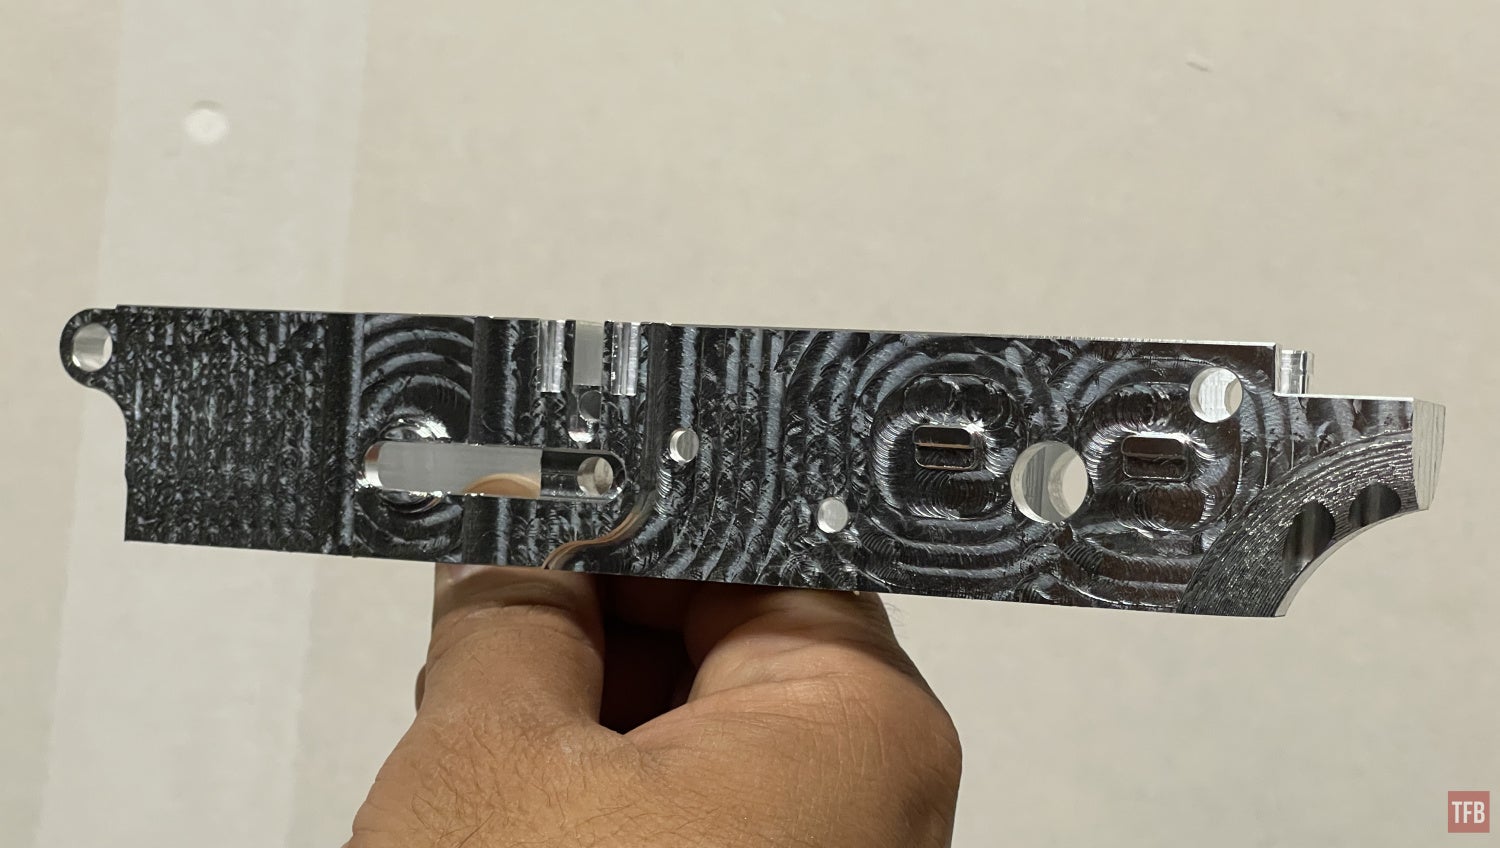
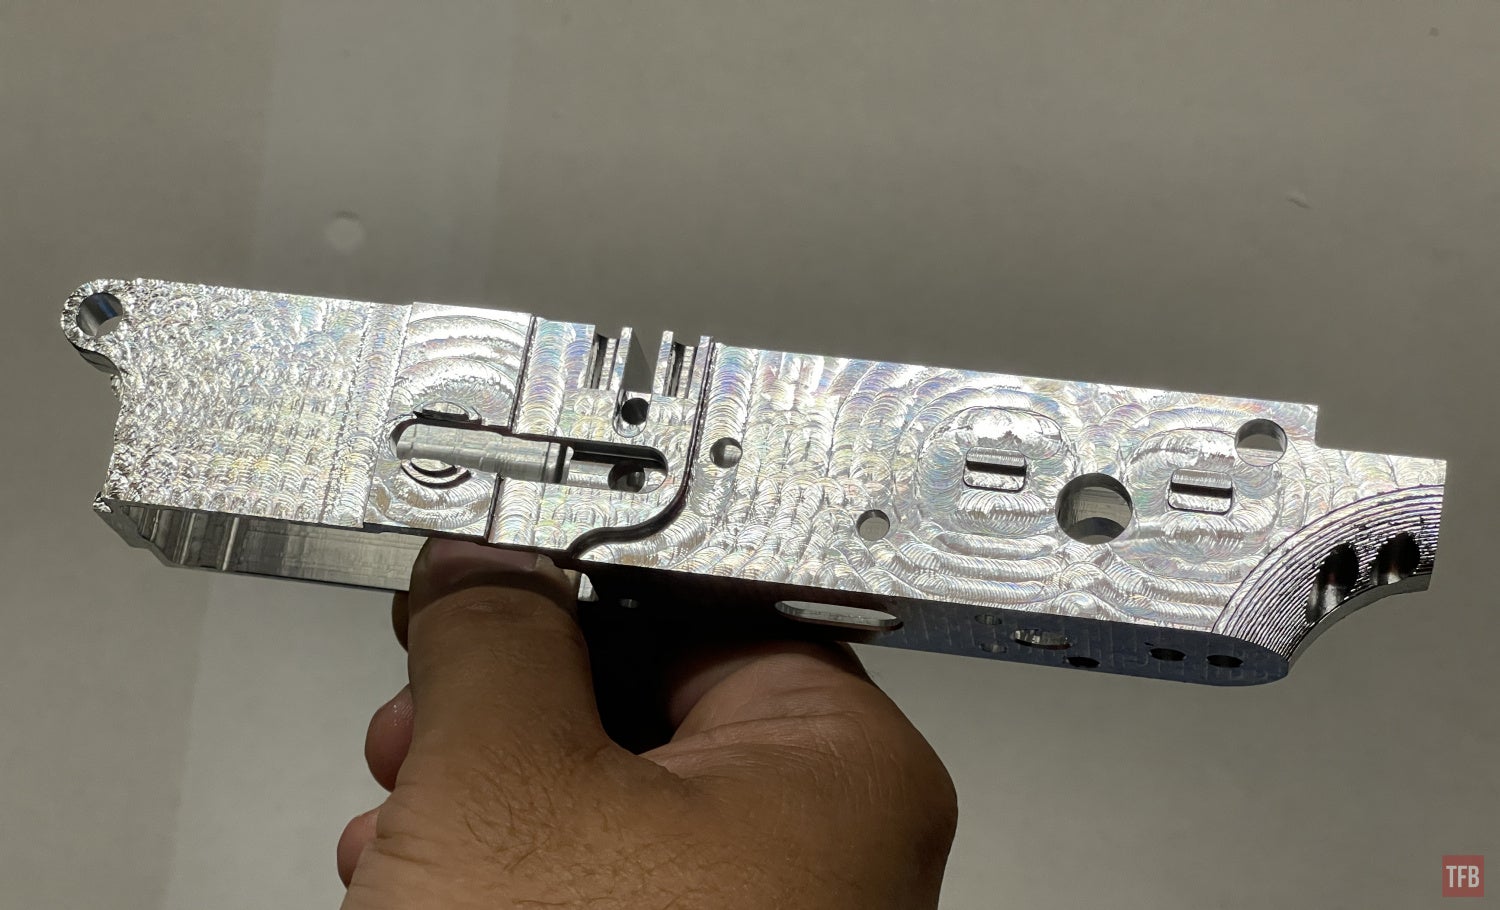
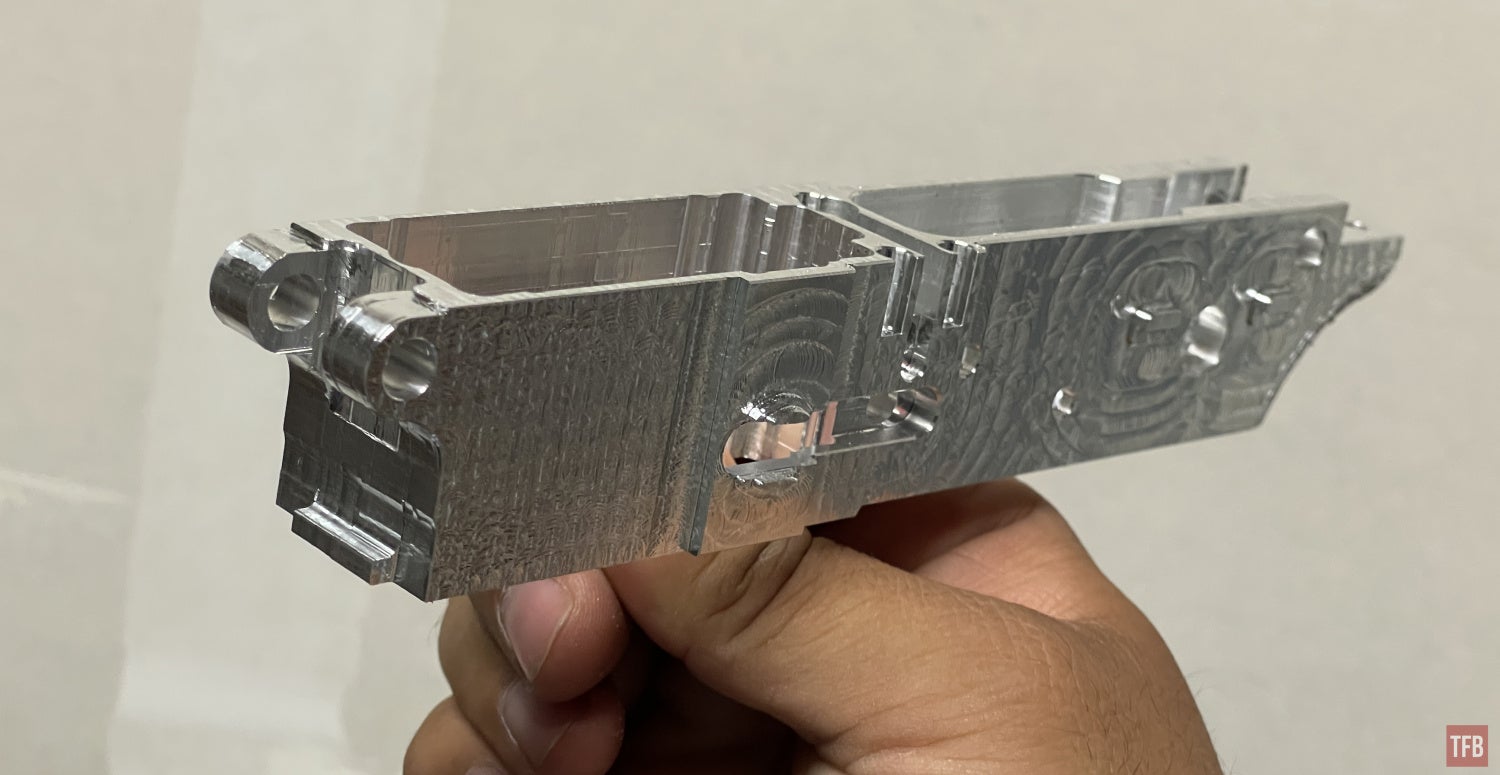
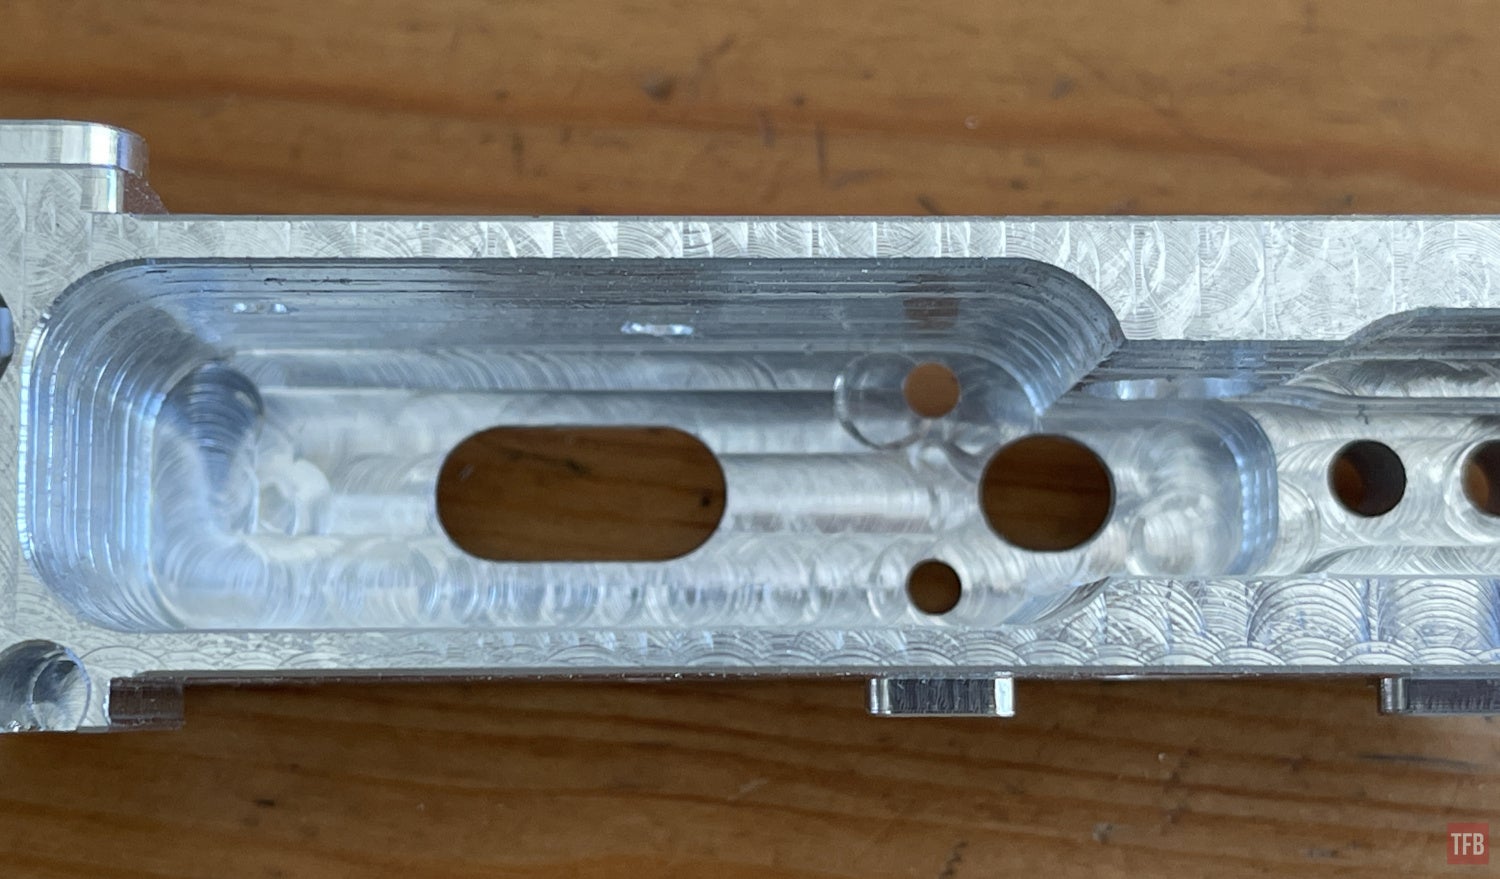
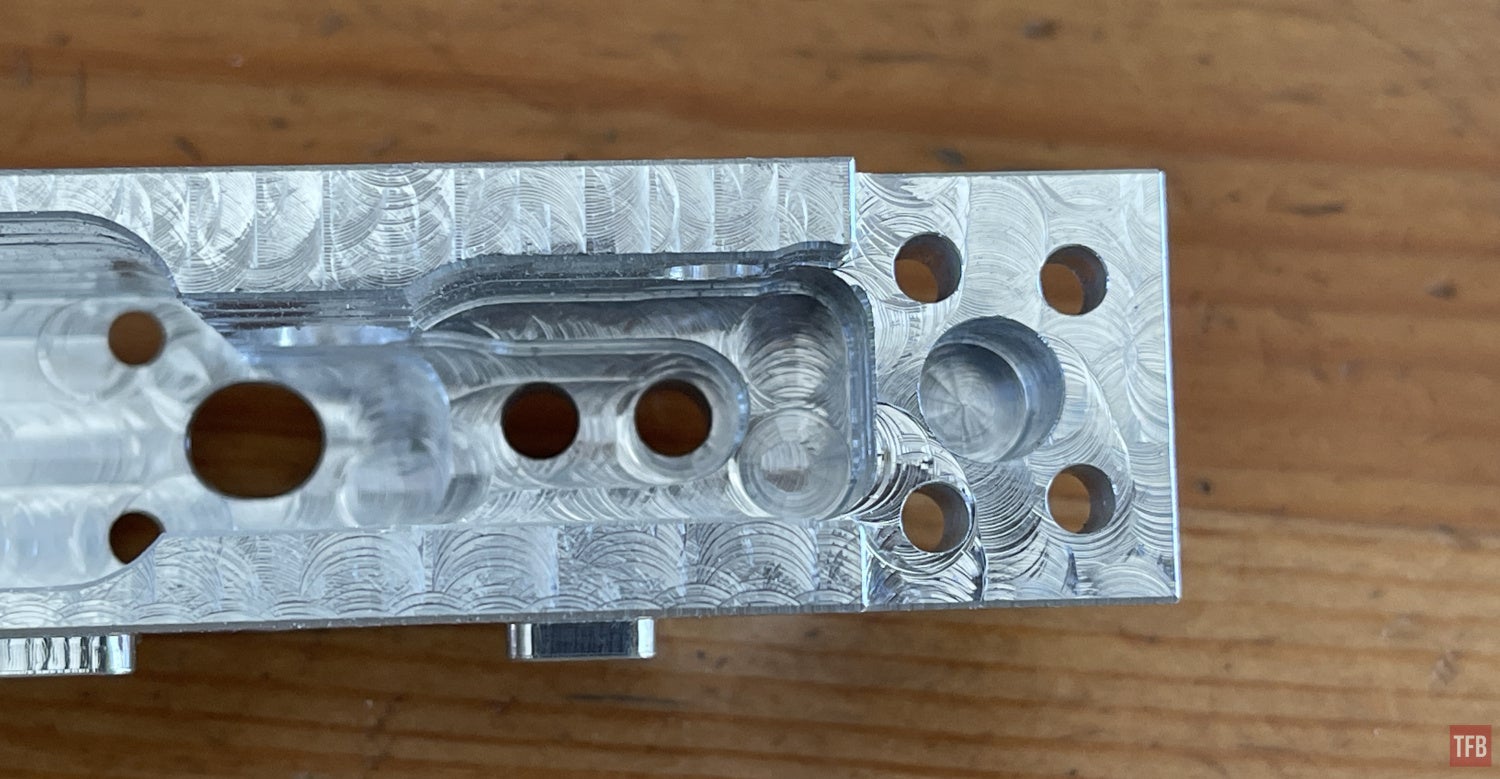
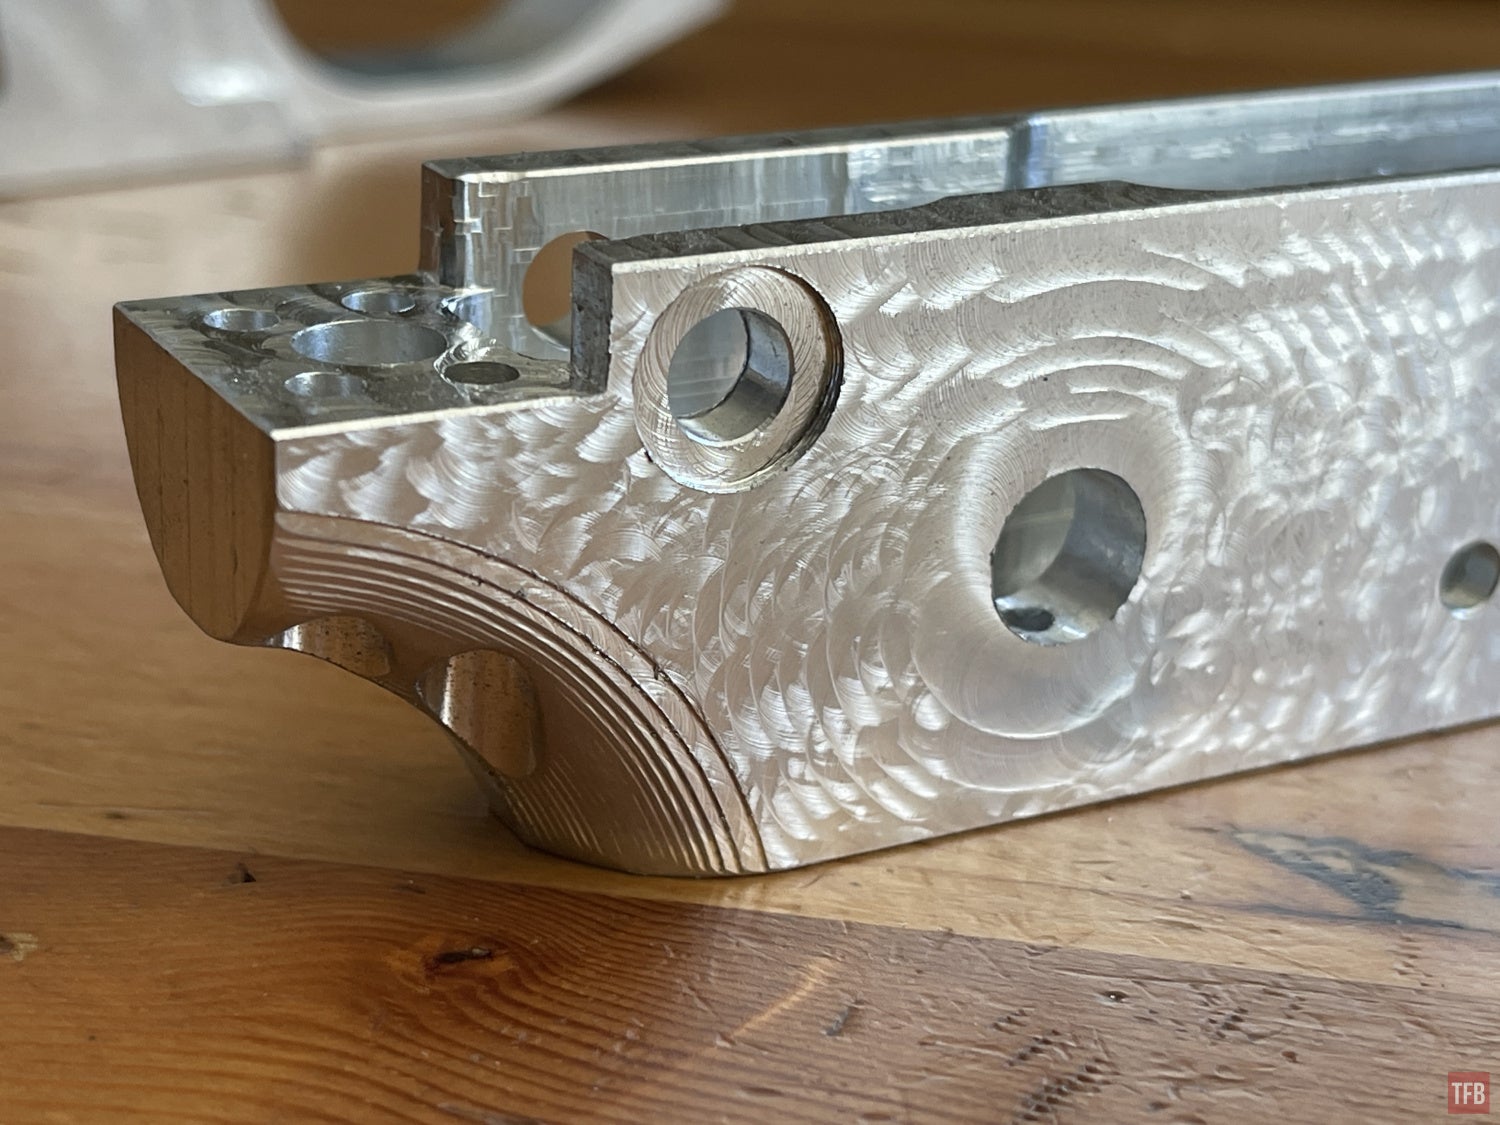
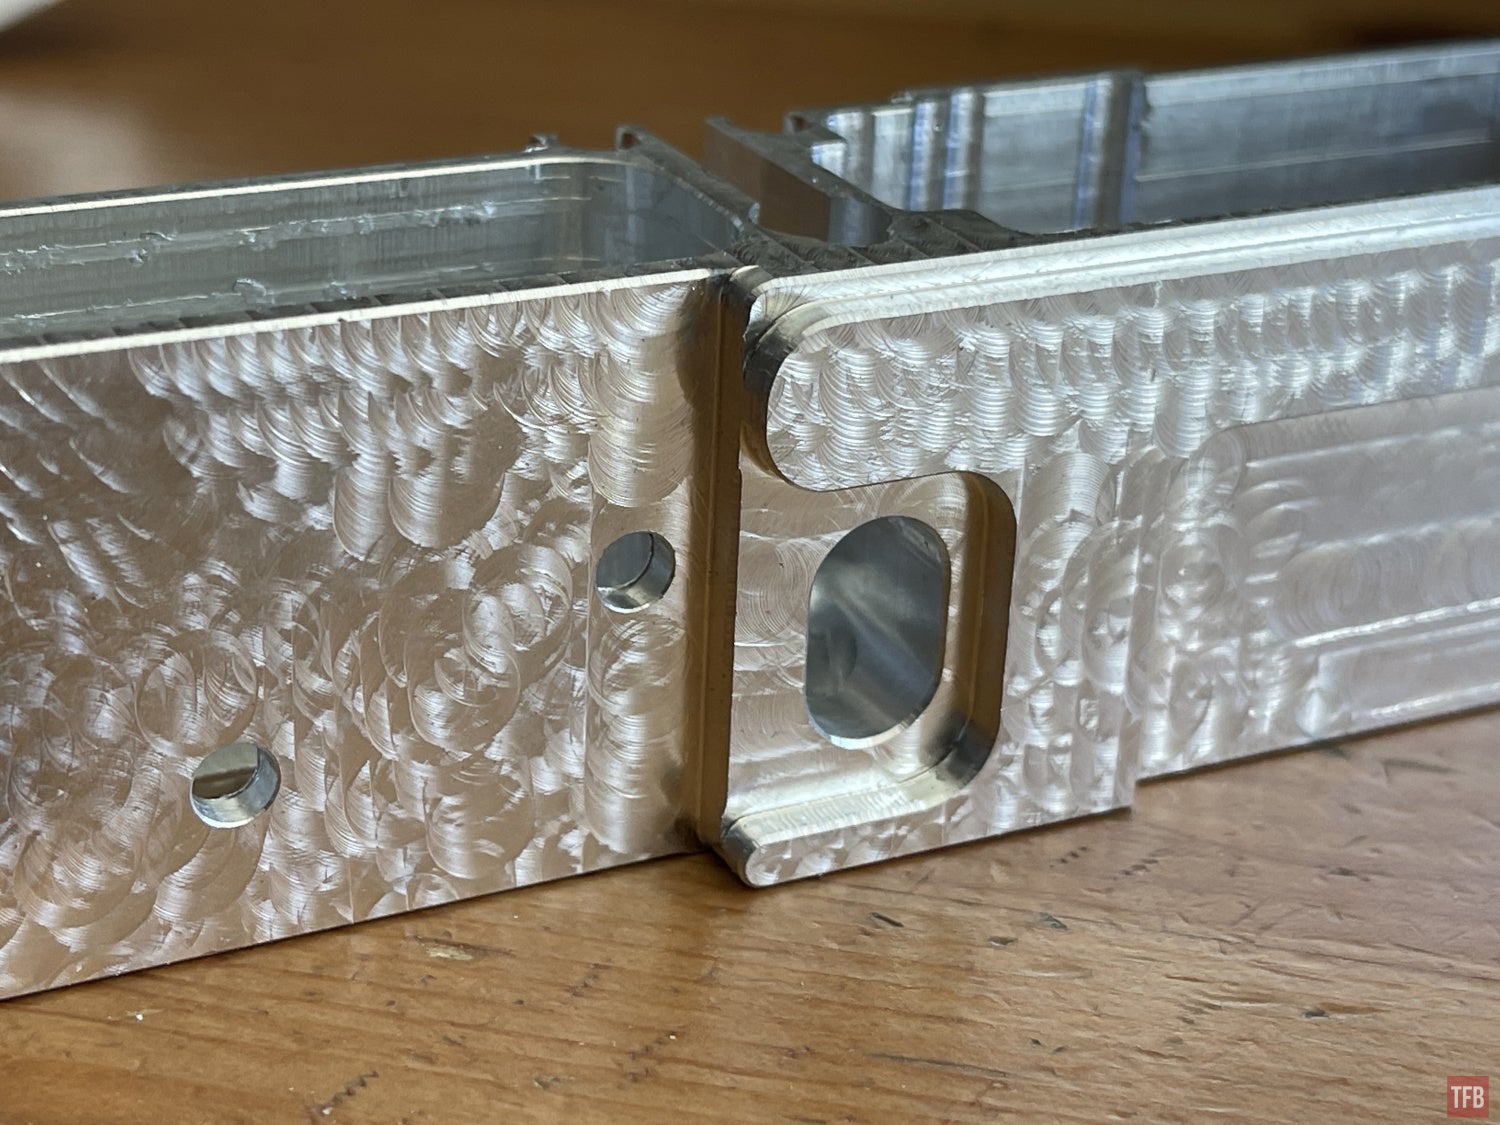
Now the 0% lower is starting to take shape. You can recognize some typical AR-15 lower receiver characteristics.
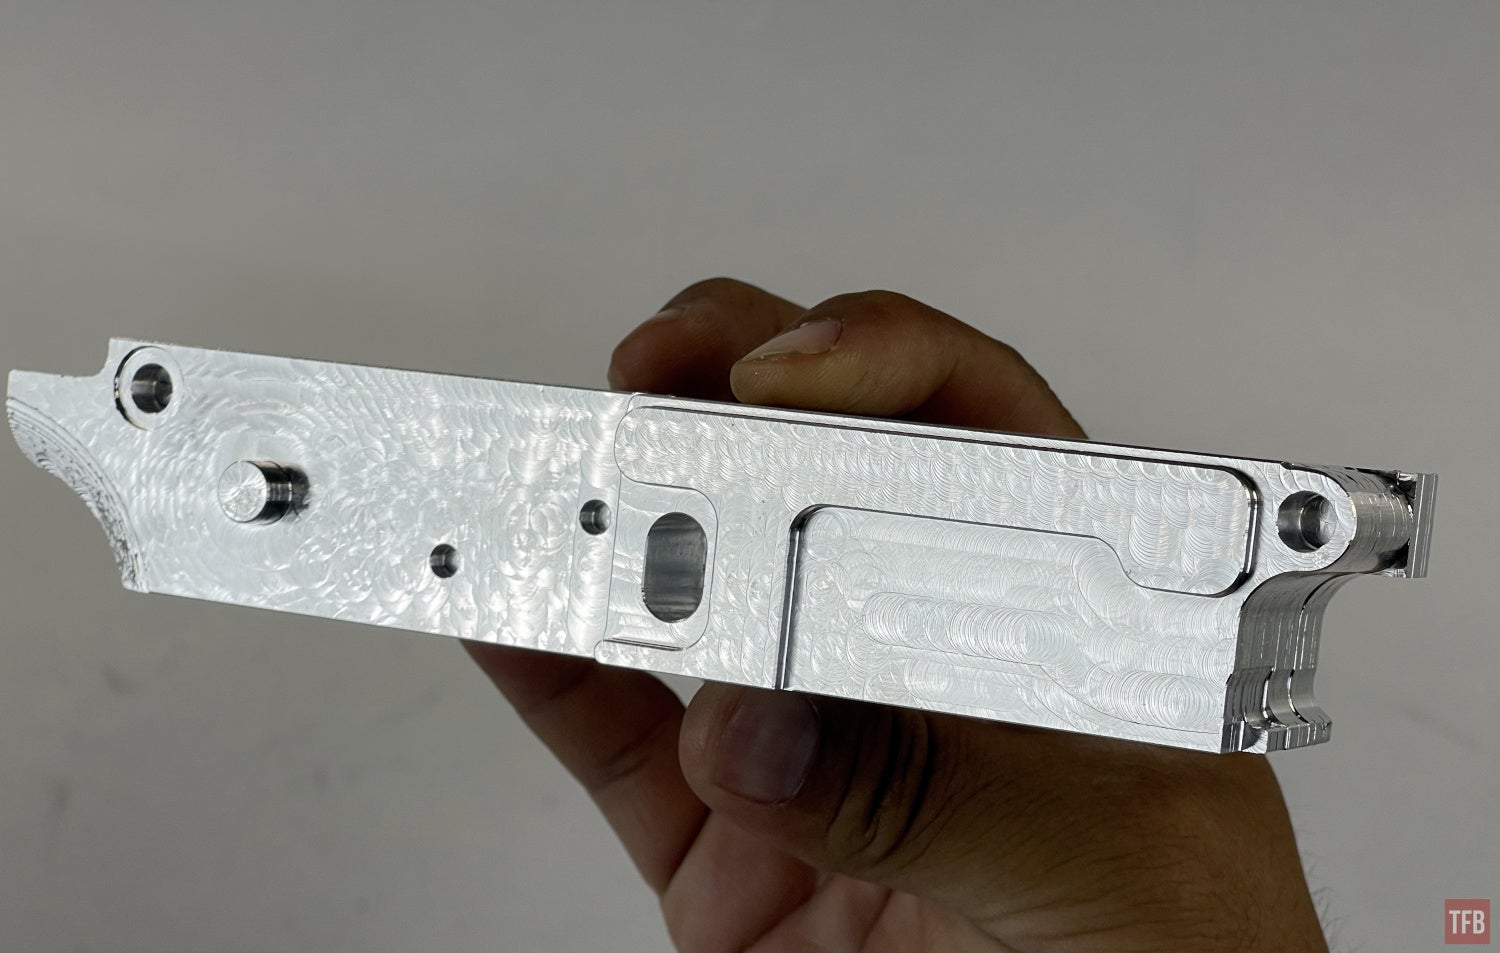

You can see the chamfered corners thanks to the 1/8″ deburring tool.
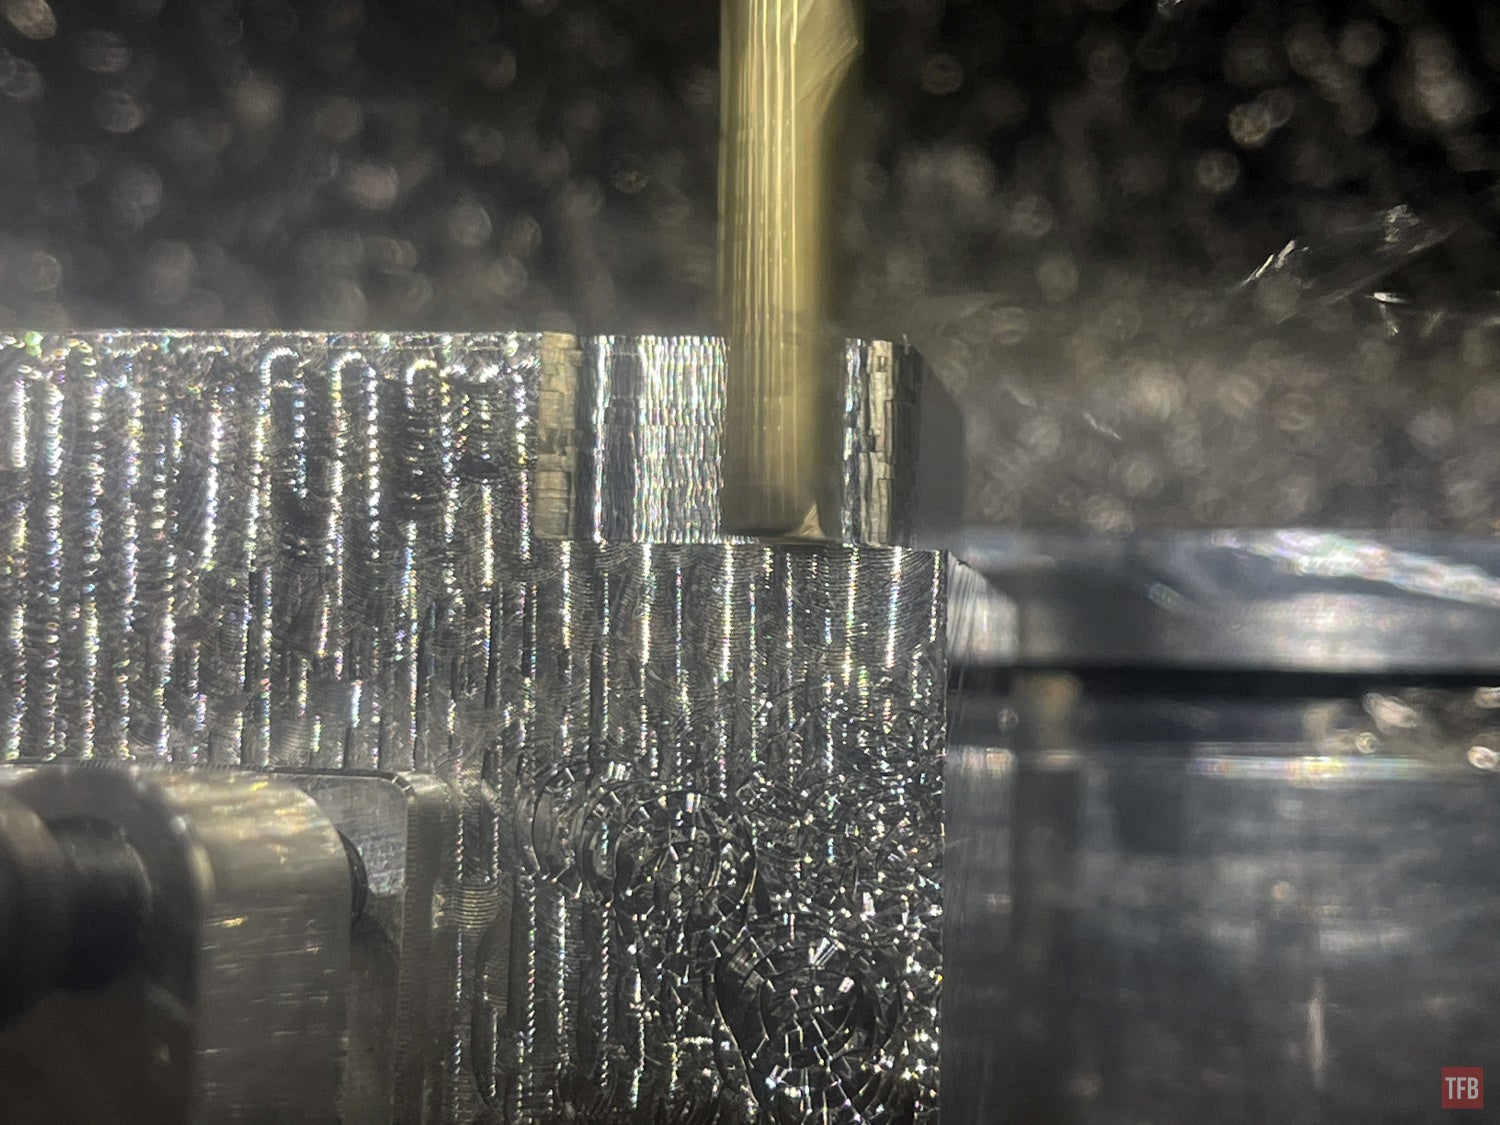
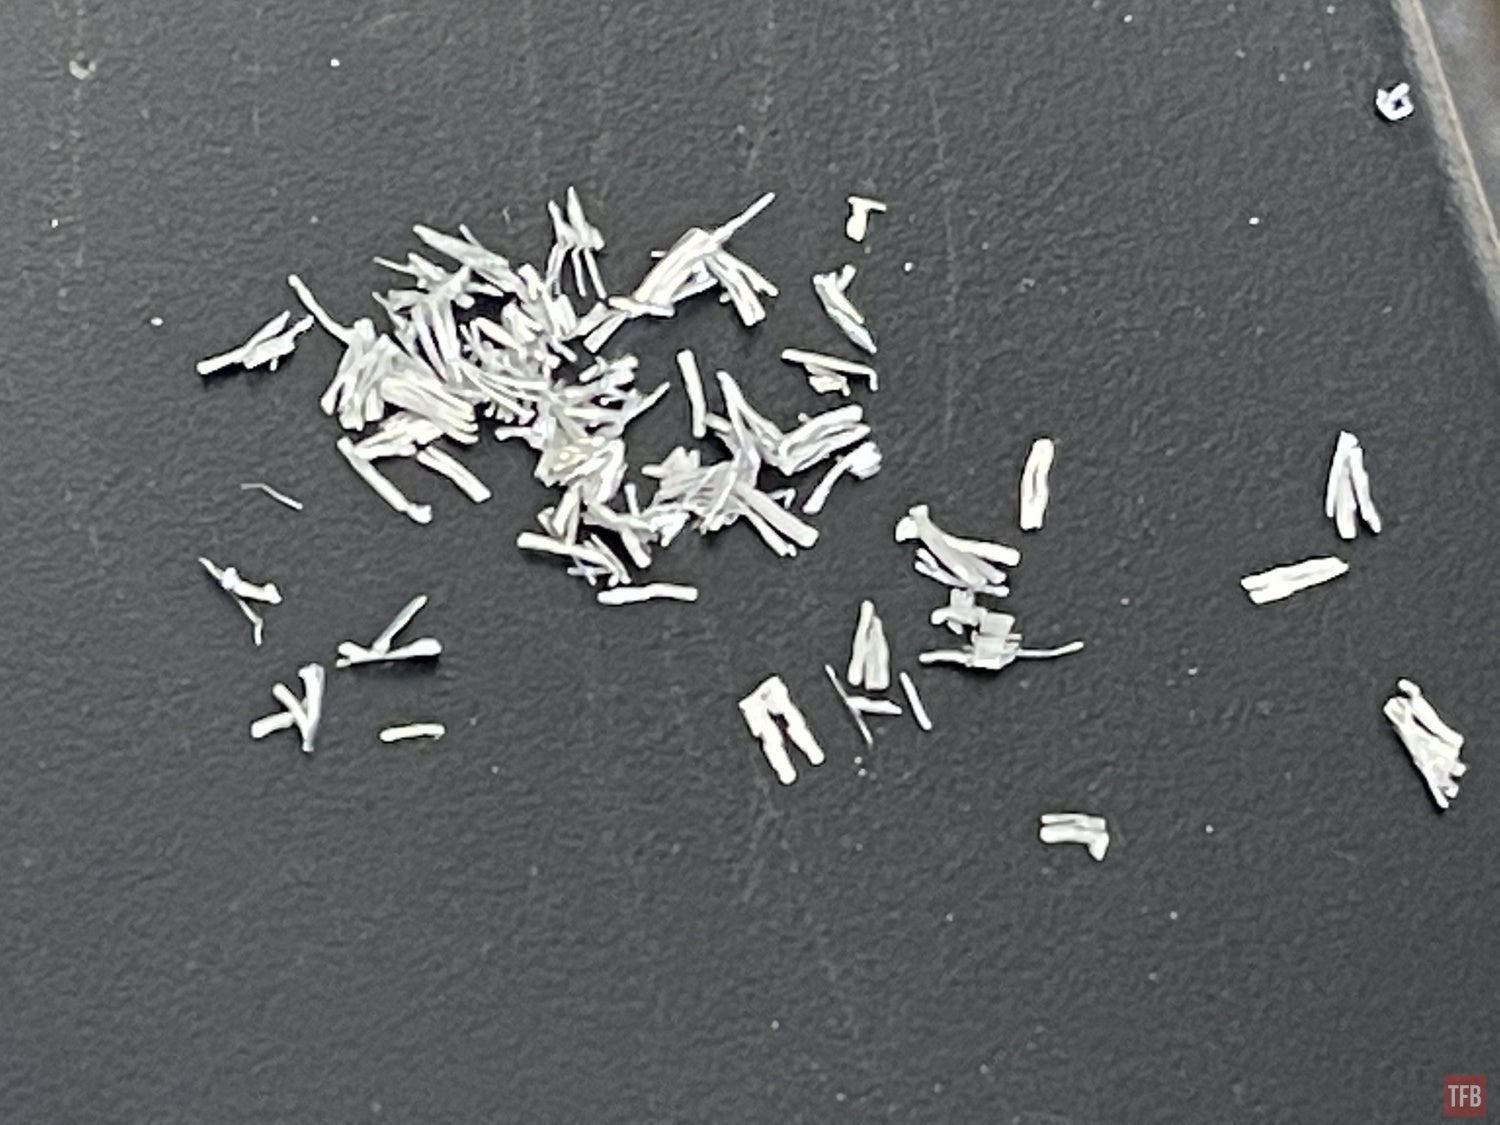
The 1/4 end mill for the 0% lower is different from the one used for the 80% lower build. Besides the length, it cuts away large slivers of metal whereas the 80% end mill cuts away smaller chips.
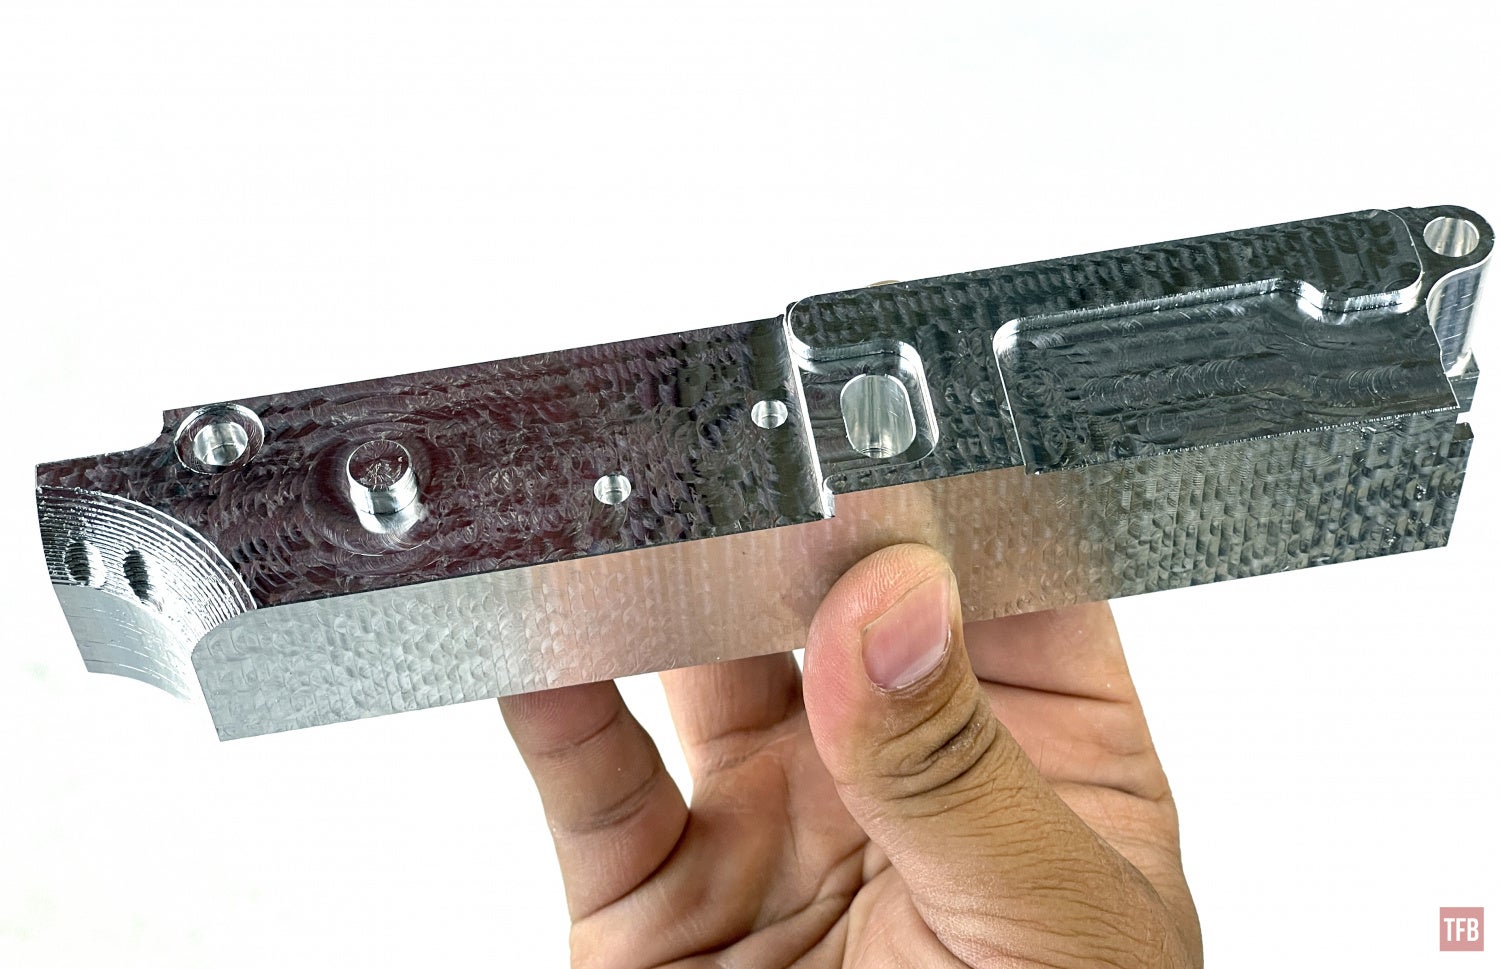
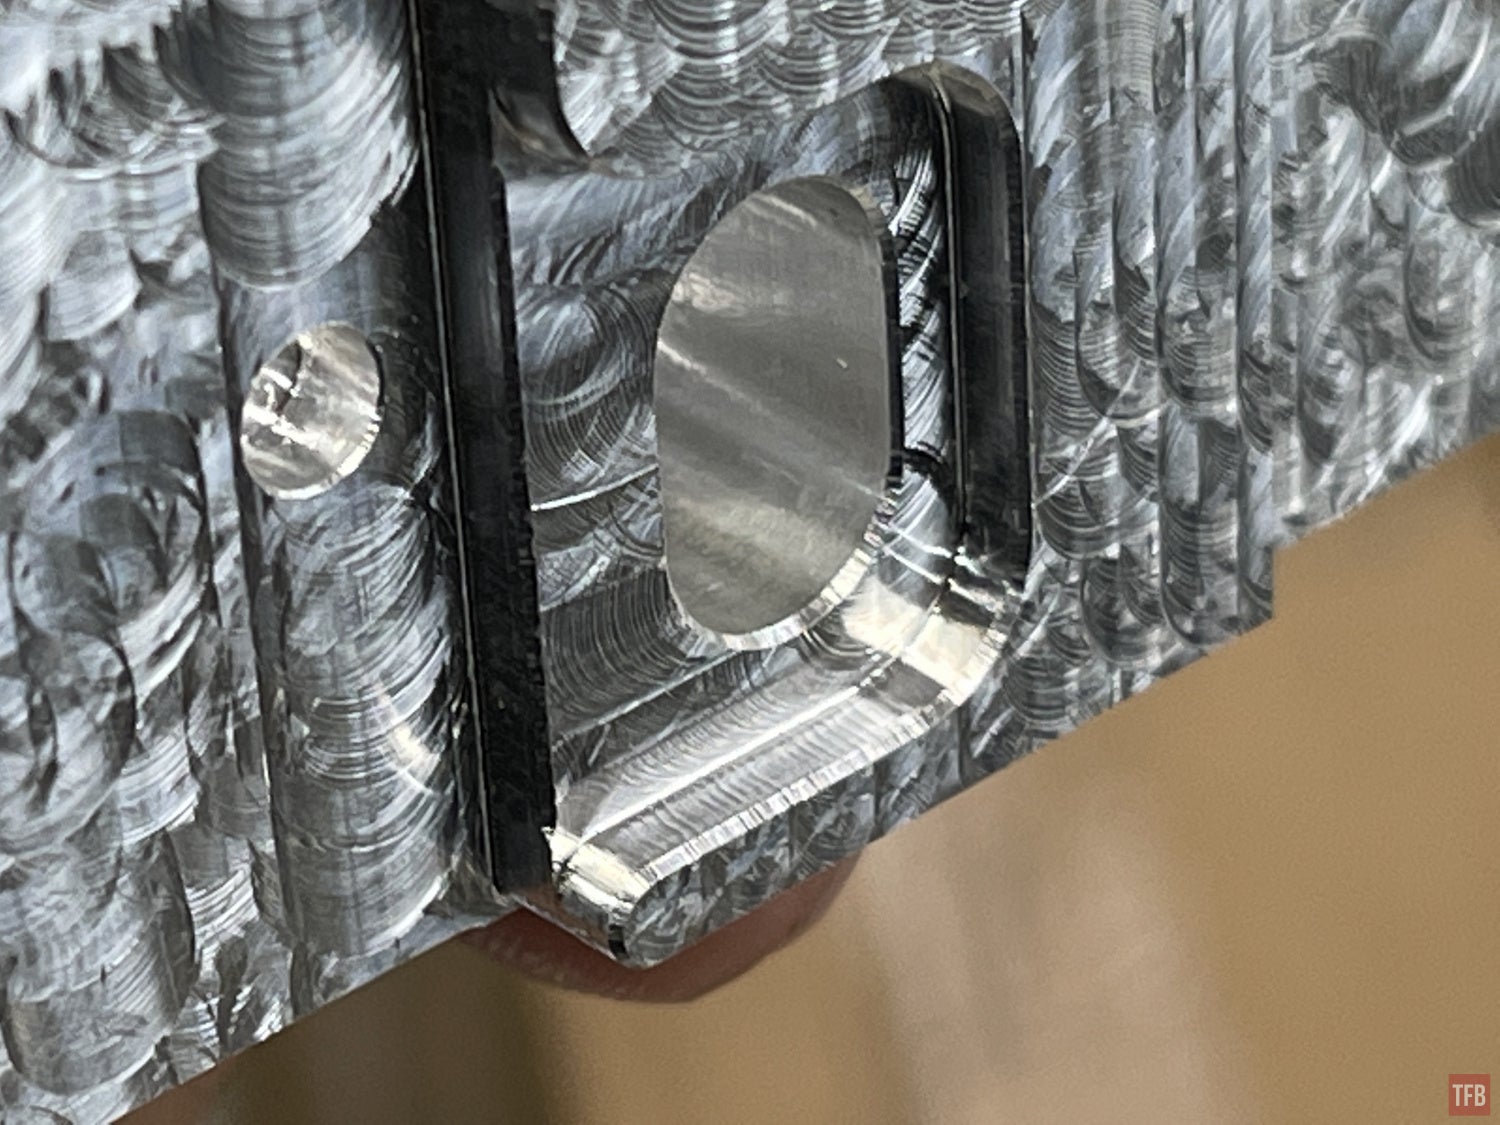
Trigger pocket, bolt catch pocket and some of the magwell have been cut away. Two more sides left.


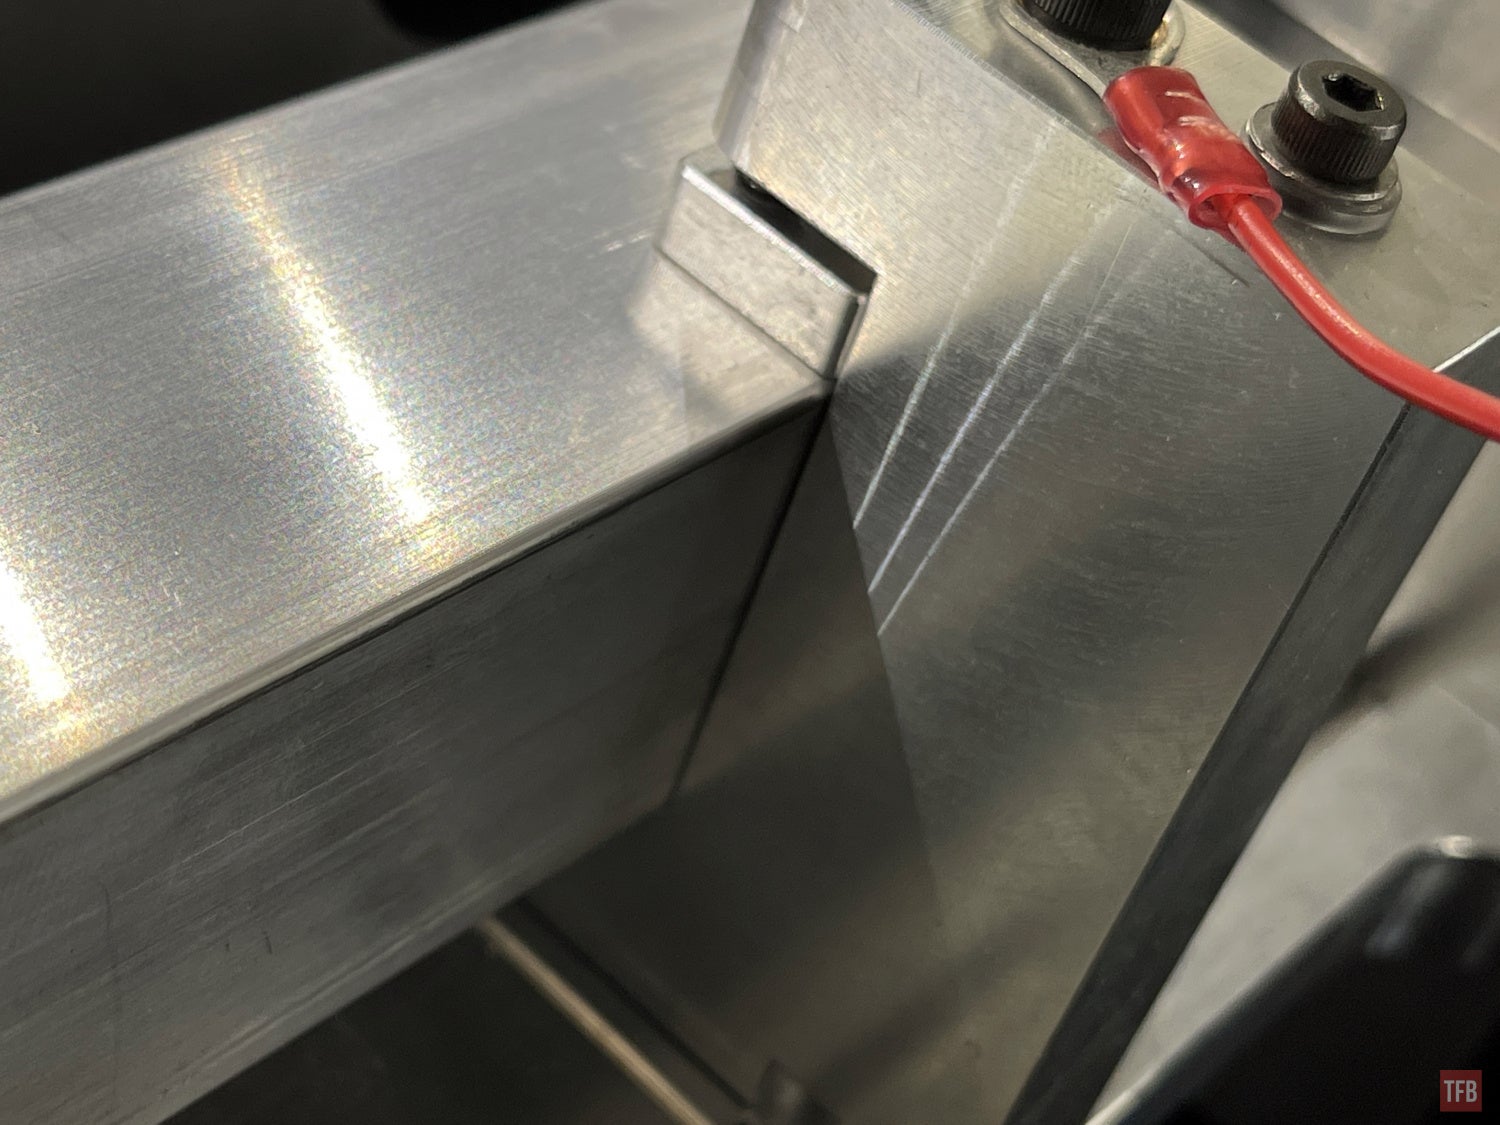
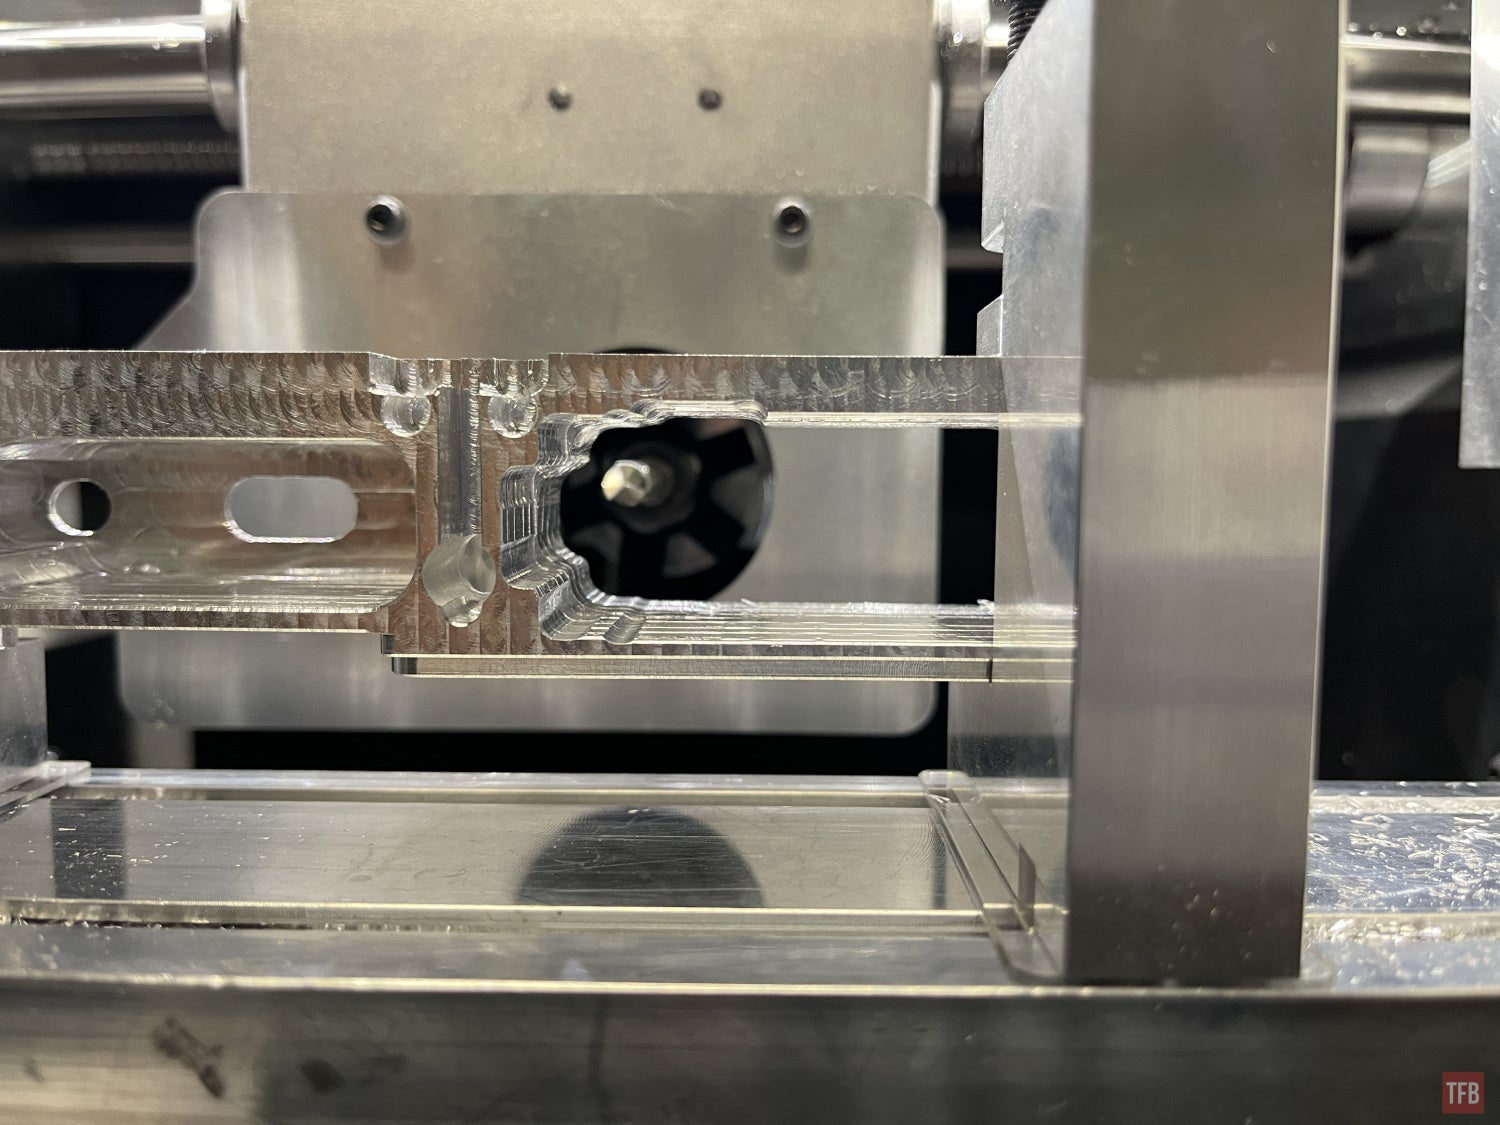
See that cylindrical boss below? It is used as a standoff device/spacer so the workpiece stays level when clamped down.

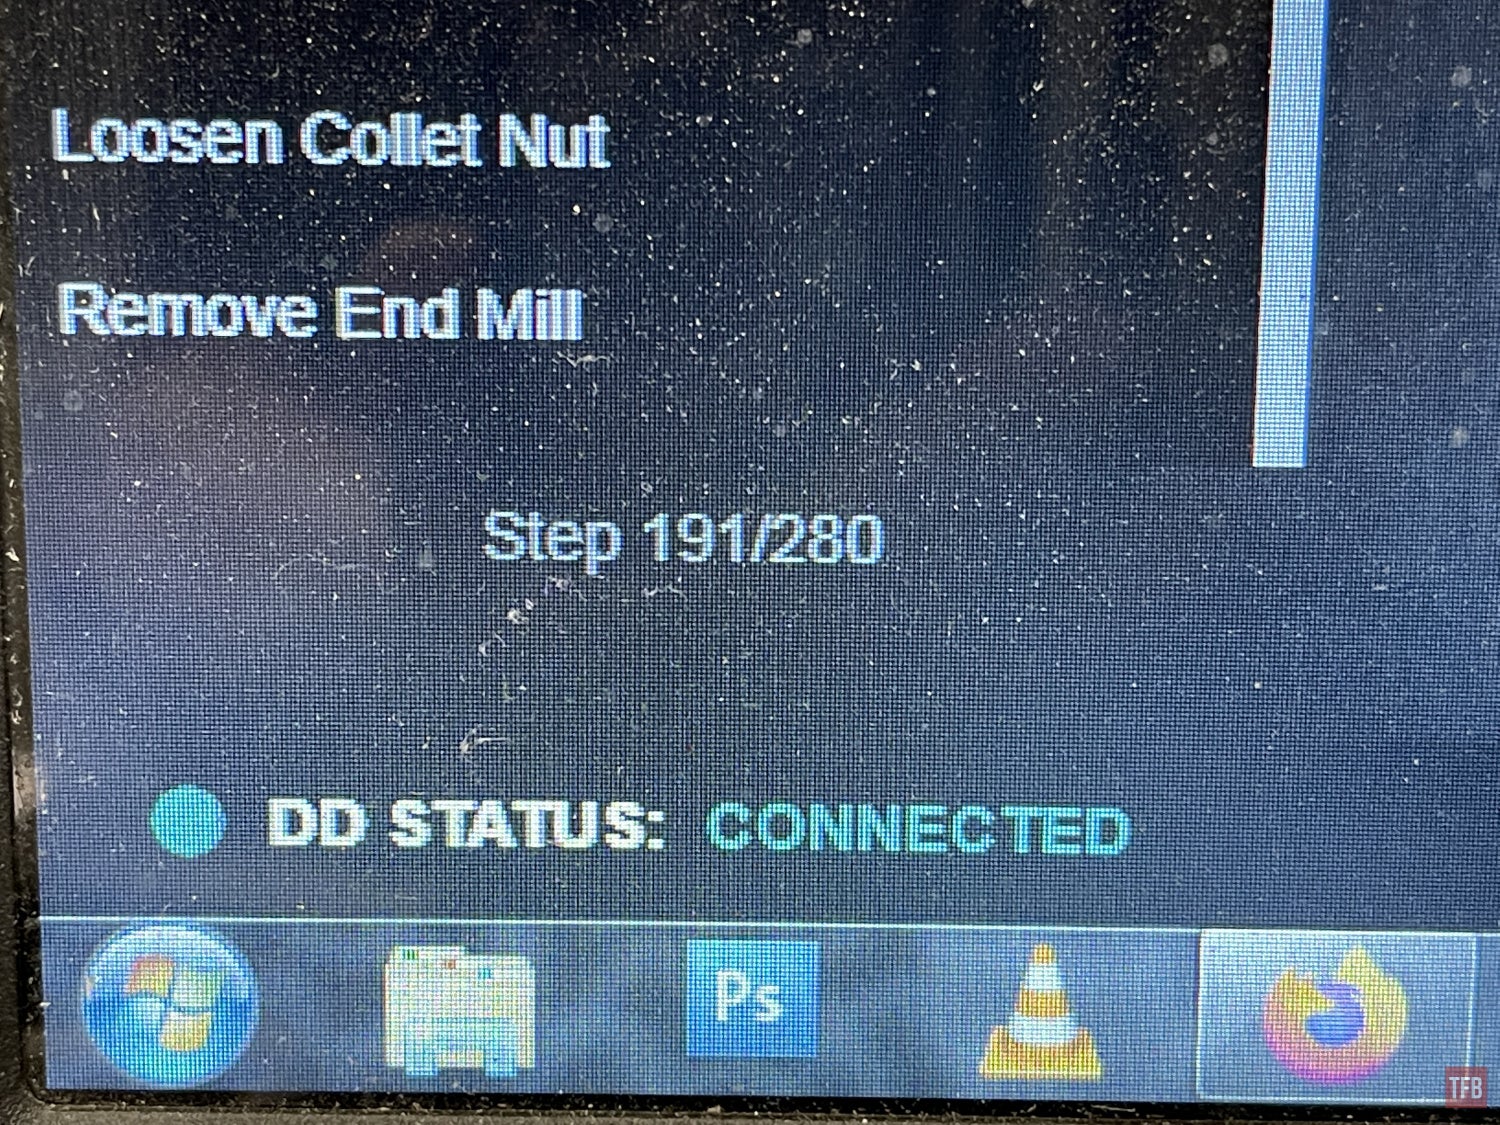
And now comes the third problem that I ran into trying to make a 0% lower. This is operation 6 and the GG3 probes the workpiece. Once it finishes, you have to click on the software to continue to start the milling process. When I do this, the end mill retracts and starts to move to the right but then it stops and says I triggered a hard limit. This happened at step 191 out of 280.
This time the end mill did not crash and yet it stopped working so I was not sure what happened.
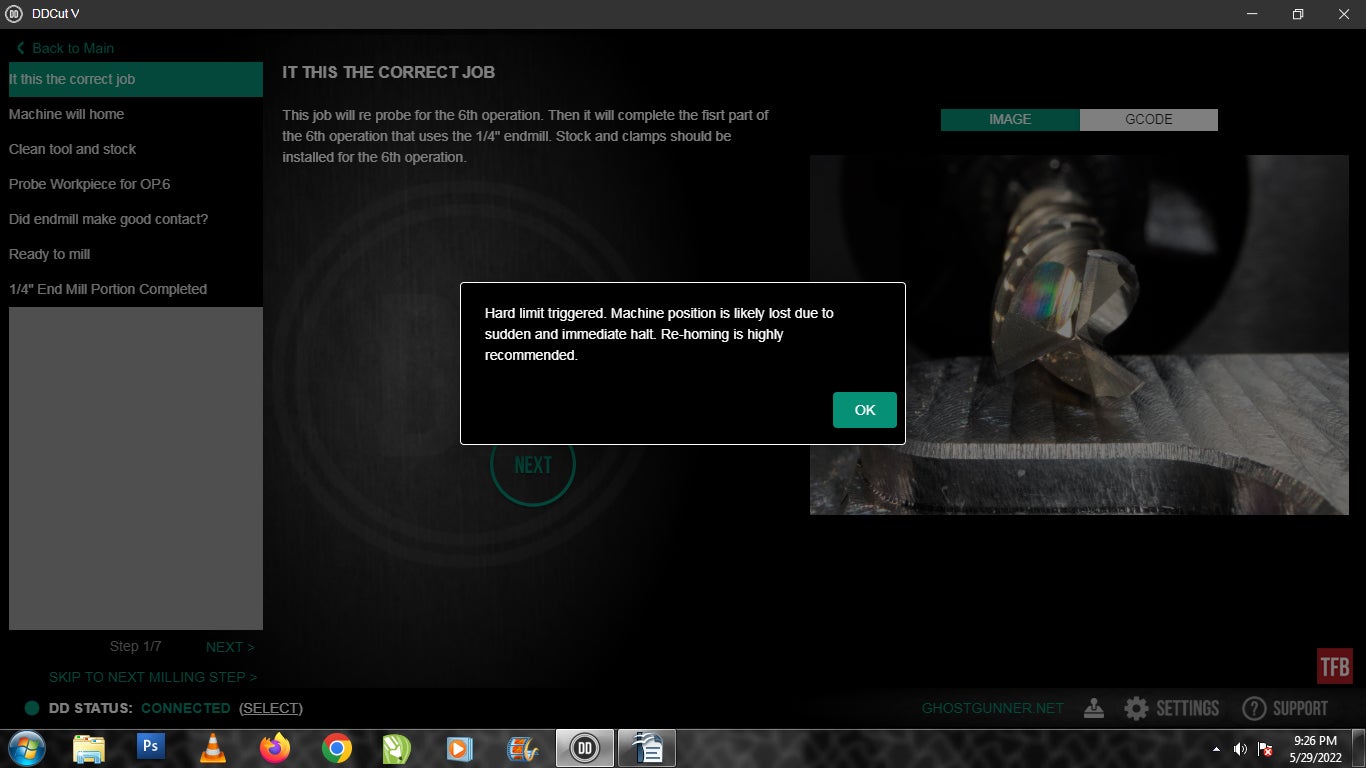
Screenshot of the “Hard Limit Triggered” error message.
I tried redoing this step. Fortunately, you can pull up different operations via the DDCUT software so you don’t have to start from the beginning. And yet this did not solve the problem. The same error code came up. I contacted Ghost Gunner Customer Service and Andres helped me out. Over a phone call, we diagnosed my GG3. He thinks the end mill position is a little too long and the code interferes with that length. So we had to edit the GCODE and change some parameters. Once we did this, the GG3 was able to continue on the mission and mill the 6th operation.
Now the GG3 will mill the left side of the 0% lower receiver.
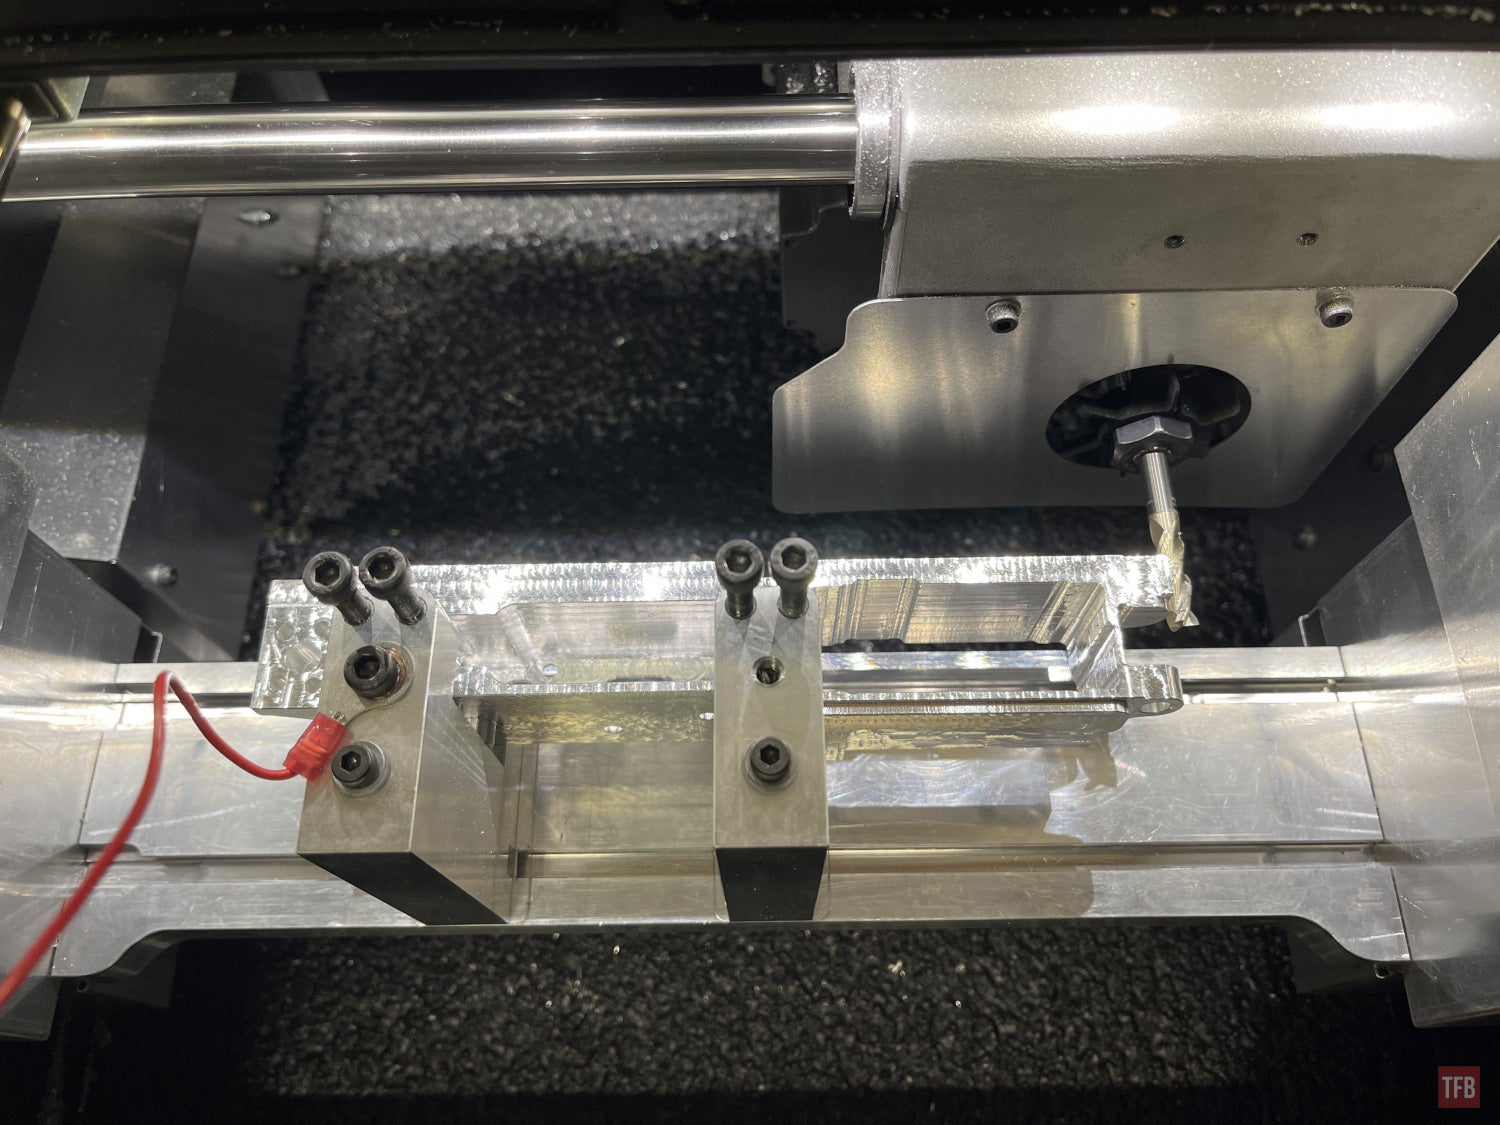
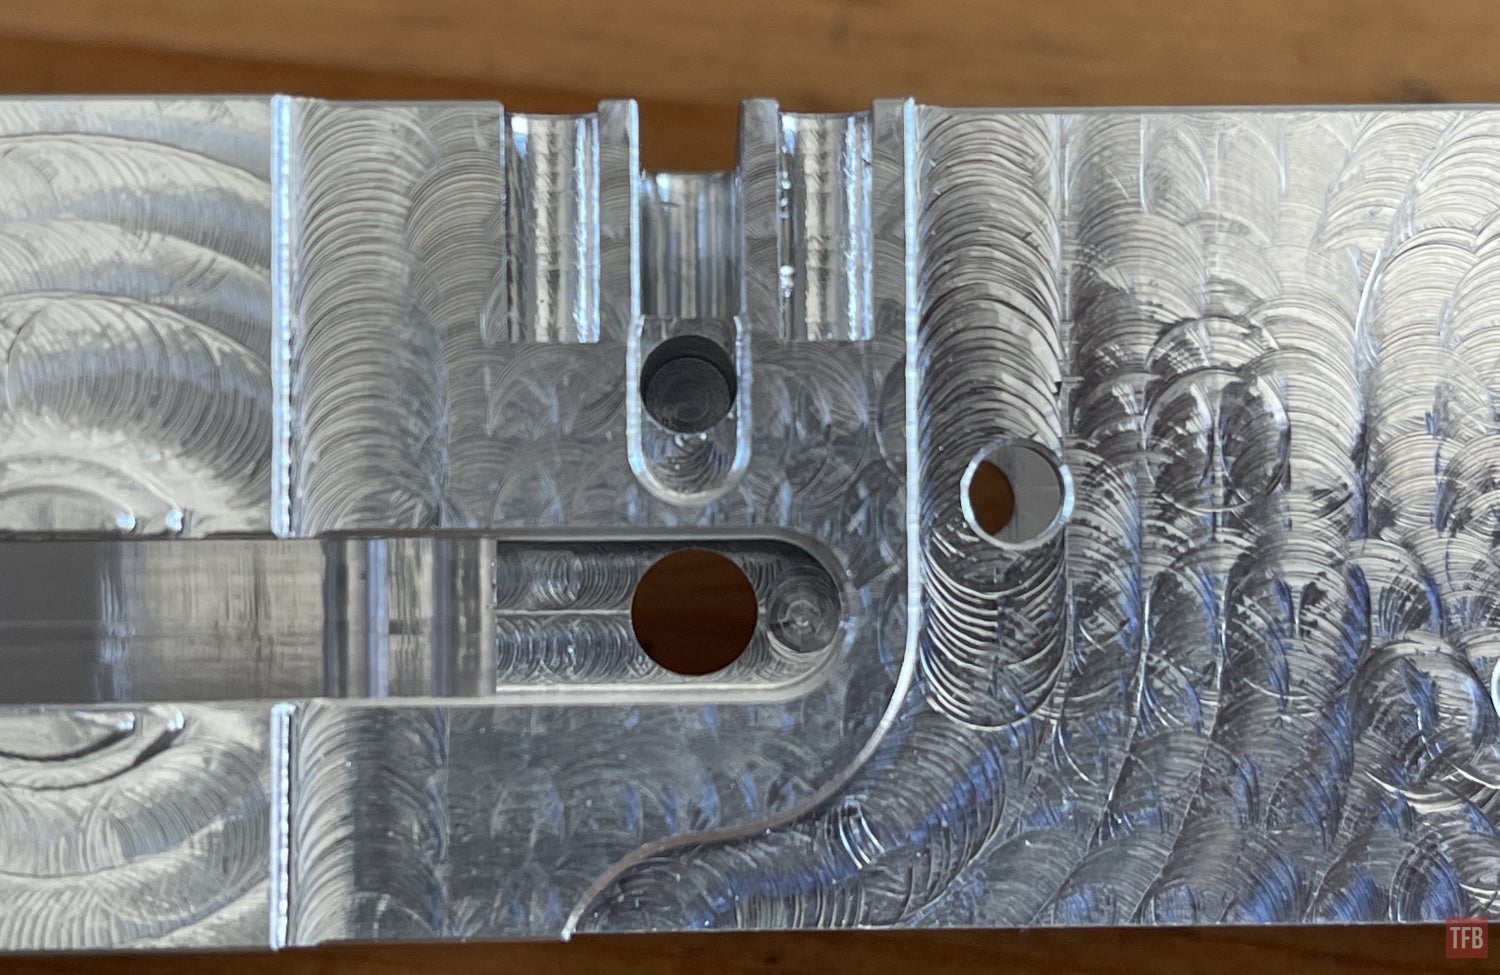
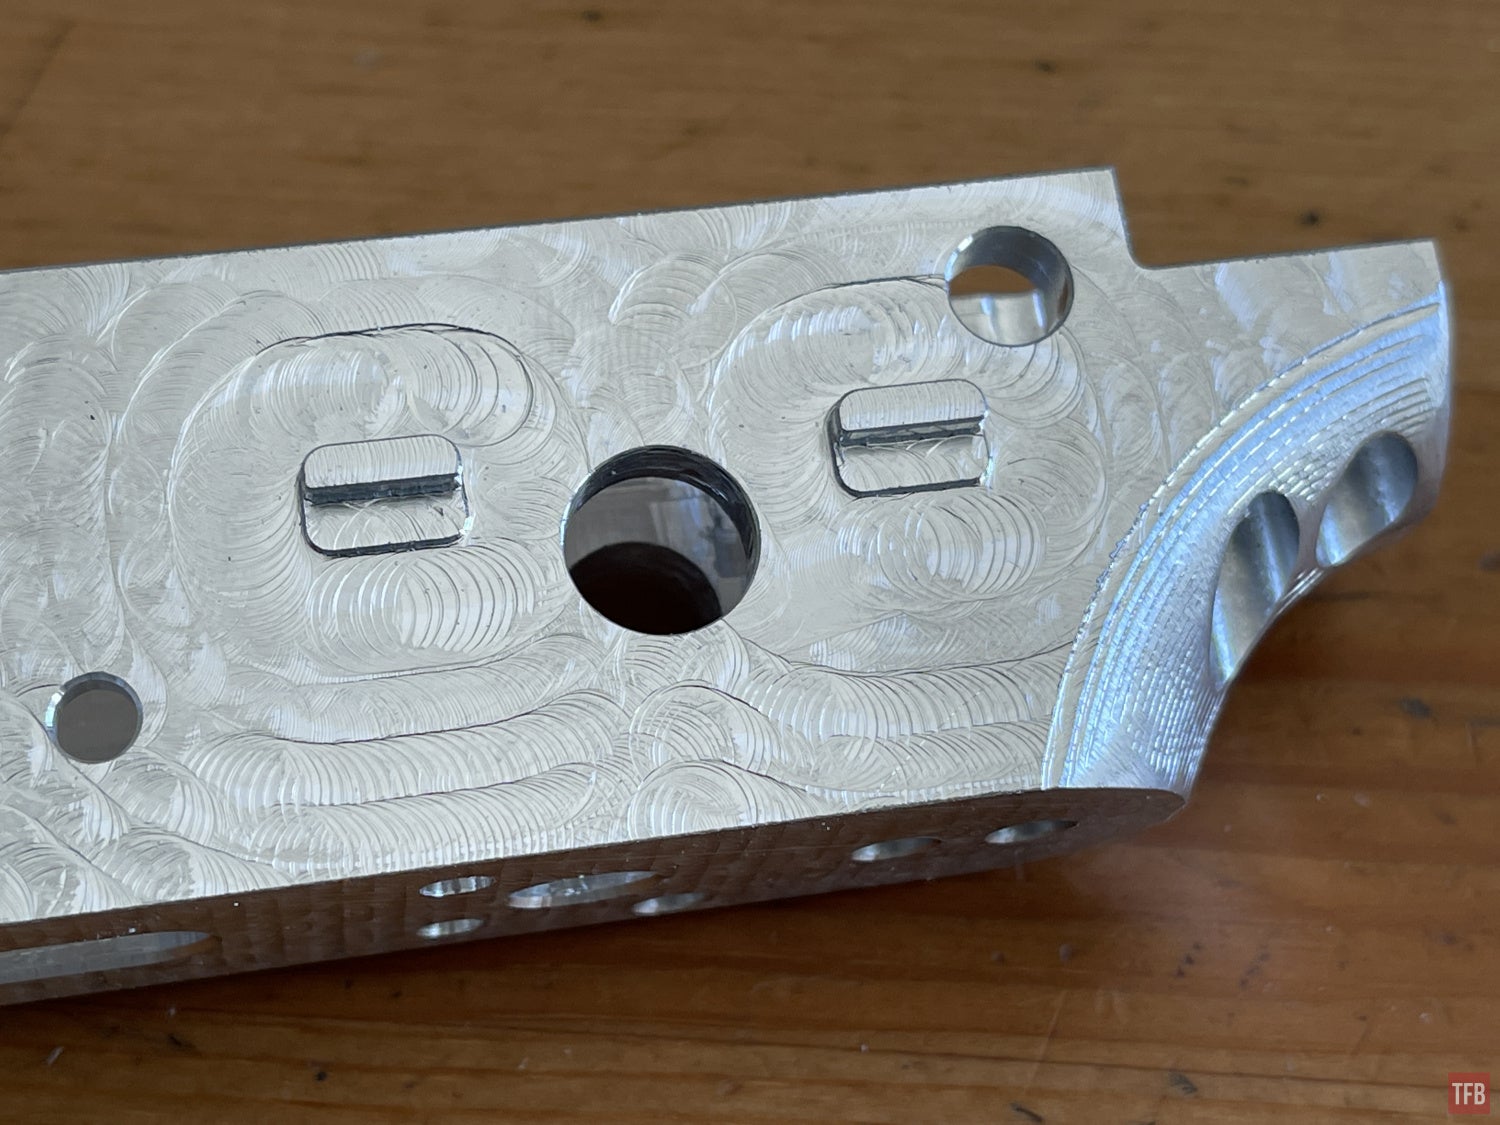
The magwell catch slot and safety selector tabs are machined.
The final operation is to mill the safety selector hole which removes that cylindrical boss/spacer.

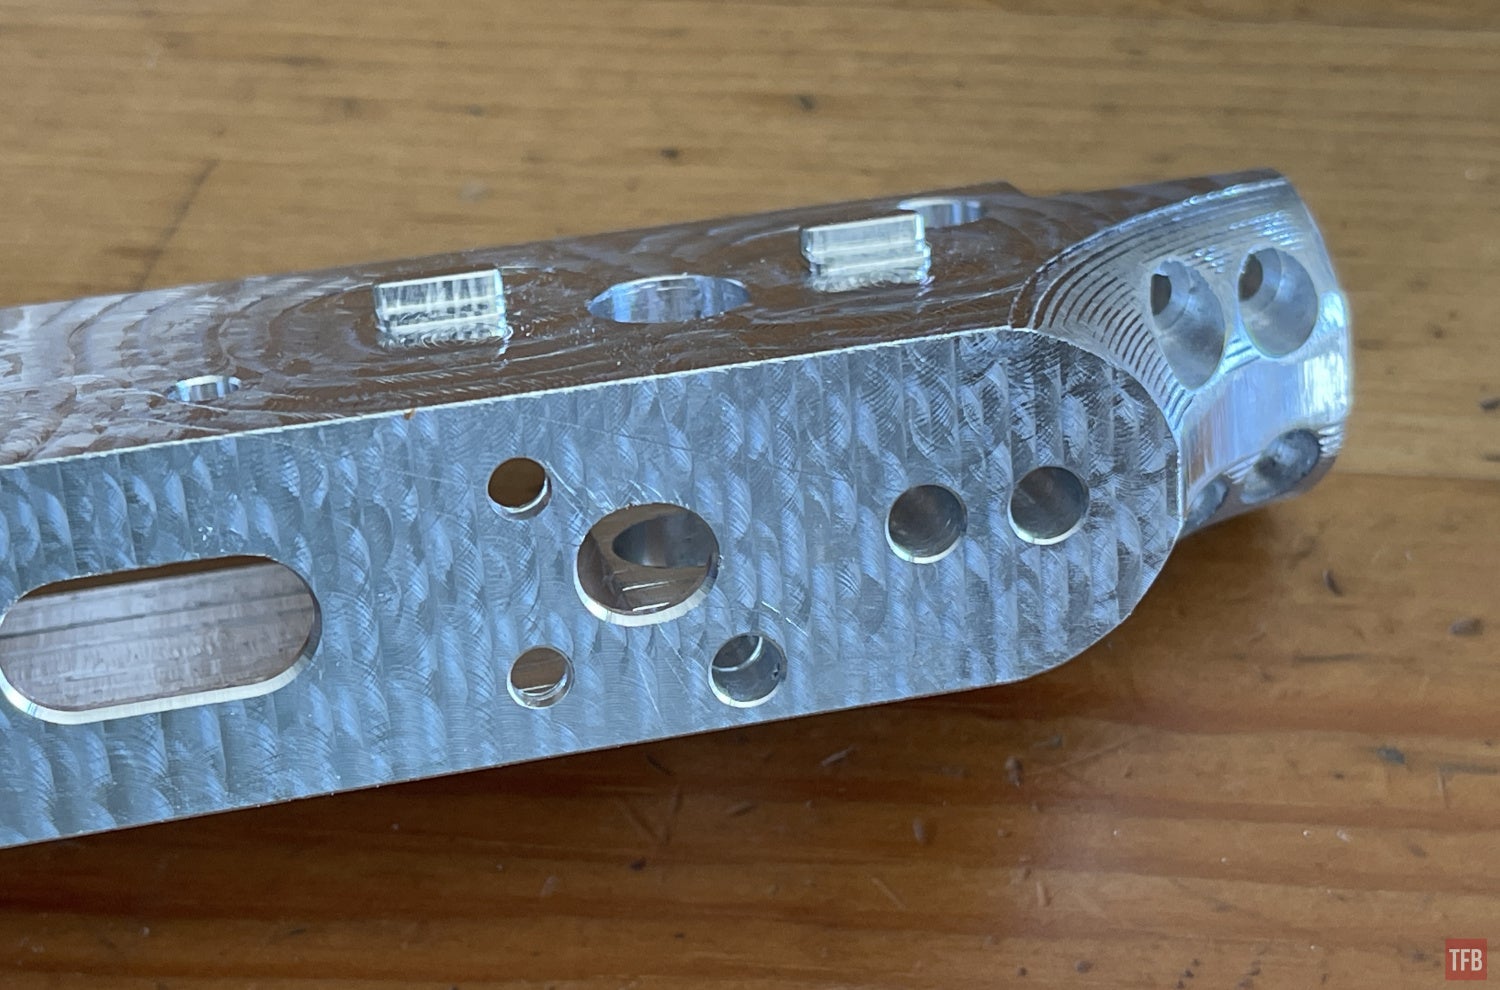
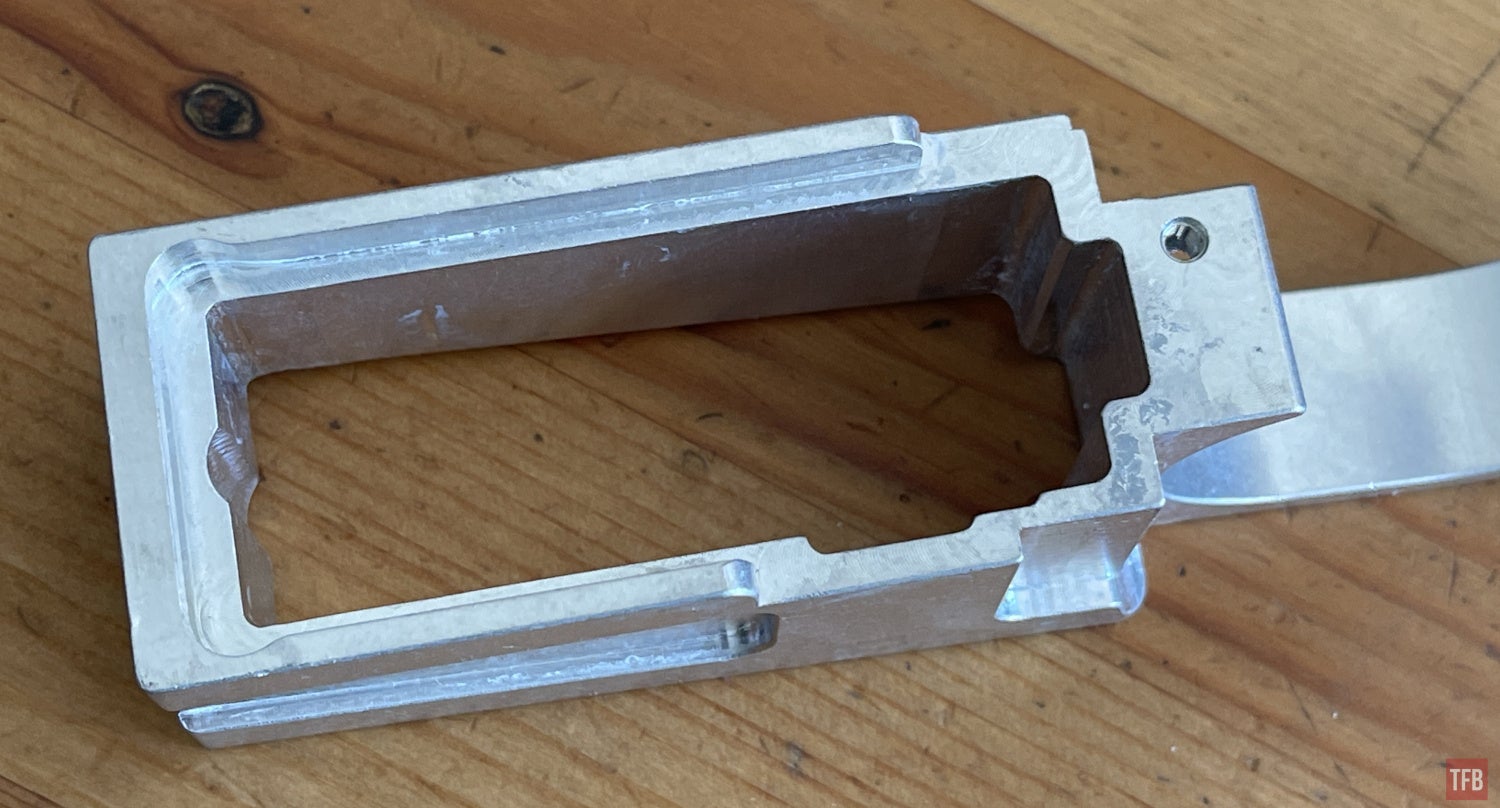
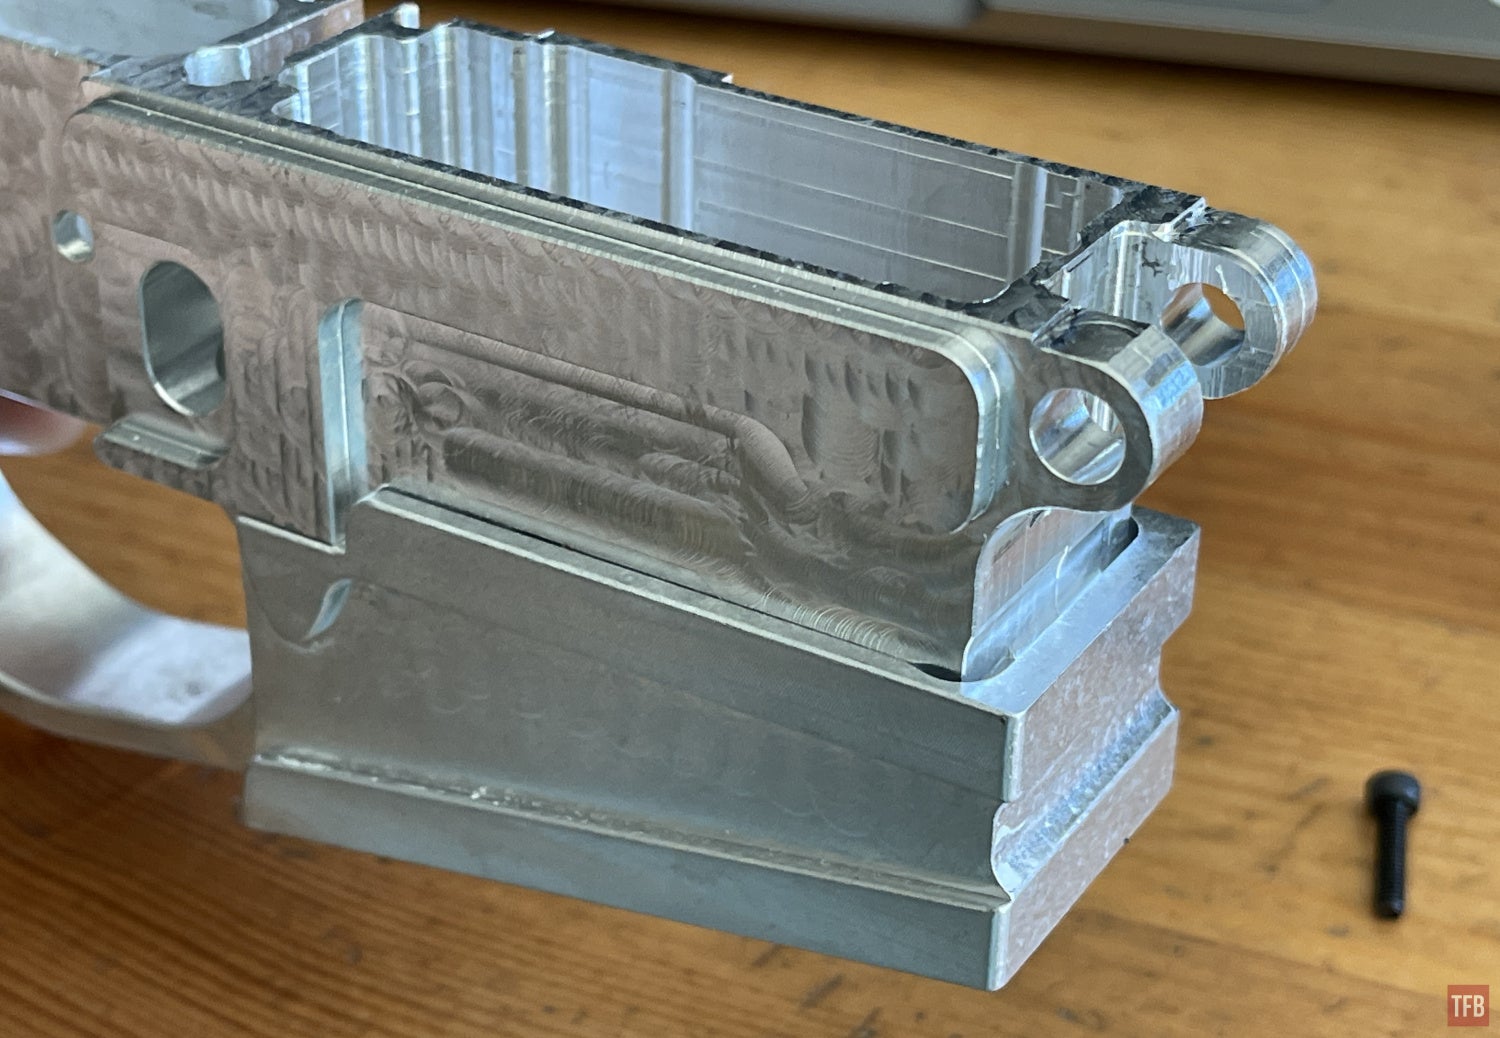
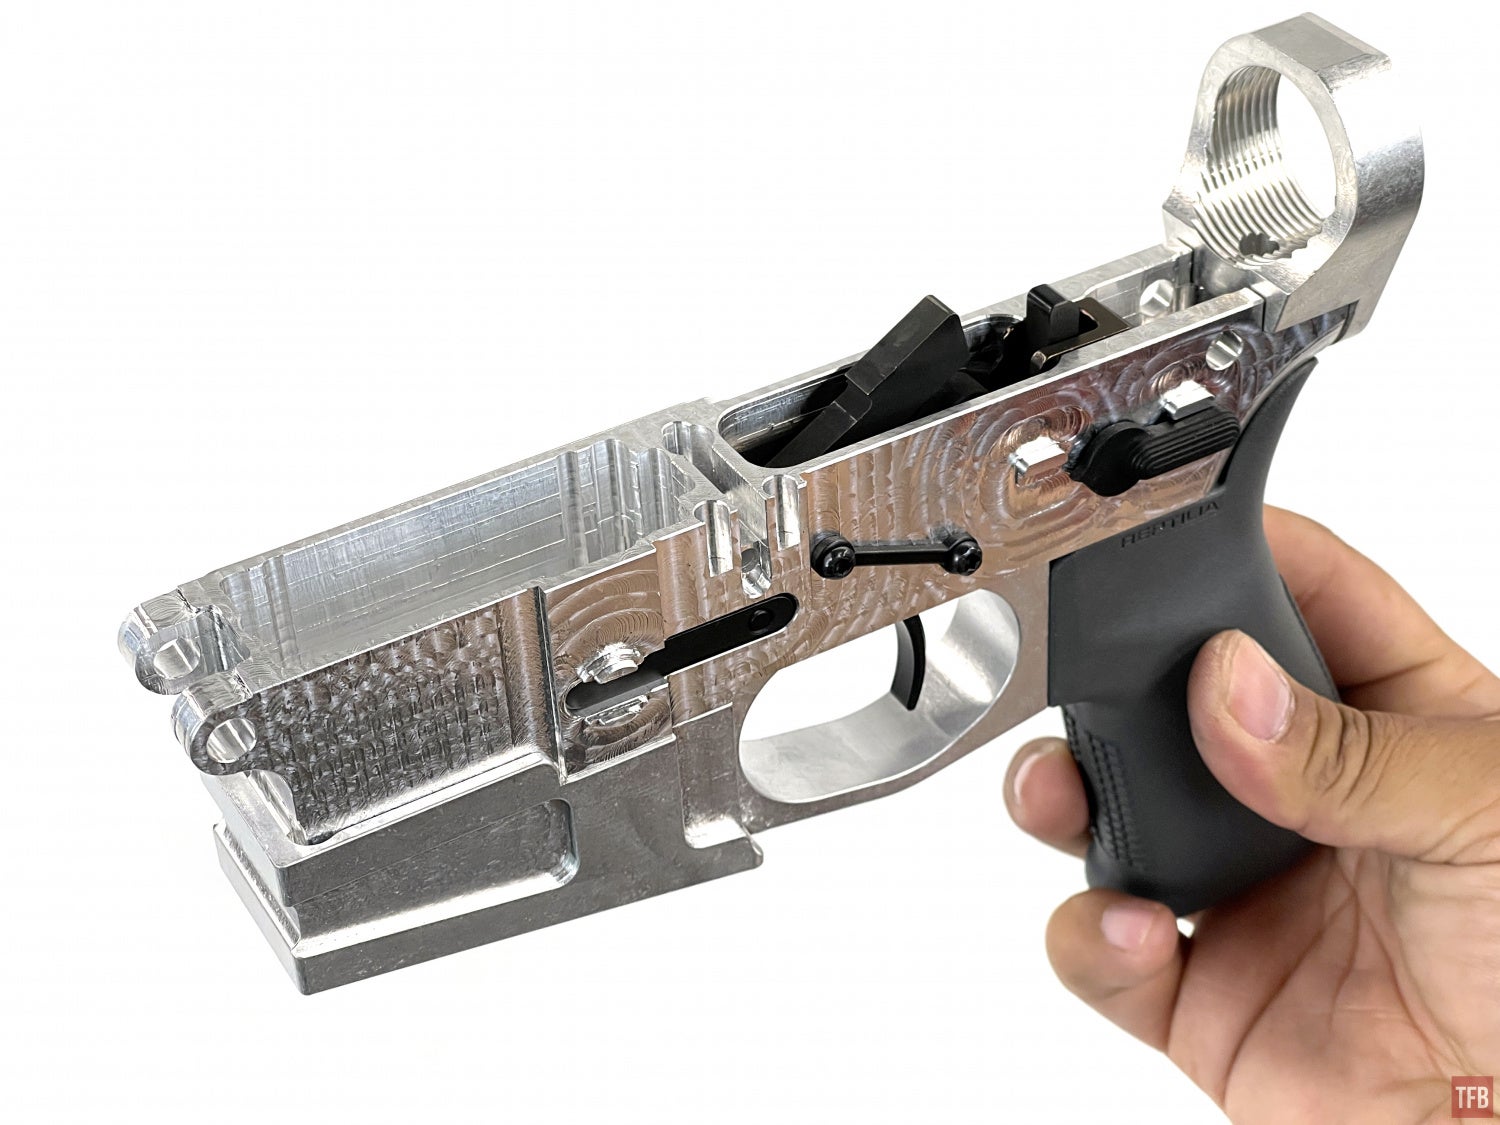
Success! 0% lower is done!
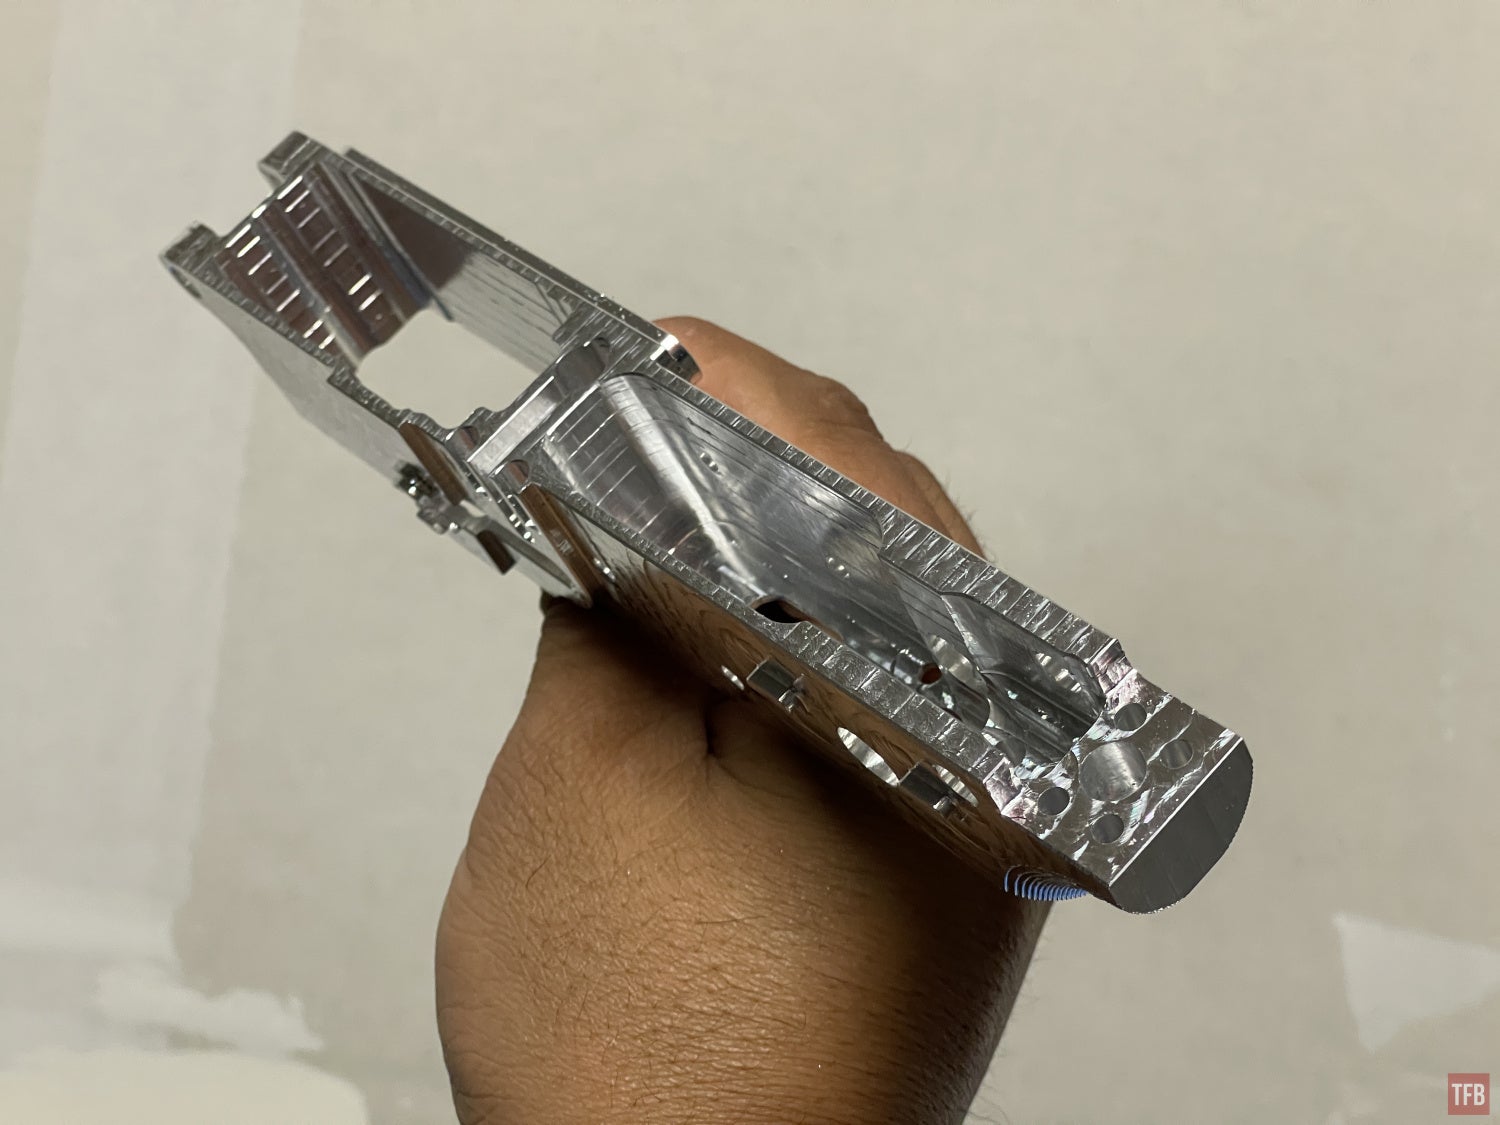
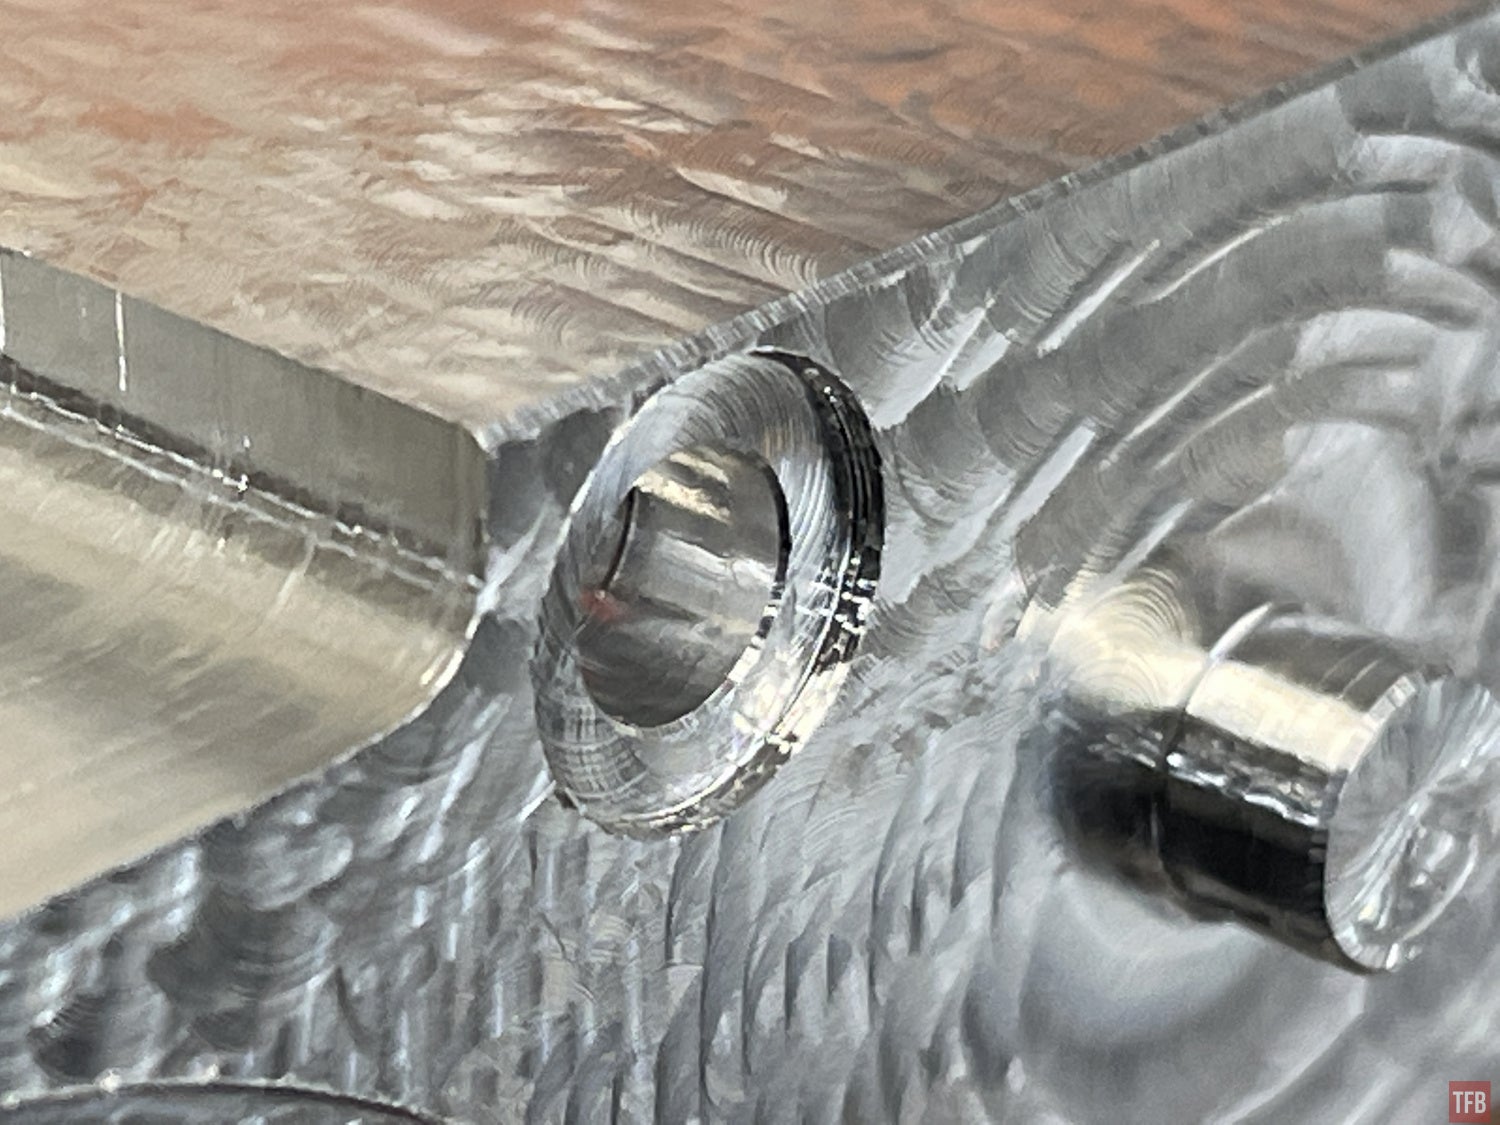
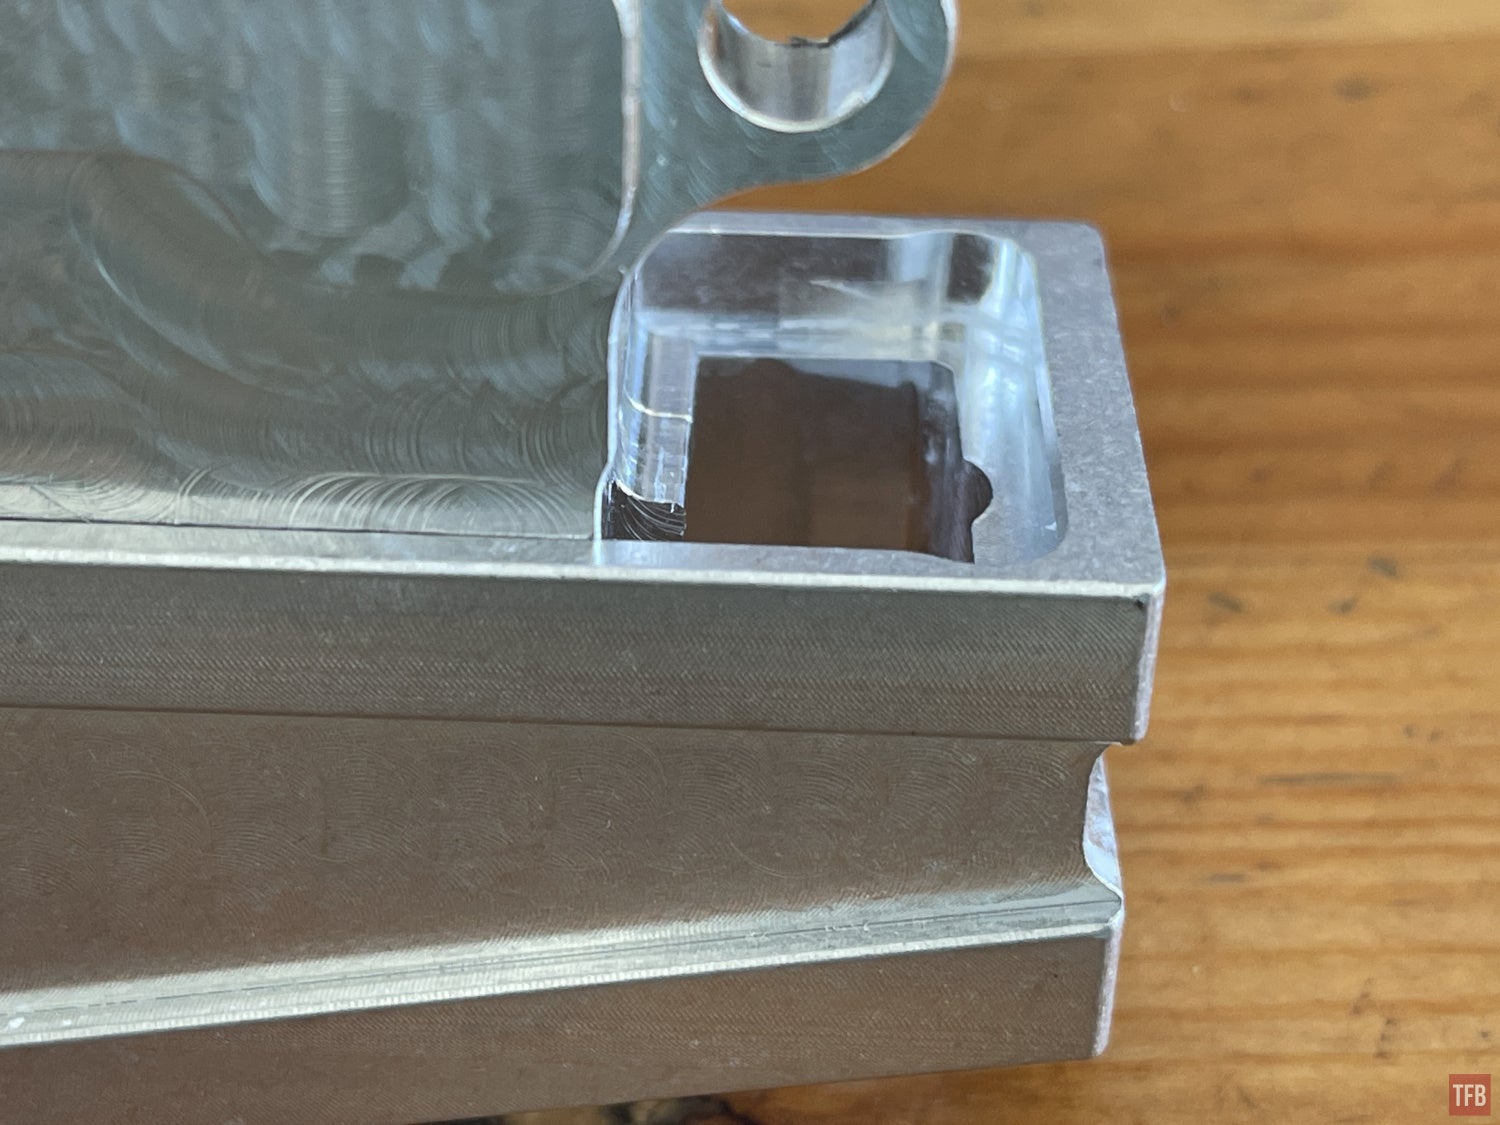
You can see the mag catch pocket.
The large hole is for a bolt that will hold the lower lower to the upper lower.
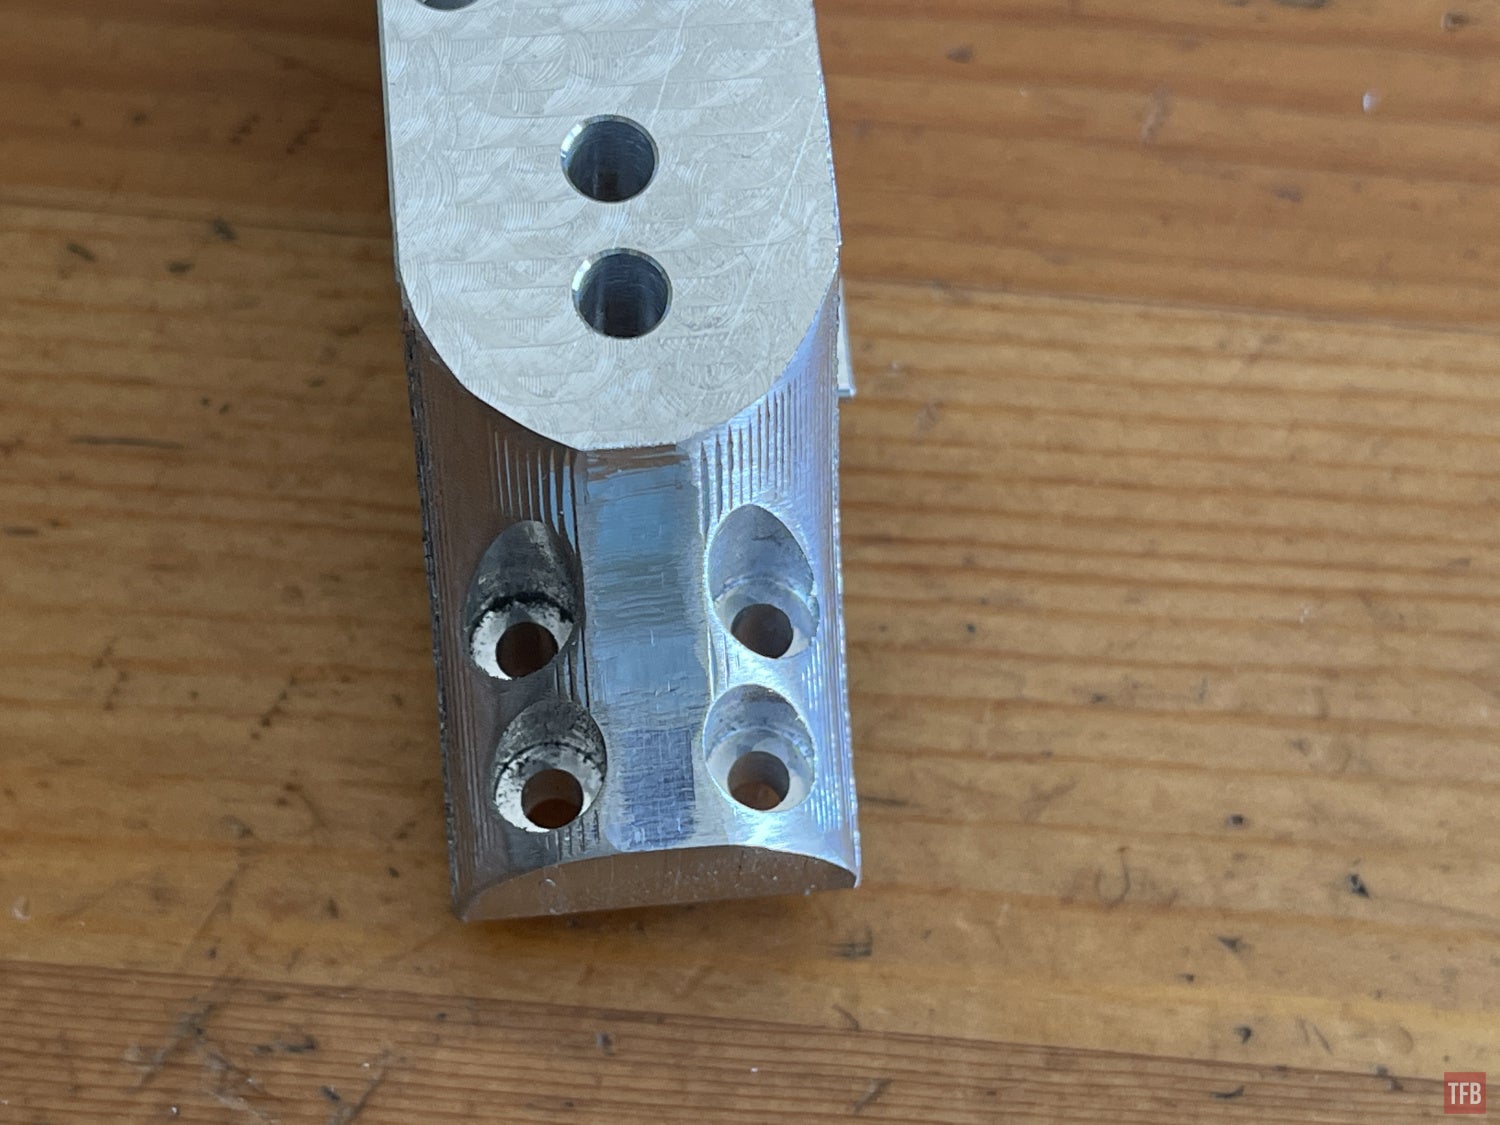
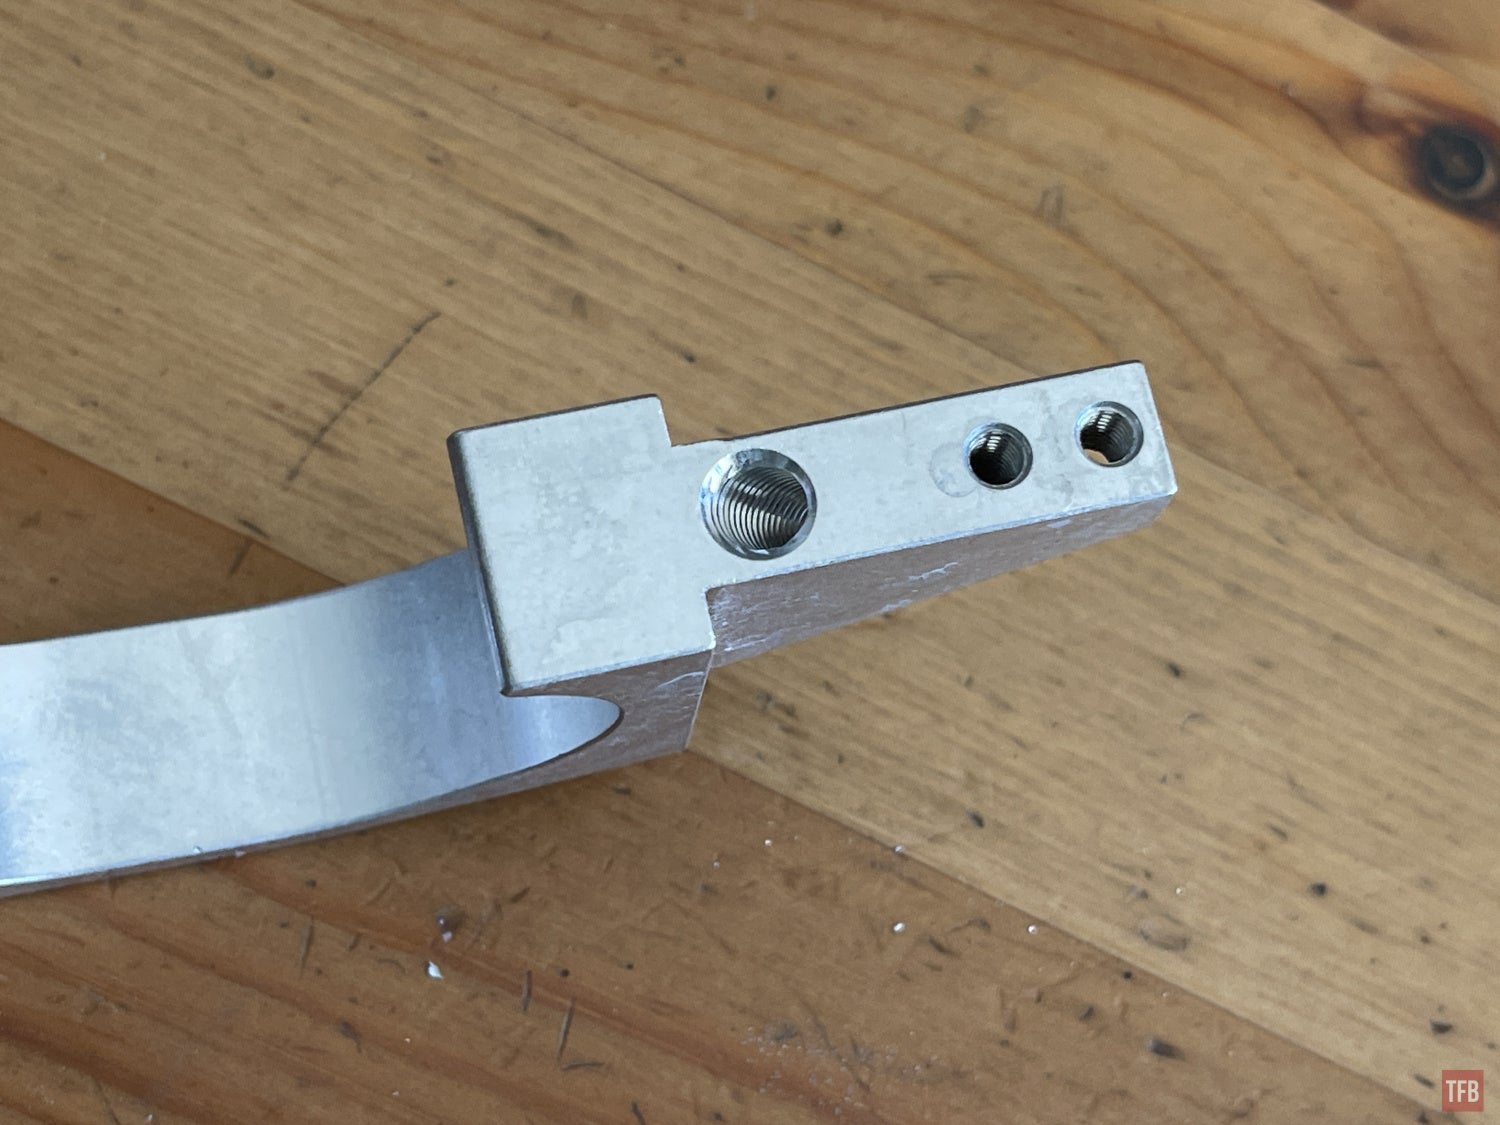
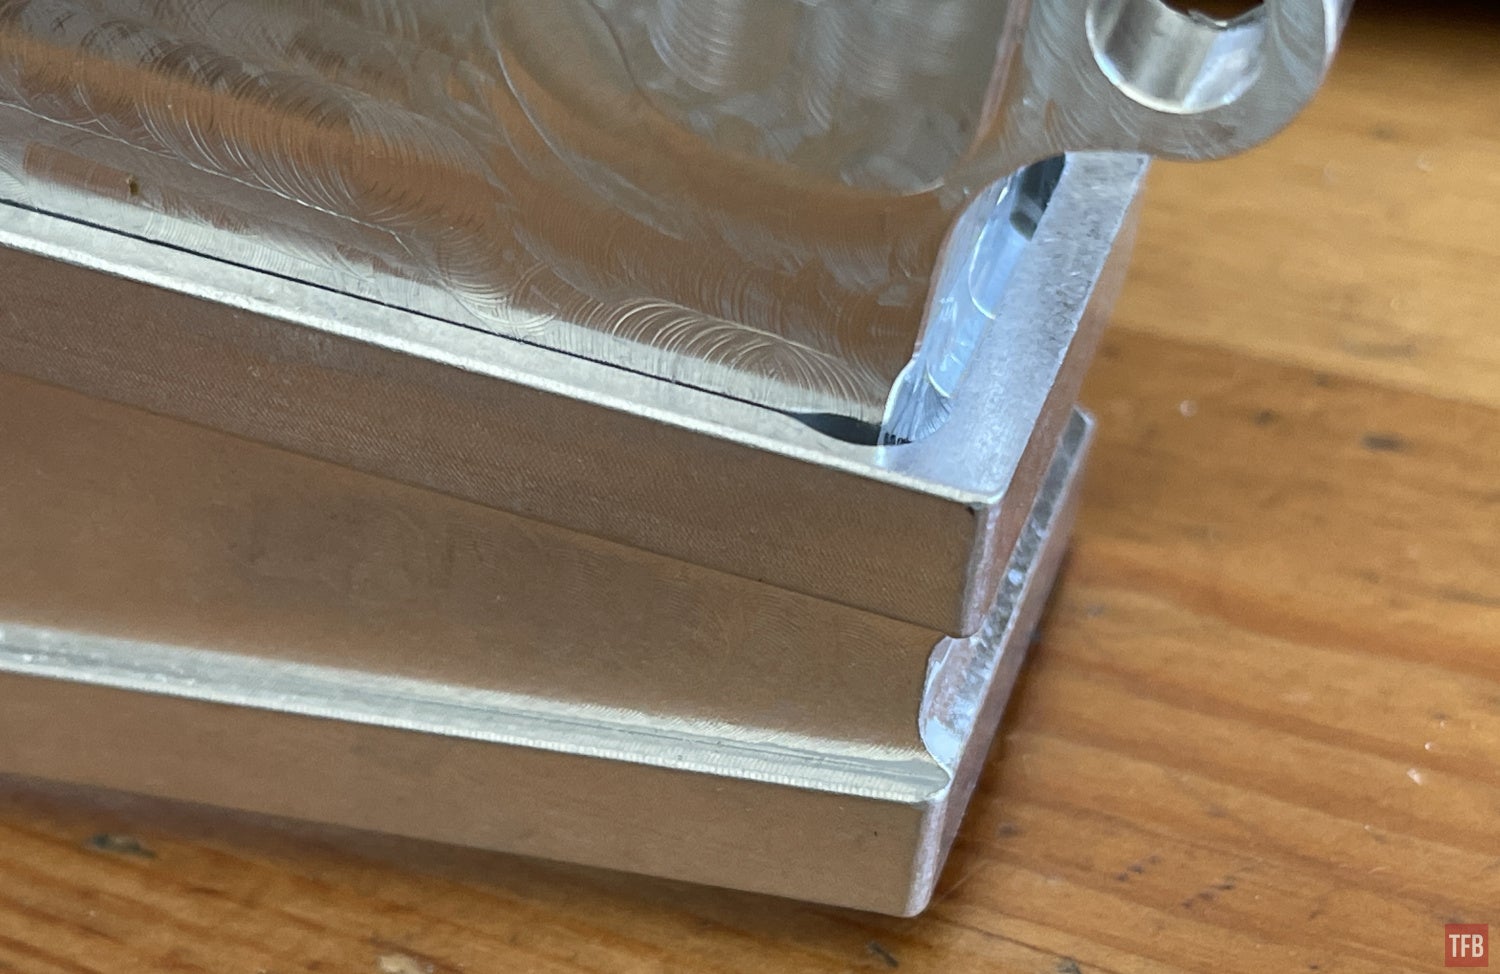
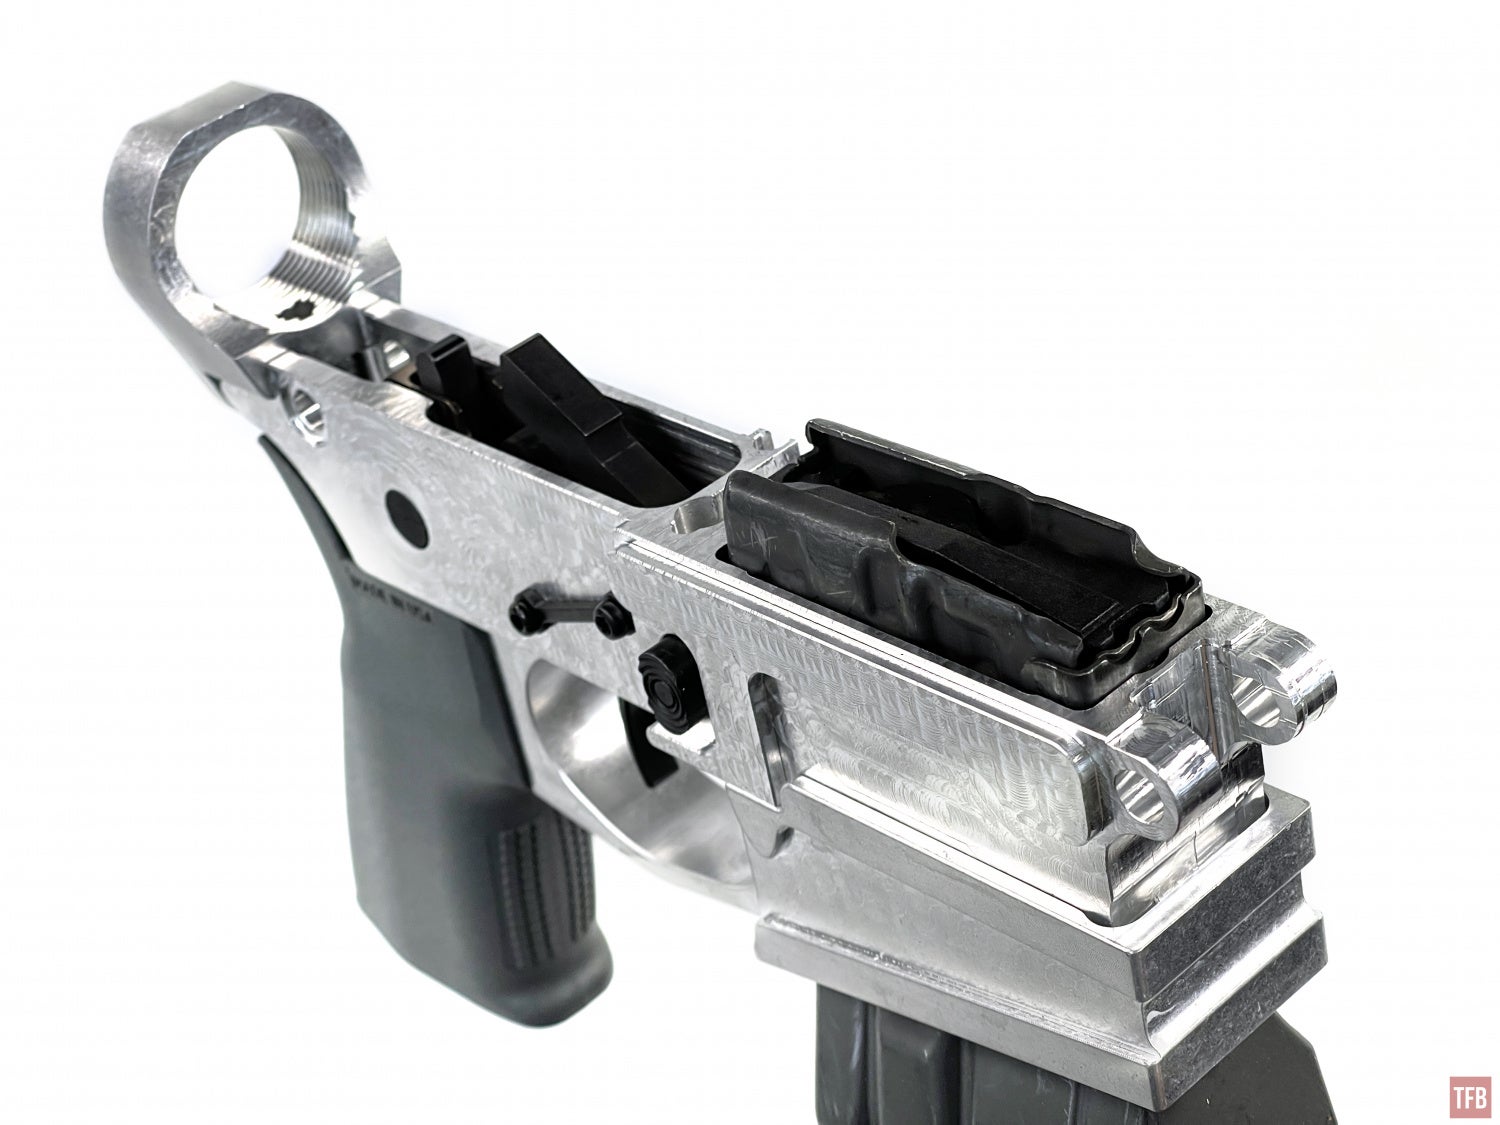
The holes in the rear of the 0% lower are for attaching the lower lower and buffer tower ring.
The curved rear beavertail section of the lower is a bit sharp so I used my Worksharp knife belt sander to smoothen out the sharp edges. Now when I run my thumb over this area, it feels smoother.
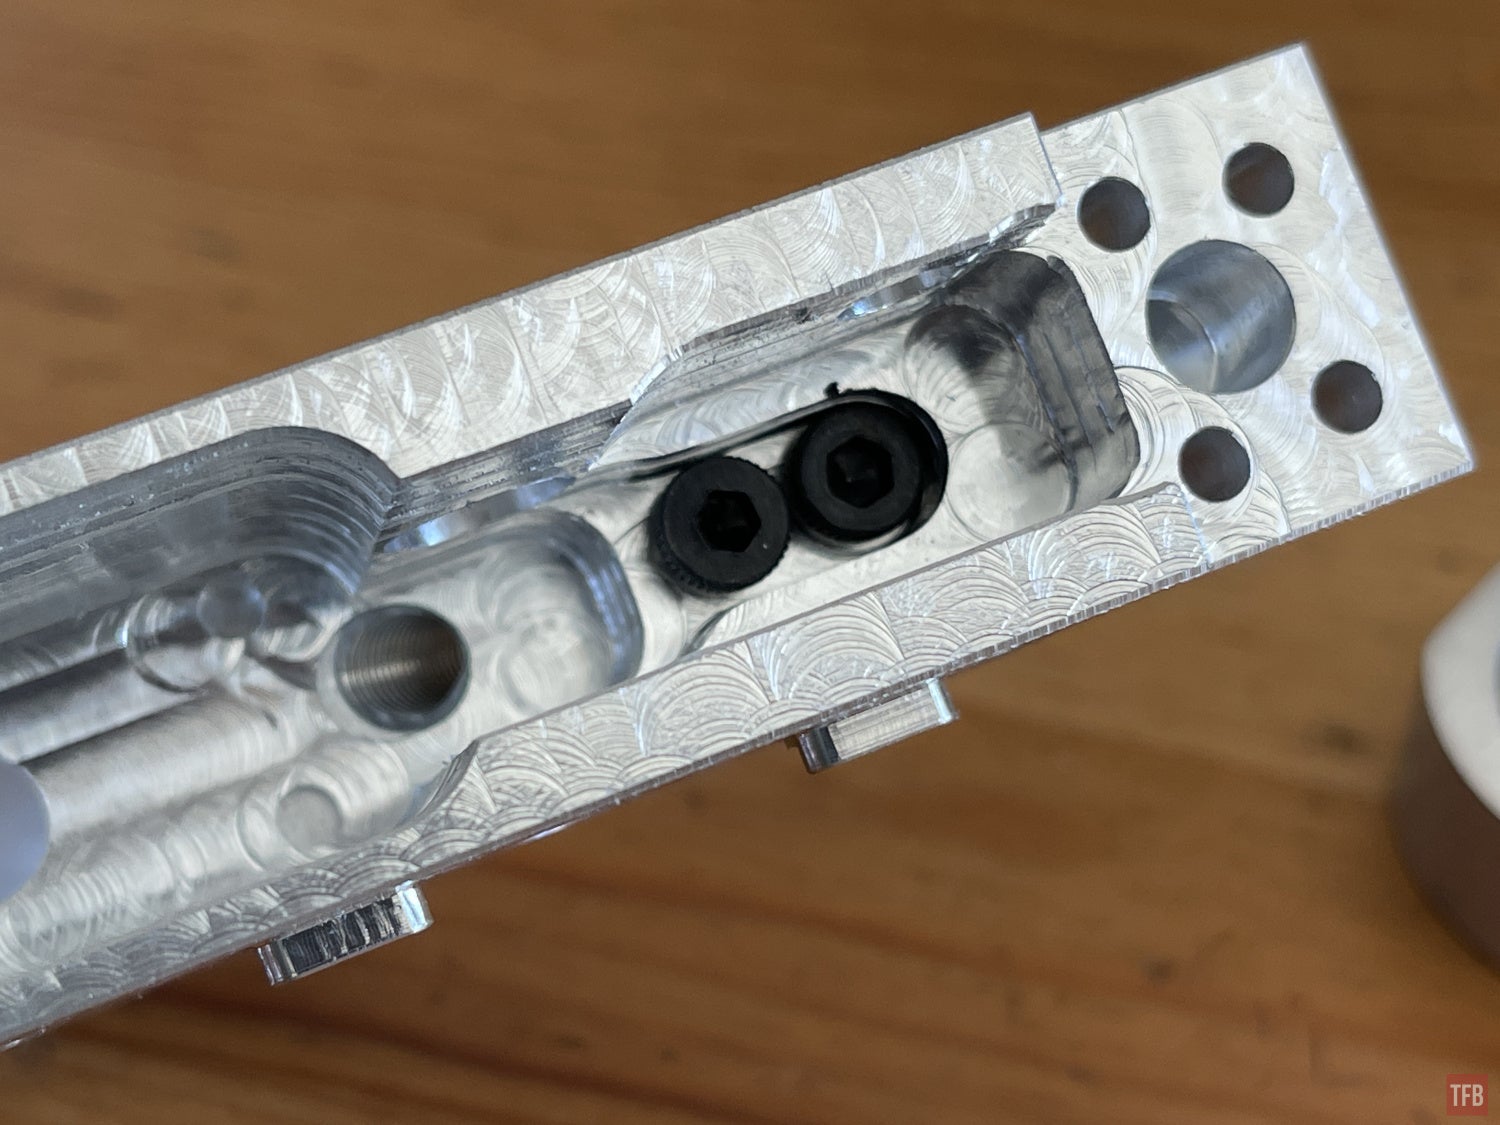
Here are the bolts that attach the upper lower to the lower lower.
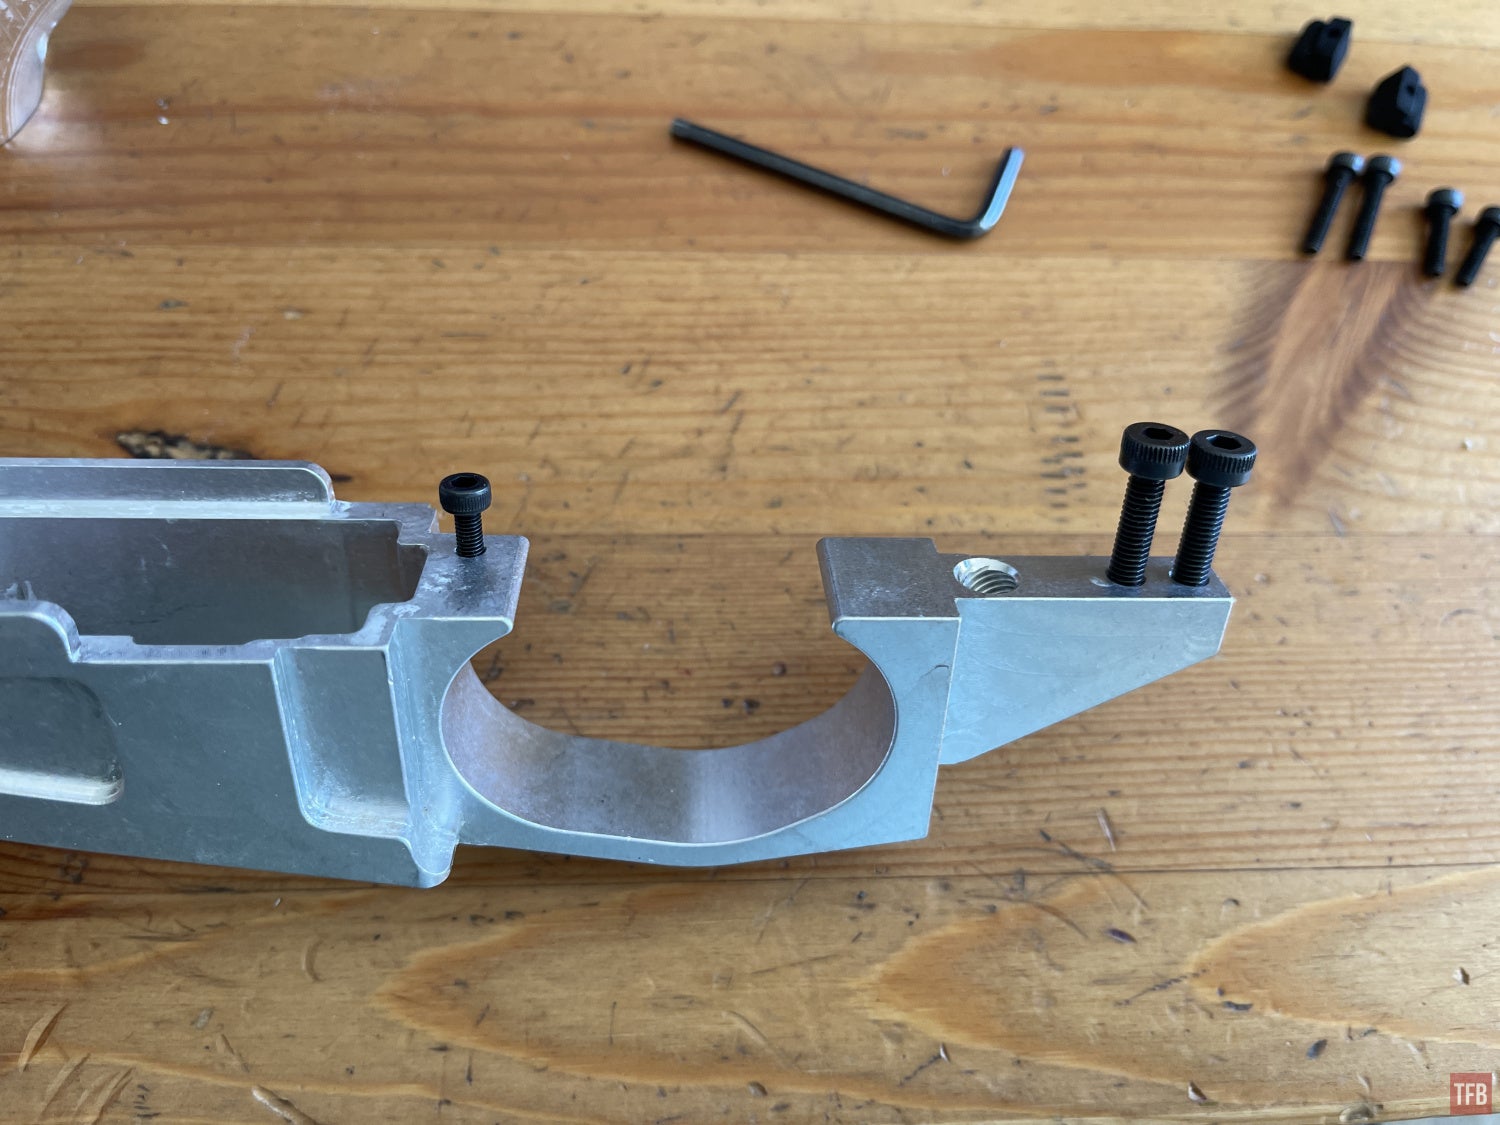
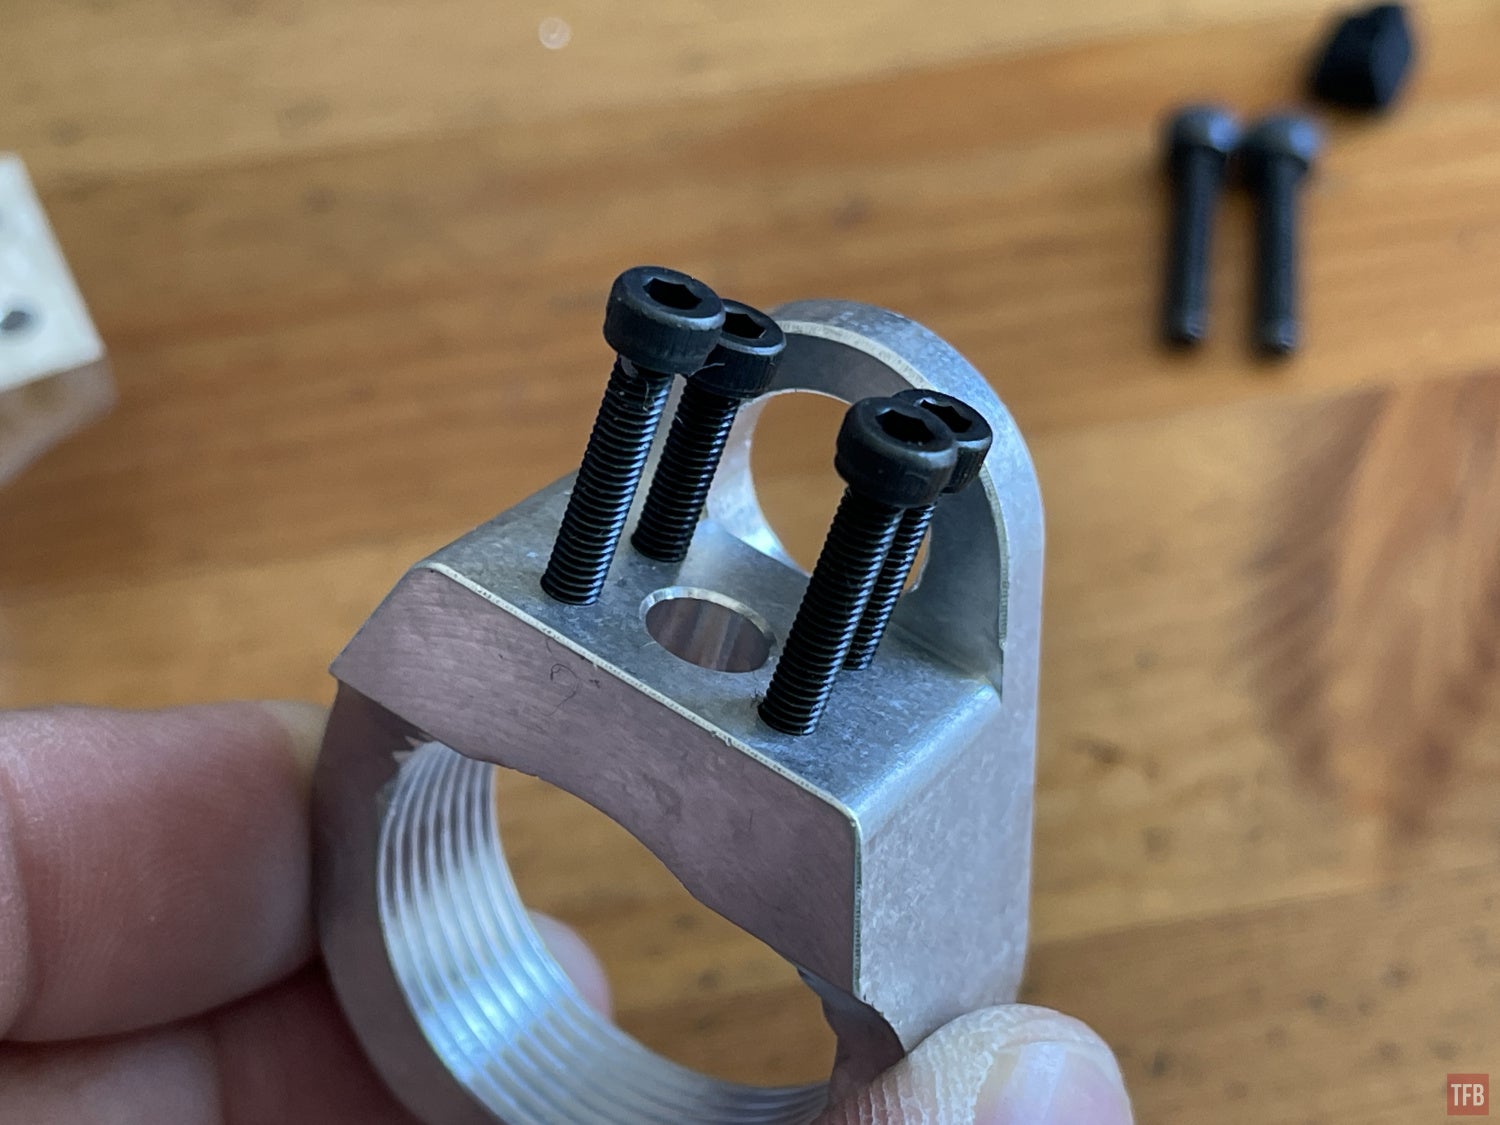
The buffer tower ring uses 4 bolts to attach it to the upper lower.

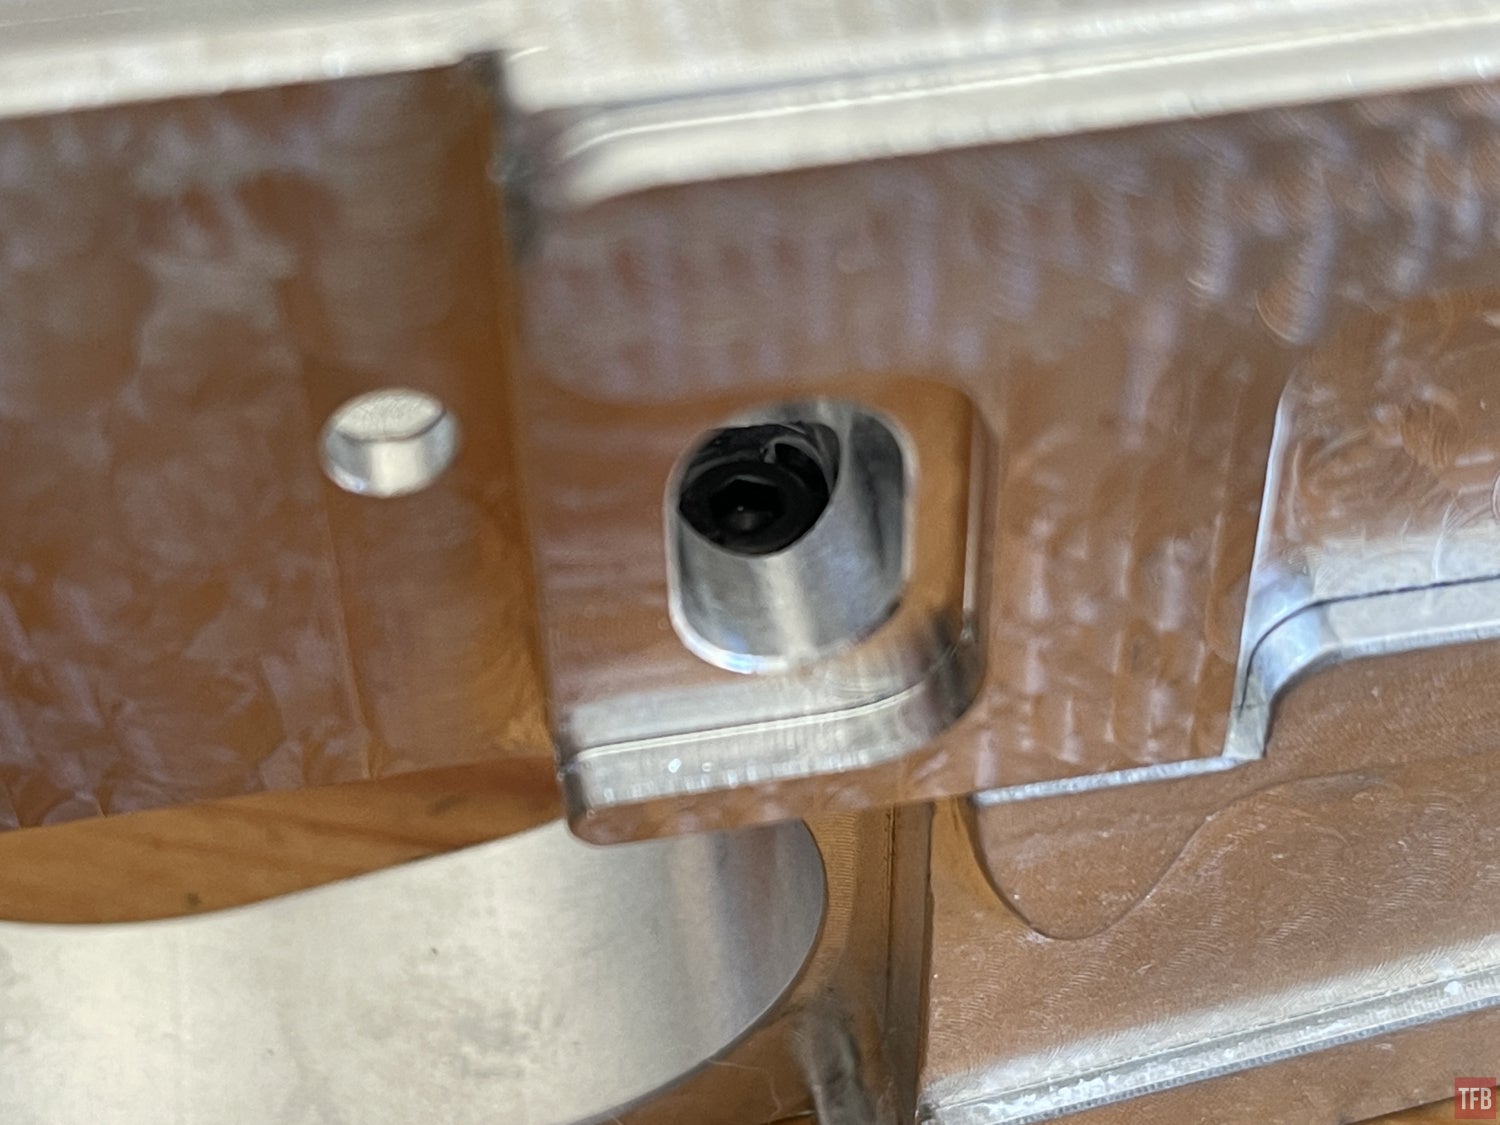
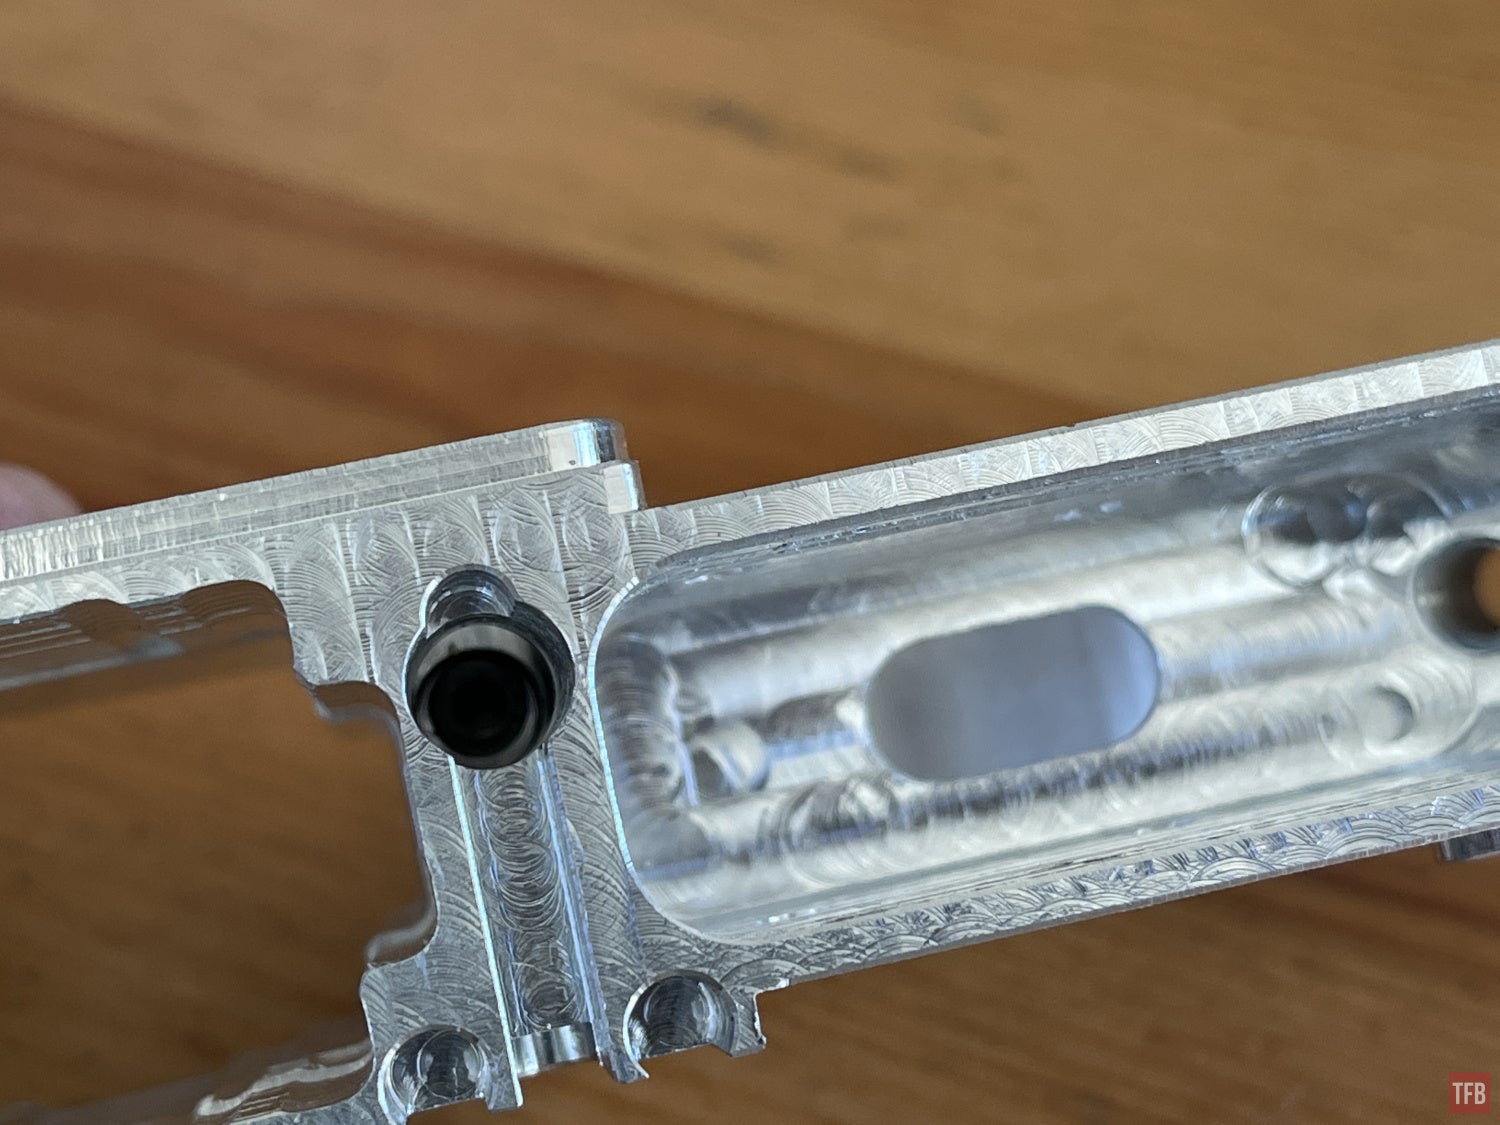
Remember that hole in the bolt catch slot? That is for the small bolt that attaches to the lower lower. You can see the bolt head through the magazine release button hole.
The lower lower is bolted at the rear with two bolts and one bolt through the mag match slot. The front has a slot and the upper lower has a tab that hooks into that slot.
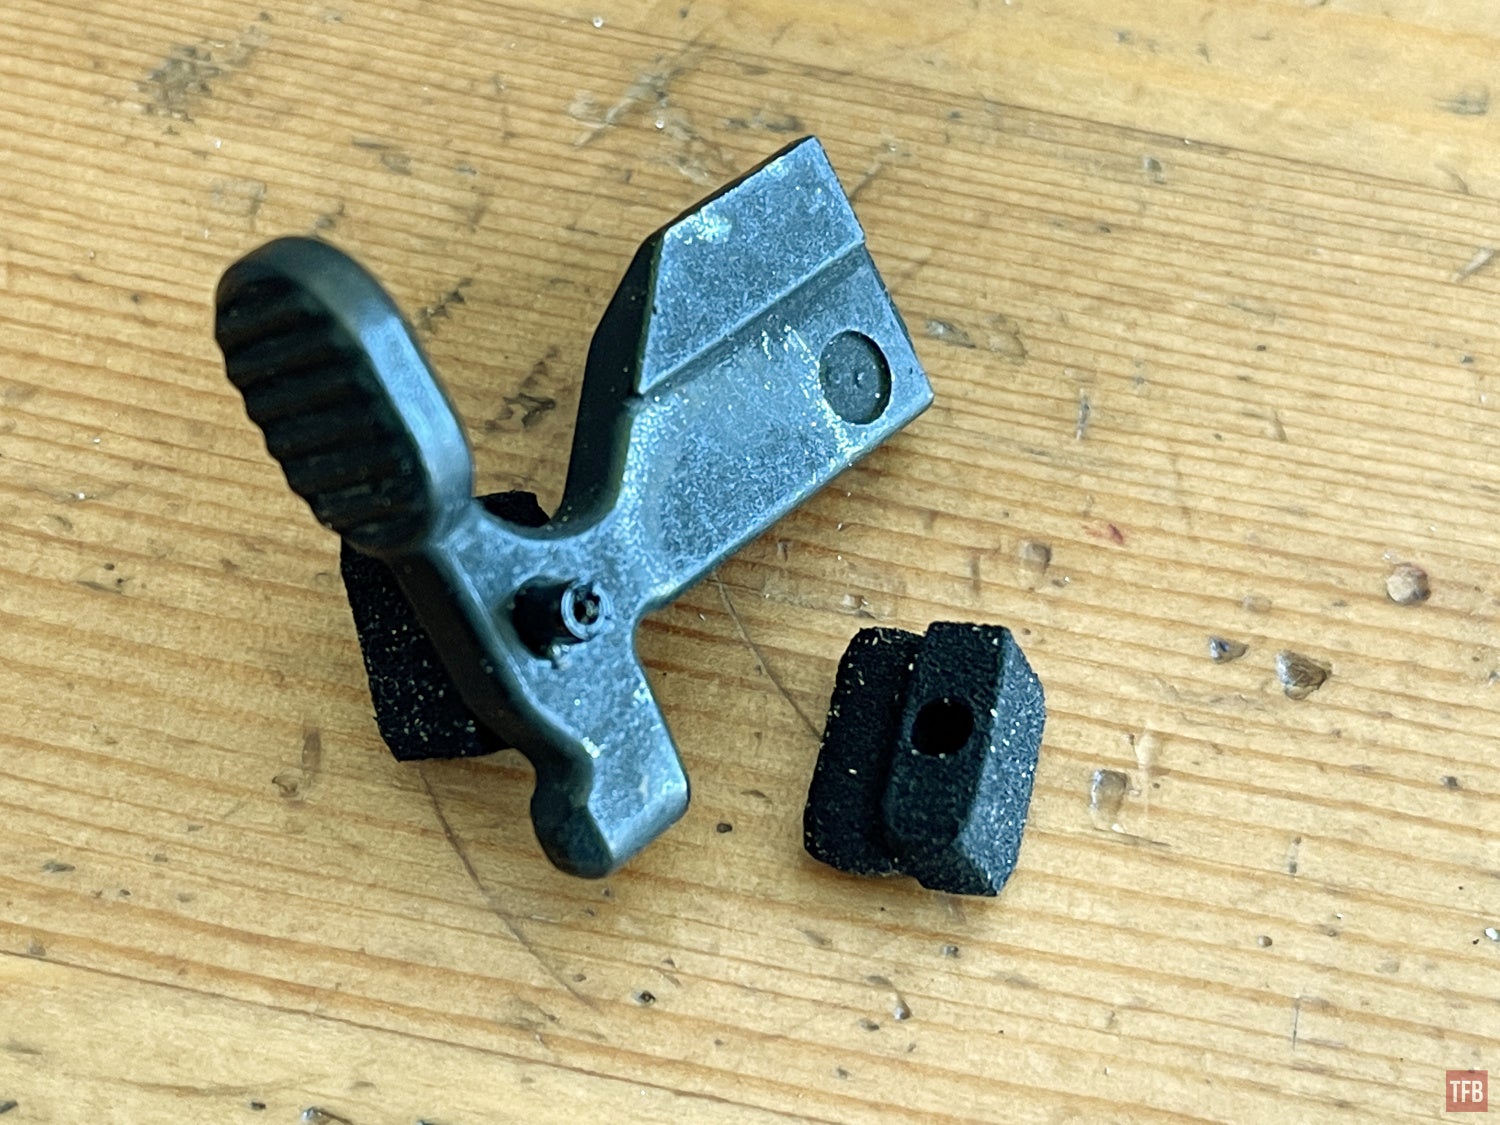
Due to the complexity, the bolt catch bosses are not machined into the 0% lower. Sure it could machine them like the safety selector tabs but drilling out the holes for the bolt catch roll pin would be too difficult for the GG3. The build space is too small and the end mill cannot reach that far. So DD designed a 3D printed bolt catch holder. You insert the roll pin into the bolt catch and cap both ends with their holders.
Install the bolt catch spring and plunger, then drop the bolt catch assembly into the 0% lower.
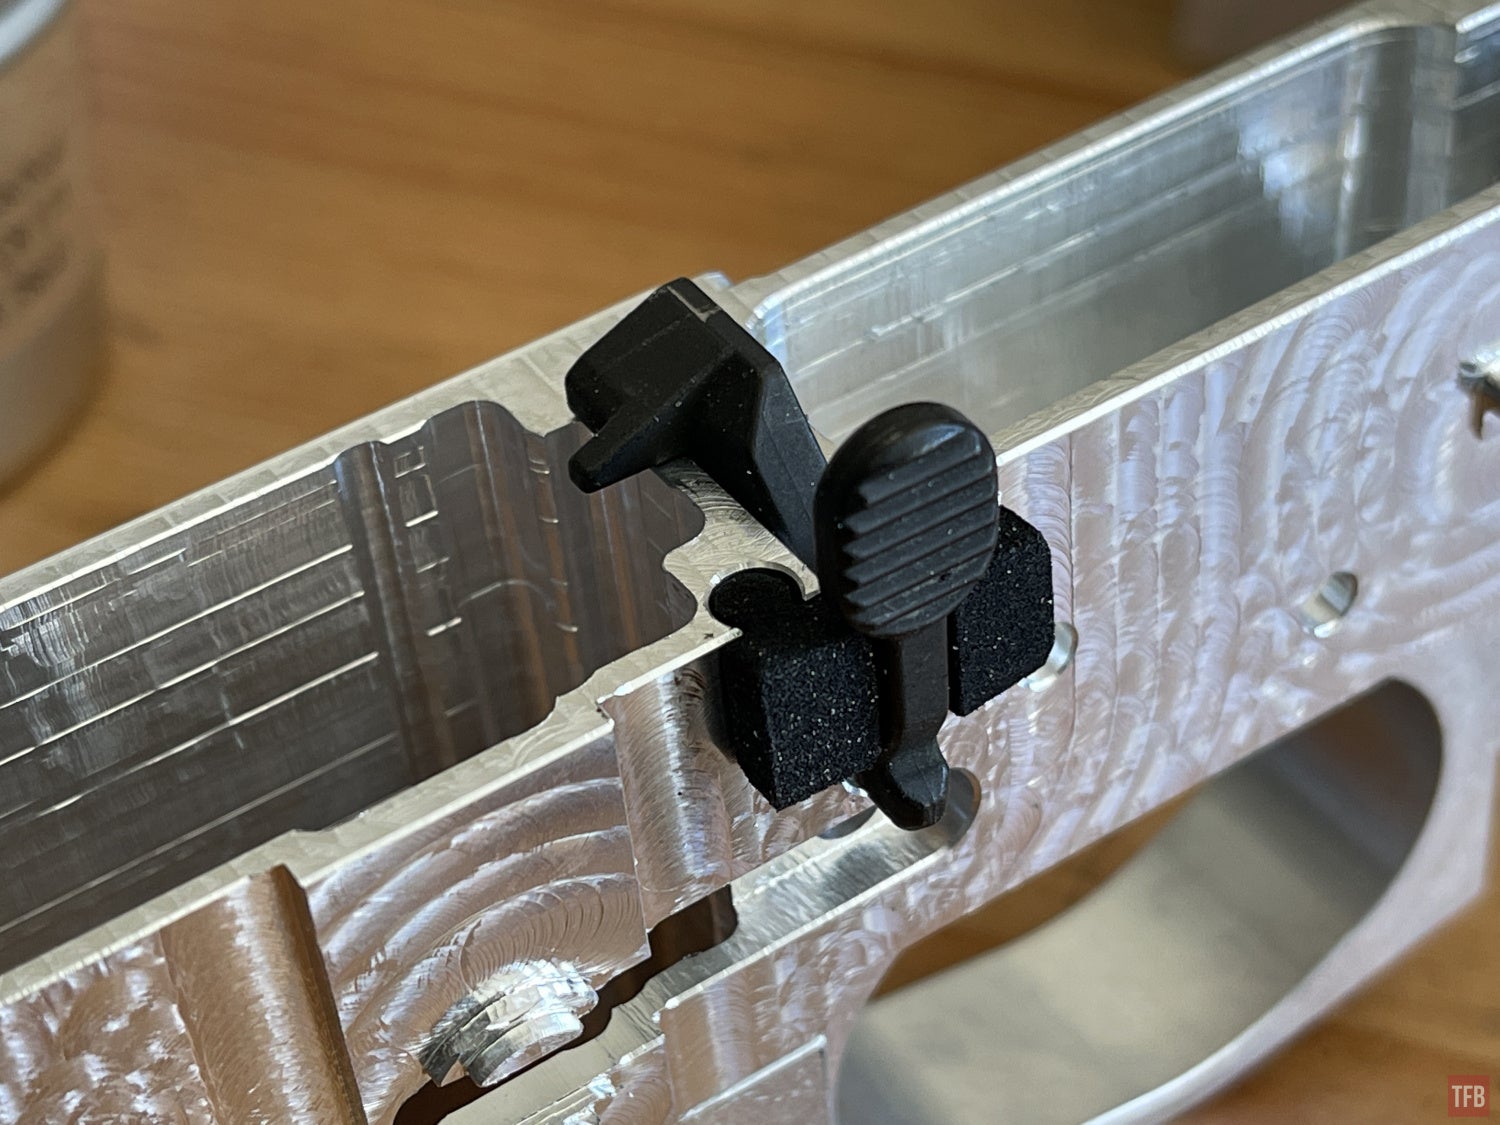
There is nothing that holds this in place other than your upper receiver. Be careful opening or removing.
I am not sure if my roll pin is out of spec, it fits the bolt catch, but it caused the bolt catch holders to crack. Andres of Ghost Gunner customer service sent me the .STL file so I can print replacements. I am not sure how well FDM 3D print will work since the ones they provided look to be MJF.
Shooting The 0% Lower
One of the minor issues I had is the takedown pins. Ghost Gunner does not include them. But more importantly, you do not use regular takedown pins. They recommend the following:
We recommend KNS Push-Button Pivot/Takedown Pins for completing your build, traditional takedown pins may experience retainment issues.
The problem I had was this information is somewhat buried in their website. It shows up when you click on their Zero Percent Lower Build Kit. It is not mentioned under their starter kit or their non-receiver block page. I would have liked them to add this information to DDCUT when you finish milling. A simple warning sign before you complete the job.
There is a cute little Easter egg after you finish the last job.
I assembled the 0% lower and tried to use an FRT trigger but the tolerances of the lower and the buffer tube I used seemed to be too much for the trigger to function properly. It would fire but have failures to reset the hammer.
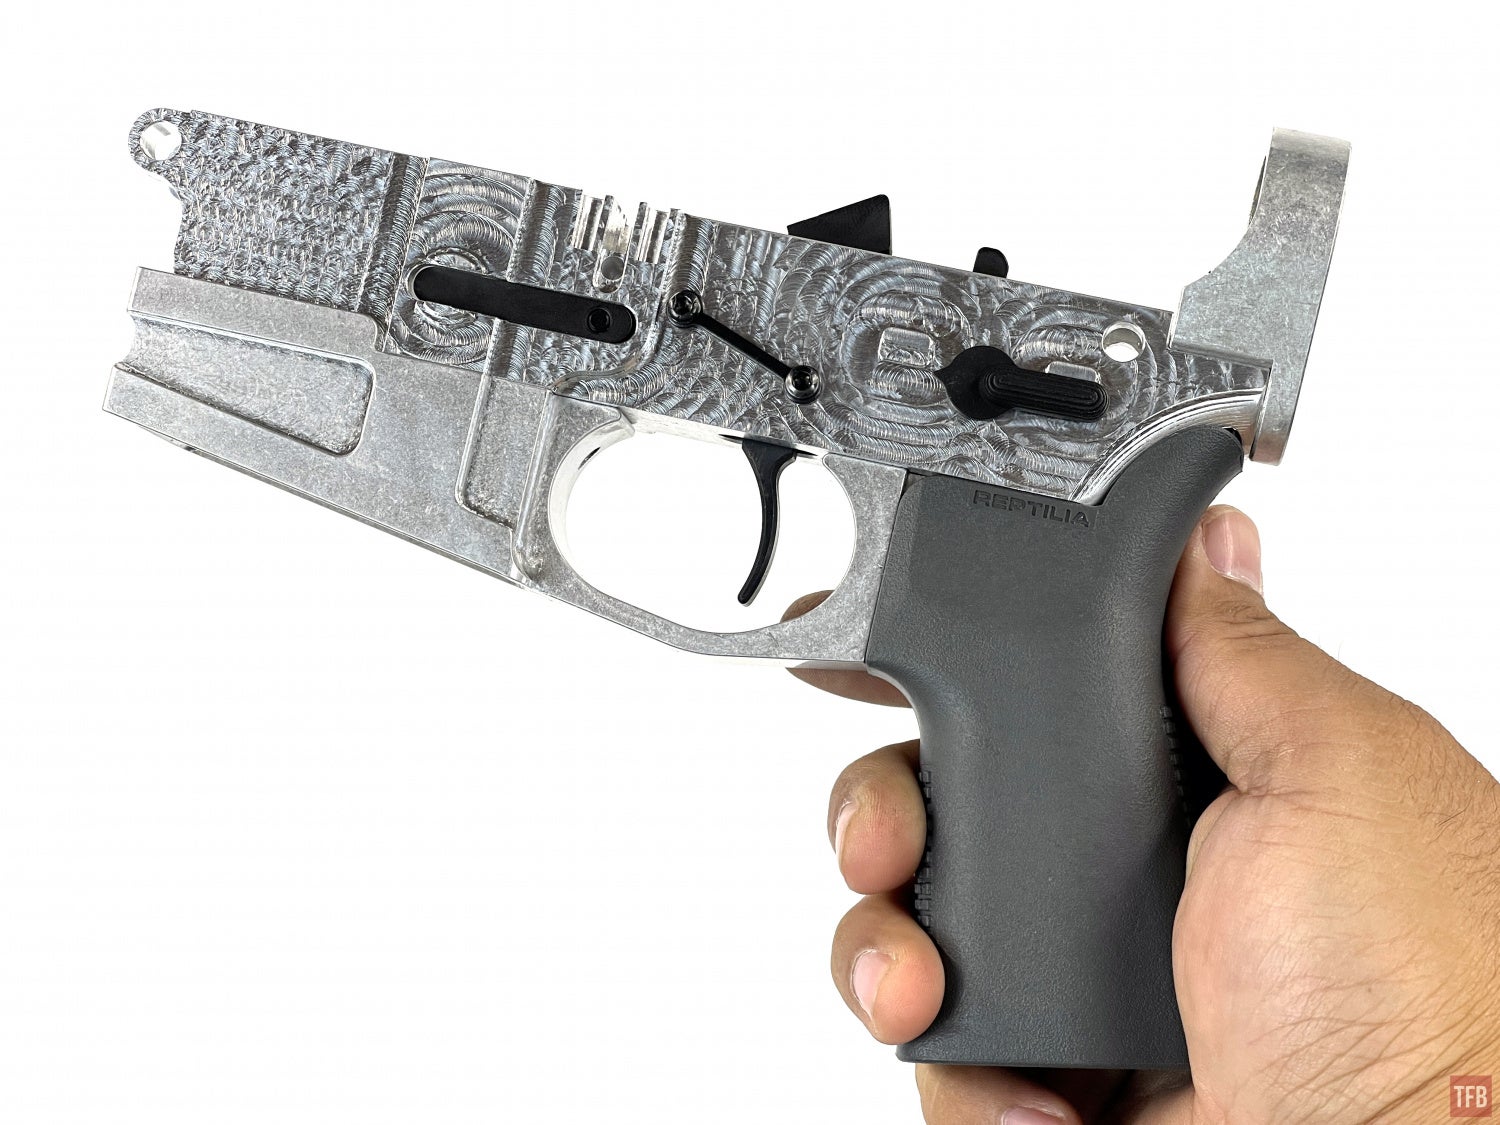

I removed the FRT and installed a Geissele trigger.
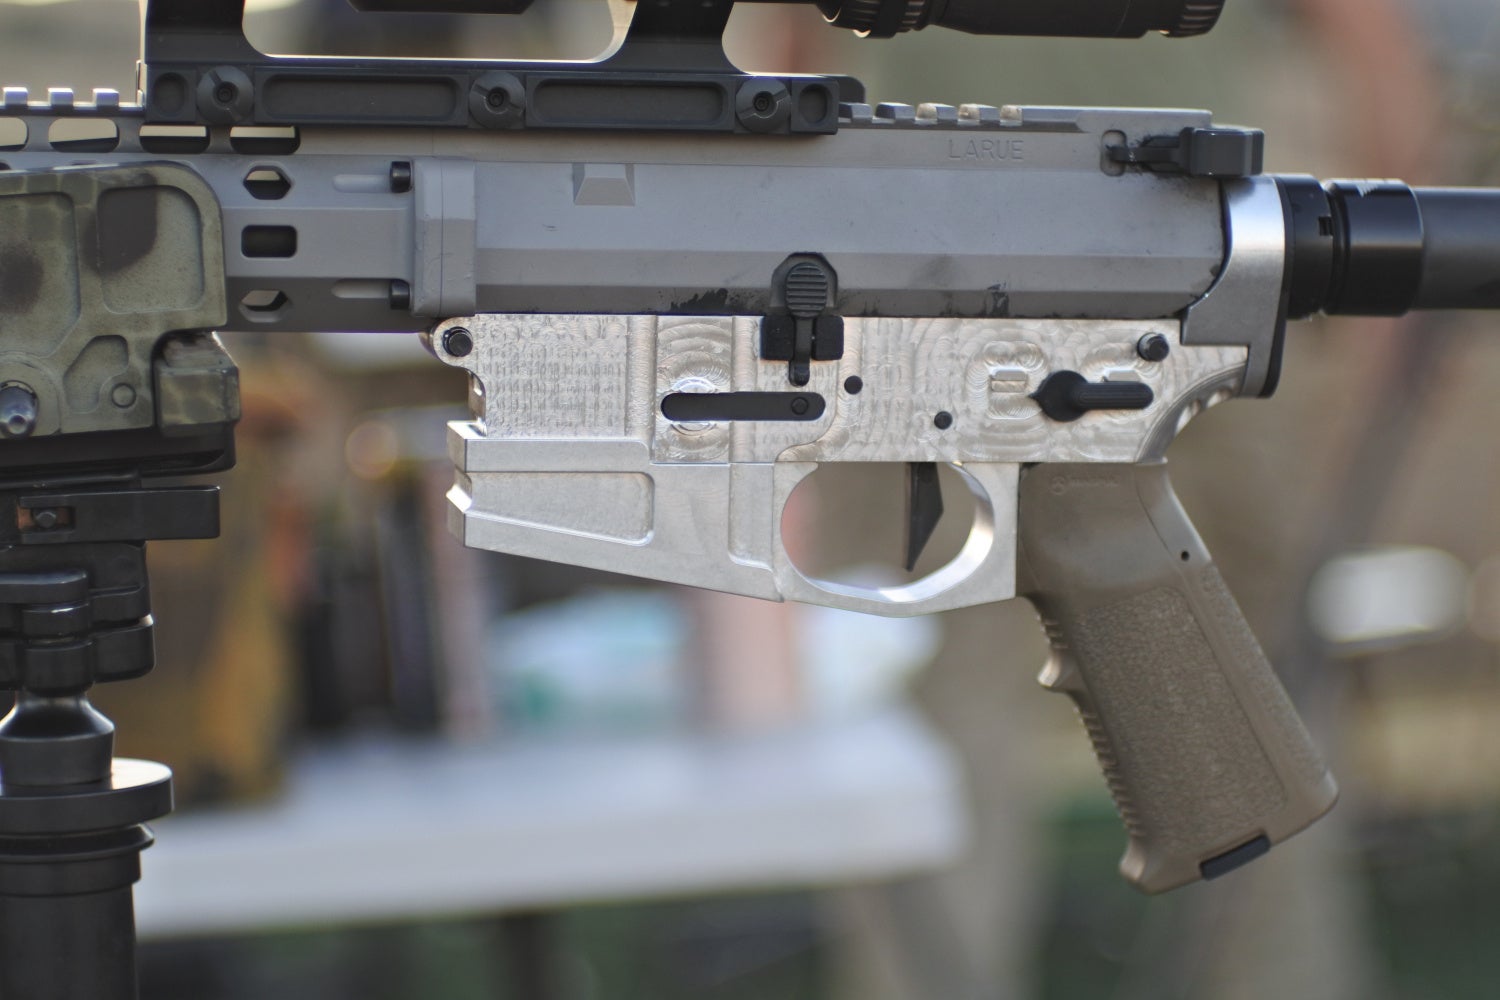
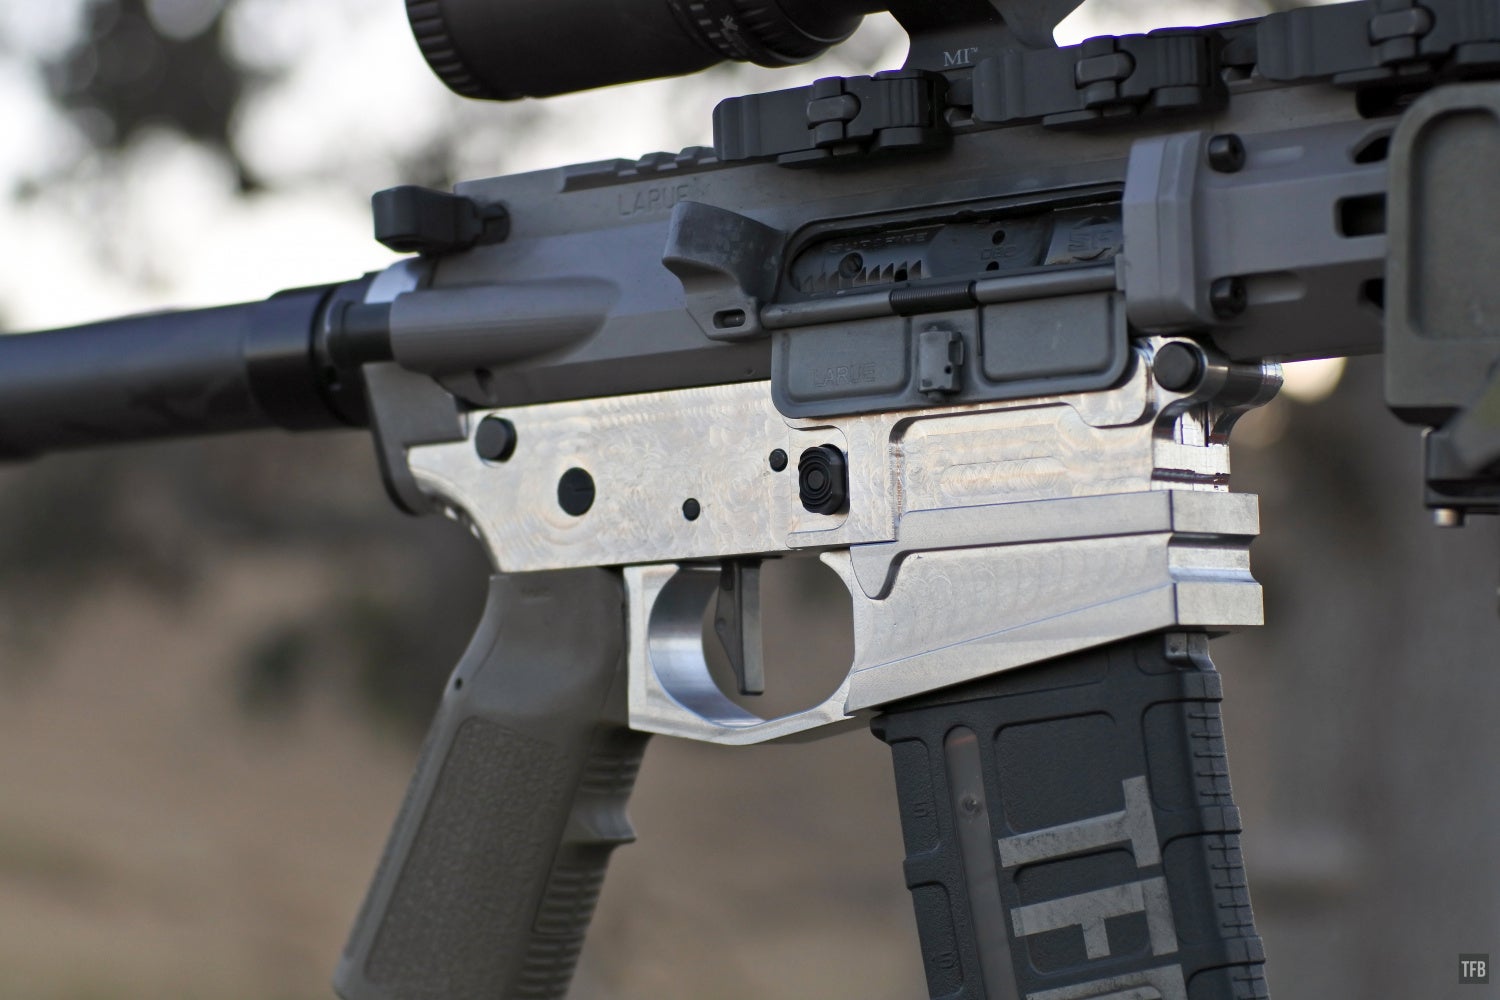
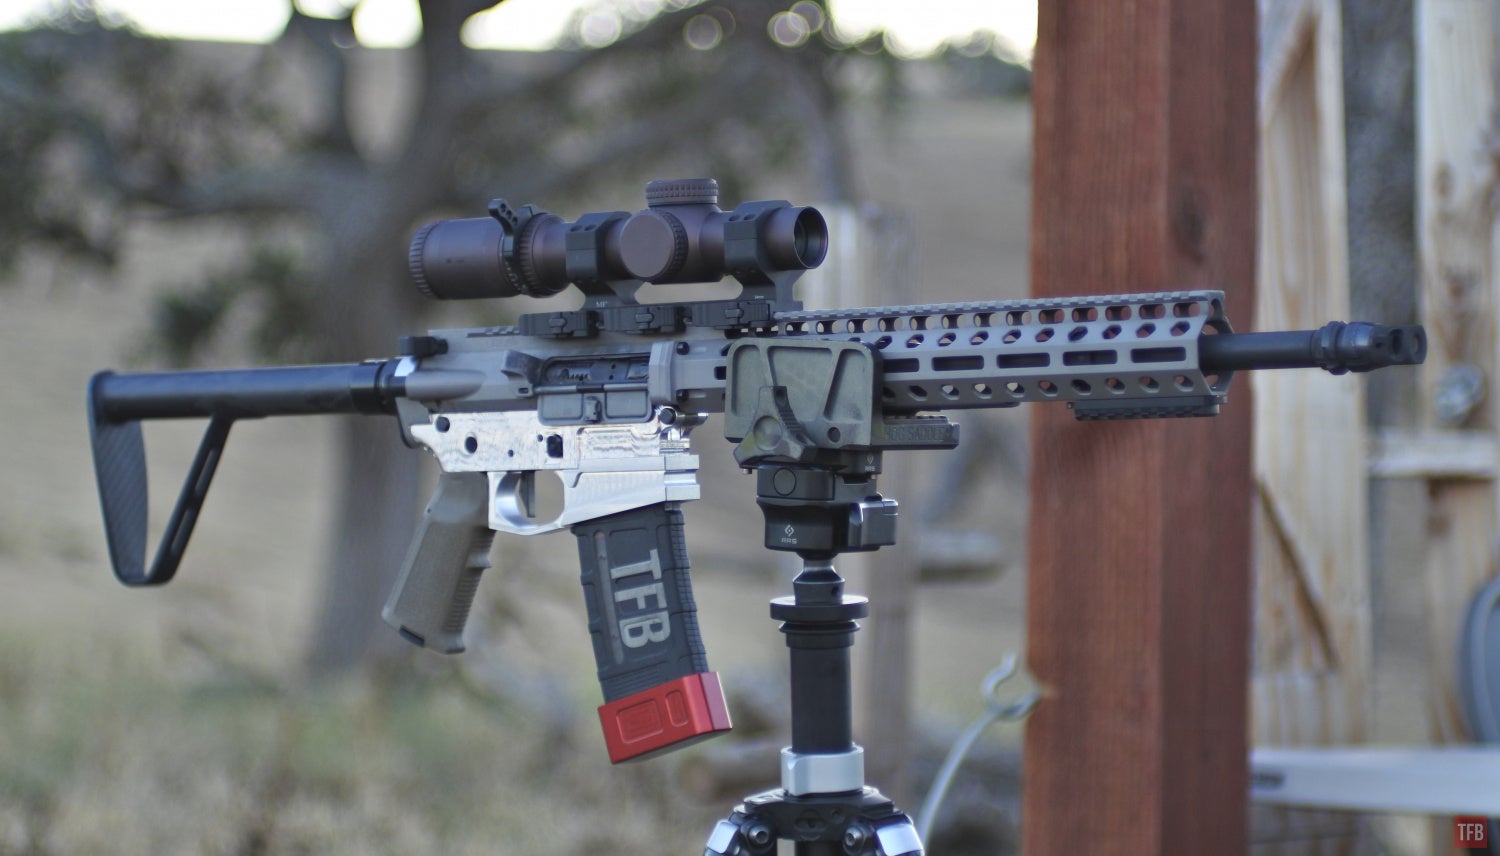
Success, it shoots. I had some other issues with ejection but I think that is due to the BCG.
Final Thoughts On The GG 0% Lower
When Defense Distributed announced a 0% lower, I was excited. When it came out, I was a little bit disappointed since the lower was broken up into three parts. The actual receiver is a $25 block of aluminum. The trigger guard/lower magwell is considered the lower lower and that along with the buffer tower ring cost an additional $85. You are in a sense paying $115 for a 0% receiver and that does not include tooling and clamps which is another $295. Defense Distributed plans to offer the code to machine the lower lower and buffer tube tower in the future. Ideally, you can 100% machine a lower from nothing more than a block of aluminum. I would have liked to have seen a single block turned into a functioning lower without having to bolt parts together but I understand why they went this route. Once the rest of the 0% lower is offered along with the proper tooling, then you can truly make an AR-15 lower out of raw blanks of aluminum.
For more information about the 0% lower, check out Ghost Gunner’s website. A big thanks to the Defense Distributed community for their assistance along with Andres of Ghost Gunner Customer Service.