 Your Privacy Choices
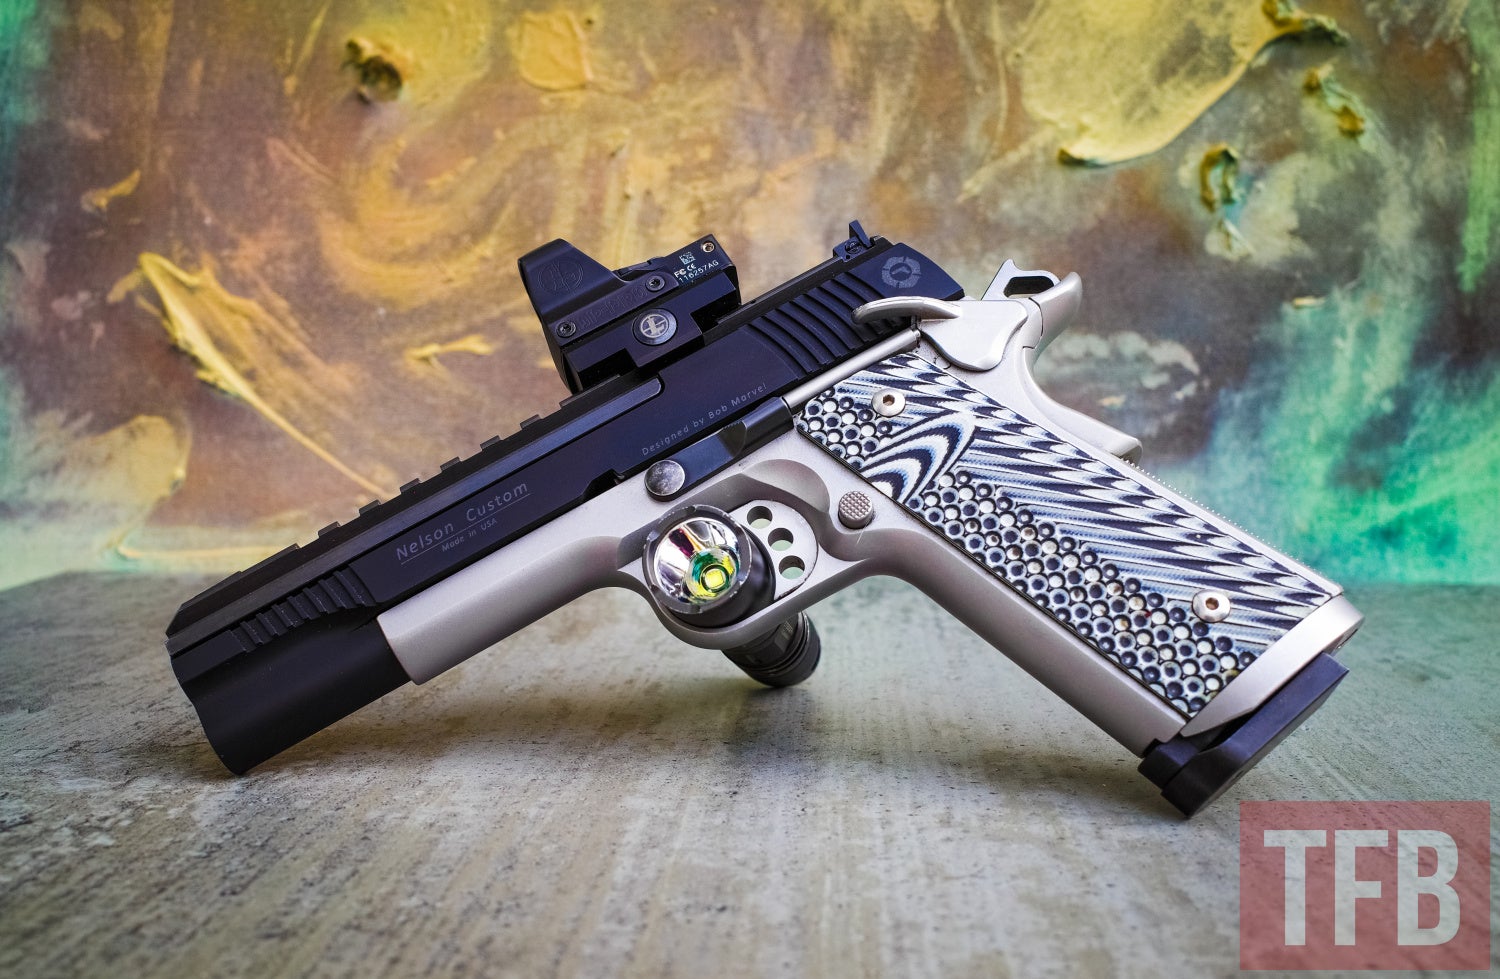
My New Year’s resolution for 2021 was to take stock of what I have, use what I’ve got, and stop compulsively internet shopping for more shit. With that in mind, I did an ammunition inventory and discovered that while my stock of 9mm practice ammo will hopefully carry me through another couple of years, I also have (if I don’t get too trigger happy) a lifetime supply of .22 Long Rifle ammo. My primary handgun for training and home defense is a Dan Wesson TCP 1911 in 9mm, so my goal was to find a reliable, accurate, .22LR 1911 conversion kit as a training aid that didn’t burn my dwindling supply of 9mm. For the tl;dr people, I’ll say right now that the Nelson Custom conversion kit I got is working out very well in its intended role. For those who want details, here you go.
Rimfire Conversion Kits @ TFB:
- Review: TacSol 2211 – 2011/1911 .22LR Conversion Kit
- The Rimfire Report: Rare Fleming .22LR HK94/MP5 Conversion Kit
- CMMG Introduces Mk57 .22LR Conversion Kit
- The Rimfire Report: The Best Rimfire Replacement Firearms to Train With
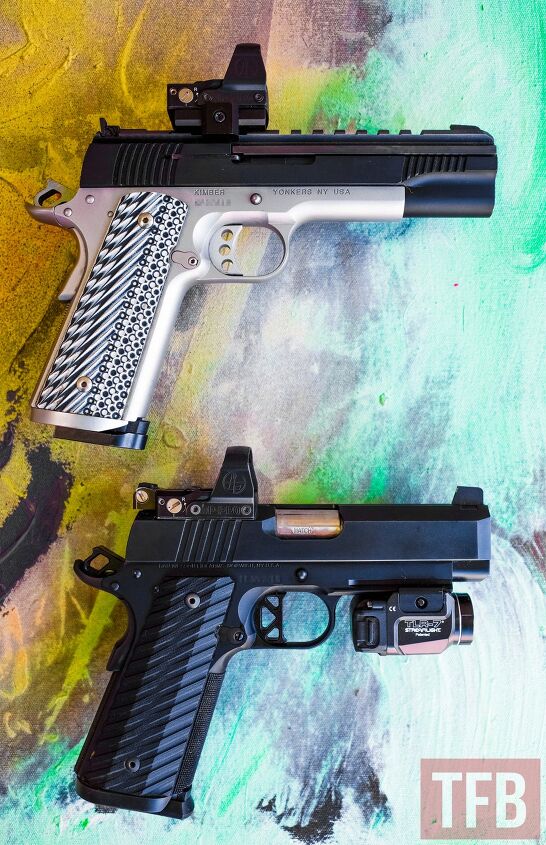
Top: Nelson Custom Guns slide on Kimber frame. Bottom: Dan Wesson TCP
Here’s What I Got, and Why
Before I begin, a quick word about me and why a 1911: I don’t consider myself to be a firearm or shooting expert, but I am an unusually well-trained up user with 20 years of shooting experience, and I’m definitely not a Fudd. I’m aware that a large, heavy, low capacity, 110+ year old pistol is perhaps not ideal for a variety of self-defense scenarios, but I’ve shot a lot of handguns over the last two decades, and I shoot 1911’s far better than any other pistol I’ve tried. Therefore I’m willing to accept the 1911’s capacity limitation and sometimes finicky temperament. Plus I always keep my sweet-ass OD green Glock 26 and a 9mm Glock mag carbine at the ready, just in case.

Home defense gear in 9mm: JP Rifles GMR-13 9mm carbine with California compliant Thordsen Customs stock, Glock 26, Dan Wesson TCP
There are several 1911 conversion kits on the market, but since the host gun for this project is my old Kimber Stainless Target II 1911 (that’s been gathering dust in the safe since I got the Dan Wesson 1911), I first looked for a Kimber factory conversion kit. Keep in mind that this project of mine was starting in the first few months of 2021, and both guns and ammo were extremely scarce. I couldn’t find the Kimber Rimfire Conversion Kit ($361) in stock anywhere, which wasn’t a tragedy to me because it doesn’t lock open on an empty magazine like my centerfire 1911 does, and I would have had to drift out the rear sight and get an adapter plate from Evolution Gun Works to mount a red dot. Marvel Precision makes highly-esteemed and highly-priced ($585) 1911 conversion kits that have all the features I was looking for, but I didn’t get one because all the units I could find for sale had threaded barrels. The problem is that I live in California, which is home to a thousand nonsensical gun laws. Threaded barrels, even for rimfire pistols, are illegal.
Nonetheless, further searching brought me to Nelson Custom Guns, who make an updated Bob Marvel-designed conversion kit ($575) and they had a non-threaded barrel option available to order.
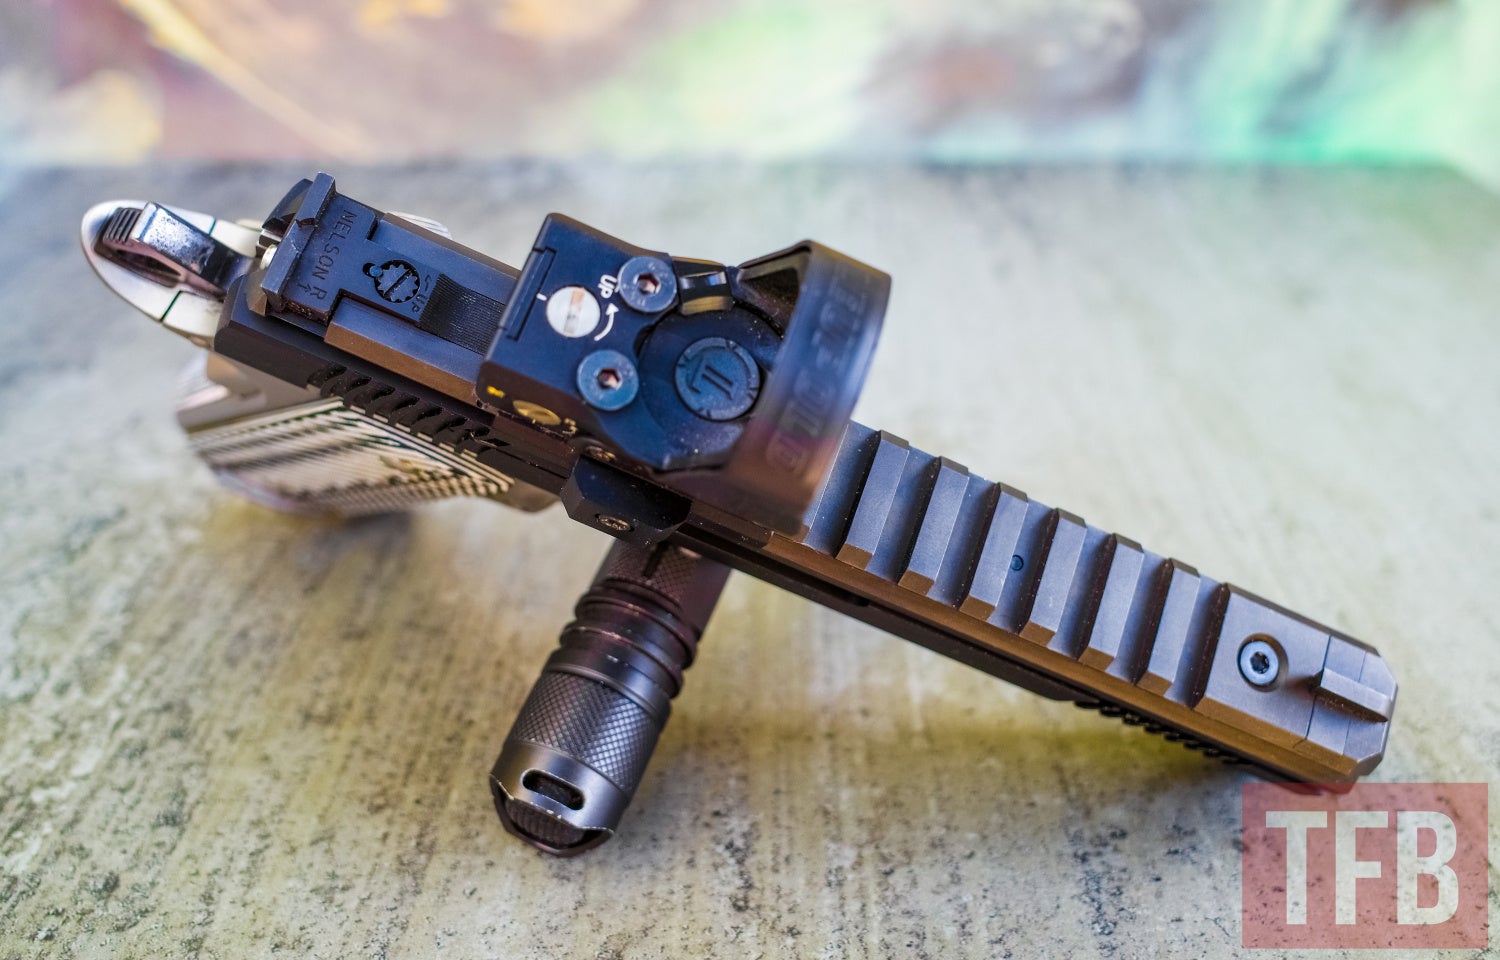
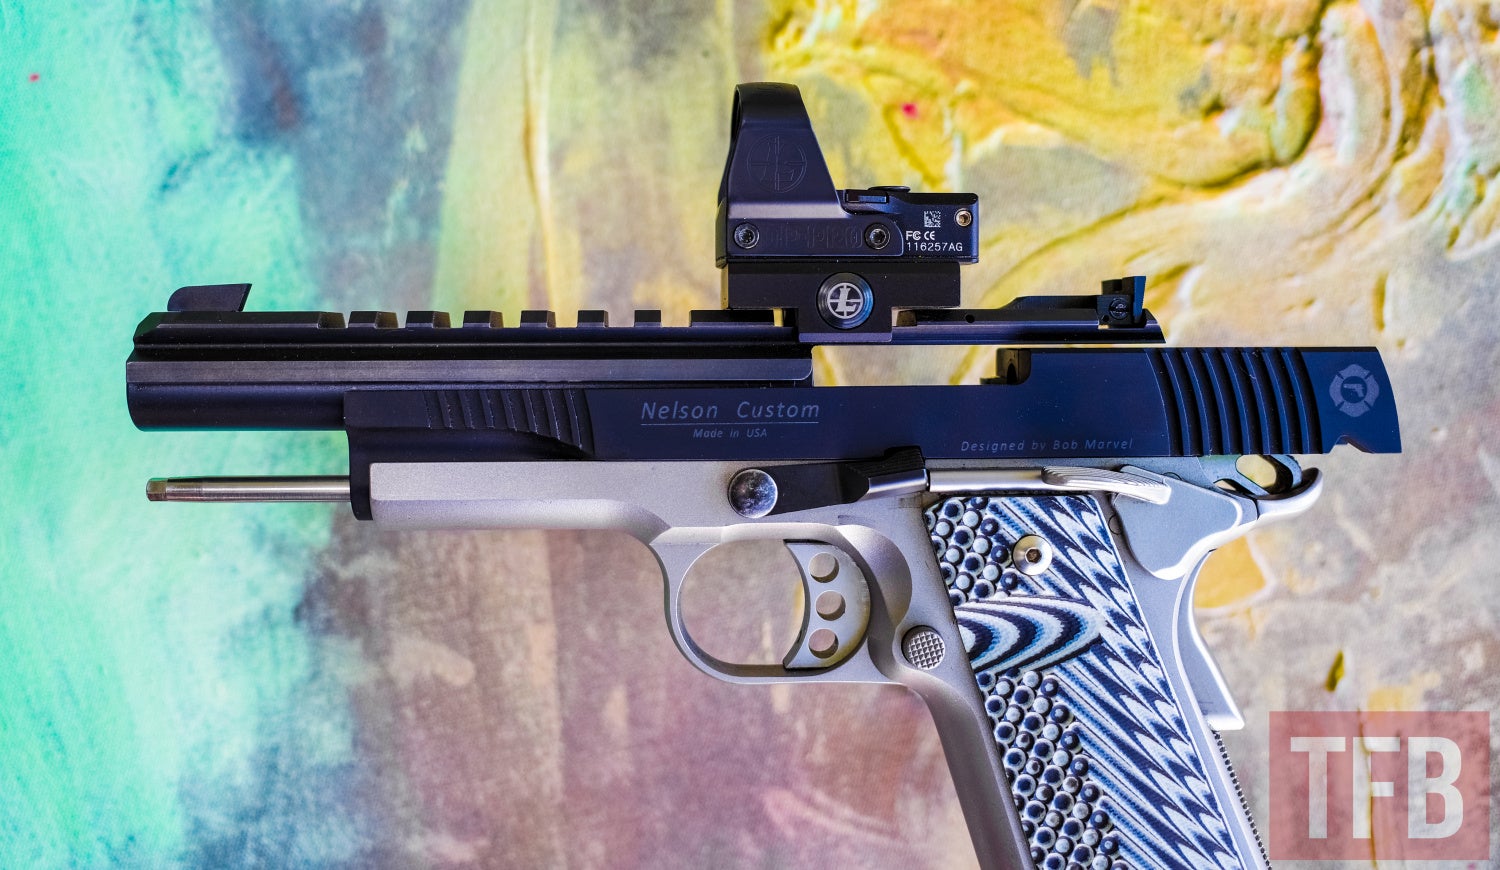
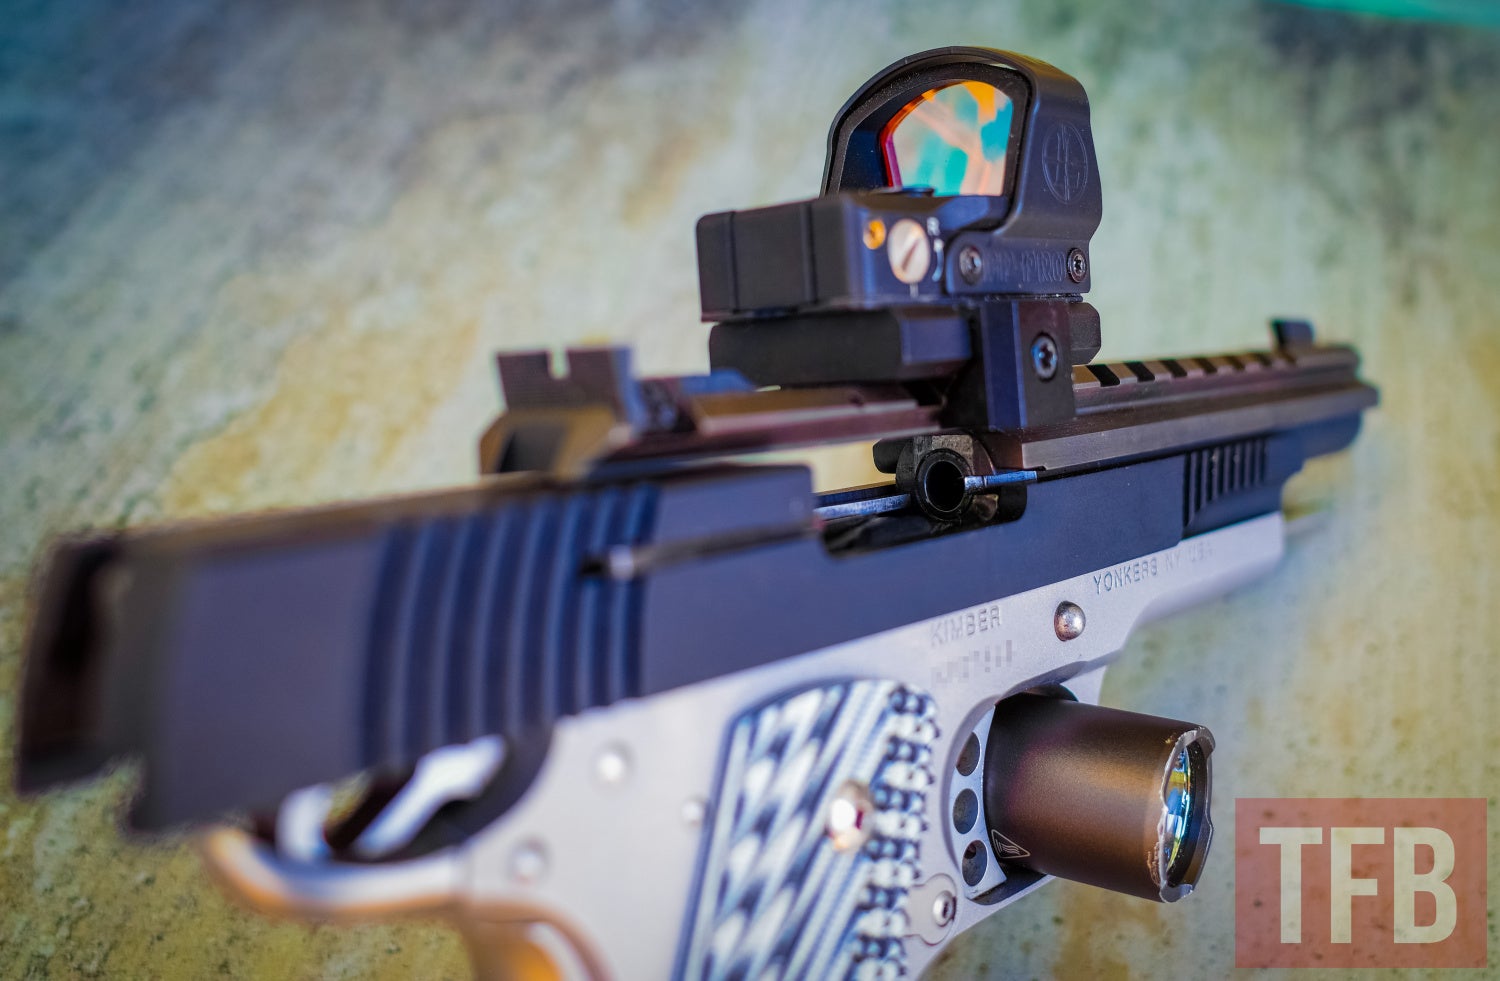
Nelson Custom top rail with adjustable rear sight
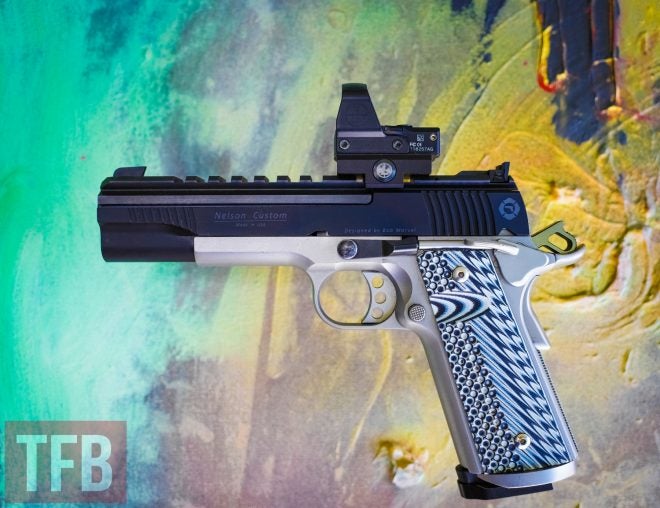
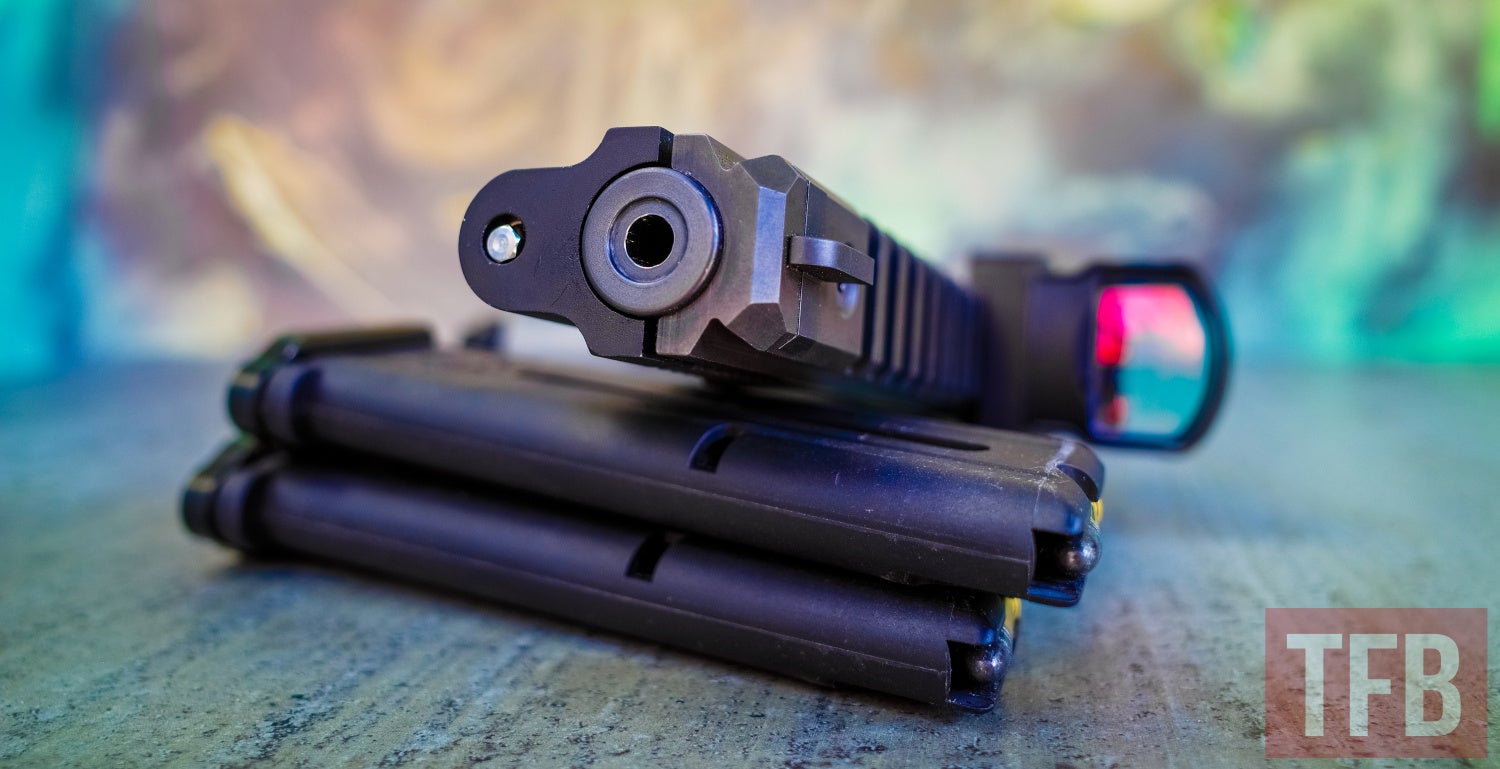
The other options I chose were to get a top Picatinny rail, rear sight with a square blade (my only regret on this build – more on that later), steel baseplates for the polymer magazines, three recoil springs with different weights for fine-tuning the action, and the “Standard” chamber option. Nelson’s website describes the Standard chamber as “Good with all ammo, standard or high velocity”. The other chamber option is the Bullseye, described as “Tight chamber optimized for standard velocity, may not work well with Mini-mag etc.” I chose reliability over accuracy, because I like it when my guns work. I used a Leupold DeltaPoint Pro Cross Slot Mount (ordinarily $50 but I got a blemished one at MidwayUSA for $15 – score!) to attach a DeltaPoint Pro that I already had.
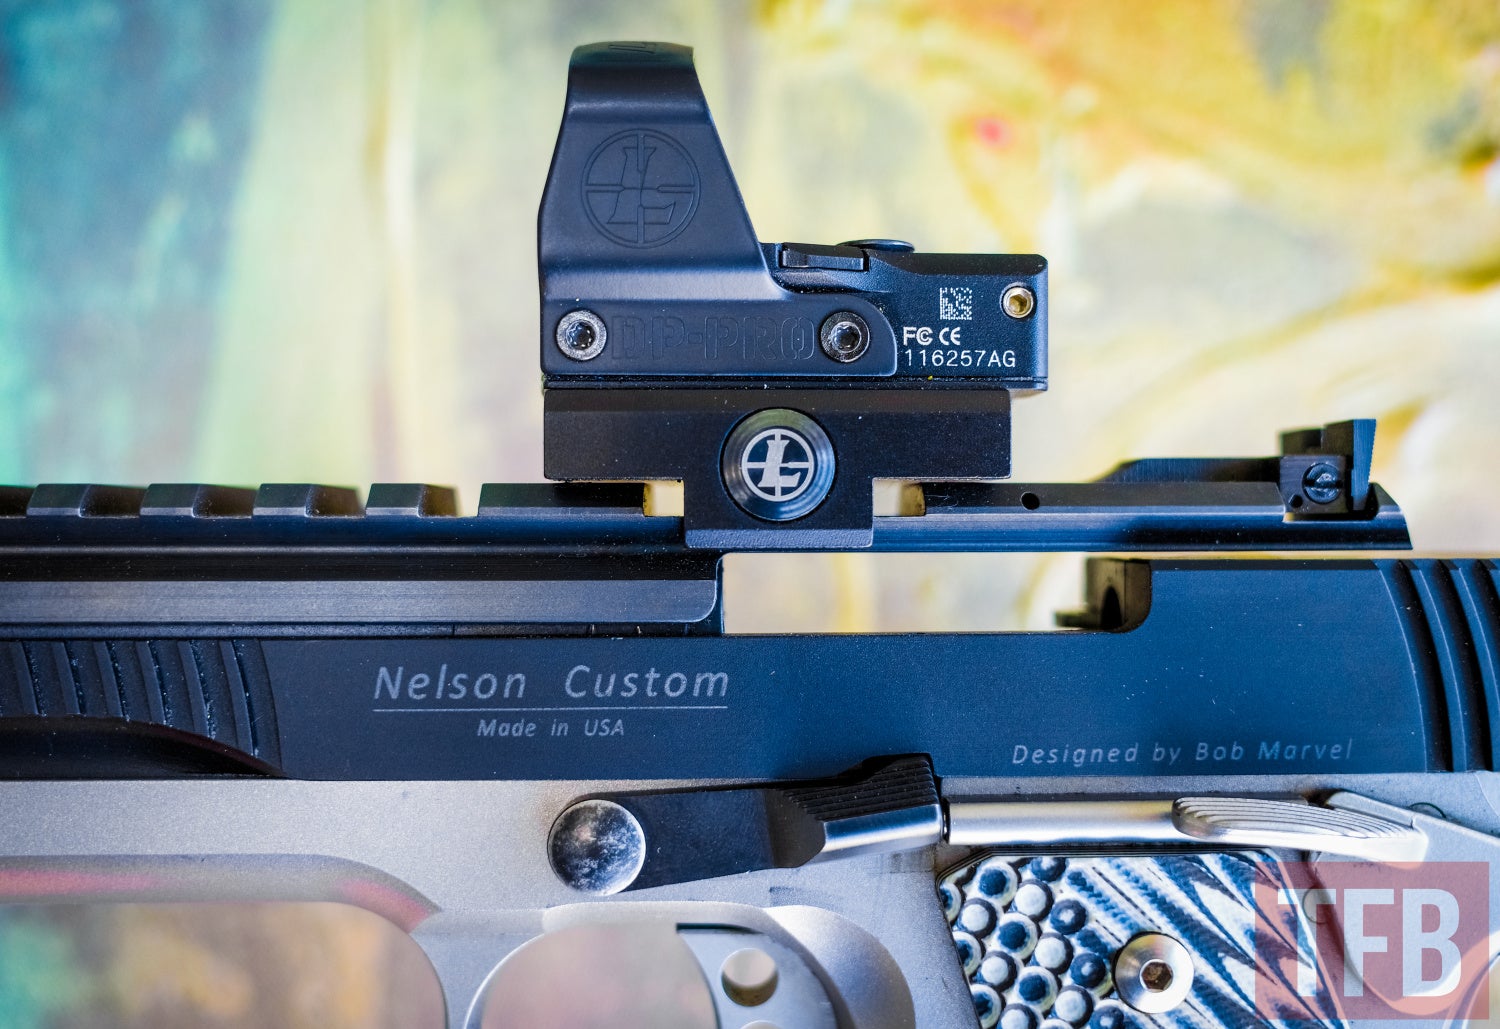
DeltaPoint Pro on a Leupold mount – that’s as low as it can go.
A quick aside about that particular optic choice: I’ve been using red dot sights since the mid-’00s, and I’ve tried a lot of them. I have astigmatism so bad LASIK couldn’t fix it, and normal, circular red dots look like little bunches of grapes to me. It’s hard to be precise when I don’t know which of the several dots is the right one. However, the triangular (AKA Delta-shaped) reticle of the DeltaPoint Pro looks like two barely overlapping triangles to me, and the bullet goes right between the upward-facing tips of the two triangles. It’s the best red dot sight picture I’ve ever seen, and when I learned that Leupold discontinued that reticle in early 2020, I bought a backup for the one I already had on my Dan Wesson 1911. I would have liked to include a photo of the reticle, but I gave up after spending a miserable 10 minutes trying to take a good picture.
Shooting the Nelson Custom Guns 22LR Conversion
Installation onto my Kimber 1911 lower was quick and uneventful thanks to an install video on the Nelson Custom website. To sum it up, you need a 5/32 socket wrench (provided) to install and disassemble the pistol. The most noticeable difference between the conversion and a centerfire 1911 is that the entire slide doesn’t fully reciprocate, similar to a Browning Buck Mark, which is also a .22LR pistol with a fixed, non-tilting barrel.
Note the gap between the lower slide and the top rail, which does not reciprocate with the slide
All of the pistol’s controls are on the frame of the donor gun, so the trigger, safety, slide catch, and magazine release felt exactly the same as when the original 9mm Kimber slide was installed.
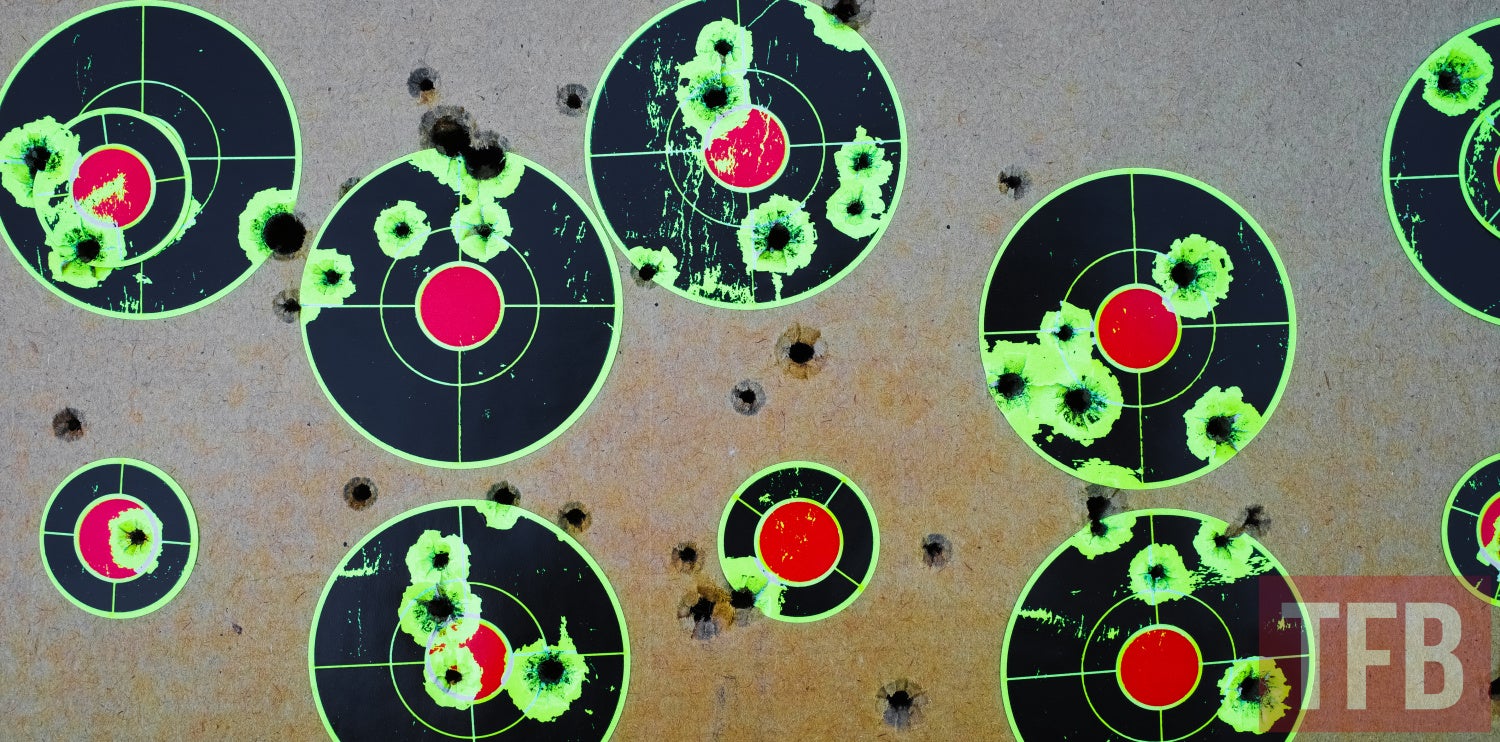
I lubed it up and went to the range with four kinds of .22LR ammo from my lifetime supply. I loaded a 10-round magazine of each brand, starting with CCI Blazer 40 grain lead round nose. Recoil was very light, and my best 5-shot group is pictured below. Second were CCI MiniMag 36 grain copper-plated hollow points, which gave me the tightest groups, but I had a few failures to fully chamber the first round of a fully loaded magazine when I used the slide release (as opposed to grabbing the slide over the top using the “slingshot” technique). In those cases, I would nudge the slide the final few millimeters forward into battery and fire away. I suspect the wax coating on the MiniMags was the cause of this intermittent malfunction.
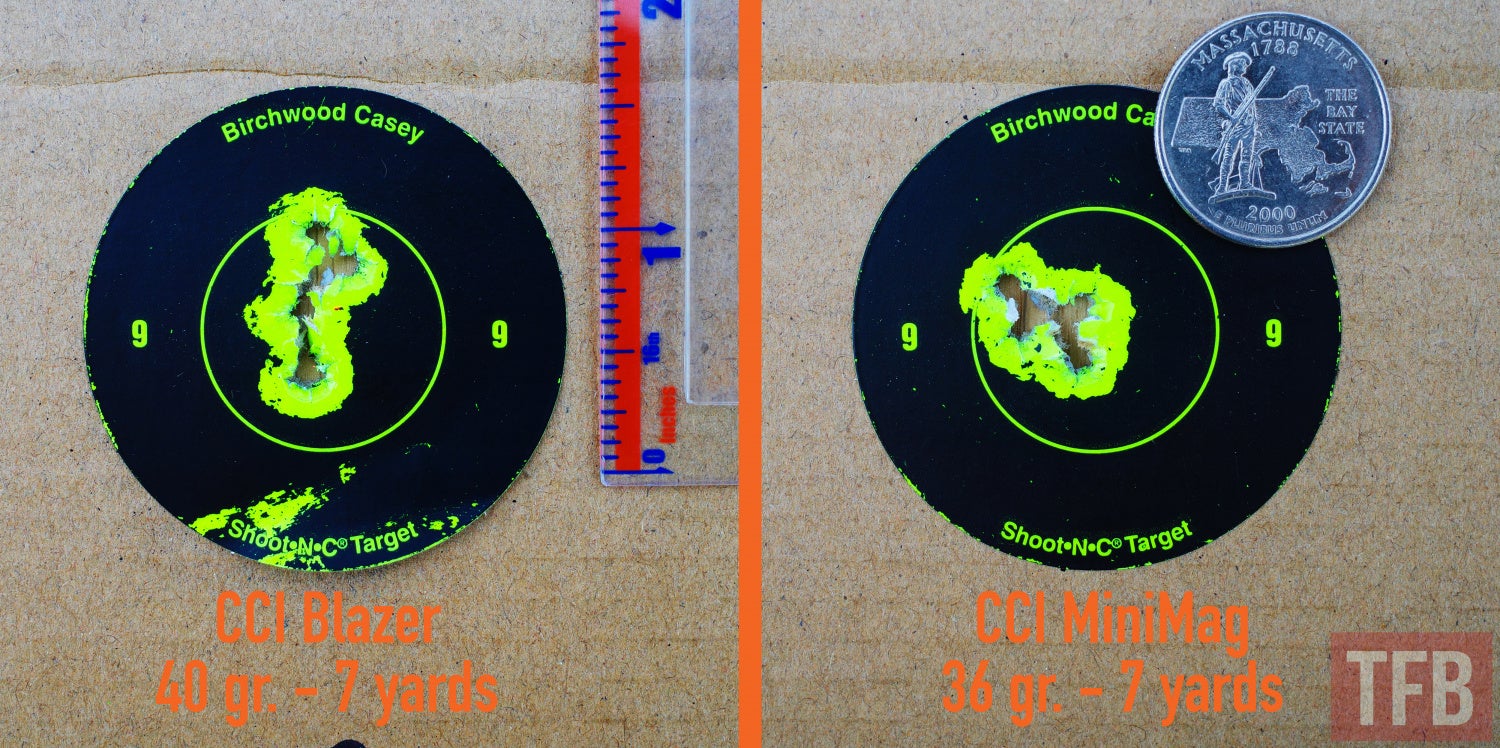
I never noticed the guy holding a musket on the Massachusetts quarter before
Next were Federal AutoMatch 40 grain lead round nose and Federal American Eagle 38 grain lead round nose, and both had failures to feed and to eject. The groups were good though, at just over an inch at 7 yards.
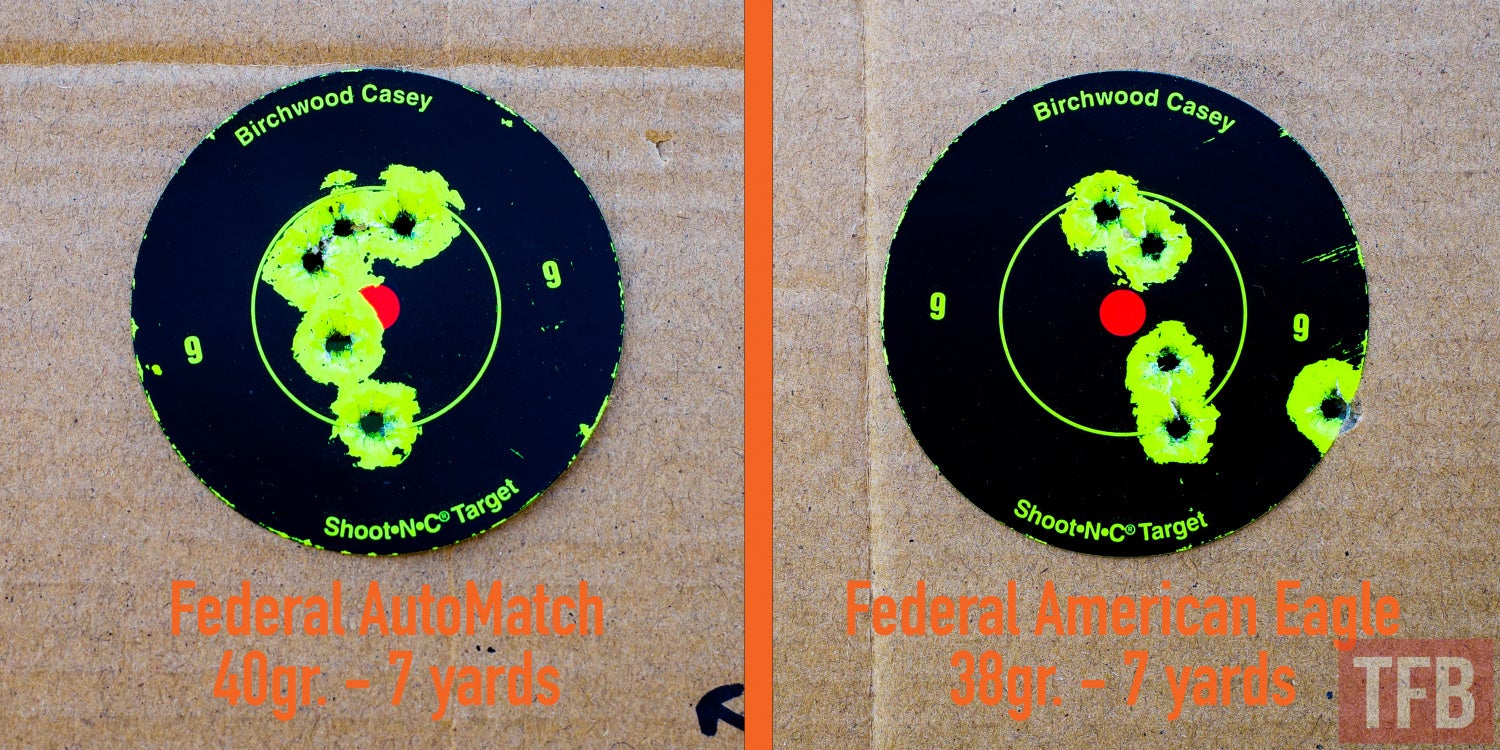
My Nelson Custom conversion prefers CCI over Federal .22LR
After a few hundred rounds, I called Nelson Custom Guns and asked why I might be having these issues, and was told that a tight chamber is a deliberate feature, and to try installing the heavier recoil spring that came with my kit. It was also suggested to me to thoroughly scrub the built-up .22LR gunk out of the first inch of the chamber with a .223 caliber metal brush and Hoppe’s No. 9 bore cleaner.
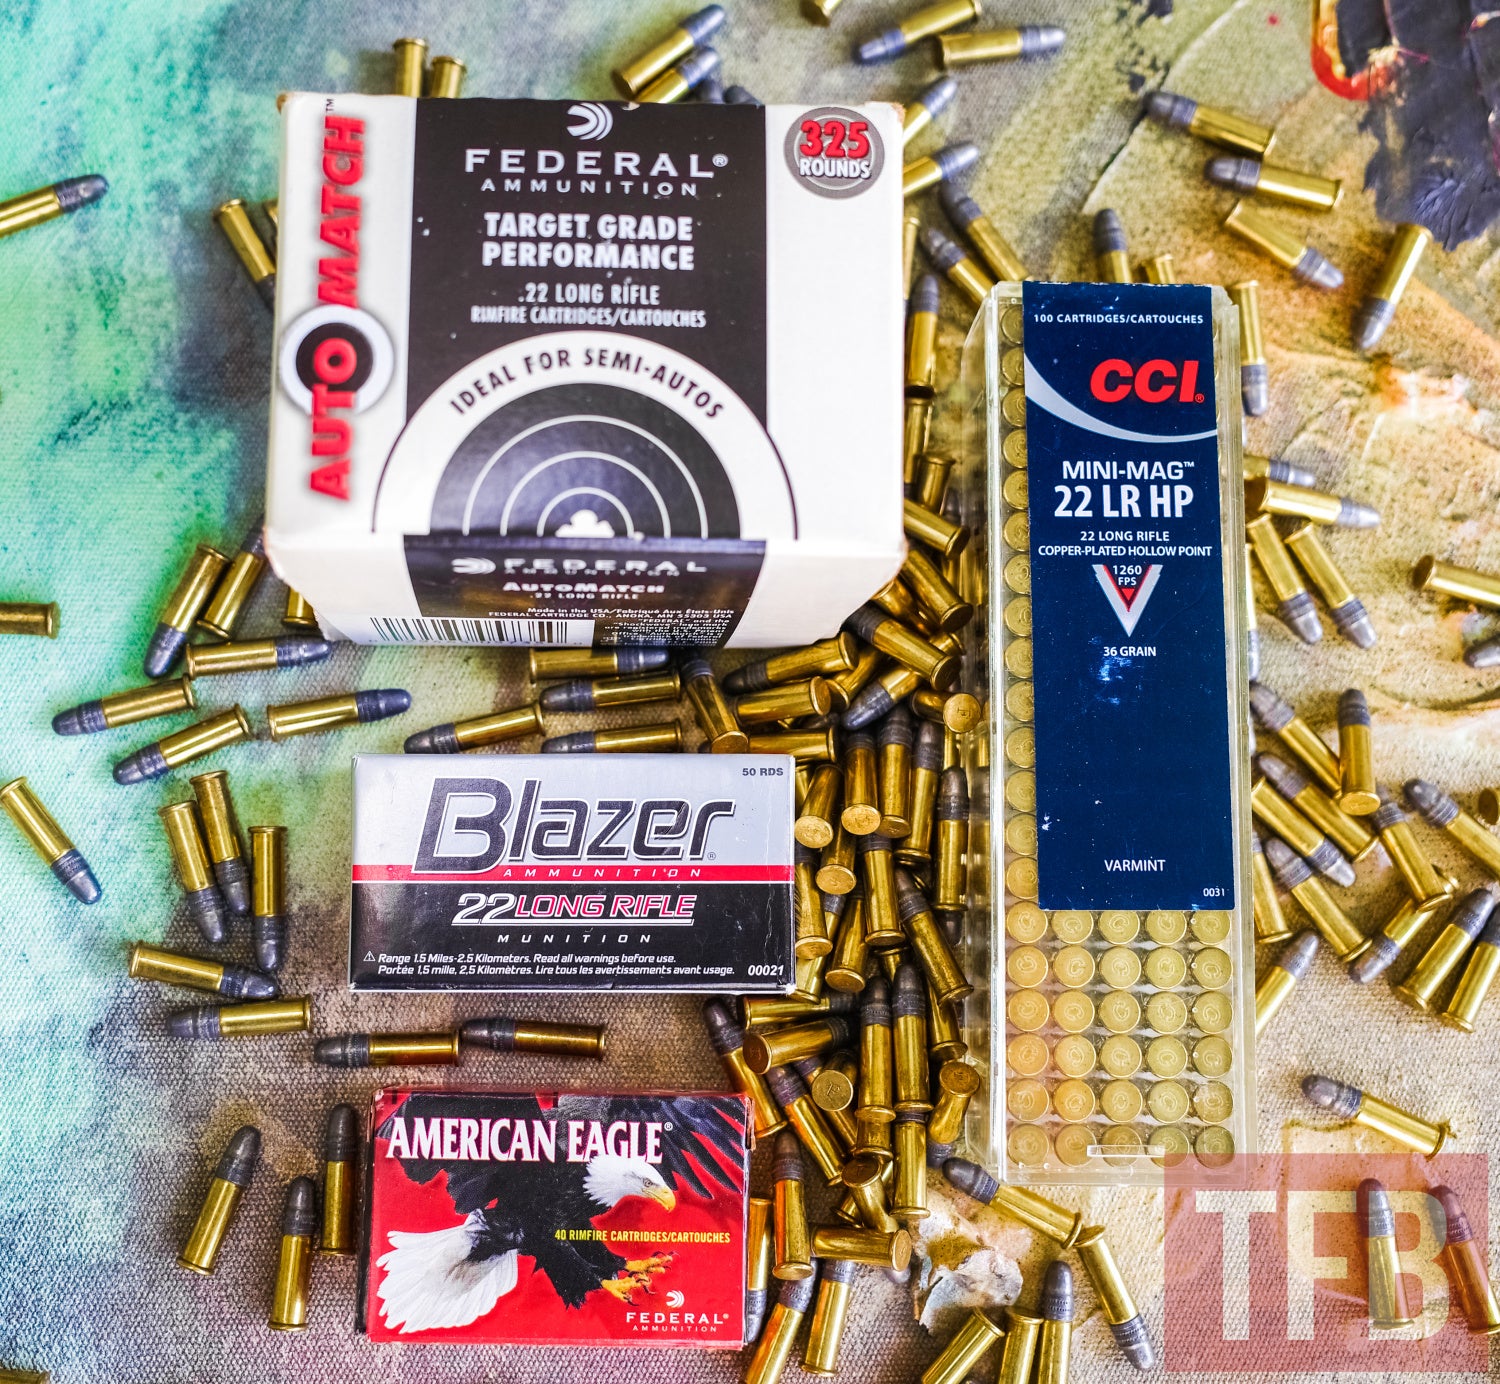
Ammo selection for this review
I changed the recoil spring, scrubbed the chamber, and since have had zero malfunctions as long as the gun is reasonably clean. After approximately 300 rounds without cleaning, the action starts getting gummy and becomes less reliable.
Nelson Custom Guns .22LR chamber after a good scrubdown
The Nelson Custom kit is a real joy to shoot. Recoil is extremely light, and since the fixed barrel and Picatinny sight rail don’t add to the reciprocating mass of the slide, the pistol barely moves when fired. Double taps are effortless, and I even treated myself to a couple of high speed mag dumps just because I could. The magazine bodies and feed lips are made of plastic, which I dislike out of principle, but I’ve yet to break a plastic PMAG, so maybe I just need to learn how to trust polymer. I don’t have enough rounds through the magazines to determine long-term durability, but they seem sturdy and all 5 magazines I have drop free every time.
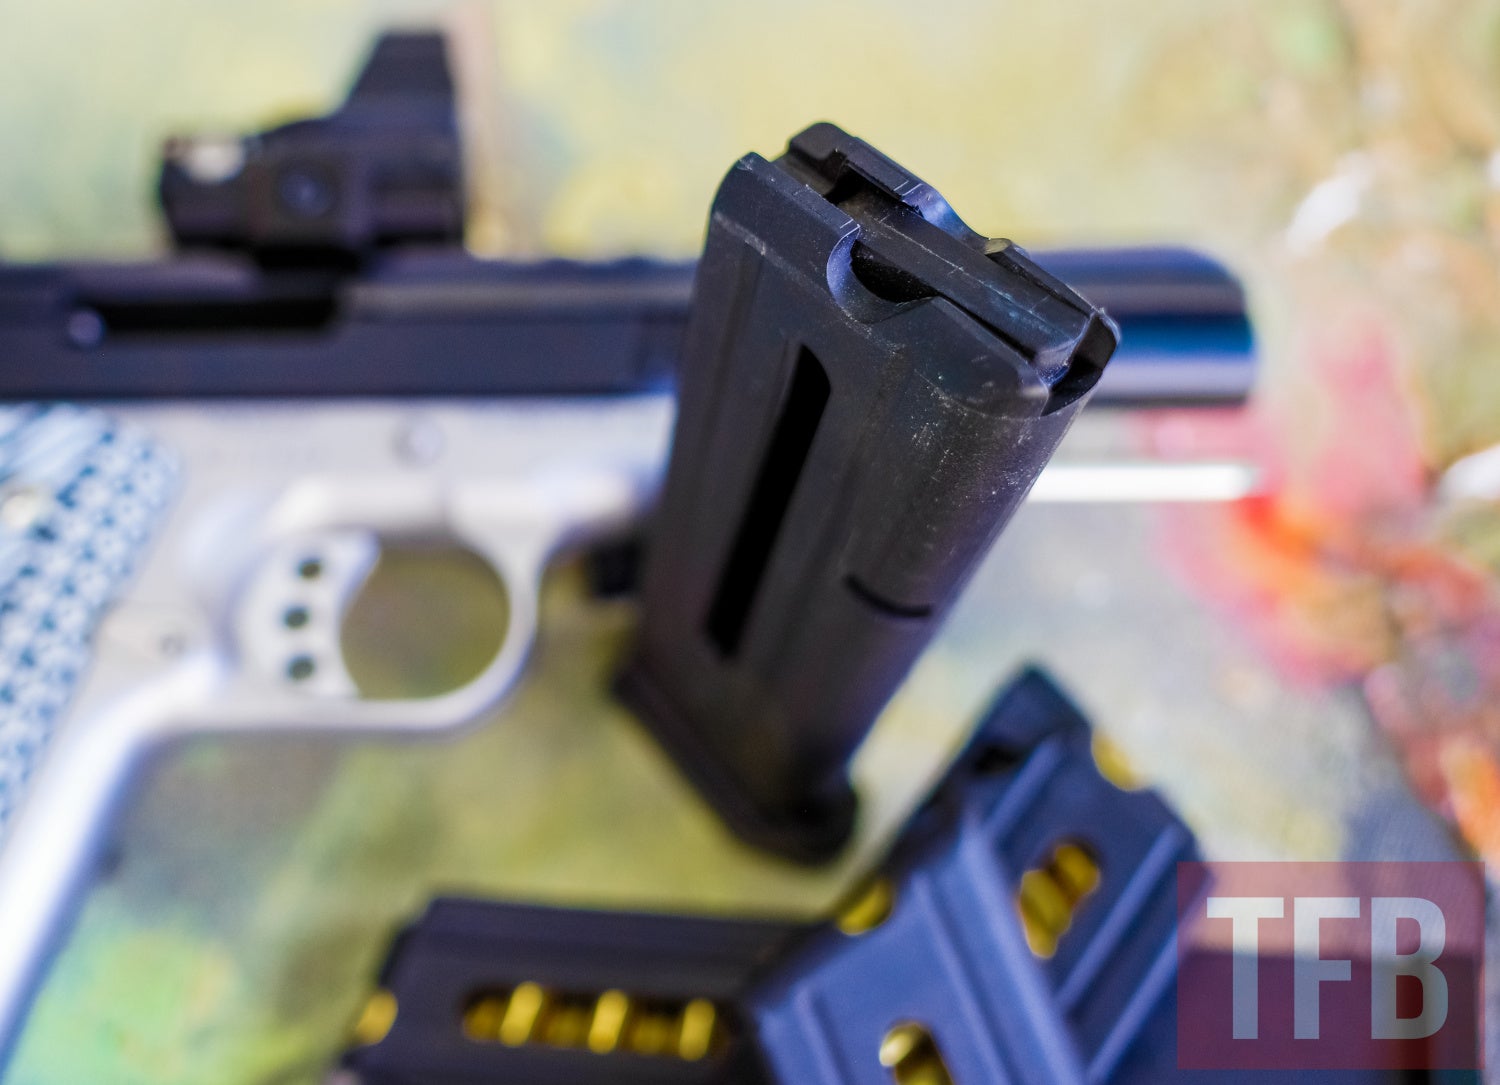
The Nelson Custom Guns plastic magazines are holding up well
I had the opportunity to try Nelson Custom magazines that had aftermarket magazine spring plugs by Taylor Tactical Supply ($4.95 each) which increased the magazine capacity to 13 by replacing the long steel spring plug under the magazine follower with a shorter aluminum plug. My experience was that it was so difficult to load the 13th round that I just used them as 12-rounders, and their function was identical to unaltered Nelson 10 round magazines.
The adjustable iron sights have crisp click adjustments, and once I got them dialed in at 7 yards, I dabbed some Loctite into the DeltaPoint Pro Picatinny mount and installed and zeroed it as well. I’ve never shot a super-accurate .22LR target pistol like a Walther SSP or a Hämmerli X-Esse, so I don’t know what kind of groups I could shoot with a laser-beam accurate 22 pistol, but I was personally impressed with the accuracy I was able to get from the Nelson, particularly with CCI MiniMags.
Use As A Trainer
22LR holes look different enough from 9mm holes that I can use the same targets
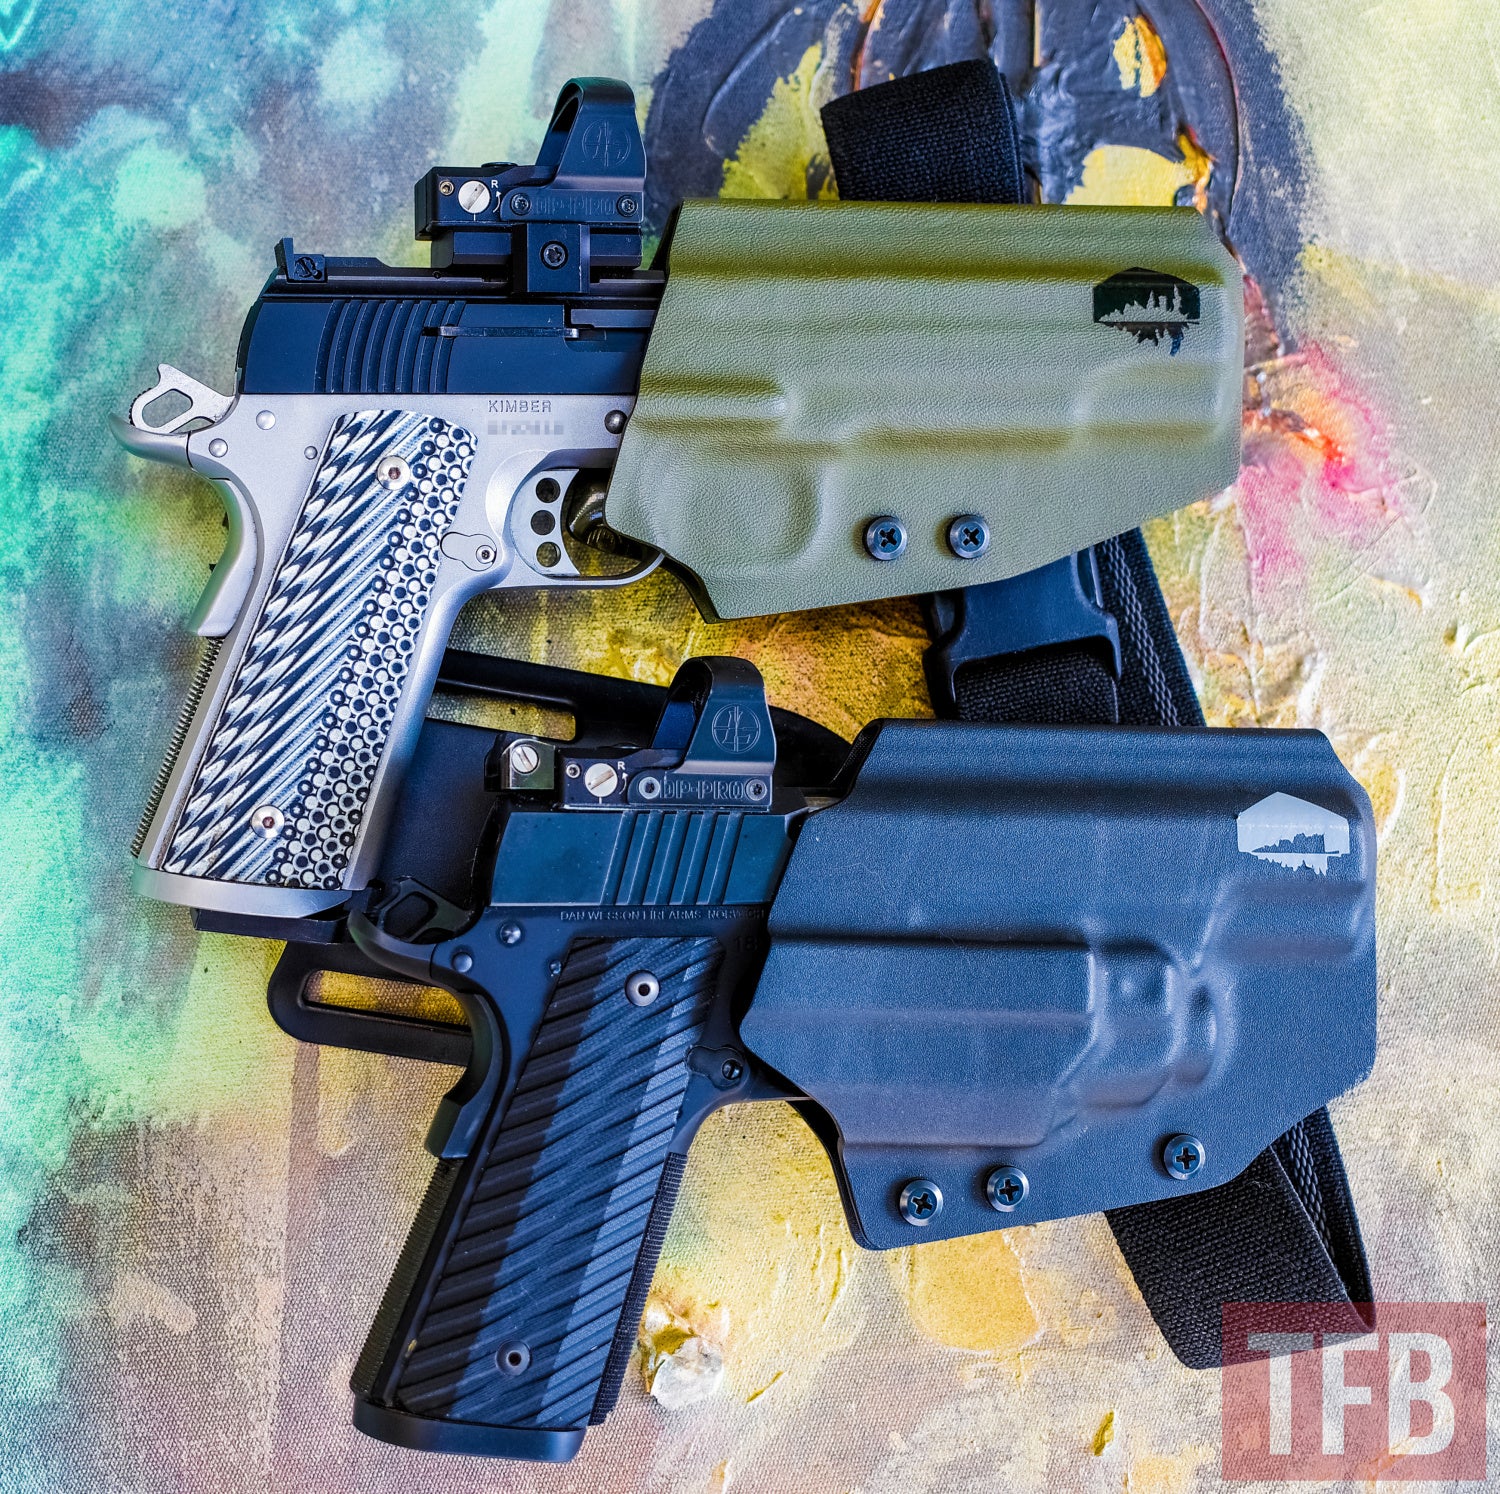
My goal was to set up my two pistols to be as similar as possible without getting obsessive about it. As is evident from the pictures, the Nelson isn’t an exact copy of the Dan Wesson 1911 it’s subbing for, especially in the height-over-bore of the red dot, but it’s similar enough to get the job done for me.
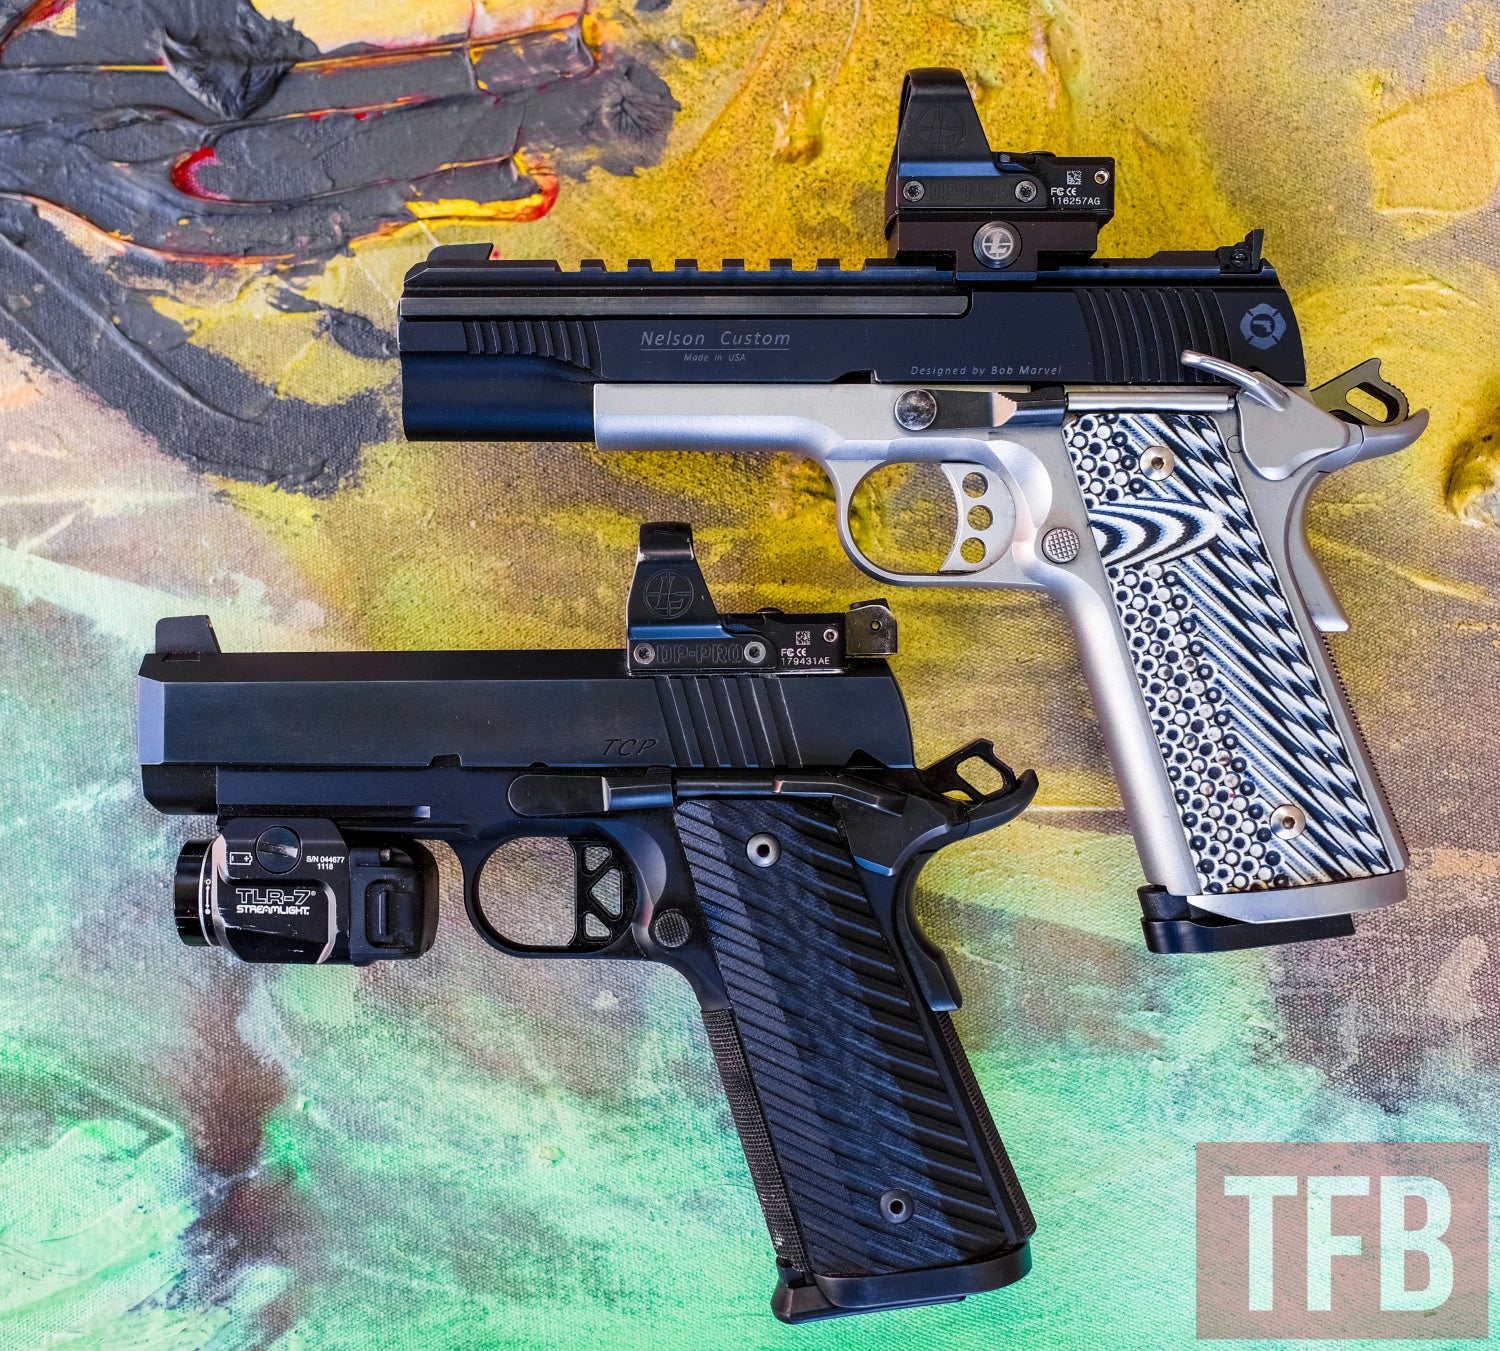
Top: Nelson Custom slide on Kimber frame. Bottom: Dan Wesson TCP
The Nelson is installed on a 5-inch steel-framed Kimber and weighs 41.2 oz unloaded, compared to 33.8 oz for the 4-inch aluminum-framed Dan Wesson. However, loaded with 10 rounds of 115 grain 9mm and 10 rounds of 22LR, they’re much closer in weight, at 44.6 oz vs. 40.4 oz. These are relatively minor differences, and since I regularly practice with a few different pistols (Glocks with and without optics, a Ruger SR9, etc.), I’m used to making adjustments to my shooting ergonomics. Regarding practice, the biggest takeaways I’ve gotten from taking several handgun classes at ITTS in Los Angeles are the importance of a quick, accurate first shot from a holster or low ready position, and practicing reloads and malfunction drills until they’re hardwired into my body.
My standard centerfire 1911 training regimen is this: I load up several magazines with 1, 2 or 3 rounds each, mix ’em up, and put them in a mag pouch or in my pockets with half of them upside-down, and practice fast-as-possible double taps and slide lock reloads. When I repeated my centerfire training routine with the Nelson Custom, I found the .22LR conversion to be ideal for practicing a quick shot starting from low ready. However, once I break the first shot with the 22, the lack of recoil makes a follow-up shot super fun but way too easy, and then it’s less realistic as a training aid.
During speed reload drills, I was initially concerned that the Nelson Custom mags don’t have sturdy metal feed lips like Ruger 10/22 magazines have, but I decided to just not worry about it, and I’ve had zero durability issues despite slamming them home like I do with steel-bodied 9mm Wilson Combat magazines on my centerfire 1911. The Nelson Custom magazines aren’t all plastic though – I upgraded to steel baseplates when I ordered the conversion kit because it seemed like a cheap way to increase mag durability. The steel baseplates on the Nelson mags make them bottom-heavy enough to drop baseplate-first, and I’d rather have the steel end take the impact of hitting the dirt.

Note the steel magazine baseplates and the handy loading tool for the Nelson Custom mags
I perform slide manipulations on all three of my red dot-equipped pistols by wrapping my support hand over the top of the red dot sight and pinching the slide between my thumb meat and fingertips. I deliberately try my best to not use the red dot as a handle to work the slide to the rear. It’s good that I practice that way because the Nelson Custom’s top rail (and the DeltaPoint Pro mounted on it) doesn’t move. Even though the top of the slide doesn’t reciprocate like a centerfire pistol, my fingertips and the meat of my thumb naturally rest on the rear slide serrations of the part of the slide that does move, and over-the-top slide manipulations work great except for a problem I mentioned earlier as my only regret on this build – the square rear sight blade.
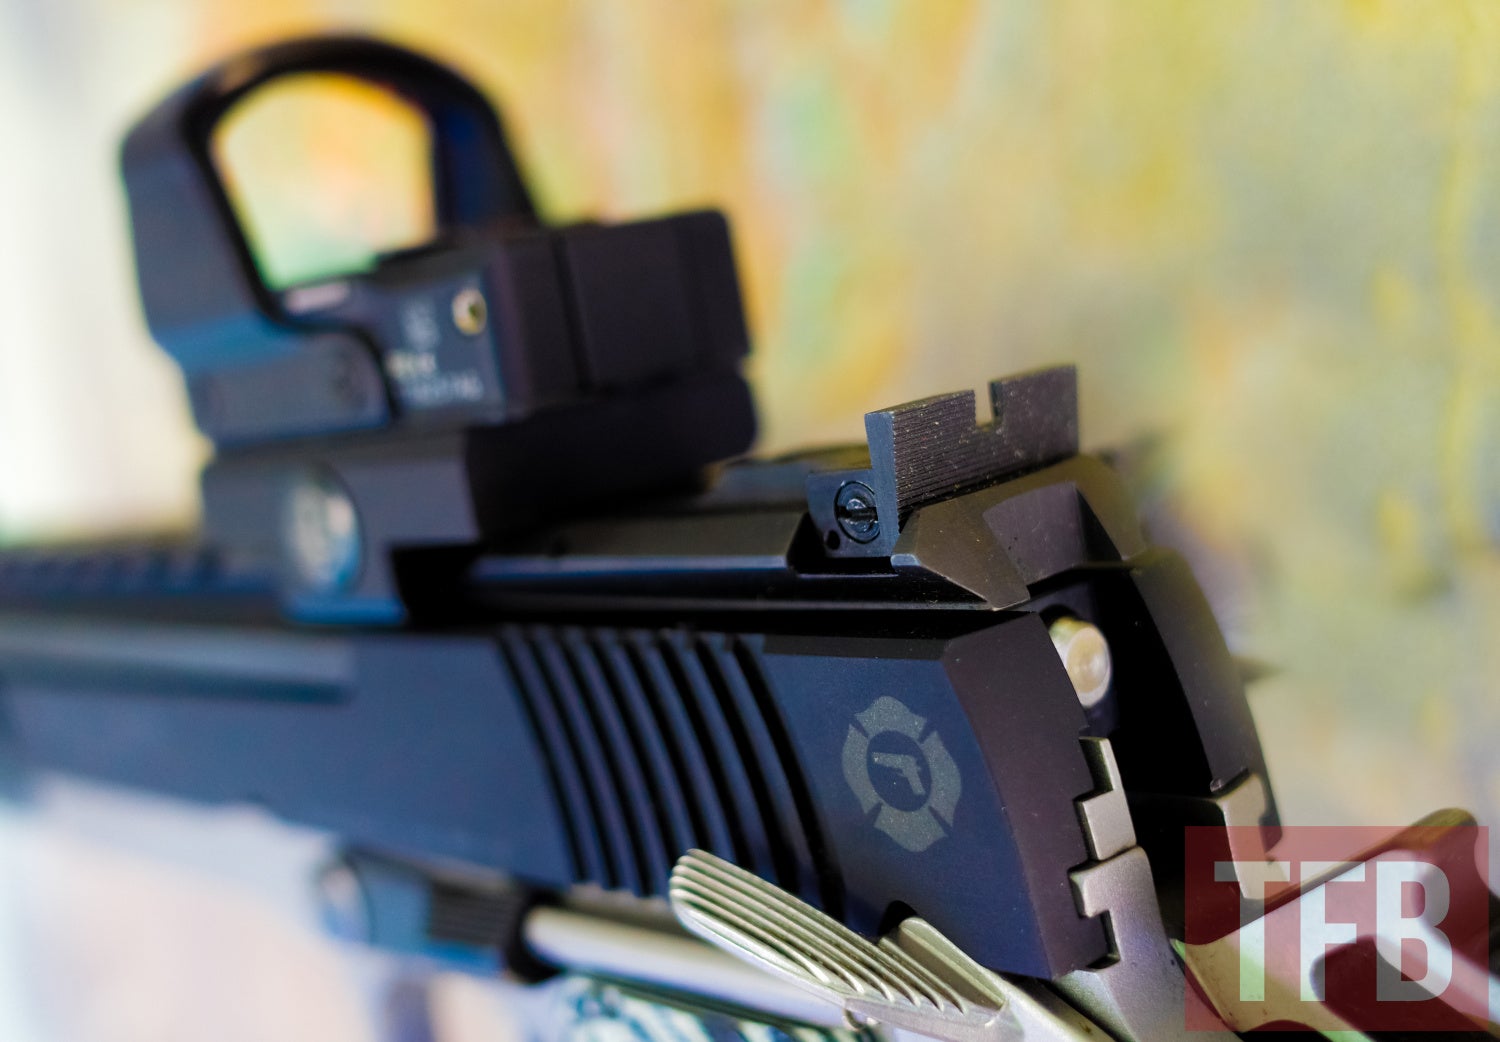
I should have ordered the rounded rear sights- I don’t know what I was thinking…
The corners of it are sharp as hell, and scratch the inside of my support hand when chambering a round or doing chamber checks. To be clear, this is entirely my fault – I should have chosen the “rounded blade” rear sight option, which has nice, non-sharp-ass corners. If I were to buy the rounded rear sight, I could send the slide back to Nelson Custom and they would swap it out for me free of charge.
I train using a holster whenever possible, and use a Cascadia Concealment OWB/Minimalist Drop Kydex holster ($55 without belt attachment) with my Dan Wesson, so I wanted a similar setup for the 22 conversion. The Nelson’s aluminum slide is very slightly thicker than a standard 1911 slide, and the top Picatinny rail gives it a more squared profile than most 1911s.
Chunky slide on the Nelson Custom
This isn’t an issue with the somewhat flexible leather holsters that most 1911 people seem to favor, but Kydex is less forgiving. Therefore, I did some research and made an educated guess when I ordered the “SIG profile” on a new Cascadia Concealment OWB 1911 holster. SIG 1911s have a more squared-off slide top than a traditional government pattern 1911, and when it arrived, I found that it does indeed have the height and width clearance I need to fit the Nelson’s railed slide. However, because of the rear iron sights integrated into the top Picatinny rail of my pistol, I had to mount the red dot farther forward than is normal. So despite the fact that the holster is specially made for pistols with a red dot, the front of the red dot keeps the pistol from fully seating inside the holster.
The Nelson Custom’s DeltaPoint Pro is mounted too far forward for this holster
After much cursing and thinking and cursing, a solution popped into my head: I can fix both the holster problem and the sharp rear sight problem at the same time by ordering a new top rail section ($99 from Nelson Custom) that doesn’t have integrated iron sights. I’ll stop scratching my thumb on that rear sight and be able to mount the DeltaPoint Pro farther back so I can use the holster I already have.
I’d love to show you a picture of the completed build, but I haven’t received the new top rail yet. I’ve dragged my feet in writing this review for too long as it is, so I’m not going to wait until this build-in-progress is perfect (if there is such a thing) to post the review.
Conclusions
As a low-ammo-cost training aid, I’m still working out the details, but so far I’m pleased. My Nelson Custom Guns conversion kit is accurate and very well made. My brief customer service experience was excellent, and now that the correct recoil spring is installed and the gun is broken in a bit, its reliability is also excellent (for a .22LR). The Nelson Custom Guns conversion kit’s weight and ergonomics are close enough to my Dan Wesson 9mm 1911 that I feel like it’s a good substitute that doesn’t screw up my muscle memory. Now, whenever I go to the range, I start by running 10 or so mags through the Nelson Custom as a warmup for my centerfire drills. I’ve managed to hang onto a good amount of my precious 9mm while still getting regular practice in.
Thank you to Bruce O’Neil for the use of his painting
Price and value are extremely subjective subjects, but for me personally, I don’t regret the $788 total I’ve spent on this build. That’s a lot of money, and I absolutely could have spent far less on a dedicated .22LR pistol like a Ruger 22/45, or on a different conversion kit, but what can I say? I like quality gear, and I wanted to get my Kimber back into circulation.
By the way, the Nelson Custom Guns conversion kit was not provided to me by the manufacturer for review. I bought this for my personal use, and since I made a few mistakes along the way and also learned a few things, I thought I’d write a review as a resource to anyone else who’s interested in doing a similar build. This is my first article for The Firearm Blog, and I hope you liked it. I can’t say I’m looking forward to the comments, but I will read them.