 Your Privacy Choices
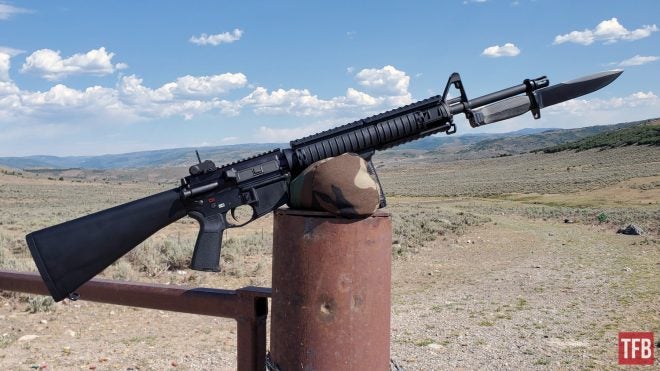
An M9 bayonet is commonly an unthought-of tool to most shooters without prior military service. While bayonets have been used since the 17th century, in today’s world, it’s considered to be an ancillary weapon or a weapon of last resort. As a result, a bayonet lug can often go unnoticed by gun buyers who often see it as just part of a front sight base. Common M9 bayonets are nothing extraordinary, and as such are often overlooked. For me, that idea started to change when late last year I stumbled upon a pair of rare M9 pattern bayonets. My interest piqued, an idea started to take hold.
The Idea
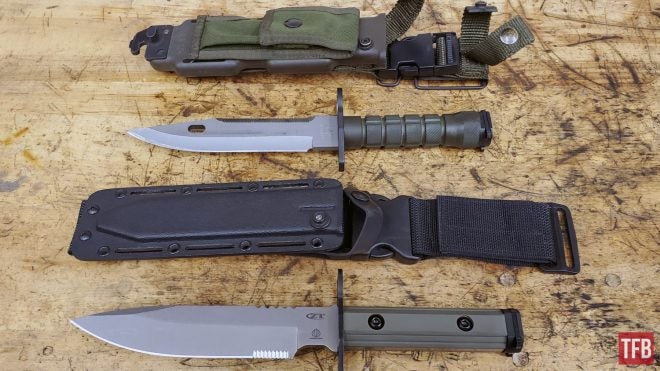
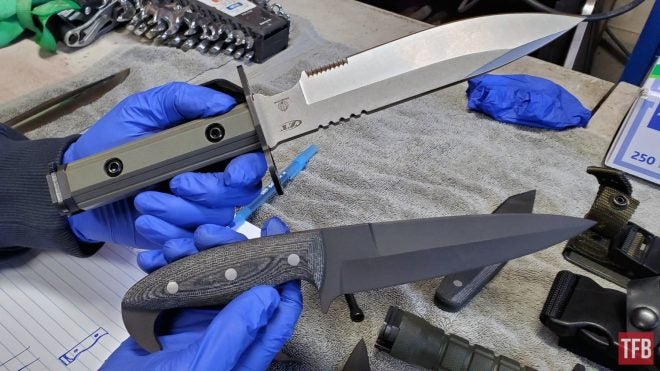
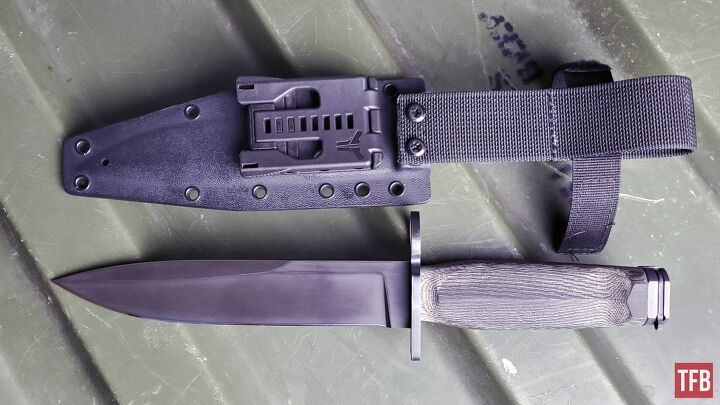
Legacy M9 Buck and ZT Bayonet
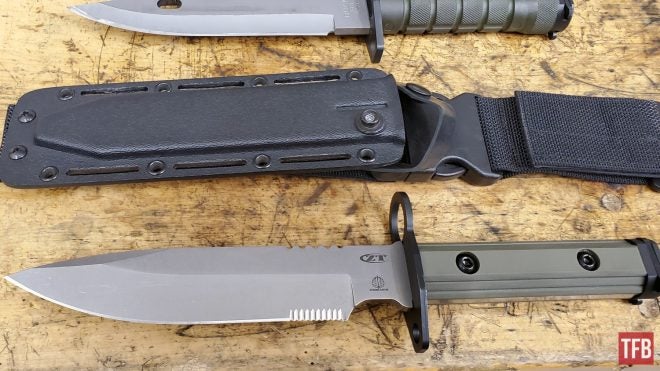
In stark contrast to the common blade profile and sheath (albeit a very rare and sought after Buck M9 shown above) the Zero Tolerance ZT-9 is something else entirely.
The Zero Tolerance Bayonet
Using ¼ inch wide S30V steel, and full tang construction, the ZT represented that perfect blend of both form and function. So why am I not writing this article about a ZT bayonet? Well, because they’ve been discontinued. This particular one just happens to be the one that was used for all the product photos and was the last one to ever leave the warehouse.
It wasn’t until months later when I met Forged In Fire winner Nate Summers that this idea resurfaced. Nate accepted the challenge to take this idea and make it even better, and from there it was off to the drawing board.
Designing Something New
Nate Summers Custom Knives
Tucked away in a small shop in Utah, Nate Summers humble shop creates some of the finest handcrafted knives money can buy.
Bringing new ideas to the table
I brought over the ZT and Buck bayonets (that were very kindly loaned to me). From there we started discussing the idea and how to make it better with different construction, finish, and materials.
Further design inspiration
I brought a few ideas like full tang construction to the table, and then asked Nate what changes he would make to make the overall blade better.
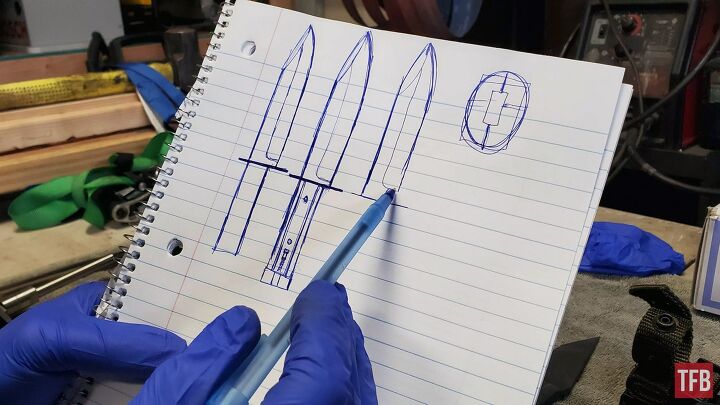
Sketching the blade pattern
Nate suggested leaving more material on the front of the blade to increase strength while adding a larger false edge. In addition, the blade’s lower edge would be extended farther rearward, and the tang hidden inside the handle. This hidden tang would allow the handle to be removed and allow handguards to be swapped just like a true M9 bayonet.
With the design sketched, materials were ordered and the work on the project began.
Starting From Scratch
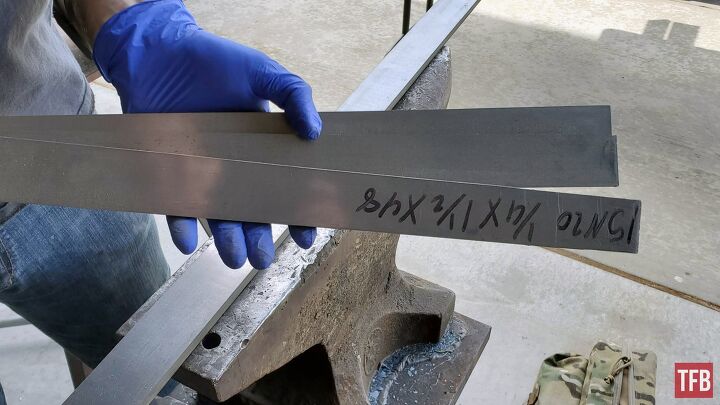
80CRV2 steel
For steel, Nate decided to use 80CRV2. This grade reaches a high level of hardness while maintaining a great deal of toughness as well. This creates an edge that won’t break, and it has both chromium and vanadium that help control for an even heat treat and fine grains.
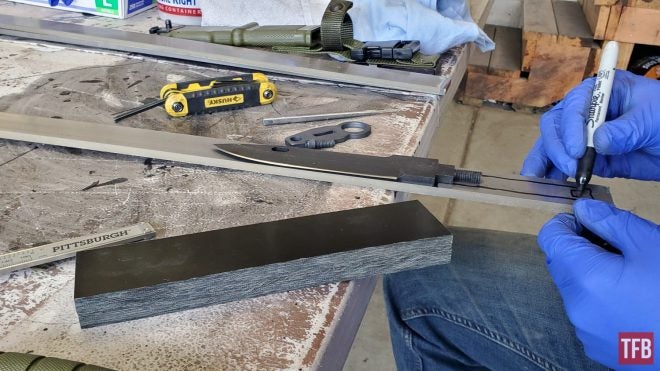
Tracing the blade for fitment
Using a disassembled Ontario M9 bayonet I purchased for parts, the handle was measured and traced onto the steel.

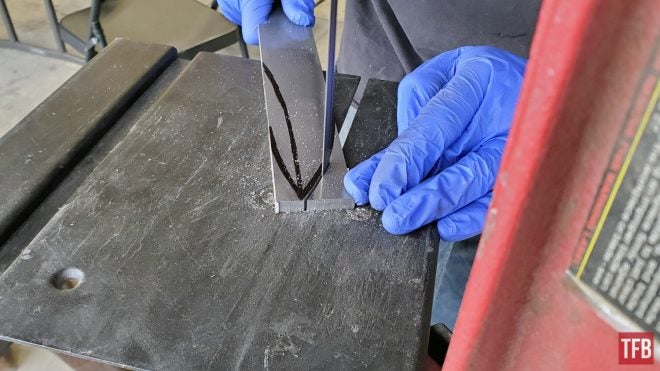
Drilling the blade corners
As 90-degree edges create weak points, the edges at the base of the handguard were drilled to eliminate even the smallest weaknesses.
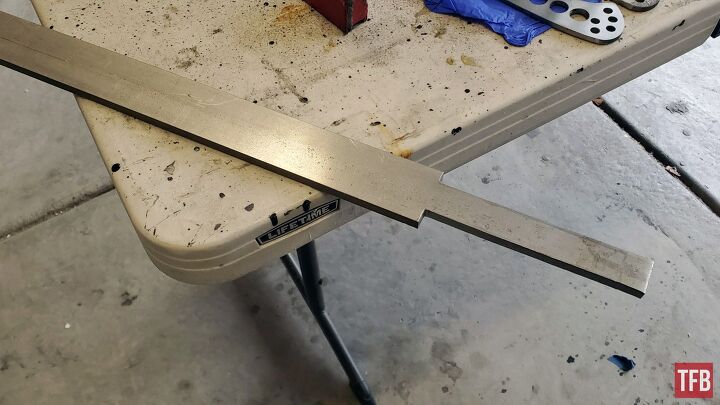
Steel with the handle cut
With the handle now cut, it was time to move the earlier designed pattern onto the steel.
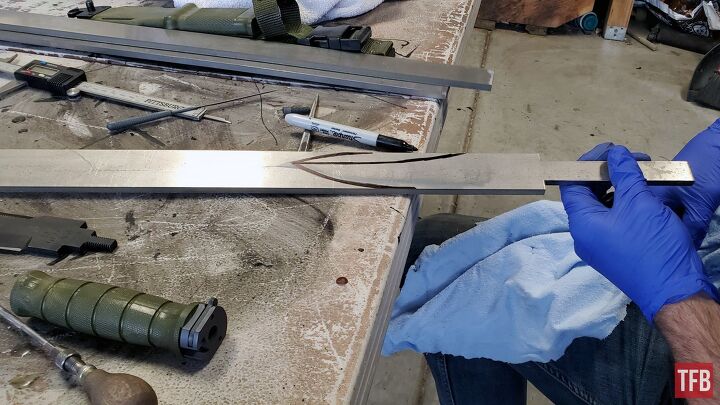
Moving the design onto the steel
The pattern was traced onto steel a couple of times until we both agreed that it was just right.
Rough cutting the 80CRV2 steel
We then moved over to a bandsaw to cut the rough outline of the blade out.
Finish sanding blade outline
From there Nate moved over to his belt grinder to make the final fine cuts to the profile of the blade.

Marking the steel
After starting cuts on both the edge and false edge, Nate stopped to score the steel with a set of calipers to make sure the final edge would be symmetrical.
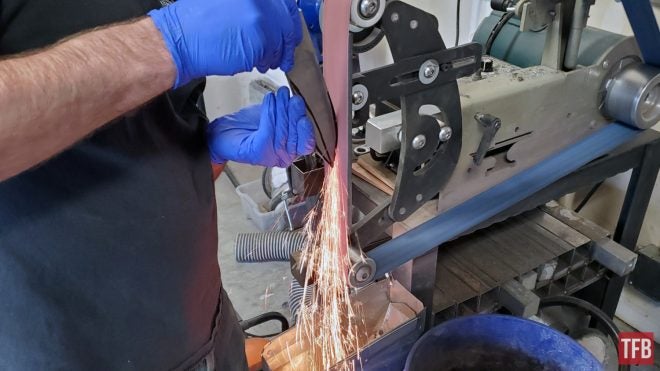
Cutting the false edge
Slowly the blade started to take shape as heavier grit belts were used to create the desired profile.
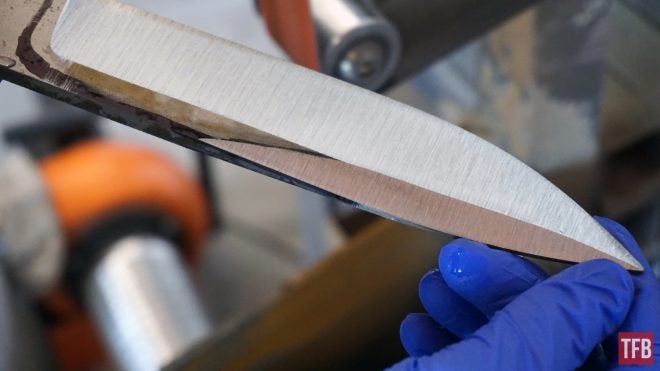
High grit final grind
Satisfied with the profile, Nate then swapped over to a finer grit to clean up what would be the final profile of the blade.
Blade ready for hardening
Profile complete, the blade was now ready for the final fit and finish.
Final Fit & Finish

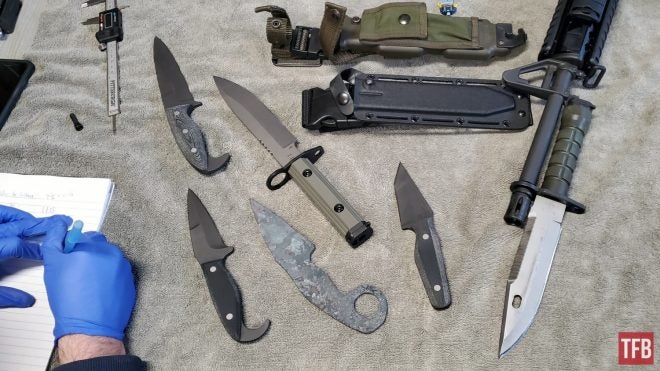
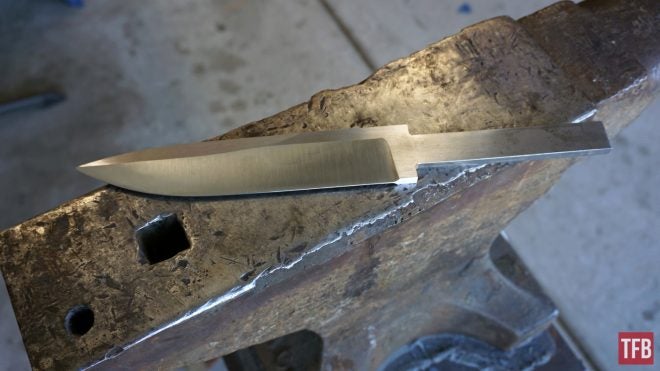
M9 Blades side by side
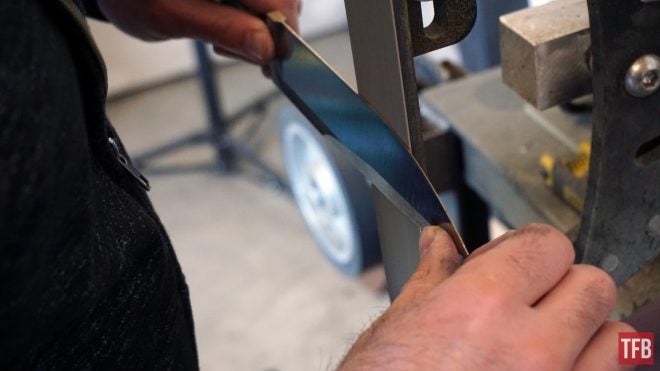
With the blade finished the rear of the handle was then drilled and threaded to accommodate the screw for the pommel. Nate then heated the steel in a kiln, quenched it in an 11-second oil, and then re-ground it for tempering. After that, the steel was parkerized and ready for final fitment.
Micarta hand-guard and pommel
For the handle, Nate recommended using Micarta. The profile was hand sanded to contour with the pommel at the rear.
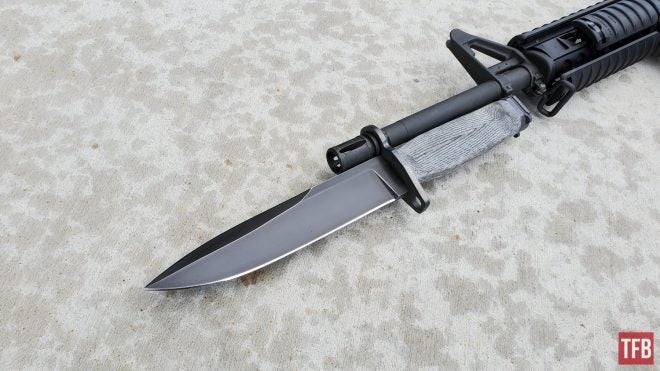
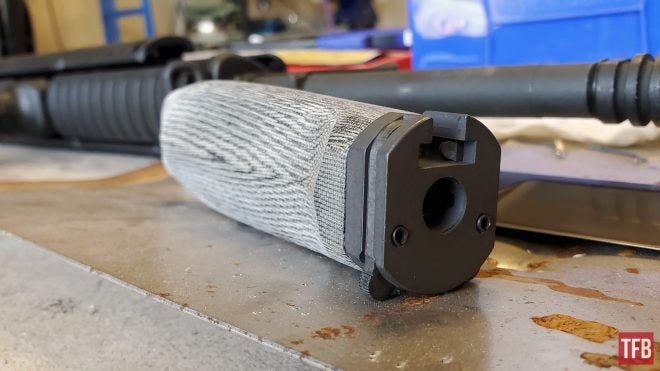
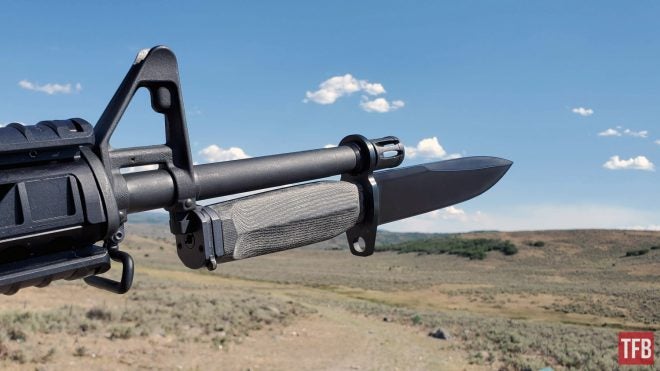
M9 bayonet mounted to M16A4 upper
Finished bayonet now assembled, it clicked right into place and looked better than I could have imagined.
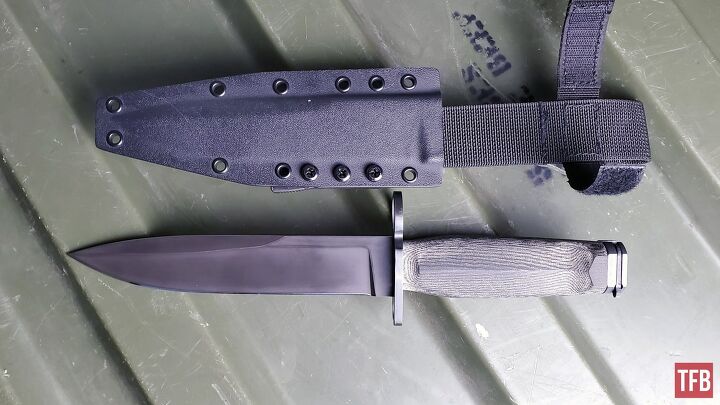
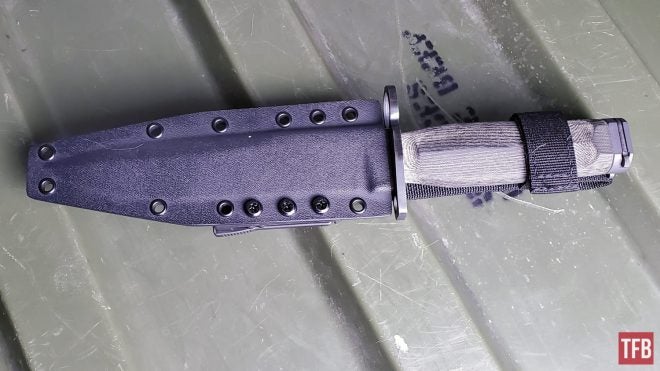
Custom Fit Scabbard to Match
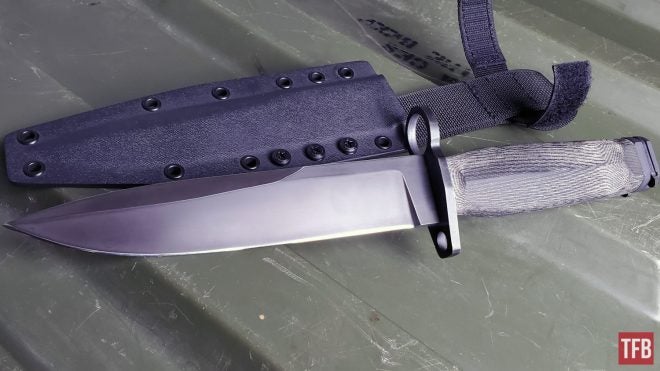
Nate Summers custom M9 bayonet and RDR Gear custom M9 scabbard
As the new bayonet was slightly longer (about 1/2 inch) and a completely different color scheme, I decided I wanted to do a ground-up overhaul of the original scabbard. Nate recommended I talk to Jeff at RDR Gear to dream up something a little more modern.
RDR Gear custom M9 scabbard – blade removed
I stipulated that I wanted the same belt mount as the original scabbard, but wanted a more versatile secondary attachment method for use with MOLLE and other modern attachment methods.
RDR Gear custom M9 scabbard w/ Blade-Tech TEK-LOK mount
To this end, Jeff used two layers of .08″ thick Kydex in a Pantex style mold to fit around the hand-ground blade. Eyelets were then cut and added by hand to allow for a Blade-Tech Tek-Lok mounted on the back. This allowed for more attachment methods via a belt, MOLLE, or other means.
RDR Gear custom M9 scabbard
1.5″ Scuba Webbing was used for belt loop that attached to the back of the Kydex and was finished with a 1″ Mil-Spec elastic capture to secure the blade inside the new scabbard.
But Wait, Is This the Only One?
Nate Summers custom M9 pattern bayonet
As the end result turned out better than I could have imagined, both Nate Summers and RDR Gear have agreed to do a limited run of these bayonets for anyone interested. Nate has committed to making ten blades, and once they’re gone, they’re gone. After each blade is handmade it will have a custom fit scabbard made for it by RDR Gear. The final price tag for the conversion and sheath will be $600.
What You’ll Need & How to Order
Please Note: At the time of this publication, only eight of the ten blades are now available.
This process is time-consuming for all parties involved. As such, Nate will start work on the first batch as soon as either 30 days have passed (from time of publication) or once all the blades have sold. You’ll need either an Ontario or Tri-Technologies Mil-Spec M9 “donor” bayonet for the conversion. The remaining parts from this conversion will be shipped back to you upon completion. The $600 for the conversion is payable upon completion. If you’d like one please reach out to Nate to reserve a spot via email at natetheblademaker @ gmail dot com.
Big thank you to Nate Summers and RDR Gear for all their help making this dream into a reality!