 Your Privacy Choices
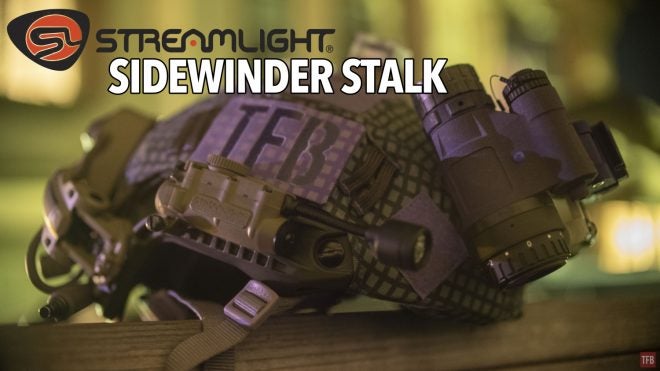
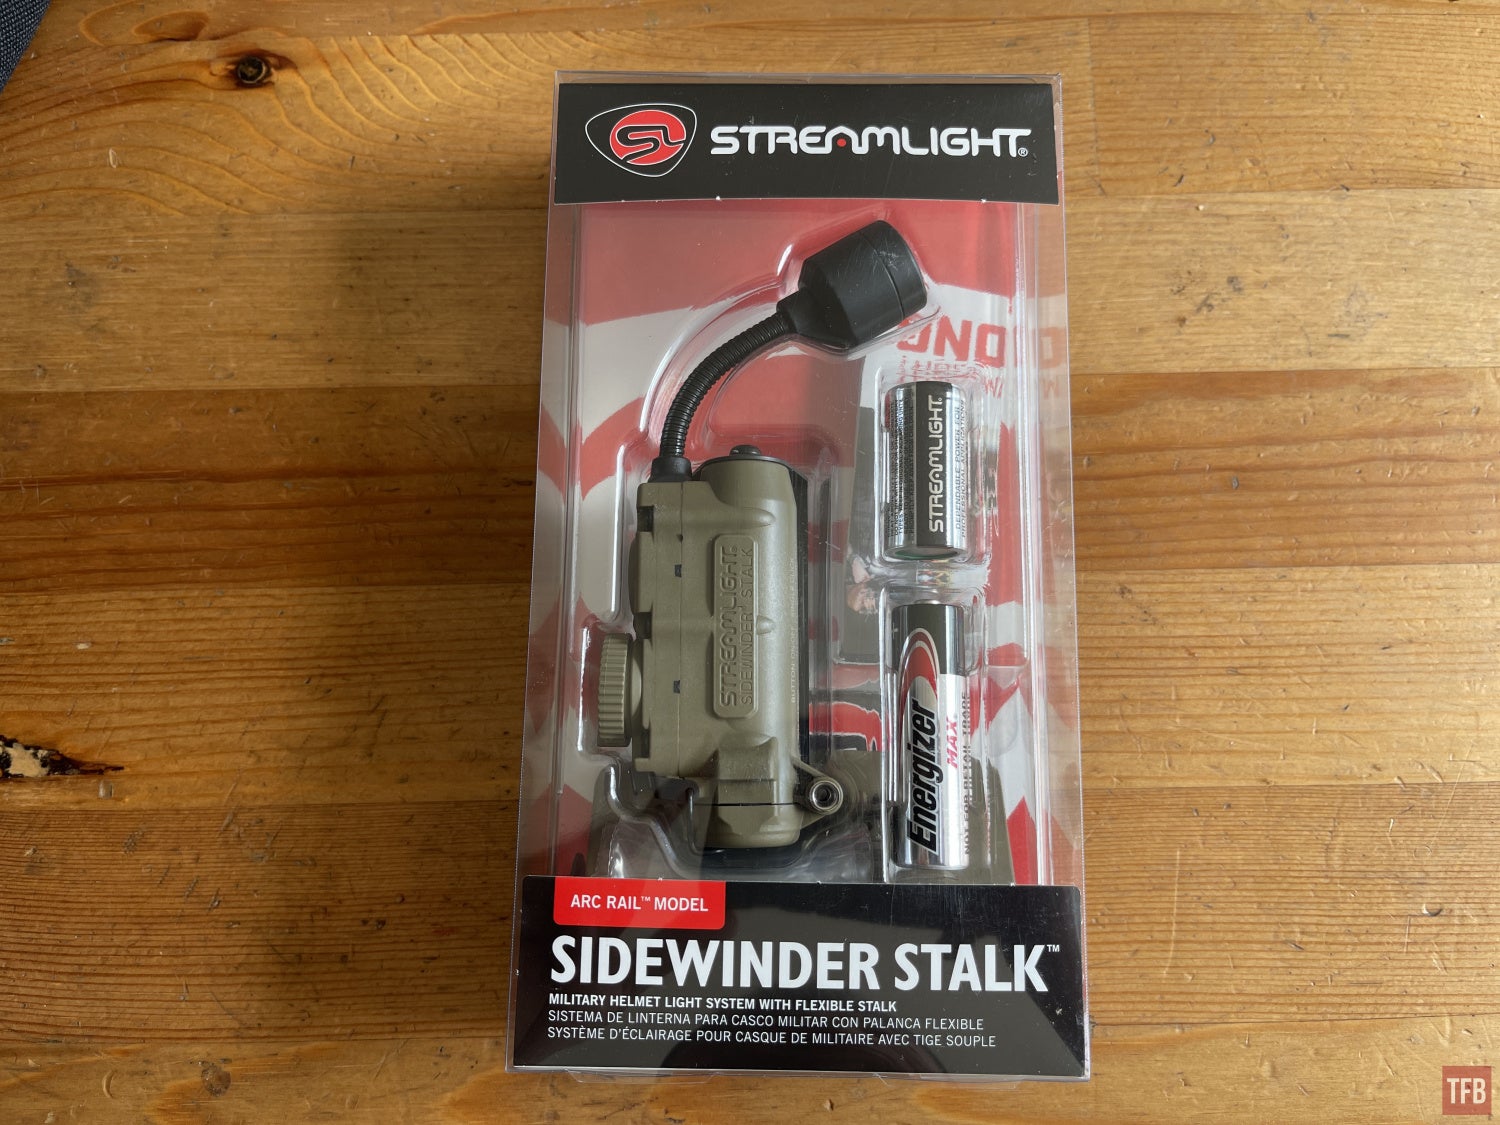
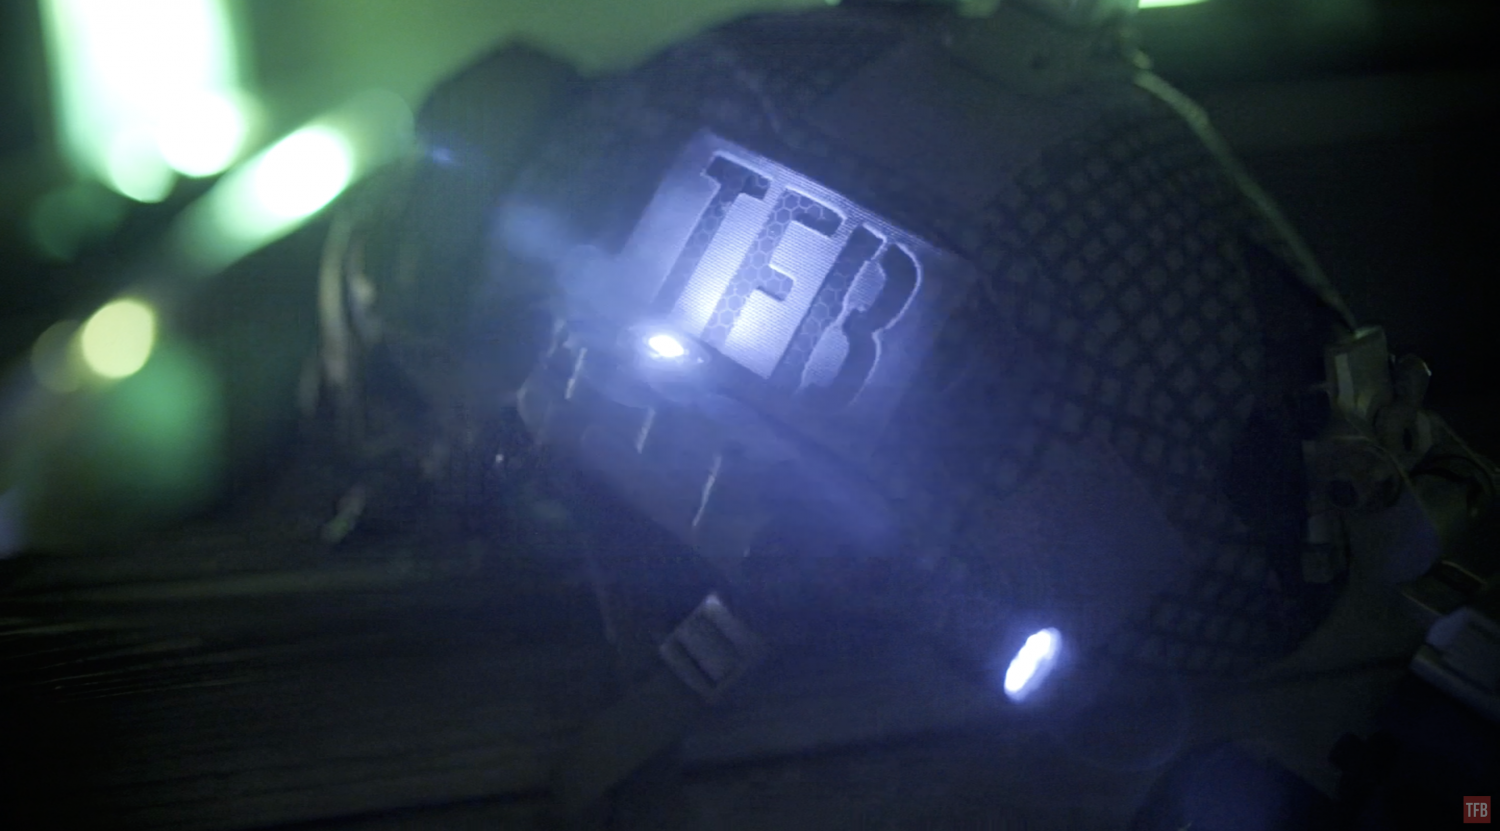
Welcome nocturnal aficionados to another installment of Friday Night Lights. Today we take a look at a relative newcomer to helmet-mounted administrative lighting. Streamlight has expanded their Sidewinder series of military lights and made the Sidewinder Stalk. It is a helmet light that has a variety of attachment methods and is dual fuel and multi-spectrum. Let’s take a closer look.
Streamlight @ TFB:
- Blackhawk Introduces Streamlight TLR-7A Flex & TLR1-HL Lights
- New Streamlight TLR-10 Gun Light with Red Laser
- Wedge Rechargeable EDC Light Launched by Streamlight
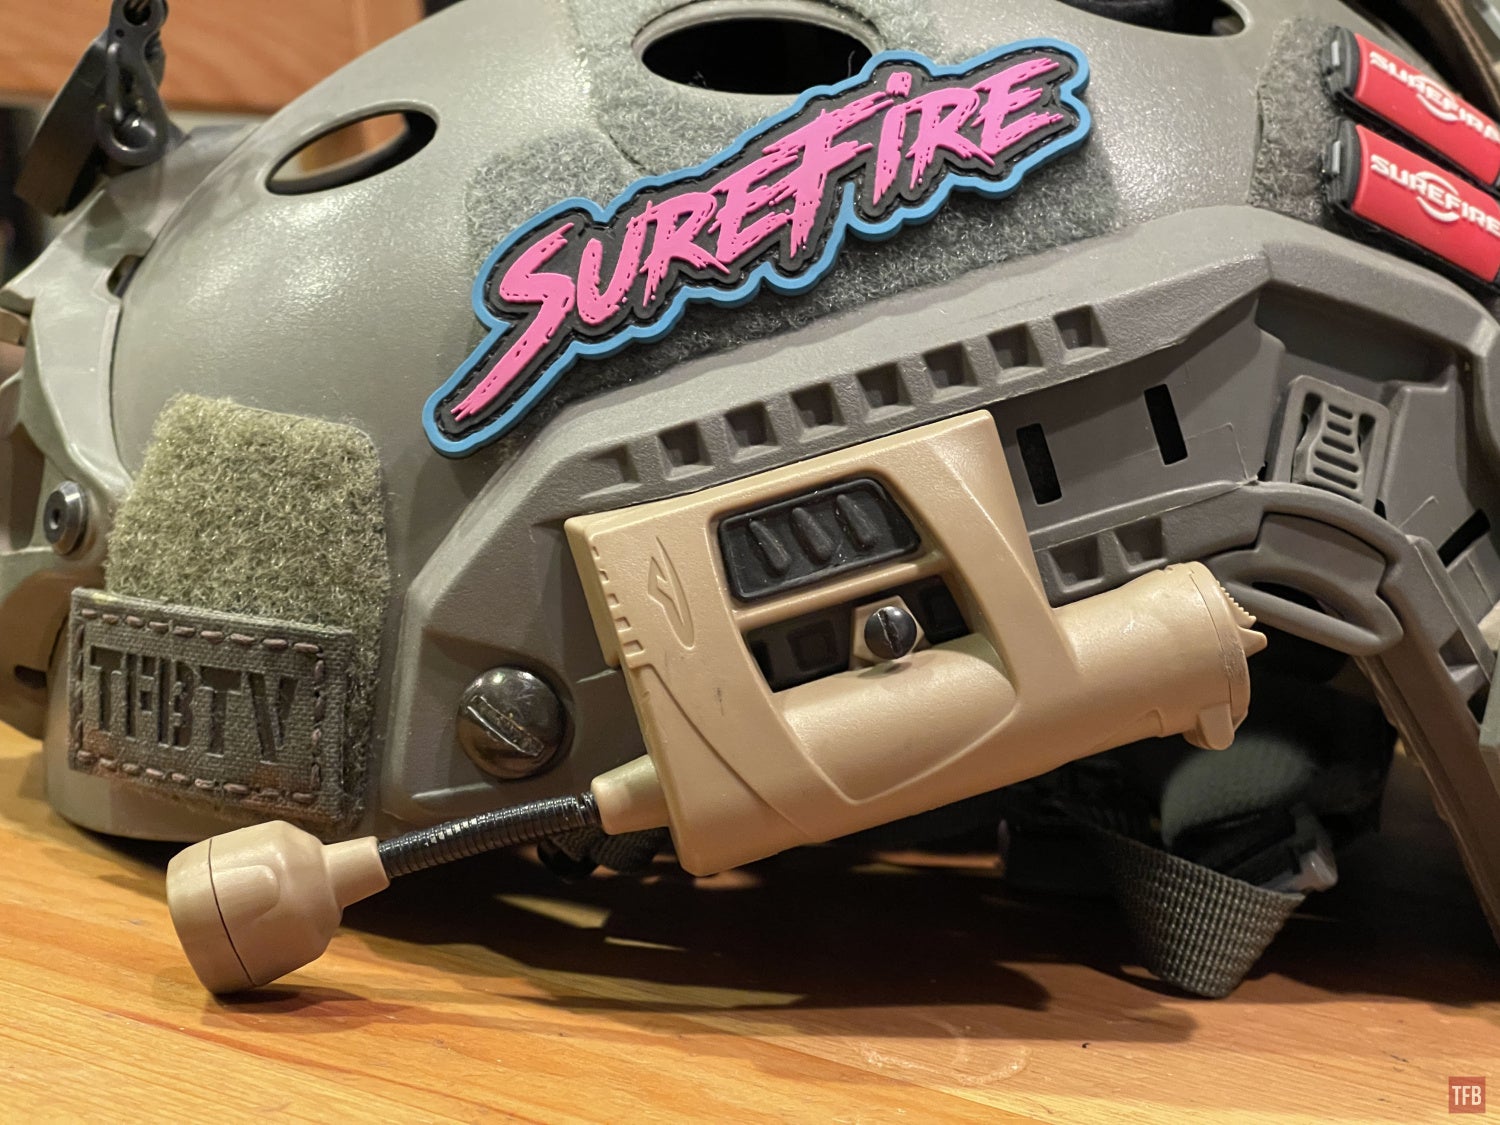
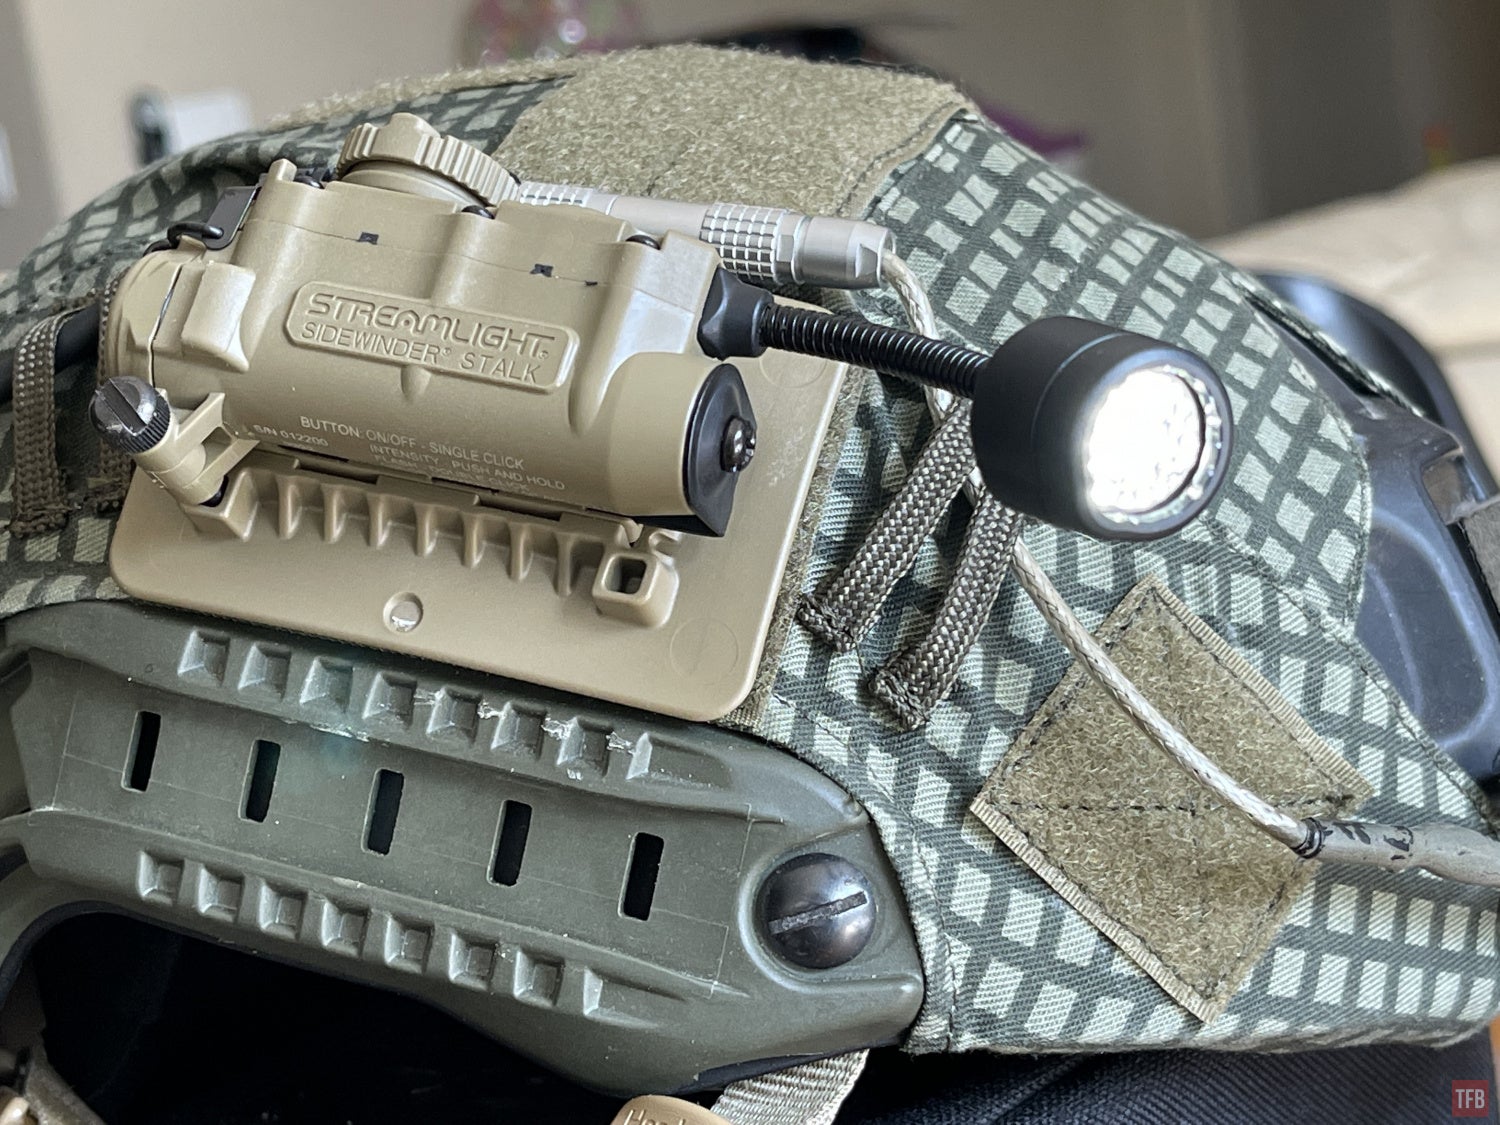
Sidewinder Stalk Helmet Light
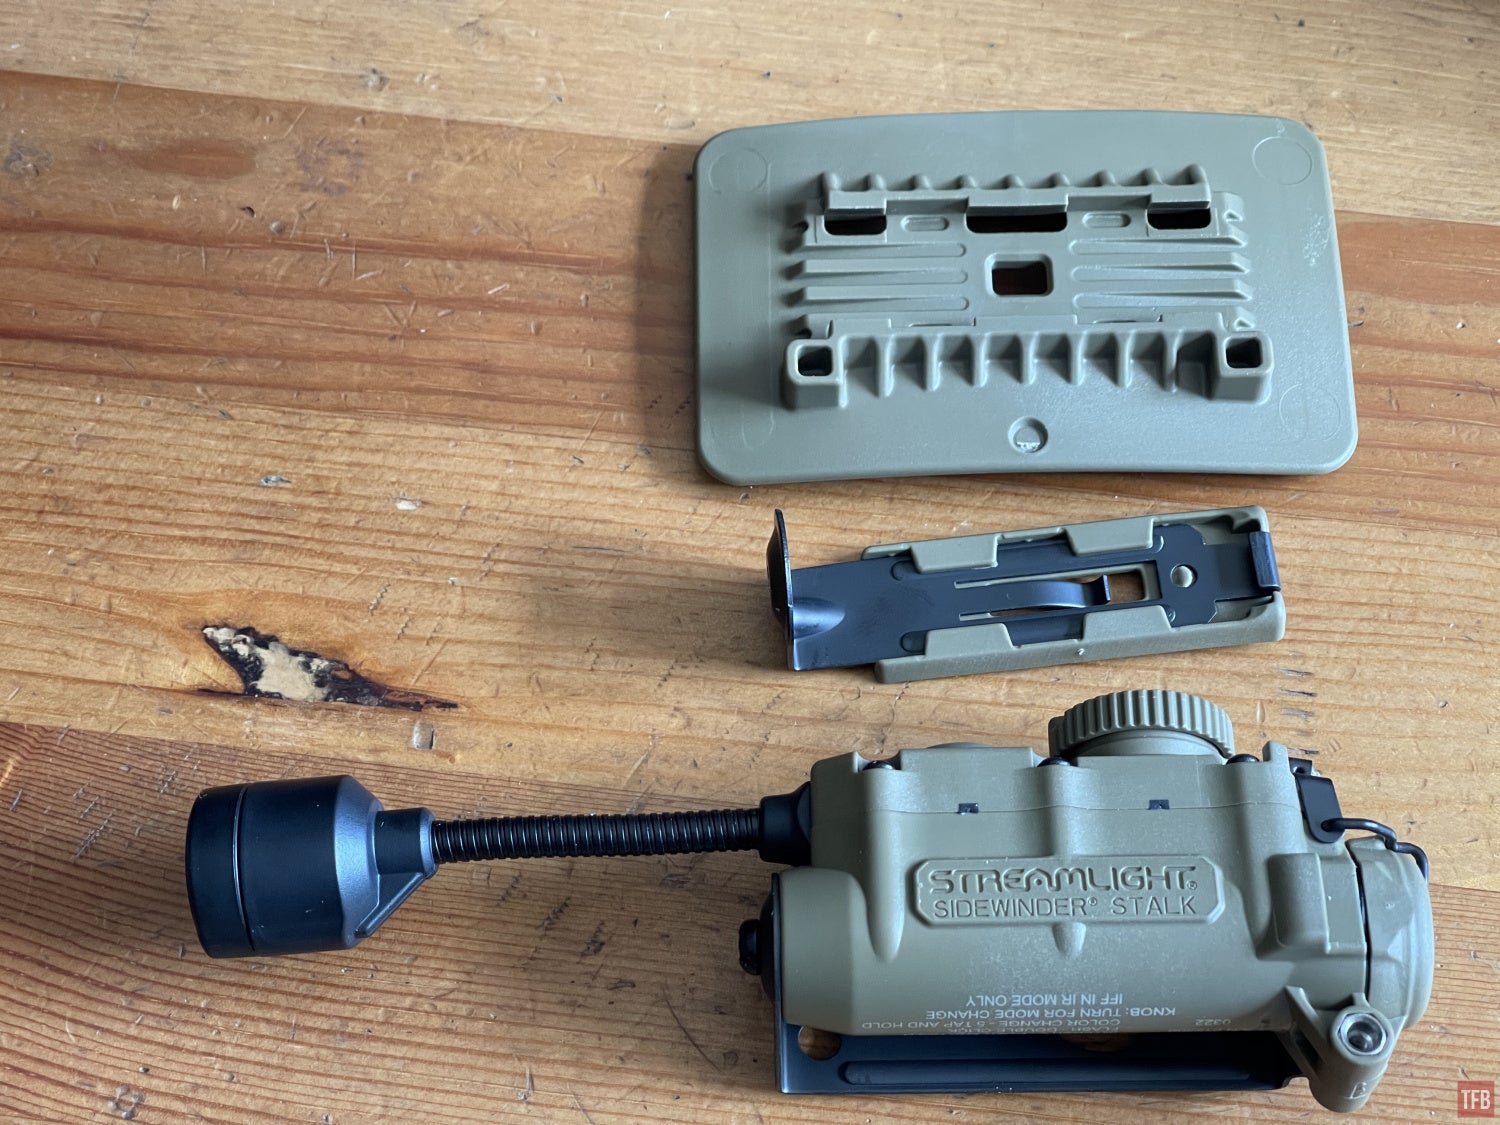
From top to bottom: Velcro mount, ARC rail adapter, Sidewinder Stalk
In the past, the Sidewinder series of lights from Streamlight were personal lights for soldiers. Most were MOLLE compatible while two of them were pseudo helmet lights. However, they were not that great. The Sidewinder Stalk gives you much more flexibility with various mounting options and the fact it is dual fuel.
Mounting The Sidewinder Stalk
The Stalk comes in the package set up for MOLLE. There is a large metal clip that can fit in in MOLLE webbing. See the large keymod-shaped hole in the clip? That is for an alternate accessory for mounting to the side of a helmet that does not have rails or Velcro.
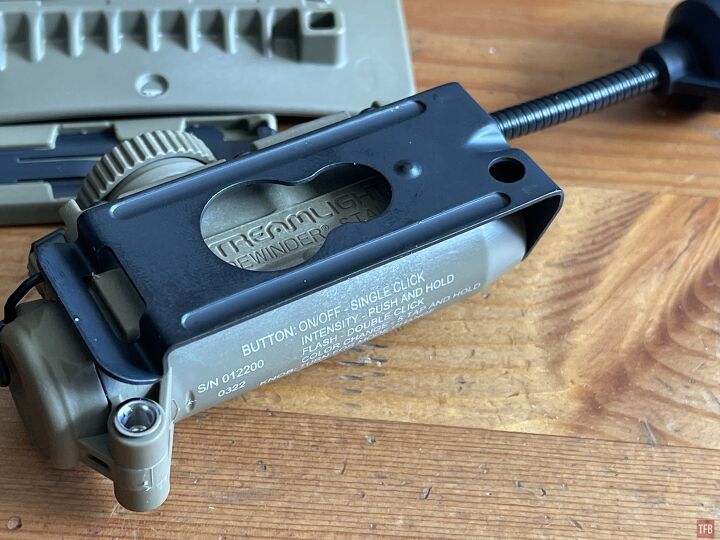
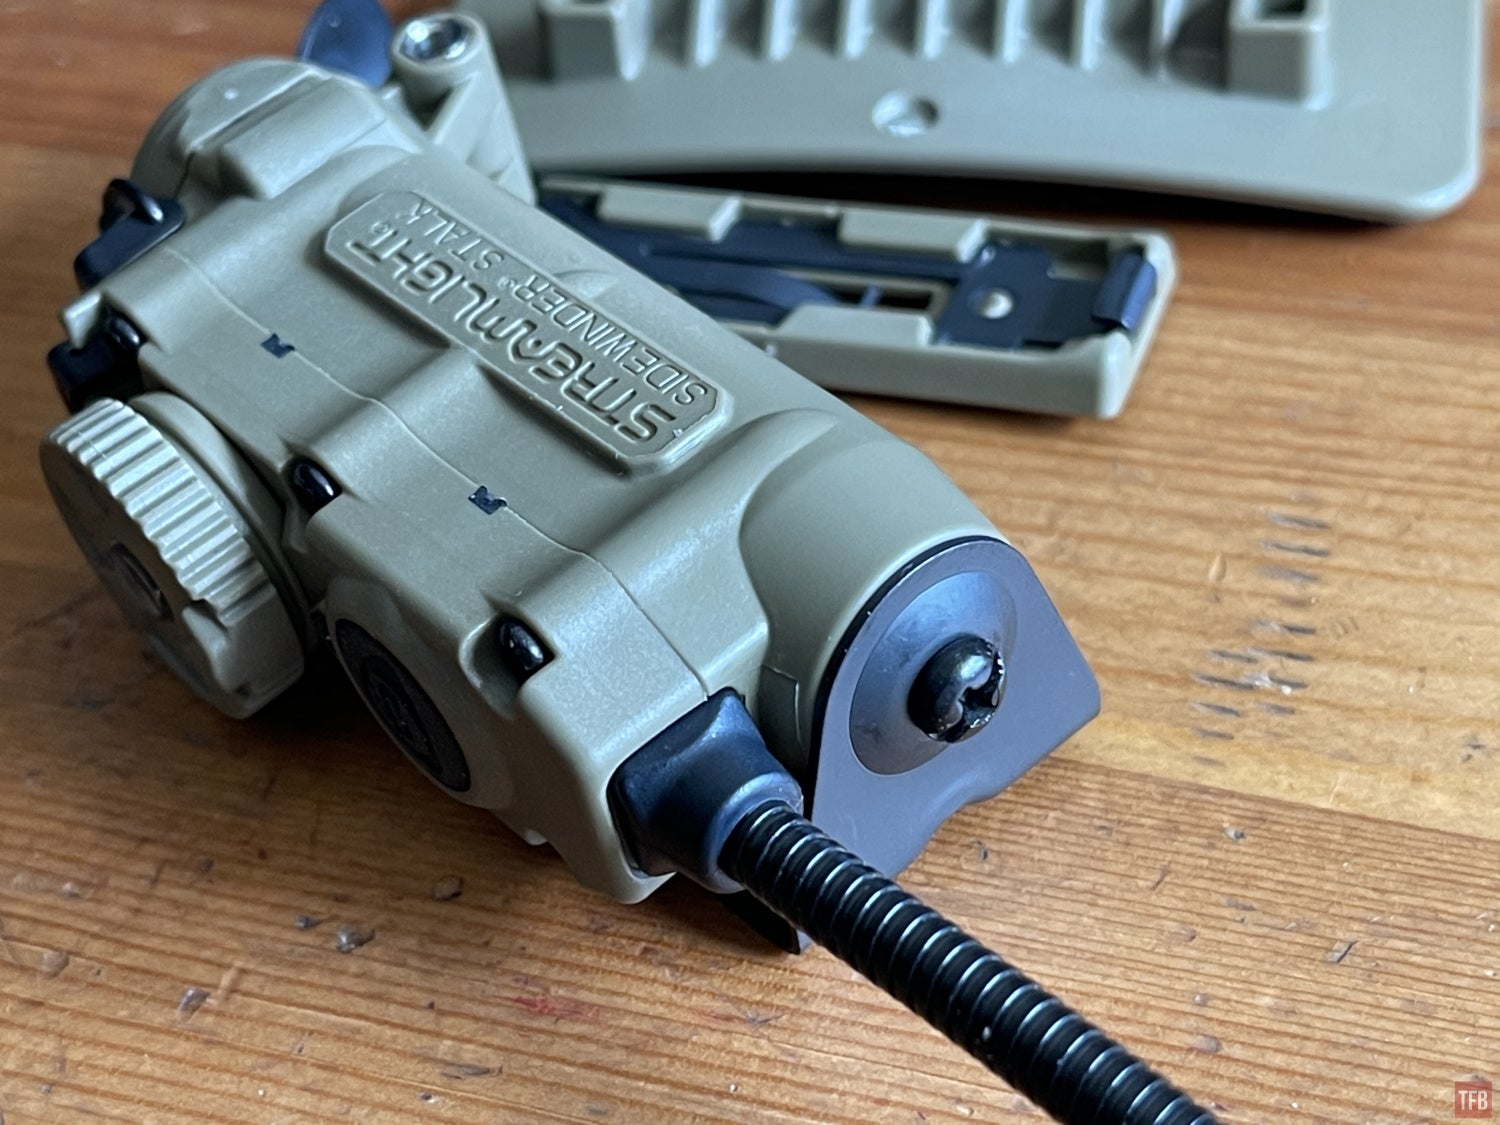

Photo by Streamlight
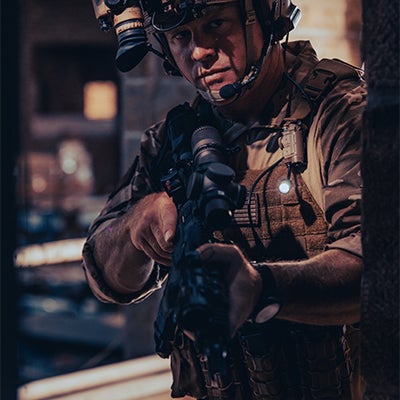
Photo by Streamlight
There is an optional helmet mount, that is not included with the Sidewinder Stalk, for attaching the light to the brim of your helmet.
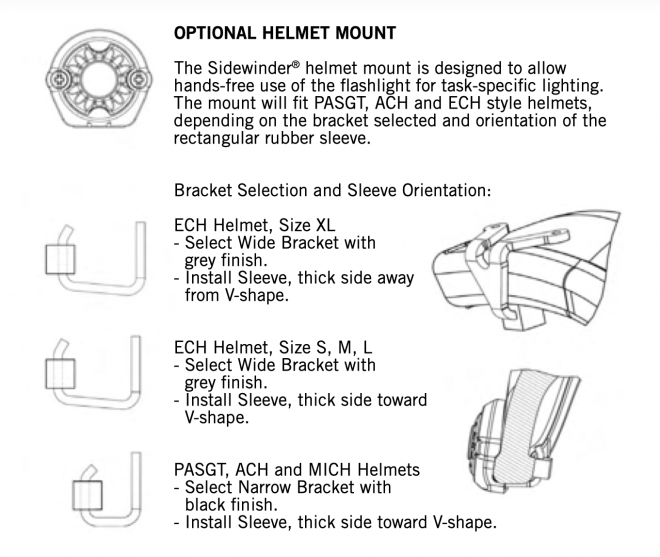
Photo by Streamlight
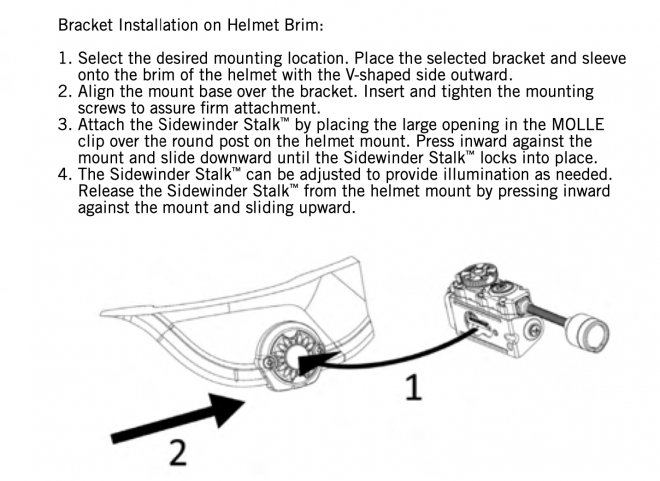
Photo by Streamlight
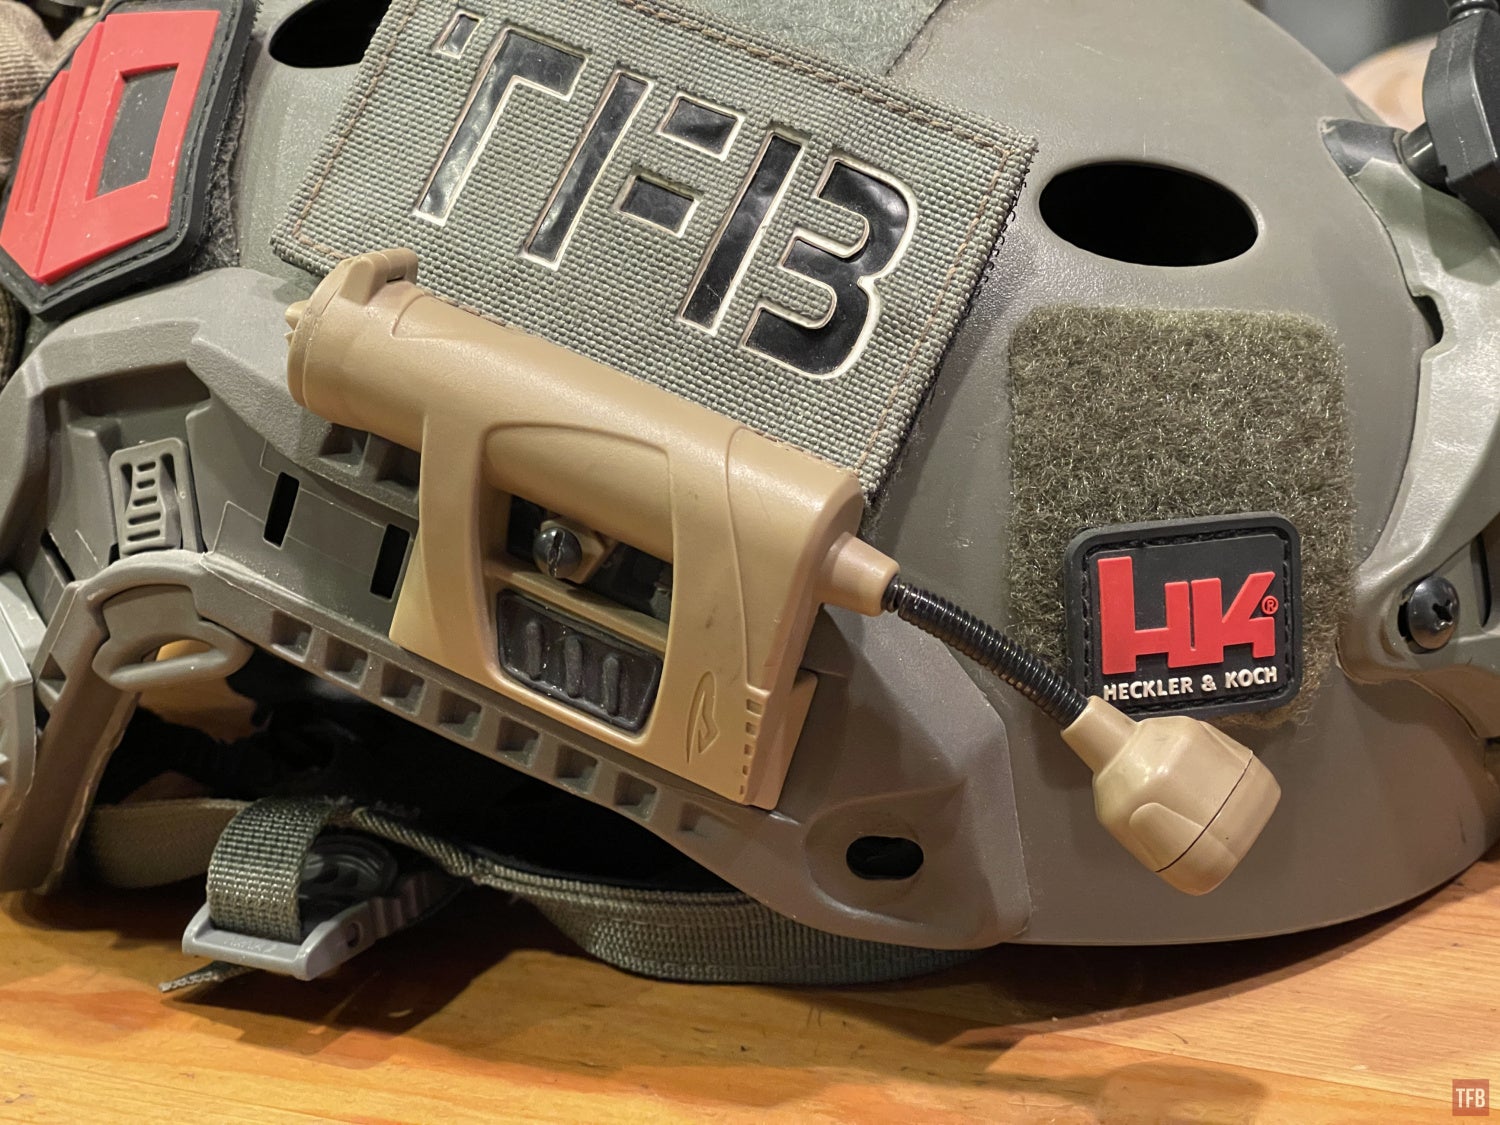
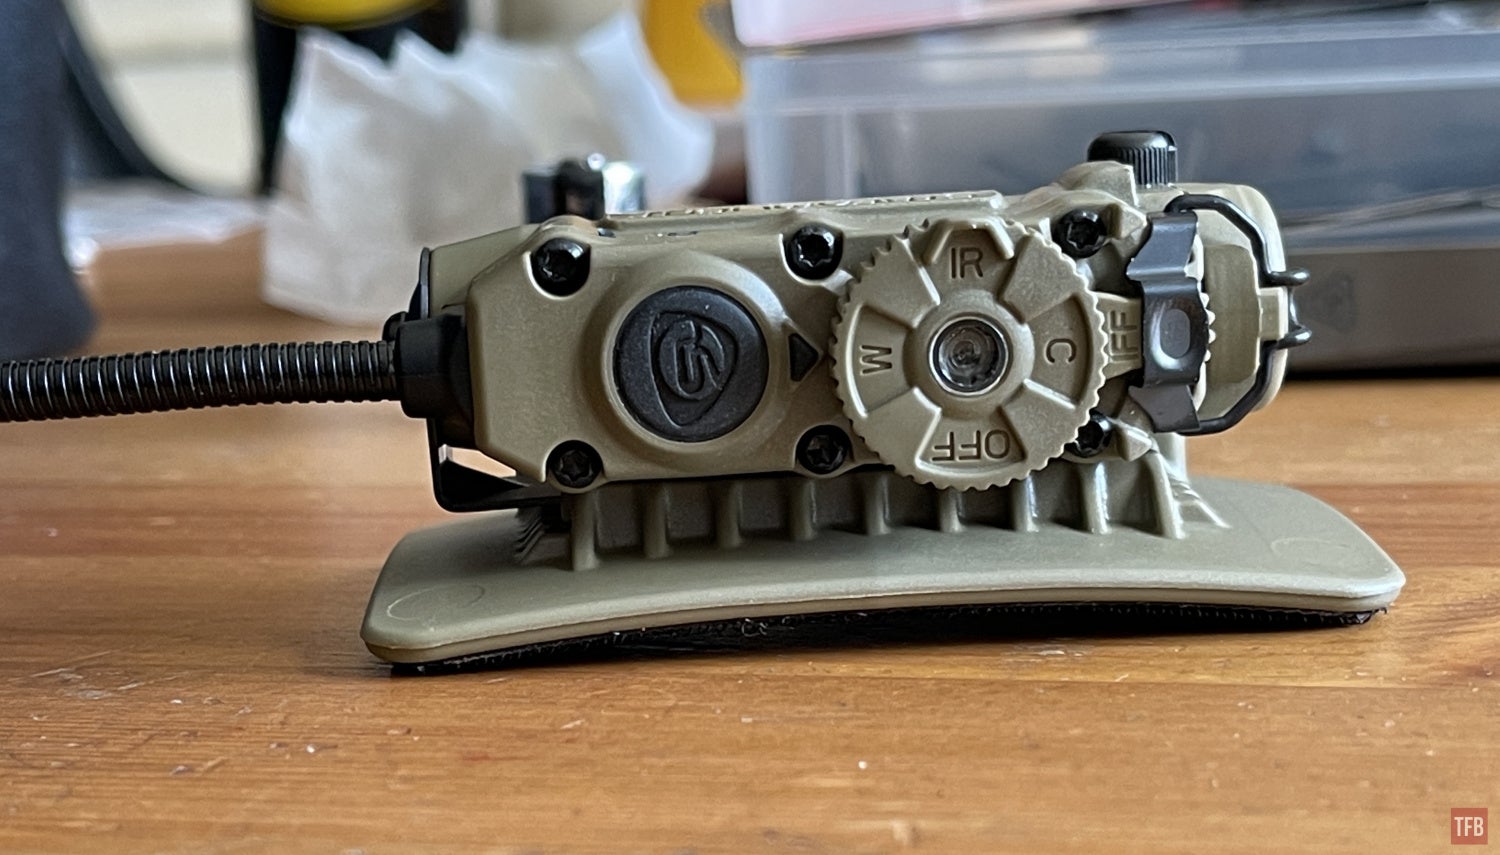
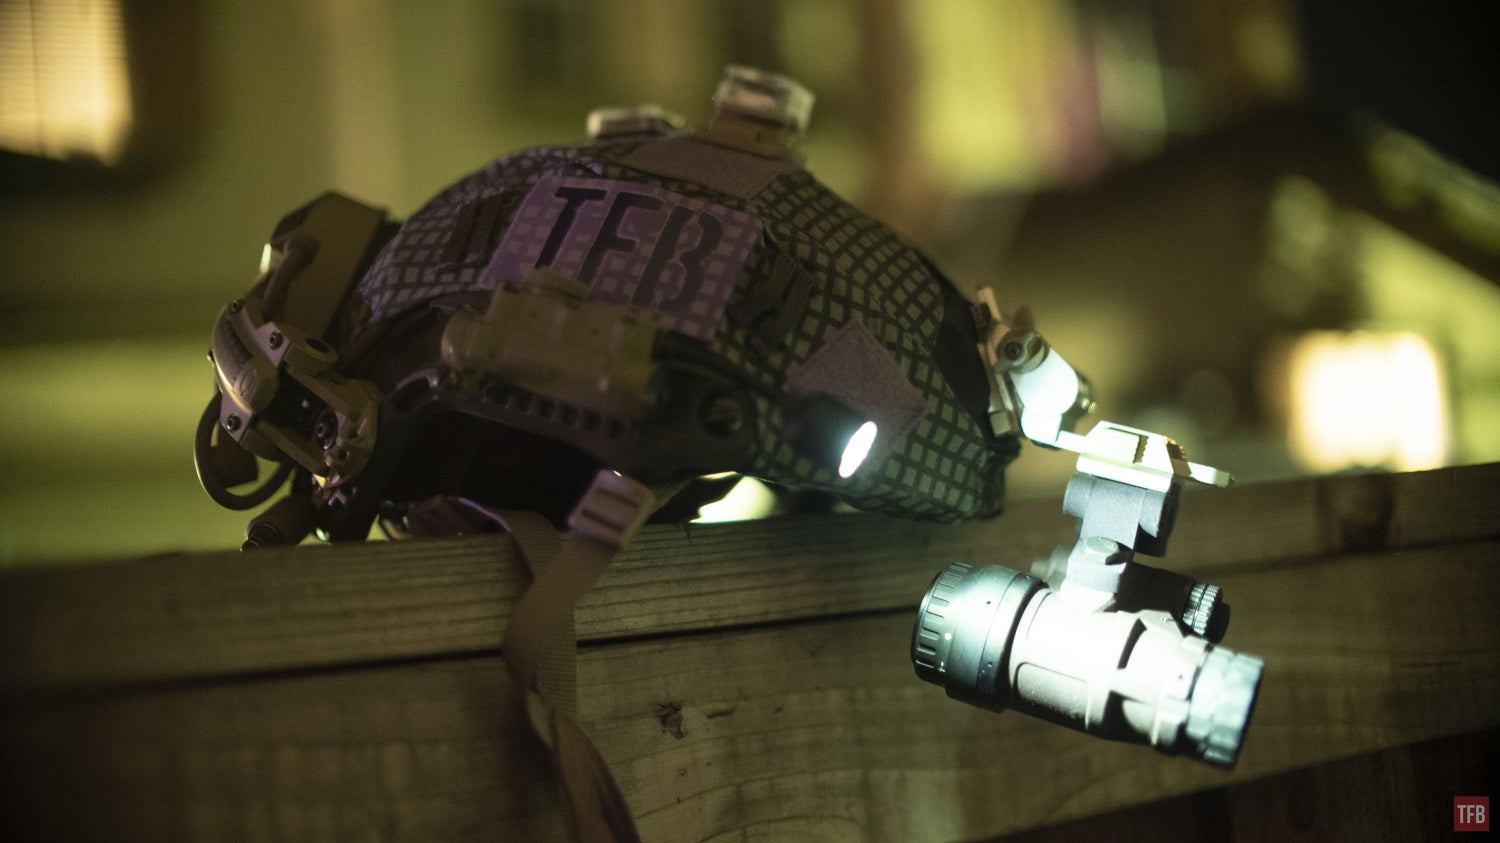
Most people are using modern helmets with rails. In that case, you simply unscrew the Phillips screw, remove the MOLLE pocket clip and attach the ACH rail adapter. It attaches to the rectangular slot on either side of the Stalk housing. This way you can mount the Sidewinder Stalk on the left or right side of your helmet’s ARC rails.
With the ARC rail adapter, you can slide the Sidewinder Stalk into the ARC rail of your helmet.
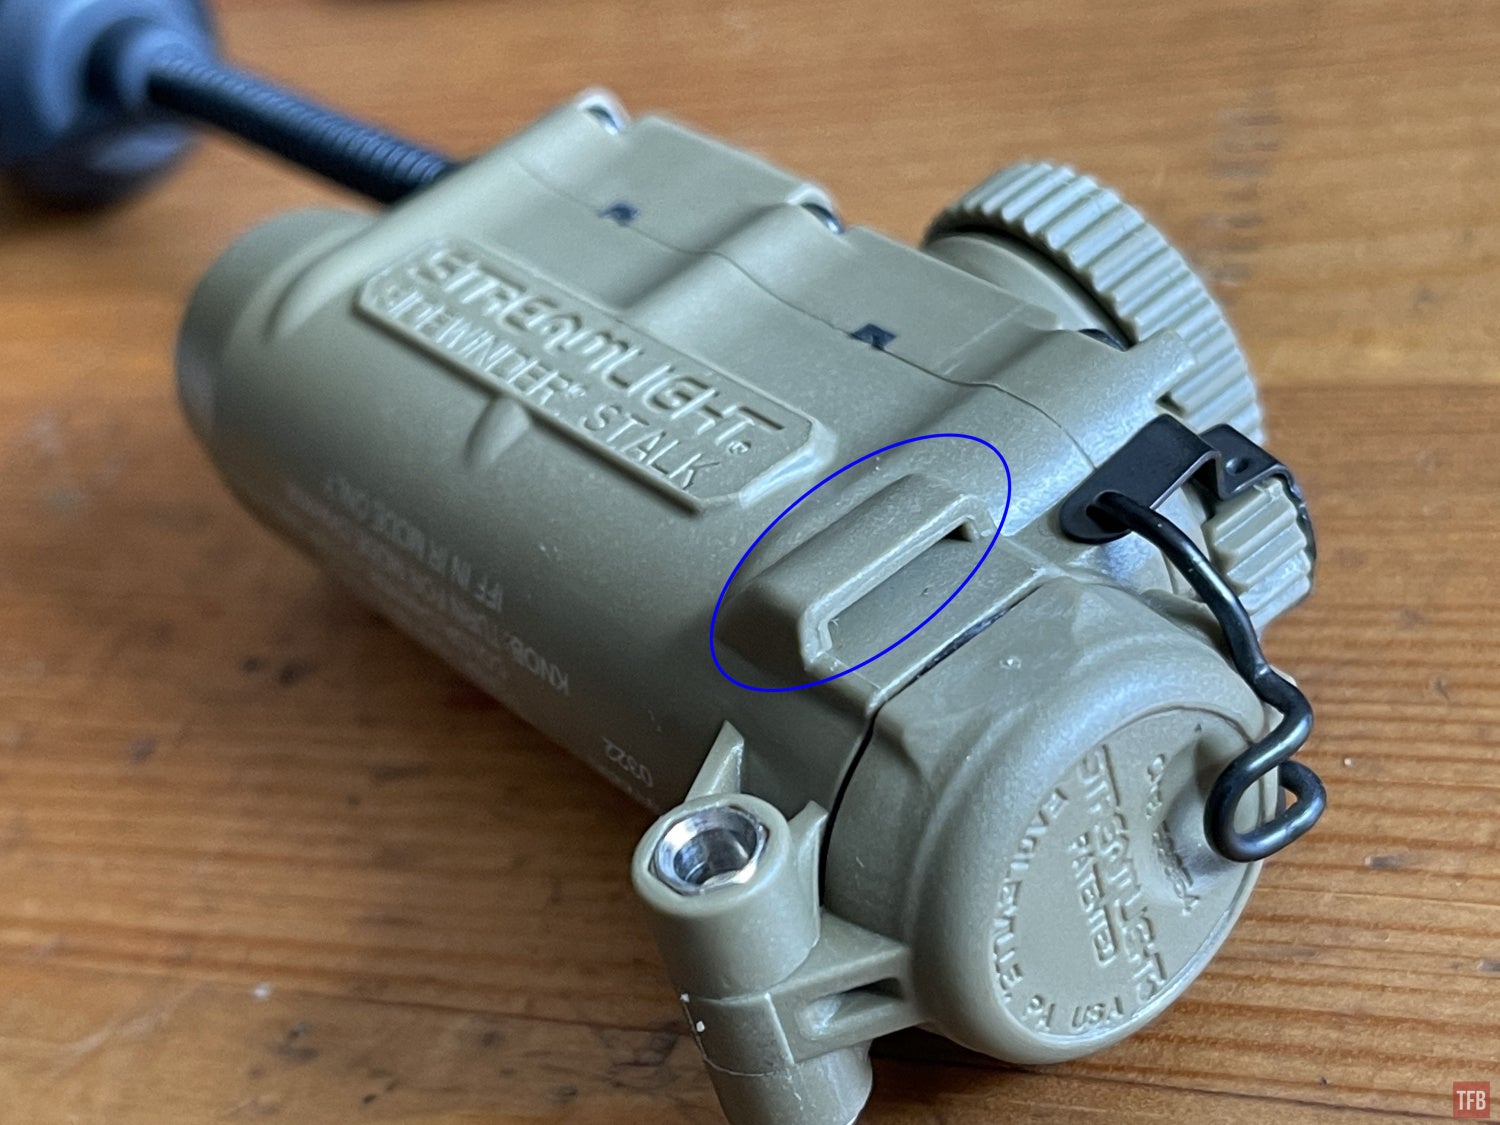
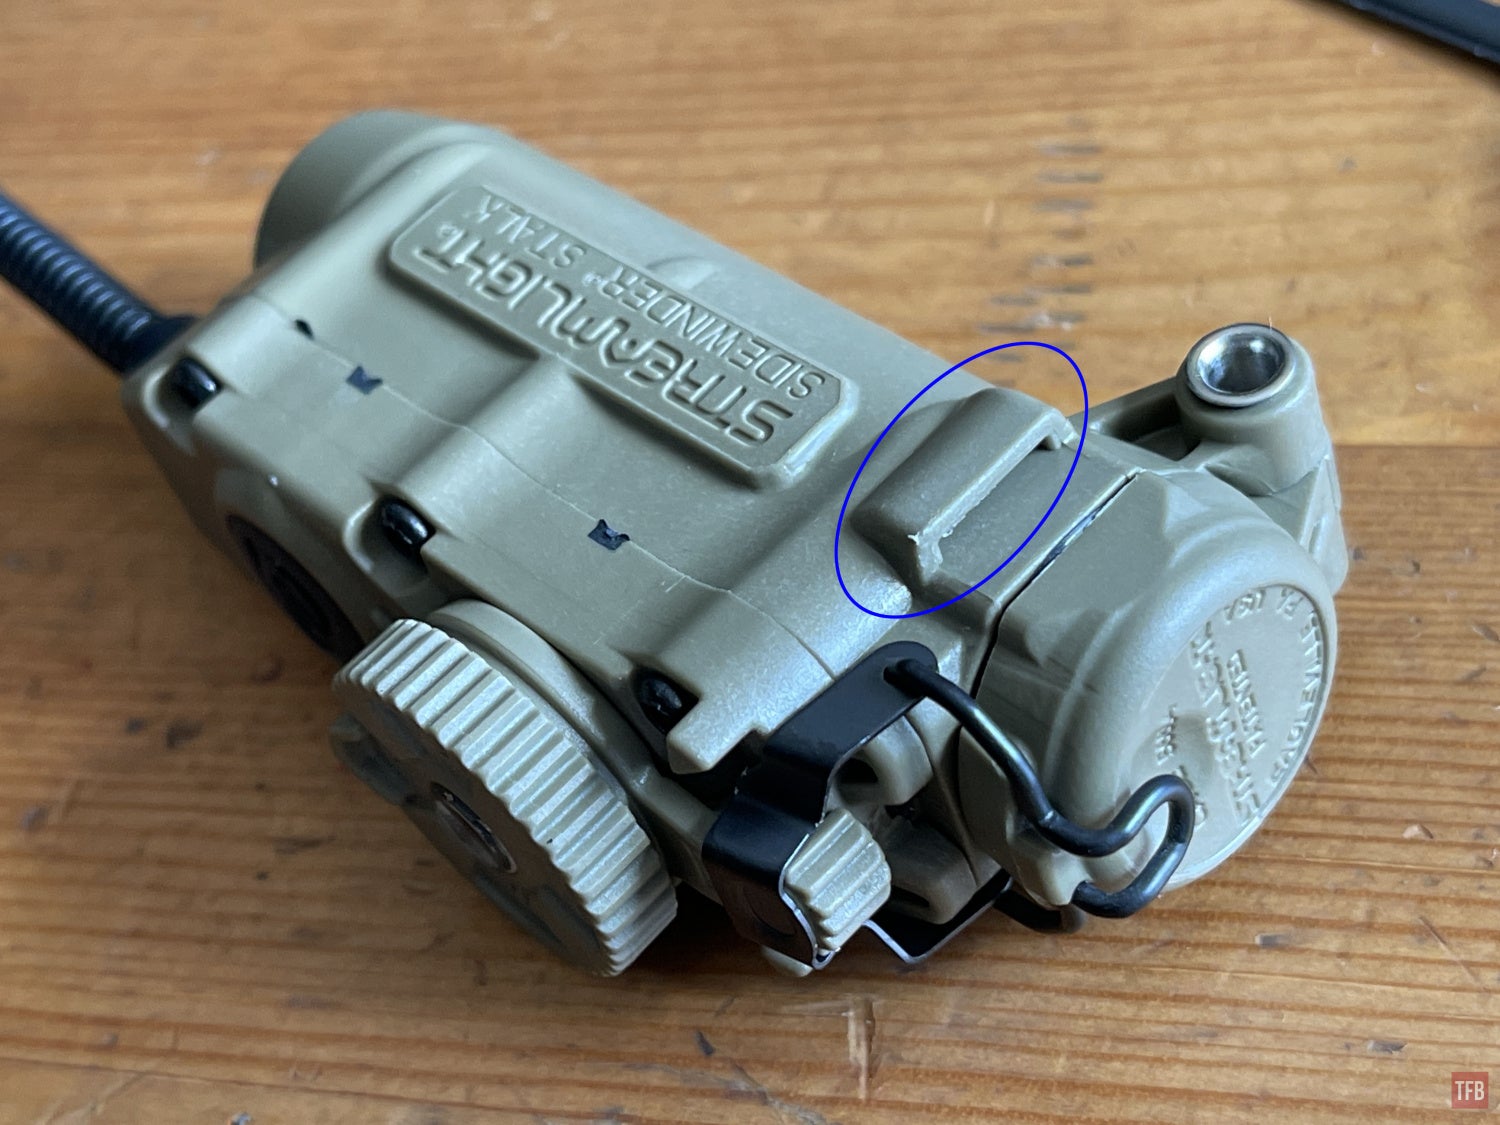
See the small metal hole just below the battery cap door? There is a set screw that you install into that hole to index with the indentations on the ARC rail. It acts like a stop so the Stalk cannot slide forwards or backwards once installed. See the screw in the photo below. You can see the screw go through the Stalk and into the small pocket in the ARC rail.
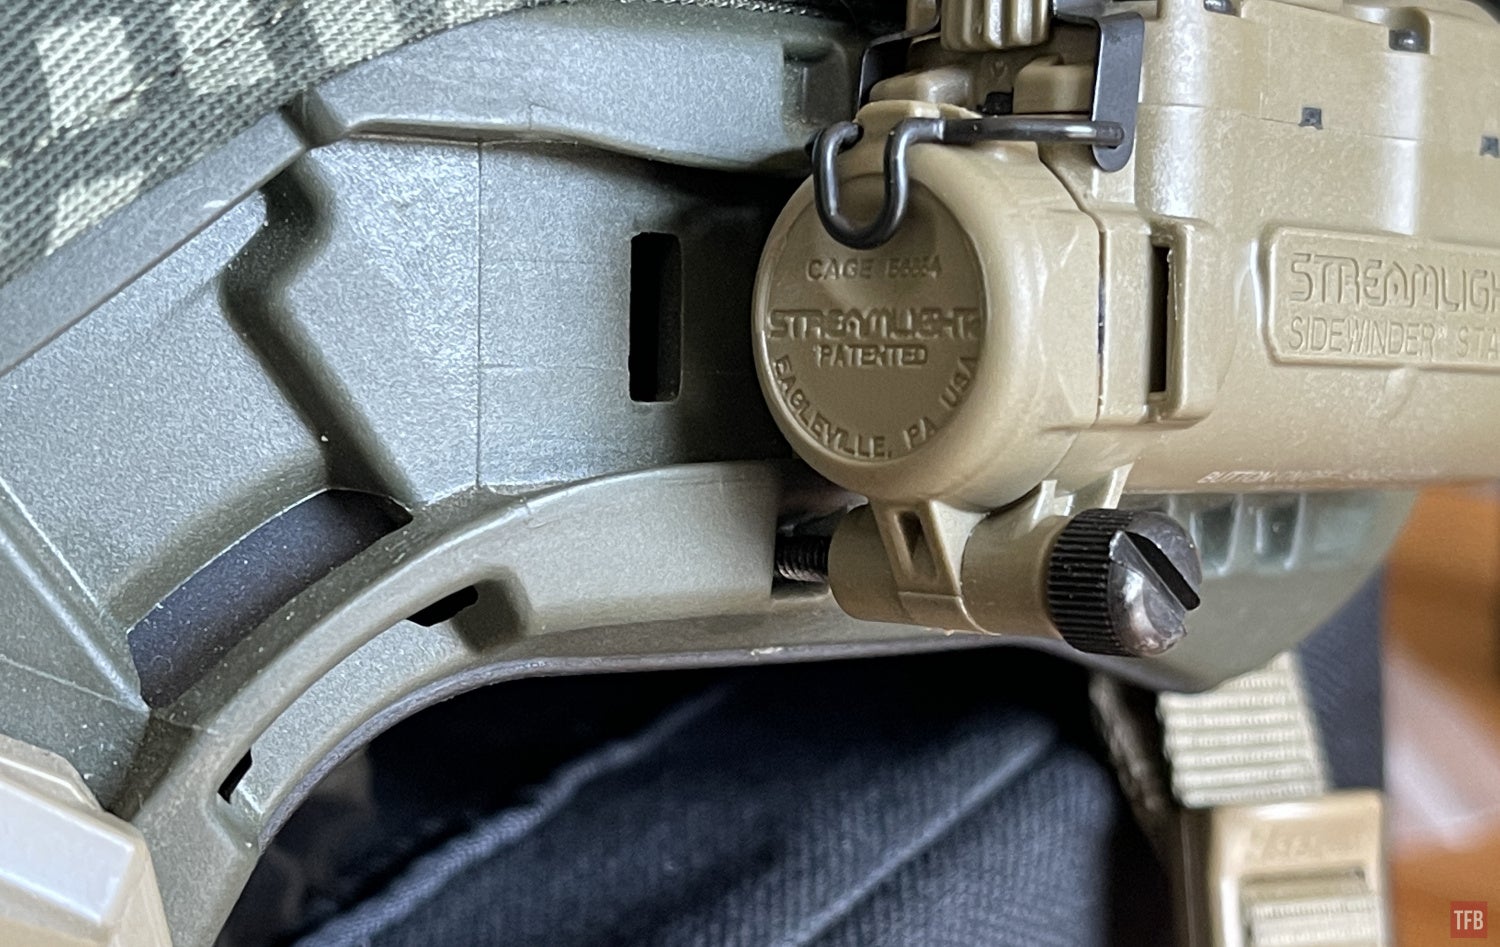
The Stalk reminds me of the Princetontec that I have, however, the Princetontec is not as ambidextrous. See photos below. The charge sits above the rail or below depending on which side the light is on.
There is an alternate mounting option for the Stalk and that is the Velcro ARC rail adapter. This is in case your ARC rail no longer has the real estate to accommodate the Sidewinder Stalk light. Below is a good example of how your ARC rails may be occupied by a helmet-mounted ear pro.
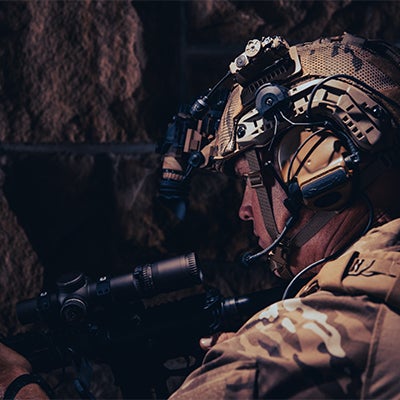
Photo by Streamlight
In that case, you simply insert the Stalk into the Velcro adapter.
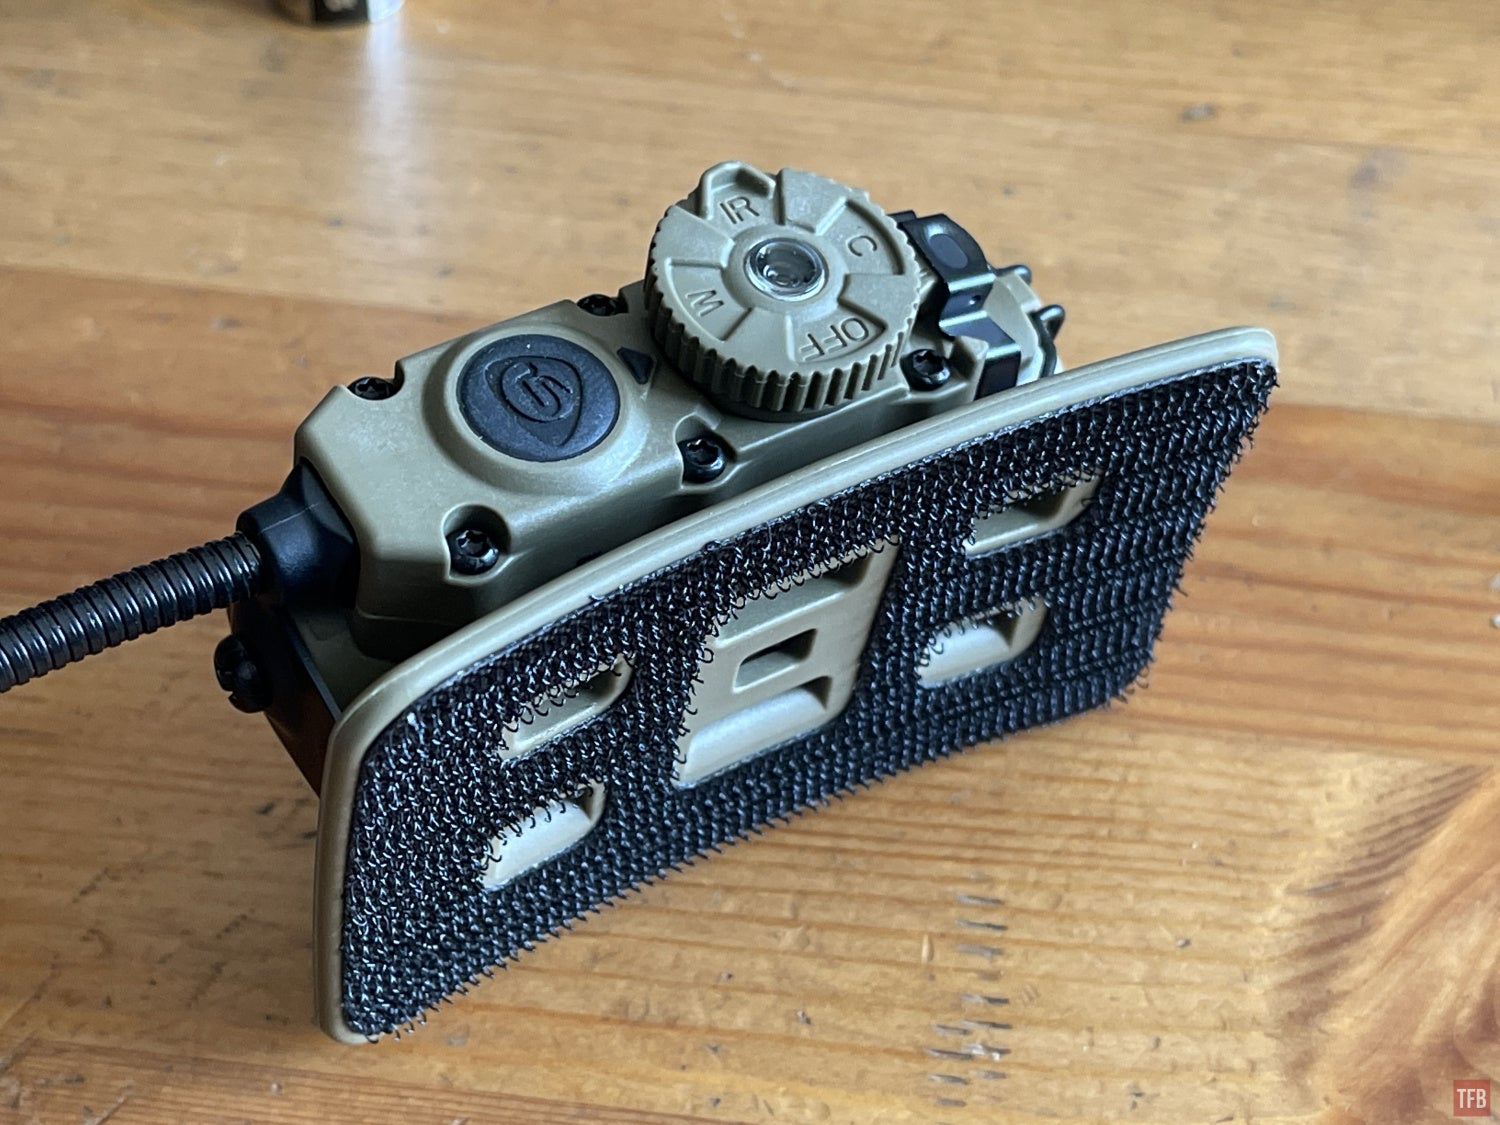
The hook and loop ARC rail adapter has pockets in each corner of the miniature ARC rail. So you can orient the Sidewinder Stalk in any direction and the set screw will find interface with one of these pockets.
The hook and loop ARC rail adapter reminds me of Echo Arms and their FAST attach mount. It is a curved piece of plastic that allows you to affix it to Velcro but it has a single M-LOK slot in it whereas the Stalk adapter has a mini ARC rail.
Dual Fuel Stalk
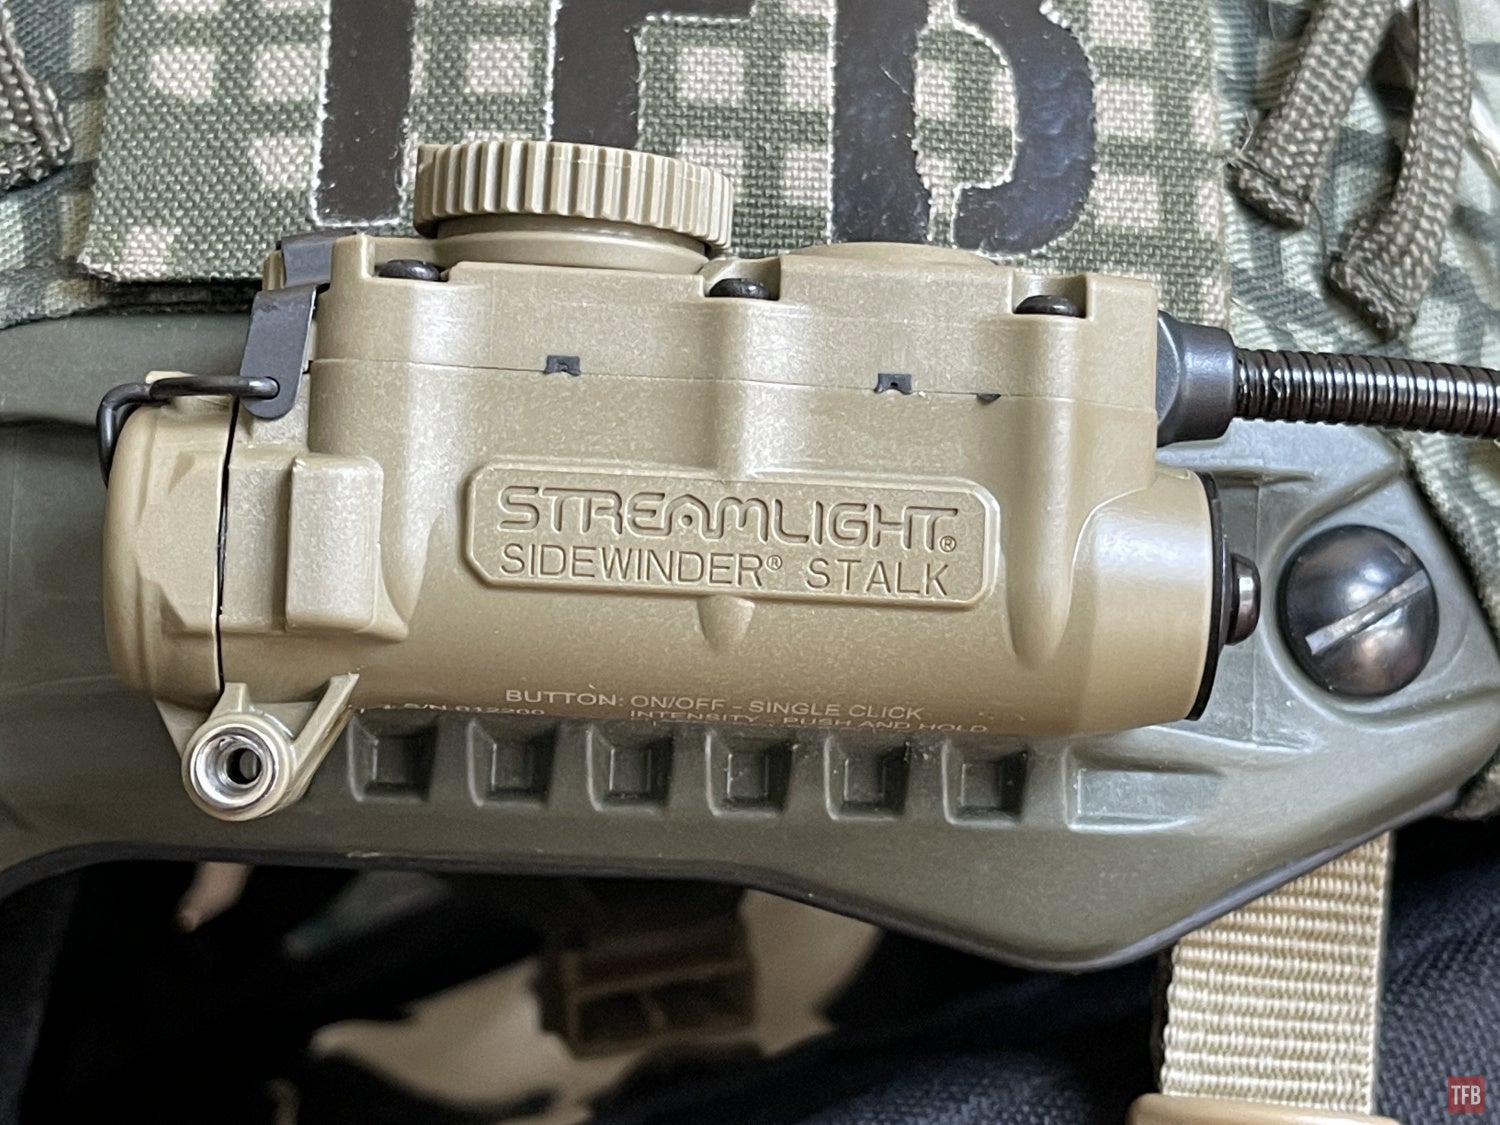
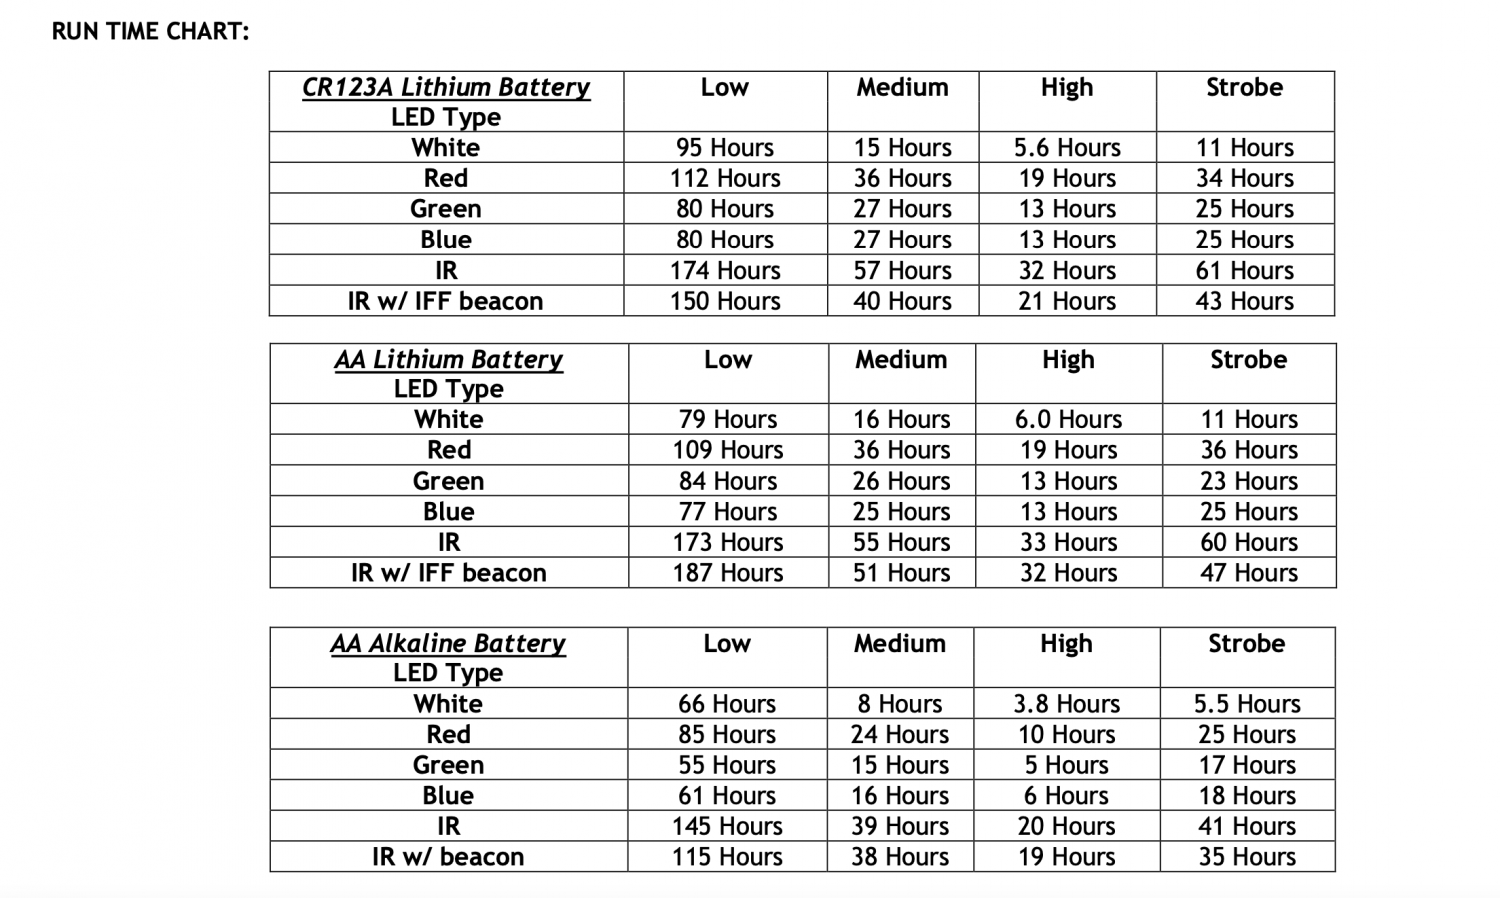
You can power the Streamlight Sidewinder Stalk with either a CR123 or AA battery. The Stalk comes with both.
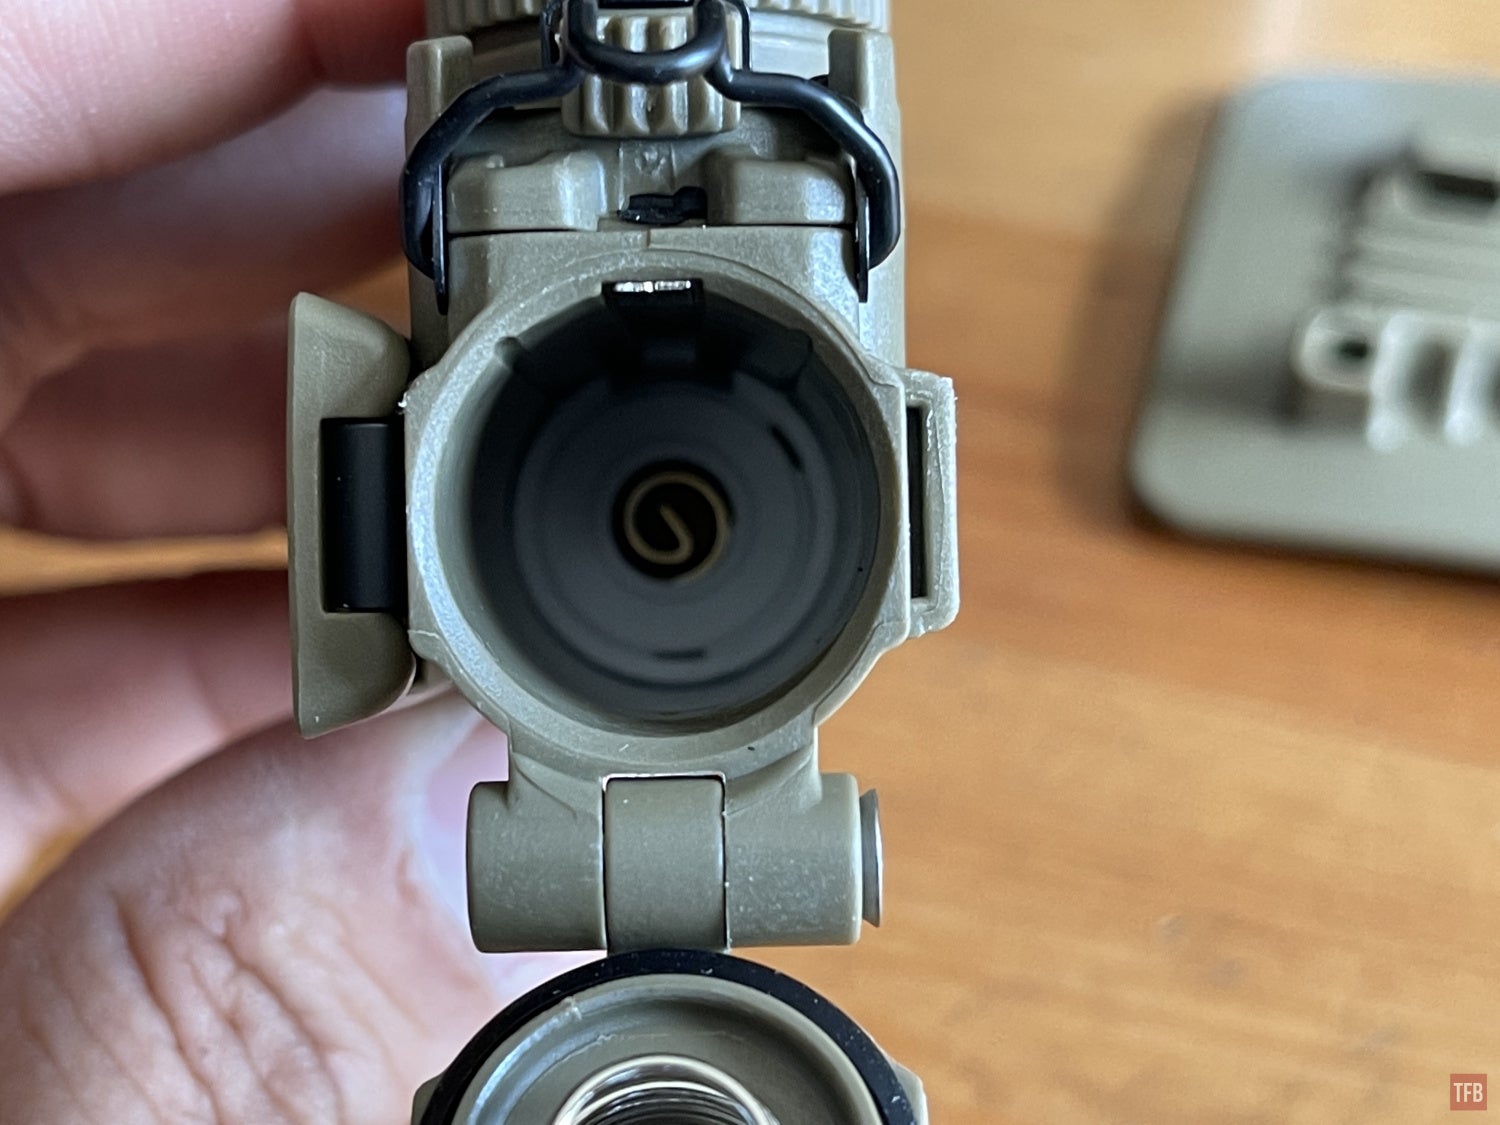
Inside the battery compartment is a two-part spacer. It adjusts to the battery you decide to use. You just drop in a AA or CR123 and they fit perfectly.
Take a look at the performance curve. A lithium AA battery will last longer than a CR123 but the CR123 can run the LEDs a little harder for 76 lumens for several minutes before tapering to 57 lumens like the AA batteries.
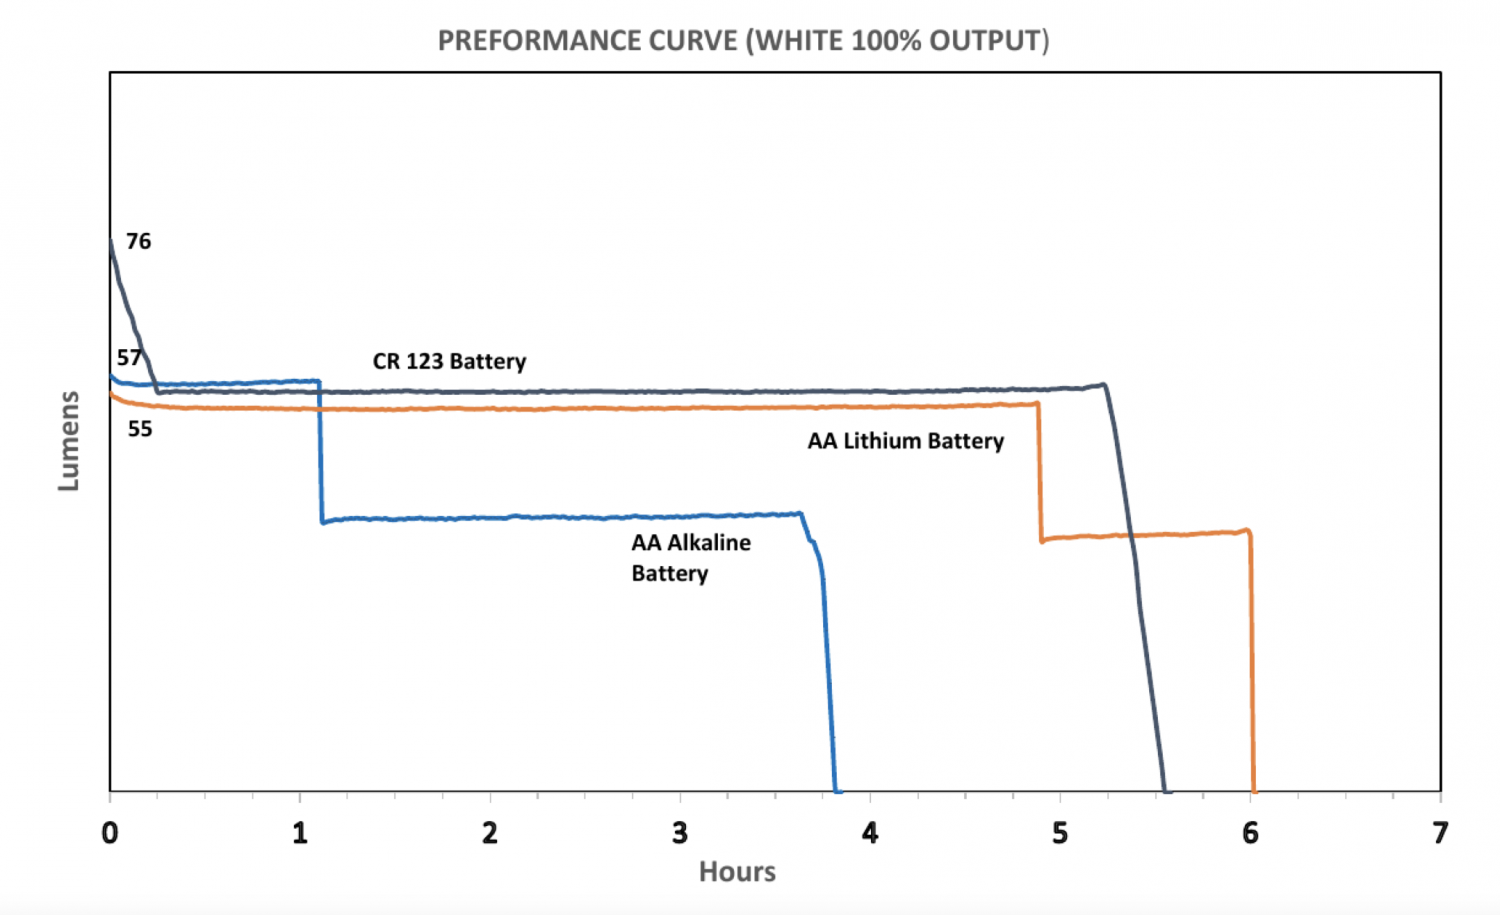
Here is the run time chart for the different battery types.
Multi-Spectrum Stalk
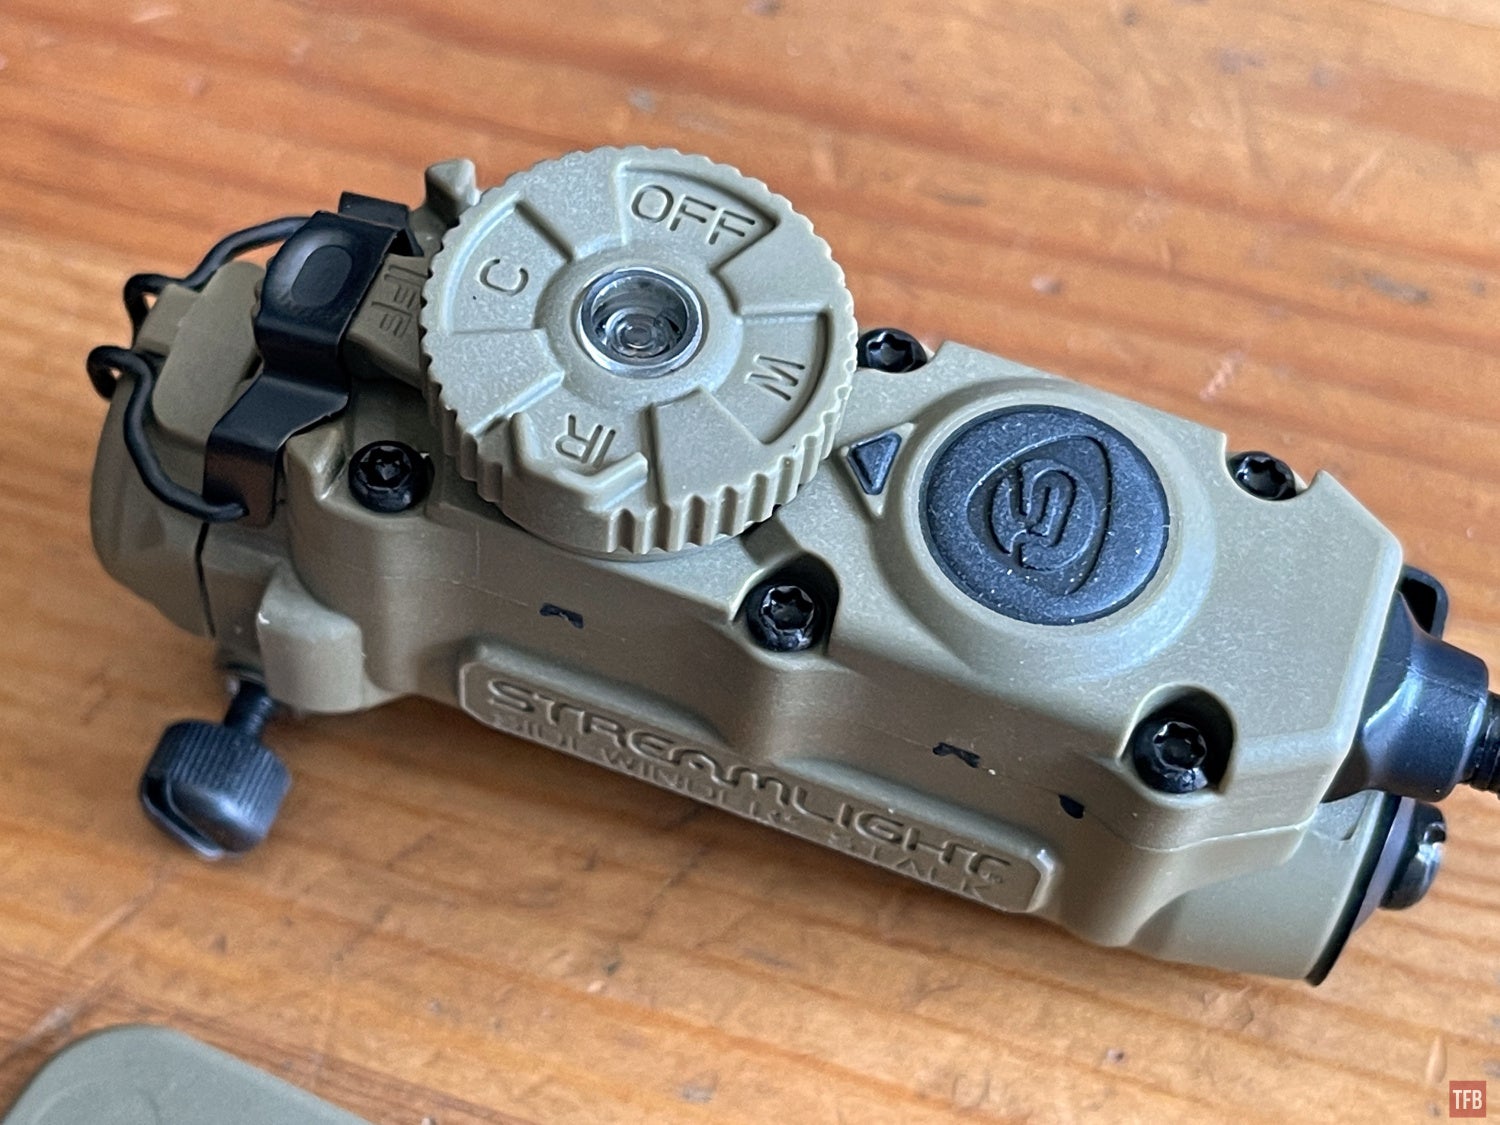
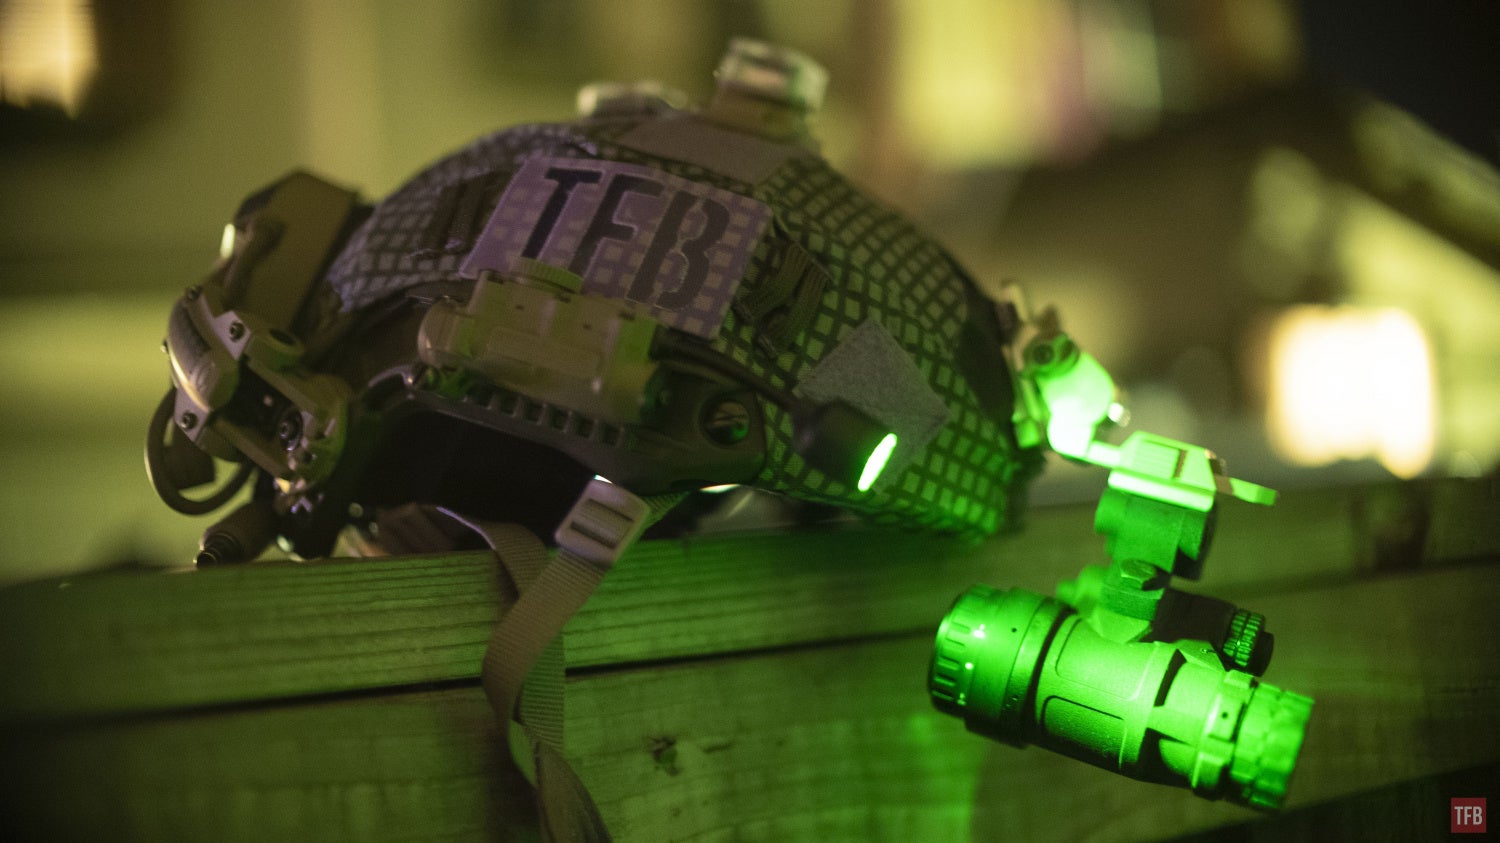
The Sidewinder Stalk has four color modes including a built-in IFF beacon. Take a look at the control wheel in the photo below. The IFF beacon is the clear center in the control wheel. There are four positions on the wheel and a main power button just in front of it. At the back is the IFF switch and cover. Flip the metal cover down and slide the IFF switch left or right. It only works in IR mode.
You can choose between white, red, blue, green, or infrared. In order to change colors, you need to press and tap the main button five times. Then it will switch through the available LEDs.
White LED
All the LEDs are white.
Red LED.
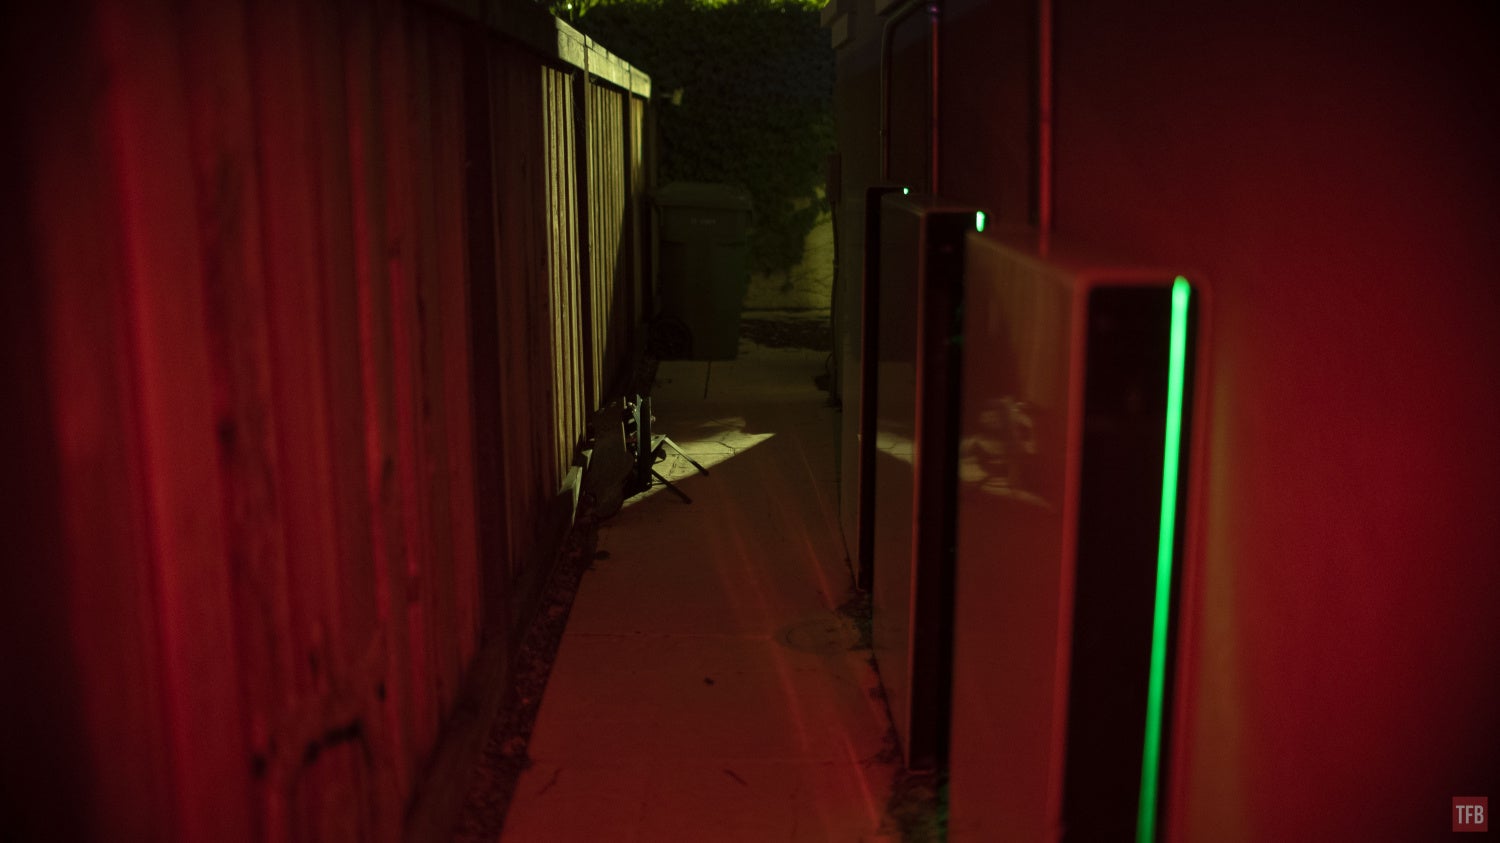
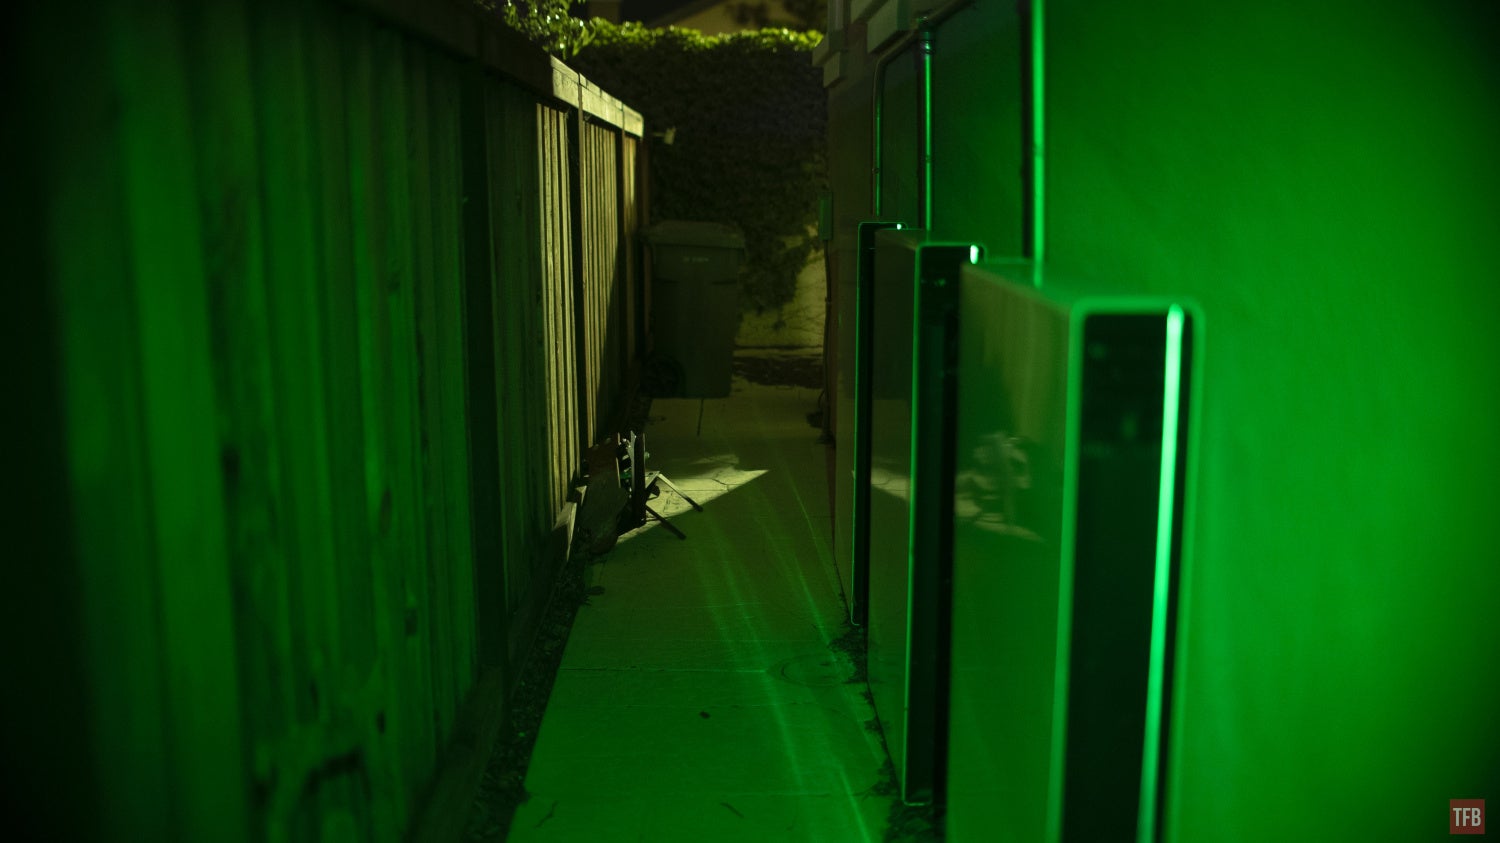
Green LED at full brightness.
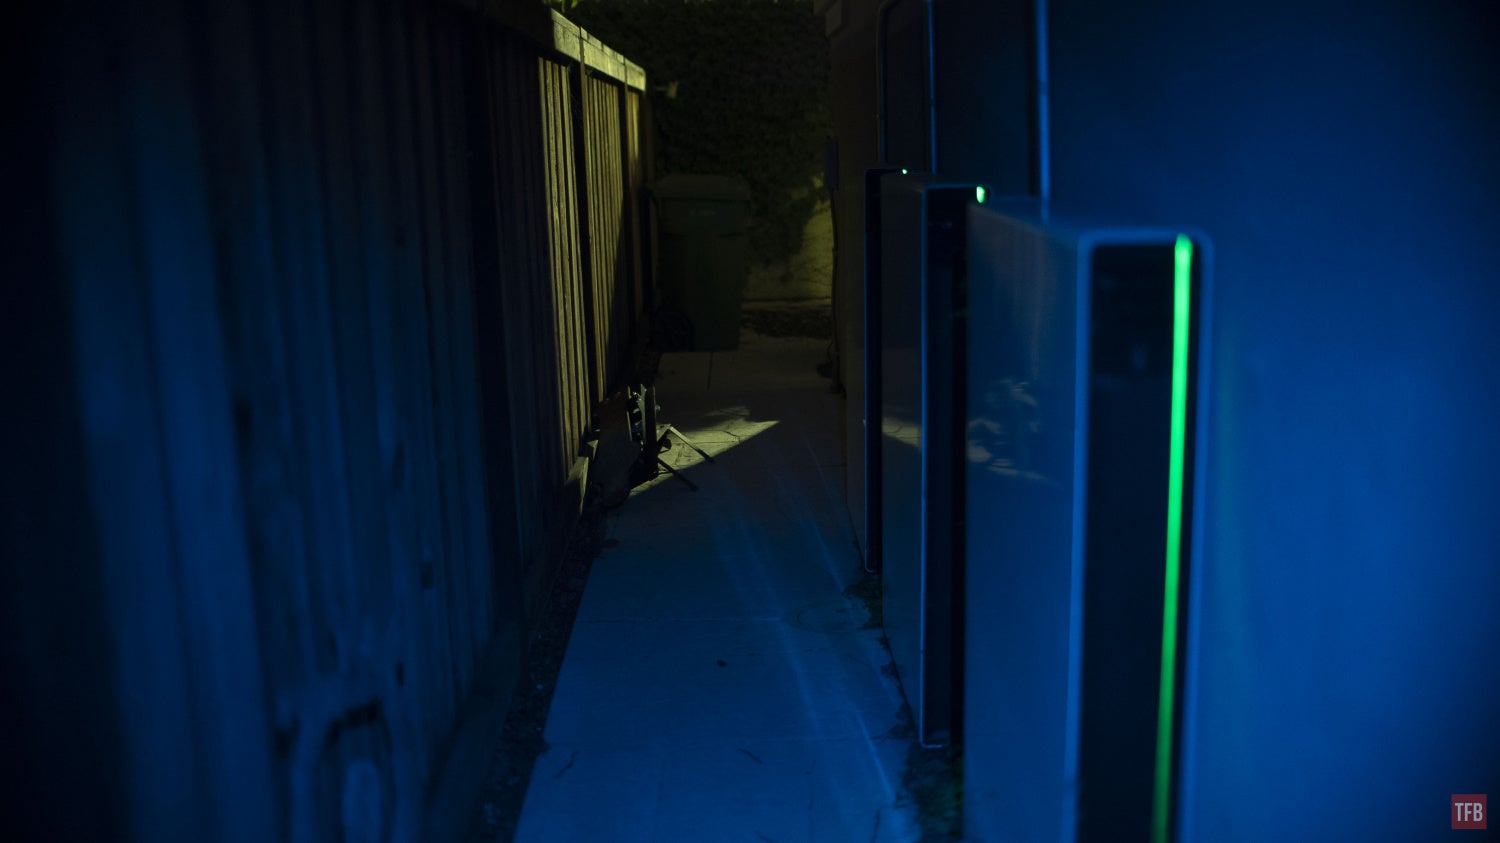
Blue LED full brightness.

Infrared LED. Even with my full spectrum SONY A7S, the IR light does not shine very far.


Here is a photo of the IFF beacon. It is a bit dim, especially in brighter-lit environments. I have it oriented upwards however I would not really use this. The beacon can only really be seen from the side. It can sort of be seen from the rear but not that well. You definitely cannot see it if the light is on the other side with the helmet between you and the light you are trying to observe. I prefer to have an IR strobe on top of my helmet so it can be seen from any direction. I suppose for more discreet use it would be better to have the IFF point backwards so other team members can see it but that is not possible on the Stalk.
Final Thoughts On The Stalk
The Sidewinder Stalk is a decent admin light for your helmet. It has a flexible gooseneck just like the Princeton Tec Charge which is great for positioning the light where you need it. I like that you can set up the Stalk for left or right side of your helmet. However, the UI for the Stalk is not as intuitive. The Princeton Tec light is a lot easier to use. It has a single large rectangular button. Press and hold it down, when the light is off, to turn on IR mode. Press again to turn it off. For visible light, you just press the button and it goes from red to blue with a press of the button. While the colored LED is on, you can switch to white by holding down the button.
In contrast, the Stalk requires 5 button presses and holding it down to switch the color of the LEDs. You have a control wheel that you need to remember what each position does otherwise you just keep trying each position to find the one you want. I do like that the Stalk has three brightness settings for each mode.
You can find the Stalk for just over $100 on various websites. Go to Streamlight’s website for more information.