Your Privacy Choices
My good friend Alex of Nocorium recently compiled and posted an interesting topic. Fixing night vision blemishes with BlackBoxing. We will go into further detail and as always the Friday Night Lights series is brought to you by ATN Corp, manufacturers of night vision and thermal optics like the THOR LT. As with all of our sponsored series, Friday Night Lights will continue to bring you unbiased news and reviews from a variety of companies.
Night Vision @ TFB:
- Friday Night Lights: Understanding Night Vision Specs And Generations
- Friday Night Lights: One Tube, Two Tube, Green Tube, White Tube
- Friday Night Lights: Enhanced Night Vision Goggle (ENVG) PSQ-20 Thermal Fusion Monocular
A Primer On Blemishes vs Spots And Other Imperfections
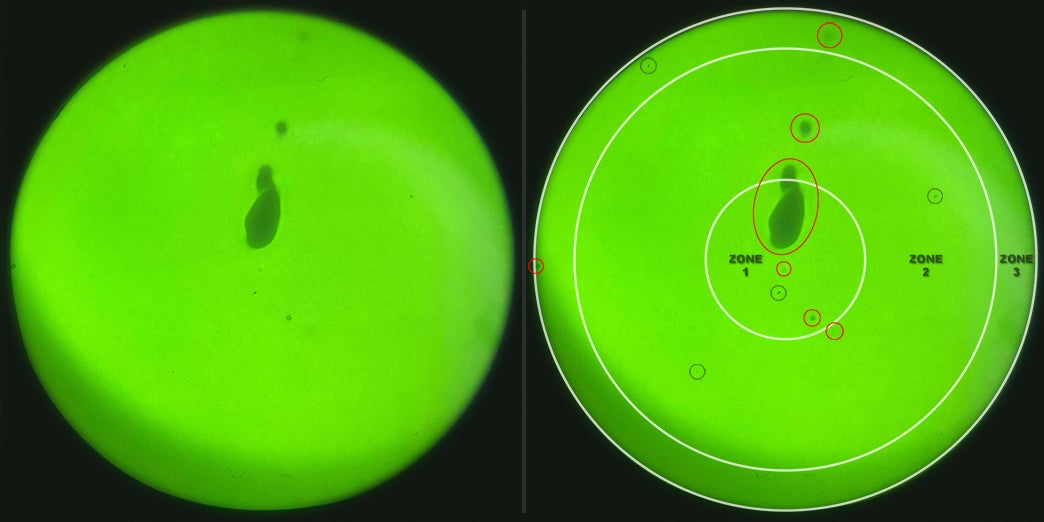
I had written an article earlier about night vision specs. In that article, I talked about tube blemishes versus factory spots. Let’s talk about factory spots then. Image Intensifiers are very difficult to make. No matter how hard manufacturers try, there is always a range of image intensifiers that are different from each other. When the tubes are made, companies strive to make the best possible tube they can. However, due to uncontrollable variables, certain specs may be affected. One such characteristic is the allowance of spots and the size of said spots. For the higher graded tubes, there is a lower allowance for factory spots. What is a factory spot? It is usually a small black dot like a pepper flake. Image intensifiers have regions or zones to help narrow down problem areas.
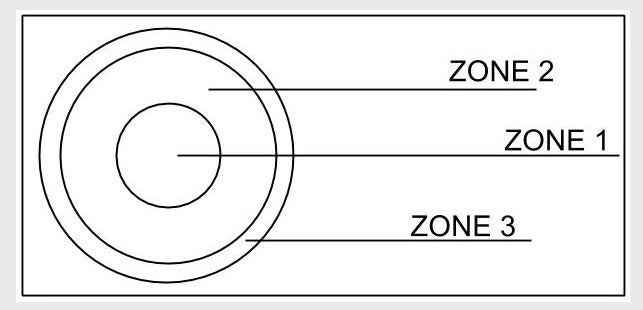
So the lower the grade of the tube, the more spots are allowed to be in certain zones. You don’t want to have a factory spot in zone one if you can avoid it. That is where you are primarily looking and engaging with the world. Zone two and zone three are typically allowed more factory spots for lower grade tubes. With higher grade tubes there is a higher standard and stricter threshold for smaller spot size and fewer spots allowed.
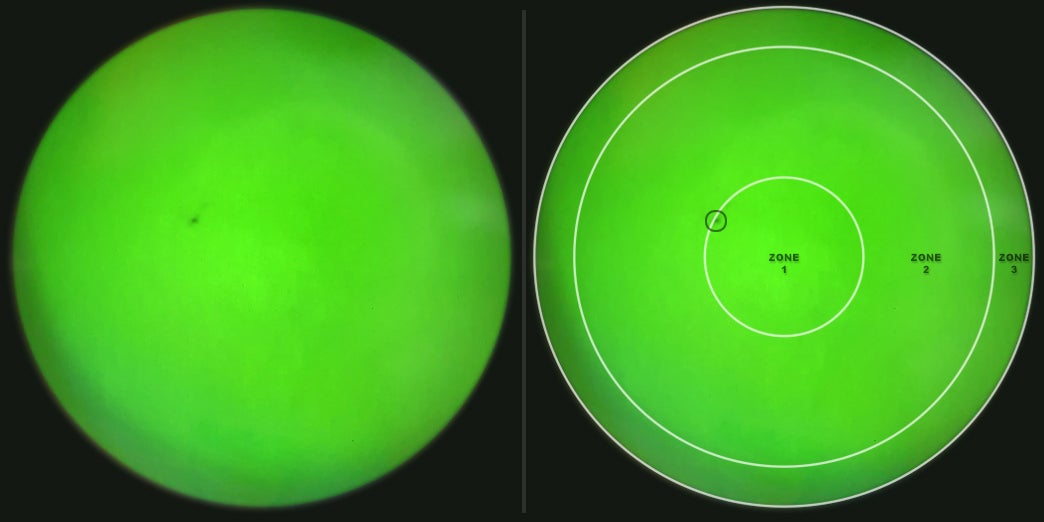
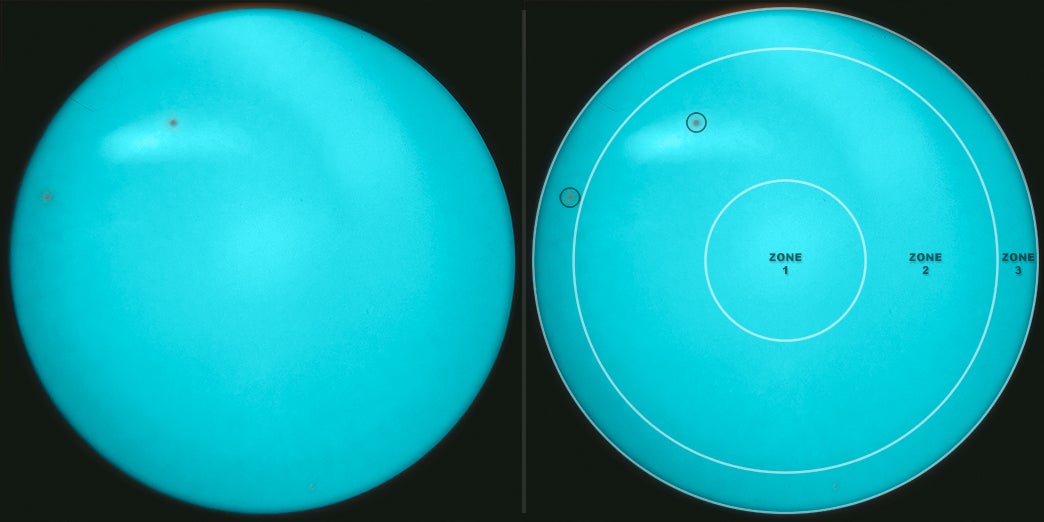
Below are photos complied by Alex of Nocorium showing various factory spots on a spot chart.


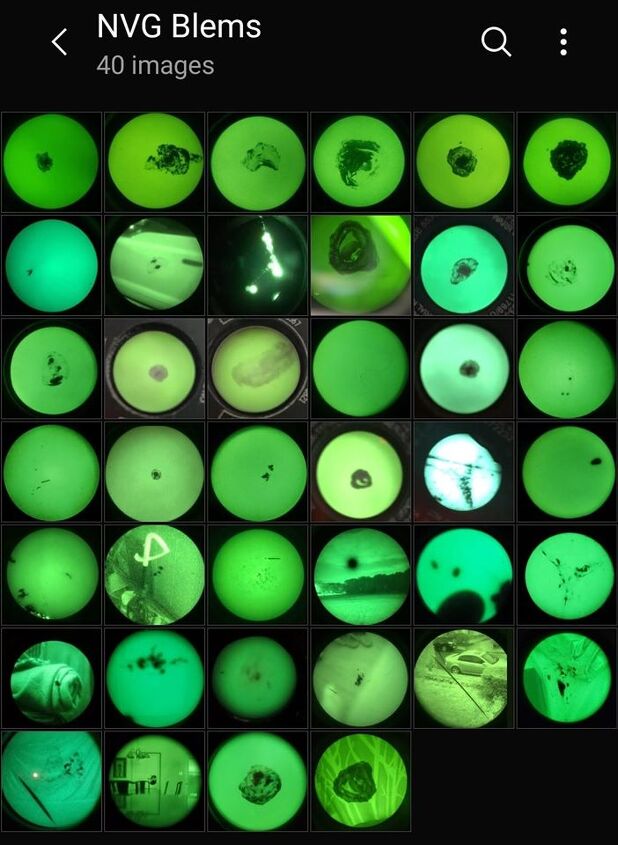
The ones below are blems not factory spots.

So What Is A Blemish?
Blemishes are a sign of damage to the image intensifier. It can either be created from physical damage or photonic reasons like lasers or too much light. Physical damage can occur due to harsh recoil or dropping night vision onto a hard surface. Inside the image intensifier, is a sandwich of layers. These are often very close together. Recoil or dropping night vision causes these layers to smash into each other and you get a sort of bruising inside the tube.
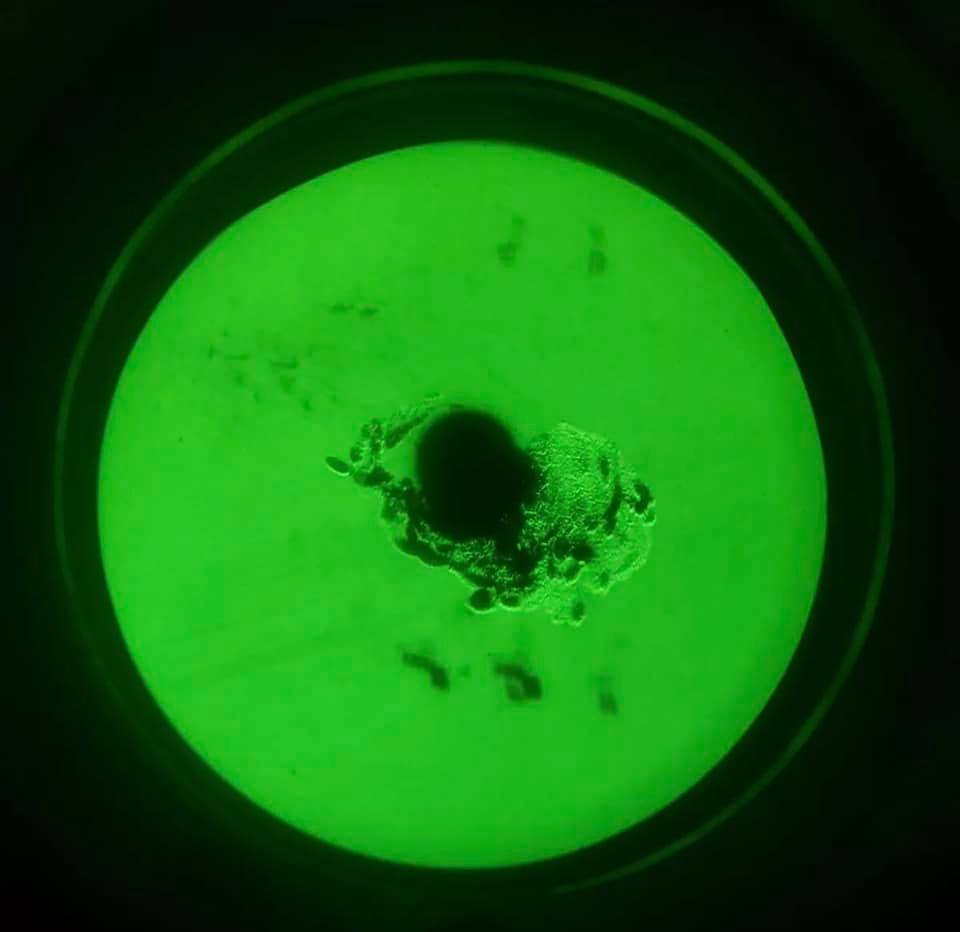
This is a typical type of blemish from dropping night vision.

Burning The Tube With Light
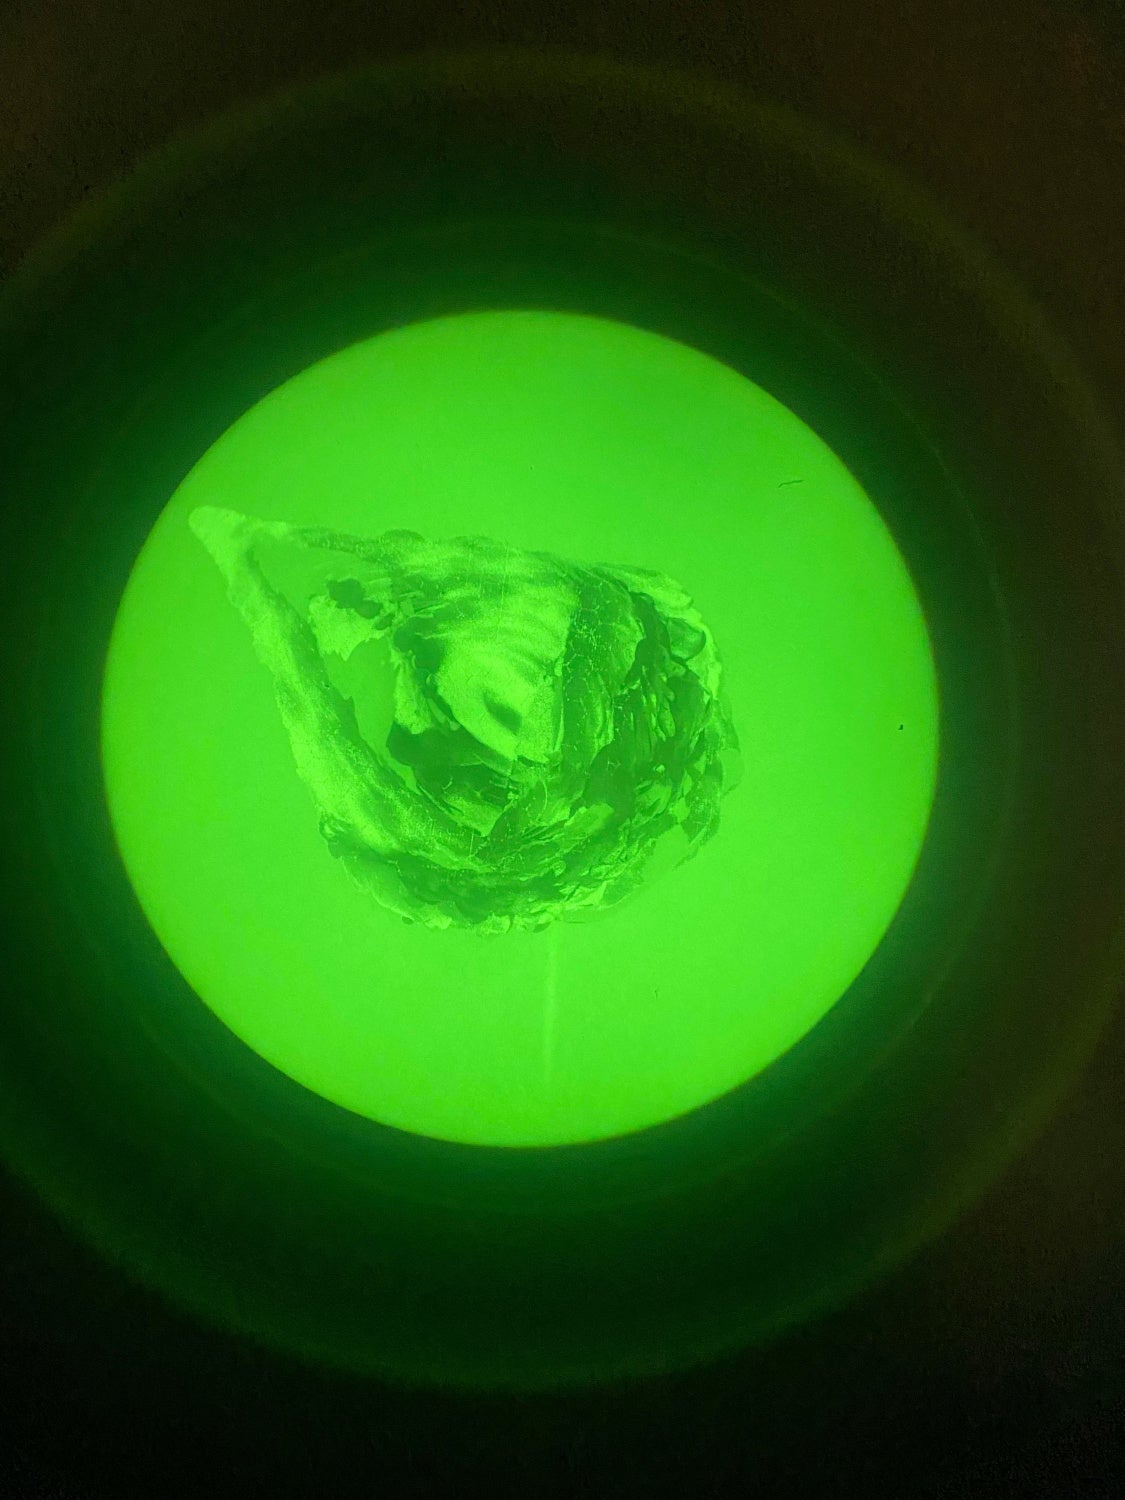
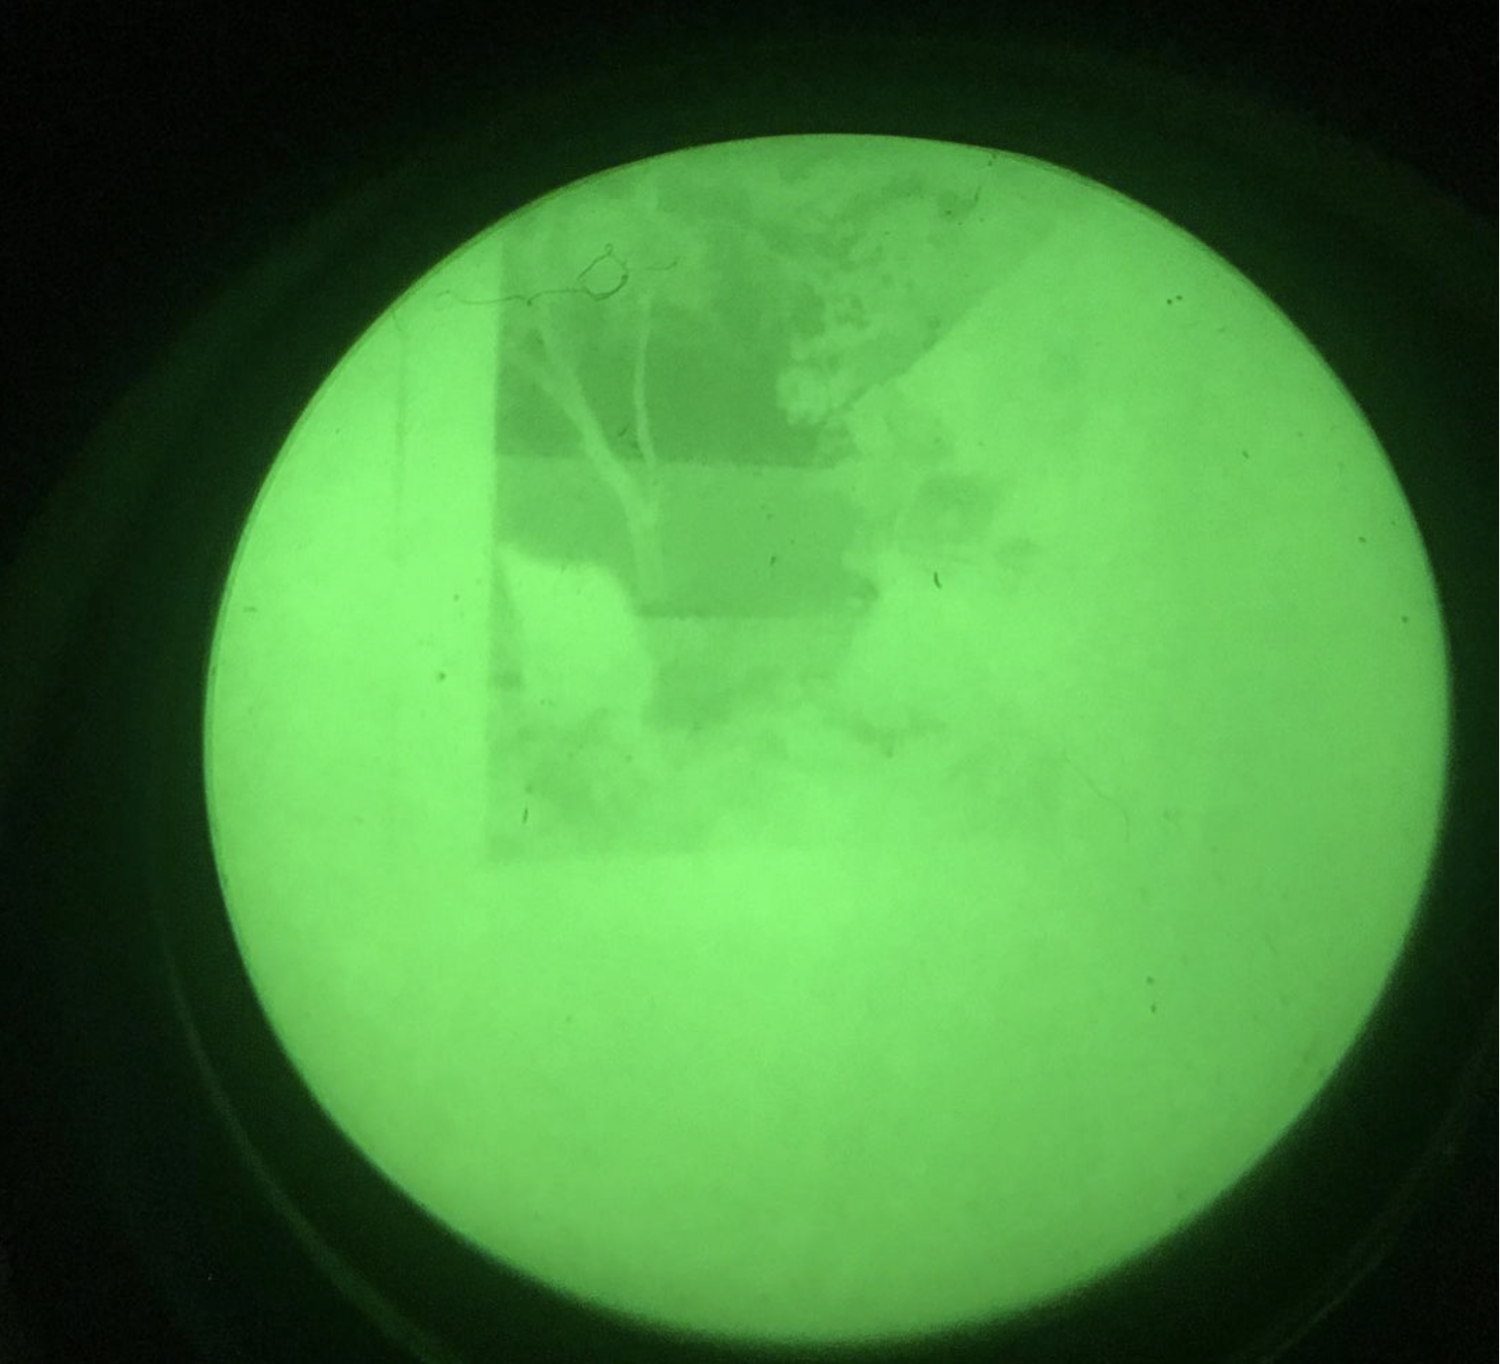
Too much light can also damage an image intensifier. Somewhat like CRT monitors for computers, you do not want your image intensifier to look at the same thing for extended periods of time otherwise you can get blemishes. Moving around is sort of like a screen saver for the tube. Here is a blemished tube that was exposed to the same light for a long time. While the intensity of the light was too great, exposing the image intensifier to it for an extended time slowly burned the image permanently into the tube. It is someone’s backyard.
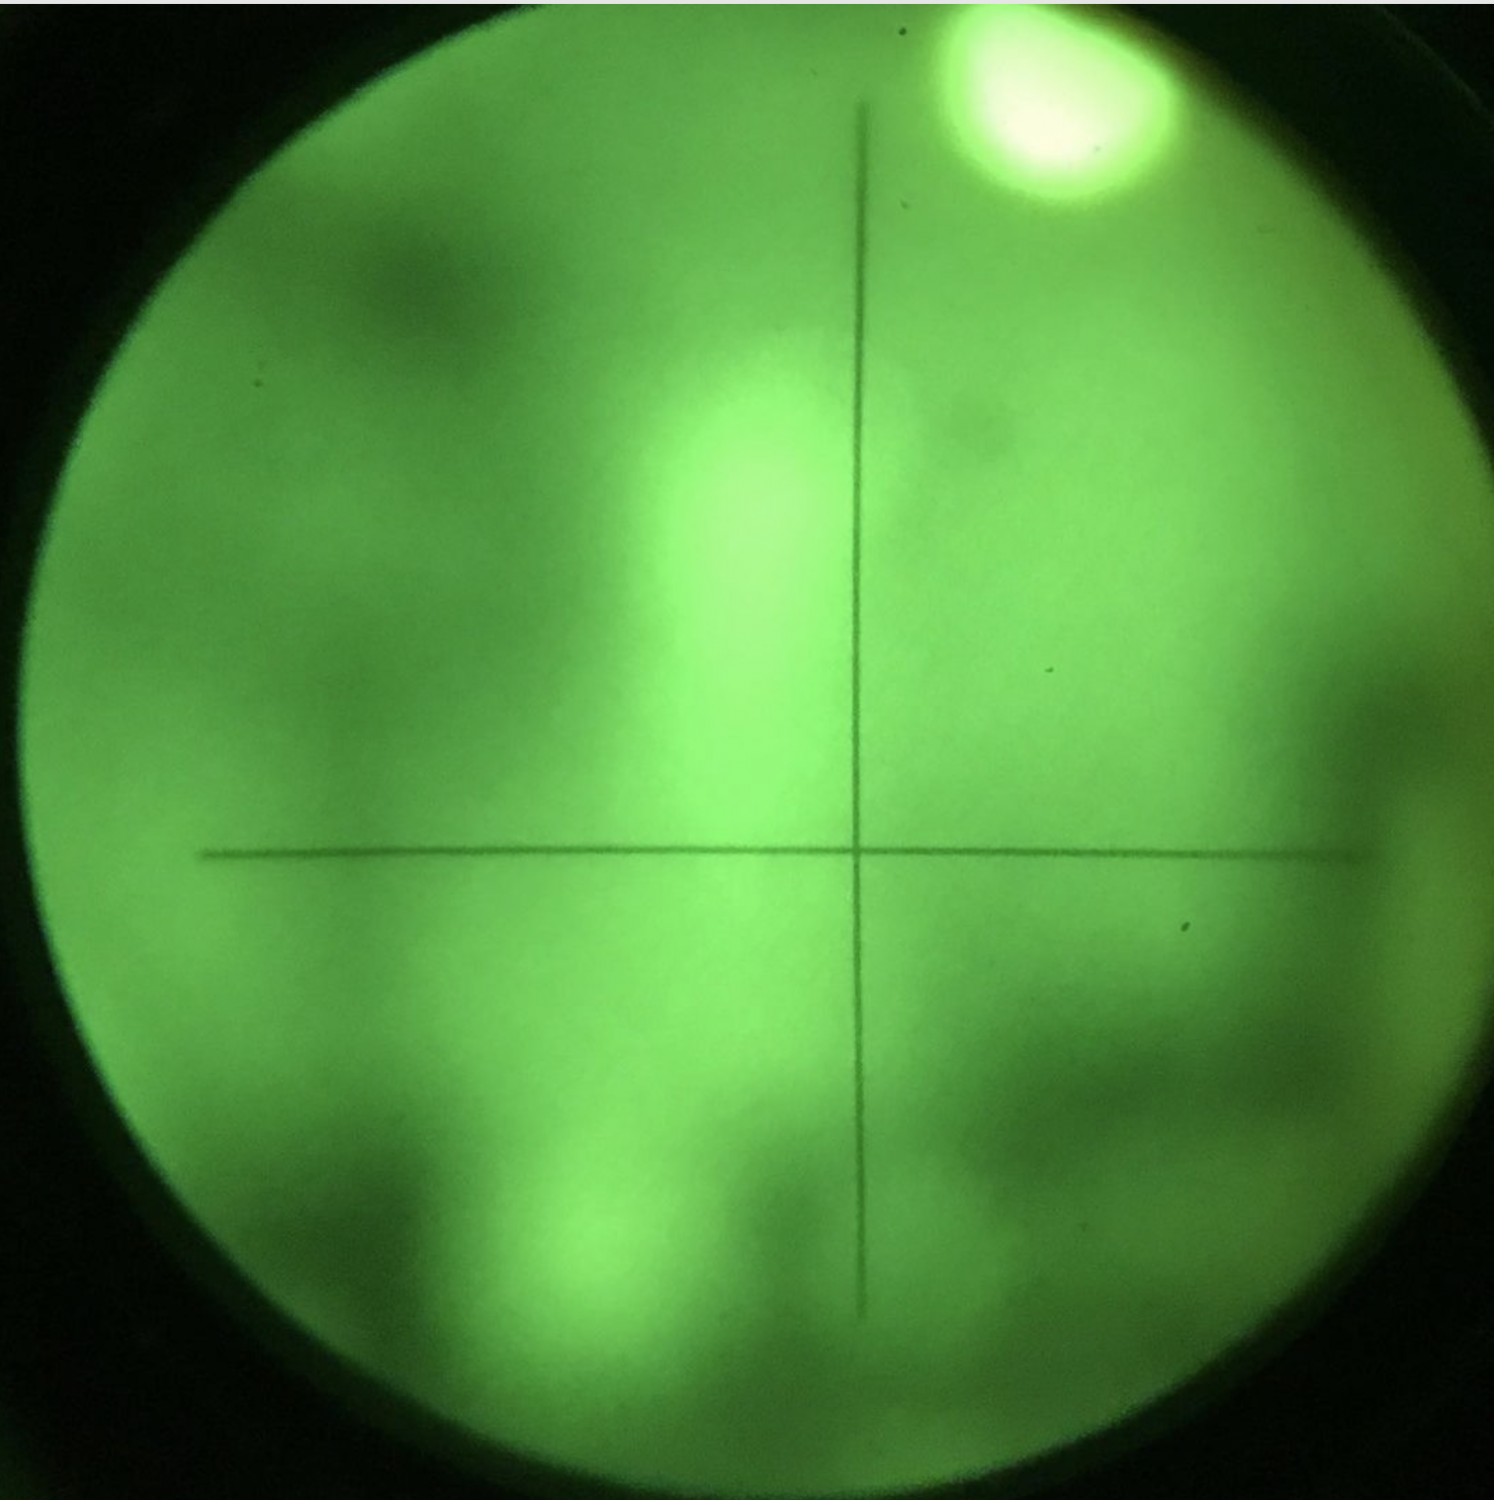
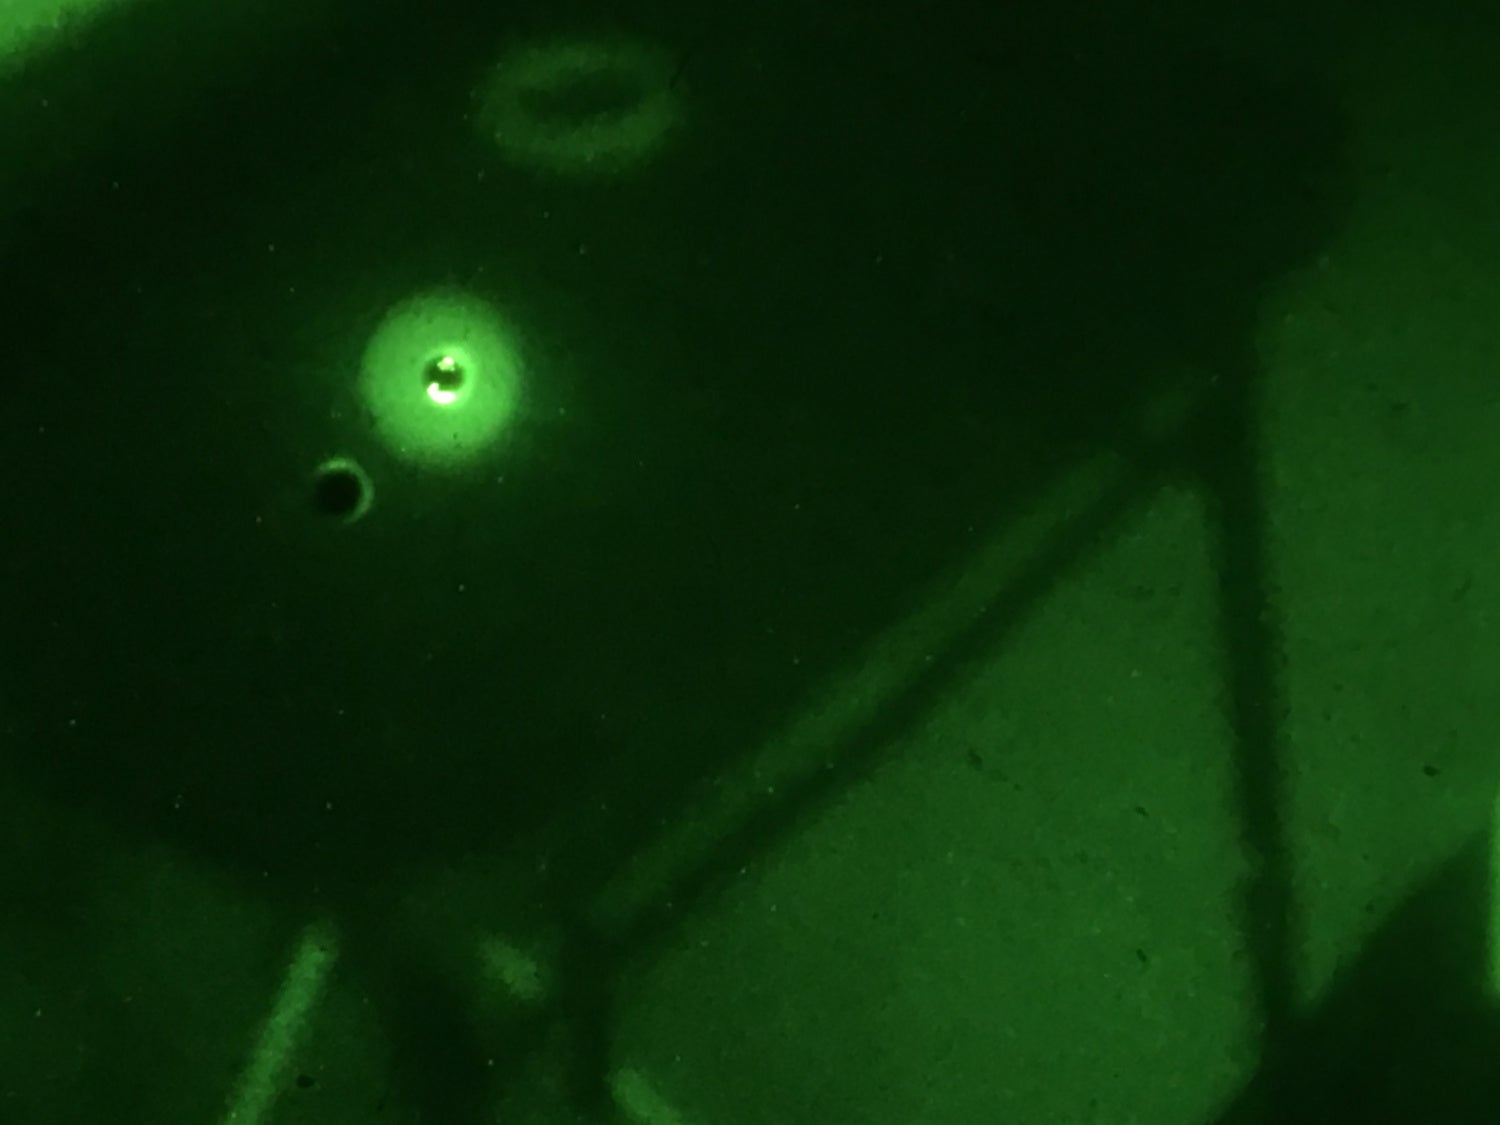
Below is one of the coolest blems I have seen. This is my Insight image intensifier that I believe came out of a PSQ-20. It is a crosshair but it is eccentric. Usually, crosshairs are a perfect X/Y graph with the intersection in the middle and each line is the same length. Not the case here.
Tracing AKA Etch-A-Sketch
There are other imperfections that are not quite blemishes that can be produced by light. Oversaturation of the micro channel plate can cause smearing across the tube. I call it tracing or etch-a-sketch since it draws lines across the tube as you move around. It typically happens when you look at a strong light source.

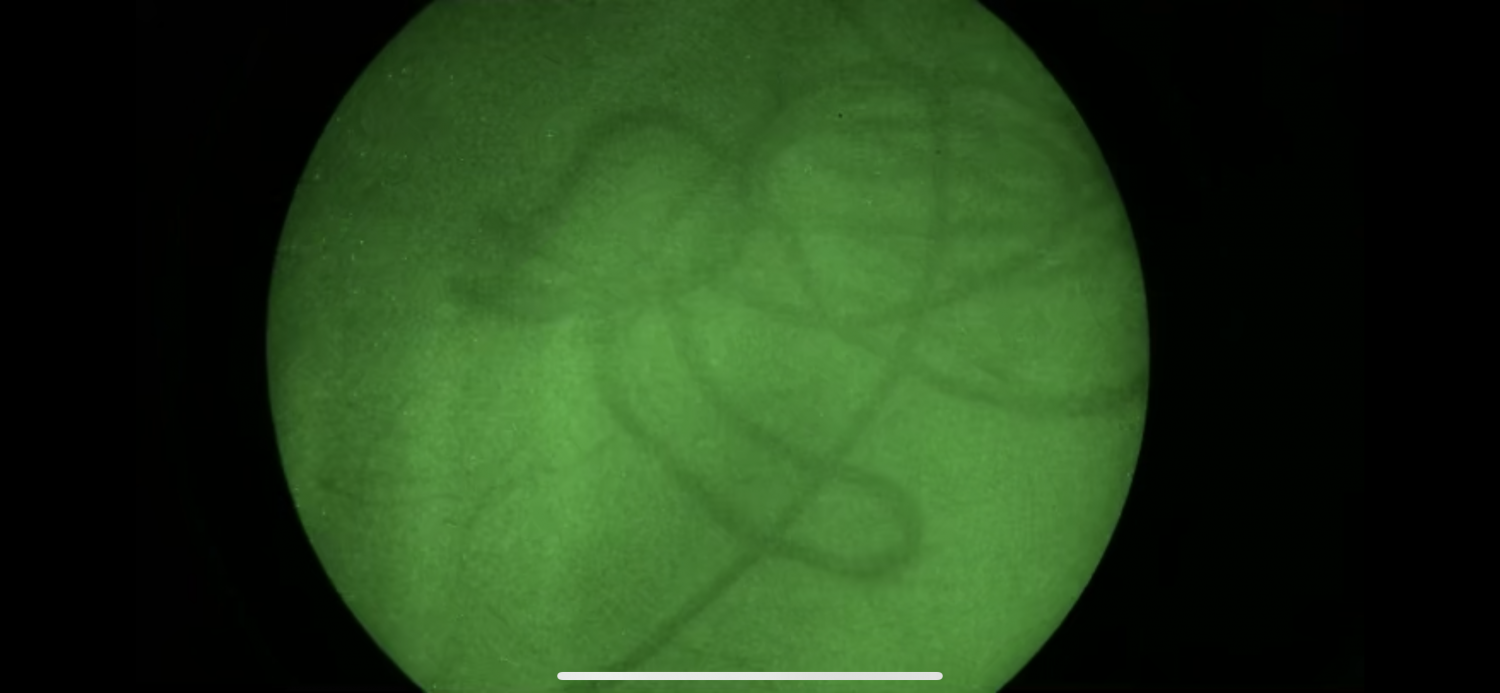
Some tubes do this worse than others. I recall seeing a tube that would trace just from looking at the moon and it was a strong opaque marking across the tube. The sample above is rather light and you can see through the dark lines. Some tubes do this as soon as you turn them on but after a minute or more the tube sort of settles and stops tracing. I am not sure why this is and unfortunately, it is not a characteristic that is tested nor documented in night vision builds by either the tube manufacturer spec sheet or night vision retailers/builders. This can be distracting to some and you don’t know it happens until you turn them and look for it.
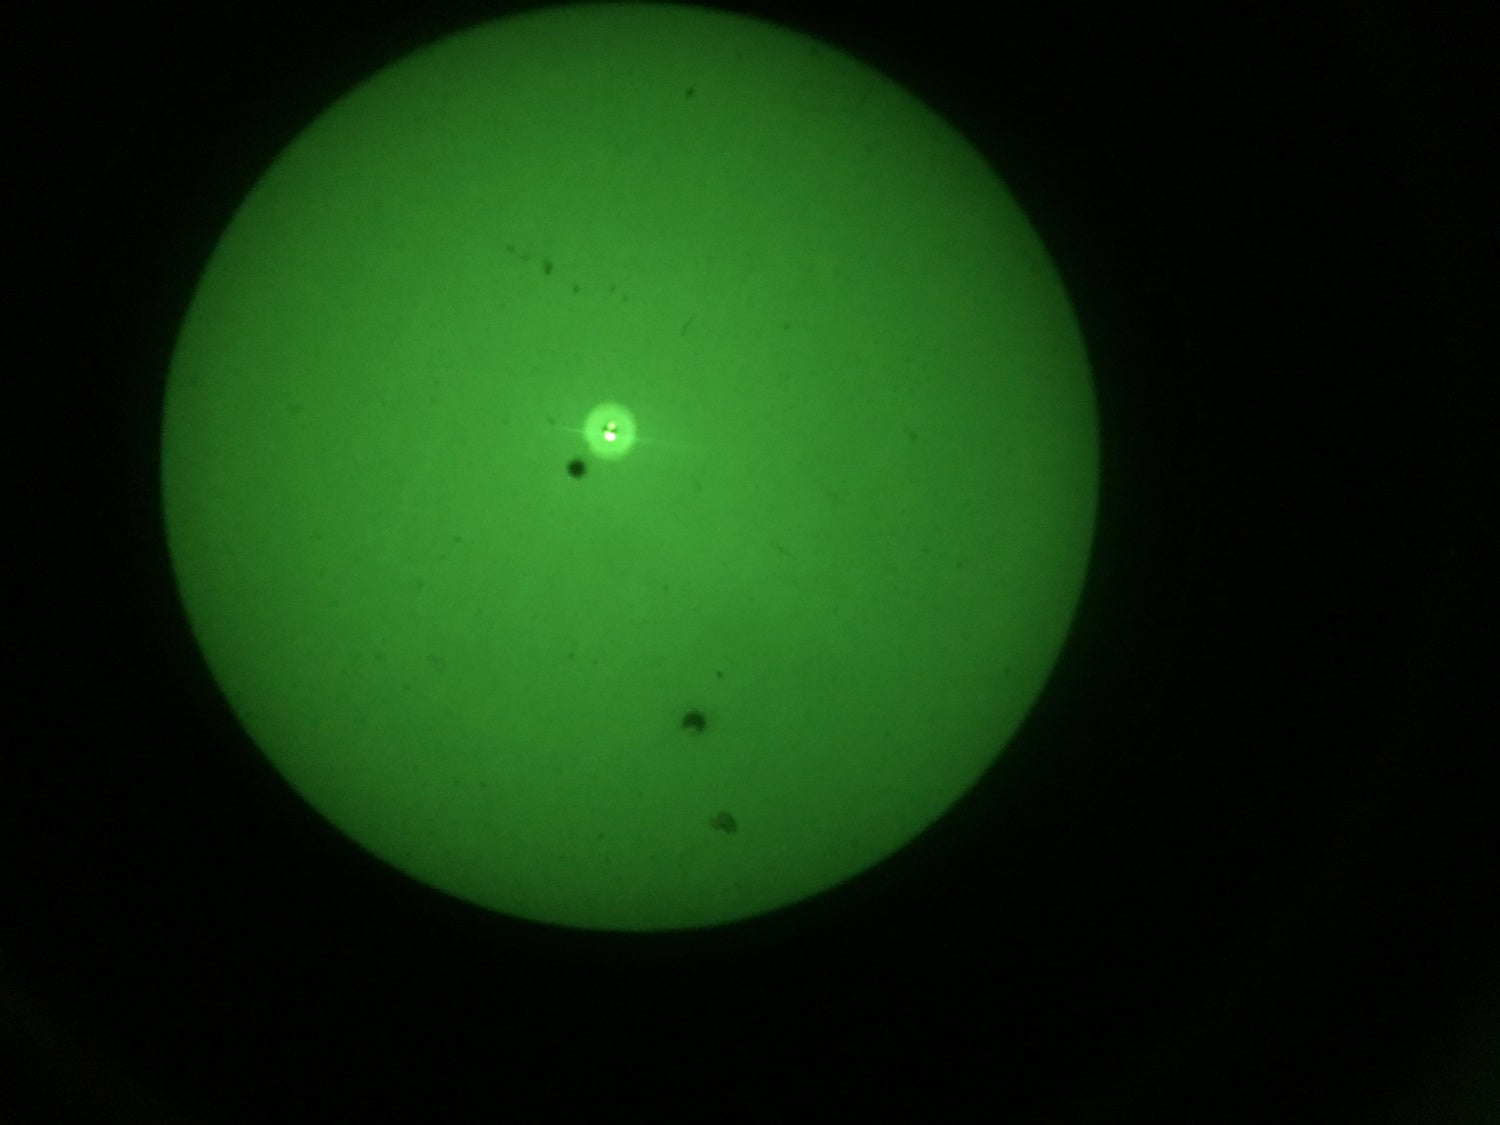
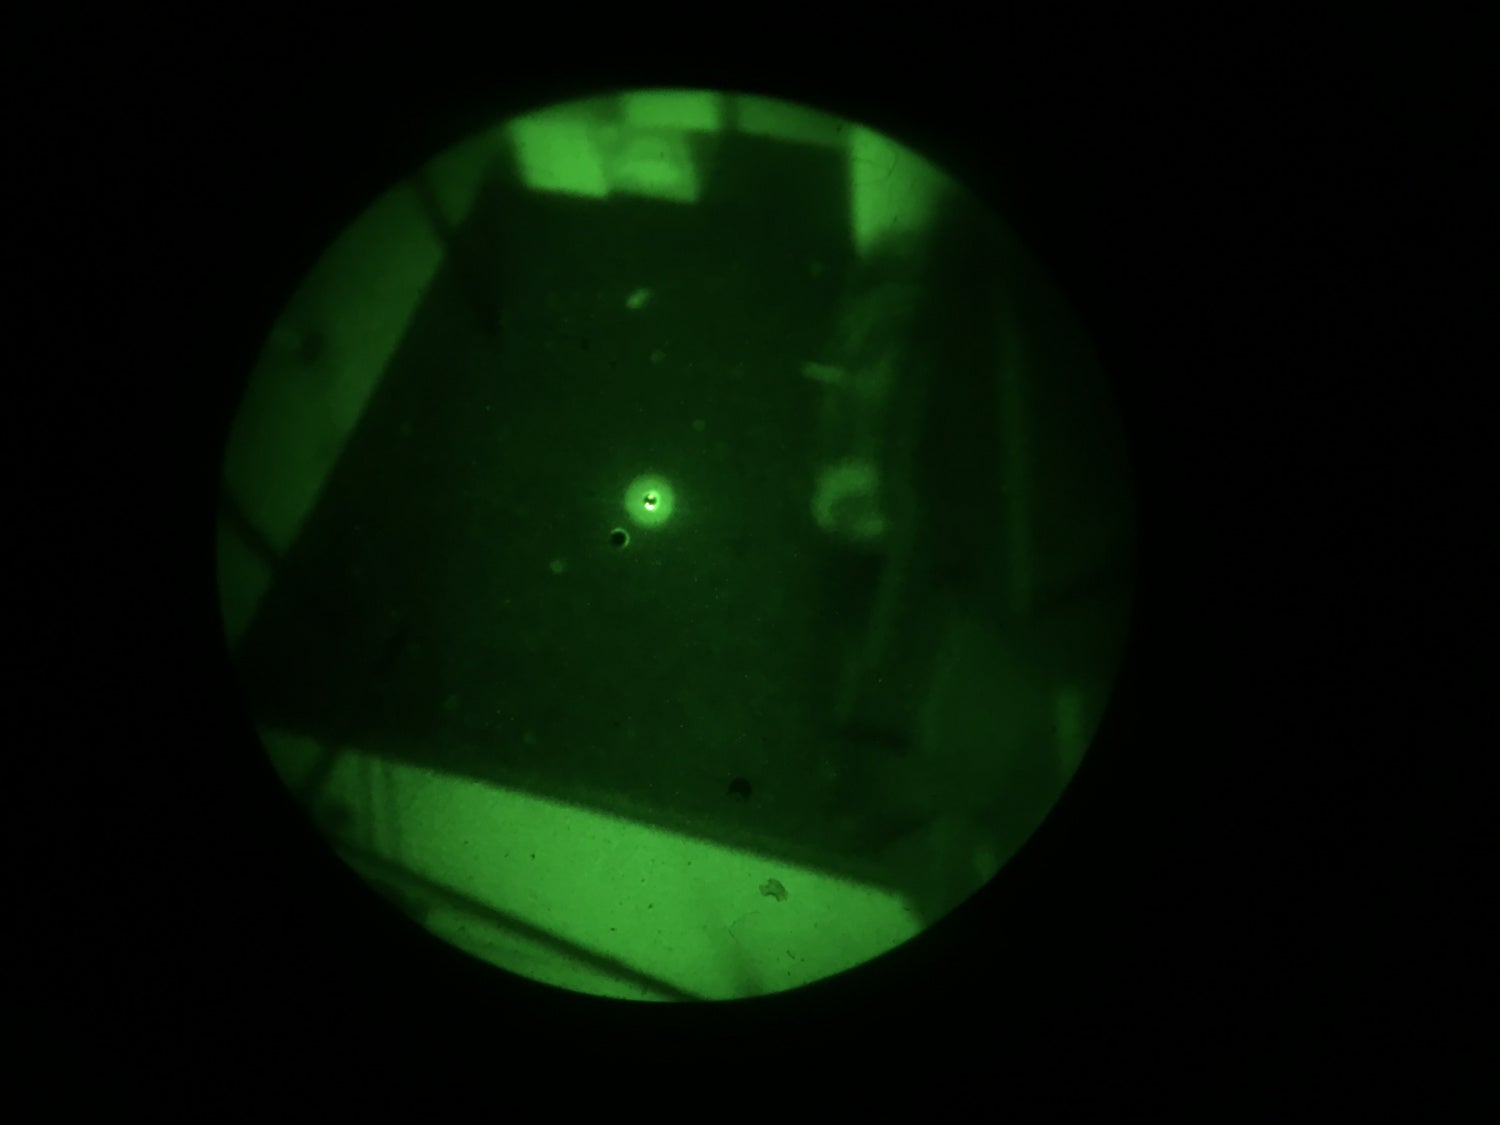
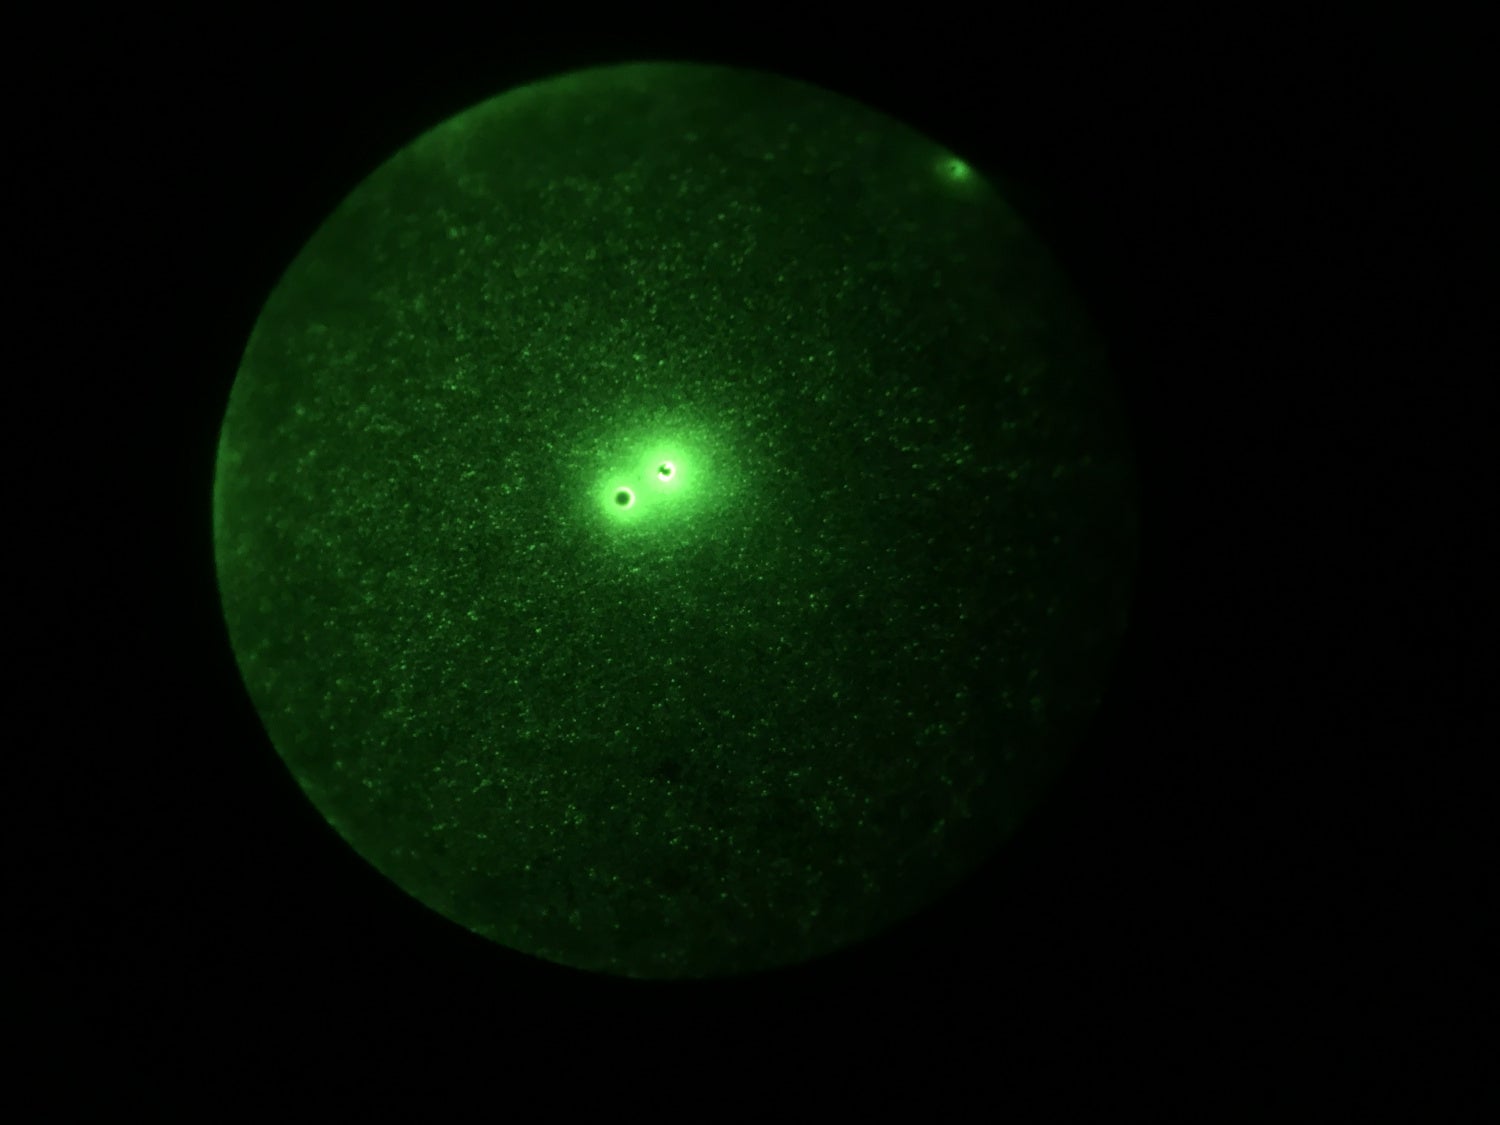
Emission Points
All the blemishes I have shown are black or a sort of darkening of the image intensifier. There are light emitting blemishes as well called emission points. Some of these can be tiny like another star in the sky. According to TNVC:
A steady or fluctuating pinpoint of bright light in the image area that does not go away when all light is blocked from the objective lens. The position of an emission point within the field of view will not move. If an emission point disappears or is only faintly visible when viewing under brighter nighttime conditions, it is not indicative of a problem. If the emission point remains bright under all lighting conditions, the system needs to be repaired. Do not confuse an emission point with a point of light source in the scene being viewed.
Other times it is indicative of damage to the micro channel plate and you have a light that can burn the phosphor screen. These types of blemishes can increase in size over time.
Can You Fix Blemishes?
In some cases, you can. Most of the time though the answer is no. The damage above is from damage to the phosphor screen. Cathode-based emission points can be burned away and converted into an opaque blemish. Identmarking claims to be able to do this on their website. Physical tube damage is irreversible while tracing type blemishes are temporary. But there is a possibility to remove more permanent-looking blemishes with a tried and trued method, Blackboxing.
Alex Ko of Nocorium lent out a set of binos and mistakes were made. This resulted in blemishes in his binos. With no way of reversing time, he tried the Blackbox trick and to our surprise, it was effective.
Tube blemishes and Blackboxing
DISCLAIMER: THIS IS NOT ADVICE. THIS IS NOT A HOW TO. THIS IS SIMPLY ME DOCUMENTING A PROCESS TO TRY TO REPAIR DAMAGE DONE TO A NIGHT VISION DEVICE’S TUBES. I AM NOT A NIGHT VISION TECHNICIAN NOR A SUBJECT MATTER EXPERT. ANY DAMAGE YOU DO TO A DEVICE IS SOLELY ON YOU. I REPEAT, THIS IS NOT ADVICE.
This article is built around a couple Nocorium™ Instagram posts I made some time ago regarding an attempt to repair some damaged tubes in one of my loaner NV setups. The process isn’t new and it is in fact a technique many have used to varying degrees of success. While not “wrap” related it seemed pertinent to Night Vision users and it was something I wanted to share my experiences with and thoughts on in the hopes it’ll help others.
Backstory … aka “Mistakes were made.”
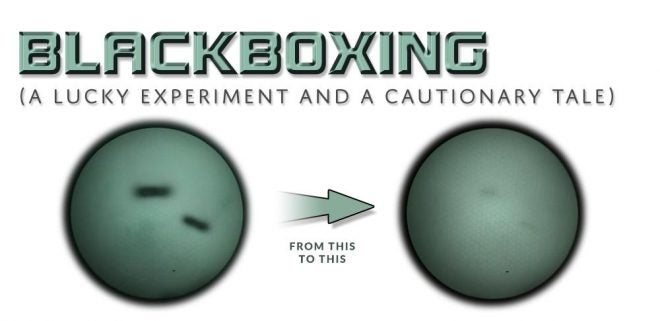
I occasionally host night shoots and at one particular event, I loaned a couple friends my spare Gen3 binos. I briefed both regarding general NV usage & what to do, what not to do. One friend had zero experience with NV, he had to leave early & he neglected to turn off the device (my 1st mistake was not reminding him to turn it off). By the time I was packing up for the night, unknown to me, the tubes were exposed for a few hours to a bright light source (I’m guessing SUV headlights). My 2nd mistake was not checking the tubes, as well as forgetting to see if the device was indeed turned off. I just assumed they were. My 3rd mistake was being in such a rush I didn’t take the battery out. I packed the device into a light sealed case and headed home. Pulling all the gear out the next day, I checked the devices and, to my horror, the Green Phosphor thin filmed RNVGs had two huge tube blemishes across both tubes:
* An important technical note: some cosmetic tube imperfections, termed factory black spots and peppering, are a common part of the manufacturing process and will vary in terms of density, shape and size. Black spots are NOT the same as BLEMISHES. “Blemishes” are cosmetic marks introduced to the NV tube that have occurred after the manufacturing process. Blemishes are produced as a result of external/user induced damage to the tube. Common instances of this is when a bright light (such as lights and/or lasers) is projected into the NV tube, essentially burning/scarring the tube. Dropping the NV device is a less common way to damage the device but may result in cosmetic damage to the tube including introducing light emission points (extremely bright pixels).
I’m sure many of you could imagine how shocking this was to see. Once I got over my initial horror, I knew time was of the essence.
Time for a Hail Mary solution: Blackboxing is a process in which you turn the NV device on, (with the on board illuminator (if one is present) set to off), and place the NV device in a light sealed box/container. Preferably leaving it in a zero light room or closet/safe. Bright light induced tube blemishes can result in permanent scarring. Sometimes, you get lucky and the tubes are only temporarily damaged (I guess you could say “bruised”), however, to reverse the damage you need to encourage the tube to repair/reset itself. The concept behind this process is that placing the device turned on in a light sealed box, the tube’s micro channel plate will slowly repair itself. It doesn’t always work and there is some debate as to whether or not the amount of time that has passed since the damage occurred has any bearing on the efficacy of the blackboxing process. All I knew was that I needed to get started ASAP.
What you see in the following pics are the results of a one week black boxing cycle:
(the images look like white phosphor but that is due to leaving the LLI WP Filters on the eyepieces. The tubes are green phosphor)
As you can see, I got incredibly lucky. While it didn’t 100% repair all the blemish damage done to the tubes, it went from being horrendous to barely noticeable under normal usage conditions. Check out how the left and right tubes now look. The areas circled in red are to highlight the remnants of the blemishes … but thankfully they are now very faint:
Testing notes:
• Multiple battery draining cycles were conducted. Batteries were replaced when I noticed they were completely depleted (around 30+/- hours for each battery).
• Timelines noted in the pics are approximate.
• Tubes are green phosphor thin filmed tubes. They appear like white phosphor tubes in the pics because they have the LowLightInnovations WP simulated filters on them. To be honest I was too horrified at the onset to remember to take photos with the filters removed.
• The IR illuminator was only turned on for photos between Blackboxing cycles. It was off during the Blackboxing process.
• It’s worth noting that by the time I initially noticed the damage it had already been blackboxed for 12 hours as it was obviously still on in it’s pelican case. So the first image was probably an improvement over the initial damage done.
• The cosmetic improvement seemed to plateau around day 4. Very minor change was seen from day 4 to day 7.Final thoughts:
• Blackboxing doesn’t always work. But if you decide to do it, you got to commit to the process and consider doing it for multiple days, not just a few hours. If after a few days you see negligible improvement, then sadly yes, your tubes are probably permanently damaged.
• Take your batteries out when storing the NV device. Battery corrosion is a very real concern. Burning the NV tubes from accidentally leaving the device on should be as much, or perhaps more of a concern.


Parting Thoughts on Blemishes
Night vision is not cheap and you should take care of them. Try not to be careless with them. Don’t leave them laying around exposing them to light. I have heard of stories where even with day filters over the objective lenses, light can still burn the tubes. I prefer solid lens covers. You can get rubber bikini covers to protect your lenses when you are not using them and they will also block light entering the tube. In most cases, blemishes cannot be repaired. Alex was very lucky. I am not sure but I think blackboxing is a time-sensitive endeavor. The sooner you do it to the moment of damage the better your chances are of reversing its effect.
TFB’s Friday Night Lights series is brought to you by ATN