 Your Privacy Choices
An opportunity arose to review the new Ghost Gunner 3 from Defense Distributed and I swooped on it like a boomer on a 1911. The Ghost Gunner 3 is a completely new machine from its predecessors. Like the Daft Punk song, the GG3 is Harder, Better, Faster. Besides completing AR-15 lowers, the Ghost Gunner can help make a bunch of other guns and with some third party support you can open up the Ghost Gunner to perform other tasks like engraving your lowers. You can also mill other lowers like a Polymer 80, AR-10 and 1911. They are working on codes and jigs for an AK but that has yet to come out.
Work It, Make It, Do It, Makes Us Lowers
The Ghost Gunner 3 is bigger, faster and stronger than the previous Ghost Gunner 1 or 2. The build area is two times bigger and the motor for the spindle can remove material five times faster than before. It used to take the Ghost Gunner 2 four hours to mill an 80% AR-15 lower, according to some GG2 users. The Ghost Gunner 3 does it in just 35 minutes. The motor in the GG3 is stronger and allegedly it can mill steel. Hence why they are working on an AK jig and code for cutting an 80% AK receiver.

Photo by Defense Distributed
However there is a caveat; setup, changing tools and repositioning the lower for the second operation takes up time. So an AR-15 lower can actually take 45 minutes to an hour depending on how fast you are at changing parts.
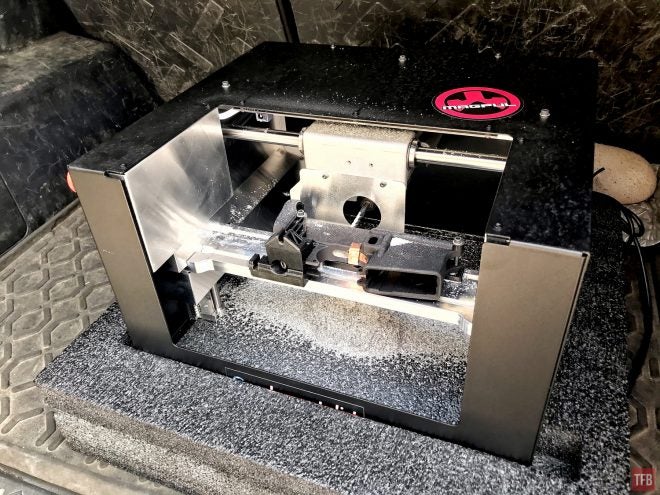
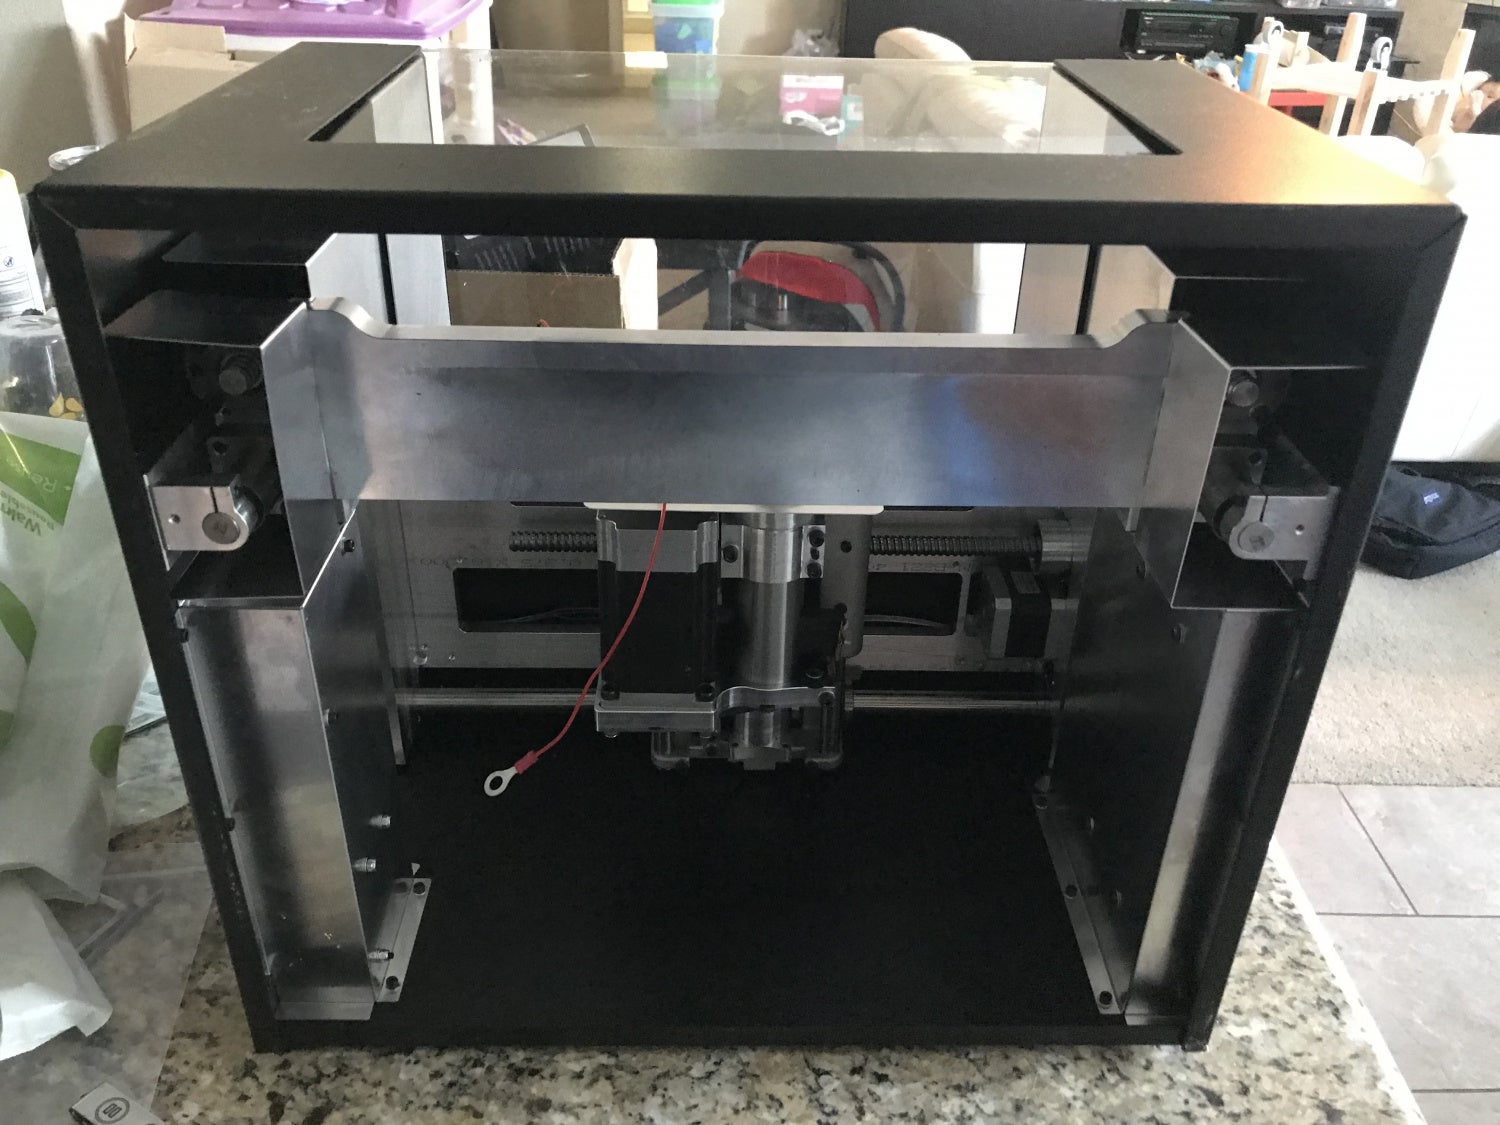
You will notice that the spindle is positioned horizontally rather than vertically. This is for a couple of reasons. It makes the Ghost Gunner shorter and it is more practical to mill horizontally. When a CNC mill is vertical the material you remove will often fall back into the area you are working so your tool bit will work harder against loose material getting in its way. By having the tool horizontally the chips can be removed out the side and will fall down rather than back into the work area.
Getting The Ghost Gunner 3 Started
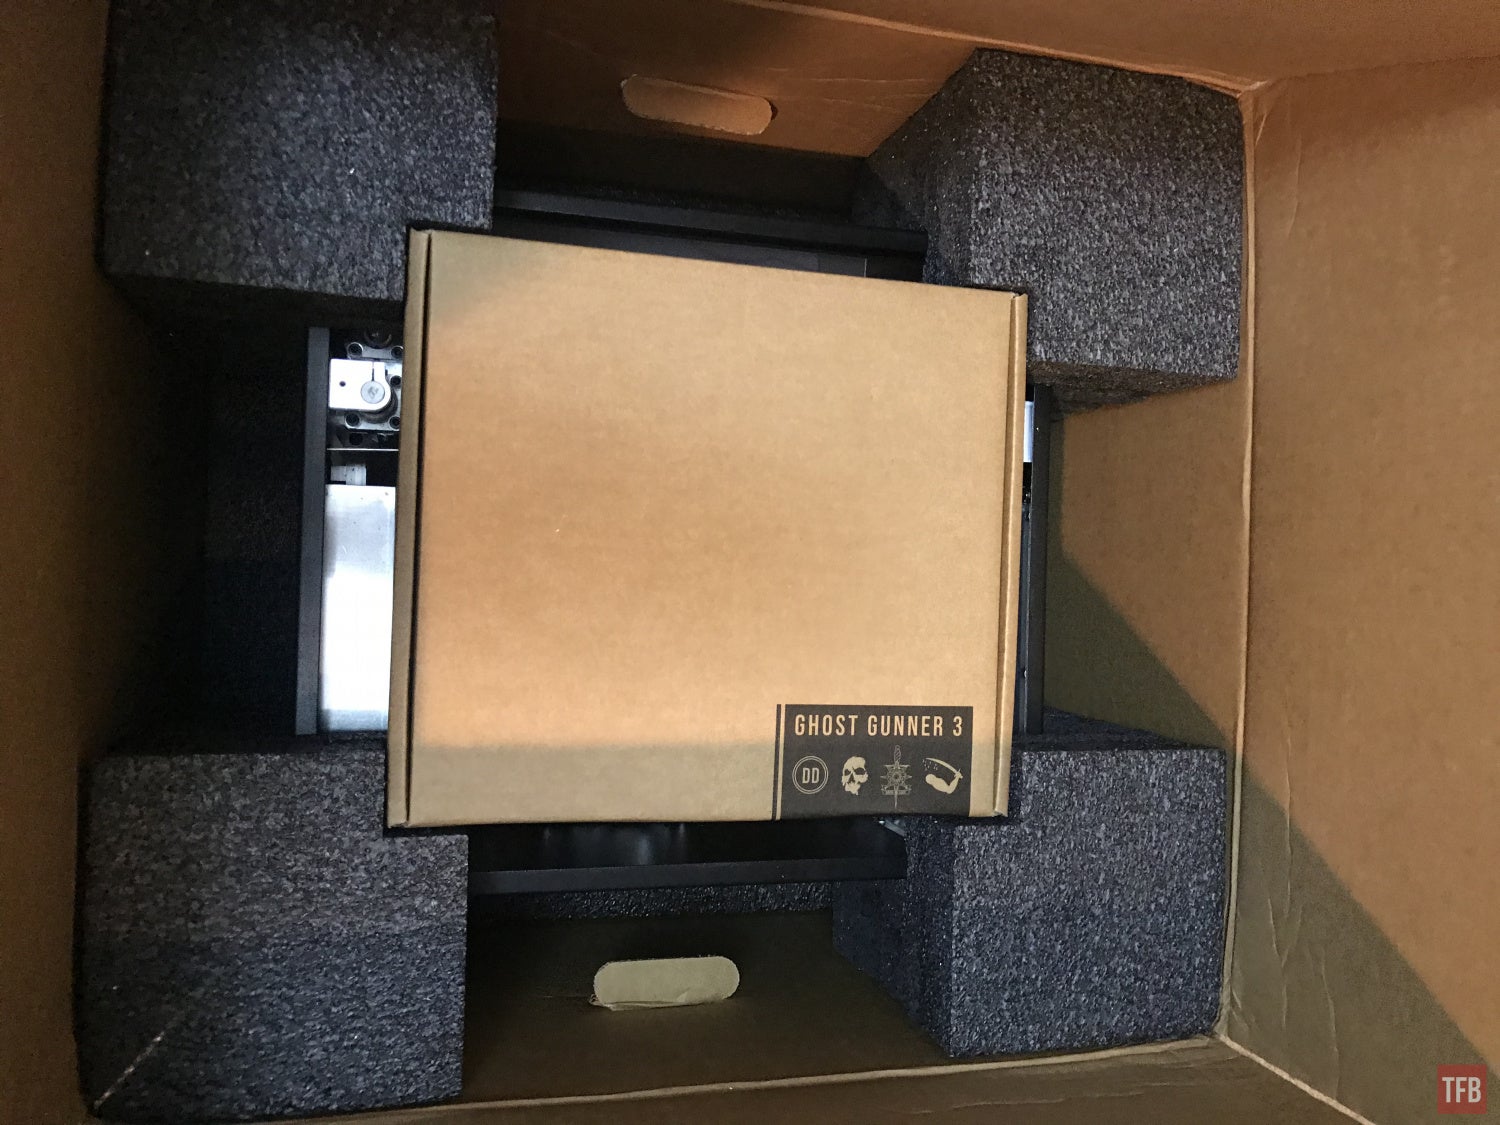
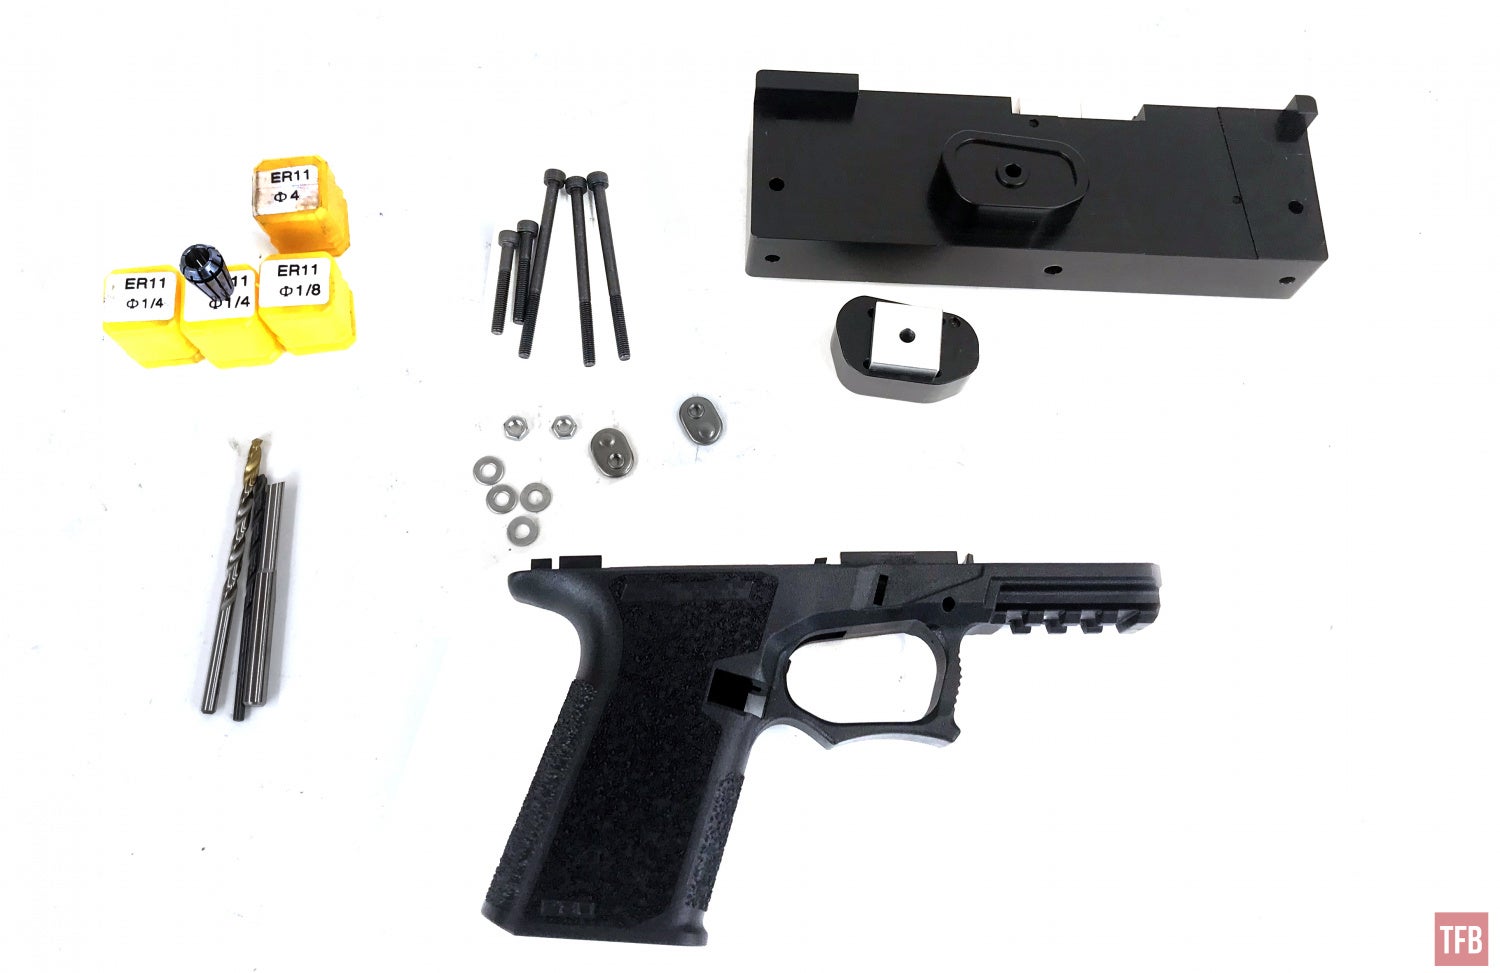
The Ghost Gunner 3 ships upside down since it is heavier at the top when right side up. There is a box nestled in the middle of the packing foam that contains the tools and wires for the Ghost Gunner 3.
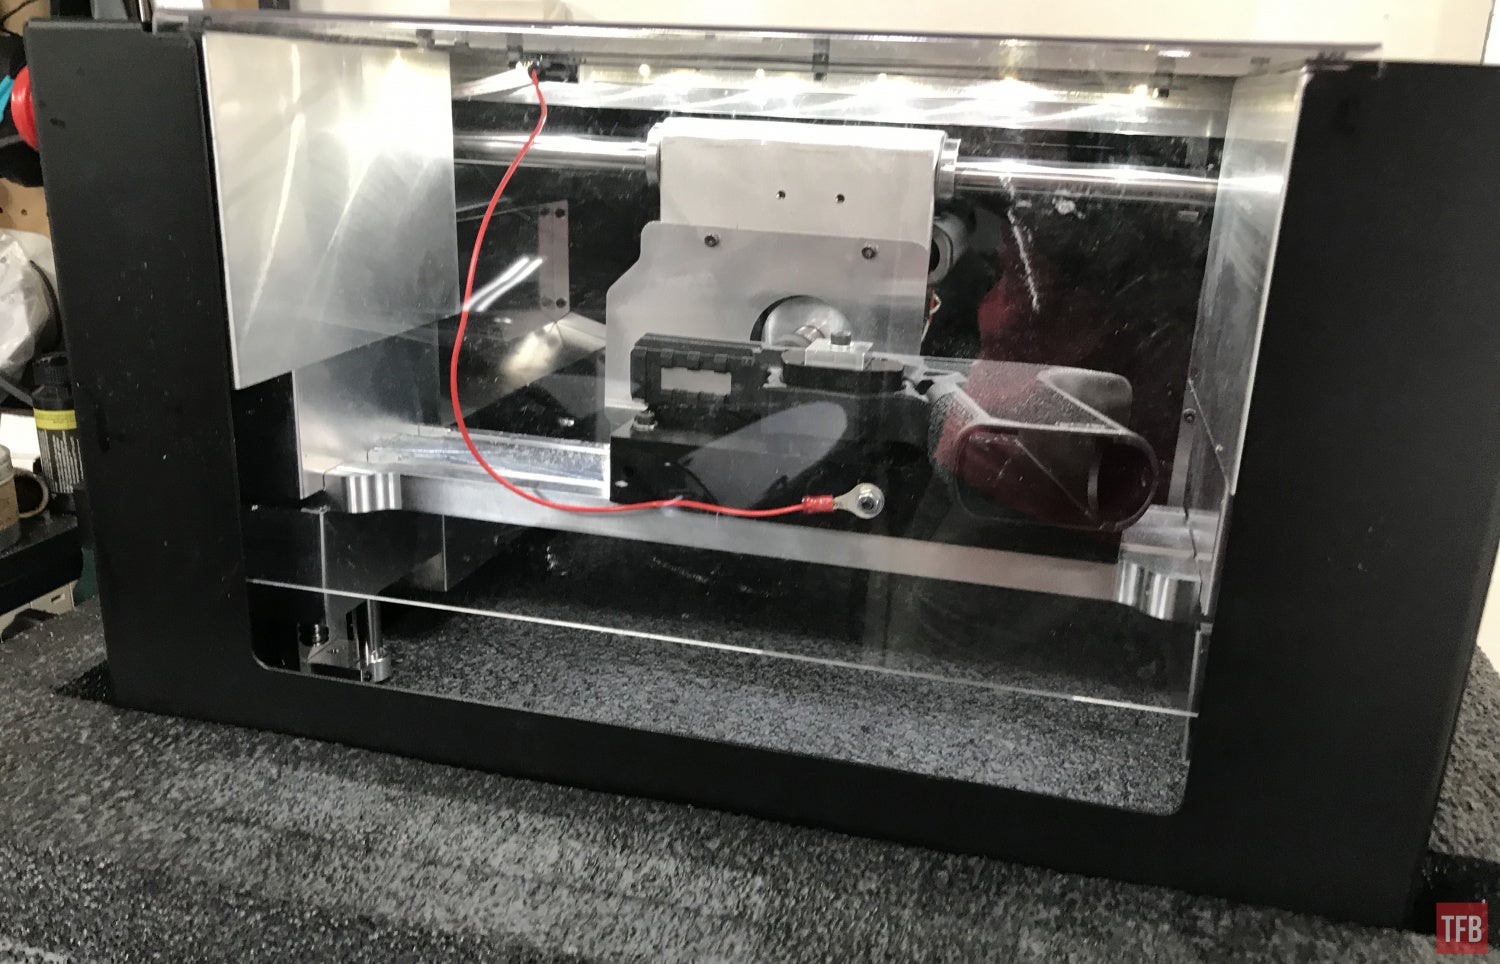
Once removed you can see into the inverted Ghost Gunner 3.


At first, the Ghost Gunner 3 seemed a bit daunting. I have never done any type of CNC machining and there were no visible instructions. There is a USB drive with the installer for the CNC software and cutting codes but no stereotypical instructions. Defense Distributed sent an AR-15 jig with tools as well as a Polymer 80 frame, jig, and tools to complete said frame. These did not come with any instructions either. I was a bit confused at first but I discovered a Facebook group solely for helping owners of Ghost Gunner machines. In order to join you have to prove you have a Ghost Gunner. Once I was in, the members were very helpful.
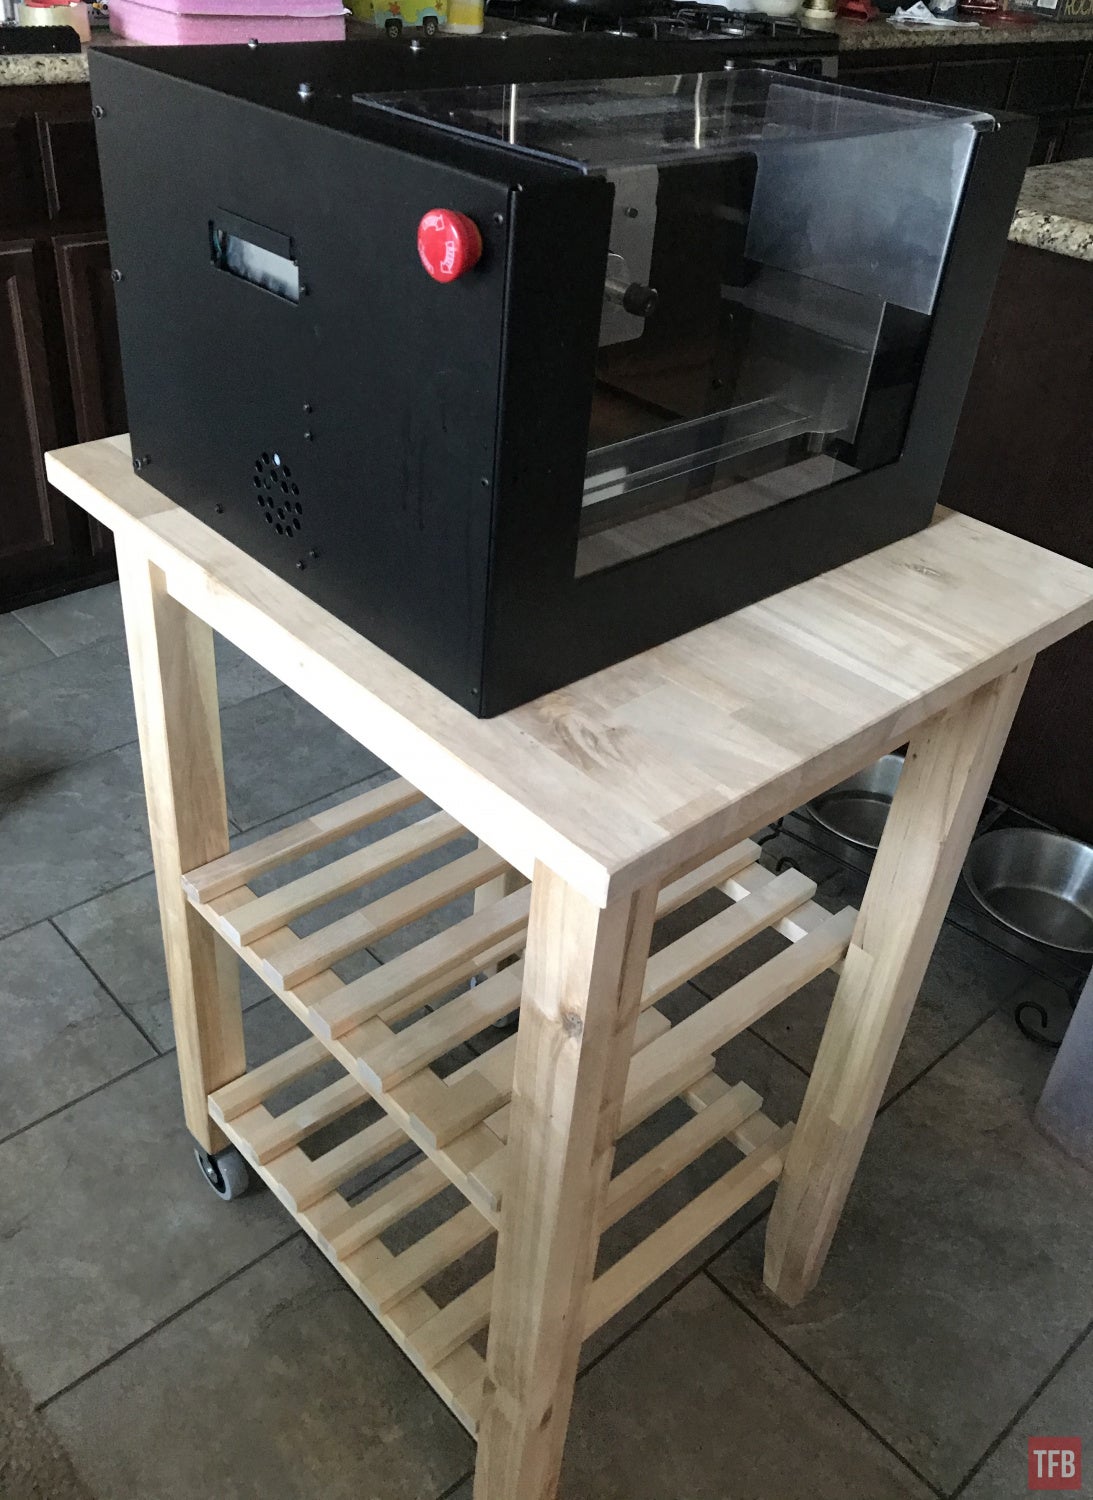
The bottom of the Ghost Gunner 3 is empty. There is no floor plate so chips will fall all the way through. I originally bought an Ikea kitchen island butcher block as a stand for the GG3. I was planning to cut a hole in the butcher block and sit a box underneath to collect the chips that fall through. However, Defense Distributed recommends reusing the closed cell foam tray that the GG3 was packed in. By sitting the GG3 in the foam tray, it will collect the chips for you and dampen vibration.
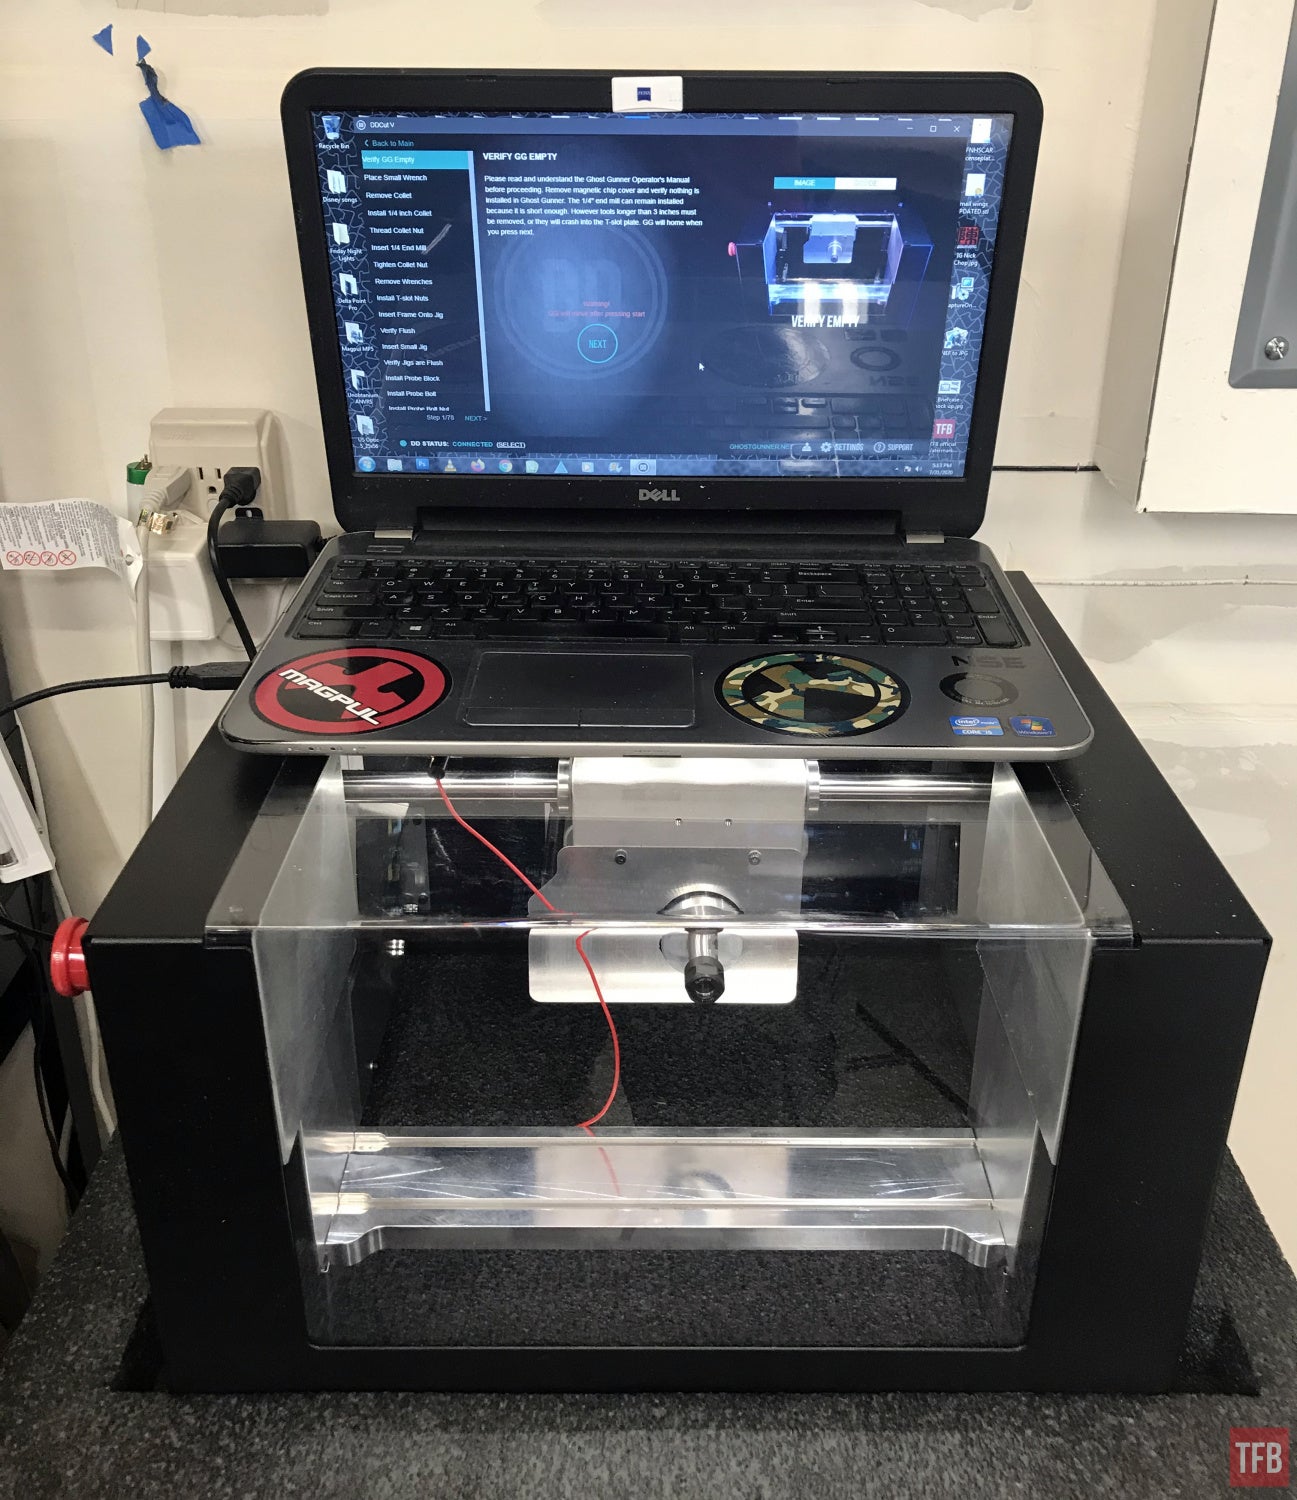
So the instructions are all programmed into DDCut V, the milling software for the Ghost Gunner 3. However, you cannot view the software if the Ghost Gunner 3 is not plugged into the USB port of your computer. Once the Ghost Gunner 3 is connected to the software you can select a cutting code.

Once the GG3 is connected you select “RUN CODE”. An explorer window will open and you can select one of the milling codes that come with the Ghost Gunner 3.
After you select the cutting code the DDCut V will walk you through setting up the Ghost Gunner 3 as well as the jig installation and eventually milling the lower. There are images that pop up on the right-hand side to illustrate what the step is talking about.

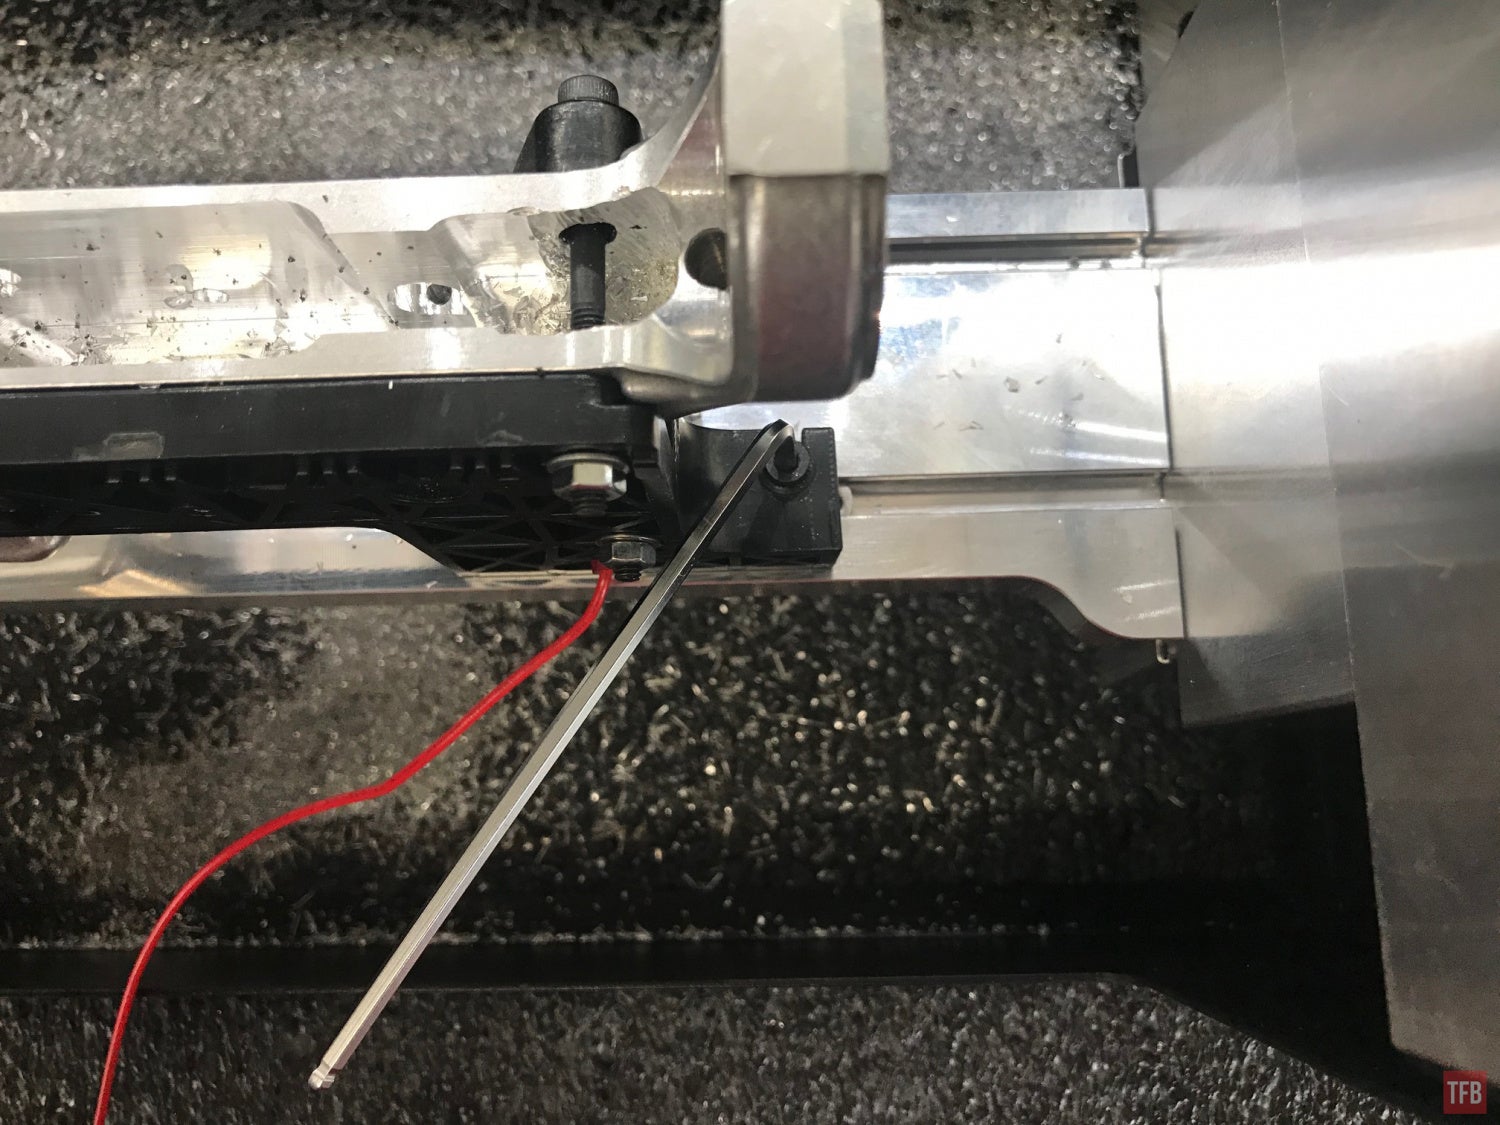
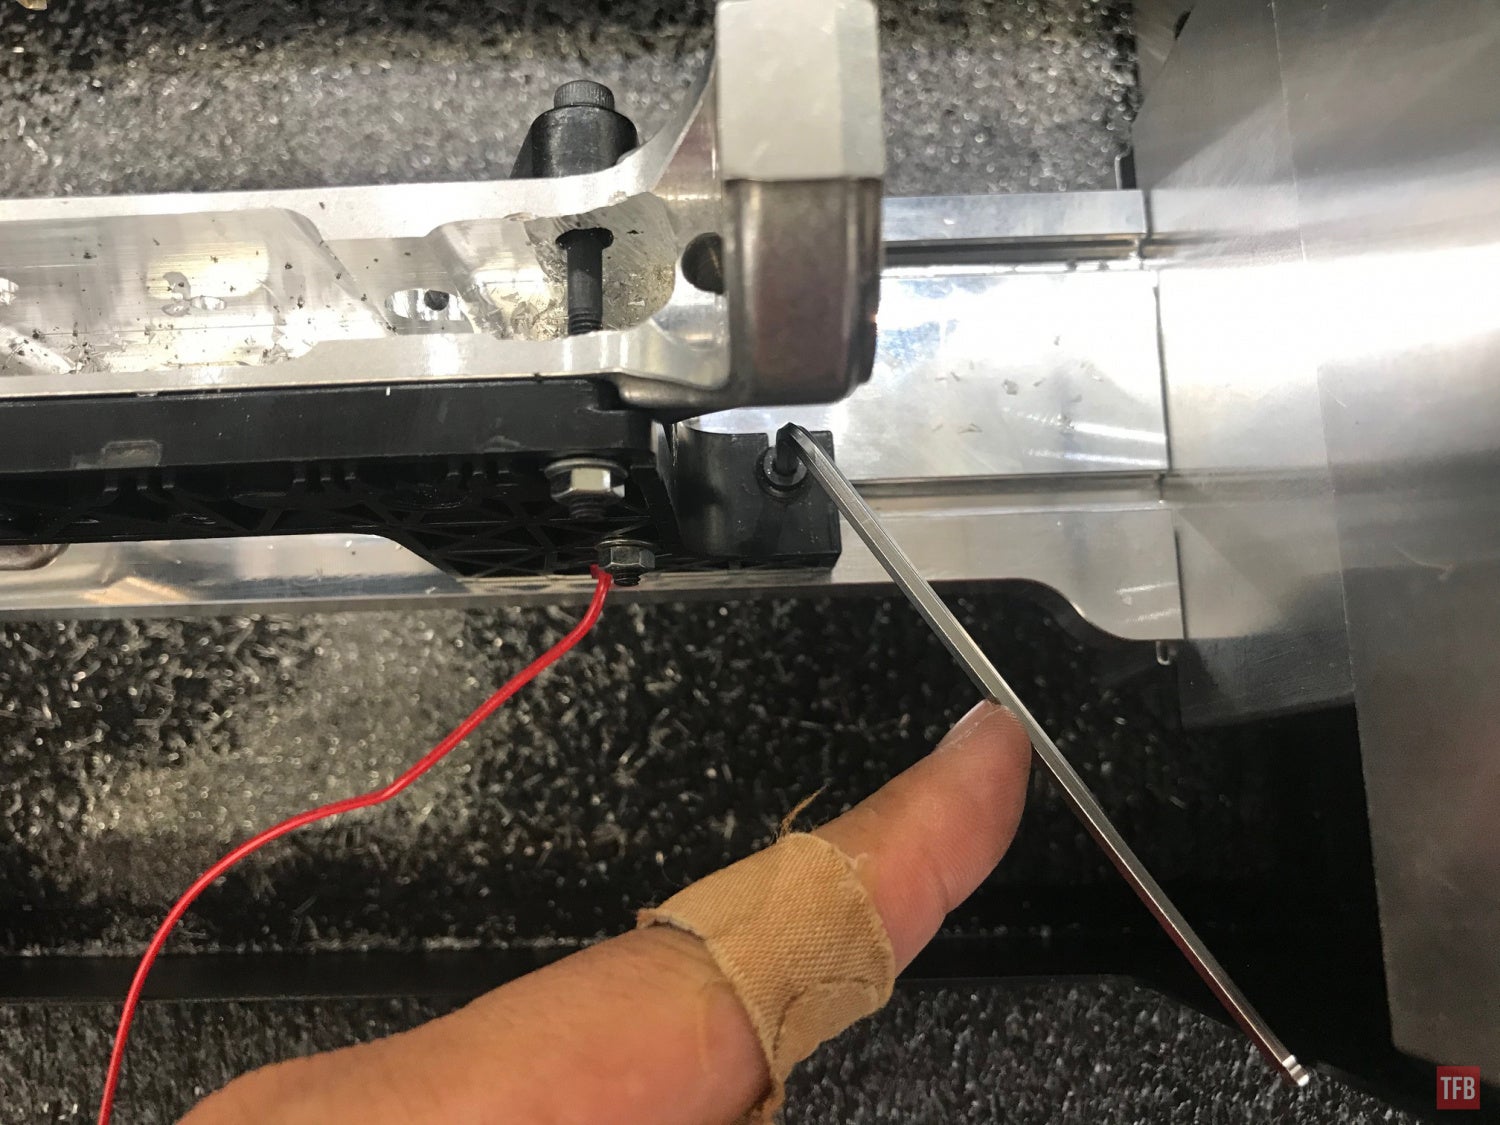
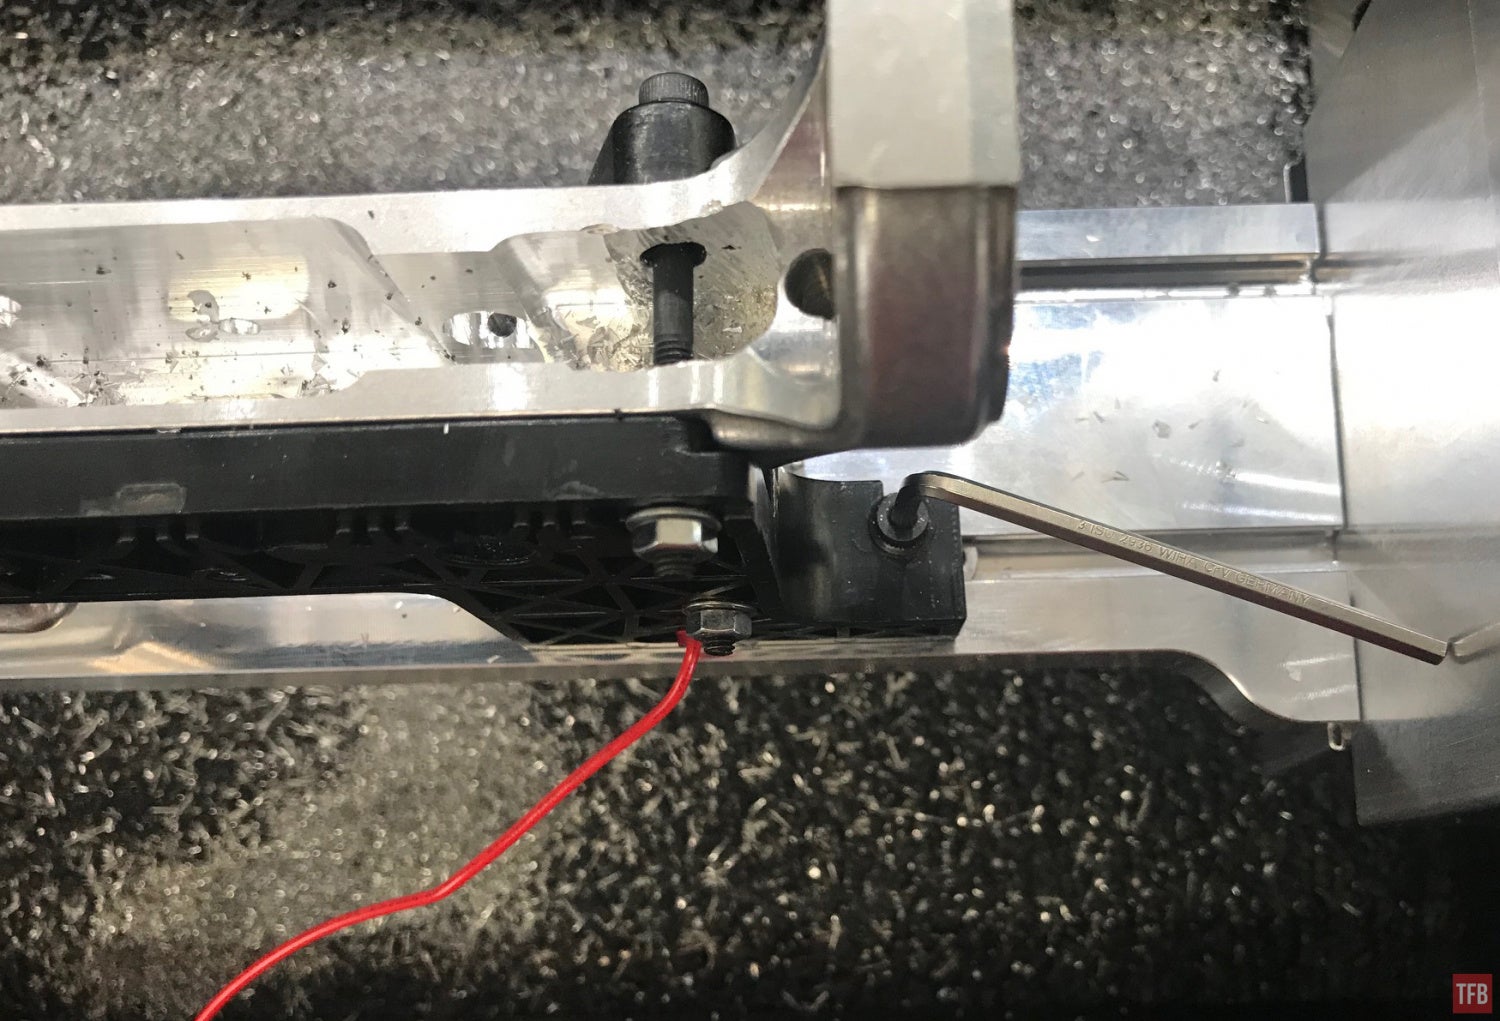
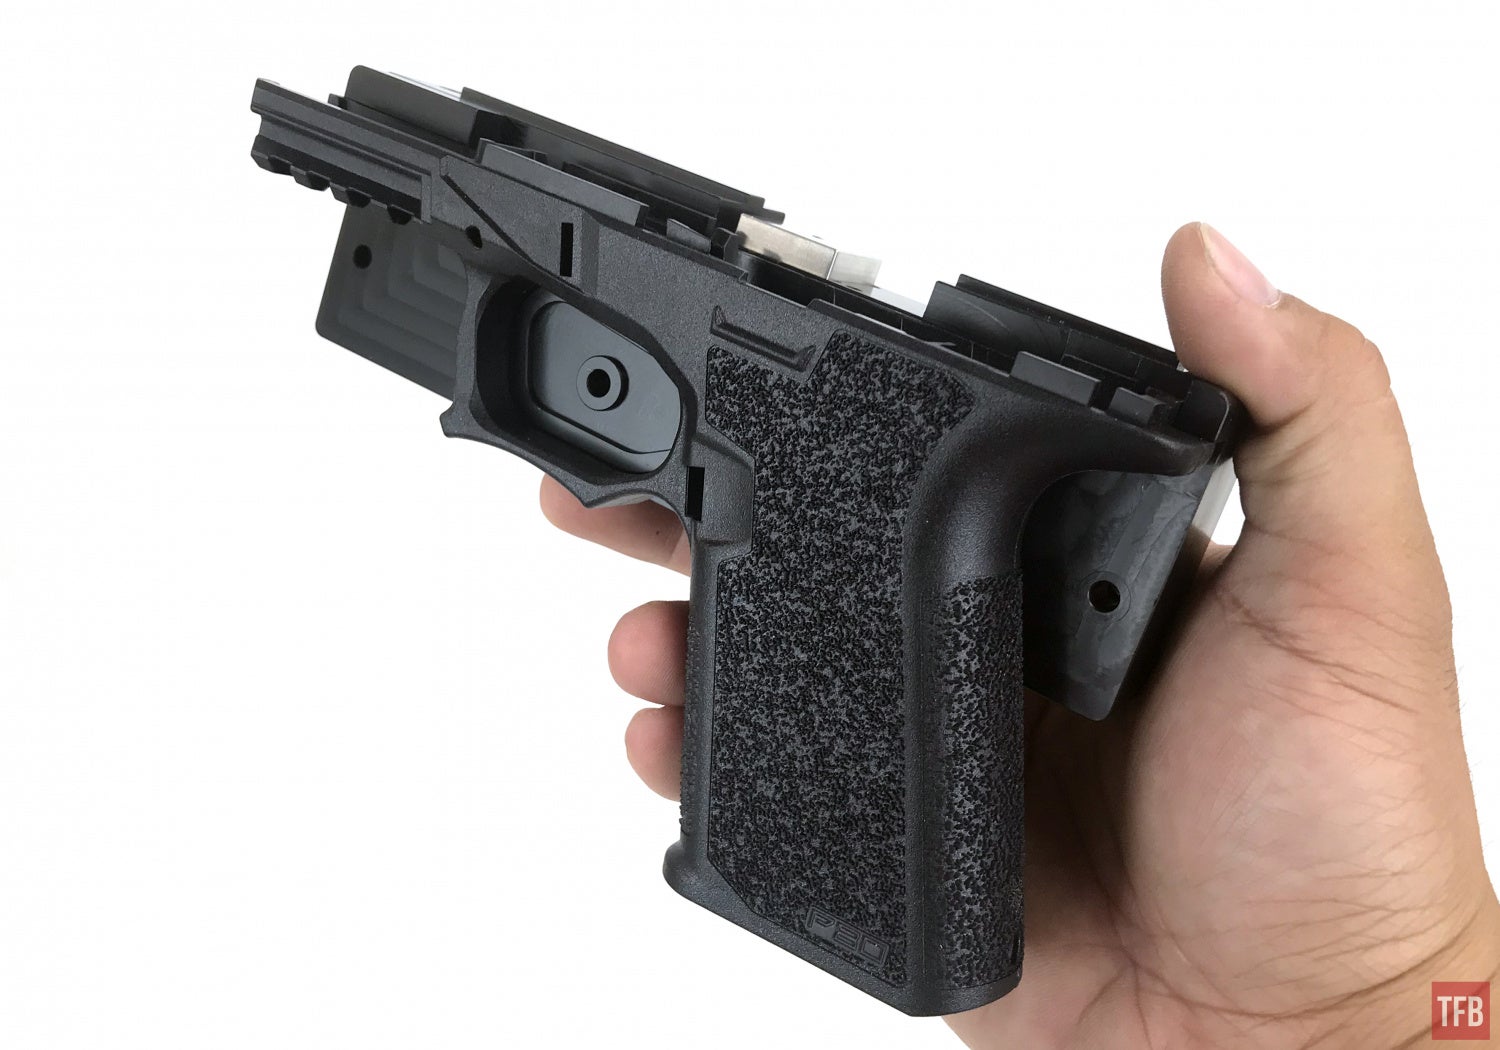
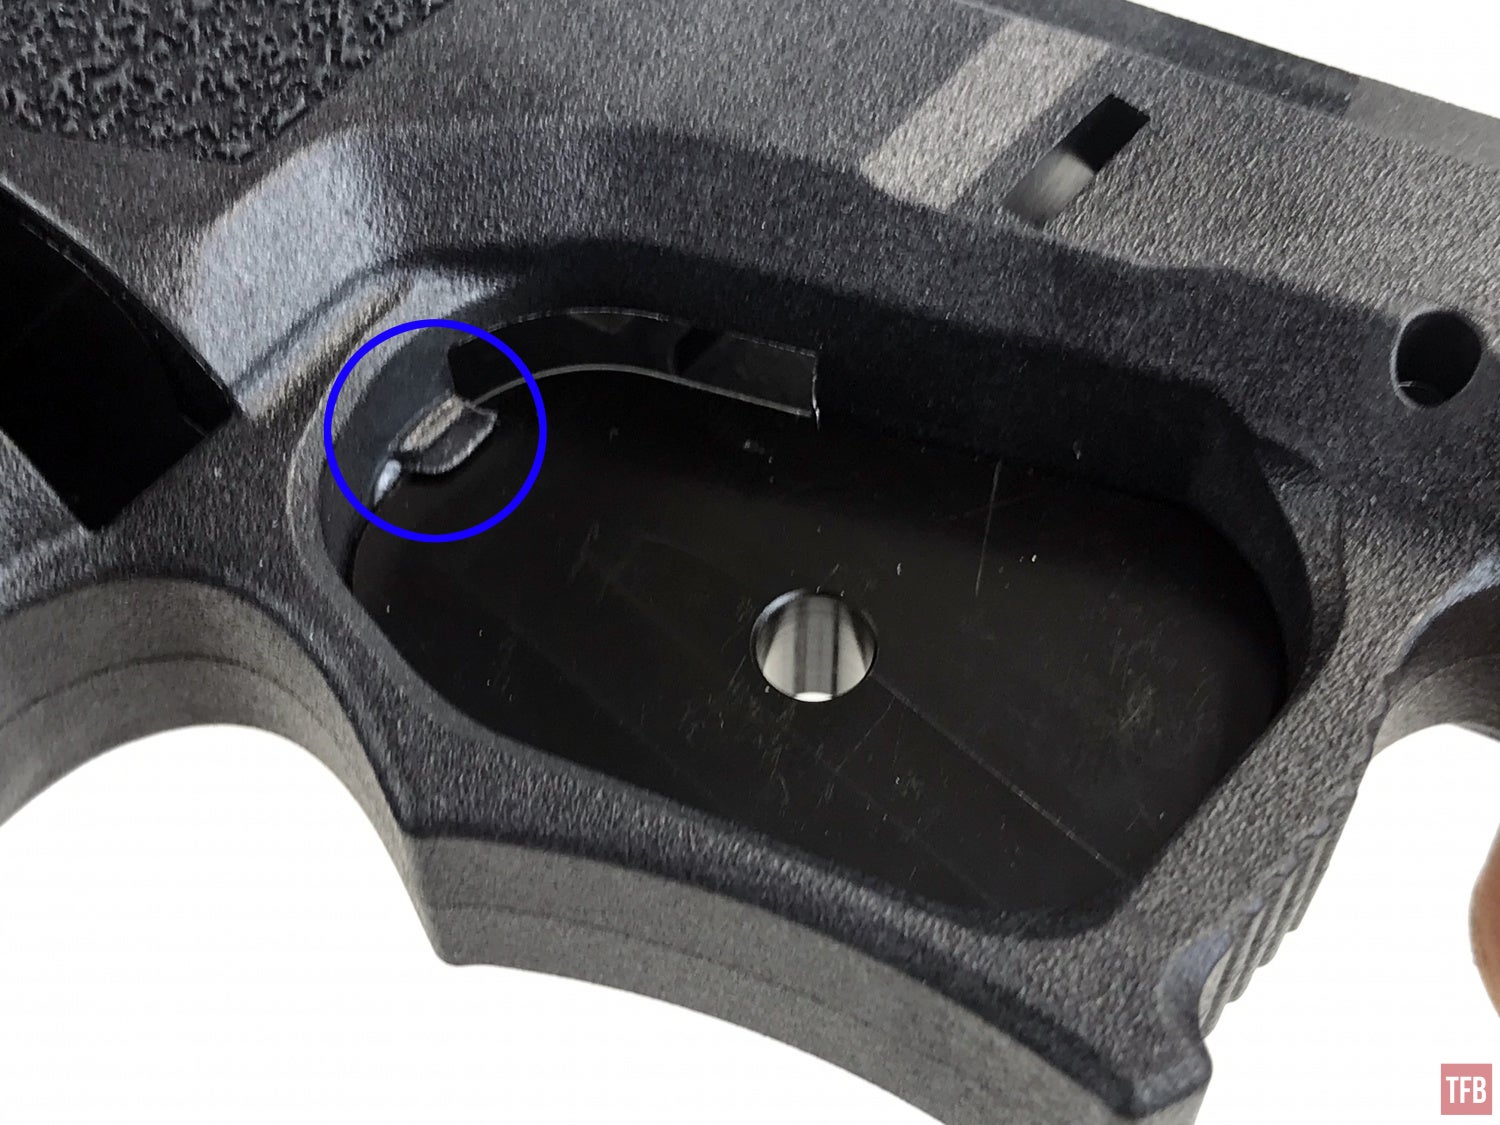
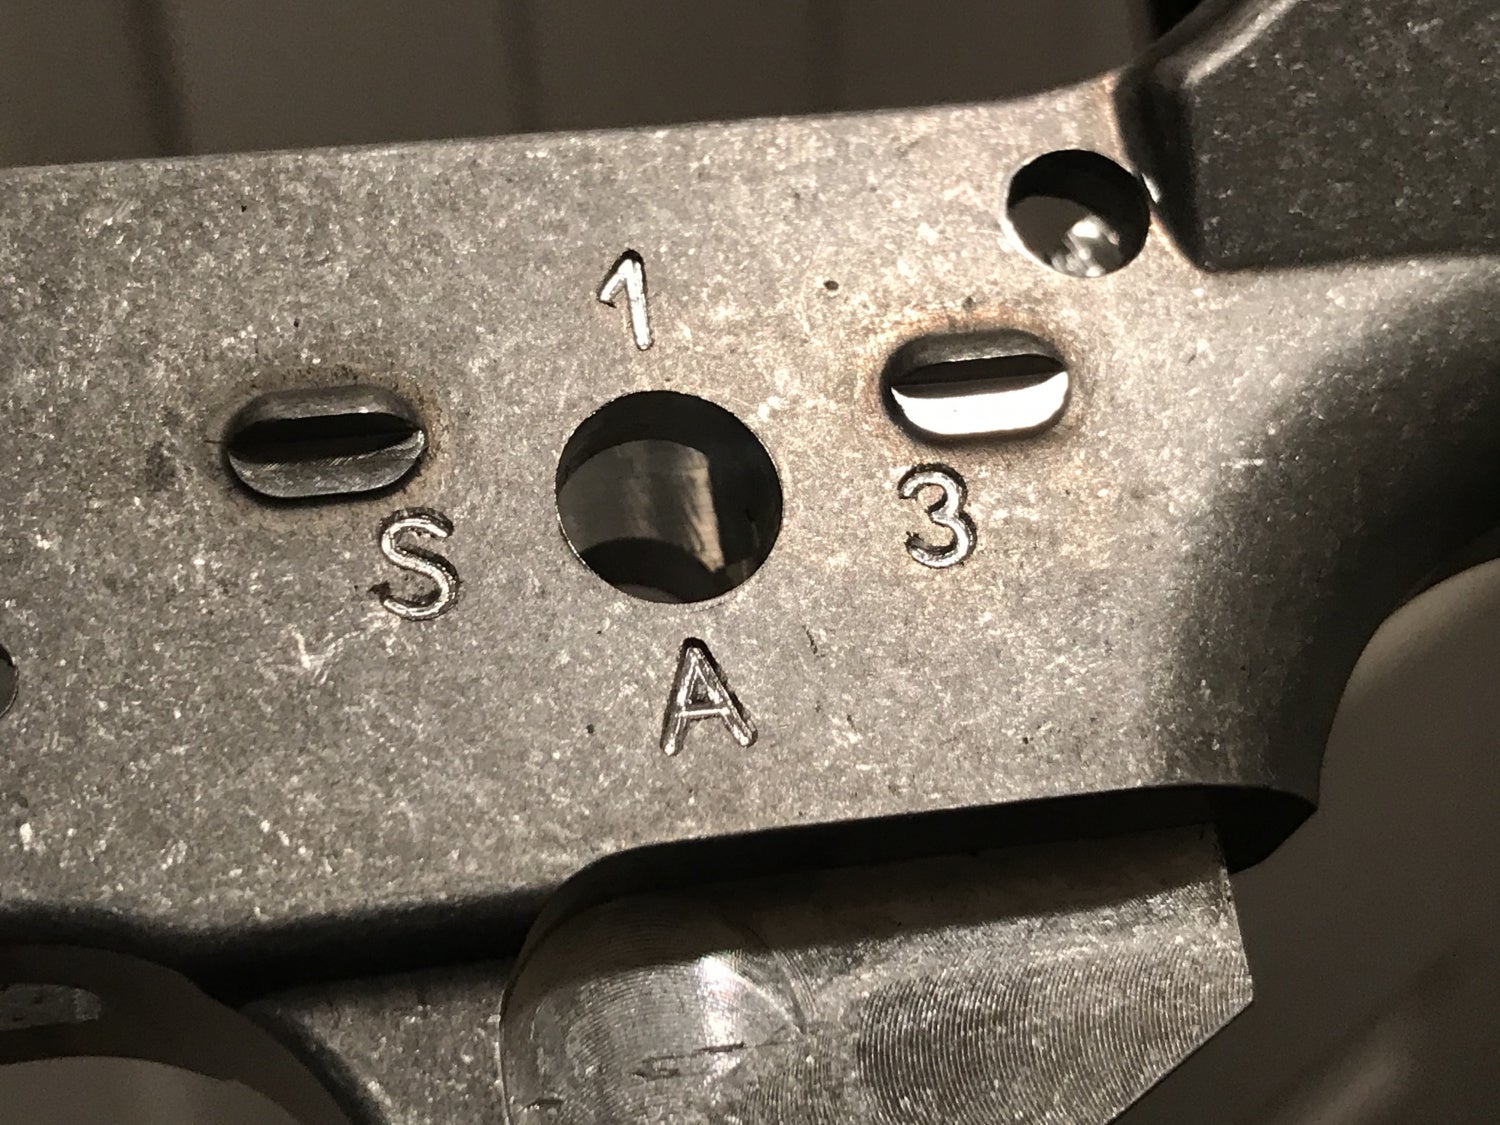
One of the main features of the GG3 is the removable probe wire and green LED indicator.
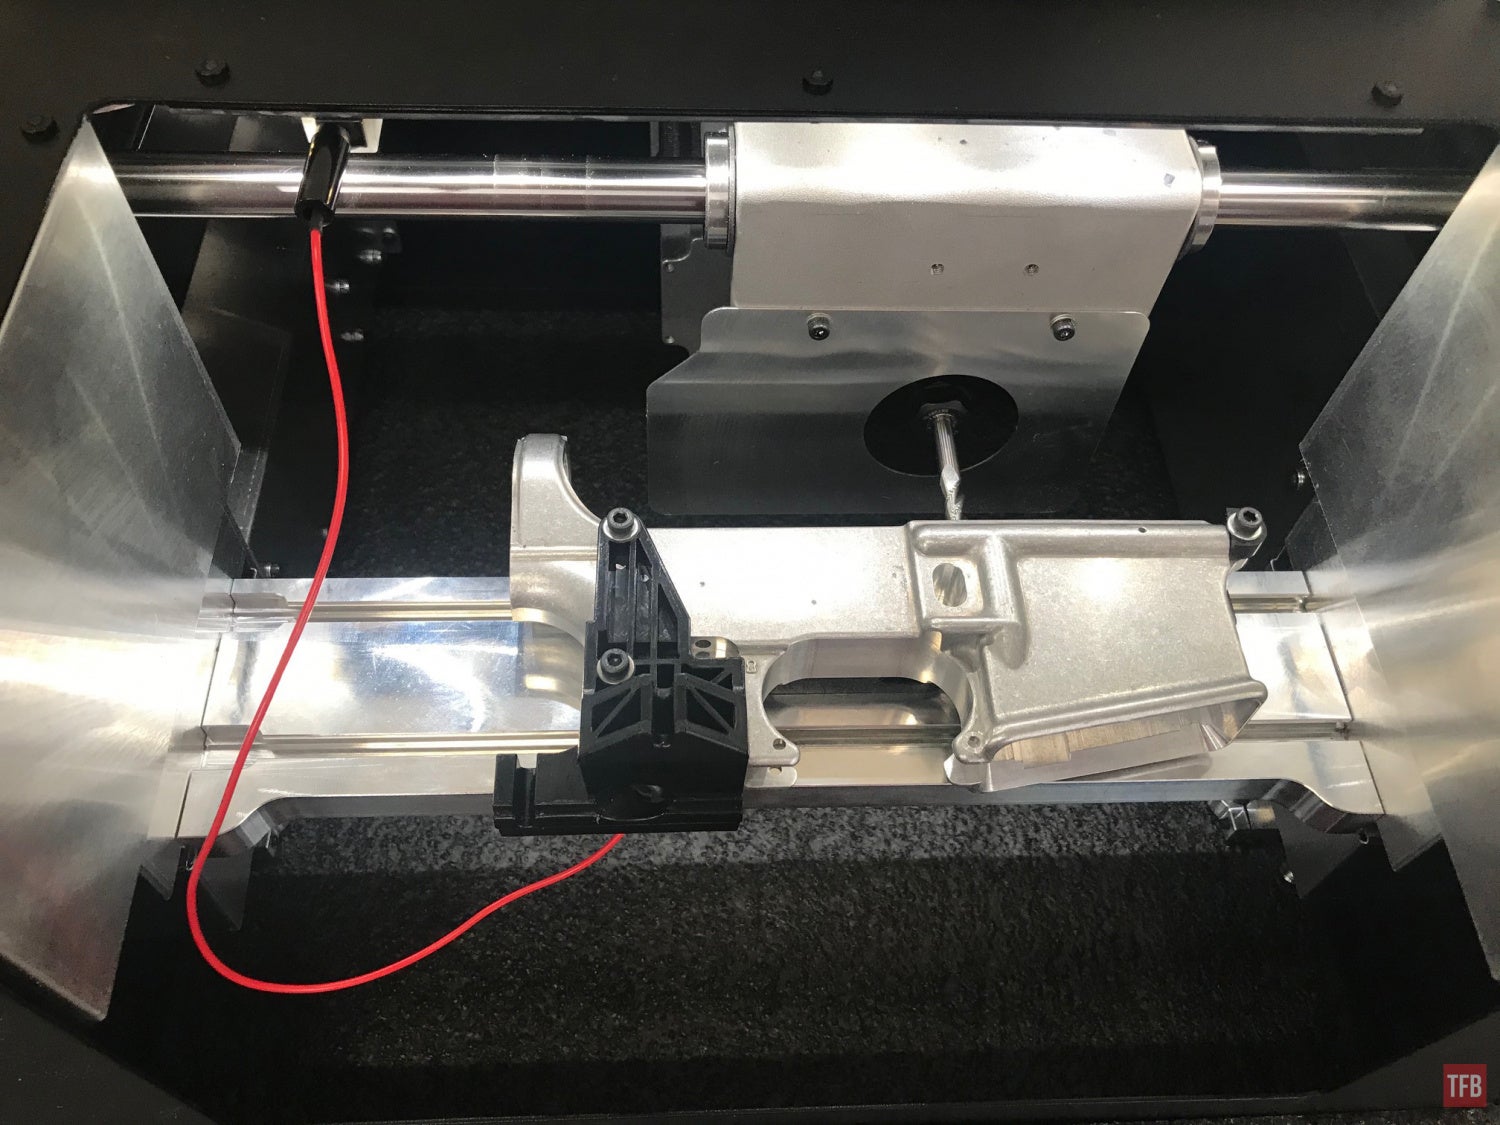
The probe wire is attached to the lower receiver via the pistol grip screw. Once connected the green LED will turn off.
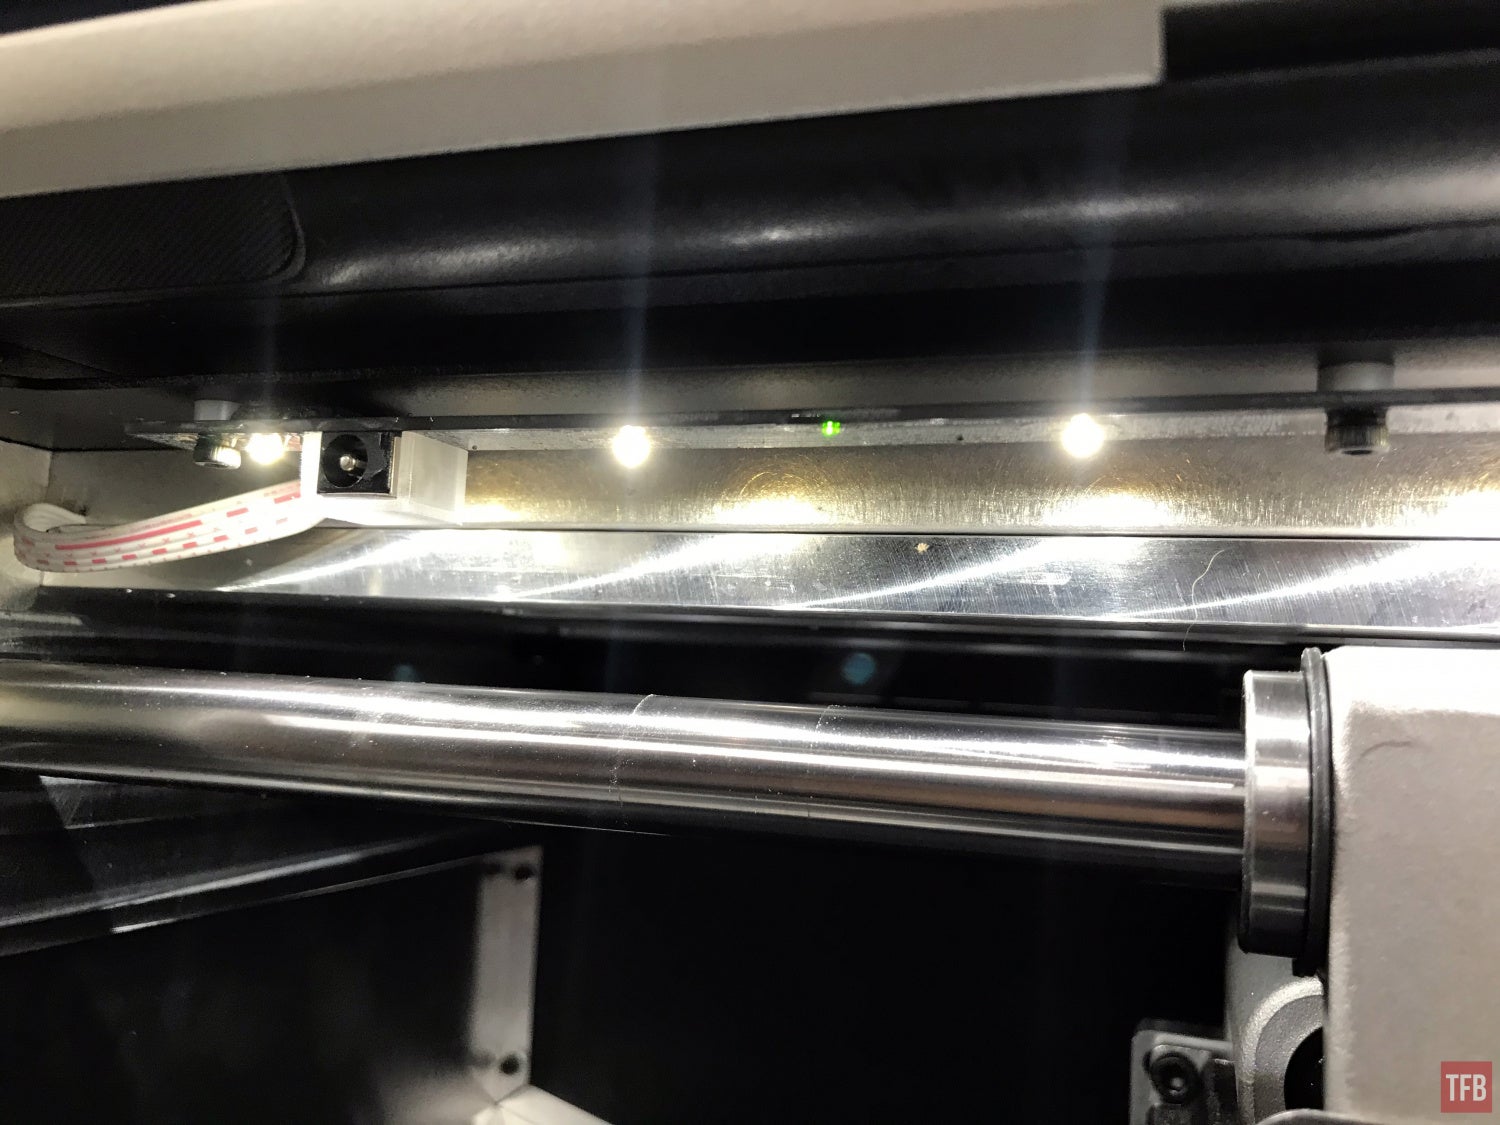
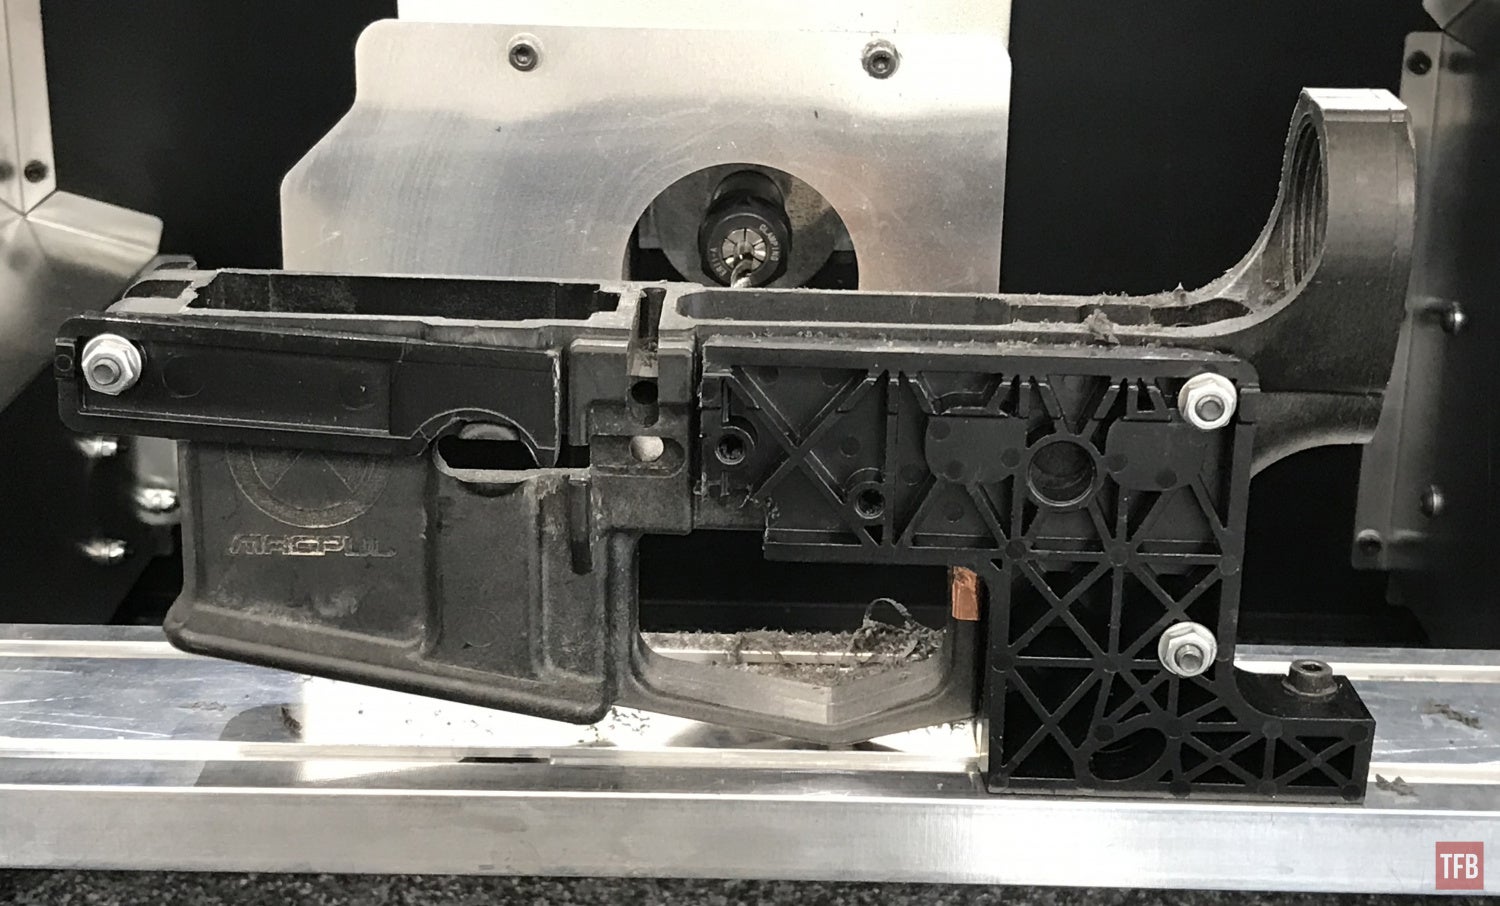
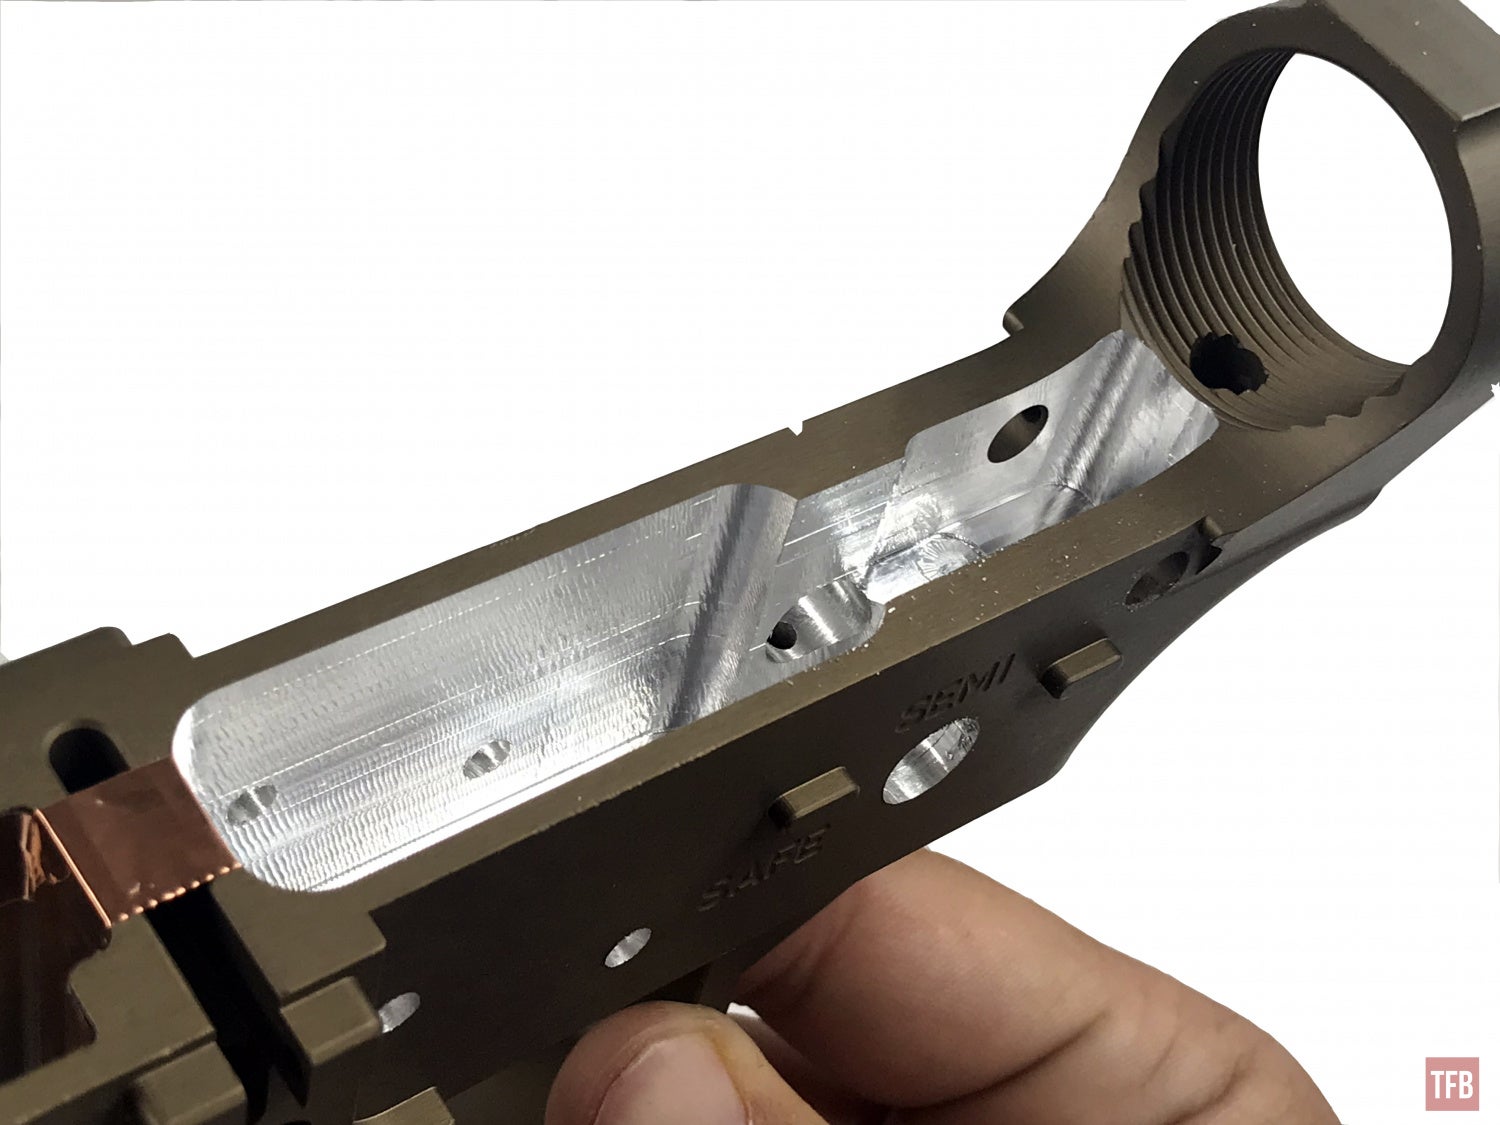
If the green light is on then there is a short in the circuit. It is imperative that the build plate and jig are free of any stray chips that could cause a short. You will notice that the lower is bare aluminum. This is necessary for running the GG3. Anodized or any other type of coating on a lower receiver will not allow the electrical circuit to be completed. With the probe wire properly attached, the GG3 uses the endmill tool as a probe to determine where the lower receiver is in relation to the endmill.
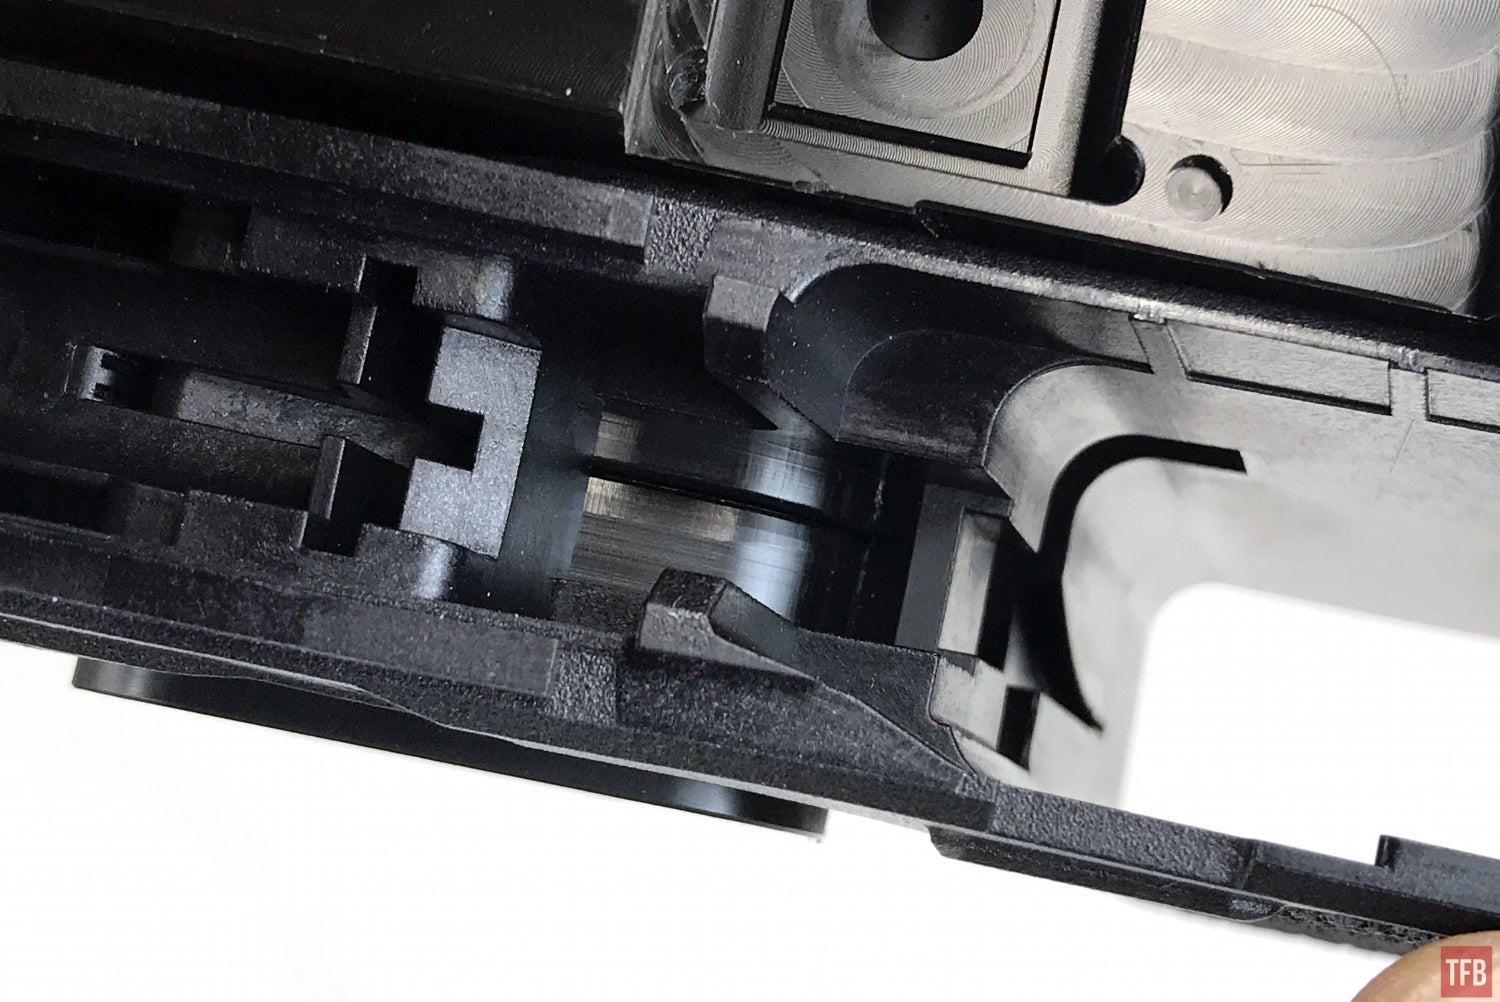
For an AR-15 lower receiver the endmill touches the top of the receiver then it touches the inside of the magwell in three positions, back, left and right sides, if the lower was positioned vertically in front of you. Once it probes you can continue with milling the fire control group (FCG) pocket.
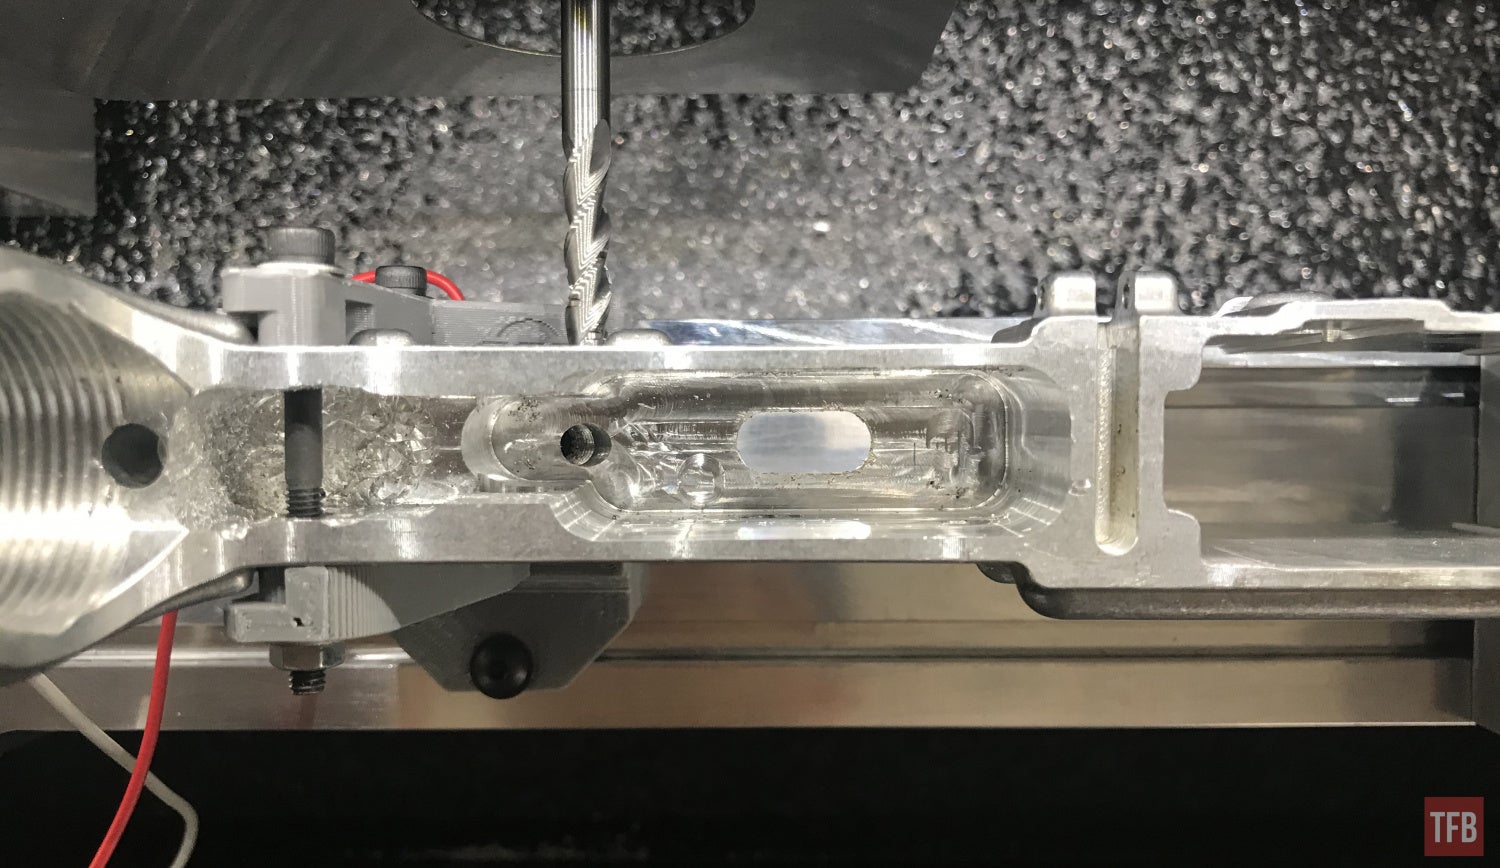
After the GG3 is done milling the FCG pocket, it is time for the second operation, milling the selector hole and drilling the trigger pin holes.
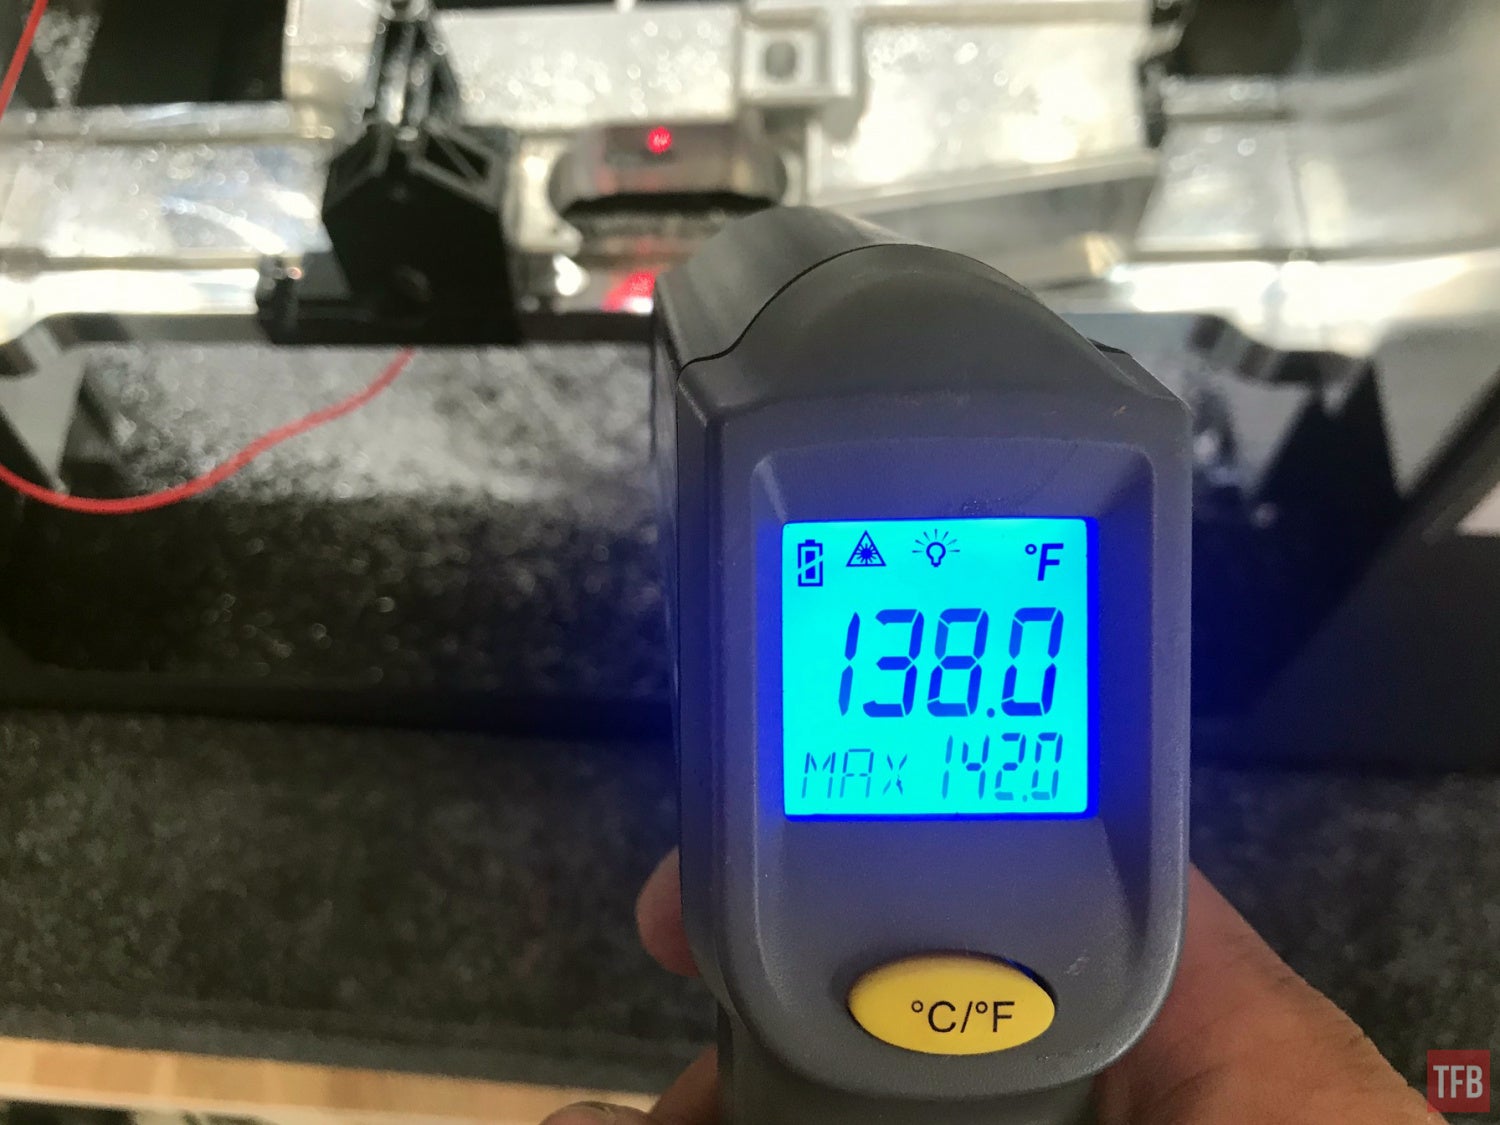
The lower will be rather warm after the FCG pocket is milled. Due to the design of the GG3, you cannot run any coolant or have a fan blowing air. The GG3 produces a lot of aluminum chips and you do not want stray chips ending up behind the spindle. In fact, to clean the GG3 it is recommended to only use a vacuum cleaner, not compressed air.
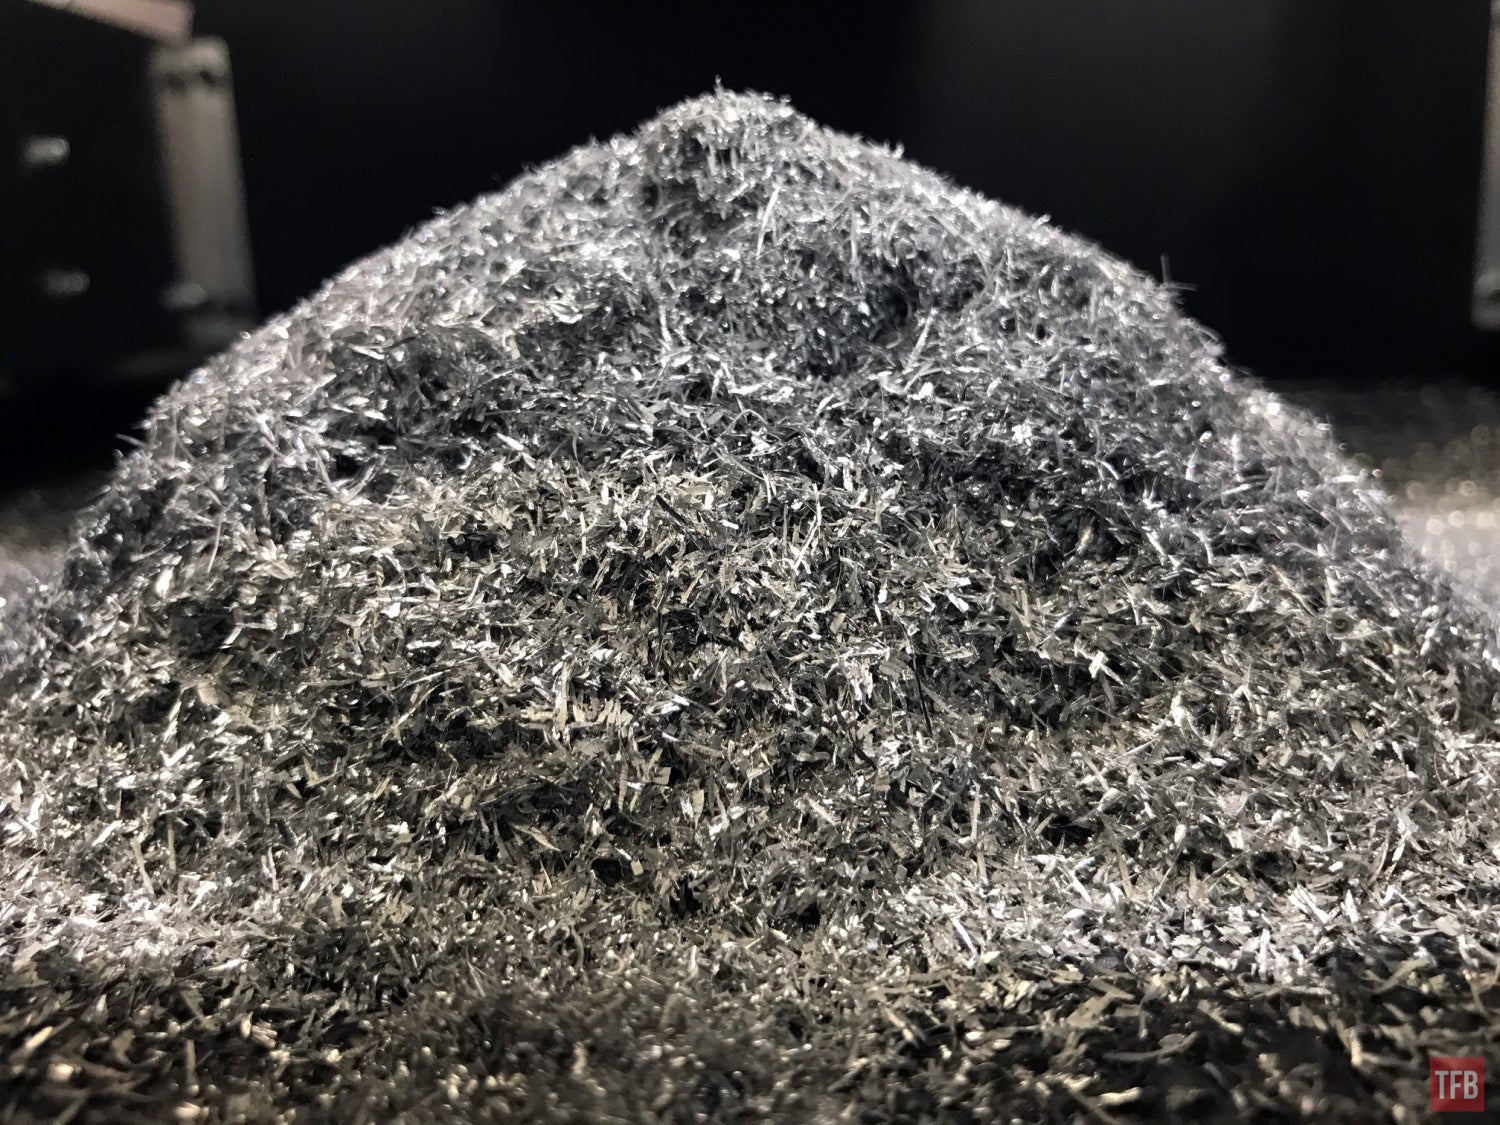
GG3 freedom chips after one lower.
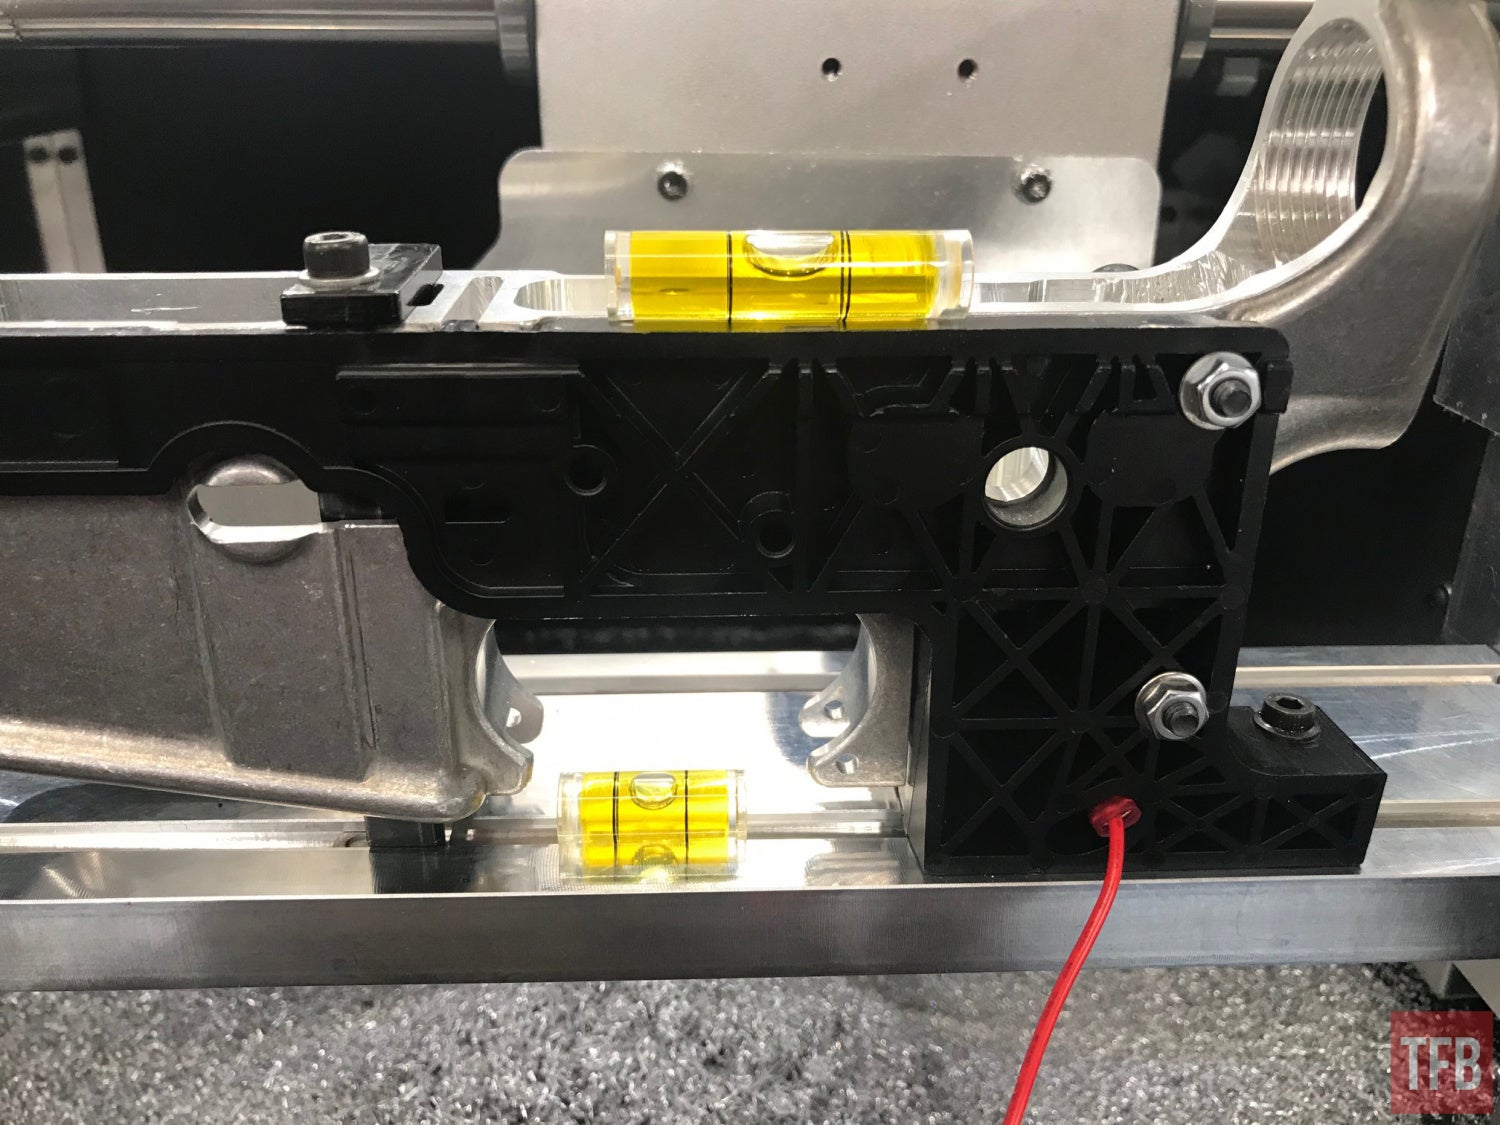
In order to mill the safety selector and trigger pins, you need to reorient the lower receiver vertically. I used two small bubble levels to ensure the lower was true to the build plate.
The jigs are made of injection-molded plastic or in some cases 3D printed plastic. This is so they are not conductive as well as inexpensive to manufacture. The downside is that they are not as rigid as metal fixtures. So when you tighten the screws to hold the jig in place it is recommended to use the shorter length of Allen key and snug the screws. No need to tighten it down as hard as possible otherwise you could deform the jig.
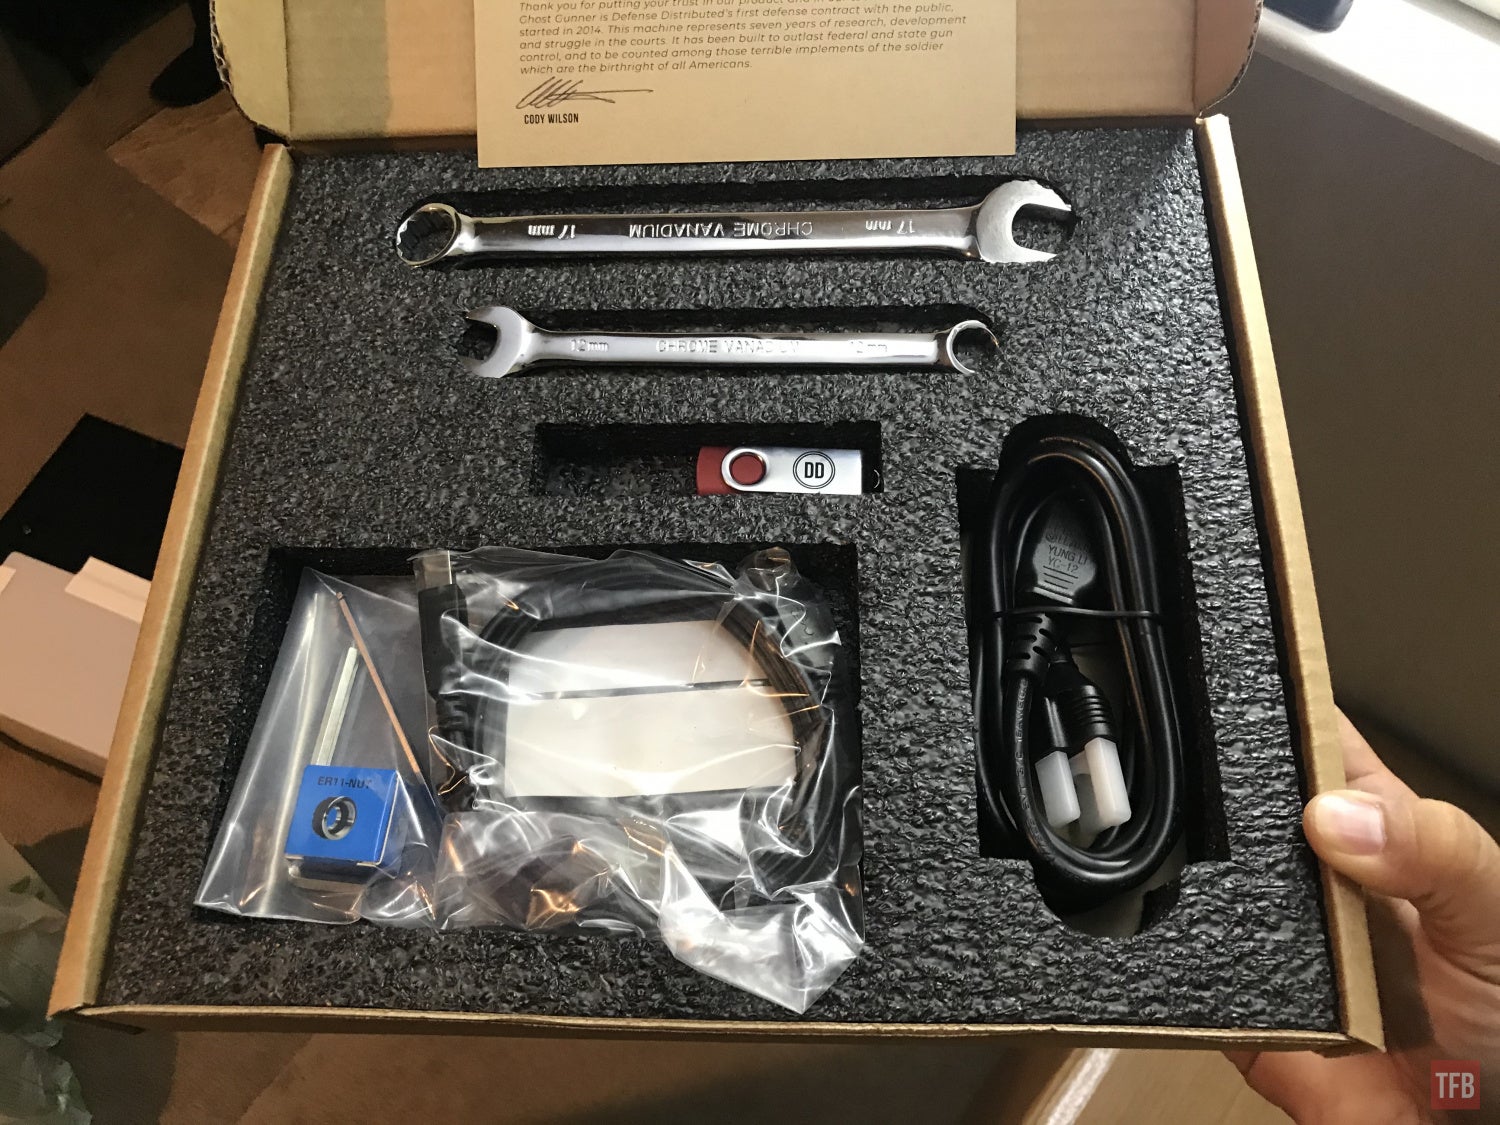
The Ghost Gunner comes with the tools you need. An Allen wrench, 12mm box wrench and 17mm box wrench. The Allen wrench is for screwing in the smaller screws that hold the jig to the build plate. The 12mm and 17mm wrenches are for installing the tools and collets to the spindle.
The Allen wrench that comes with the Ghost Gunner 3 is a little bit long. It makes it difficult to turn in tight areas.
I can only turn the Allen wrench this far before it hits the jig.
I can only move the Allen wrench this far to the right before it hits the GG3 itself.
I found a shorter Allen wrench and keep it handy for removing screws in tight areas as seen below. I can turn this wrench further.

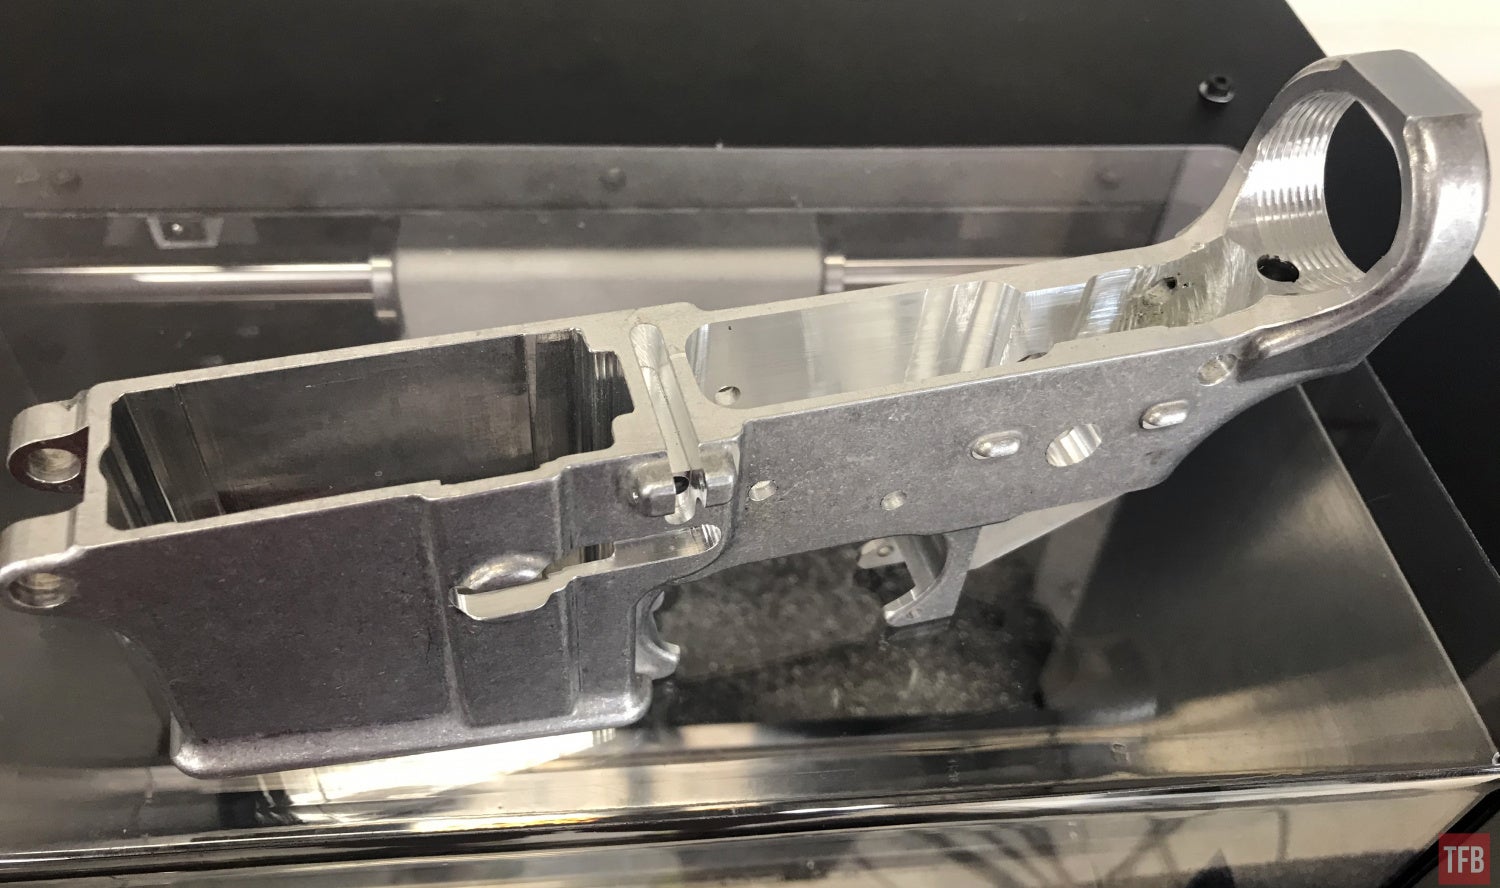
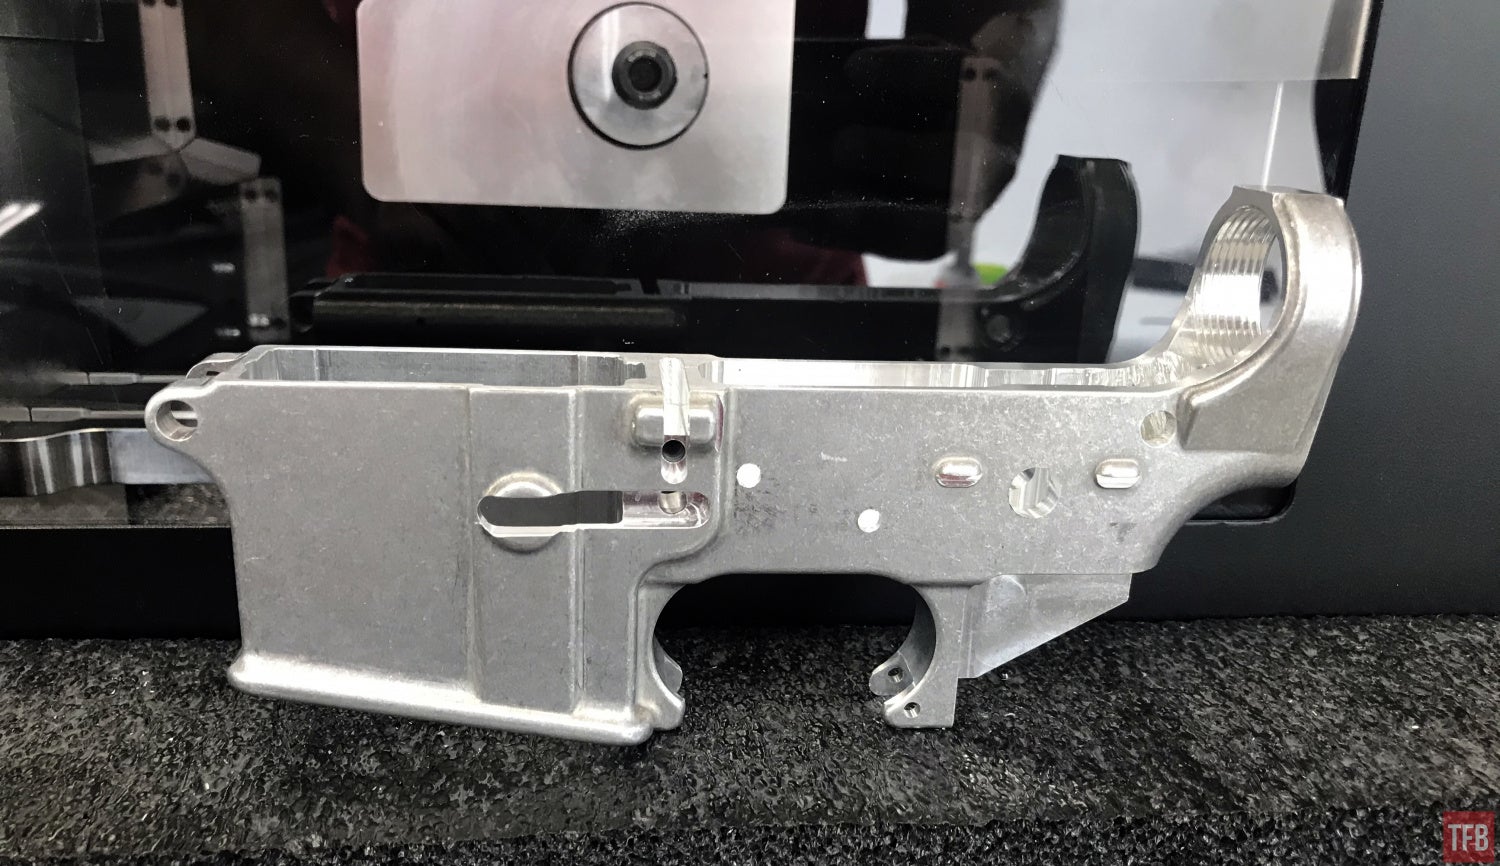
Voila, a completed AR-15 lower thanks to the Ghost Gunner 3.
But What About Anodized Or Polymer Lowers?
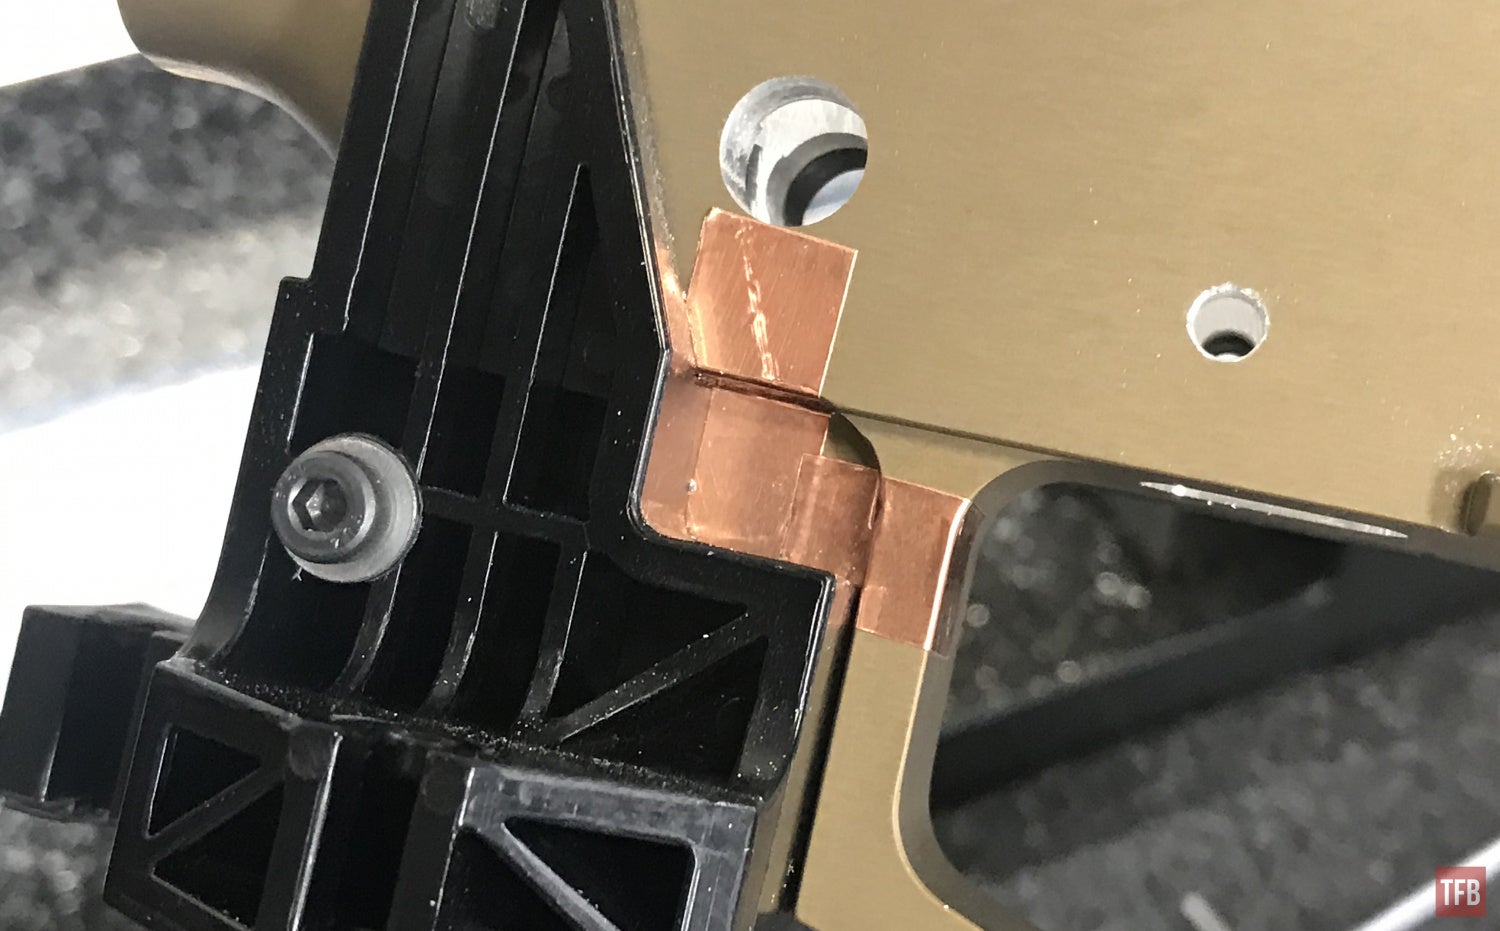
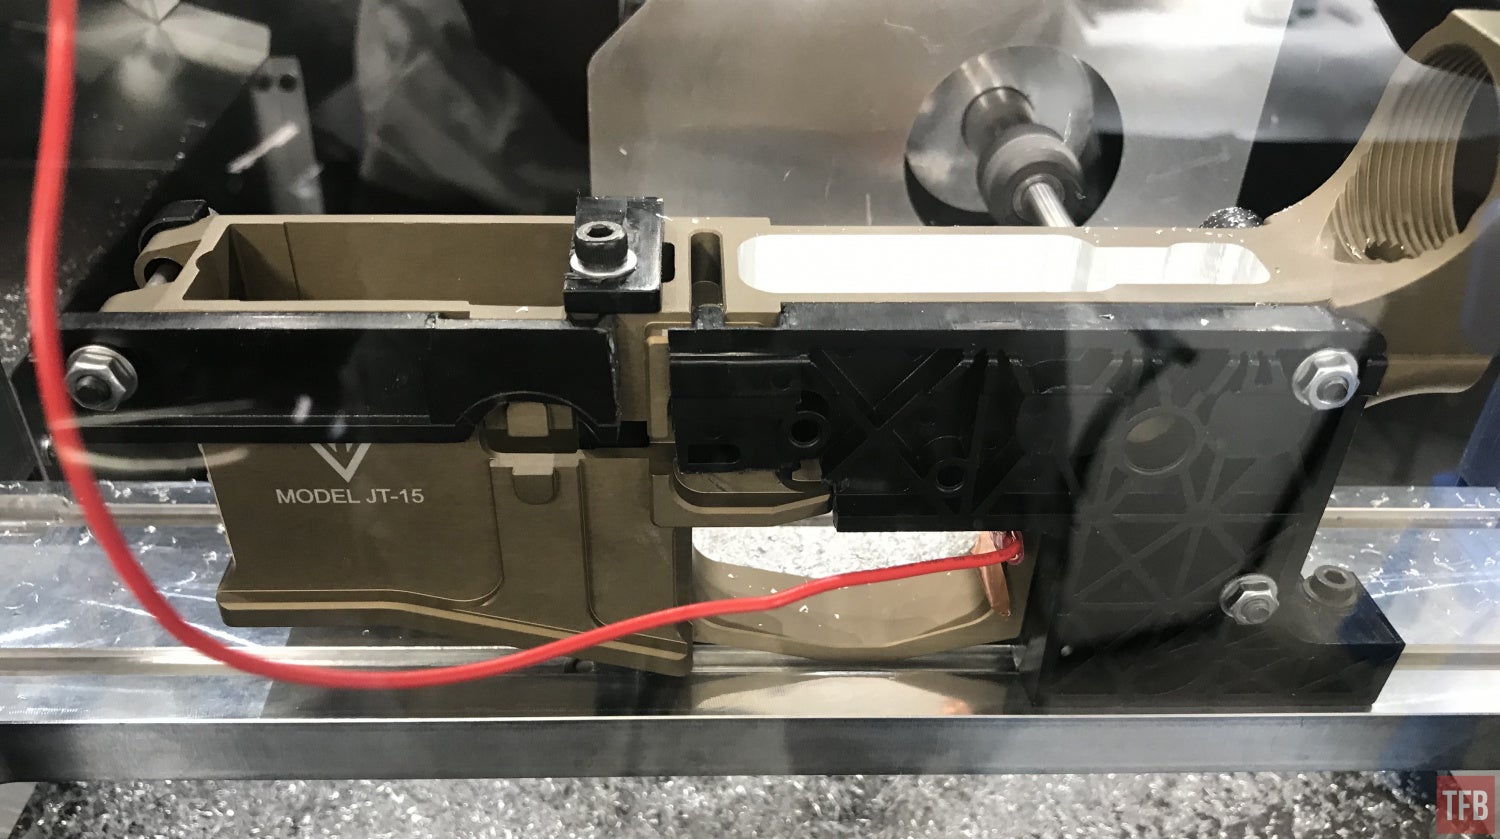
This is where the experience of the Ghost Gunner group helped a lot. The Ghost Gunner 3 typically uses the pistol grip screw to hold the probe wire in place. Since the probe wire is touching the screw and the screw is touching bare aluminum the electrical circuit is closed. But that is not the case if you are using a polymer lower or anodized/coated lower. So you have to get crafty with some copper tape. You do not install the probe wire to the pistol grip screw. You need to lay down copper tape where the endmill will probe. Then you need to run a strip down the magwell to attach the probe wire lead.
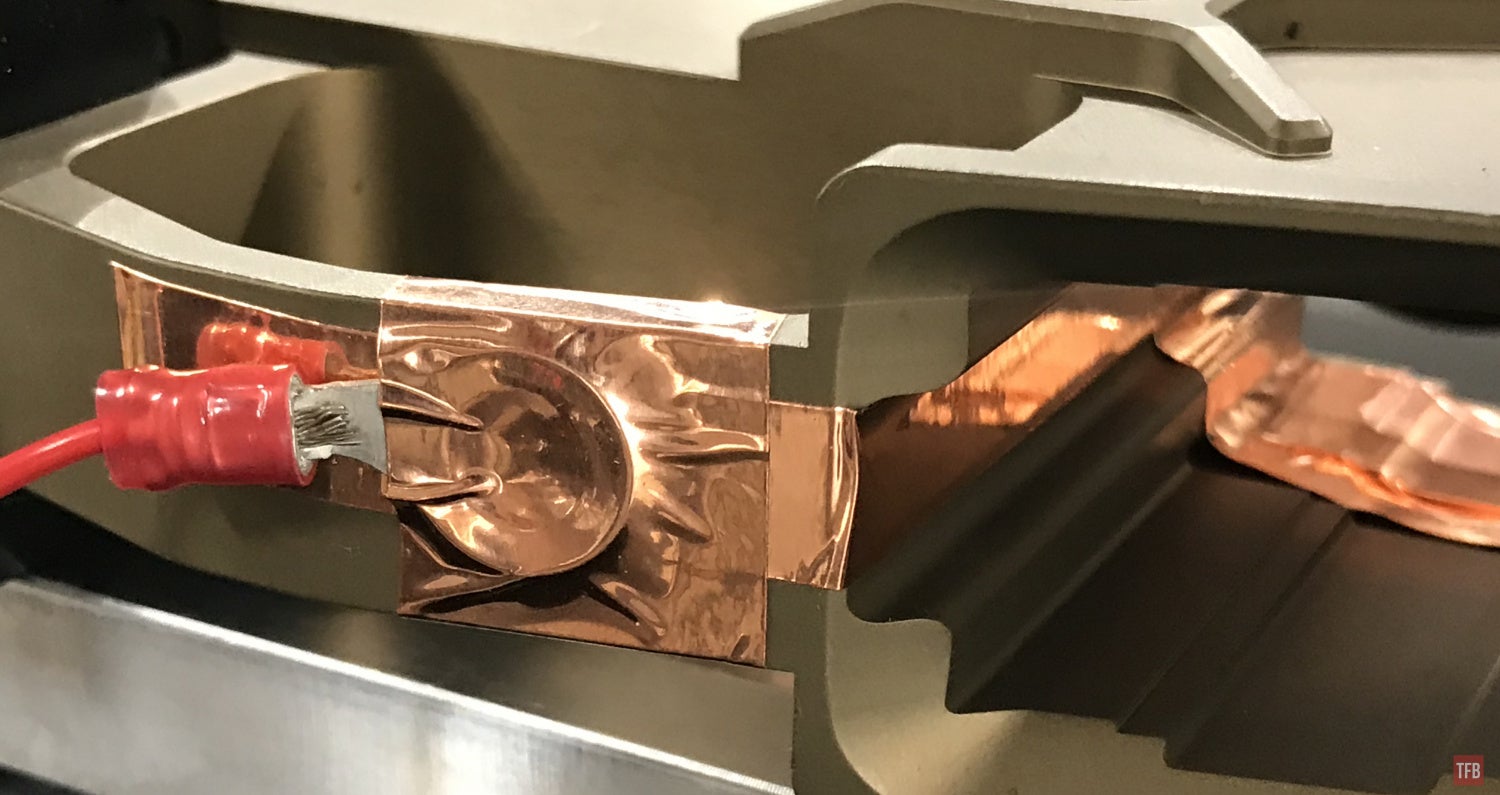
The second place the endmill probes is the pistol grip pocket seen below. This is where the GG3 probes for the second operation and mills the selector hole and trigger pins. You need to put copper tape there and attach the probe wire to the tape.
It works for polymer receivers as well.

The flashing is easily cleaned up with a razor blade.

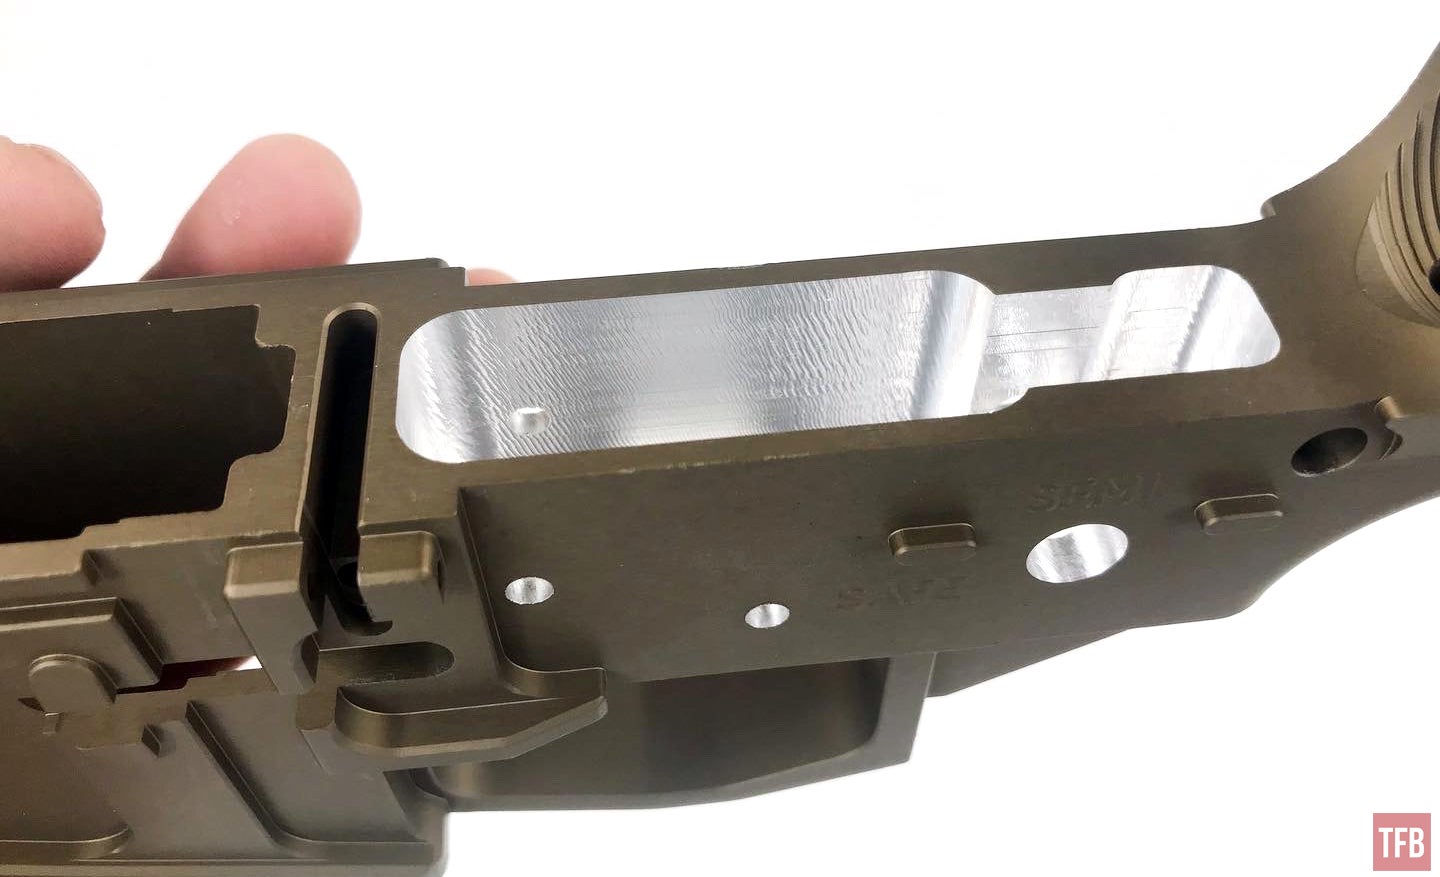
The only part of the AR-15 lower that needed to be retouched was the selector hole. It was too small and I could not get a standard mil-spec safety to fit in the hole. I tried re-running the selector hole cutting code but it did not help. I ended up simply grabbing a 3/8″ drill bit and reaming the selector hole a bit to widen it for the safety selector.
Completing A Polymer 80 With The GG3
There have been some responses online and even in the Ghost Gunner community that using a Ghost Gunner to complete a Polymer 80 is unnecessary. The naysayers say that they can finish one with hand tools and a drill press. My rebuttal to this is “I’m lazy and I have a robot to make my guns for me. We have the technology so let’s use it”.
The first thing I noticed was that the jig for the Polymer 80 is made of machined Delrin.
Now I was a little disappointed that this jig and the cutting code only work for the PF940C. It does not work for the full size or any other size frame from Polymer 80.
The Polymer 80 jig holds the frame by the trigger guard however it is only held in by friction. The instructions say to have the frame pressed up against the jig as much as possible. I found it easier to use a clamp to push the frame onto the jig. 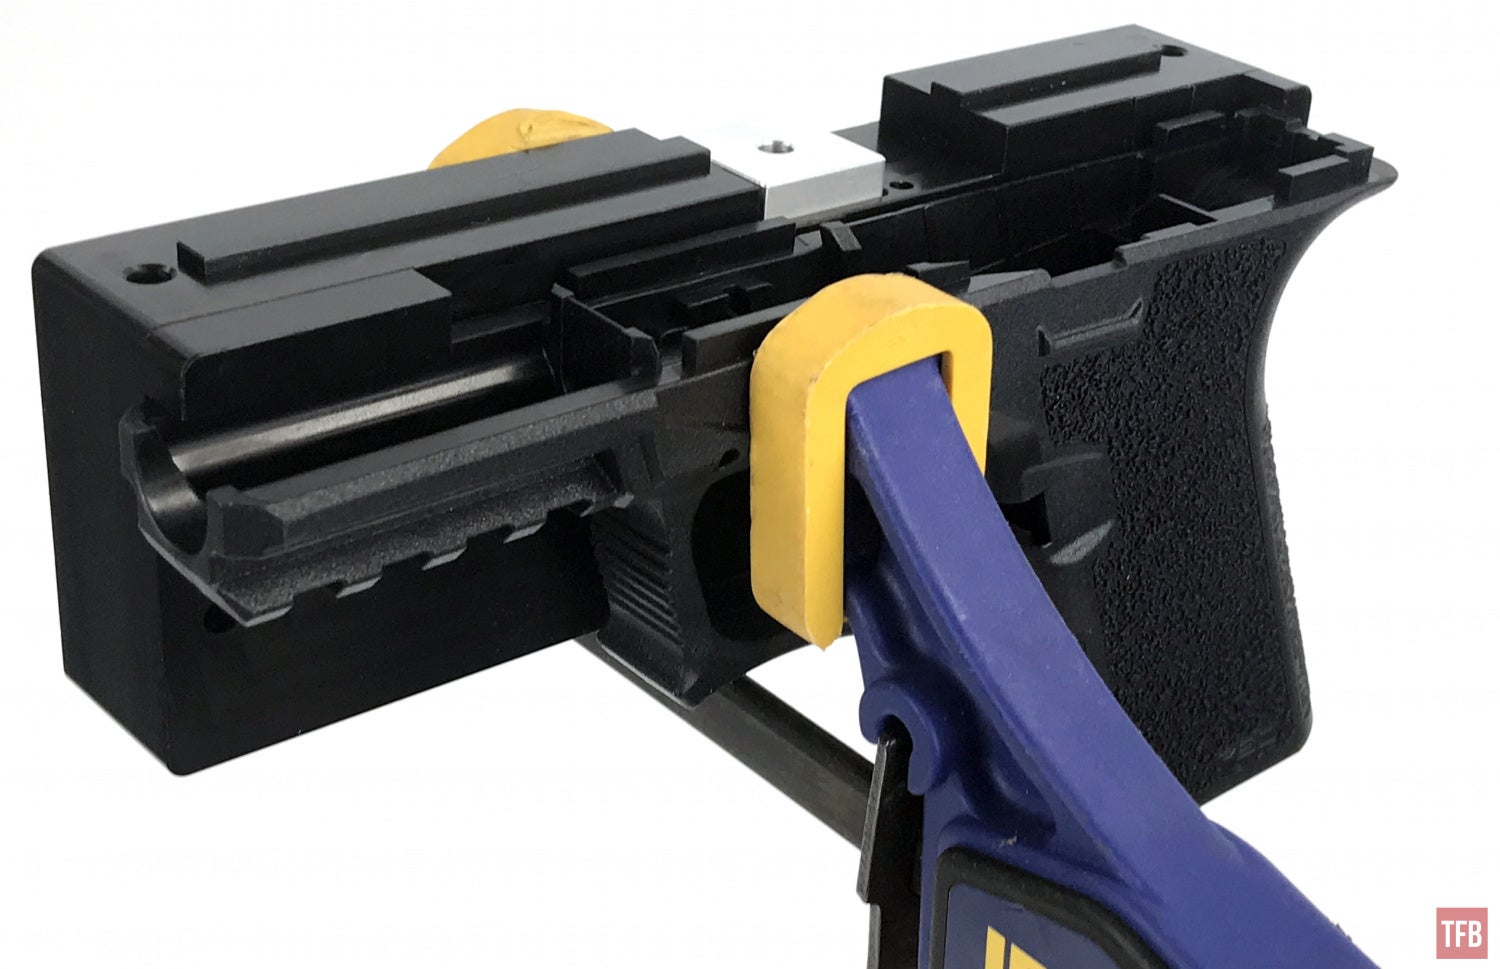
Then you add the small jig part that fills the rest of the trigger guard. You want the two halves of the jig to touch. However, I noticed a sizeable gap. I removed the small jig and noticed the P80 frame had a piece of flashing that was not cleaned well from the factory. So I removed the frame and shaved off that piece of plastic off with a sharp knife.
See that dark line? Now the two jig halves are touching after I cleaned the flashing from the trigger guard.
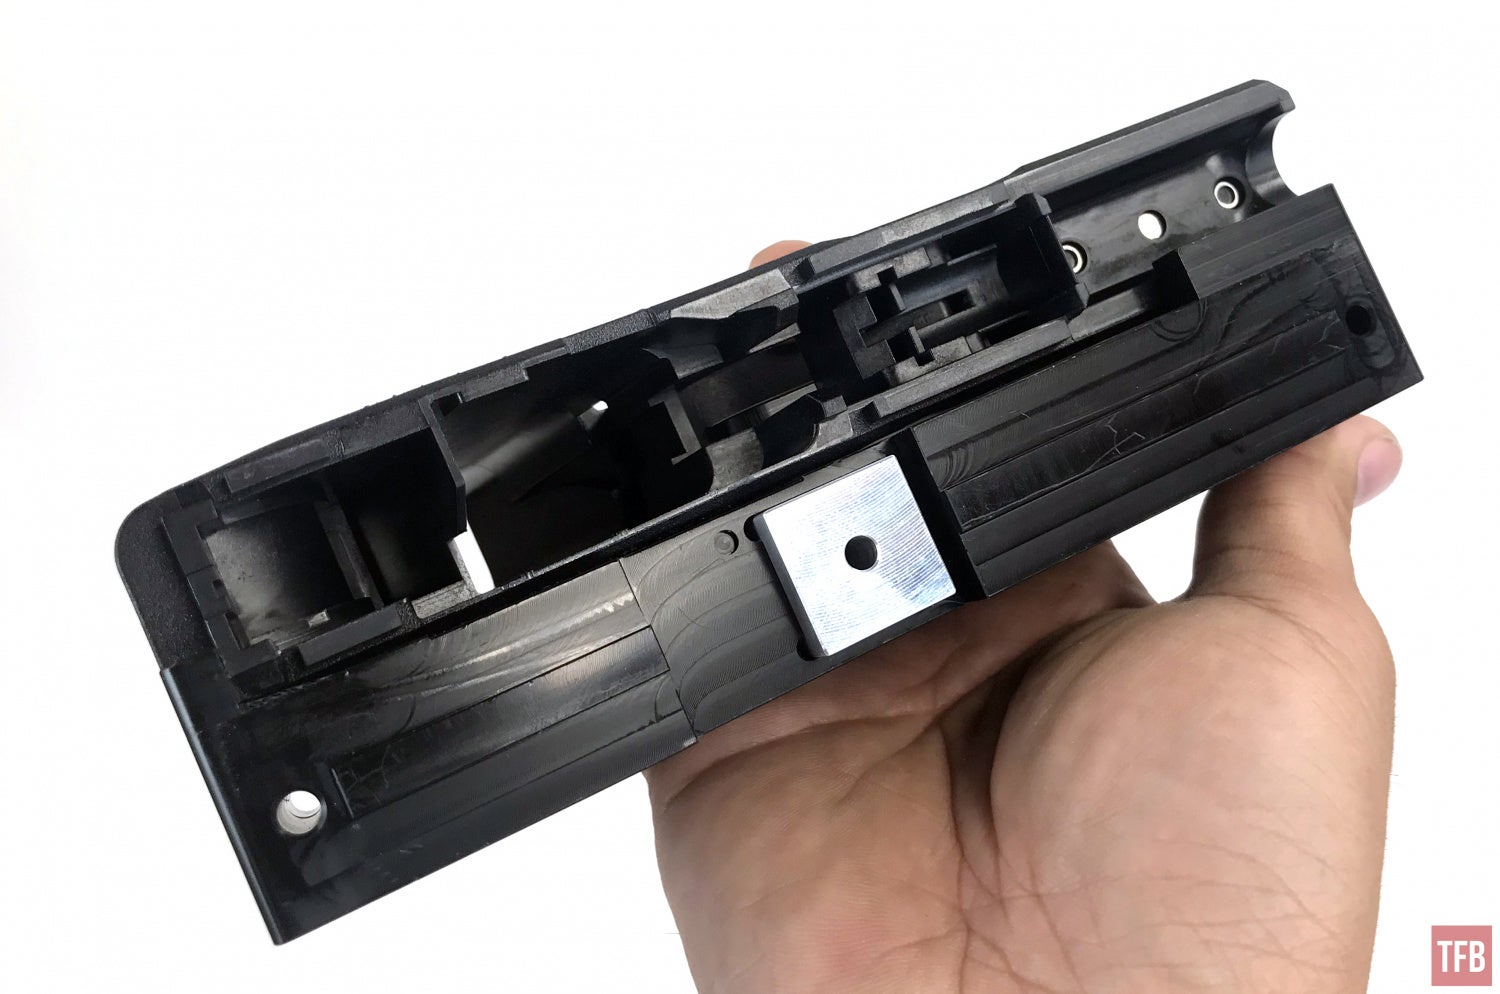
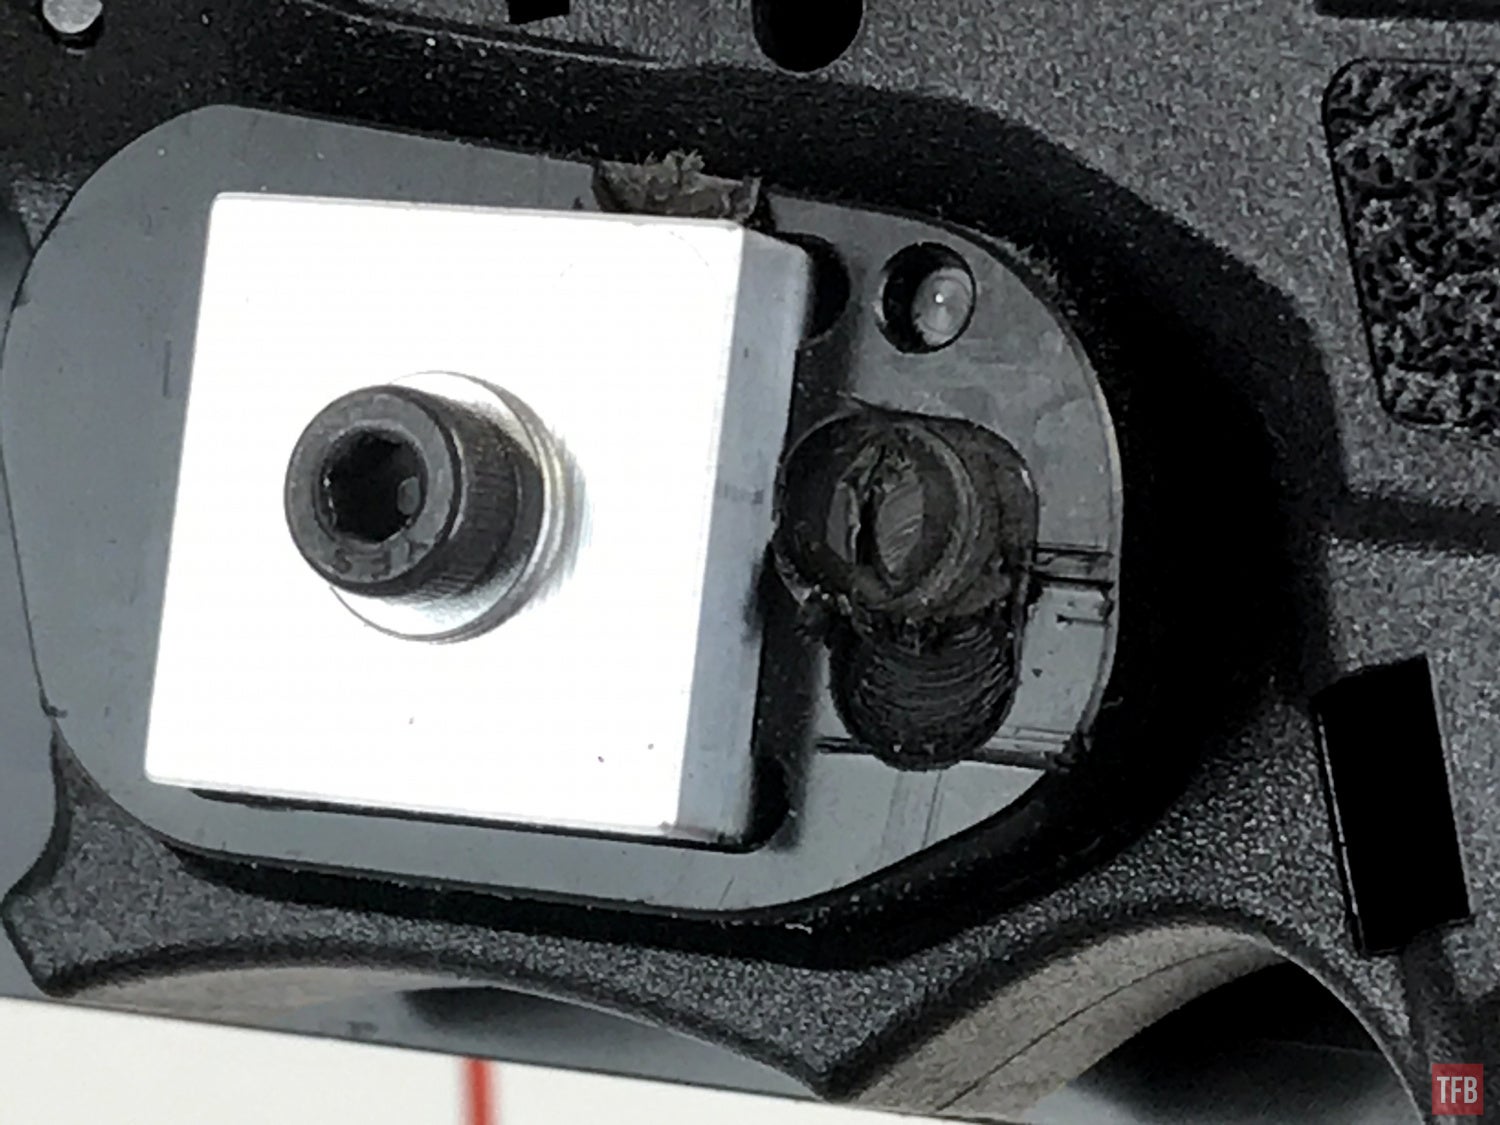
Since the Polymer 80 pistol frame is made of polymer the probe does not have anything to touch. So the jig has consumable aluminum probe blocks that you can see below. You attach the probe wire to the bottom of the screw to complete the circuit.
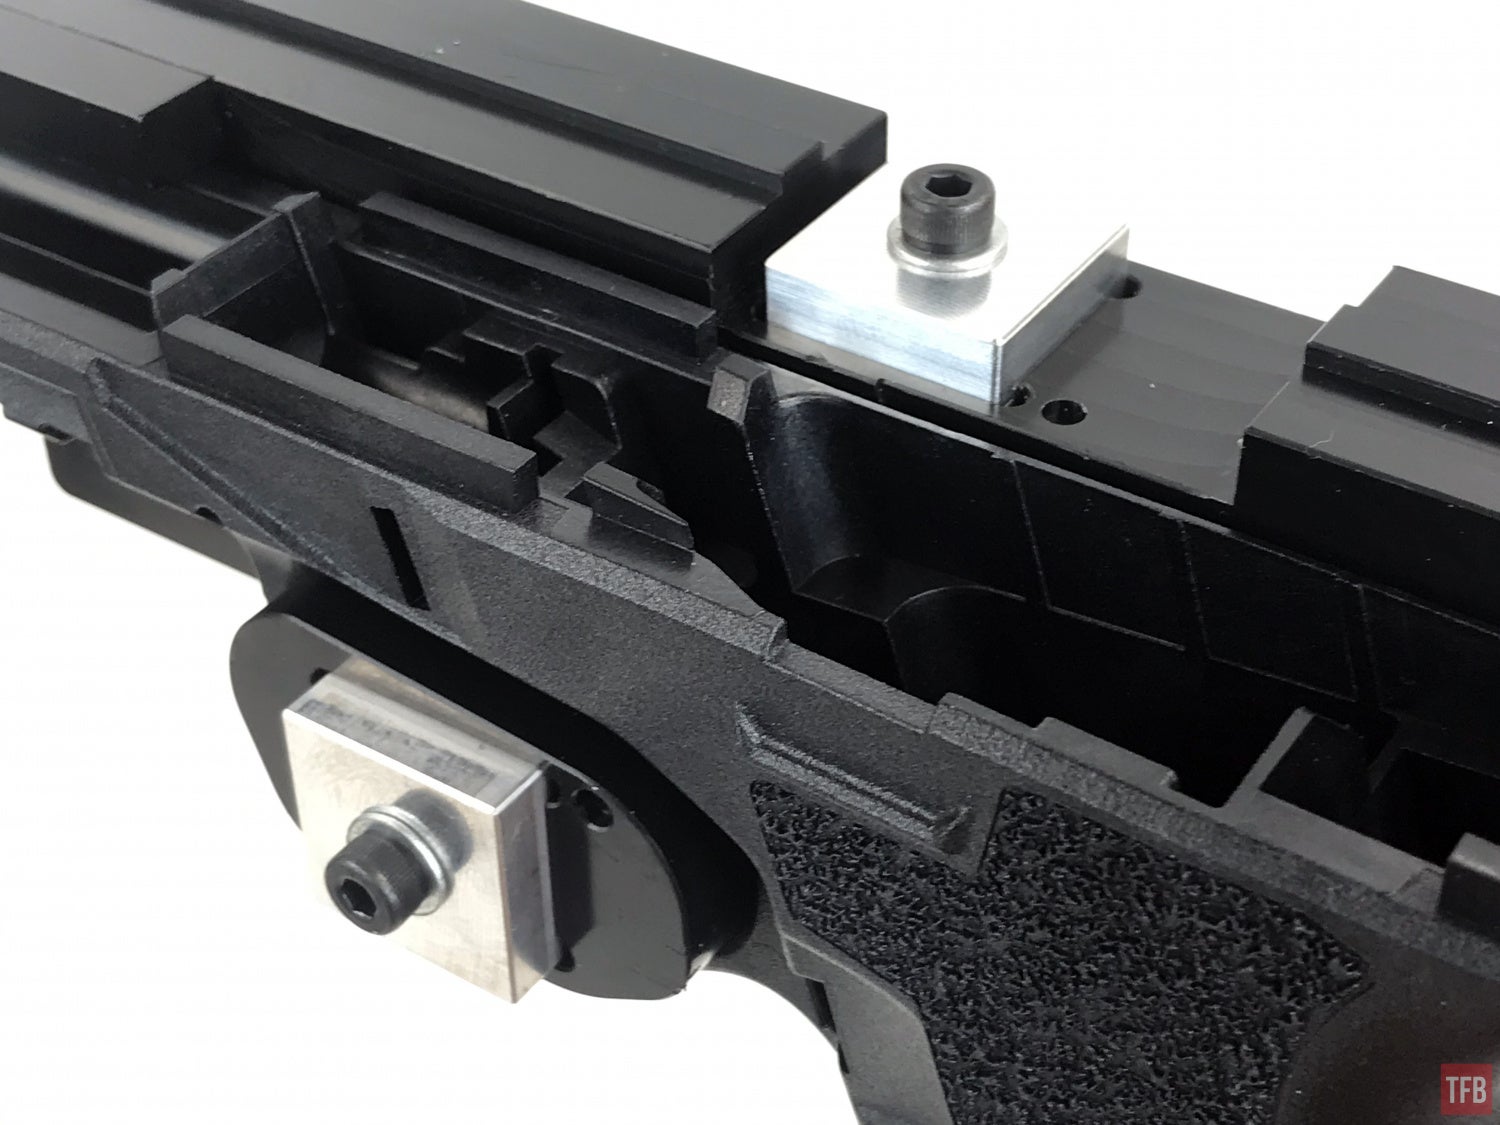
When probing, the endmill will touch the corner next to the hole in the jig. This is a reference point. After you finish your P80 pistol frame and you want to machine another, you have 7 more corners per block to probe off of. Just make sure you remember where the endmill had touched before. If you use the same probe location on the block there will be a little bit of material removed from the first probe procedure. So when you probe again, the endmill will not touch in the same place. That is why you need to rotate the probe block so the endmill has a fresh side to touch off of.
I had a slight issue on the second operation. This is after you finish milling the inside of the pistol frame and now you need to drill the pin holes. The end mill ended up a bit too close and it touched the small jig.

Rather than try and figure out what went wrong I went ahead with the probe operation. All that matters is the end mill probes the block so it knows where the frame is in 3D space so it can drill precisely.
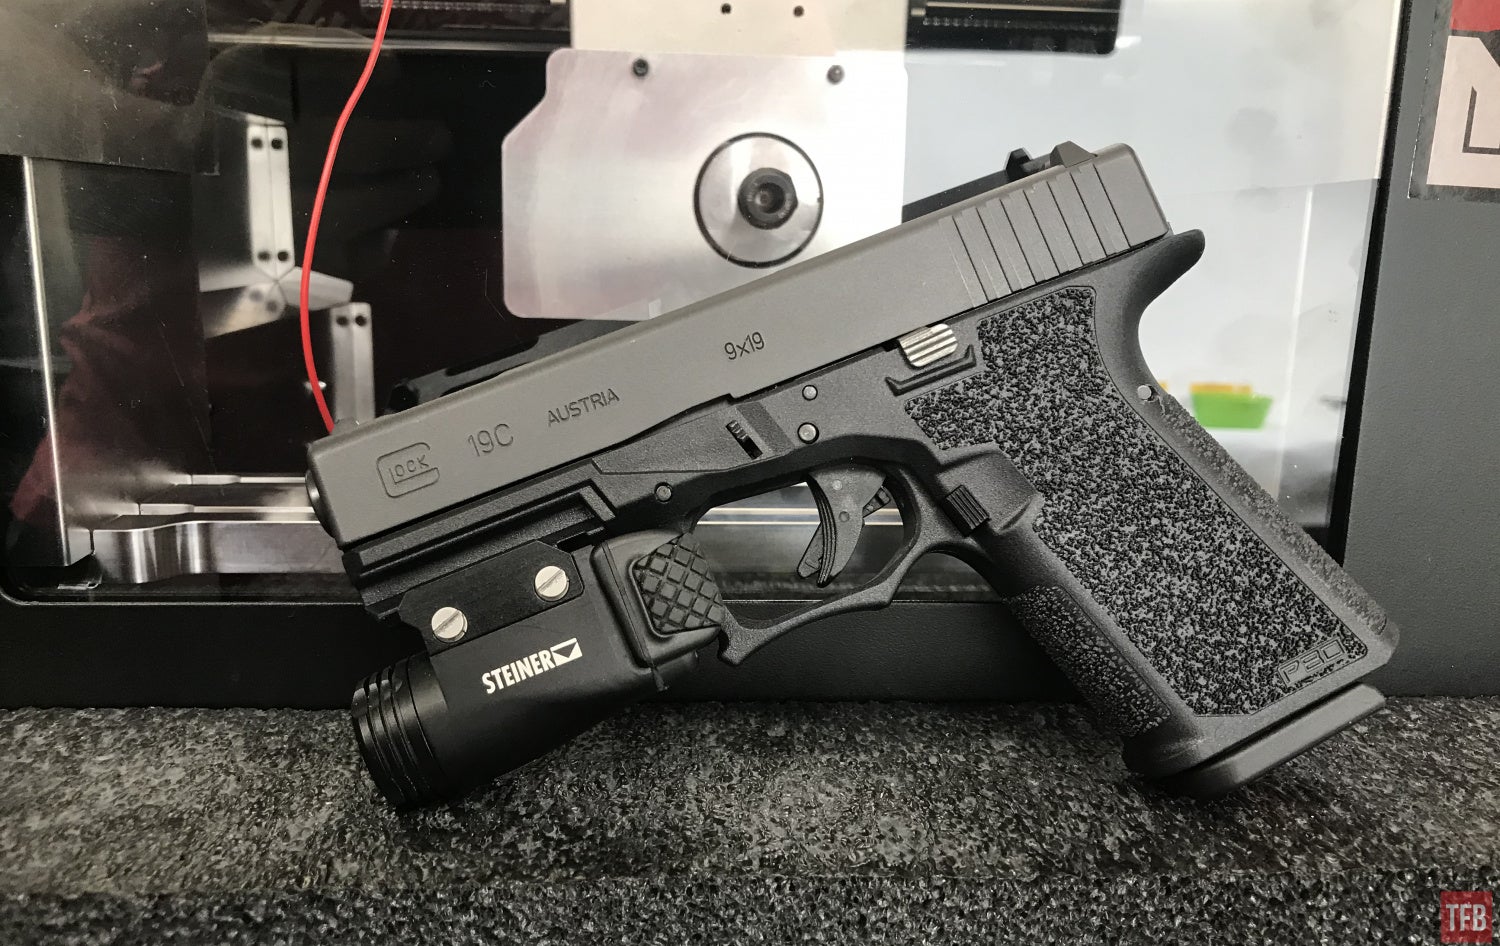
When The GG3 finished I used a donor Glock 19C and transplanted all the internals into the PF9040C frame. The rear pin hole did not line up. So I ended up using the same drill bit that came with the Polymer 80 Ghost Gunner kit and used my cordless drill to fix this hole.
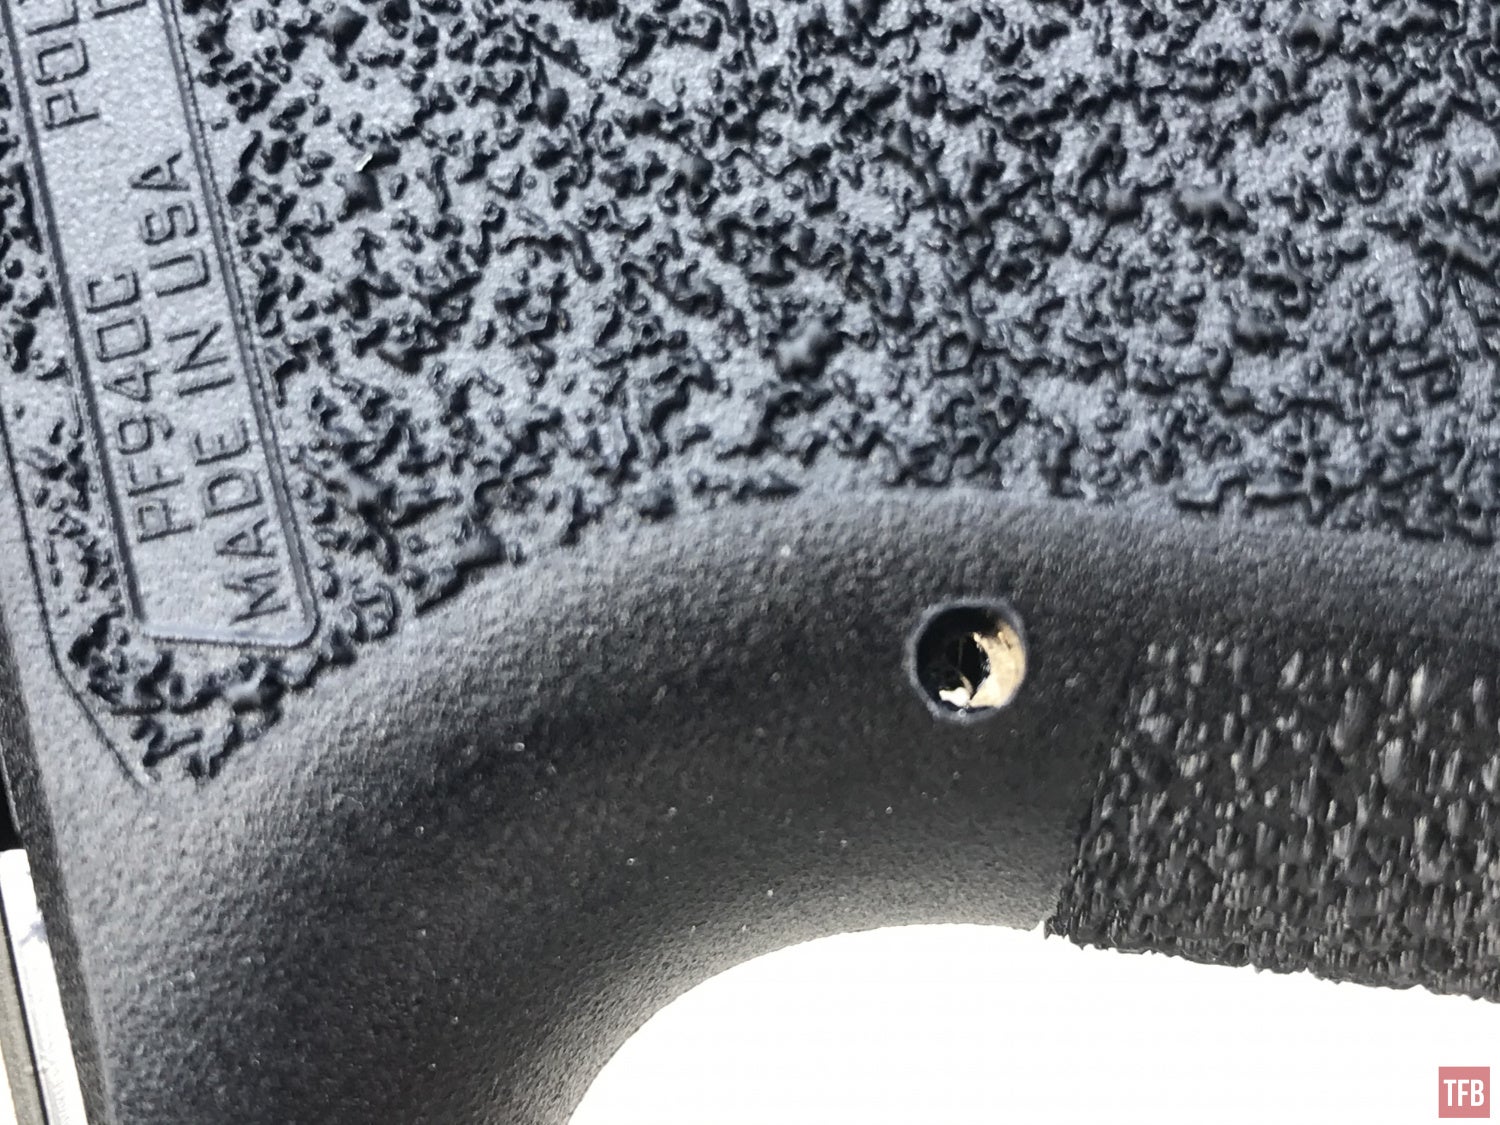
I went out and test fired the P80 and it worked flawlessly. I have had a number of friends who hand completed their P80s and it took a bit of finessing and hand fitting to get the gun to cycle properly. Not the case with the Ghost Gunner 3 built P80. Other than the rear pin hole being off-center, everything was fine.
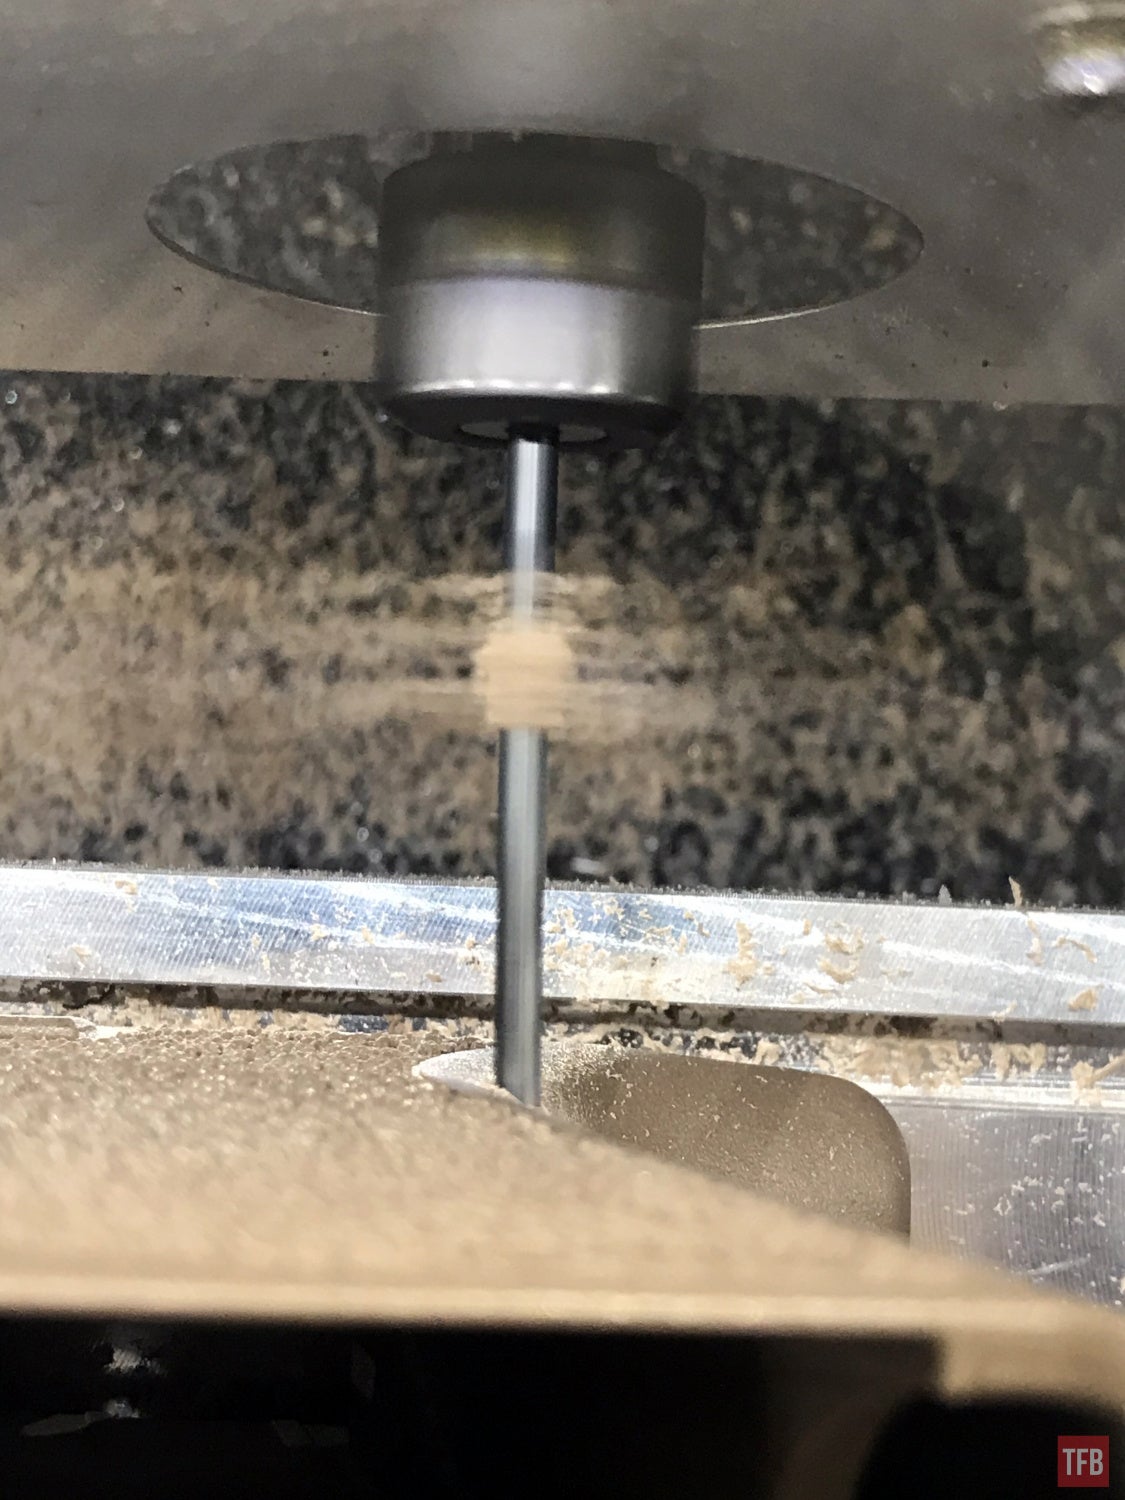
In order to check why the rear pin hole was off, I ran another frame to see what the problem was. The drill bit walked sideways. You can see in the picture I took while it drilled the hole wrong again. The drill bit was not straight. As soon as it touched the side of the frame, it started to glance off before it bit into the polymer.
Ghost Gunner technical support recommended that I run the GG3 slower for this process. You can adjust the feed rate and speed of the rotation in the DDCut V software. While that is great, it is a bit annoying that I learned about this after the fact. Why wasn’t the code already setup to prevent this problem? However, I do not know if this is a recurring problem or if it is just me and how I set up the jig and frame in the jig. In hindsight, I would use the GG3 for the more complicated milling but then stop before the second operation and use the factory Polymer80 jig to guide and drill the pin holes with a cordless drill.
Hacking The Ghost Gunner 3
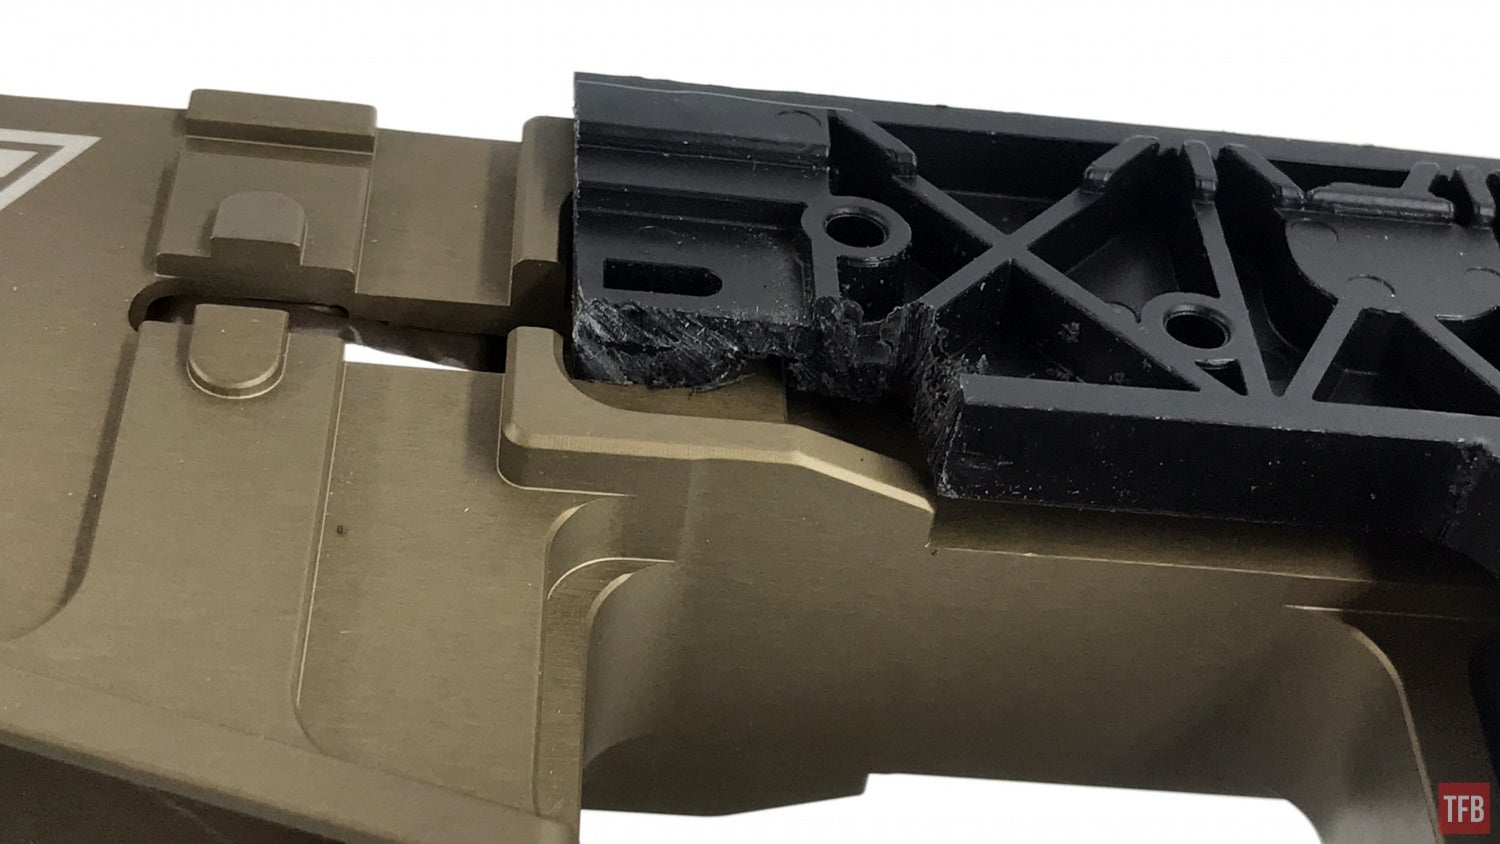
Getting the Ghost Gunner 3 to work takes a little bit of outside thinking and modification when you try to do things outside the norm. For example, the polymer lower is made by EP Armory and the anodized lower is a billet lower from Juggernaut Tactical. The problem is that neither of those lowers are mil-spec in exterior dimensions. The jig made by Defense Distributed only works with your basic mill spec lower. However, you can modify the jig and make it work with oddball lowers.
See the picture below. Due to the design of the Juggernaut Tactical lower, it has protrusions from fencing that interfere with the jig. So I simply cut away any portion of the jig so it can sit flush with the side of the receiver.
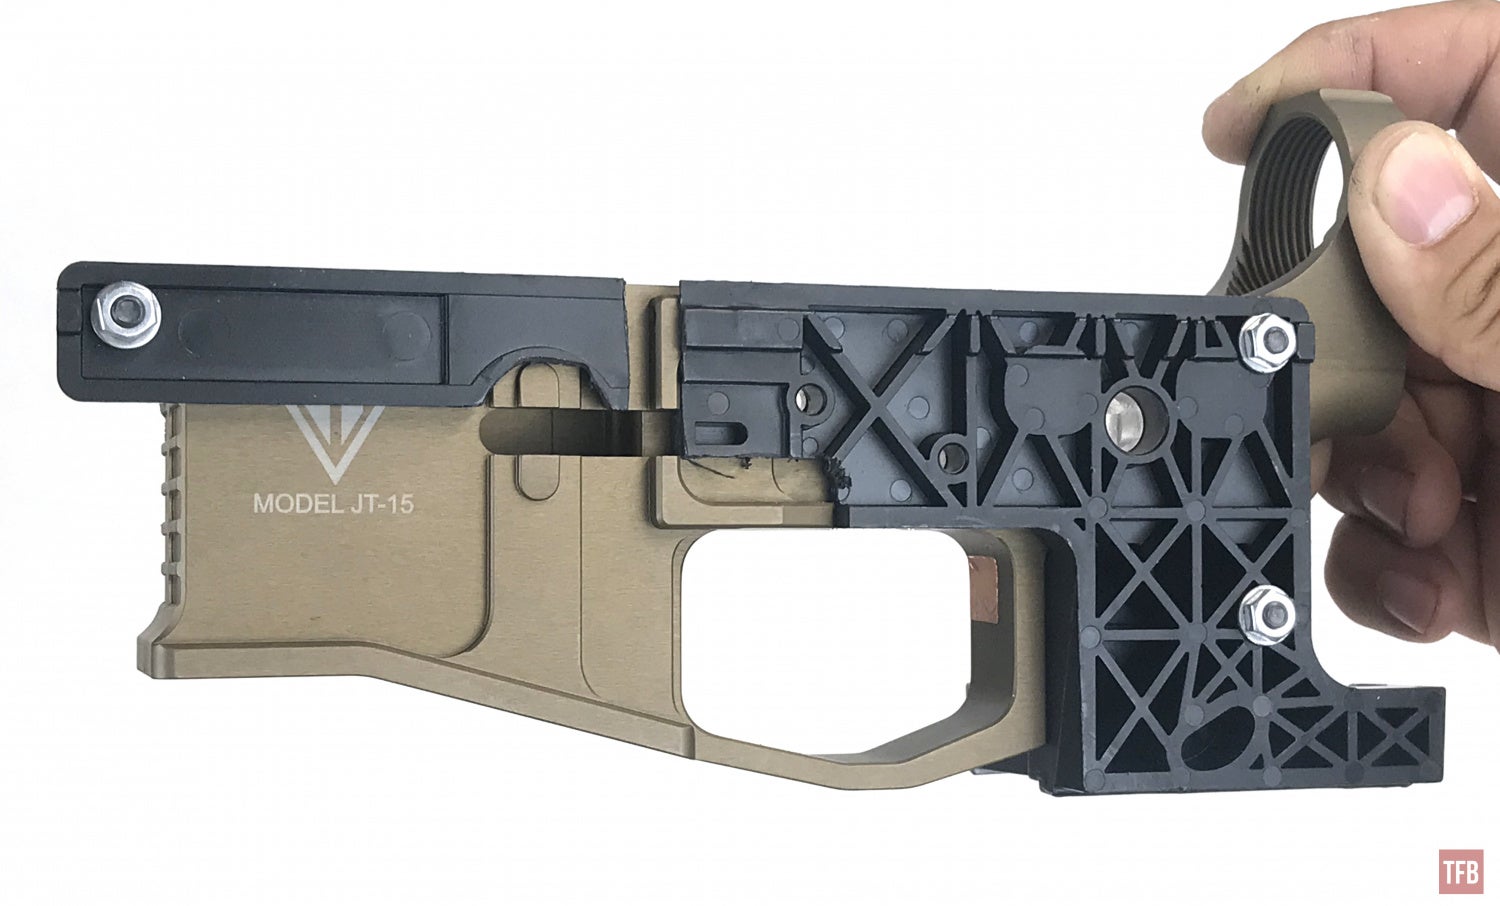
I ended up having to remove even more material to get the jig to fit the EP Armory polymer receiver. The bolt catch area did not work with the jig, so I removed it.
3rd Party Support
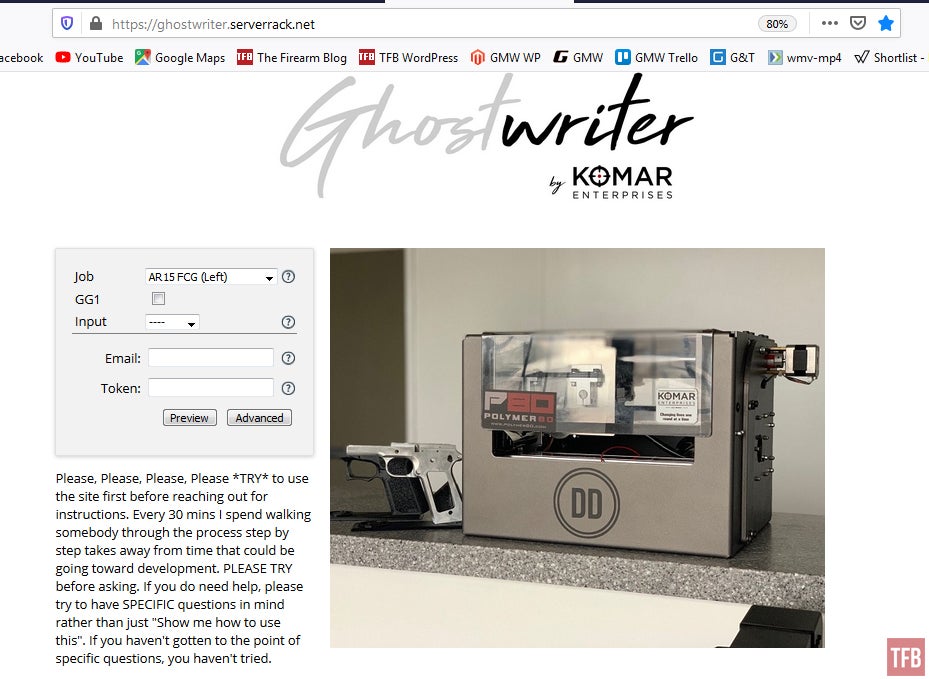
So there is a lot of support for the Ghost Gunner and not just the GG3. GGD Store and Ghost Writer provide the Ghost Gunning community with alternate options. GGD Store has a whole library of custom cutting codes that go beyond the ordinary codes from Defense Distributed. For $35 you get a USB drive with these codes and the .stl files for printing their publicly released jigs.
-Generic AR10
-Generic AR15
-Flared Magwell AR-15
-Daytona Tactical AR-10
-New Frontier Arms C10
-Polymer 80 PF940C
-Upper Receiver Skeletonizing
-A Code Meant to be Used for PCC (Pistol Caliber Carbine) Lowers that already have the rear takedown pocket milled (This program probes in that location)
-1911 No-Check File
-Buffer Tube Milling File (meant to shave down the top of an AR-10 Buffer tube so that the charging handle can clear on some upper/lower combinations)
-Lower Receiver Skeletonizing Code

If you are an FFL with SOT you can use GGD Store’s codes to cut an M4 fire control group and the third pin hole.
There are some 80% lower receivers that do not have the rear takedown pocket milled out. The Juggernaut Tactical 80% lower was one such lower. Below is how much the Defense Distributed cutting code cuts into the lower receiver. You can see there is still a considerable amount of material that blocks the rear takedown of the upper receiver if you were to install one on this lower.

Well, with the GGD codes there is a specific code just for milling the rear pocket. And just like the regular Defense Distributed codes, the GGD Store codes walk you through the process step by step.
Juggernaut Tactical lower complete after GGD Store rear takedown pocket cutting code.
There are some aspects of the instructions that do not really apply. Like there is a reference to a magnetic chip cover. The GG3 has a slot for the chip cover so no magnets are used. Also, there is no need to use a multimeter to check for continuity since you have the probe wire set up on the GG3 and green indicator led.
Another third party feature is by Matthew Komar who programed GhostWriter. Ghost Writer is a free online engraving file generator. You upload a picture and it will show you a preview where it will be on the lower receiver. Here are all the options you have for engraving. For the polymer 80 frames, you are engraving the small metal plate under the accessory rail.

However, there is a limit to the free files. You are allowed up to 10 generated files per email address.
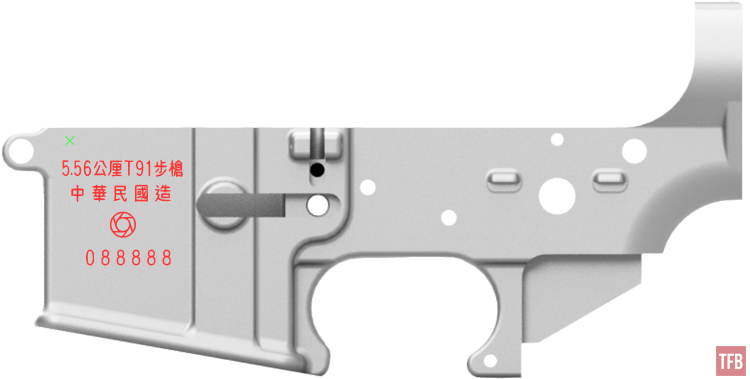
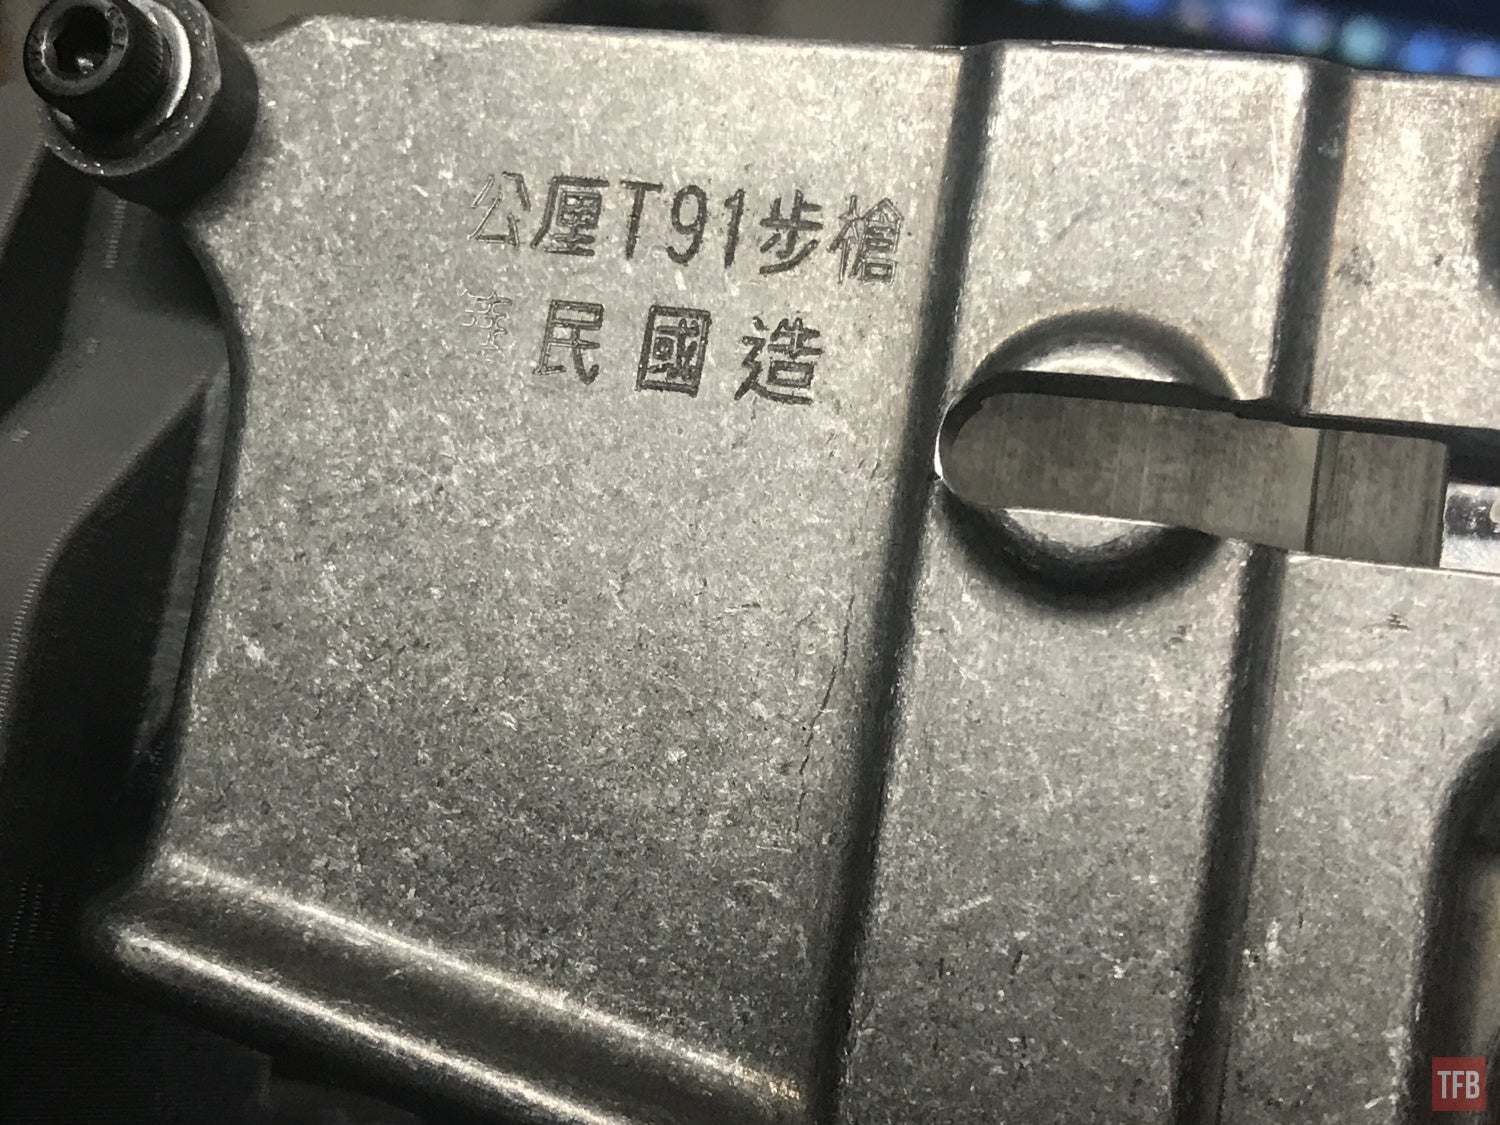
I purchased an engraving jig and bit from GGD Store to try and complete my Taiwanese T91 clone rifle build.

GGD Store engraving jig
Here is the preview from GhostWriter. Ignore the third pin hole, that is just the default lower image used by GhostWriter.
Just like other processes the 1/4″ endmill is used to probe the pistol grip pocket. It is getting X, Y, and Z locations for the lower receiver.
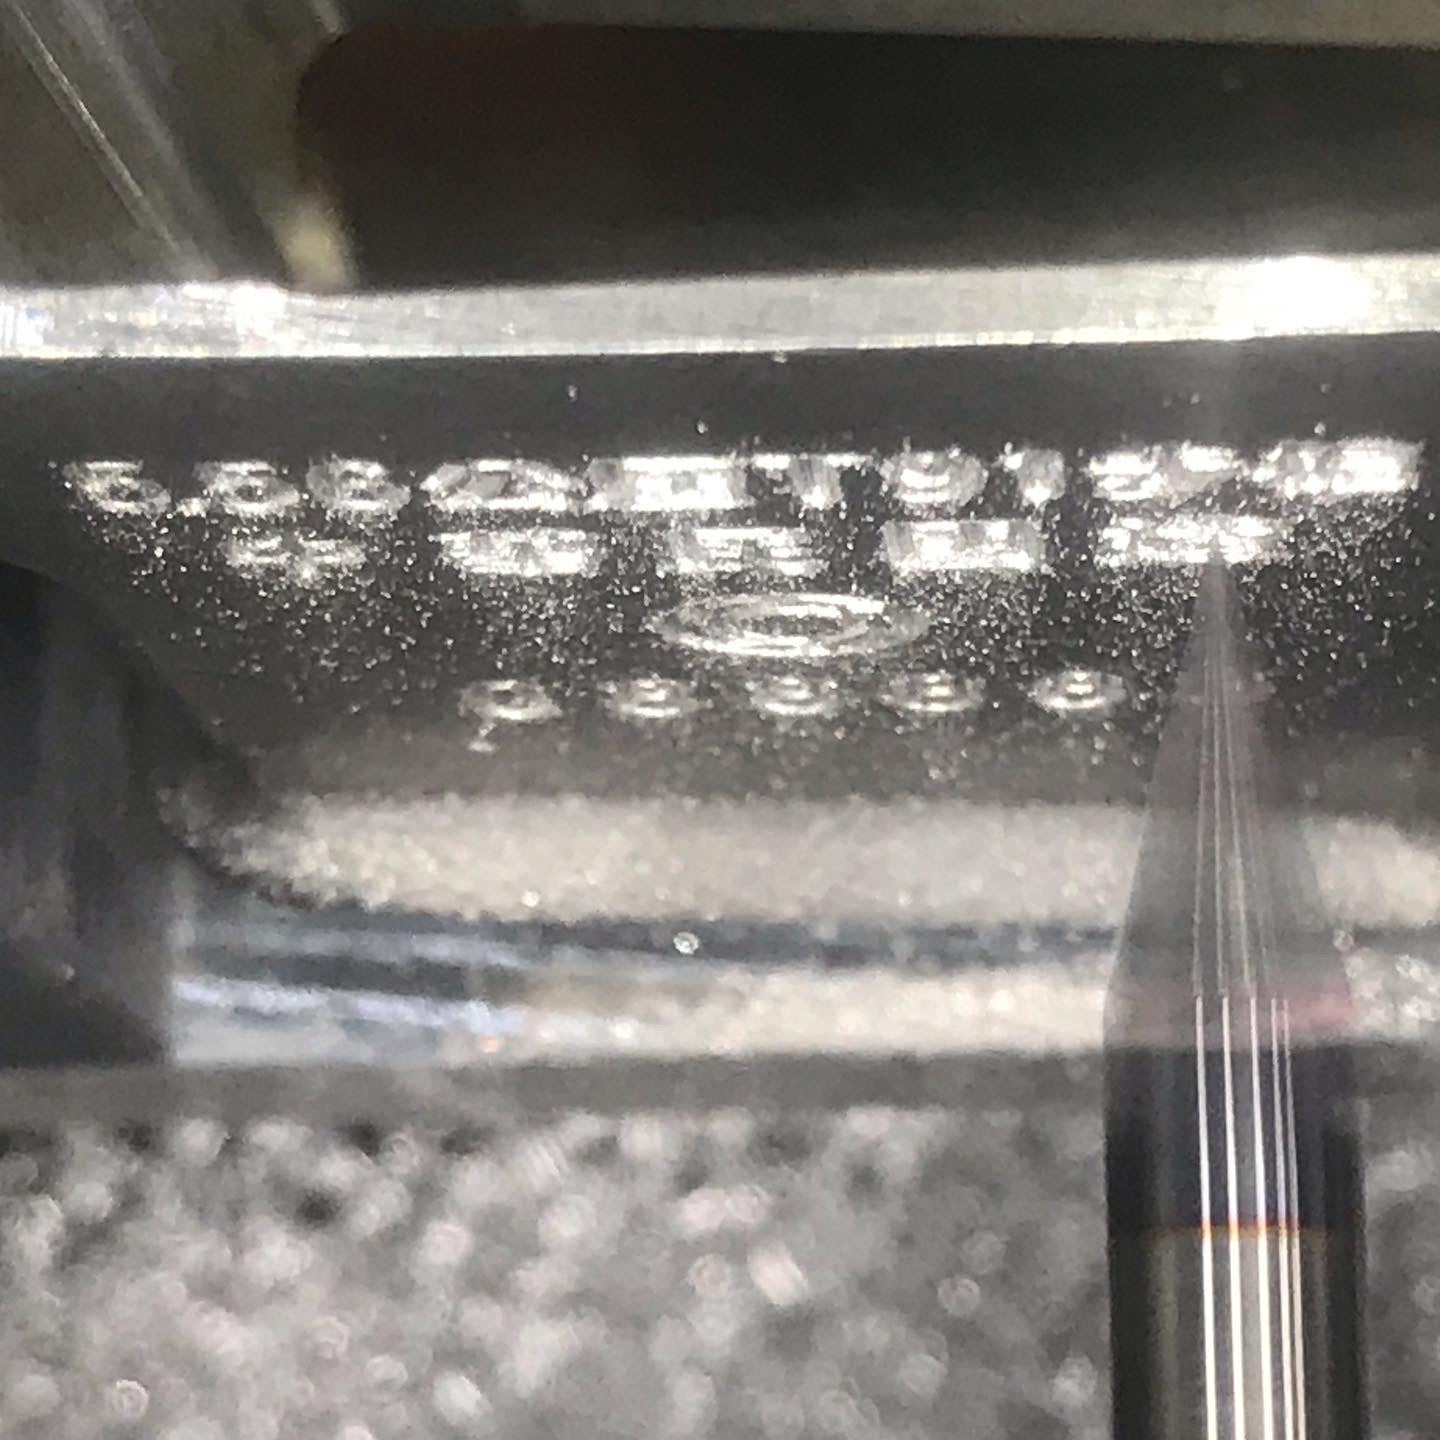
I did run into an issue. I did not check if the lower was level and true to the build plate. Since it was canted the engraving bit only made contact with the lower receiver in the upper right corner of the image.
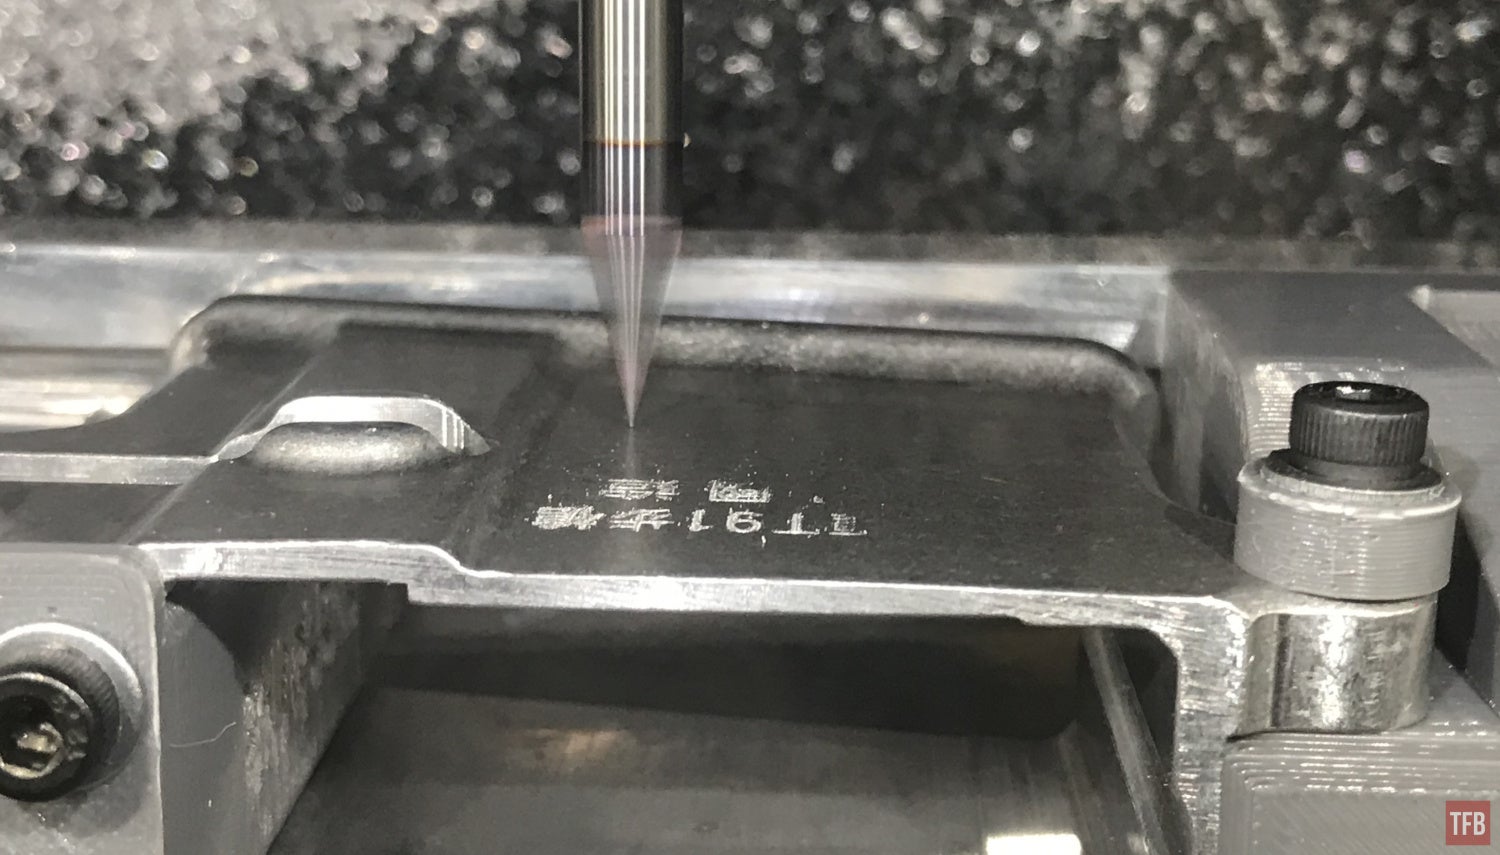
The engraving took a lot longer than anticipated and that was with 80% of the engraving bit just spinning in the air and not making contact with the lower receiver.
I ran the engraving code again and made sure that the top deck of the lower receiver was level using a bubble level. This time the engraving bit made contact with the mag well the entire time.
It took just over 40 minutes to cut the selector markings.
The entire process took about 6 hours. While it is cool that I can engrave a lower receiver, I rather pay my friend to use his fiber laser. It is faster and easier. The GGD Store jig and GhostWriter engraving file work as advertised but they are limited to the jig and position of the lower receiver. A fiber laser can engrave anywhere as long as you keep the piece steady under the laser. I’ve engraved BRN-4 416 lowers to mimic the HK 416 logos. With enough passes, a fiber laser can do deep engraving as well and it does not take several hours. I will say though that there is a sense of satisfaction in machined engraving regardless of how long it took. It feels great to see the artwork freshly cut into the raw aluminum.
Ghost Gunning On The Run
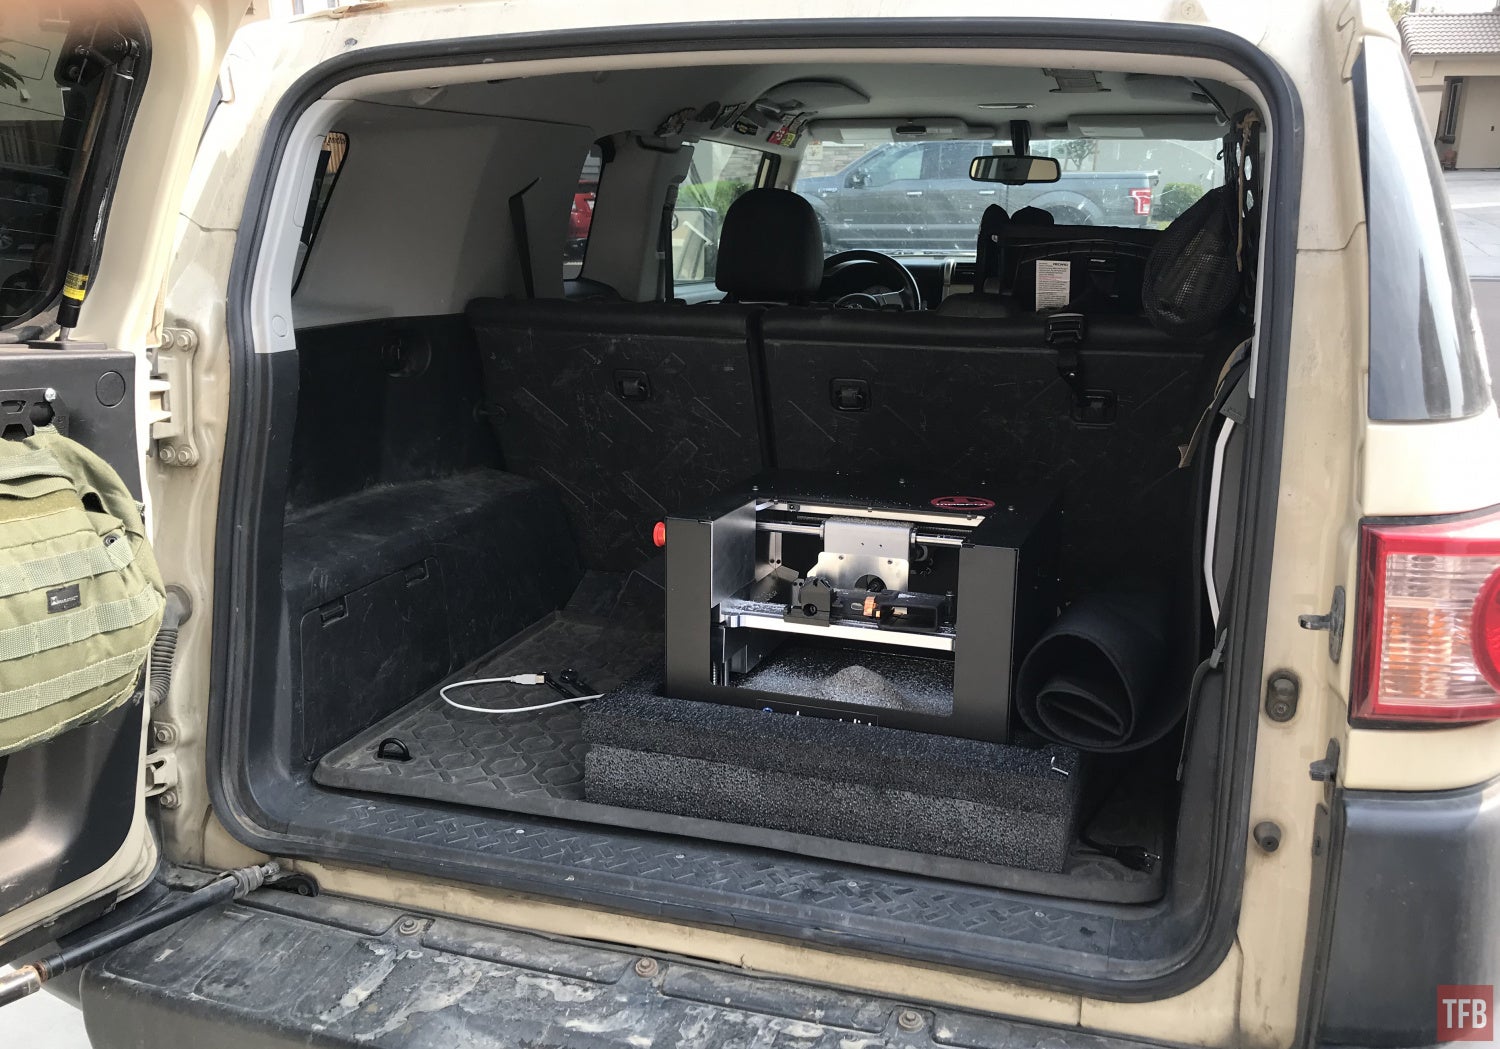
Earlier this year, Benjamin F. documented his gun running exploits. Well, I thought I would up the ante a bit and try Ghost Gunning the whip. (thanks to Rusty S. for that phrase). When the opportunity arose that I could review the Ghost Gunner 3, I immediately thought of running the GG3 out of the back of my FJ Cruiser. There is a factory inverter socket on the right-hand side under the factory subwoofer. When I asked Defense Distributed if the GG3 could be run on an inverter or a Yeti power bank, their engineer was doubtful it would have enough wattage.
NickOur engineer advised the GG3 would draw too much wattage for FJ/Yeti specs, he added the following-The inverter must have 600 W continuous minimum rating (peak not important)
-Must be pure sine (modified sine not guaranteed to work)
You can literally make a gun anywhere.
Final Thoughts On The Ghost Gunner 3
The Ghost Gunner 3 is a great tool for helping you to complete an 80% receiver. But it is so much more than merely a tool to help you complete an 80%. It is open source. If you know how, you can code your own Gcode and make the Ghost Gunner do whatever you want. There are youtube videos that can teach you how to CAD in Fusion 360. Then it is apparently an easy step to generate a code for the GG3. The onl other issue is that you need to design a custom jig and get it 3D printed. GGD Store has certainly done this. And supposedly they have a code to cut RMR cuts into Glock slides. That is something I cannot wait to get my hands on and a jig of course.
It was mentioned in James’ TFBTV video last SHOT Show 2020.
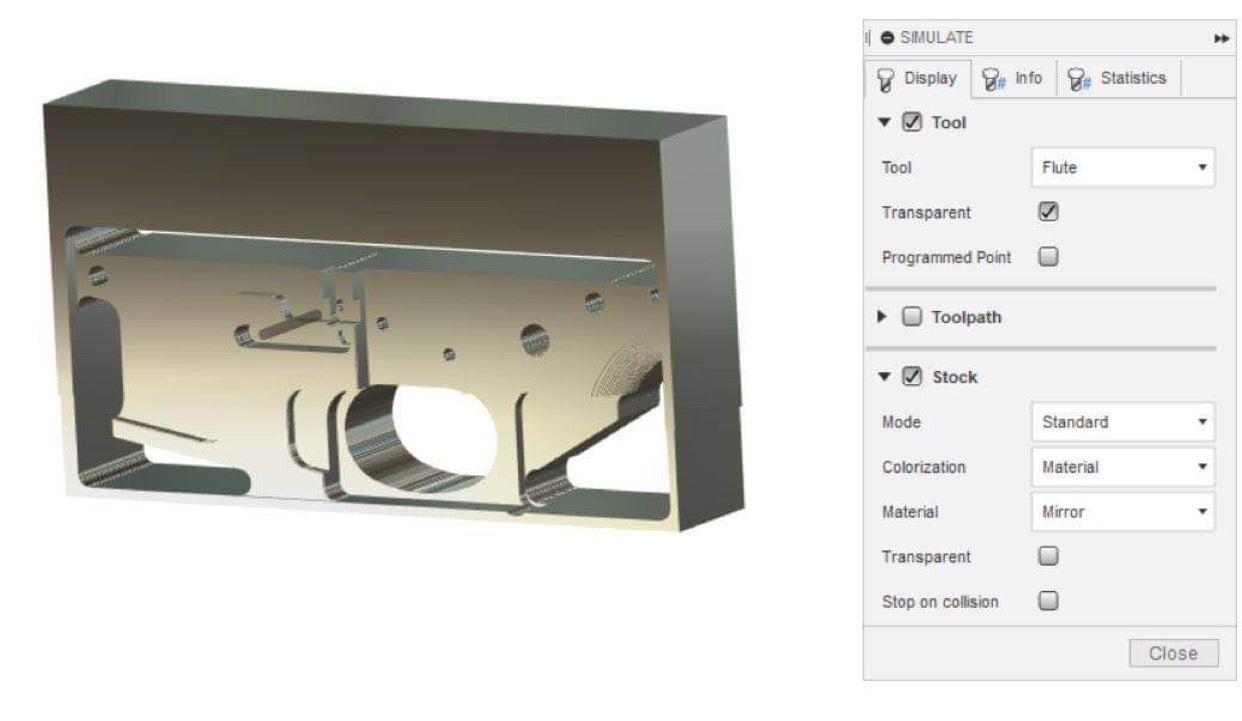
In fact GGD Store has a lot more in store for the Ghost Gunner 3. There is growing concern over politicians trying to ban the Ghost Gunner and other “firearm manufacturing devices”. Other parties are trying to sue the ATF over 80% lowers. Well GGD Store is working on coding where you no longer need an 80% lower receiver. The GG3 is a 3-axis CNC machine so it has a lot of potential. The guys at GGD Store are finalizing code that will allow you to mill a lower out of a billet blank of aluminum. That’s right. A simple brick of aluminum that you can buy online from McMaster Carr. I wonder if it could work with a block of delrin? As long as the lower design is robust enough I don’t see why not. These are exciting times. Below is a screen shot of GGD Store’s simulation.
The price for the Ghost Gunner 3 is $2,100 and it is in high demand just like the previous models. You can currently put down a deposit of $500 to reserve your place and get in line to buy one.
Just know that running the Ghost Gunner 3 will take a little bit of trial and error. For the most part, it will complete an AR-15 lower receiver and you might have to open up the safety selector hole. The plastic jigs are soft so be careful torquing the screws when mounting it to the build plate. I would like to see CNC Delrin or better yet metal jigs but the cost is too high to make them. Plenty of people have run 3D printed jigs just fine. You do need to be careful running the GG3 continuously. Some users have reported their plastic jigs have melted because they ran lower after lower in rapid succession. Aside from letting the GG3 cool down you just need to know how to make the jigs work properly and not overtighten the screws. If you have an issue, Andres of Ghost Gunner Support is always available and quick to help out. Right before I could test if the GG3 could actually cut a lower while being powered through my FJ Cruiser inverter, the Arduino board that controls the USB port stopped working. They sent out a replacement GG3 to finish this review. Normally it would be easier to replace the Arduino board and flash it.
I am eager to see what Defense Distributed have coming out as well as the 3rd party guys. Some Ghost Gunner owners have come up with their own gcode to engrave objects other than firearms. The Ghost Gunner is a programmable robot CNC, so it has great potential beyond a simple gun making robot. It just needs your imagination to explore the possibilities.