 Your Privacy Choices
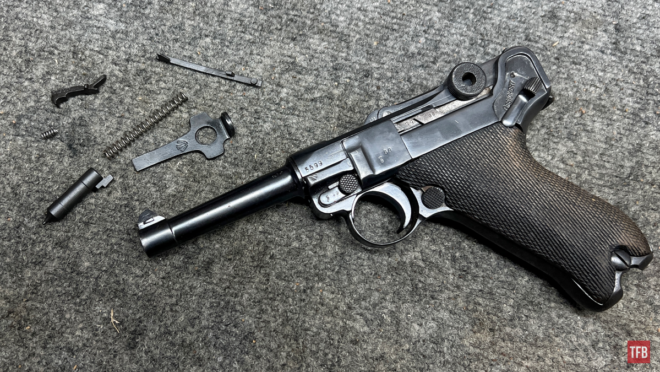
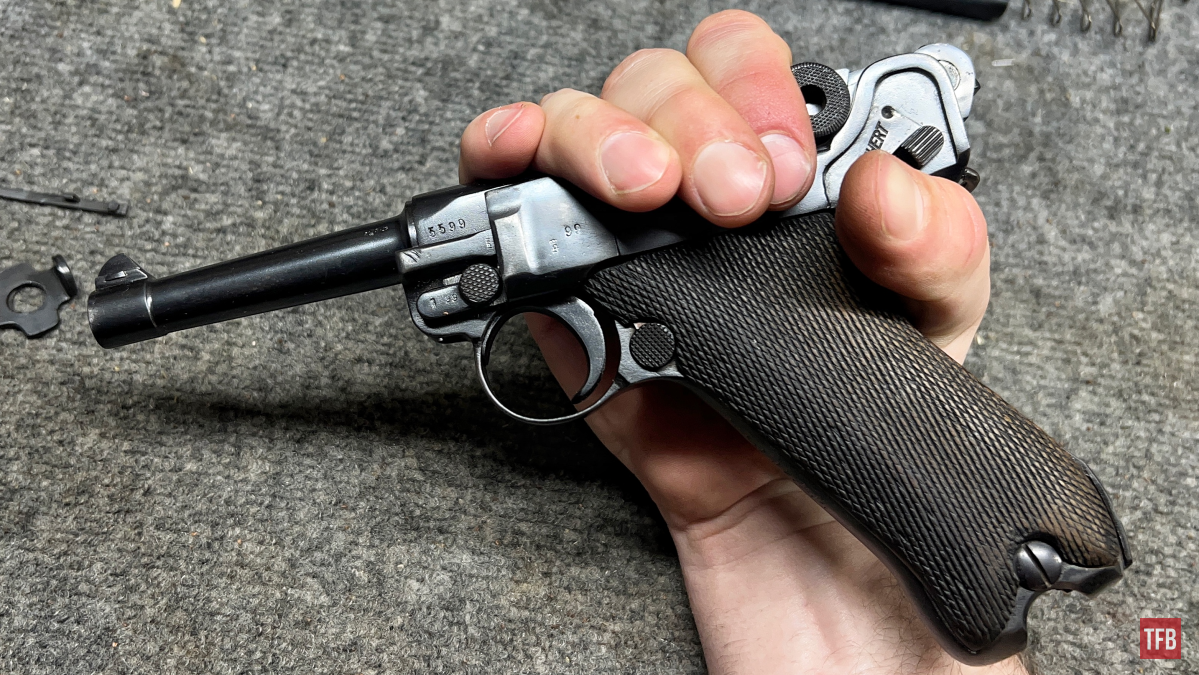
Welcome everyone to the TFB Armorer’s Bench! As mentioned in the little blurb below, this series will focus on a lot of home armorer and gunsmith activities. In this article, I decided to take a break from the sawdust and woodwork on the Remington Model 10 Trench Gun project and do some quick new old gun maintenance. I recently picked up a 1916 World War One Luger P08 with many matching numbers. Let’s dive right into replacing a Luger P08’s small parts!
TFB & AllOutdoor Luger P08 Content:
- HOT GAT or FUDD CRAP? Red, White, or Just Blue German Luger?
- TFBTV Luger Field Strip Video
- Curious Relics #061: Another Beloved Icon – The Luger
- Curious Relics #062: Too Many Toggle Locks – The Luger Pistol Part II
- Curious Relics #063: A Documented Life – The Luger P08 Pistol Part III
- Curious Relics #064: Targets & Toggles – The Luger P08 Pistol Part IV
TFB Armorer’s Bench: Luger P08 Small Parts Replacement
Here, we at TFB hope to inform, entertain, and even inspire any would-be gunsmith or armorer out there. Ideally, with the information I provide and with the help of our sponsors, you can have some useful knowledge pertaining to the conservation and improvement of firearms technology while at the same time sharing experiences and teaching each other new tips and tricks along the way in the comments. Digging deep into what it is to be an armorer or gunsmith has significance but what is important is what those people do to show they’ve earned that title. I am happy to share my experiences and knowledge and hope it is informative!
Make your personal safety a priority:
- Practice proper gun safety. Always make sure before the firearm hits your bench that it is unloaded and safe to be handled.
- Wear the proper safety equipment. The main one would be safety glasses (decent ones) since parts are often under spring tension and you may work with high RPM tools. Other honorable mentions would be latex gloves or a respirator when working with potentially harmful solvents and oils. Also hearing protection when working with loud machinery or test-firing firearms.
- Modifications, alterations, and customizations will void your firearm’s warranty 9.5 times out of 10. Please take that into consideration before attempting any at-home gunsmithing.
- If you are unsure about proper safety practices, disassembly procedures, or warranty standards, stop, put down the tools, and consult a competent gunsmith.
Old Gun Maintenance Tips: Luger P08 Small Parts Replacement
I have touched on this topic before whether it be replacing necessary important original parts on older firearms or general tips as far as things to be aware of when purchasing a new old firearm. First and foremost (ideally before purchasing) look over the overall condition. It sounds obvious and it sort of is but you need to take a look under the hood. Just about every “old gun” out there has got some wood on it. Wood absorbs moisture and often naturally has moisture deep within it. Years and years of changes in humidity, sweaty hands, and no routine maintenance add up. Always check under the wood.
This 107-year-old Luger P08 had some light rust spots under the grip. Nothing some VERY FINE steel wool and a light carding touch mixed with oil will not remedy.
As far as replacing parts goes, there are a couple of reasons a person may want to do this or have a gunsmith do it for them. Guns known to have firing pins and extractors break should have their current ones replaced since they were likely hand-fit to that gun. On the other hand, a gun such as this Luger P08 has almost every single small part numbered to the gun (at least the last two numbers of its serial number). Besides the potential of breaking these parts using the gun, it is wise to remove those especially breakable parts as a form of investment. Years down the road I might be unable to enjoy my guns and may look to sell them. A firearm with its original parts is worth more than one without.
Use your best judgment. It is a precaution I take and many others take. Now with that out of the way let’s dive in!
Taking Apart The Toggle Lock: Luger P08 Small Parts Replacement
First thing is first! Practice all the rules of gun safety. When disassembling a firearm, you should always wear safety glasses due to multiple parts being under spring tension. Triple-check that the firearm is unloaded. Check the chamber, magazine, and the area in between. All set? Let us jump right into it!
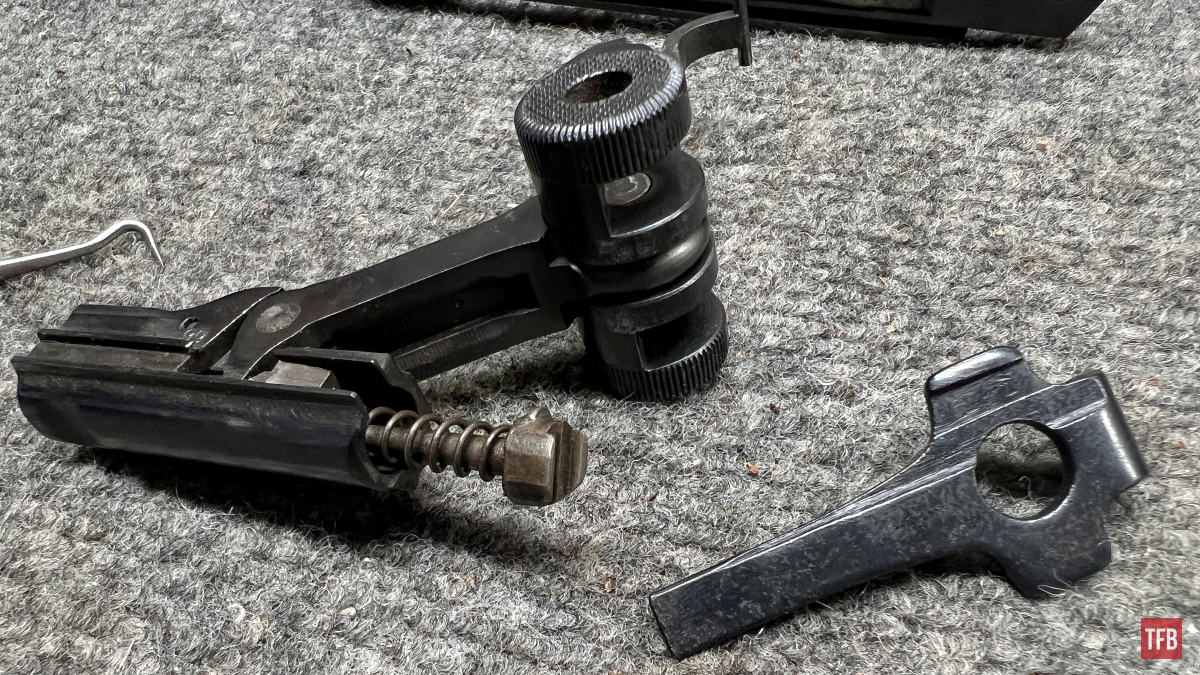
Kicking things off with some disassembly. Remove the magazine and make sure the firearm is not loaded. Starting out you have to flip down our disassembly latch in order to remove the side plate.
BEFORE you start hulking down on the lever you have to do the good ol’ Glock hold (guess Luger was “perfection” in this era) since this upper assembly is short recoil operated.
Pull the upper to the rear like so.
Flip the disassembly lever down as shown.
Remove the side plate and set it aside. These usually get fairly dirty over time so give the interior a quick scrub with a nylon brush and some oil. Wipe down afterward.
Now the upper assembly should slide forward. DO NOT force it off. The strut that links to the recoil spring may be hooked or caught. For best results hold the gun at an angle with the top almost upside down and slide off.
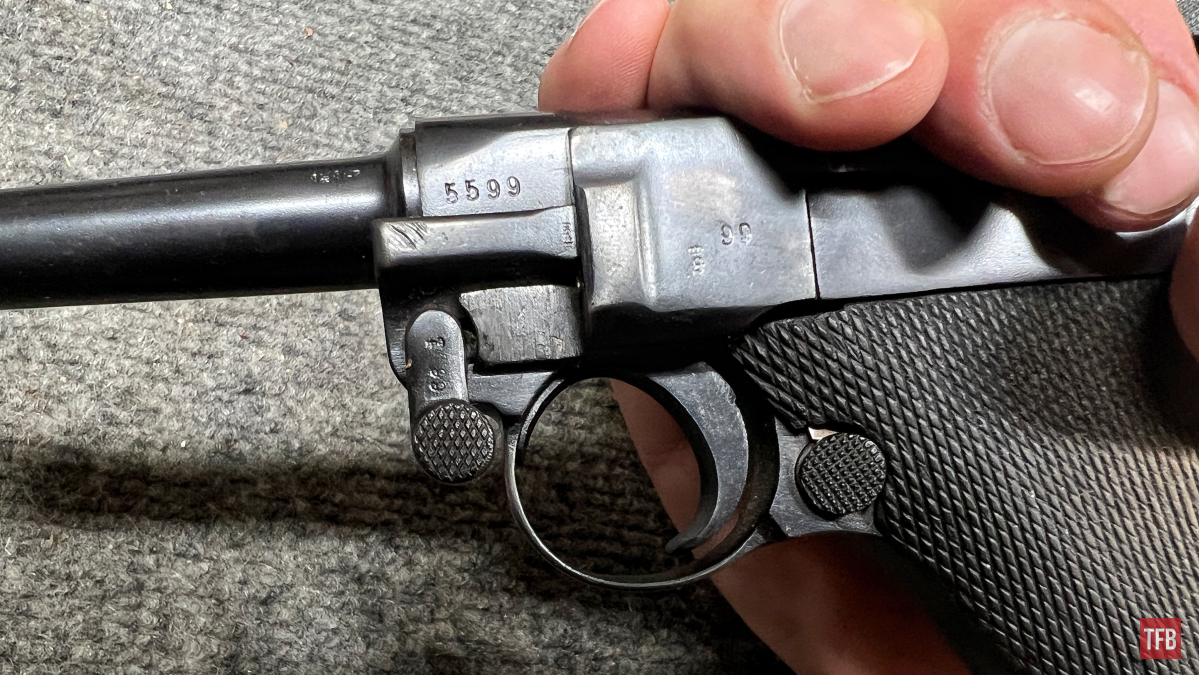
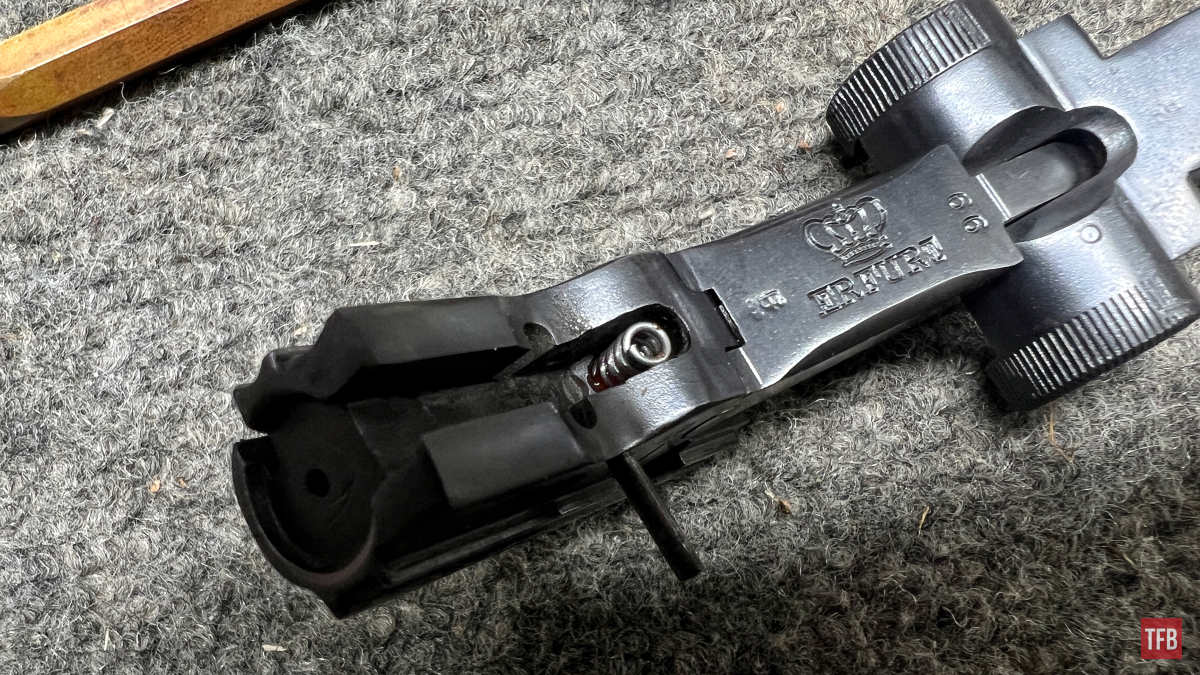
Concentrating on the upper, find this pin at the rear of the upper assembly. It can only be pushed out one way. “Pushed” is the right word since usually, they do not need to be hammered out.
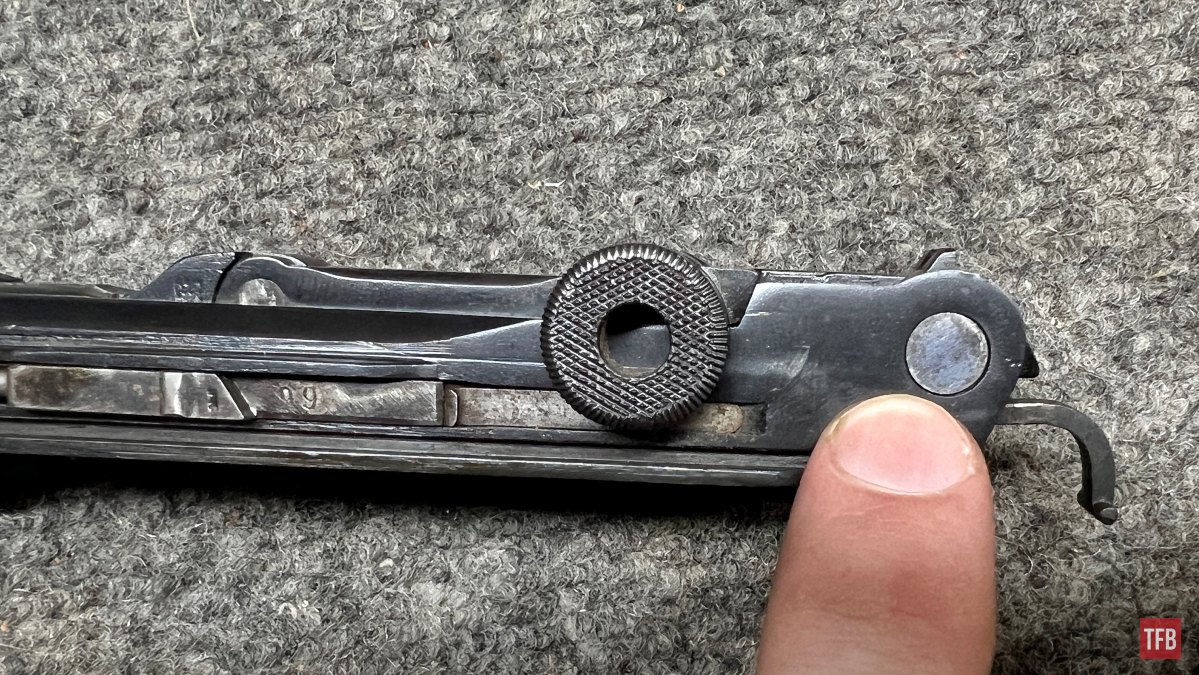
As you can see it has a capped end and all I had to do was get it started coming out by pushing on it with my finger on one side and pulling it out with my fingernail. This is under spring tension so if you have trouble make sure the bolt is fully forward. Apply pressure forward if necessary.
The toggle/bolt assembly should now be able to slide out the rear of the upper.
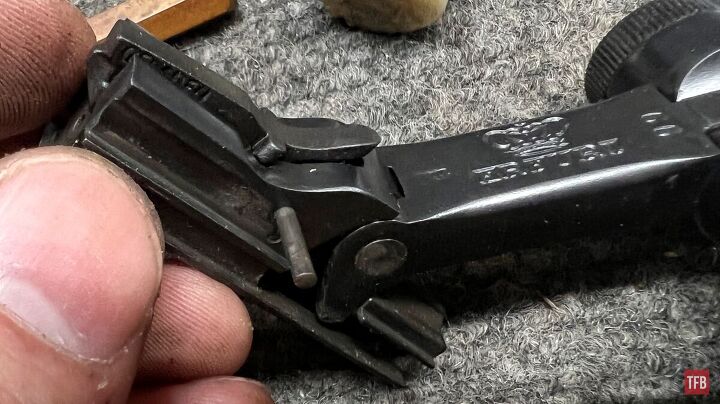
Flipping the bolt upside down we will reveal the firing pin plunger with a rear slit. This slit is thin but can accommodate a thin flat-head screwdriver or use an accompanying Luger tool that has said flat-head built in.
Using the flathead portion of the tool the plunger is depressed and rotated. It will only rotate in one direction and it will be fairly easy. Once rotated relieve pressure slowly so no parts go flying.
You may notice the firing pin plunger has a nub on it. This nub intersects with a cut on the inside of the bolt. This is very similar to the way a bushing works on a Model 1911.
Here you can see that this firing pin is original to this gun since it is numbered to this gun which is kind of incredible. You may also note that this firing pin lacks any flute cuts which are another pointer to its authenticity. The flute cuts showed up after World War One.
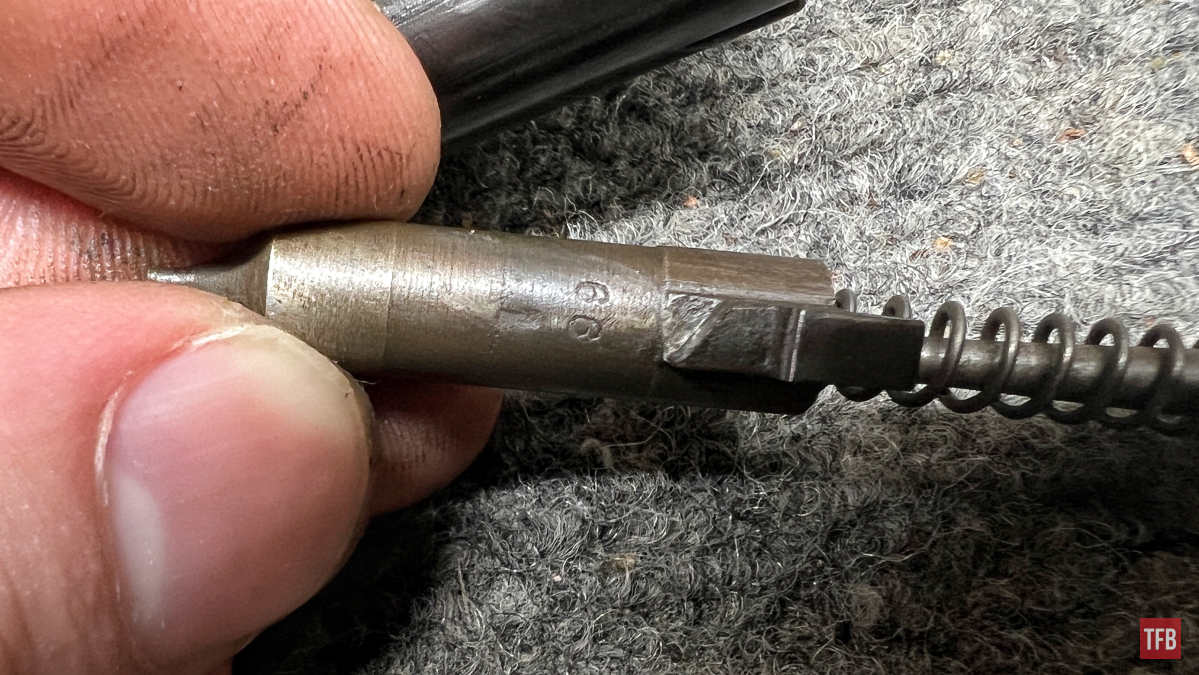
Note: Typically the purpose of fluting or fins geometry on a firing pin is to ensure it will go off if liquid is inside the firing pin channel. If a gun was dropped in a puddle for example. On this gun, the firing pin may be impeded by water and not have enough speed to hit the primer hard enough to go off.
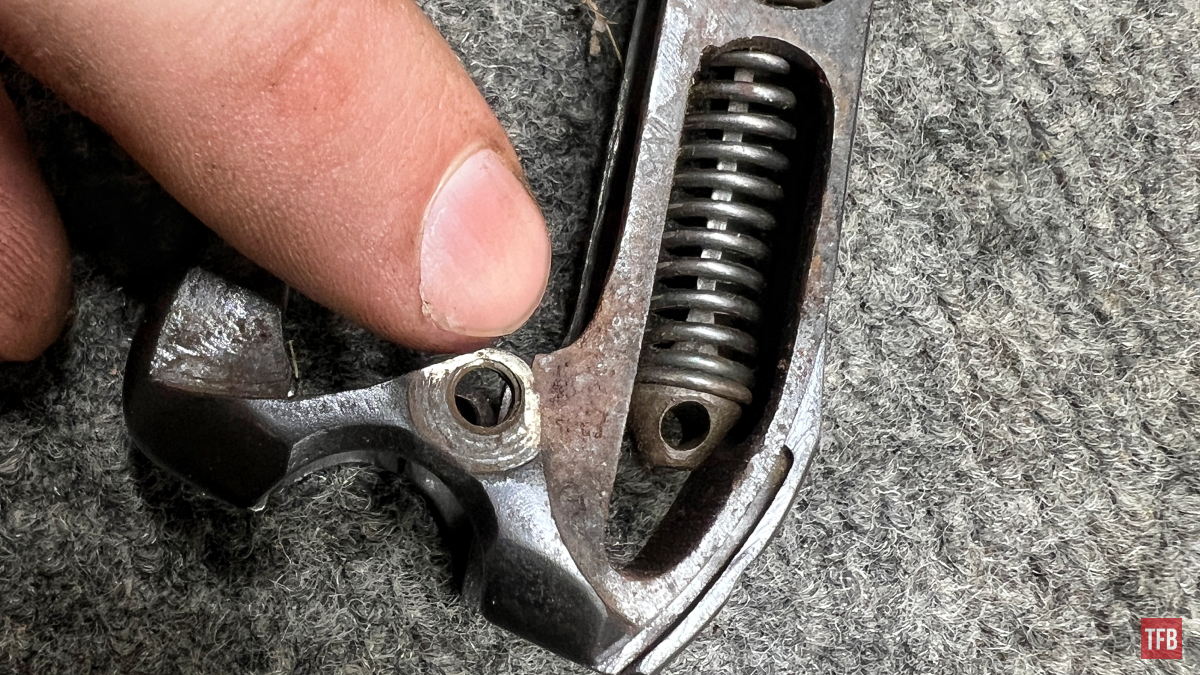
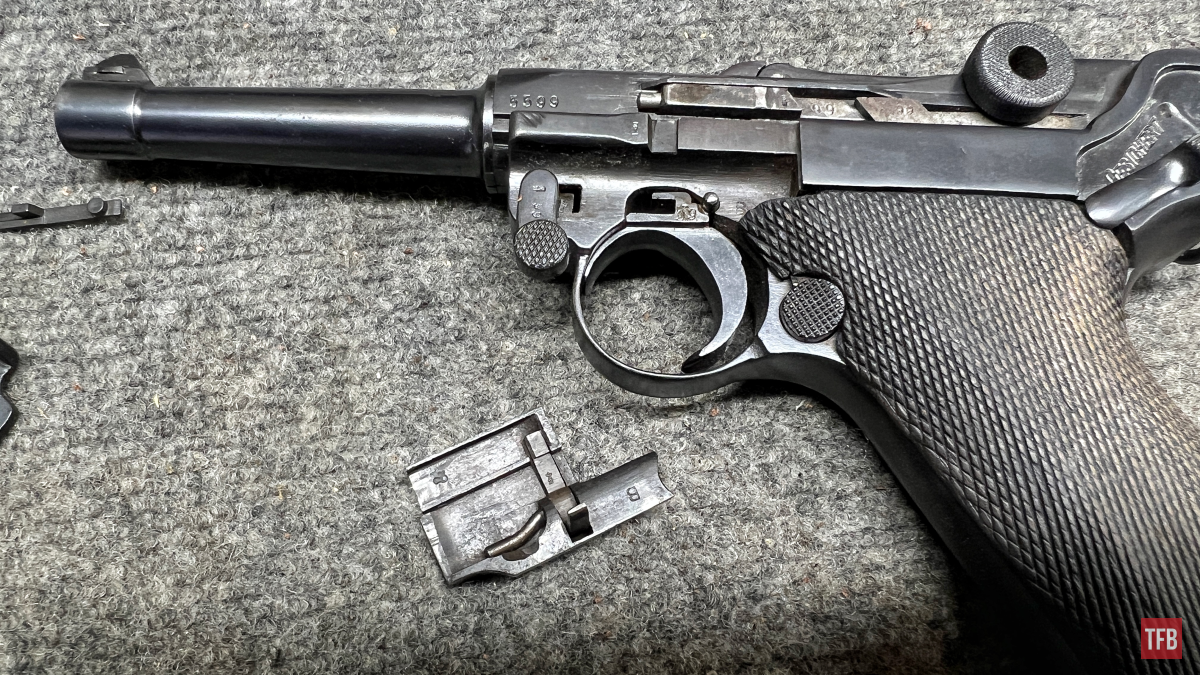
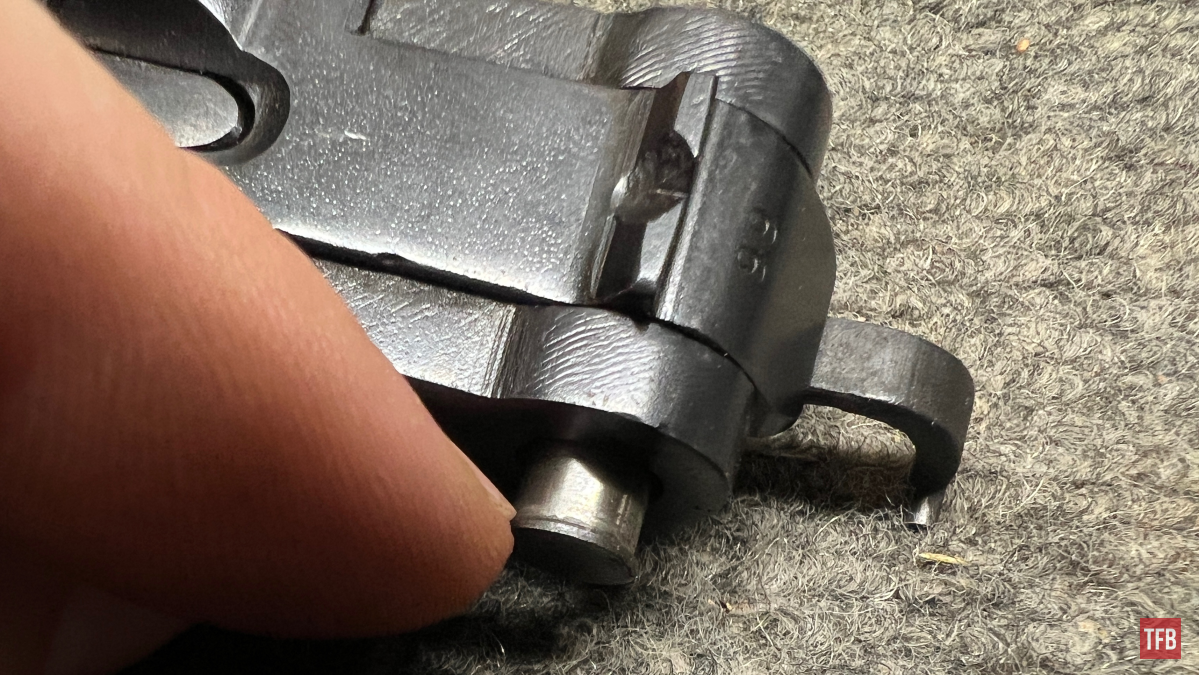
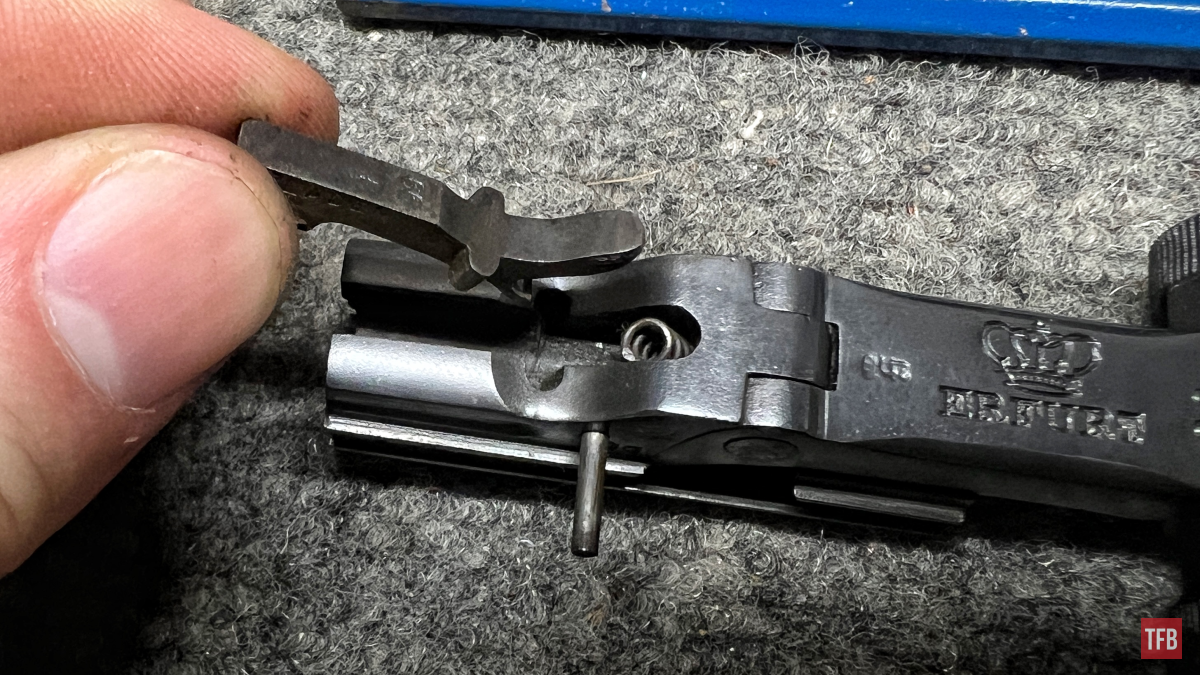
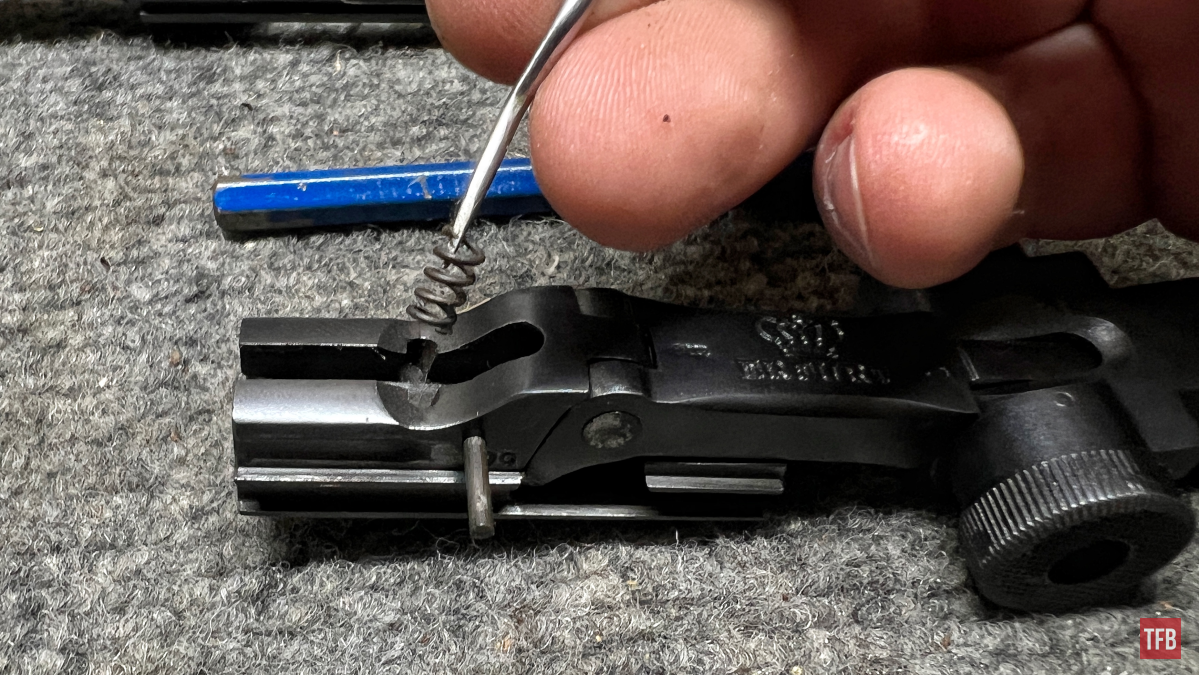
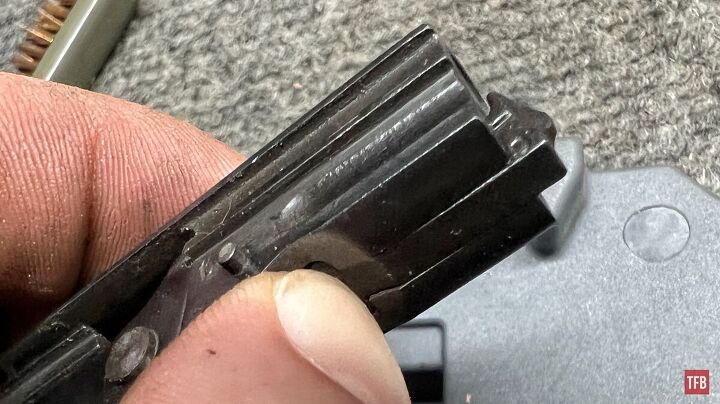
This curvaceous cross-shaped piece is our extractor. As you can see, it is also numbered to this gun. The extractor is removed by pushing out the pin you see started here. Once again I use the word “push” because that is all I had to do. No hammer is necessary. Spring tension is all that keeps that pin holding solid.
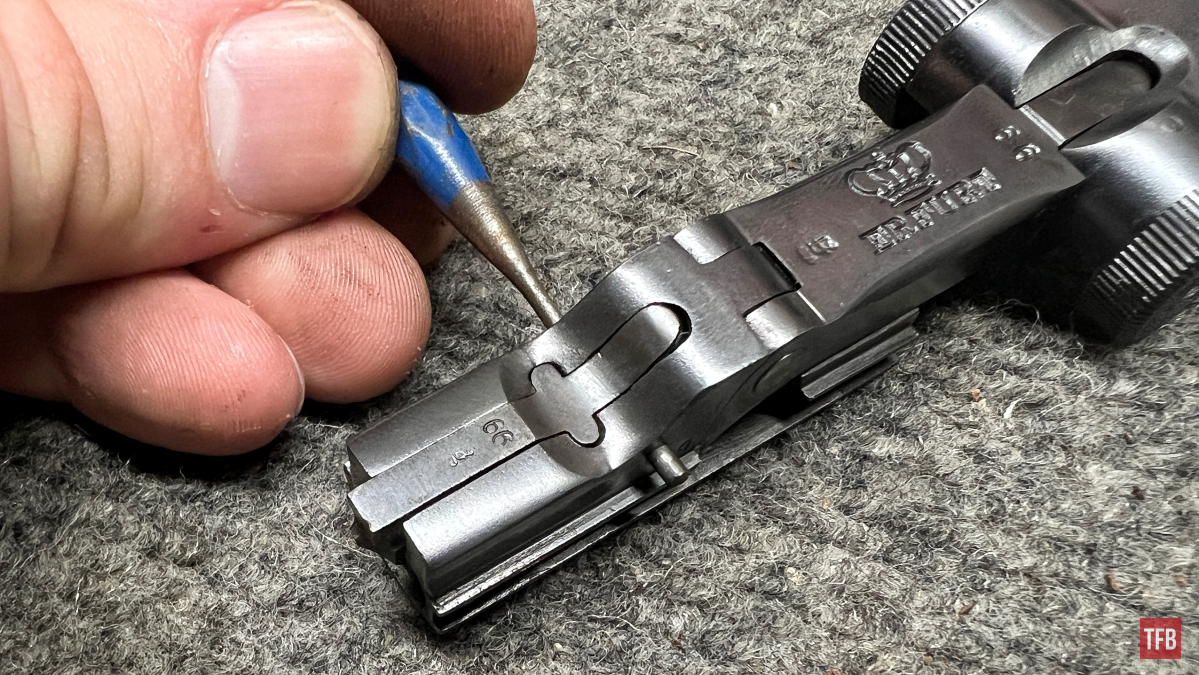
With the pin out of the way, the extractor needs to be pulled forward (going off of the bolt) and then up. There will be a small spring beneath in the extractor slot but will likely not have enough energy to travel anywhere.
If the extractor spring is stuck for whatever reason, a punch, tweezers, or pick will do just fine to grab it.
Note: Always have a magnetic parts tray on standby for this sort of thing.
Make sure to clean out the extractor channel. Hopefully, you will not have to be in here for a while.
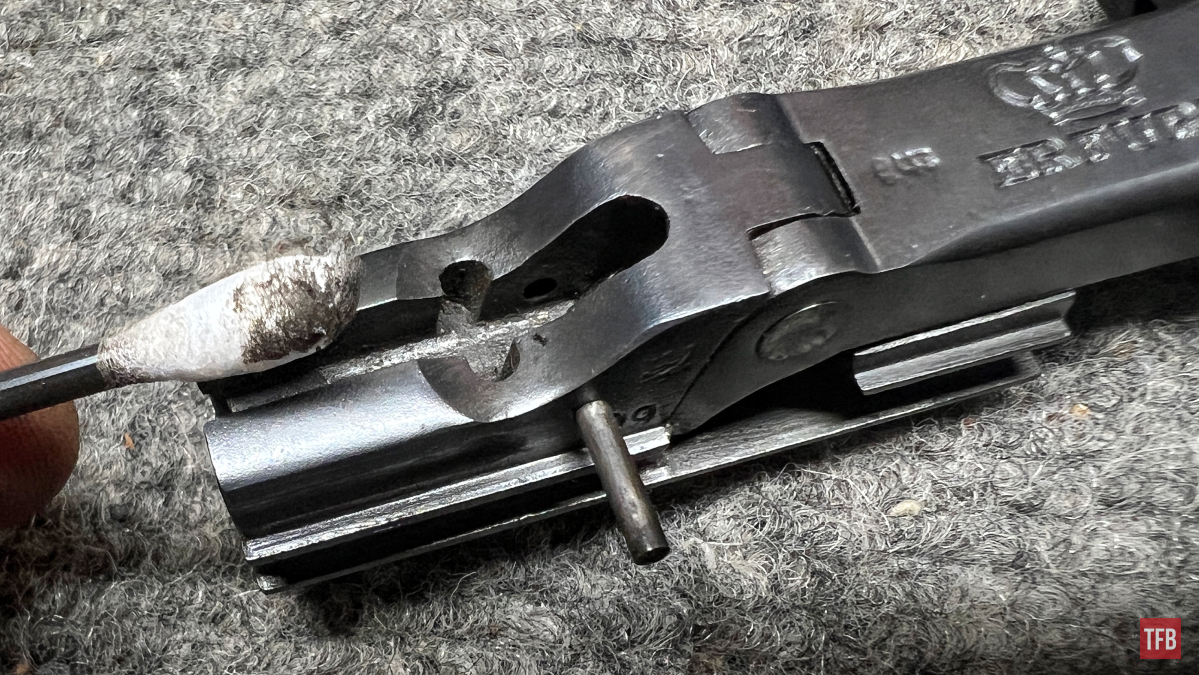
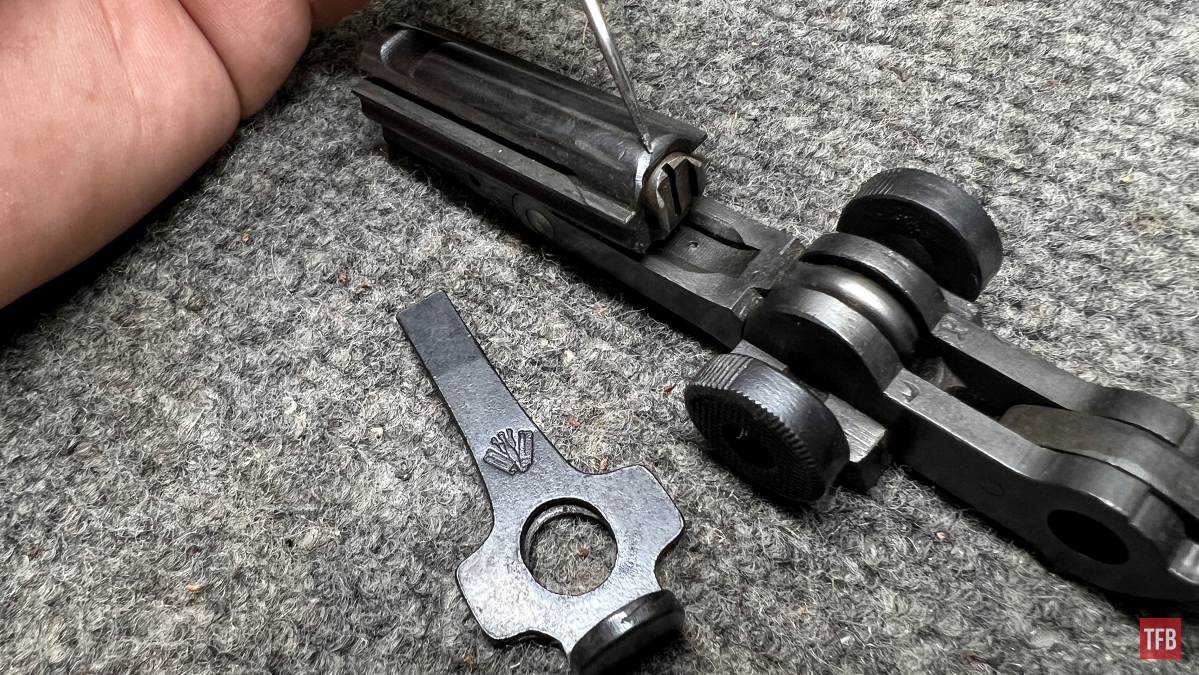
The ejector can be a tricky piece and I do not recommend it be replaced unless you know what you are doing or absolutely need to. In this case, I know what I’m doing and I also know some hand fitting will likely be involved.
Note: See in the picture below the original ejector is the thin speckled silver bit lengthwise.

The ejector is a long spring with a triangular bit that pokes through the upper frame. When a cartridge is extracted and brought backward, the rear of the cartridge hits this triangular ejector and is sent flying.
The ejector can be removed (carefully!) by placing a pick point or a very thin flathead in this spot shown. You may notice the cutout spot to accommodate larger tools. I used a pick point to minimize any potential scratches. Apply pressure to get beneath the rear end of the ejector and it will simply pop loose.
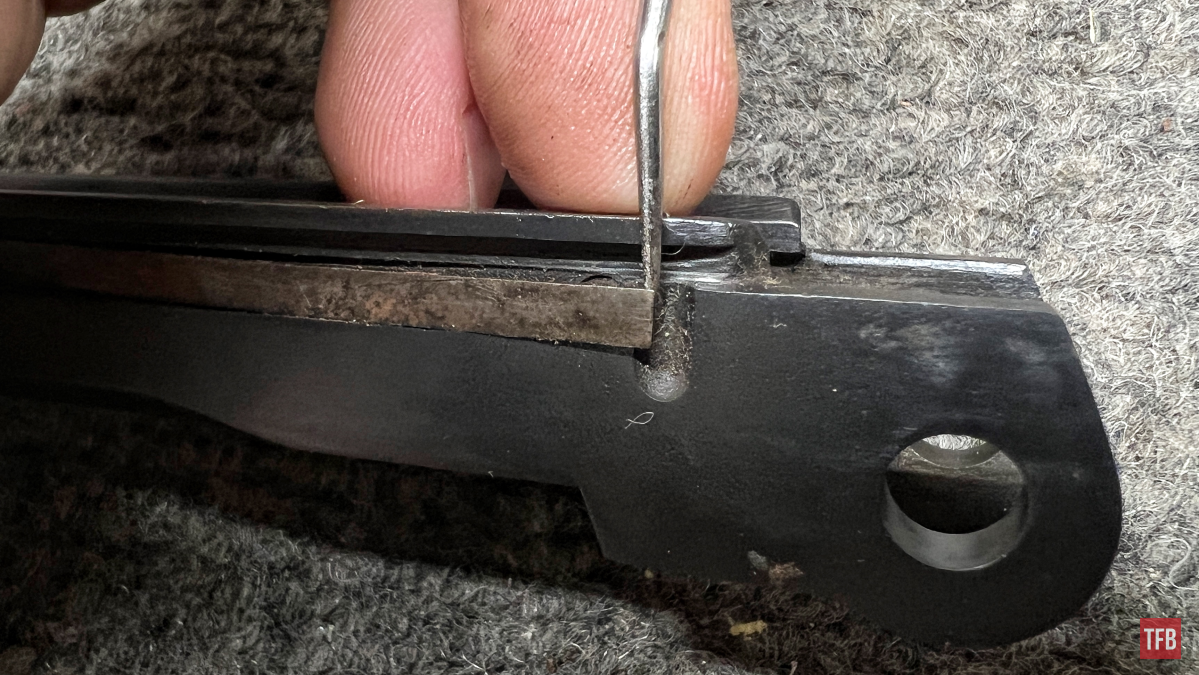
The rear portion has a small round nub that keeps it captive under spring tension.
Here we can see (moving right to left) a hole for that round nub, a square hole that is cut at an angle, and the thin cut for the ejector’s head.
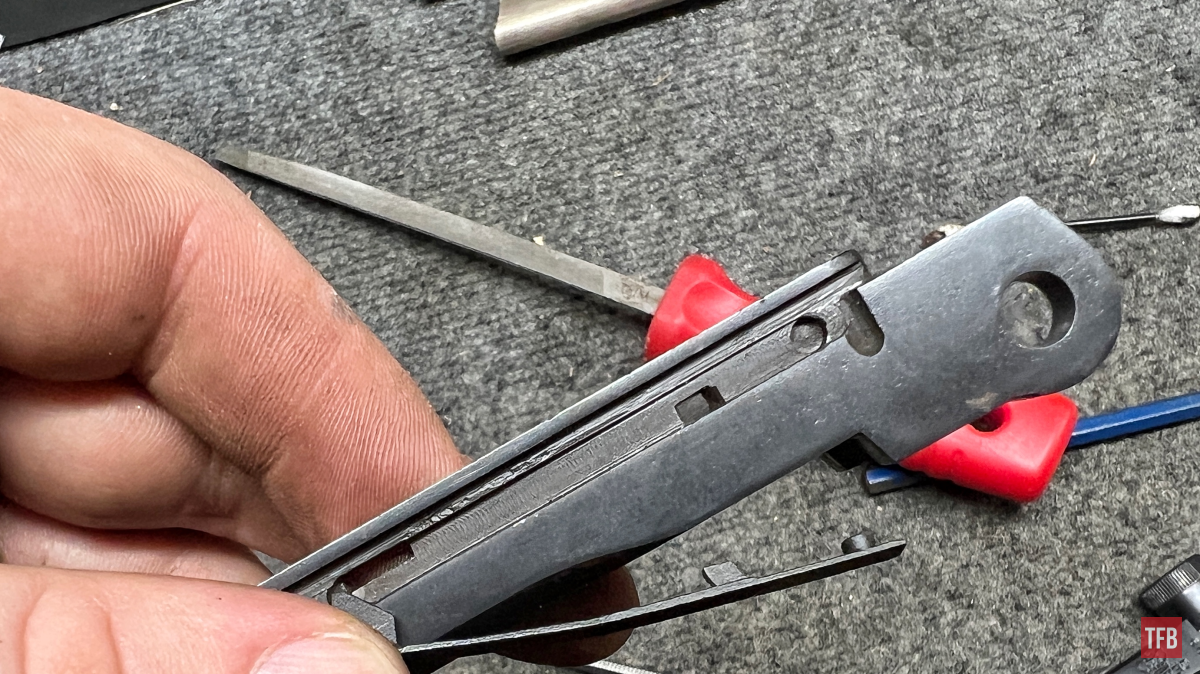
This is a good time to inspect the upper frame for any damage or cracks. A good way to ensure there is no crack is to thump on the side with a nylon handle (on a screwdriver for example) or just flick it really hard. The upper will react much like a tuning fork (look it up) and hum if it is sound. If it does not hum and simply makes a flat sound when thumped then there is likely damage hiding somewhere.
If a new ejector is properly fitted it is set down in the groove with the middle nub slipping into the slanted hole. When both the ejector and slanged nub are in their respective homes, the ejector can be persuaded forward towards the chamber with a brass punch (no hammer). The rear round nub should snap into its reservoir with spring tension.

When reinstalling springs such as the extractor spring (this is a new spring), I like to put a glob of grease on it to help it stick to its spot as well as lubricate the spring.
The new extractor is installed at the front of the bolt by being slid in first of all and then pushed down.
In order to fully secure the extractor, the pin must be pushed back through. This is done by applying pressure to the top of the extractor until the pin can be pushed through flush to the other side.
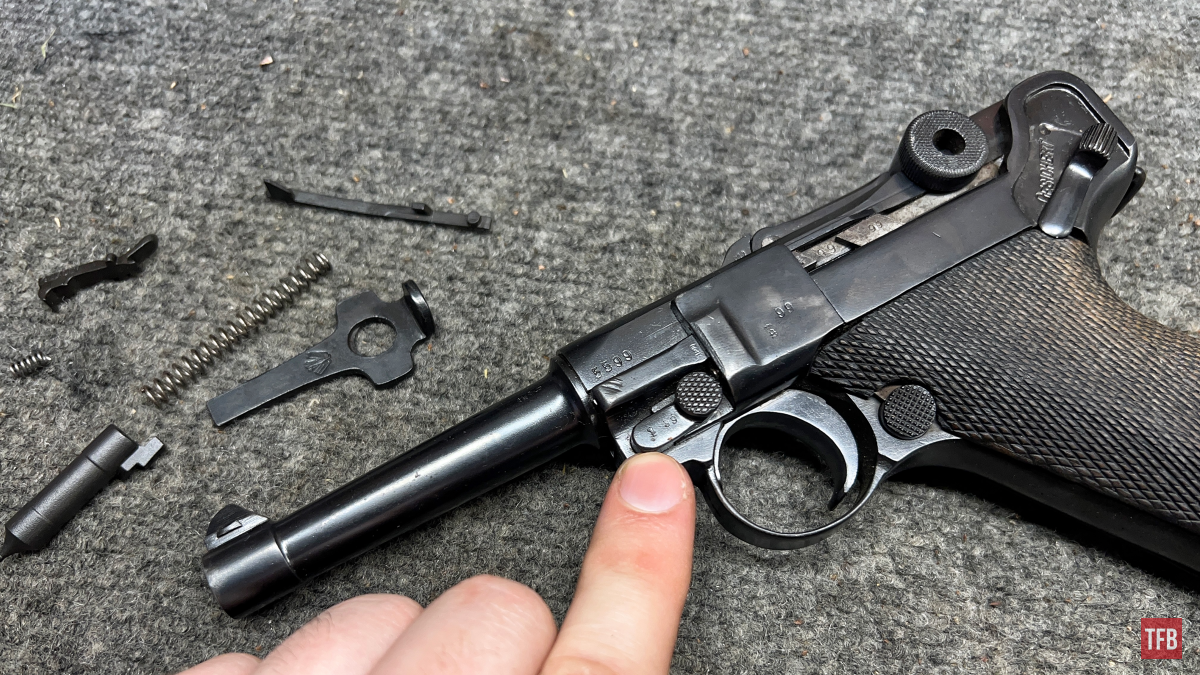
Make sure to test its grip with a dummy or some brass. If it does not hold well, the extractor claw may need some stoning to make a sharper edge (this one needed to be stoned).

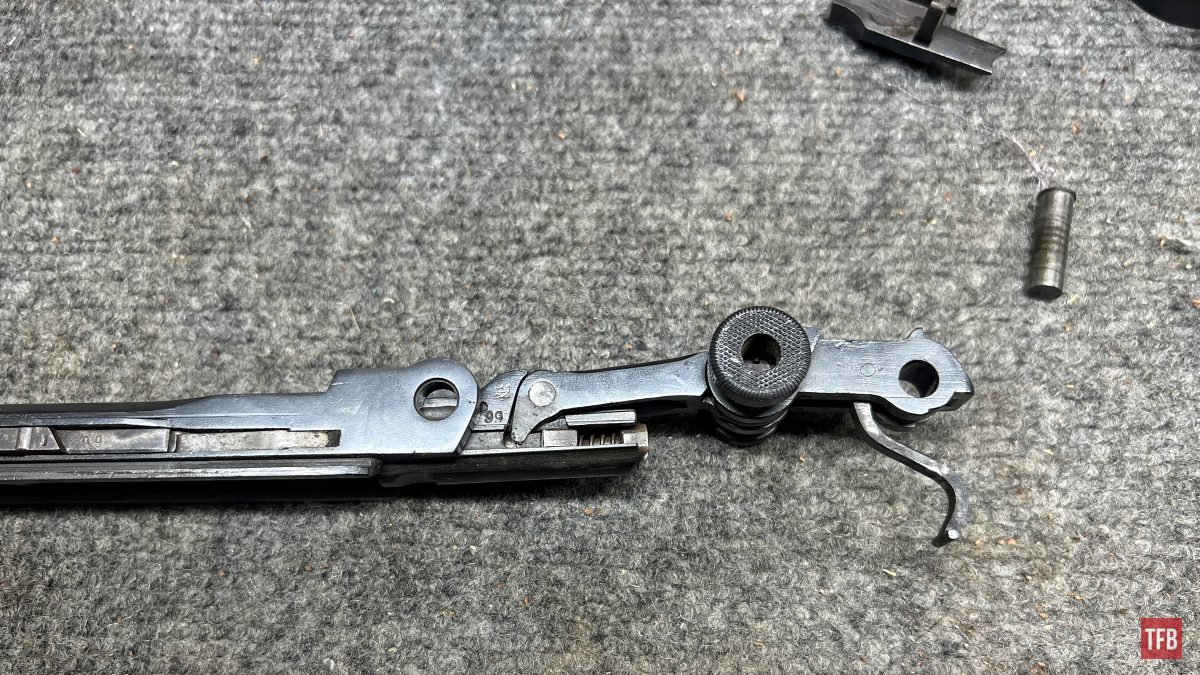
Here we have a new firing pin and spring as well as the old firing pin plunger. They both need to be inserted into the bolt so that their respective nubs are jutting out the left side of the bolt.
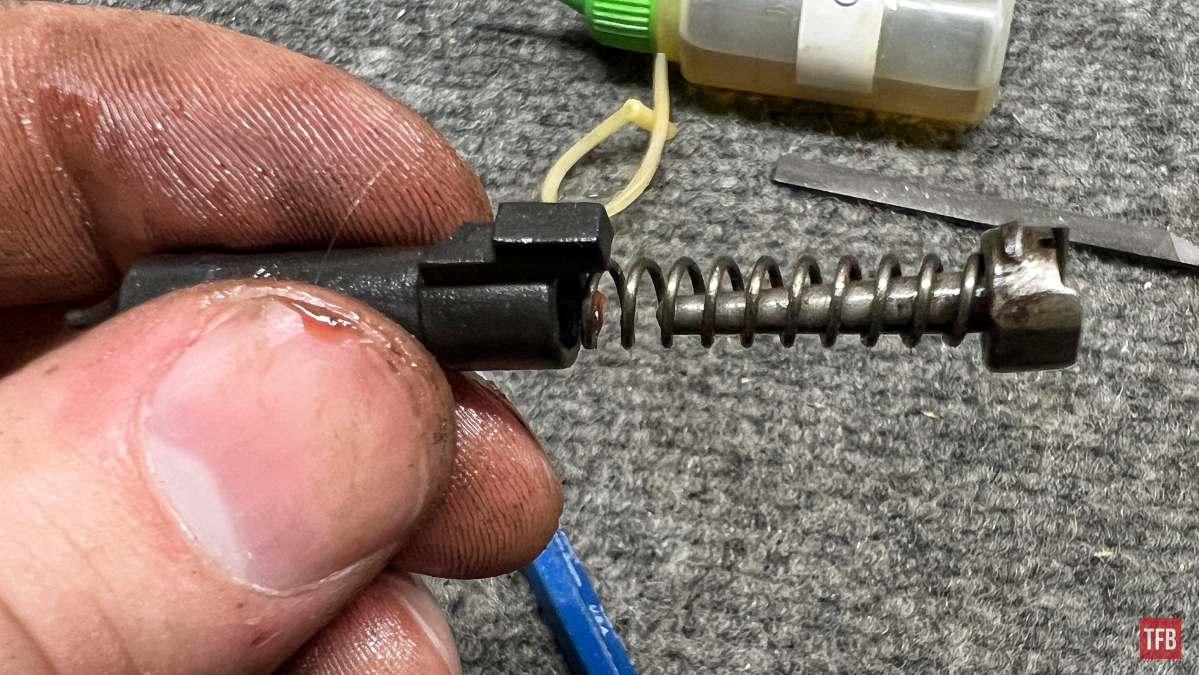
Use the same tool for the slot on the firing pin plunger to push and twist clockwise into its internal groove. Then it will be captive.

This is a good time to see how much the firing pin protrudes. This new one actually protrudes less than the old one which is okay with me. It’ll likely work fine.

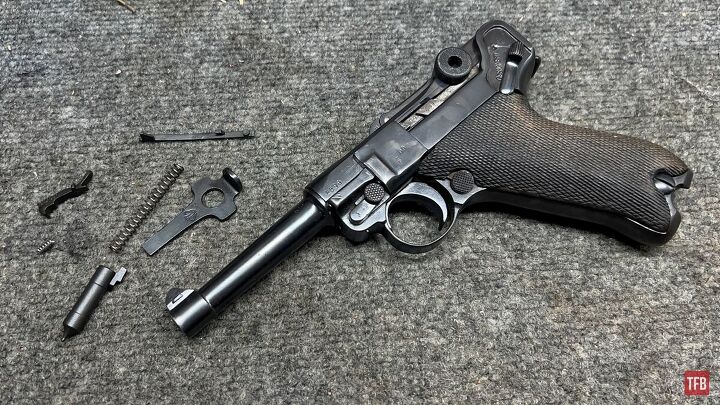
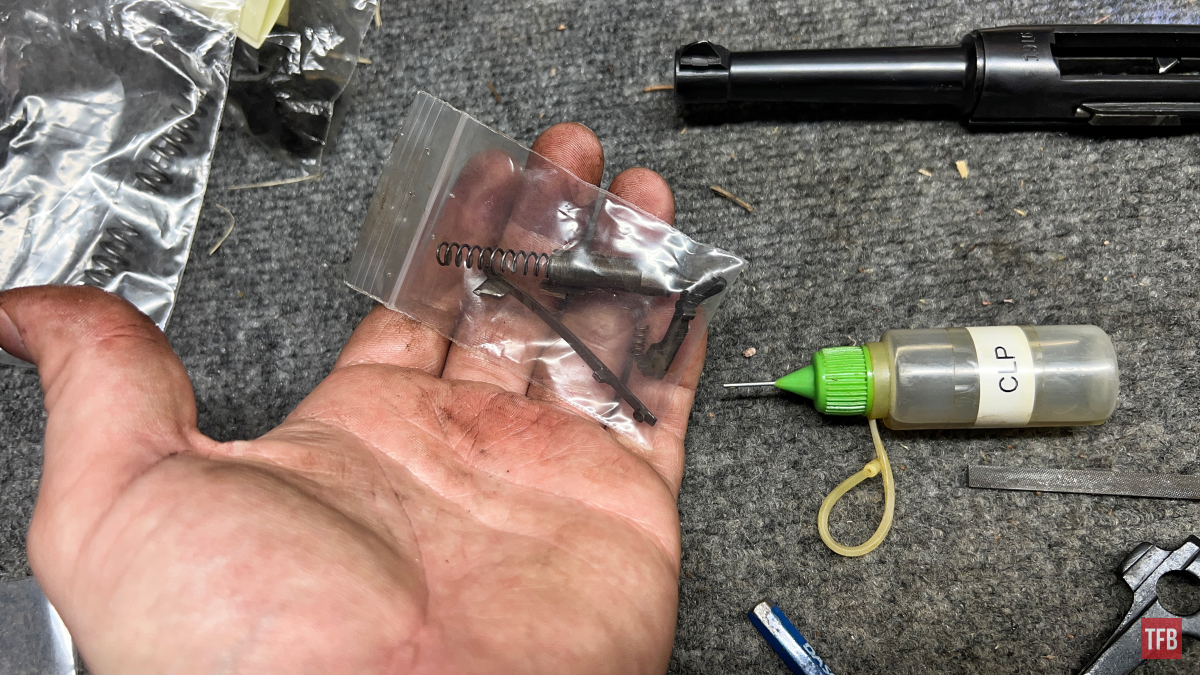
Make sure to put the original parts in a bag and store them for safe keeping.
Conclusion: Luger P08 Small Parts Replacement
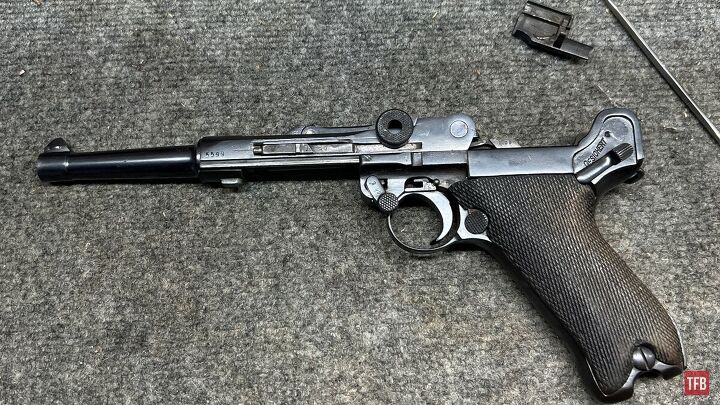
Reassembly is very simple and typical. Do the reverse steps of disassembly. The biggest thing to be aware of is your strut or link that attaches to the recoil spring. Inserting the upper into the lower should be started upside down so gravity keeps the link from falling into the wrong spot.
The link can be in the wrong spot and the gun will be able to fire. This can result in damaging your gun.
Insert the upper until you are about here and turn the gun right side up so the link falls into the recess in order to hook onto the recoil spring.

The correct spot for the link to drop.
As always, thank you for reading TFB! Be safe out there, have fun while shooting, and we will see you next time for the TFB Armorer’s Bench! Also, let us know what you think in the comments below! We always appreciate your feedback.