 Your Privacy Choices
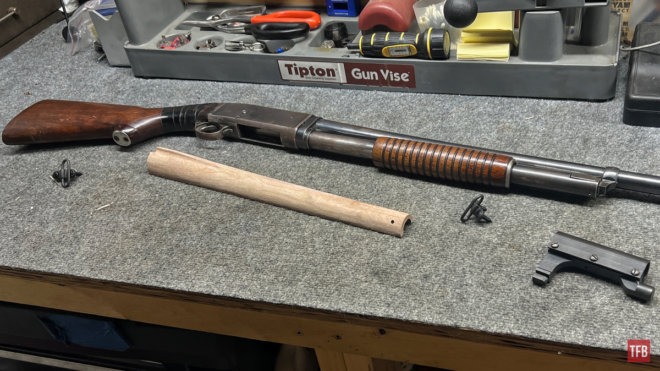
Welcome everyone to the TFB Armorer’s Bench! As mentioned in the little blurb below, this series will focus on a lot of home armorer and gunsmith activities. In this article, I decided to do a little woodworking. I apologize for the lack of Armorer’s Bench content as of late. It has been tough juggling all the projects I have planned and getting them set up. One such multifaceted project is my Remington Model 10 Trench Gun project. Fear not! I am not destroying a beautiful well working and well-finished Remington Model 10 in order to achieve this. I picked up a real heap of one and got the necessary materials together to make a gun I never thought I’d own. My old soul is absolutely flustered with excitement. Let’s dive right into this Remington Model 10 Handguard Fix!
Recent TFB Armorer’s Bench Articles:
- TFB Armorer’s Bench: Commentary on The Marlin Model 60
- TFB Armorer’s Bench: Cleaning a Silencer Central Banish 45
- TFB Armorer’s Bench: Infante S6 Ultrasonic Cleaner 1-Year Review
- TFB Armorer’s Bench: Installing New Mauser C96 Parts
- TFB Armorer’s Bench: Installing XS Sights on The Magpul MBUS
TFB Armorer’s Bench: Remington Model 10 Handguard Fix
Here, we at TFB hope to inform, entertain, and even inspire any would-be gunsmith or armorer out there. Ideally, with the information I provide and with the help of our sponsors, you can have some useful knowledge pertaining to the conservation and improvement of firearms technology while at the same time sharing experiences and teaching each other new tips and tricks along the way in the comments. Digging deep into what it is to be an armorer or gunsmith has significance but what is important is what those people do to show they’ve earned that title. I am happy to share my experiences and knowledge and hope it is informative!
Make your personal safety a priority:
- Practice proper gun safety. Always make sure before the firearm hits your bench that it is unloaded and safe to be handled.
- Wear the proper safety equipment. The main one would be safety glasses (decent ones) since parts are often under spring tension and you may work with high RPM tools. Other honorable mentions would be latex gloves or a respirator when working with potentially harmful solvents and oils. Also hearing protection when working with loud machinery or test-firing firearms.
- Modifications, alterations, and customizations will void your firearm’s warranty 9.5 times out of 10. Please take that into consideration before attempting any at-home gunsmithing.
- If you are unsure about proper safety practices, disassembly procedures, or warranty standards, stop, put down the tools, and consult a competent gunsmith.
Brief History & Explanation: Remington Model 10 Handguard Fix
Many know the typical and often overexaggerated stories of shotguns being used in the trenches of World War One. Far more will recognize the silhouette of a Winchester Model 1897 paired with its metal heat shield and bayonet lug. That shotgun of the few that were actually used was probably the most common. Was it the best? Arguably no.

Lot 3465: World War I Era Winchester Model 1897 Trench Shotgun – Desirable World War I Era Winchester Model 1897 Slide Action Trench Shotgun with Bayonet. (n.d.). Rock Island Auction Company. photograph. Retrieved May 5, 2023, from https://www.rockislandauction.com/detail/82/3465/world-war-i-era-winchester-model-1897-trench-shotgun.
The Remington Model 10 had a lot going for it. Sure it was a slightly overcomplicated shotgun designed by one of the greatest firearm minds that ever lived but it also featured a relatively sealed action. The rounds were fed and ejected through the bottom of the receiver and that is all there was to it. Far less room to get mud and muck in the action compared to the Winchester.
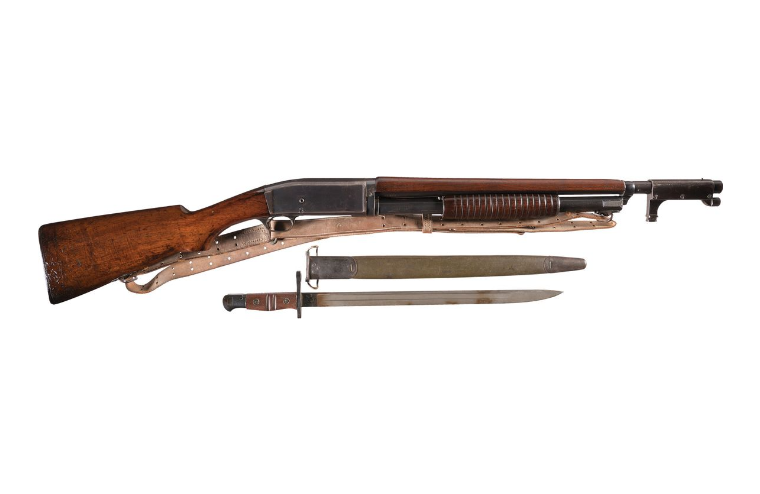
Lot 1369: World War I Remington-Umc Model 10-A Trench Shotgun – Very Scarce and Desirable World War I Remington-Umc Model 10-A Trench Shotgun with Bayonet. (n.d.). Rock Island Auction Company. photograph. Retrieved March 6, 2023, from https://www.rockislandauction.com/detail/85/1369/world-war-i-remingtonumc-model-10-a-trench-shotgun.
Shotguns in World War One, despite Germany’s hypocritical protests and proclamations of unnecessary suffering, were handicapped. They had extreme potential and when they were used and they worked they are documented to have worked very well. The downside is that at this time waxed paper shotgun shells were the norm. This was before the plastic hulls of the modern day. These shells would get wet one way or another and seize up and cause malfunctions in a hurry. Toward the end of the war, brass shells were issued but very few to make a difference. The United States would not learn from this and they would take the same paper shells to places like the war in the Pacific in World War Two and have many of the same issues. Let’s get back to our gun today or rather the Remington Model 10 handguard.

Remington Model 10 Handguard
So the biggest question from the uninformed I suspect would be “Why a wood handguard?”. That is kind of a neat albeit short story. With the need for shotguns not being fully met by Winchester, Remington stepped up to the plate to submit their Remington Model 10 to be the second most common trench gun on the frontlines. It was a capable and rather modern 12 gauge pump action shotgun.
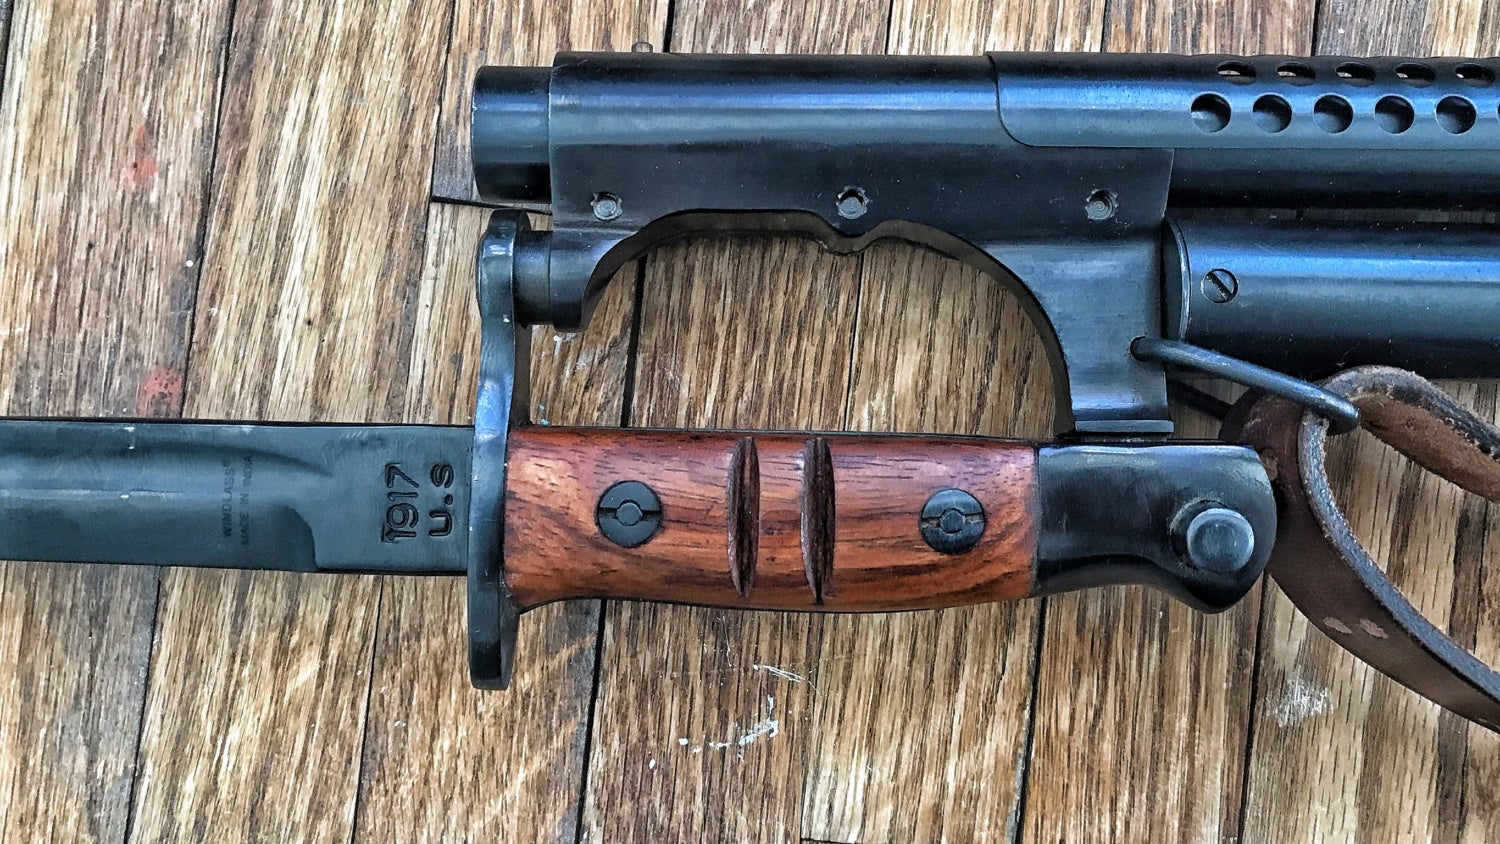
Winchester 1897 bayonet lug, bayonet, and heat shield
Unfortunately for them the heat shield/bayonet apparatus that Winchester utilized was patented so Remington had to come up with a solution for their Model 10 handguard. They decided to roll with an upper handguard like many military rifles of the time. This resulted in the wooden style one you see before you. They are extremely uncommon these days since they are obviously more fragile (I already had to fix the new reproduction one sooooo yeah) but I would assume they did the job they were meant to do for the few years they were in service.
The Fix: Remington Model 10 Handguard Fix
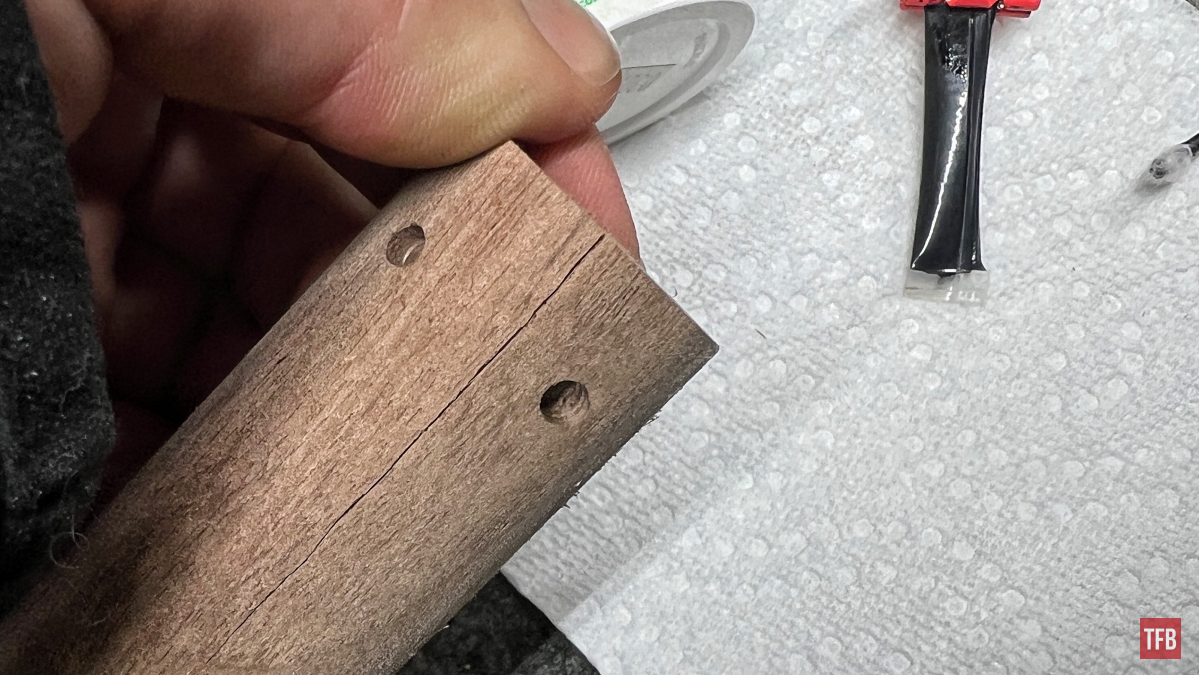
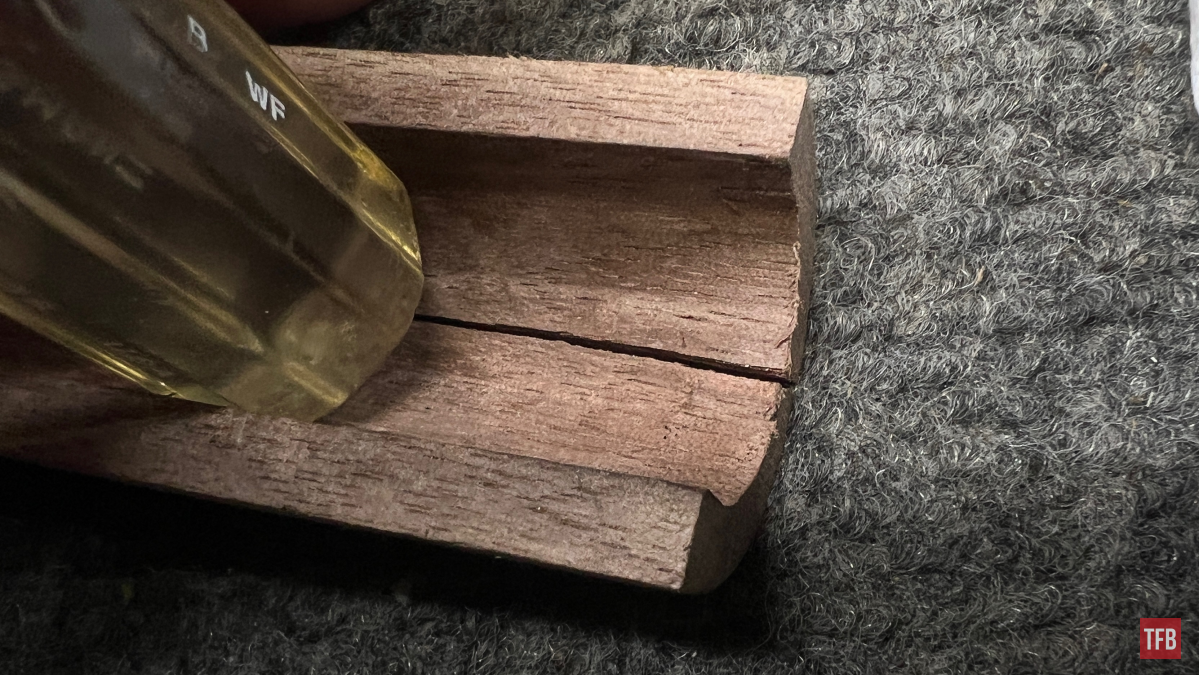
You can call this article a quick lesson in Acraglas more than anything. The handguards for these guns have been extinct for years. I happened to stumble across a very nice person on eBay that reproduces them amongst other wooden stocks and handguards. Their eBay can be found here. When I received the handguard, you can guess the first thing I did. I tried to see how well it fit to the top of my barrel. It obviously needed fitting which was fine with me but I was a little overzealous in my pressure on the forward part of the Model 10 handguard and it ended up splitting down the middle (only about 2” thank god).
I could just order another (time is money people!) but I figured this would be a good chunk of the project to prime the pump so to speak but also demonstrate the wonderful world of Acraglas.
Acraglas is an epoxy/resin that is used for bedding guns as well as general woodworking or gunstock repairs. It is applied in liquid form like glue and acts like glue but does not shrink or contract very much. It is tough but flexible much like quality wood that has the right amount of moisture inside.
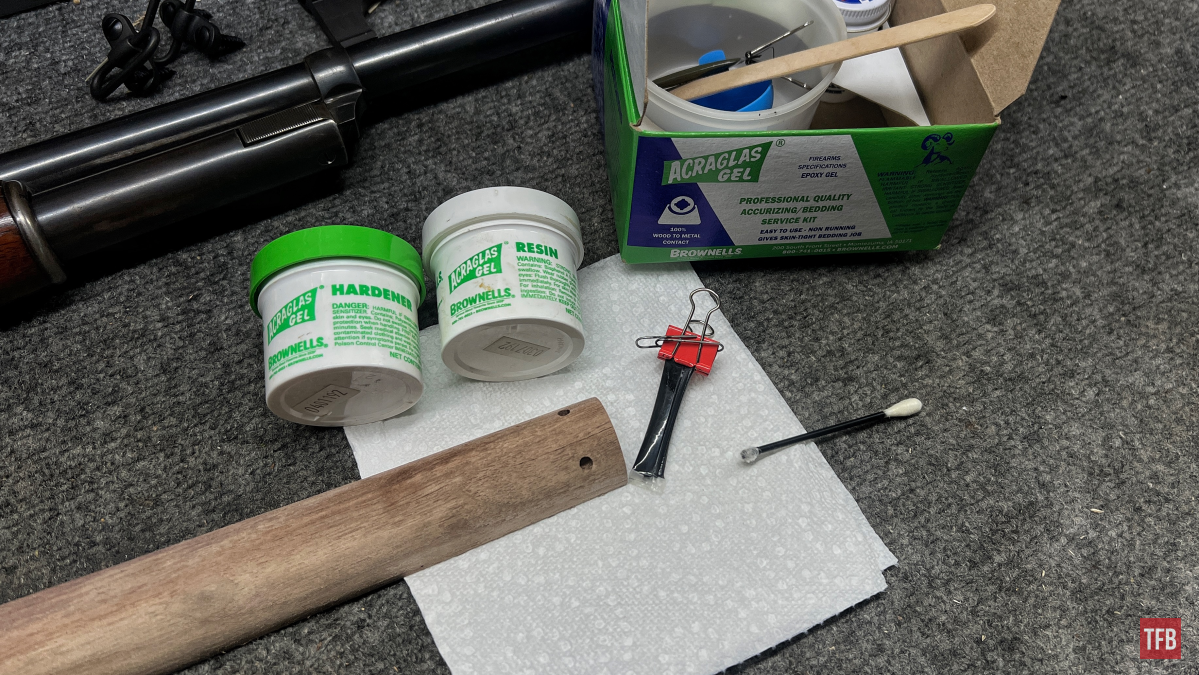
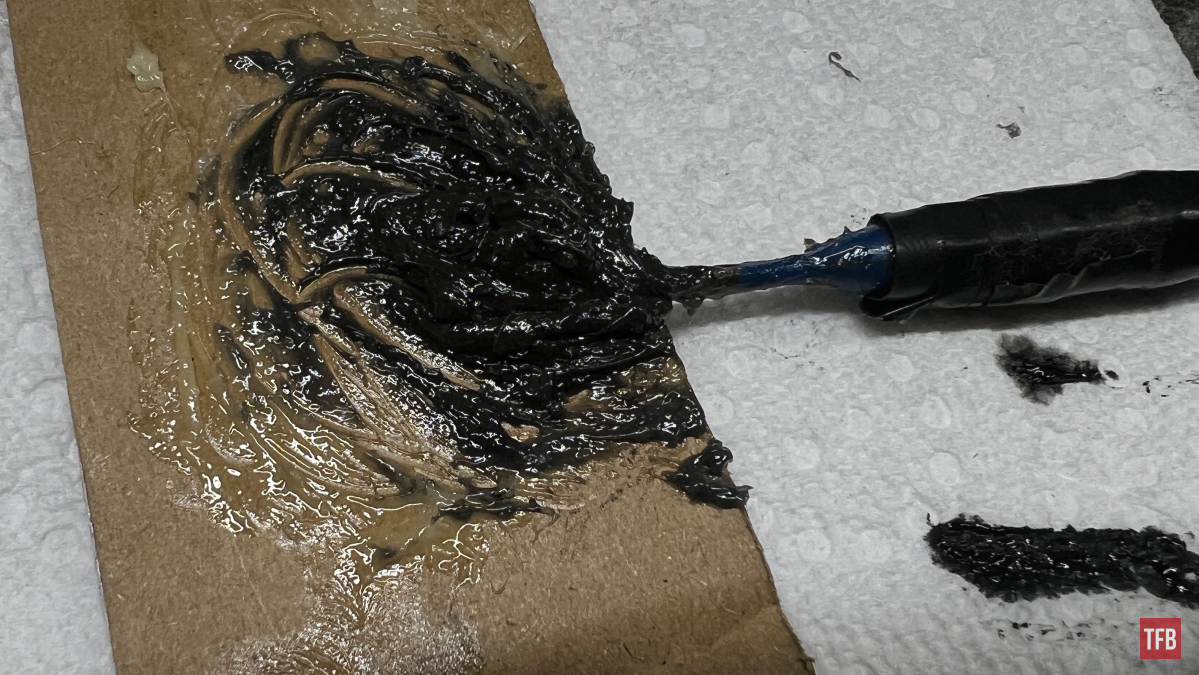
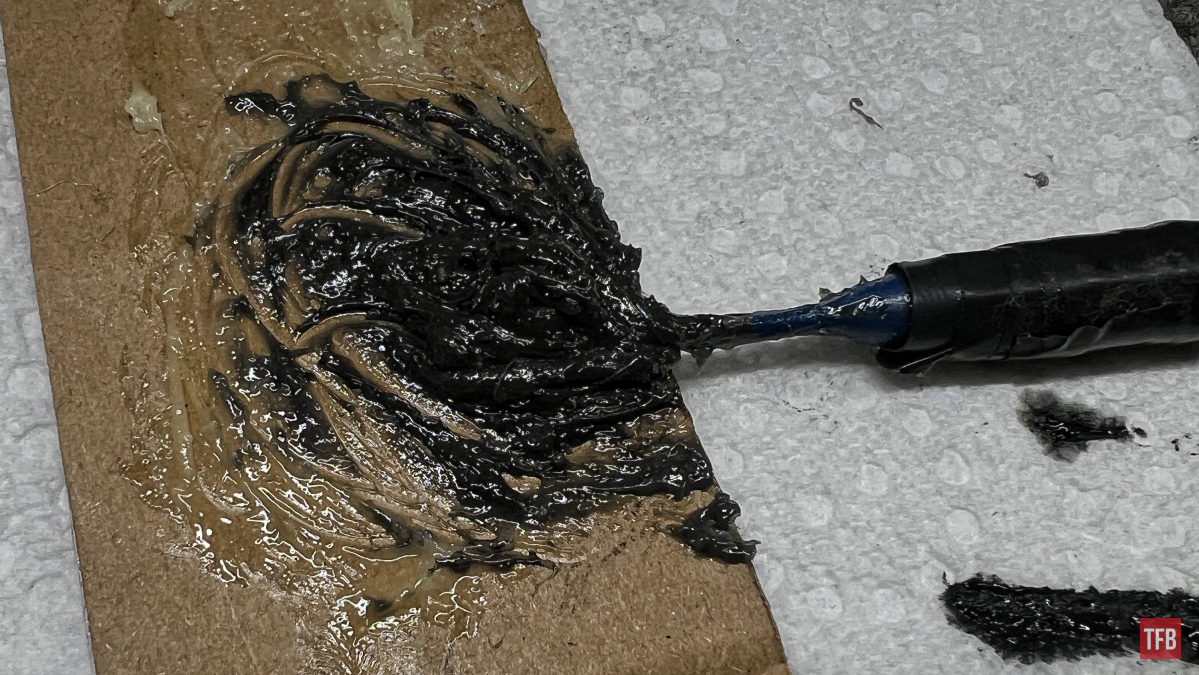
Using Acraglas is thankfully very simple. Start by dabbing some resin on a surface you can set aside and later throw away. For me, I got a piece of cardboard. Make sure to put about half the amount you want to end up with because this is a mix and it is a 1:1 ratio.
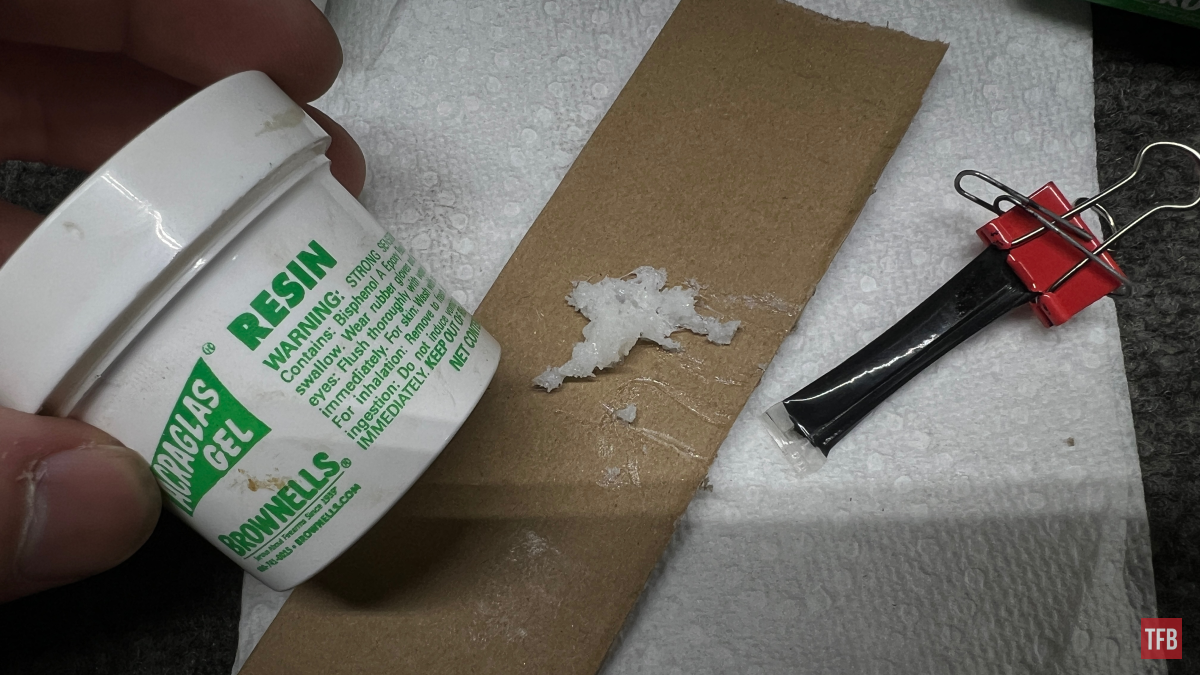
Next dab roughly the same amount of hardener into the resin and begin to mix. It will all look like one color and be very sticky when it is mixed.
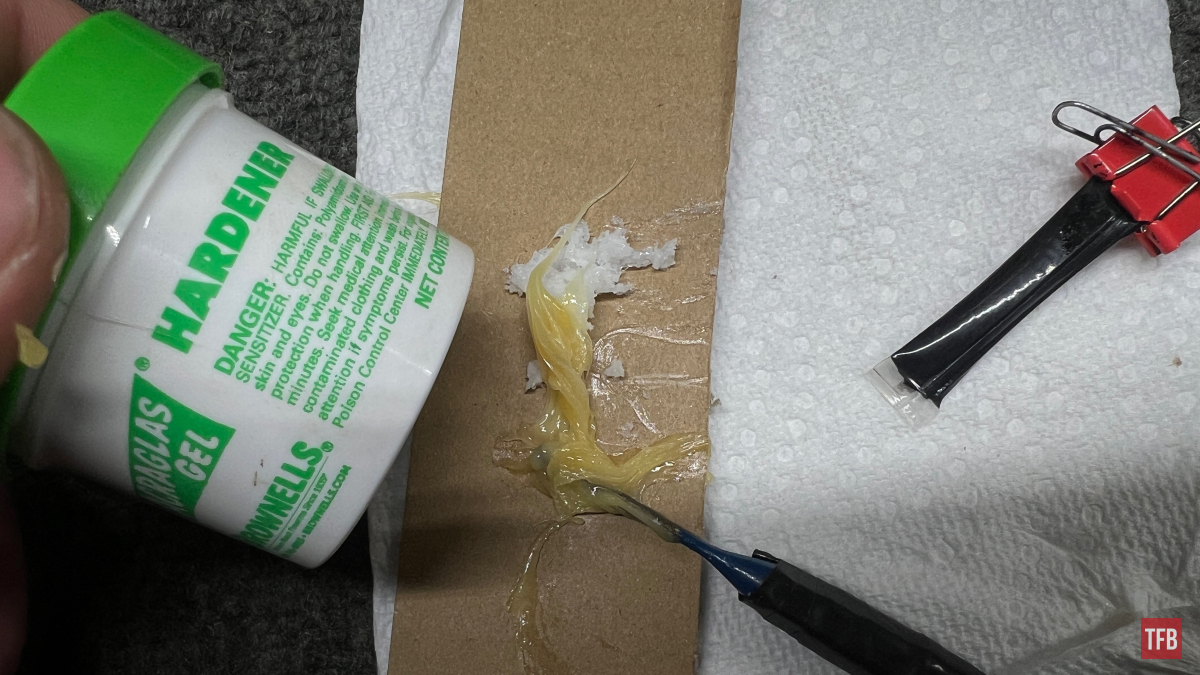
Next, we add a drop or two of black dye. It does not take much to make something very dark. We use black dye instead of brown because wood grain looks more black than brown. Brown makes a very strange dark tan sort of streak that just looks out of place. You’ll always know there was a repair but at least it’ll look pleasing.
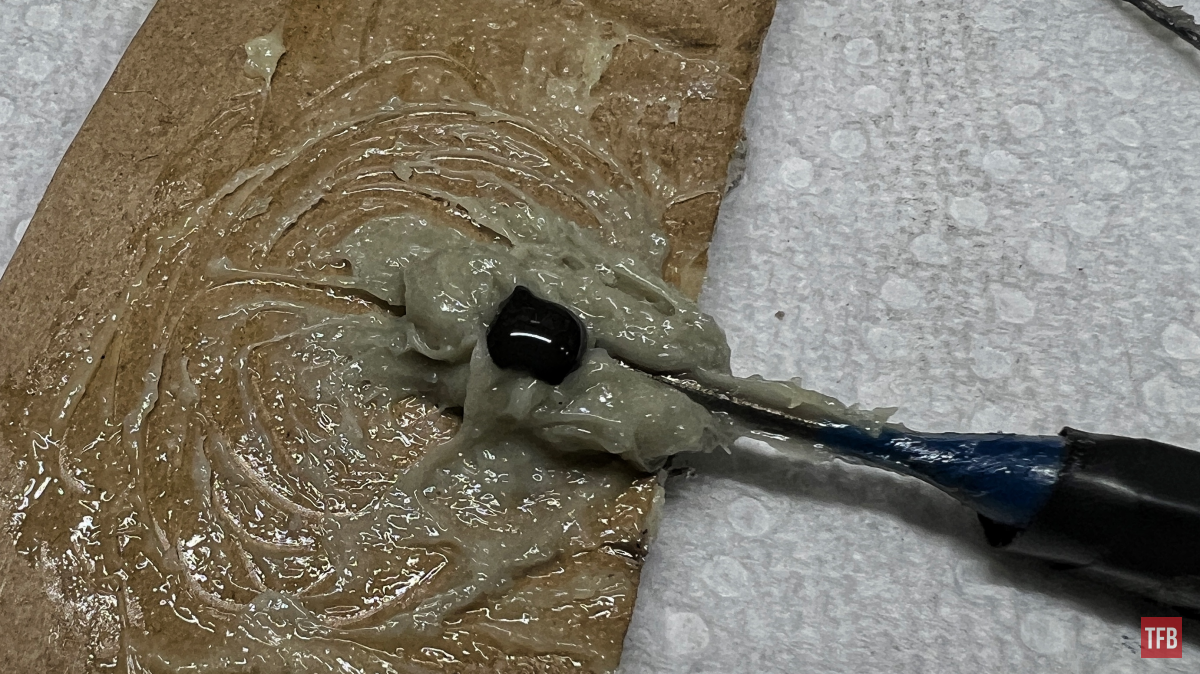
Mix the dye into the Acraglas.
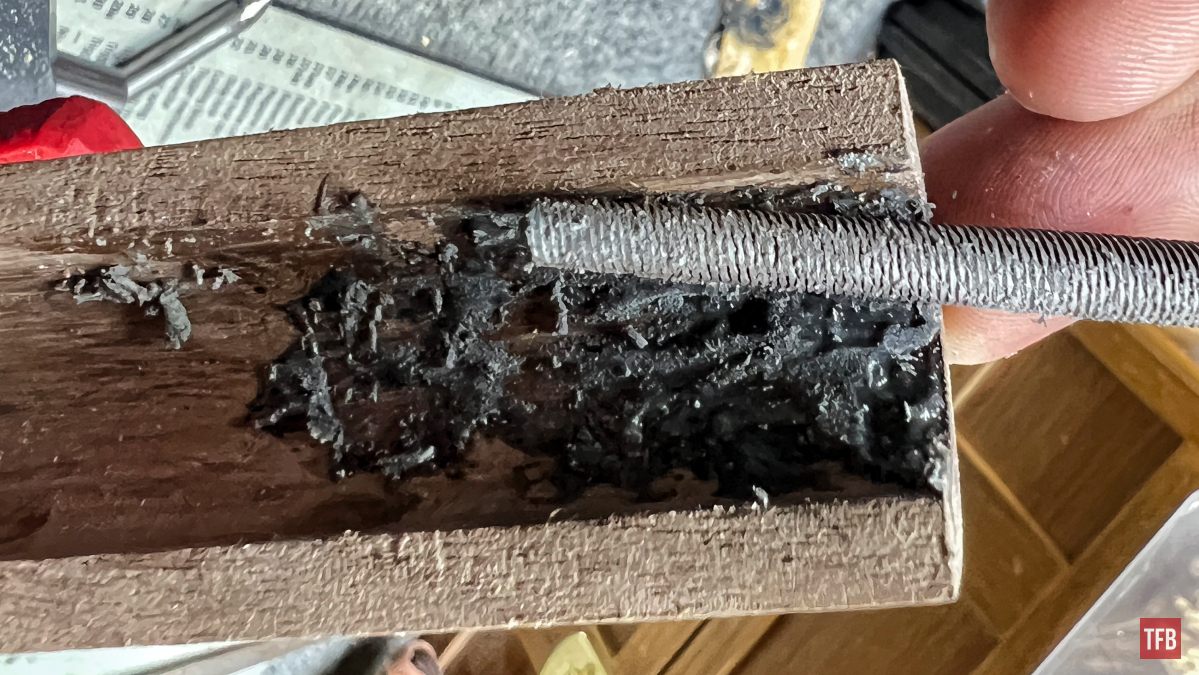
In this case, I spread the wood so the split was visible and open to apply the Acraglas and get it deep in there.
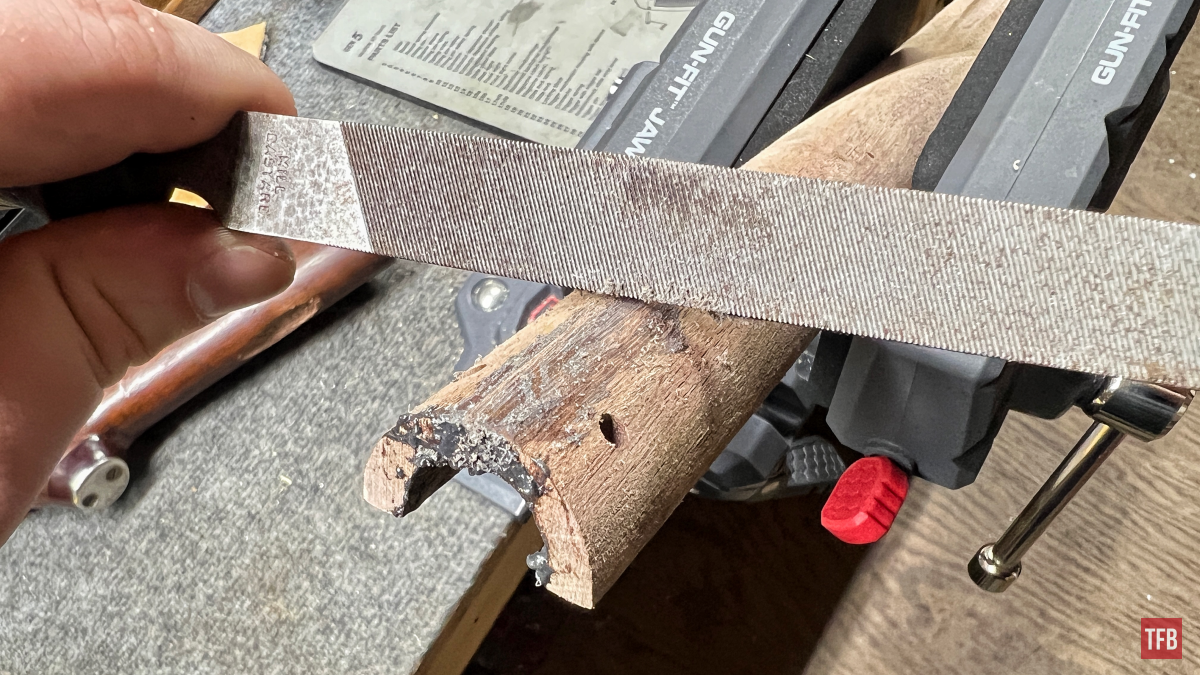
Less is more does not really apply here. Apply a good amount for maximum repair coverage. After the Acraglas hardens, it reacts a lot like wood when met with a file, chisel, or sandpaper.
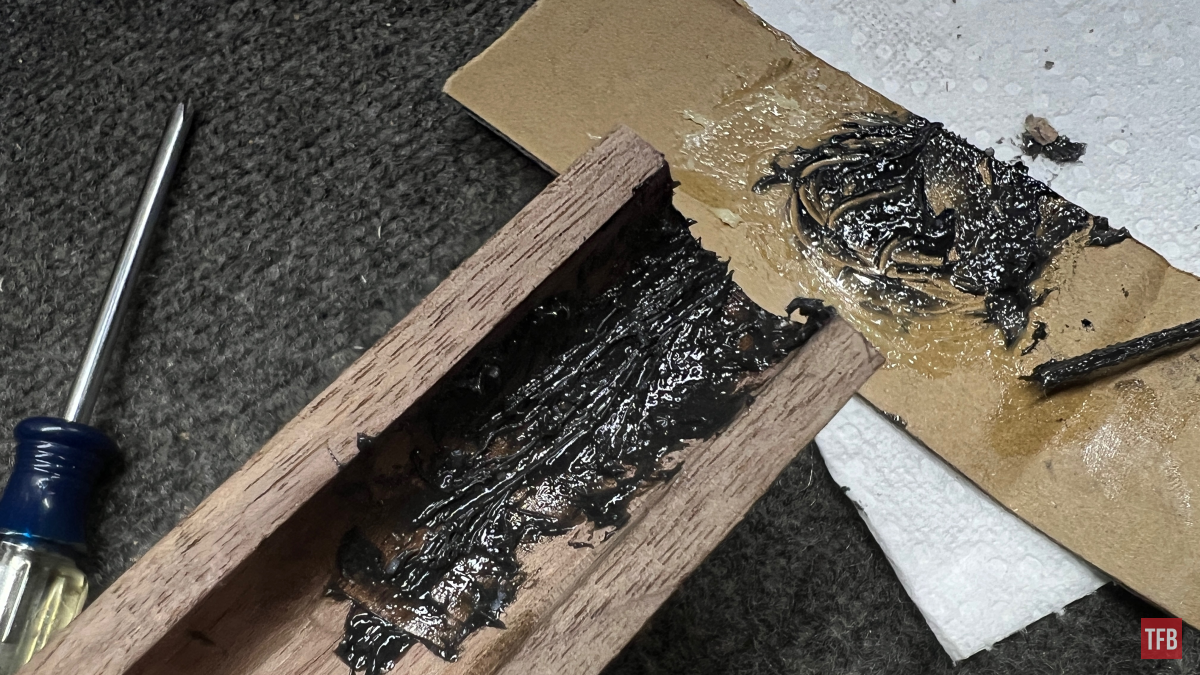
The excess can be easily removed and carved just like a piece of softwood.
Next is to let this sit for a recommended amount of 10 hours and under some heat. Not hot. Think of a lightbulb hovering over it as far as heat. The heat helps cure and accelerate the hardening.
Remember that piece of cardboard I used to mix it with? Whatever you use, set it aside with your workpiece. That way if you are wondering if it is cured properly, you can inspect the mixing tray to see if it has hardened all the way or not.
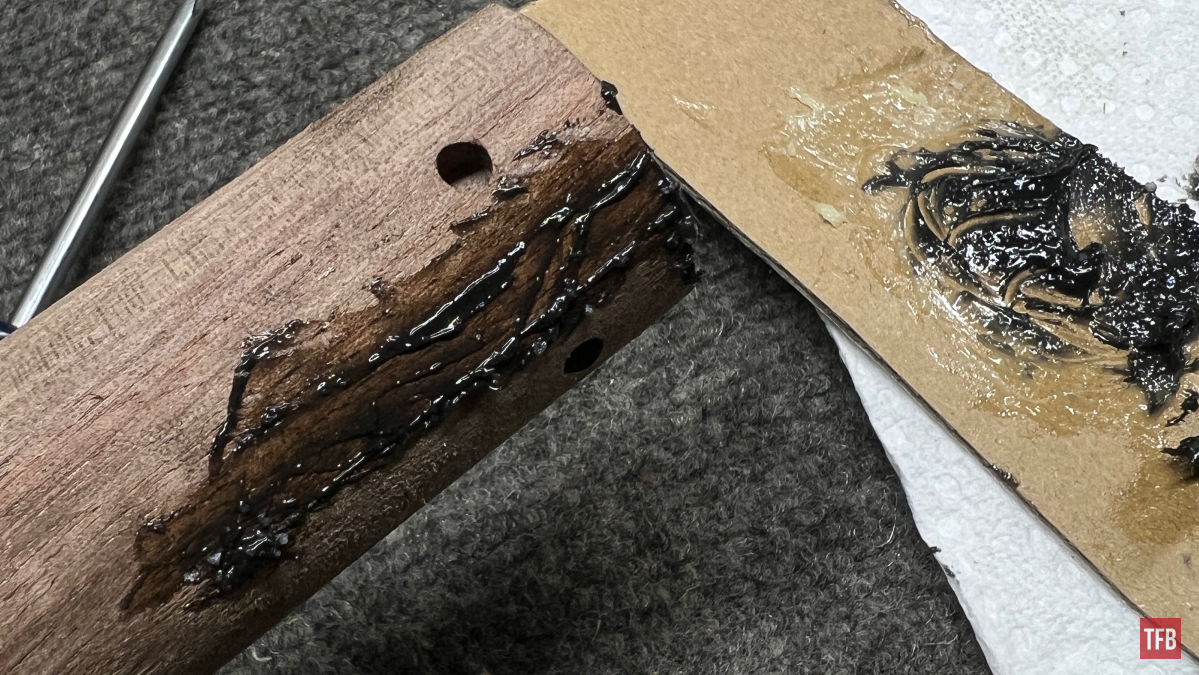
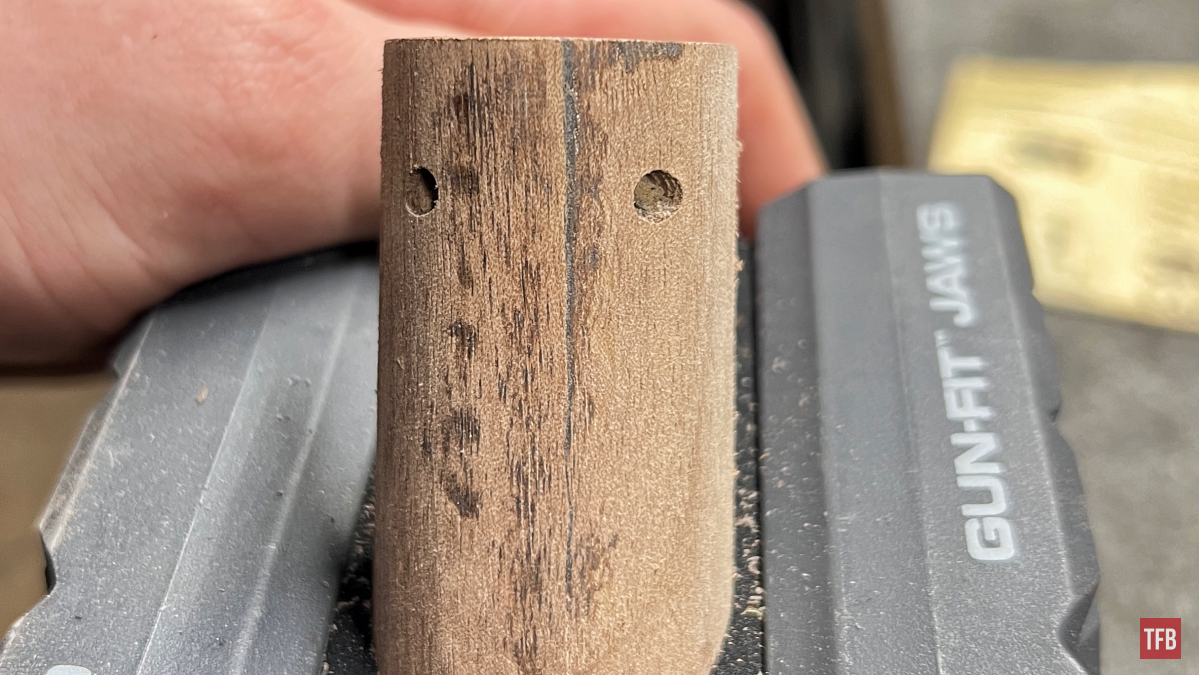
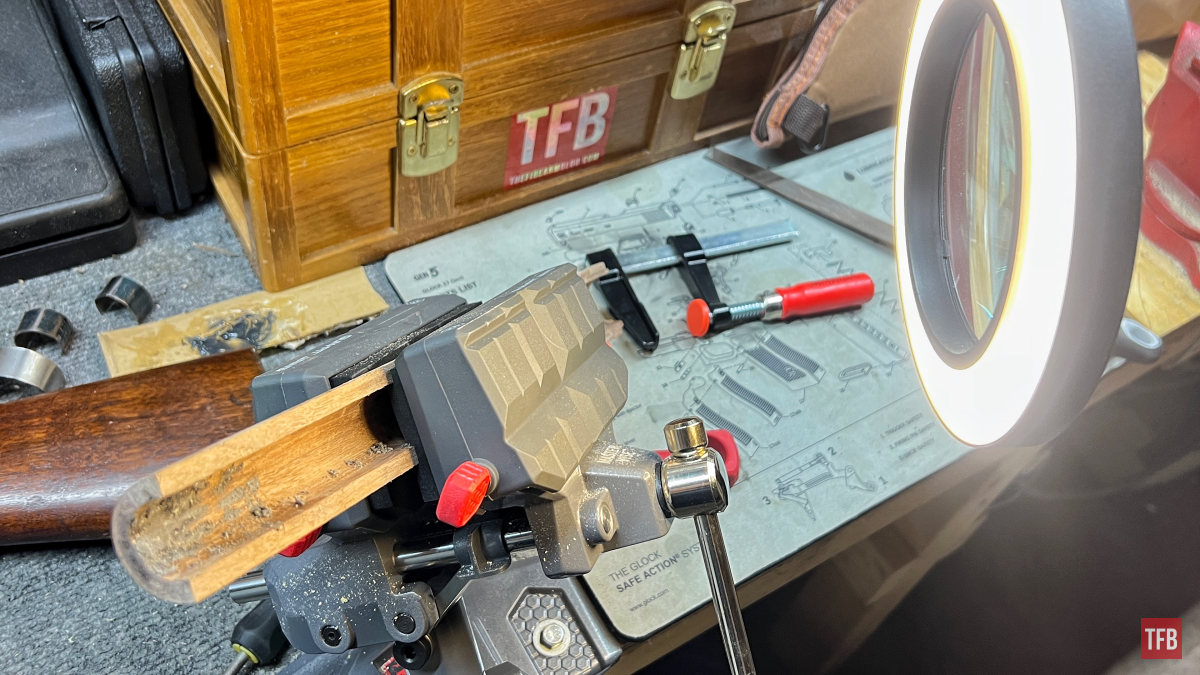
When your Acraglas has hardened (I got busy so it sat for days), you can file, draw file, sand, or chisel the excess depending on where it is. I draw filed the top of the handguard.
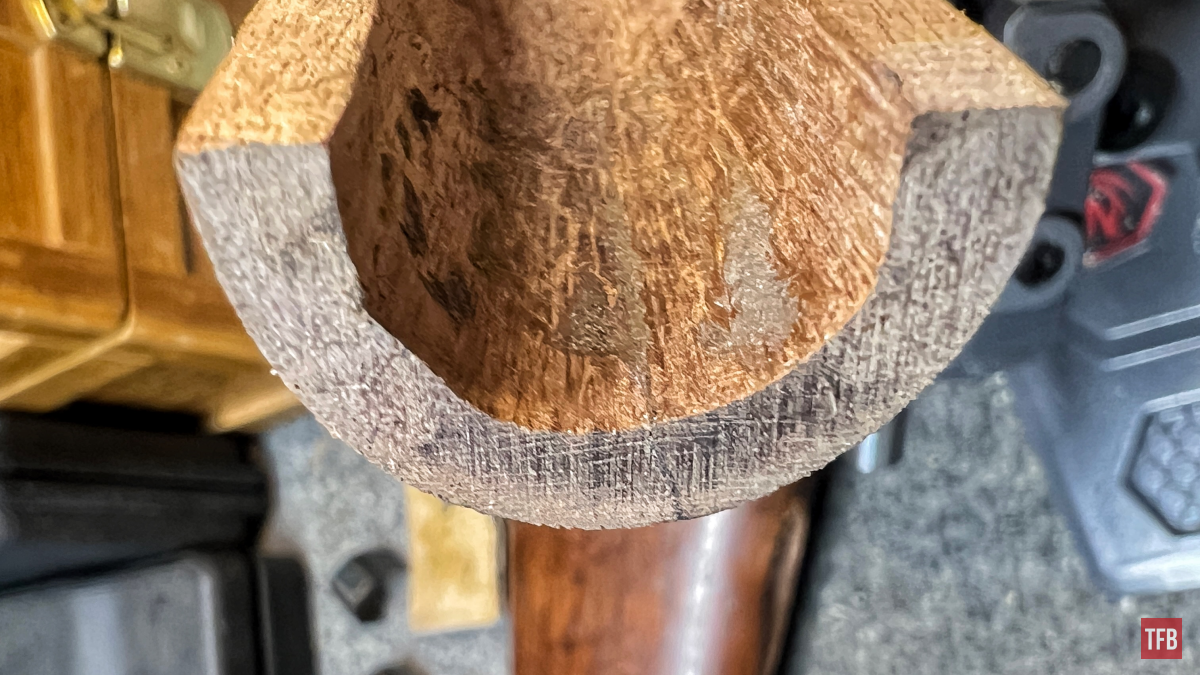
Then did some very light sanding to get the file grooves knocked out.
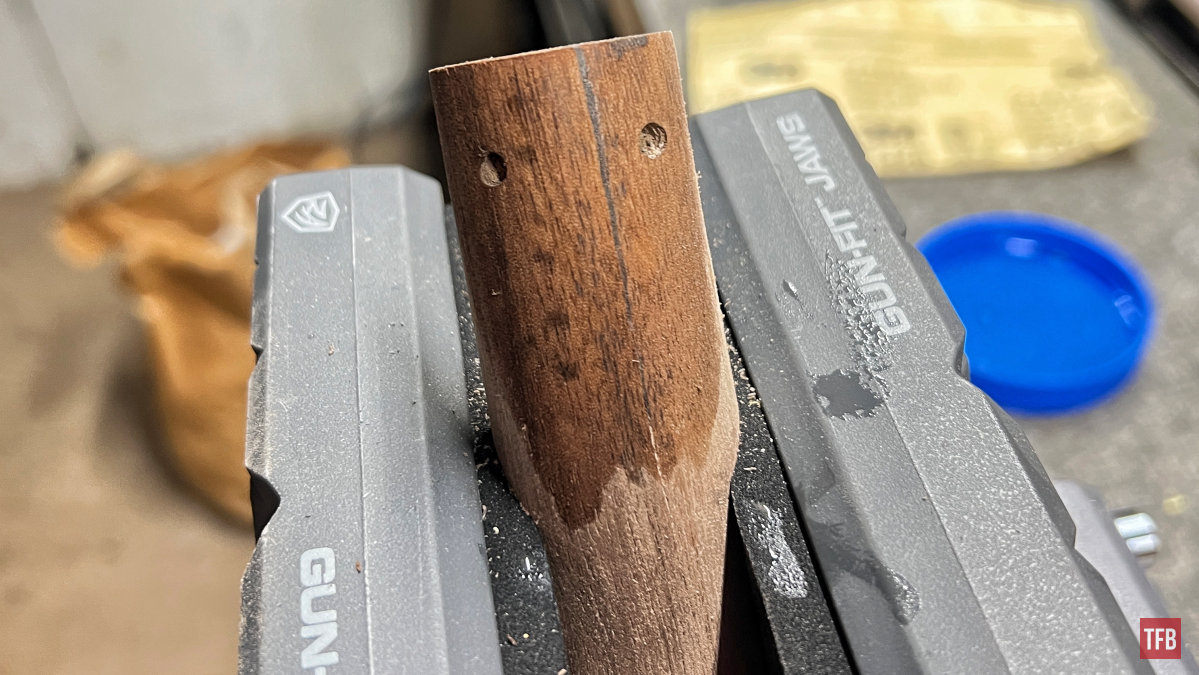
To get an idea of how things will look when it is finished, you can rub a splash of water on it. These were probably churned out in seconds and dunked in a barrel of oil during the war. I’m not too worried about beauty pageants.
I ended up using a rat tail file to do the heavy lifting on the inside of the handguard.
This is a good time to remind you all that maneuverable lighting is a must on your bench!
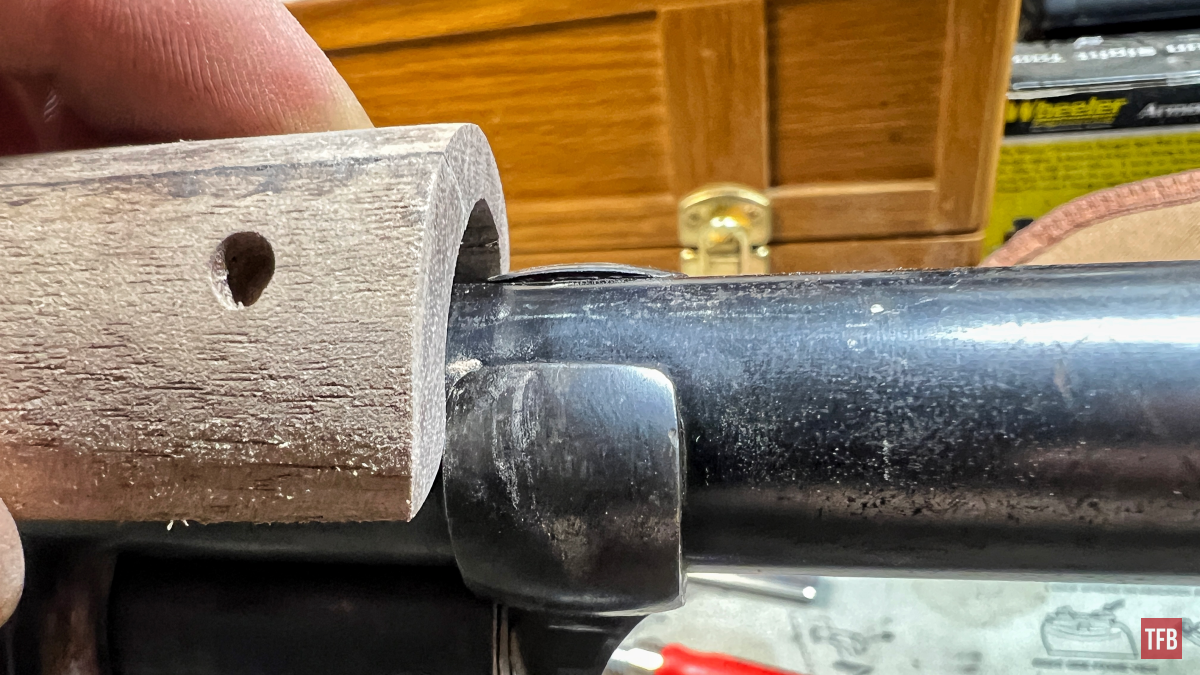
Not the cleanest but this handguard still needs to be fit to the barrel and the barrel channel will need A LOT of sanding to get there.
Conclusion: Remington Model 10 Handguard Fix
I had originally planned to go a little more in-depth as far as continuing to fit the handguard to the top of the barrel but this ended up being long-winded. Ideally, by the next time an article comes to light, I will have done some more fitting. That being said, I hope you enjoyed the history mixed with some Acraglas action. See you folks next time!
As always, thank you for reading TFB! Be safe out there, have fun while shooting, and we will see you next time for the TFB Armorer’s Bench! Also, let us know what you think in the comments below! We always appreciate your feedback.