 Your Privacy Choices

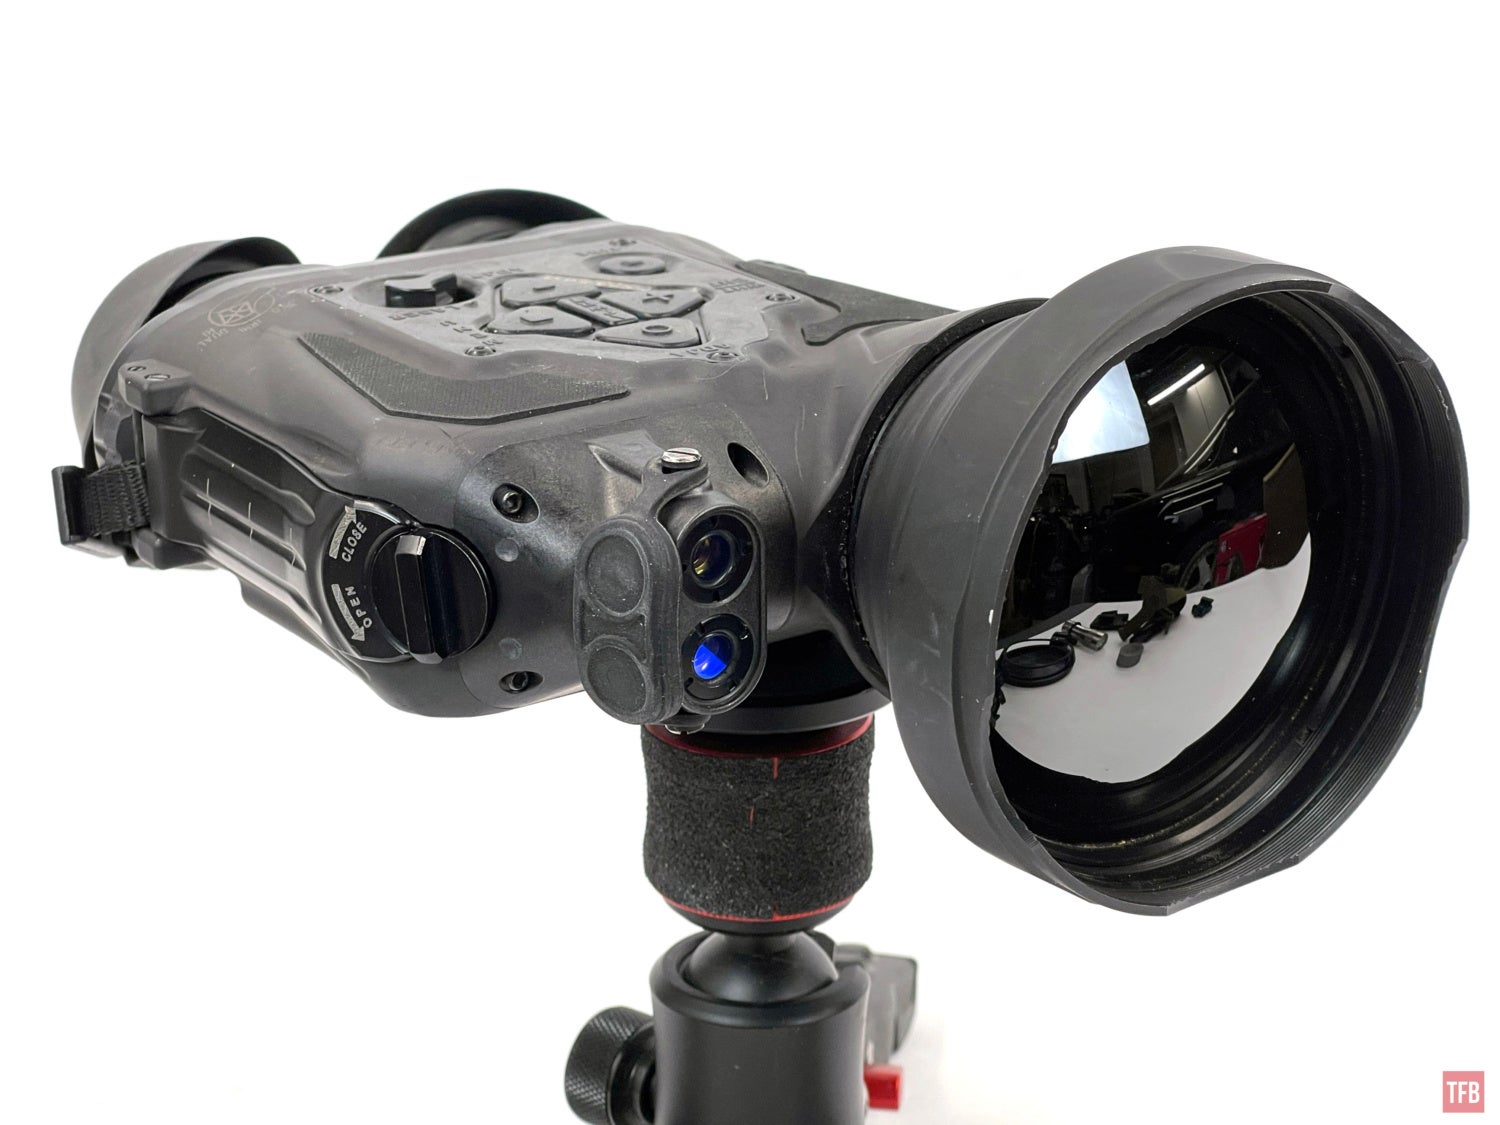
Greetings nocturnal enthusiasts and thank you for joining me here at Friday Night Lights. Last week I shared how my friends and I shot 2,200 yards in the dark. Today we take a look at another piece of Oasys Technology’s thermal lineup. This time we take a close look at the Universal Thermal Binocular aka UTB.
Oasys Technology @ TFB:
- Friday Night Lights: Trijicon/BAE OASYS UTCXII – Long Range Thermal Clip-On
- Friday Night Lights: SKEETIRX Micro Thermal Imaging Monocular
- Friday Night Lights: BAE SKEETIRL – Thermal Binos And SKEETIRCOTI
Oasys – BAE Systems – Trijicon Oasys?
Oasys Technology is the original company that made the UTB. They are also the ones who made the SKEETIR, UTC and UTM. BAE Systems acquired Oasys in 2010. BAE Systems later sold Oasys to Trijicon around 2018. So you can still get Oasys products but they are now manufactured and sold by Trijicon.
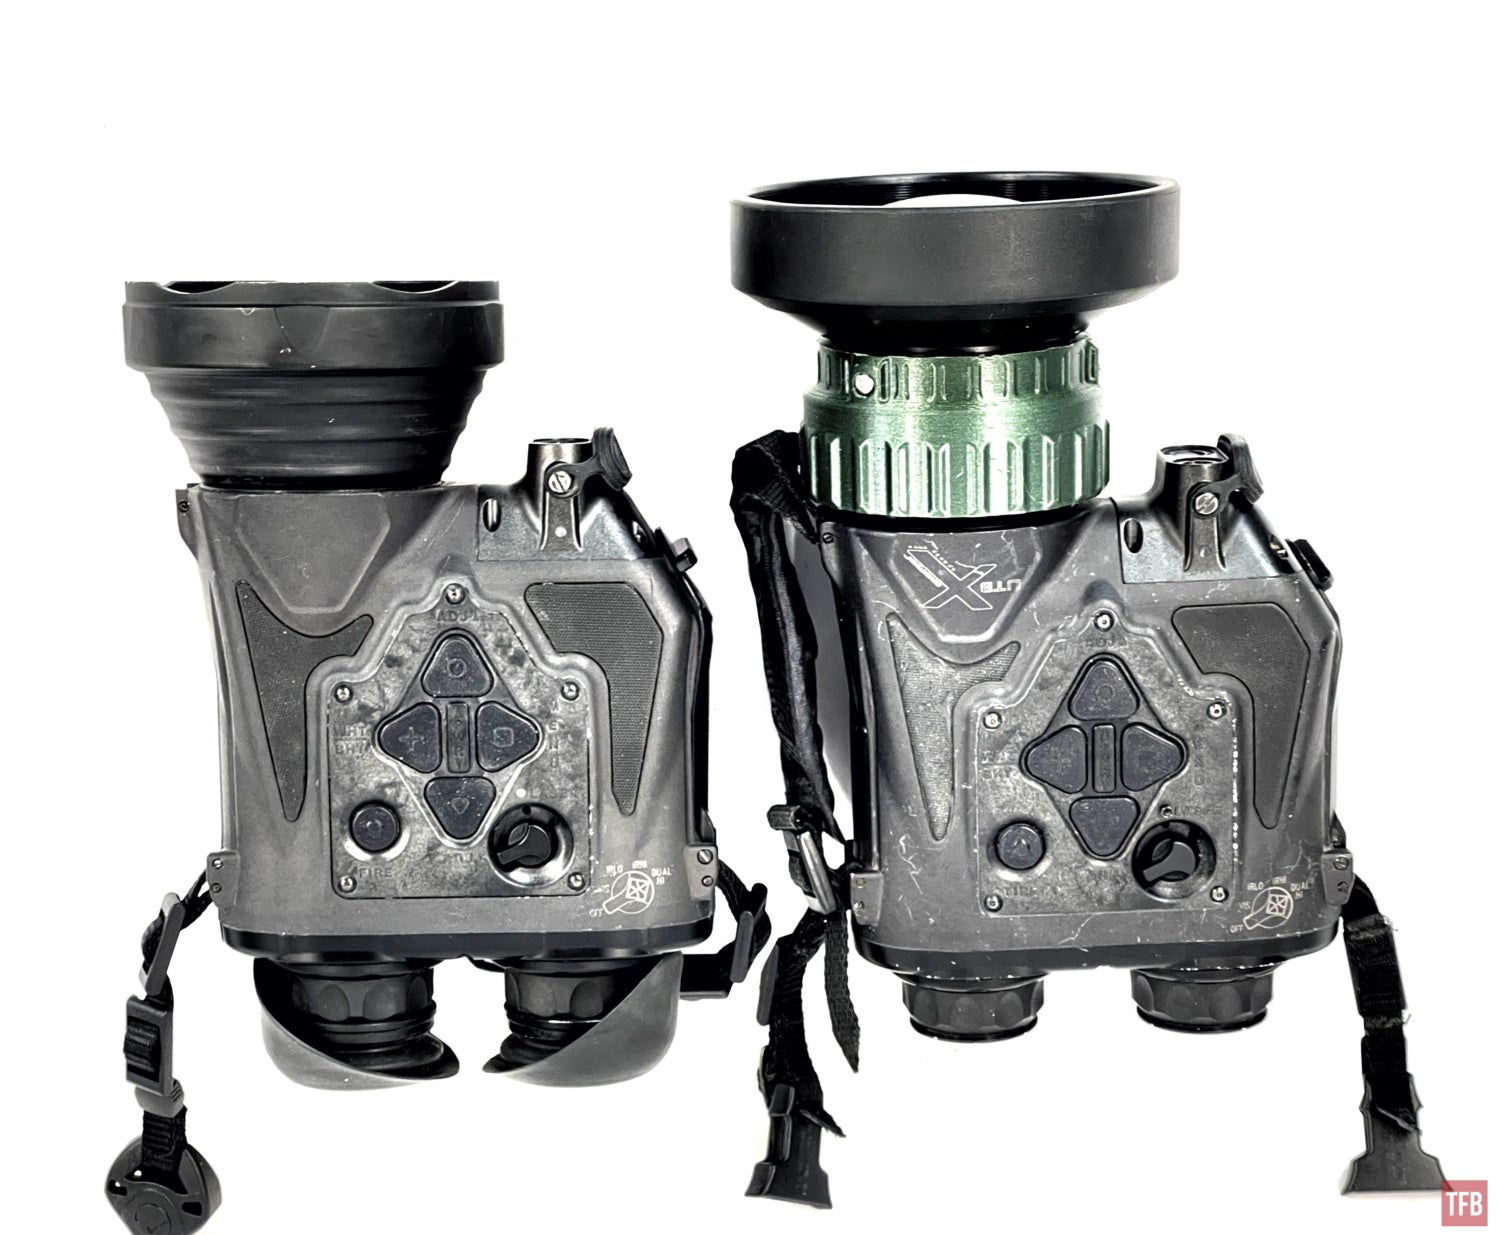
Binocular? You Keep Using That Word . . .

The UTB is not really a binocular. It only has a single objective lens and thermal sensor. While it does have two eyepieces, both eyepieces display the same image. You do not have stereopsis like you would with a traditional binocular that produces two distinct images.
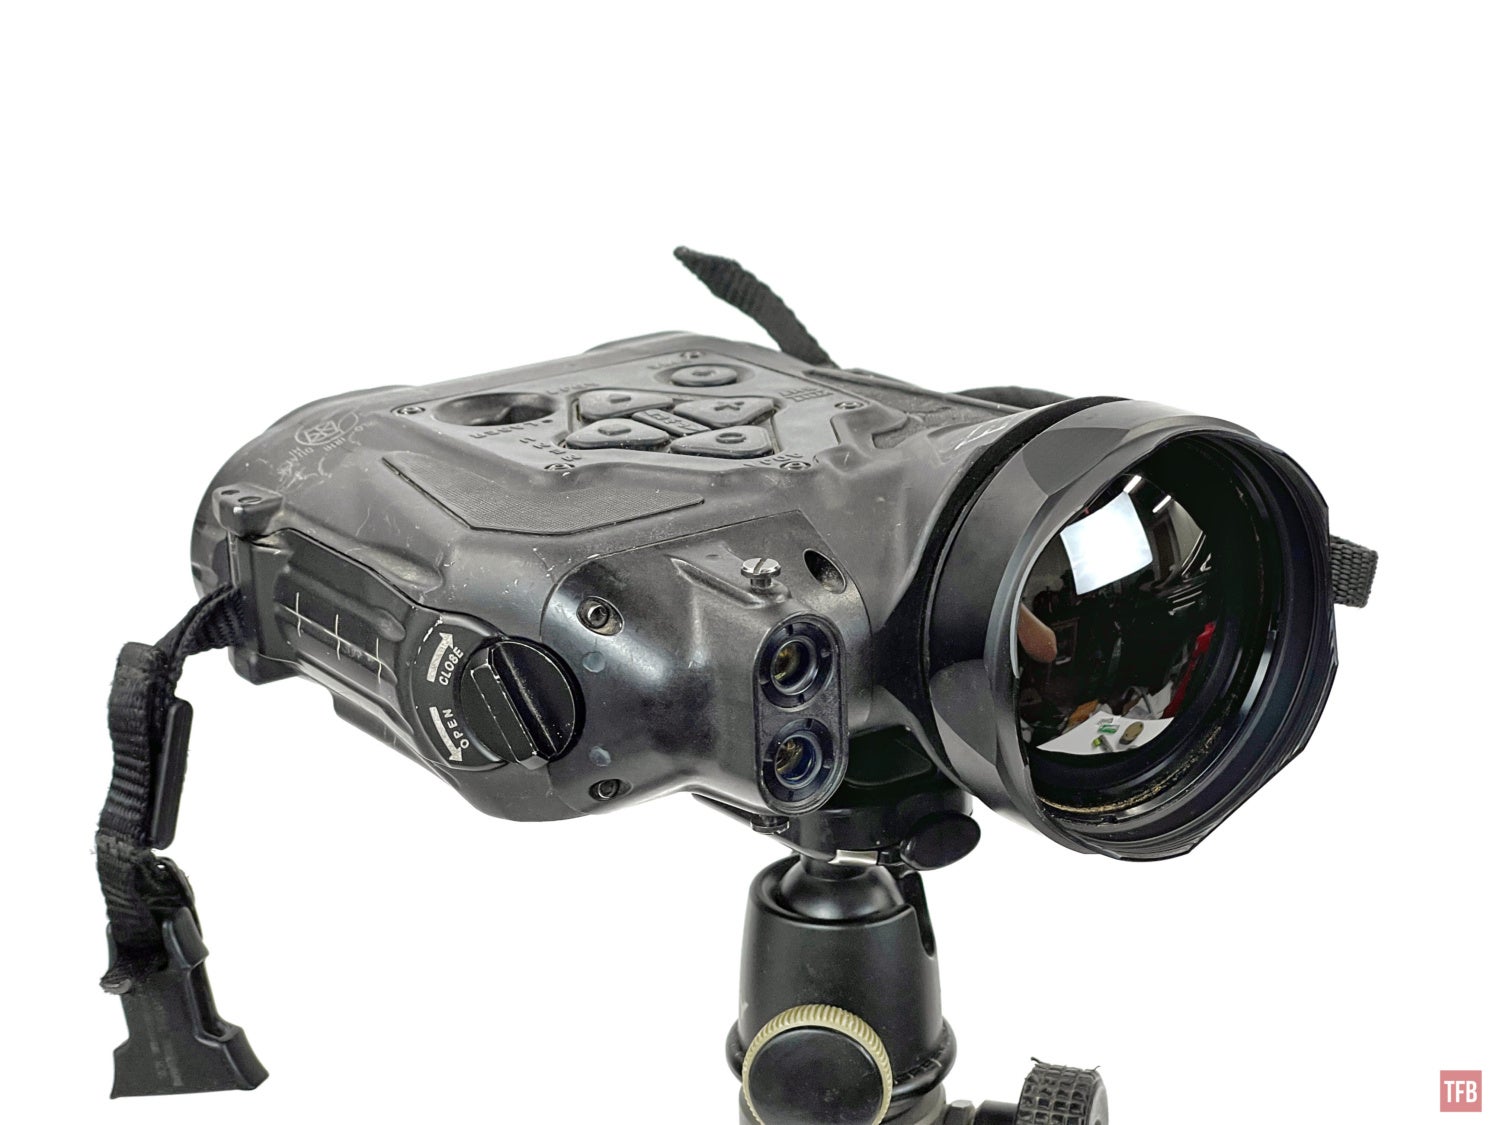
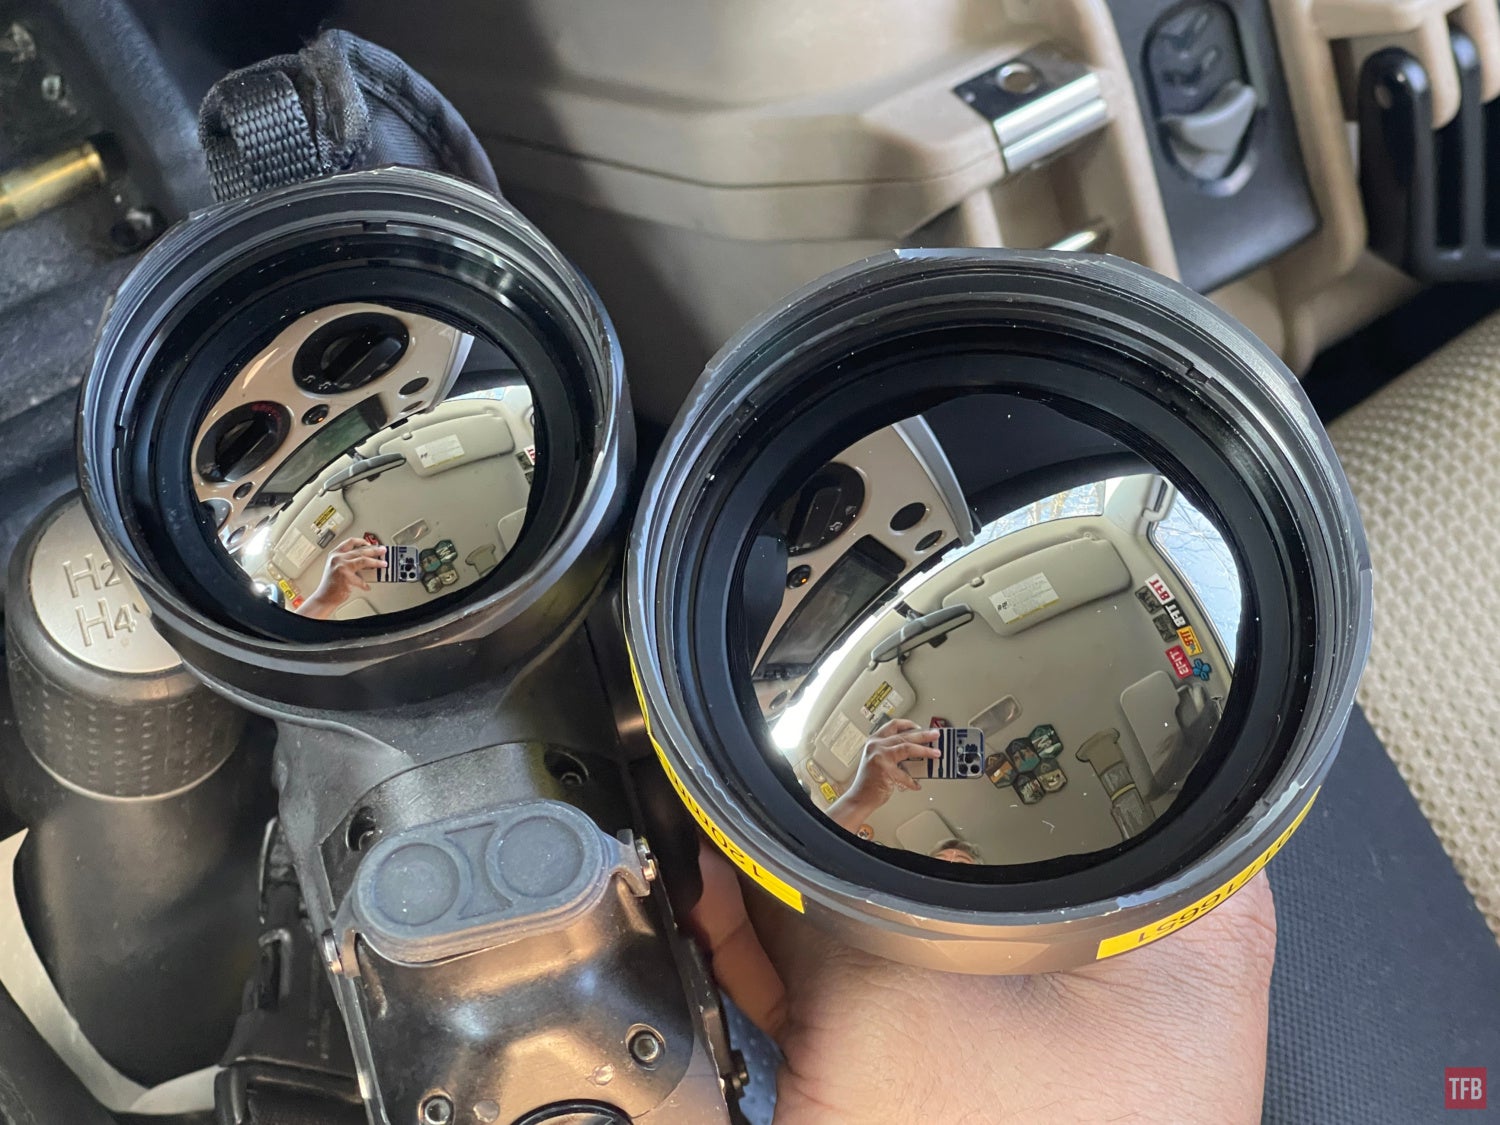
The eyepieces have independent adjustable diopters and you can push the eyepieces closer or further apart just like a PVS-7 for pupillary distance adjustment.


Powering The UTB

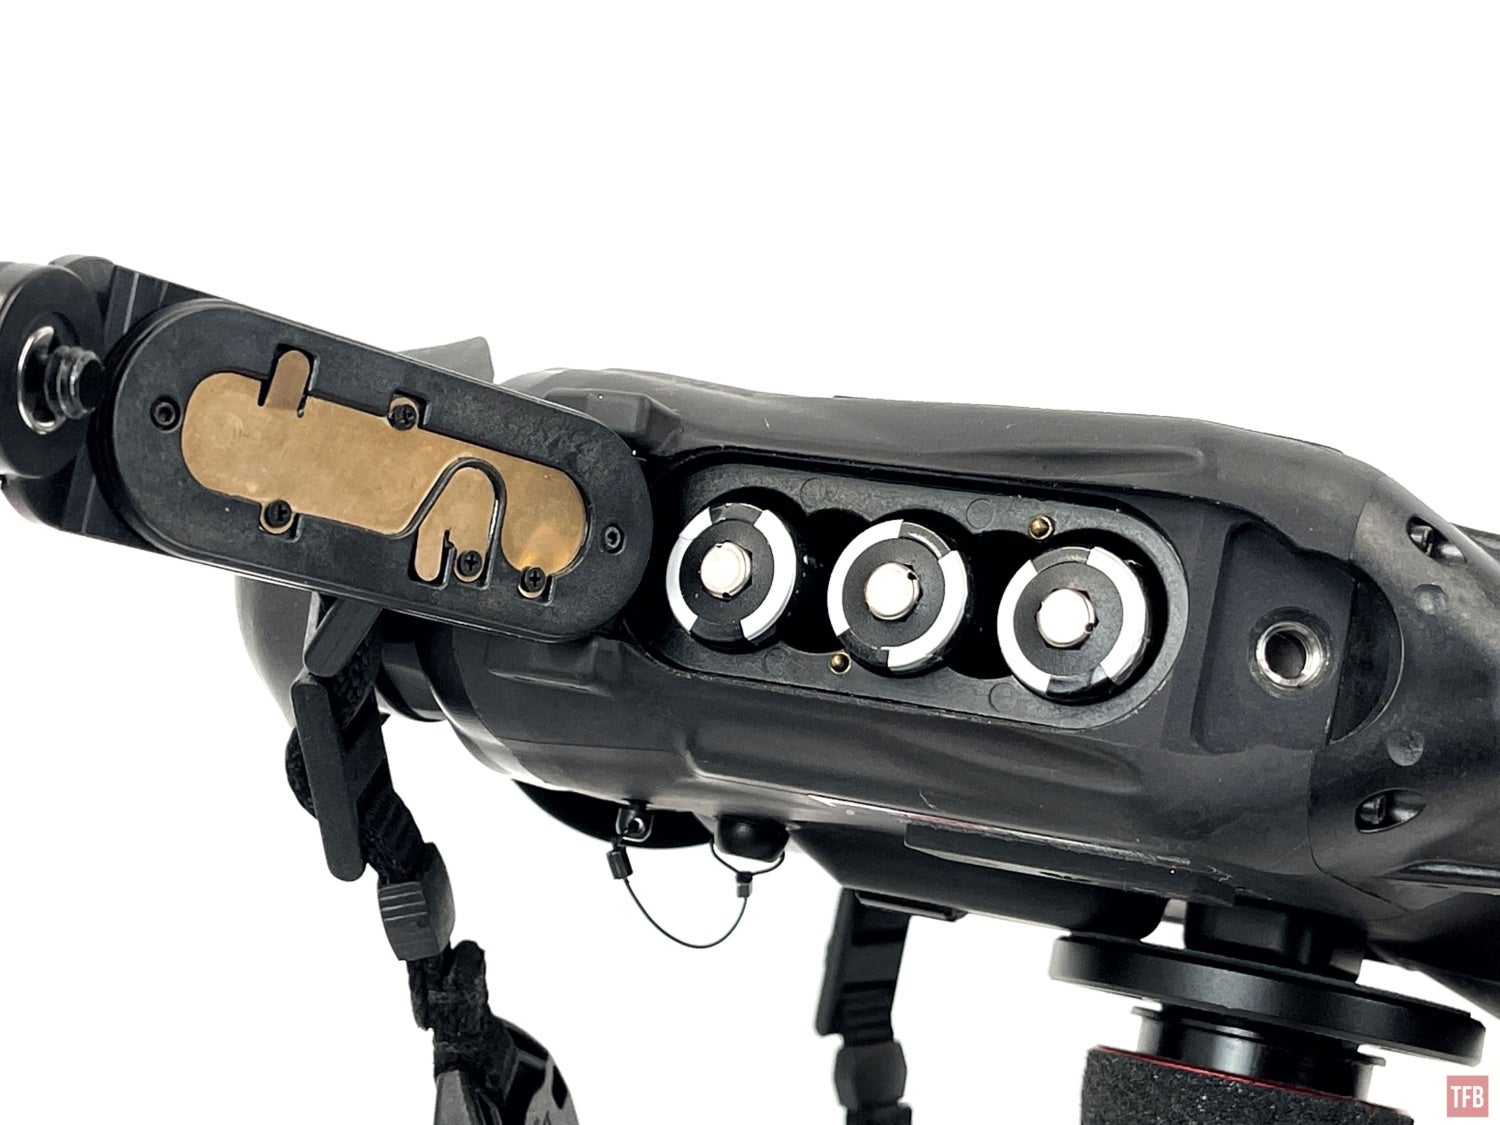
The UTB is actually pretty cool, it is dual fuel. The battery compartment can hold 3x CR123 or 2x Lithium AA. The UTB will run for 5.5 hours on 3x CR123s. Lithium L91 AA batteries will power the UTB for 2.25 hours. In a pinch you can use alkaline AA batteries for a short run time of 20 minutes. I am using Keeppower rechargeable li-ion AA that are regulated to produce 1.5v each.


Like other Oasys thermal devices, the UTB has adjustable objective focus only it is adjusted differently. There is a small thumb wheel underneath the UTB body that you roll with your thumb.
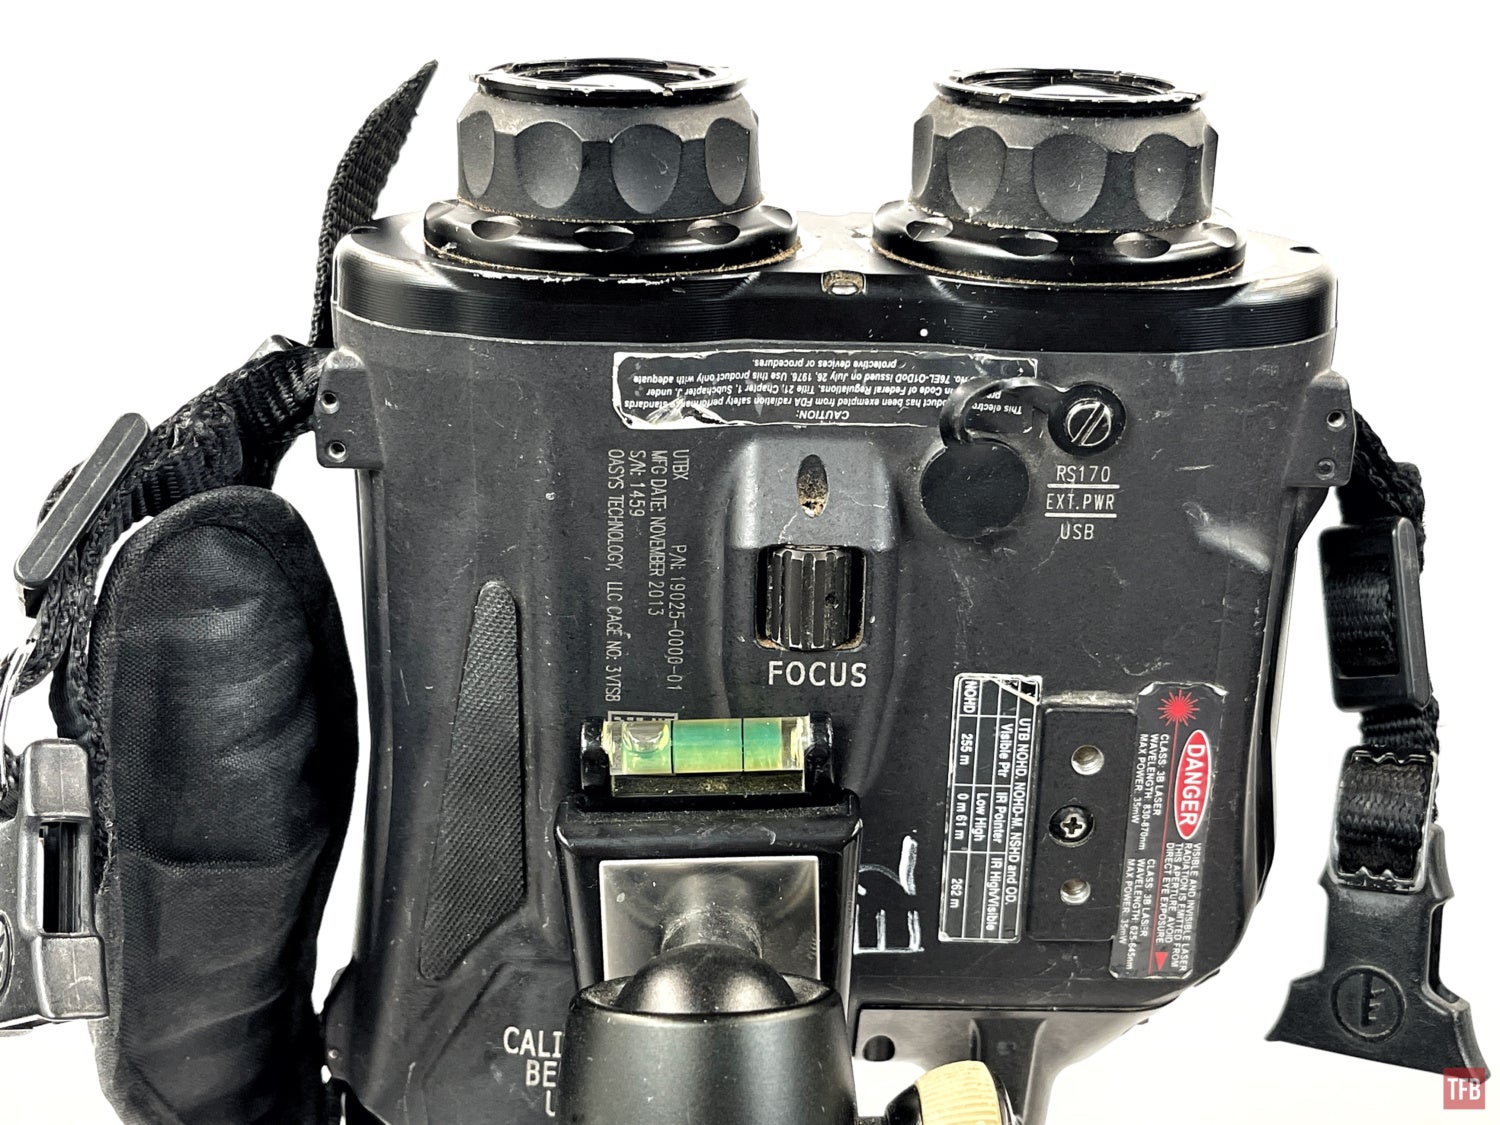
Since the focus wheel is in the center of the UTB, you can reach with either your left or right thumb.

The UTB has similar controls as the UTC and Skeetir.
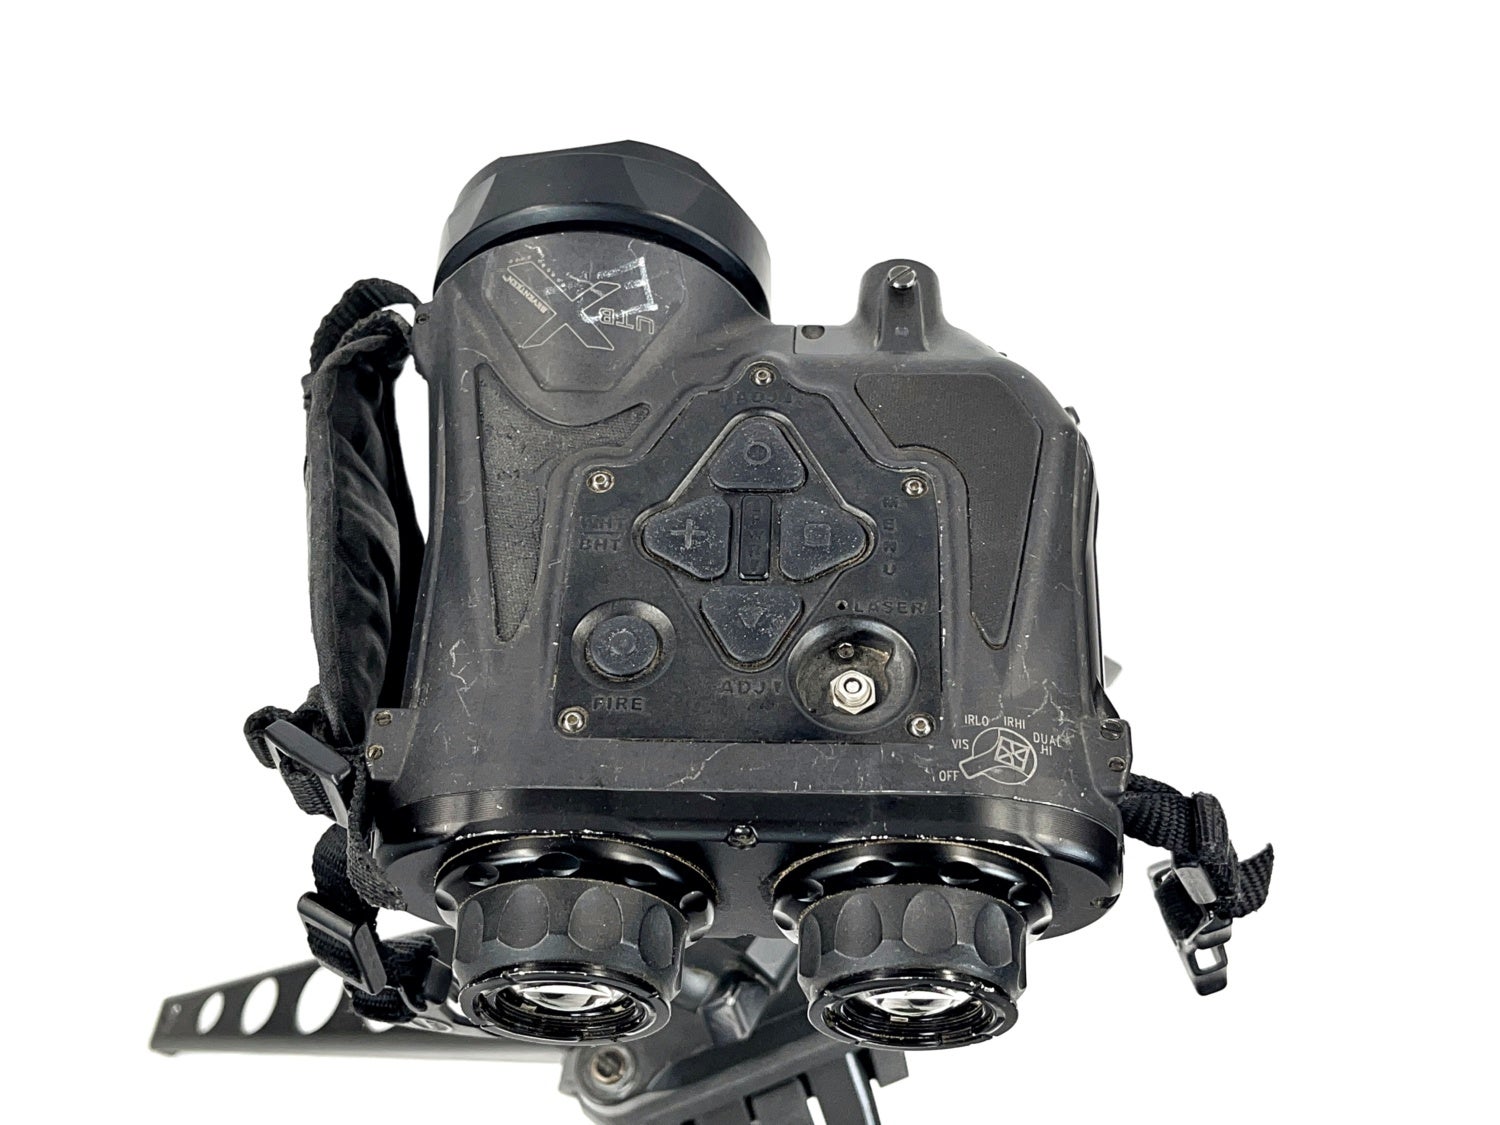
The buttons are easily accessible with the left or right hand. I often use my right index and middle finger to access the four main buttons. The laser activation button is near the bottom left of the main buttons and is easier to press with my left index finger.
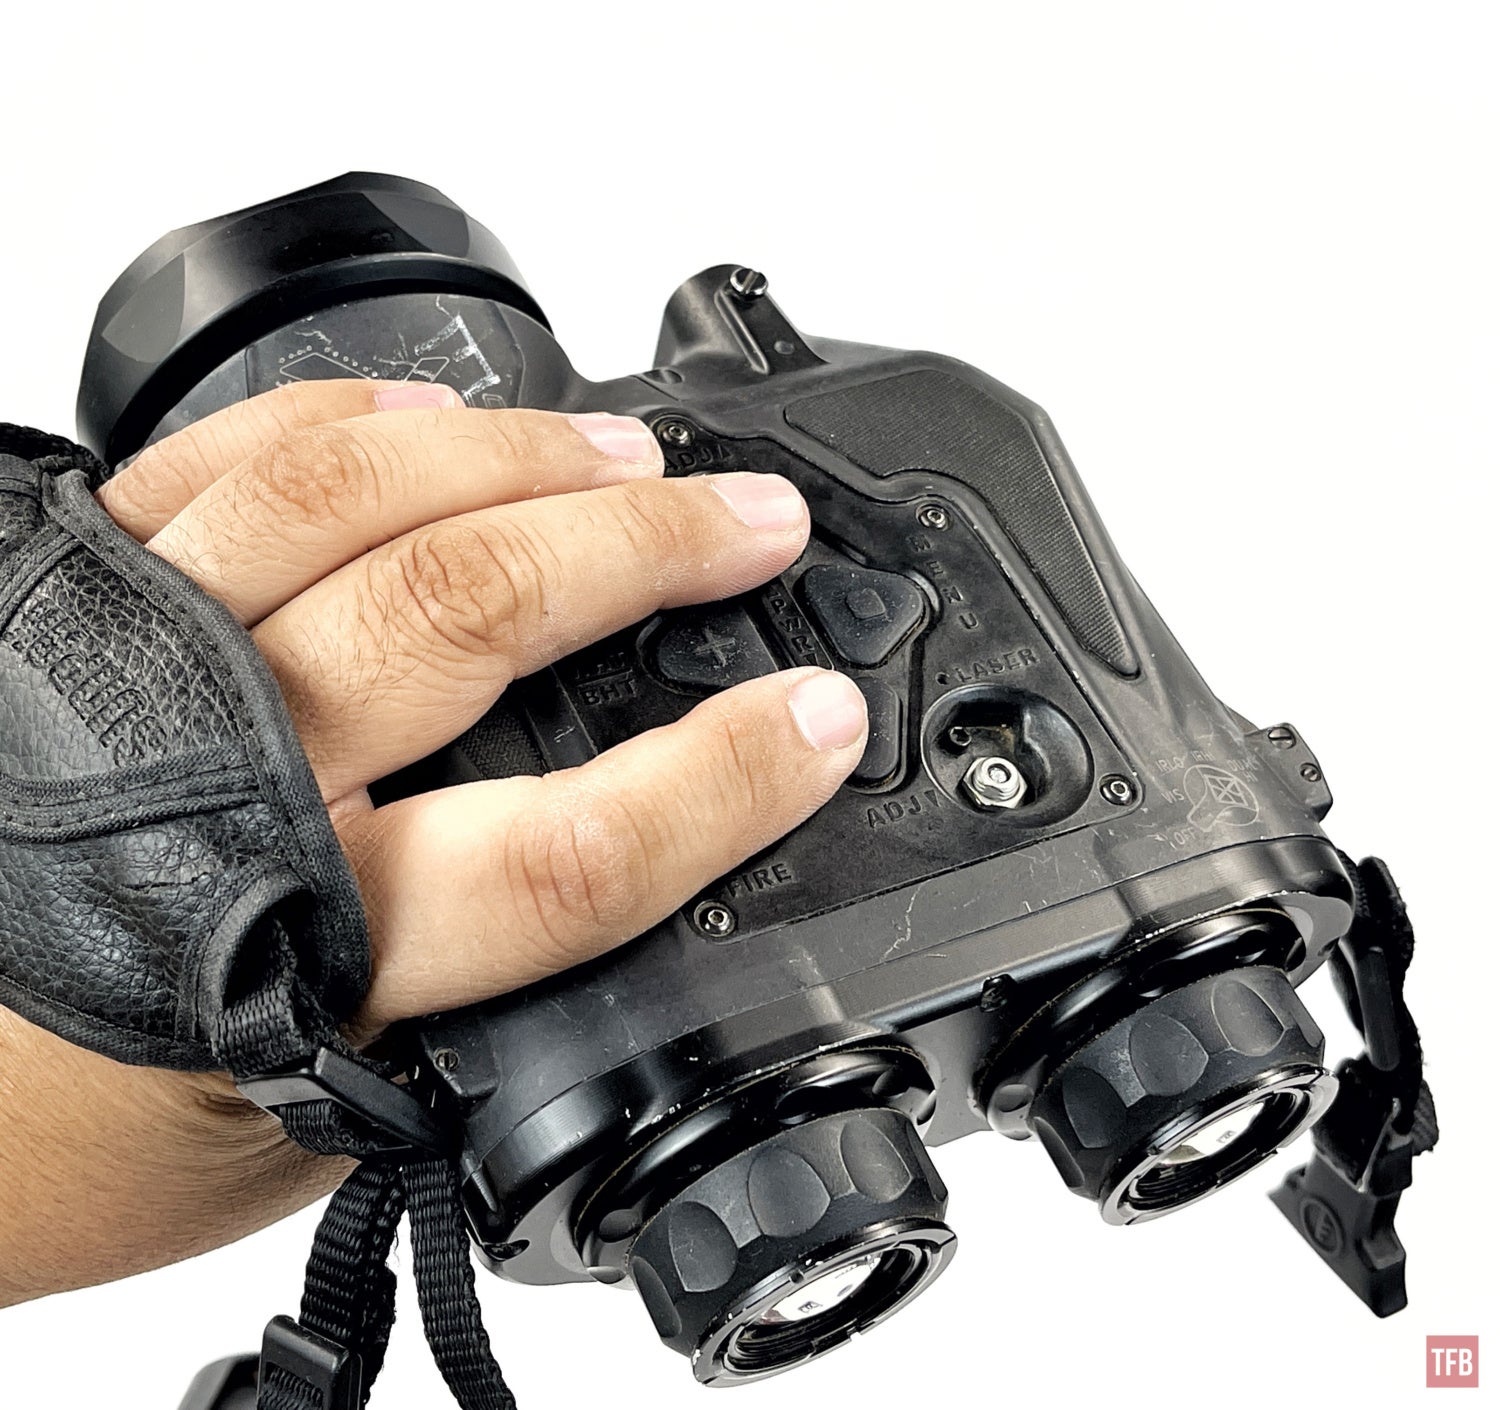
In order to turn the UTB on, you have to press the up and down arrow buttons simultaneously. Just like Oasys’ other thermal devices, a black background splash screen shows up with the devices firmware then goes into the thermal image. Everytime you turn the UTB on, you need to calibrate before use. So you press the right side button down and hold it down. In order to turn the UTB off, you have to go into the menu. Select the main menu and scroll down to the last option. Press the right button to confirm and the UTB turns off. All you have to do it press the right, up, right and the UTB turns off. No need to press down and cycle sequentially through all the options.
While the UTB is on, the up button changes gain. Press it once and you can push up or down to adjust gain. There are 10 settings and the last one is for AGC (automatic gain control). If you press down, while the UTB is at rest, you can adjust brightness. There is no automatic brightness. Both the gain and brightness control will cycle through all the settings and jump back to the first setting after you go past the highest setting. Same thing happens if you go the other way down past the lowest setting.
Left button changes polarity, white hot, black hot and edge detect. The right button accesses the menu.
Laser Beams On The UTB
The UTB has twin lasers. One is visible red and the other is infrared. There is a selector switch on top of the UTB housing. The laser fire button is on the top left side of the housing. You activate it with your support hand index finger.
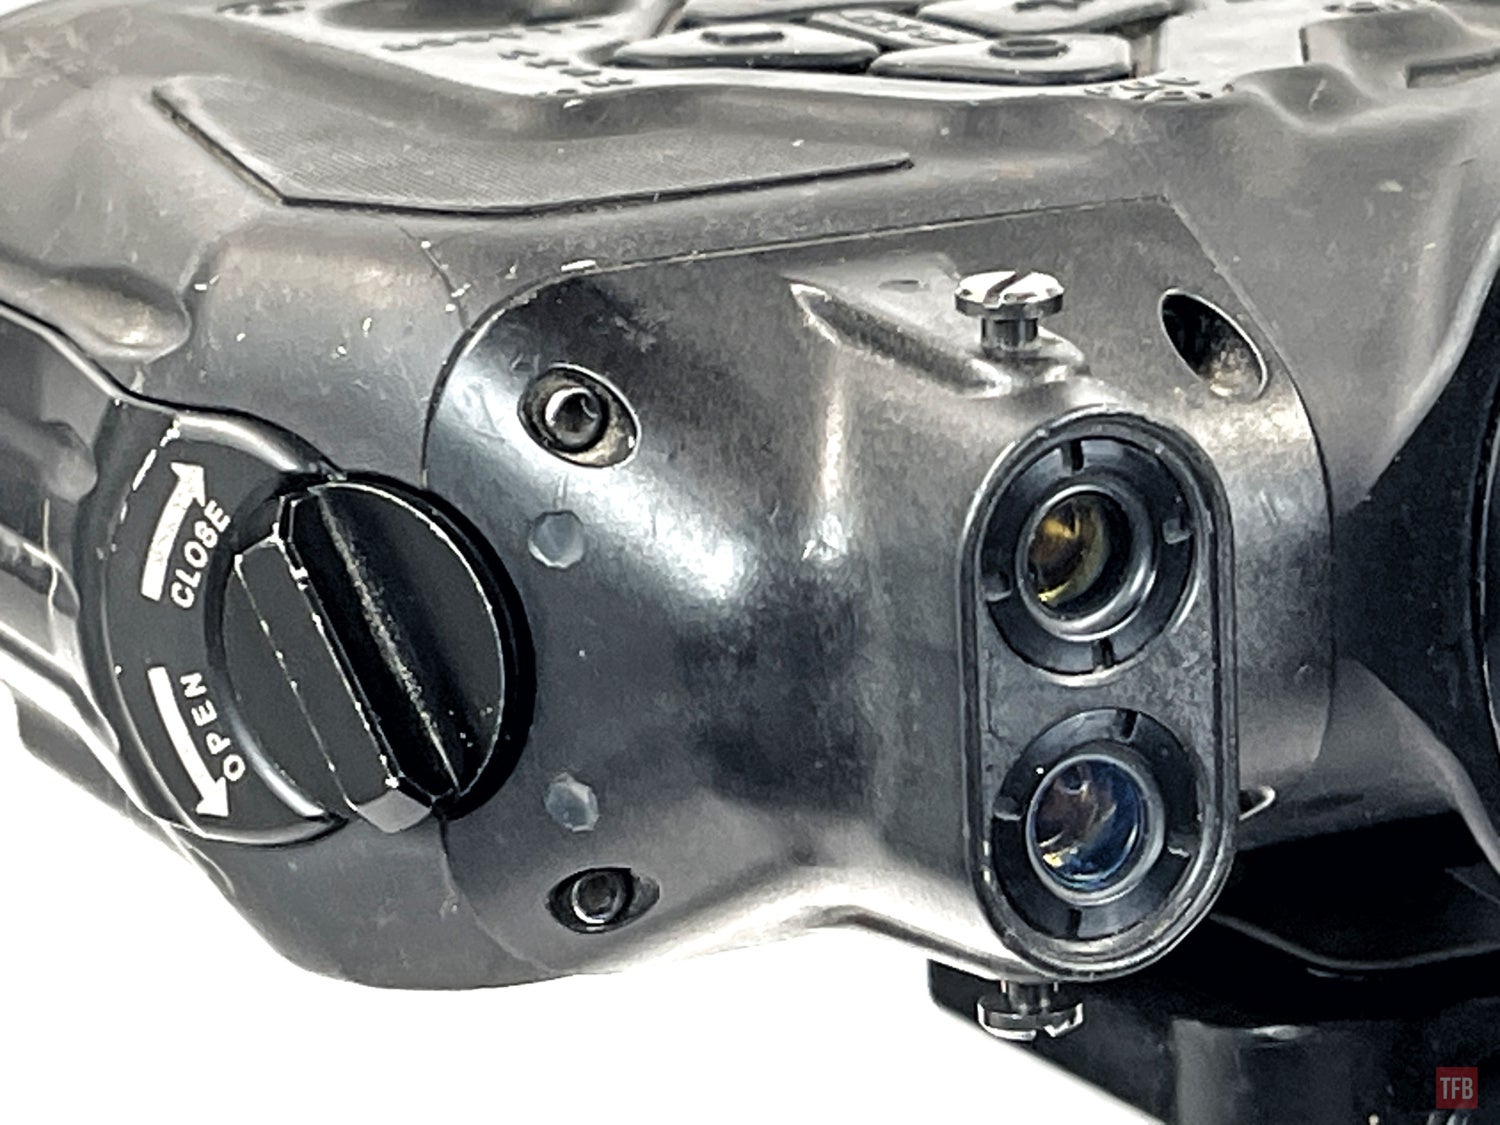
The lasers are 0.7mw on low power mode. When set to high power, they are 35mw.


Enhance, Enhance, Enhance. Go Big Or Go home.
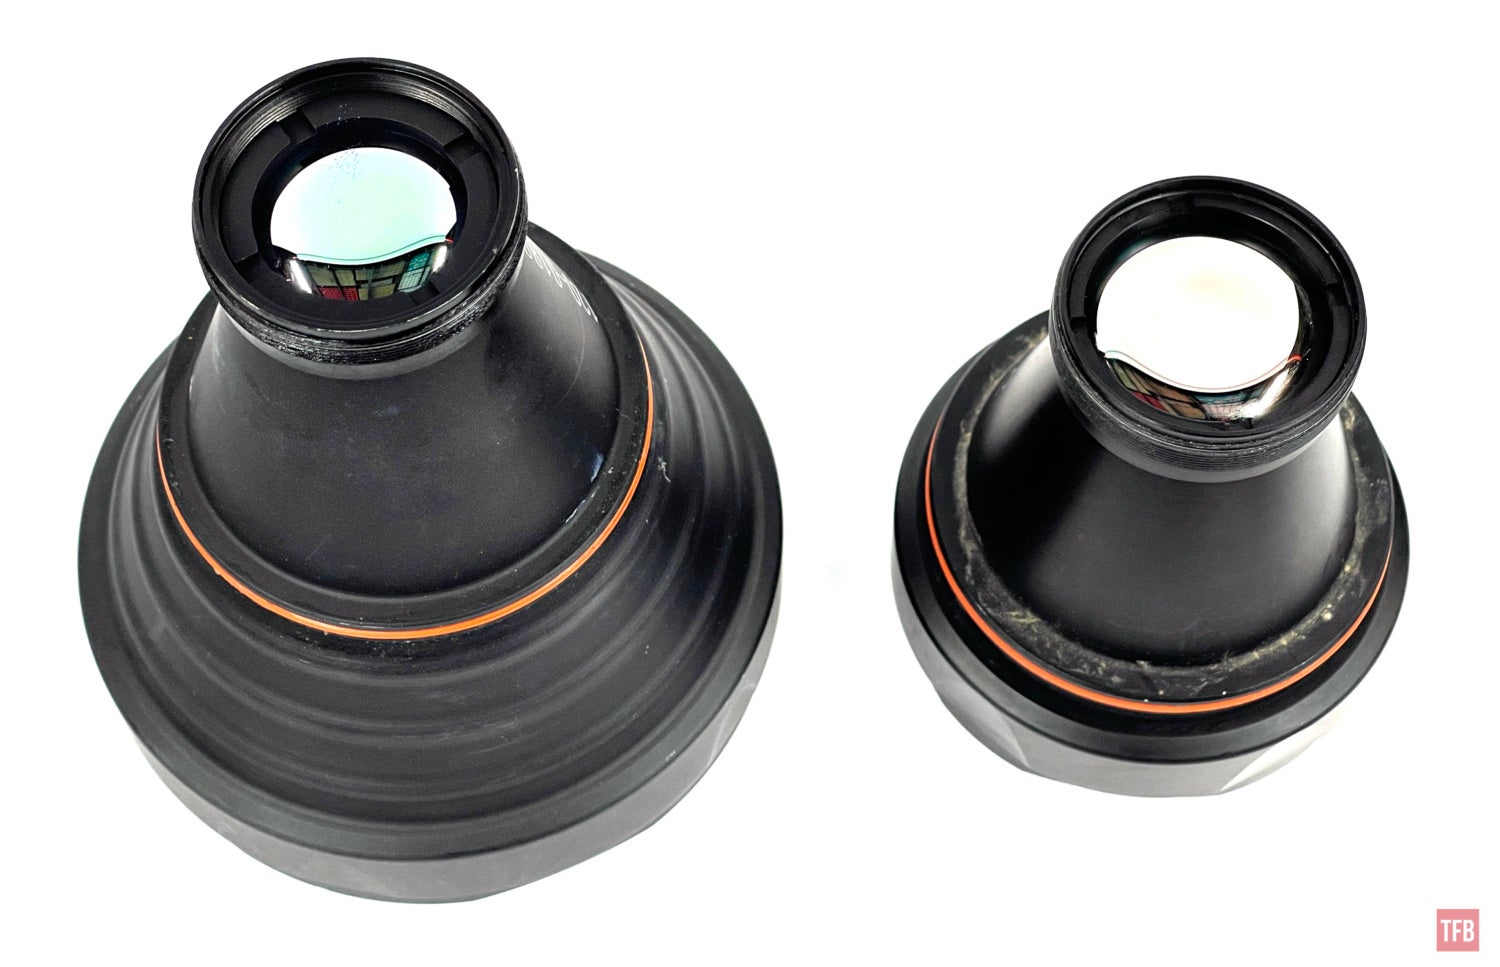
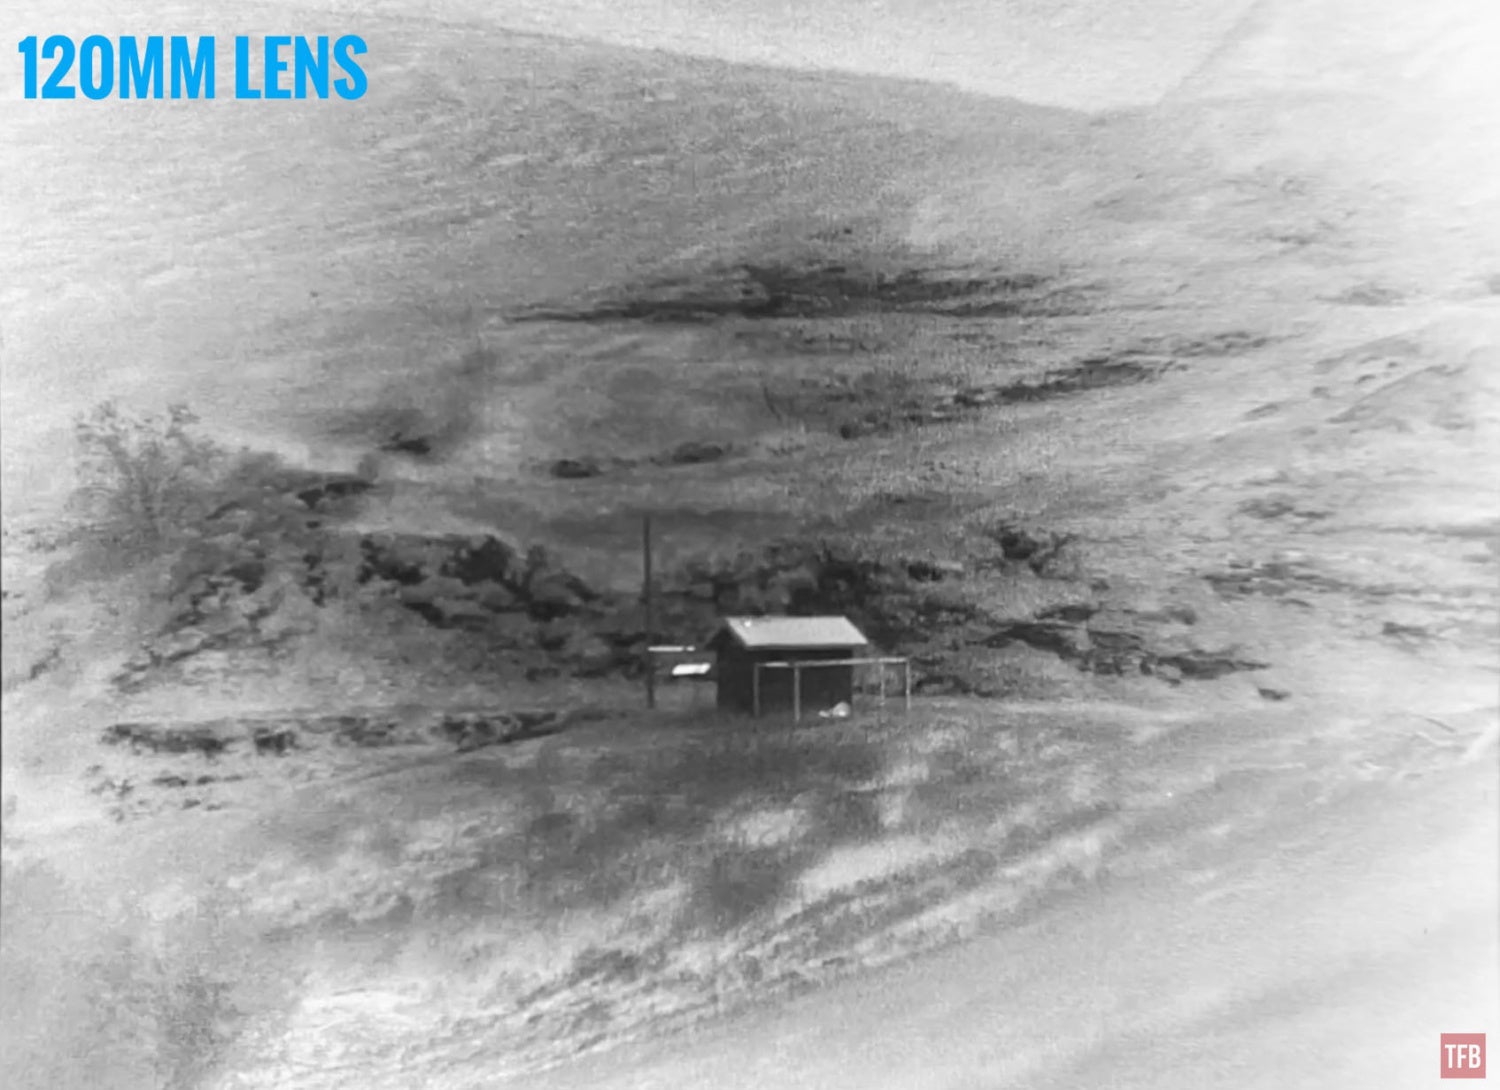
Since the adjustable objective focus is internal to the UTB housing, it has an interchangeable objective lens system. The standard lens is 75 mm. Oasys makes a 120mm germanium objective lens that allows you to see further away. You simply unscrew the objective lens and swap in the other lens. The threads are very fine and often it vibrates causing a loud high pitched squeaking noise when changing lenses. The Oasys manual mentions a wide angle lens option that is 38mm but I have not seen one online or in-person.


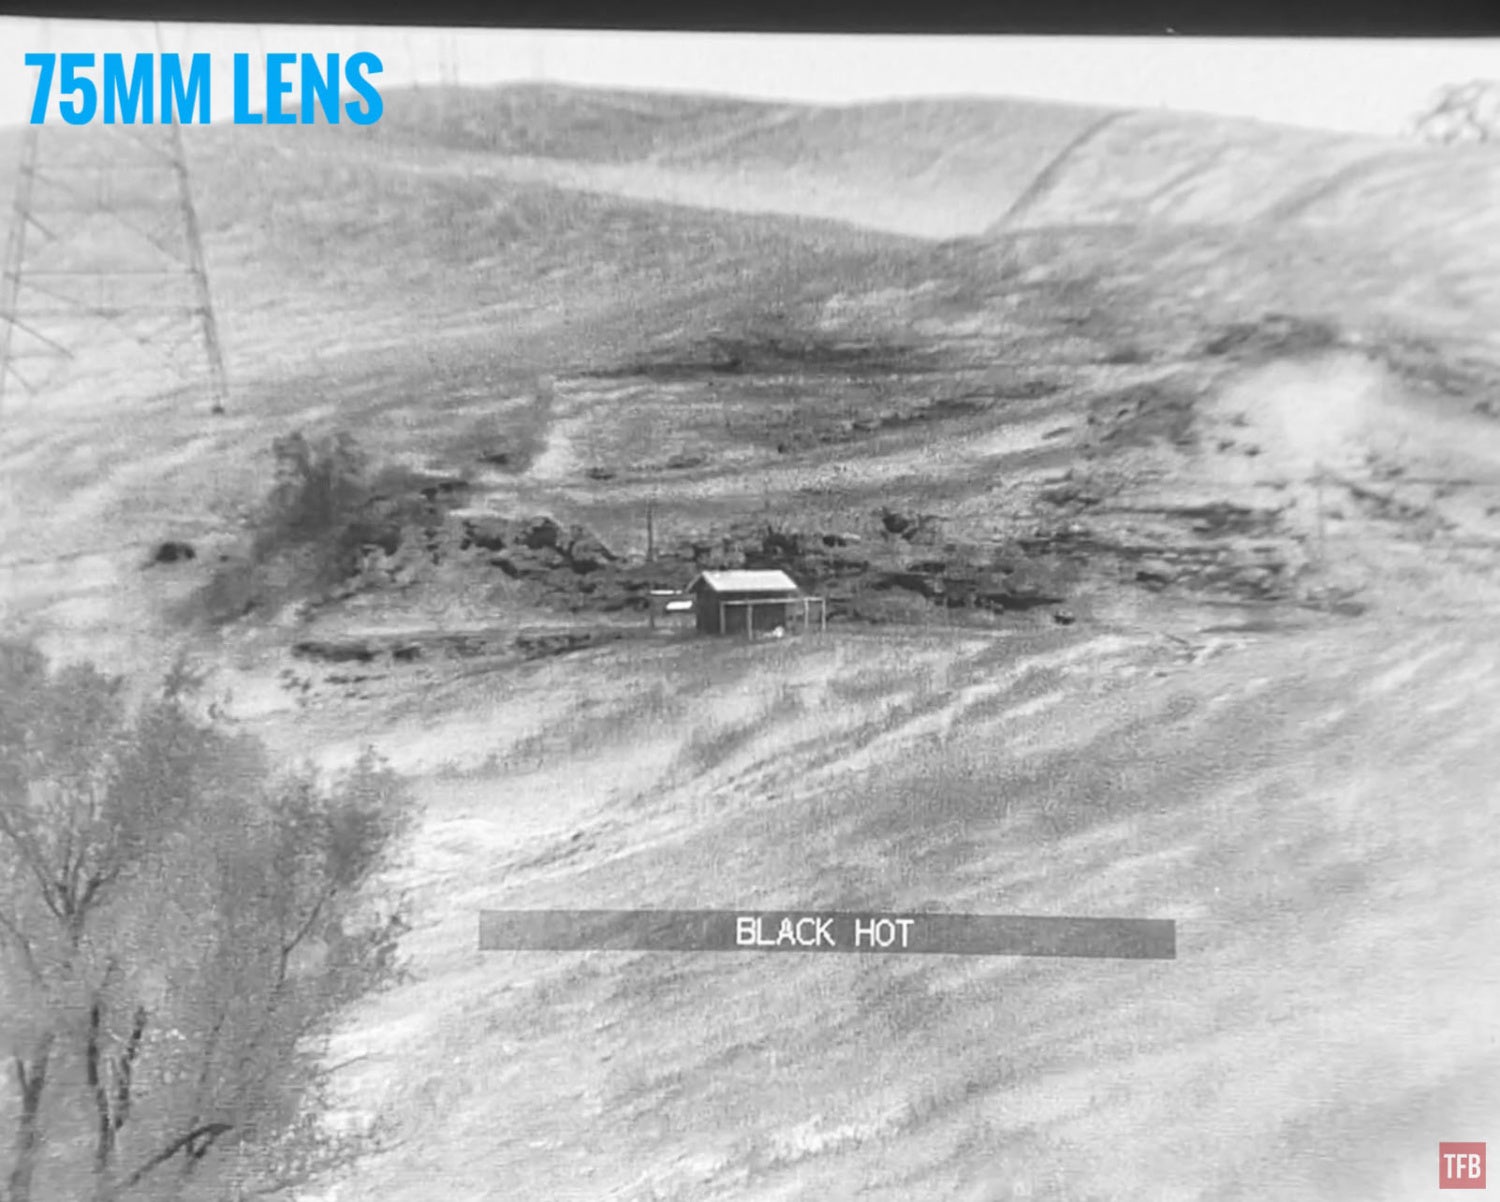
Shed is 530 yards away.
I found swapping lenses to be slow and less than ideal especially with the squeaking noise. Another minor issue when swapping the lenses is that each has its own focus length. For example, when I have the UTB setup with the 75mm lens and I swap to the 120mm lens, I have to adjust the focus all the way to the max in order to get the unit in focus. If I want to switch back to the 75mm, I have to readjust the focus. I have a solution for that, we have the technology. If you recall my UTCXII review, I boosted its performance with my FLIR 2x magnifier. I dubbed it “the trombone mute” because I used a take-away plastic bowl to hold the magnifier against the UTCXII. I tried it with the UTB as well.

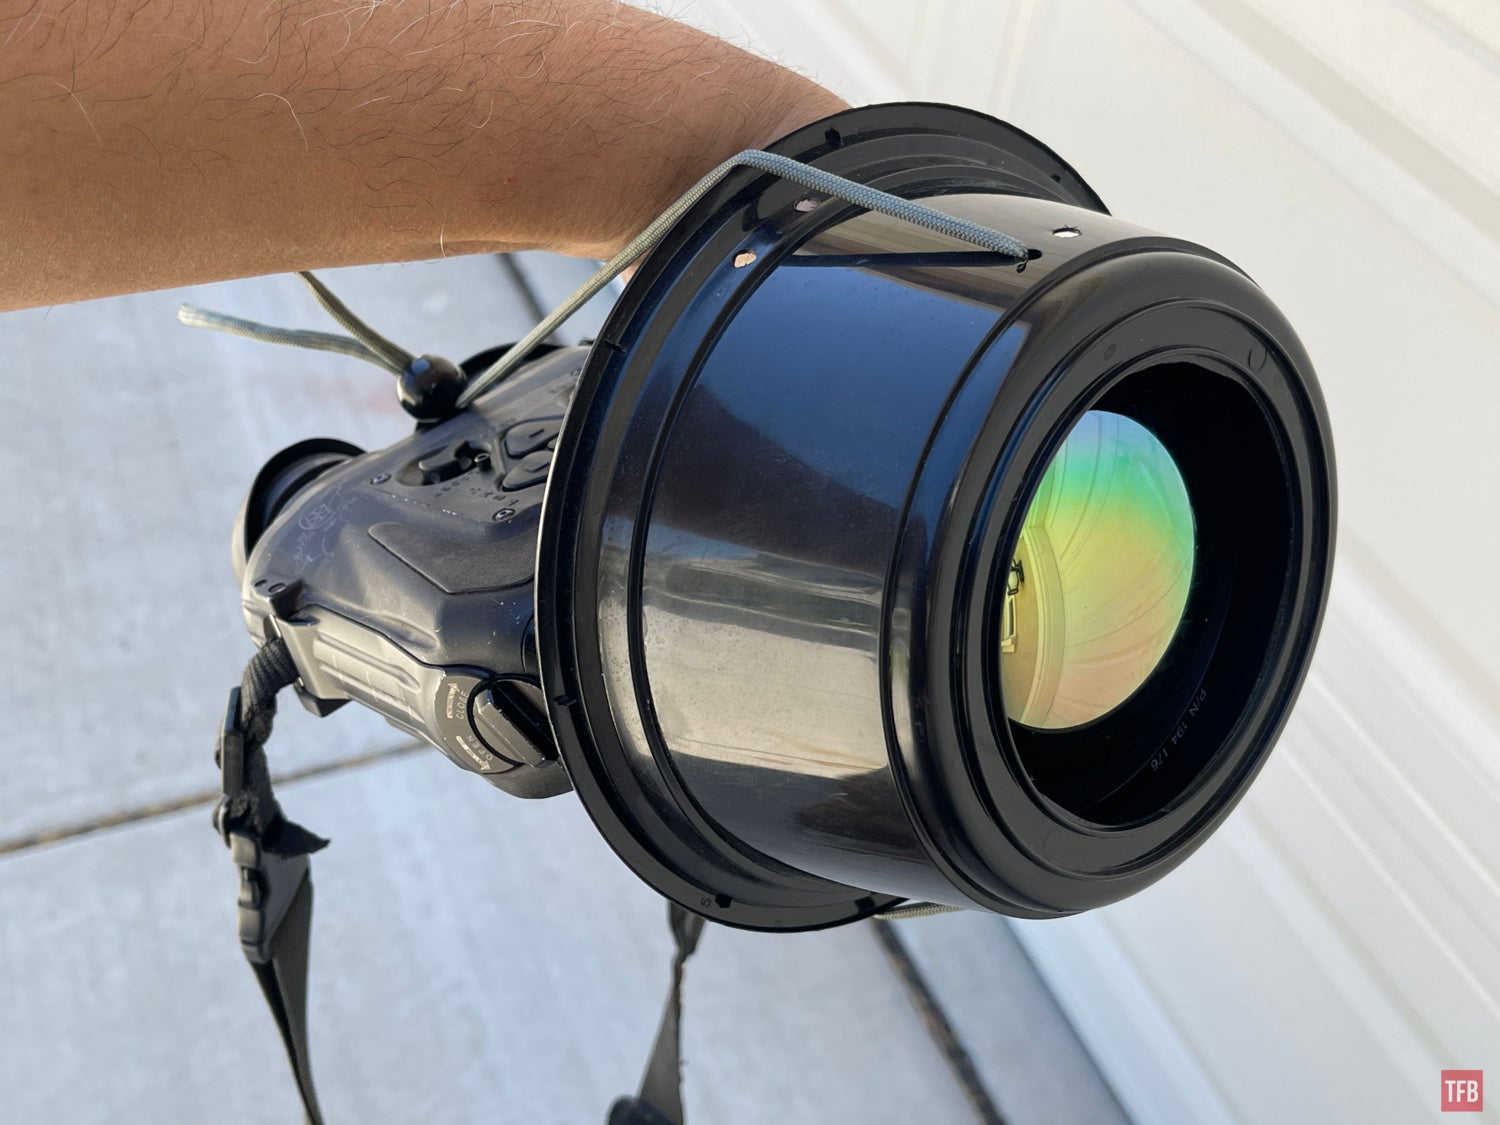
My friend Thomas A. offered his CAD skills and made this 3d printed coupler so I can attach the magnifier without a plastic bowl. With a 2x magnifier on the 75mm lens, I have technically made a 150mm lens.

Here are some example screenshots taken from the UTB video out. The shed is 530 yards away.

75mm lens.

75mm lens with 2x magnifier.
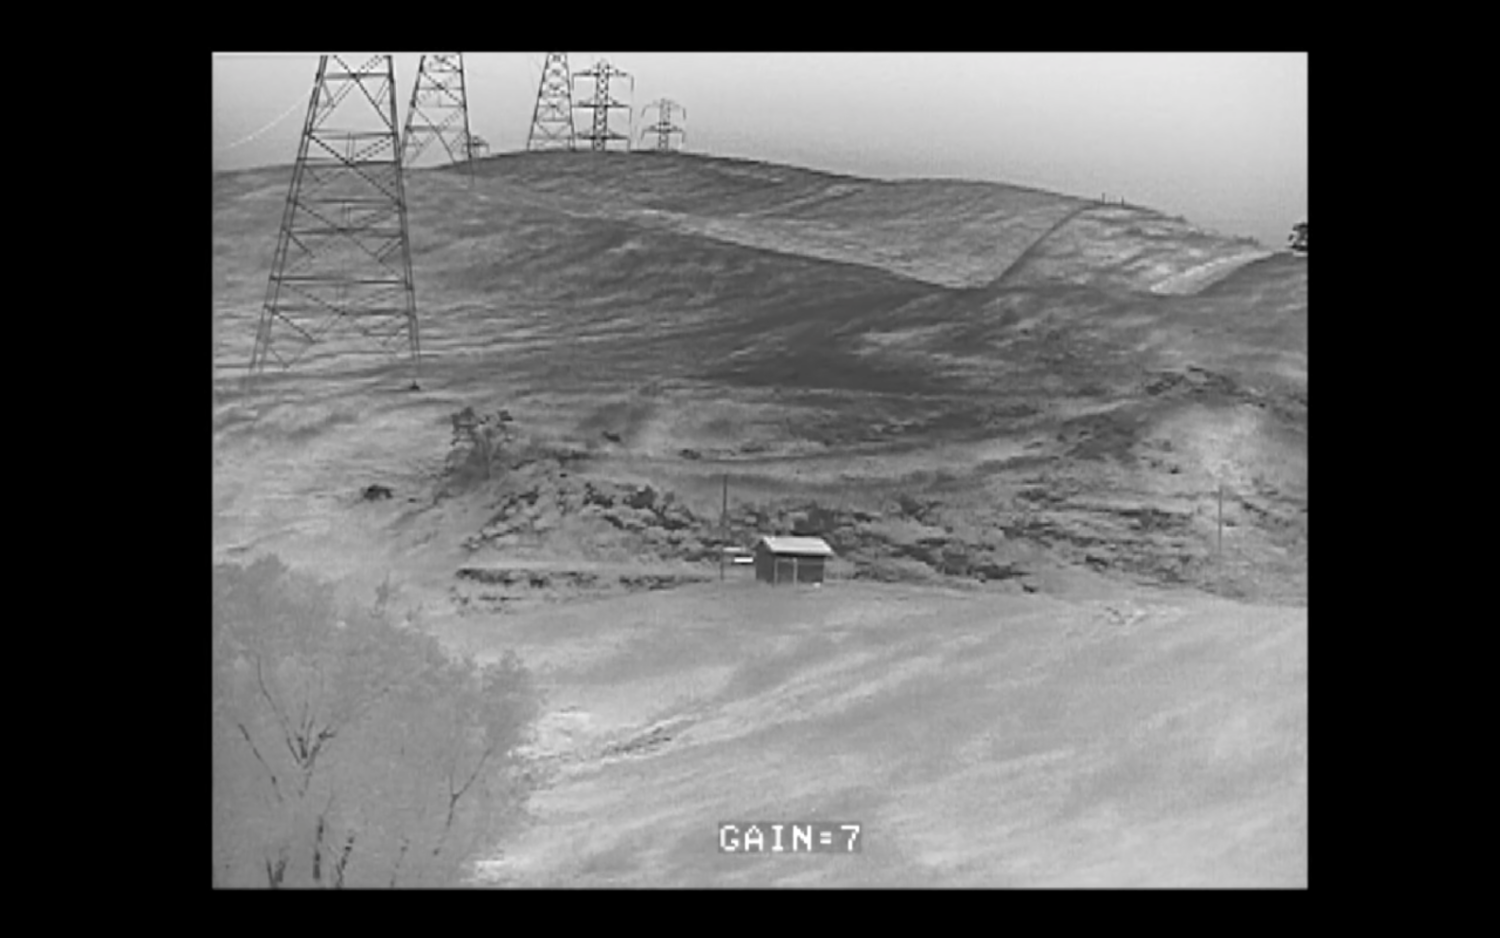
120mm lens.

75mm lens.

75mm lens with 2x magnifier.

120mm lens.
The image produced by the 2x magnifier is a bit muted compared to the 75mm and 120mm lens. But the speed and ease of use outweighs the slight reduction in image quality. I can still clearly see that shed 530 yards away. If that was a coyote, I do not think the 120mm lens would resolve the image that much better than my DIY magnifier setup. Also, I can play with the adjustable gain to help improve the magnified image.

Thomas testing the magnifier coupler he designed and printed for me.
My original method of capturing images through the UTBx. My second UTB has functioning video out so now I record direct rather than trying to film or photograph through the eyepiece like the photo below.

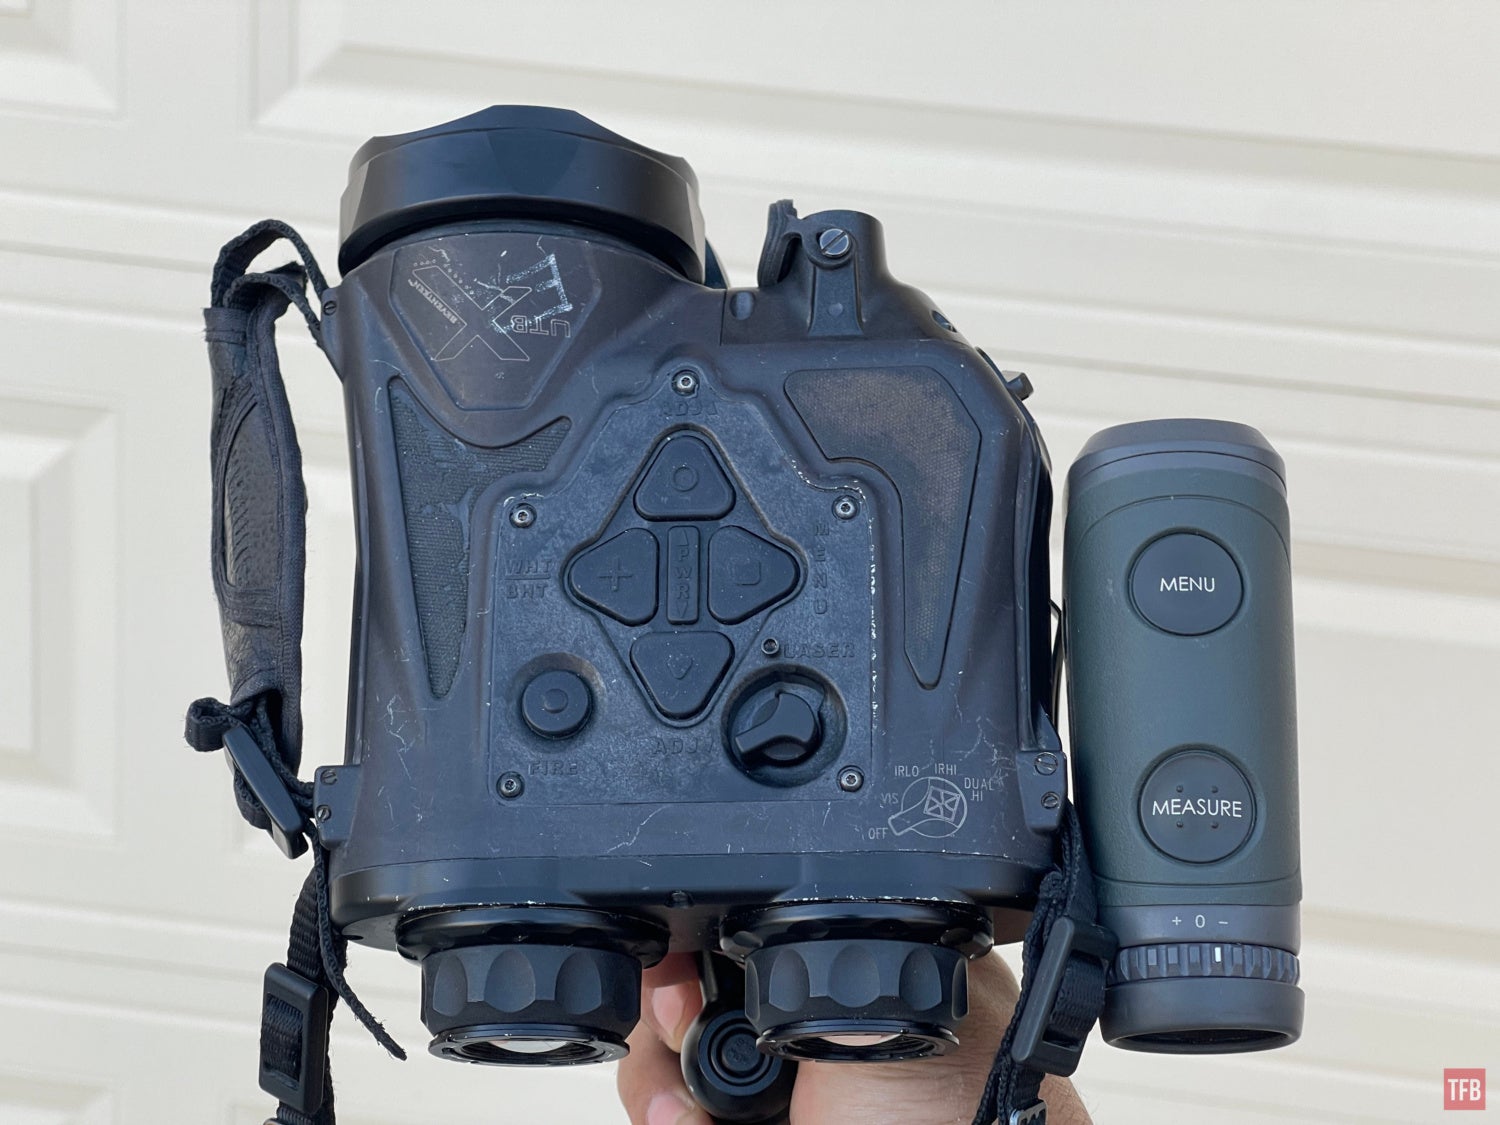
UTB LRF

Photo by Trijicon Oasys
Trijicon Oasys has a version of their UTB that has a built-in laser rangefinder. Only problem is that these cost north of $30k. So I used a photography magic arm to mount my Vortex Razor 4000 LRF to the side of my UTB.


I turn on the VIS laser on the UTB and zero the LRF to the laser at infinity. Then I look through the UTB with my left eye and look through the LRF with my right eye. It is not perfect but it works.

Final Thoughts On The BAE UTB
Just like the BAE Skeetir L and UTCXII, I love the images the BAE systems core produces. It might not be the cleanest image like the InfiRay RS75 but the contrast and programming produces some of the best images I have seen in a thermal device. Everyone who has looked through my UTBs all agree the thermal image is fantastic. The large 120mm lens helps boost its capability but I prefer the versatility of swapping to the 75mm without making a lot of noise or having to grossly adjust focus. Thanks to my friend Thomas I can use my 2x magnifier and get a quick bump in optical zoom. Now comes the downside. The BAE UTB and UTBx are expensive. Trijicon Oasys still makes them and they cost around $24k new. That is rather pricey and not really affordable for most. However if you want some of the best thermal around it is hard to beat a BAE device like the UTB. FYI the UTB and UTBx are the same performance wise.