 Your Privacy Choices

I acquired a Daewoo DR200 a couple years ago and like any other gun, the Daewoo rifles have their own cult following. Thanks to a Facebook group for Daewoo owners, I found Richard Pierce and his DR200 upgrades.
Daewoo @ TFB:
- MITS Precision Daewoo M-LOK Handguards For South Korea
- South Korean SOF Daewoos And NODs
- TFB Review: Strike Industries Dual Folding Adapter (Stock/Brace)
Daewoo DR200 Upgrades
Last fall Richard came out with his first product in a line of DR200 upgrades – charging handles for the DR200. See the photo below. On the left is the new charging handle. It is a mix of milled steel and MJF 3D printing. You can see how the angle is very different from the original Korean DR200 charging handle. These also work for the K2 rifle.
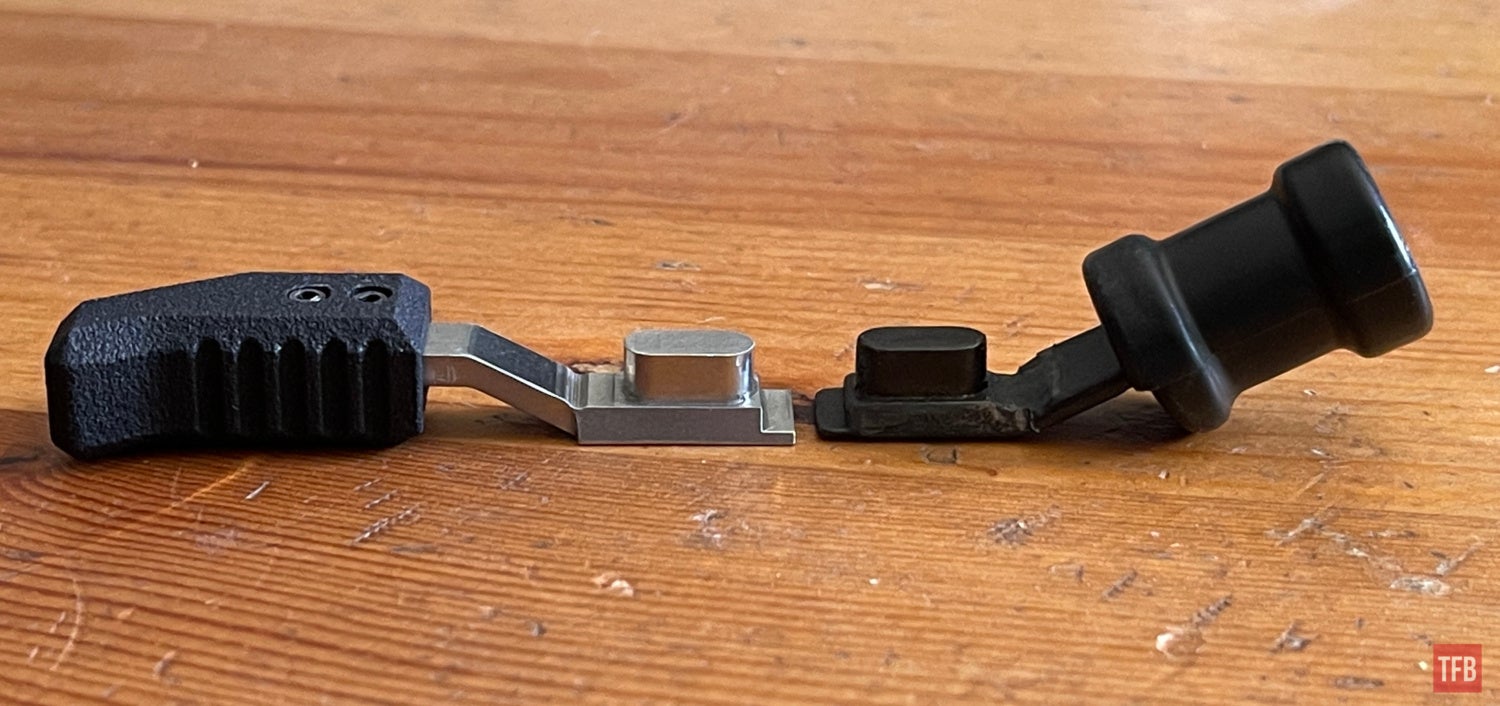
Installing the charging handle is super easy. Just remove the upper from the lower, and pull the bolt back so you can slide the charging handle out. Similar to a SCAR, only it is not ambidextrous. Then you swap in Richard’s charging handle. Now the charging handle is easier to manipulate. Somewhat like an AK.

More DR200 Upgrades

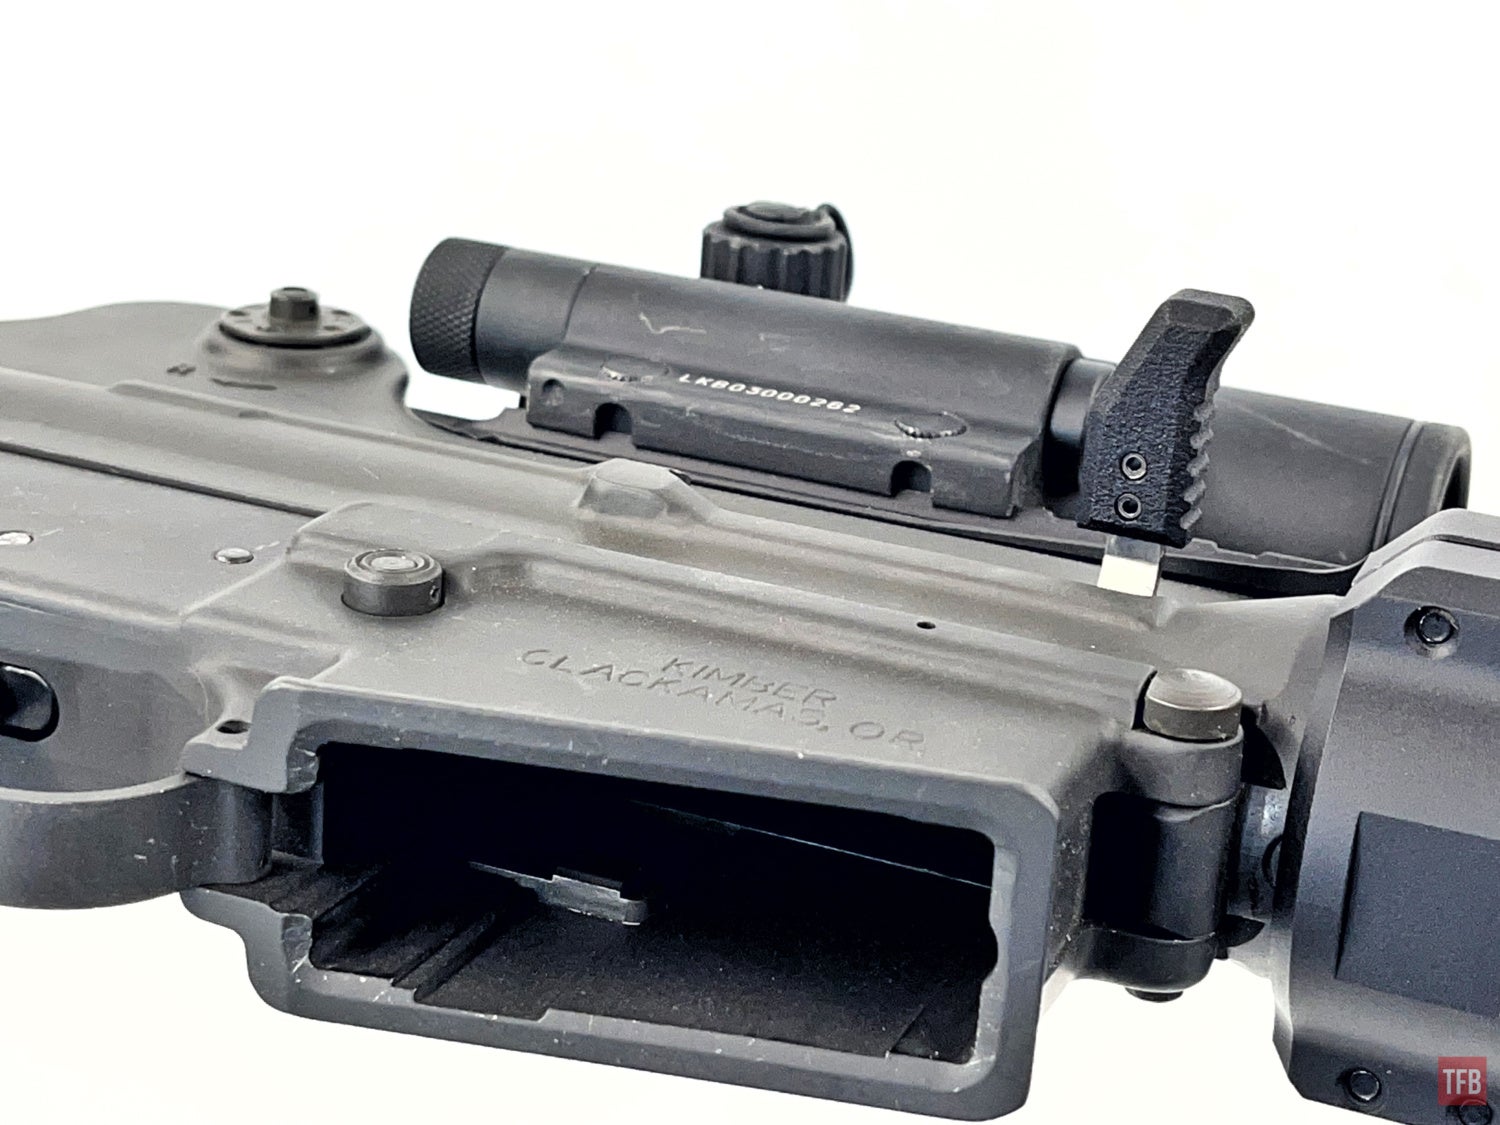
Now Richard has come out with more DR200 upgrades. This time an enhanced bolt catch, ambi-mag release/catch, and 6-position gas regulator.

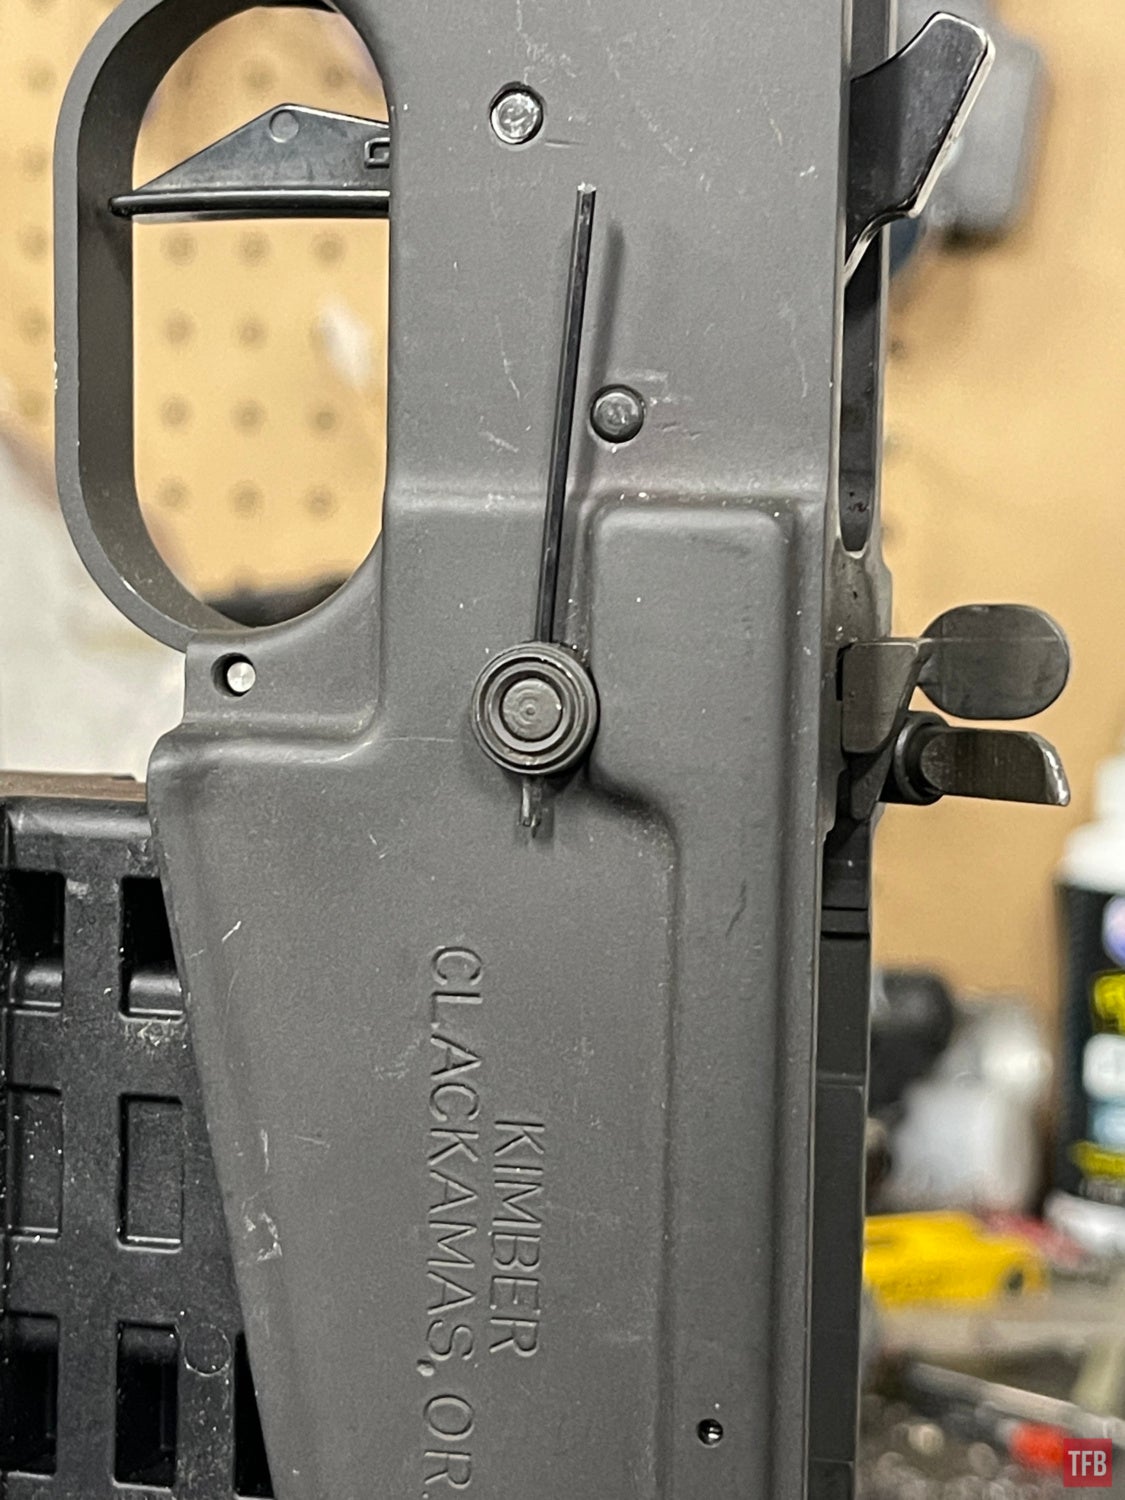
The ambi-mag catch is the most difficult to swap. For some reason, Daewoo/SNT Motiv decided to take a departure from Eugene Stoner’s design and use a round mag release button than an oval-shaped one. The mag button is not even threaded, instead, it is held in place with a very small roll pin. Richard had to take a 1/16 punch and grind it down to get it to fit in the mag button. I took a different approach. I used an Allen wrench that was small enough to fit in the hole. Cut off the 90º bend and use my Wheeler AR Pivot pin/roll pin tool to punch the Allen wrench.
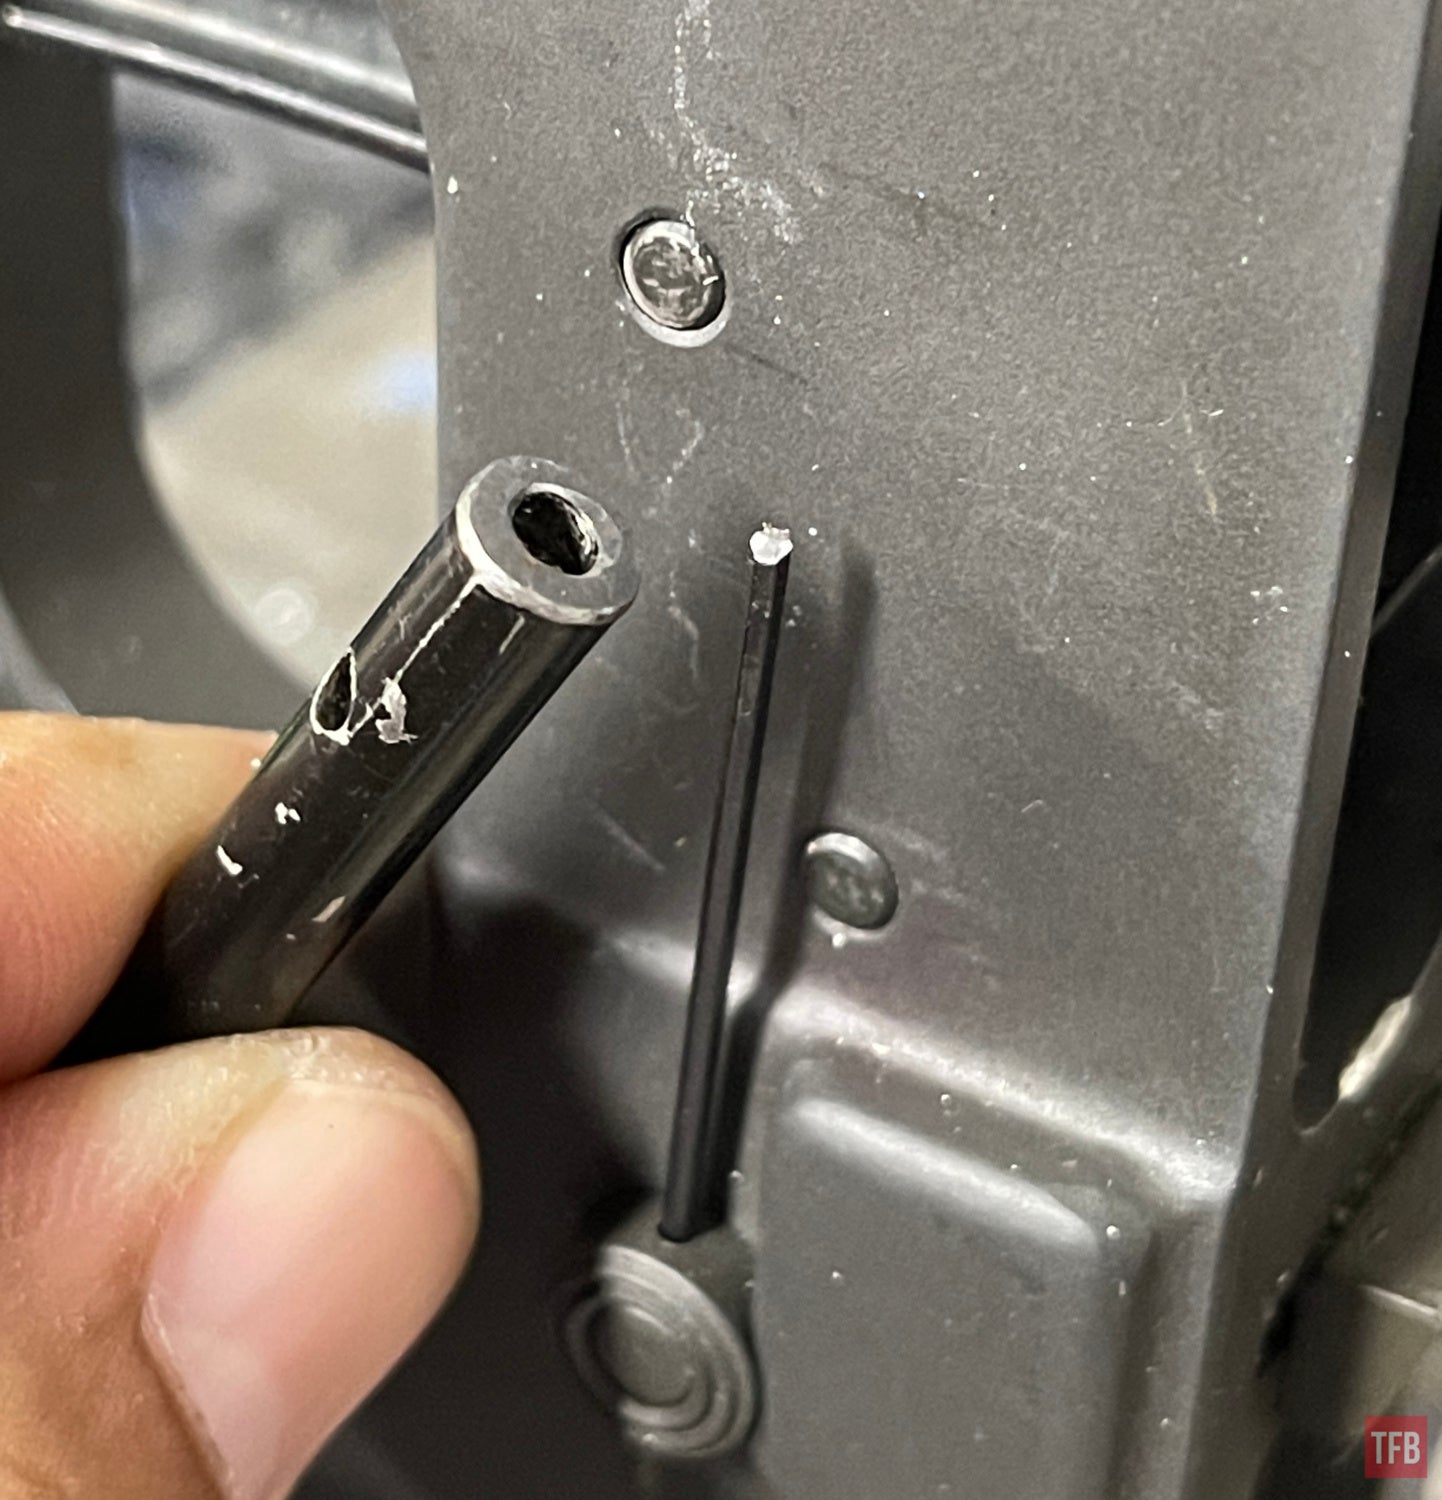

You can see the roll pin poking out below the mag button. Go slow so the roll pin doesn’t fall all the way out.
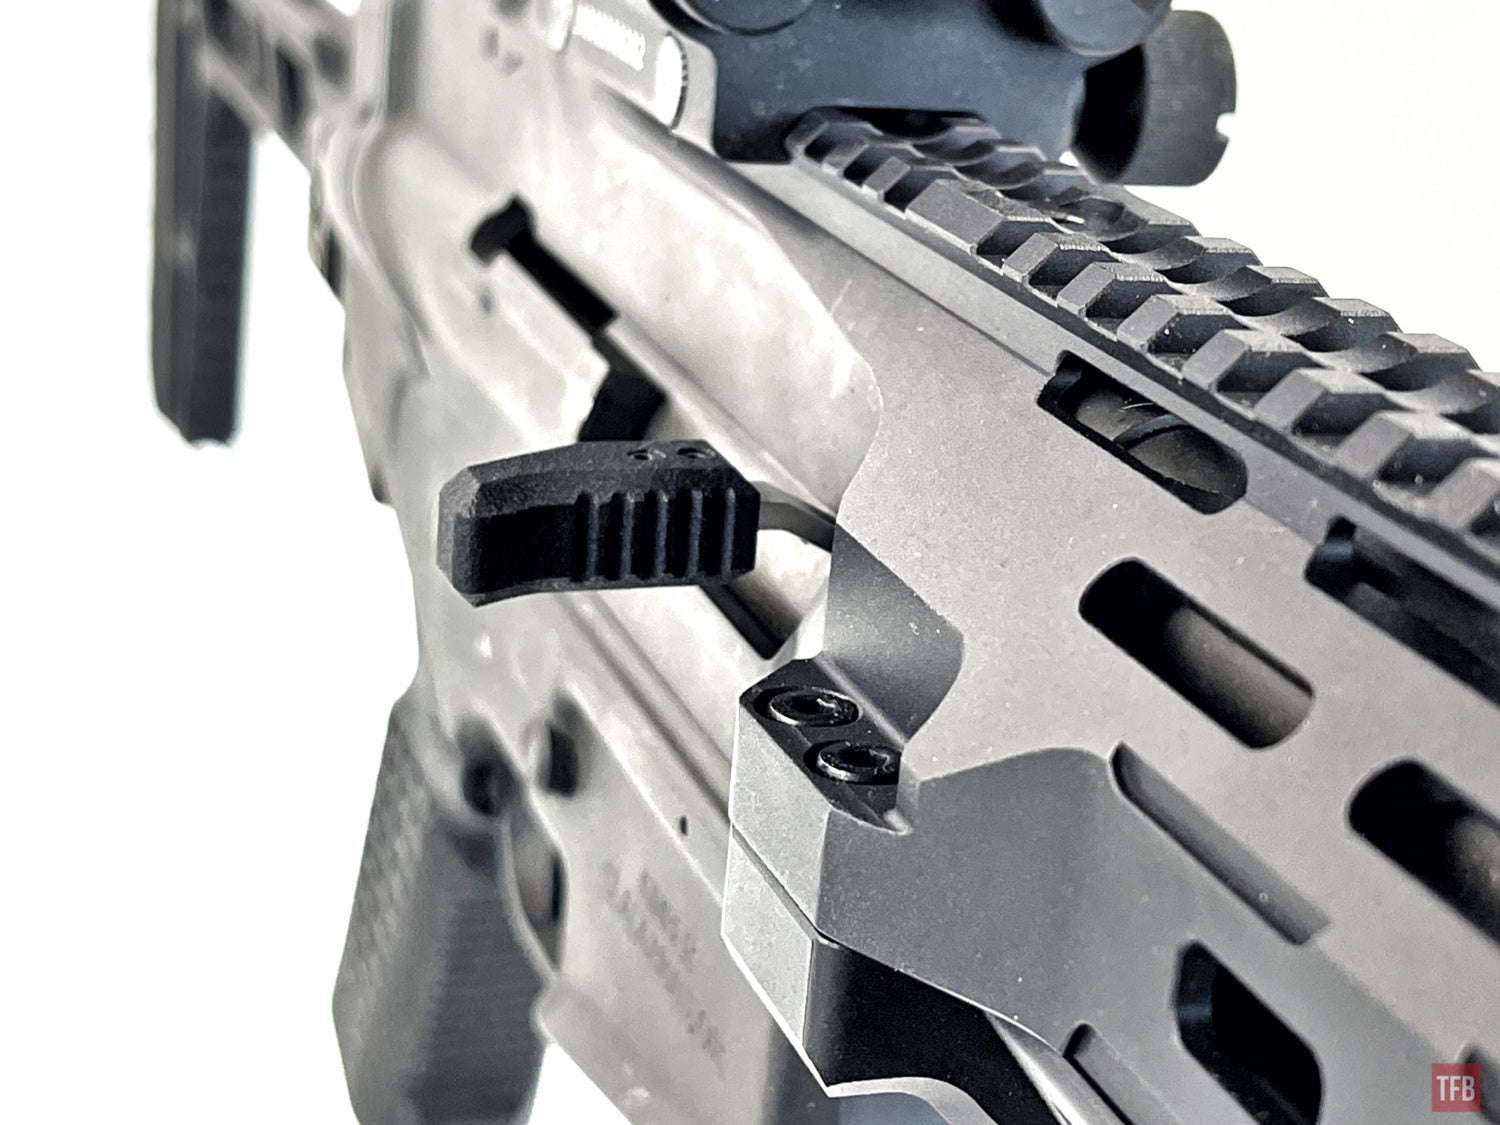
Next up is the enhanced bolt catch.
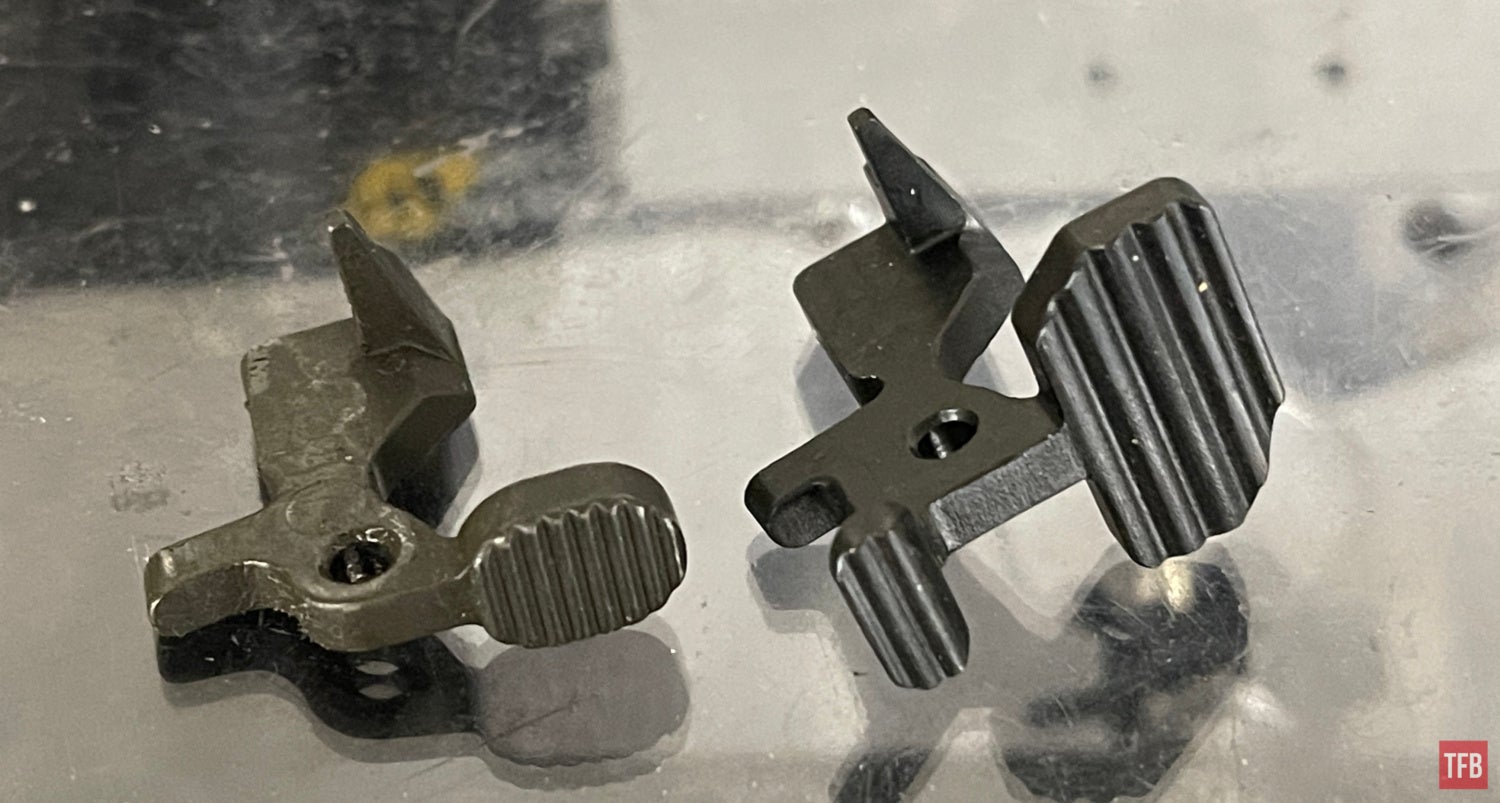
The factory bolt catch is only a bolt release. You could grab the ping pong paddle and pull it out to lock the bolt back but that is overly complicated. So Richard made this catch for his DR200 upgrades. Just use a 3mm punch. Punch the roll pin towards the muzzle. Go slow since this punch also holds the ejector in place. Once you clear the bolt catch, just swap it for the enhanced version. I used channel lock pliers to push the roll pin back in place.
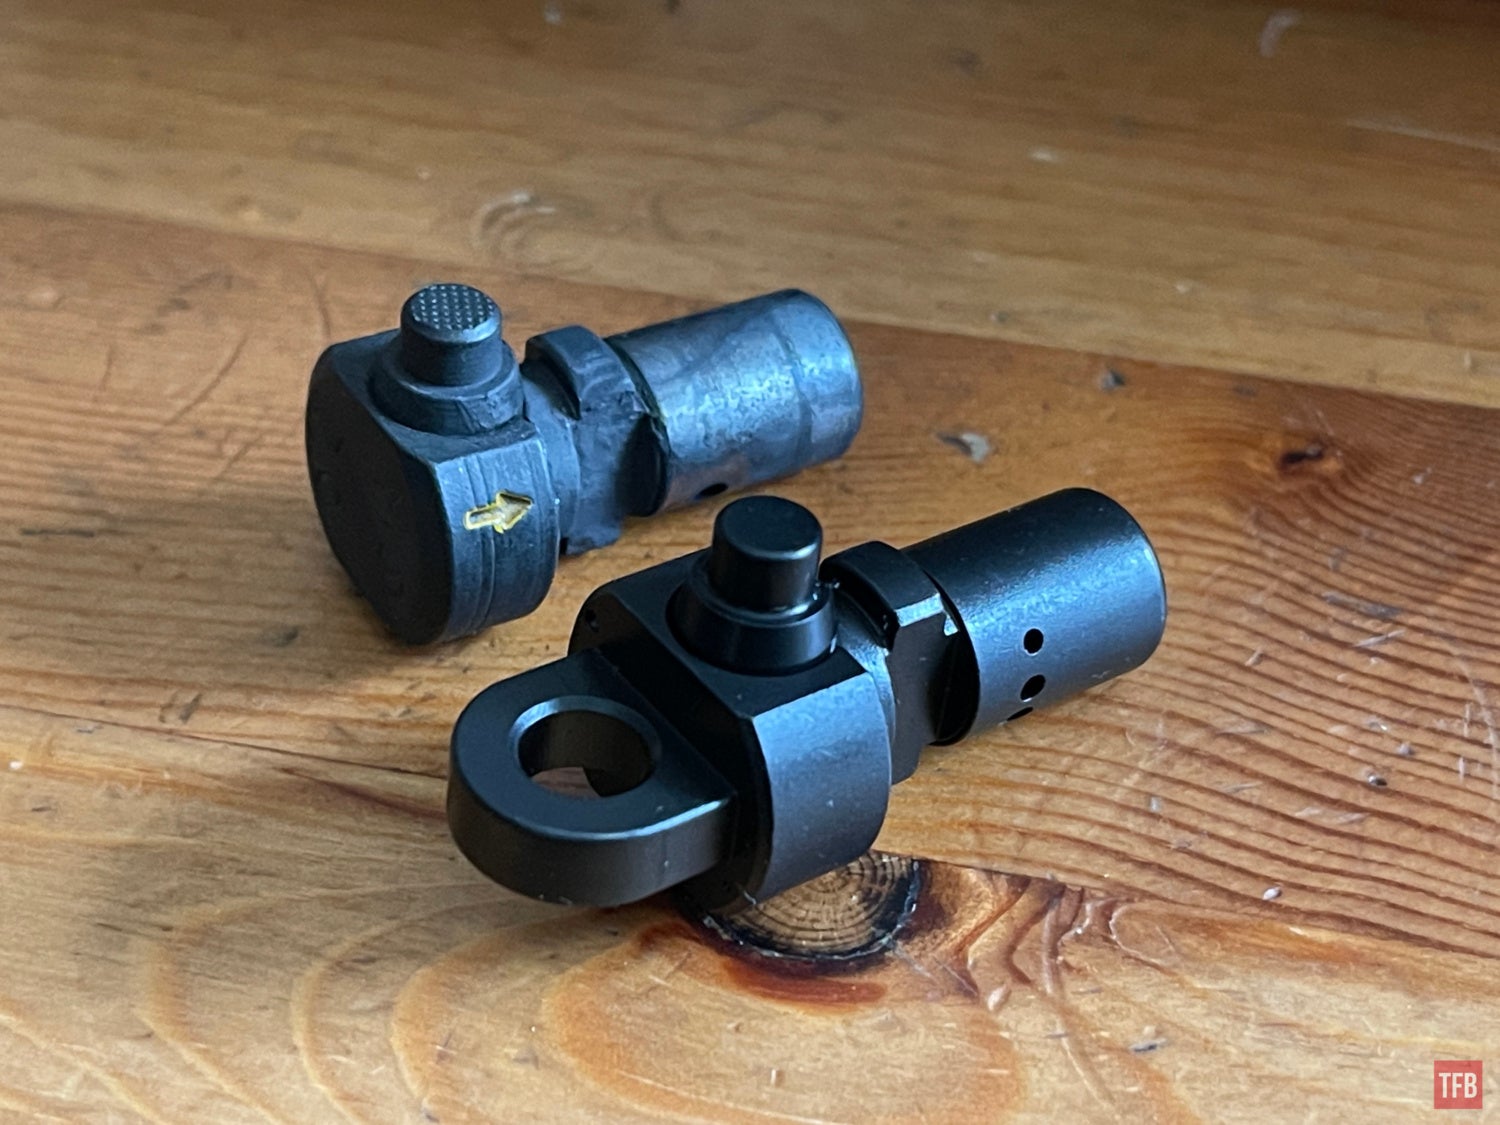
Last up in Richard’s DR200 upgrades is his 6-position gas regulator. The factory one has four positions. Now you have two suppressed settings along with the normal four positions. Just push the detent and rotate the gas regulator vertically. Pull it out of the gas block and install the new one.


Final Thoughts On DR200 Upgrades
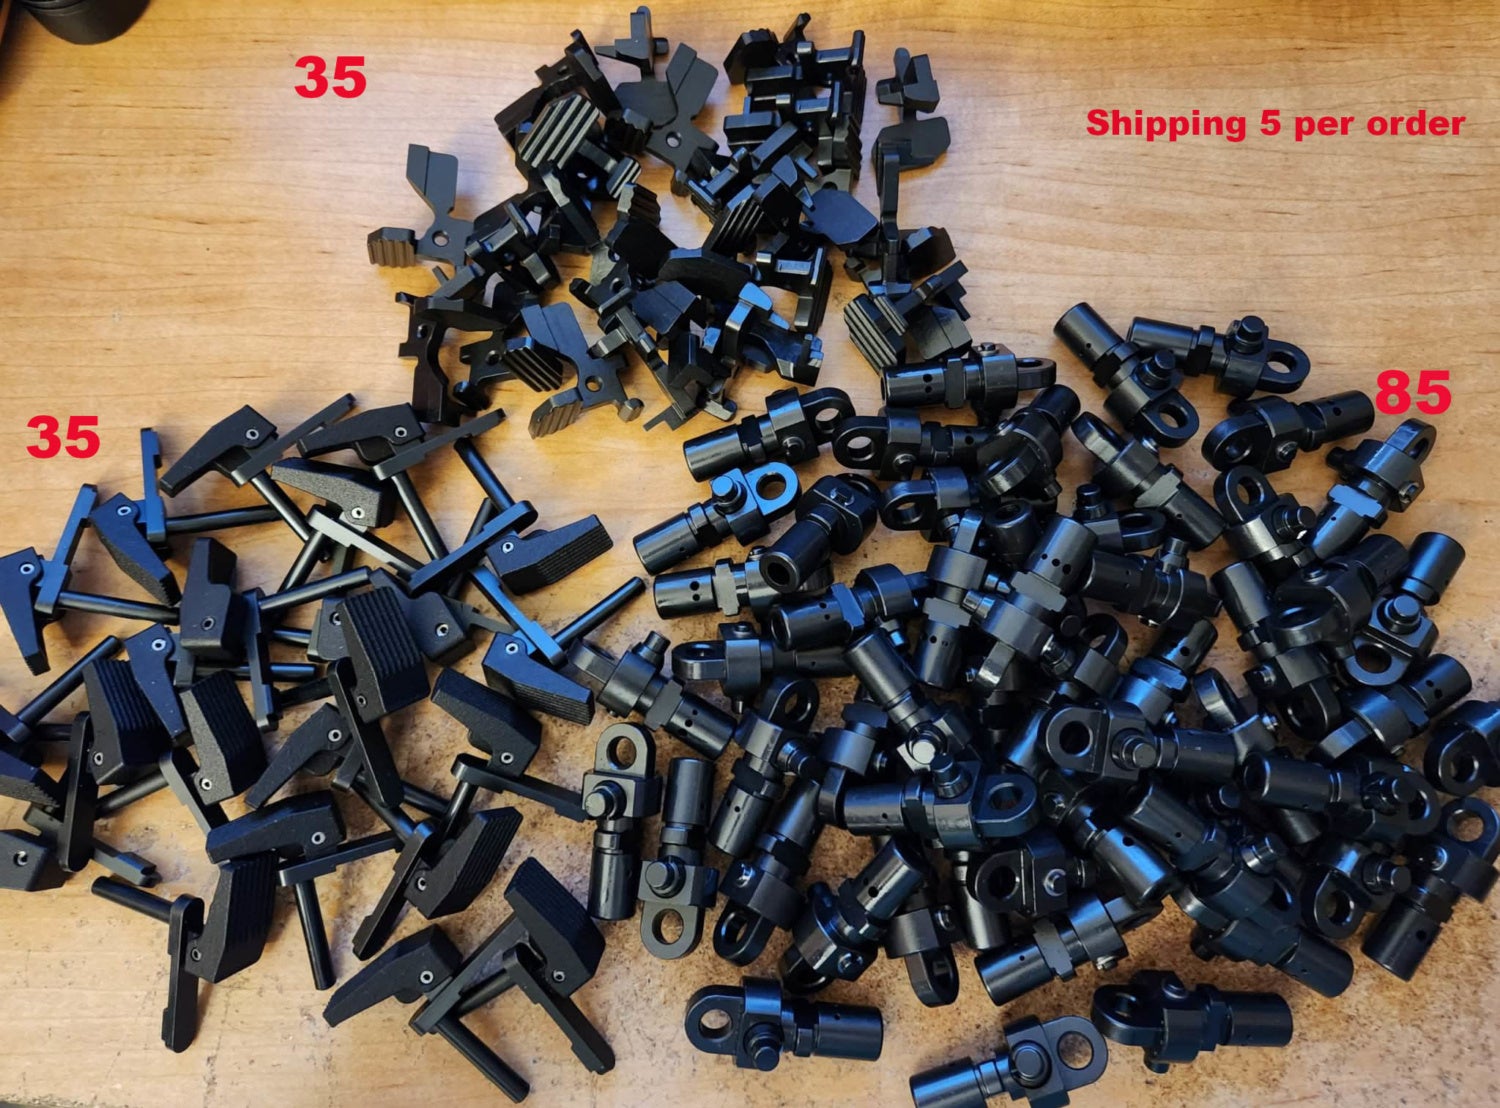
Photo by Richard Pierce
Richard has a bunch of regulators but not that many mag catches or bolt catches. At this moment he sold out of those parts but still has some gas regulators left.
I have yet to go to the range and test these DR200 upgrades. The mag catch and bolt catch work as they should. But I will have to shoot the DR200 to test the gas regulator. The price was not bad, especially for small part runs like this for a niche weapon platform. I hope other people come up with more upgrades, new barrels would be great. To find the group and Richard’s post click here.