 Your Privacy Choices
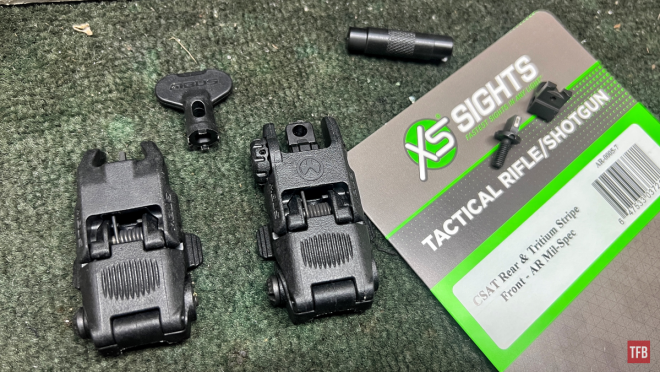
Welcome everyone to the TFB Armorer’s Bench! As mentioned in the little blurb below, this series will focus on a lot of home armorer and gunsmith activities. In this article, I decided to try something I have not done before. This article will be pretty uneventful as far as earth-shattering content BUT!!! I could not find much content out there as far as replacing Magpul MBUS sight pieces so I figured I’d share my little adventure and hopefully reveal some helpful things along the way. That being said, let’s dive right into installing XS Sights on the MBUS.
Note: This is a bit of a spoiler but before you decide to potentially follow along, this combination of sight pieces and sight system is not a perfect fit (at least the rear sight is not). I am not saying that it does not work or does not fit but there is one minor hangup that is addressed down below. At the very least treat this as a resource for how the MBUS sights are configured.
TFB Armorer’s Bench: Installing XS Sights on The Magpul MBUS
Here, we at TFB hope to inform, entertain, and even inspire any would-be gunsmith or armorer out there. Ideally, with the information I provide and with the help of our sponsors, you can have some useful knowledge pertaining to the conservation and improvement of firearms technology while at the same time sharing experiences and teaching each other new tips and tricks along the way in the comments. Digging deep into what it is to be an armorer or gunsmith has significance but what is important is what those people do to show they’ve earned that title. I am happy to share my experiences and knowledge and hope it is informative!
Make your personal safety a priority:
- Practice proper gun safety. Always make sure before the firearm hits your bench that it is unloaded and safe to be handled.
- Wear the proper safety equipment. The main one would be safety glasses (decent ones) since parts are often under spring tension and you may work with high RPM tools. Other honorable mentions would be latex gloves or a respirator when working with potentially harmful solvents and oils. Also hearing protection when working with loud machinery or test-firing firearms.
- Modifications, alterations, and customizations will void your firearm’s warranty 9.5 times out of 10. Please take that into consideration before attempting any at-home gunsmithing.
- If you are unsure about proper safety practices, disassembly procedures, or warranty standards, stop, put down the tools, and consult a competent gunsmith.
Background Info: Installing XS Sights on The Magpul MBUS
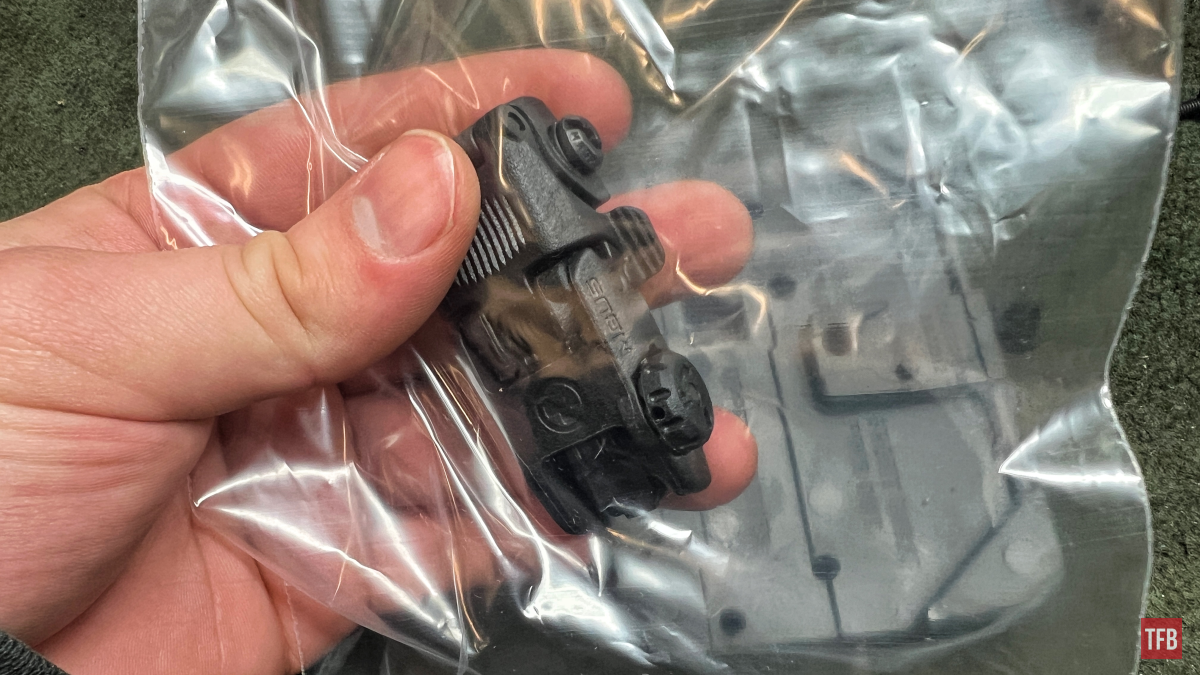
I received these sight pieces as a part of a promotional thing at my day job and have had them laying around for a while. I always wanted to pop them on some flip-up sights so when I had a spare set of Magpul MBUS sights and a rifle to put them on, it felt like it was the right time. I looked all over the internet to see if this matchup would work or if anyone had attempted it and I found squat. There were a few short-handed resources as far as the disassembly of the sights which was welcome in my book.
Installing XS Sights
Installation: Installing XS Sights on The Magpul MBUS
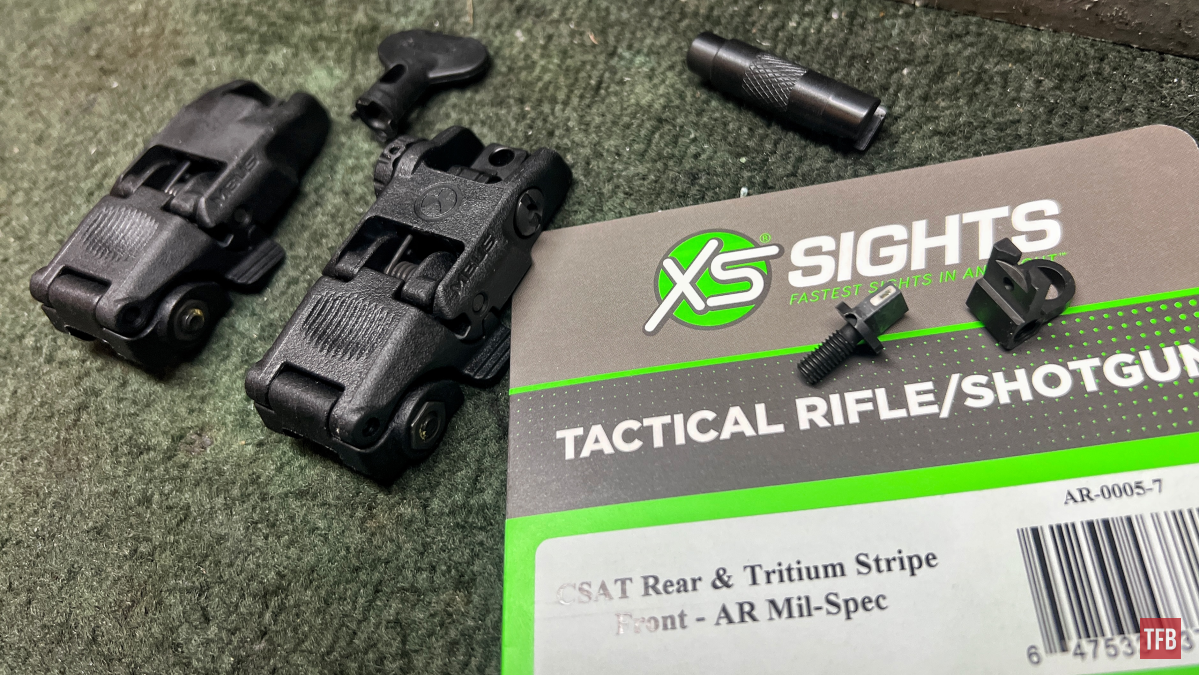
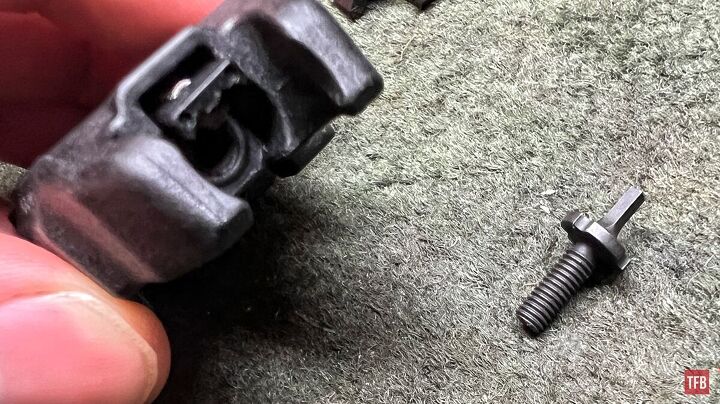
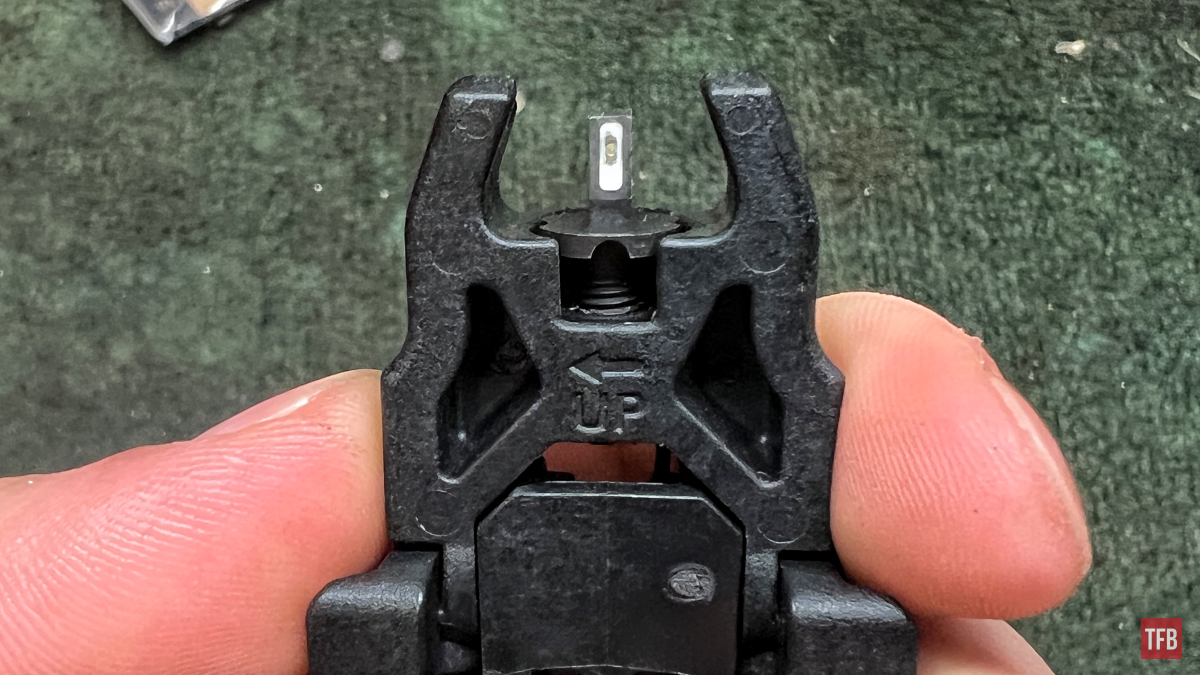
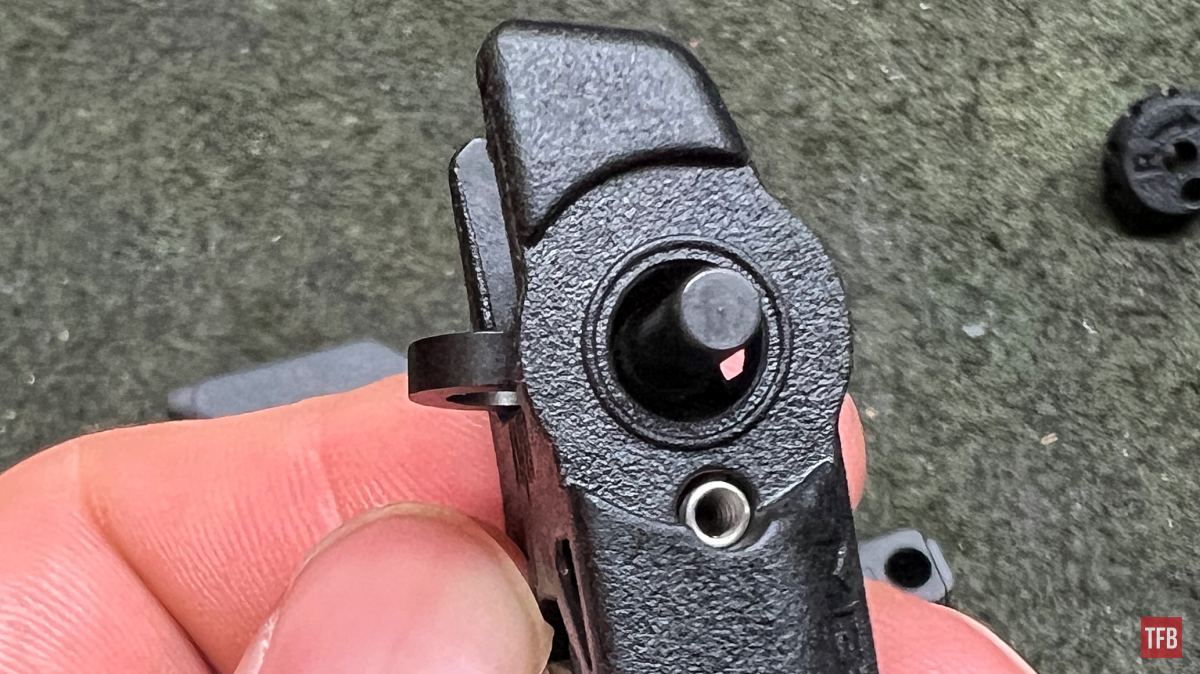
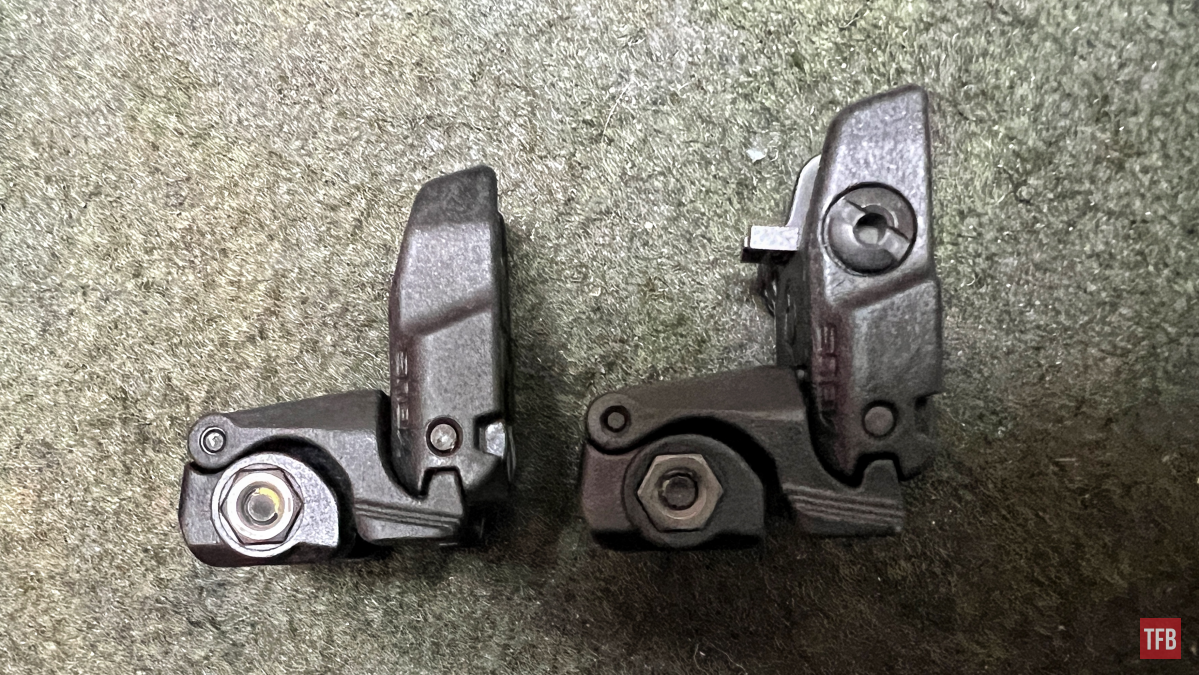
Installation starts with disassembly as per usual so let’s dive right into that. The Magpul MBUS flip-up front sight comes with a sight post adjustment tool which is a nice addition.
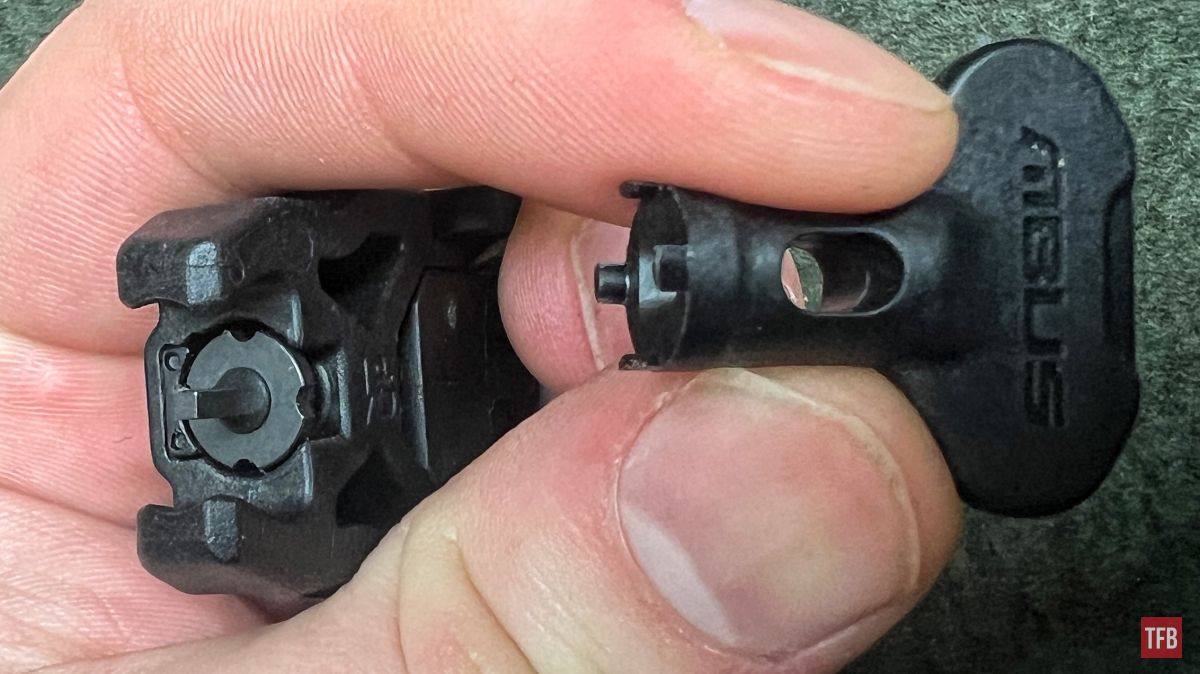
The four prongs on the key fit into corresponding slots in the sight post to allow for grip.
From here, the post can be tightened (lowered), loosened (raised), or simply removed.
Note: The post itself is under spring tension so pushing down while turning the key will yield proper results.
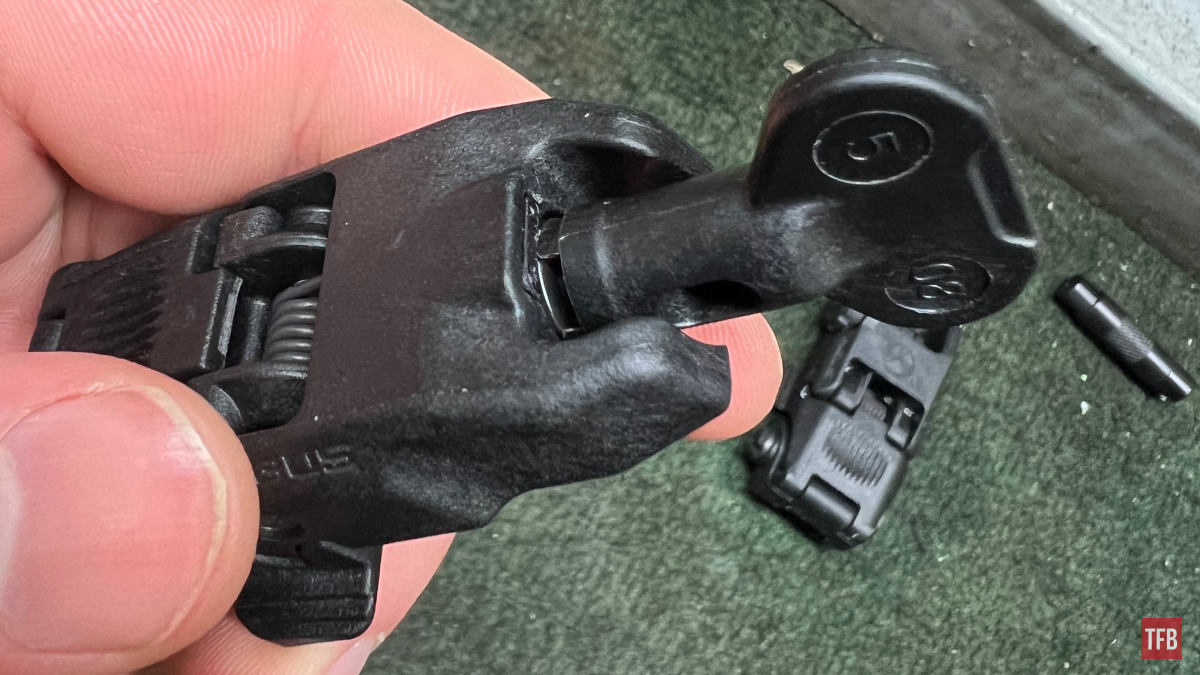
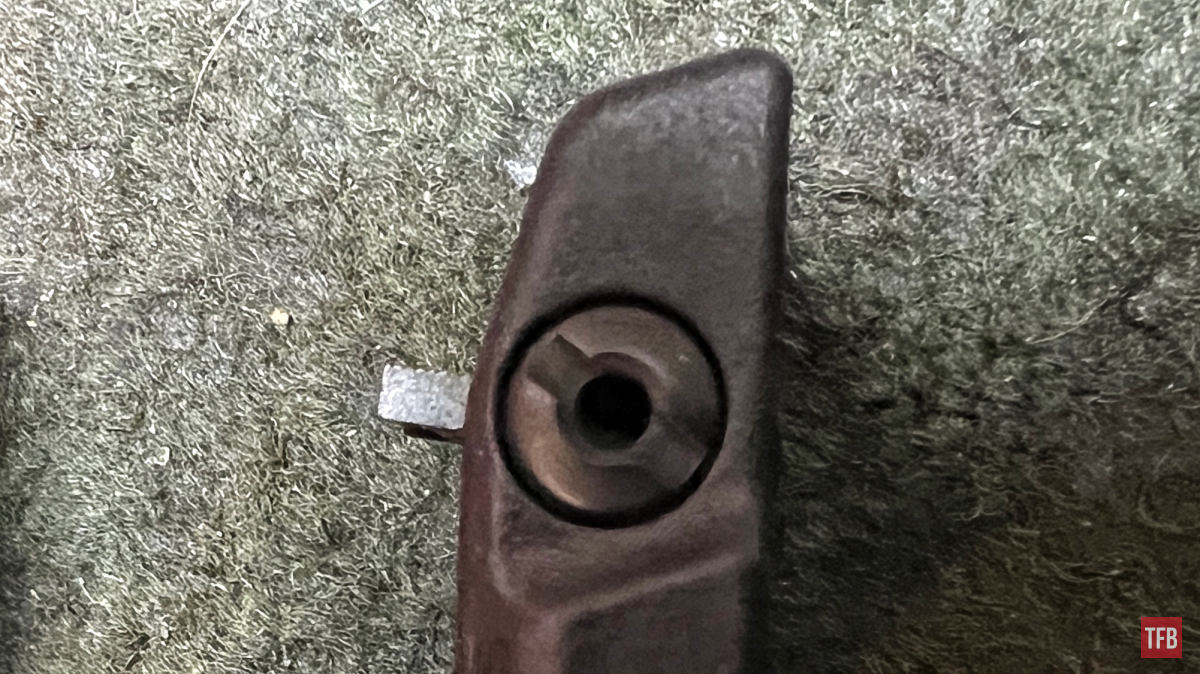
I backed the sight post all the way out and the post was easy to remove.
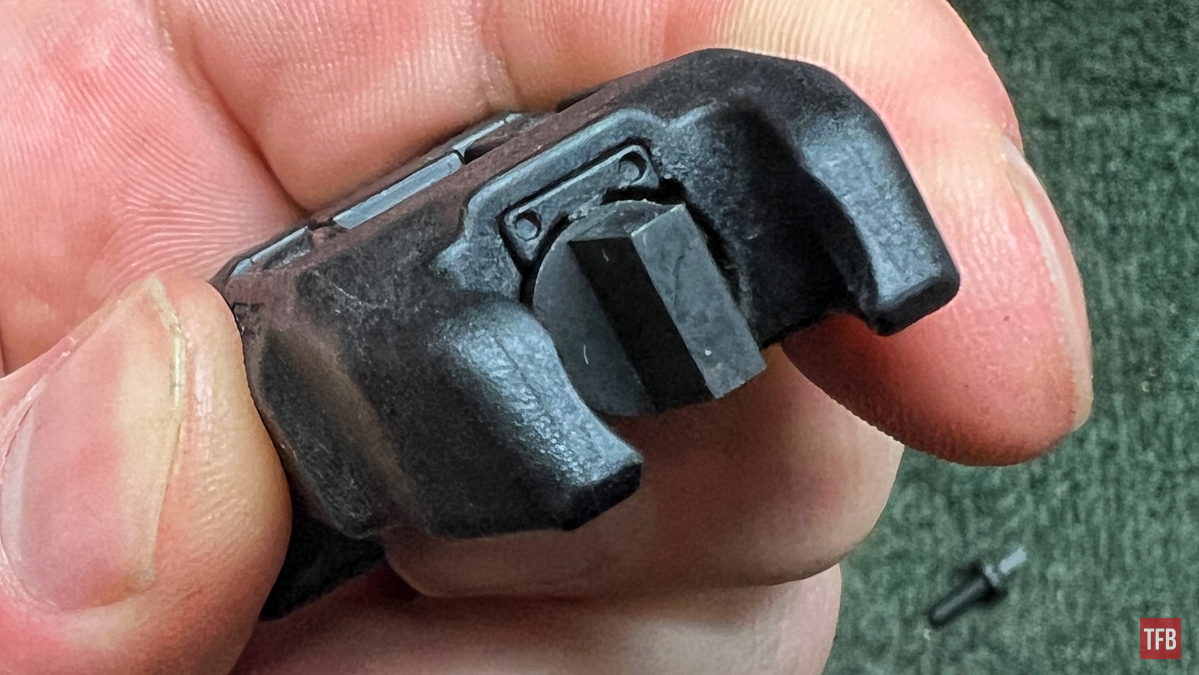
Under the post is a spring and plastic piece that provides spring tension to the sight to keep it from rotating out during firing. We do not need to remove the spring or plastic sight post retainer.
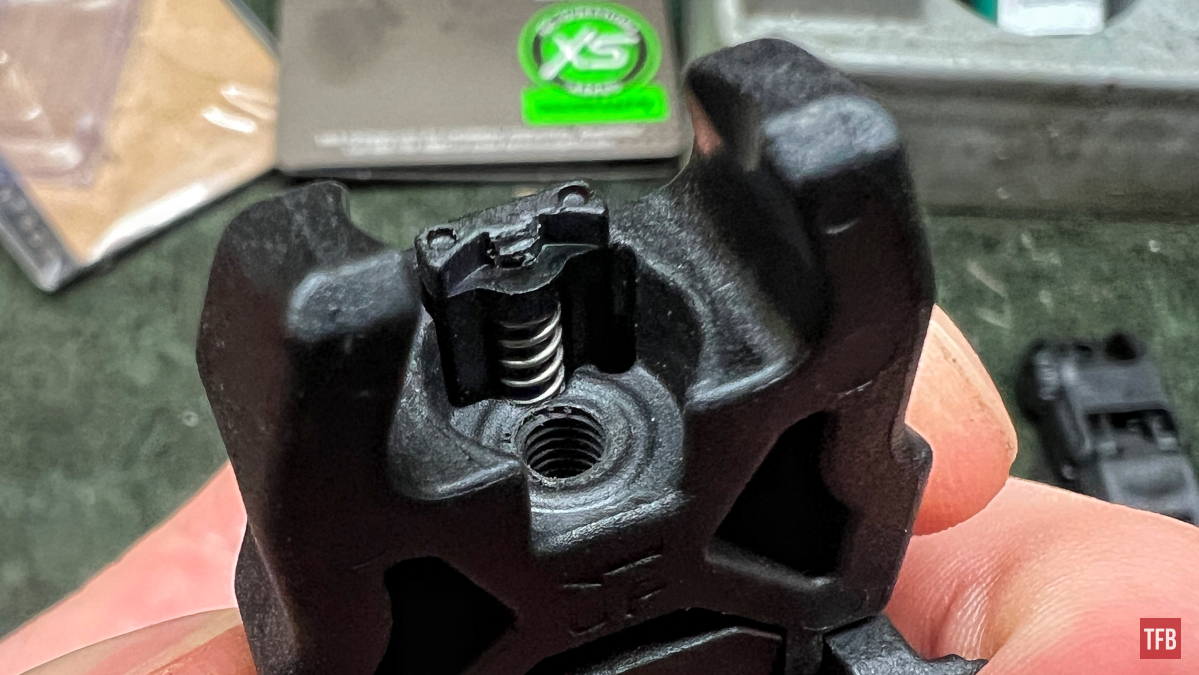
Now with the old post removed, the new one can be installed. XS Sights includes a tool to adjust their sight post but it was not made specifically for the MBUS sight so it does not depress the spring plunger. I had to depress the plunger with a dental pick until the post was at the desired elevation.
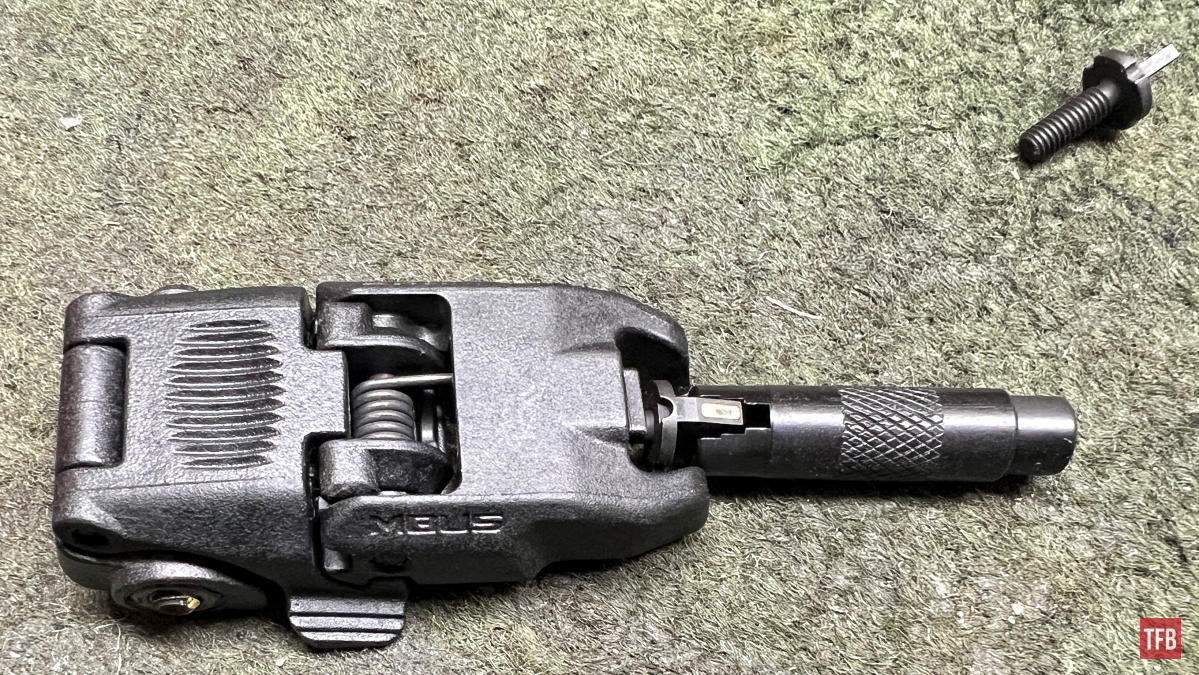
Besides this, it screwed in with no issue and shares the same locking/indexing points as any other mil-spec sight post.
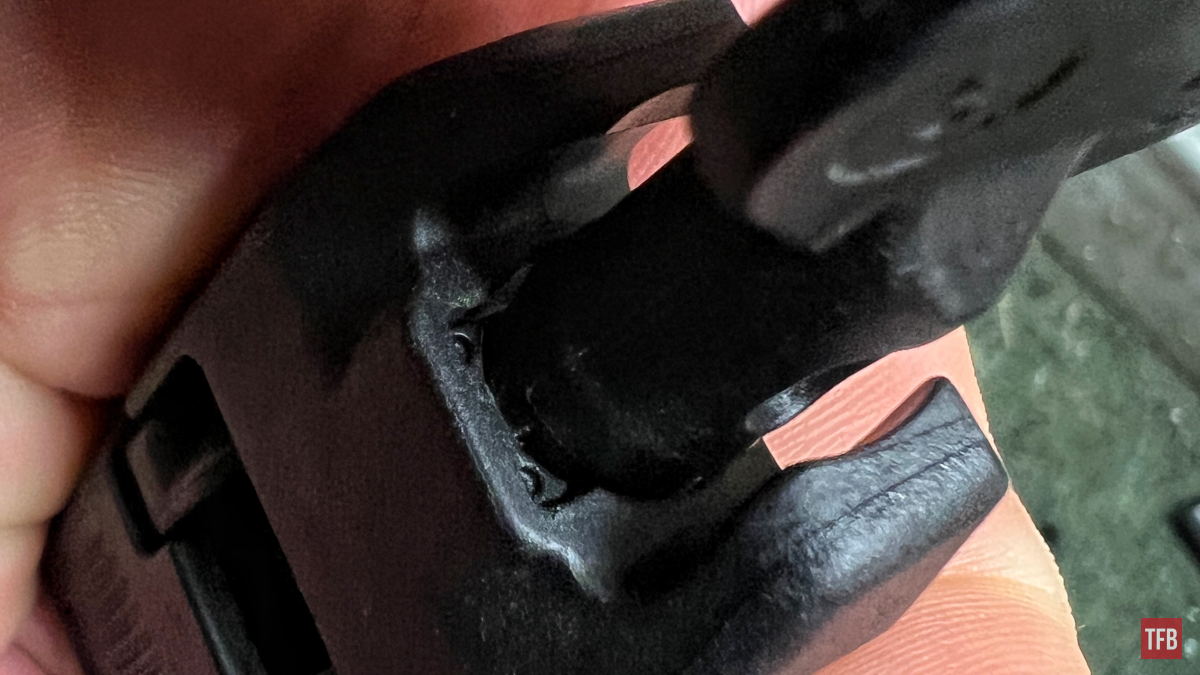
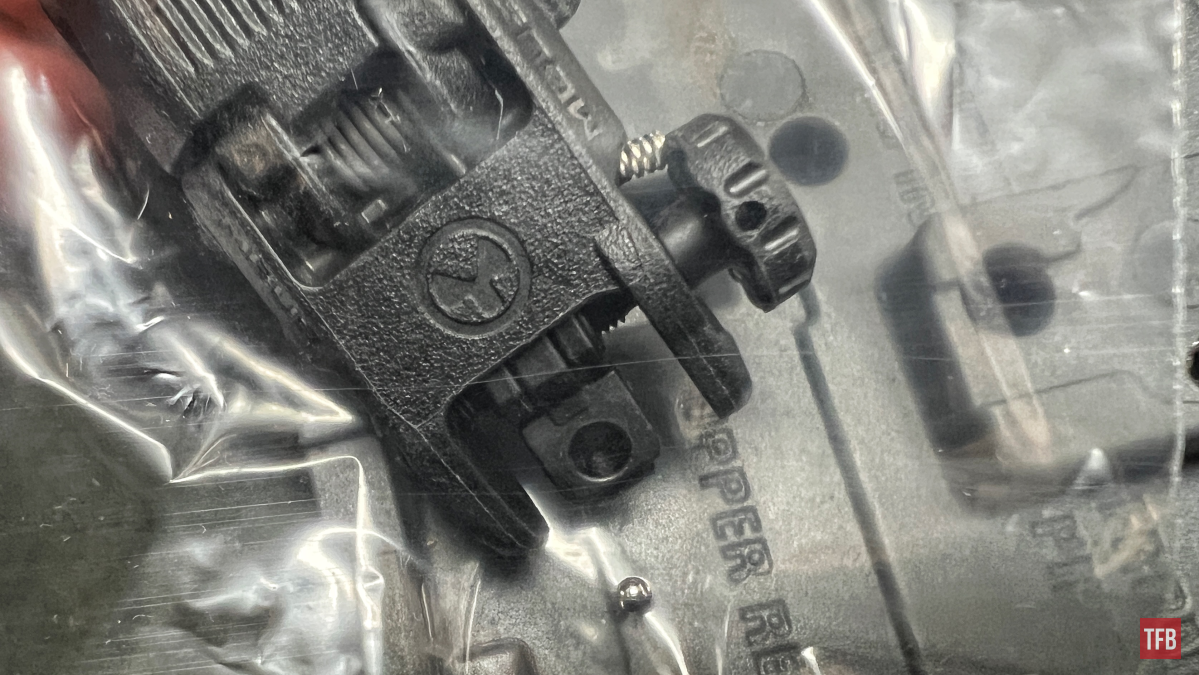
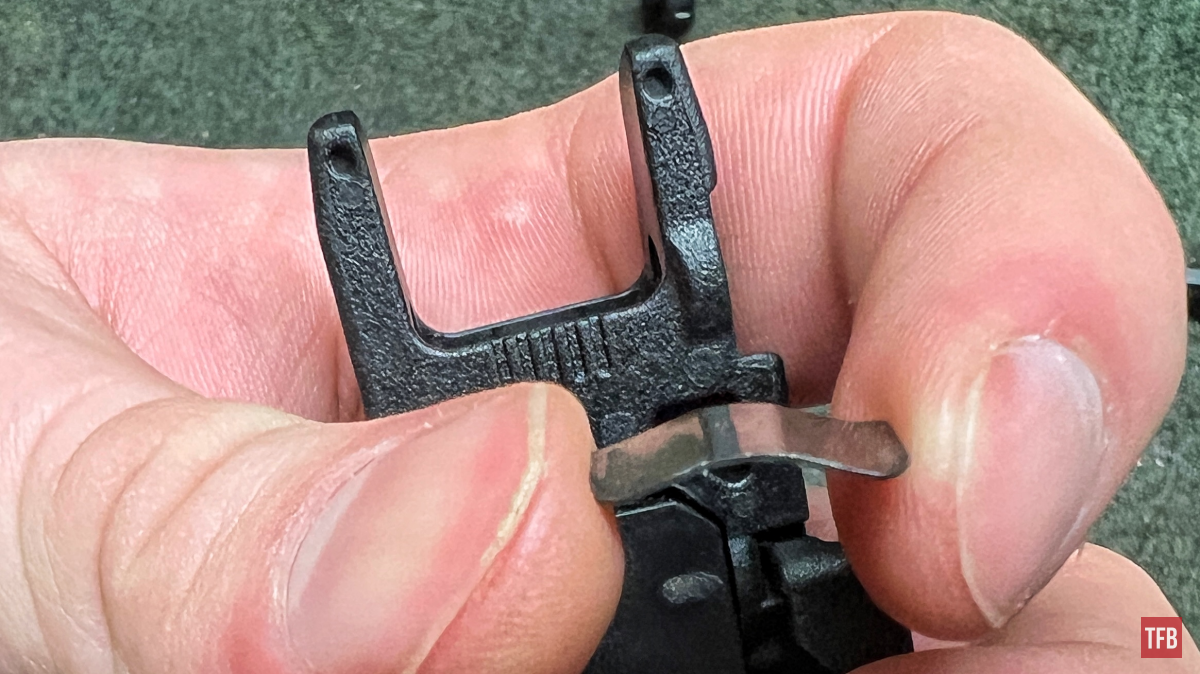
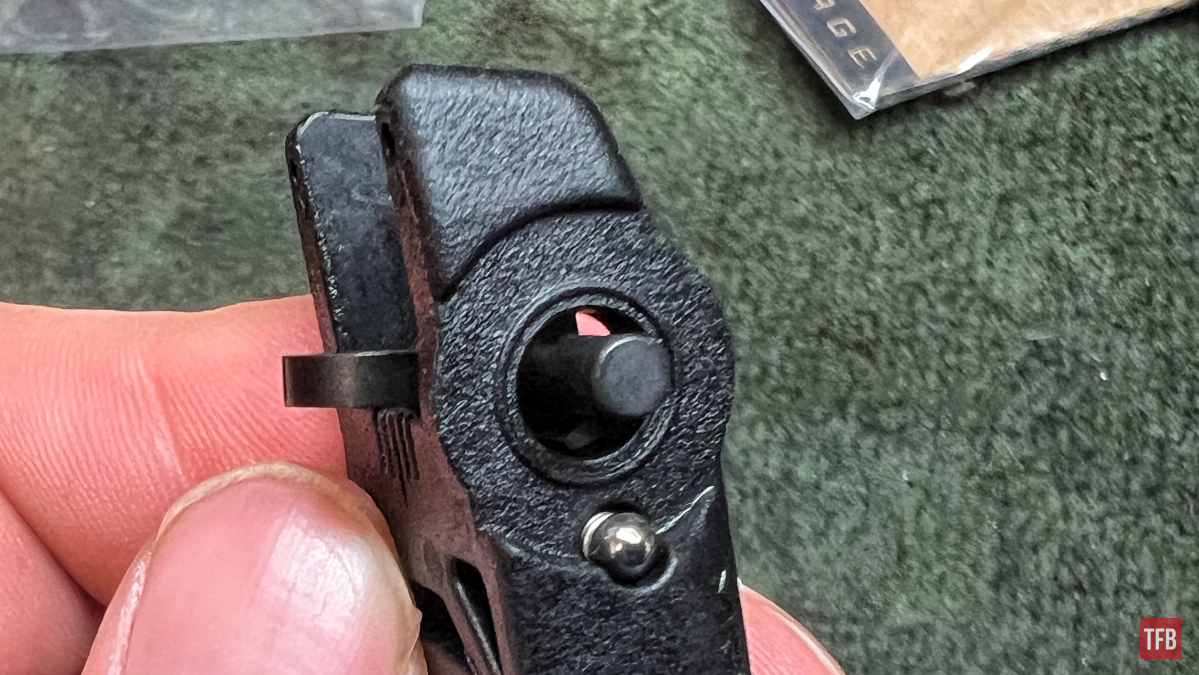
Going at the rear sight is a little more intensive but nothing earth-shattering I would take your time. This roll-pin needs to be punched out.
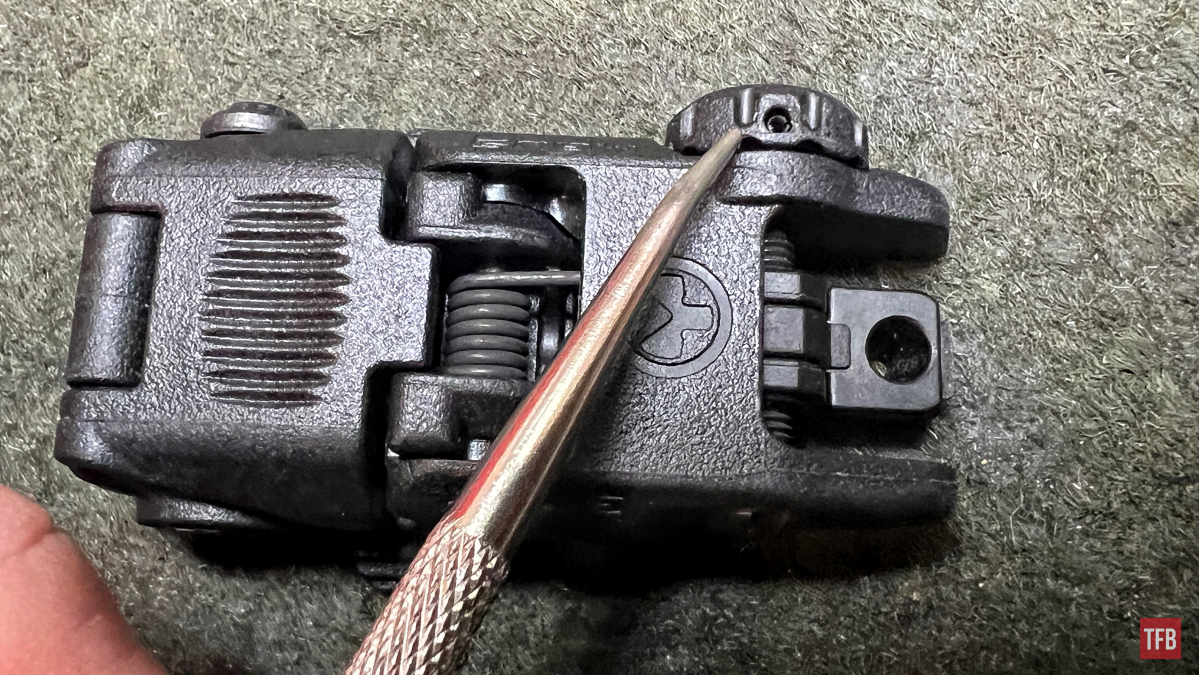
I recommend using a roll pin punch and bench block. Make sure to let the punch follow all the way through just in case the adjustment wheel wants to fall off. Luckily my adjustment wheel stuck pretty well so the next step was less worrisome.
This is an extreme precaution, a rag on the side would do just fine, but there is a spring and ball bearing under the adjustment wheel.
Using a plastic bag I placed the sight into the bag so I could remove the wheel without worrying about the ball bearing being launched and subsequently lost.
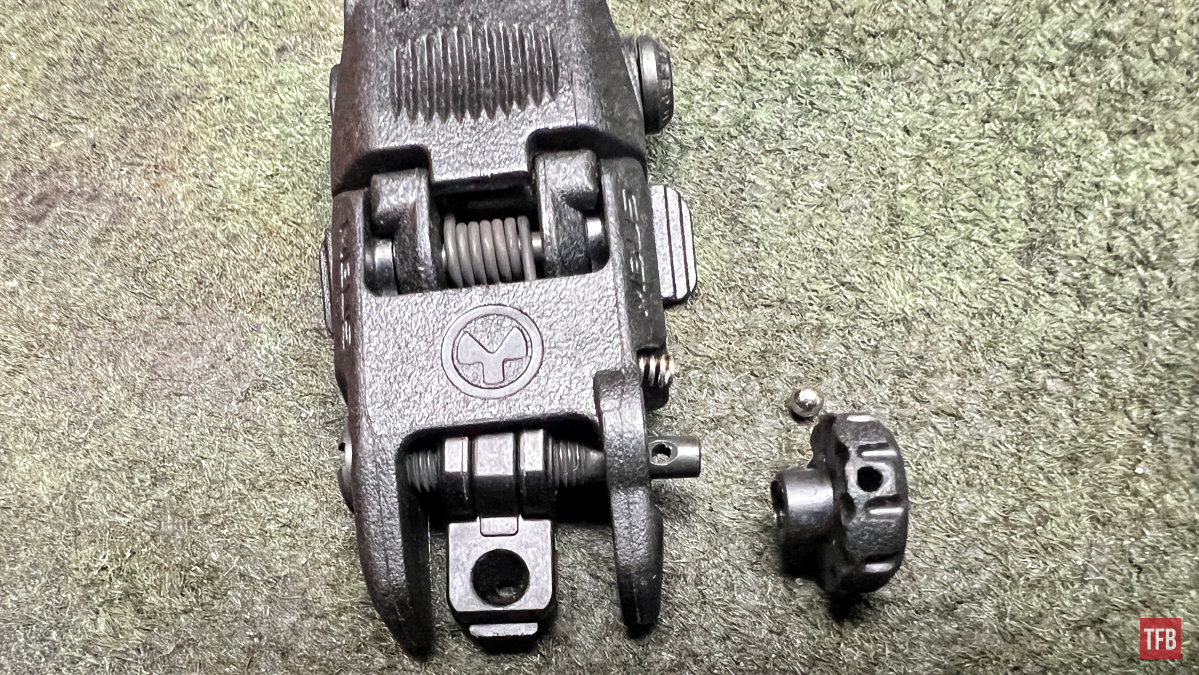
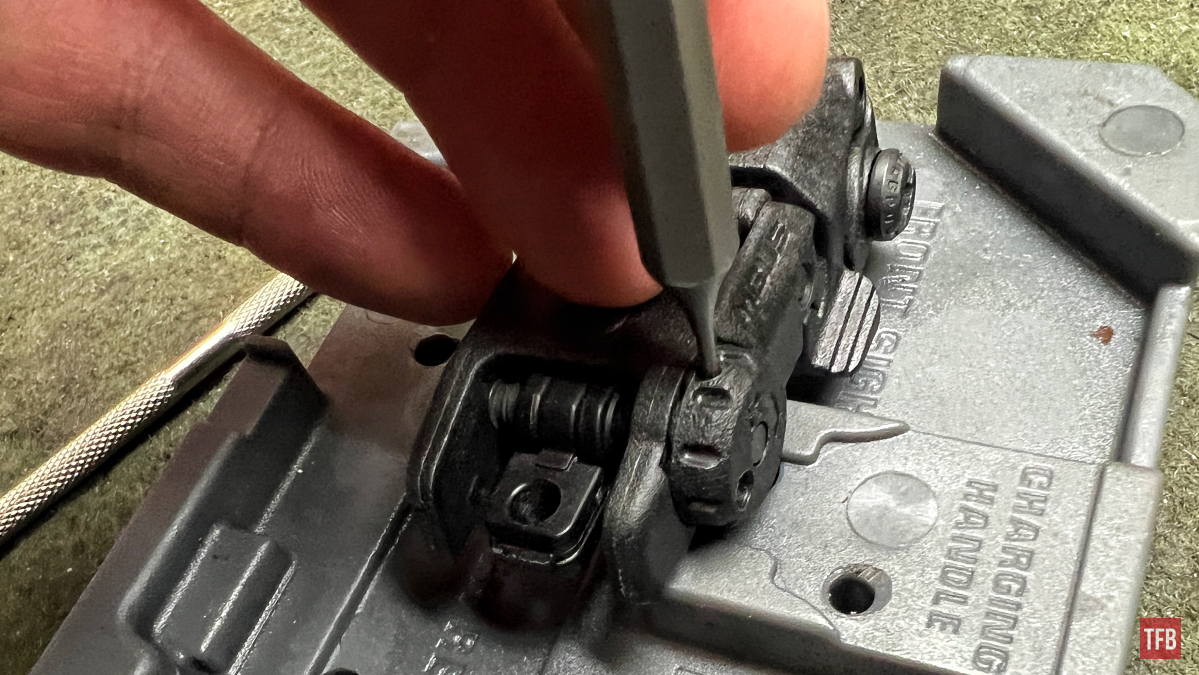
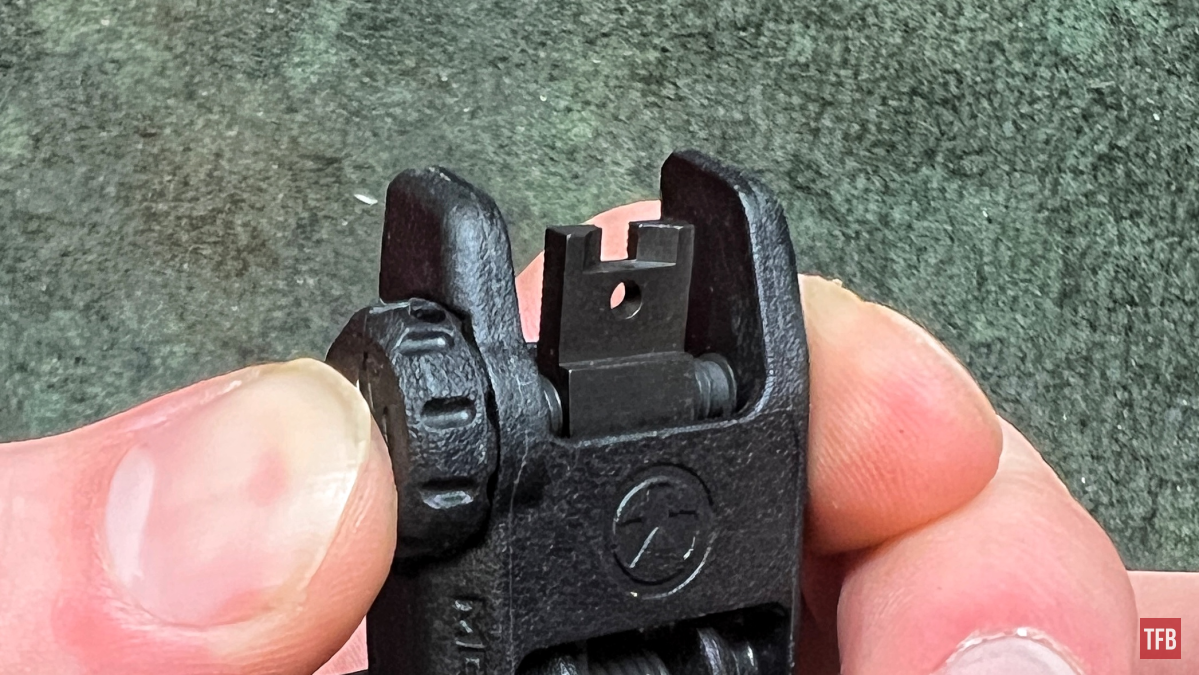
With the adjustment wheel off and the spring and ball bearing in a safe spot we can move onto the windage screw. Just back it out like any other screw and the sight aperture will thread free.
Note: There is a piece of spring steel under the aperture. The aperture is the only thing keeping it in its spot. If it were to fall out this is the correct orientation.
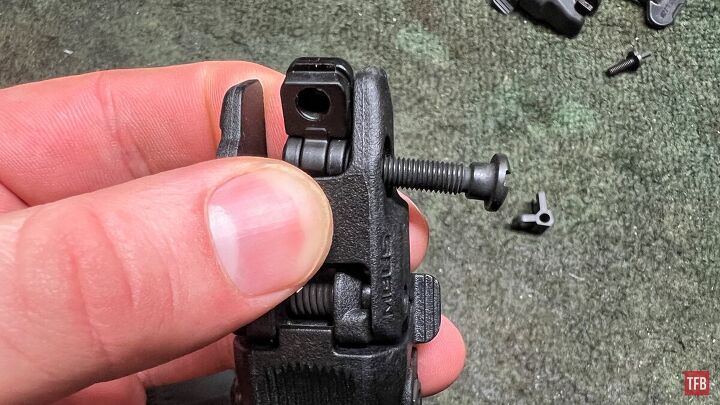
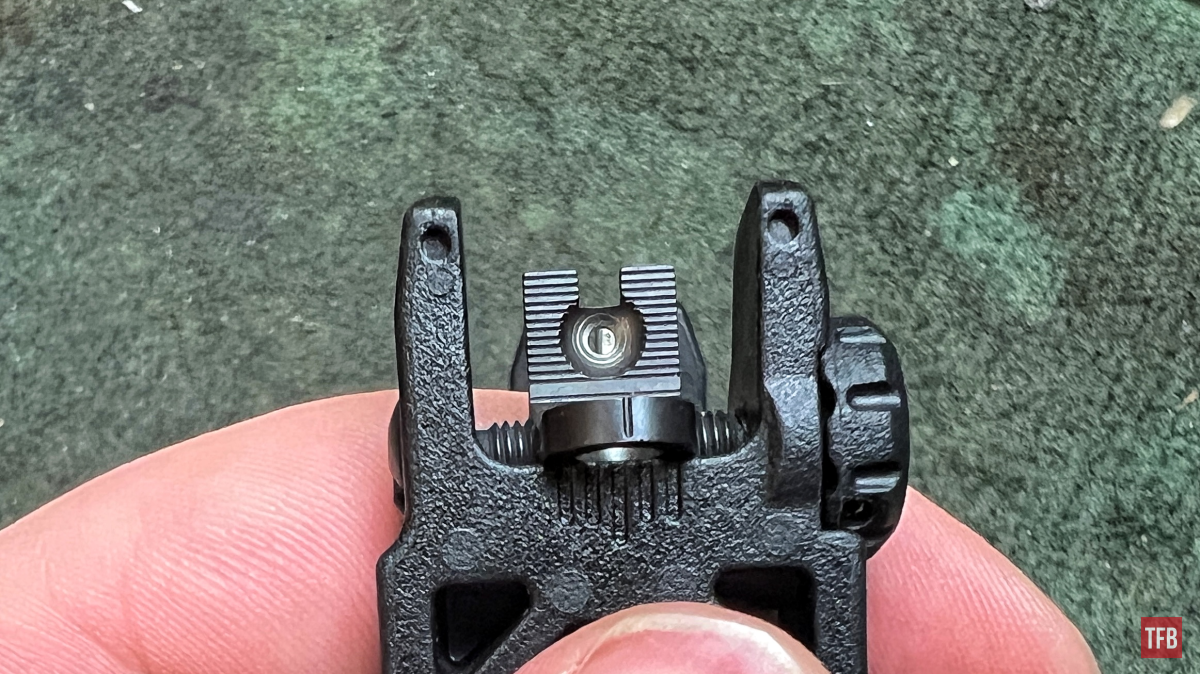
Now the new aperture piece can be installed and threaded onto the windage screw.
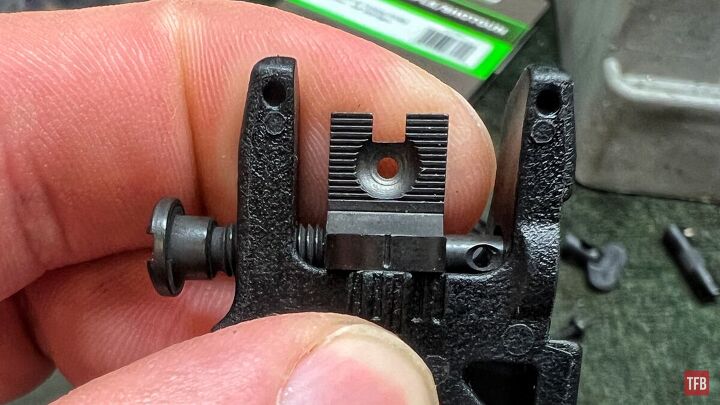
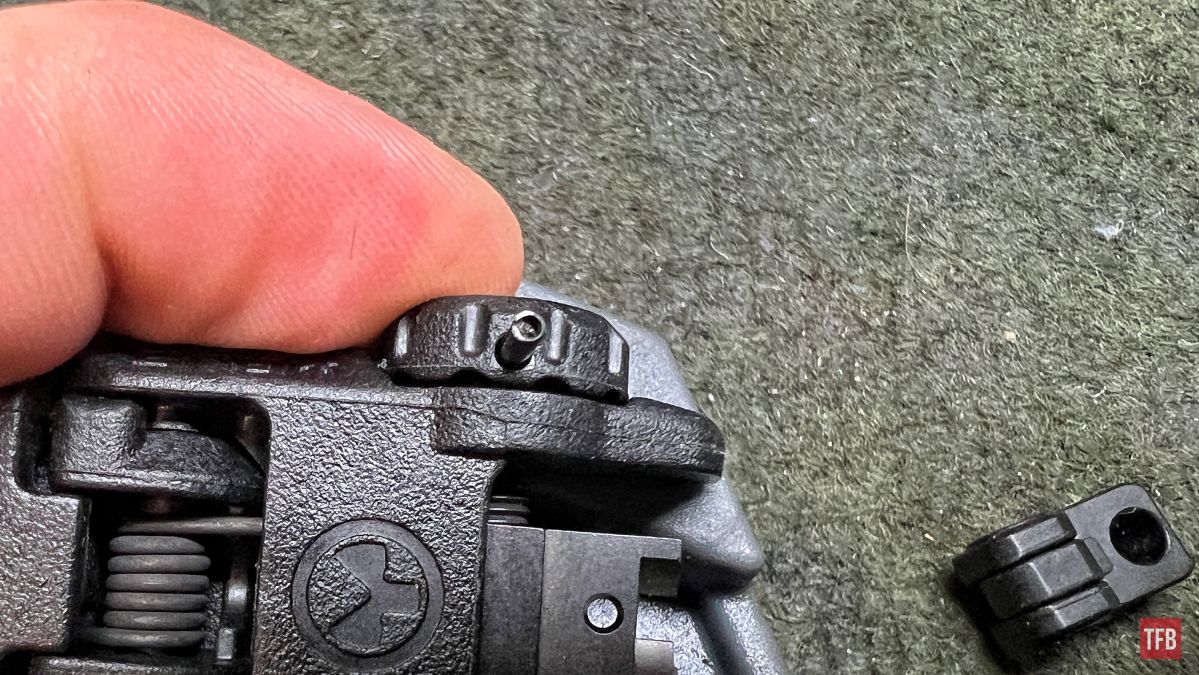
With the aperture piece on the windage screw threads, we can place the windage wheel spring and detent in their hole.
Carefully the wheel can be placed onto the windage screw. Make sure that the hole in the screw lines up with the hole in the wheel.
From here hammer in the roll pin. Be careful, if there is an obvious stoppage double check that both holes are still lined up.
Note: If you have trouble lining up the holes, insert a punch from the other side to keep it aligned while the pin is hammered in.
Conclusion: Installing XS Sights on The Magpul MBUS
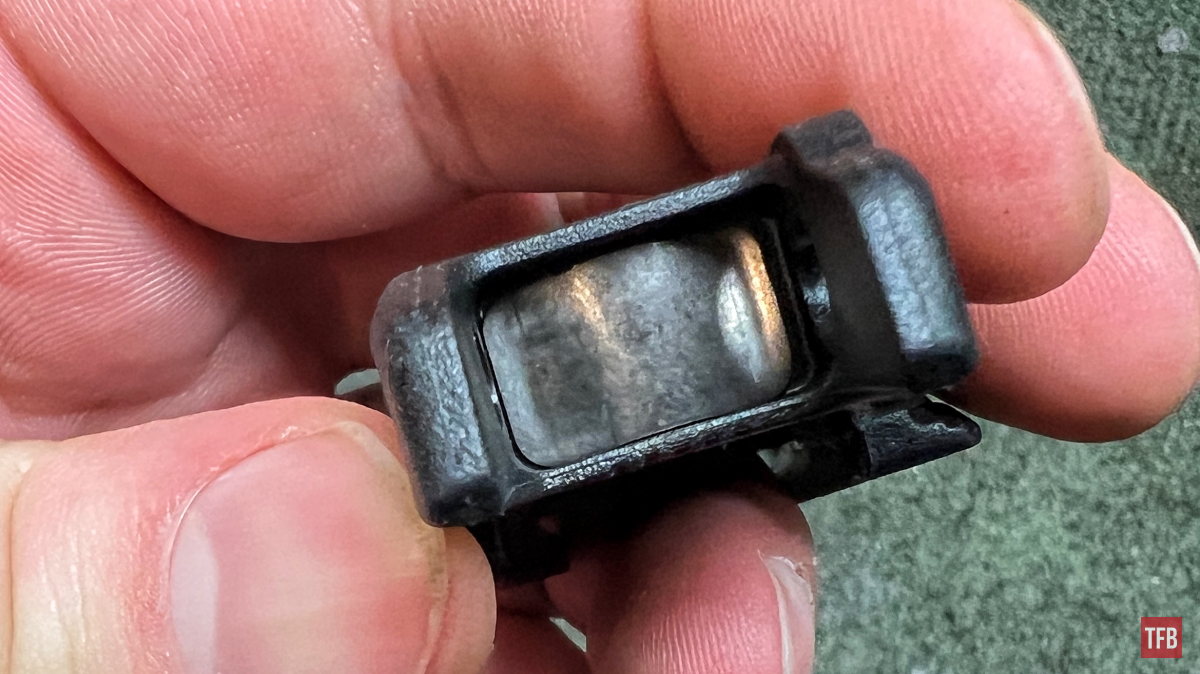
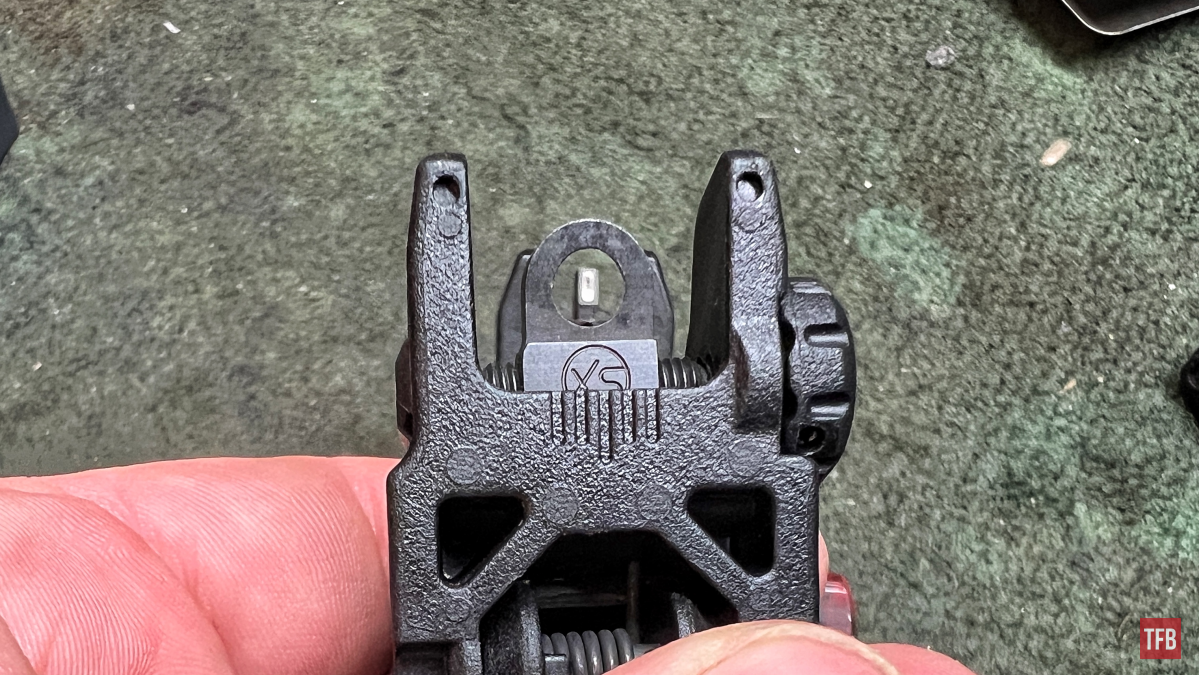
So, here is the big reveal and slight letdown. As I mentioned upfront, this was more of an experiment on my end so it does not surprise me that it did not work out perfectly. The aperture, despite fitting, threading, and actuating wonderfully, does not sit flush.
The walls of the sight shell are a tad bit too high for it when it is flipped down. Will it work? Yeah, it definitely would work just fine at the range but it bugs me because I like things to be as close to perfect as possible. If I felt like it, I could file but most likely I will just put these on a different set of flip-ups when I get a chance.
Speaking of the aperture being flipped forward or backward, if it is flipped backward the sight aperture, not in use will make contact with the top of the receiver when the sight is flipped down. Therefore it must always be flipped forward for reliable use. What an adventure!

As always, thank you for reading TFB! Be safe out there, have fun while shooting, and we will see you next time for the TFB Armorer’s Bench! Also, let us know what you think in the comments below! We always appreciate your feedback.