 Your Privacy Choices
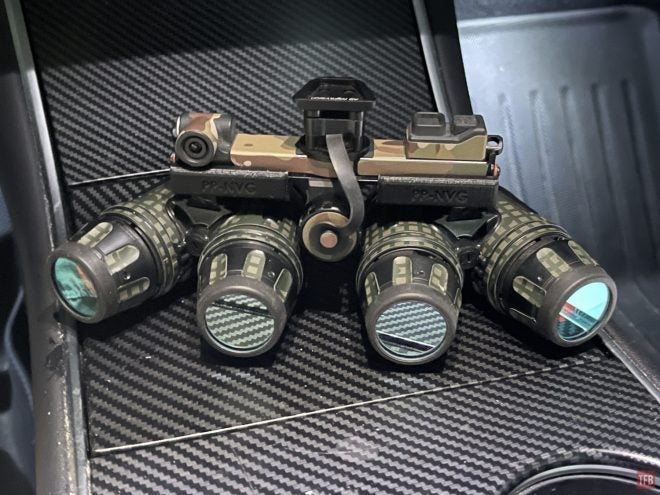
Welcome to Friday Night Lights. If you have been here before then thank you for coming back. For those of you who are new, thank you for coming in to check out my article. Last week we talked about about the Dark Mile: shooting a mile in the dark. This week we highlight a project that took over a year – modified ANVIS10 which I have dubbed PP-NVG. PP for Pano Pano or Pano². Let’s take a close look at my modified quads.
Quad Tube NVGs @ TFB:
- Friday Night Lights: DIY Build Your Own Quadtube – ANVIS10
- FRIDAY NIGHT LIGHTS: A Peek Through ANVIS10 PNVG (Panoramic Night Vision Goggles)
- Friday Night Lights: QTNVG – Panos For The Masses
Modified ANVIS10
Last year in July I had the idea to modernize my ANVIS10 using an AB Night Vision MOD-3 bridge. The problem with ANVIS10 is that they are rather fragile. There is not much I could do about the pods but If I could get them mounted to a MOD-3 bridge, it would be better. Using a MOD-3 bridge would simplify power as well. ANVIS10 uses a ball detent mount and remote battery pack. This makes it annoying if I want to share the ANVIS10 or use a normal bino goggle I would have to switch the mount. I knew I wanted to make a ground version of the ANVIS10 but I had to take certain things into consideration. Whichever bridge I go with, they have to have pupillary distance adjustment and onboard power. The MOD-3 bridge has both of those features. Below are some mock-ups I made to show it could be possible. I simply placed the bridge on top of the ANVIS10 pods.
ANVIS10 pods sitting underneath the MOD-3 bridge
Here is the same setup but with QTNVG pods.
QTNVG pods sitting under the PP-NVG bridge.
All I needed was an offset adapter that could dovetail into the MOD-3 bridge QD shoes and have a matching dovetail that fits into the ANVIS10 pods. Then a set of pogo pins to deliver power from the bridge, through the adapter, and into the pods. I had asked a friend of mine to help me but after several months of not much progress, I abandoned the project.
RPNVG To The Rescue
If you recall, I reviewed the AB Night Vision RPNVG housing. It is similar in concept to the MOD-3 in that it has QD monocular pods. So I had envisioned this technological terror.

Just like the MOD-10 (MOD-3 + ANVIS10) mock-up, I placed the RPNVG bridge directly over the ANVIS10 pods. Only this time I bent the bridge in its panning mode and approximated the position of the ANVIS10 pods. I tested this using a standalone battery adapter Ed Wilcox had made which when attached to a single ANVIS10 pod would power it independently. Somewhat like the GPNVG monocular battery adapter. I then held half an ANVIS10 with bridge and COPS (Clip On Power Supply) in one hand and the standalone Ed Wilcox ANVIS10 pod in the other. Then I spread the pods apart like a panobridge and it seemed to work. Instead of a 3-circle Venn diagram, I saw an Audi logo-looking POV – four overlapping circles. ANVIS10 have a 97º FOV. The RPNVG goes from 40º FOV to 65º FOV so I estimate the PP-NVG has a FOV of 122º similar to QTNVG. If we got this to work with QTNVGs then you could theoretically have 145º FOV but I have my doubts about how practical that would be since the QTNVG eyepieces have a lot of distortion.
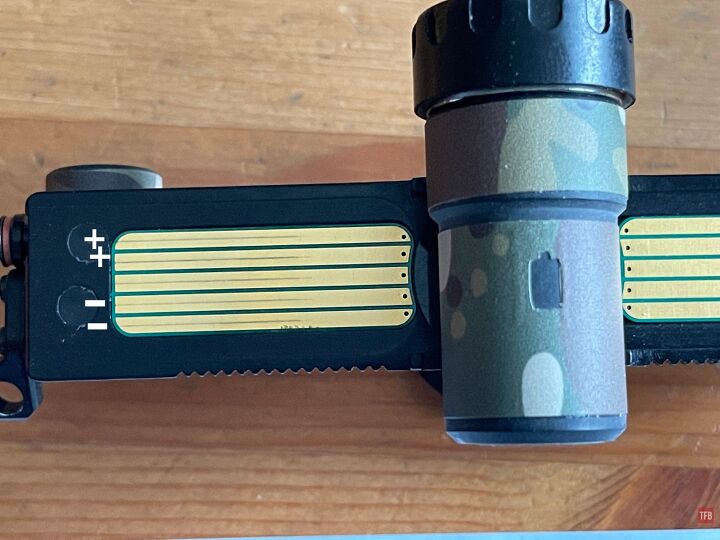
At this time I made a new friend Thomas through our mutual friend Cajer. Thomas is an engineer and has the skill to CAD and 3D print prototypes. So I asked him for his help to make the PP-NVG dream a reality. The first thing to do was to map out the power rails underneath the RPNVG bridge. I just used a voltmeter and measured the rails to find out which ones were positive and which were negative as well as if they produce the proper voltage to deliver 3v.
Here are pictures of the second iteration of the PanoPano adapters. I never took photos of the first set of adapters but I did make a video to show proof of concept. They worked but needed refinement. The second set is a bit wide. We went with a simple design. Using friction from the adapters to set pupillary distance rather than trying to replicate the ratcheting mechanism in the RPNVG monocular pods.


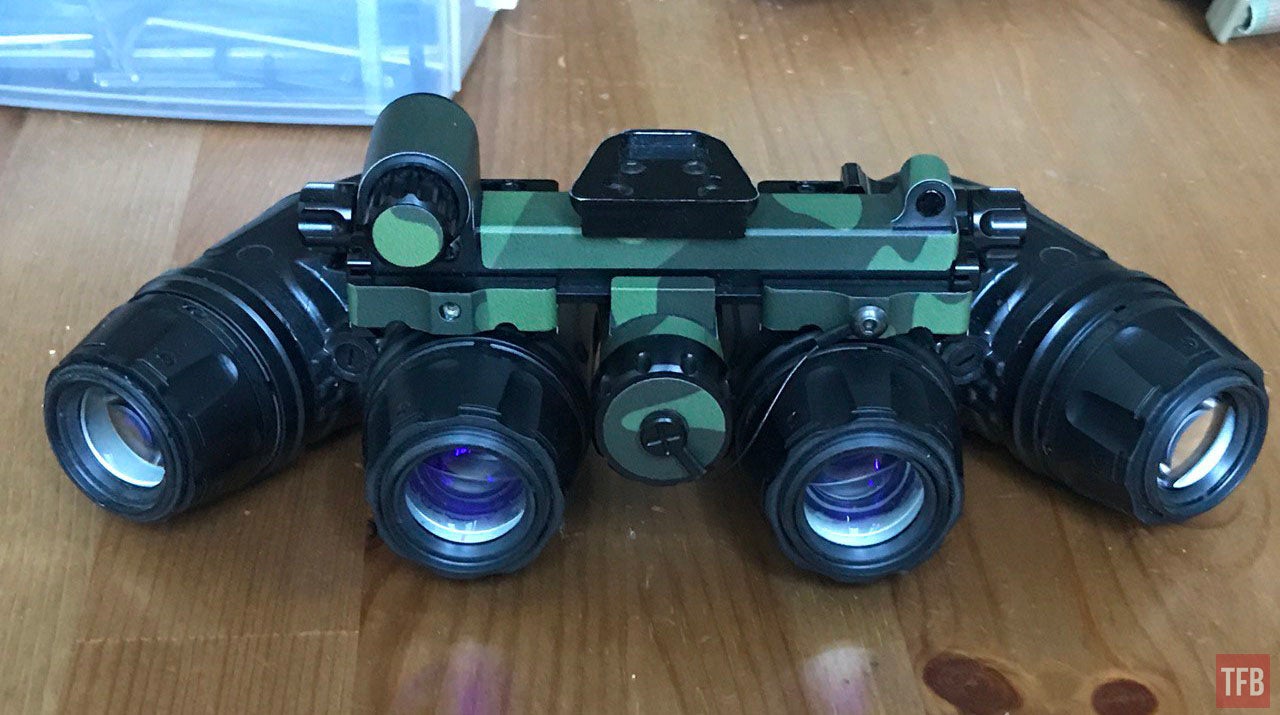
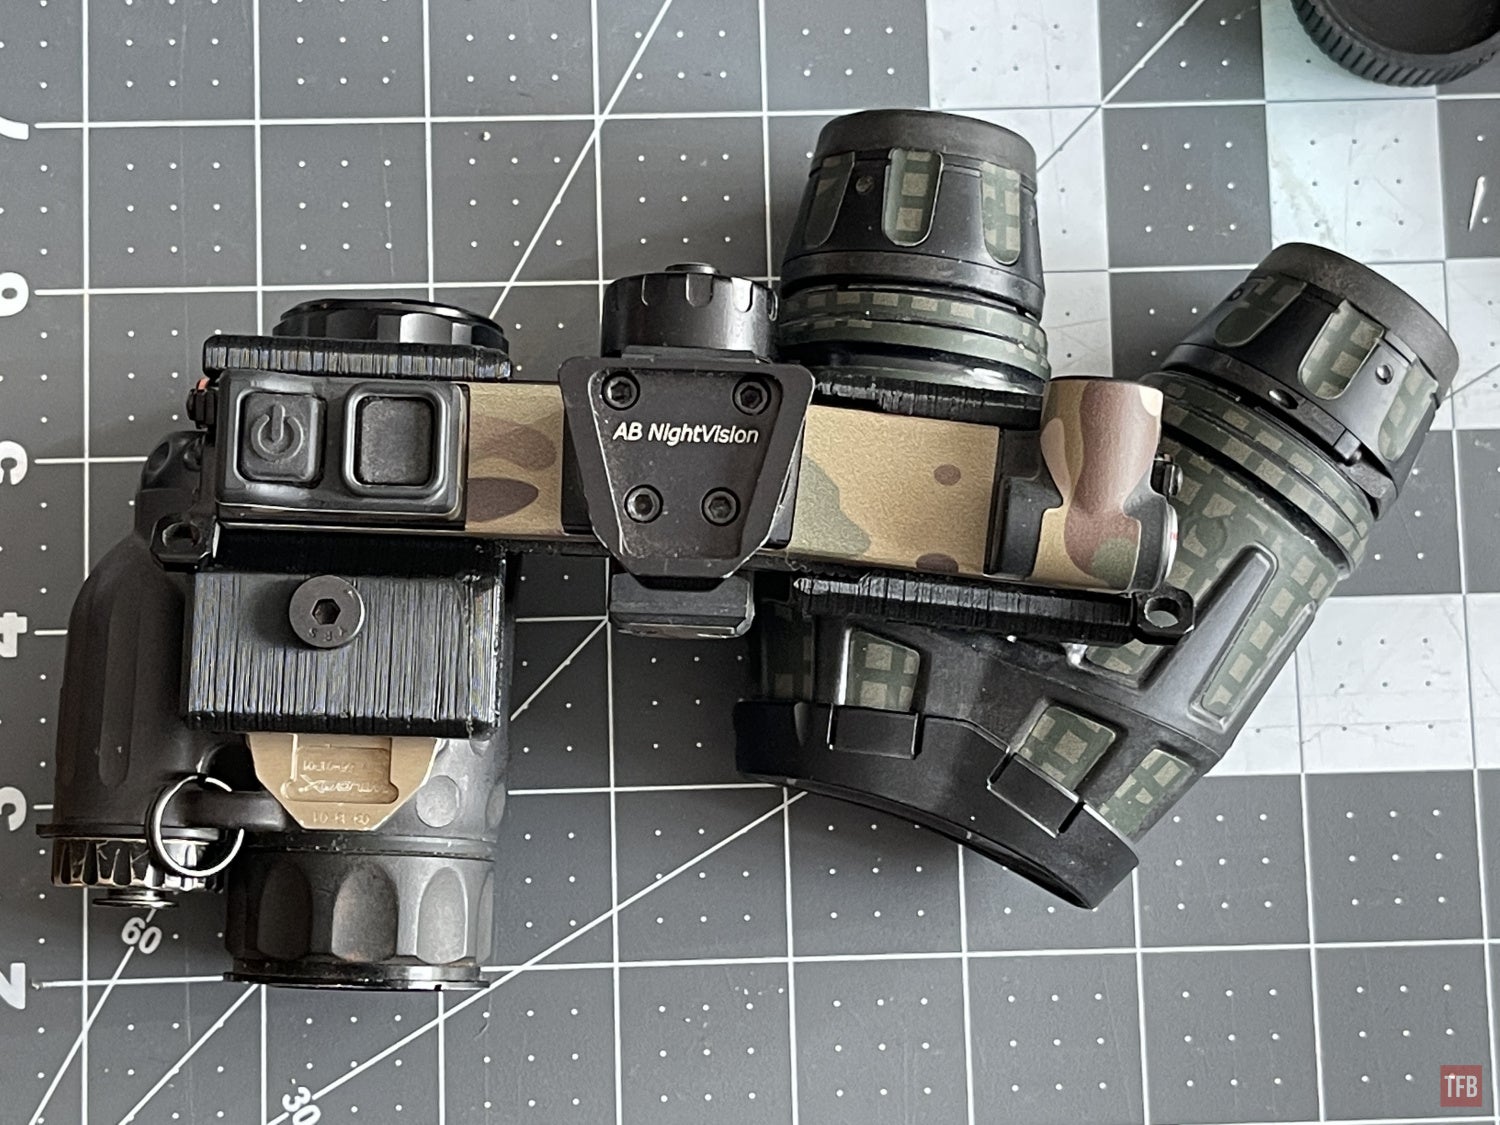
Here is the final form of the PP-NVG. In the two images below I had the spacer installed for the dovetail. I have since removed this since the PP-NVG adapters lower the pods a bit so there is no need for the spacer.
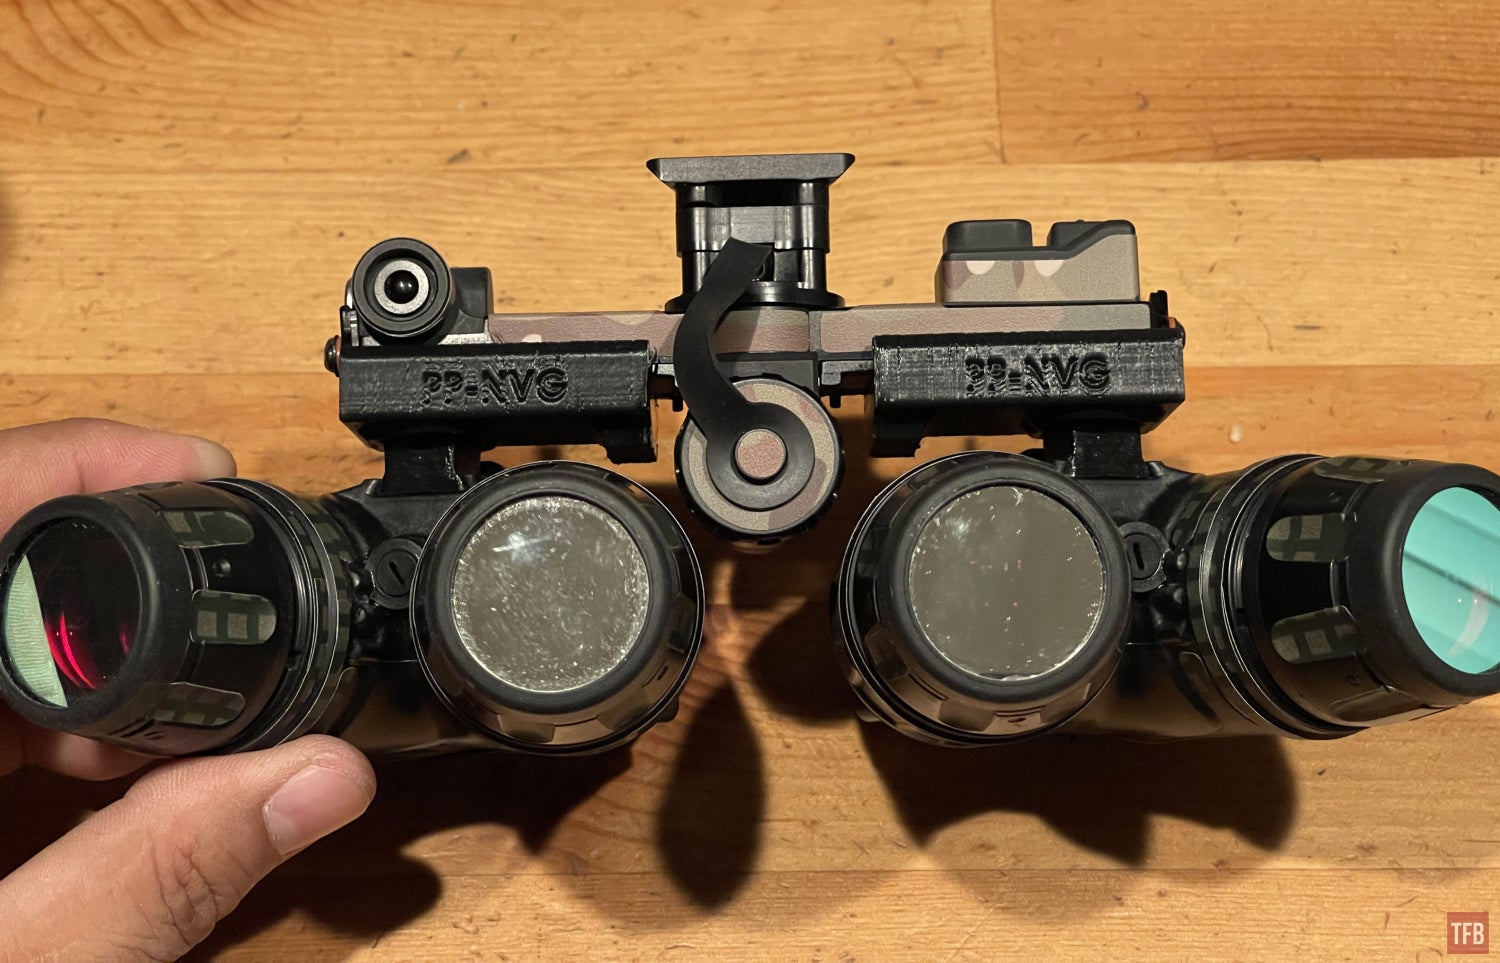
See how far the PP-NVG eyepieces are below the RPNVG bridge? The spacer needs to go.
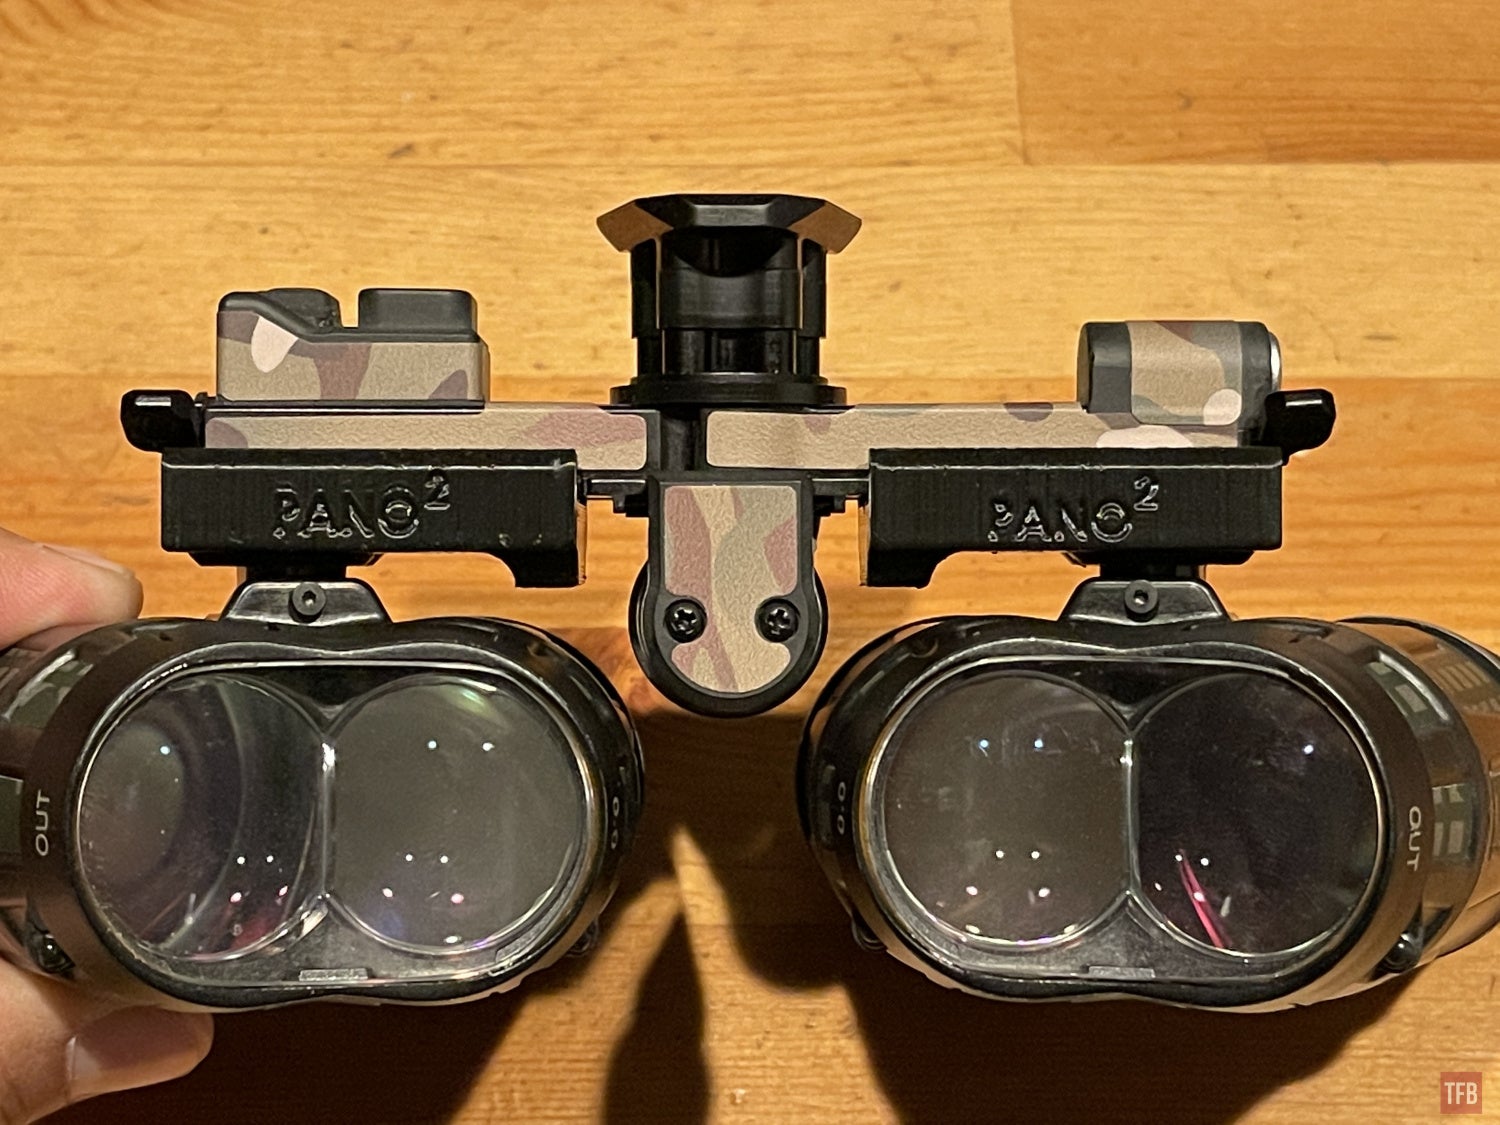
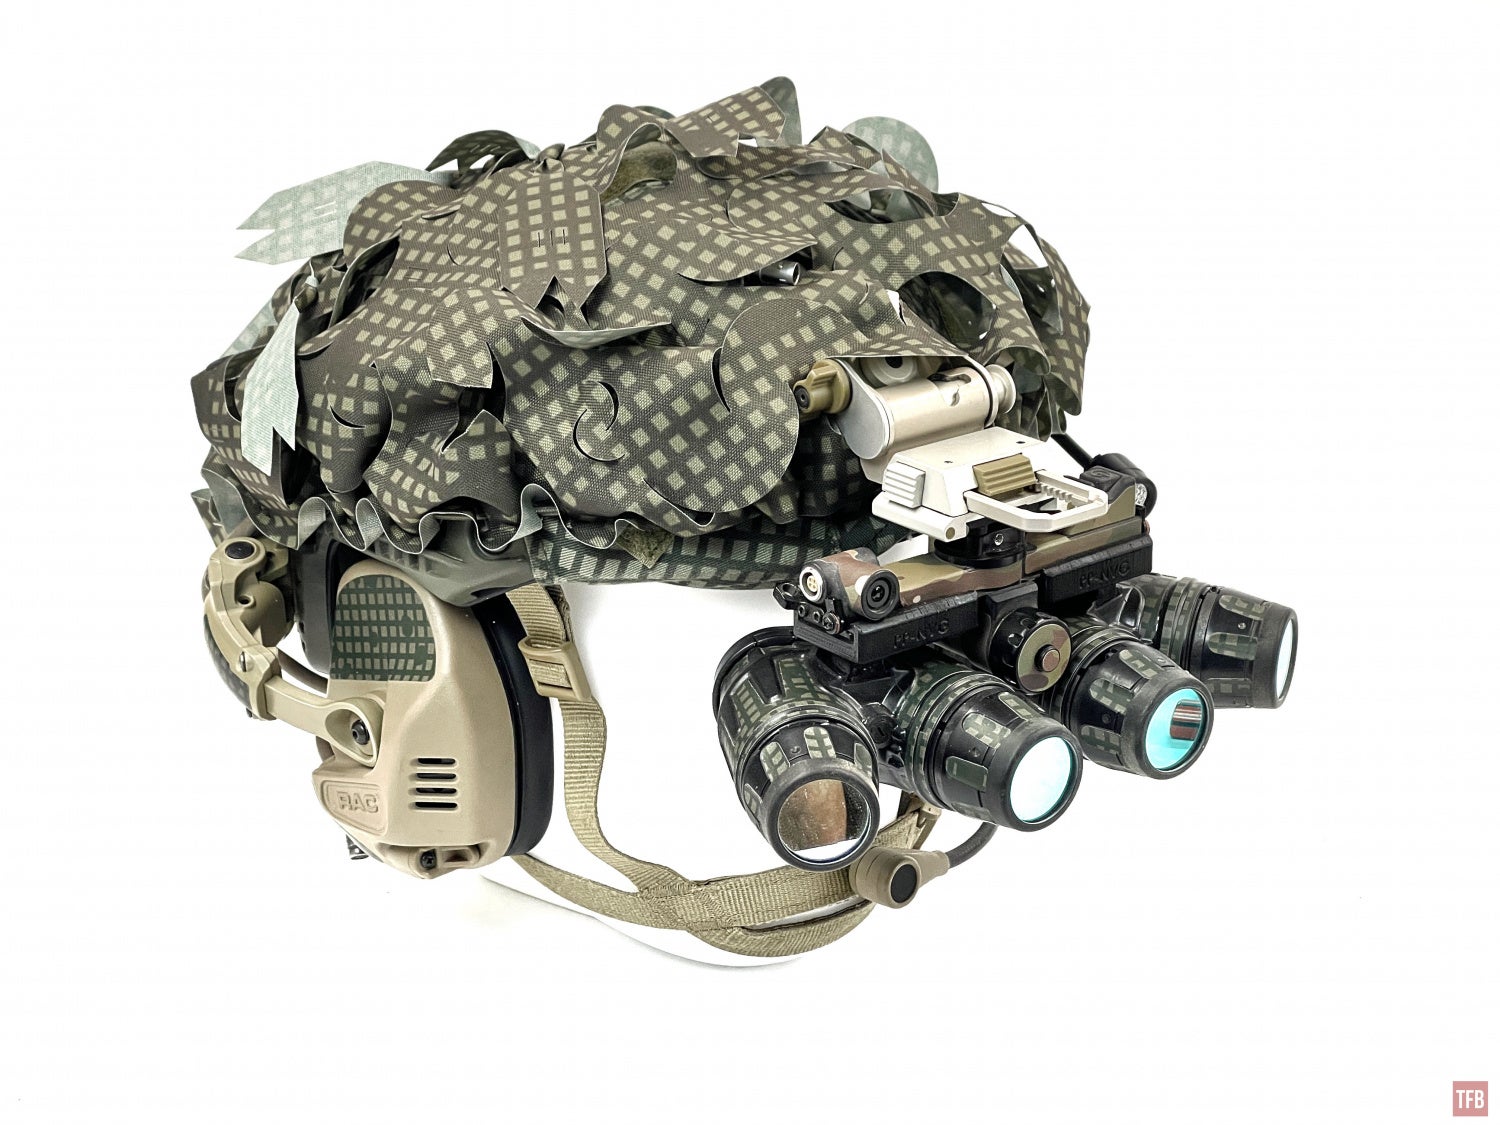
Here is the PP-NVG at the normal position like an ANVIS10.
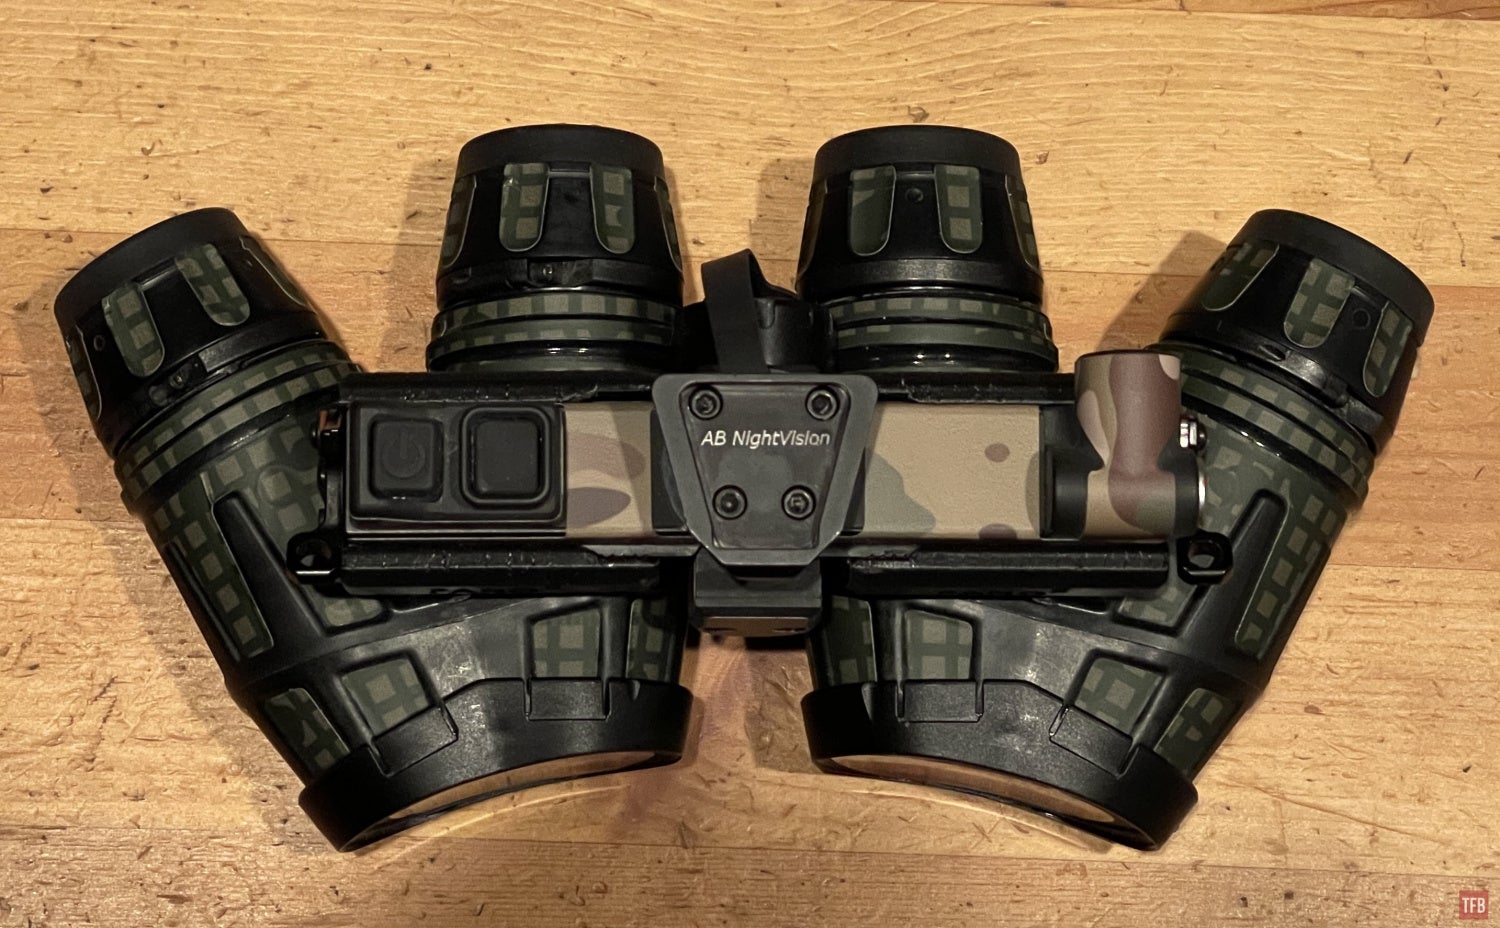
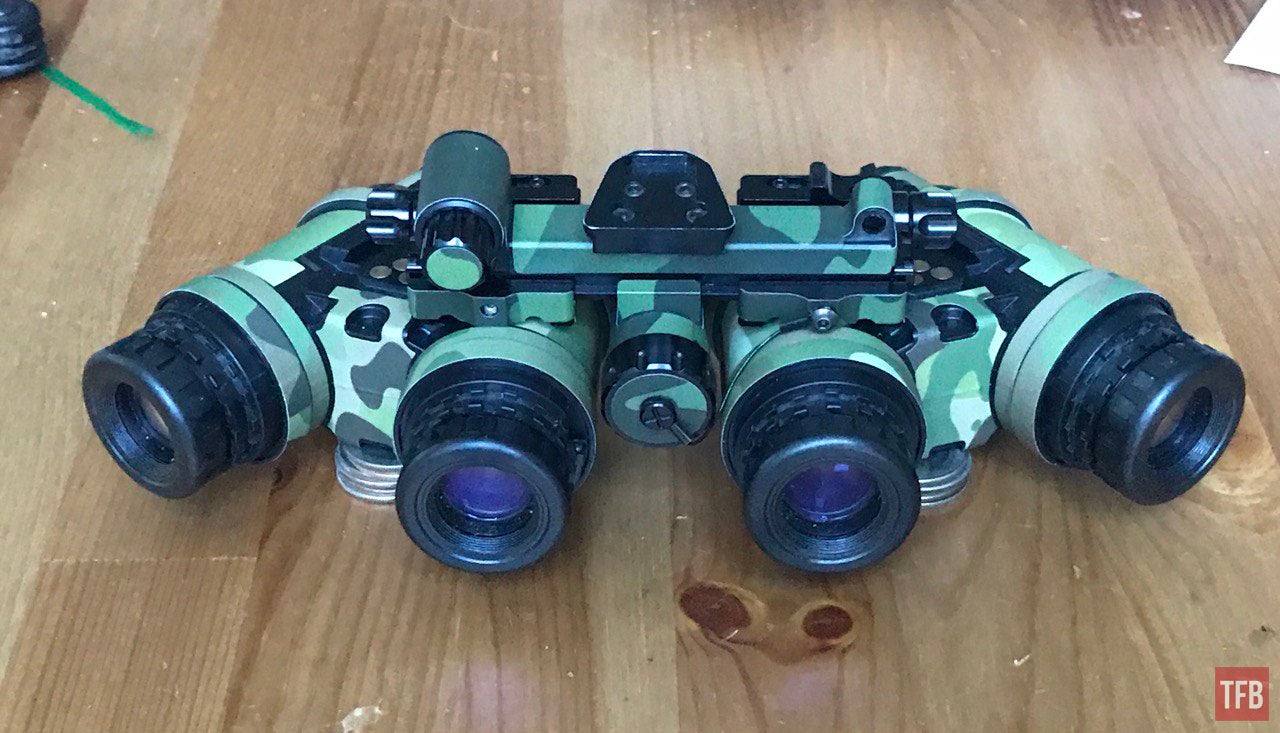
Here is the PP-NVG with the RPNVG set to panning mode.
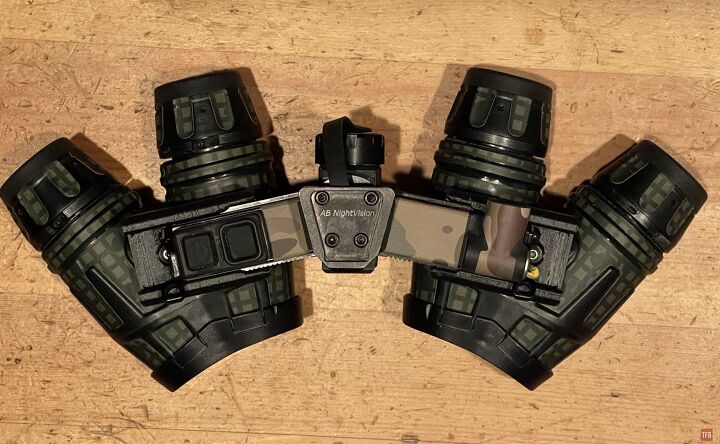
PP-NVG spread eagle
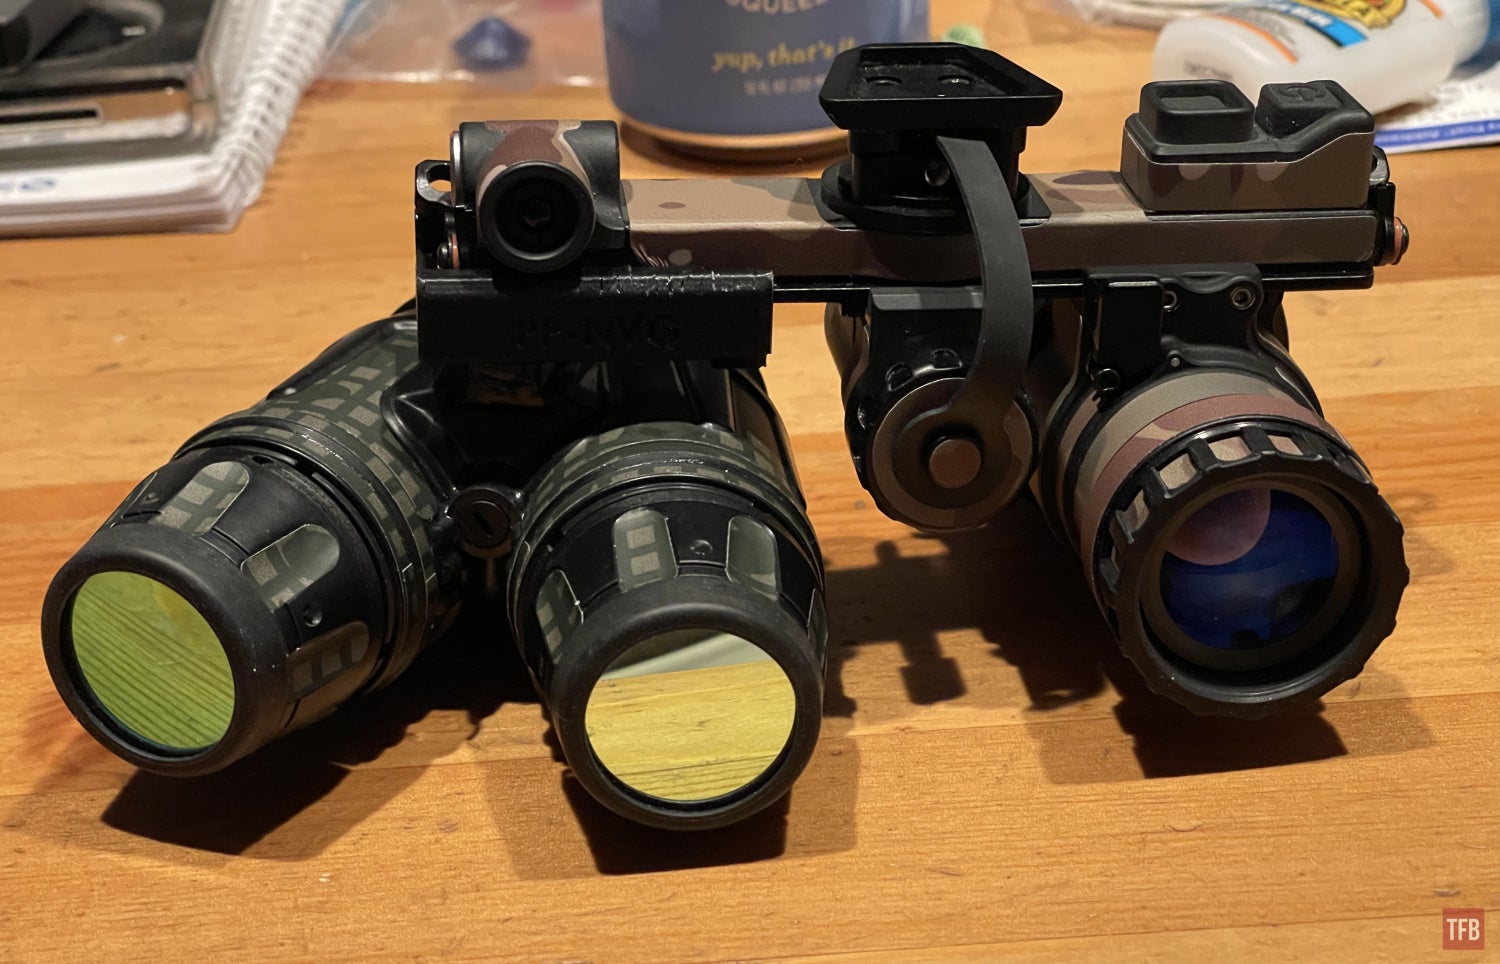
Out of curiosity, I removed one PP-NVG pod and reinstalled the RPNVG monocular pod.

While it fits and works, the height difference in the eyepieces is not suitable. The PP-NVG pod sits too low.
Using The PP-NVG
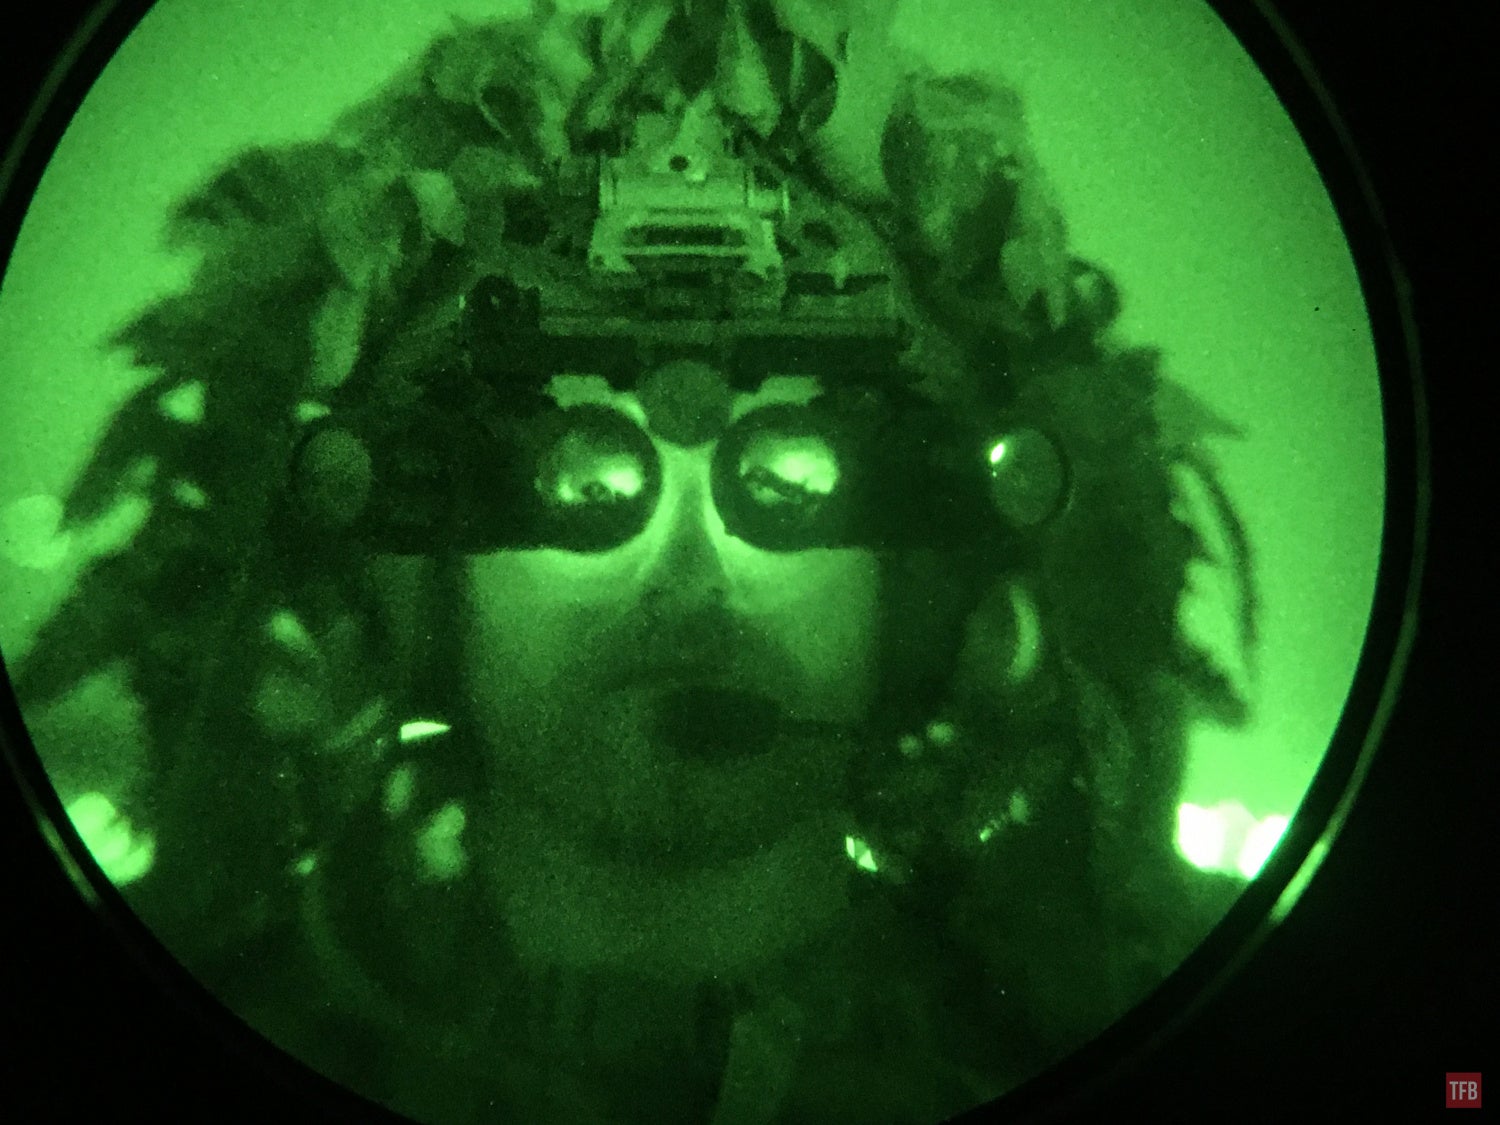
The PP-NVG is great. It is like a GPNVG in that I can use Wilcox dovetail mounts. Here is a photo of my friend Houston trying out the PP-NVG when we were out testing BeezCombat thermal camouflage.
You might recall this image from the East Coast Night Shoot. The PP-NVG setup is self-contained and it ran flawlessly all night in Ohio. I have not been tracking the hours I have used the PP-NVG but I think I am still on the second CR123 battery and I have been using these for a while now.
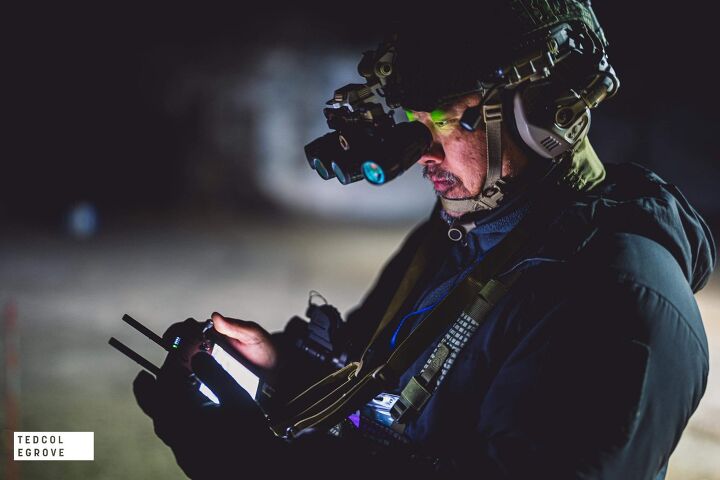
Photo by Ted Colegrove
PP-NVG Thermal Fusion
After helping a local friend with some depredation problems, I realized the PP-NVG could be beneficial. When we were driving around looking for coyotes and beavers, I was driving with a bridge thermal setup. I had a MUM-14 bridged with a SKEETIR-L. That way I could drive lights out around the property with night vision but scan for possible targets out my side window which was rolled down. This worked but I could only look in one direction at a time. I had to swivel my head back and forth so I didn’t drive off the dirt roads.
Well, here is a mock-up I came up with to bridge thermal with the PP-NVG.

I performed a functionality test and it works. When worn, I have my head facing the A-pillar. I can glance with my right eye to look out the far pod in the PP-NVG monocular which is pointed down the road. Then I just need to glance back to the left to look through the thermal out the side window. No need to turn my head anymore.
I showed Thomas what I wanted to do and he came up with this adapter. The eye relief of the SKEETIR-L is rather shallow so that is why it sits so far back. The PP-NVG eyepiece is very forgiving so it does not need to sit so close to my eye.

What Does The Future Hold For The PP-NVG?
How well does the Panning Panos work? It works but just like panobridge monoculars, I find the setup a cute gimmick. I much prefer keeping the ANVIS10 pods in the parallel orientation rather than sacrificing the image quality for a bit more FOV. The PP-NVG prototype is functional but it has some minor issues. For simplicity, the adapters are mirror images of themselves. Due to print orientation reasons, the dovetail for the ANVIS10 pods is printed in a different orientation and is bolted to the RPNVG bridge adapters. They have a tendency to spin a little bit. I want to redesign the PP-NVG adapters so they are a solid piece and have them printed in MJF like the Noisefighters Panobridge. Maybe one day I can get them machined out of Delrin.
For now, they work and they work well enough. Thanks Thomas for all your help.