 Your Privacy Choices

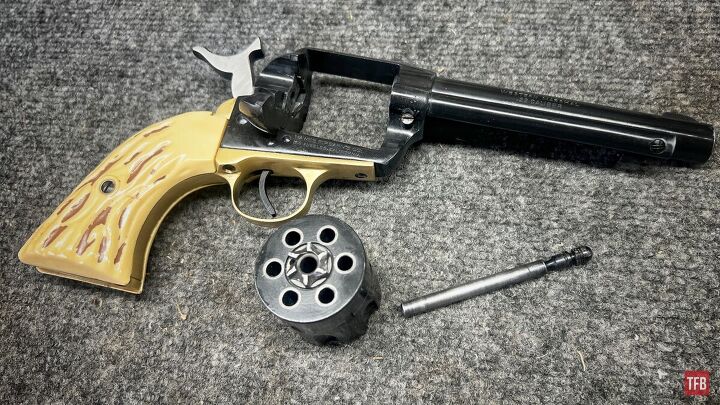
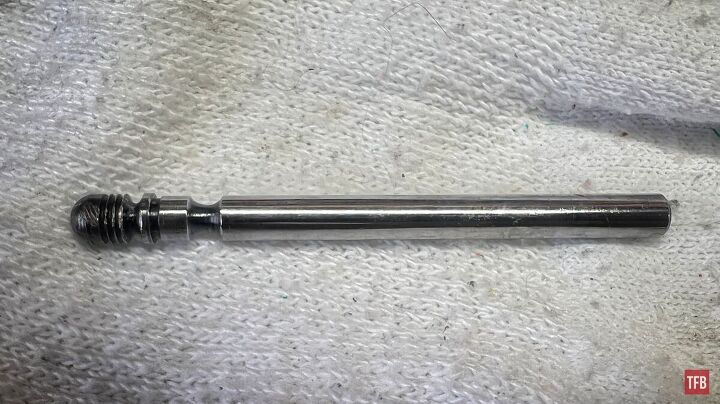
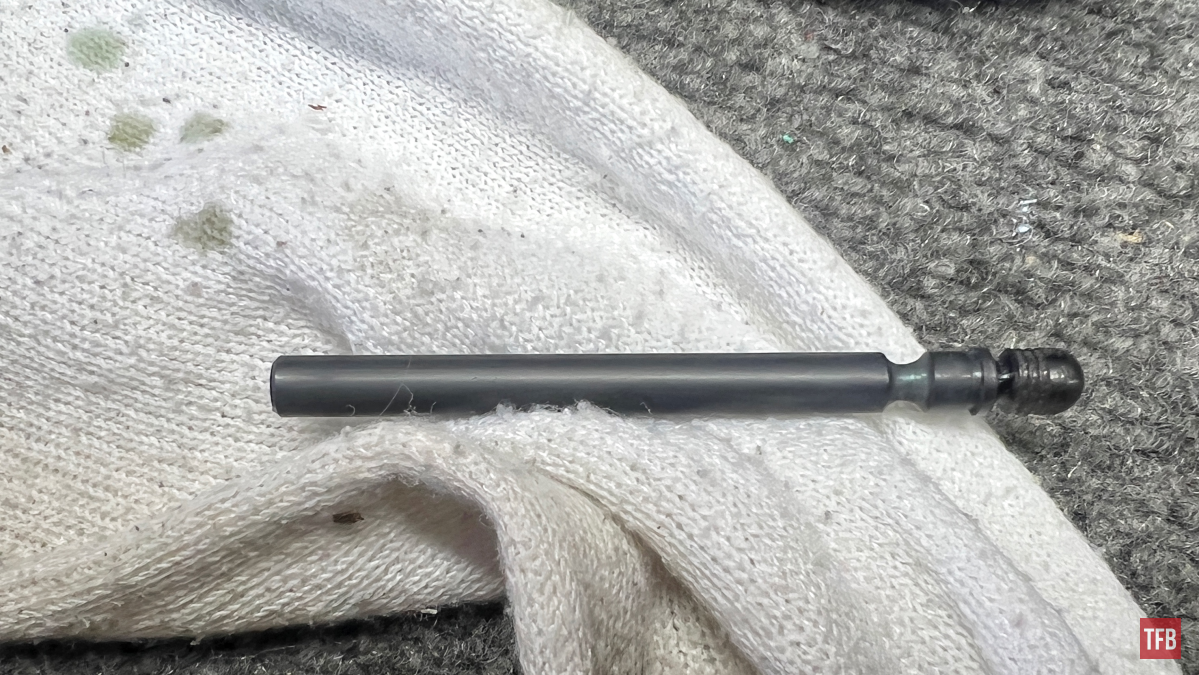
Welcome everyone to the TFB Armorer’s Bench! As mentioned in the little blurb below, this series will focus on a lot of home armorer and gunsmith activities. In this article, I decided to showcase a real generic scenario in which someone would be using cold blue. Cold blue looked at critically would reveal itself as a separate chemical reaction from real-deal bluing. Real true bluing is accomplished with rust as a core fundamental. With real bluing, rust gets converted to a black oxide layer (basically black rust) that acts as an added barrier to normal red rust. Cold blue typically is a chemical solution that more or less stains steel black. It is usually used for touch-ups and small parts. This time around I will be using it on a center pin for an old German 22 revolver.
Other Bluing Reading @ TFB:
- TFB Armorer’s Bench: Cleaning Up and Fire Bluing Screws
- TFB Armorer’s Bench: Education on Bluing Types & Processes – Part 1
- TFB Armorer’s Bench: Education on Bluing Types & Processes – Part 2
- Review: Can You Use Birchwood Casey Super Blue to Refinish an AK?
TFB Armorer’s Bench: Using Cold Blue
Here, we at TFB hope to inform, entertain, and even inspire any would-be gunsmith or armorer out there. Ideally, with the information I provide and with the help of our sponsors, you can have some useful knowledge pertaining to the conservation and improvement of firearms technology while at the same time sharing experiences and teaching each other new tips and tricks along the way in the comments. Digging deep into what it is to be an armorer or gunsmith has significance but what is important is what those people do to show they’ve earned that title. I am happy to share my experiences and knowledge and hope it is informative!
Make your personal safety a priority:
- Practice proper gun safety. Always make sure before the firearm hits your bench that it is unloaded and safe to be handled.
- Wear the proper safety equipment. The main one would be safety glasses (decent ones) since parts are often under spring tension and you may work with high RPM tools. Other honorable mentions would be latex gloves or a respirator when working with potentially harmful solvents and oils. Also hearing protection when working with loud machinery or test-firing firearms.
- Modifications, alterations, and customizations will void your firearm’s warranty 9.5 times out of 10. Please take that into consideration before attempting any at-home gunsmithing.
- If you are unsure about proper safety practices, disassembly procedures, or warranty standards, stop, put down the tools, and consult a competent gunsmith.
The Polish: Using Cold Blue
Removing the center pin on this old J.P. Sauer & Sohn Western Marshal for cleaning and other maintenance was noticeably hard after I bought it used. Someone else has obviously had this issue as well because plier marks are still visible on the head portion of the center pin. Usually a good polish of the center pin and deburring of the channel in the frame it travels through alleviates this sort of thing. So in this case that is what I started with. I removed the center pin and cleaned up the center pin hole in the frame ( I also paid attention to the hole in the cylinder just in case).
I polished the center pin (this will remove any present finish) with some good old Flitz and a soft rag. A quick and easy way for doing something like this is using a drill.
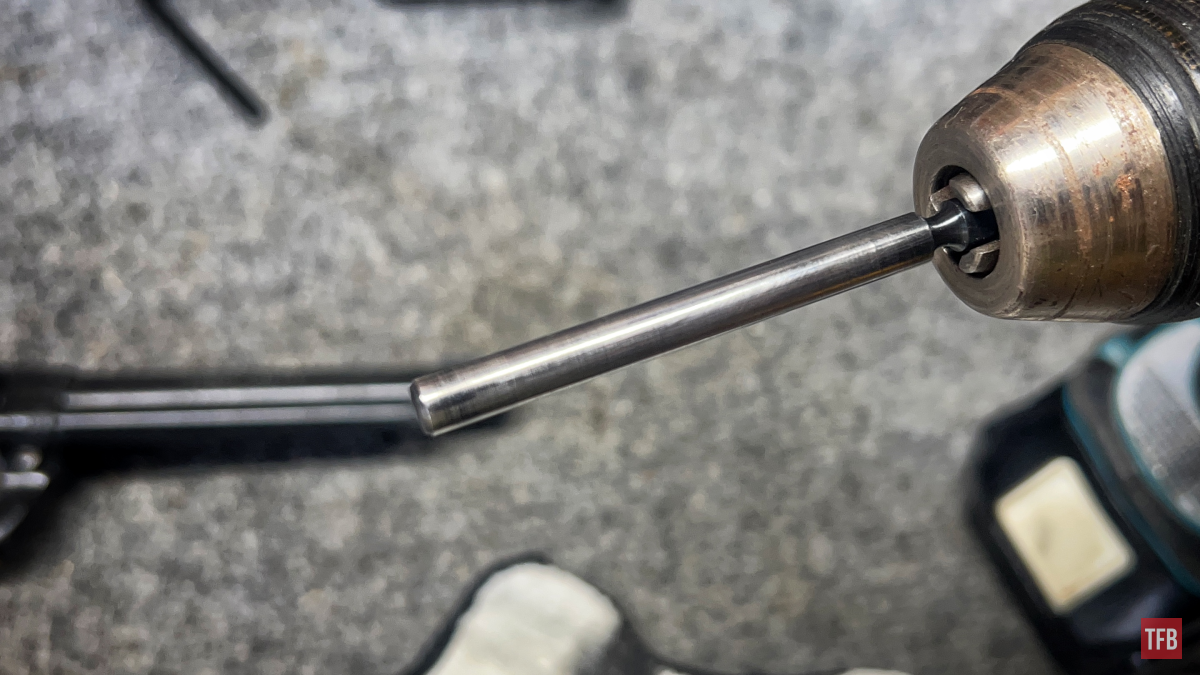
I chunked the center pin into my drill and plopped some Flitz polishing compound on it.

Be careful if you ever attempt anything like this (I do not recommend doing anything you see me do) as the rag or cloth can get sucked in. I ran the drill slow enough where it was safe and polished the metal in mere minutes.
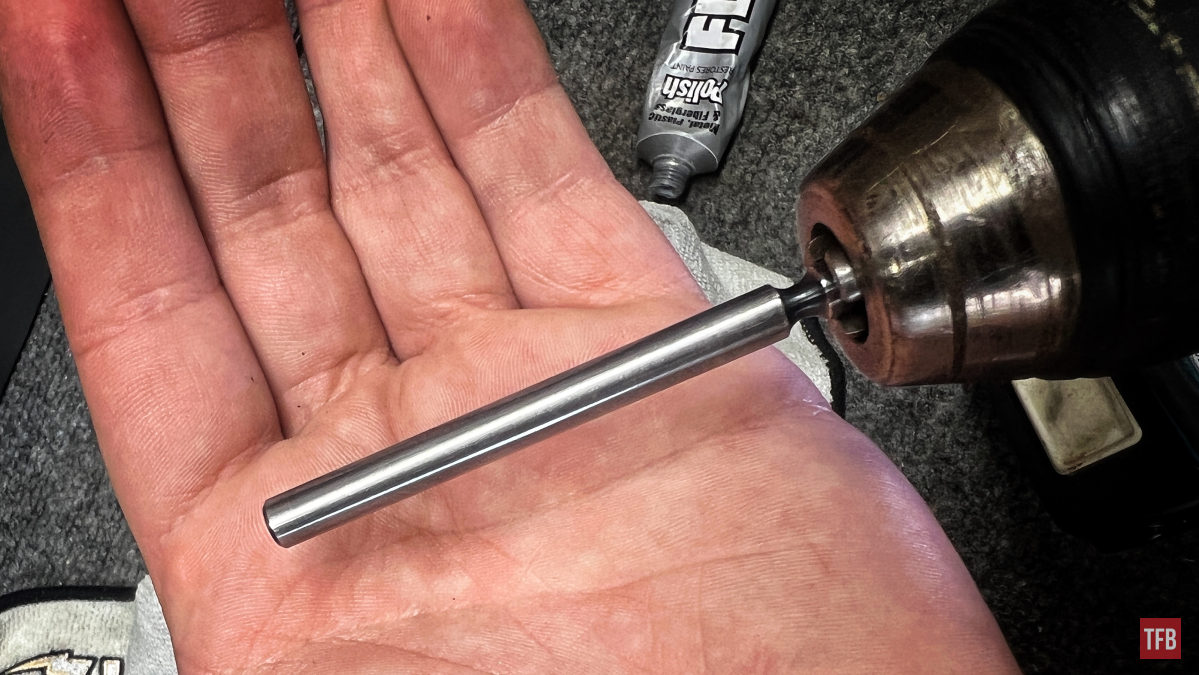
With the center pin polished to my liking, I could move onto using the cold blue. Want a glossier finish? Have a higher polish. Want a more matte finish? Lower polish. Simple and easy!
Step One: Using Cold Blue
The first thing is first! Safety. Yes, I know safety is boring and sooo mainstream but bear with me. Make sure your ammunition is stored and away from your bench. If starting out with an assembled firearm, make sure to check the chamber, magazine, and space between. Then check again. As far as PPE, I highly recommend wearing safety glasses at the very least.
Step Two: Using Cold Blue
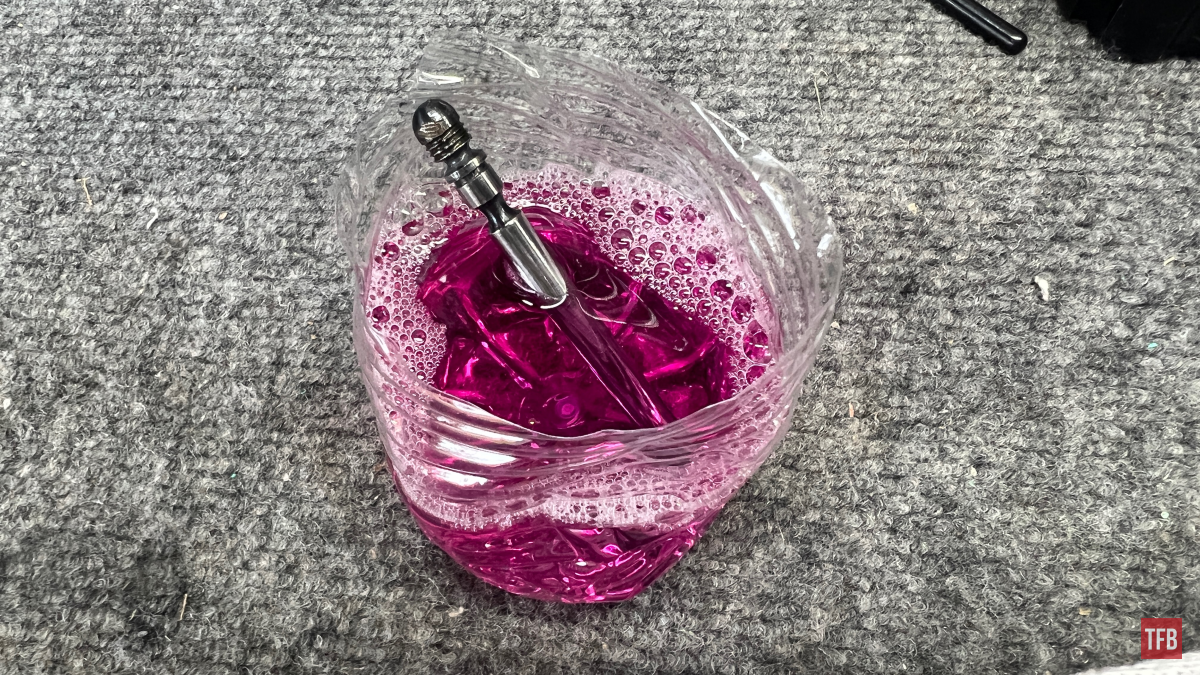
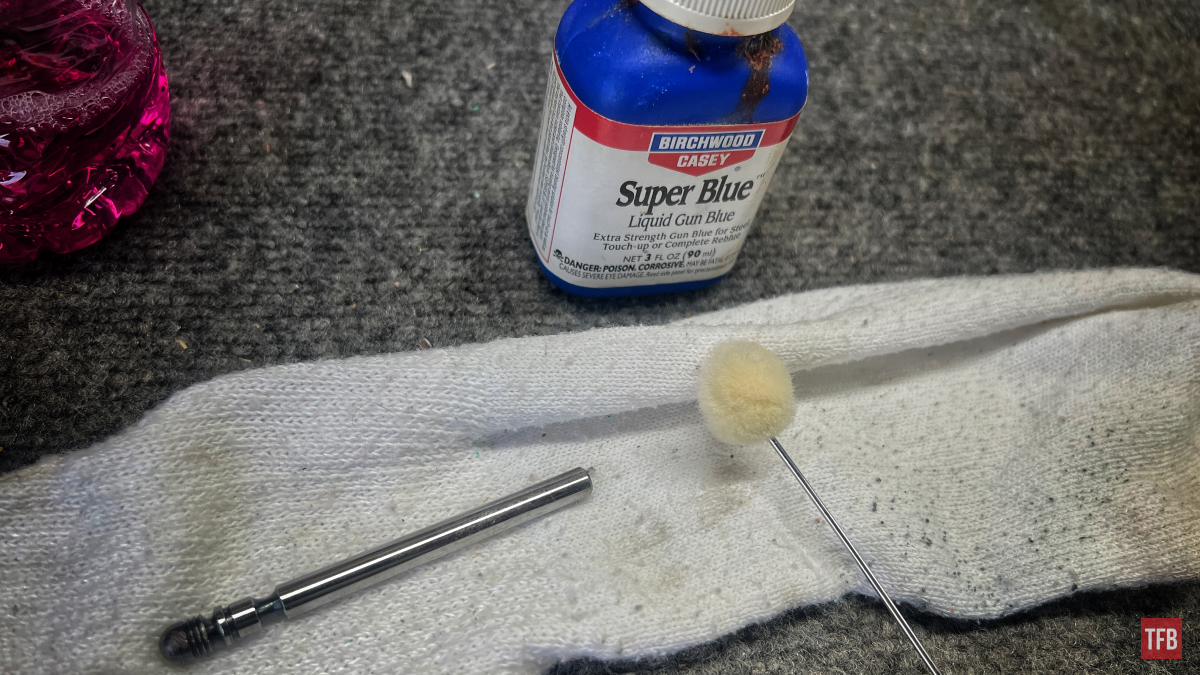
In order to “blue” this center pin according to the instructions, we have to first degrease the part to remove any present oils that may impede the chemical from doing its thing. I used some automotive degreaser in a plastic cup (made from the bottom of a water bottle) and filled it so that it would soak most if not all of the center pin.

I let it sit there for five or so minutes to fully degrease while I worked on some other projects.
Step Three: Using Cold Blue
After degreasing, I grabbed a clean rag and wiped the center pin dry.
Once dry, the cold blue solution can be applied to the center pin. I used a cotton swab to wipe light streaks onto the pin.
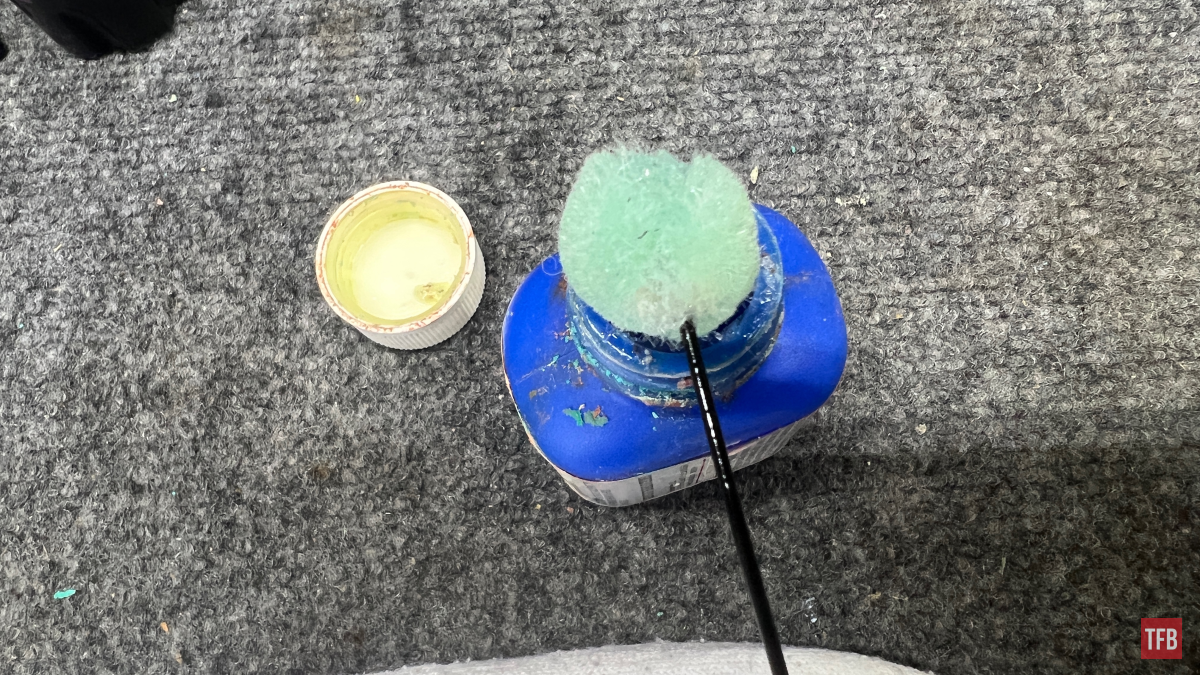
The color transformation is almost immediate. Like I had said, you are basically staining the metal. Let the center pin sit with the solution active for around 30 seconds.
Step Four: Using Cold Blue
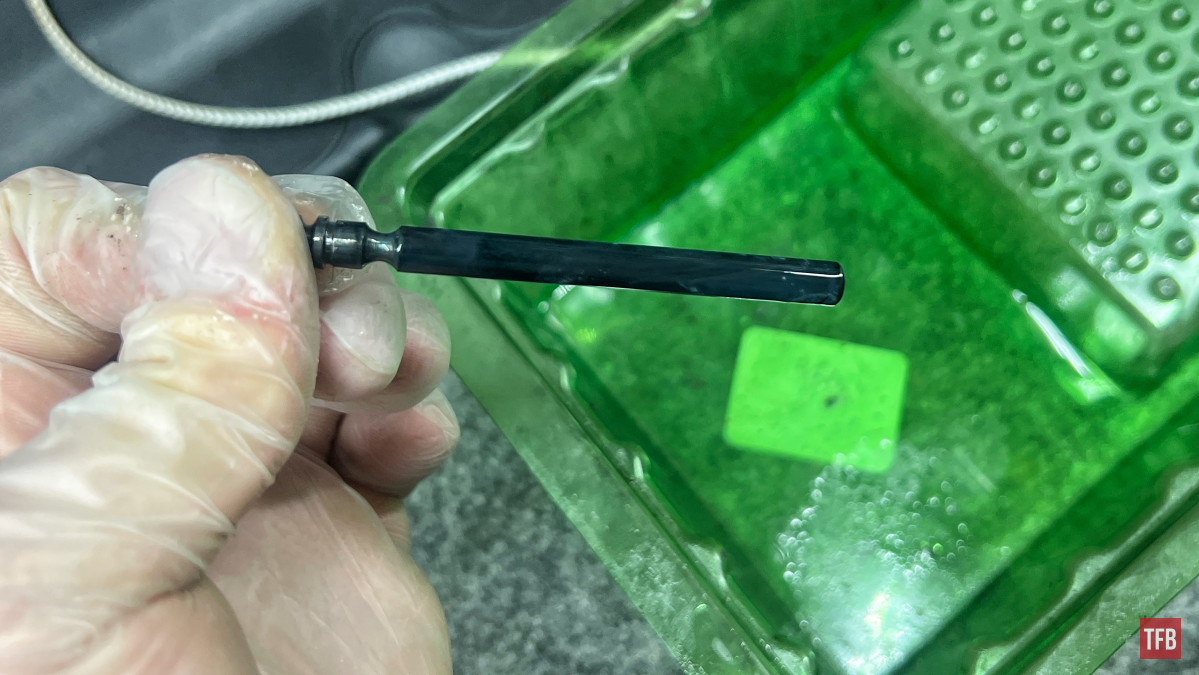
After 30 seconds dunk and shake or rinse in cold water. This will likely result in a glossy-looking finish but be aware it is not its true finish.
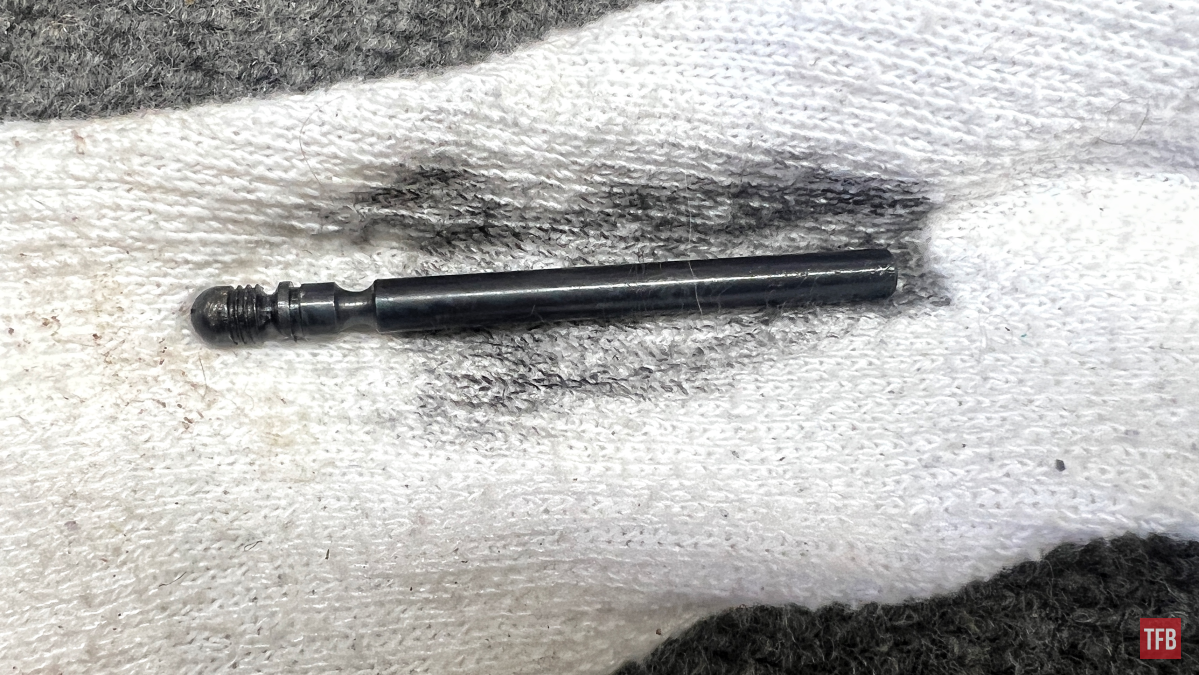
The outside layer usually is not the permanent one and can be wiped off with a rag or steel wool to reveal a more matte-looking finish.
Step Five: Using Cold Blue
Re-polish or blue as you desire. I did not re-polish because I honestly do not mind one way or another how this pin looks just as long as it functions better. I continued to apply the cold blue until I reached my desired depth of darkness.

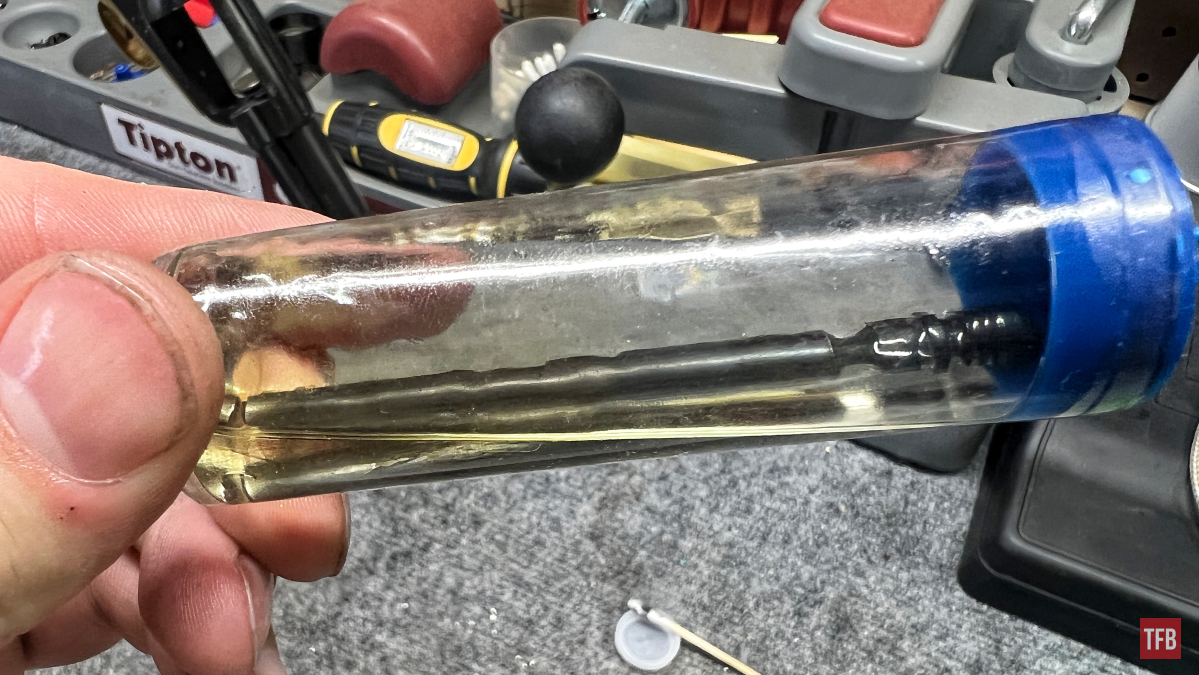
Literally, rinse and repeat the wipe, apply, and rinse process. When the goal blue has been reached, the part should be dried and placed in a well-oiled area for a day or so. I have an old cleaning brush tube that worked perfectly for this sort of thing. Just gun oil and our part. This keeps the newly “blued” part from rusting as a result of the degreasing and chemicals applied.
Conclusion: Using Cold Blue
I am not a fan of cold blue being used for much other than touch-ups and small parts. Call me a purist if you want but it simply is not bluing by definition and only by appearance. The finish by no means is as durable or rust-resistant as actual full-blown bluing done with salts or rusting processes. It has a small place in my shop. I have used this same bottle for years hence its beat-up look. It works well for the job it is meant for.
As always, thank you for reading TFB! Be safe out there, have fun while shooting, and we will see you next time for the TFB Armorer’s Bench! Also, let us know what you think in the comments below! We always appreciate your feedback.