 Your Privacy Choices
Welcome everyone to the TFB Armorer’s Bench! As mentioned in the little blurb below, this series will focus on a lot of home armorer and gunsmith activities. In this article, I decided to touch on a specific “specialty” tool that I covered in last week’s TFB Armorer’s Bench. This is covering the M1 Carbine bolt disassembly tool and how it works. Let’s dive right into Using an M1 Carbine bolt disassembly tool!
Other M1 Carbine Reading @ TFB:
- TFB FIELD STRIP: M1 Carbine
- The M1 Carbine, A Great Gun For Youth And Small Framed People
- Tactical M1 Carbine? The Inland M30-P Pistol and Brace
- Modern Historical Personal Defense Weapon Calibers 006: The .30 M1 Carbine
- The American M1 Carbine
TFB Armorer’s Bench: M1 Carbine Bolt Disassembly Tool
Here, we at TFB hope to inform, entertain, and even inspire any would-be gunsmith or armorer out there. Ideally, with the information I provide and with the help of our sponsors, you can have some useful knowledge pertaining to the conservation and improvement of firearms technology while at the same time sharing experiences and teaching each other new tips and tricks along the way in the comments. Digging deep into what it is to be an armorer or gunsmith has significance but what is important is what those people do to show they’ve earned that title. I am happy to share my experiences and knowledge and hope it is informative!
Make your personal safety a priority:
- Practice proper gun safety. Always make sure before the firearm hits your bench that it is unloaded and safe to be handled.
- Wear the proper safety equipment. The main one would be safety glasses (decent ones) since parts are often under spring tension and you may work with high RPM tools. Other honorable mentions would be latex gloves or a respirator when working with potentially harmful solvents and oils. Also hearing protection when working with loud machinery or test-firing firearms.
- Modifications, alterations, and customizations will void your firearm’s warranty 9.5 times out of 10. Please take that into consideration before attempting any at-home gunsmithing.
- If you are unsure about proper safety practices, disassembly procedures, or warranty standards, stop, put down the tools, and consult a competent gunsmith.
Field Strip? – Using an M1 Carbine Bolt Disassembly Tool
The first thing is first! Safety. Yes, I know safety is boring and sooo mainstream but bear with me. Make sure your ammunition is stored and away from your bench. If starting out with an assembled firearm, make sure to check the chamber, magazine, and space between. Then check again. As far as PPE, I highly recommend wearing safety glasses at the very least. There are parts under spring pressure.
As far as removing the bolt for disassembly goes, you do not need to field strip your M1 Carbine. If you want to, whether it be because you want to get to know your firearm better or to perform general maintenance on it, I highly recommend this article by staff writer Doug E. The bolt can be removed on its own without disassembling the gun or harming your gun. I know veterans and collectors who know this trick and attest to it.
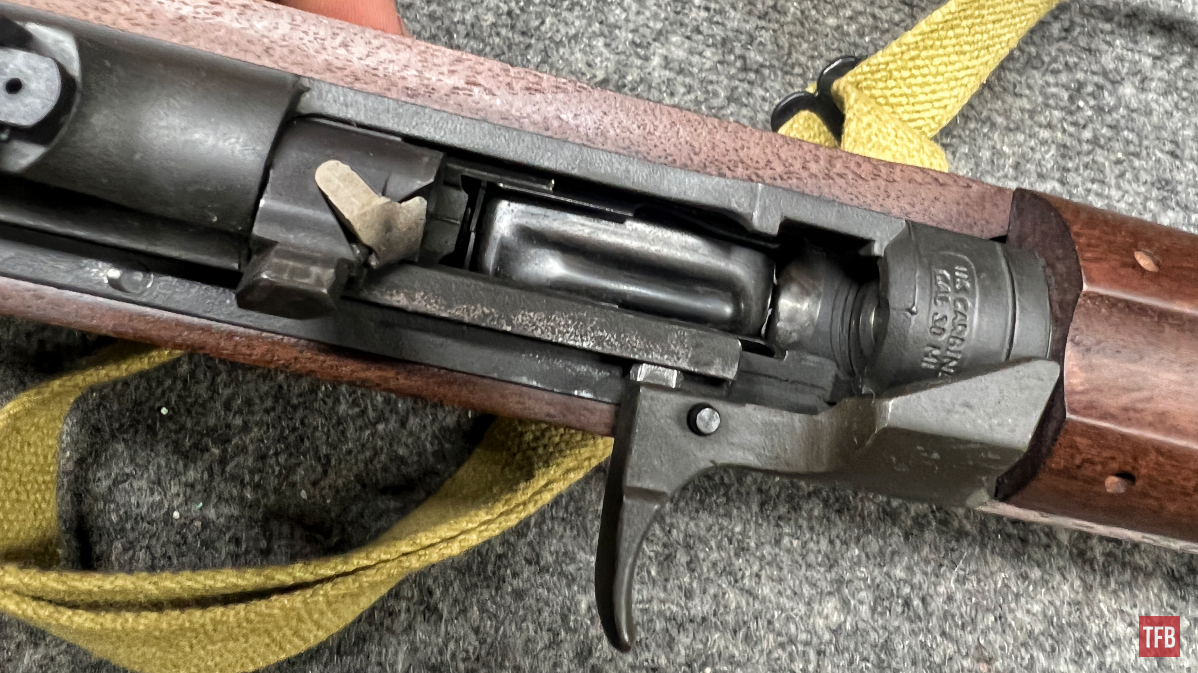
Starting out, make sure to locate this cut on the right-hand side of the receiver. It lies in the rail recess for the slide (the “charging handle” is referred to as the slide in most literature).
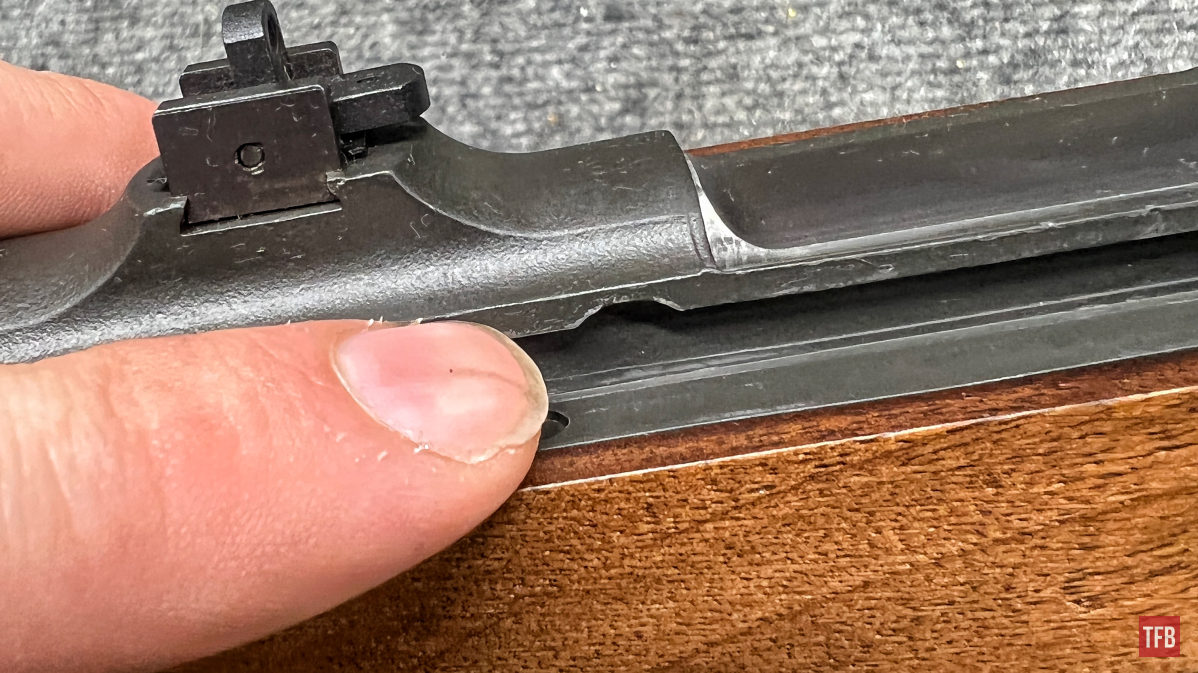
Moving the slide back to this position (where the notch is) and then pulling outward, the slide will be released from the rail.
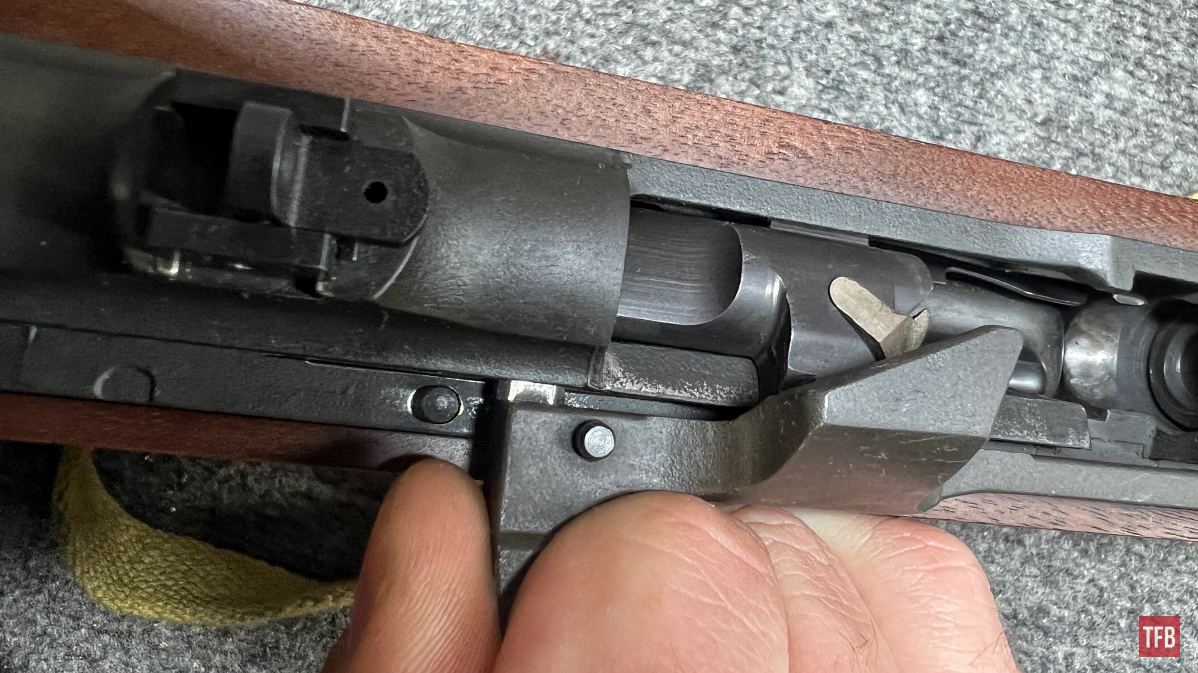
With the slide released from the rail, push the bolt to its rearmost position.
Allow the slide to move forward (it can be back in the recess at this point).
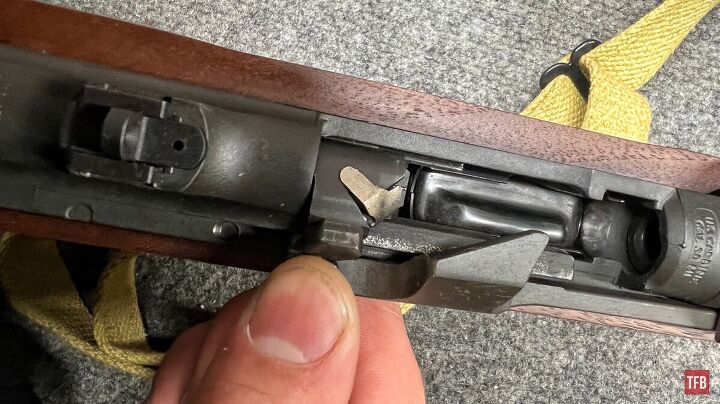
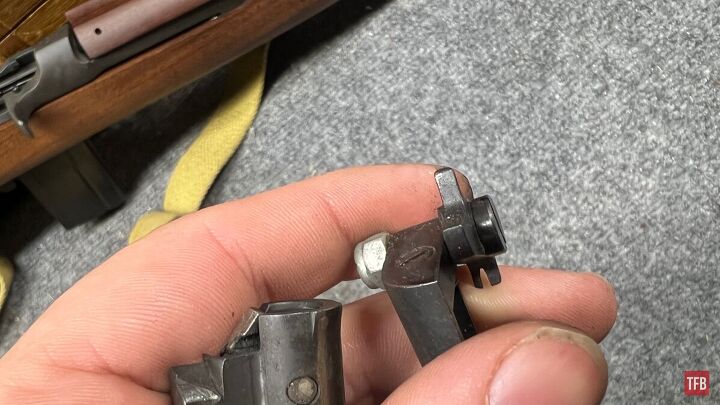
Slide the bolt forward to the point as shown below.
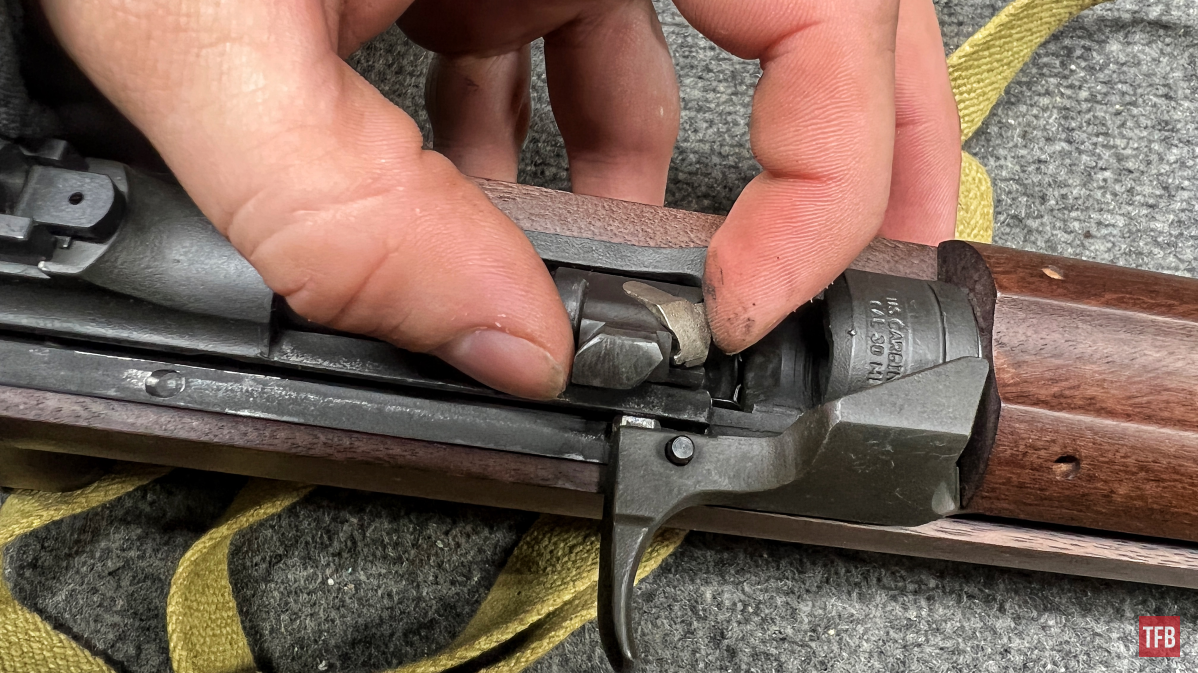
The bolt should be able to be leveraged out. It may take a little twisting and turning.
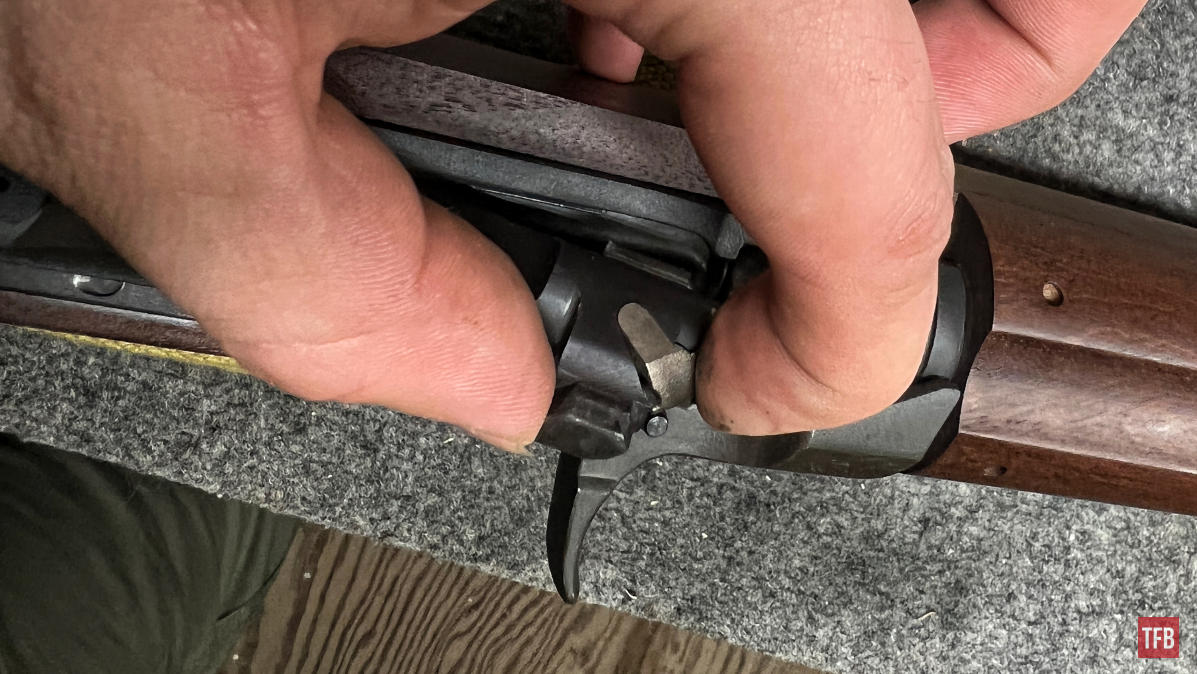
Our bolt is now removed and ready to be taken apart.
Step One: Using an M1 Carbine Bolt Disassembly Tool
Reminder! Wear safety glasses there are springs and detents. You have been warned.
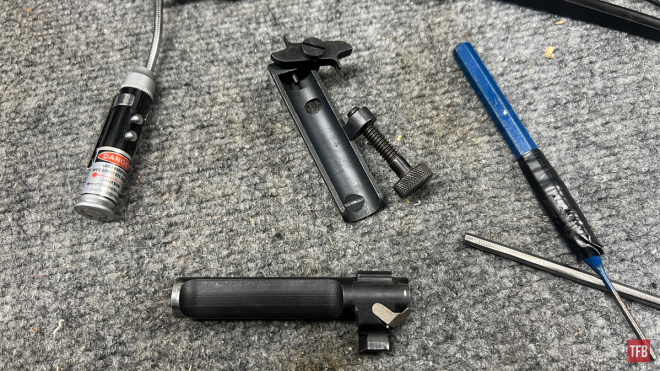
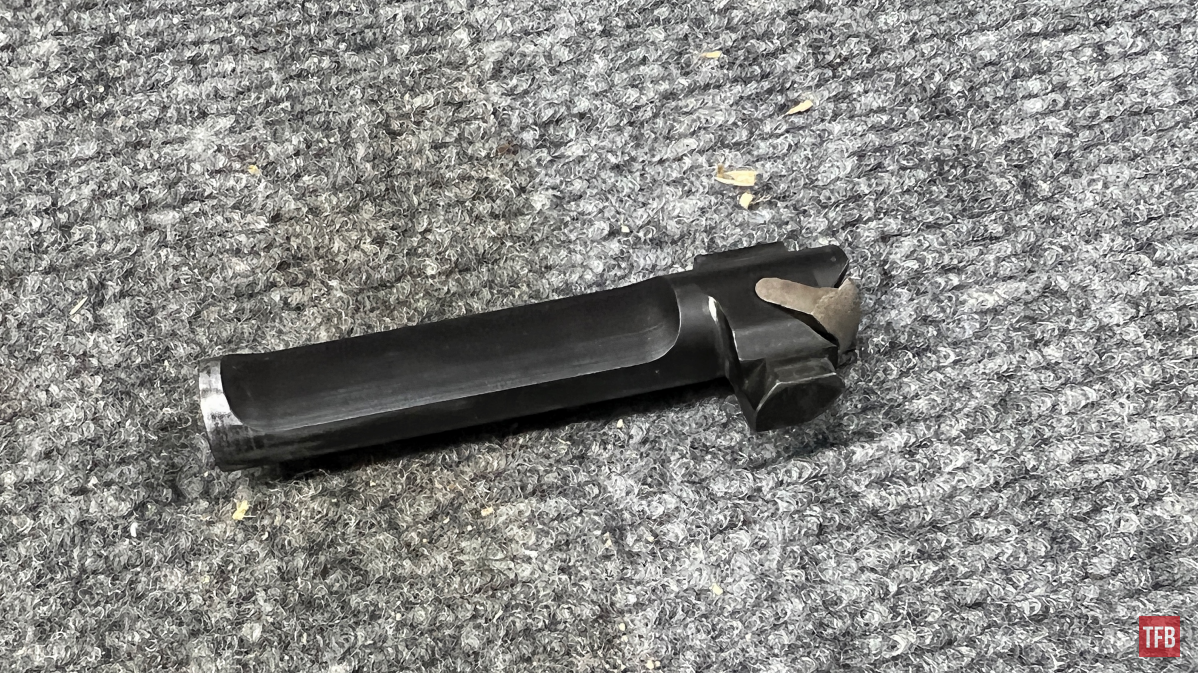
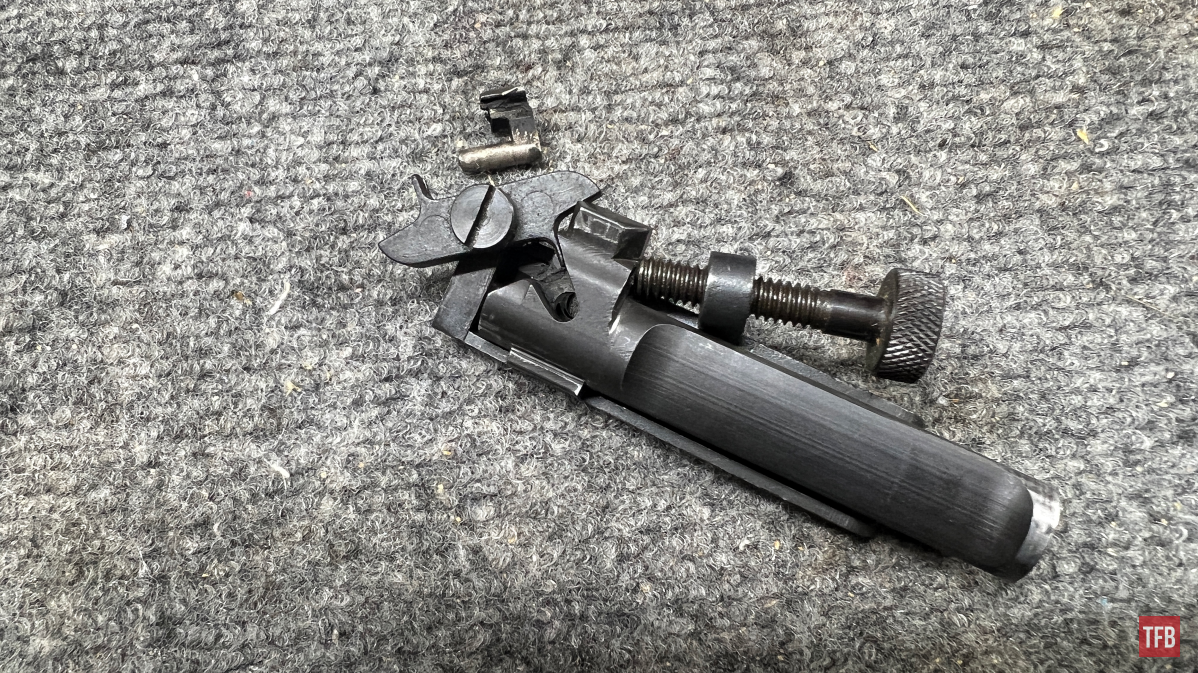
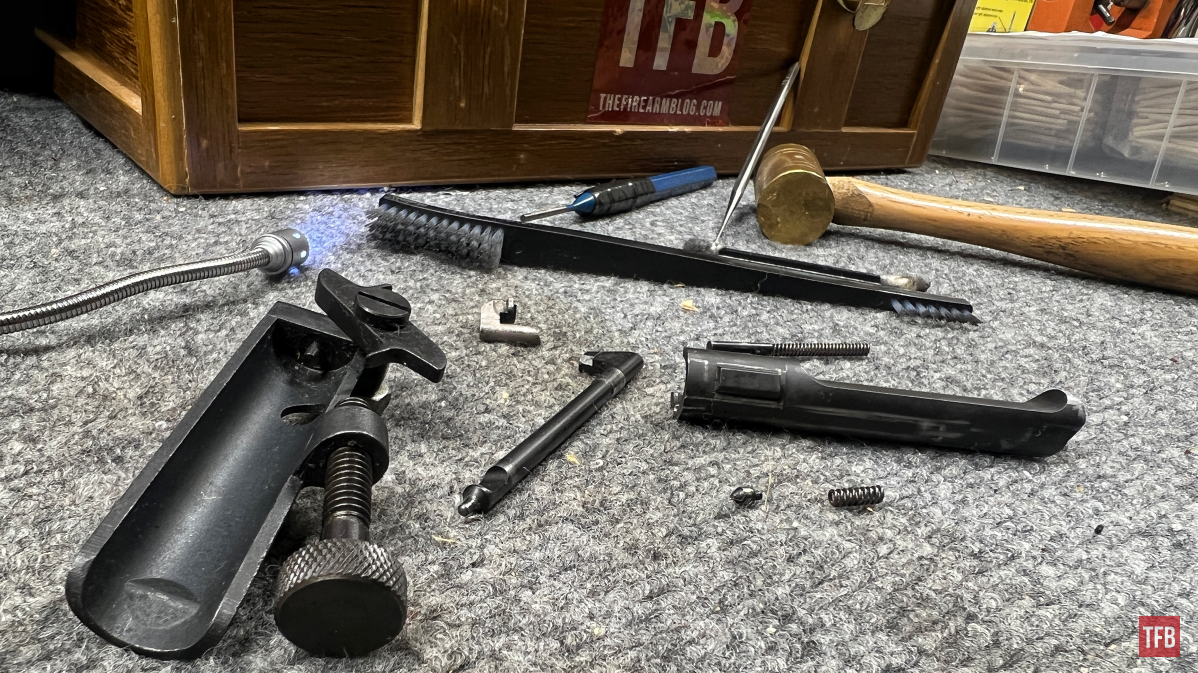
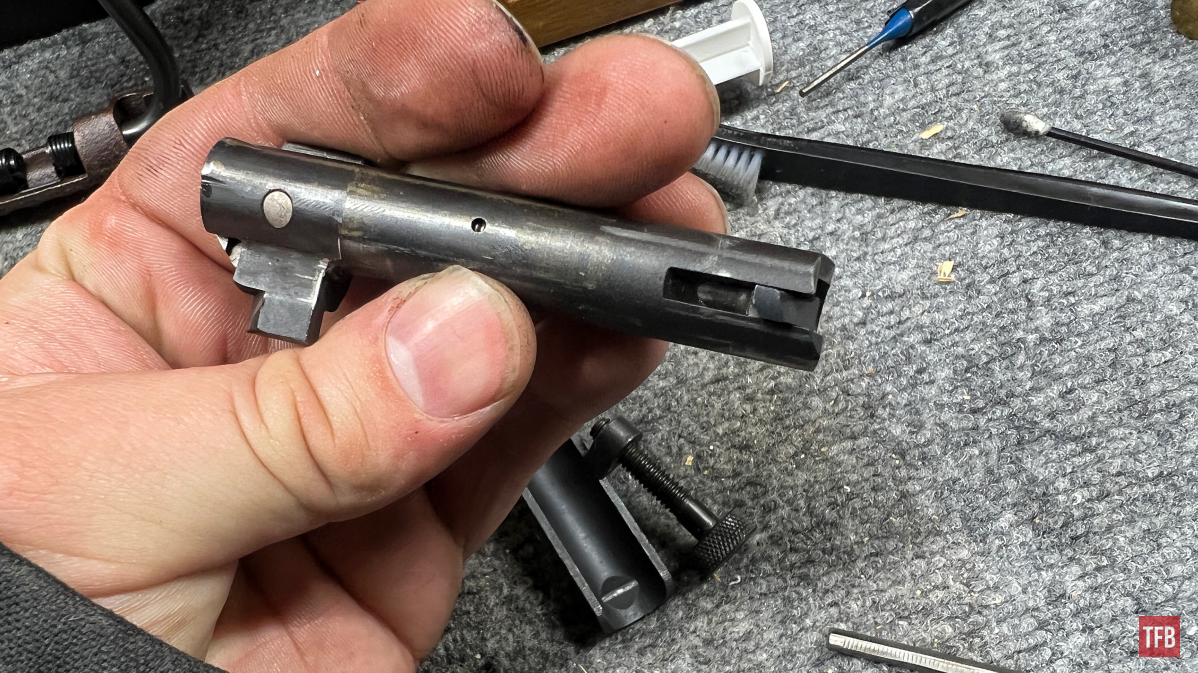
Here we have our M1 Carbine bolt and M1 Carbine bolt disassembly tool.
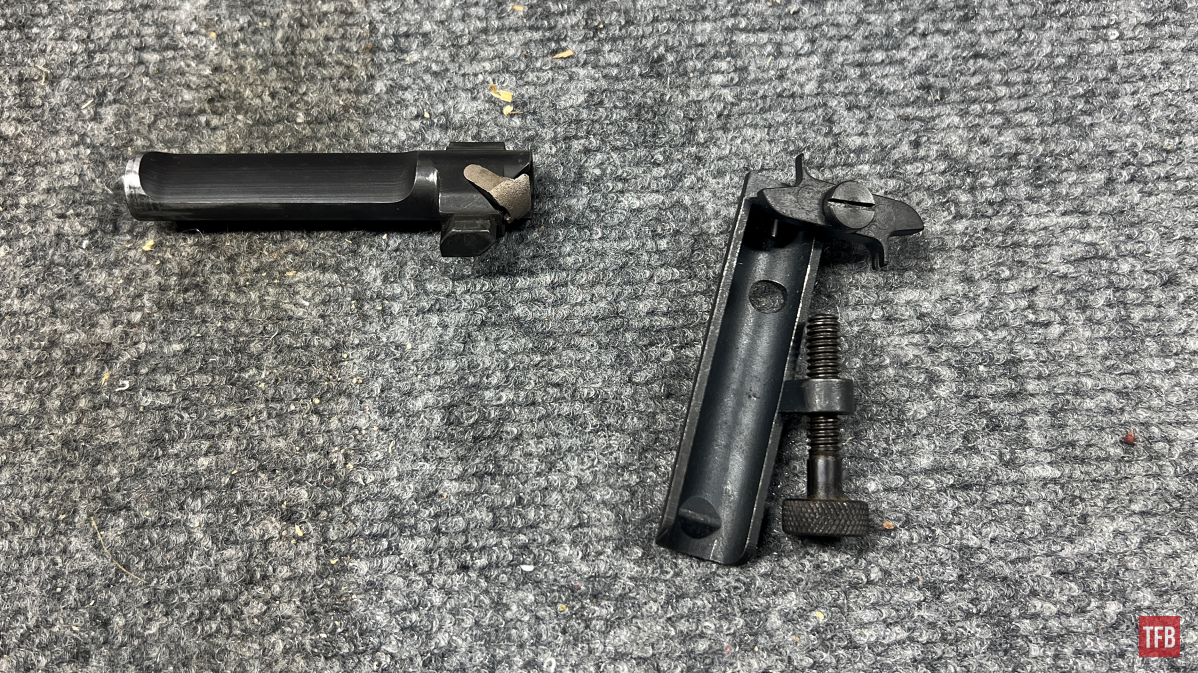
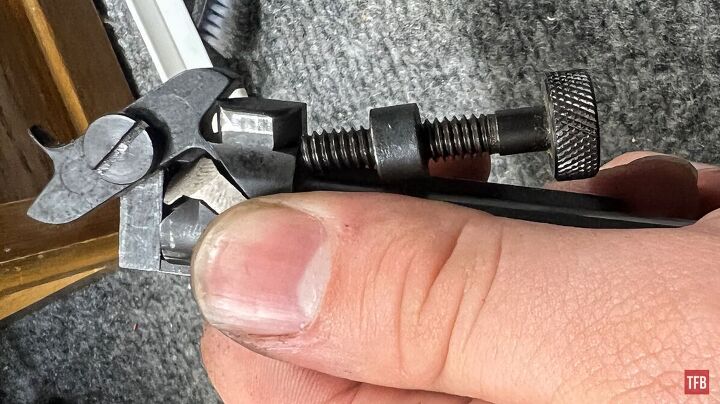
The M1 Carbine bolt disassembly tool has a wheel (for lack of a better description) with two different flat parts on it. The first one that will be used is literally just flat. Nothing fancy about it.
The other side is another flat piece but it is forked. This forked portion will be used later for reaseembly.
Step Two: Using an M1 Carbine Bolt Disassembly Tool
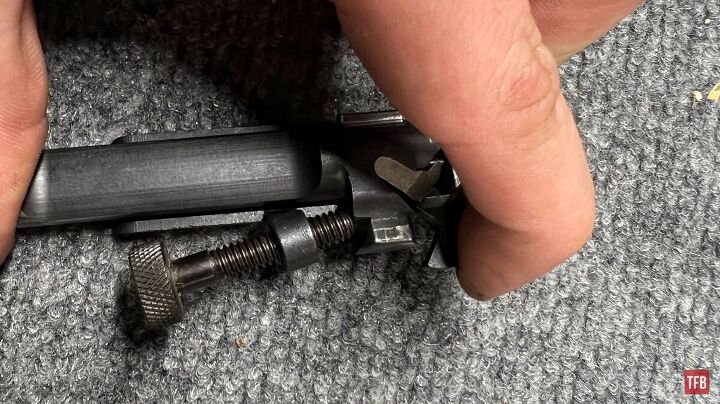
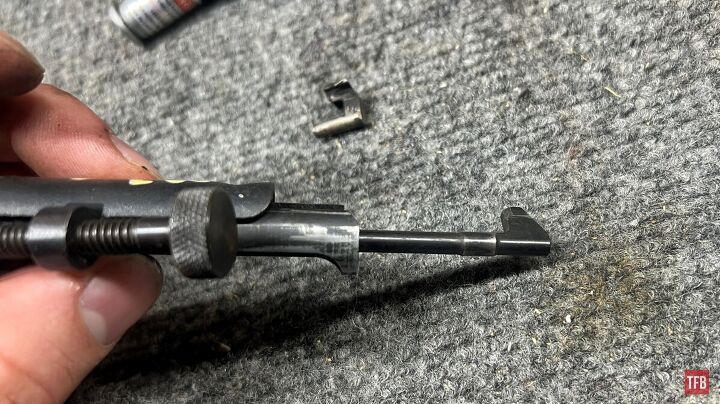
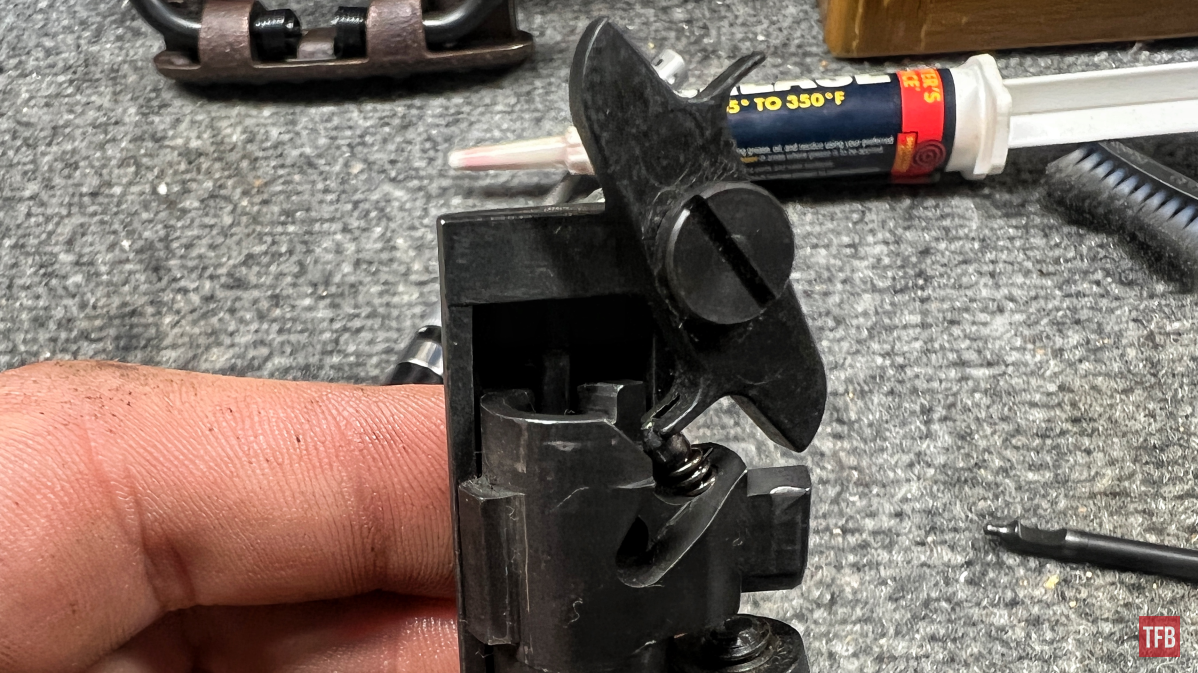
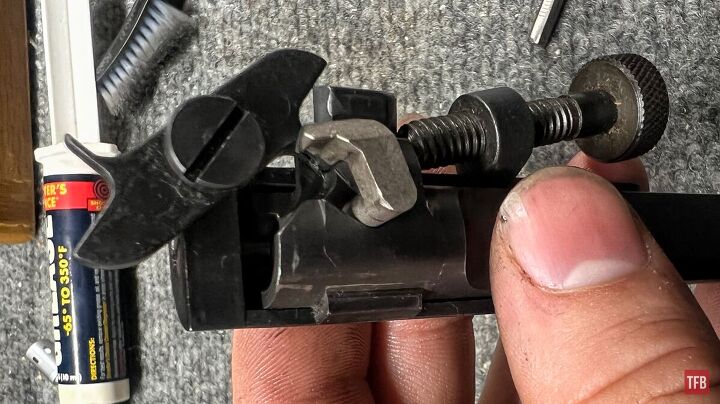
So, once again here is our M1 Carbine bolt disassembly tool. Pay attention to the knurled portion that has threads. Make sure that the screw is threaded out at least this far. Also, make sure the flat part of that wheel we talked about is on the right-hand side. Not the forked one.
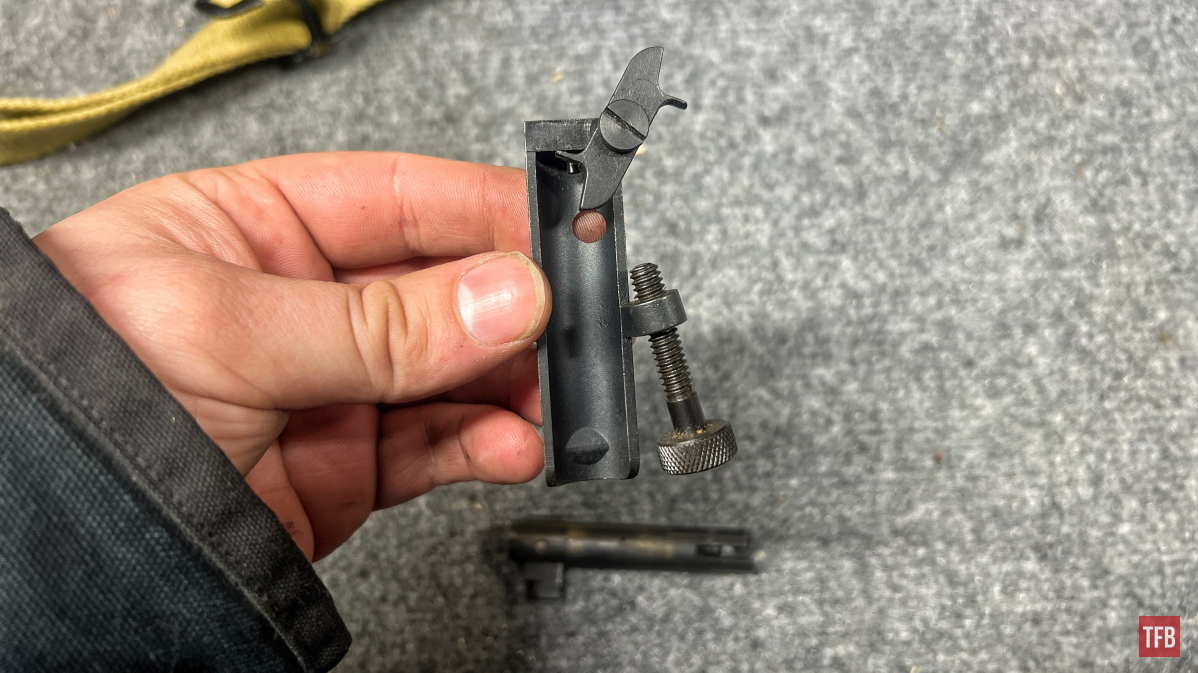
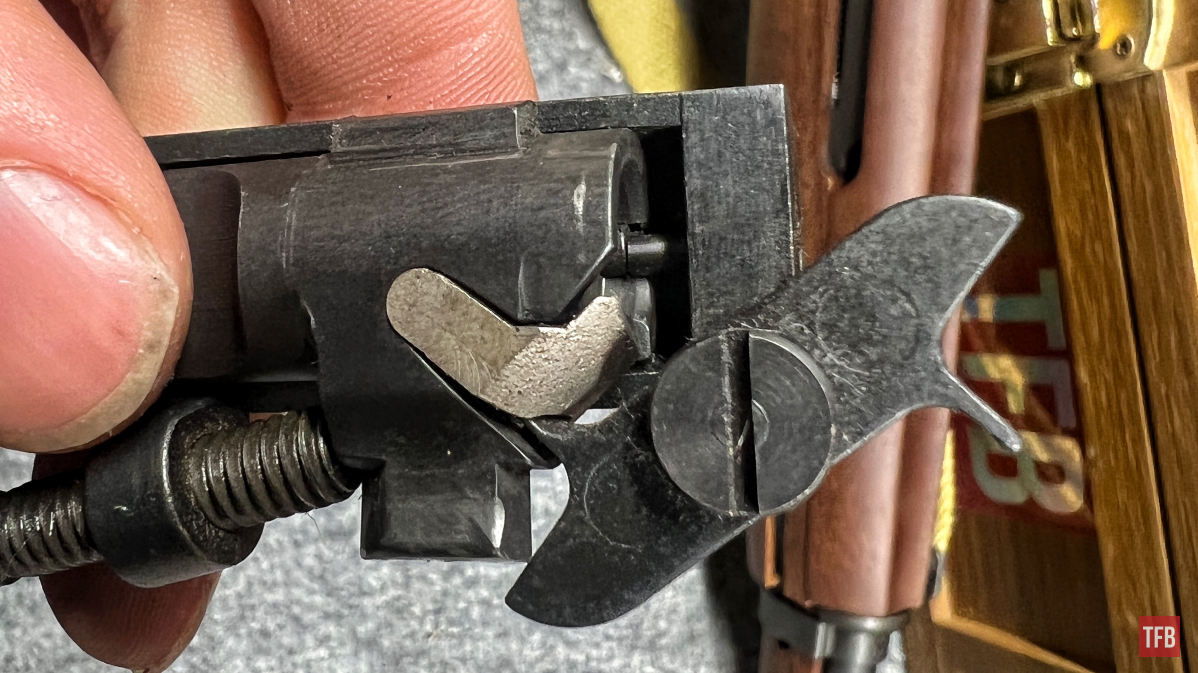
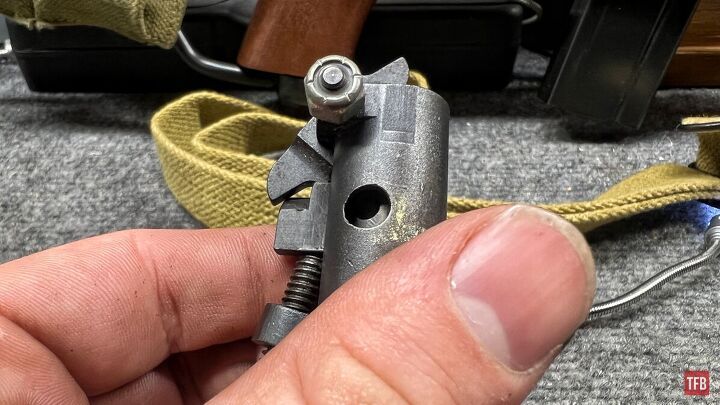
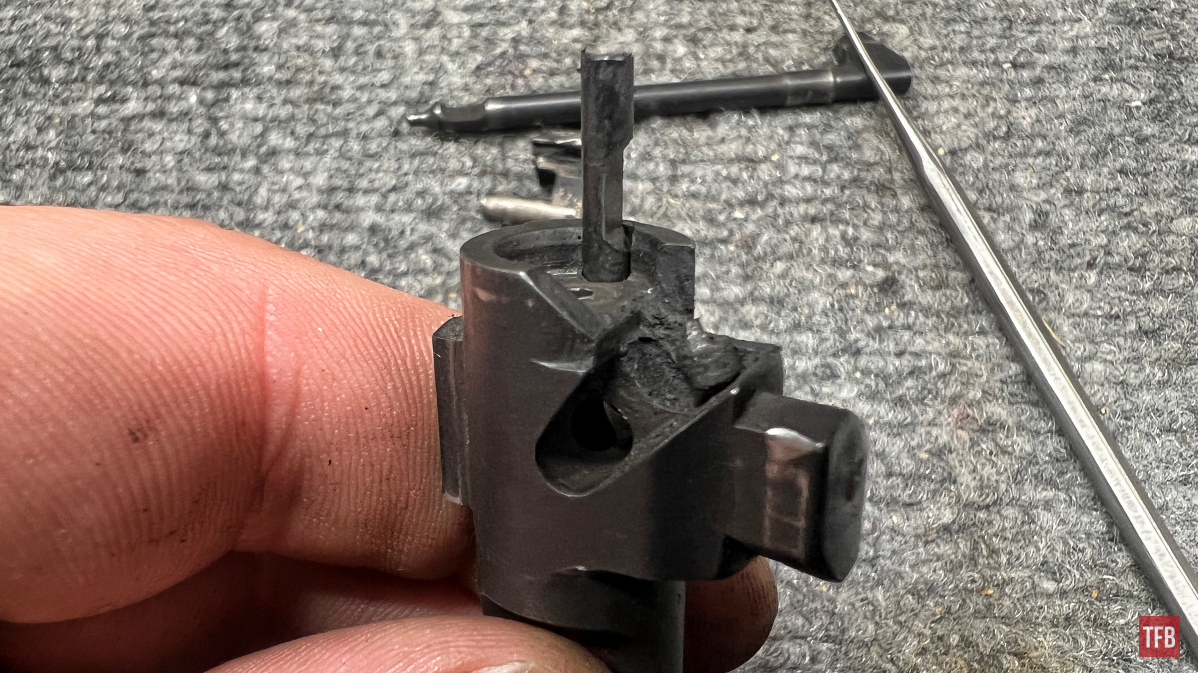
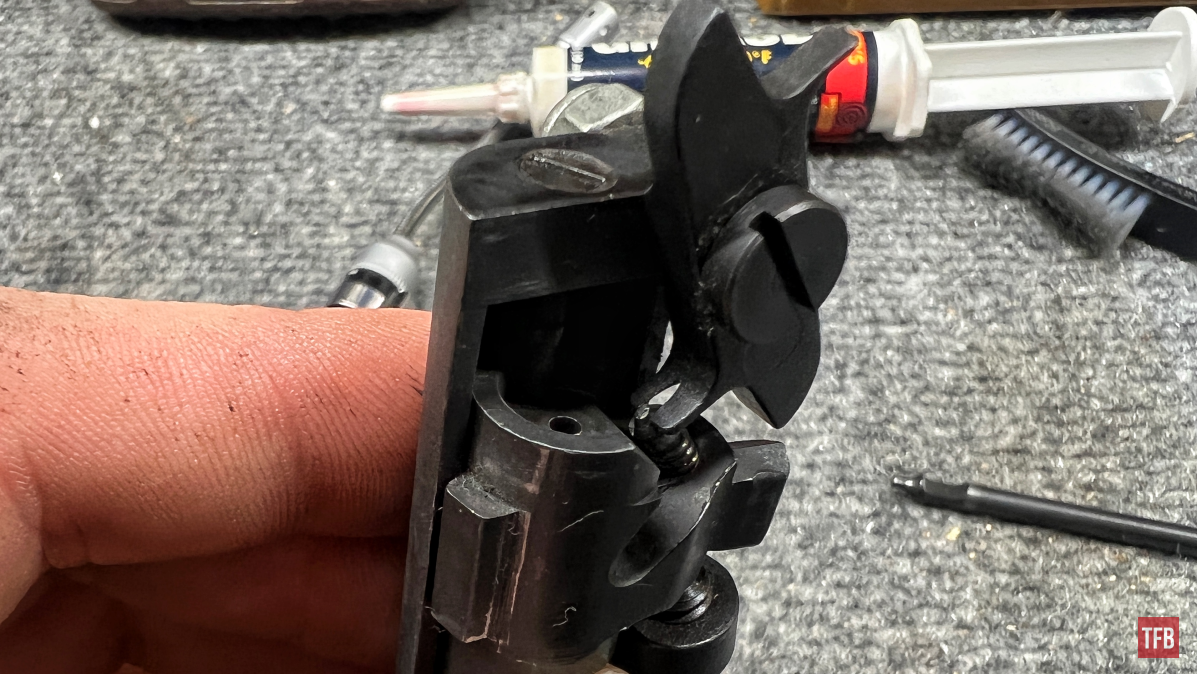
Place the bolt in the disassembly tool as shown. Note the peg inside and at the top of the tool. This will depress the ejectory plunger during disassembly.
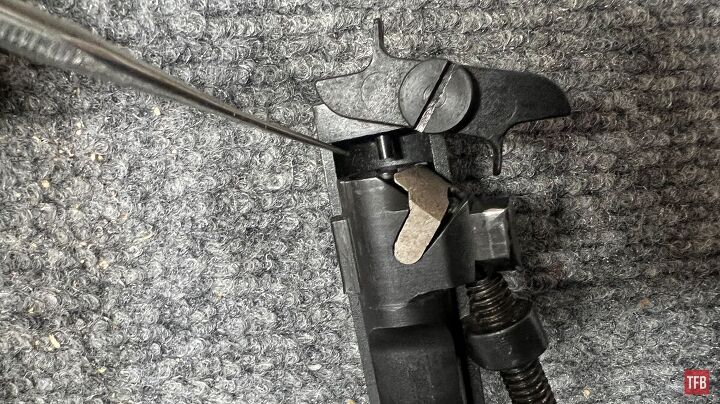
Push the bolt up into the tool and depress the ejector with the peg. While that part is in position, swing down the flat side of that wheel from earlier. The flat finger should enter the gap shown below.
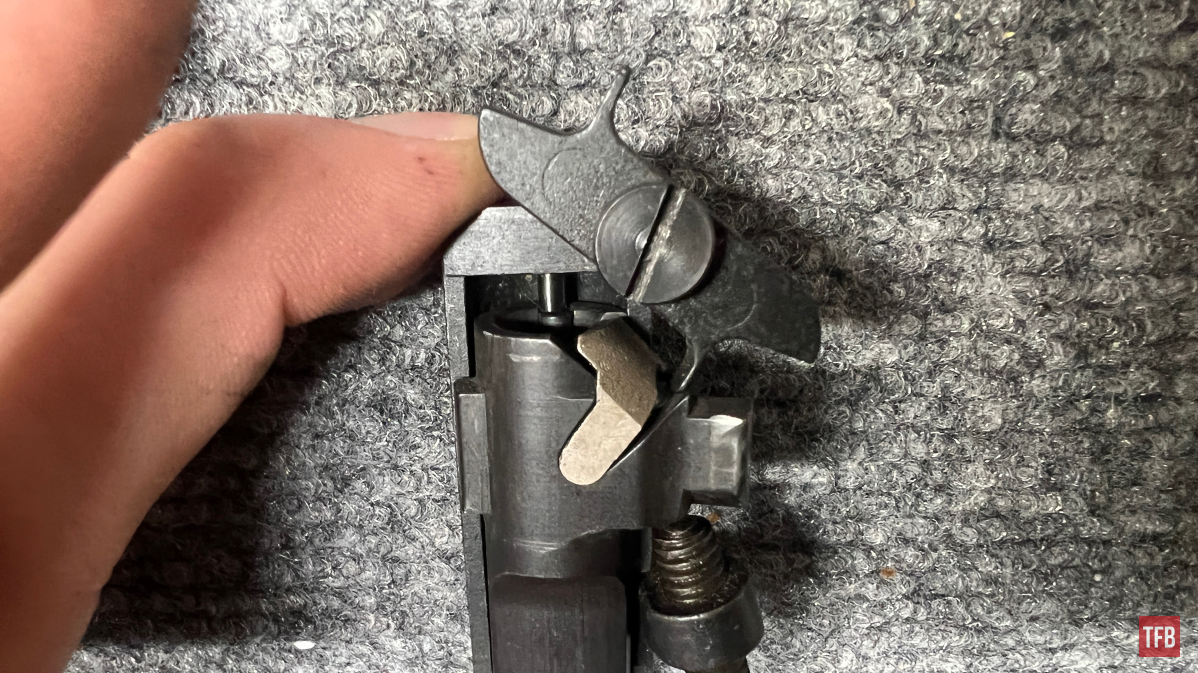
Note how the finger is on top of the plunger under the ectractor.
Very Important Note: The bolt does not hold itself in the tool. Technically, nothing does. Do not rely on the tension from the tool and springs to keep the bolt body in the tool. It will pop out if justled or unintended.
Step Three: Using an M1 Carbine Bolt Disassembly Tool
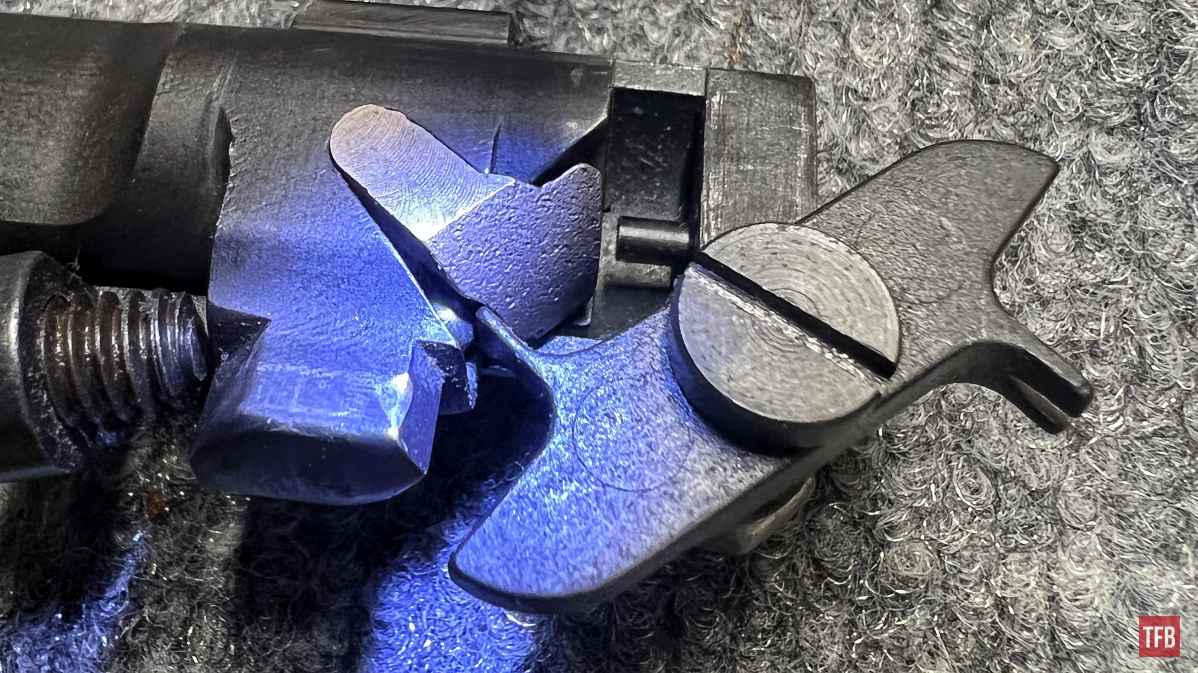
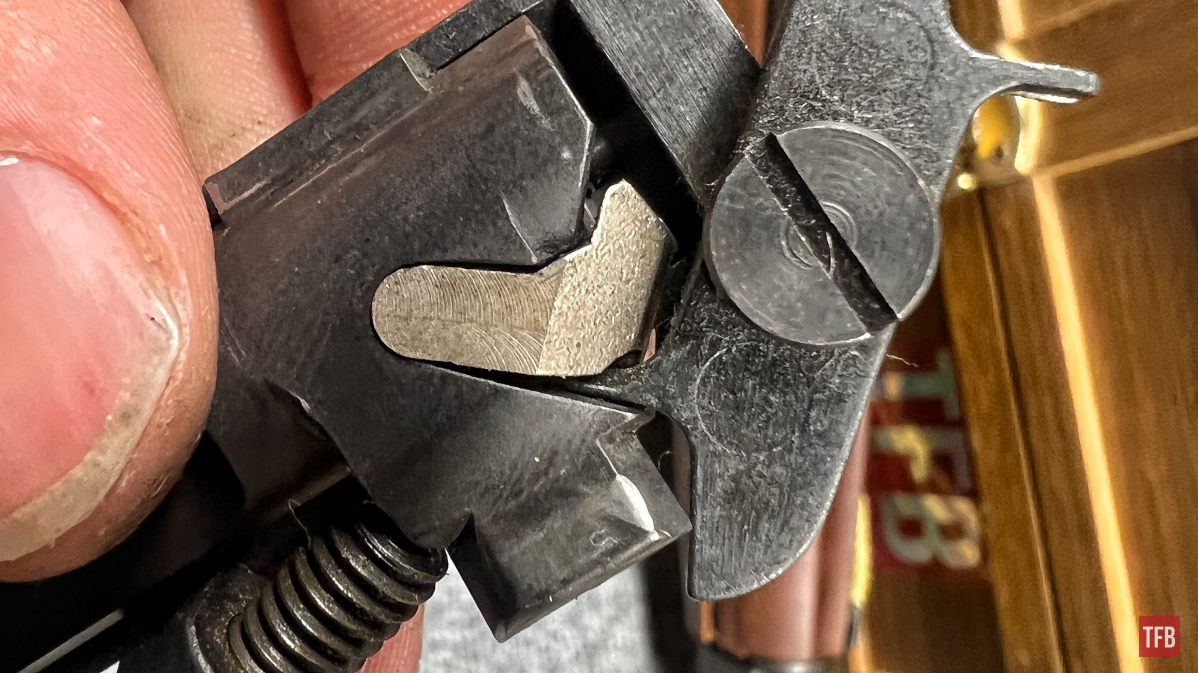
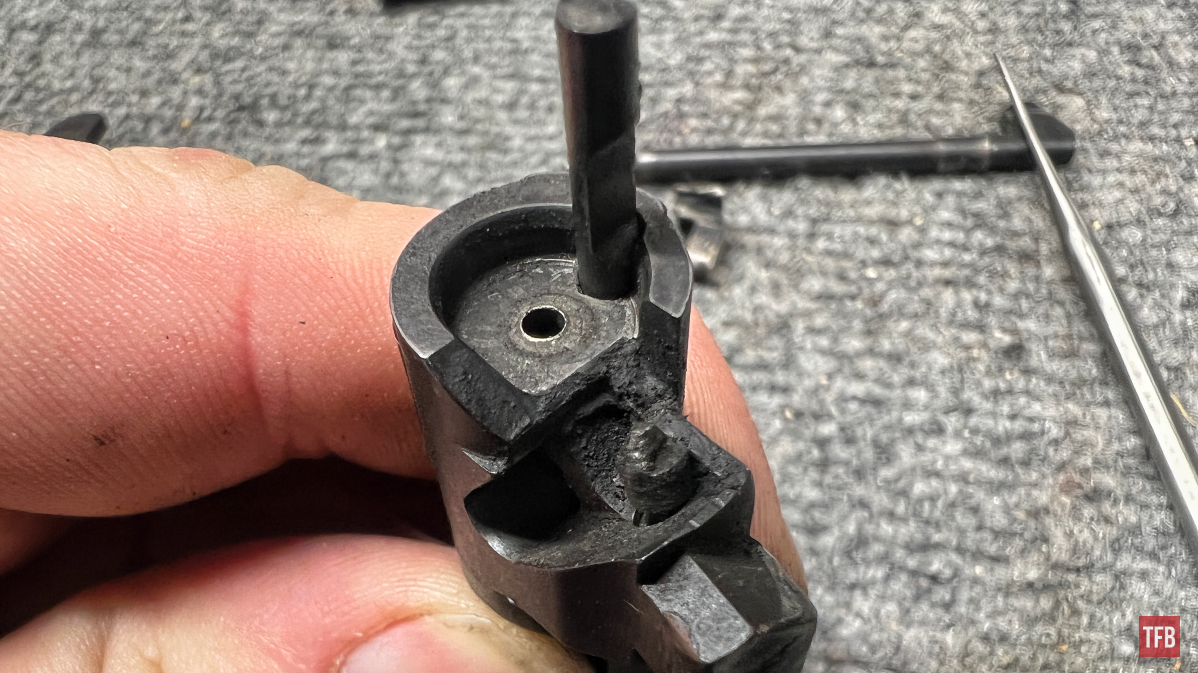
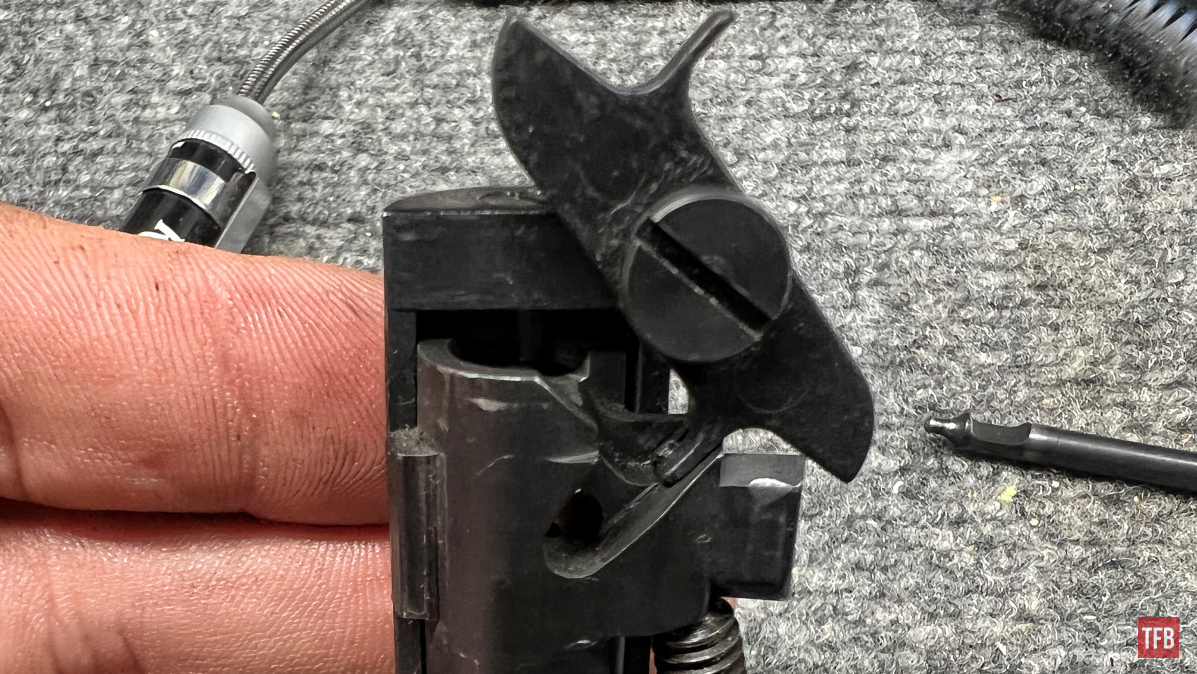
While holding the bolt and extractor plunger finger in place, thread the screw in slowly.
This will eventually depress the extractor plunger until the finger sits flat on the bolt.
When that plunger is depressed fully and the tension is taken off of the extractor, it can either fall free or be punched out. There is a window on the back side of the tool so you can punch out the extractor.
Be very careful not to punch the bolt out of the tool!
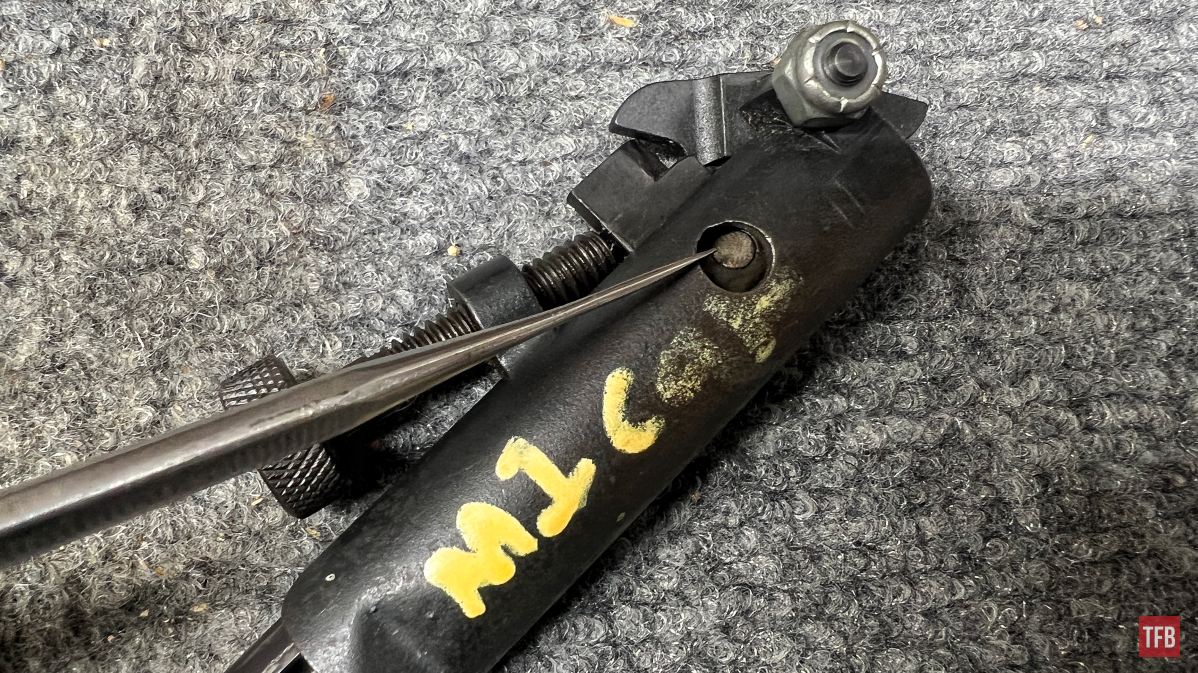
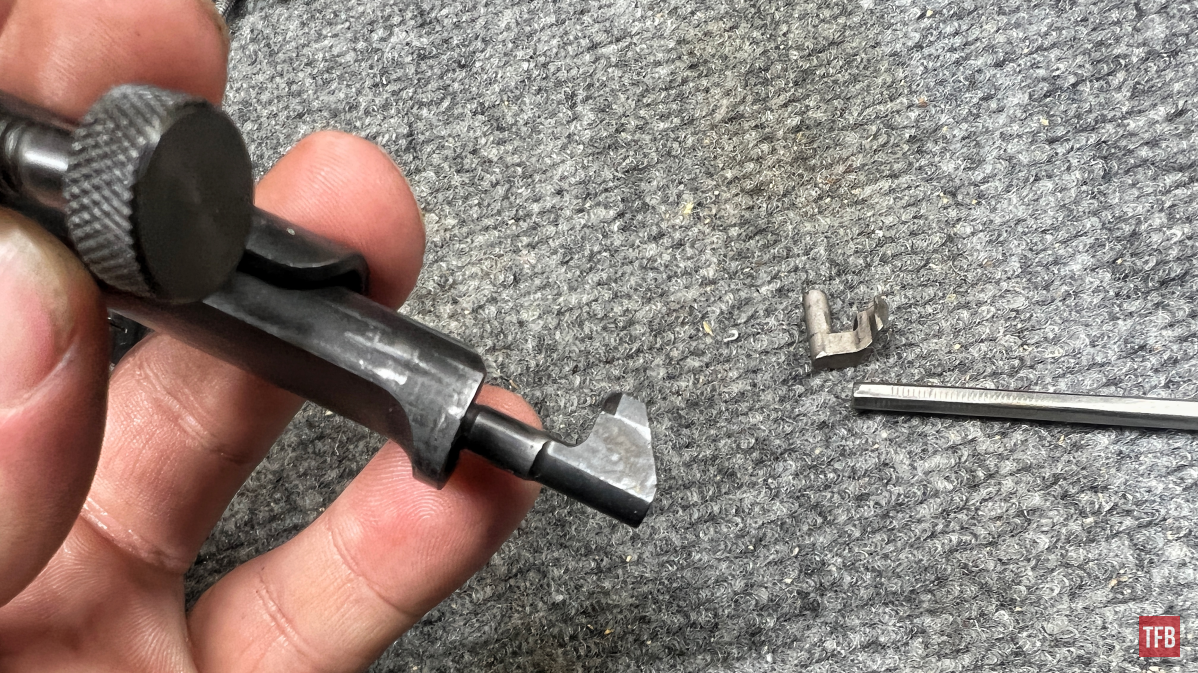
Luckily, my extractor was easy to push out with a punch.
Step Four: Using an M1 Carbine Bolt Disassembly Tool
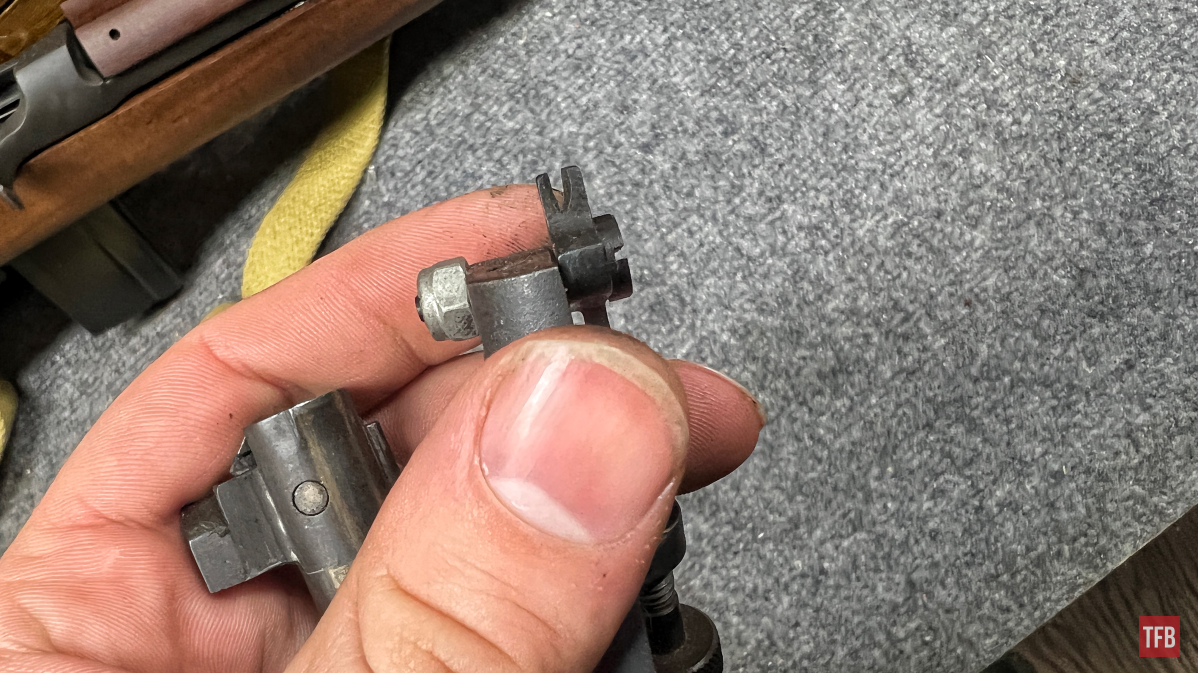
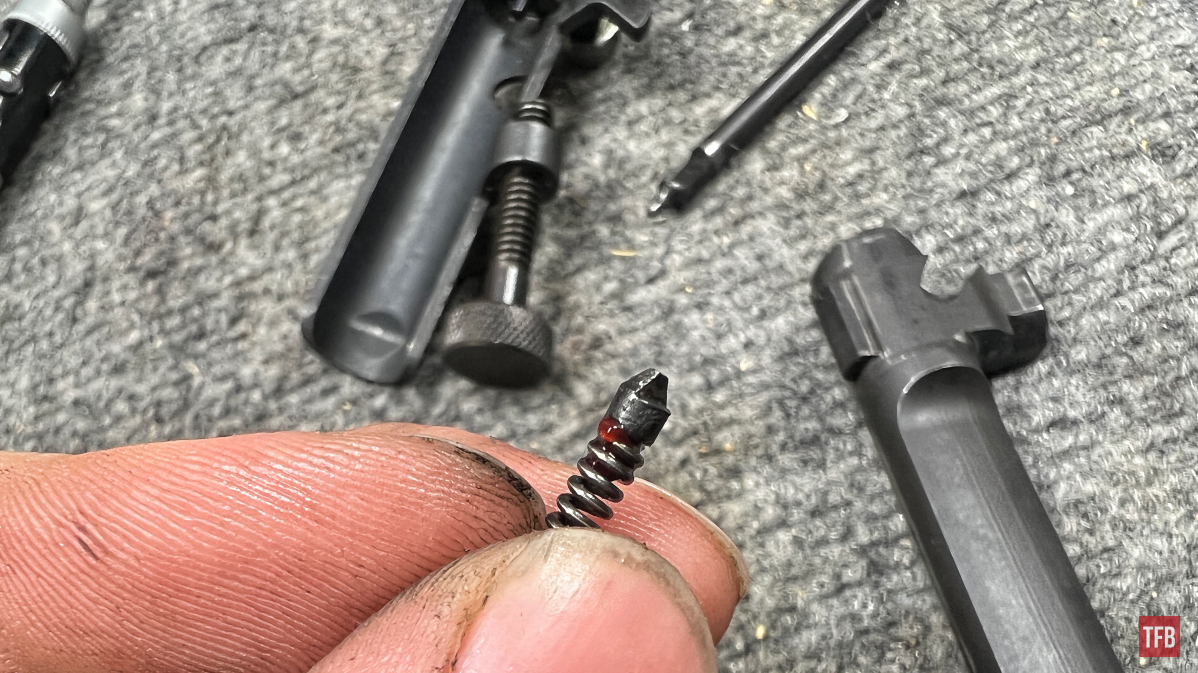
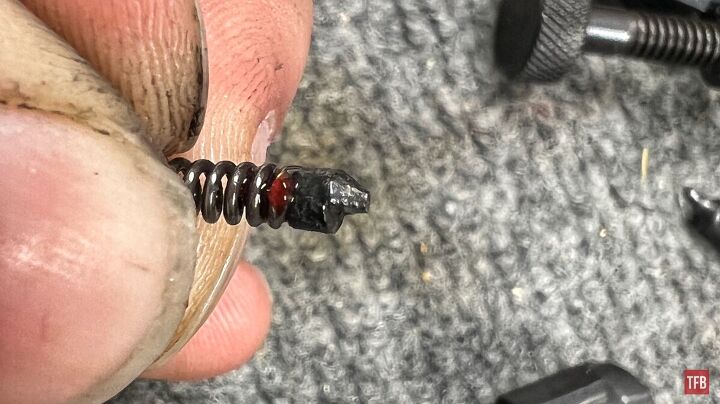
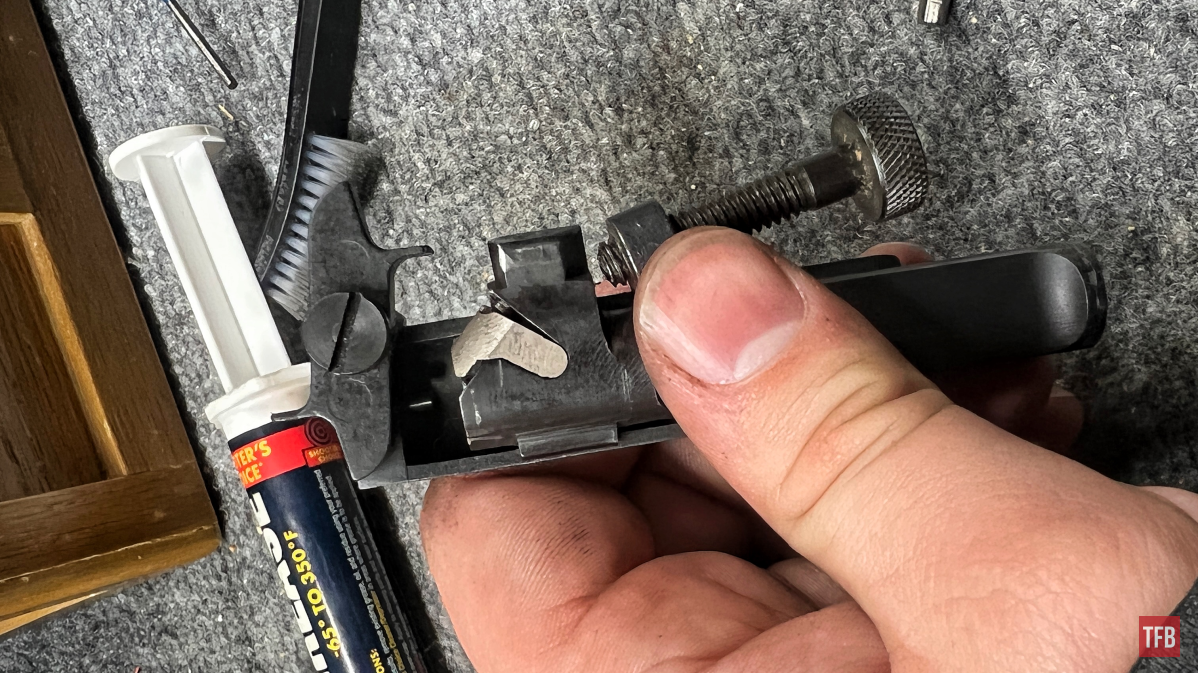
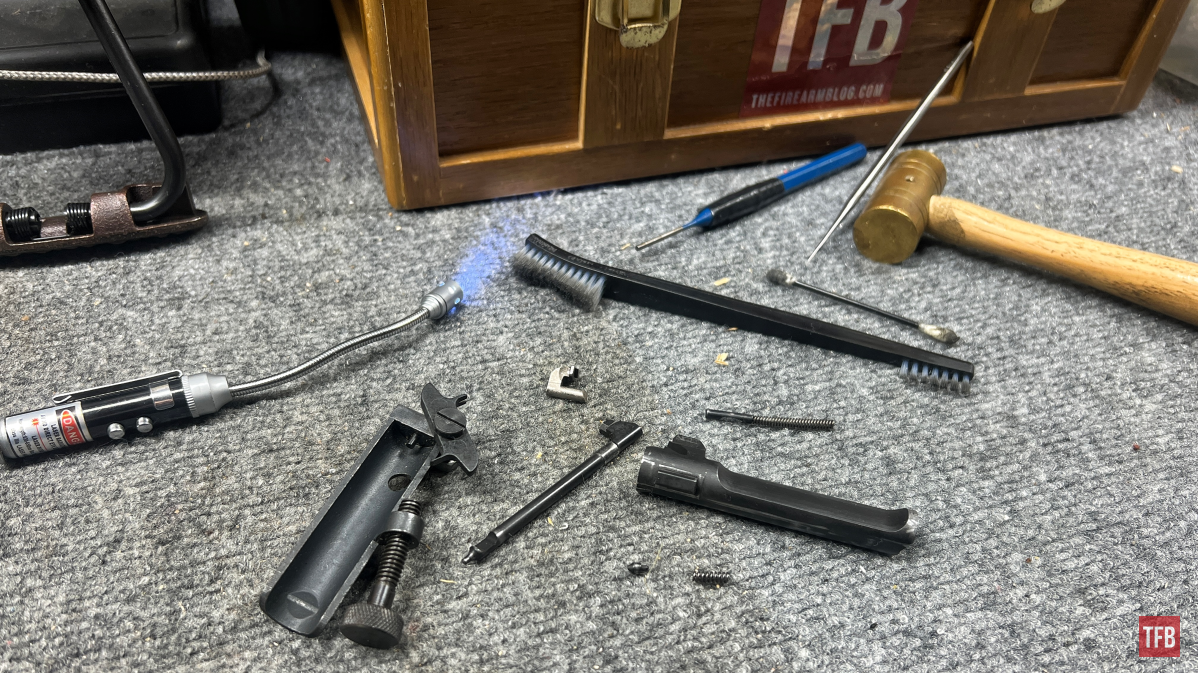
With the extractor removed, the firing pin will be able to fall free from the back/bottom of the bolt
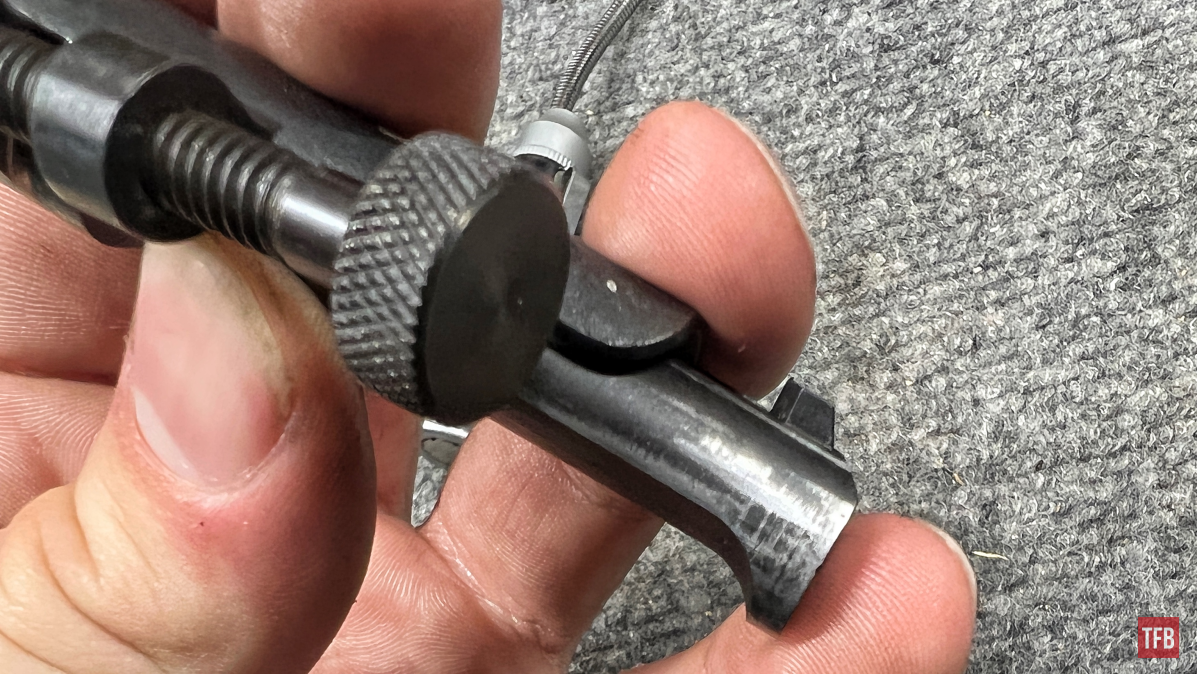
Note that the extractor plunger is still captured and under tension. With a hand or rag wrapped over the top of the tool slowly loosen the screw portion of the tool.

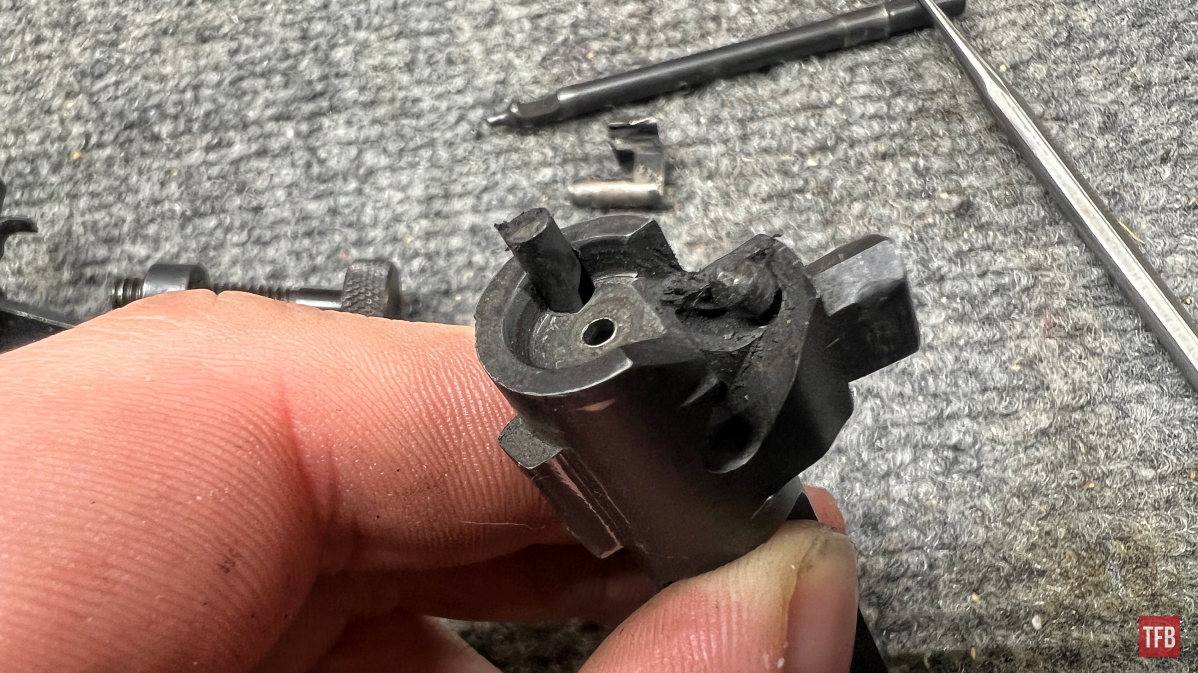
An excellent example of why you may want to disassemble your bolt for maintenance. This bolt’s extractor recess is dirty!
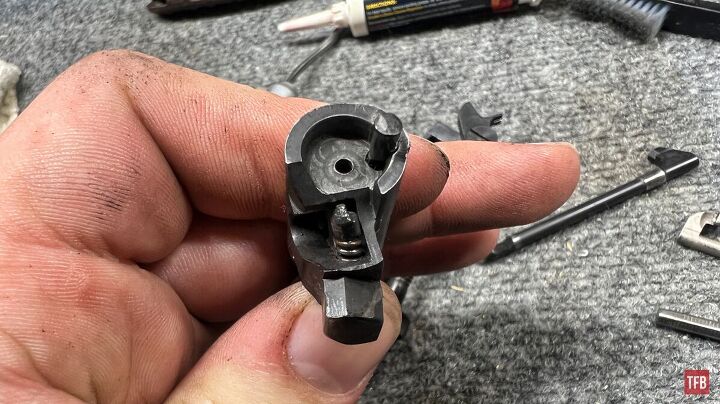
The extractor plunger will likely fall free if you are not careful. put it in a magnetic parts tray in order to keep track of it. The ejector as shown below is slightly pulled out to showcase its proper orientation.

Step Five: Using an M1 Carbine Bolt Disassembly Tool
At this point, all plungers and springs can be removed and cleaned. Keep track of them!

Reassembly Step One: M1 Carbine Bolt Disassembly Tool
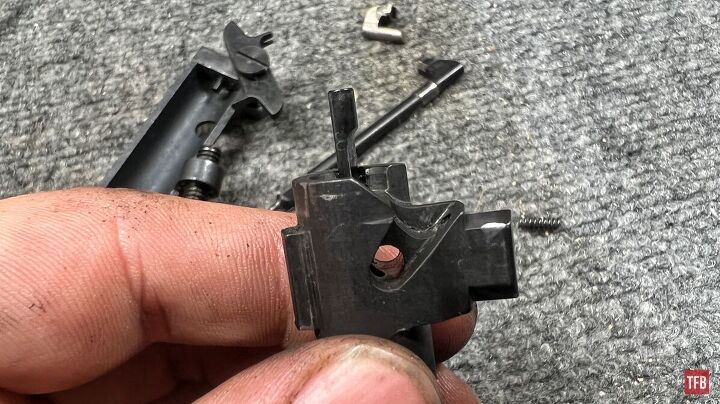
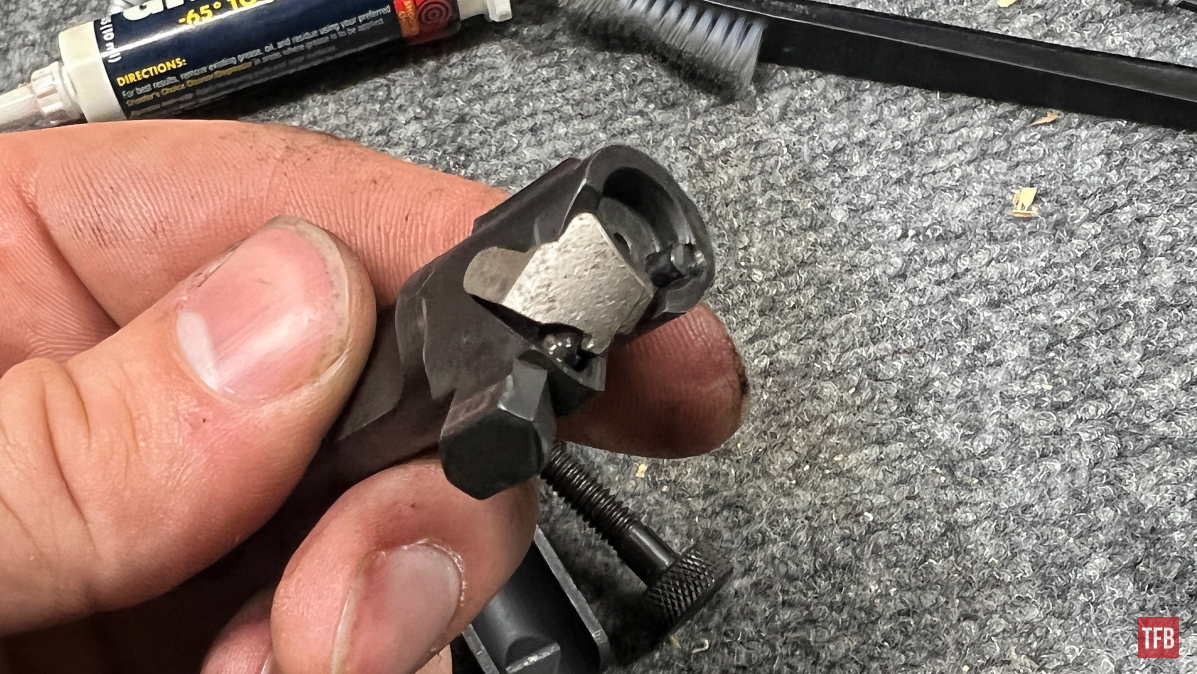
Place the ejector and its spring into its hole as shown. We want the cutout to be facing this direction so the extractor peg can slide past it.
The extractor plunger can be a little finicky and want to fall off while being installed. I put a dab of grease onto its spring in order to stick the plunger to the spring.
In terms of the way we have mainly been facing the cutout side of the plunger should face away from you or toward the solid side of the disassembly tool.
It helps to hold the bolt at this angle for the time being.

Reassembly Step Two: M1 Carbine Bolt Disassembly Tool
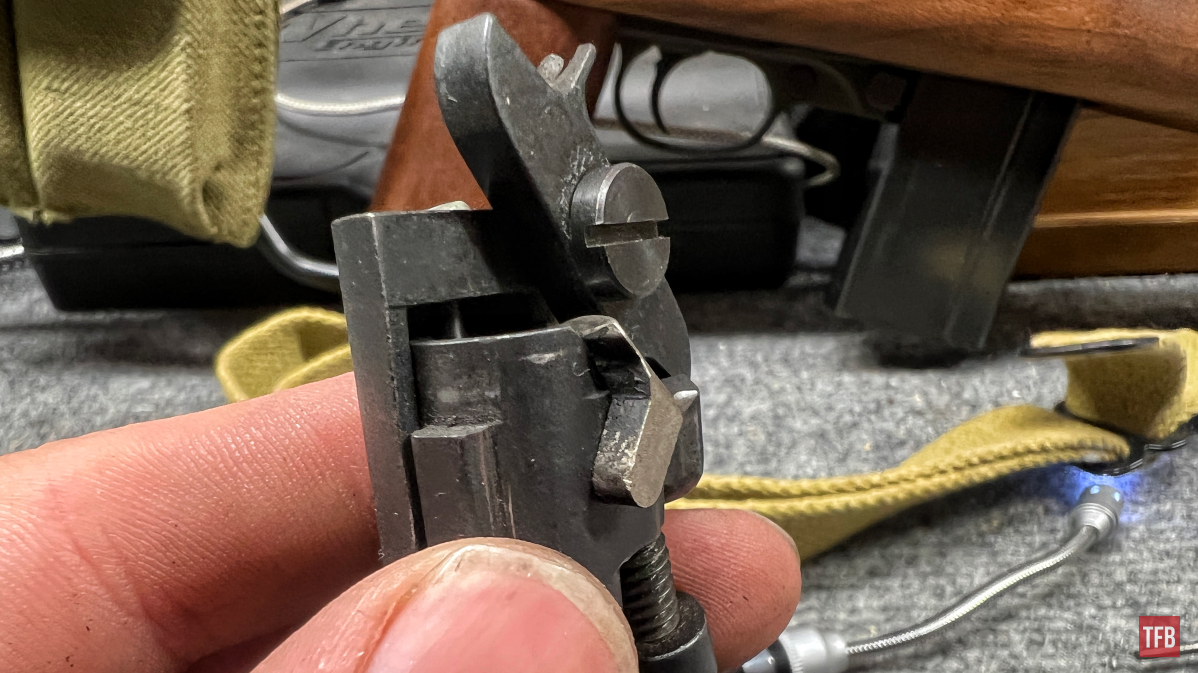
Slide the bolt into the tool as we did before but now the forked finger can rest on top of the extractor plunger.
Thread the screw slowly until the plunger is good and depressed.

Reassembly Step Three: M1 Carbine Bolt Disassembly Tool
Insert the firing pin at the rear as such.
Make sure it stays in place by holding it in with a finger or a flat surface.
Reassembly Step Four: M1 Carbine Bolt Disassembly Tool
The extractor can now be placed back into its hole. It may need a firm push with a thumb.


Reassembly Step Five: M1 Carbine Bolt Disassembly Tool
Loosen the screw, remove the bolt, and test its functions.
Conclusion: Using an M1 Carbine Bolt Disassembly Tool
This was a fun one because I have only used this tool once before and I have been hoping for an excuse to do it again. It is extremely helpful and honestly, it is 100% necessary. Doing this with a flathead screwdriver and punch would be a terrible nightmare. To my knowledge, these tools are common and cheap so look into picking one up! I will see you next time! Take care and be safe out there!
As always, thank you for reading TFB! Be safe out there, have fun while shooting, and we will see you next time for the TFB Armorer’s Bench! Also, let us know what you think in the comments below! We always appreciate your feedback.