Your Privacy Choices
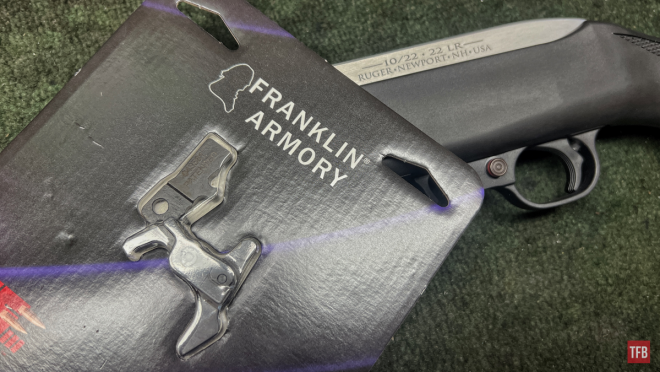
Welcome everyone to the TFB Armorer’s Bench! As mentioned in the little blurb below, this series will focus on a lot of home armorer and gunsmith activities. In this article, I ran out of time to work on some projects and ended up having a 10/22 in need of a binary trigger installation land on my bench. This one requires the entire trigger pack/assembly of a Ruger 10/22 to be disassembled and reassembled with new components. Binary triggers may be a novelty to some but to me, in a rimfire platform, I welcome it because it is good fun. Let’s dive right into the Franklin Armory 10/22 Binary Trigger Installation!
Other 10/22 Reading on TFB
- The Rimfire Report: Franklin Armory BFSIII 22-C1 Binary Trigger Review
- TFB Weekly Web Deals 19: The Best Ruger 10/22 Upgrades
- The Rimfire Report: Desert Tech Trek-22 Bullpup 10/22 Stock Review
- BINARY RUGER: Franklin Armory Pulls (And Releases) A 10/22 Trigger
- The Rimfire Report: The Top 4 10/22 Aftermarket Chassis
TFB Armorer’s Bench: 10/22 Binary Trigger Installation
Here, we at TFB hope to inform, entertain, and even inspire any would-be gunsmith or armorer out there. Ideally, with the information I provide and with the help of our sponsors, you can have some useful knowledge pertaining to the conservation and improvement of firearms technology while at the same time sharing experiences and teaching each other new tips and tricks along the way in the comments. Digging deep into what it is to be an armorer or gunsmith has significance but what is important is what those people do to show they’ve earned that title. I am happy to share my experiences and knowledge and hope it is informative!
Make your personal safety a priority:
- Practice proper gun safety. Always make sure before the firearm hits your bench that it is unloaded and safe to be handled.
- Wear the proper safety equipment. The main one would be safety glasses (decent ones) since parts are often under spring tension and you may work with high RPM tools. Other honorable mentions would be latex gloves or a respirator when working with potentially harmful solvents and oils. Also hearing protection when working with loud machinery or test-firing firearms.
- Modifications, alterations, and customizations will void your firearm’s warranty 9.5 times out of 10. Please take that into consideration before attempting any at-home gunsmithing.
- If you are unsure about proper safety practices, disassembly procedures, or warranty standards, stop, put down the tools, and consult a competent gunsmith.
Step One: 10/22 Binary Trigger Installation – Disassembly
The first thing is first! Safety. Yes, I know safety is boring and sooo mainstream but bear with me. Make sure your ammunition is stored and away from your bench. If starting out with an assembled firearm, make sure to check the chamber, magazine, and space between. Then check again. As far as PPE, I highly recommend wearing safety glasses at the very least. There are quite a few parts under spring pressure.

Step Two: 10/22 Binary Trigger Installation – Disassembly
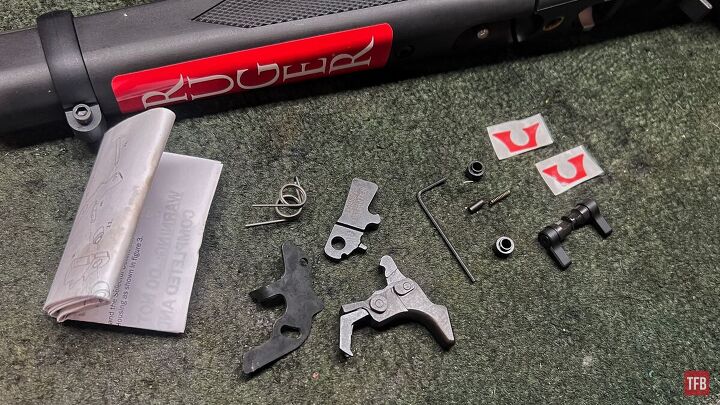
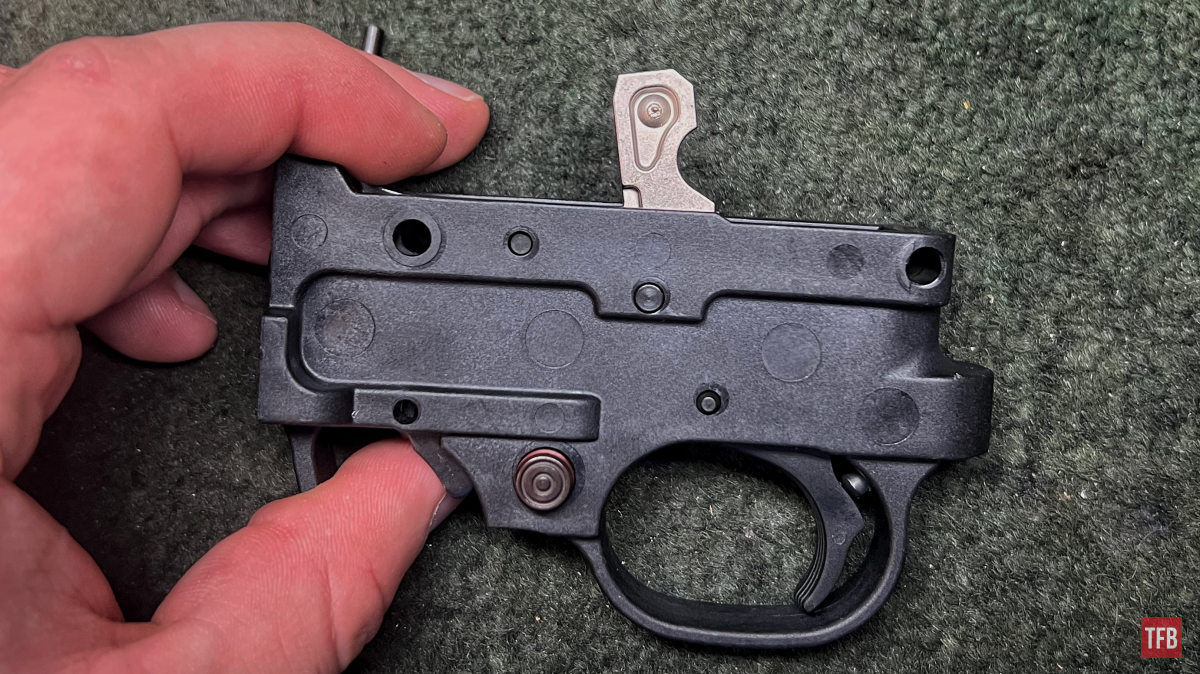
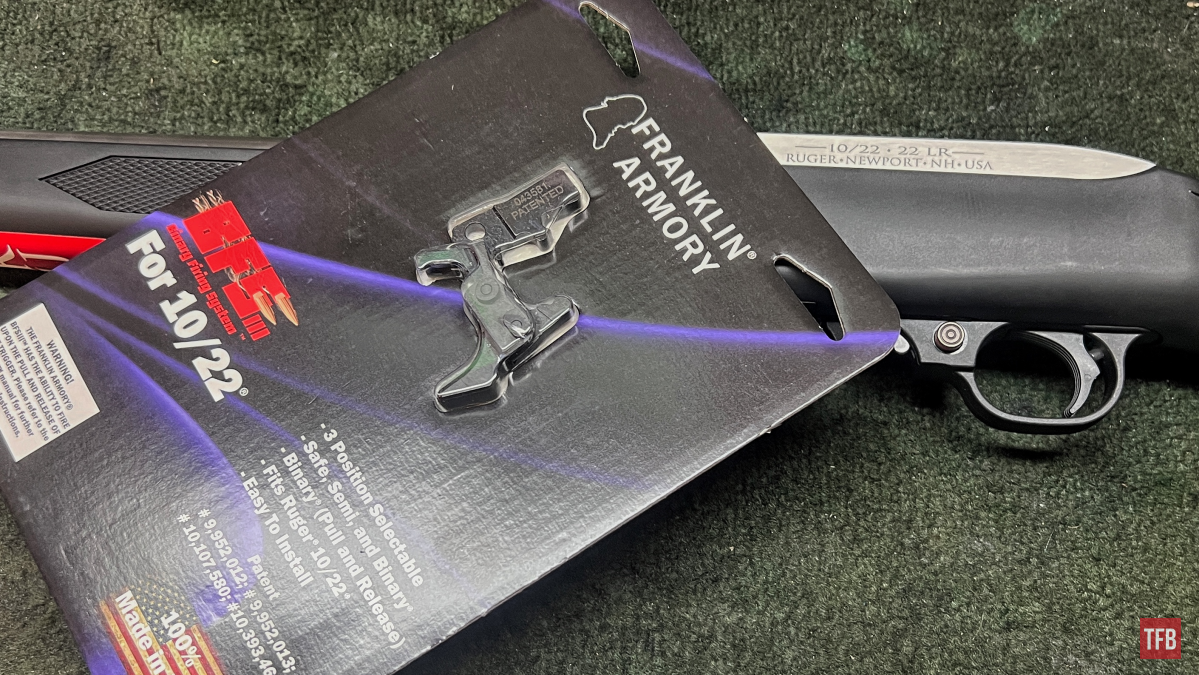
So as I mentioned, I had a 10/22 show up and it needed a Franklin Armory BFSIII 22-C1 installed. This one is a takedown so please don’t be confused about why the barrel is removed. Just got it out of my way so it was easier to work with. Buckle up because this one is gonna be a long one!

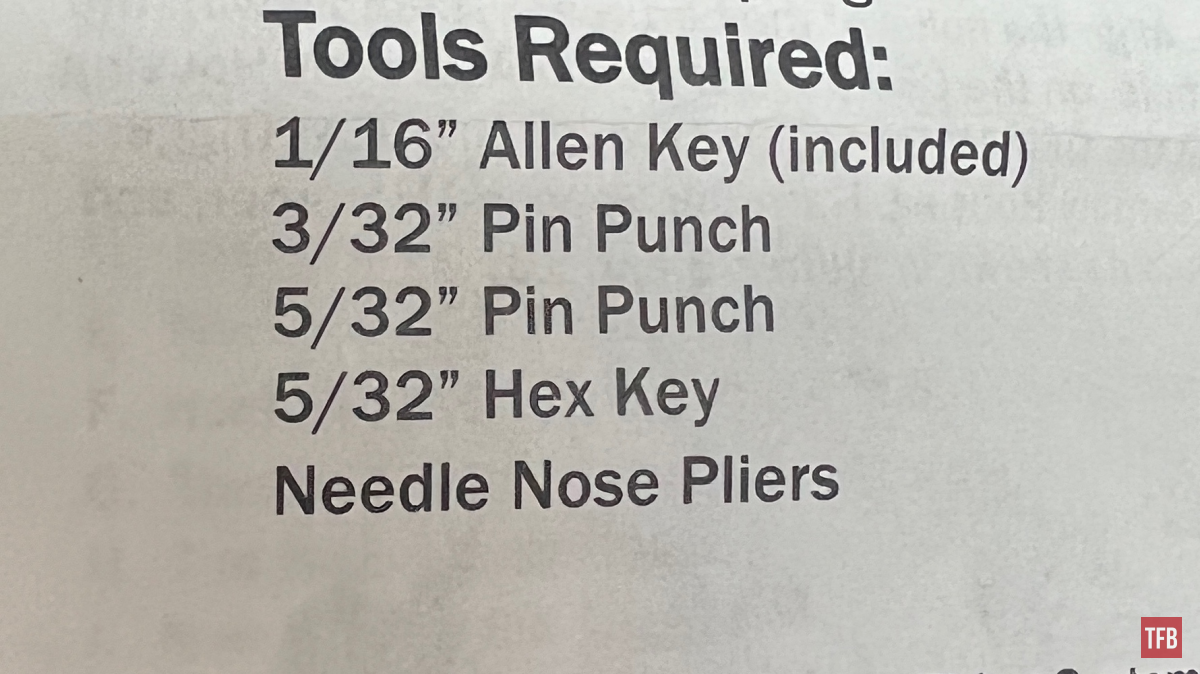
Franklin Armory includes a “tools needed” section which is a kind thought.TFB staff writer Luke C had done a review on the Franklin Armory BFSIII 22-C1 a while back and he mentioned some add-on helpful tools.
Pair of Tweezers
Magnetic Parts Tray
Vice with Soft Jaws
Cold Beer
Plastic bag for unused OEM 10/22 trigger pack parts
I personally have reviewed a Franklin Armory binary trigger over at our sister site AllOutdoor.com. My biggest critique is their manual for that specific trigger and this was my first time seeing the 10/22 trigger and its manual and I was not blown away this time either. They tend to be vague in some aspects and also do not include extra useful information. I do not think this is the literal fault of Franklin Armory but rather probably their legal team making sure they do not give more information than they should. Just a guess. That being said, hopefully, this article and its steps lend a hand in installation.
Note: The current Ruger user manuals do not list a section detailing the disassembly of the trigger guard assembly.
Step Three: 10/22 Binary Trigger Installation – Disassembly
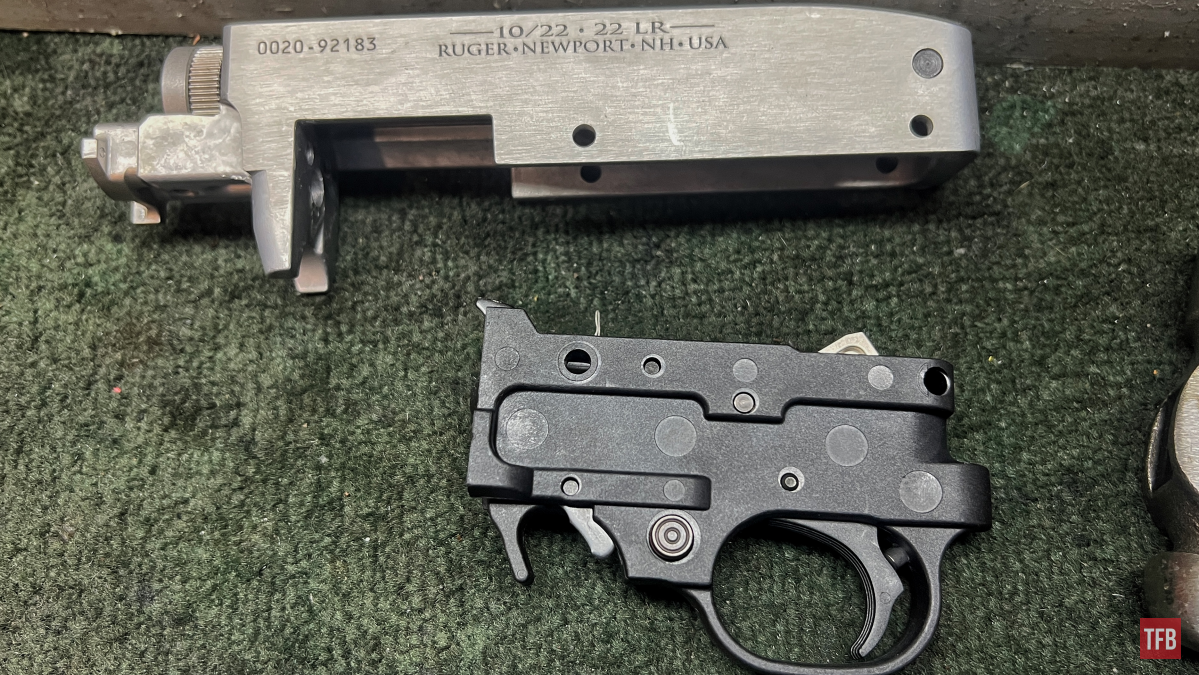
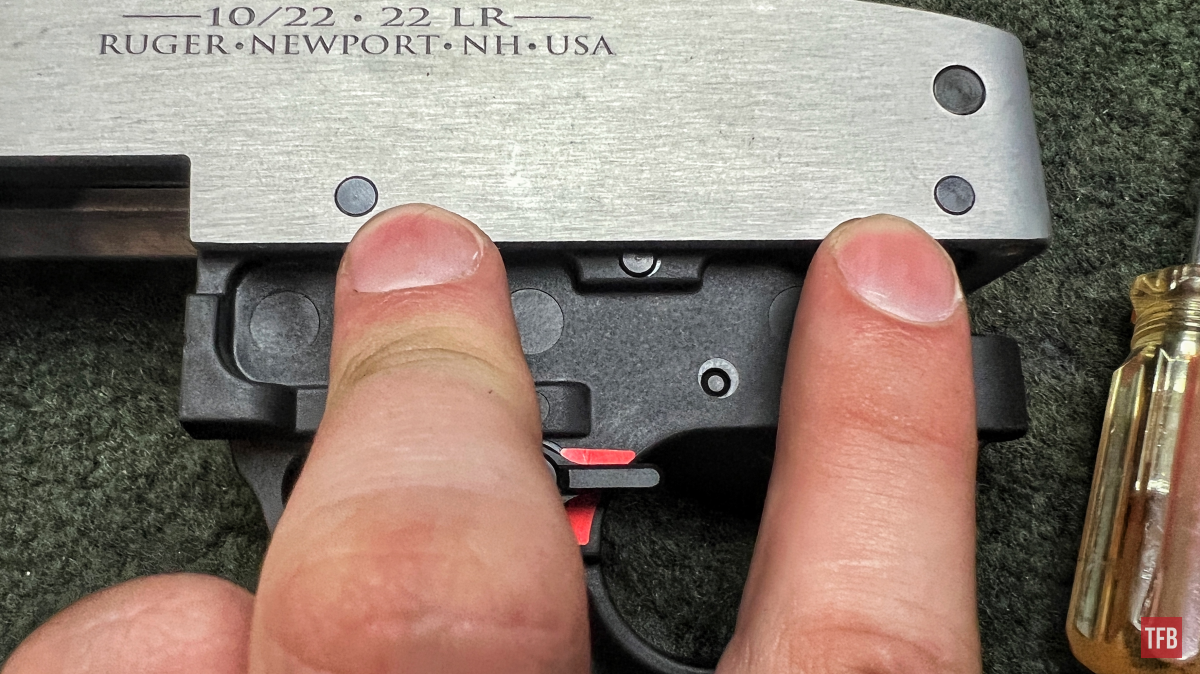
Starting out we need to remove the receiver/trigger guard assembly from the stock. If you do not have a takedown gun, the barrel band will need to be loosened and slipped off the front of the barrel. Now the takedown screw can be loosened. It is captive so do not remove it from the stock itself.
With the takedown screw loosened and unscrewed from the receiver, the safety needs to be evenly spaced between being in the safe and fire positions. This way the receiver can slide out of the stock.
Slide the receiver out of the stock.
Quick Random Tip!
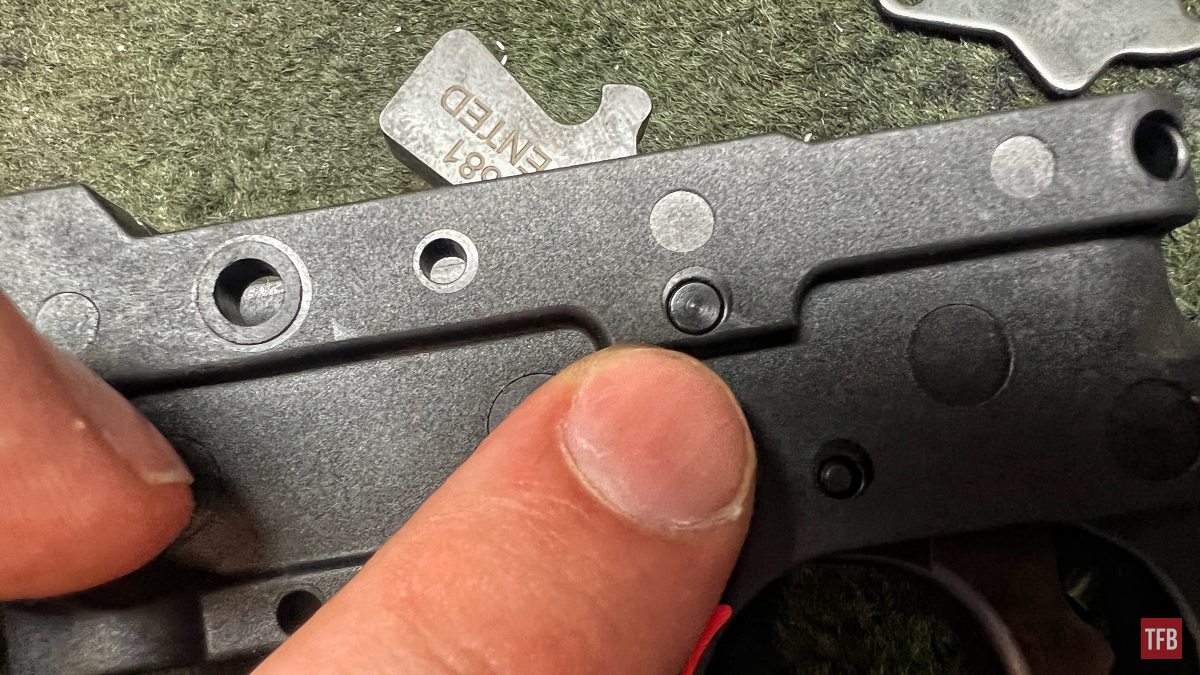
This pin is the magazine latch pivot pin and it is under basically no spring tension at all. Because of that, it tends to just fall out at random. It gave me the idea to mention this quick tip. This tip does not necessarily pertain to the assembly or disassembly of this gun.

A very small piece of tape placed over a pin can prevent it from falling out if it is loose and prone to falling out.
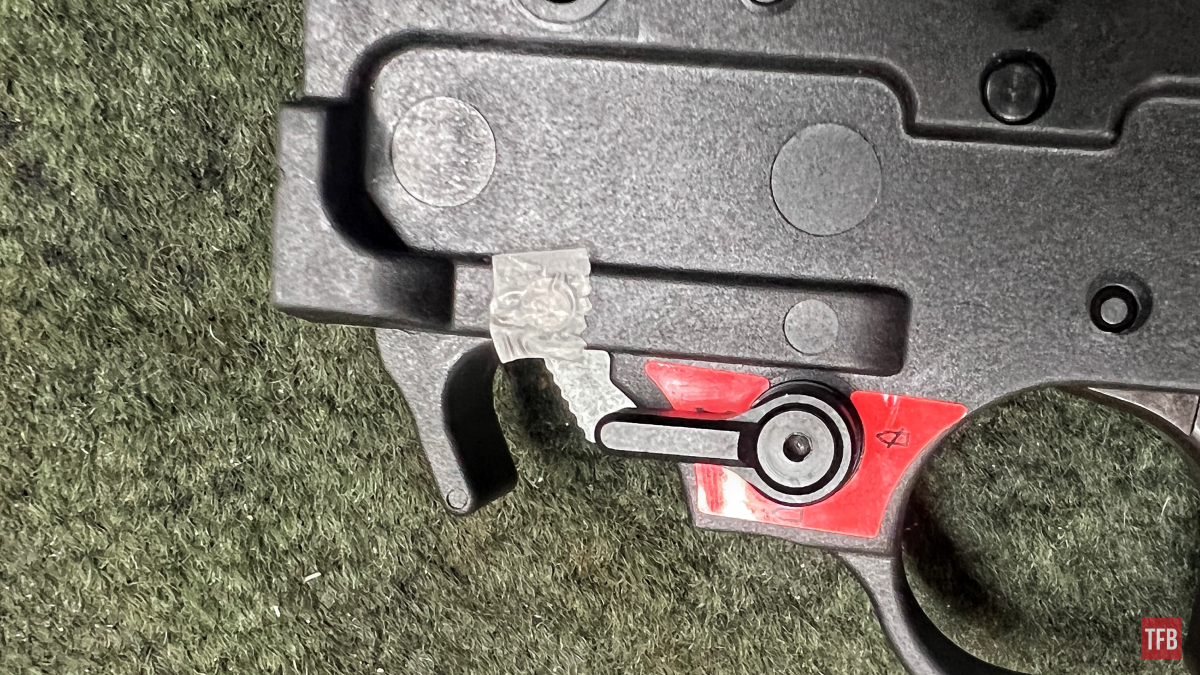
Most of the time this tape can stay in place when put back together and not affect the function of a firearm. I do not recommend putting a gun back together with a foreign object stuck to the side of a part but in this instance, it would not change anything at all besides the pin not constantly falling out.
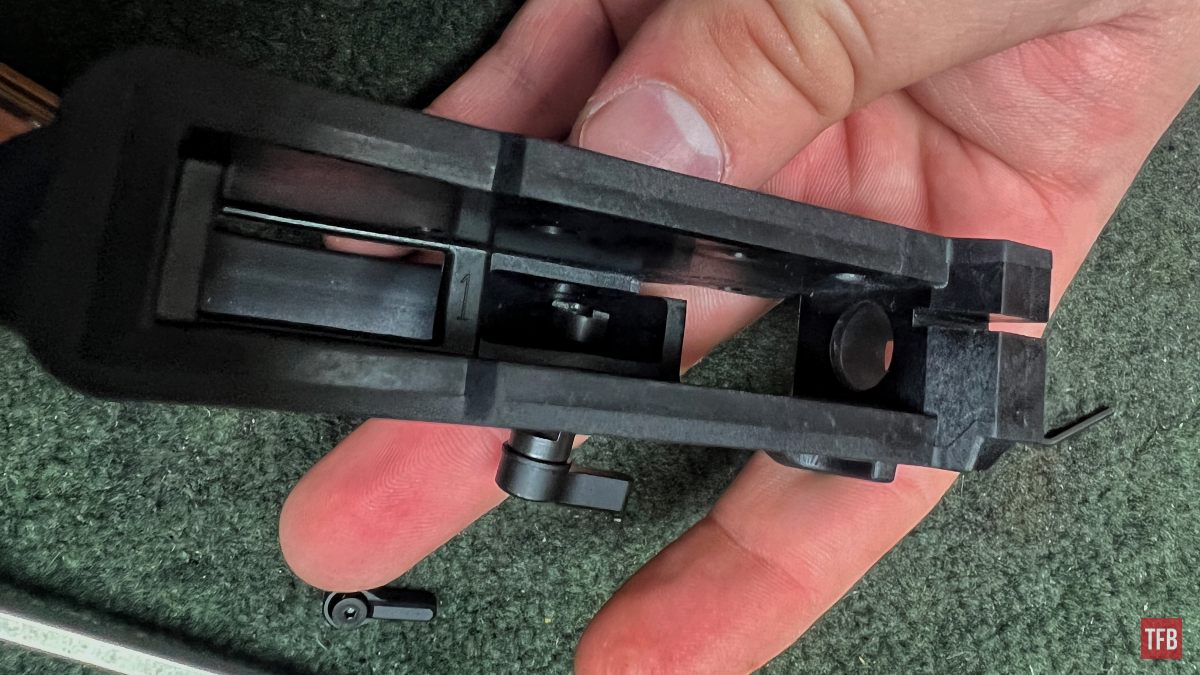
Step Four: 10/22 Binary Trigger Installation – Disassembly
I always take out the magazine latch pivot pin so I do not lose it when it inevitably falls out.
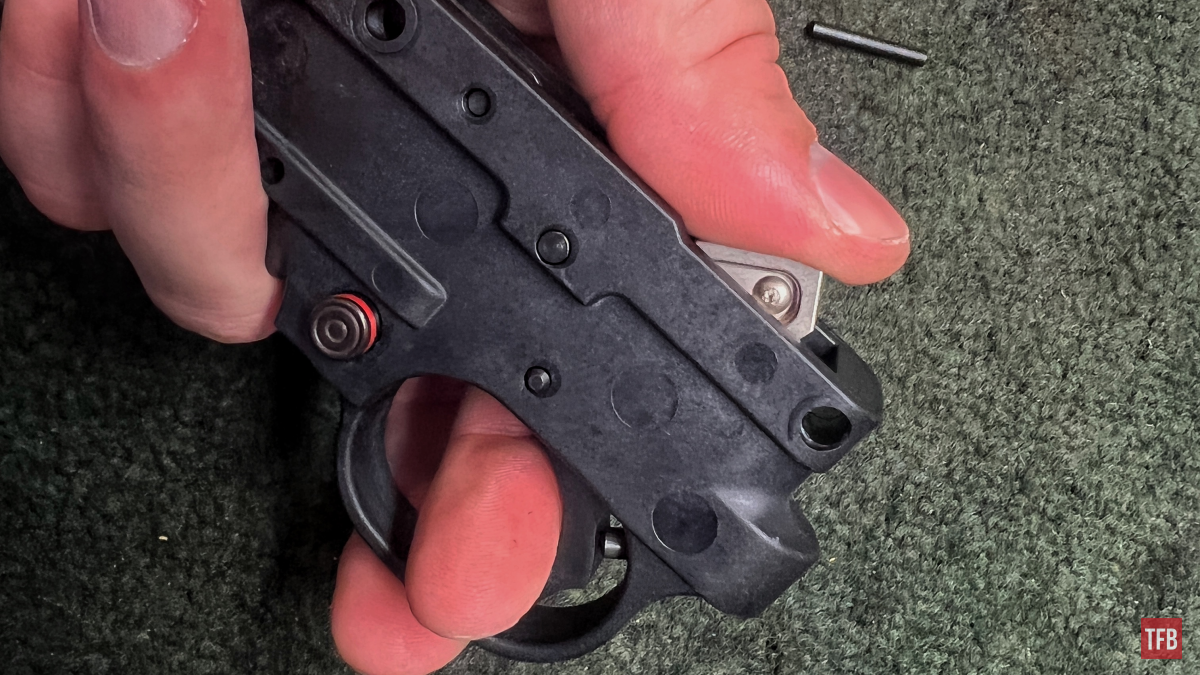
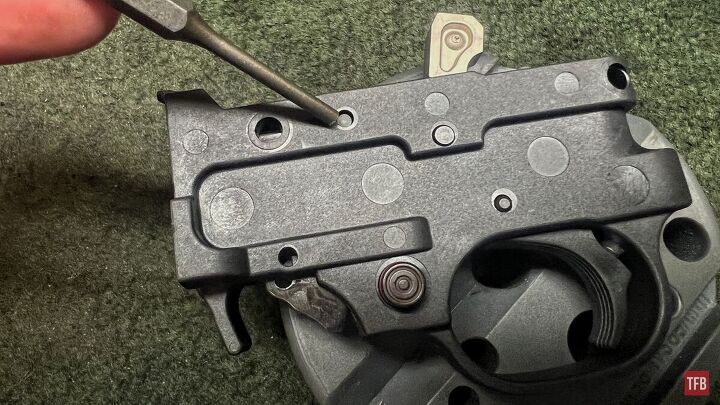
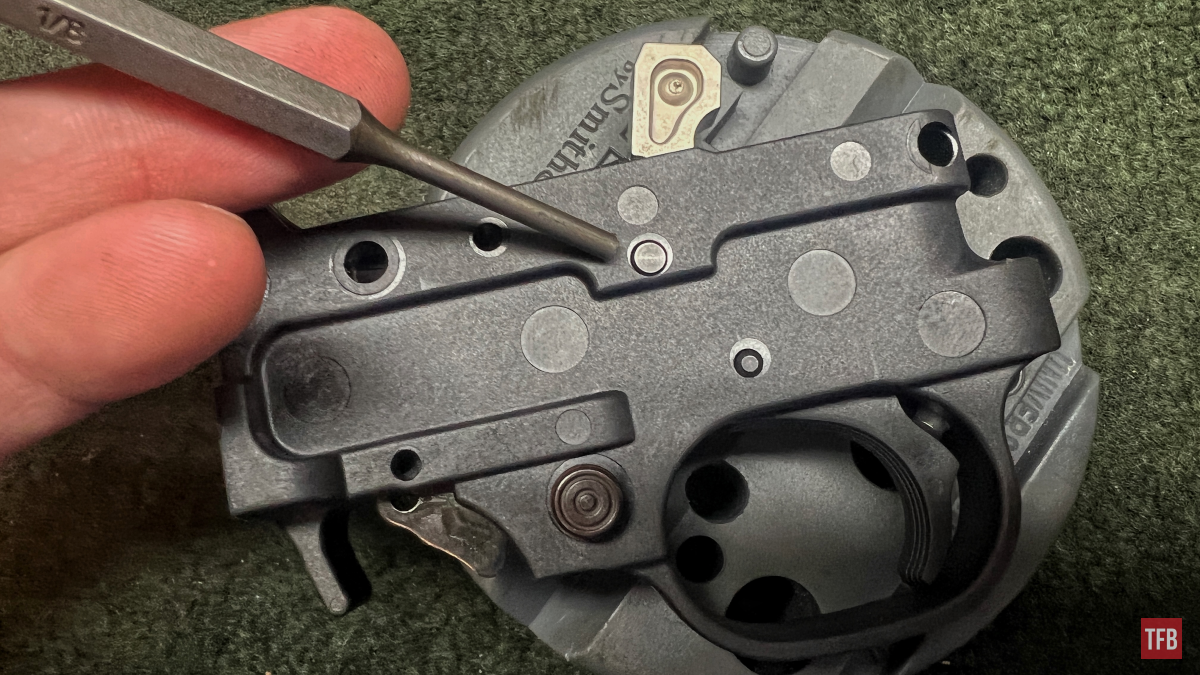
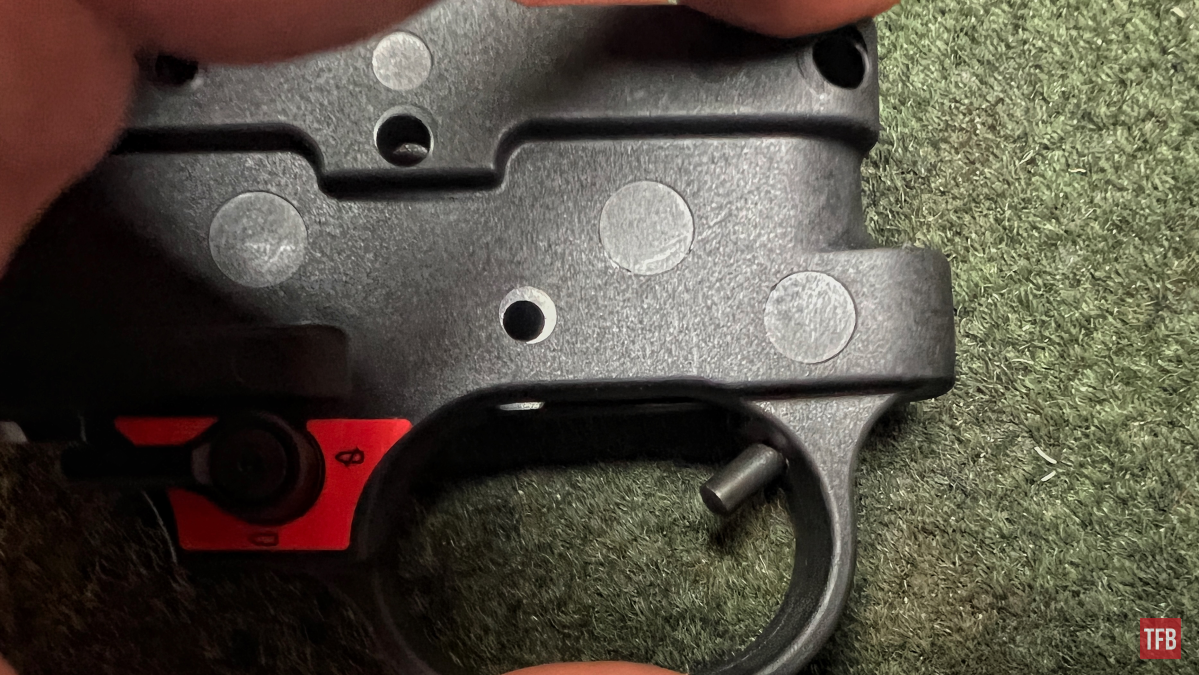
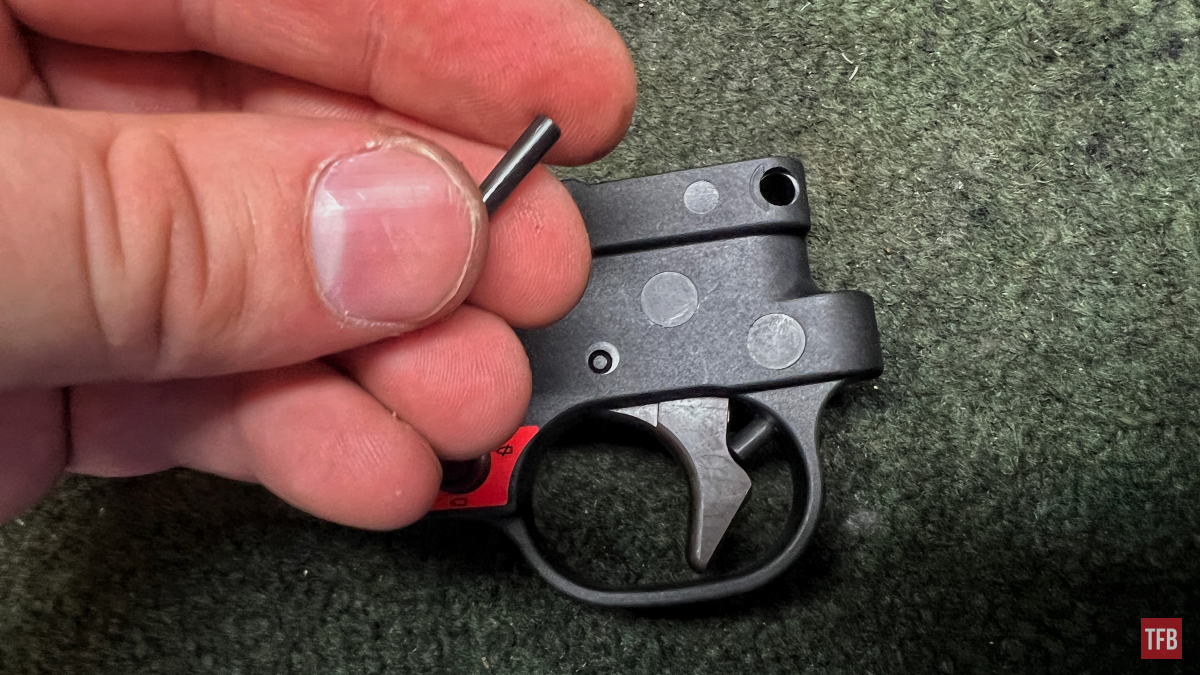
Whether or not you start by doing that you definitely have to take out the two receiver cross pins.

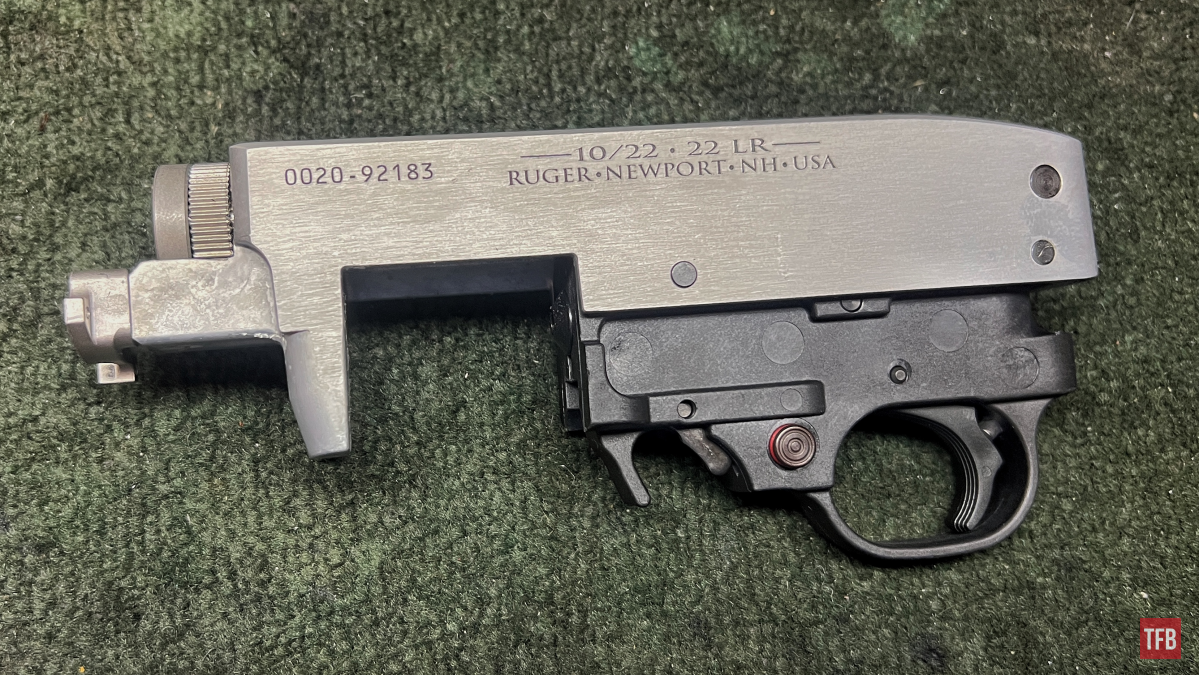
The receiver cross pins can be driven out in either direction in my experience. After they are driven out, the receiver can be lifted from the trigger guard assembly.
Step Five: 10/22 Binary Trigger Installation – Disassembly
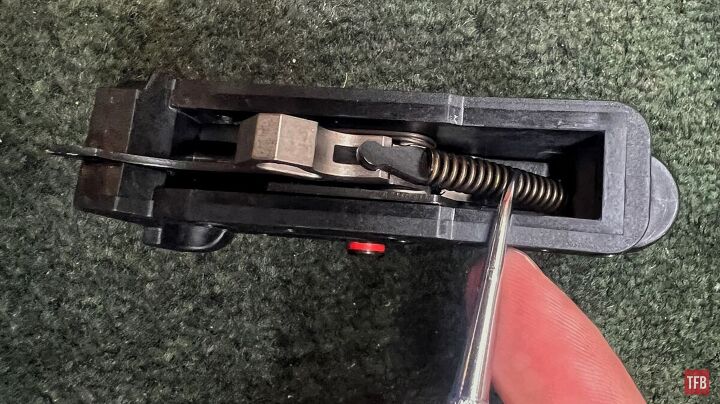
Next up, I start by lowering the hammer gently. I hold the trigger guard in this orientation and pull the trigger while letting the hammer down nicely.
With the hammer as far forward as it can go, the hammer spring and strut can be slid out. I used a pick to assist it.
Step Six: 10/22 Binary Trigger Installation – Disassembly
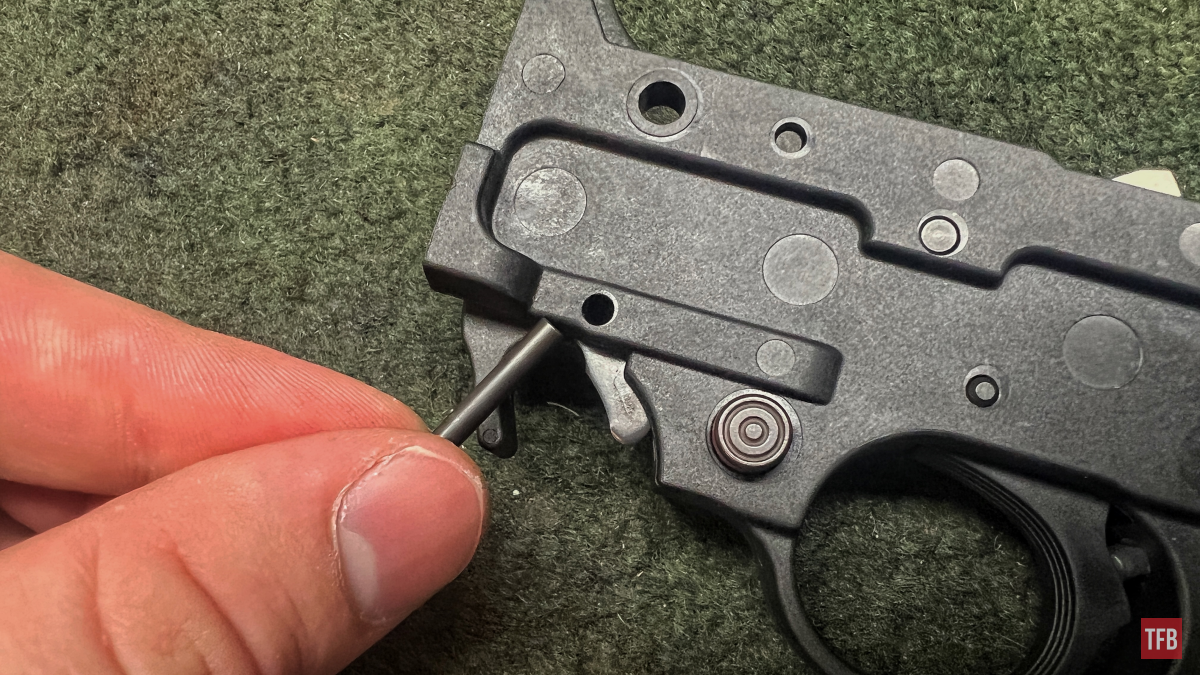
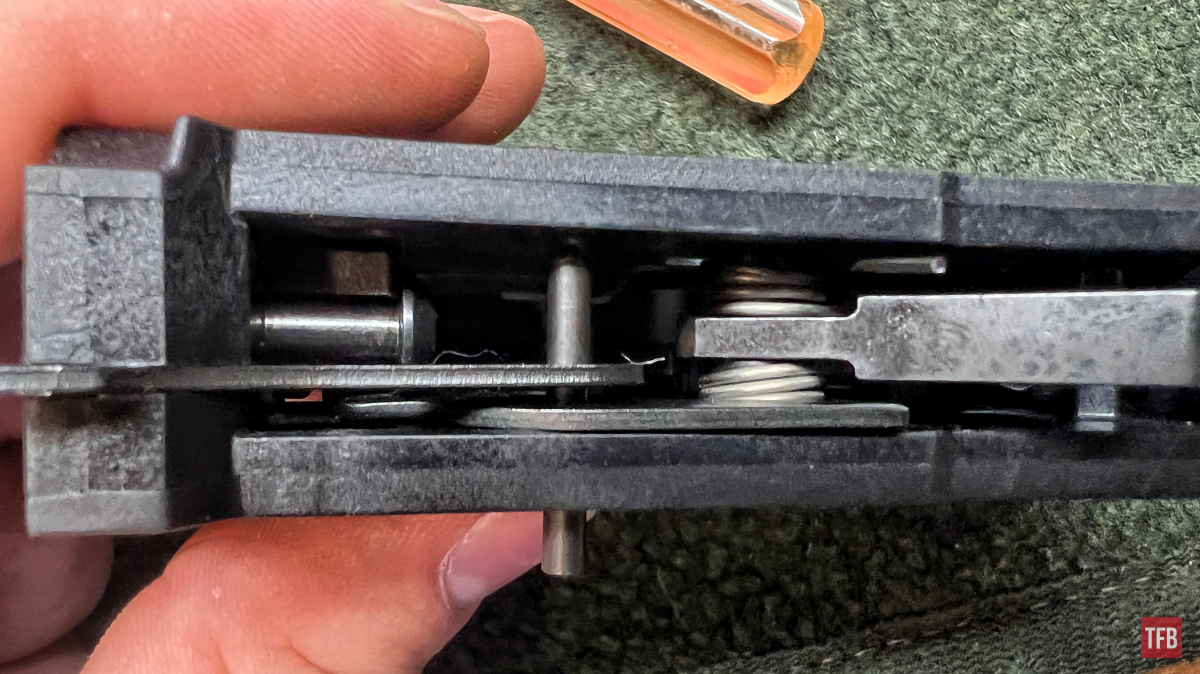
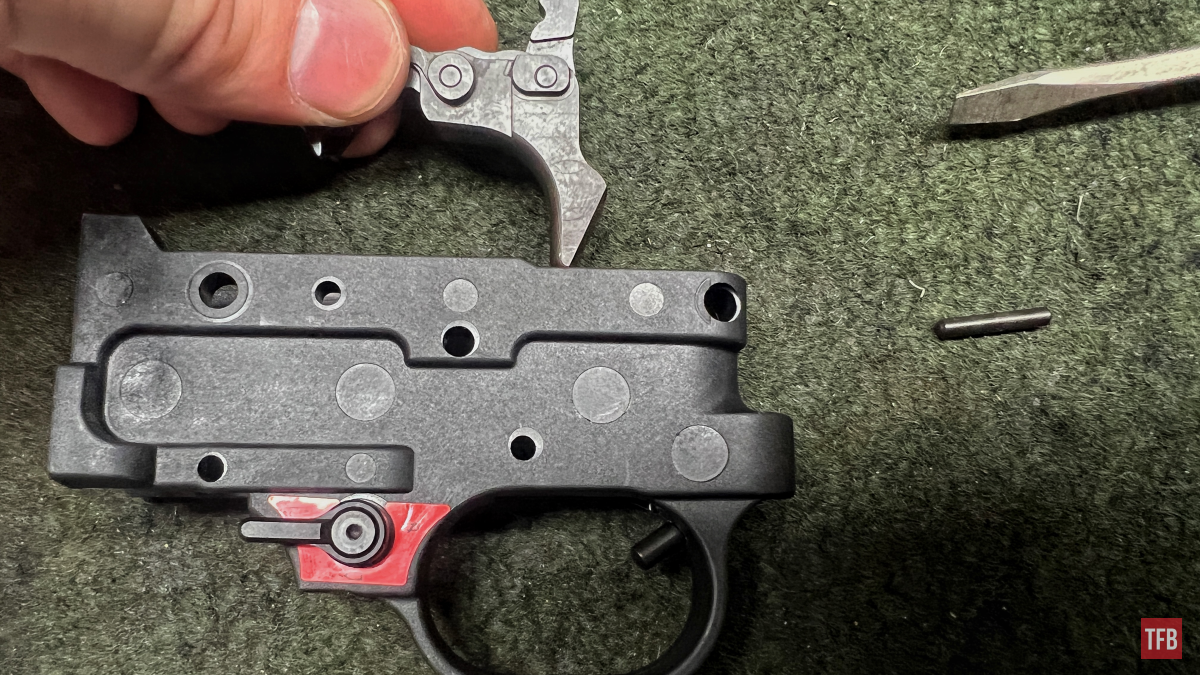
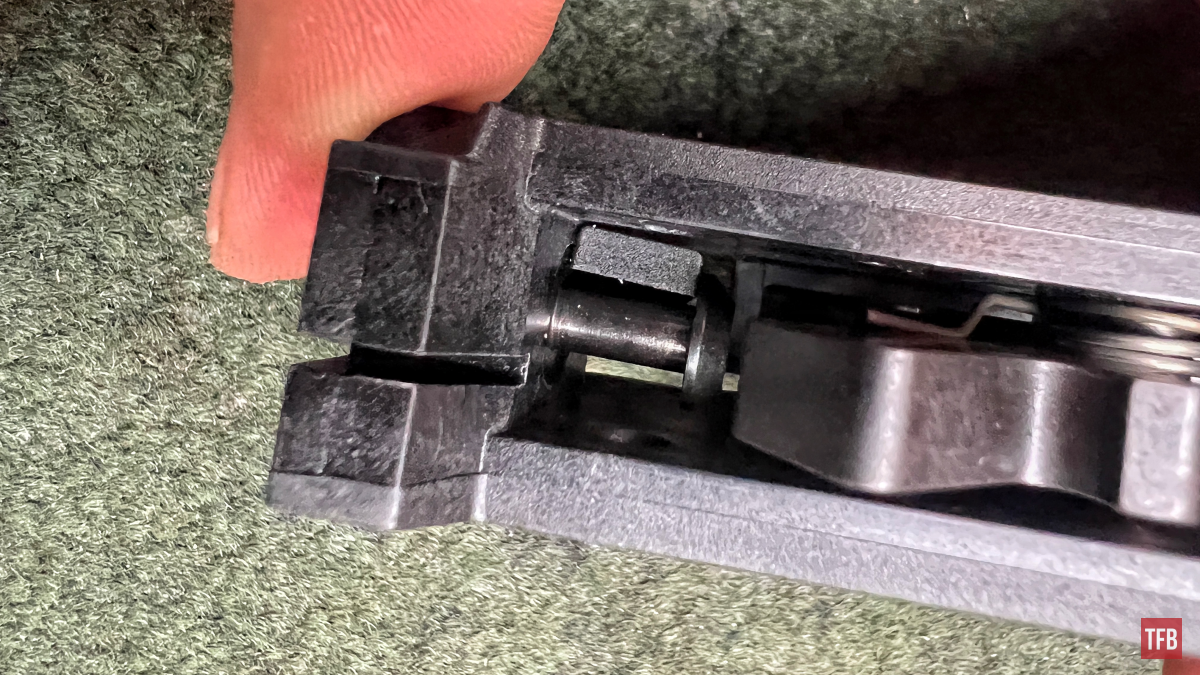
With the hammer spring and strut removed, we can punch out the ejector/bolt release pin.
After this pin is out, the bolt release and ejector can be removed (so long as you already removed the magazine latch pivot pin) but for sake of speed, I skipped straight to punching out the hammer pin.
After both of these pins are removed, the hammer, bolt lock spring, ejector, and bolt release can be removed.
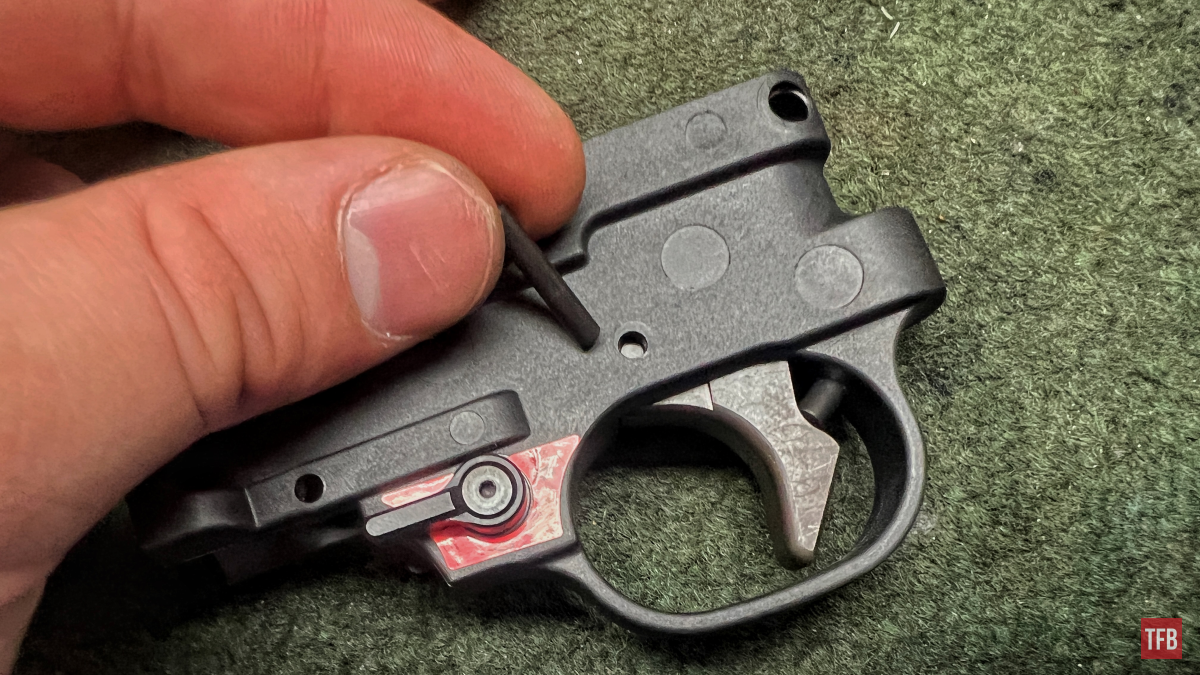
Step Seven: 10/22 Binary Trigger Installation – Disassembly
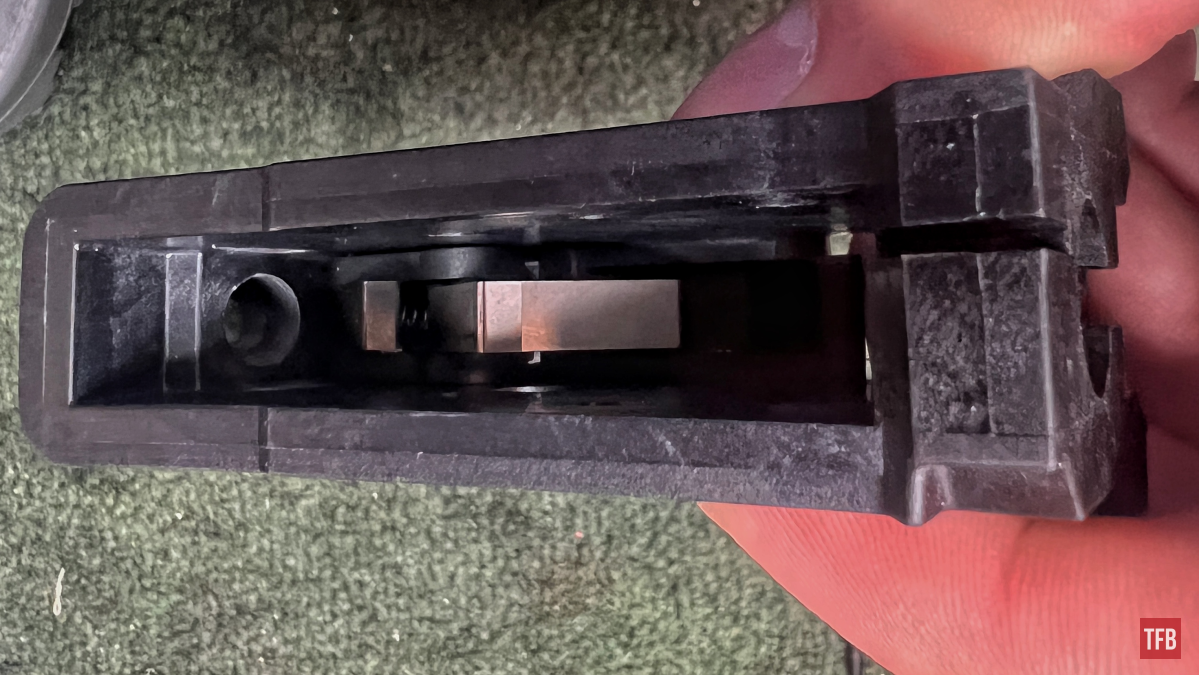
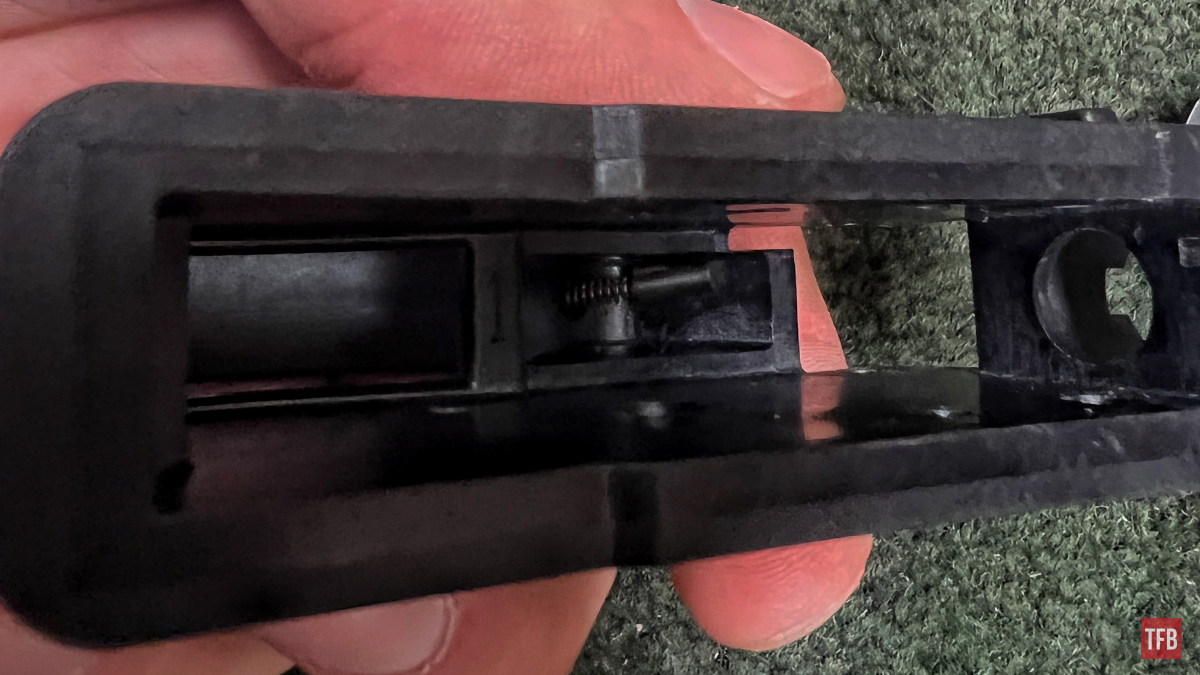
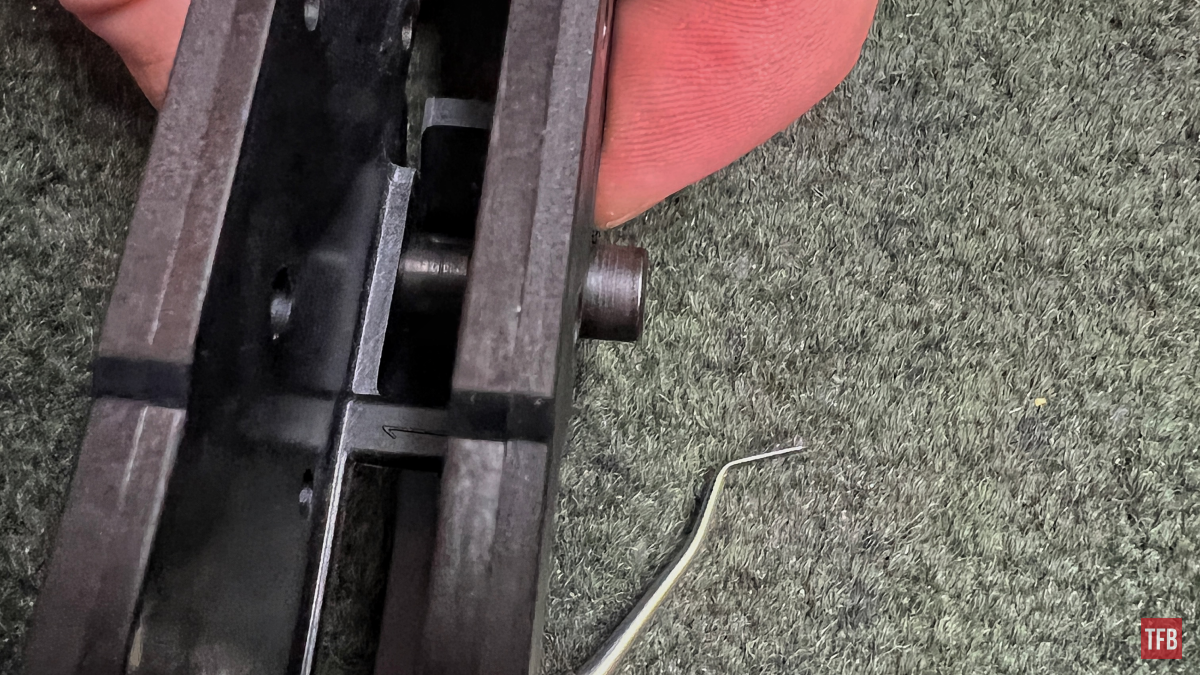
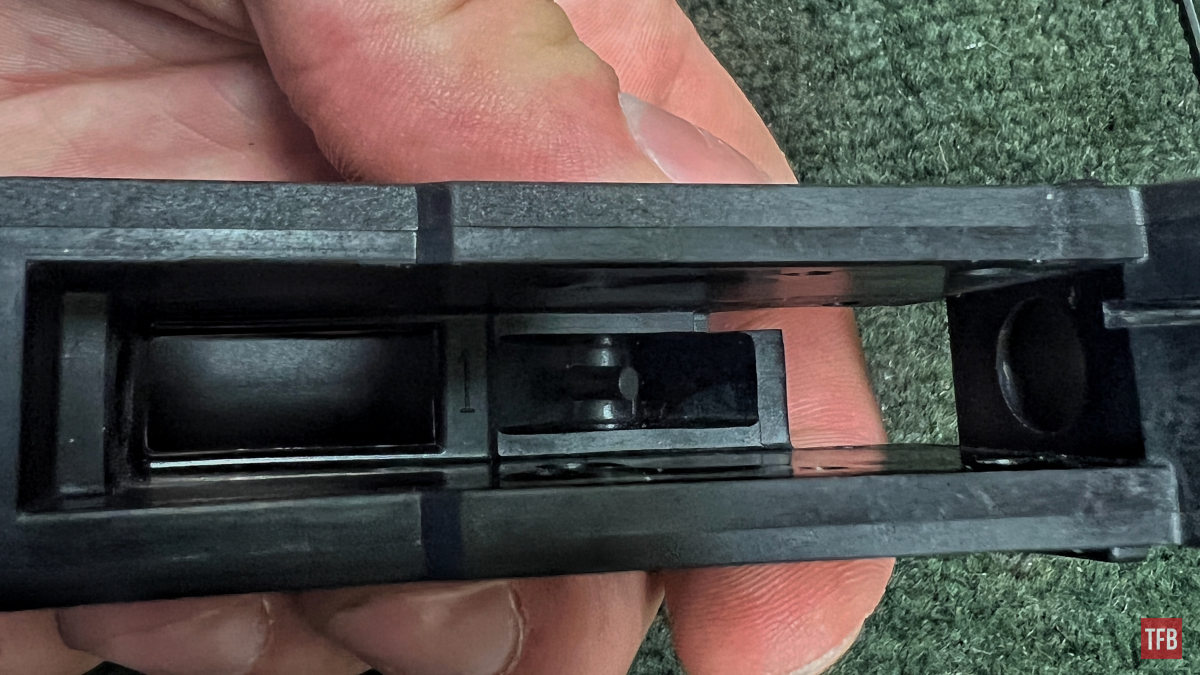
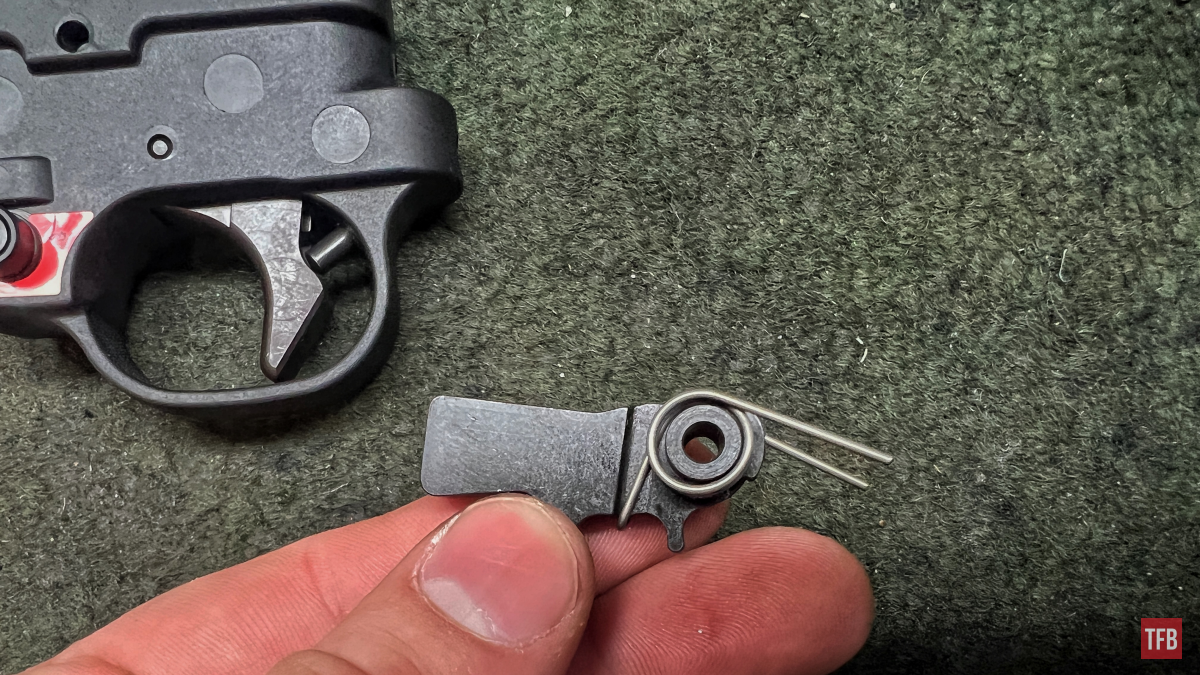
The magazine latch plunger and magazine latch can be removed by depressing the magazine latch plunger.
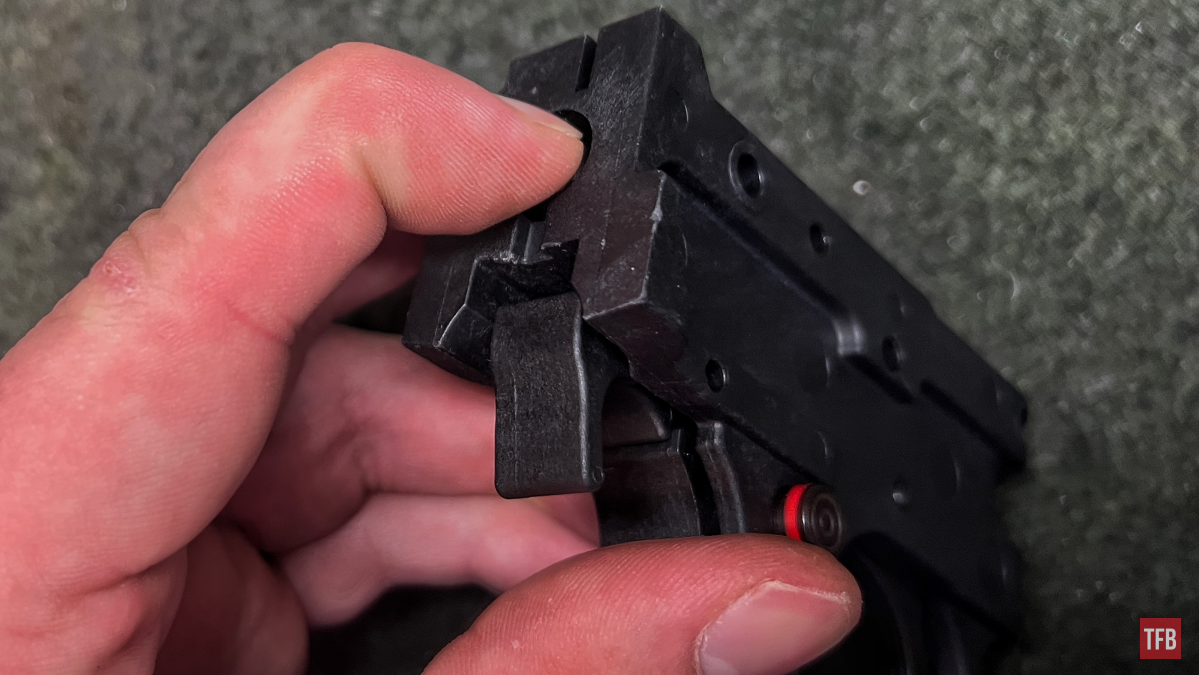
With the plunger depressed all the way, the latch should fall free or be able to be pulled free. below is what the latch and plunger relationship looks like from a top-down view
Step Eight: 10/22 Binary Trigger Installation – Disassembly
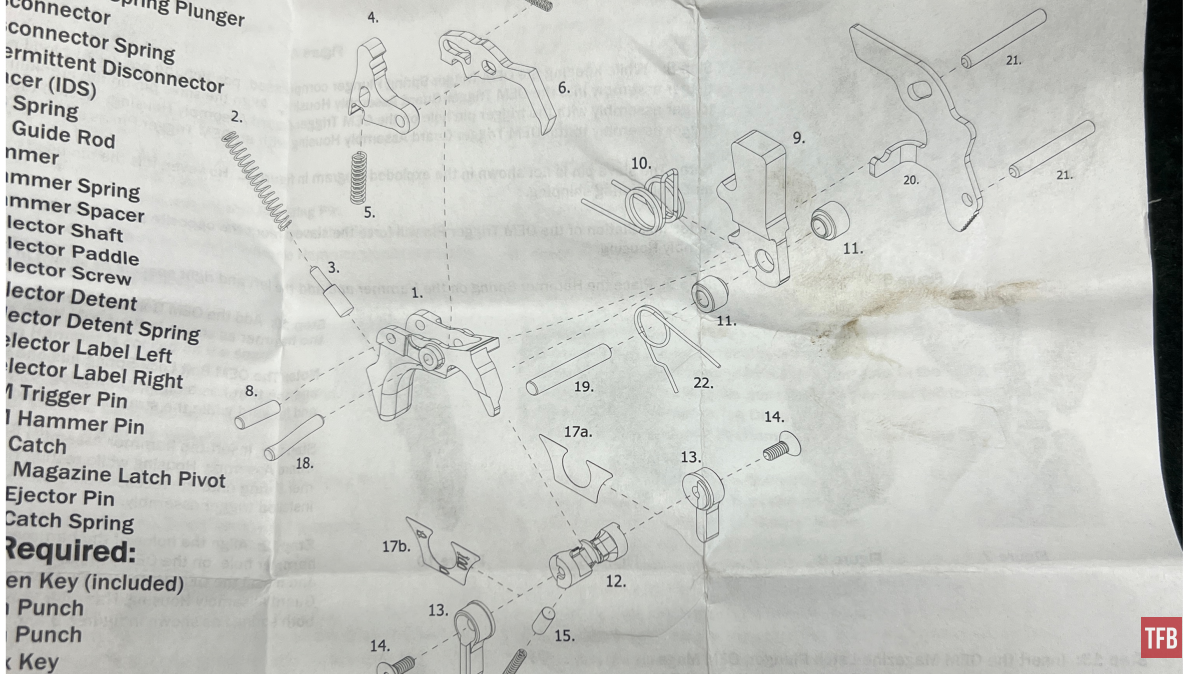
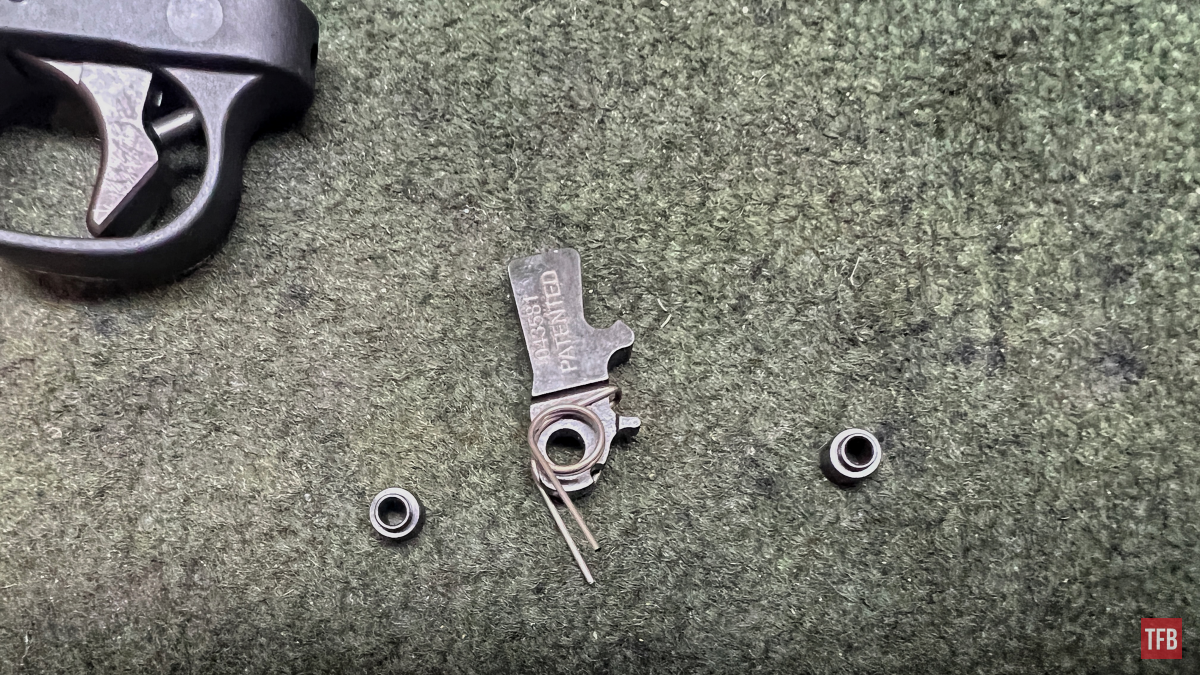
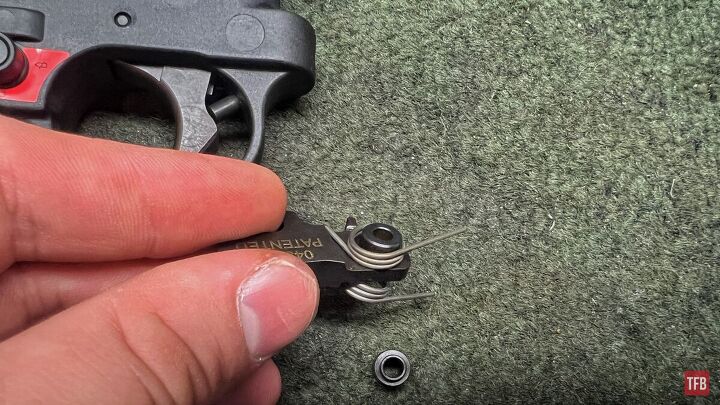
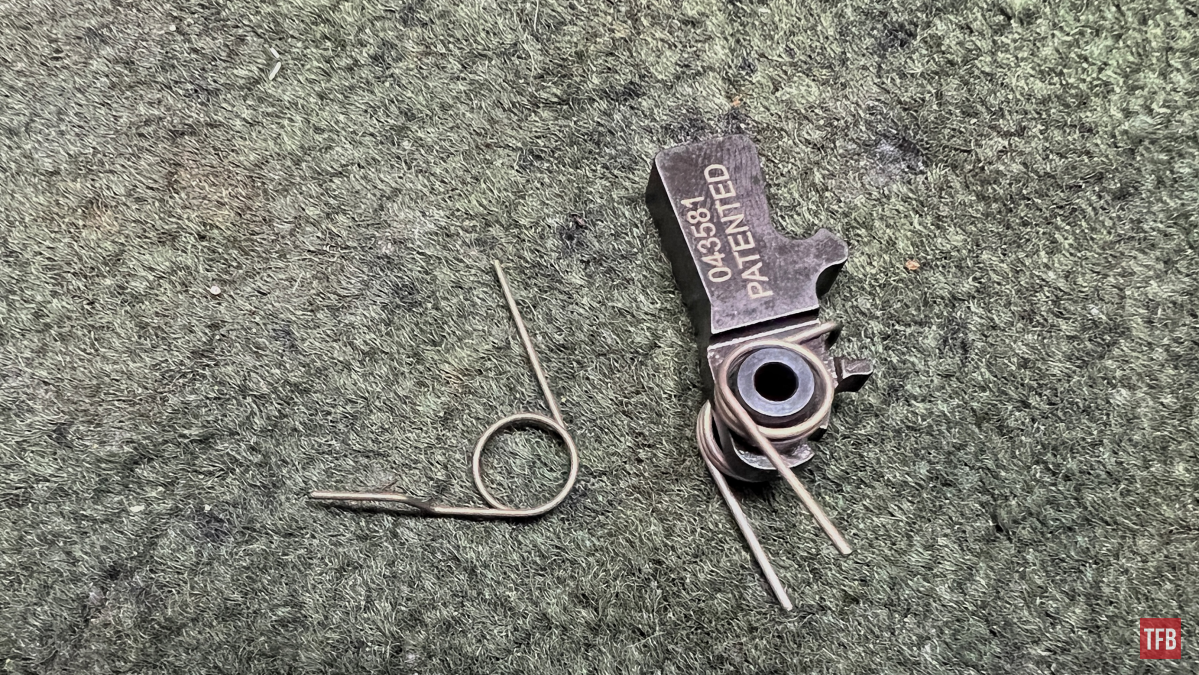
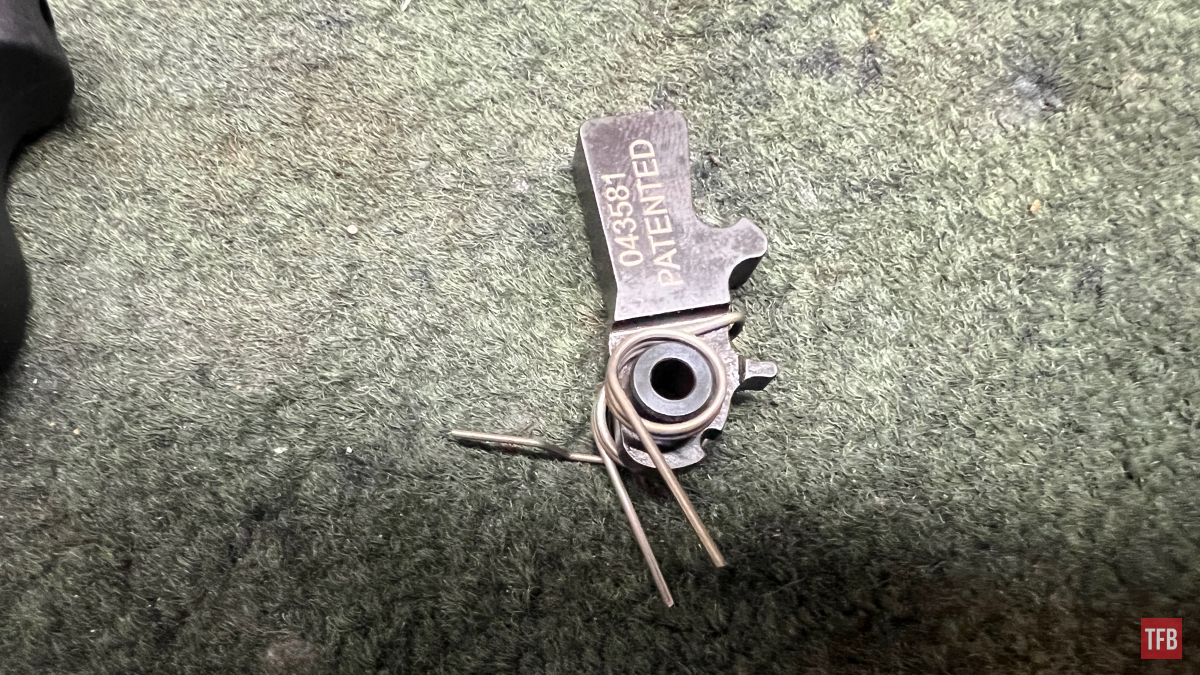
I apologize, I did not take a picture of this bit but the trigger pin can be punched out. The trigger assembly consists of five parts, the trigger, trigger pivot pin, sear, disconnector, and disconnector spring. The disconnector and its pin do not need to be removed from the trigger.
The trigger return spring is free to fall out so be careful. It is simply removed by pulling it out.
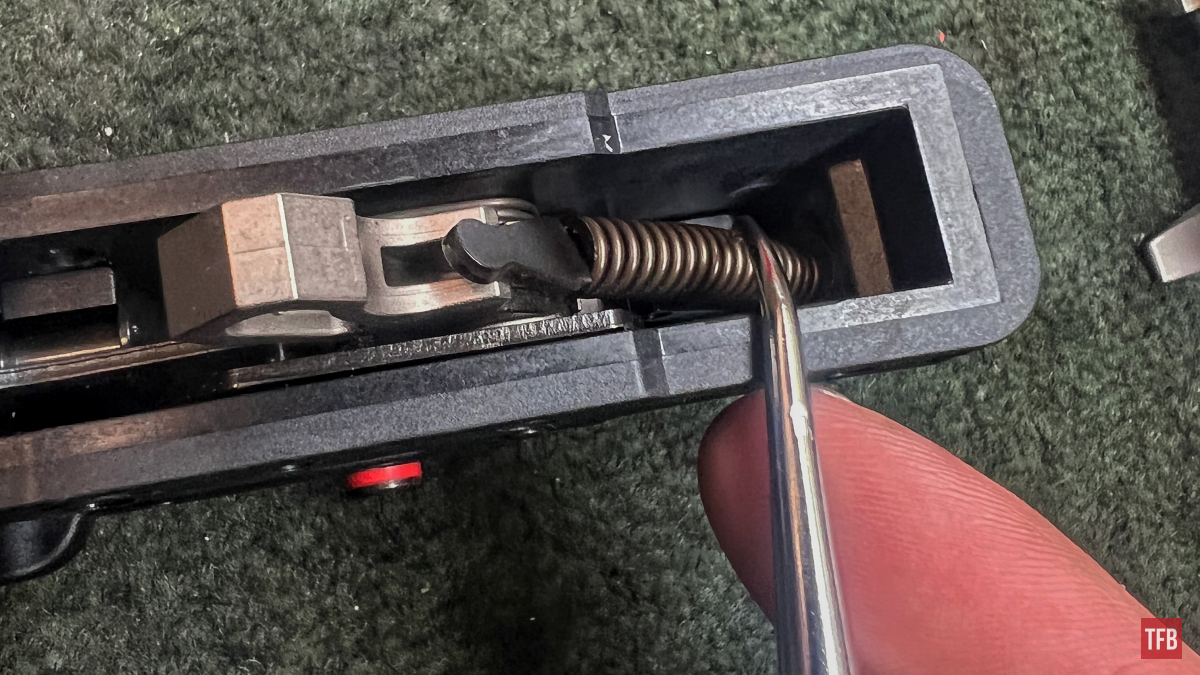
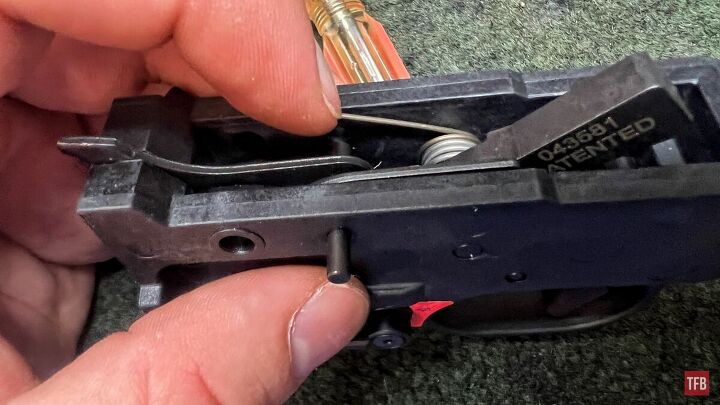
Step Nine: 10/22 Binary Trigger Installation – Disassembly
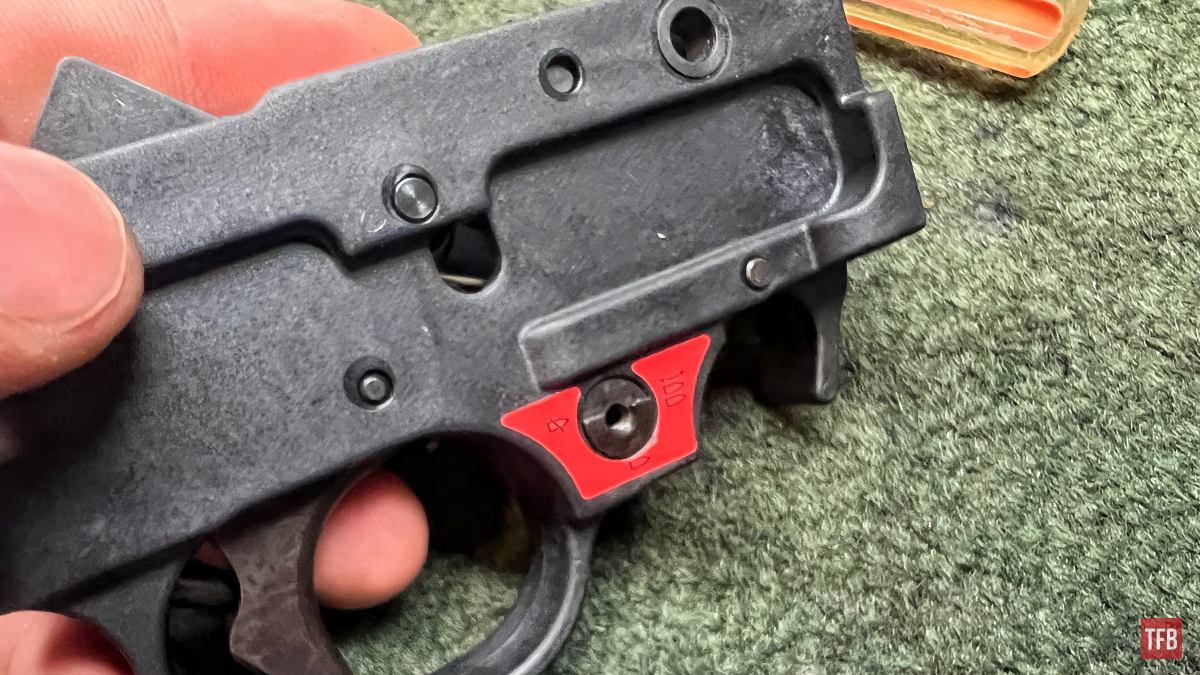
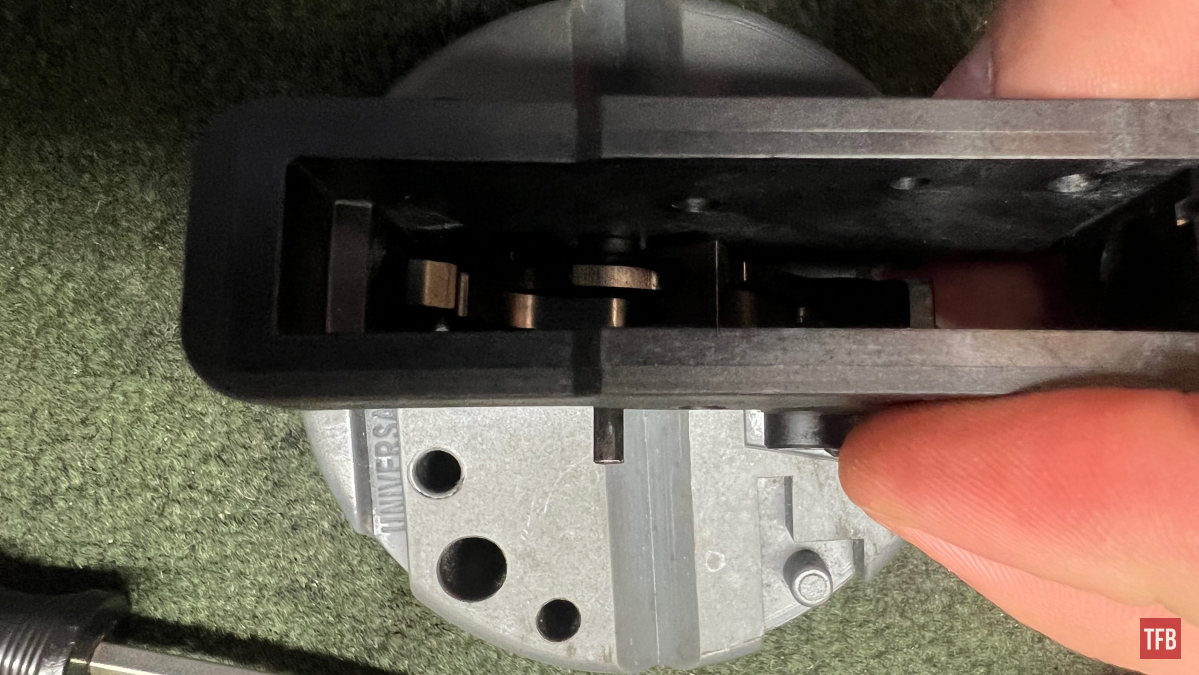
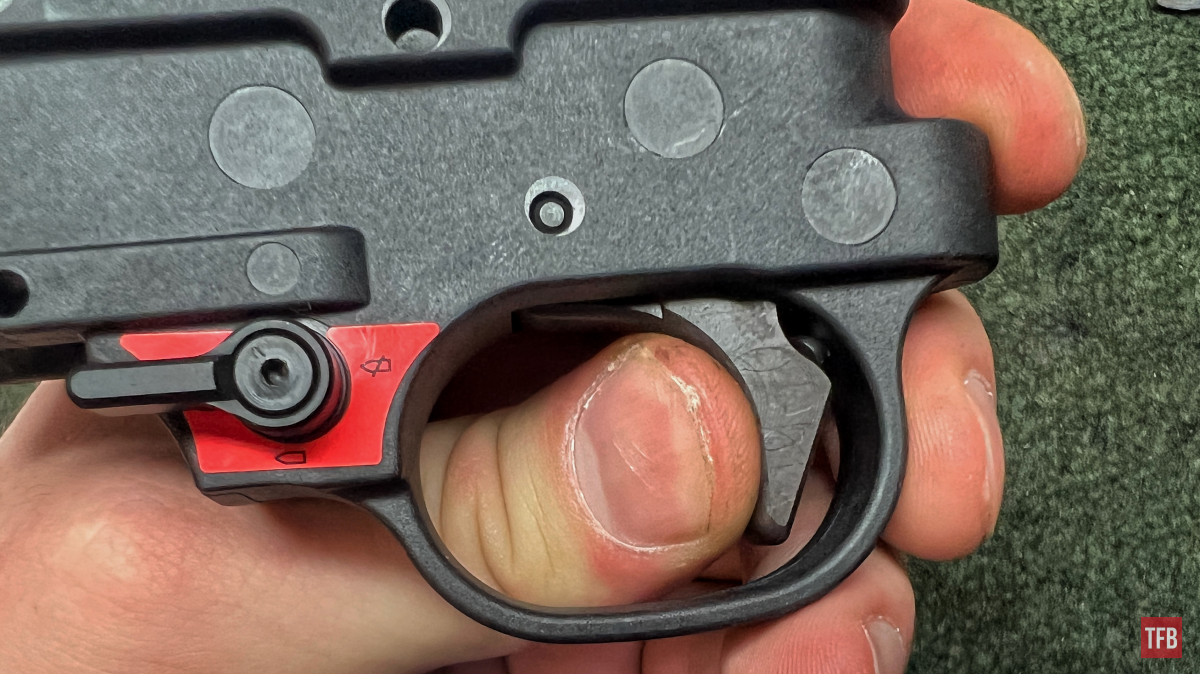
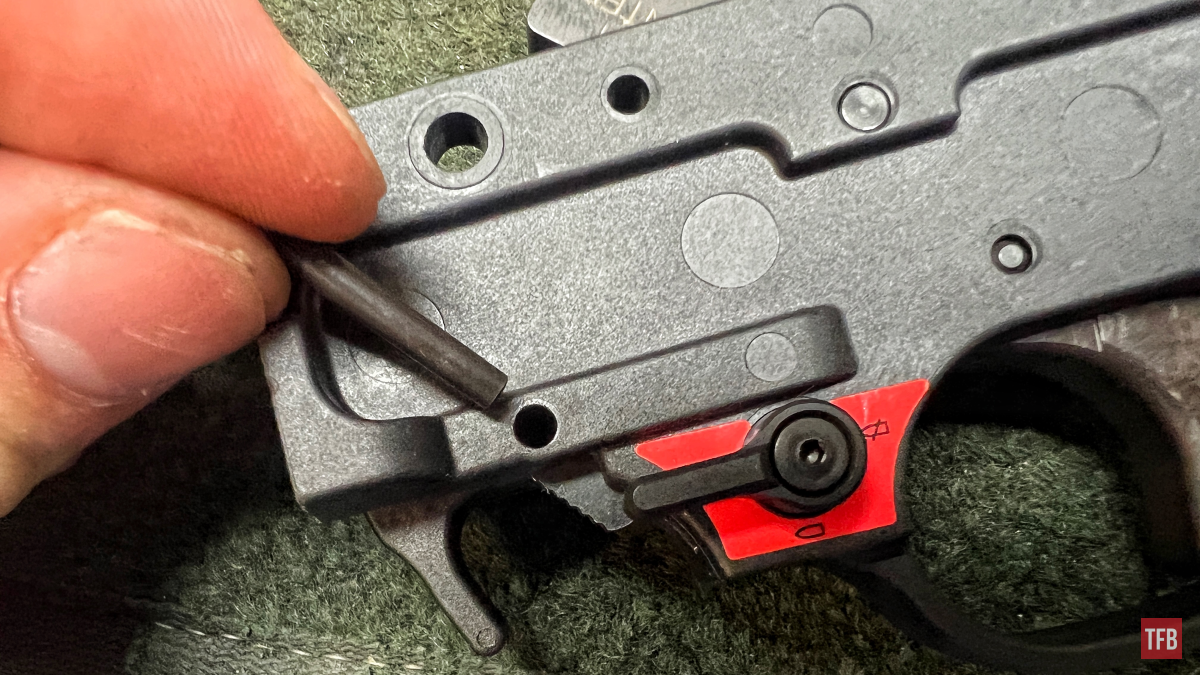
The next big challenge is going to be removing the safety button. It has a spring and plunger hidden under it which keeps it from falling out. Note the plunger peeking out at the bottom of the safety (silver-looking bit).

I had this handy flat sort of dental pick to slide under the safety and depress the plunger.
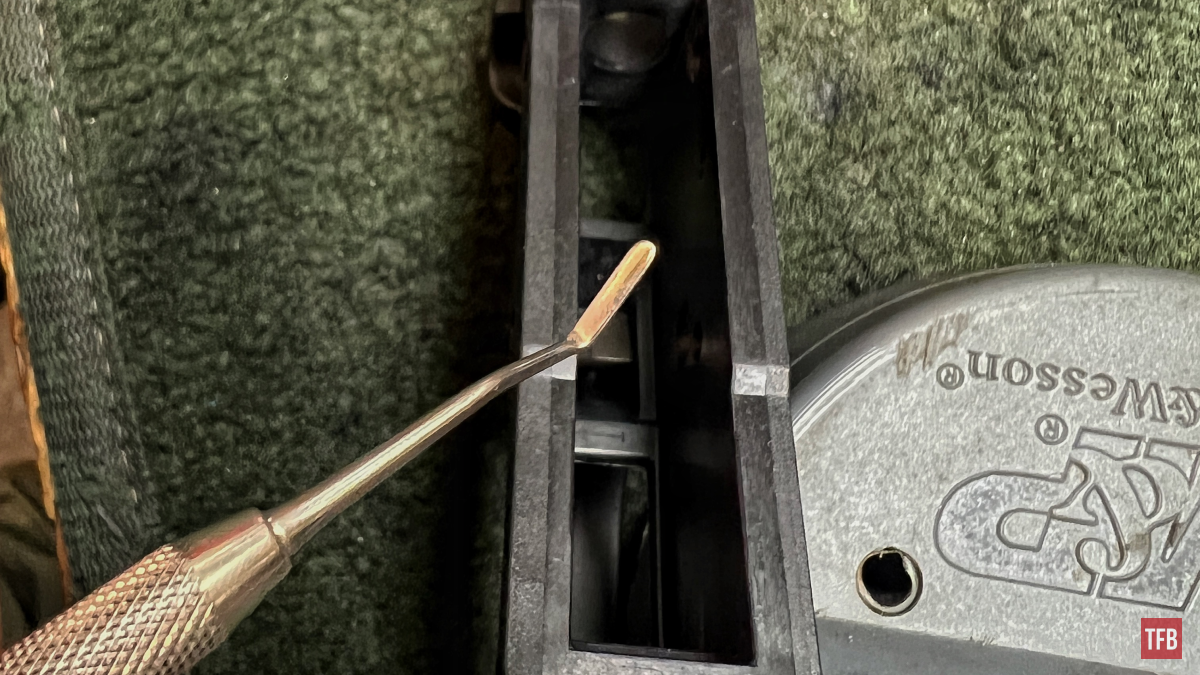
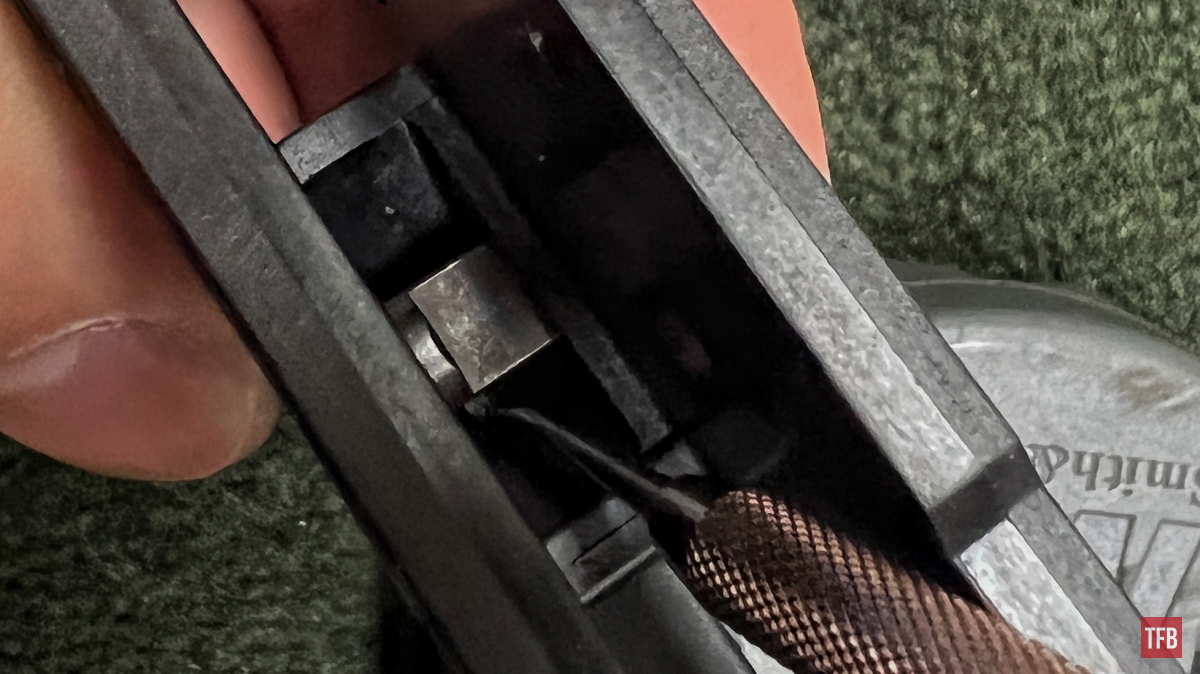
After the plunger is depressed and the safety started out to one side, do not push it all the way out. The plunger and spring will fling across the room.
Wrap a cloth or your palm around the top opening to the trigger guard in order to capture the safety plunger and spring as you pull the safety button out one side.
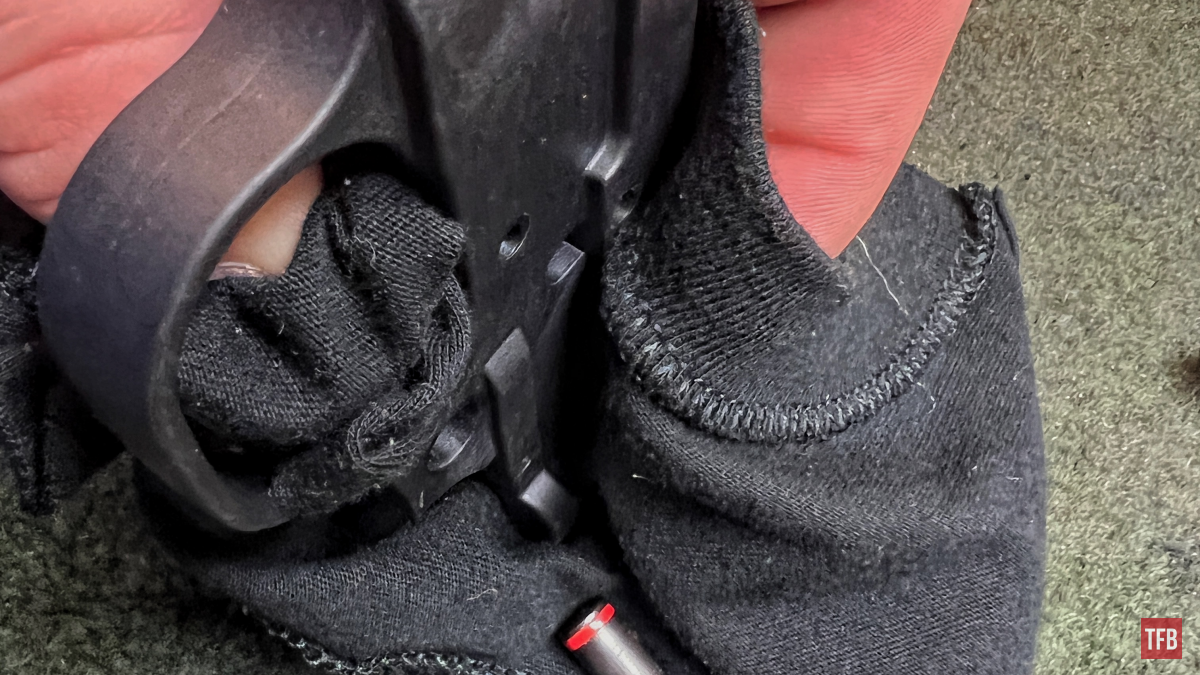
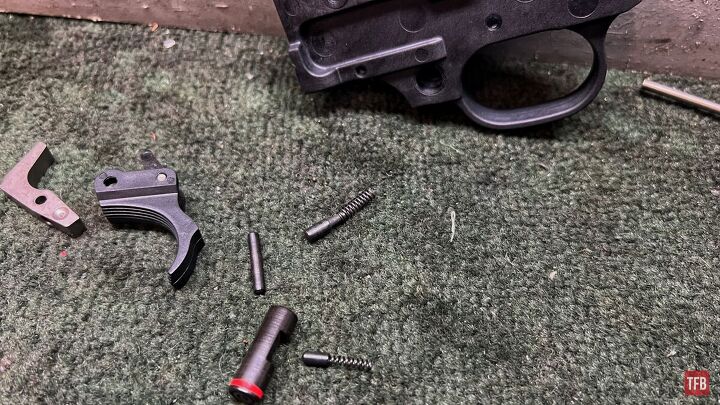
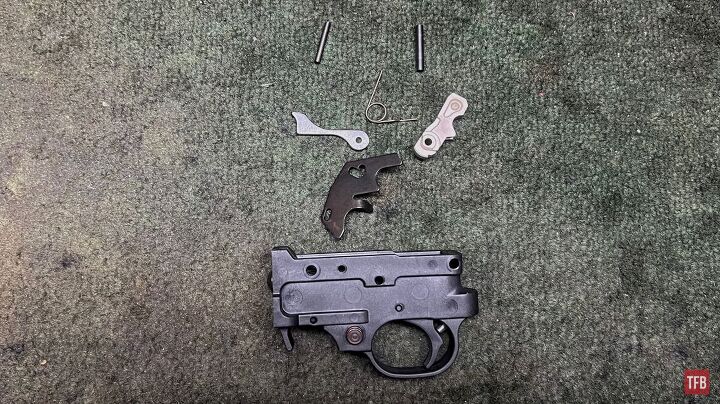
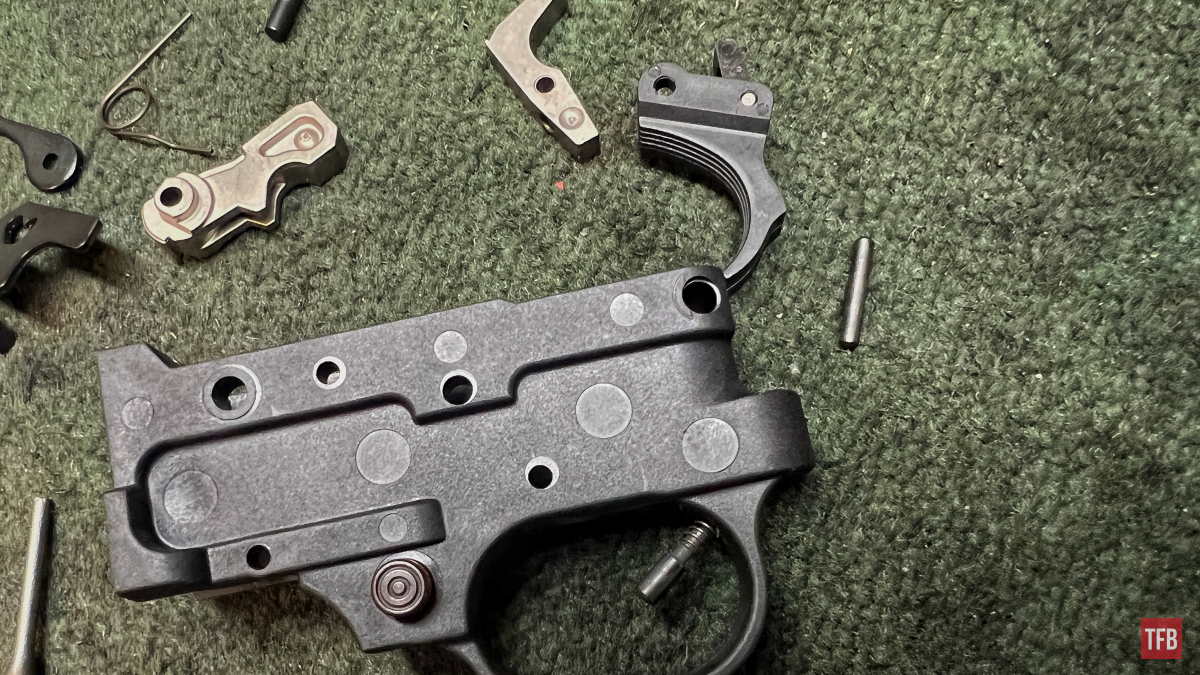
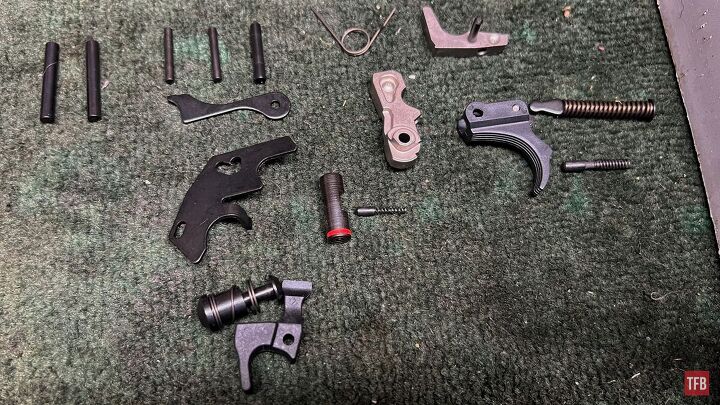
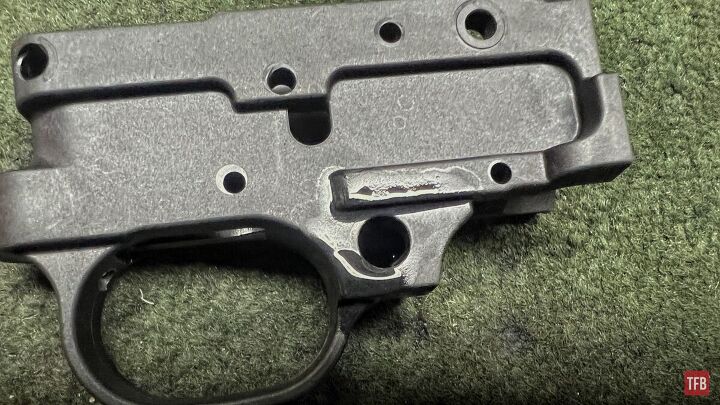
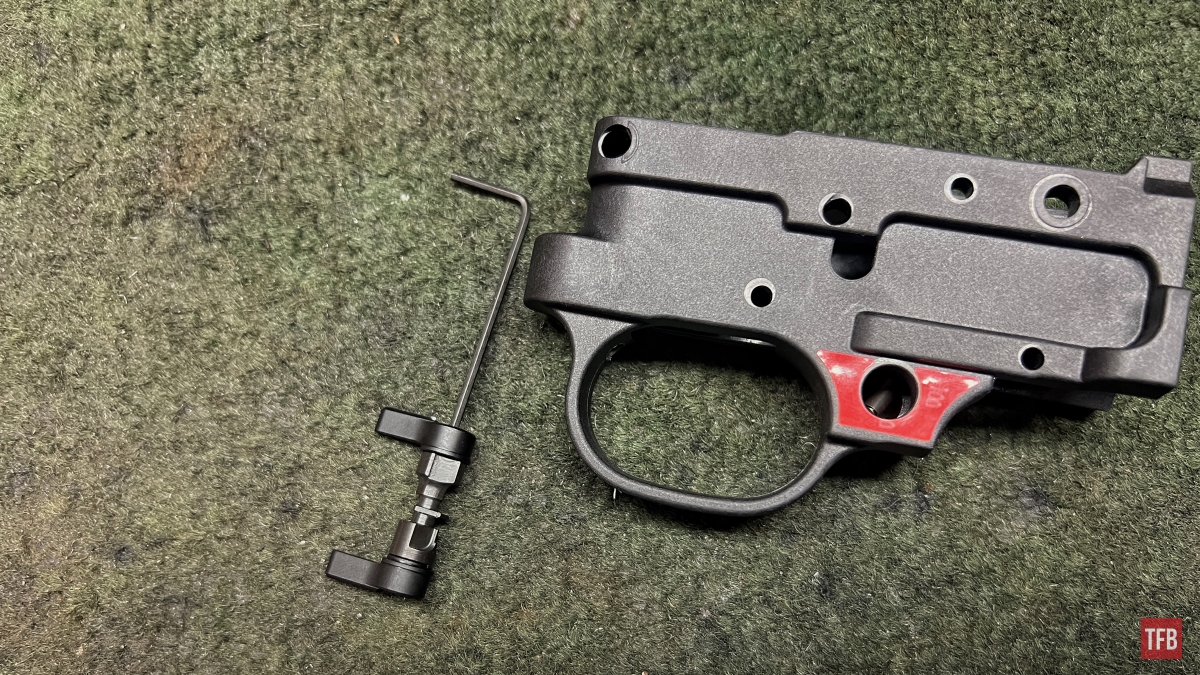
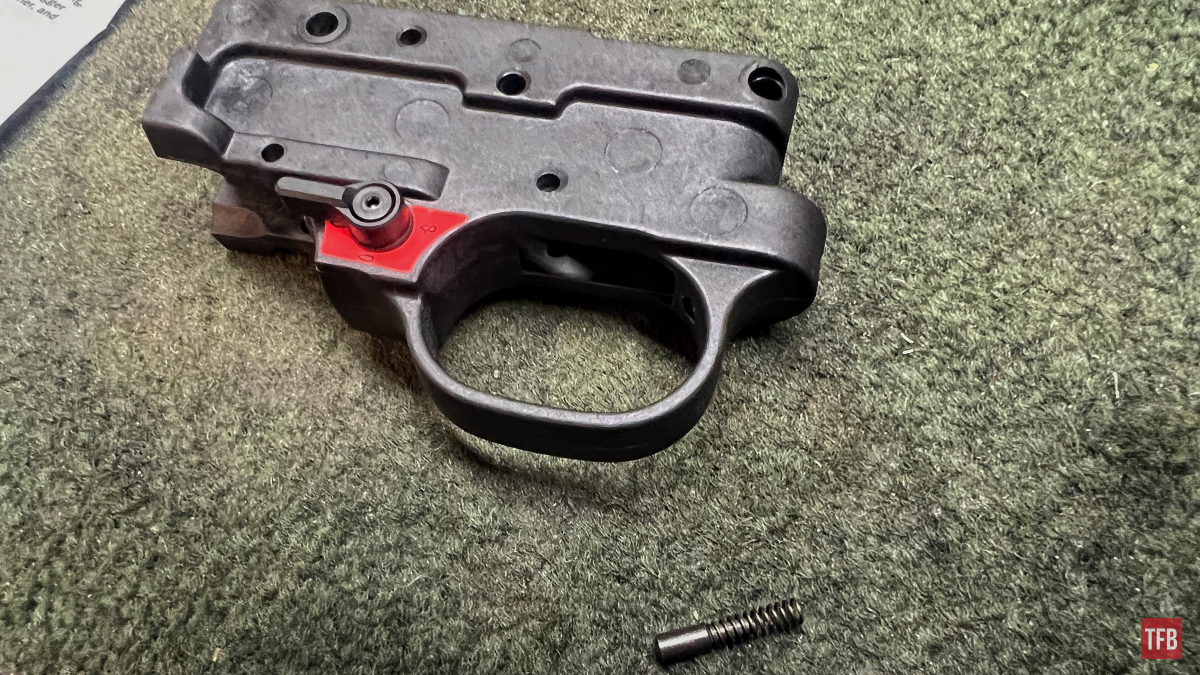
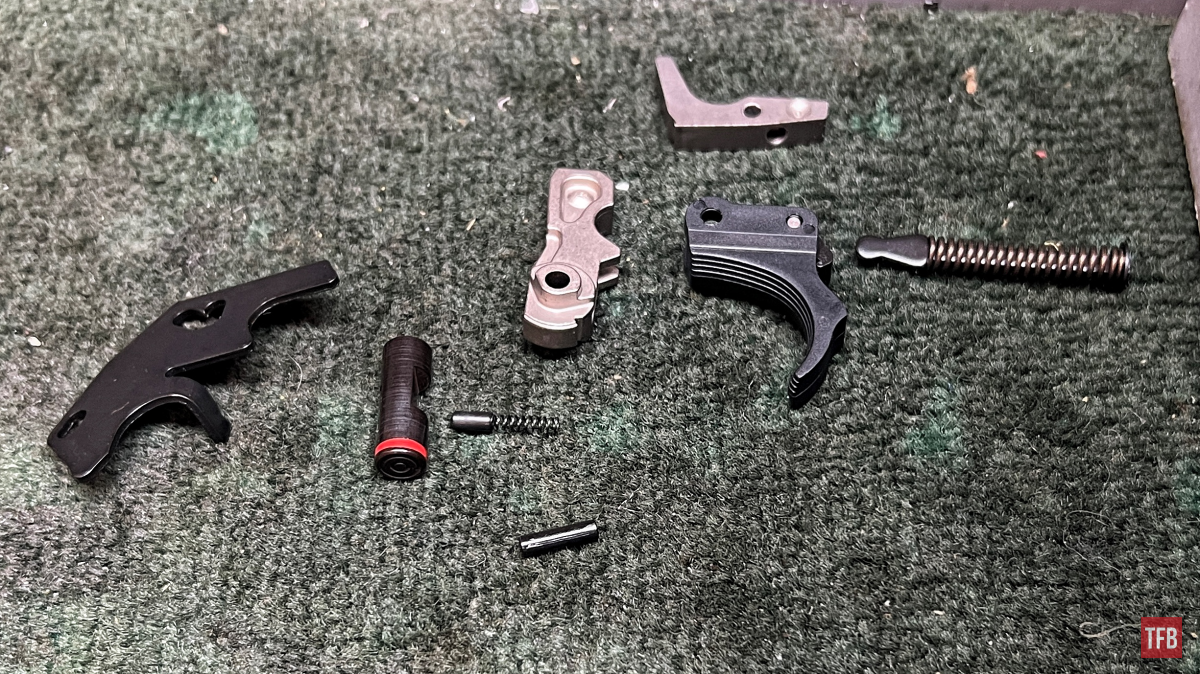
Below are all of the parts disassembled from the trigger guard.
Onto the installation!
Step One: 10/22 Binary Trigger Installation
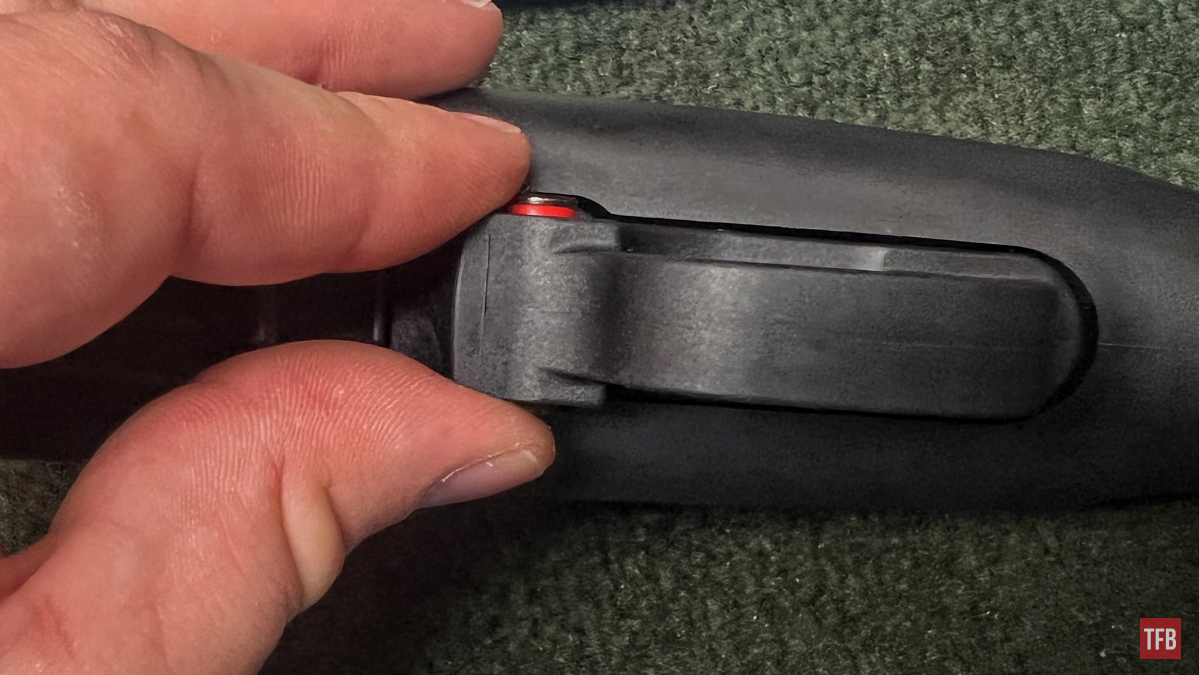
So now we can actually start our installation. It is a bit of reassembly of the normal trigger assembly but it has subtle differences mixed in. Starting out it is recommended to degrease the spot on the trigger assembly where the Franklin Armory binary trigger sticker needs to go. The spot is the area around the safety hole. I put a couple drops of acetone on the spot and wiped it clean.
The stickers are side specific. The binary position needs to be facing the muzzle direction of the trigger assembly.
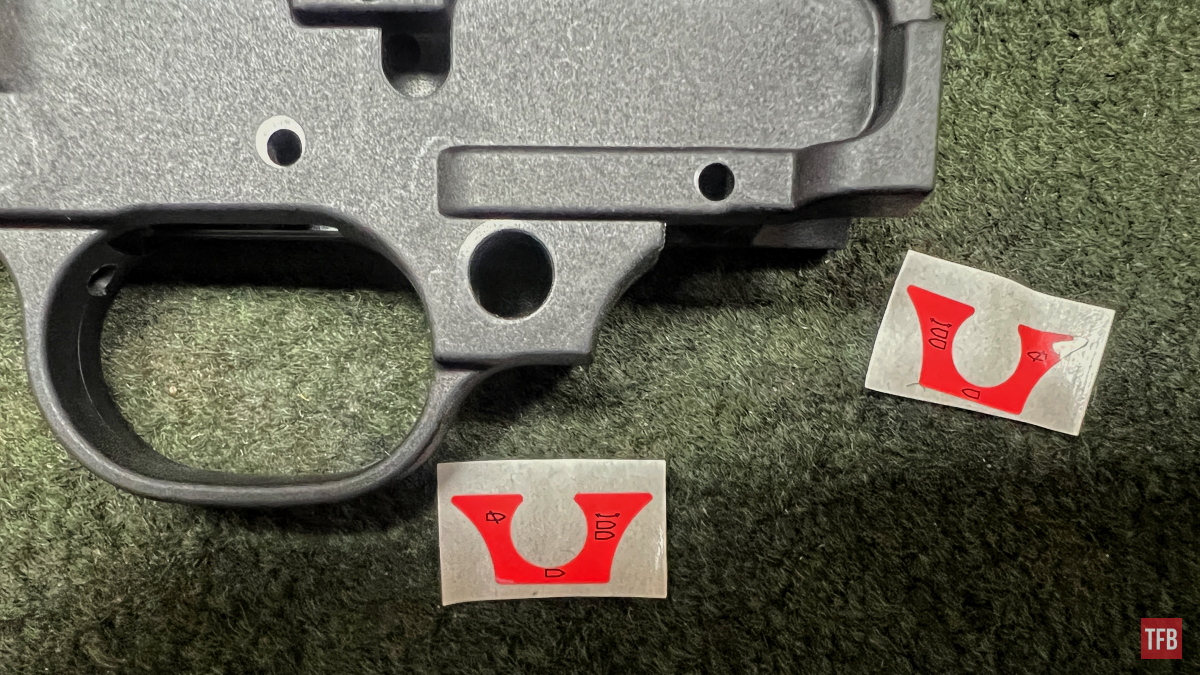
Carefully apply the sticker around the safety hole. I have no tips here besides don’t mess it up. The stickers are pretty cheap and not really removable and reusable. I have shaky hands and this was the most stressful point for me.

Step Two: 10/22 Binary Trigger Installation
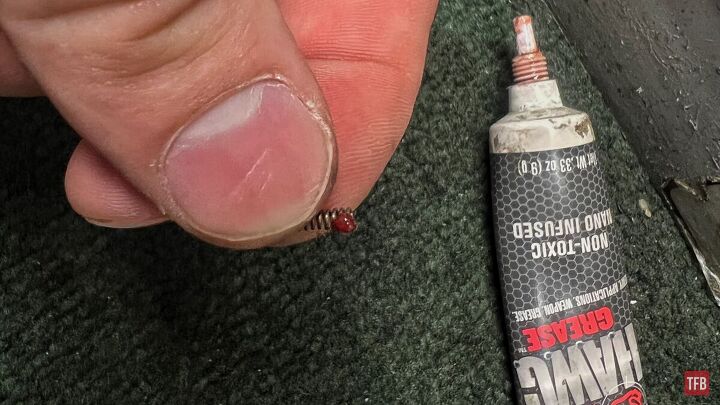
Now we have to put the original safety plunger and spring back into the hole it belongs.
One thing that I found annoying was that the plunger and string kept separating or bouncing out of place. In order to keep the two parts together, I applied a small glob of grease which will not hurt in the long run. This part sees almost no dirt, grim, fouling, etc so it should work reliably for a very long time.
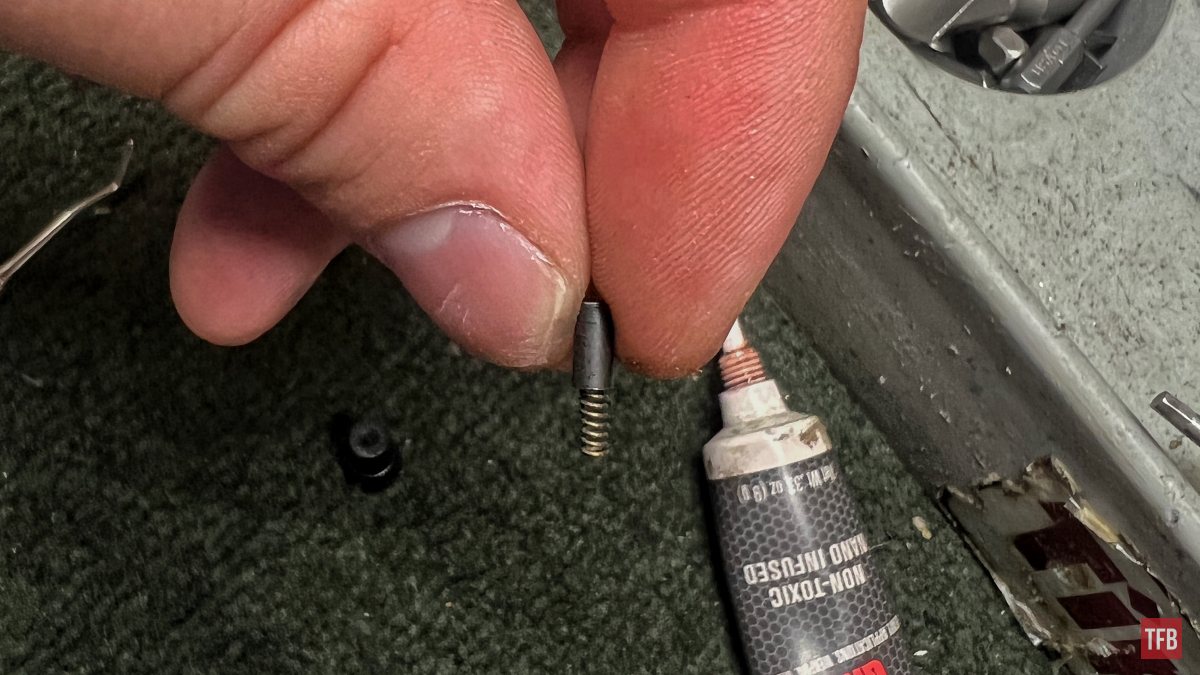
Slide the string and plunger back into the hole.
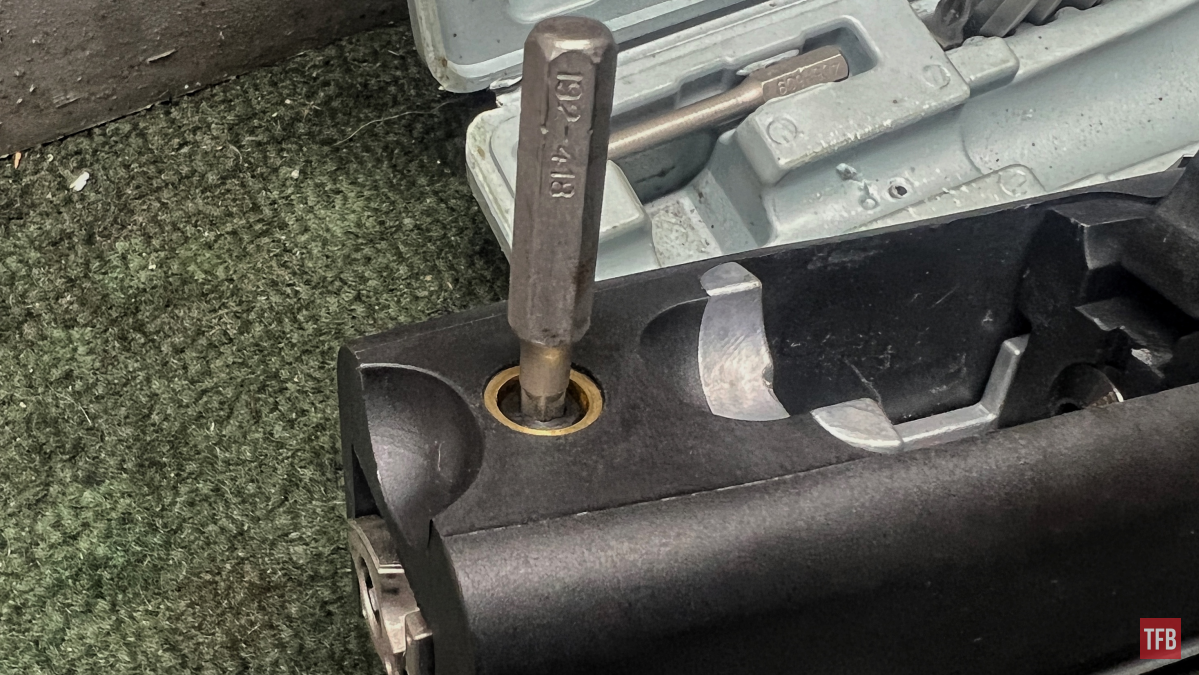
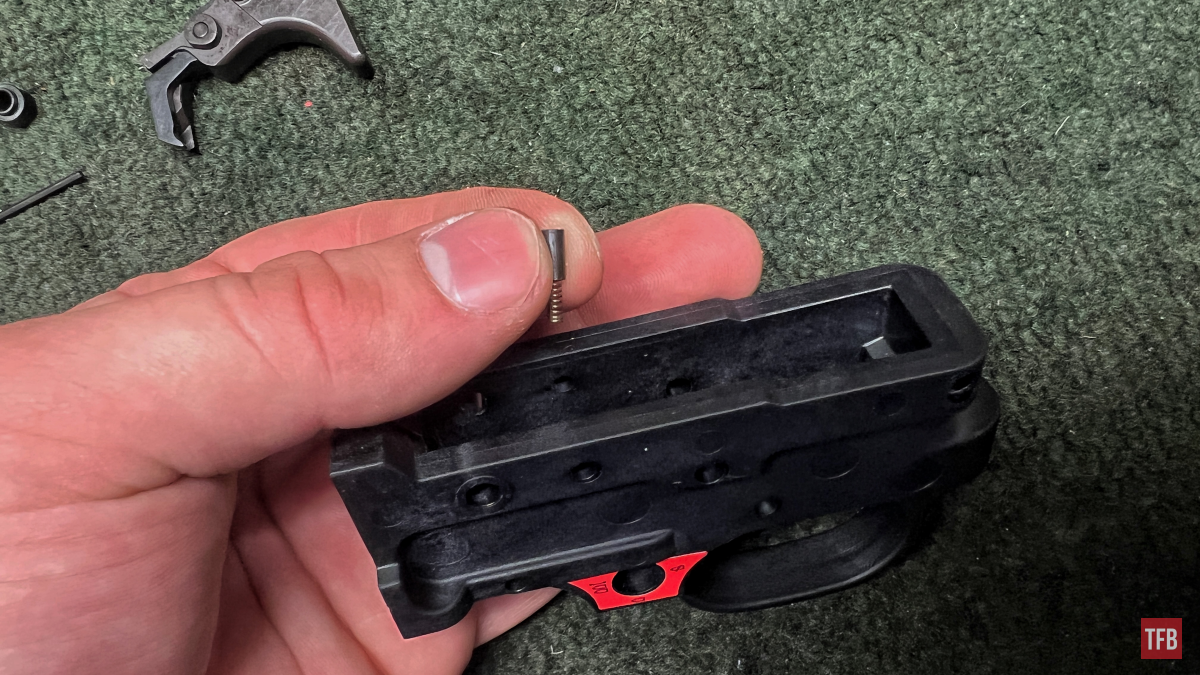
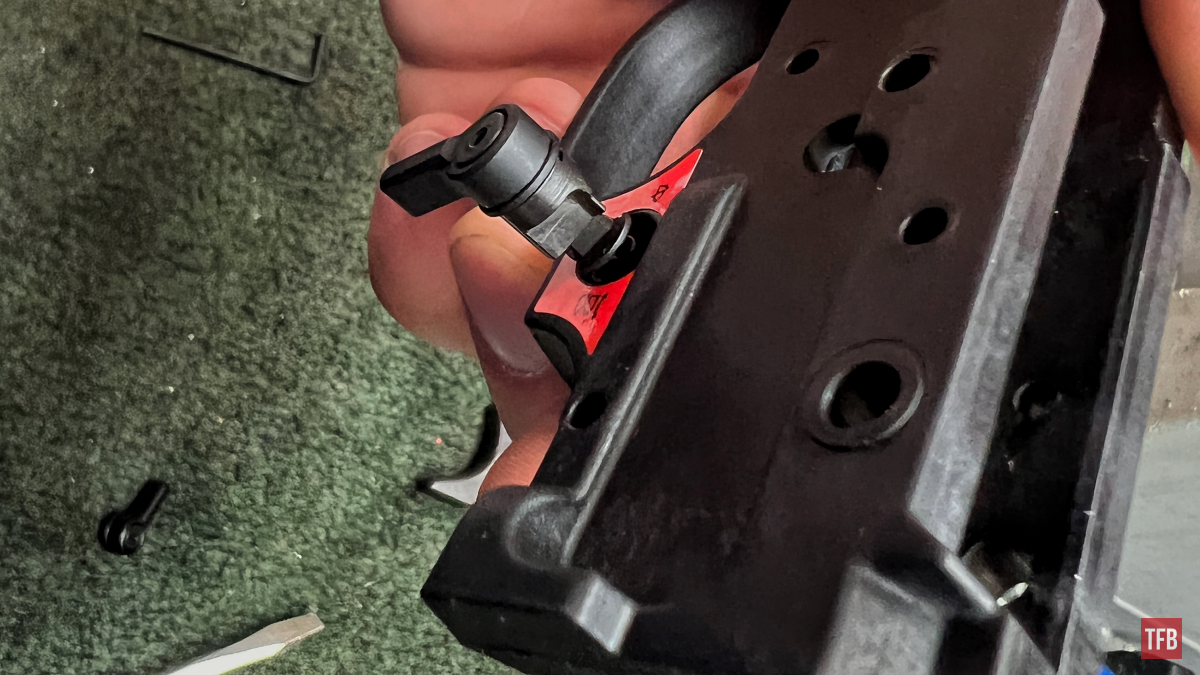
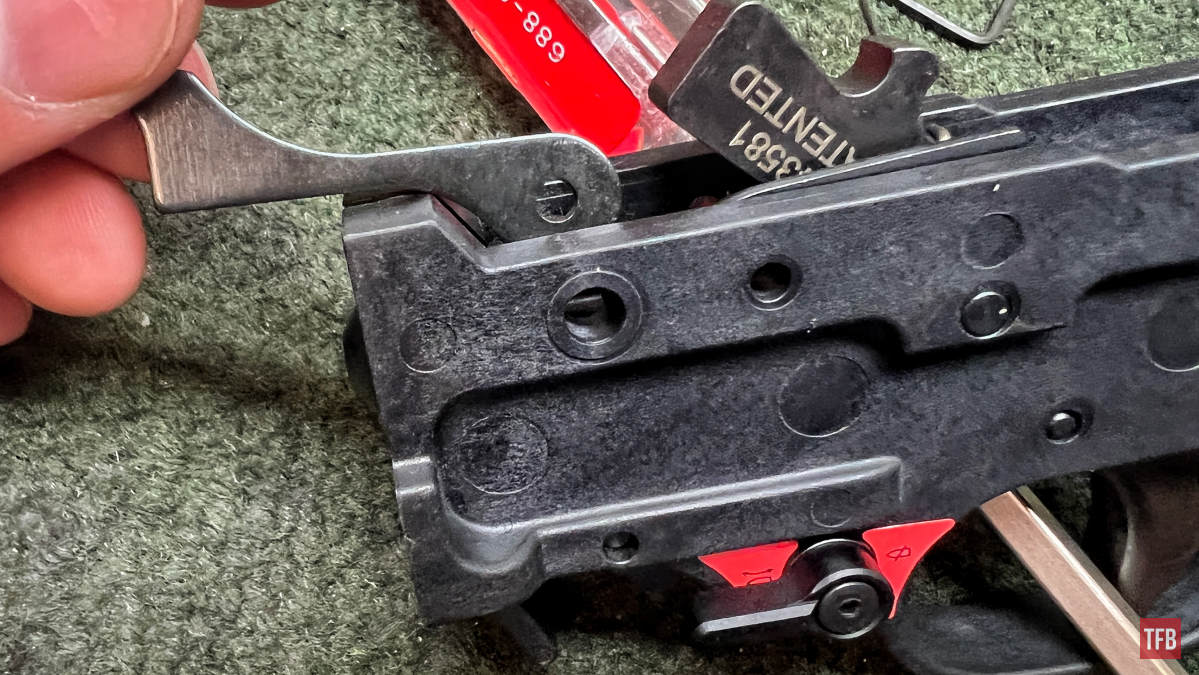
The Franklin Armory selector switch comes assembled in one piece. One selector switch will need to be removed with the included Hex wrench.
I ended up using a large flathead screwdriver to press the safety plunger down while I insert the selector.
This part is hard to explain but it is meant to be helpful. Pay attention to the orientation of the trigger guard and selector. This is the correct way, side, and orientation of things for the selector to be inserted.
Once the selector has settled on top of the plunger like below –
– twist the selector and push it into place.
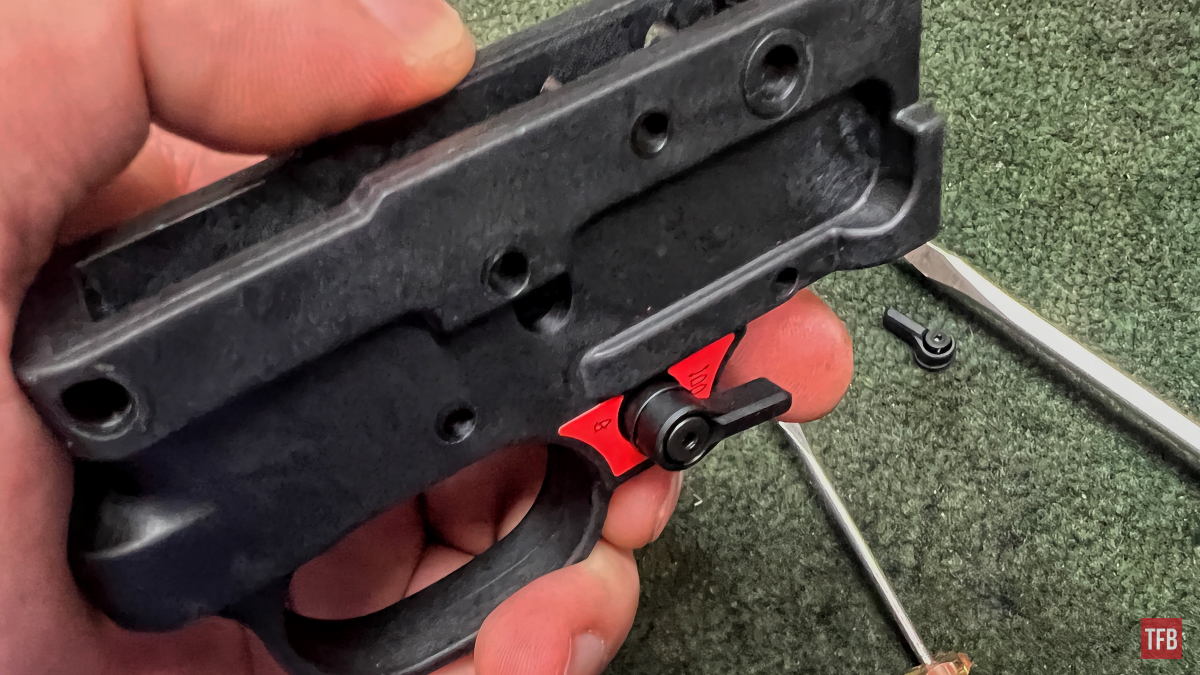
At this point, you can remove both selector switches or attach both (I attached both so I had more overall control).
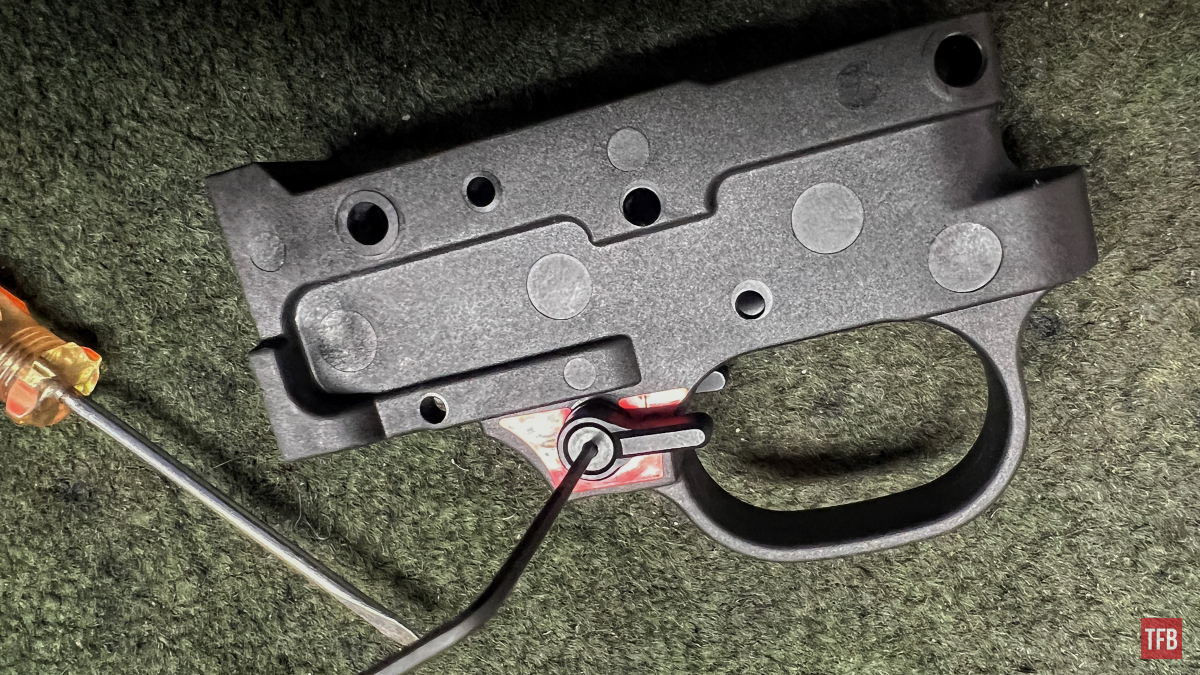
Step Three: 10/22 Binary Trigger Installation
Now we can put the original trigger return spring and plunger back into its spot.
Be careful not to pick up the trigger assembly and accidentally allow the spring and plunger to fall out.
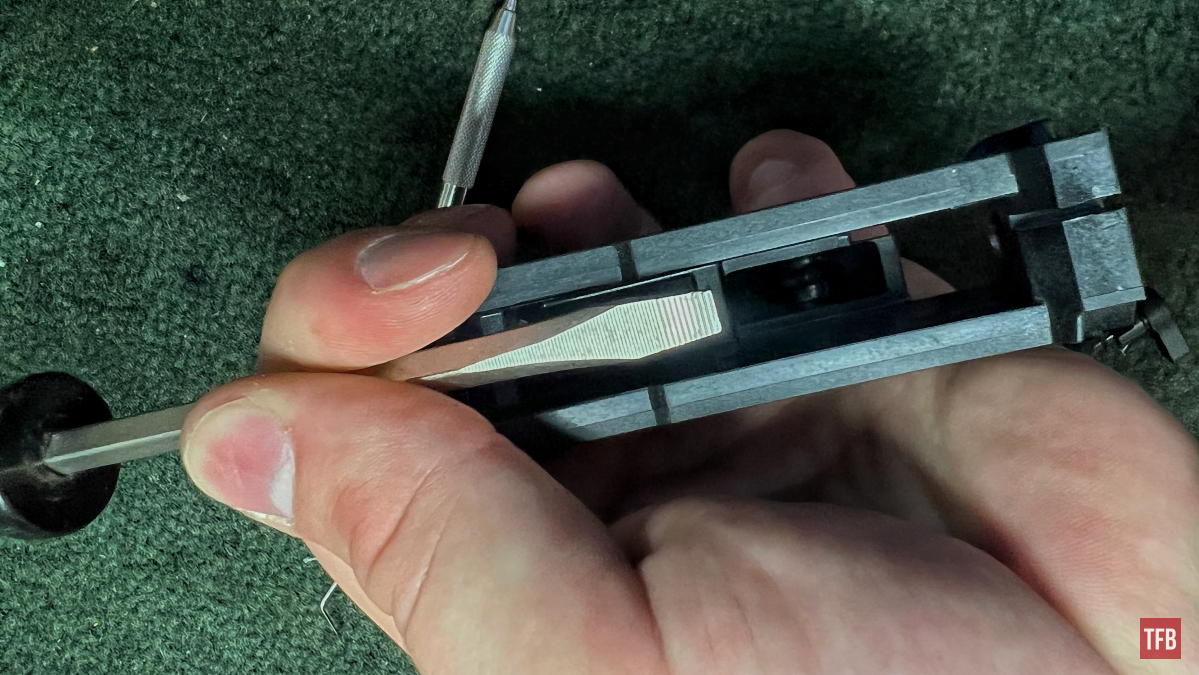
Now for some commentary on the Franklin Armory trigger. The trigger comes assembled (trigger, trigger pivot pin, sear, disconnector, and disconnector spring) and it has a slave pin in place to assist in assembly.

Note: To those of you who may not be familiar with a slave pin, it is a pin that is typically shorter and flush with a part so that its assembly can all be in one piece and inserted in place. Then the actual pin can drive out the slave pin and take its place when installed.

Pictured with a full-size trigger pin
Slide the trigger assembly down into the trigger guard.
Make sure that the slave pin is in view through the trigger pin hole.

Place the trigger pin in position and pound out the slave pin. A bench block is really handy for this.
Lastly, test the trigger function.
Quick Random Tip!
That last chunk reminded me of a good thing to keep in mind while assembling or reassembling is to test functions as you go along. Obviously, some things cannot be tested until the end but the little things like testing the trigger return at this point can help solve issues later. In other words, if I finished assembling this and something did not work, I know at this point that everything was working as intended.
Step Four: 10/22 Binary Trigger Installation
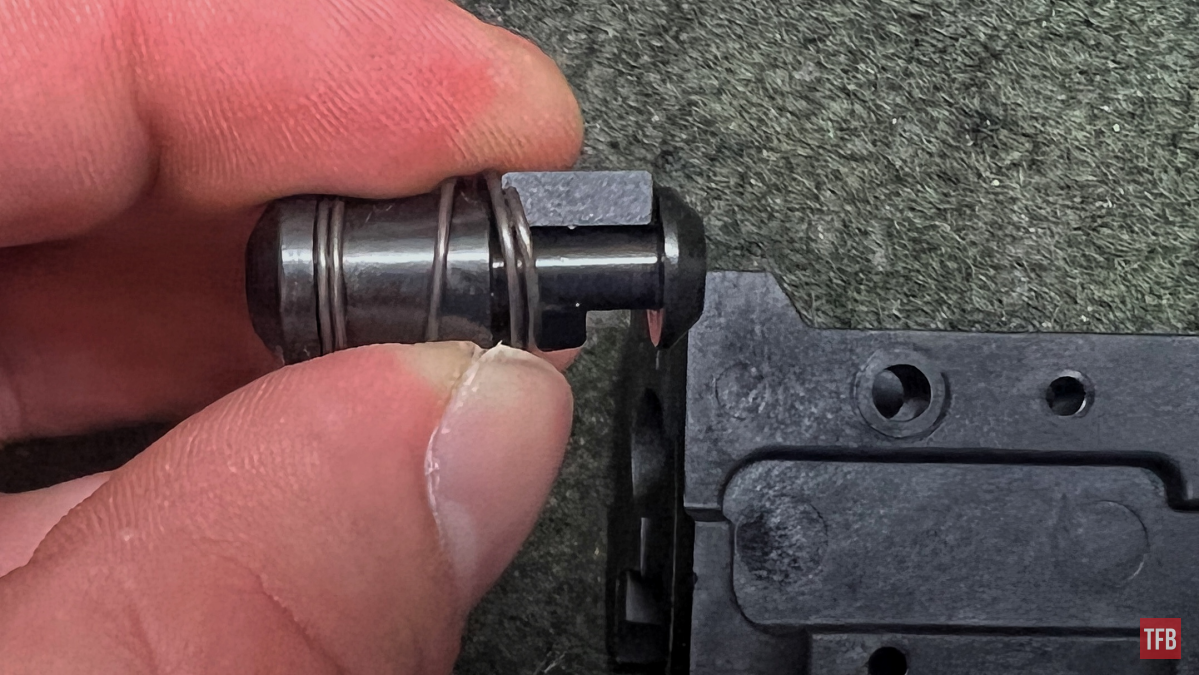
Onto the hammer! This hammer is very similar to the old-school Ruger 10/22 hammers where it has removable buttons/spacers.
Pretty self-explanatory but the spacers have a diameter that fits into the hammer. The hammer spring should be in position as shown above and below.
Now we have to take the original bolt release spring and put it in this orientation on the hammer next to the hammer spring.
Step Five: 10/22 Binary Trigger Installation
Installing the hammer is easier done than written. Slide the hammer assembly into the trigger guard much like an AR15 where the tails of the hammer spring sit on top of the sides of the trigger assembly.
Note the orientation of the bolt release spring indicated by the poorly created arrows.
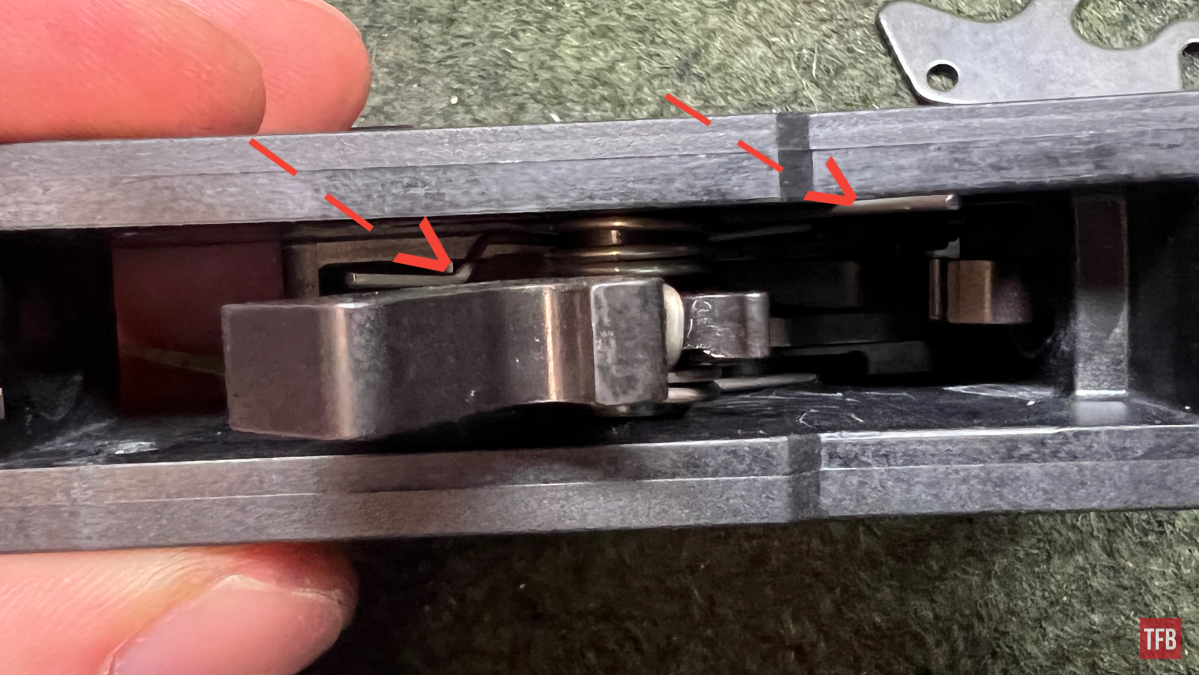
Put the hammer pin through its hole to secure the hammer assembly in place.
Note: Do not worry about the bolt-release spring hanging out right now. We will get to that later.
Step Six: 10/22 Binary Trigger Installation
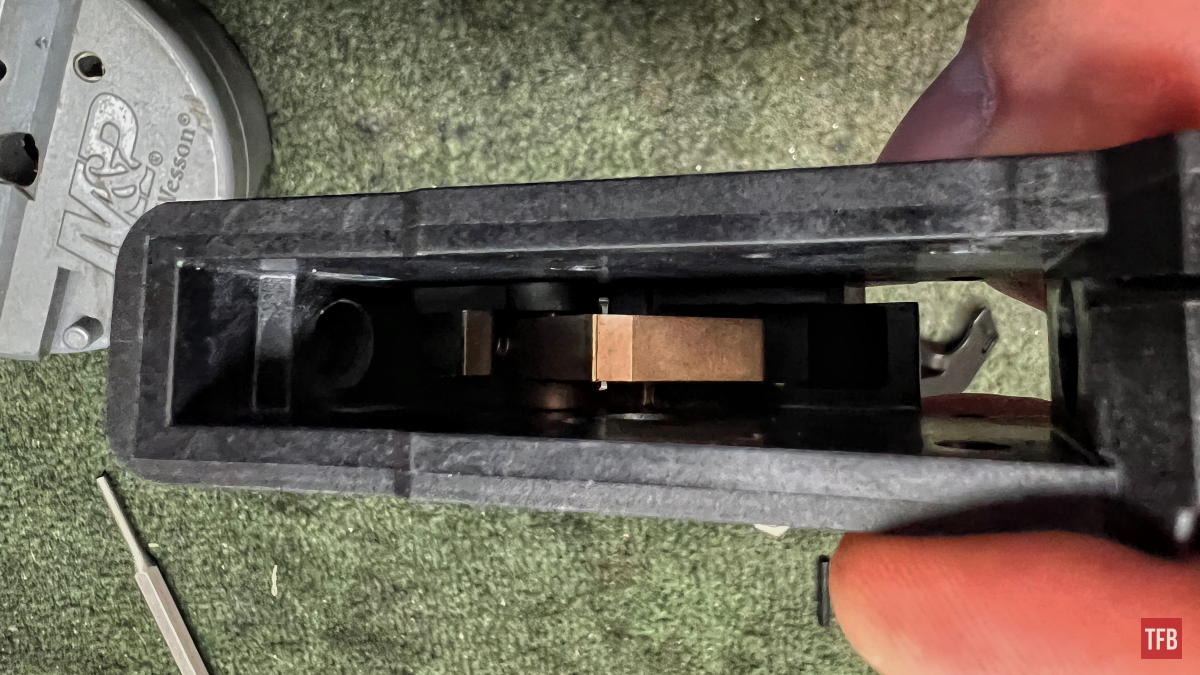
At this point, I reinstalled the magazine latch, plunger, and spring. It can wait but I did it now because the bolt release is coming up. Push the plunger and spring in place and slide the latch up into its position as shown from this top-down view.
Slide the bolt release into the trigger guard.

Put the lower bolt release/magazine latch pin into its hole.
Now slide the ejector into its slot and line up its hole with the bolt release hole.
Slide the pin in from the left side of the trigger guard. Do not put it all the way because that bolt release spring needs to be messed with.

Now with that space in place, the bolt release spring needs to be bent down under where the pin will eventually be.
With the spring held down under where the pin will be push the pin the rest of the way into place.

Step Seven: 10/22 Binary Trigger Installation
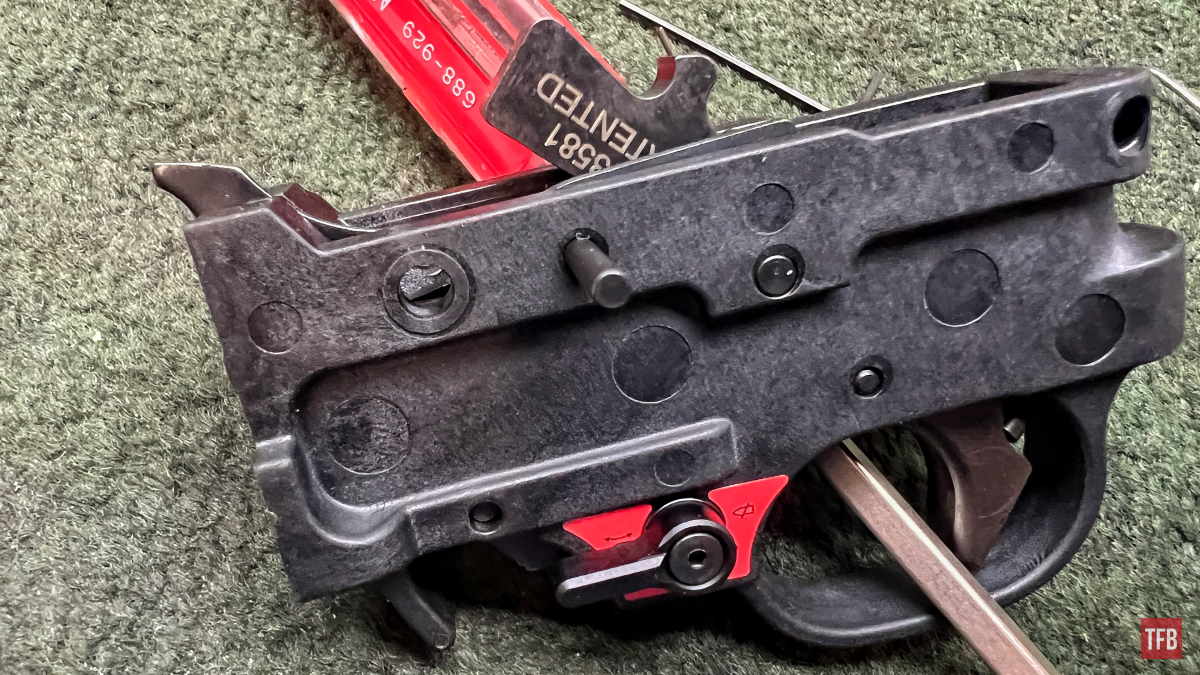
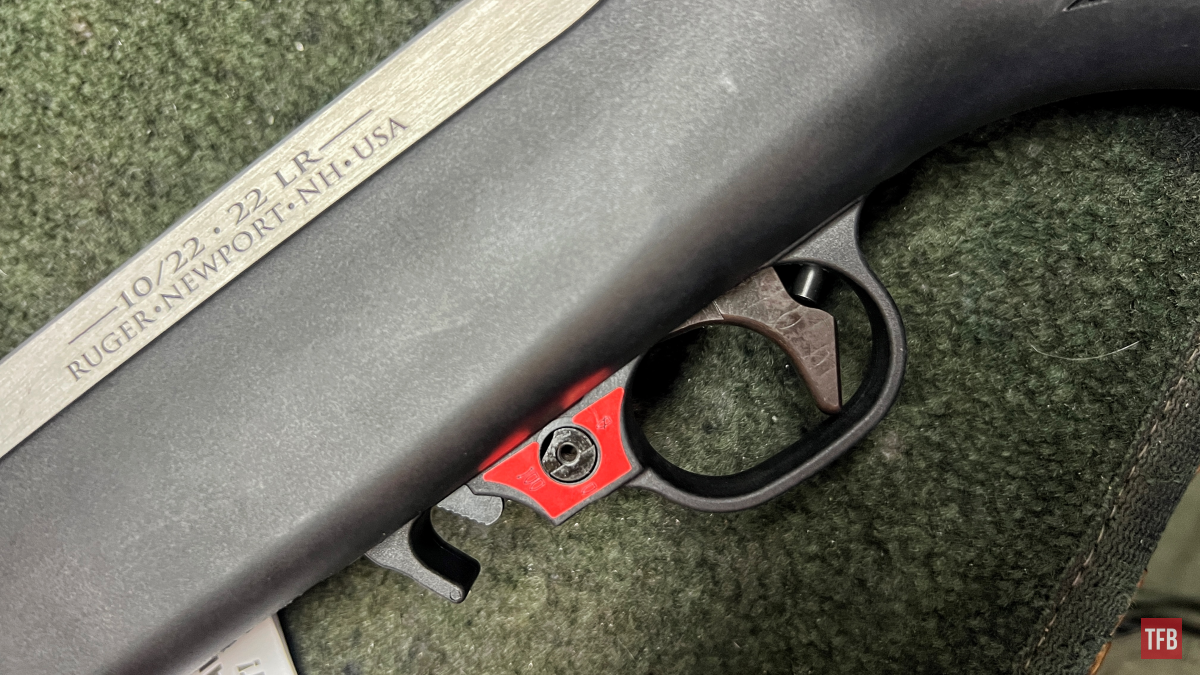
The trigger guard is now assembled (whoof). It can be inserted and pinned into place in the receiver.
Before placing the action into the stock, the slector switches need to be removed on both sides.
Step Eight: 10/22 Binary Trigger Installation
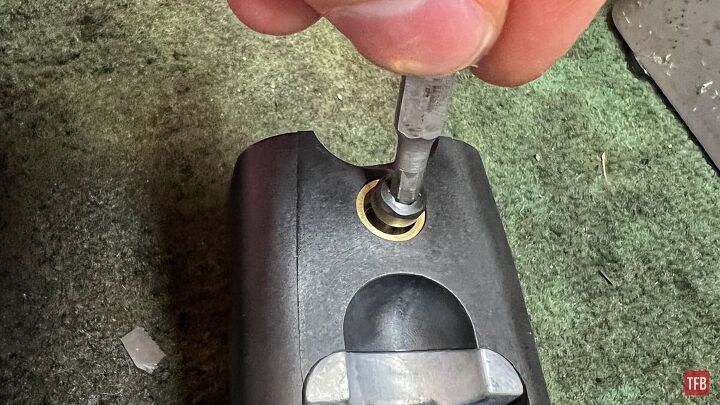
Now the takedown screw can be tightened down and the job is basically done. I do want to mention that after doing this, while running through function checks, I noticed in binary mode the rifle was not functioning right. The problem was that the takedown screw was too tight. How that makes a difference I cannot say off the top of my head but I just thought I would share in case this happens elsewhere.
Step Nine: 10/22 Binary Trigger Installation
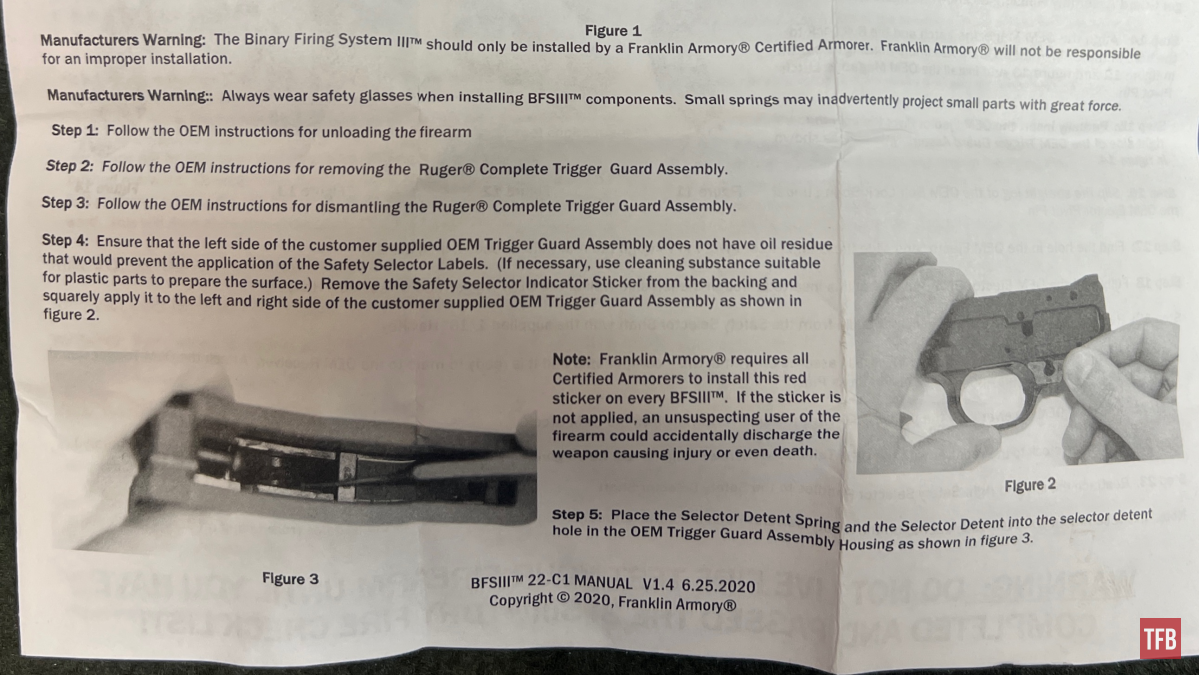
At this point I recommend and Franklin Armory almost certainly recommends going through its safety steps. The safety steps are as pictured below.

In Closing: 10/22 Binary Trigger Installation
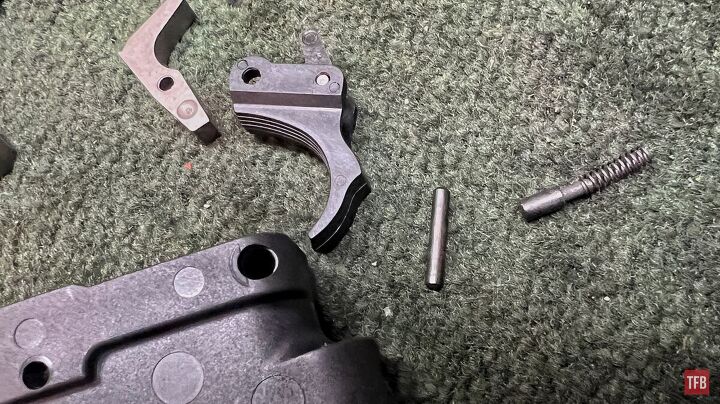
Here are the parts you should have left over.
Well, that is that. This was a very long one and I apologize but I did not want to skip over the whole disassembly bit like the manual for the trigger did. I hope this is of use to someone out there at some point. I will for sure reference it if I ever have to do it again and need a helping hand. See you, folks, next time!
As always, thank you for reading TFB! Be safe out there, have fun while shooting, and we will see you next time for the TFB Armorer’s Bench! Also, let us know what you think in the comments below! We always appreciate your feedback.