 Your Privacy Choices

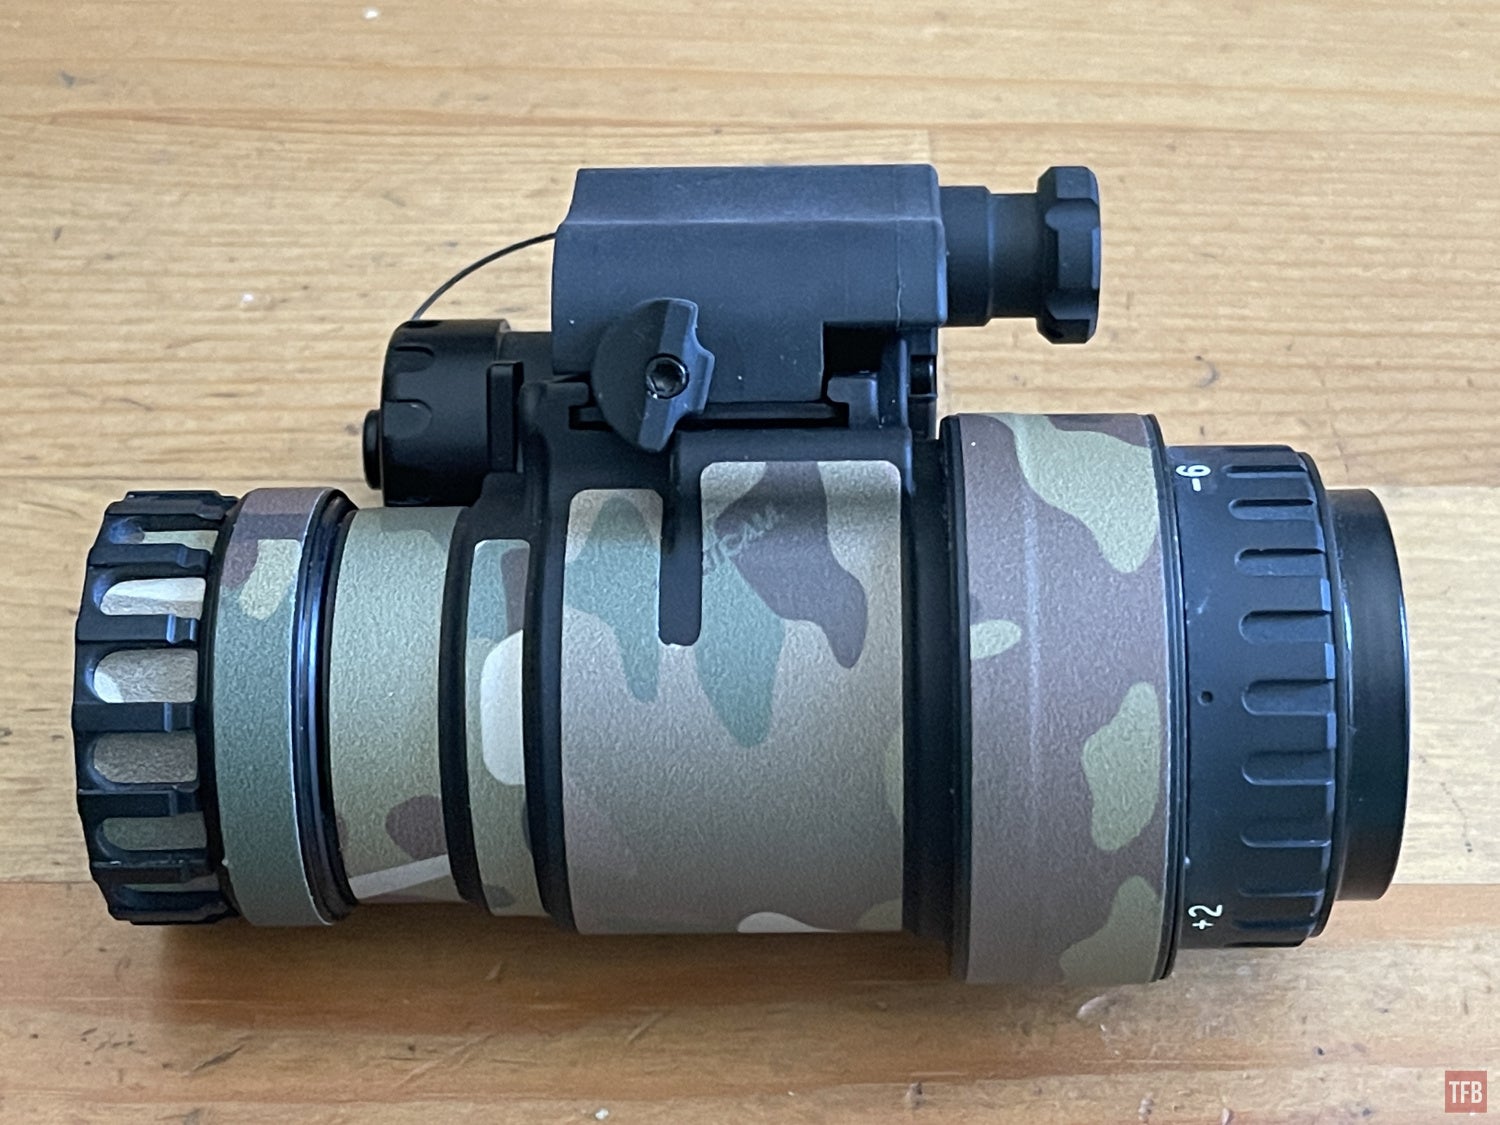
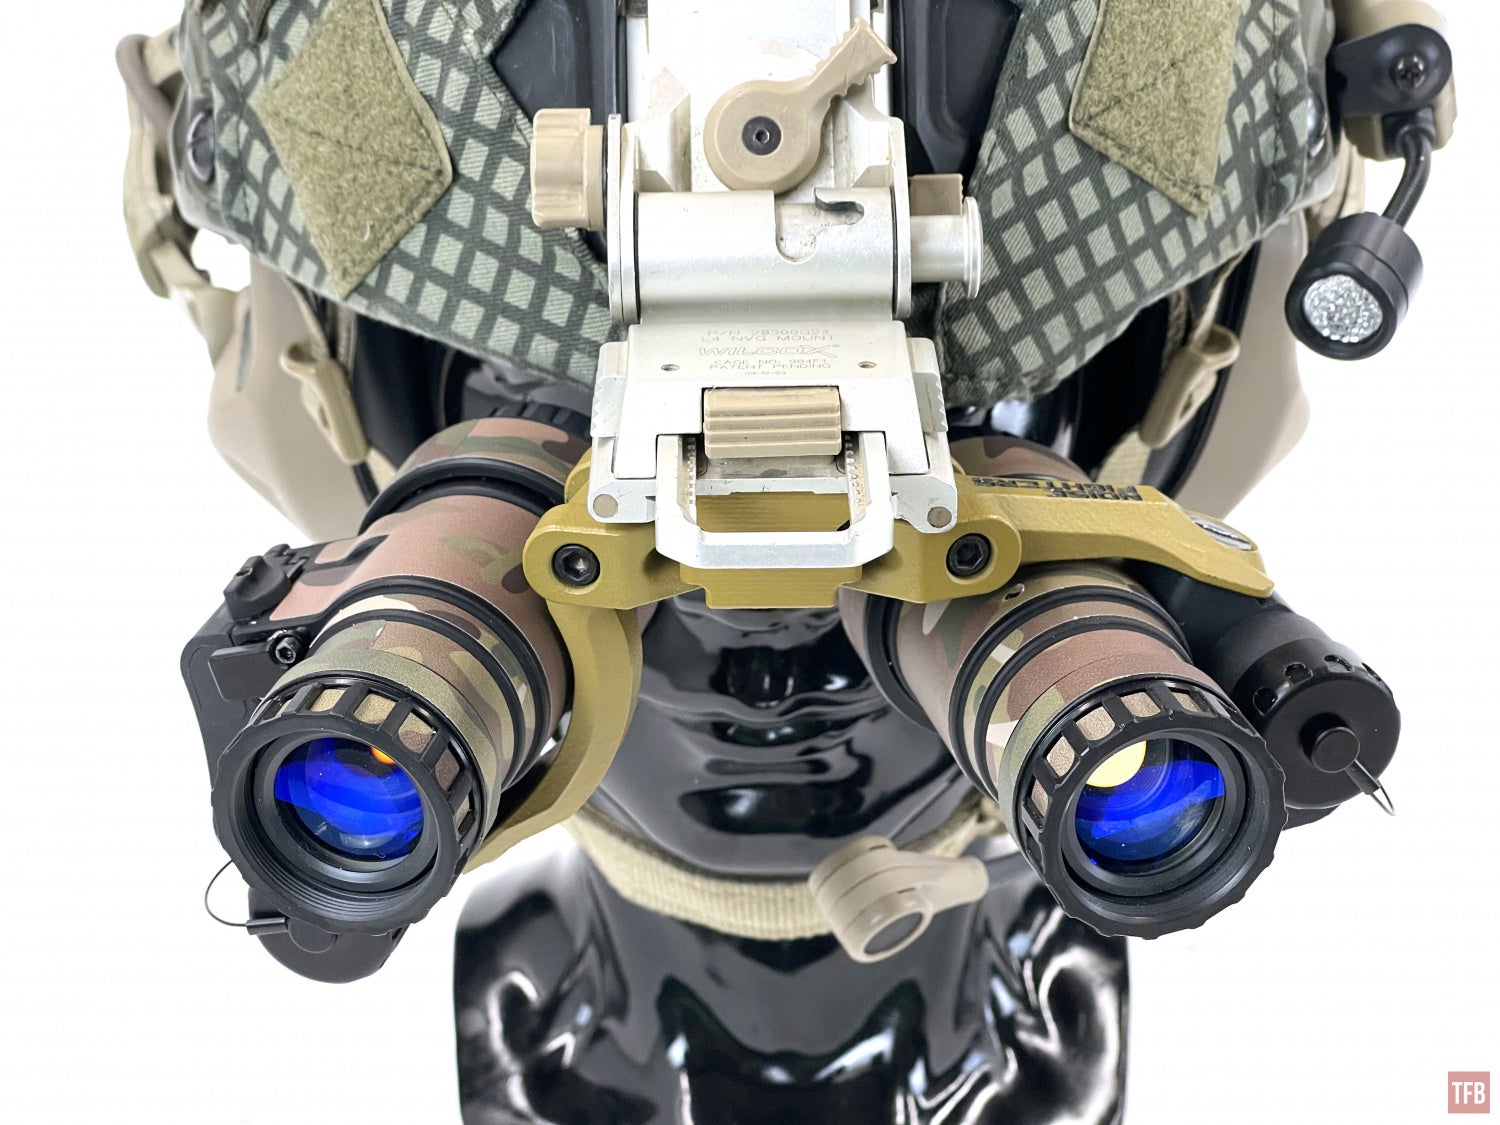
Hello, low light enthusiast and welcome back to Friday Night Lights. Last week we took a look at Hollywood Night Vision Myths in Amazon Prime’s Terminal List. Well, this week we revisit the AB Night Vision RPNVG but focus on their new RPNVG Mono adapter. They convert the QD pods into a stand-alone monocular night vision device.
ABNV @ TFB:
- Friday Night Lights: ABNV RPNVG – Ruggedized Panning Night Vision Goggle
- Friday Night Lights: Dual Tube Spotlight – ABNV MOD-3
- Friday Night Lights: Dual Tube Spotlight – RNVG, Sentinels, & ANVS
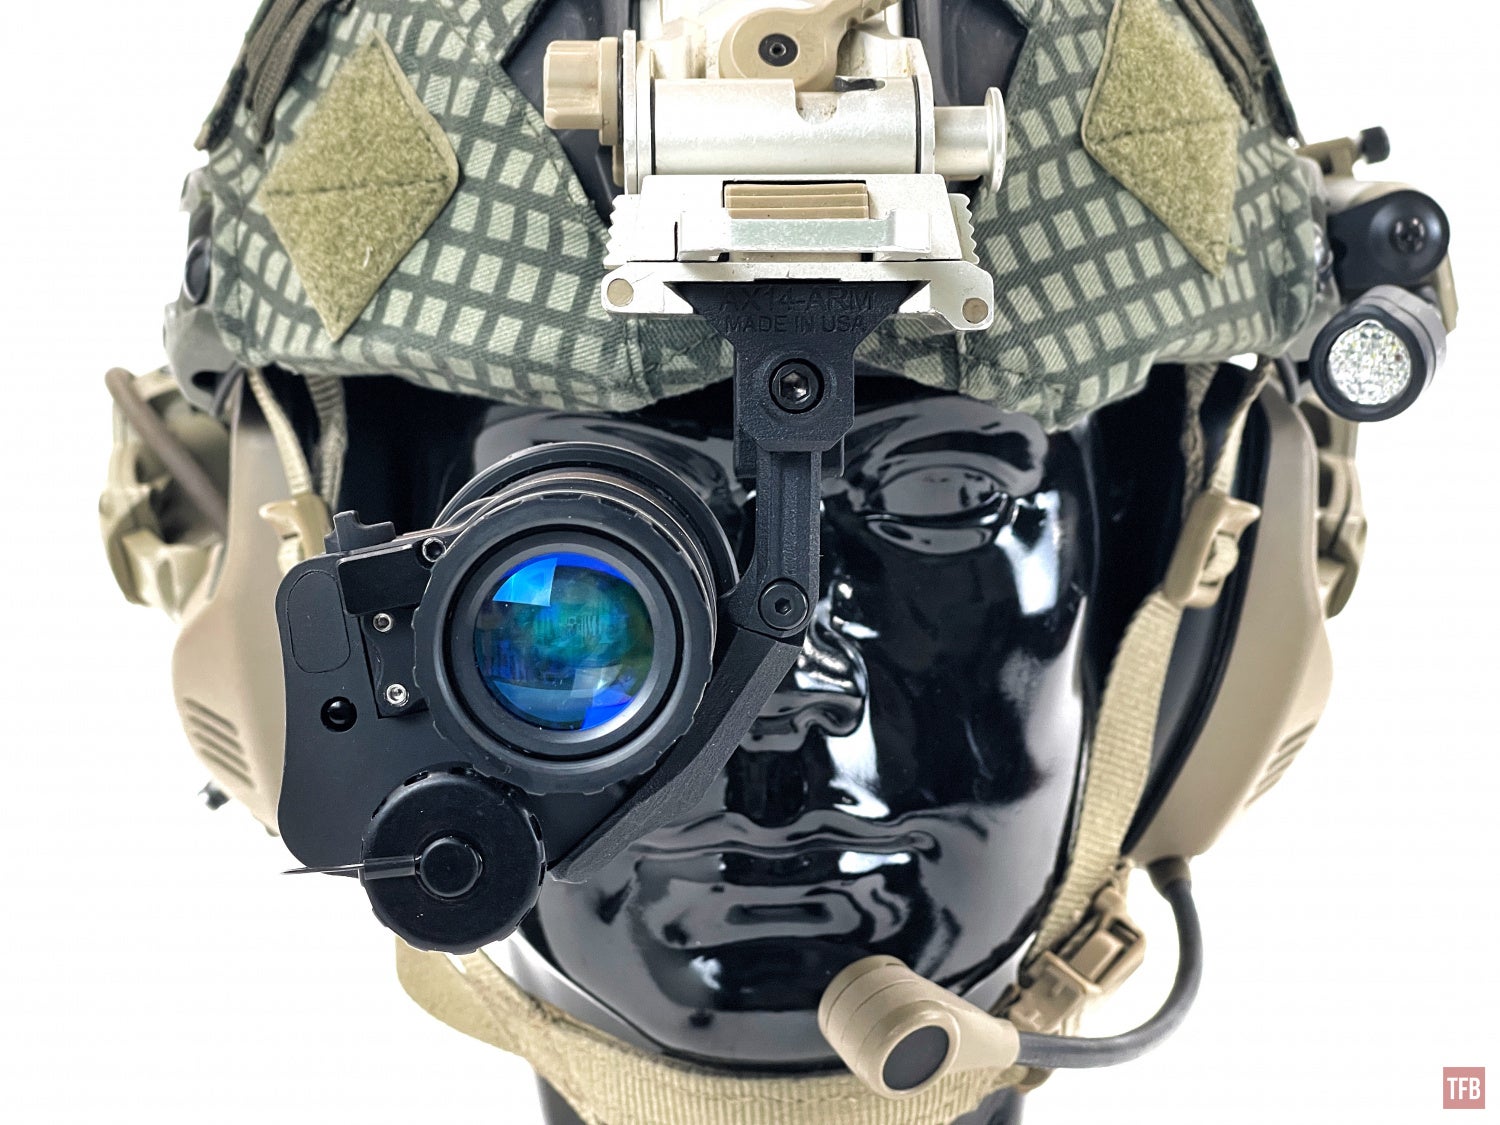
RPNVG Mono Adapter
At SHOT Show 2022, ABNV teased the night vision industry with their RPNVG. They even had prototypes of their RPNVG mono adapter. Click here to check out the prototype. As far as I can tell, not much has changed from the prototype. The pods have changed more than anything else. So let’s take a closer look at the mono adapter for the RPNVG pods.
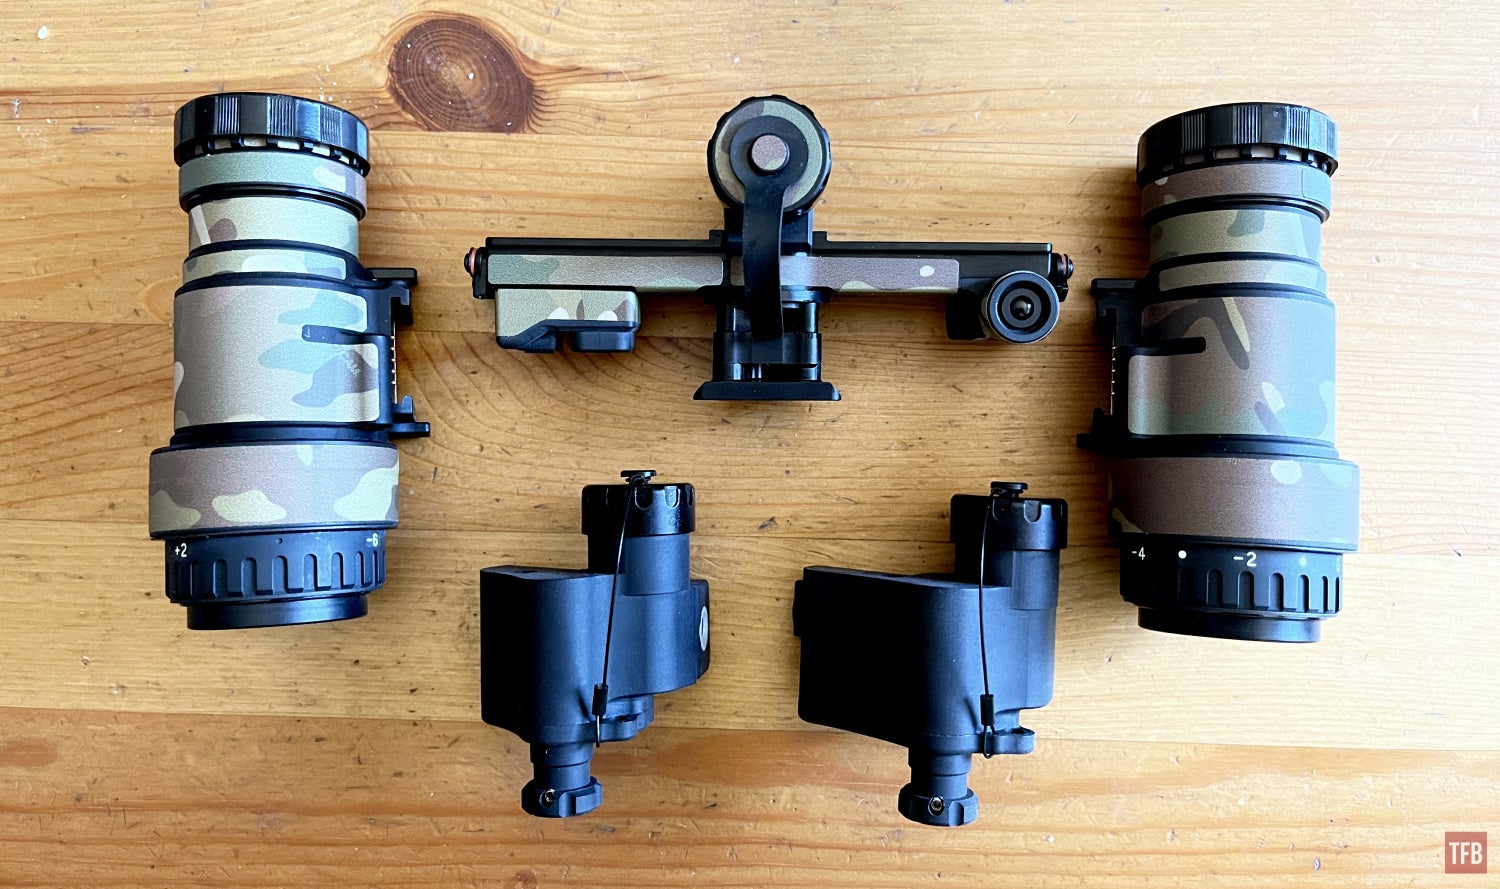
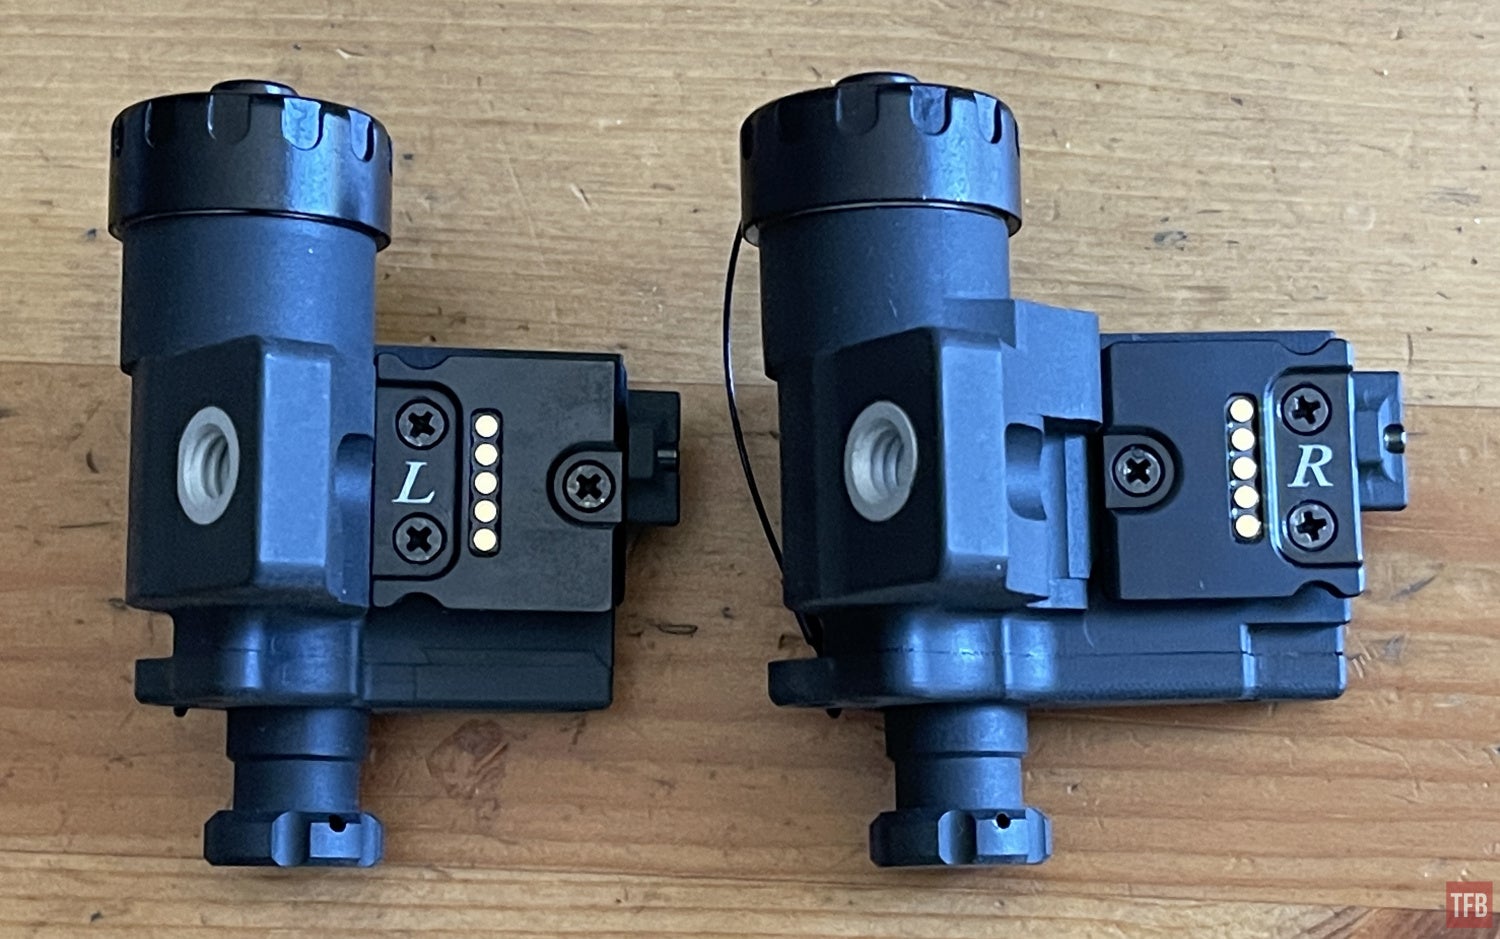
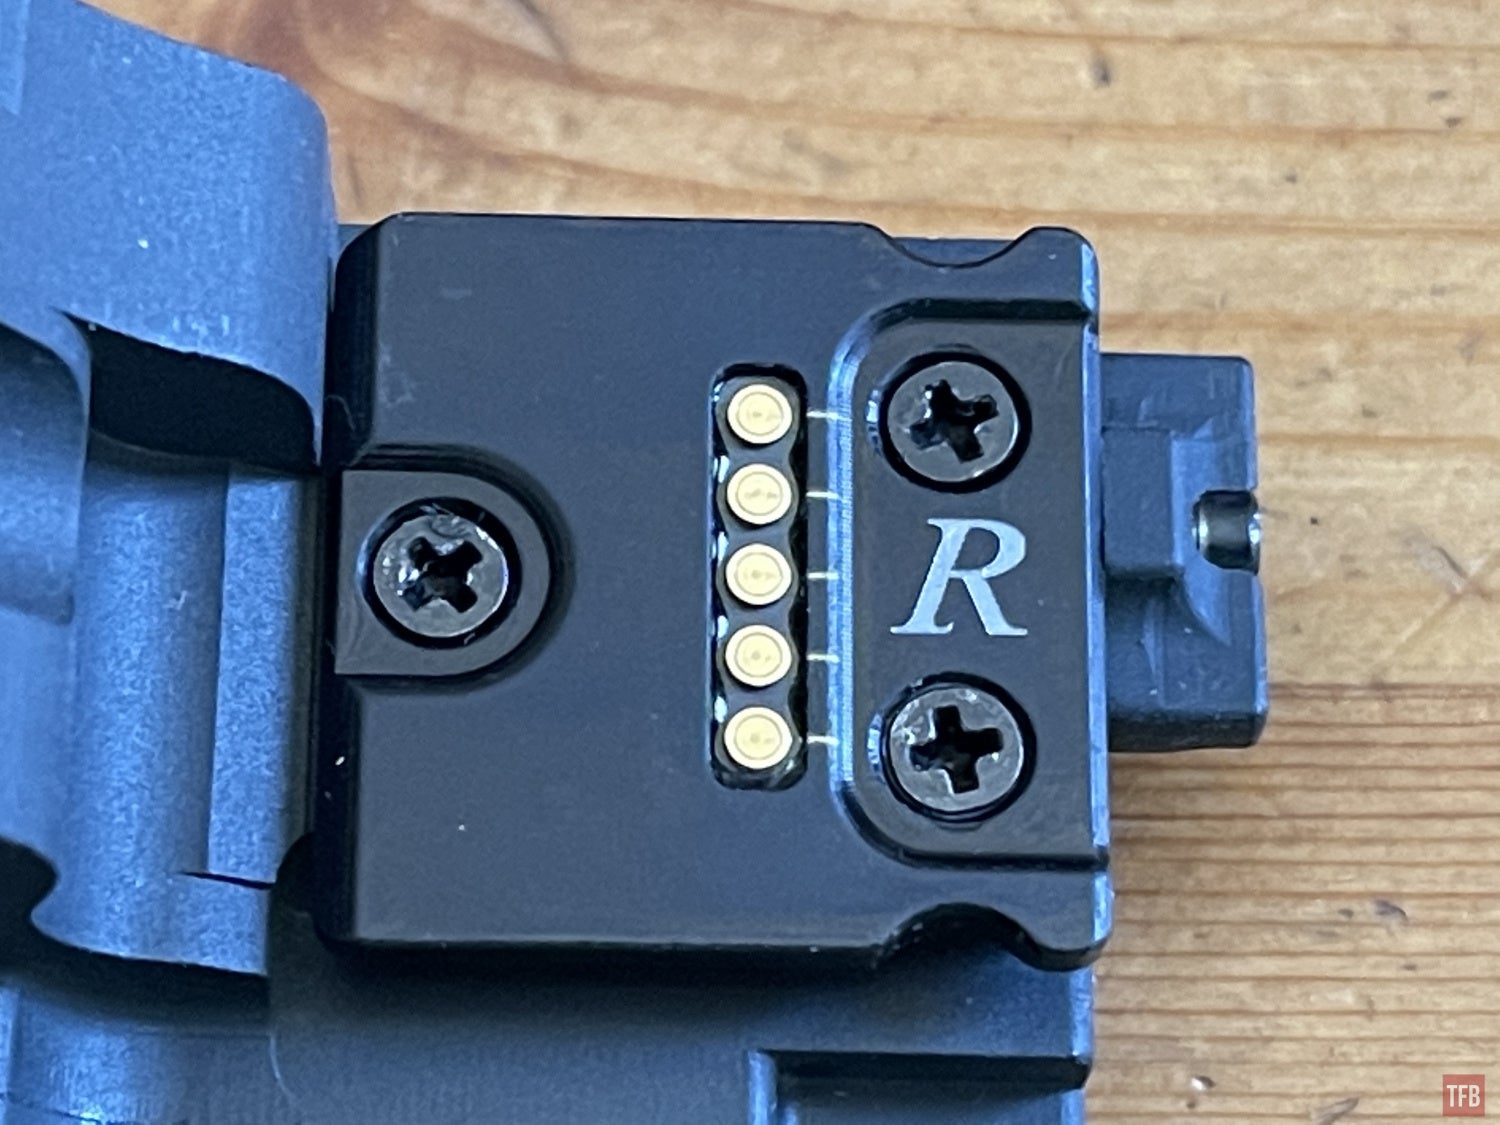
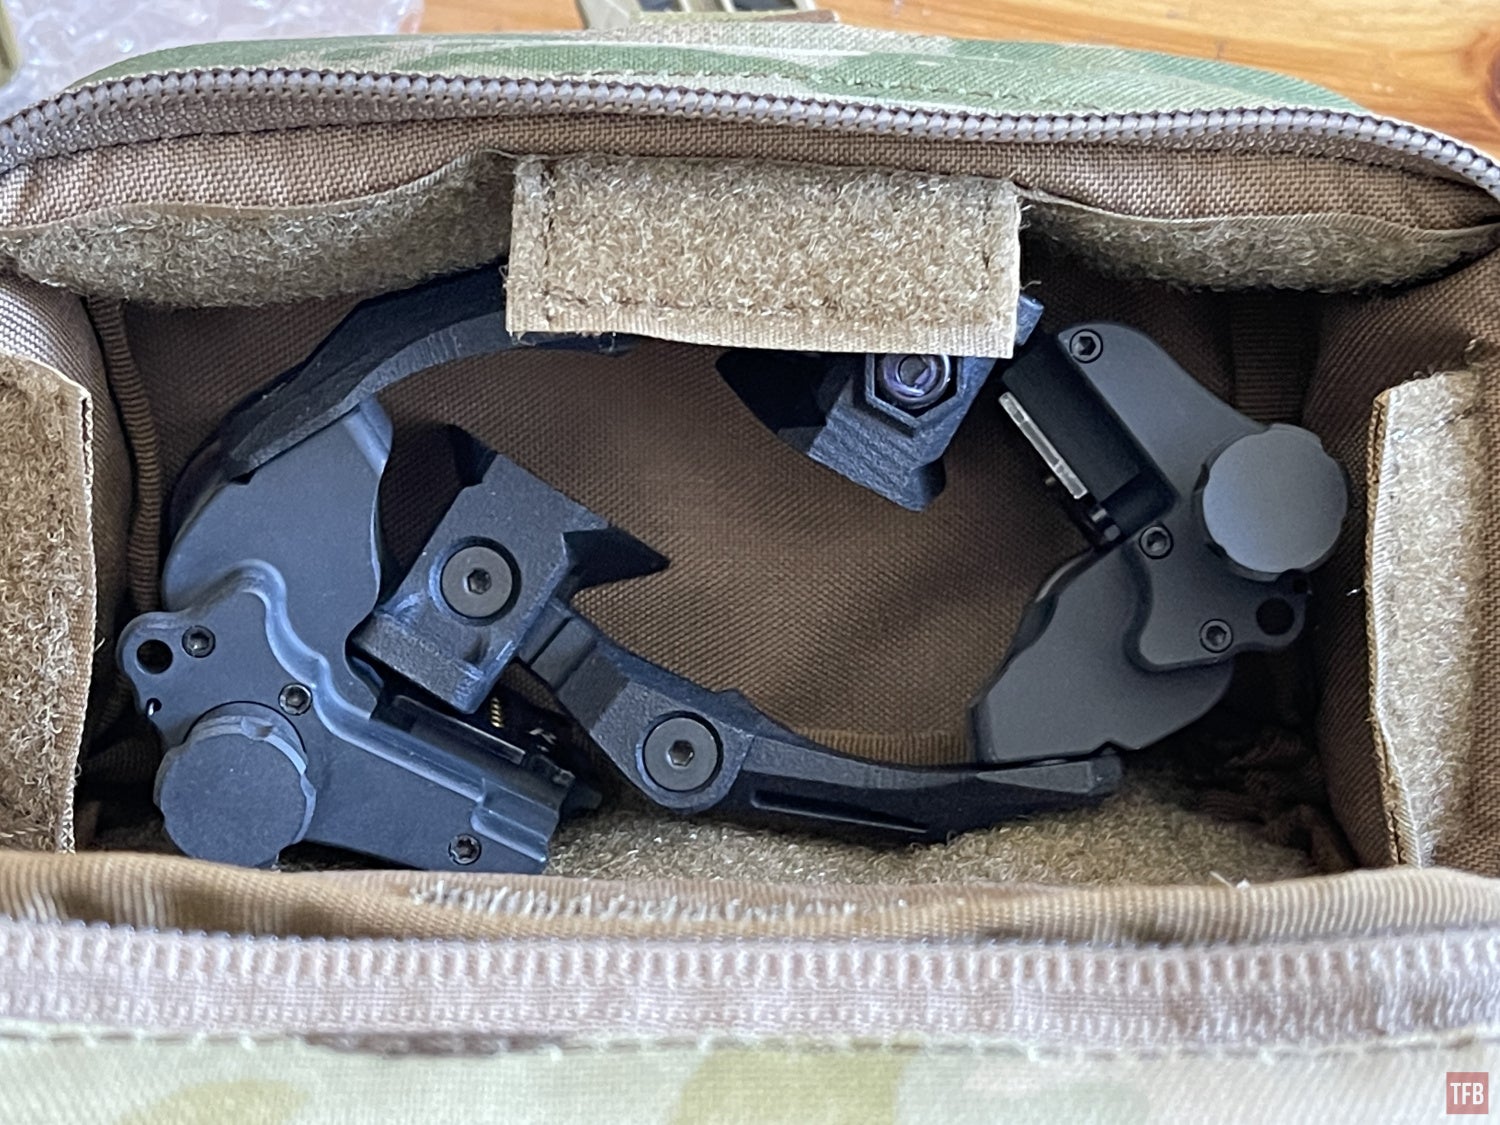
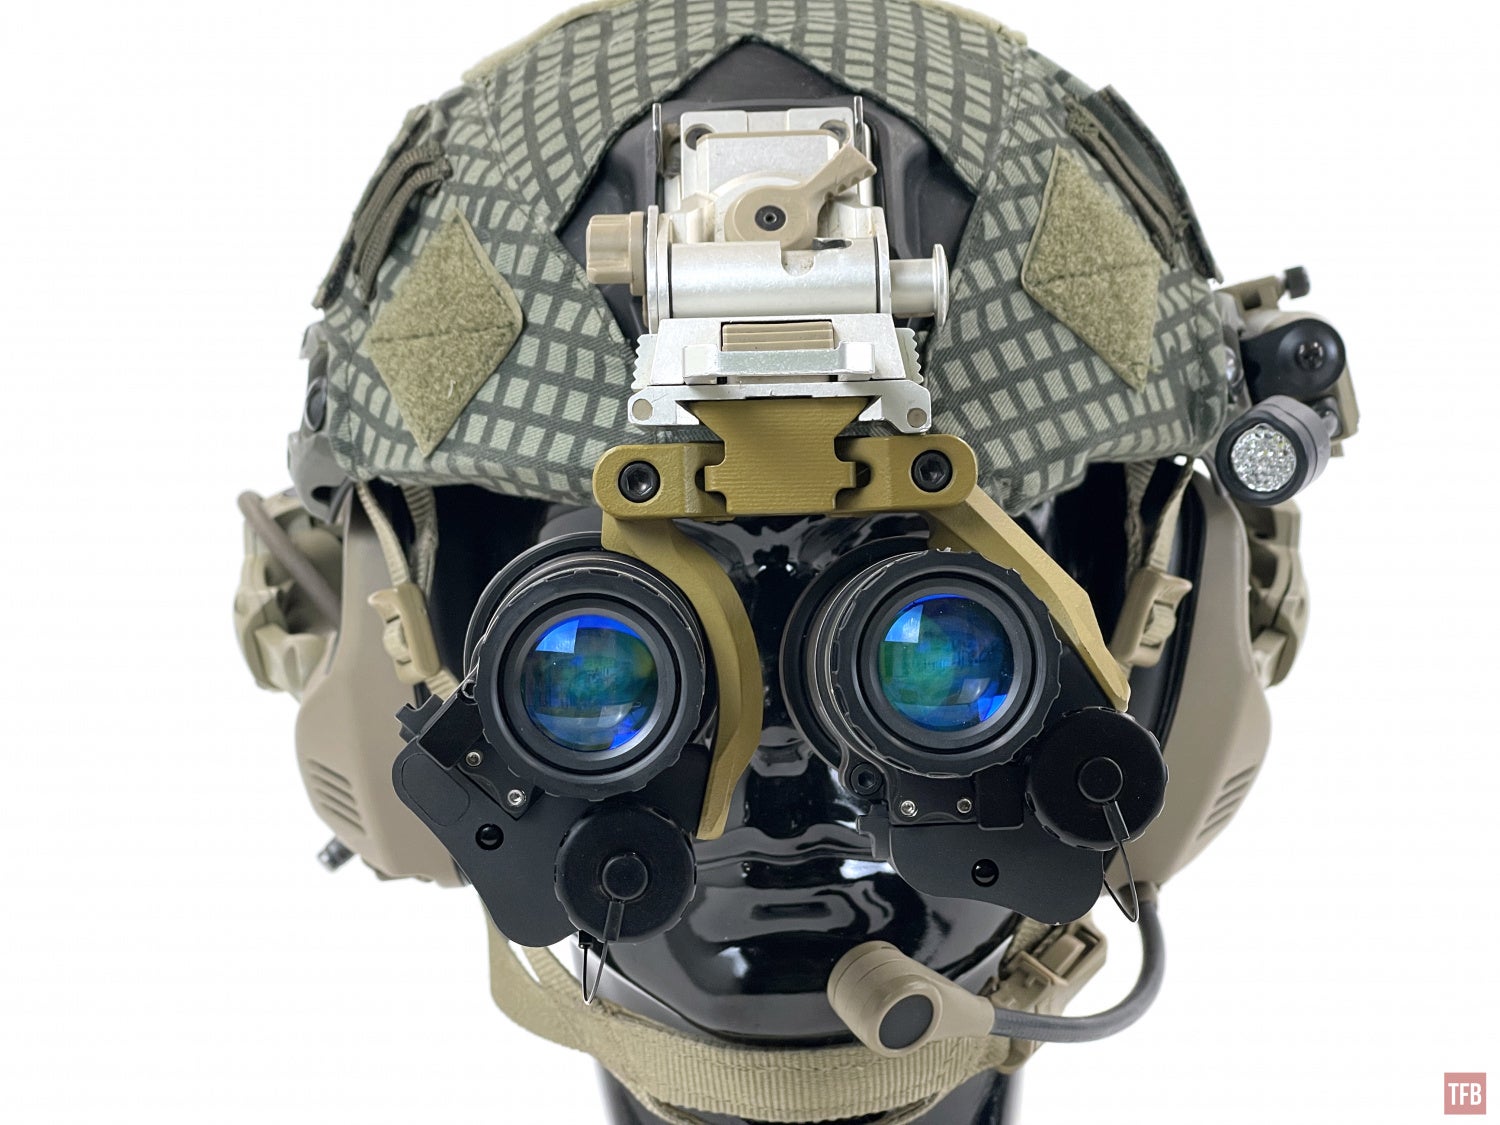
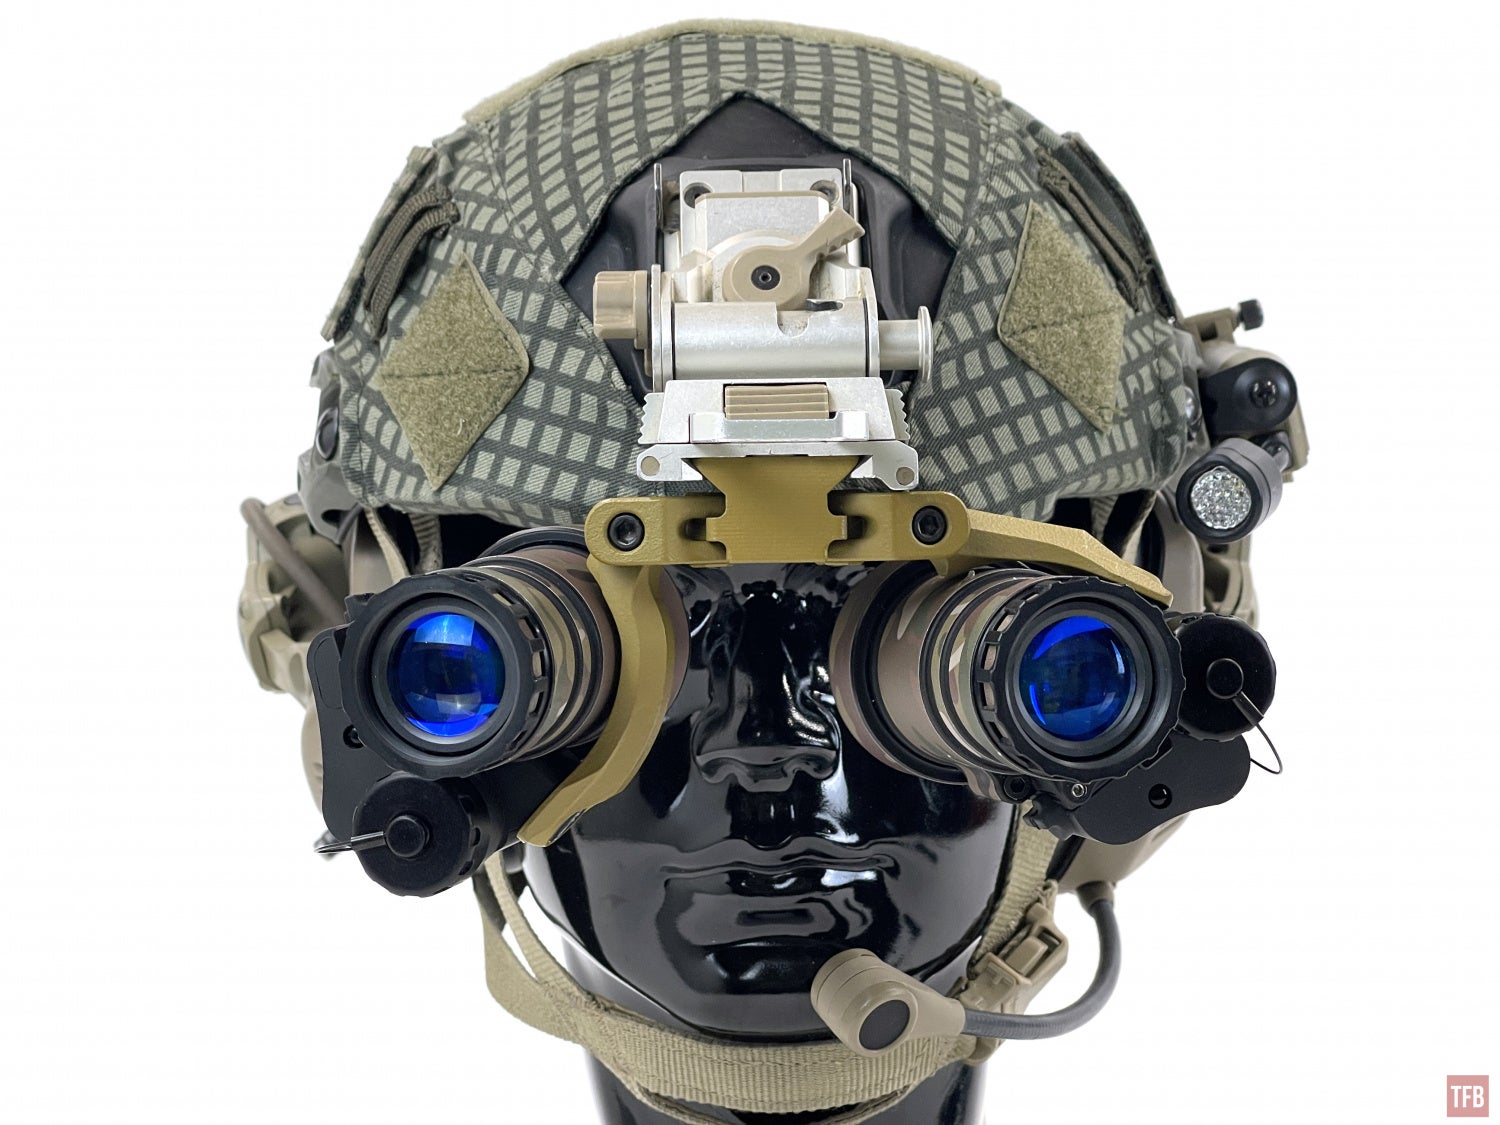
The RPNVG pods are QD and can detach from the bridge without tools. It is similar in concept to the AB Night Vision MOD-3. Like the MOD-3 ABNV makes a mono adapter to convert the pods into standalone monocular night vision devices. The RPNVG mono adapters are labeled underneath L and R. They are pod specific. There is a slight weight difference as well. The right side is longer and is 0.2oz heavier than the left side.

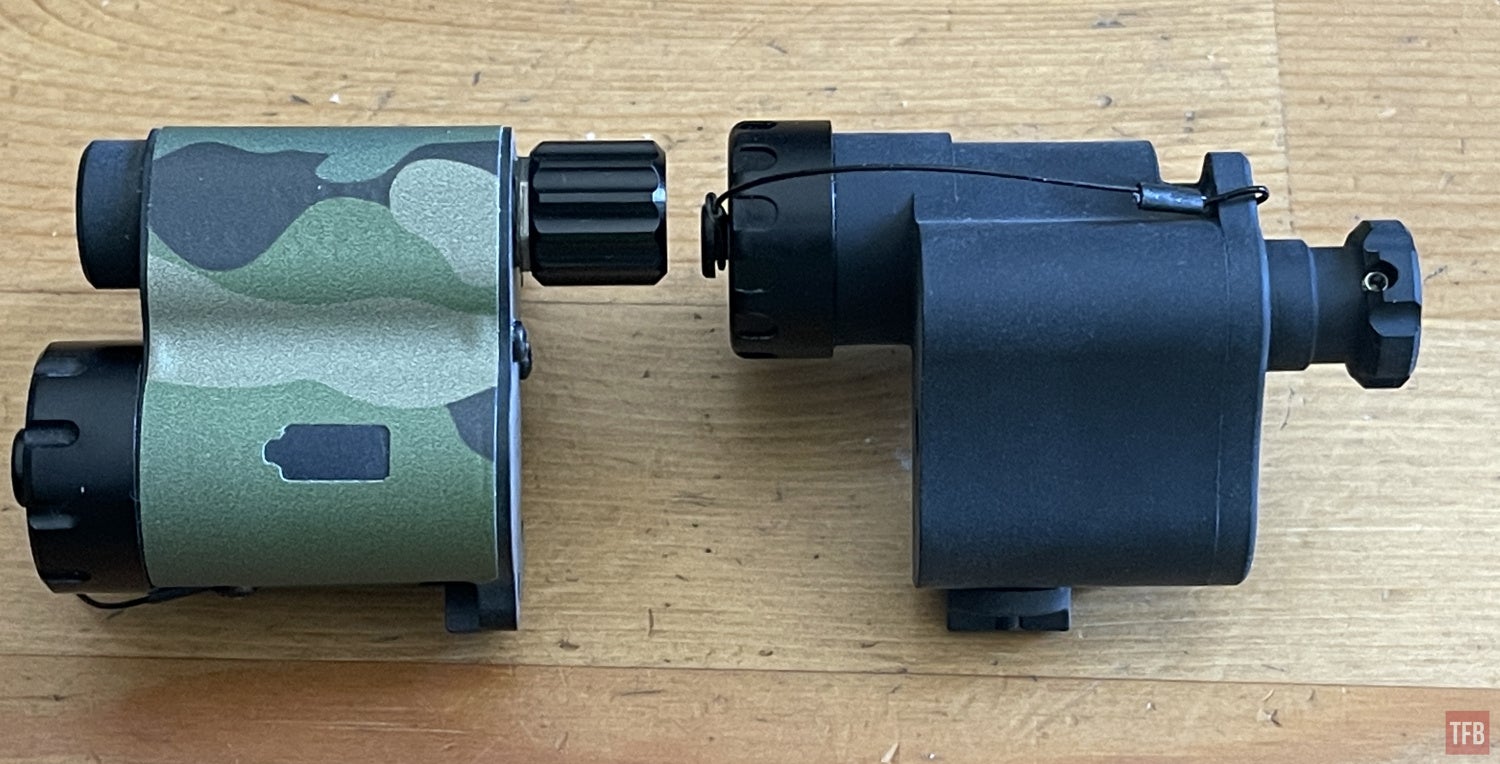
Right pod on the left, left pod on the right.
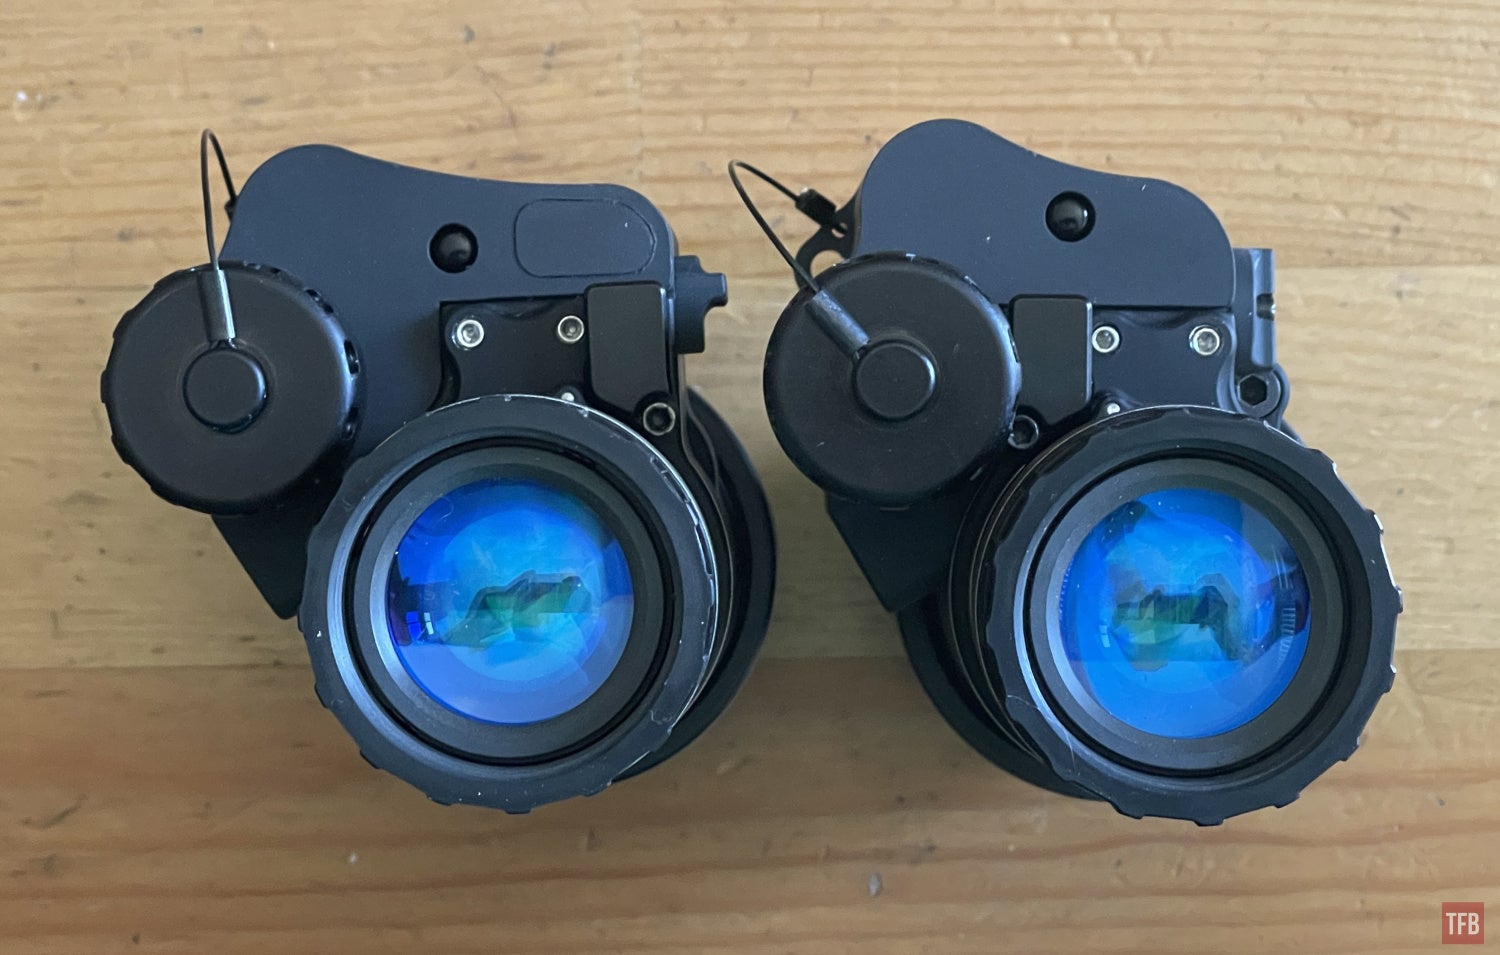
Right pod on the left, left pod on the right.
One thing that is different from these production mono adapters compared to the prototypes is the inclusion of the mono rotary latch. You rotate this to prevent the mono adapter from accidentally sliding off the monocular pod.
Right side monocular
Left side mono adapter rotary latch only rotates about 86º before hitting the protrusion on the monocular pod.

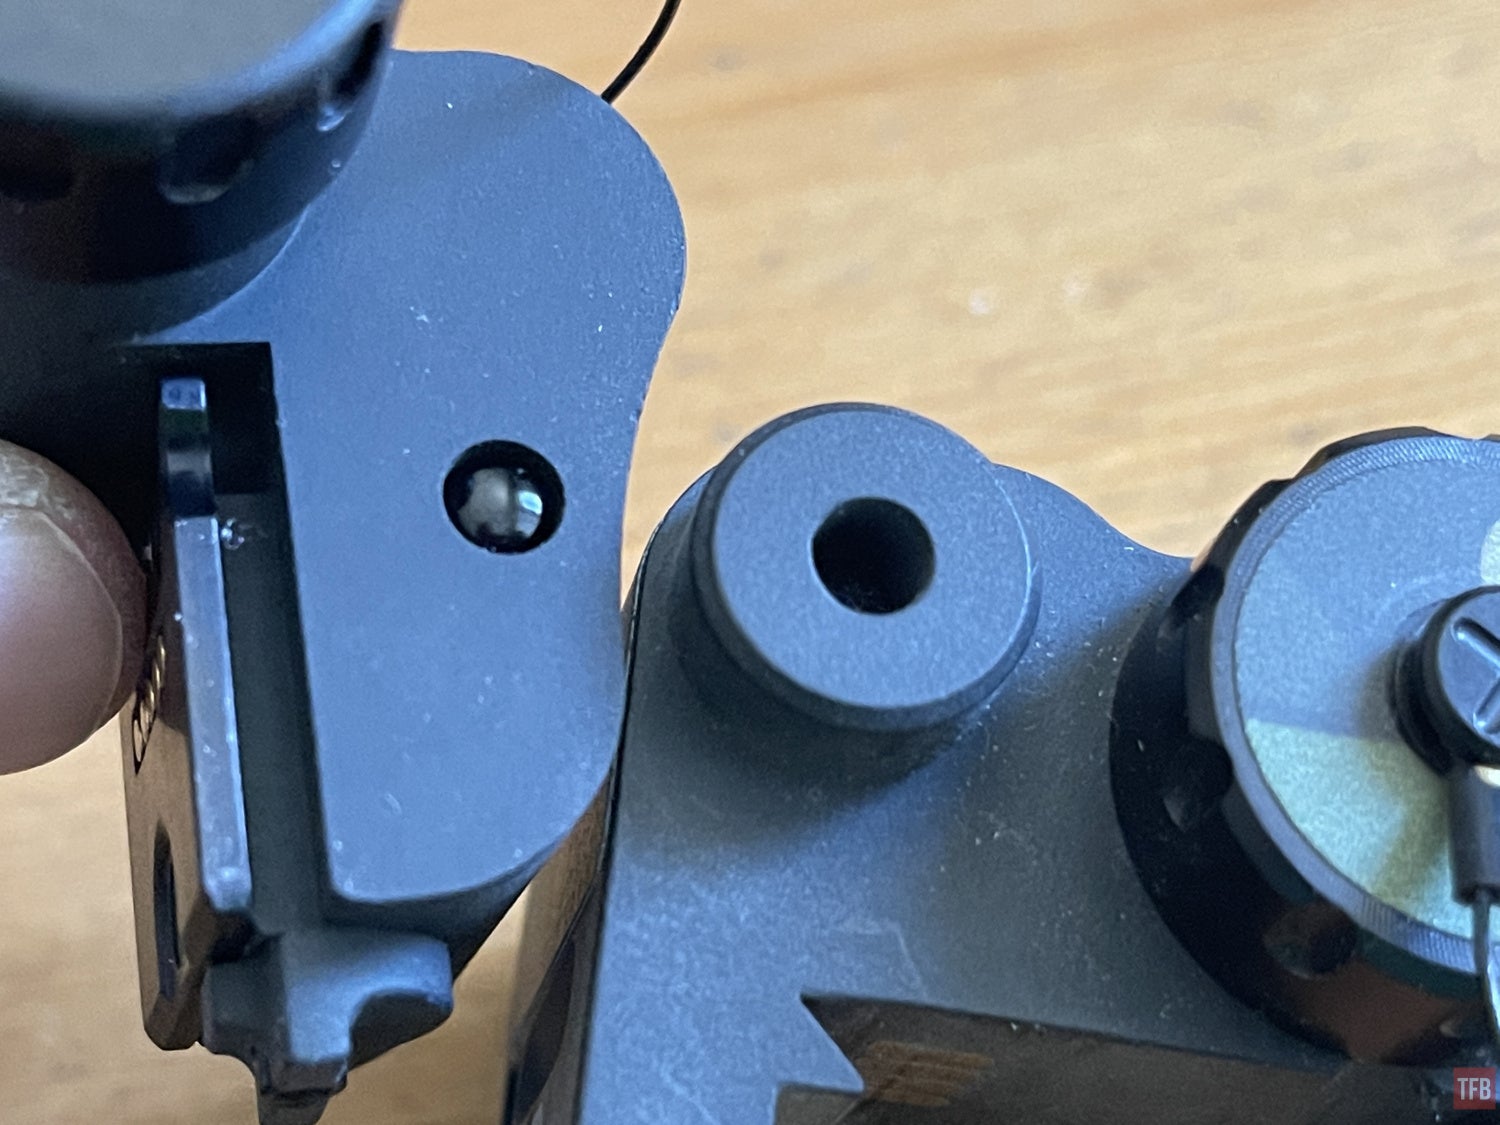
Why are there two different mono adapters? It has to do with the way the pupillary adjustment (PD) latch works on each pod. The latches are biased to one side on each pod. If you look at the RPNVG from the front, the PD latches are inboard on each pod. Take a look at the mounting plate on each mono adapter. Look where the laser engraved letter is, just above and below it are semi-circular indentations. This is where the PD latch indexes and grabs onto the mono adapter mounting plate.
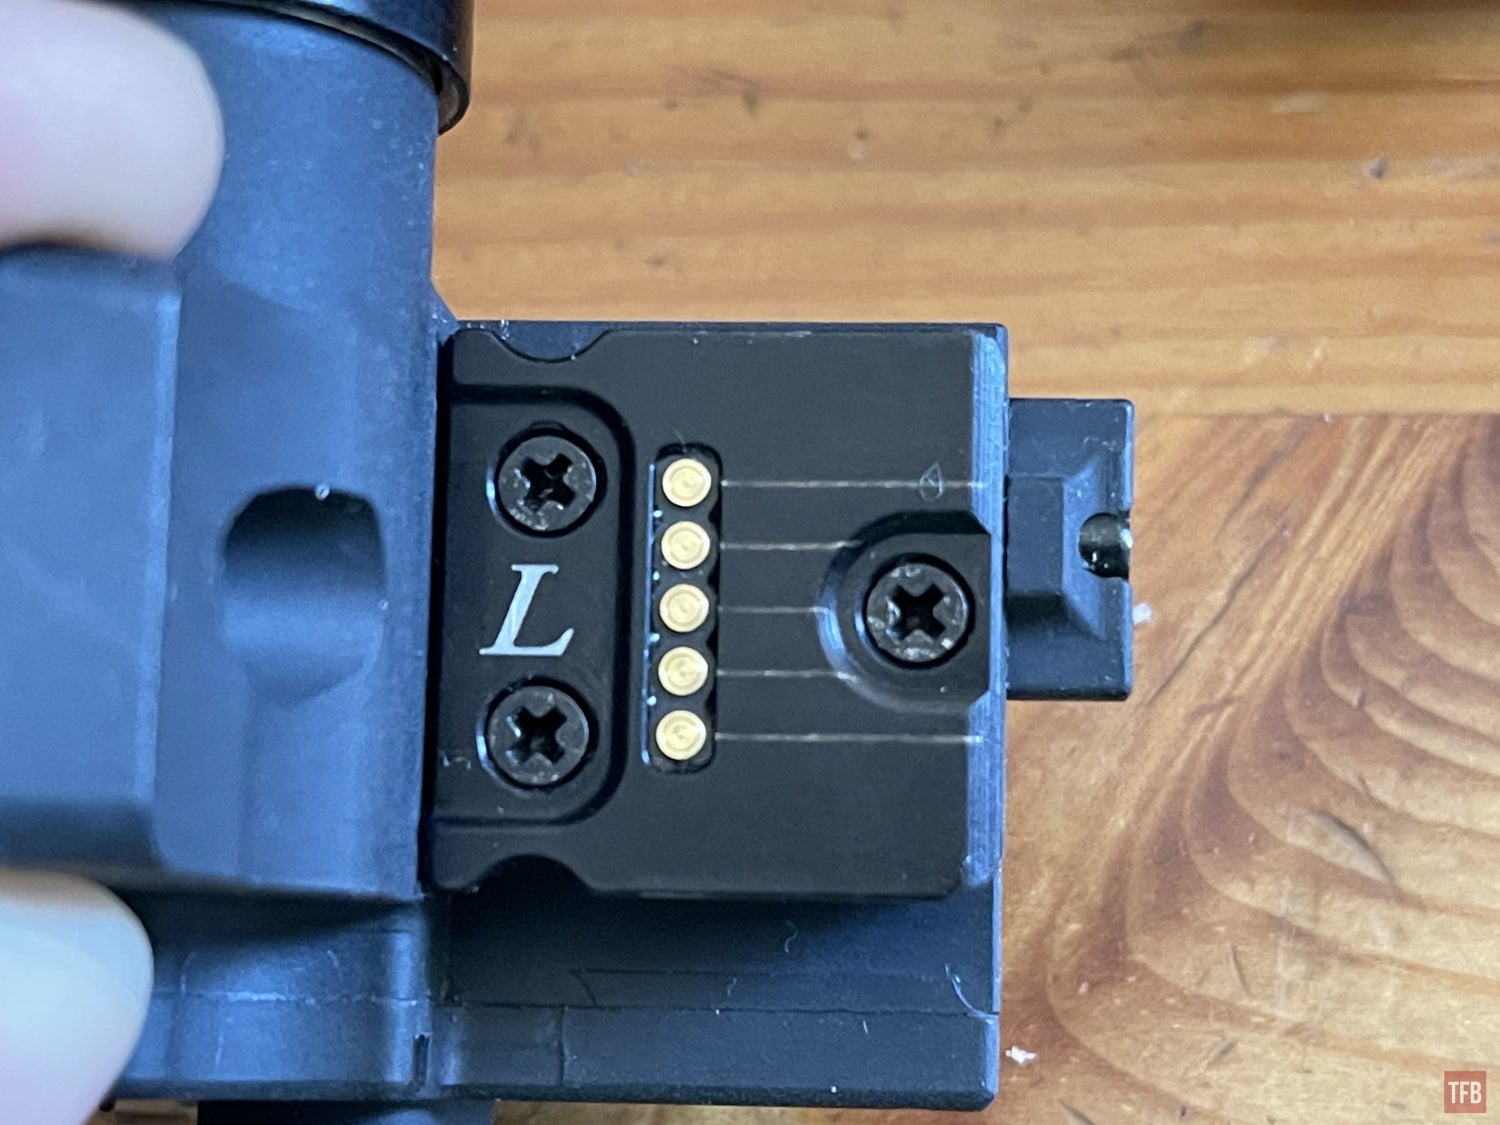
The left pod mono adapter has the indentation inboard close to the battery compartment, while the right pod mono adapter has the mounting plate flipped 180º. See the lines scratched into the plate? The left side is longer than the right side. Those are from the pogo pins on the pods. The right side pod pogo pins only scratch the mounting plate for about 1mm while the left mono adapter mounting plate has 10mm long scratches from the left side pod pins. This means less wear and tear on the right-side pogo pins.
Take a look at the two monocular pods below, left is on the left, right is on the right. Due to the position of the left pod PD latch, you have to press it in to release the mono adapter the whole time as you slide the adapter off. Whereas the right side, you only have to press it for a short time until the mono adapter clears the PD latch. Once it clears, you don’t have to keep pressing the PD latch anymore and the adapter will slide off.

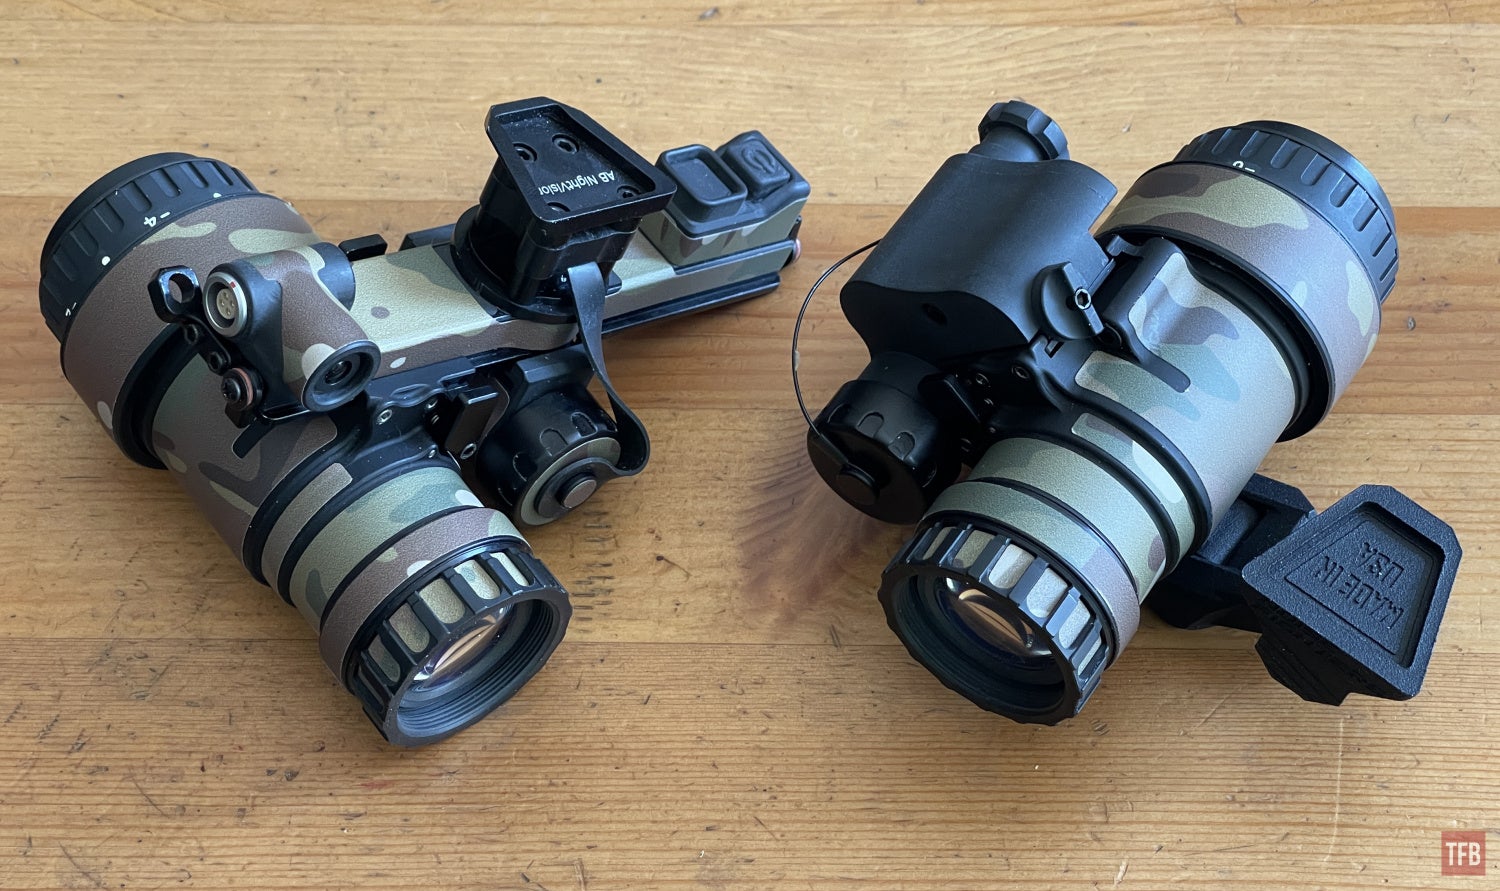
MOD-3 vs RPNVG Monoculars

While similar in functionality, the RPNVG mono adapter is more svelte. The MOD-3 mono adapter is more bulky.


One big difference, besides size and aesthetics, is a practical one. The RPNVG mono adapter no longer has the ability to use the PVS-7 refocus lens. See the MOD-3 mono adapter below has a circular protrusion. This is for an IR illuminator focus lens. The RPNVG IR illuminator no longer has this feature.
Mounting The RPNVG Monoculars
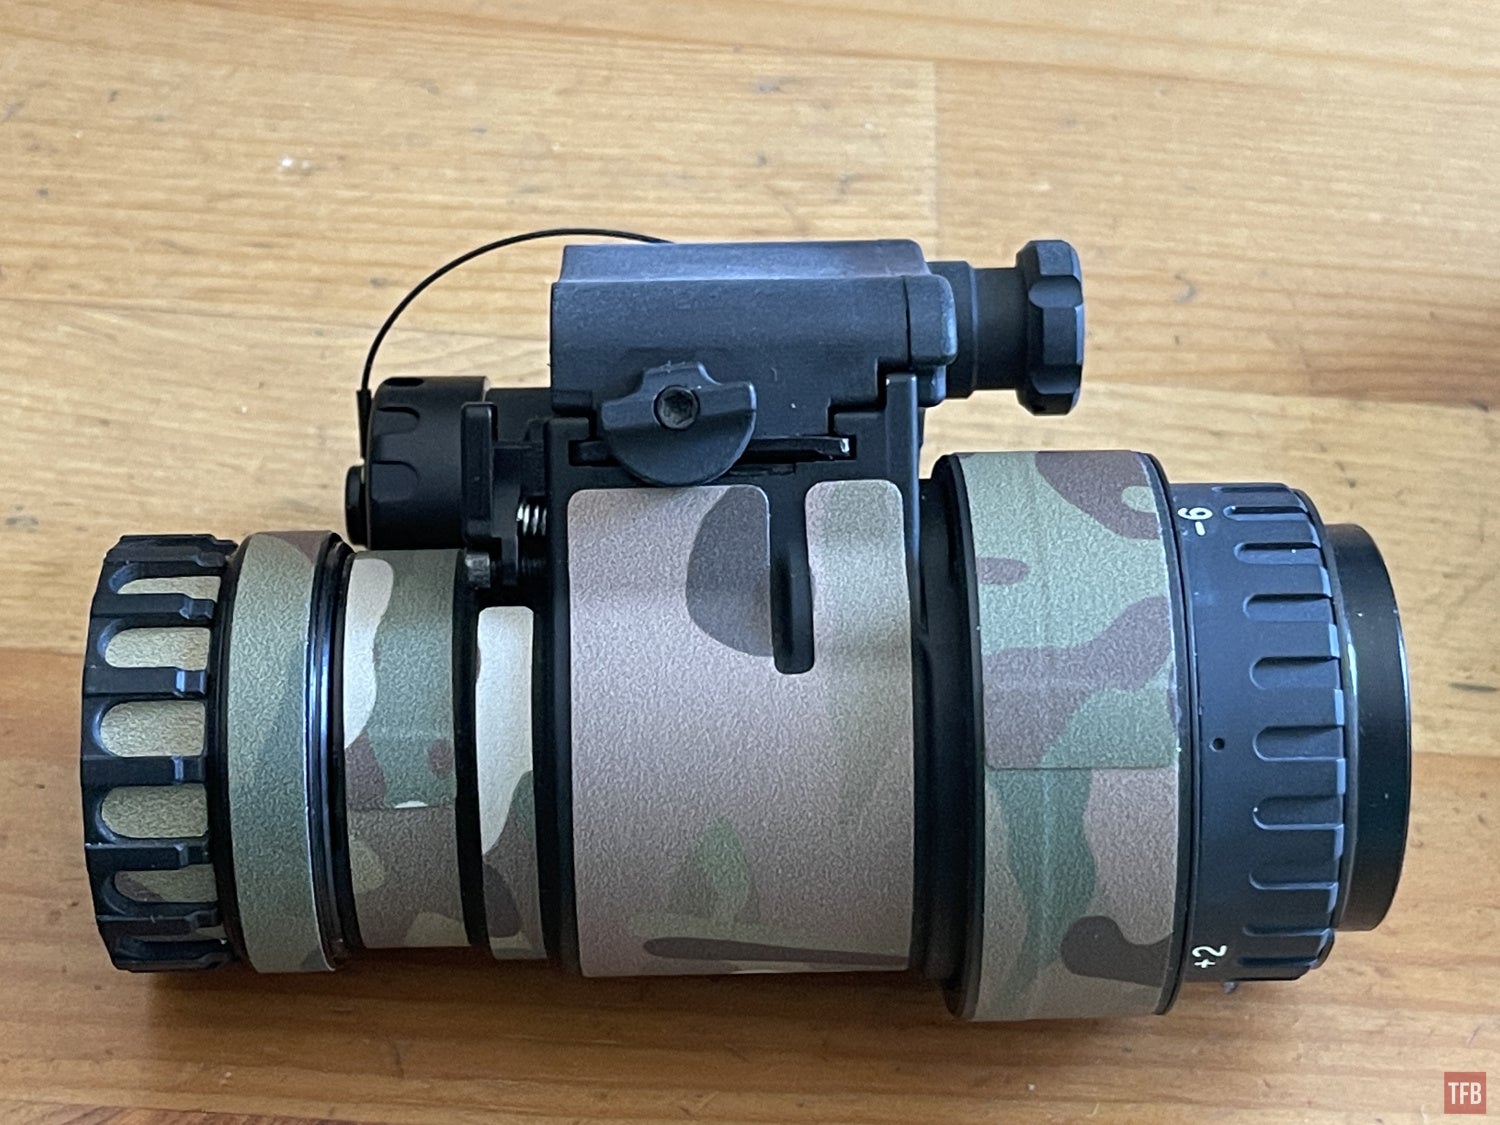
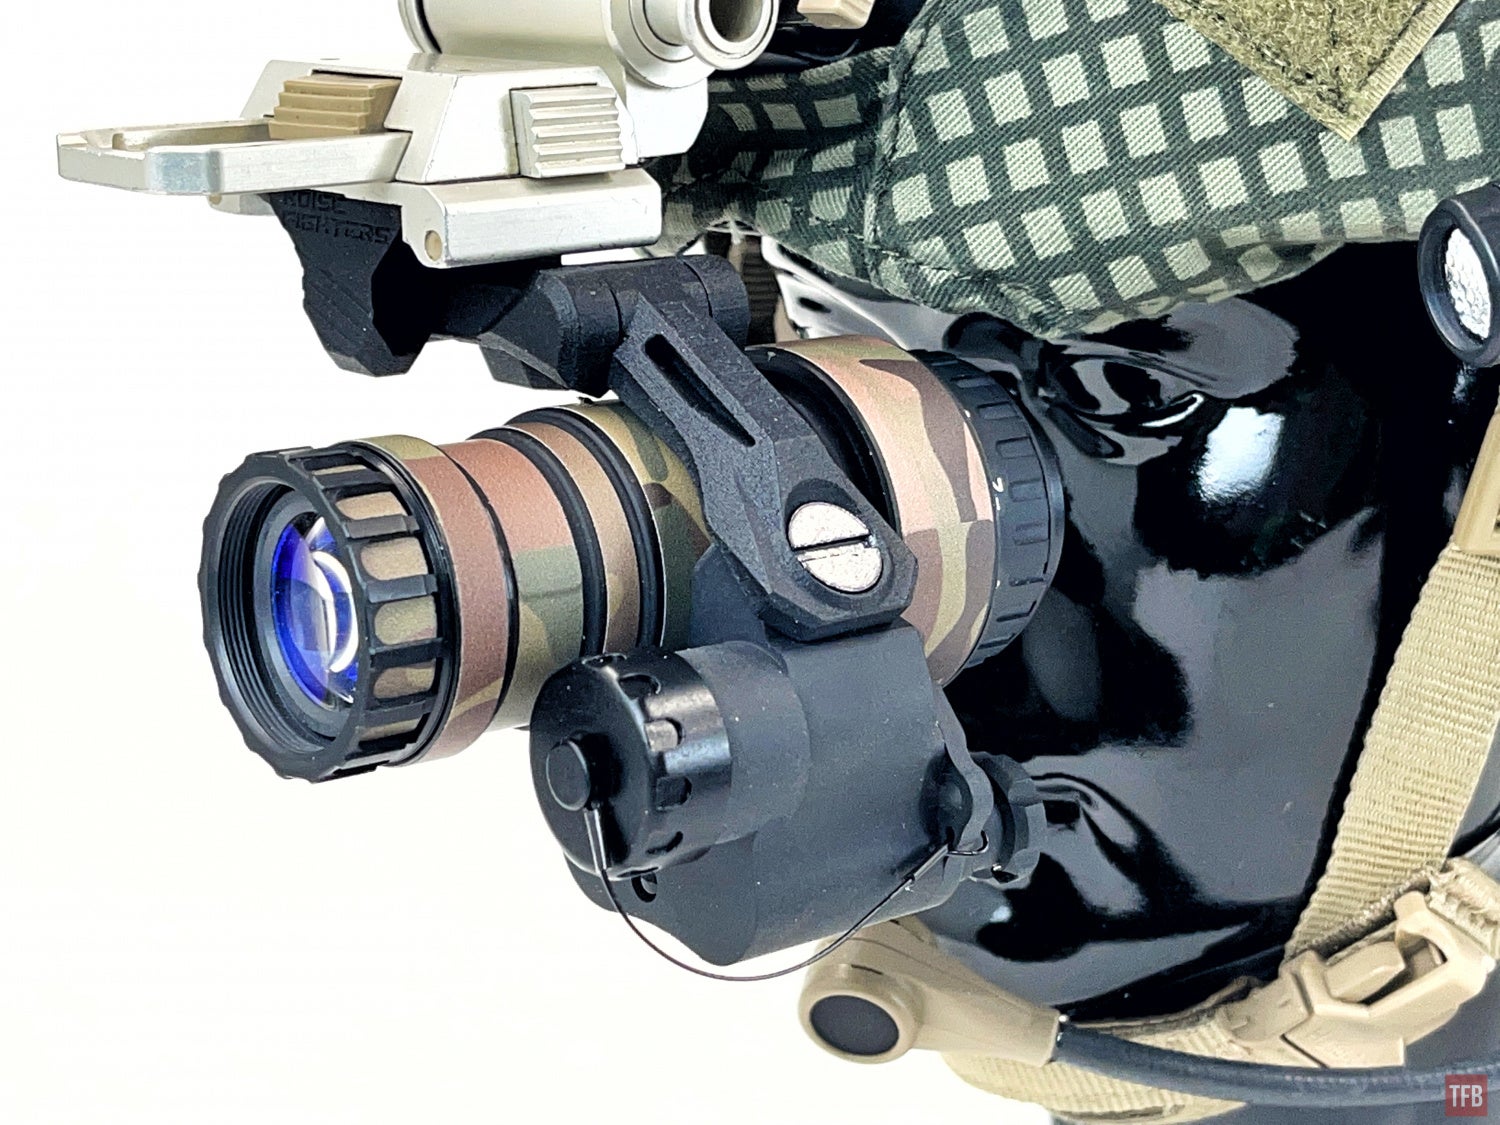
One problem I had with my MOD-3 was the fact the pods have manual gain. So it has odd protrusions in each monocular pod that make it incompatible with certain J-Arms like the Noise Fighters AX-14 and Pano Bridge. That is not the case with the RPNVG mono adapters. One cool thing about these adapters is you can leave the J-Arm installed. Just slide the monocular pod to convert them into a stand-alone monocular.

Here is the left monocular mounted on a helmet.
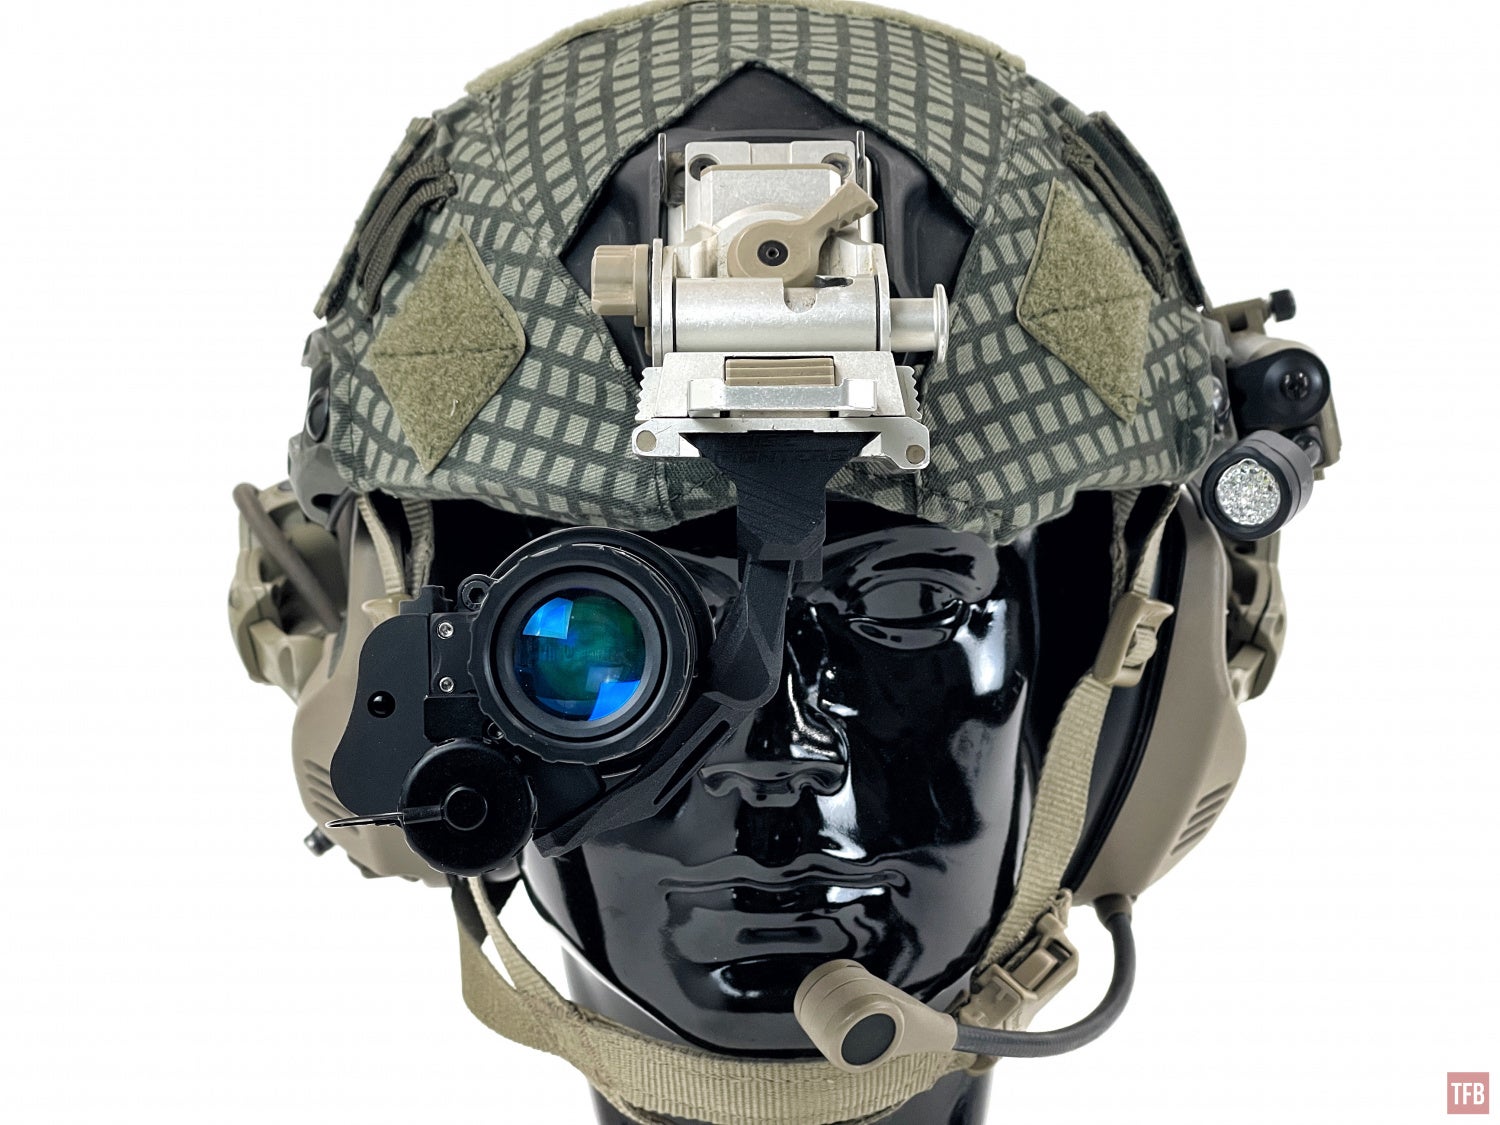

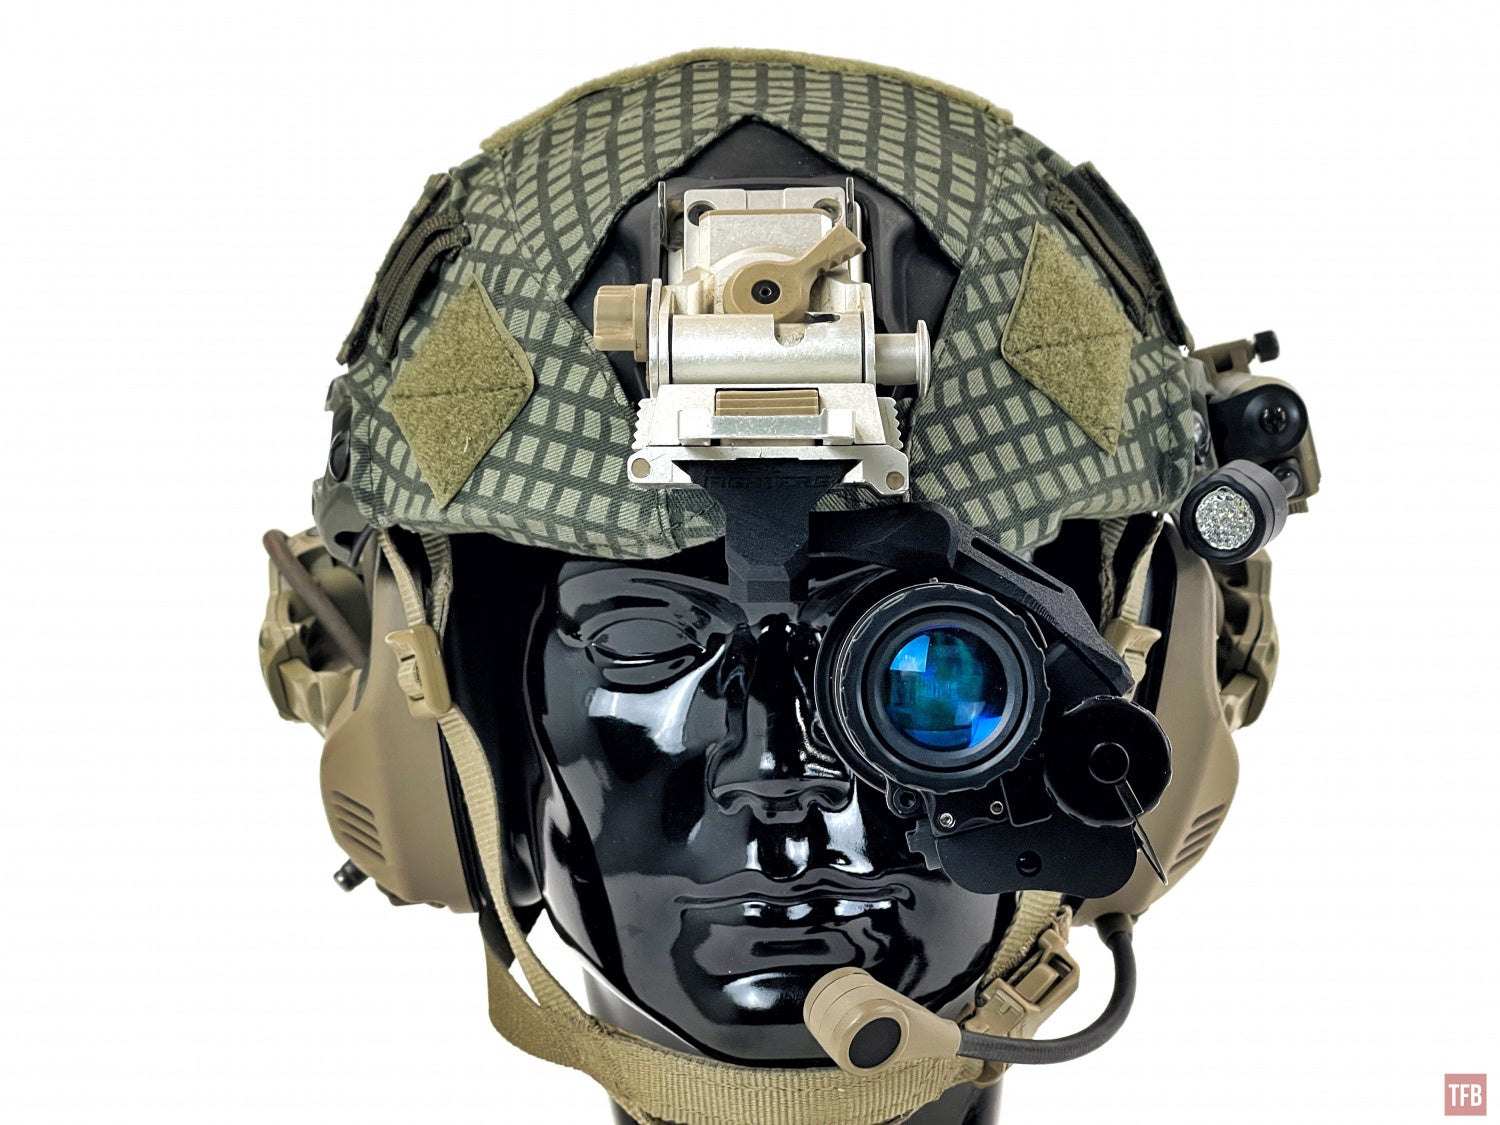
Right monocular mounted on the helmet. There is no difference function-wise between the monocular pods when used as a stand-alone monocular.
Since the J-Arms can stay on the battery adapter, you can store them in a pouch with your RPNVG. Now you can make a functioning monocular without needing to install anything other than the pod onto the adapter.
Can you use a panobridge? Yes, you can but why would you? For those who really want to know, here is what it would look like. It is obviously heavier than the RPNVG bridge with a single battery. RPNVG with RPO lenses weighs 18.8oz whereas two monoculars with adapters and panobridge are heavier at 21.3 oz.

You do get articulation though but now when you adjust PD you have to adjust the height of the NVGs to line up the eyepiece.
Final Thoughts On The RPNVG Mono Adapter
I think the RPNVG could replace the MOD-3. It makes the MOD-3 somewhat obsolete now. The only thing that the MOD-3 still has over the RPNVG are manual gain monocular pods. I do not know how popular that option is but it does have its allure. If you do not need manual gain, like the majority of binocular night vision users, then the RPNVG, with a mono adapter may be the best option out there.
Looking at the two mono adapters I do not think you need to buy both adapters. Each adapter is $228 MAP. That is $456 additional cost for the pair. However you really only need one adapter. If you want to pull a pod off to make a monocular, you can simply pull that one side off and attach the mono adapter to it. While your RPNVG bridge with the other monocular pod will continue to function.
As seen in my review of the RPNVG, you can see it still functions even with a pod removed.

Now the question to ask is which side should you get? I like the right-side mono adapter because it is easier to install and remove than the left side. But it does weigh 0.2oz more. Another factor is that now I have to use my left pod on the RPNVG bridge. This is an issue as I am right-eye dominant and prefer to have night vision over my right eye. I could hack the RPNVG and move the left side pod to the right side of the bridge. But that is extra steps. If I go with just the left side mono adapter, it is 0.2oz lighter but is more difficult to install and remove. I do get to keep my right pod over my dominant eye on the RPNVG bridge. I can see benefits for either case but it all comes down to user preference and you have options. You can mix and match how you see fit. But I do not see the need to buy both mono adapters. Just buy the side you think you can go without when you do lend it out as a monocular.
For more information go to AB Night Vision’s website. Thanks to AB Night Vision for sending the RPNVG housing and mono adapters for review.