 Your Privacy Choices
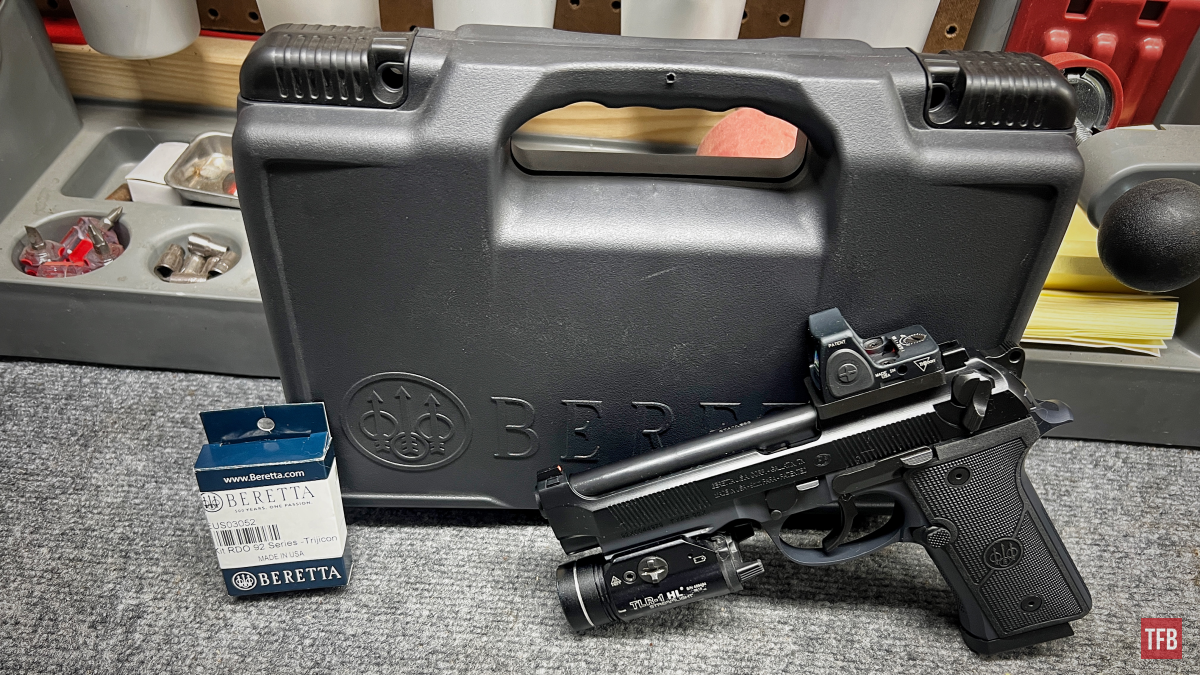
Welcome everyone to the TFB Armorer’s Bench! As mentioned in the little blurb, this series will focus on a lot of home armorer and gunsmith activities. In this article sponsored by Wheeler, Tipton, Caldwell, and Frankford Arsenal, I decided to take a break from the recent assembly stuff and showcase some optics mounting while it is still fresh in my mind. Recently, I have been working with the fantastic Beretta 92X RDO and it occurred to me that there is little available as far as a resource for a step-by-step optics mounting process. The Beretta manual does a decent broad spectrum job but I want to take a look under the microscope so to speak. That being said, let’s dive right into the Beretta 92X RDO Optic Installation!
Disclaimer: It is stating the obvious when I say do not attempt this if you do not have confidence you can. There is no shame in not taking your assembled gun apart. Consult a competent gunsmith/armorer for advice or if they would do the goal you wish to achieve. Refer to the first Armorer’s Bench article So, You Like Taking Guns Apart? where we talk about knowing your limitations.
TFB Armorer’s Bench: Beretta 92X RDO Optic Installation
Welcome to our recurring series of Armorer’s Bench which is made possible and brought to you by Wheeler, Tipton, Caldwell, and Frankford Arsenal who are our sponsors. Here, we at TFB hope to inform, entertain, and even inspire any would-be gunsmith or armorer out there. Ideally, with the information I provide and with the help of our sponsors, you can have some useful knowledge pertaining to the conservation and improvement of firearms technology while at the same time sharing experiences and teaching each other new tips and tricks along the way in the comments. Digging deep into what it is to be an armorer or gunsmith has significance but what is important is what those people do to show they’ve earned that title. I am happy to share my experiences and knowledge and hope it is informative!
Make your personal safety a priority:
- Practice proper gun safety. Always make sure before the firearm hits your bench that it is unloaded and safe to be handled.
- Wear the proper safety equipment. The main one would be safety glasses (decent ones) since parts are often under spring tension and you may work with high RPM tools. Other honorable mentions would be latex gloves or a respirator when working with potentially harmful solvents and oils. Also hearing protection when working with loud machinery or test-firing firearms.
- Modifications, alterations, and customizations will void your firearm’s warranty 9.5 times out of 10. Please take that into consideration before attempting any at-home gunsmithing.
- If you are unsure about proper safety practices, disassembly procedures, or warranty standards, stop, put down the tools, and consult a competent gunsmith.
Step One: Beretta 92X RDO Optic Installation
The first thing is first! Safety. Yes, I know safety is boring and sooo mainstream but bear with me. Make sure your ammunition is stored and away from your bench. If starting out with an assembled firearm make sure to check the chamber, magazine, and space between. Then check again. As far as PPE, I highly recommend wearing safety glasses at the very least.
Step Two: Beretta 92X RDO Optic Installation
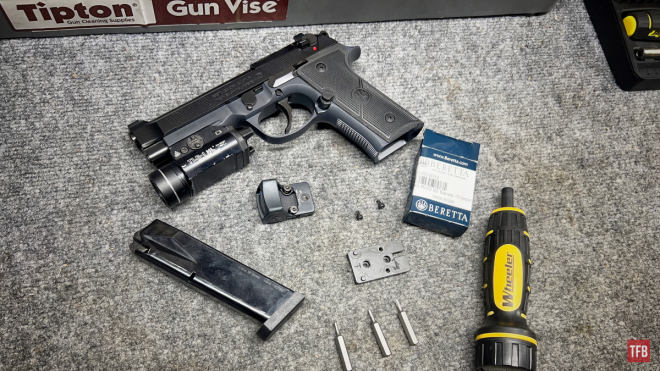
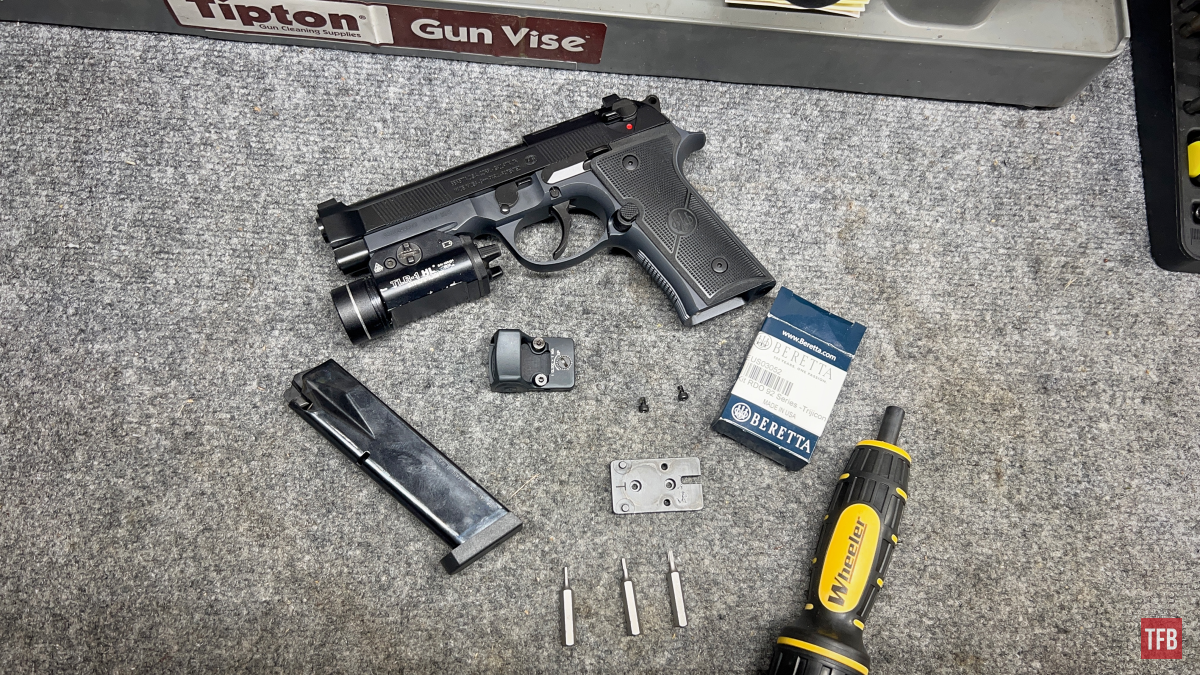
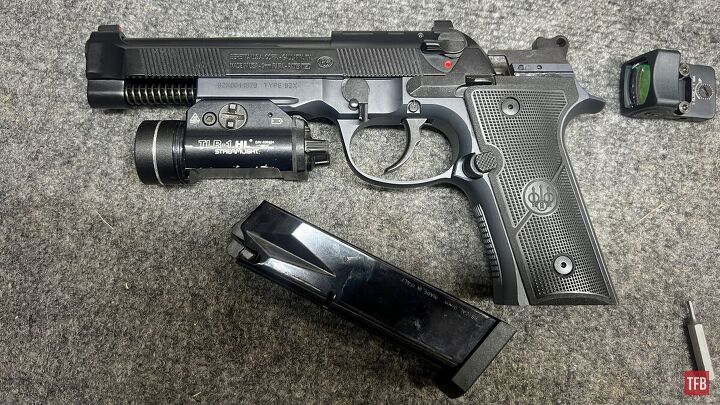
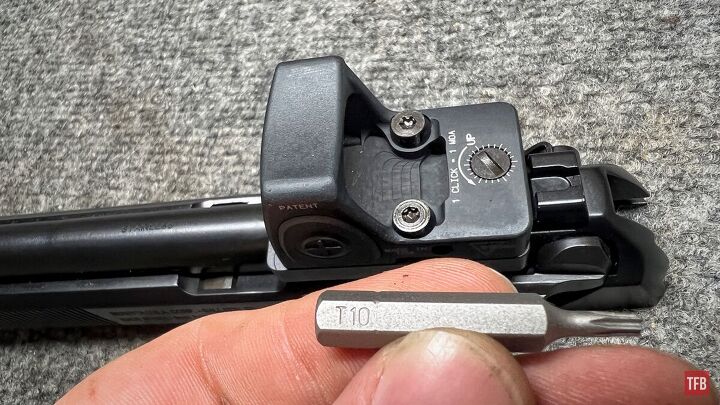
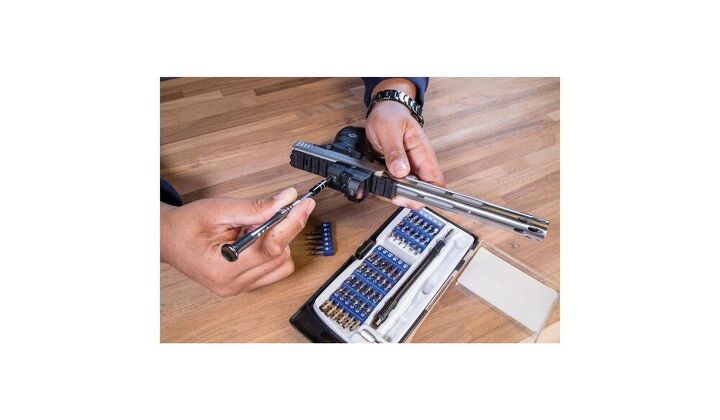
Now that safety is out of the way, let us make sure we have everything we need. Beretta 92X RDO, a mounting plate of your desired footprint (and its screws), the optic (and its screws), CLP/protectant (optional but recommended), torque wrench (the Wheeler FATT Wrench is fantastic), and three different screwdriver bits (5/64 Hex, 2mm Hex, and T10 Torx in this case).
Step Three: Beretta 92X RDO Optic Installation
This step is optional. Removal of the slide from the frame is a step that is completely optional. I only did this for ease of photographing, ease of manipulation, and it is kind of fun to take off the Beretta 92 style slide.
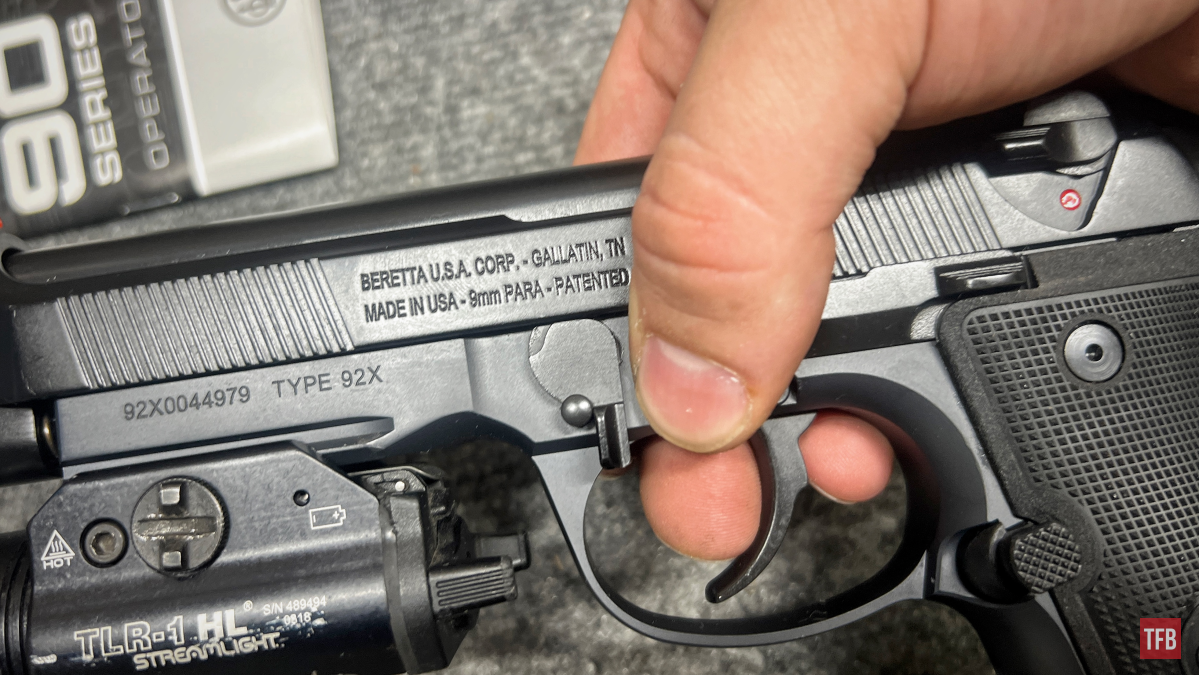
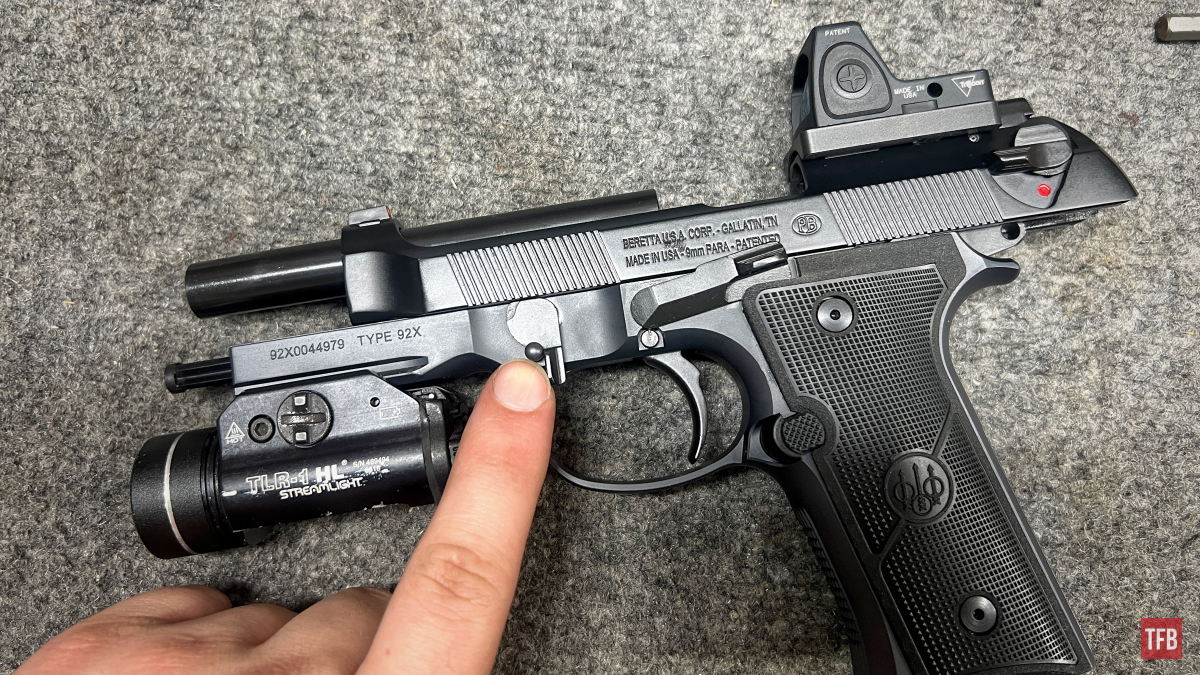
Removing the slide, as I just mentioned, is kind of fun. It is fun mainly because of how easy and painless it is. It is helpful to have your magazine removed beforehand. Press the disassembly latch release button on the right side of the gun.
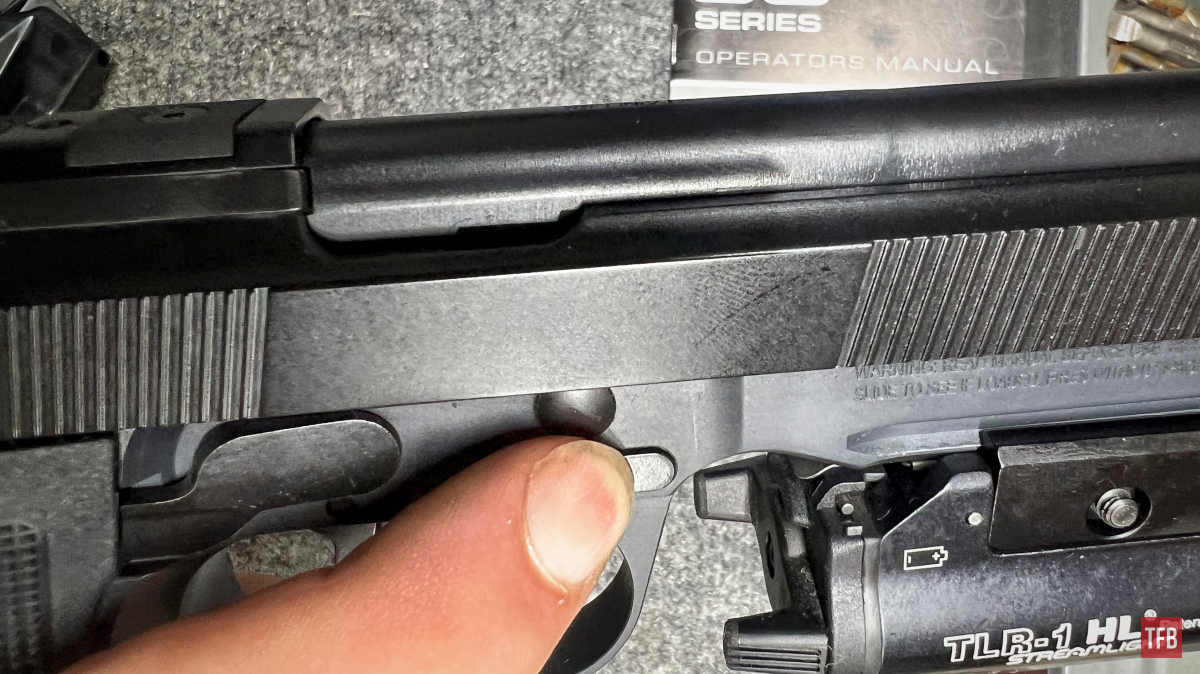
While keeping the disassembly latch release button (what a mouth full!) depressed, swipe the disassembly latch (located on the left-hand side of the frame) downward in the position shown.
At this point, the slide will freely slide off the front of the receiver. This is the same initial field strip step with every gun in the Beretta 90 series of handguns. Again, in this case, this is optional.
Step Four: Beretta 92X RDO Optic Installation
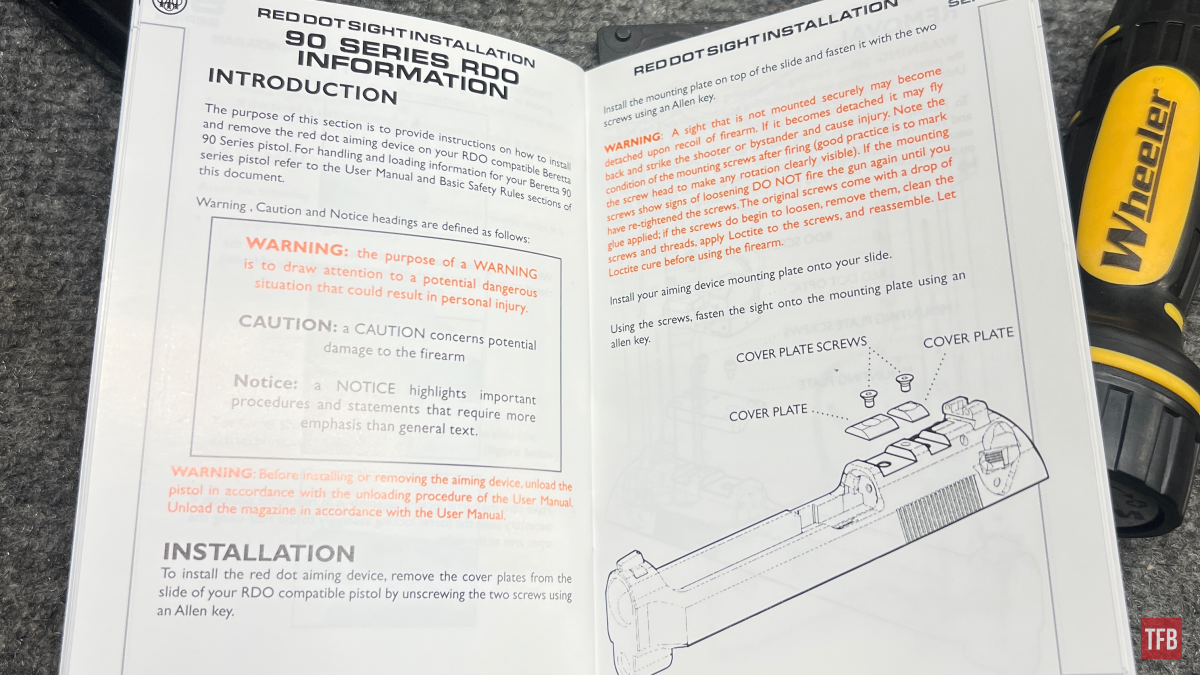
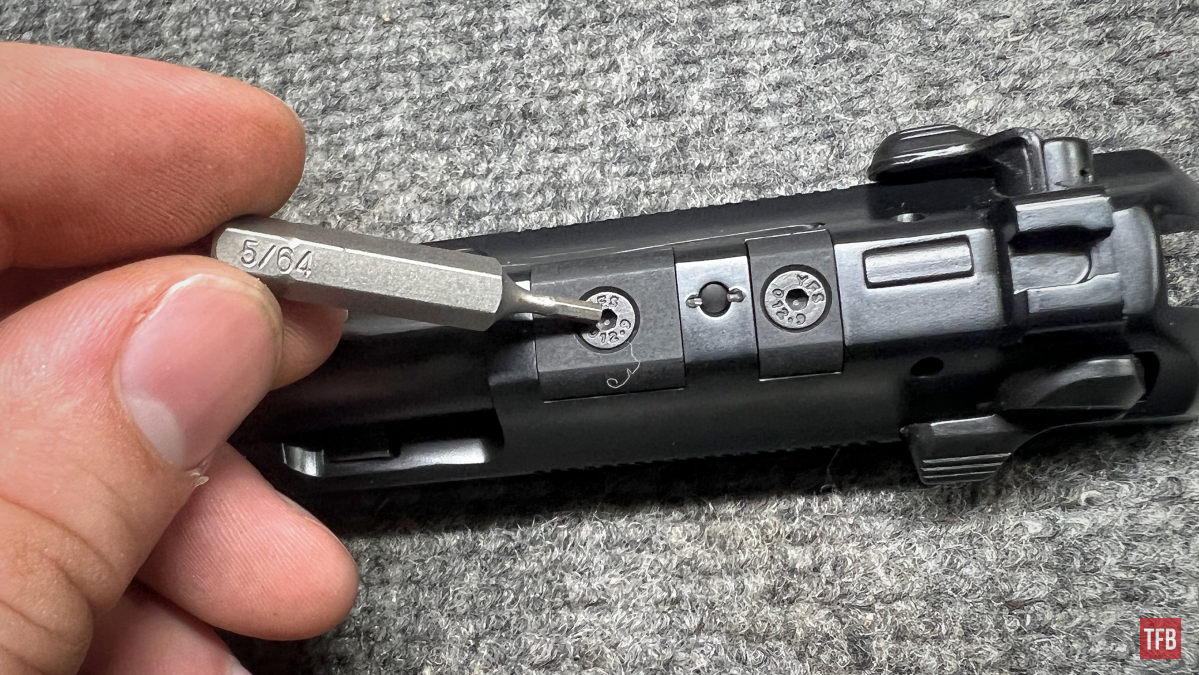
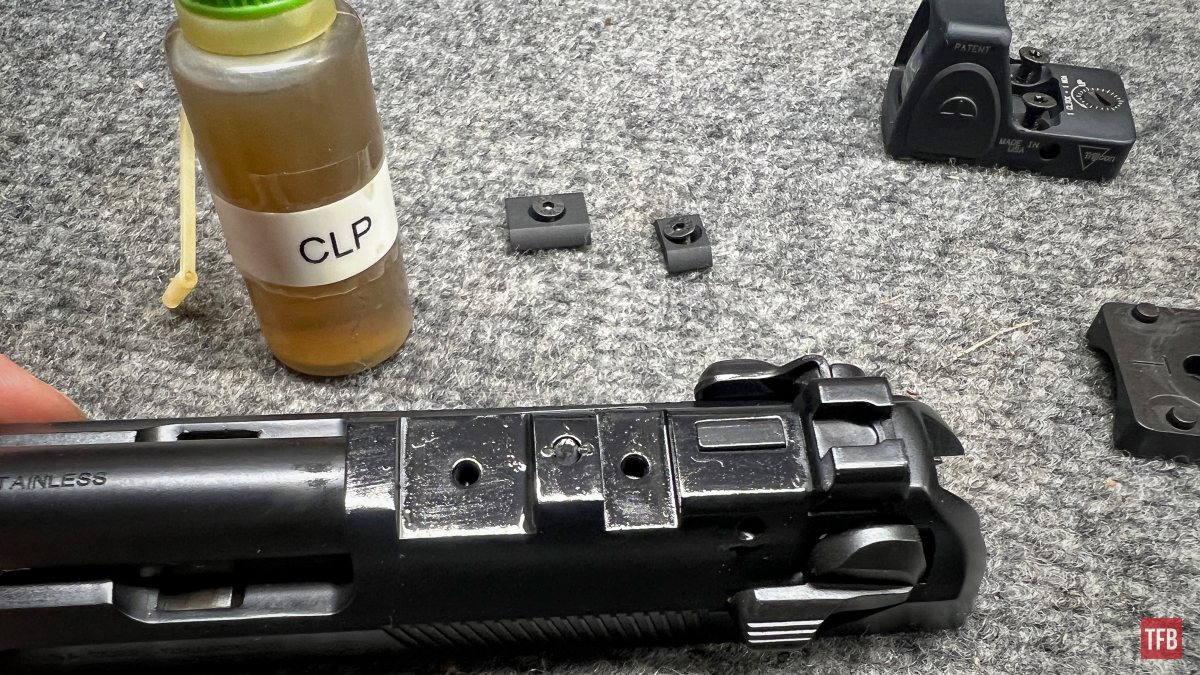
The Beretta 92X RDO comes with its slide uniquely milled out in two places. These two spots have plastic (I think they are plastic) inserts in position while an optic plate is not installed.

Using a 5/64 Hex head bit, remove the two screws in the placeholder inserts.
Optional Extra Step!: Beretta 92X RDO Optic Installation
With the inserts removed, I recommend putting a drop or two of some rust preventative in the slots where the inserts were and where the optics plate will cover. Do not put it into the screw holes, that is not necessary.
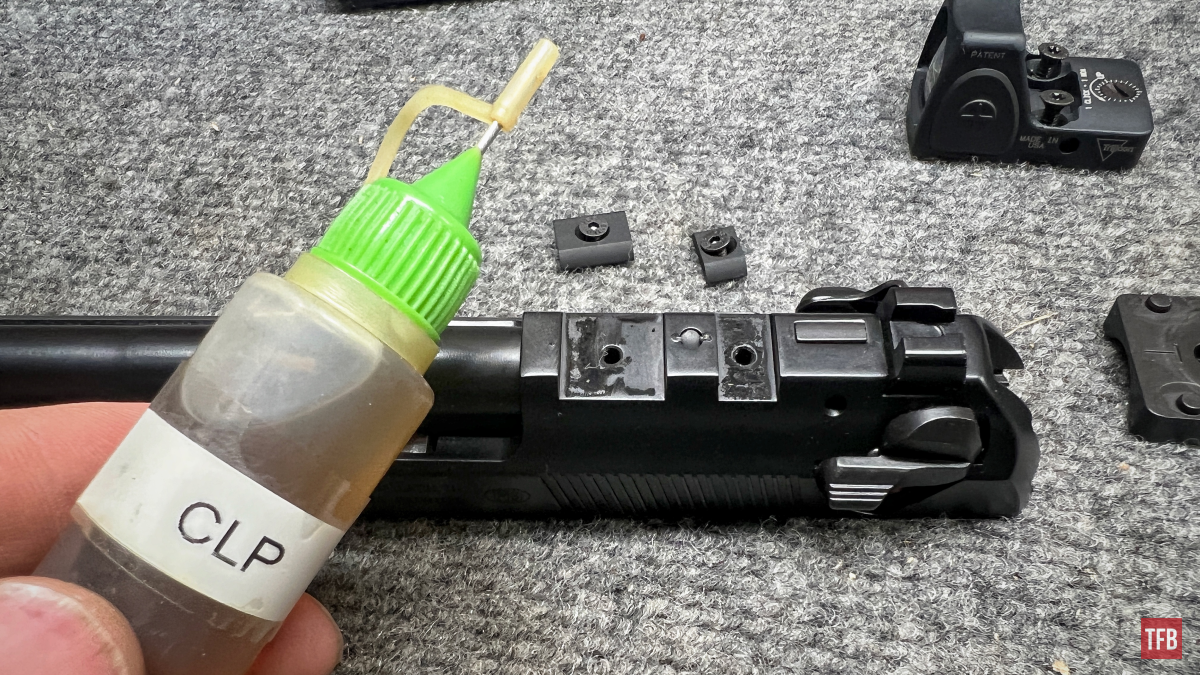
I used CLP and wiped it with a patch until it was coated decently. It does not need to be sopping wet.
Step Five: Beretta 92X RDO Optic Installation
With the slide inserts removed the mounting plate can be set into the recesses in the slide. I rolled with the Trijicon footprint plate to mount my new RMR. Buy once cry once as they say (still feeling it…getting teary-eyed as I type).
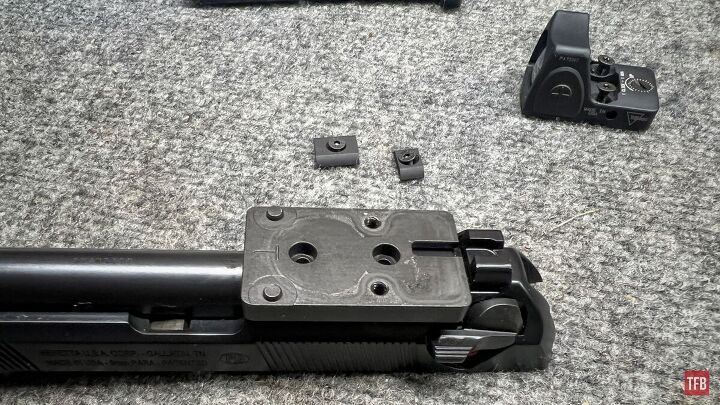
Using the 2mm Hex bit I mentioned earlier, screw the screws into the plate and slide. The manual does not mention anything in the way of torque specifications for this portion so I reached out and was told 8 to 10 inch-pounds. I did the full 10 inch-pounds cause I do not want this coming off and hitting me in the face.
Note: Unrelated to the Beretta. My personal rule of base/mount/plate torque, in the event I have exhausted all resources searching for the correct torque, is 10 to 20 inch-pounds. It is sort of arbitrary on my part but if I think the gun and mount combination can handle it I go higher and if not I go lower.
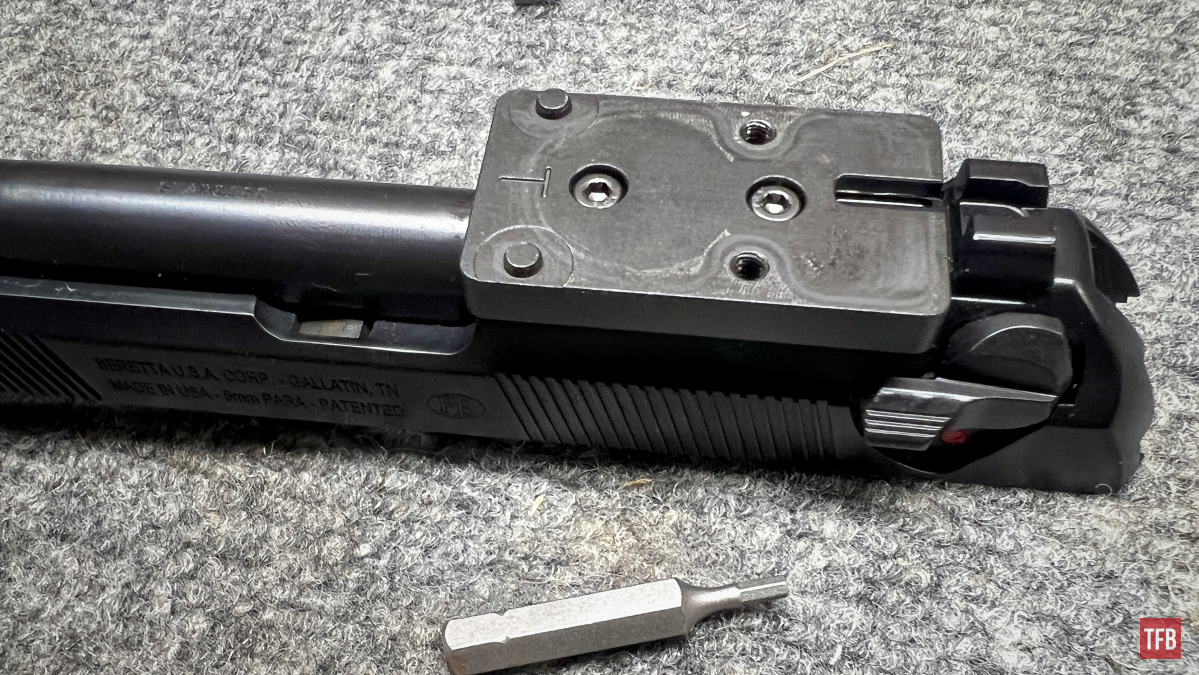
Step Six: Beretta 92X RDO Optic Installation
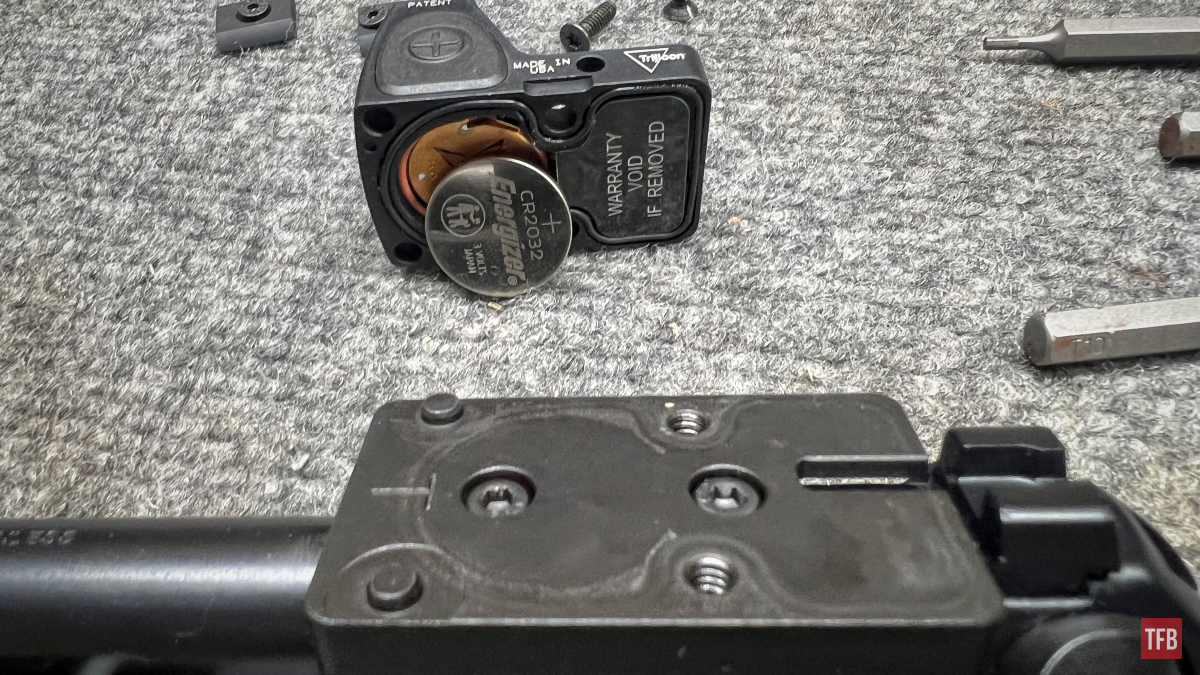
Installing the red dot (RMR in this case) is fairly straightforward. No matter what you put the dot on the plate and screw it down. For the Trijicon RMR, the battery fits into a recess under the dot so while positioning the red dot in there put the red dot onto the plate. It will index on the pegs and line up the holes.
Place the screws into the holes.

Using a T10 Torx bit screw down the red dot onto the optics plate. Trijicon’s torque specifications for the RMR are 12 inch-pounds.
Step Seven: Beretta 92X RDO Optic Installation
If the slide was removed, it can now be replaced on the frame. Begin by sliding it onto the rails at the front.

Move the slide all the way to the rear of the frame and lock it in place by lifting the slide release upward.
After locking the slide back, flip the disassembly latch back up into its horizontal position.
Conclusion: RDO Optic Installation
As I mentioned at the very beginning, this was something I was working with recently so I figured it may be of use to someone out there eventually. The biggest takeaway for things like this is to read the literature pertaining to your mount/base/plate, firearm mounting, and the optic to be mounted. Using the incorrect torque specifications on either end of the spectrum can spell a bad day. Too light and things will come loose and too tight, you may break something. Another last item of note would be I do not recommend any thread lock be used either. Does anyone have any fun optic mounting stories or cautionary tales? Please feel free to share with one another in the comments below. See you folks at the bench next time!
As always, thank you for reading TFB! Be safe out there, have fun while shooting, and we will see you next time for the TFB Armorer’s Bench brought to you by Wheeler, Tipton, Caldwell, and Frankford Arsenal! Also, let us know what you think in the comments below! We always appreciate your feedback.

Pro Range Glasses, Clear

The Caldwell® Pro Range Glasses feature a stylish wrap-around design and are a great choice for all shooters. They feature an adjustable nose piece and temples for all day comfort. The scratch resistant lens meets ANSI Z87.1 standards and offers 99.9% UV protection.
89 Piece Professional Gunsmithing Screwdriver Set
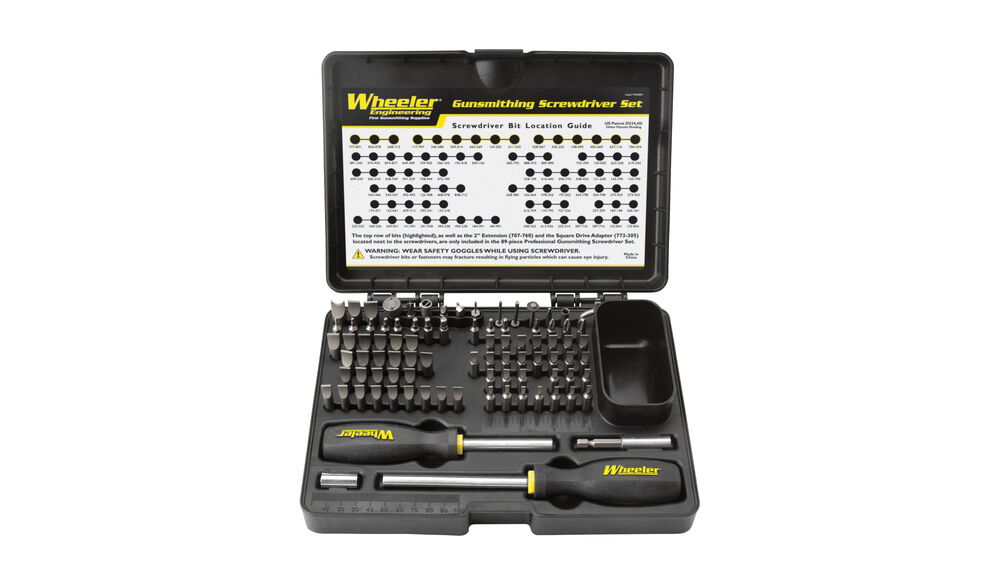
The last screwdriver set you’ll ever need, the Wheeler 89 Piece screwdriver set has it all. The durable custom-molded case features 54 hollow-ground flat bits, 15 specialty bits, 8 allen, 4 phillips, 3 torx, 1 2 1/4 shaft extension, and a hex-to-square drive adapter. The hollow-ground bits have a concave shape that allows for insertion all the way into the screw slot for maximum contact. The kit also includes 2 non-slip, over molded plastic handles with a convenient hinged storage case complete with a bit location guide and is constructed from durable S2 tool steel.
POWER SWABS – PISTOL CLEANING KIT, 500 COUNT
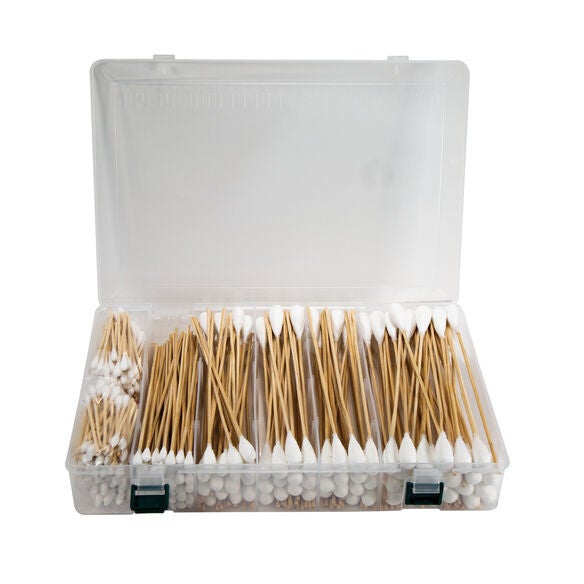
Tipton’s new Power Swabs are an essential part of your cleaning kit. They’re disposable, fast, and easy to use, plus they provide no-mess cleaning with all your favorite solvents and oils. They also fit lands and grooves better than a patch for maximum cleaning.
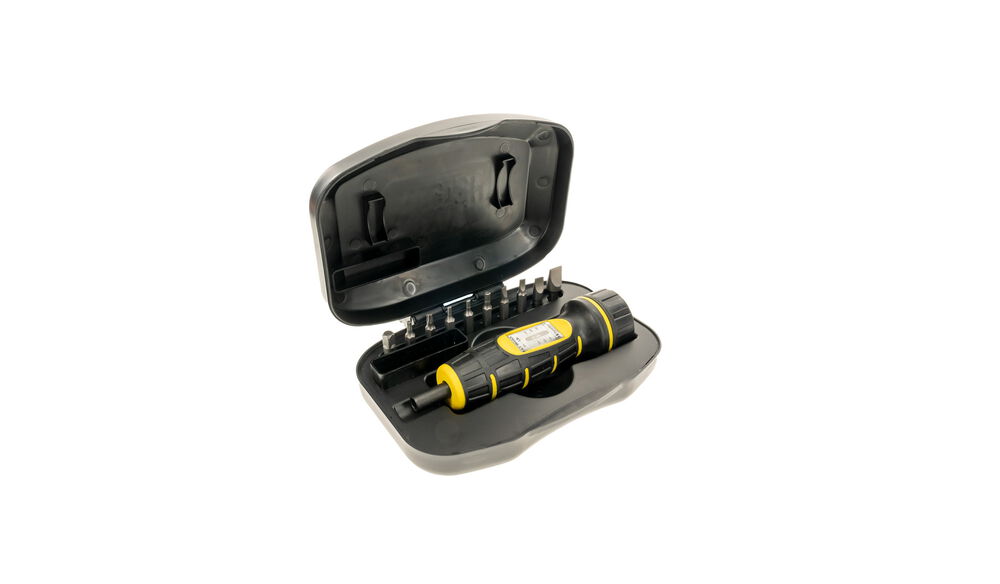
Precision Micro Screwdriver Set
Frankford Arsenal Stainless Steel Dial Caliper
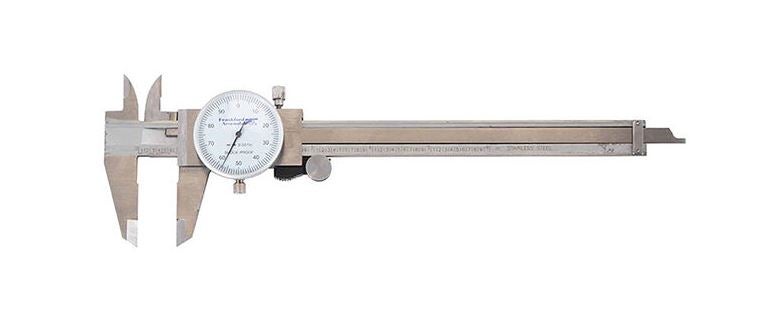
Reloading ammunition requires attention to many critical cartridge dimensions, including case length, neck and base diameters, overall length, primer pocket depth, etc. Verifying these dimensions is quick and convenient with the Frankford Arsenal® Stainless Steel Calipers. These calipers are accurate to within .001″. The calipers allow you to measure inside and outside diameters, plus depths. You will find them useful for many measuring tasks on and off the reloading bench. Packaged in a convenient and protective case.
F.A.T. Wrench® with 10 Bit Set
Wheeler’s F.A.T. Wrench® (Firearm Accurizing Torque) brings perfect consistency to every screw on your rifle! This amazing handheld torque wrench lets you apply repeatable, accurate torque settings to scope rings, guard screws, and other screws, which aids in accuracy and decreases the opportunity for problems in the field. The FAT Wrench is a perfect compliment to the Deluxe Gunsmithing Screwdriver Sets. Together, they can ensure accurate tightening of most every screw on any gun in your collection.