 Your Privacy Choices
Welcome everyone to the TFB Armorer’s Bench! As mentioned in the little blurb, this series will focus on a lot of home armorer and gunsmith activities. In this article sponsored by Wheeler, Tipton, Caldwell, and Frankford Arsenal, we’ll show how to completely assemble an AR15 upper receiver. Previously, I covered the disassembly of the lower receiver, bolt carrier group, and upper receiver. Last week I also detailed the assembly of an AR15 lower receiver. I am well aware that most of the folks who pass through these parts are into the new, cool, and tacticool. I personally love older and obsolete stuff but I also like to take things apart and put them back together. That being said, we here at TFB thought it would be nice to have a resource available for disassembling and assembling an AR15.
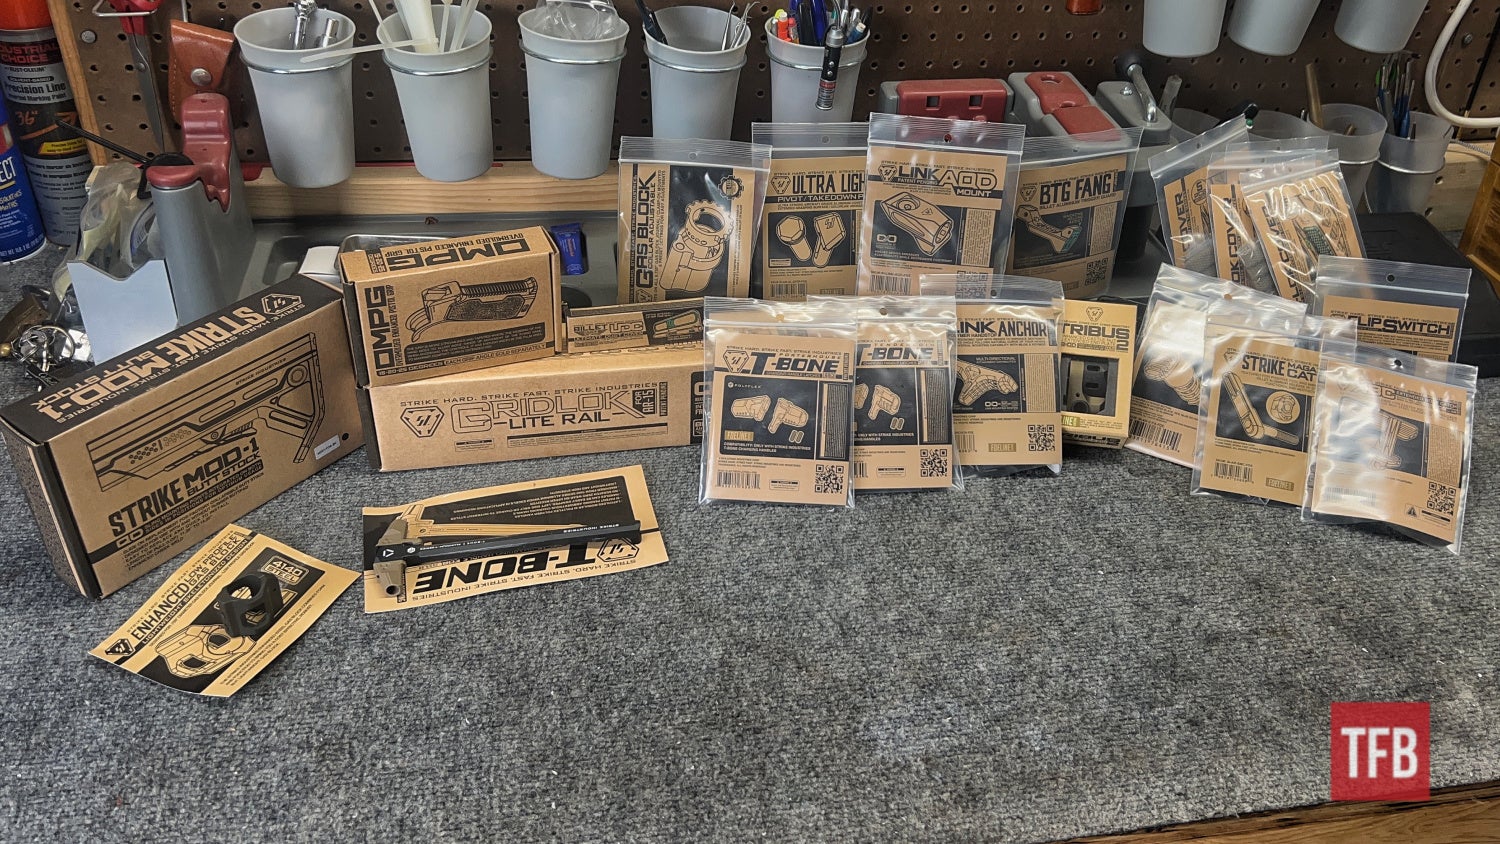
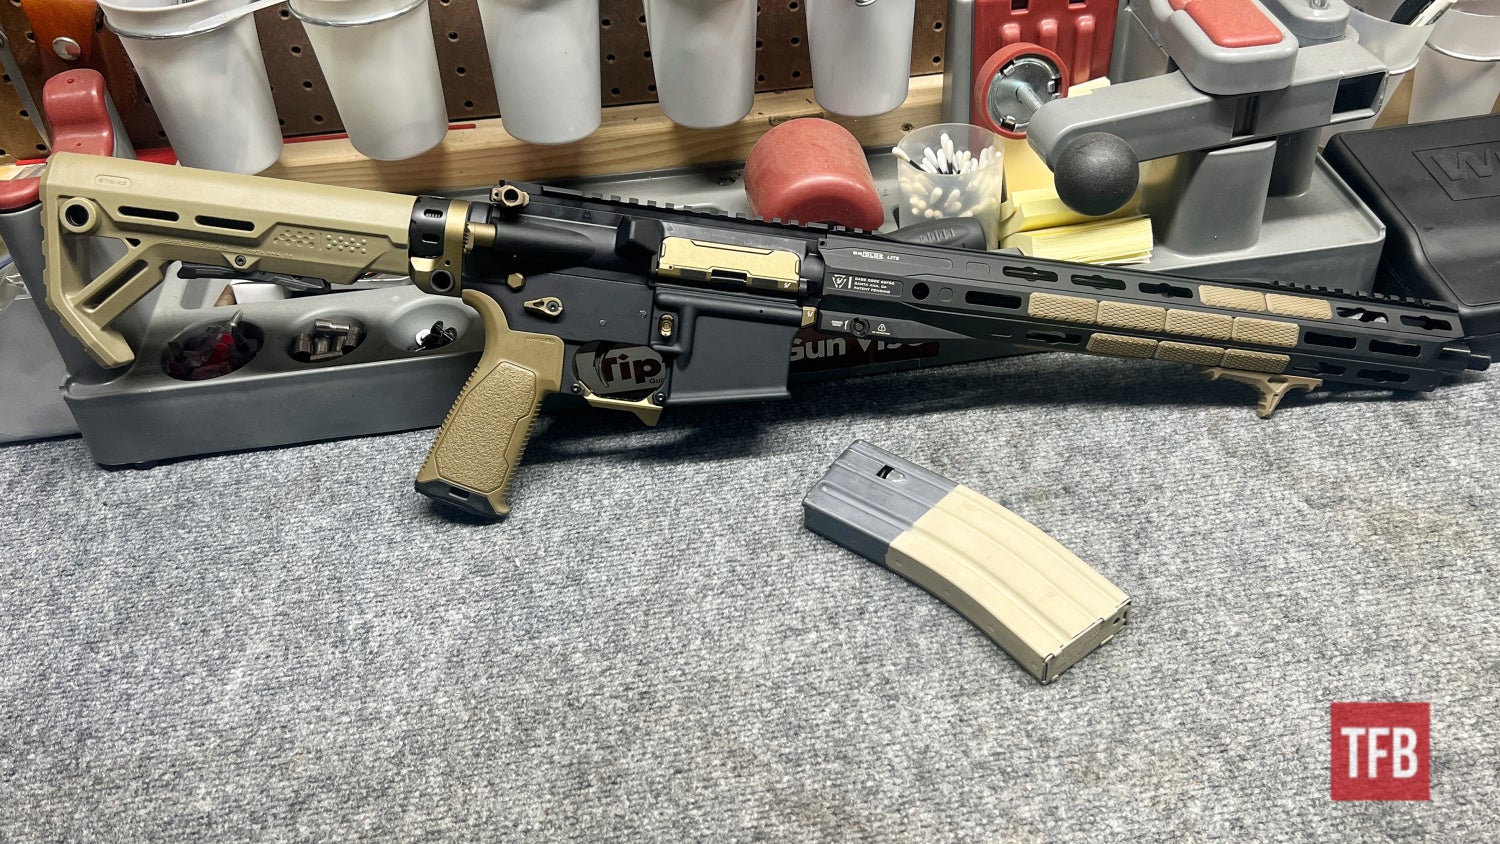
Smith & Wesson was gracious and kind enough to help us out and sent us one of their Sport II models. I asked for a very simple and frequented offering to demonstrate common upgrades and general assembly. Strike Industries has also joined the fold and sent out a whole host of their AR15 parts to showcase in this assembly. Let’s dive right into Complete AR15 Assembly – Upper Receiver!
Disclaimer: It is stating the obvious when I say do not attempt this if you do not have confidence you can. There is no shame in not taking your assembled gun apart. Consult a competent gunsmith/armorer for advice or if they would do the goal you wish to achieve. Refer to the first Armorer’s Bench article So, You Like Taking Guns Apart? where we talk about knowing your limitations.
TFB Armorer’s Bench: Complete AR15 Assembly – Upper Receiver
Welcome to our recurring series of Armorer’s Bench which is made possible and brought to you by Wheeler, Tipton, Caldwell, and Frankford Arsenal who are our sponsors. Here, we at TFB hope to inform, entertain, and even inspire any would-be gunsmith or armorer out there. Ideally, with the information I provide and with the help of our sponsors, you can have some useful knowledge pertaining to the conservation and improvement of firearms technology while at the same time sharing experiences and teaching each other new tips and tricks along the way in the comments. Digging deep into what it is to be an armorer or gunsmith has significance but what is important is what those people do to show they’ve earned that title. I am happy to share my experiences and knowledge and hope it is informative!
Make your personal safety a priority:
- Practice proper gun safety. Always make sure before the firearm hits your bench that it is unloaded and safe to be handled.
- Wear the proper safety equipment. The main one would be safety glasses (decent ones) since parts are often under spring tension and you may work with high RPM tools. Other honorable mentions would be latex gloves or a respirator when working with potentially harmful solvents and oils. Also hearing protection when working with loud machinery or test-firing firearms.
- Modifications, alterations, and customizations will void your firearm’s warranty 9.5 times out of 10. Please take that into consideration before attempting any at-home gunsmithing.
- If you are unsure about proper safety practices, disassembly procedures, or warranty standards, stop, put down the tools, and consult a competent gunsmith.
Step One: Complete AR15 Assembly – Upper Receiver
The first thing is first! Safety. Yes, I know safety is boring and sooo mainstream but bear with me. Make sure your ammunition is stored and away from your bench. If starting out with an assembled firearm make sure to check the chamber, magazine, and space between. Then check again. As far as PPE, I highly recommend wearing safety glasses at the very least. Multiple parts in an AR15 are under spring pressure and are commonly flung across a room and it would sure suck to take one to the face or eye.
Step Two: Complete AR15 Assembly – Upper Receiver
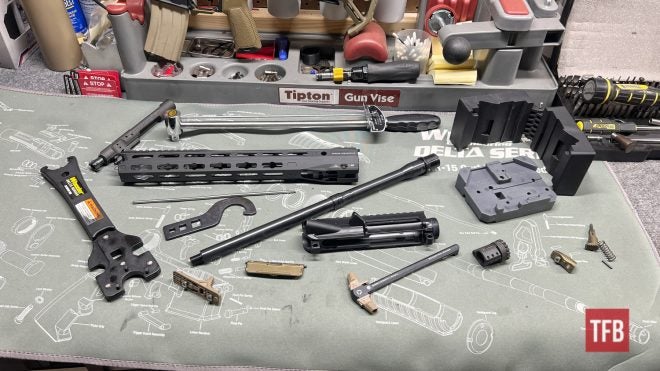
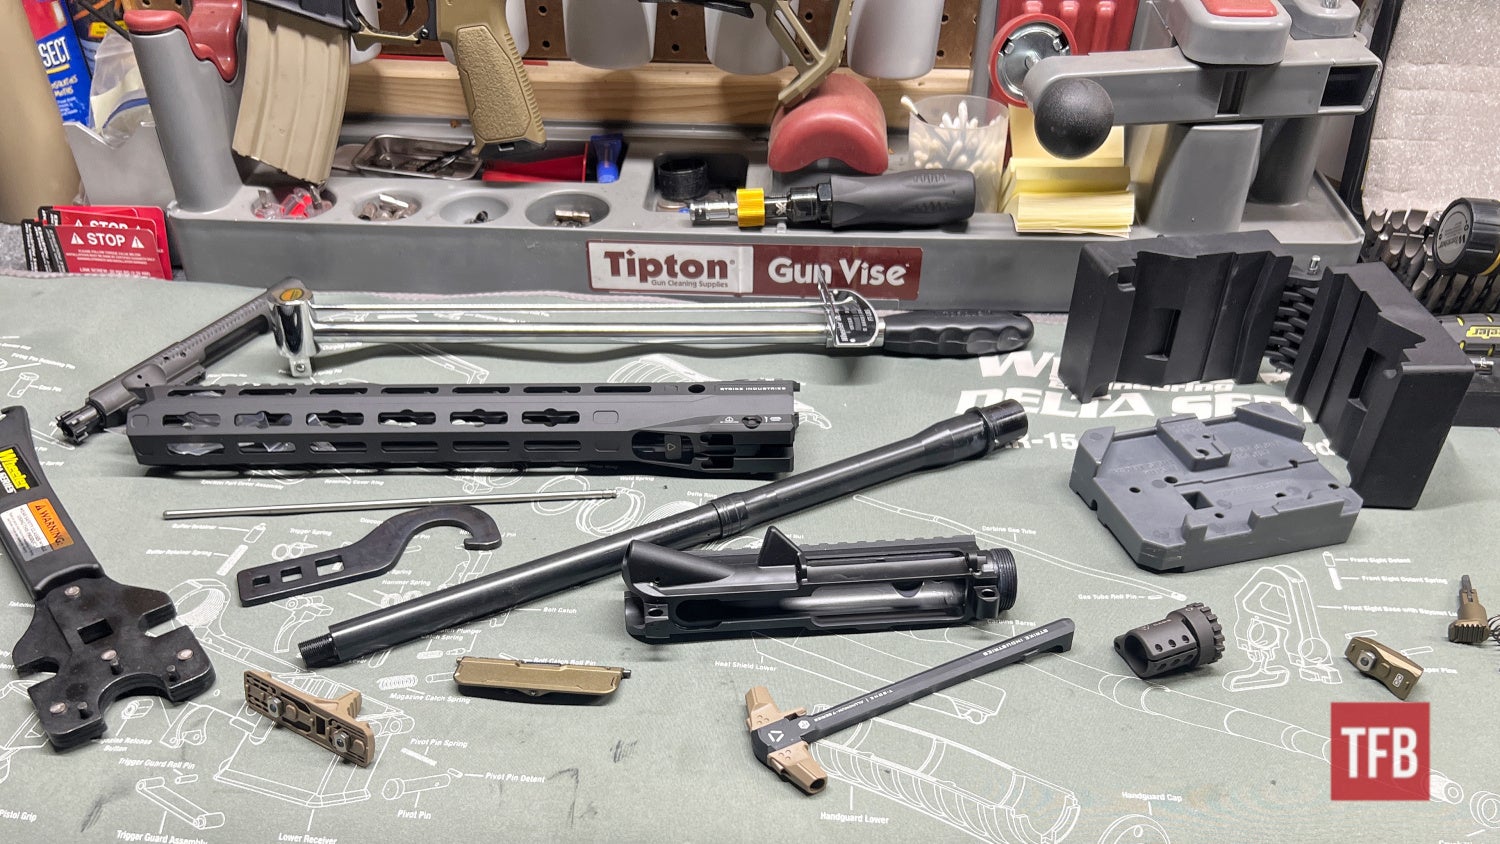
Now that safety is out of the way, let’s make sure we have all of our parts. This time we have a mix of original Smith & Wesson Sport II and Strike Industries parts. As far as I know, there is not really a correct part to start with so take these “steps” more as mini demonstrations of how to install certain parts. Obviously, some need to be installed before others.
Step Three: Complete AR15 Assembly – Upper Receiver
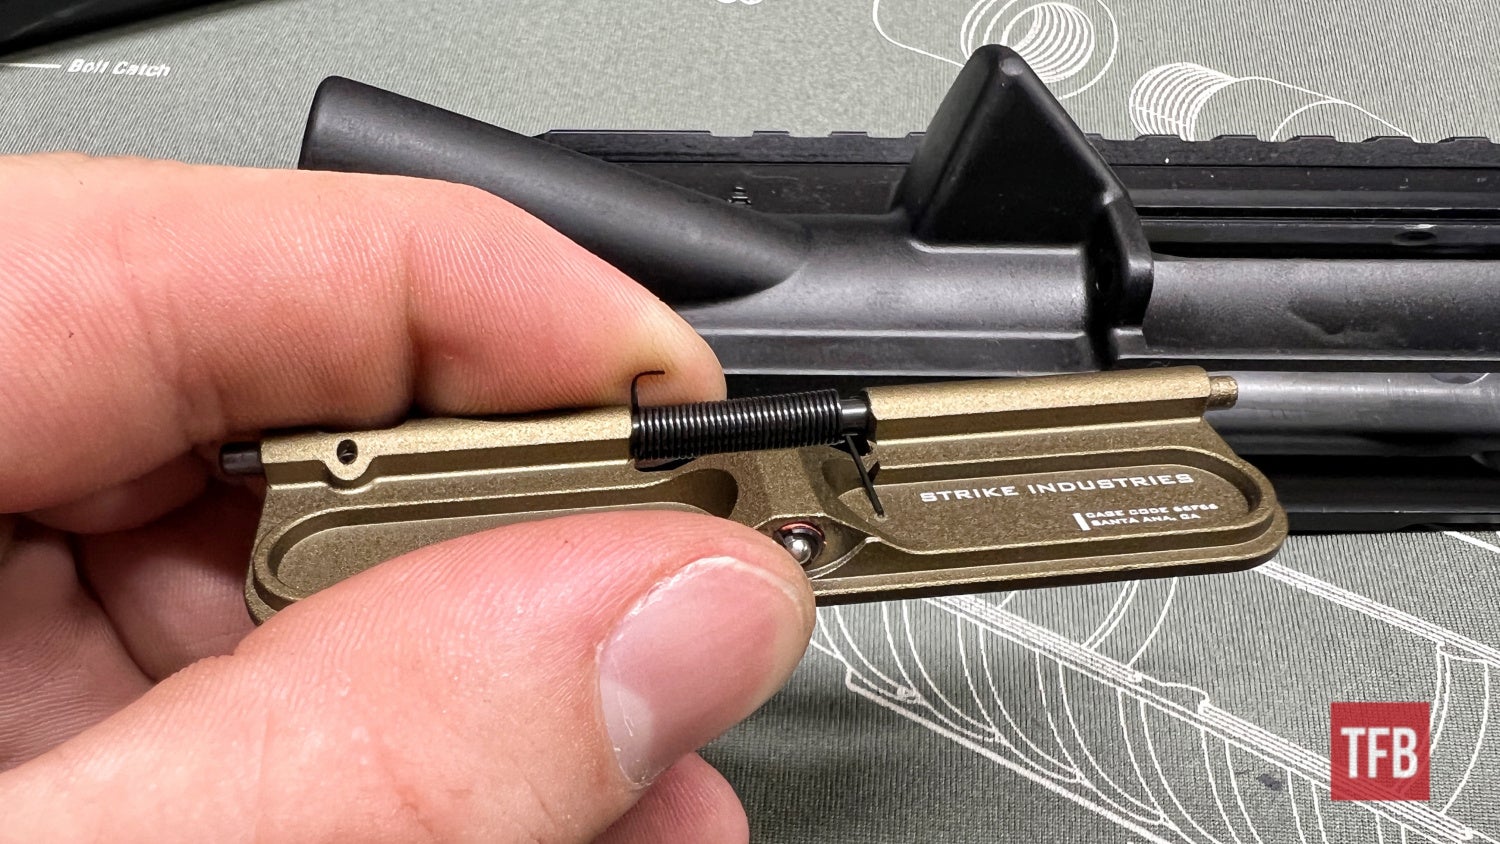
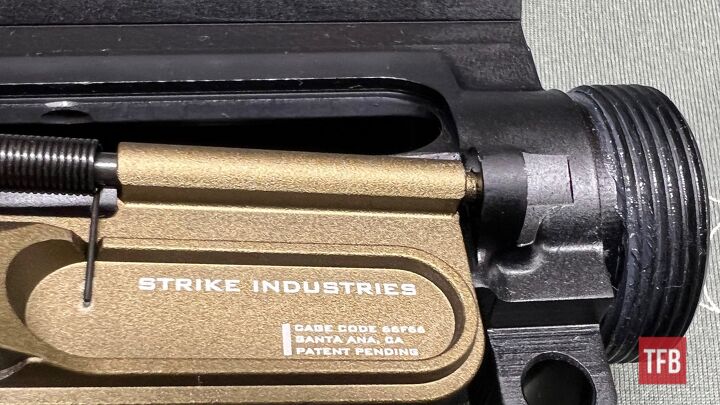
I started out by installing this Strike Industries dust cover. It comes with adhesive pads that dull the noise of the dust cover flying open when in operation.

The pads are easily peeled off of their plastic base. The adhesive side is applied to the slots on the outside flat side of the dust cover.

The installation of the dust cover itself is usually pretty tricky but the Strike Industries one is built to be easy and relatively painless. It all starts by grasping the dust cover as such and the dust cover spring wound as depicted.
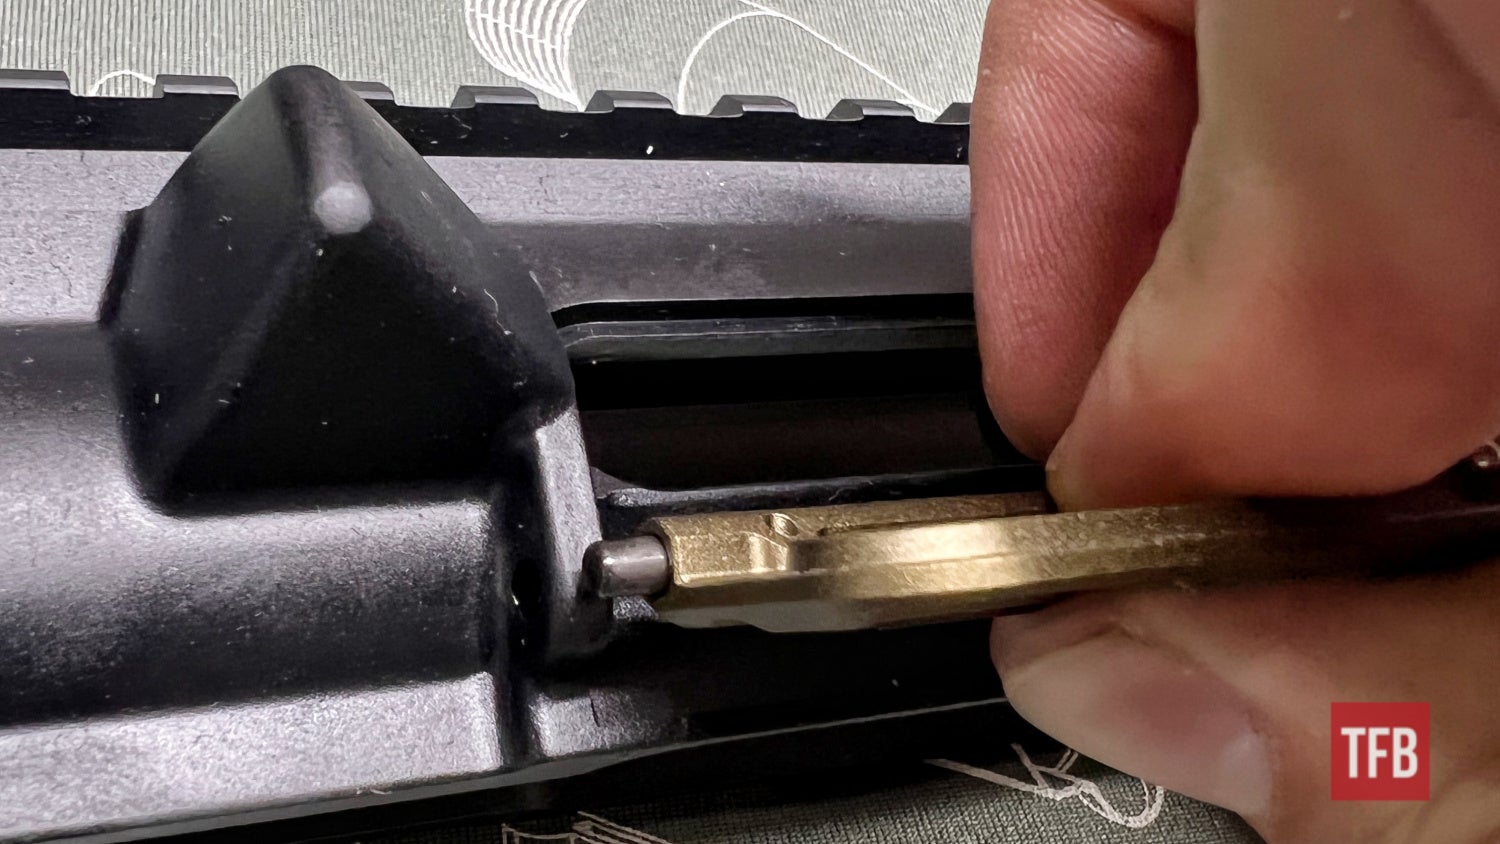
While continuing to hold the spring, as shown above, the right (fixed) end of the dust cover pin can be inserted into the pinhole shown.
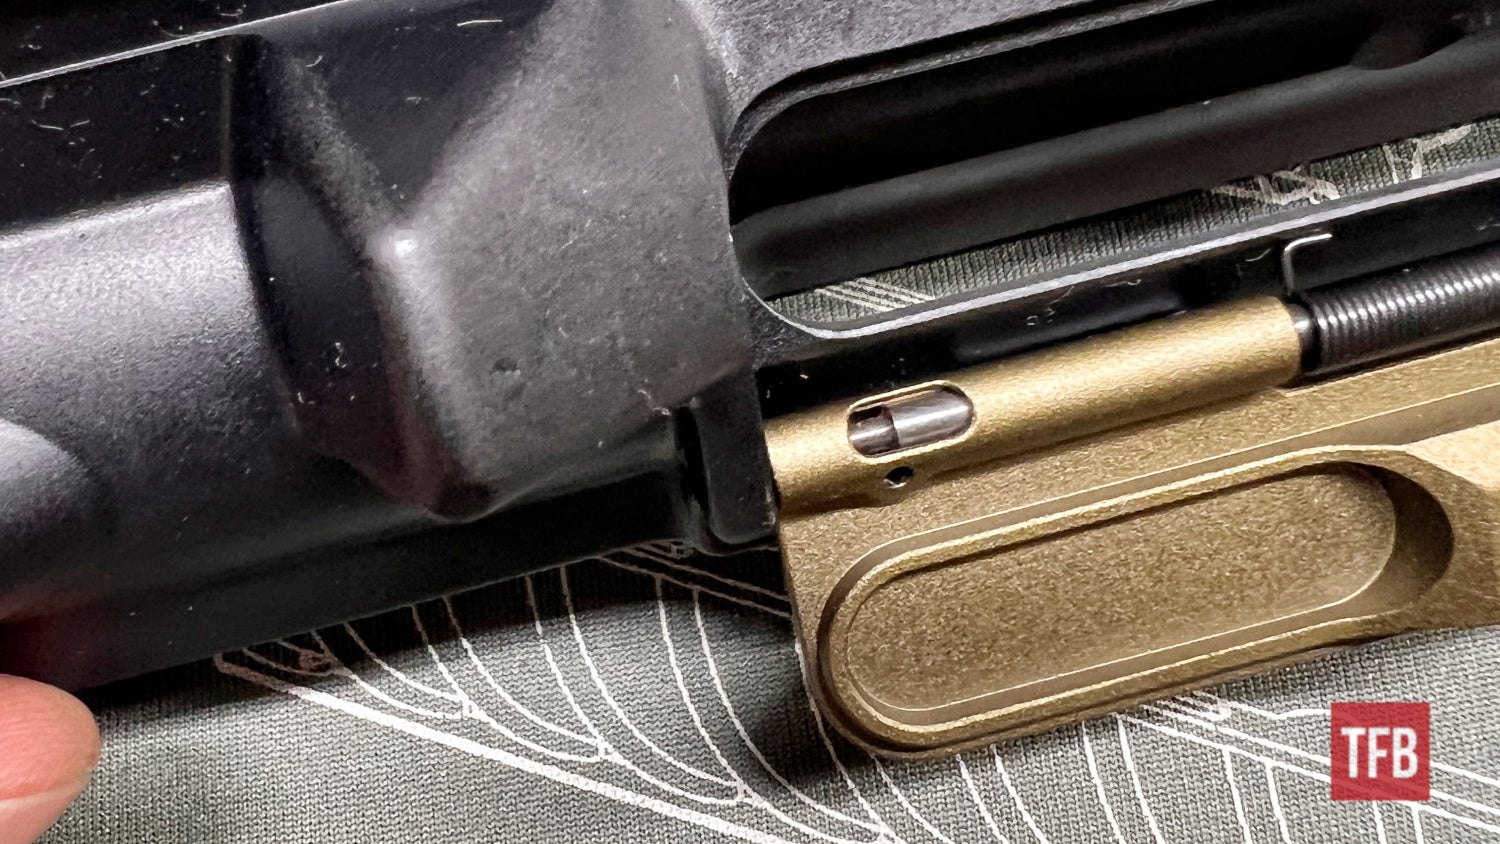
While the right side of the dust cover with the fixed pin is stationed in the pinhole and the dust cover spring is still captured with your fingers or the side of the receiver, start to place the left side flat.
As shown above there is another pin on the left side but this one by Strike Industries is intelligently and thoughtfully a spring-loaded pin. Think of most toilet paper roll holders and how they are collapsible. Press the spring-loaded pin down and insert the dust cover flat until the pin clicks into the hole.
Note: Obviously, a standard dust cover is a little more intensive to install. That being said, I will include that in a future article.
Step Four: Complete AR15 Assembly – Upper Receiver
Next up, I decided to install the forward assist which is common on most of the AR15 uppers. It consists of the forward assist button assembly, the forward assist spring, and the forward assist retaining roll pin.

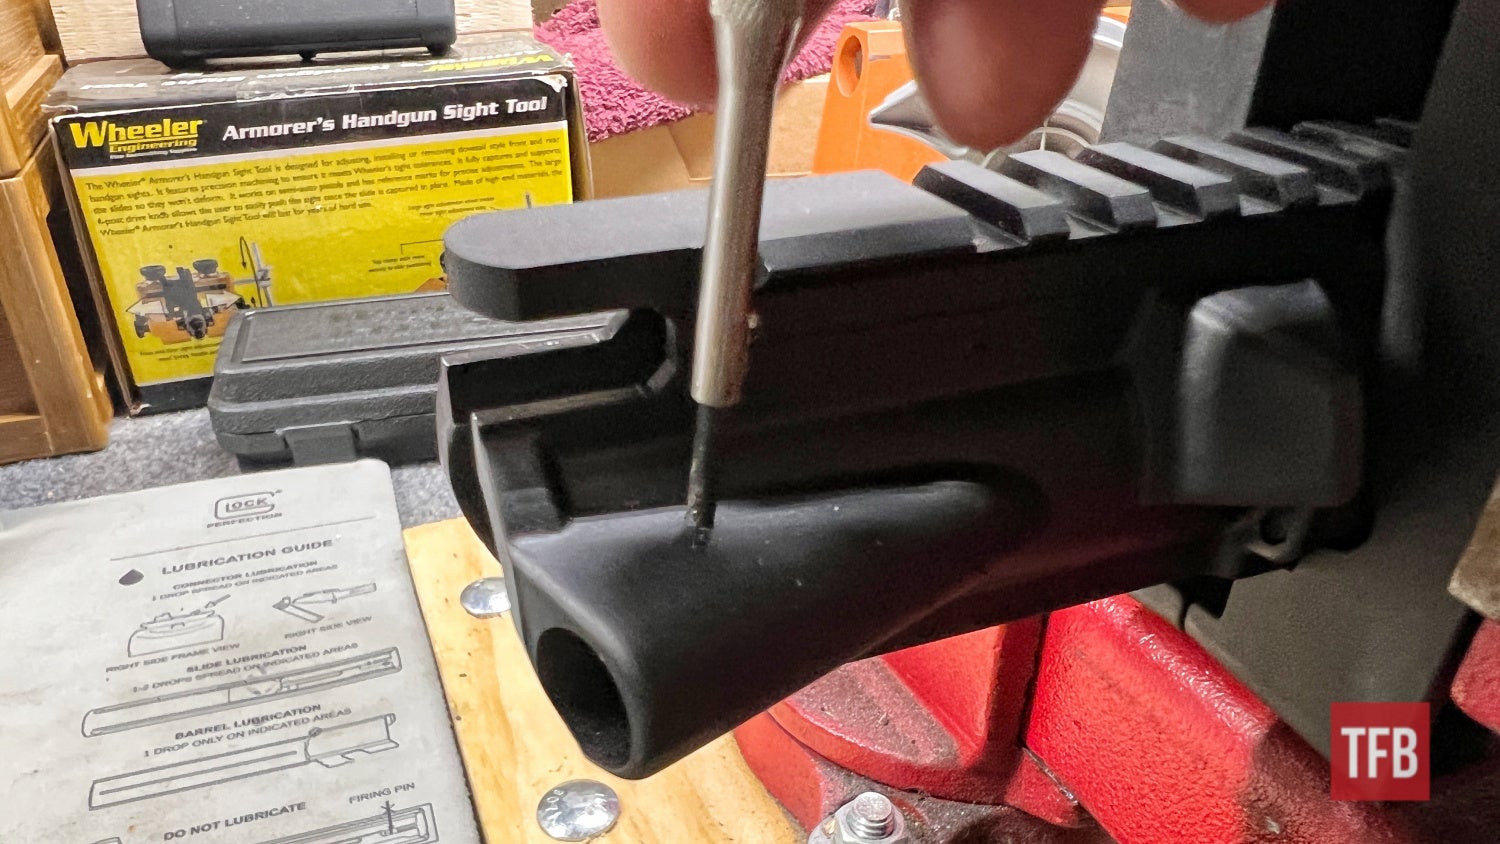
I always start by placing the roll pin just barely in its hole. This way I am not juggling loose parts in the next step.
Note: A roll pin starter punch is extremely helpful in this situation. If you do not have one on hand you can try to hold the roll pin with a set of pliers or vise grips. You can also do the punch/tape method I mentioned in the lower assembly article. The biggest word of caution is never to use a punch that is small enough to wriggle inside of the roll pin. This will widen the roll pin making it tighter in the hole and also capture the punch making everything difficult to remove. I have had to remove these for customers before.
With the roll pin started and stationary, the forward assist spring and button can be inserted.

With the forward assist inserted and in the orientation shown, with the flat side facing the inside of the receiver, push the button down while hammering in the roll pin the rest of the way.
This captures the forward assist and allows it to move back and forth but not fall out.

Step Five: Complete AR15 Assembly – Upper Receiver
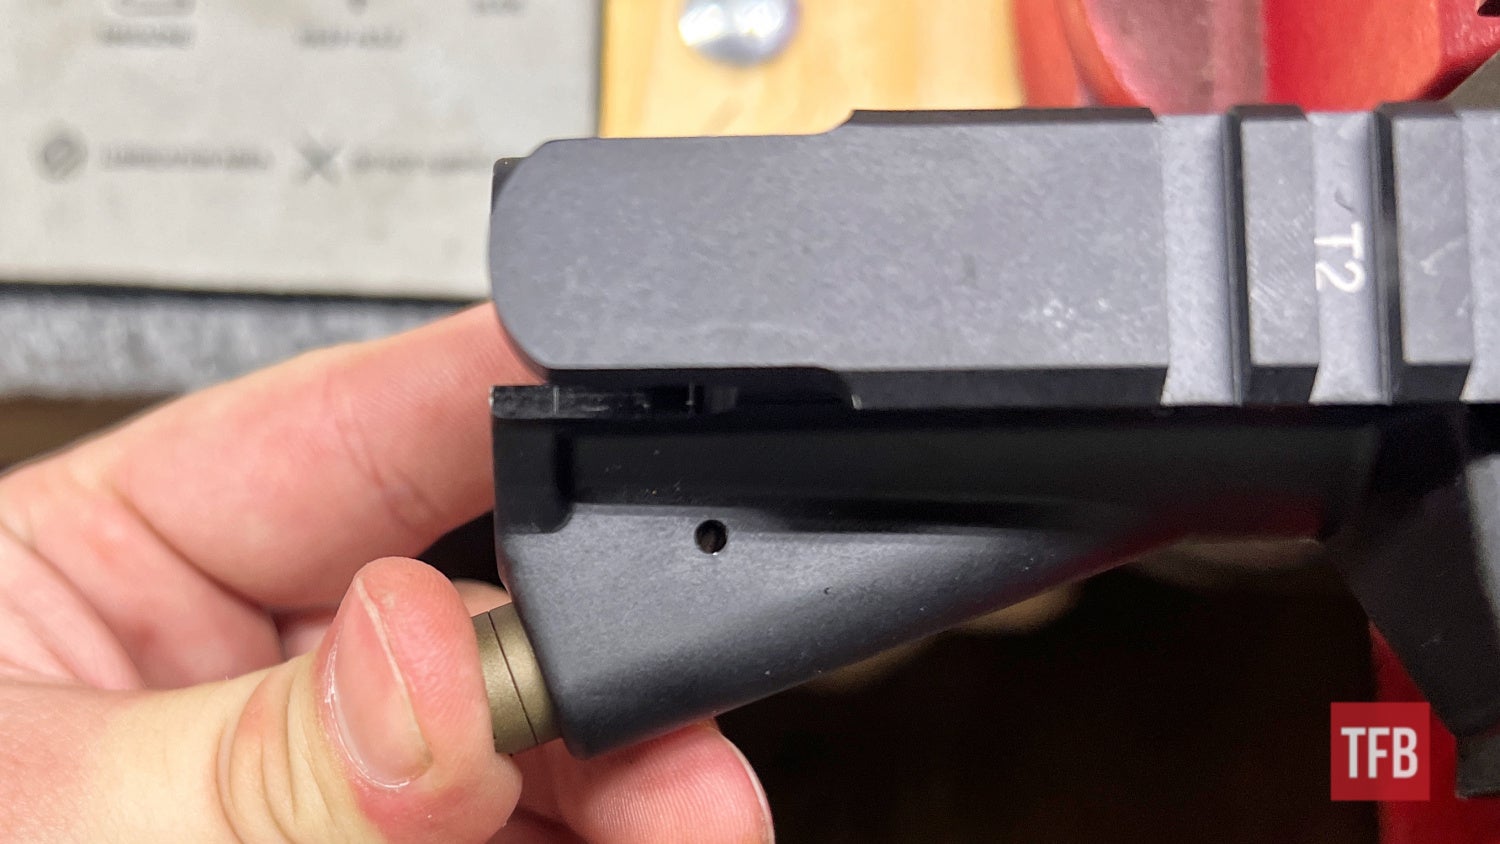
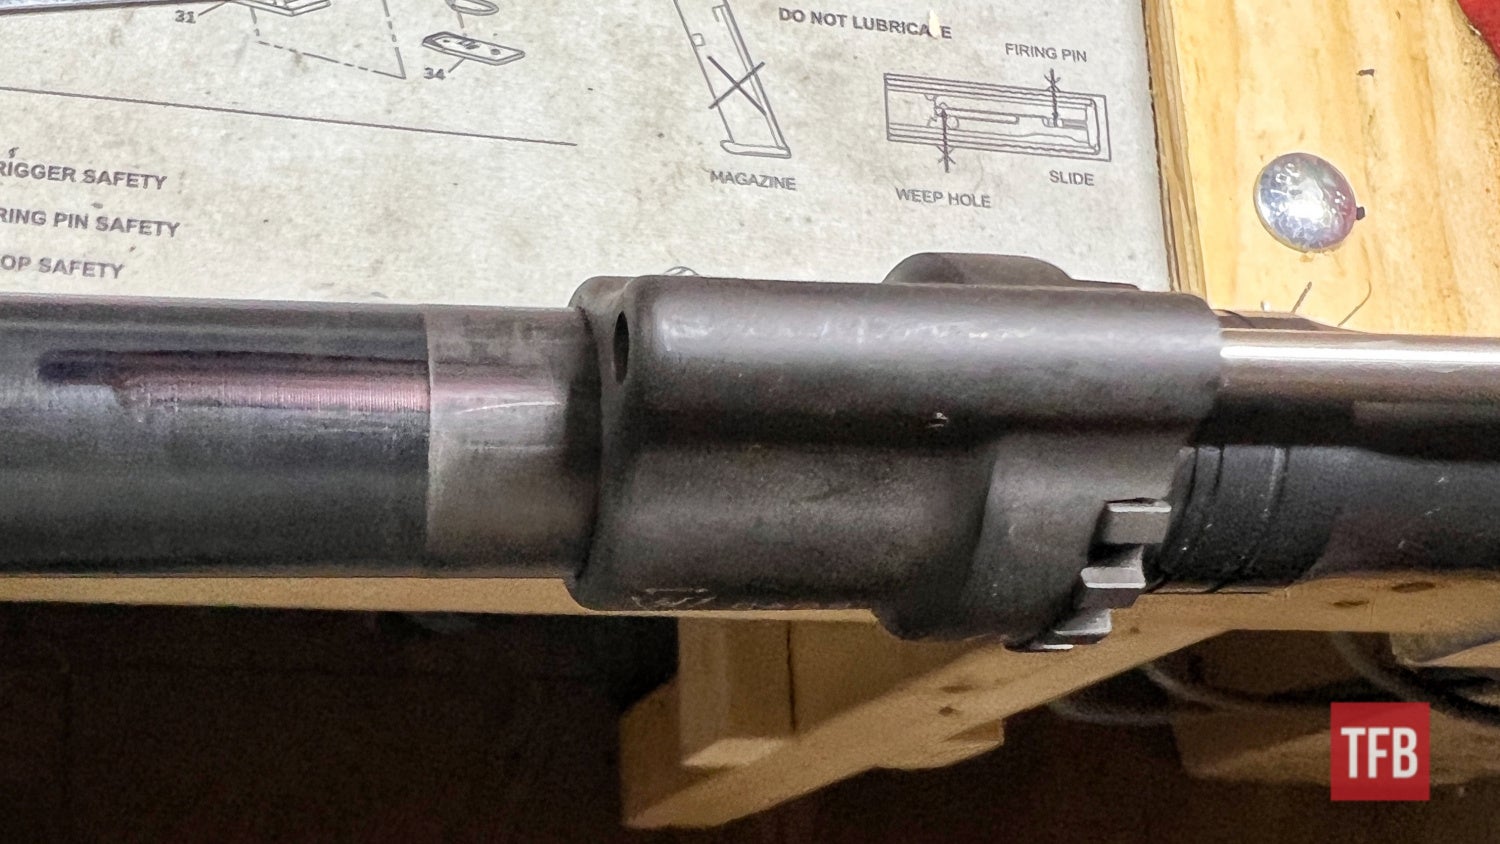
Next is installing the barrel and barrel nut. The barrel is simply inserted as shown. the barrel slides into the receiver and the barrel peg has a corresponding notch to index with.
Note: The use of an upper receiver vise block is highly encouraged.

On this particular receiver’s threads, there was already some leftover Smith & Wesson barrel anti-seize. I suggest you apply some. Muzzle loader breach plug anti-seize works very well.
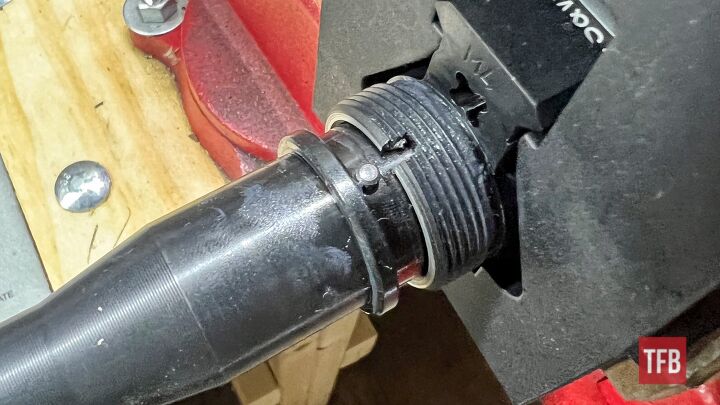
Slide the barrel nut down the barrel and begin to thread it onto the receiver. If you have trouble, I suggest removing the nut and evaluating the threads in the nut and receiver. The littlest bits of debris can cause a hang-up and even damage the threads if forced.
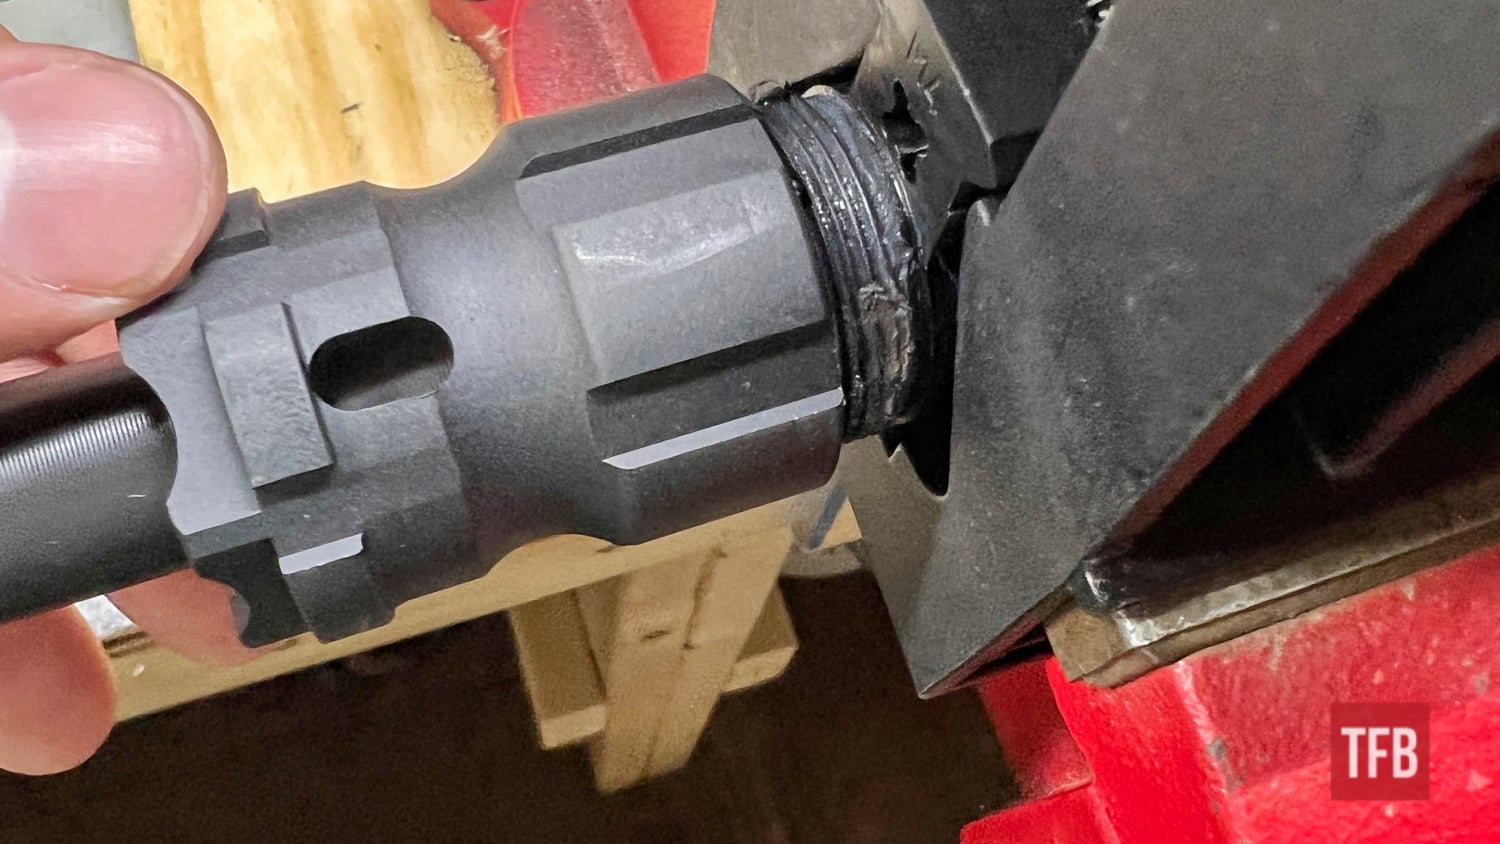
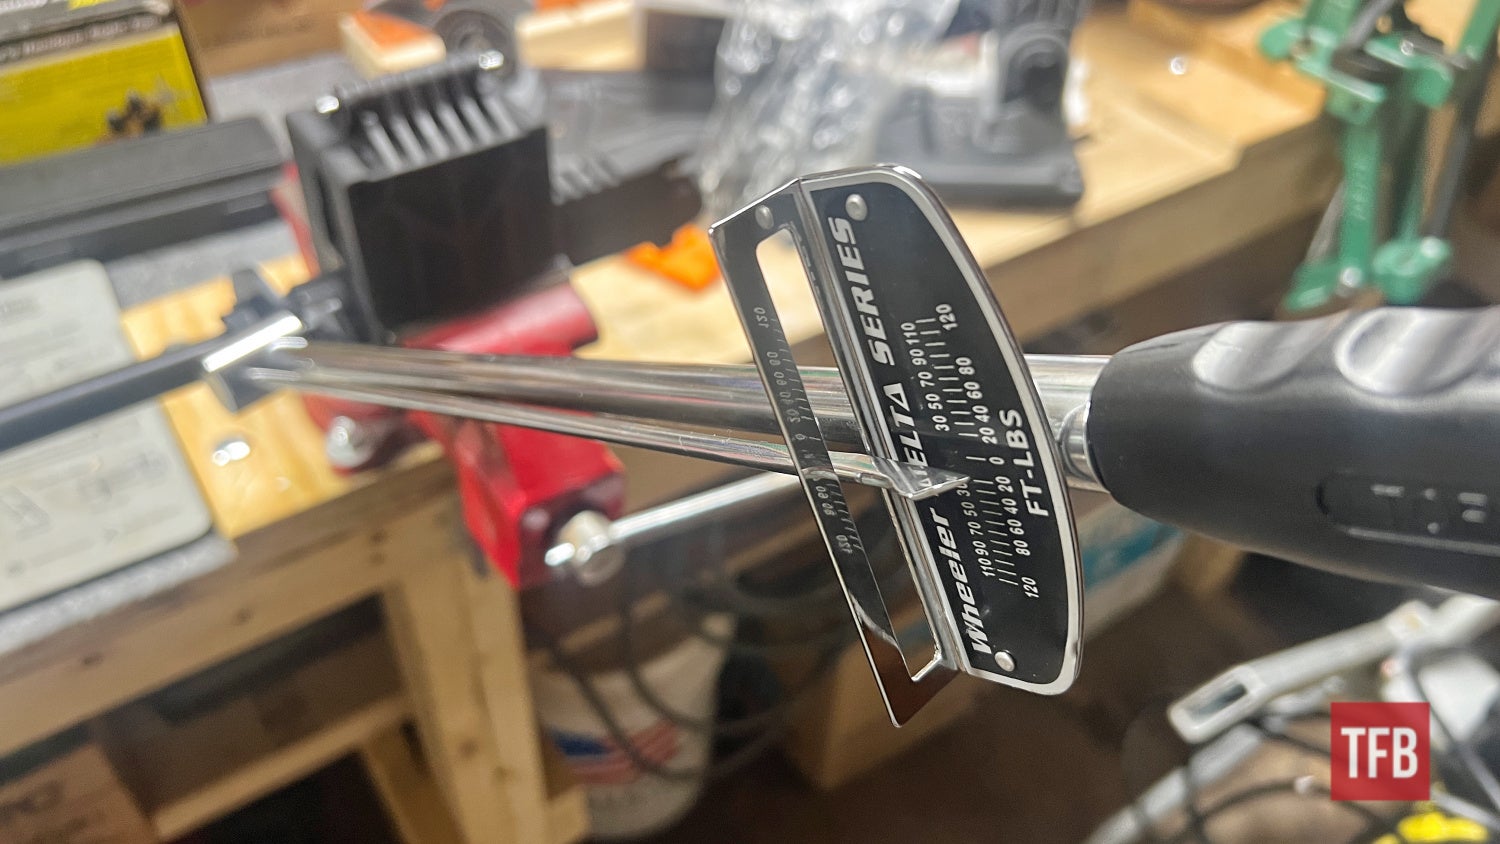
With the barrel nut threaded all the way, consult the manual or instructions for whatever brand of the part you are installing. They will usually have the same sort of torque specifications but it is always safer to check. The Strike Industries barrel nut for the Gridlok handguard asks for 30 to 50 foot-pounds. This can be felt out by hand but I do not recommend rolling with feel. Use a torque wrench.
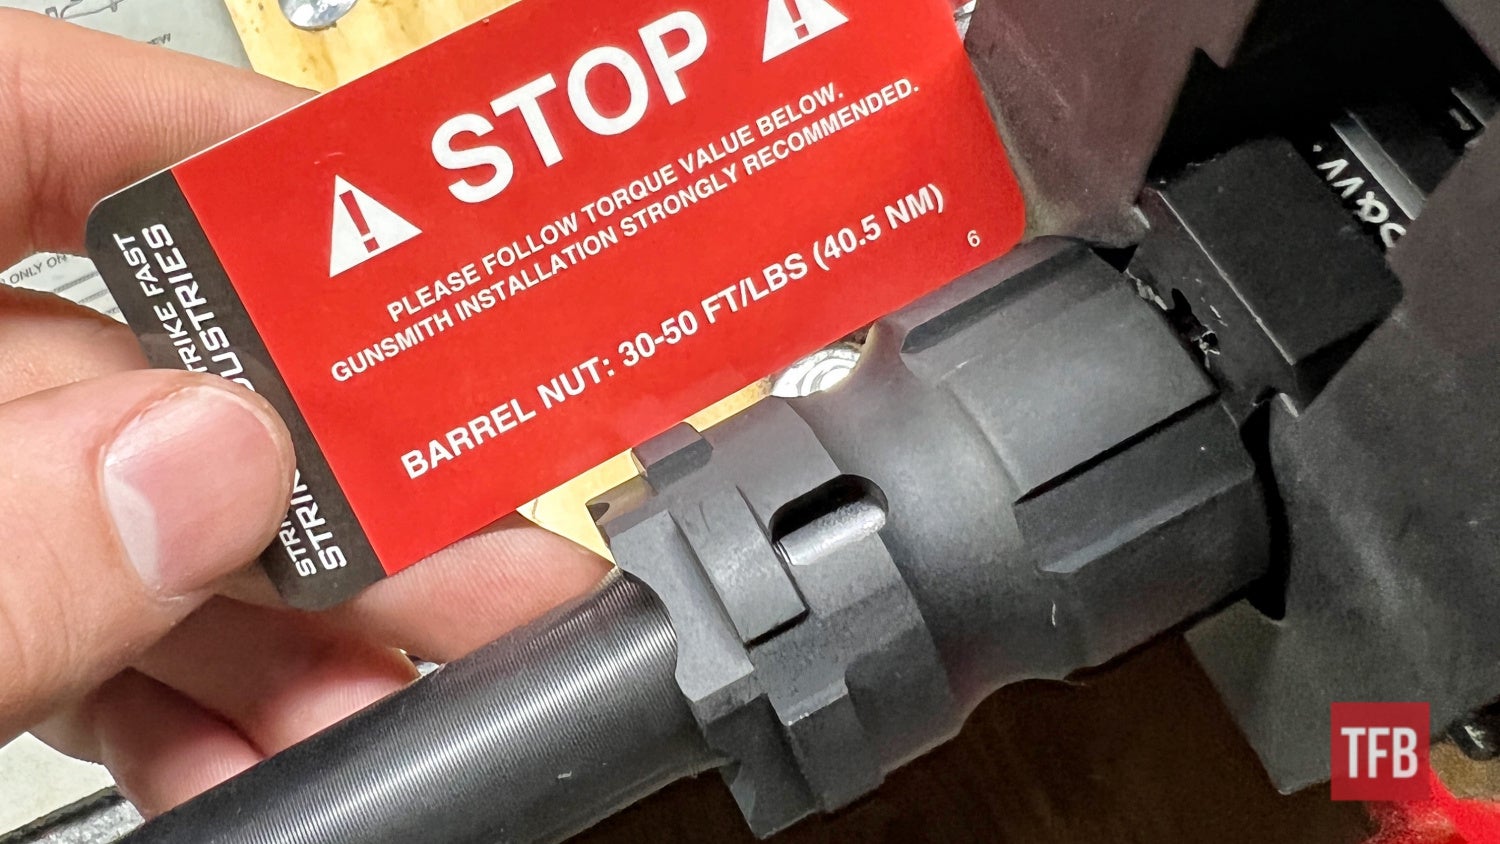
Wheeler offers a simplistic but useful one that will plug into just about any AR15 armorer’s wrench.
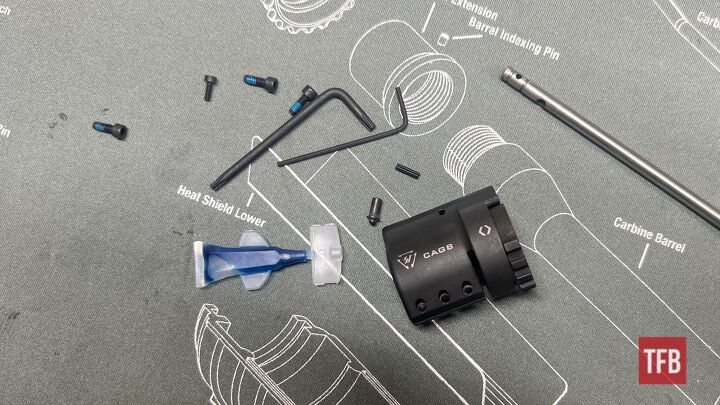
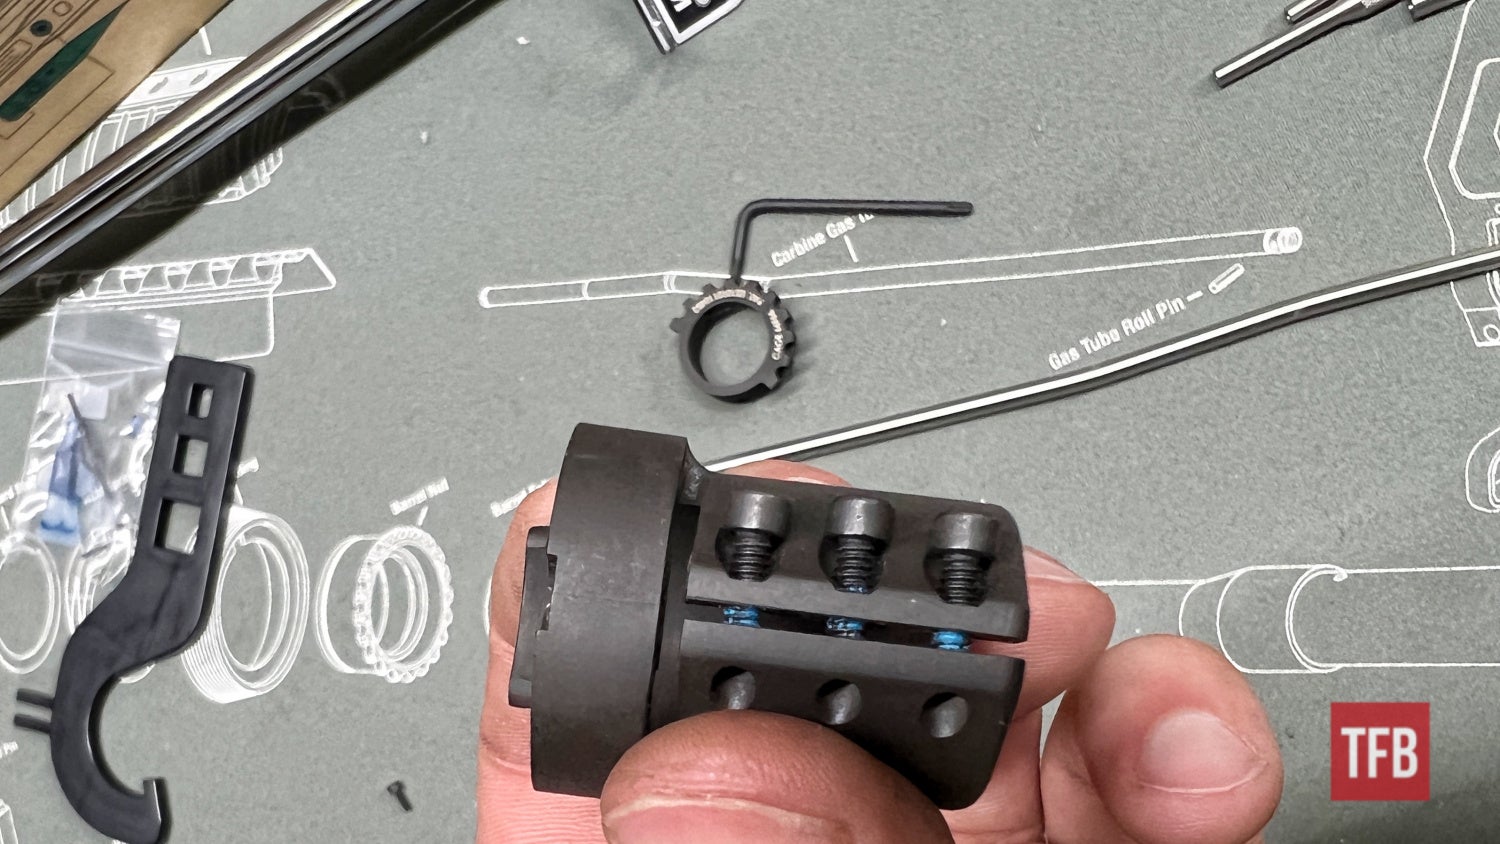
Now onto the gas block. This particular gas block is a Strike Industries adjustable gas block. Adjustable gas blocks are very handy when working with suppressors and overall calibrating the correct amount of gas in the system. The parts of this adjustable gas block consist of the gas block body, the adjustment ring, adjustment ring set screw, three set screws/clamp screws, an indexing peg with a spring-loaded plunger, and a roll pin to attach the gas tube to the gas block.
First following Strike Industries instructions, I installed the adjustment ring set screw into the adjustment ring.
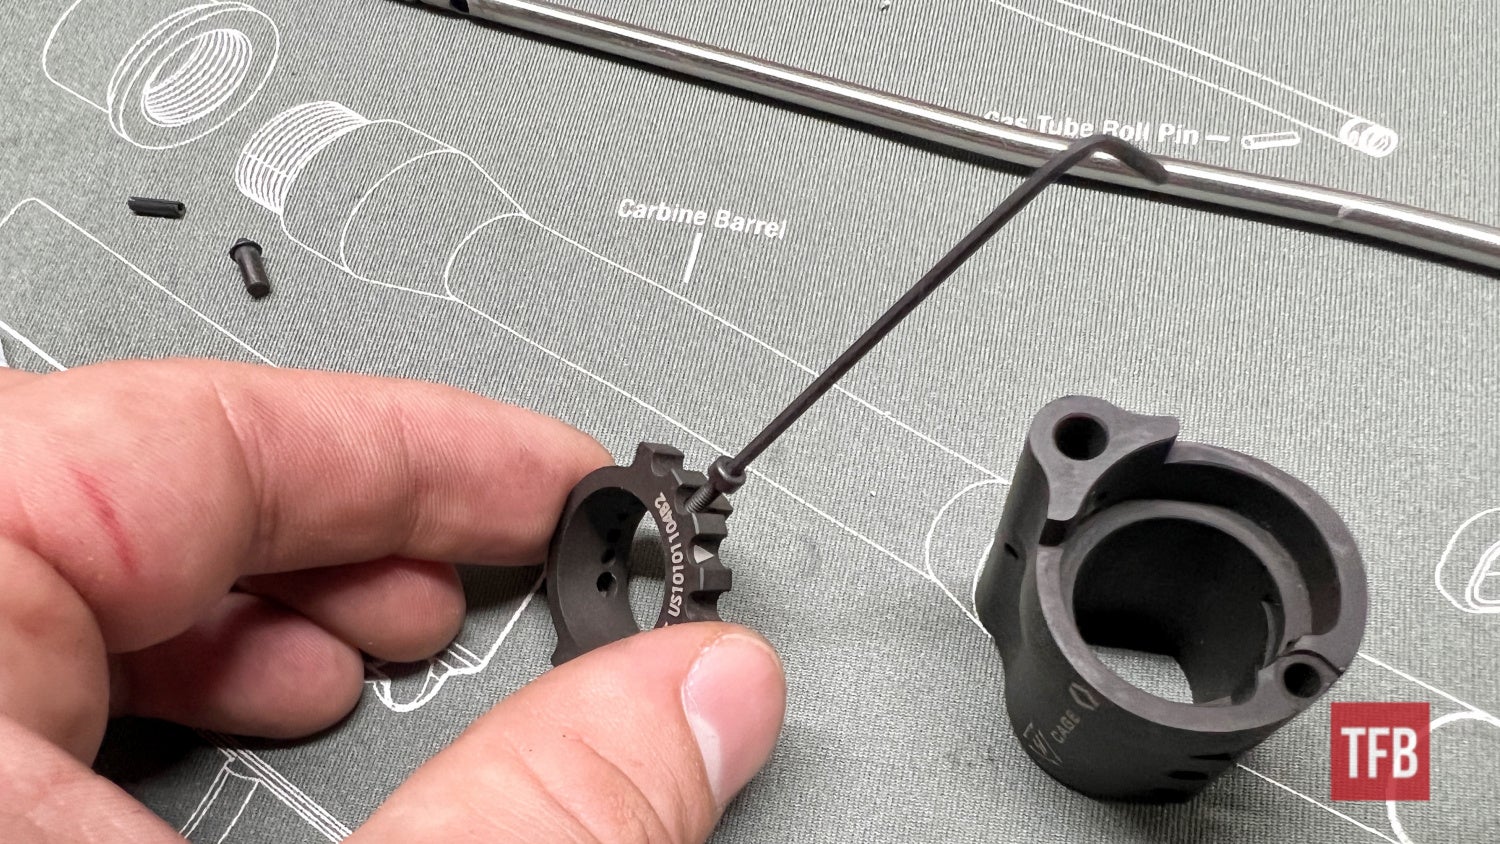
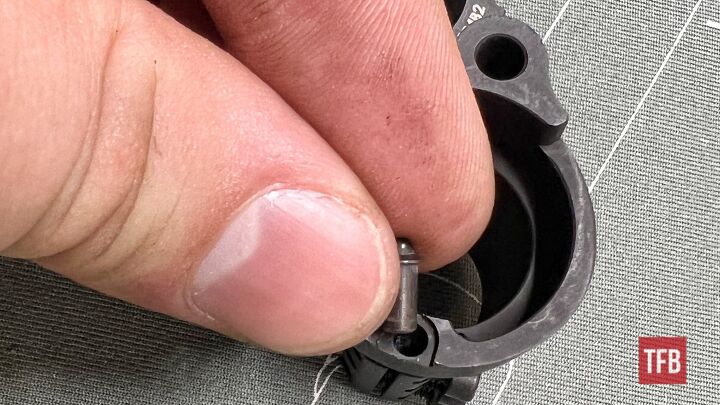
Then I installed the indexing pin into the gas block. It simply presses into the block.
Next, I threaded the gas block set screws into the gas block partially.
The gas block adjustment ring can be installed before or after installing the gas tube. I opted to install it after. One less moving part to work around.

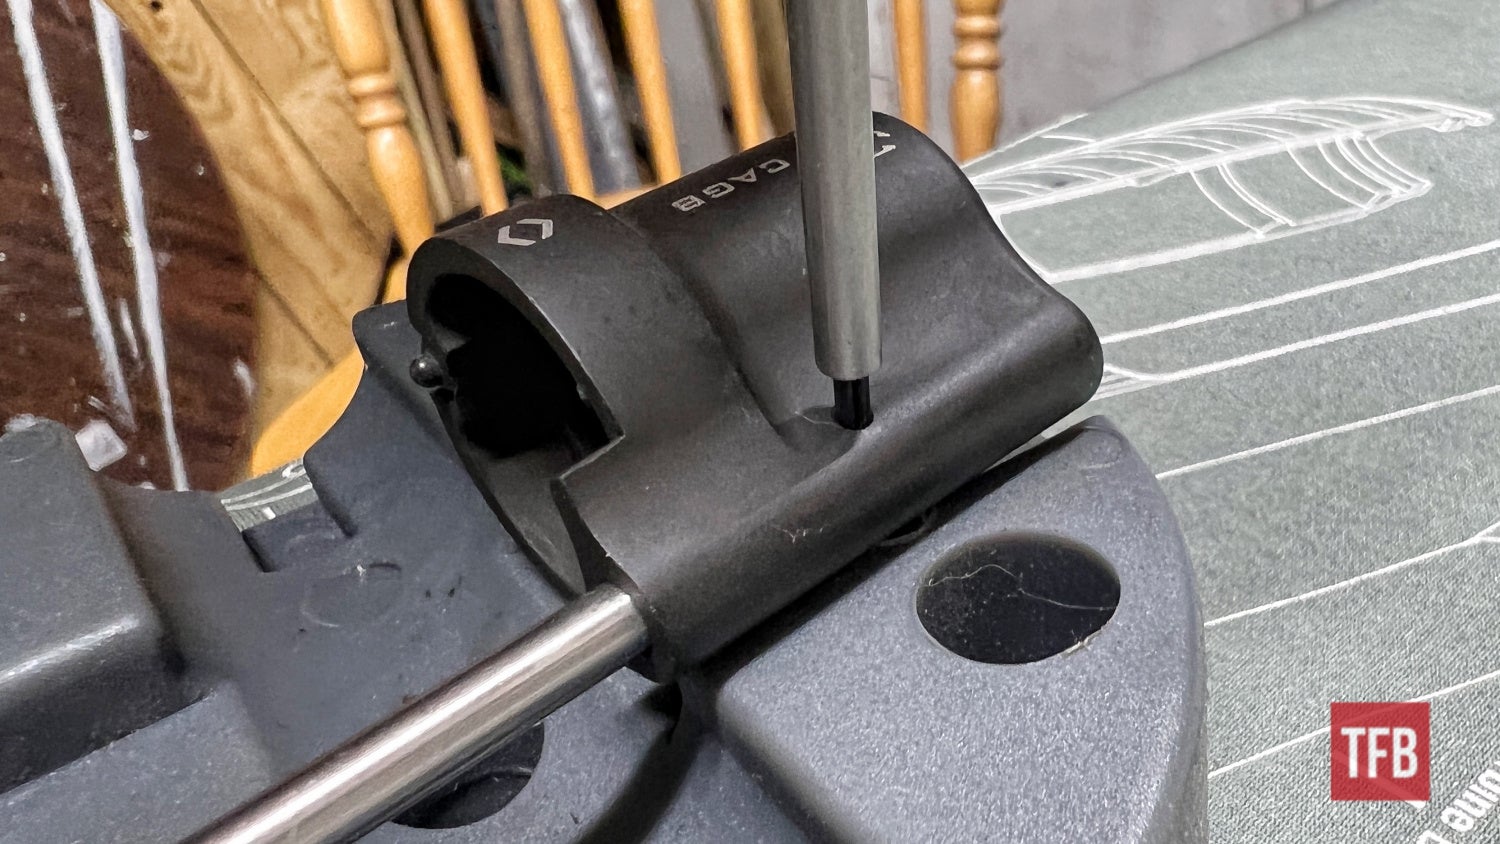
Now onto installing the gas tube into the gas block. The gas tube will be in this orientation with the larger one-sided hole facing into the gas block. This is the hole that gas is forced into. The hole that goes straight through is meant for the roll pin.
Note: The gas tube has a deliberate bend in it. Do not attempt to straighten it.

Installing the gas tube in the gas block can be tedious. Insert the gas tube so the holes for the roll pin are seen through the gas block hole as shown.
Note: Depending on the gas block, you can go too far or not far enough. Installing the roll pin when the gas tube is too far or not far enough will cause damage to your gas tube and potentially cause the pin and tube to become stuck.

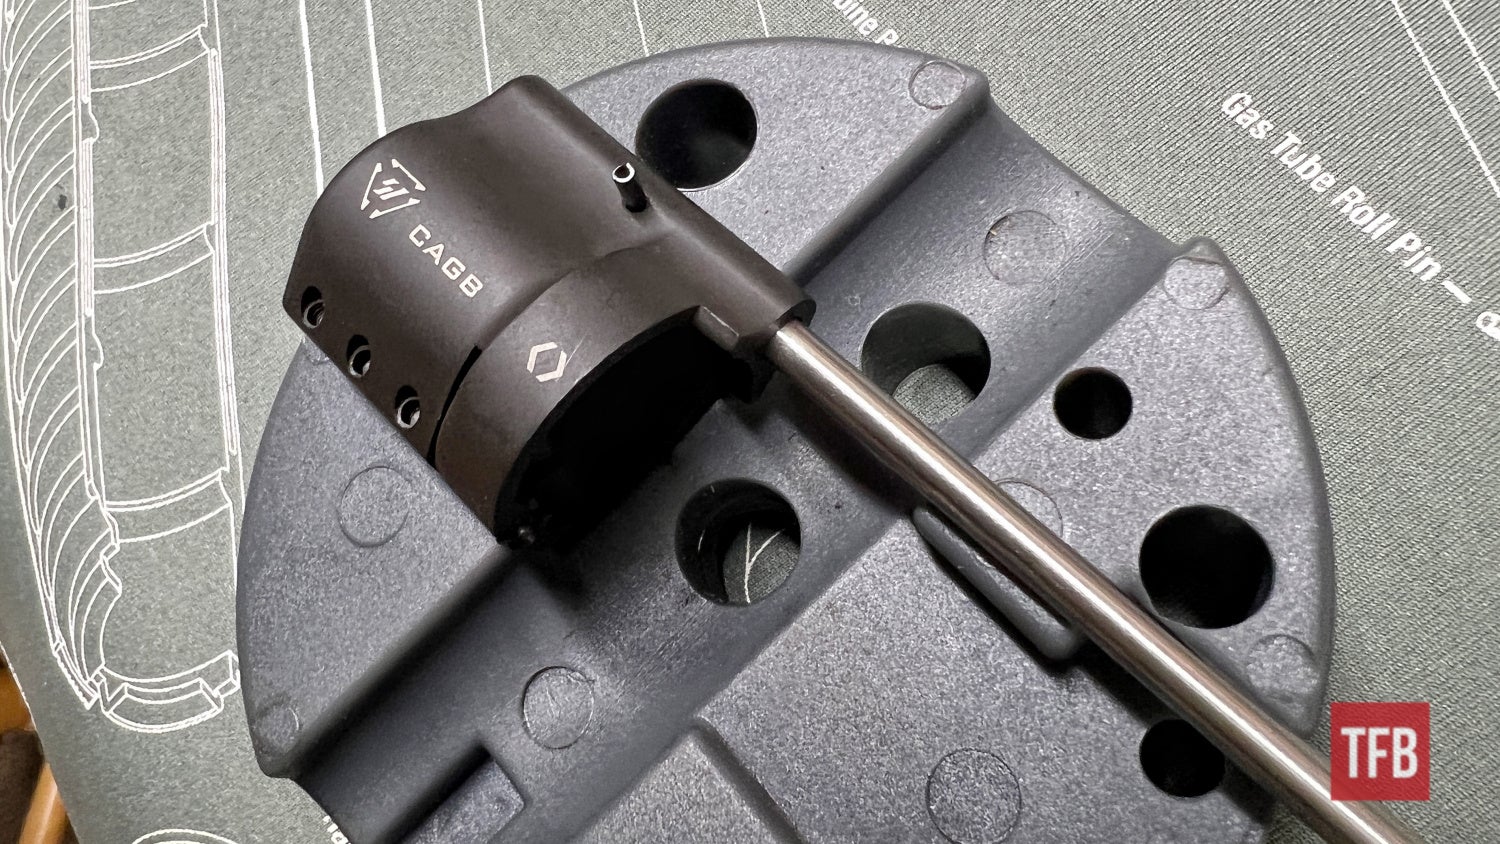
Use a roll pin starter punch to assist in the initial installation.
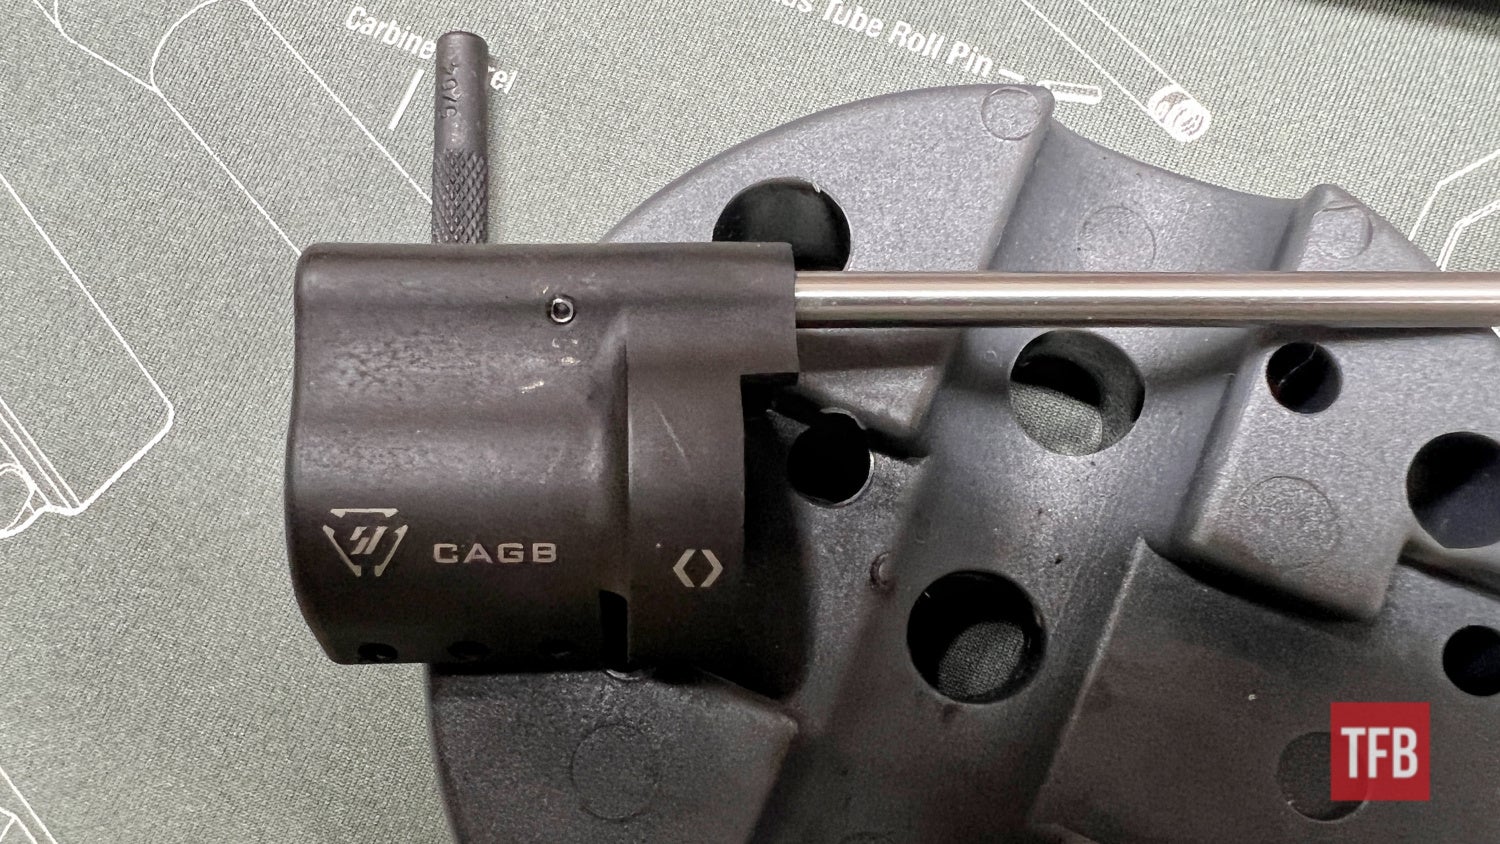
Once started, you can swap to a hammer (an appropriately sized one for the job) and pound the pin in the rest of the way.
Note: Remember if a pin going in the correct way is not moving, the answer is not to hit harder but to get a bigger and heavier hammer.
Make sure to check out the “TFB Armorer’s Bench: Tips and Tricks – AR15 Gas Blocks” article for more gas-block-related information.
Step Six: Complete AR15 Assembly – Upper Receiver
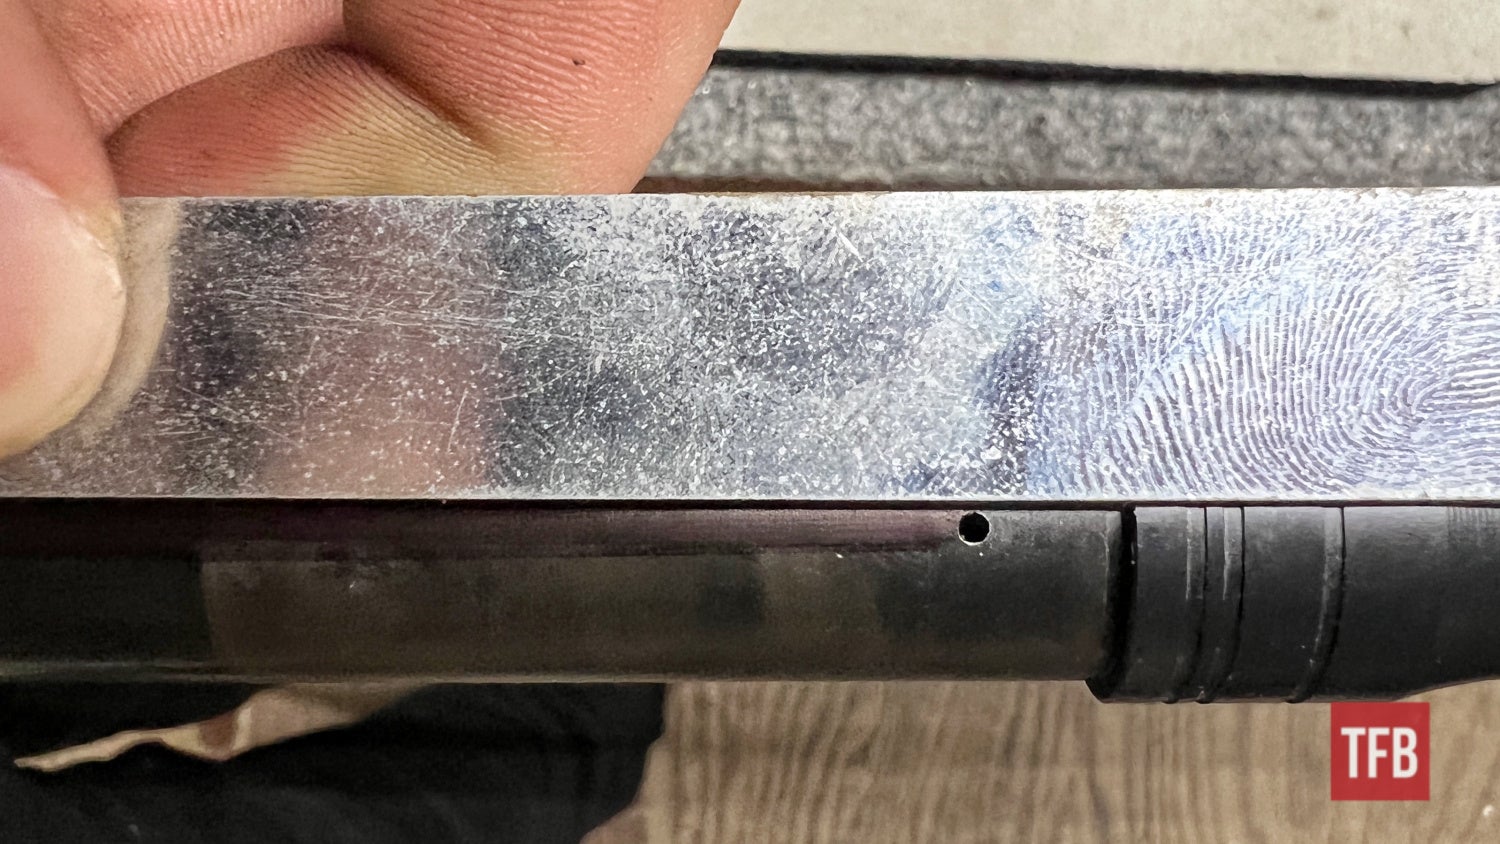
Installing the gas block/gas tube assembly onto the upper receiver is a quick and easy step. Most barrels will have a built-in stop or wider diameter portion that the gas block will perfectly butt itself up against. If you are concerned with the alignment you can use something with a straight edge to draw a line from the hole in the barrel down the barrel.
The gas block slides down the barrel and the gas tube goes into its recess in the receiver.
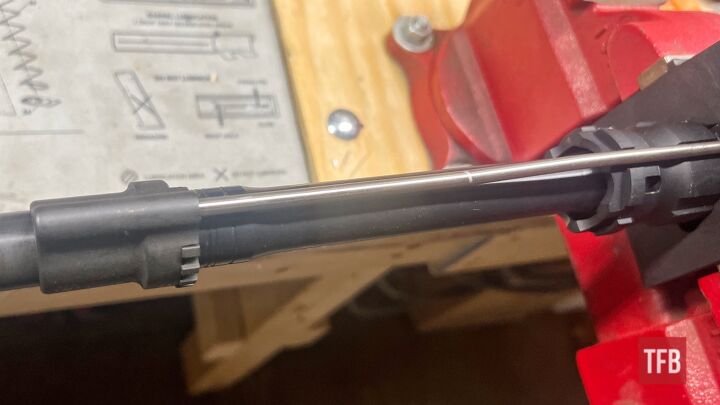
With the gas block/gas tube assembly slid on and centered we can now tighten the set screws.

Step Seven: Complete AR15 Assembly – Upper Receiver
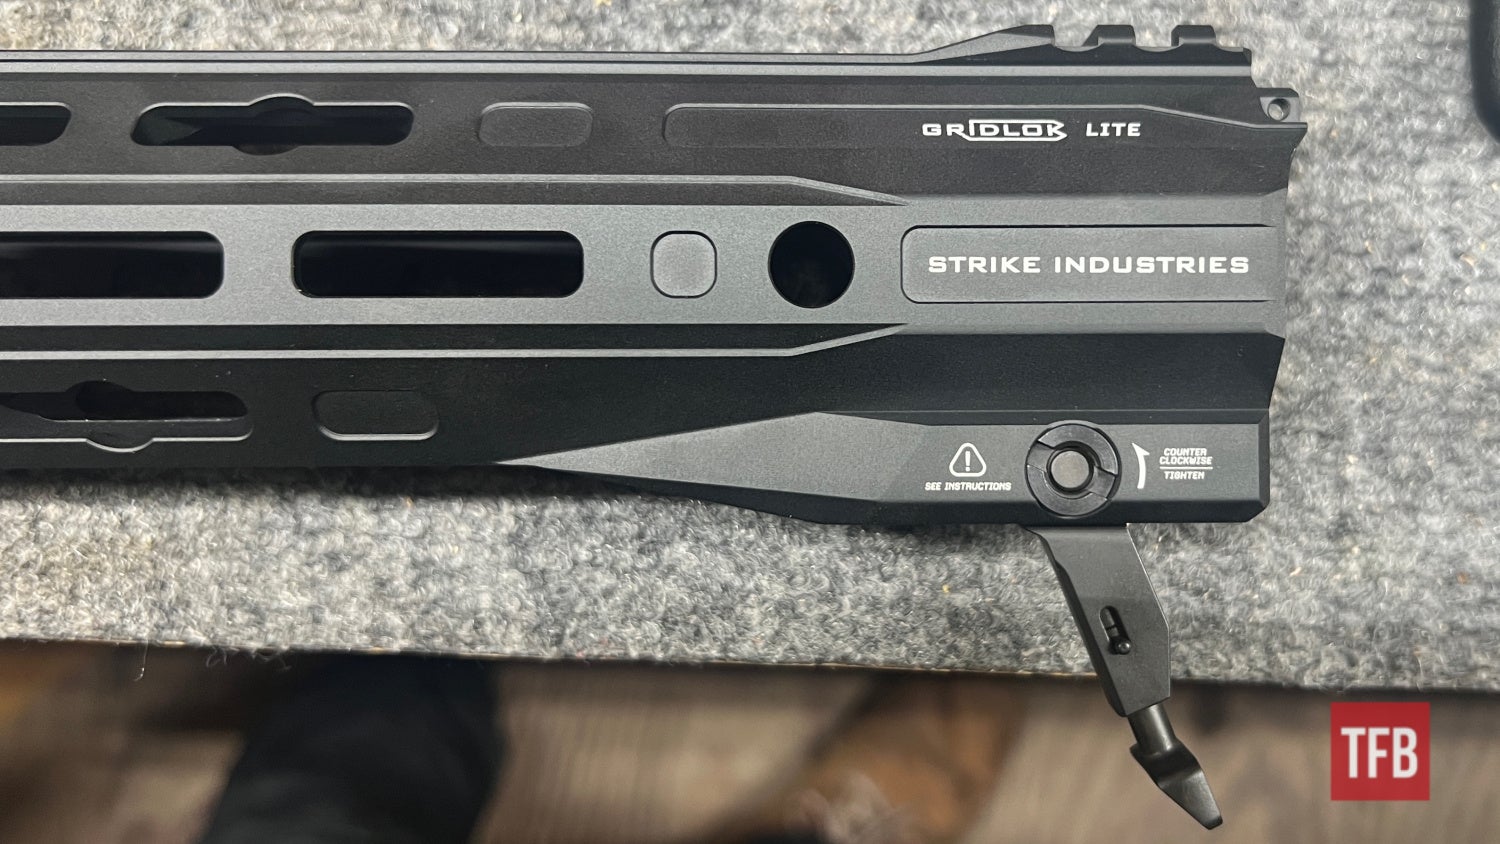
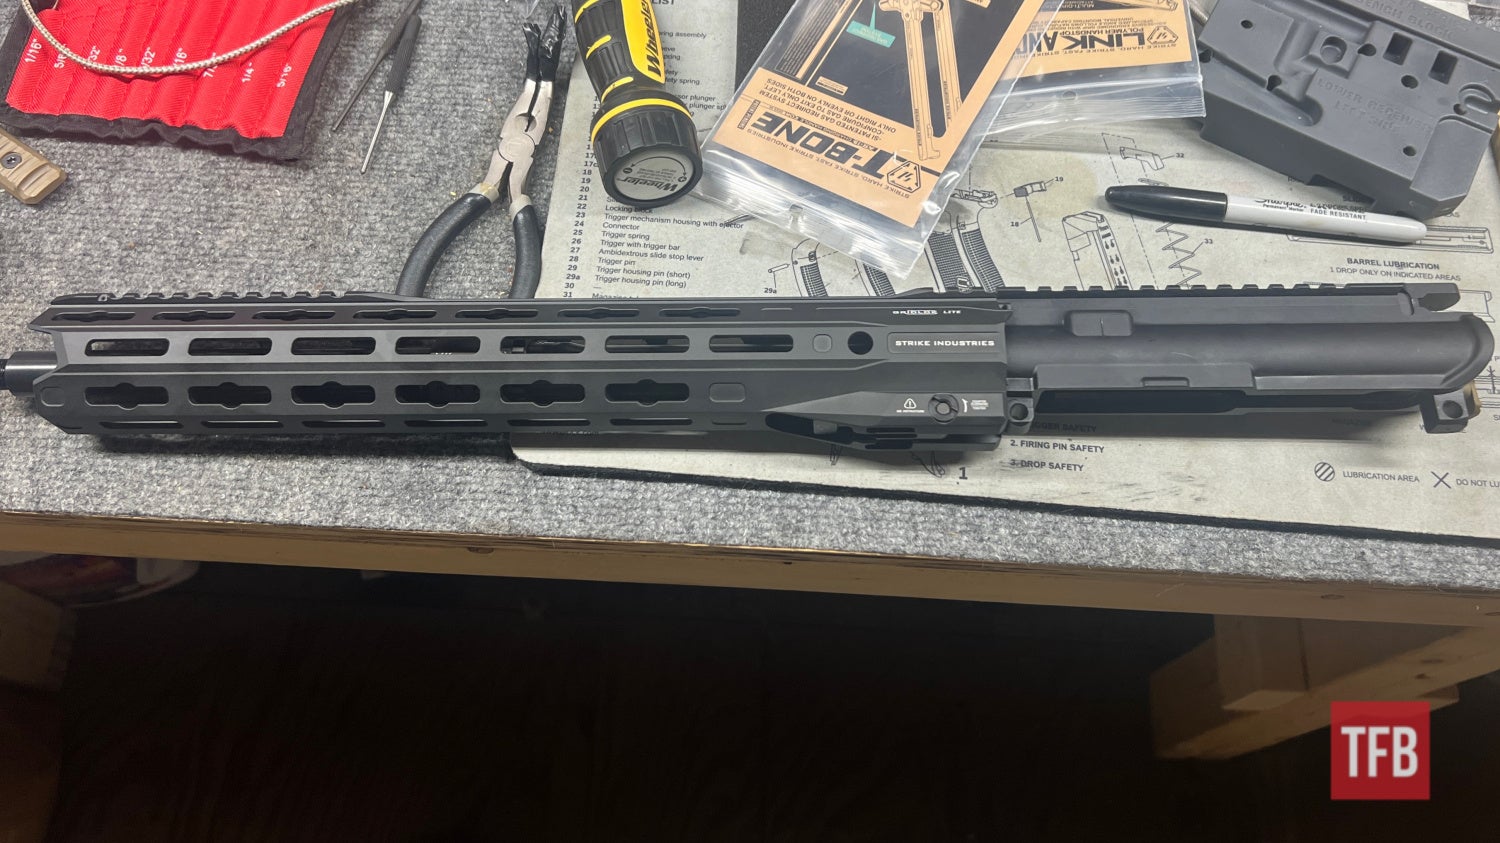
Next up we install the free float handguard which is an extremely common AR15 upgrade. This one from Strike Industries is a quick attach handguard of sorts. It is extremely handy to remove in the field in order to adjust the gas block on the fly. Most generic sets of free float handguards will be secured by set screws that tighten around the barrel nut. This one simply has a spring-loaded lever at the bottom that can be flipped out to remove or install and then flipped flush to lock in.
Step Eight: Complete AR15 Assembly – Upper Receiver
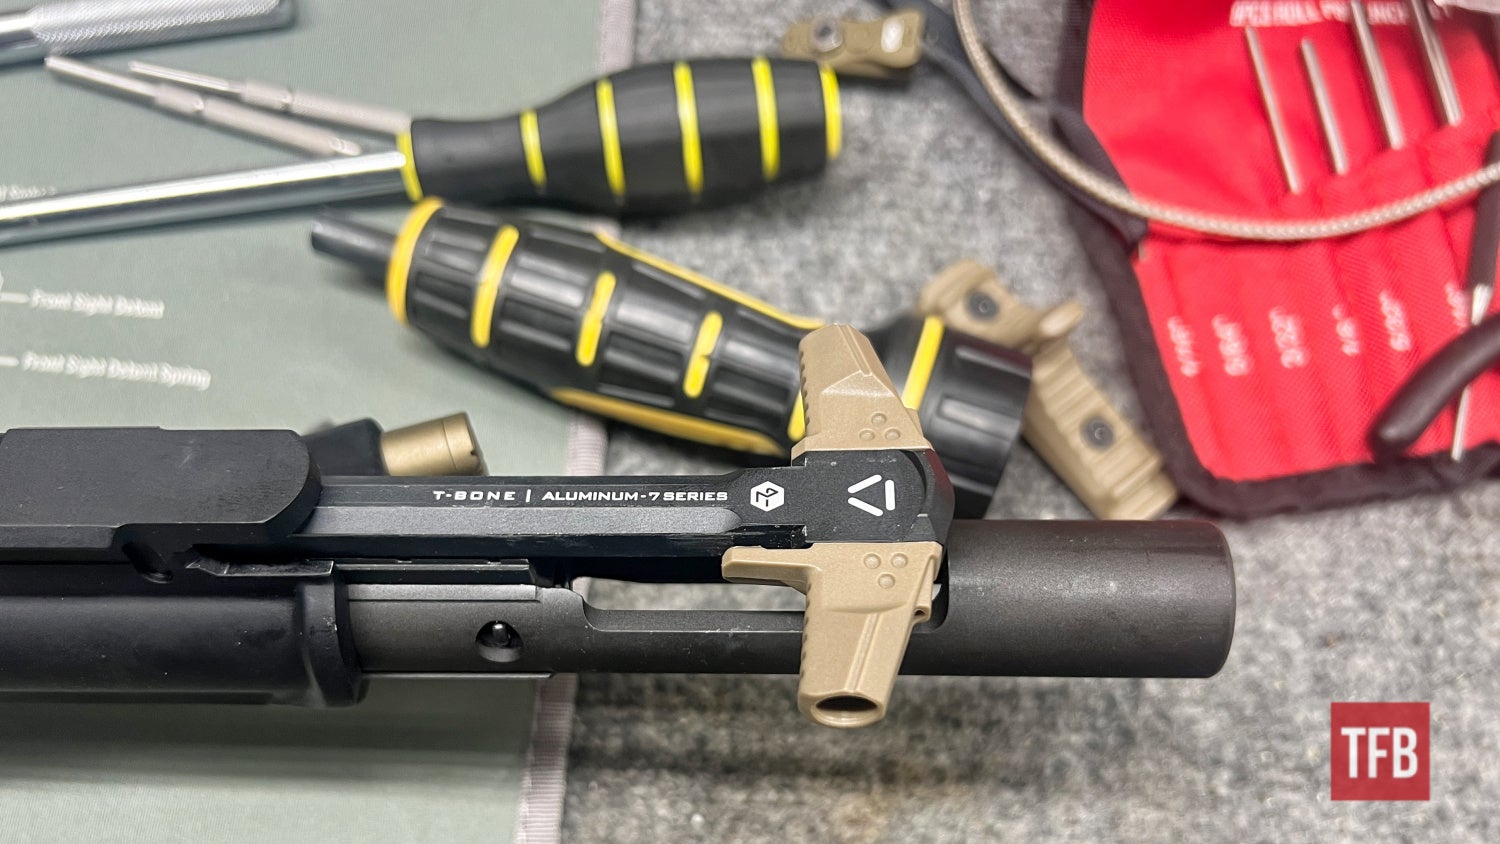
Finally, we can install the bolt carrier group and charging handle. The charging handle gets installed first. The charging handle has a built-in ridge and corresponding recess in the receiver which prevents it from coming straight out the back. Sliding the charging handle stem into the receiver until you feel it di into the recess is as far as you should go until you install the bolt carrier group.

With the charging handle sticking out the back slightly, insert the BCG underneath and into the receiver. Both pieces will click into place when fully installed.
Honorable Step: Complete AR15 Assembly – Upper Receiver
You may have noticed that I opted not to showcase the installation of a muzzle device. This is mostly because the one intended for this build has yet to show up. Not to anyone’s fault but my own. That being said, I will leave this information: certain brands of muzzle devices may specify a torque specification. If they do not, then refer to mil-spec muzzle device torque specifications which are 15 to 20 foot-pounds.
End of The Upper: Complete AR15 Assembly – Upper Receiver
That is that, folks! I apologize if that last part is not clearly stated. I found it odd how hard it was to think of an explanation for the easiest and simplest installation in this whole part. Nonetheless, I hope this was informative and I invite you, readers, once again to list their own tips and tricks or recommendations for anyone out there that needs a hand with an upper or lower assembly, feel free to talk amongst each other in the comments. At some point, I plan to do a separate tips and tricks article! Keep in mind that some folks may be new to this sort of thing and be considerate of any questions they may have. Thanks for tagging along and see you next time!
As always, thank you for reading TFB! Be safe out there, have fun while shooting, and we will see you next time for the TFB Armorer’s Bench brought to you by Wheeler, Tipton, Caldwell, and Frankford Arsenal! Also, let us know what you think in the comments below! We always appreciate your feedback.

Pro Range Glasses, Clear

The Caldwell® Pro Range Glasses feature a stylish wrap-around design and are a great choice for all shooters. They feature an adjustable nose piece and temples for all day comfort. The scratch resistant lens meets ANSI Z87.1 standards and offers 99.9% UV protection.
72 Piece Professional Gunsmithing Screwdriver Set

The Wheeler 72 Piece screwdriver set features 54 hollow-ground flat bits, 4 phillips, 3 torx, and 8 specialty bits all made from durable S2 tool steel with a 56-58 Rockwell “C” hardness rating. The precision-engineered bits have a concave shape that allows for insertion all the way into the screw slot of rmaximum contact to prevent burred, buggered, busted up screw slots. The kit also includes 2 non-slip, overmolded plastic handles that come in a convenient hinged storage case whcih includes a bit location guide.
AR Armorer’s Bench Block

Tired of trying to secure your AR parts while installing a pin, detent or spring? The AR-15 Bench Block is the answer! Specifically designed for AR-15 assembly and disassembly, the AR-15 Bench Block is the perfect tool. It securely holds the upper receiver, lower receiver, front sight and charging handle during assembly, disassembly and maintenance.
Hammer and Punch Set, Plastic Case

The Wheeler® Hammer and Punch Set includes a polymer/brass combination hammer, eight precision brass punches, four steel punches and two plastic punches. It comes in a handy molded case. It makes for a great tool for driving pins or drifting sights at the shooting range, or on your gunsmithing bench.
AR Bolt Catch Install Punch Kit
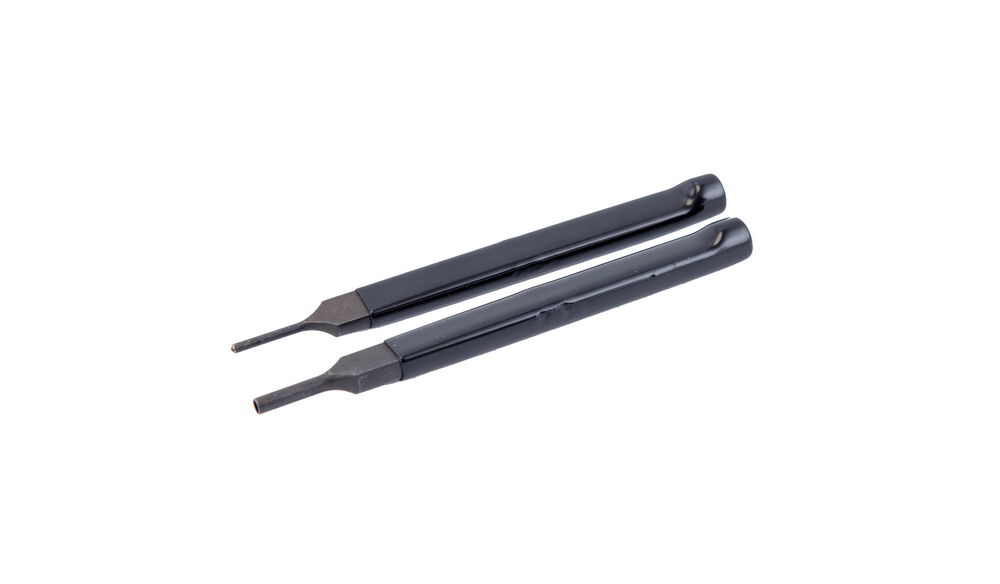 Wheeler® Engineering Bolt Catch Install Punch Kit starts bolt catch roll pins easily with the starter punch and finishes installation flush with the finishing punch.
Tipton ULTRA GUN VISE
The Tipton® Ultra Gun Vise features a completely modular interchangeable design to allow virtually any shape firearm or crossbow to be cleaned and worked on with ease. The ball and socket articulating clamp pads allow for the pads to adapt to any surface. The dual clamp technology rigidly holds any firearm shape in place, while the rigid steel tube frame structure allows for complete access to your firearm or crossbow. The front and rear clamps are both height and length adjustable, and feature fast-turn knobs allowing for quick clamping. The solvent-resistant accessory and tool trays are movable and removable to stand up to even the toughest jobs.
Wheeler AR Armorer’s Ultra Kit

Ultra Kit includes: AR-15 AR Armorer’s Vise, AR-15 Combo Tool, Torque Wrench, AR-15 Armorer’s Bench Block, AR-15 Roll Pin Installation Tool Kit, Upper Vise Block Clamp with Gas Tube Alignment Tool, Maintenance Mat with Exploded AR-15 Diagram, Pivot Pin & Roll Pin Installation Tool, AR Front Sight Tool, Delta Ring Tool, Strap Wrench, AR-15 Bore Guide, AR-15 Adjustable Receiver Link, .22 Cal Bore Brush, Bolt Carrier Brush, Chamber Brush, Magazine/Upper Receiver Brush, Nylon Brush Handle, Double-ended General Cleaning Brush, Cleaning Pick Set, and Custom Fitted Carrying Case.