 Your Privacy Choices
Welcome everyone to the TFB Armorer’s Bench! As mentioned in the little blurb, this series will focus on a lot of home armorer and gunsmith activities. In this article sponsored by Wheeler, Tipton, Caldwell, and Frankford Arsenal, we’ll show how to completely assemble an AR15 lower receiver. Previously, I covered the disassembly of the lower receiver, bolt carrier group, and upper receiver. I am well aware that most of the folks who pass through these parts are into the new, cool, and tacticool. I personally love older and obsolete stuff but I also like to take things apart and put them back together. That being said, we here at TFB thought it would be nice to have a resource available for disassembling and assembling an AR15.
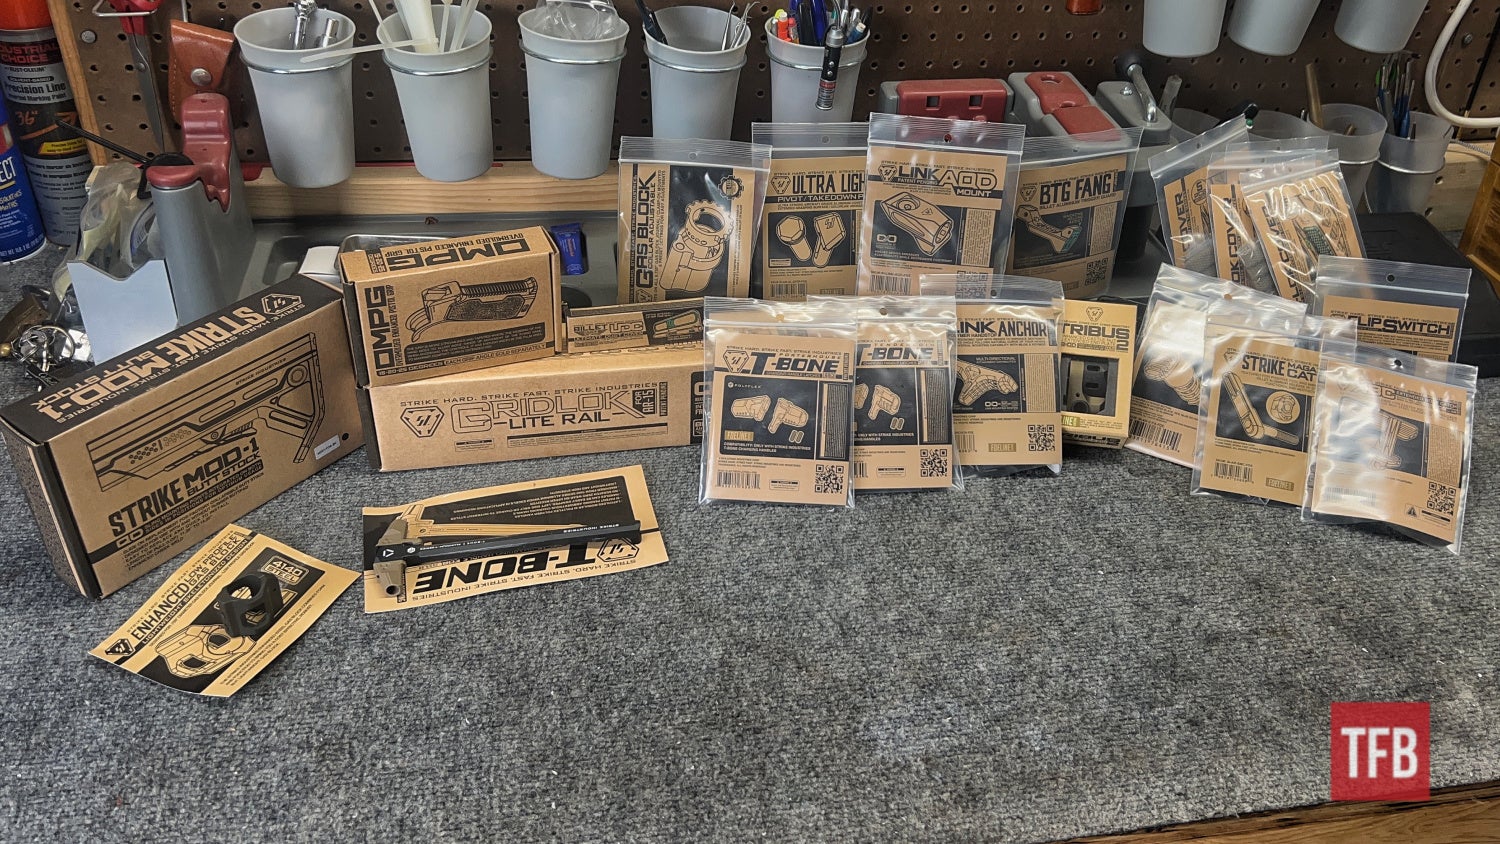
Smith & Wesson was gracious and kind enough to help us out and sent us one of their Sport II models. I asked for a very simple and frequented offering to demonstrate common upgrades and general assembly. Strike Industries has also joined the fold and sent out a whole host of their AR15 parts to showcase in this assembly. Let’s dive right into this Complete AR15 Assembly – Lower Receiver!
Disclaimer: It is stating the obvious when I say do not attempt this if you do not have confidence you can. There is no shame in not taking your assembled gun apart. Consult a competent gunsmith/armorer for advice or if they would do the goal you wish to achieve. Refer to the first Armorer’s Bench article So, You Like Taking Guns Apart? where we talk about knowing your limitations.
TFB Armorer’s Bench: Complete AR15 Assembly – Lower Receiver
Welcome to our recurring series of Armorer’s Bench which is made possible and brought to you by Wheeler, Tipton, Caldwell, and Frankford Arsenal who are our sponsors. Here, we at TFB hope to inform, entertain, and even inspire any would-be gunsmith or armorer out there. Ideally, with the information I provide and with the help of our sponsors, you can have some useful knowledge pertaining to the conservation and improvement of firearms technology while at the same time sharing experiences and teaching each other new tips and tricks along the way in the comments. Digging deep into what it is to be an armorer or gunsmith has significance but what is important is what those people do to show they’ve earned that title. I am happy to share my experiences and knowledge and hope it is informative!
Make your personal safety a priority:
- Practice proper gun safety. Always make sure before the firearm hits your bench that it is unloaded and safe to be handled.
- Wear the proper safety equipment. The main one would be safety glasses (decent ones) since parts are often under spring tension and you may work with high RPM tools. Other honorable mentions would be latex gloves or a respirator when working with potentially harmful solvents and oils. Also hearing protection when working with loud machinery or test-firing firearms.
- Modifications, alterations, and customizations will void your firearm’s warranty 9.5 times out of 10. Please take that into consideration before attempting any at-home gunsmithing.
- If you are unsure about proper safety practices, disassembly procedures, or warranty standards, stop, put down the tools, and consult a competent gunsmith.
Step One: Complete AR15 Assembly – Lower Receiver
The first thing is first! Safety. Yes, I know safety is boring and sooo mainstream but bear with me. Make sure your ammunition is stored and away from your bench. If starting out with an assembled firearm make sure to check the chamber, magazine, and space between. Then check again. As far as PPE, I highly recommend wearing safety glasses at the very least. Multiple parts in an AR15 are under spring pressure and are commonly flung across a room and it would sure suck to take one to the face or eye.
Step Two: Complete AR15 Assembly – Lower Receiver
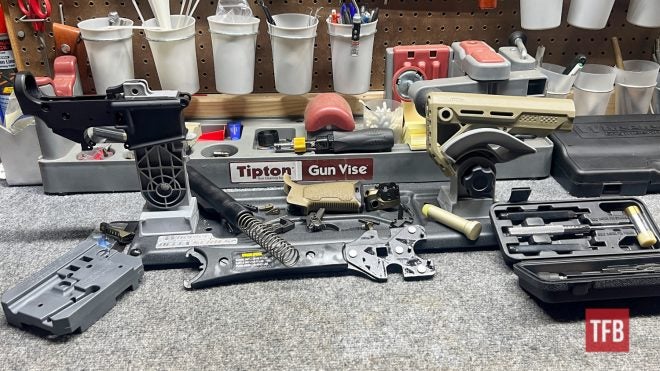
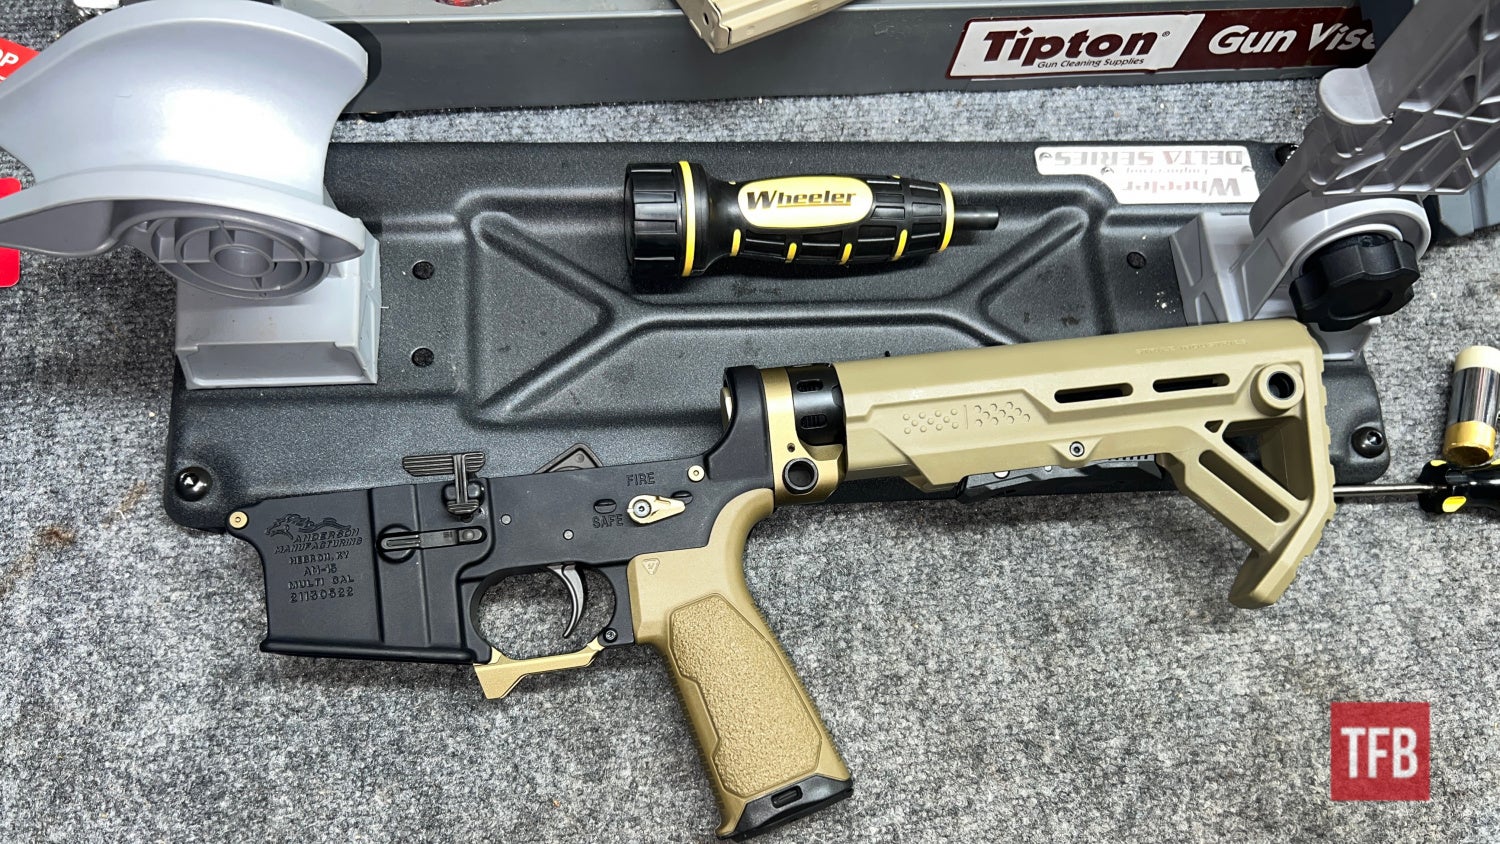
Now that safety is out of the way, let’s make sure we have all of our parts. This time we have a mix of original Smith & Wesson Sport II parts, Strike Industries, and Anderson. As far as I know, there is not really a correct part to start with so take these “steps” more as mini demonstrations of how to install certain parts. Obviously, some need to be installed before others.

Step Three: Complete AR15 Assembly – Lower Receiver
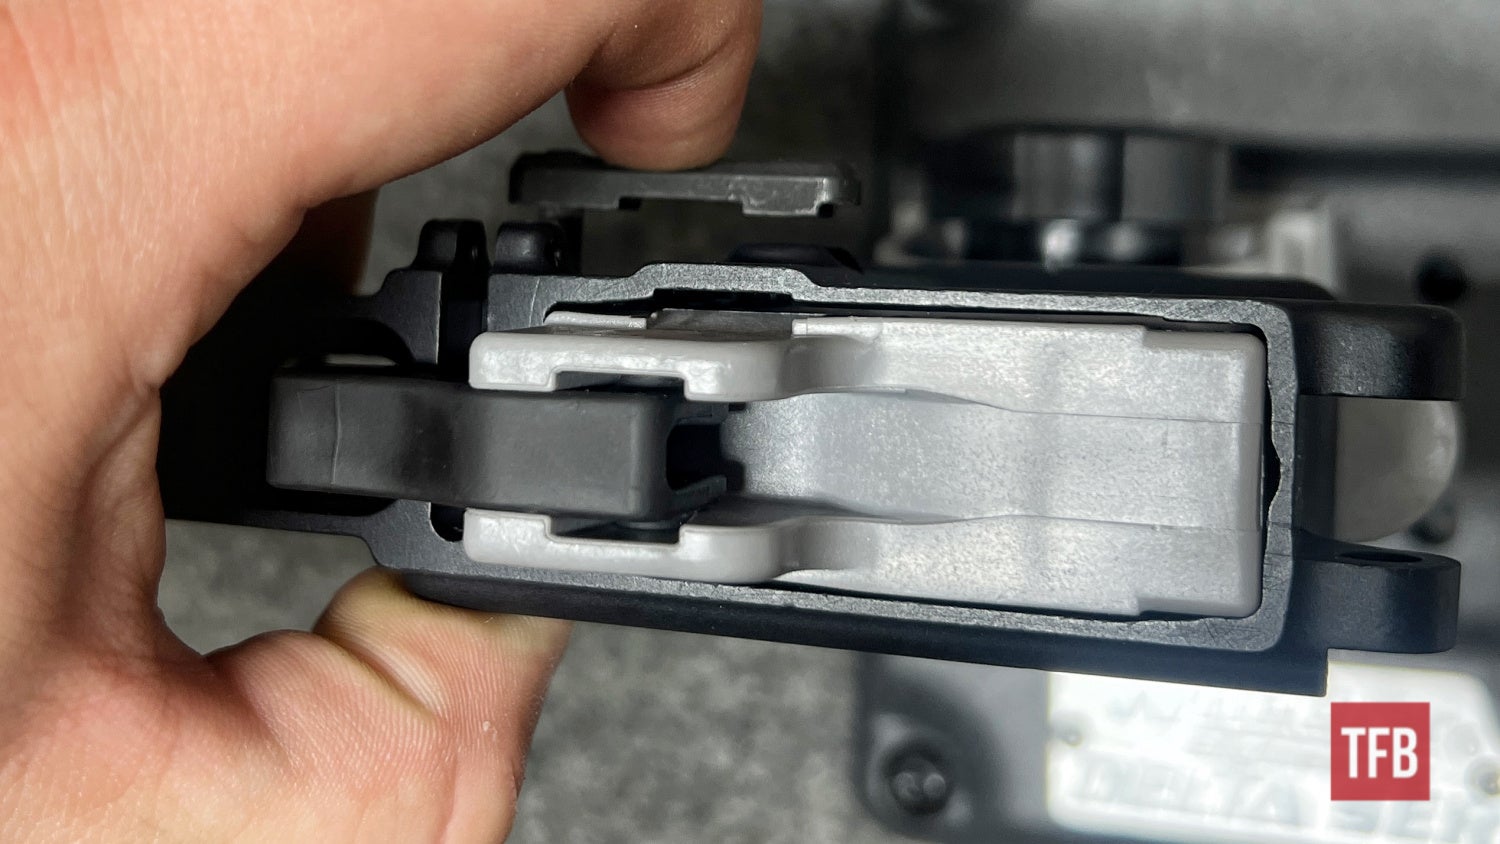
I started out by installing the magazine release. I utilized the Wheeler AR15 magazine vise block and Delta Series Armorer’s stand to install the magazine release. The magazine release parts are shown below.

Start by inserting the magazine catch in the slot on the left side of the receiver.
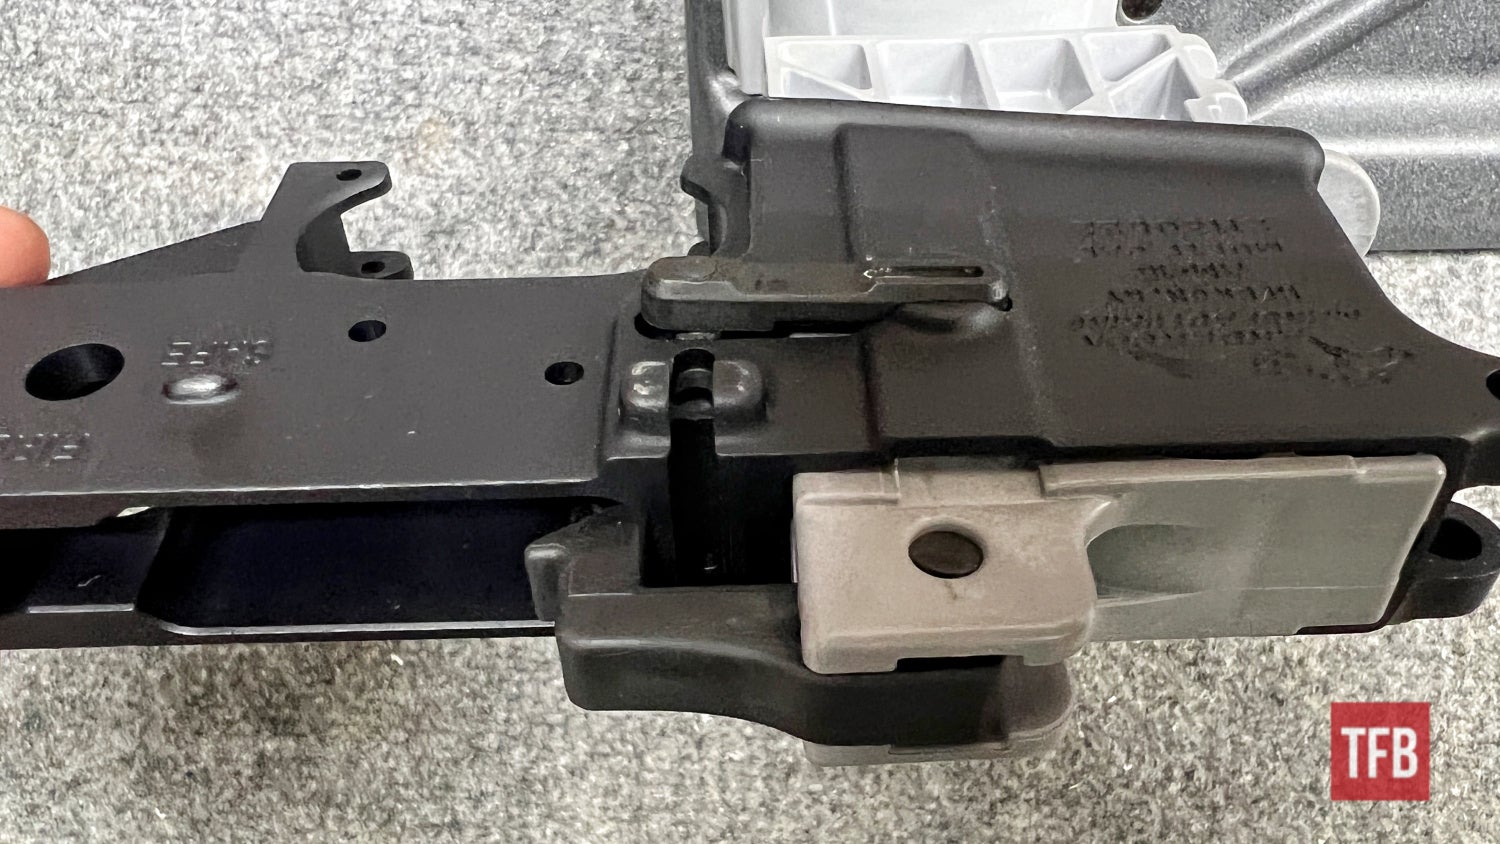
On the right side, the magazine catch spring can be inserted around the magazine catch. Note that the end of the magazine catch is threaded to accept the magazine release button.
The button may now be inserted into its slot on top of the spring and threaded end of the magazine catch. You will keep it depressed to keep it in place while you thread the bolt catch into the button.

While depressing the magazine release button and bolt catch with a finger (a large punch allows you to depress it further) the bolt catch will extend out the left side of the receiver allowing you to rotate it and thread it into the button.
Thread the bolt catch in until you make contact with the left side of the receiver and then go back a turn until the catch can settle into its recess. Insert a magazine and eject it to confirm proper installation.
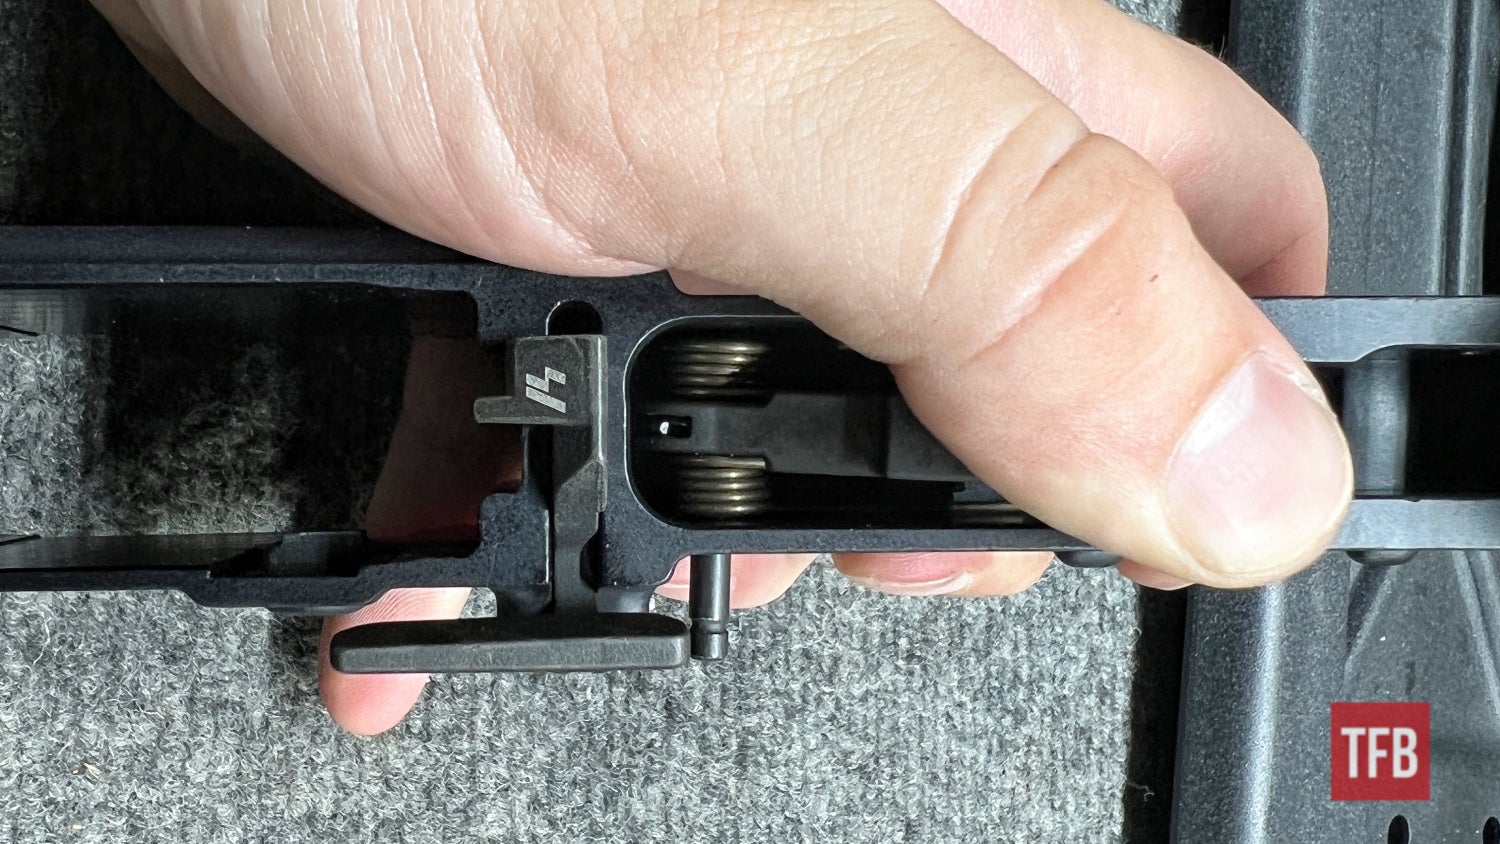
Step Four: Complete AR15 Assembly – Lower Receiver
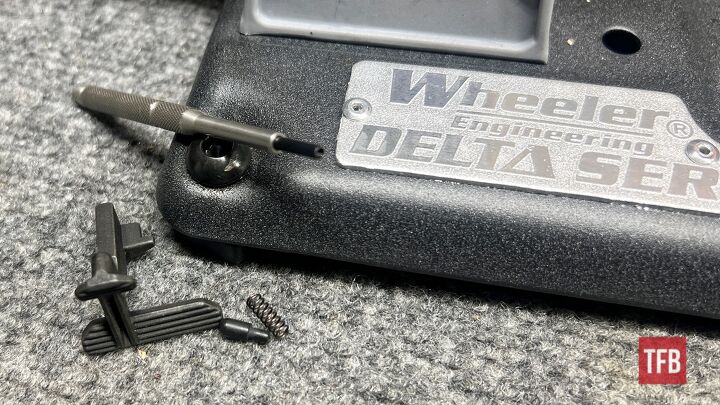
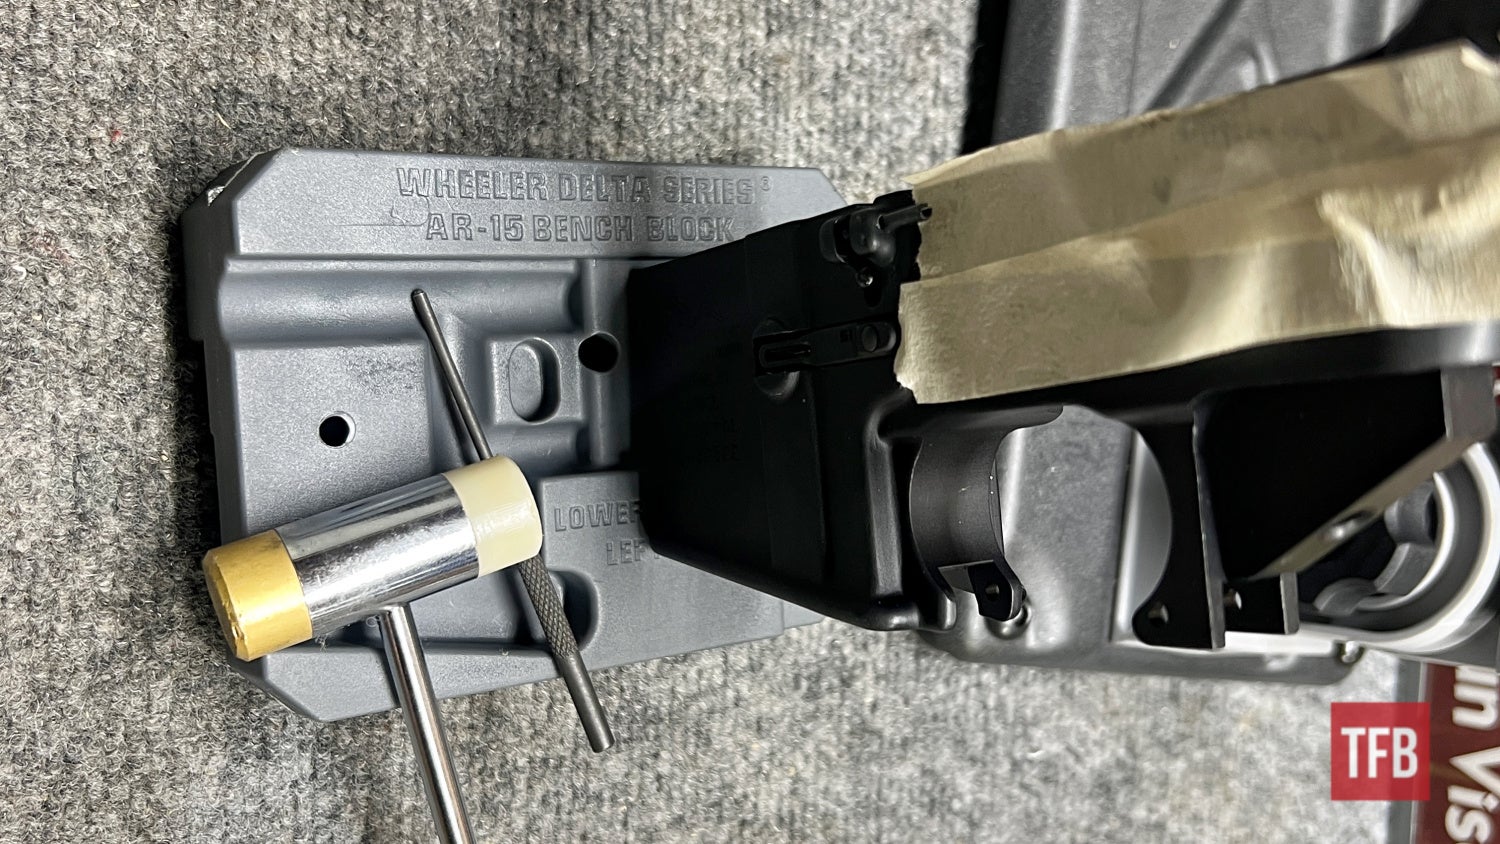
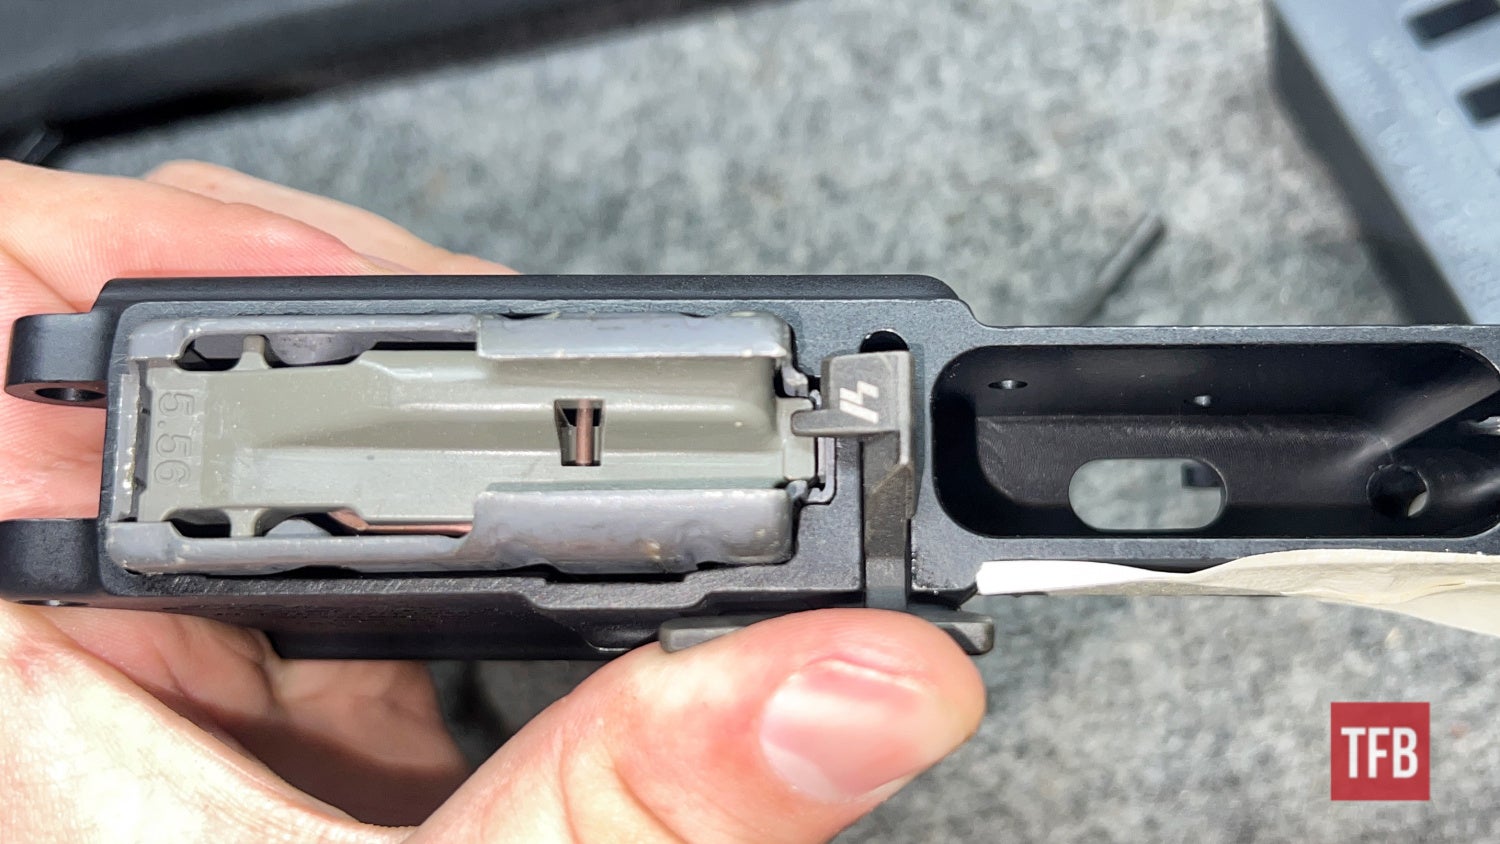
Next, we move on to the bolt catch which is responsible for holding open the bolt when the magazine runs empty. The parts for that particular assembly are pictured below along with a roll pin starter punch which is very helpful for installing the bolt catch roll pin. If this bolt catch looks different compared to yours, it is because it’s an extended one offered by Strike Industries.
I find it prudent to apply grease to the bolt catch spring since it does not come in contact with much fouling or dirt in the field and it is often in use.
On the left side of the receiver the bolt catch, spring, and plunger can be placed into the pocket intended for it.
It may need to be held in with one hand while the bolt catch is installed over the top of it and then that held in place until the roll pin is installed.
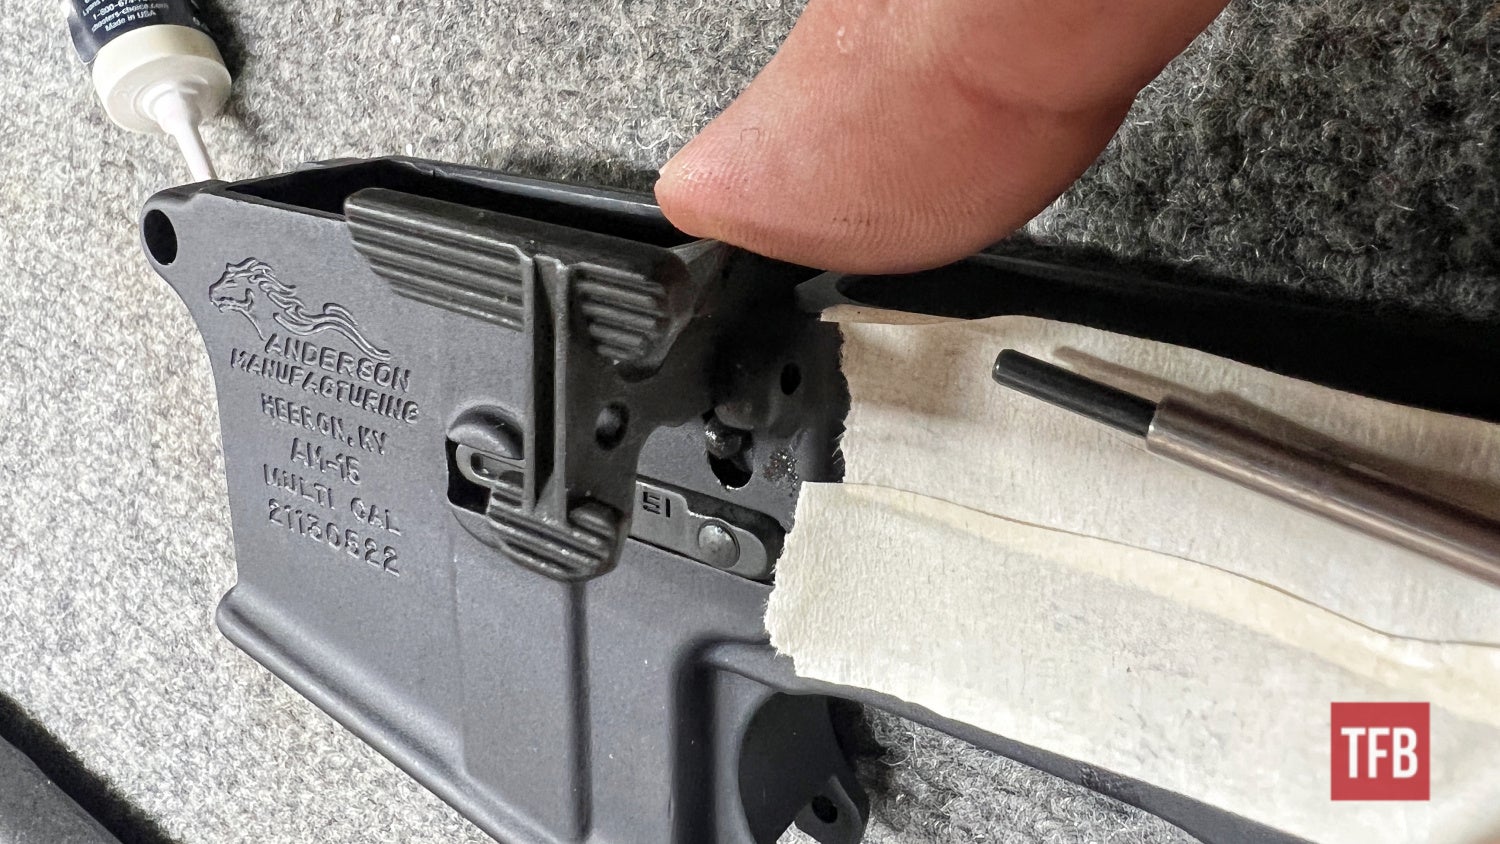
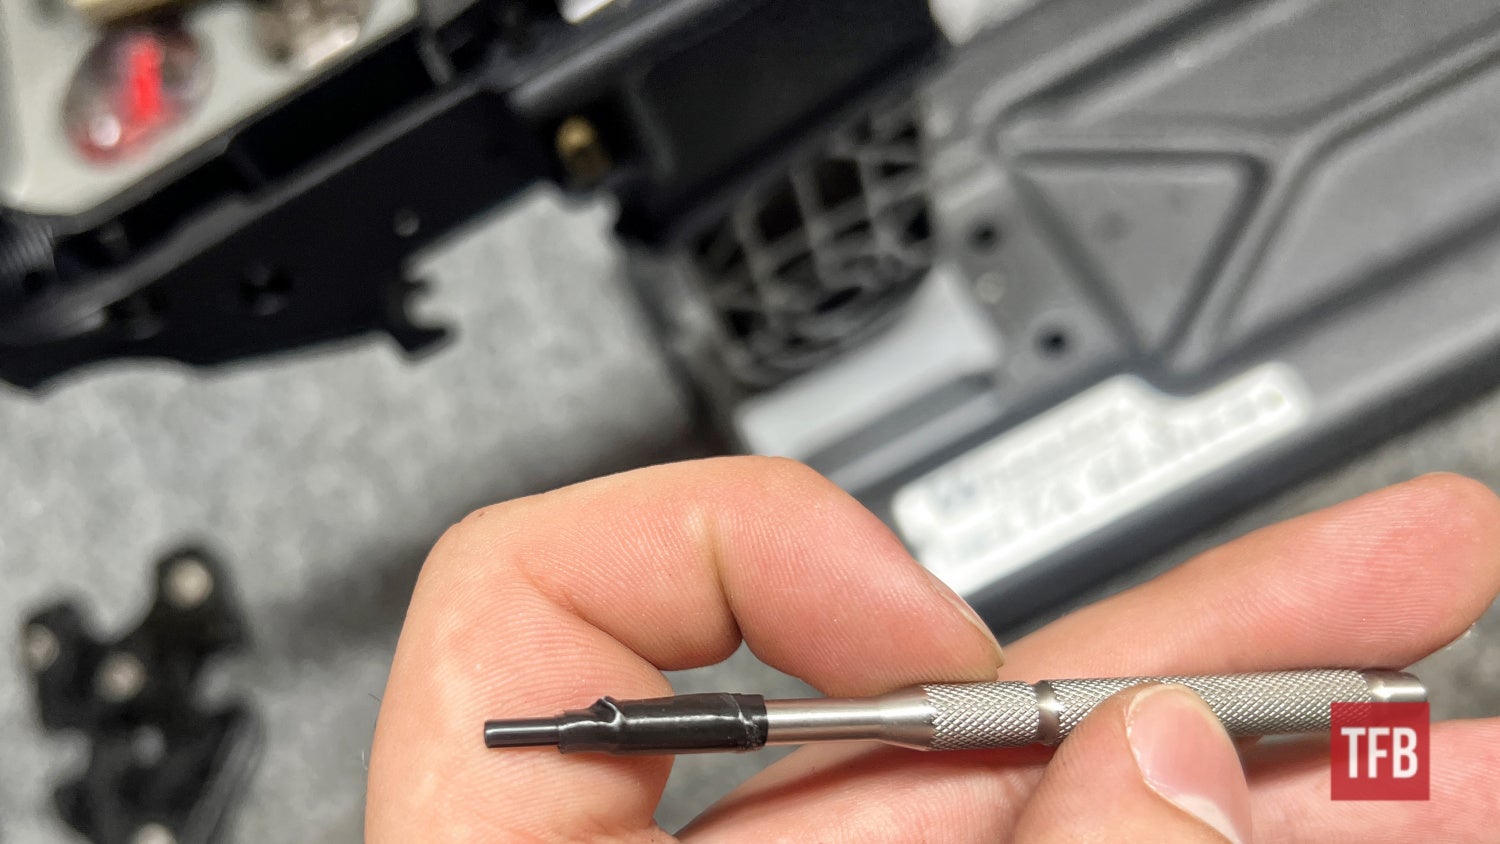
Installing the bolt catch roll pin can be cumbersome and in the wrong hands, aesthetically destructive. Placing tape on the side of the receiver and using a roll pin starter punch will help to alleviate most issues.
Note: If you do not have a roll pin starter punch you can wrap the roll pin end and the tip of the punch in tape to temporarily hold onto it.
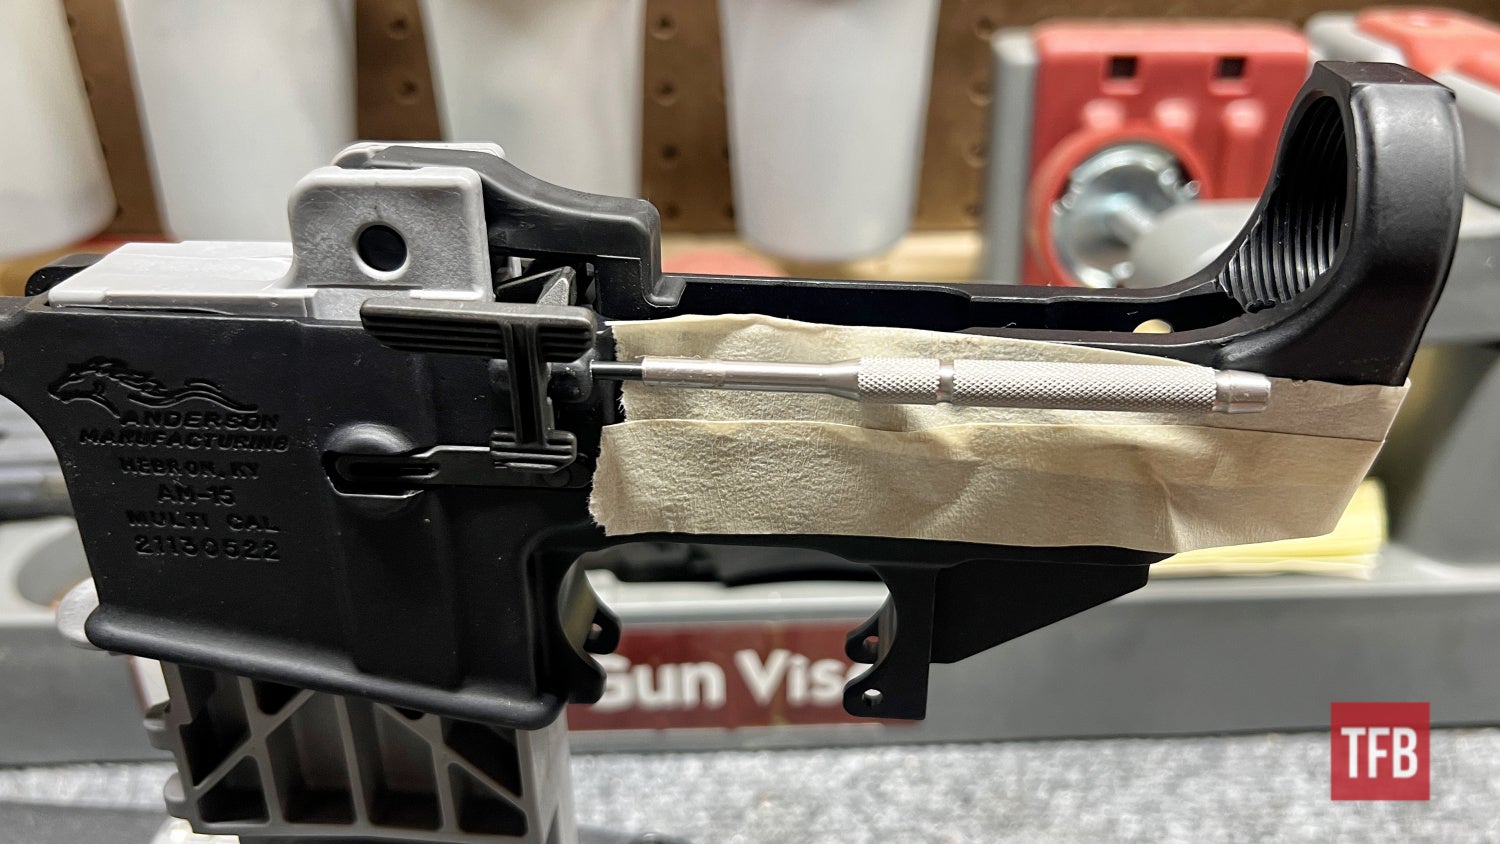
With the roll pin started, put it in the rest of the way ideally with a roll pin punch (Wheeler has a set and it is included in many of their kits) but a standard punch will work too but be aware it may slip off.
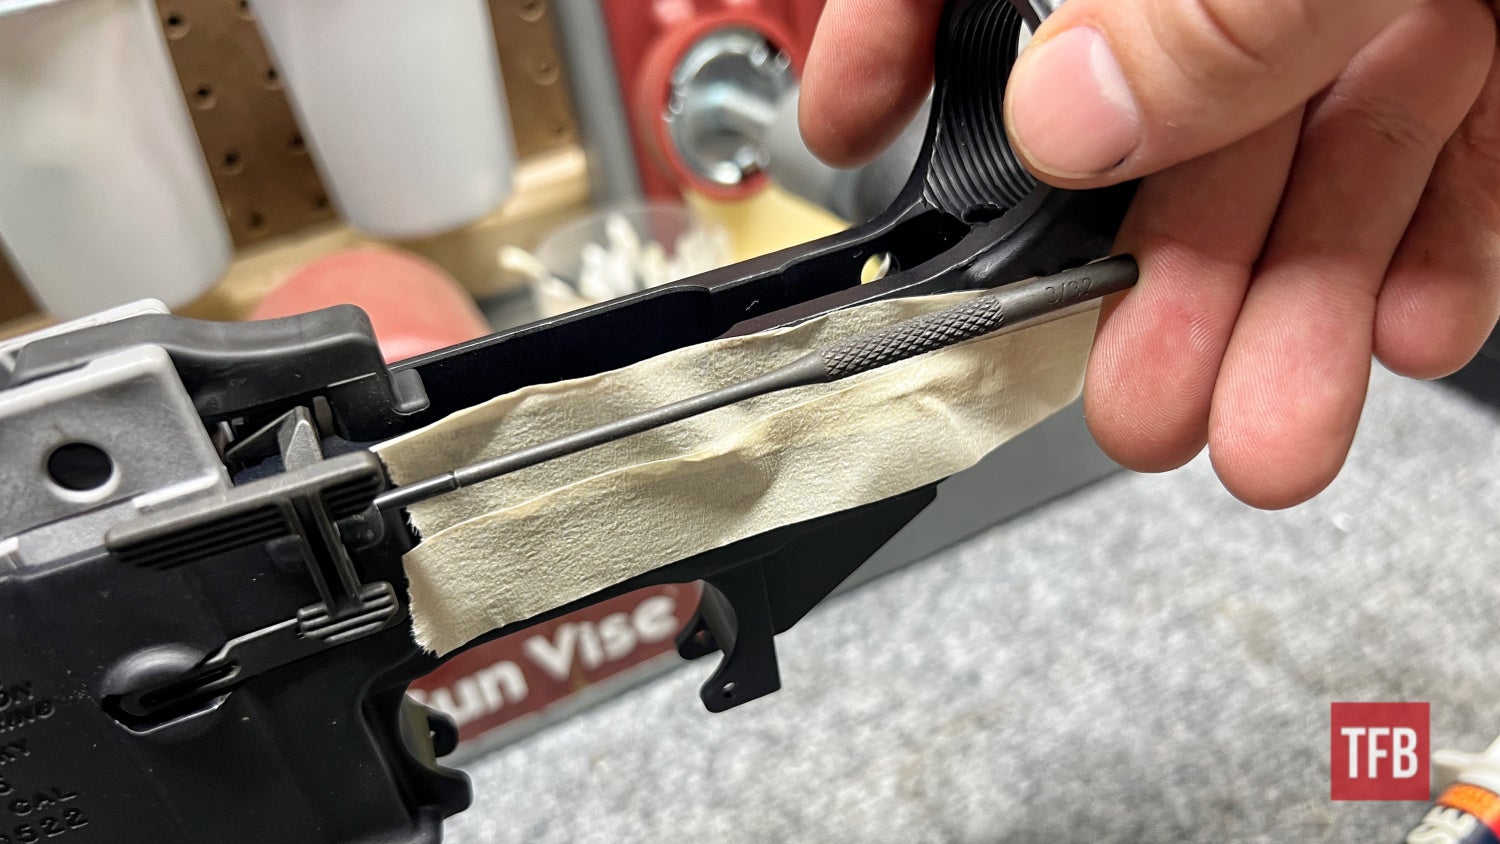
Wheeler’s AR15 bench block is handy to set the front of the lower receiver into.
The last step here would be inserting a magazine and testing the bolt catch by forcing it to push the magazine follower down.
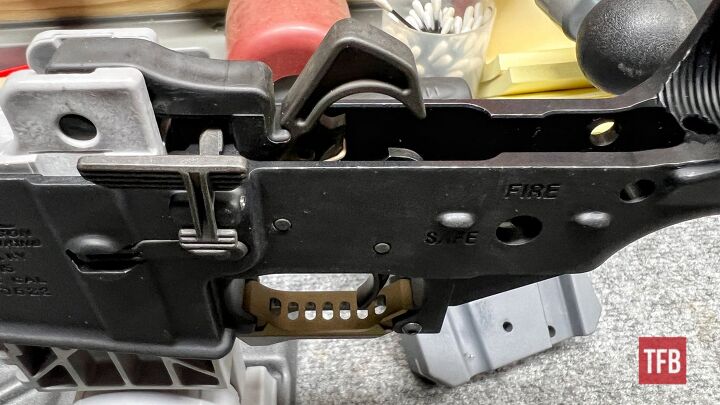
Step Five: Complete AR15 Assembly – Lower Receiver
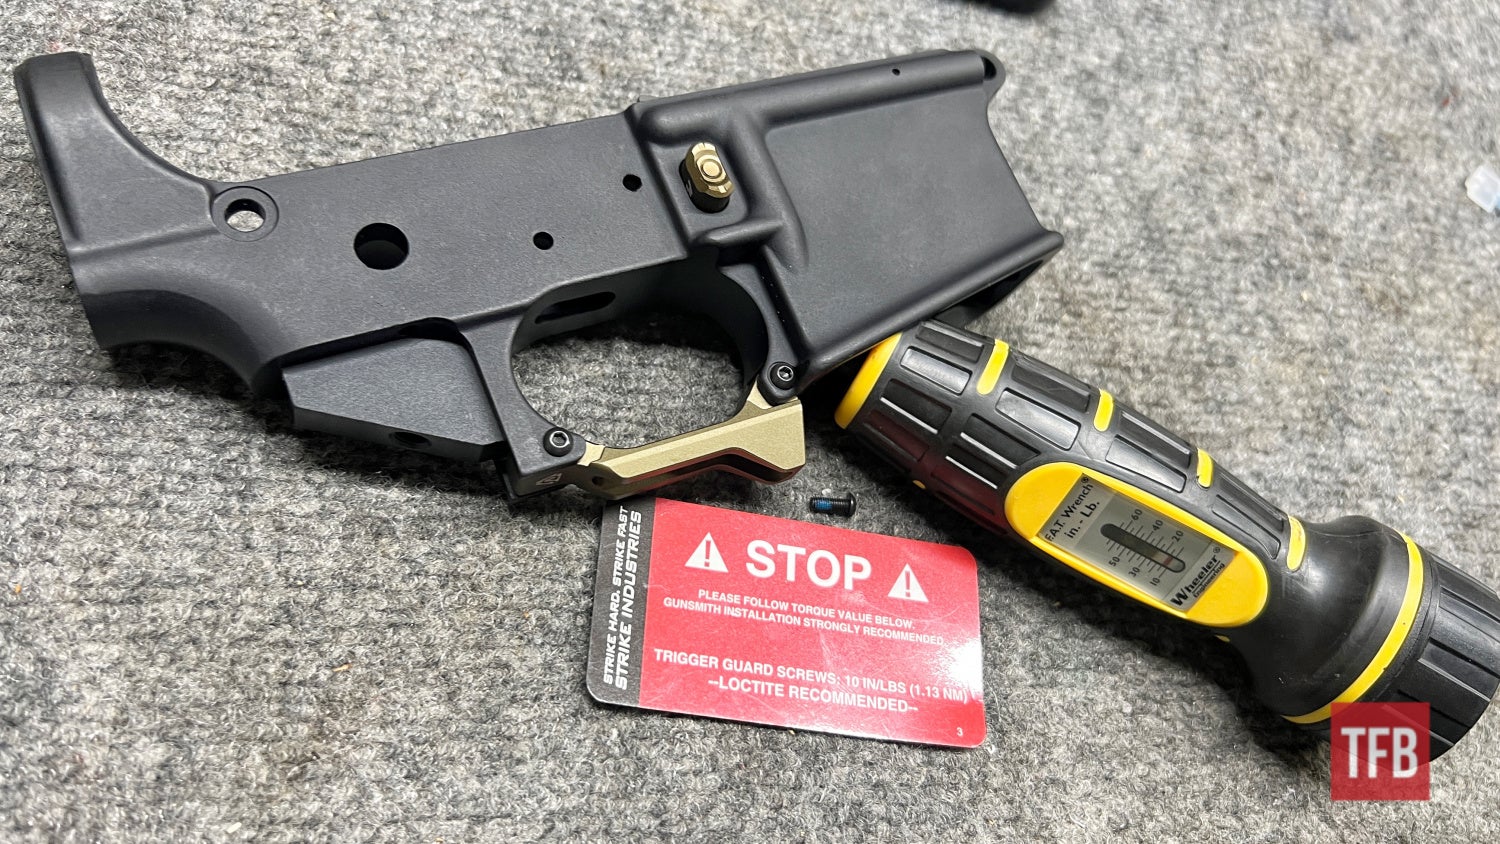
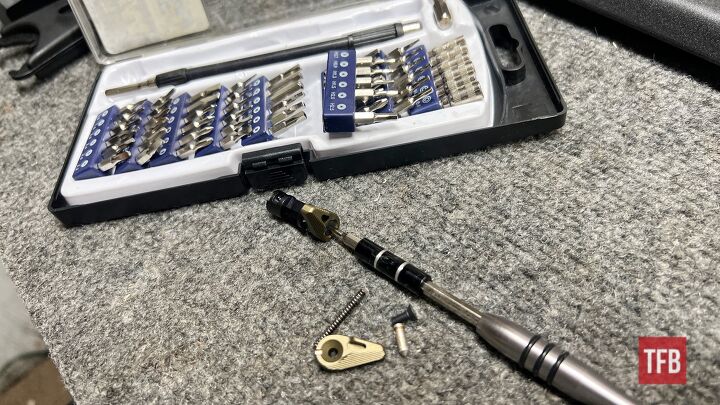
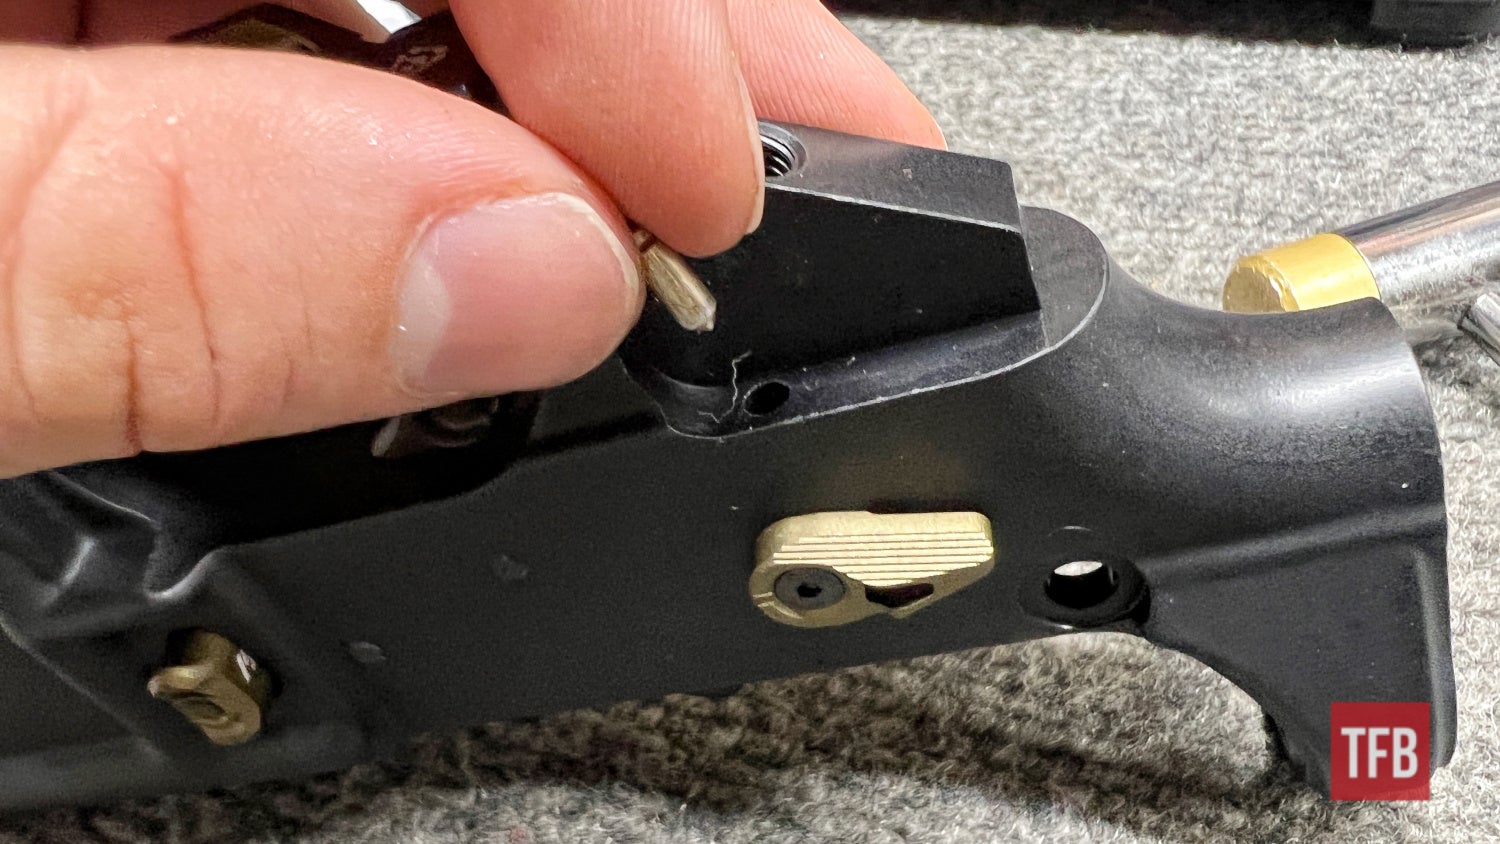
Next up is the installation of the trigger guard. Most of the time this can be slightly cumbersome and it involves a roll pin. The biggest concern with the roll pin installation is making sure that the trigger guard portion of the receiver is supported during installation. I plan to cover this specific roll pin style amongst others down the road but for now, the Strike Industries Fang trigger guard makes installation simple with three screws.
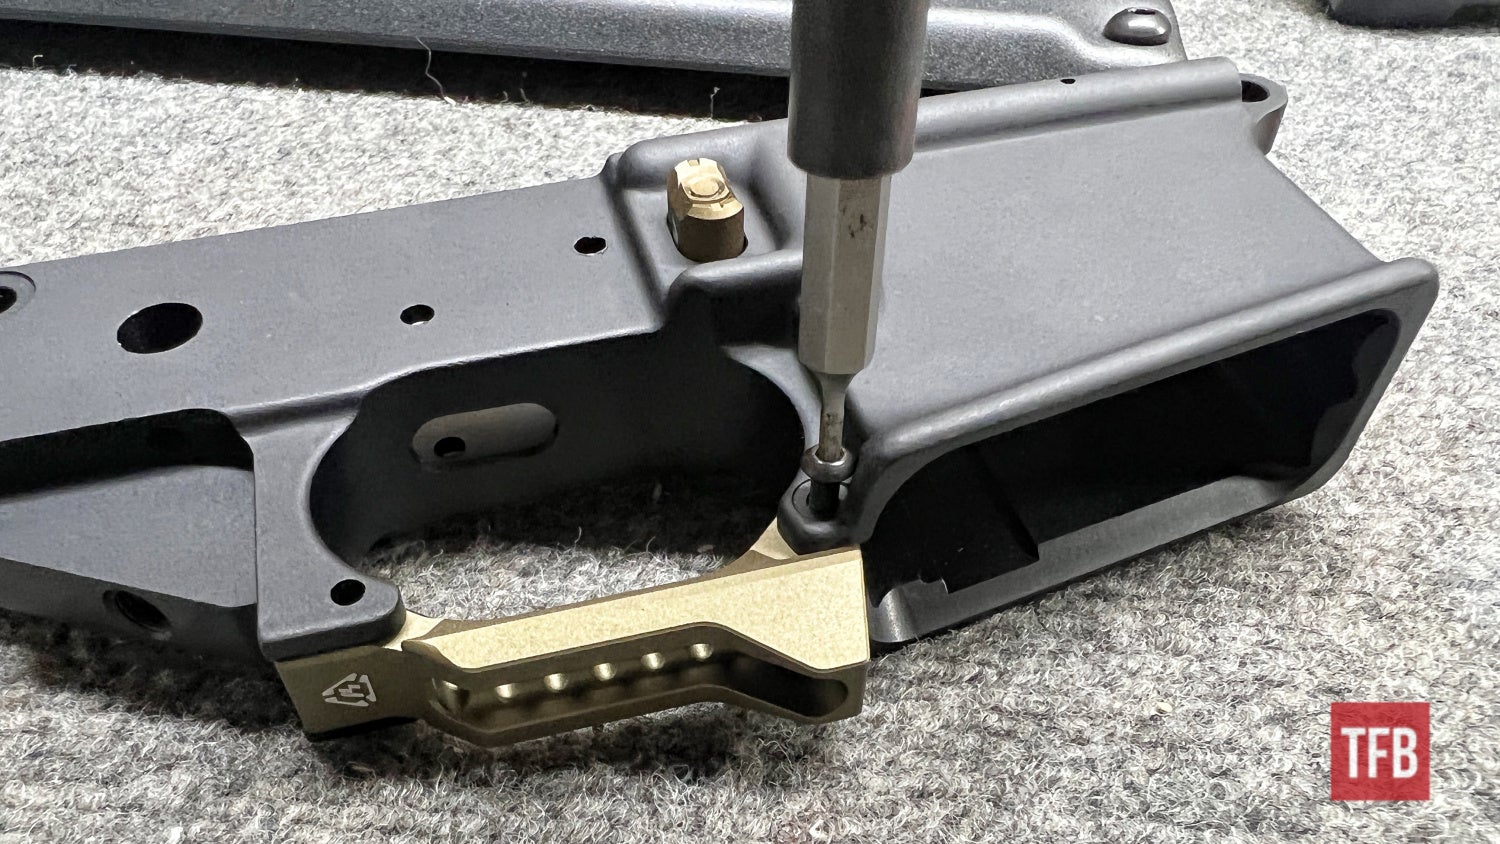
Two on the left side and one on the right.
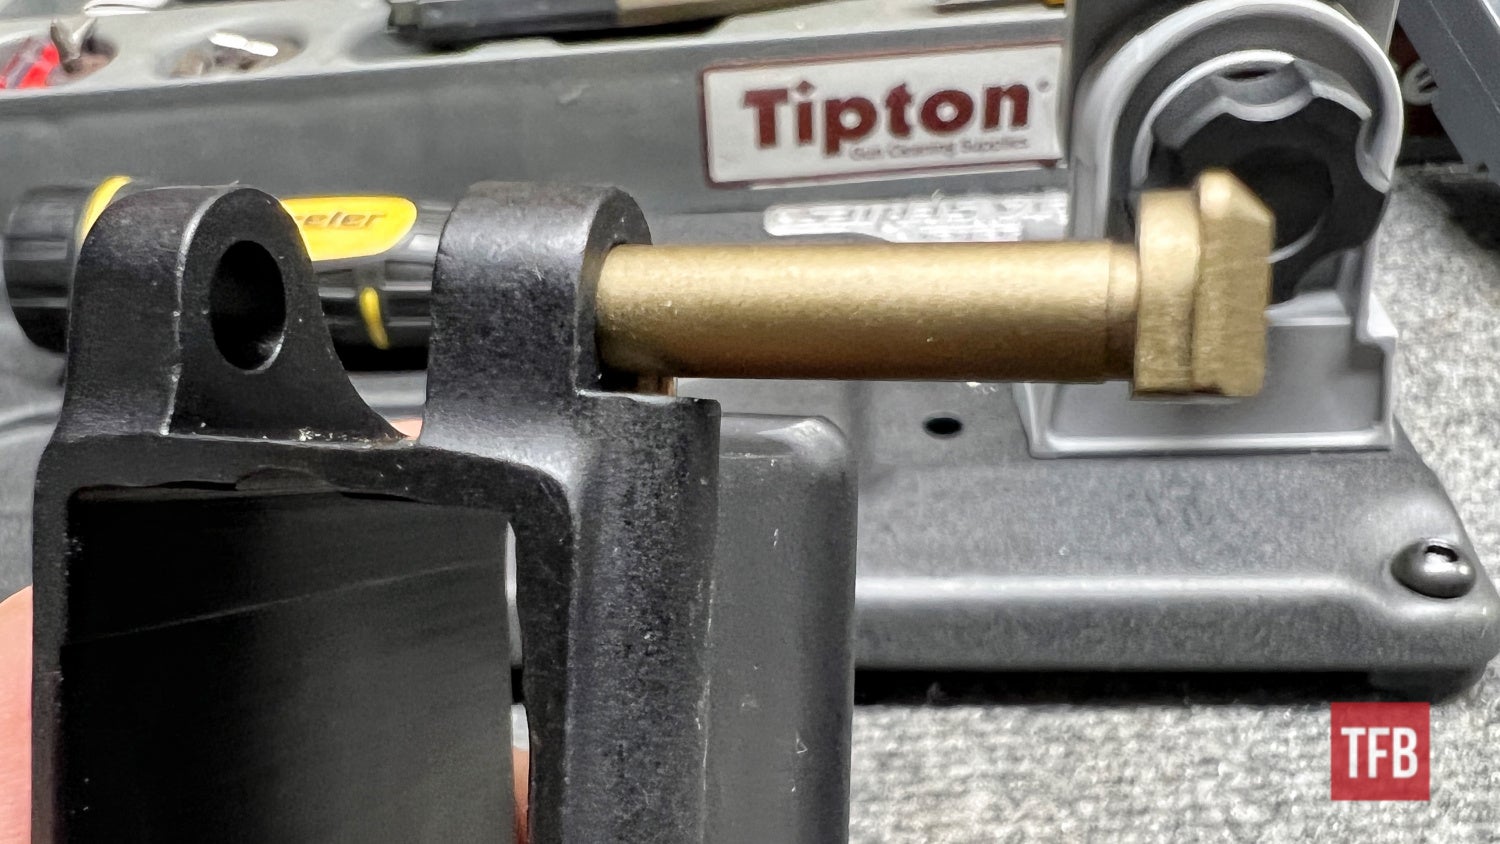
Step Six: Complete AR15 Assembly – Lower Receiver
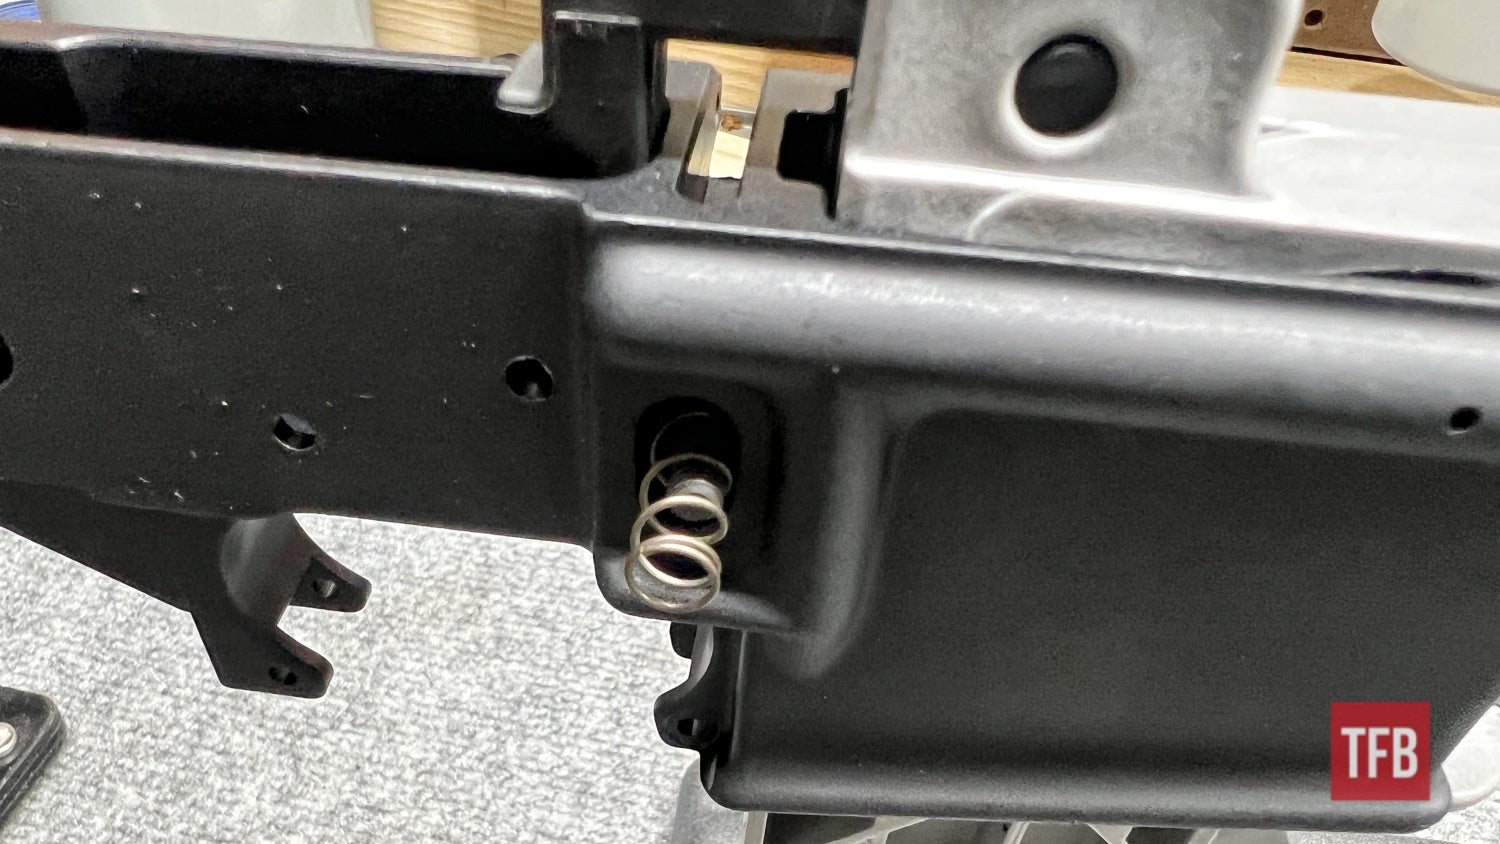
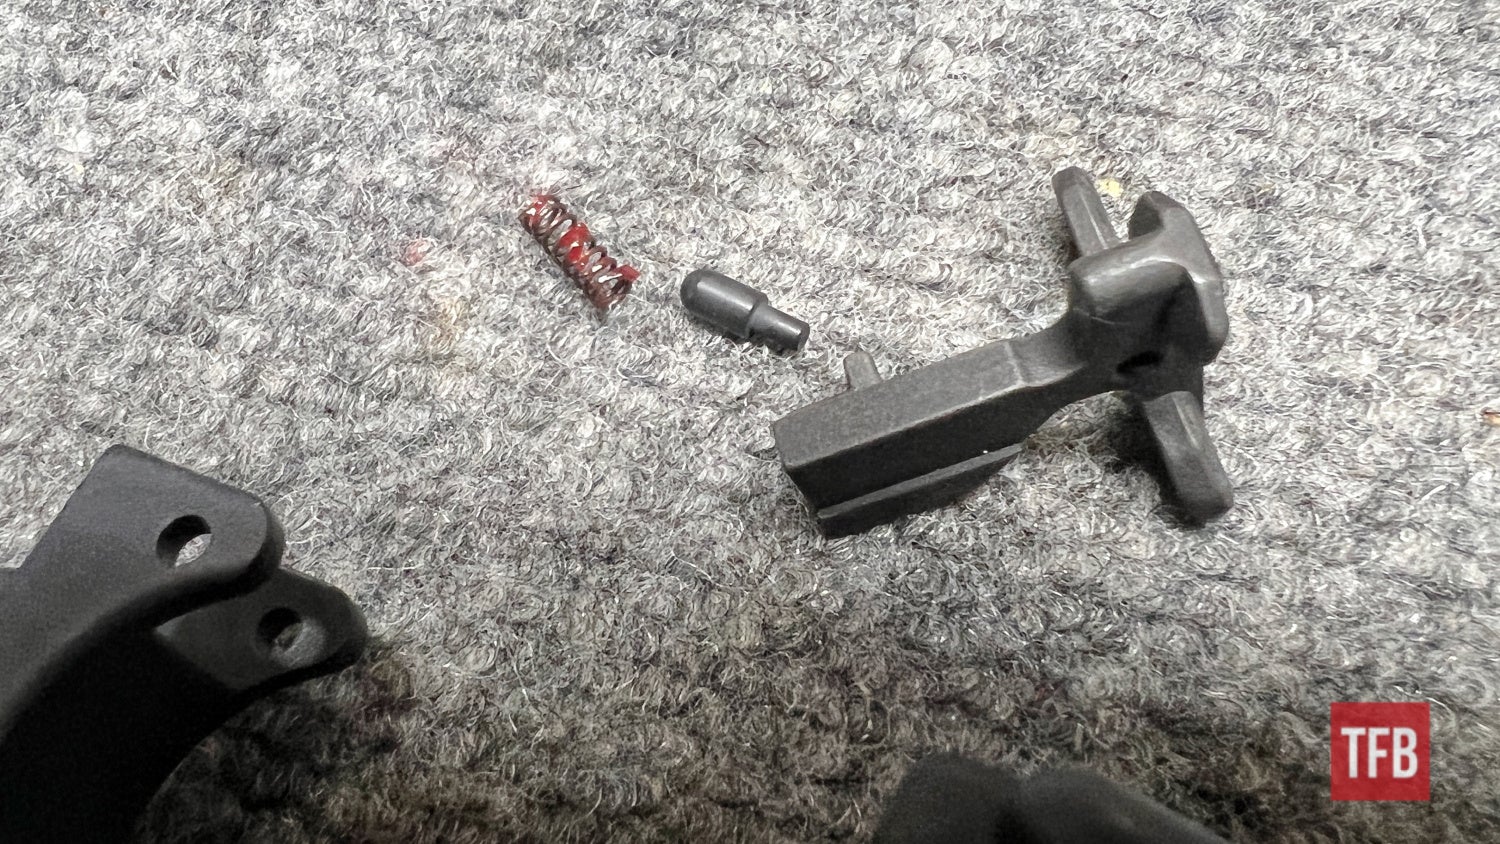
The pivot pin at the front of the receiver consists of the parts seen below.
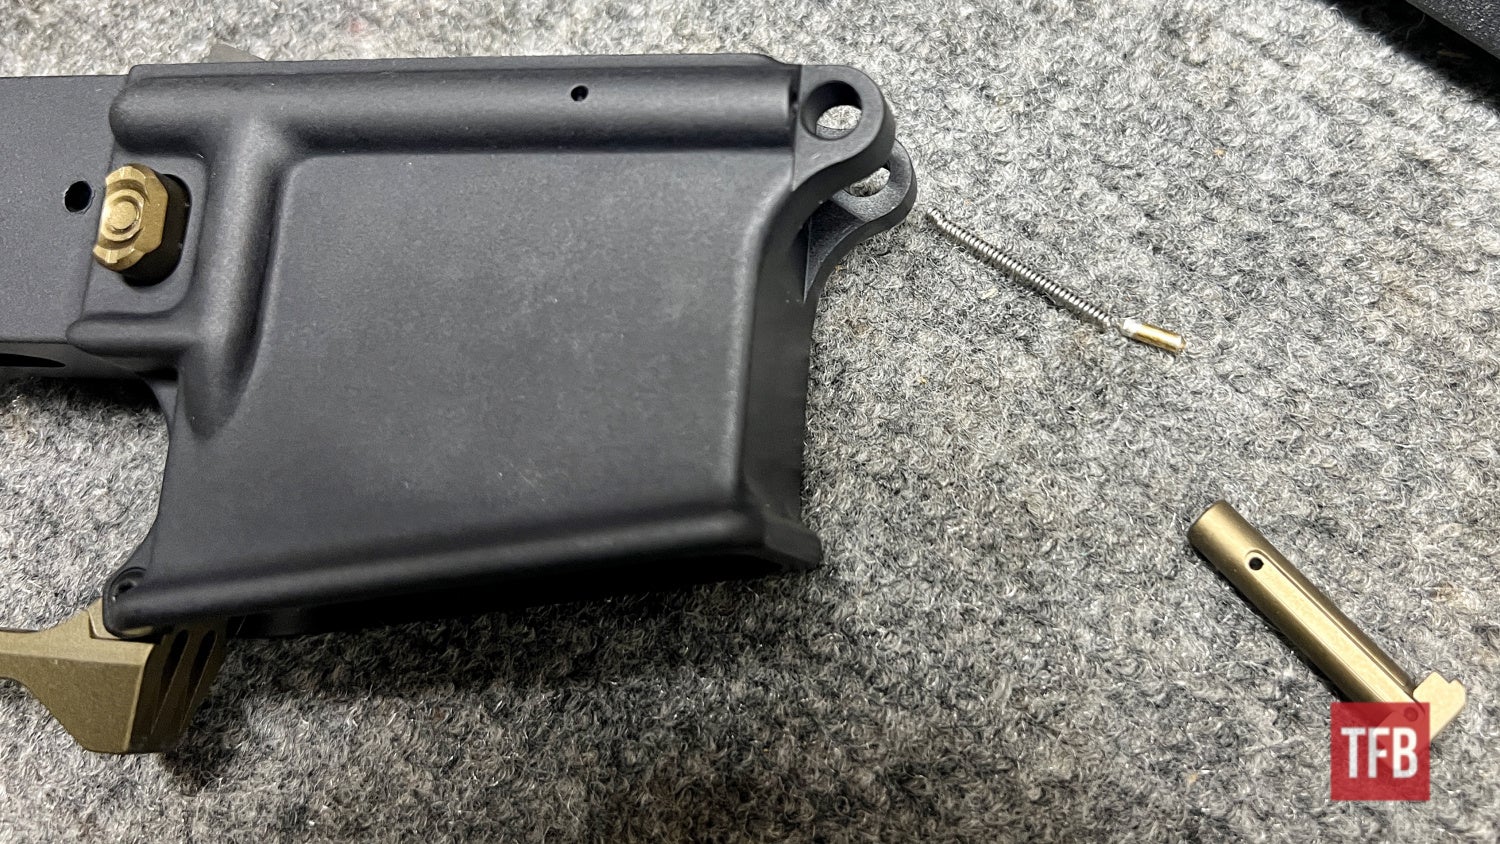
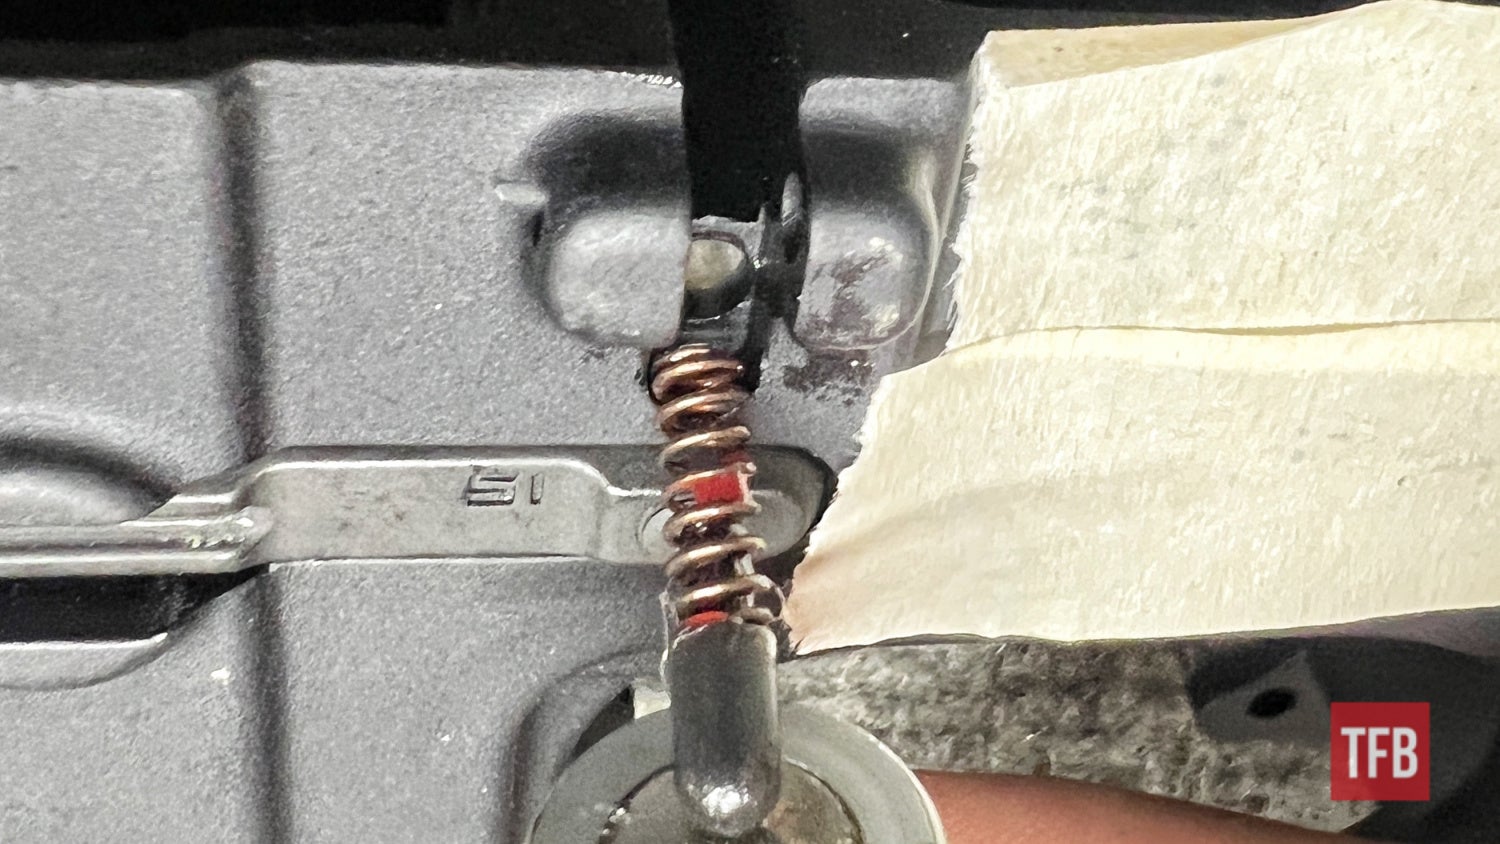
The pivot pin spring and plunger are inserted as shown. Be very careful these are among the most common parts of the lower to be flung across the room.
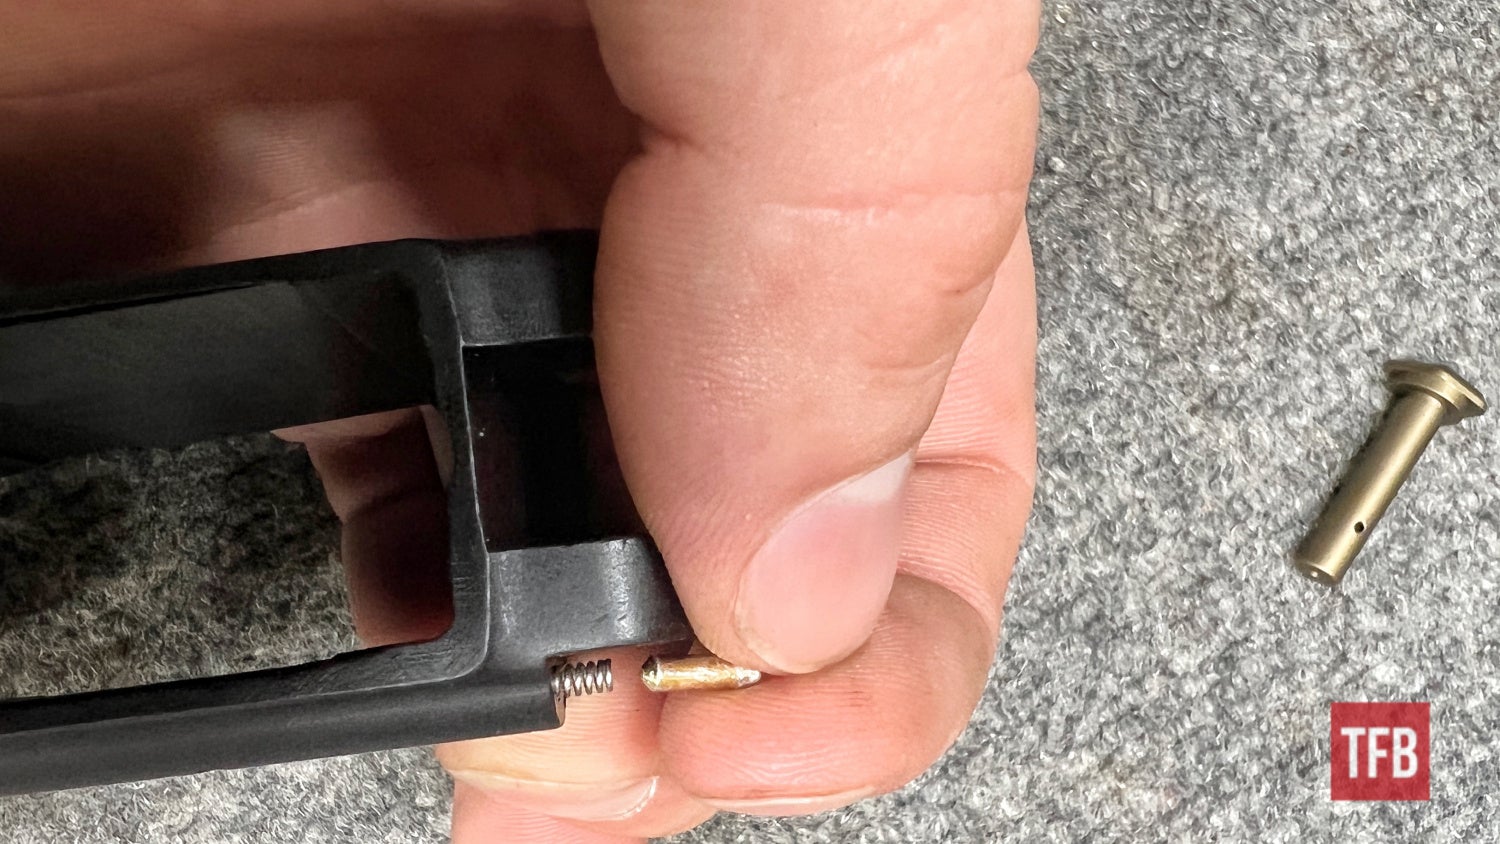
One of the easiest methods of pivot pin installation comes in the form of placing a punch (or rod of similar diameter to the hole) from the left side of the frame and keeping the spring and plunger captive.
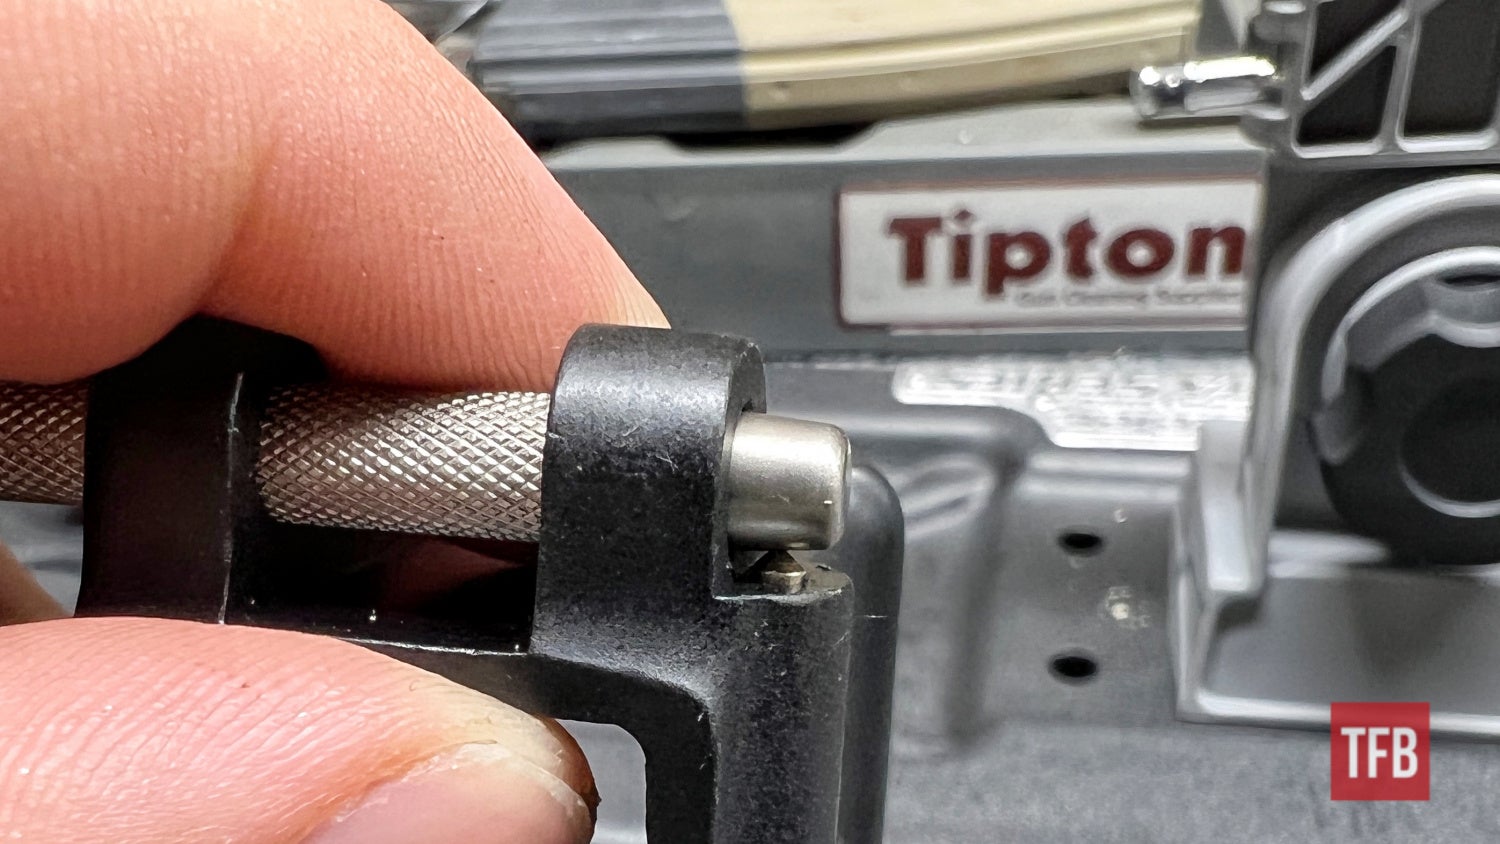
With the plunger and spring held captive, the pivot pin can be slid in replacing the punch.
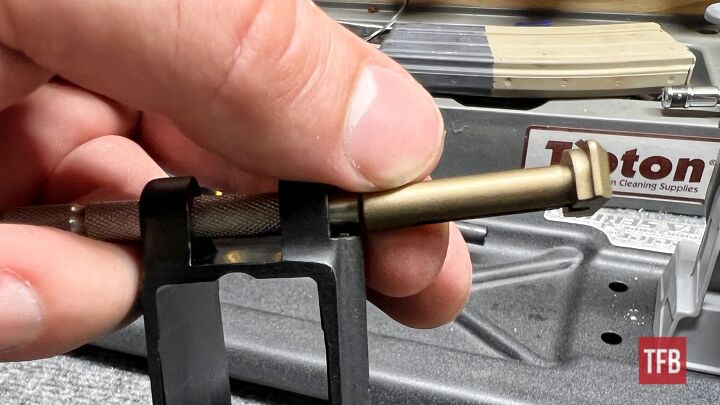
With the pivot pin now keeping its spring and plunger captive, make sure to rotate it until it locks into place and test its function by working it back and forth. If installed correctly, the pivot pin should not slide out from the receiver.
Step Seven: Complete AR15 Assembly – Lower Receiver
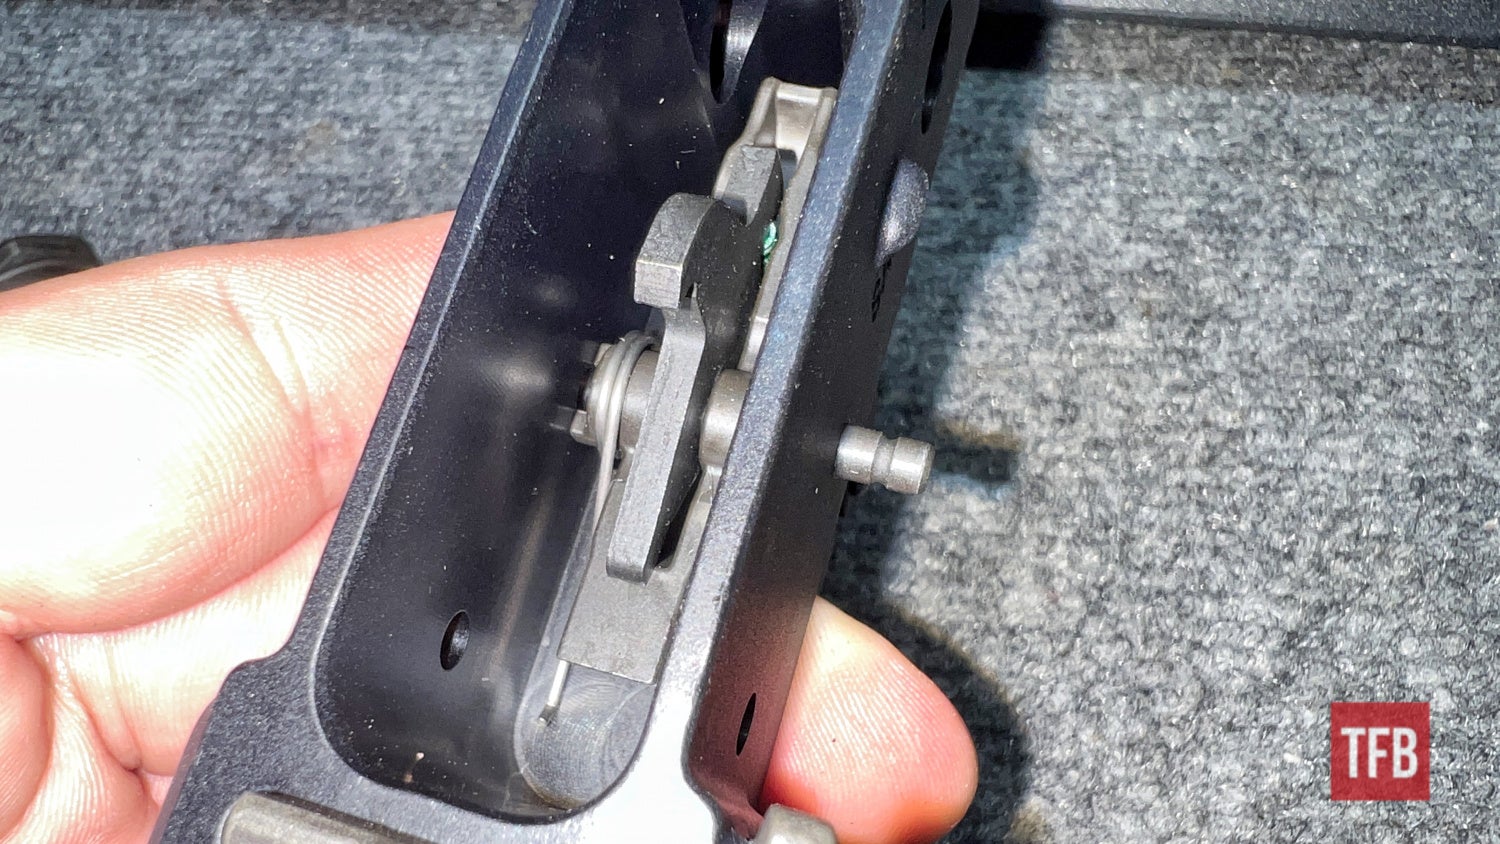
The trigger install is up next and its parts and orientation are shown below. It consists of the trigger, trigger pin, trigger spring, disconnector, and disconnector spring.
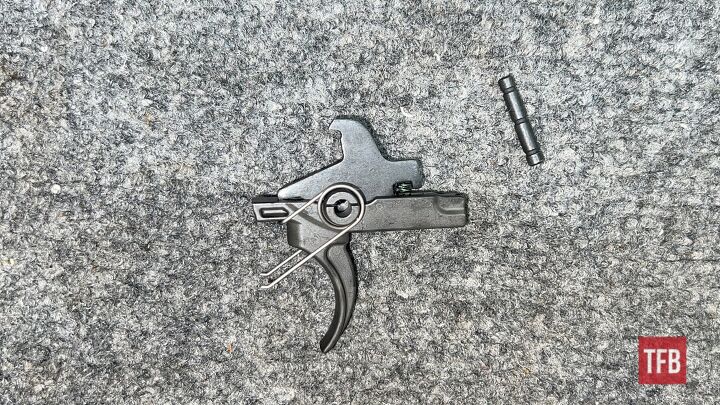
Placing this assembly as shown into the receiver with a finger or thumb will help line up the disconnector and trigger hole so the pin can be put through.

Here is an over-the-top view with half of the trigger pin installed.
Step Eight: Complete AR15 Assembly – Lower Receiver
With the trigger assembly installed the hammer comes next. Unfortunately, I forgot to take a picture of the hammer assembly this time so below is one from the disassembly article.
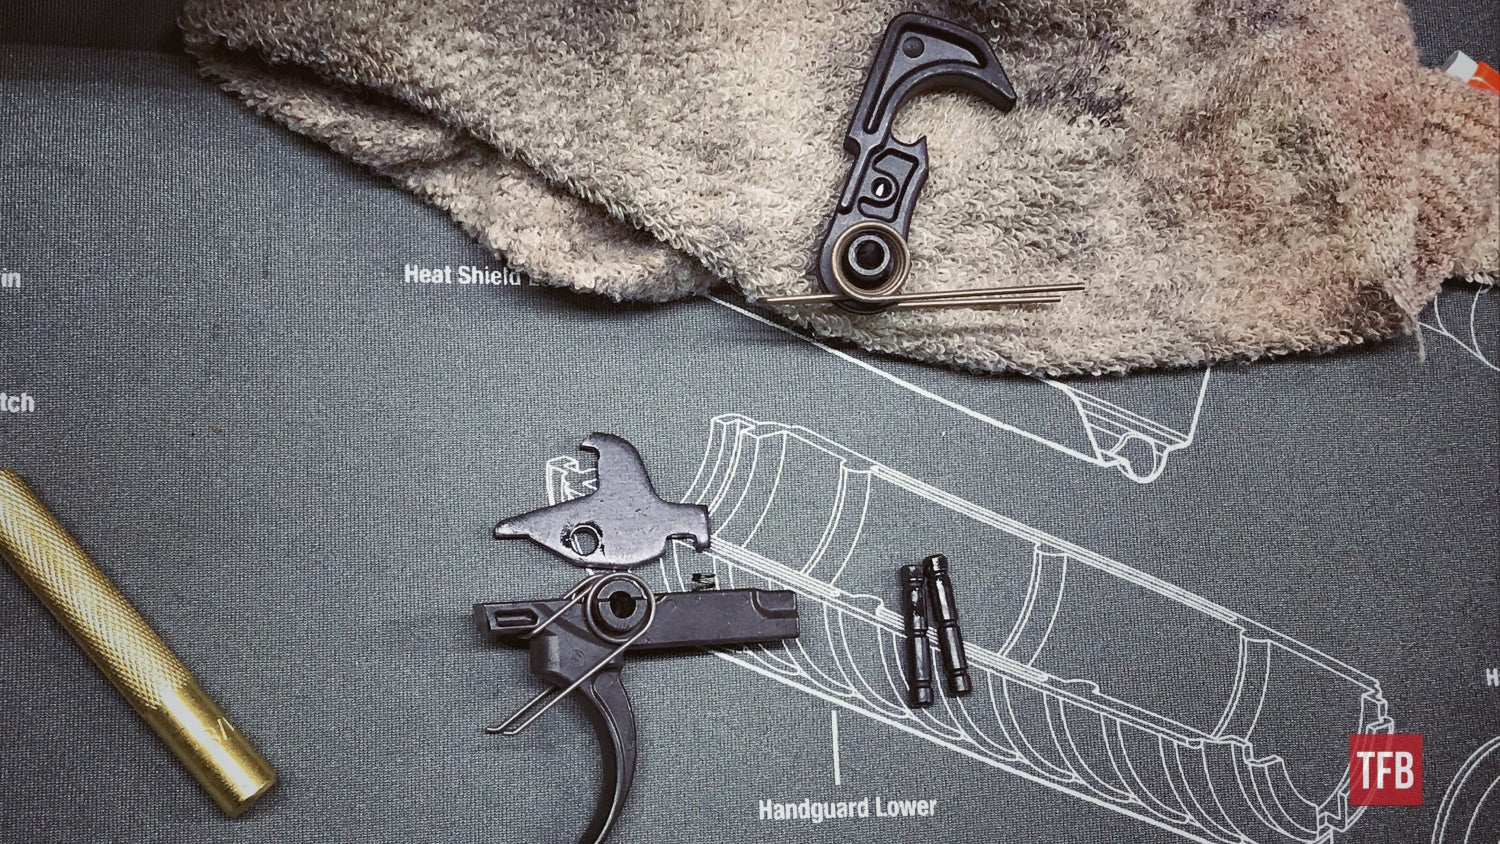
Make sure the wings of the hammer spring rest on the flats of the hammer assembly and apply pressure downward onto the hammer in order to line up the holes for the hammer pin.
Insert the pin and persuade it into place with a hammer. Test its function by either letting the hammer down nicely with your thumb or by using an AR15 vise block with an accompanying hammer stop as shown below.
Step Nine: Complete AR15 Assembly – Lower Receiver
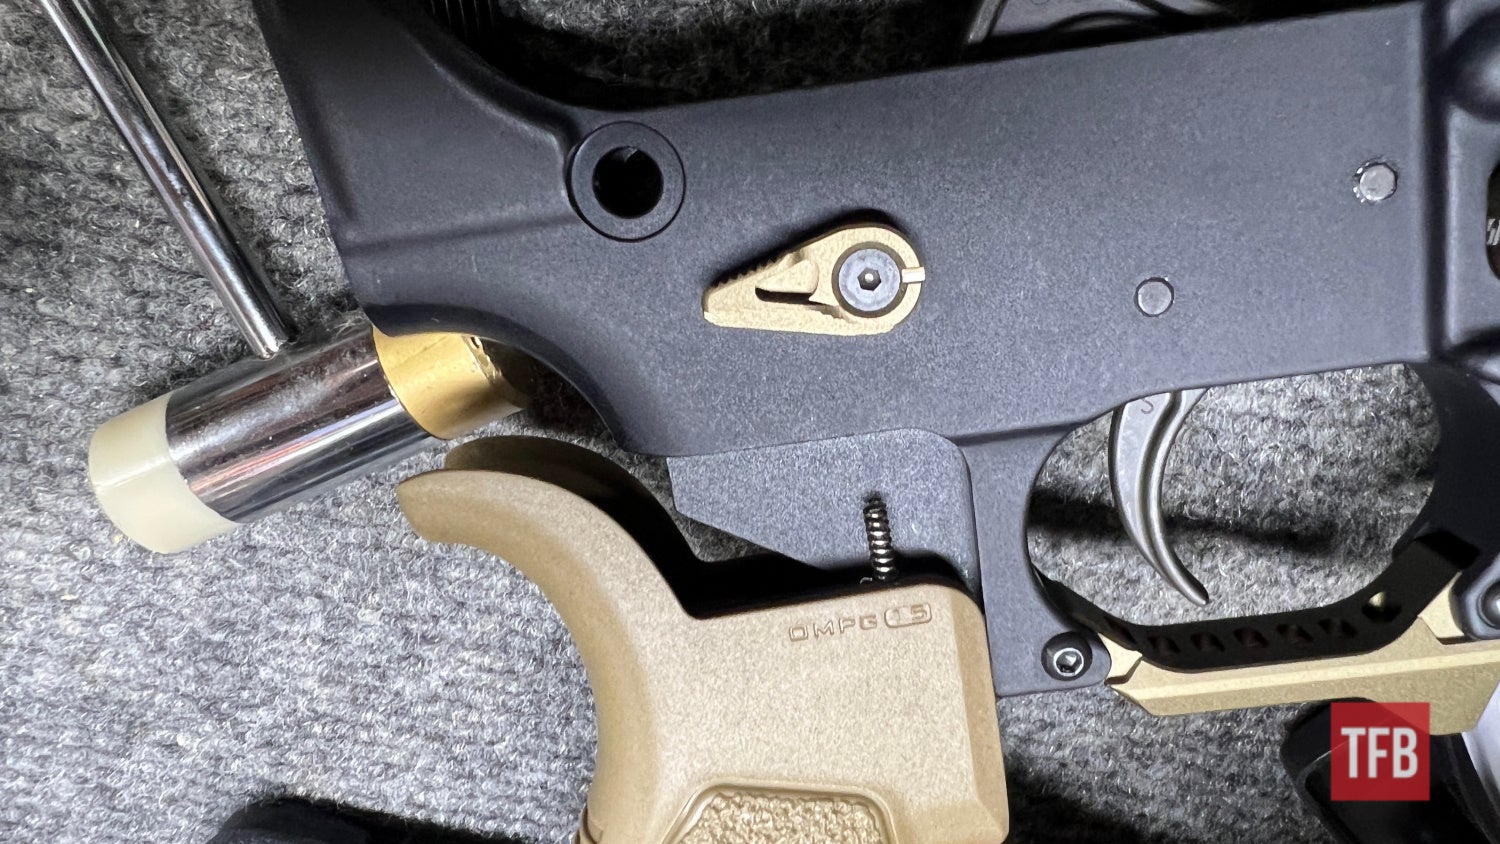
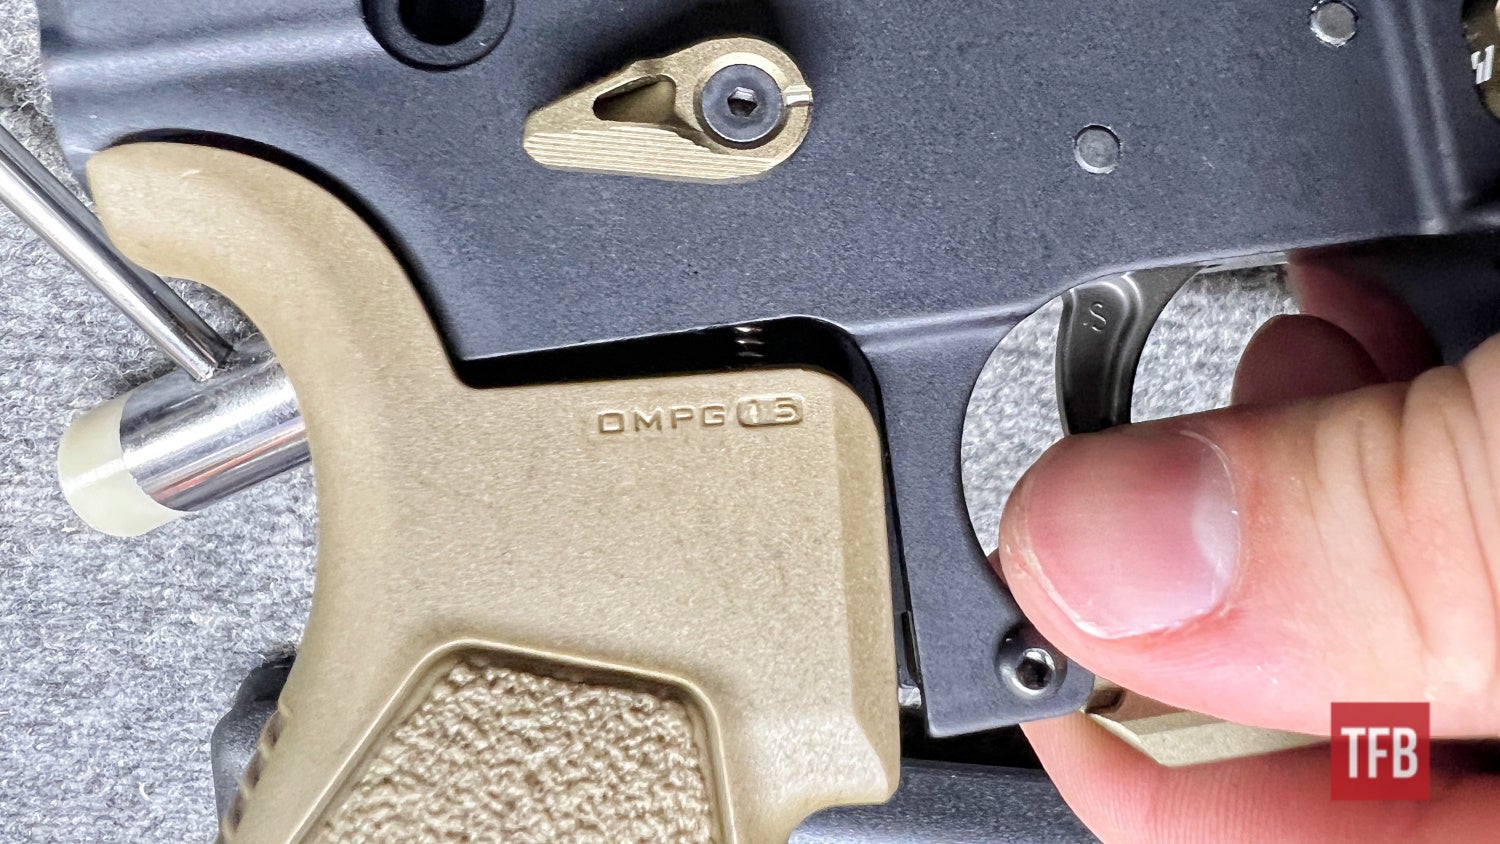
With the hammer installed we can move onto the selector switch. This one is an ambidextrous one from Strike Industries and it also optionally throws 60/90 degrees. The parts are shown below.
Insert one side of the ambidextrous into the frame and screw the other end into place which locks it into the receiver.


Step Ten: Complete AR15 Assembly – Lower Receiver
This step runs in tandem with the last one since it involves the selector plunger and spring. This is the part where we install the pistol grip which retains the selector switch plunger and spring. The pistol grip also applies pressure to those parts in order for the selector switch to function properly. The plunger is dropped into its hole which gets hidden by the pistol grip.
The selector spring is installed into a hole in the pistol grip as shown below.
The pistol grip itself usually fits just enough where it holds tight enough to the frame so you do not need to keep a hand on it while screwing it into place.
Screw the grip into the receiver.
Make sure to test your selector’s range and function after the pistol grip is installed.
Step Eleven: Complete AR15 Assembly – Lower Receiver
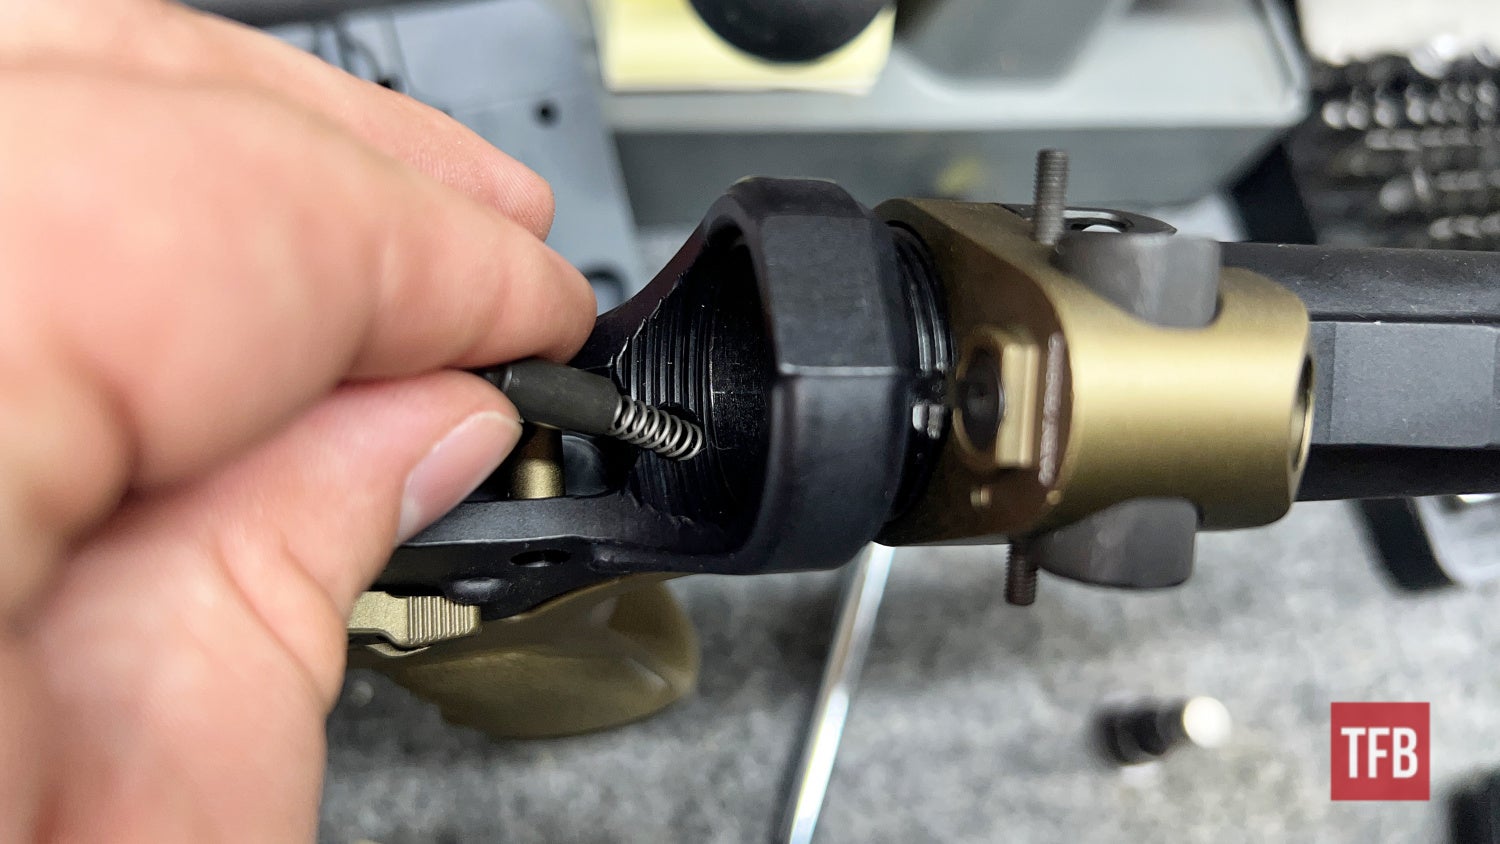
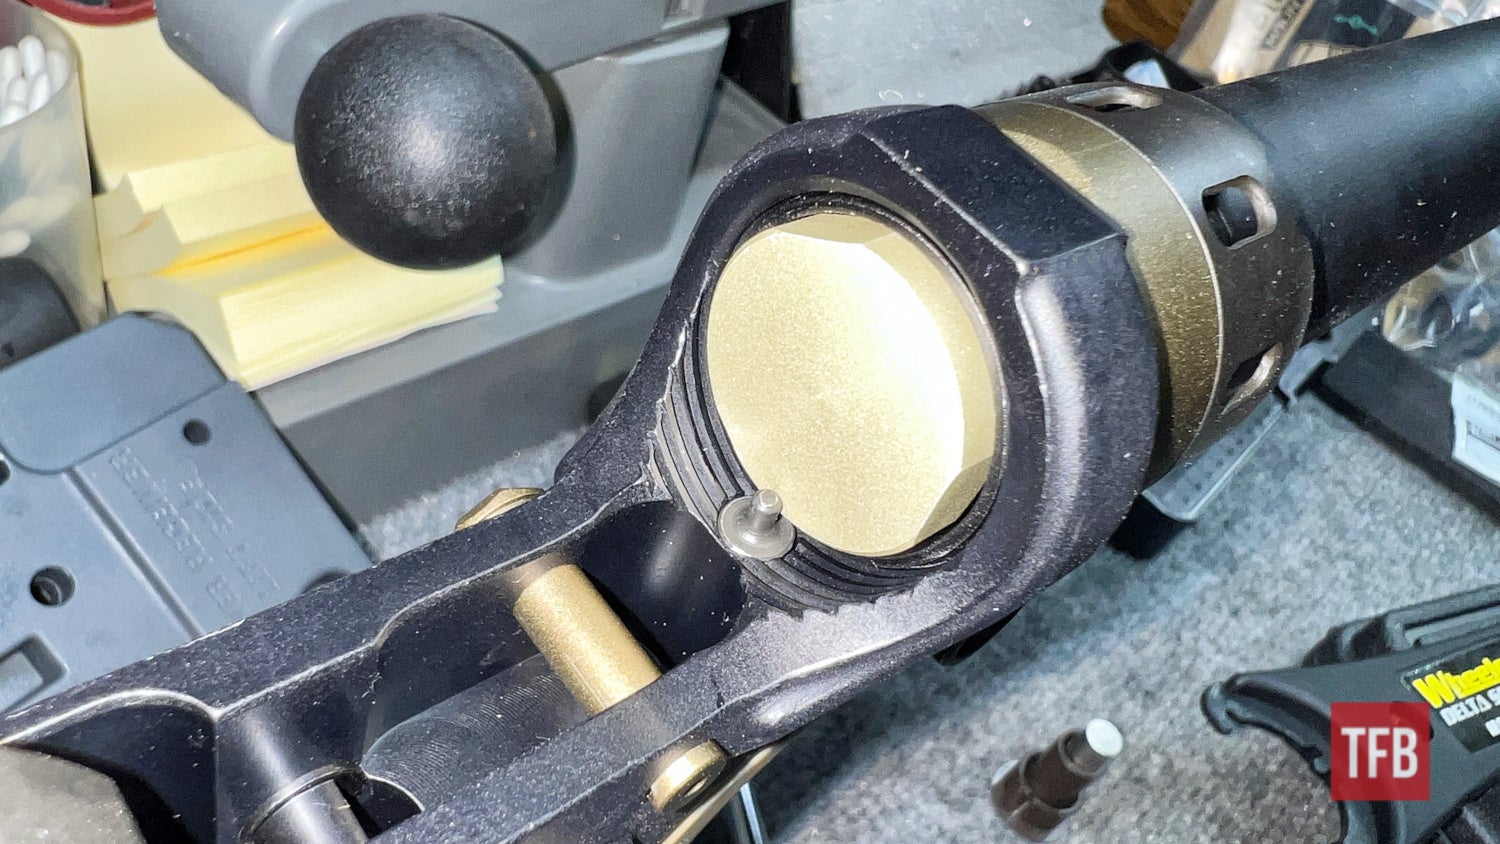
In this step, the buffer tube, castle nut, end plate, buffer retaining spring and plunger, takedown spring, takedown plunger, and take down pin are installed all at once.
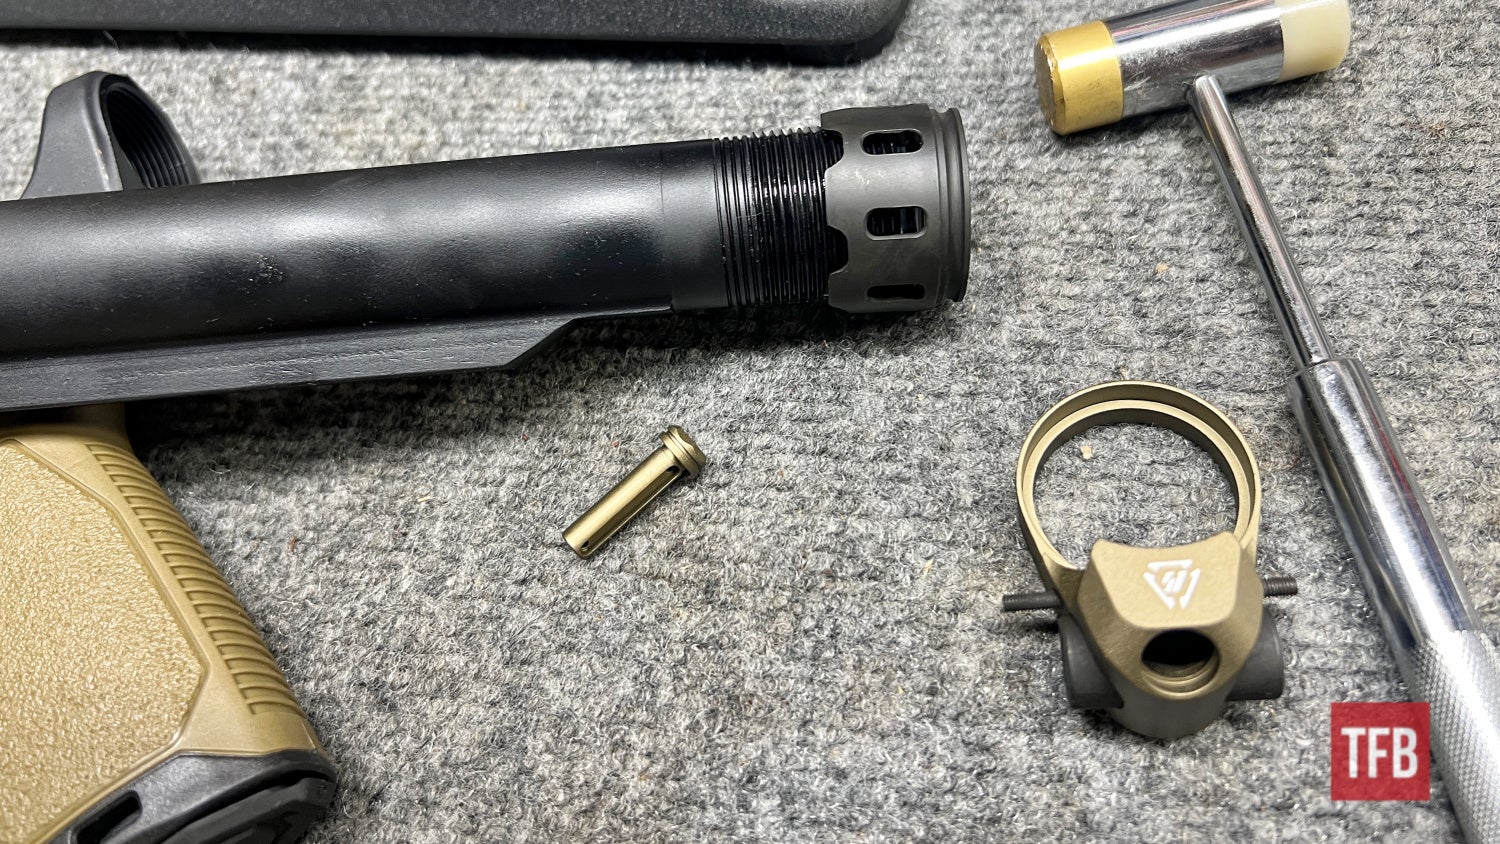
Install the castle nut and endplate onto the threaded end of the buffer tube. This creative endplate assembly is a Strike Industries three QD slot endplate.
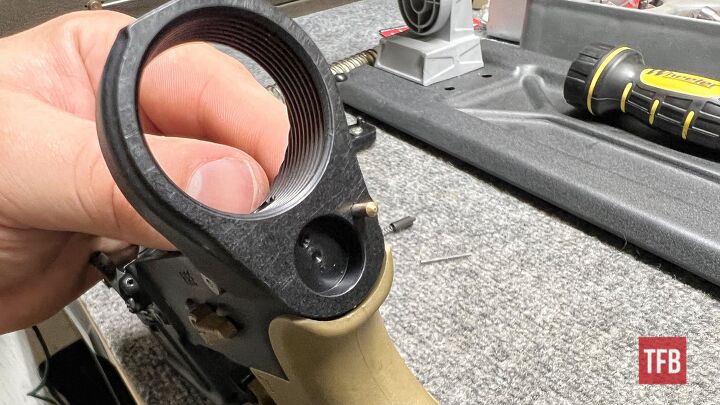
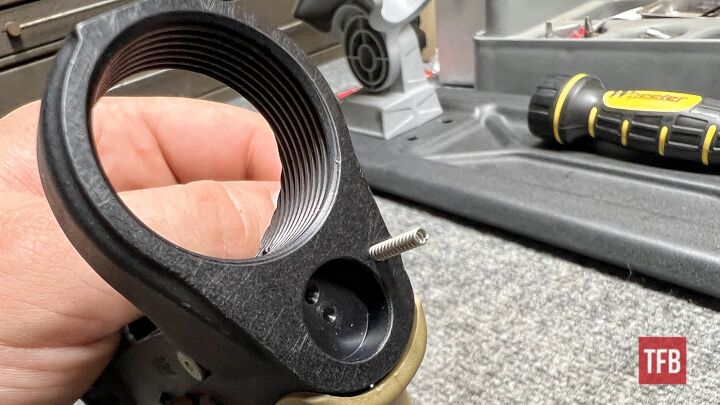
Place the takedown pin in its hole and the plunger into the hole in the rear of the receiver.
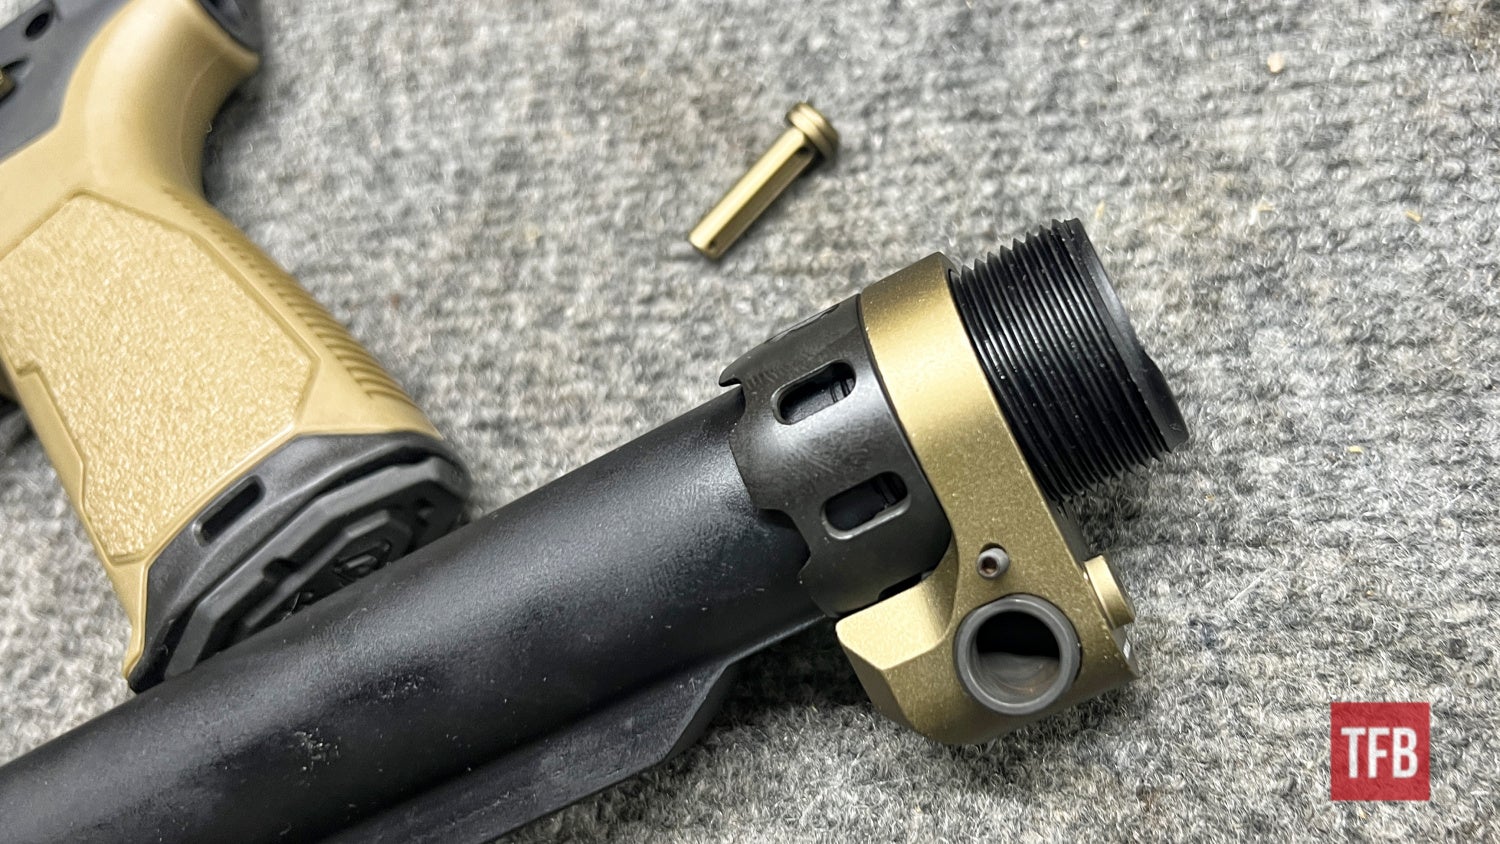
Screw the buffer tube into the rear of the receiver until you are about this far.

This is where the takedown pin spring is installed behind the plunger. Ignore that the buffer tube and endplate are not pictured.
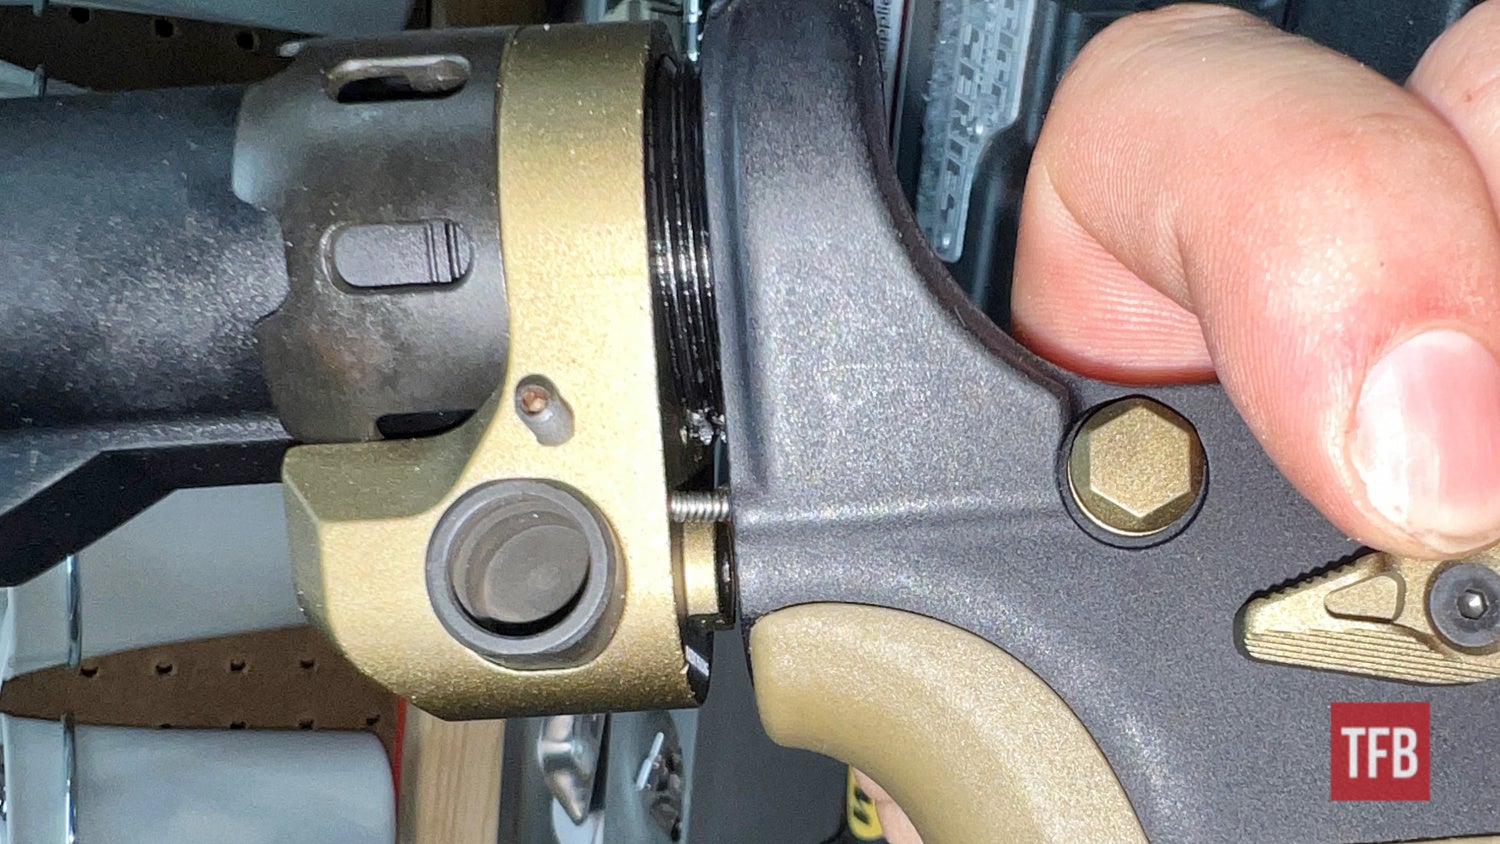
Continue to screw the buffer tune into place and mind the takedown spring while you do it. Screw the buffer tube in until you are able to just barely cover the buffer retaining plunger and spring.
With the buffer retaining plunger captured by the lip of the buffer tube, slide the endplate forward which in turn compresses the takedown spring and plunger.
The castle nut can now be screwed down onto the endplate which keeps it captive. This castle nut and endplate combination does not need to be staked in place like most normal ones do (I will cover this process in a different article). Instead, it has two screws, one on either side, that get tightened down and lock it in place.
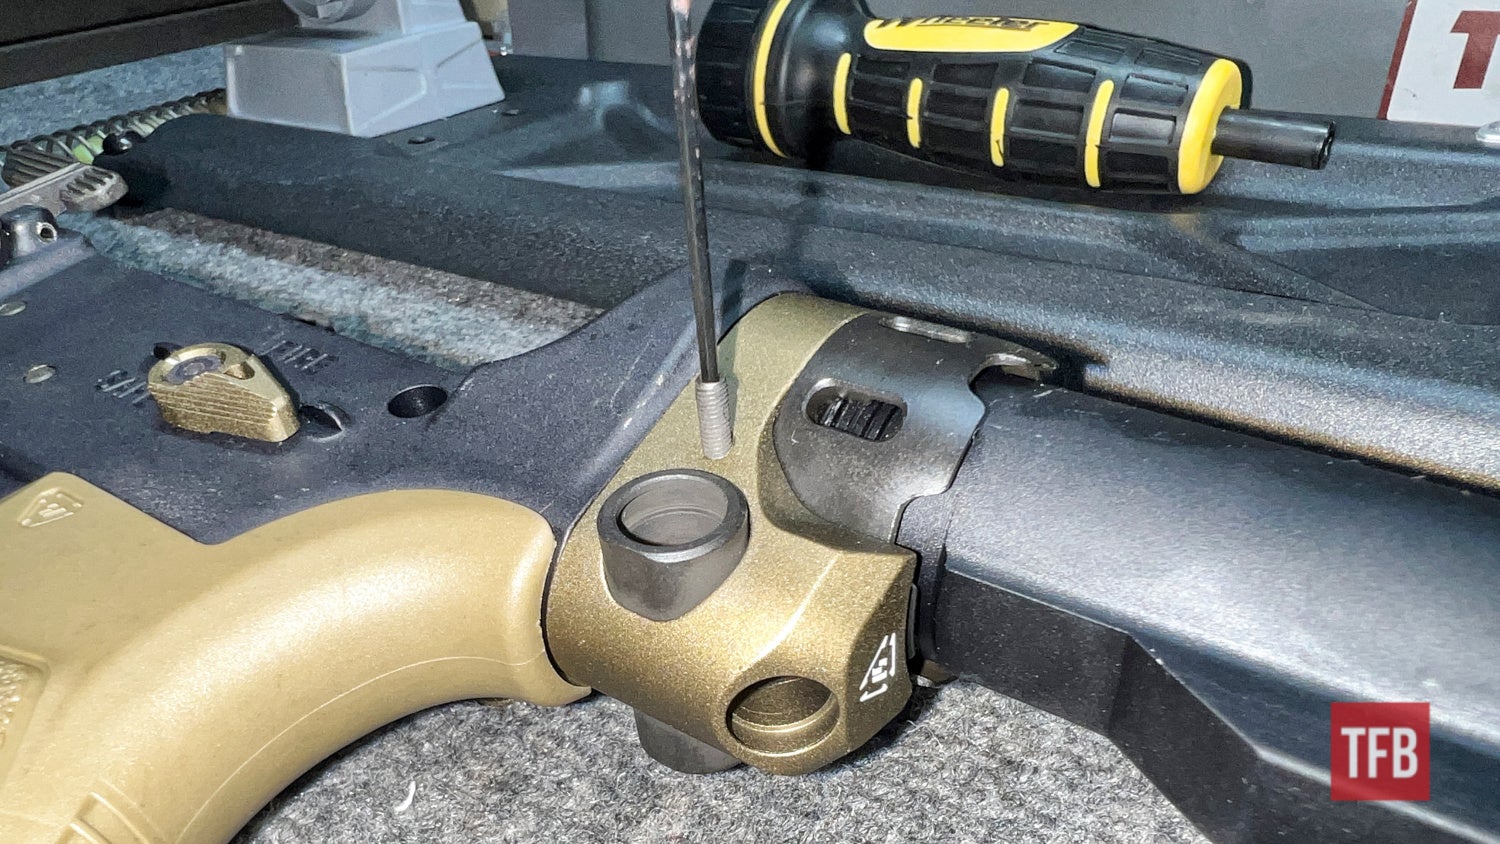
Note: Typically the castle nuts are torqued down to 35 to 40 foot pounds.
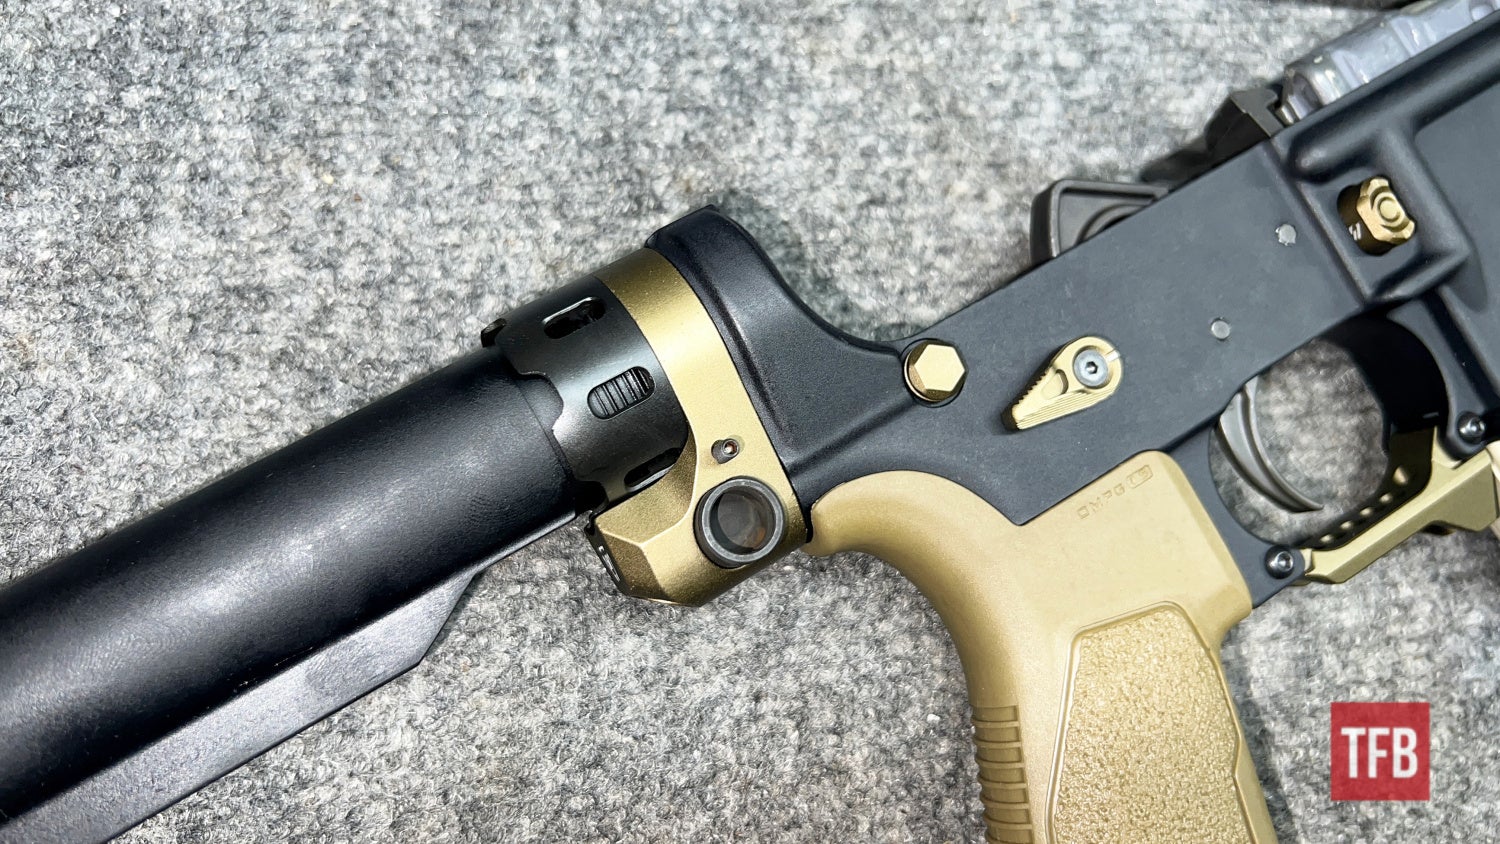
Step Twelve: Complete AR15 Assembly – Lower Receiver
After the buffer tube assembly is installed the buffer and buffer spring can be slid into the tube.

Note: If the buffer tube is over-tightened and against the buffer retaining plunger, it will most likely be unable to move, prevent the buffer’s installation, and/or produce malfunctions.
Step Thirteen: Complete AR15 Assembly – Lower Receiver
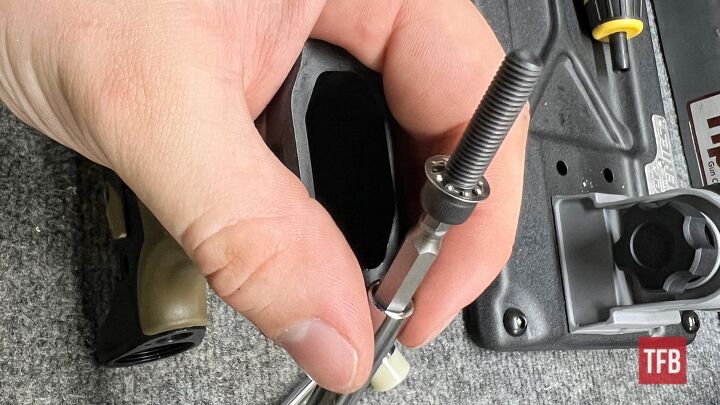
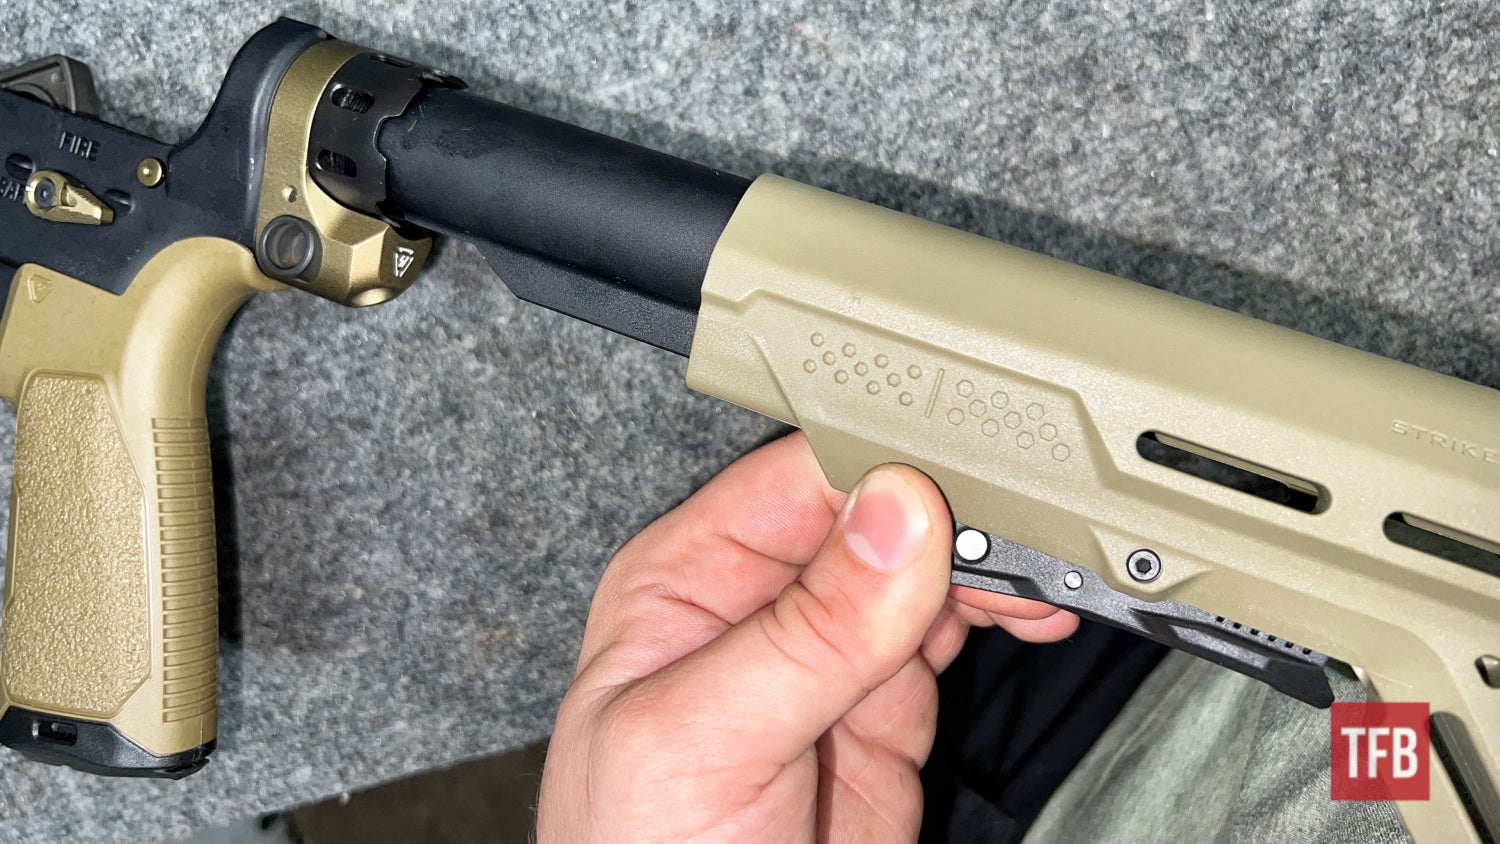
Lastly, the stock of your choosing can be installed. This one is another Strike Industries product. Most adjustable style stocks are installed the same way. The lever responsible for adjustment is pulled straight out as far as it can go in order to pass onto the rails on the buffer tube.
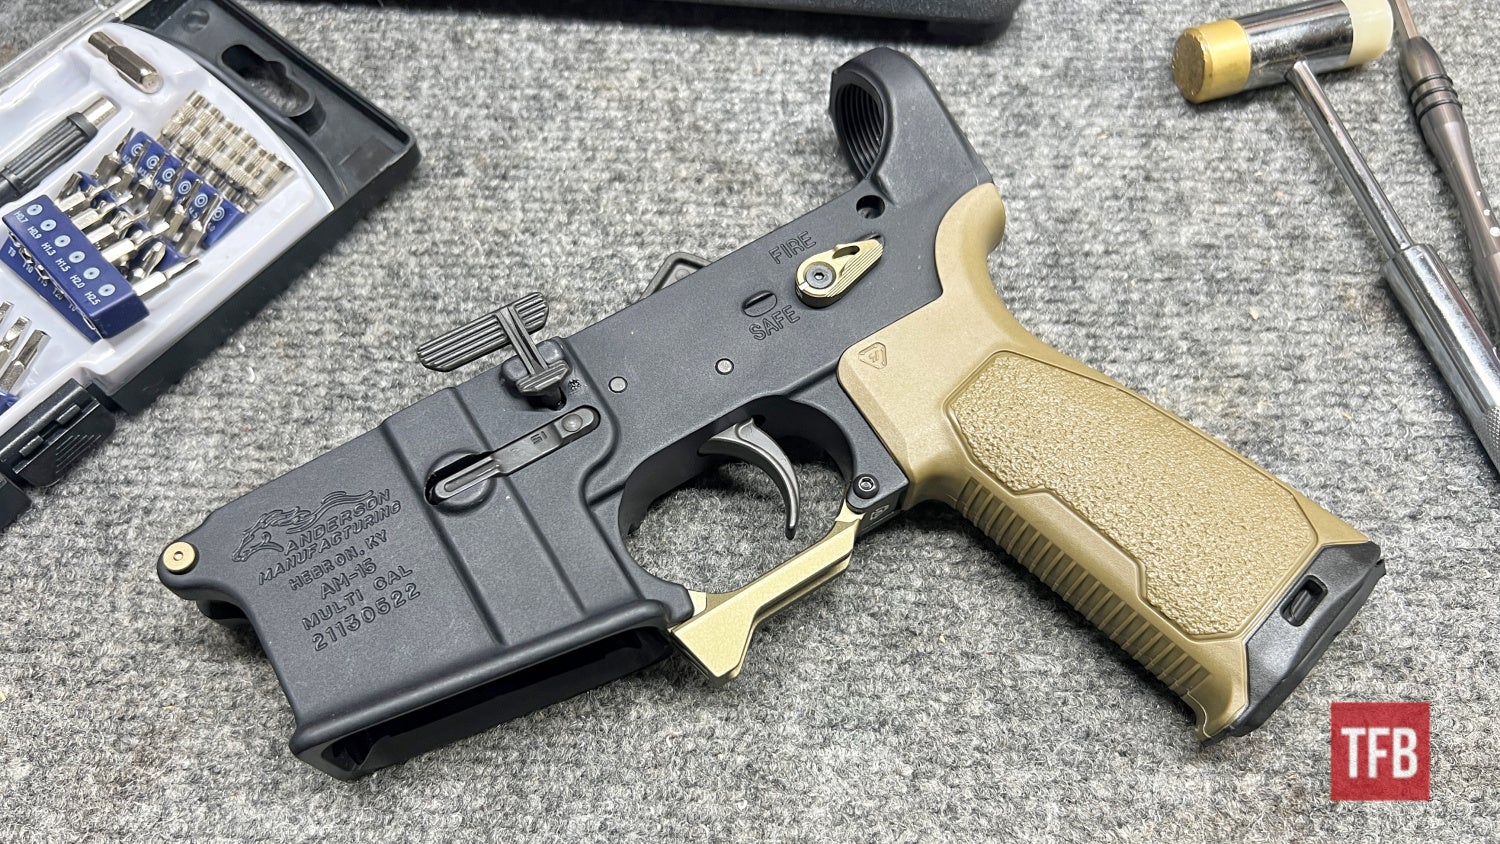
End of The Lower – Complete AR15 Assembly
I hate to leave anyone hanging with just the lower assembled but the upper will have to wait for a separate week. If anyone has their own tips and trick or recommendations for anyone out there that needs a hand with lower assembly, feel free to talk amongst each other in the comments. At some point, I plan to do a separate tips and tricks article! Keep in mind that some folks may be new to this sort of thing and be considerate of any questions they may have. Thanks for tagging along so far and see you next time!
As always, thank you for reading TFB! Be safe out there, have fun while shooting, and we will see you next time for the TFB Armorer’s Bench brought to you by Wheeler, Tipton, Caldwell, and Frankford Arsenal! Also, let us know what you think in the comments below! We always appreciate your feedback.

Pro Range Glasses, Clear

The Caldwell® Pro Range Glasses feature a stylish wrap-around design and are a great choice for all shooters. They feature an adjustable nose piece and temples for all day comfort. The scratch resistant lens meets ANSI Z87.1 standards and offers 99.9% UV protection.
72 Piece Professional Gunsmithing Screwdriver Set

The Wheeler 72 Piece screwdriver set features 54 hollow-ground flat bits, 4 phillips, 3 torx, and 8 specialty bits all made from durable S2 tool steel with a 56-58 Rockwell “C” hardness rating. The precision-engineered bits have a concave shape that allows for insertion all the way into the screw slot of rmaximum contact to prevent burred, buggered, busted up screw slots. The kit also includes 2 non-slip, overmolded plastic handles that come in a convenient hinged storage case whcih includes a bit location guide.
AR Armorer’s Bench Block

Tired of trying to secure your AR parts while installing a pin, detent or spring? The AR-15 Bench Block is the answer! Specifically designed for AR-15 assembly and disassembly, the AR-15 Bench Block is the perfect tool. It securely holds the upper receiver, lower receiver, front sight and charging handle during assembly, disassembly and maintenance.
Hammer and Punch Set, Plastic Case

The Wheeler® Hammer and Punch Set includes a polymer/brass combination hammer, eight precision brass punches, four steel punches and two plastic punches. It comes in a handy molded case. It makes for a great tool for driving pins or drifting sights at the shooting range, or on your gunsmithing bench.
AR Bolt Catch Install Punch Kit
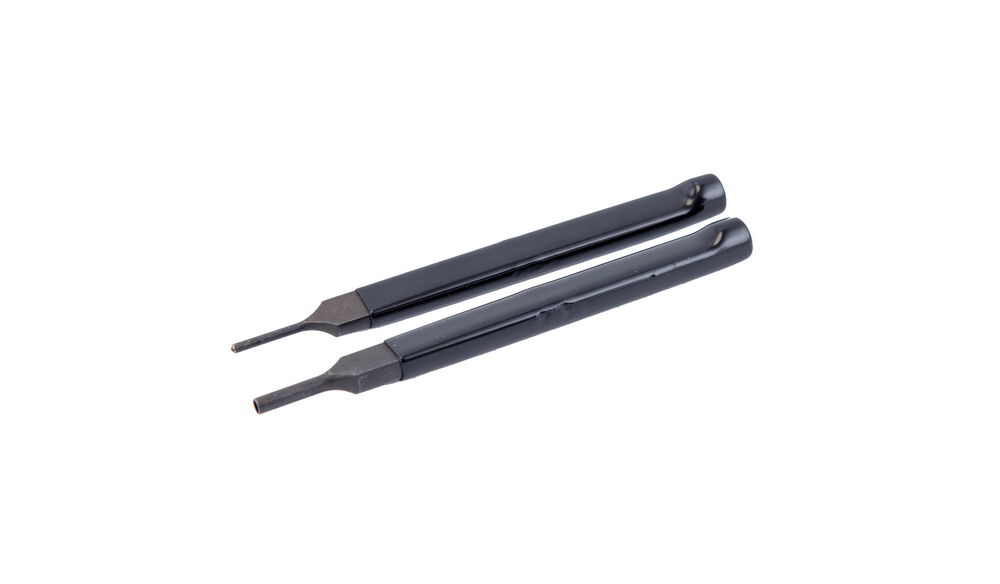 Wheeler® Engineering Bolt Catch Install Punch Kit starts bolt catch roll pins easily with the starter punch and finishes installation flush with the finishing punch.
Tipton ULTRA GUN VISE
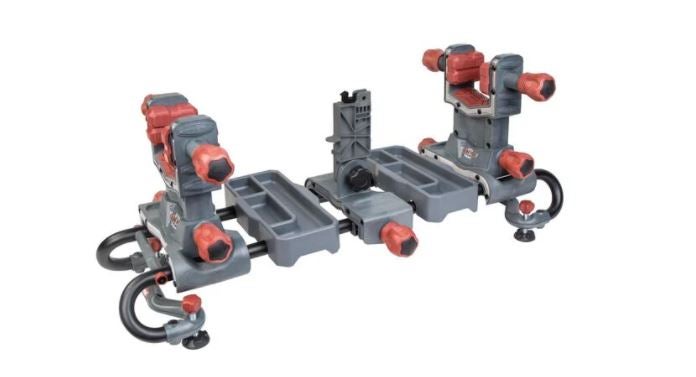
The Tipton® Ultra Gun Vise features a completely modular interchangeable design to allow virtually any shape firearm or crossbow to be cleaned and worked on with ease. The ball and socket articulating clamp pads allow for the pads to adapt to any surface. The dual clamp technology rigidly holds any firearm shape in place, while the rigid steel tube frame structure allows for complete access to your firearm or crossbow. The front and rear clamps are both height and length adjustable, and feature fast-turn knobs allowing for quick clamping. The solvent-resistant accessory and tool trays are movable and removable to stand up to even the toughest jobs.
Wheeler AR Armorer’s Ultra Kit

Ultra Kit includes: AR-15 AR Armorer’s Vise, AR-15 Combo Tool, Torque Wrench, AR-15 Armorer’s Bench Block, AR-15 Roll Pin Installation Tool Kit, Upper Vise Block Clamp with Gas Tube Alignment Tool, Maintenance Mat with Exploded AR-15 Diagram, Pivot Pin & Roll Pin Installation Tool, AR Front Sight Tool, Delta Ring Tool, Strap Wrench, AR-15 Bore Guide, AR-15 Adjustable Receiver Link, .22 Cal Bore Brush, Bolt Carrier Brush, Chamber Brush, Magazine/Upper Receiver Brush, Nylon Brush Handle, Double-ended General Cleaning Brush, Cleaning Pick Set, and Custom Fitted Carrying Case.