 Your Privacy Choices
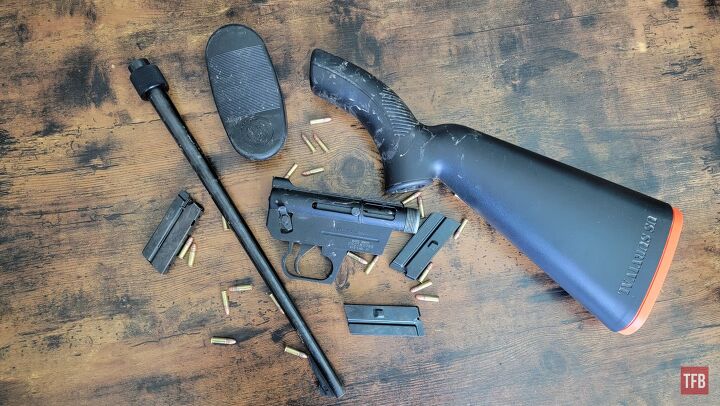
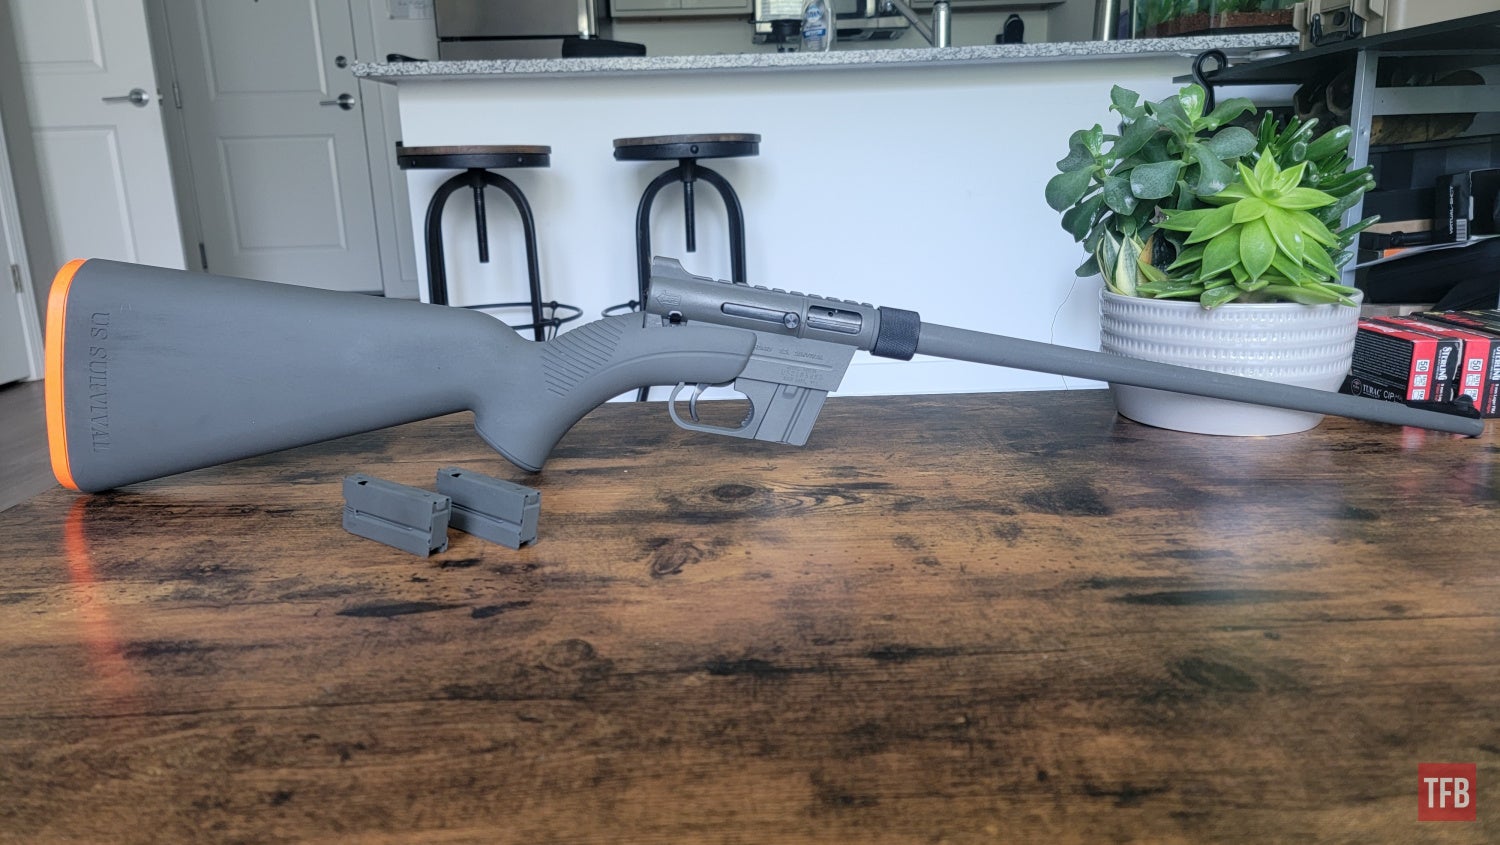
Hello and welcome back to another edition of The Rimfire Report! This ongoing series is all about the rimfire firearm world and its many firearms, ammunition, shooting sports, and history! Last week we did a direct comparison of a dedicated integrally suppressed rimfire Integra 15-22 upper and a Form 1 oil filter suppressor. In that article, we discovered that although the integrally suppressed rifle works beautifully, it has a few drawbacks, and the same goes for the oil filter suppressor. Ultimately, my pick would be the Integra 15-22 for its straightforward design and sleek, low-profile suppressor that still allows you to use red dots without a ridiculously high riser. In any case, suppressors only serve to add to the fun when it comes to rimfire guns, at least in my opinion. This week we’re digging back a bit further into the Rimfire Report archives to bring back a perhaps infamous firearm from the series. That’s right, I’ve gone and dunked my Henry AR-7 into the water again. However, this time I didn’t manage to lose one of the most crucial parts to the build (the barrel), and as a result, it almost immediately became covered in rust, as did the magazines. Not happy with the low resistance to such corrosion, I set out last week to better “weatherproof” the Henry AR-7. Today I’ll be sharing this process with you and showing you where I succeeded, and where I could probably have done a bit better with the whole process.
More Rimfire Report Articles @ TFB:
- The Rimfire Report: Gemtech Integra Suppressed Upper vs Oil Filter
- The Rimfire Report: The SIG P322 – 10,000 Rounds Later
- The Rimfire Report: Walther WMP 22WMR Pistol Review

The Rimfire Report: The Best DIY Upgrade For Your Henry AR-7
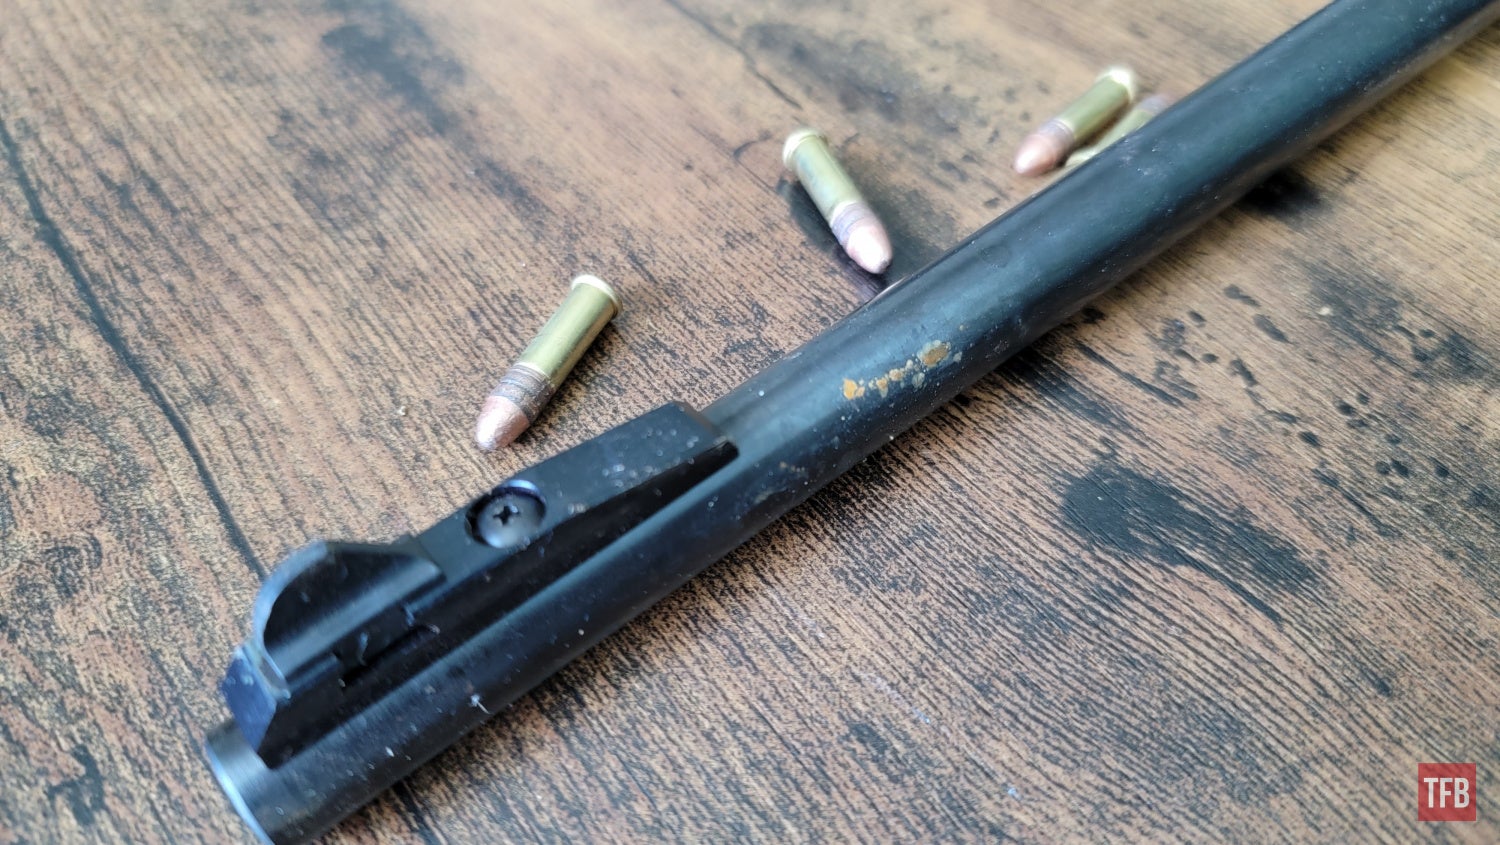
For most gun owners, a lot of care and time is put into making sure that their rifles, pistols, and shotguns are properly cleaned and dried before being put into storage. I more or less fall in line with this type of thinking and methodology but I have a few firearms in my collection that I don’t do this with – one of them is the Henry AR-7 Survival Rifle. Although the AR-7 can indeed float and features mostly aluminum construction which is fairly corrosion resistant on its own, the barrel itself is made from steel and only has a blued finish – not the most durable when it comes to being submerged or subjected to lots of water for long periods of time.


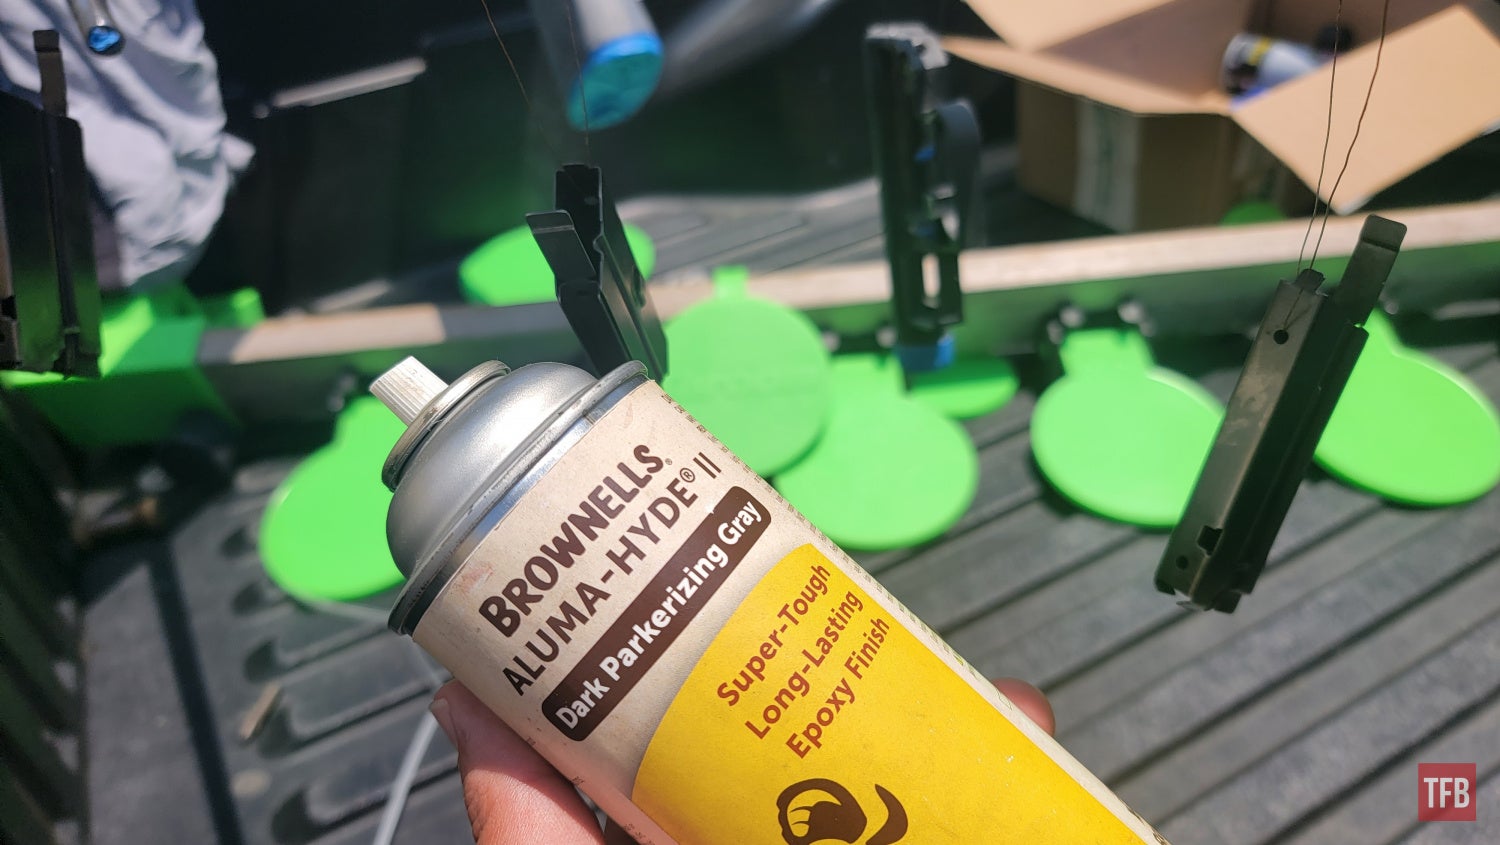
For the task of recoating the barrel in a much more corrosion-resistant finish, I chose Brownells Aluma-Hyde II Epoxy Spray Paint. I’ve used Aluma-Hyde II in the past to fix other corroded parts and I thought that it might not only give the barrel of the AR-7 a better coating for the type of abuse that I deal to it but it also might make the rest of the gun a bit more custom and perhaps a bit more durable as well in the long run. The list of supplies I needed to accomplish this task is pretty small and I’ve listed them below for you.
- Aluma-Hyde II Parkerizing Gray – $12.99 from Brownells
- Non-Chlorinated Brake Cleaner – $5.29 from Advance Auto Parts
- Heavy Duty Stripping Pads – $3.98 from The Home Depot
- Disposable Nitrile Gloves – $12.97 from The Home Depot
- Masking Tape – $7.98 from The Home Depot
- Common Garage Tools – You should already have these in your garage
Step 1: Disassembly and Surface Prep
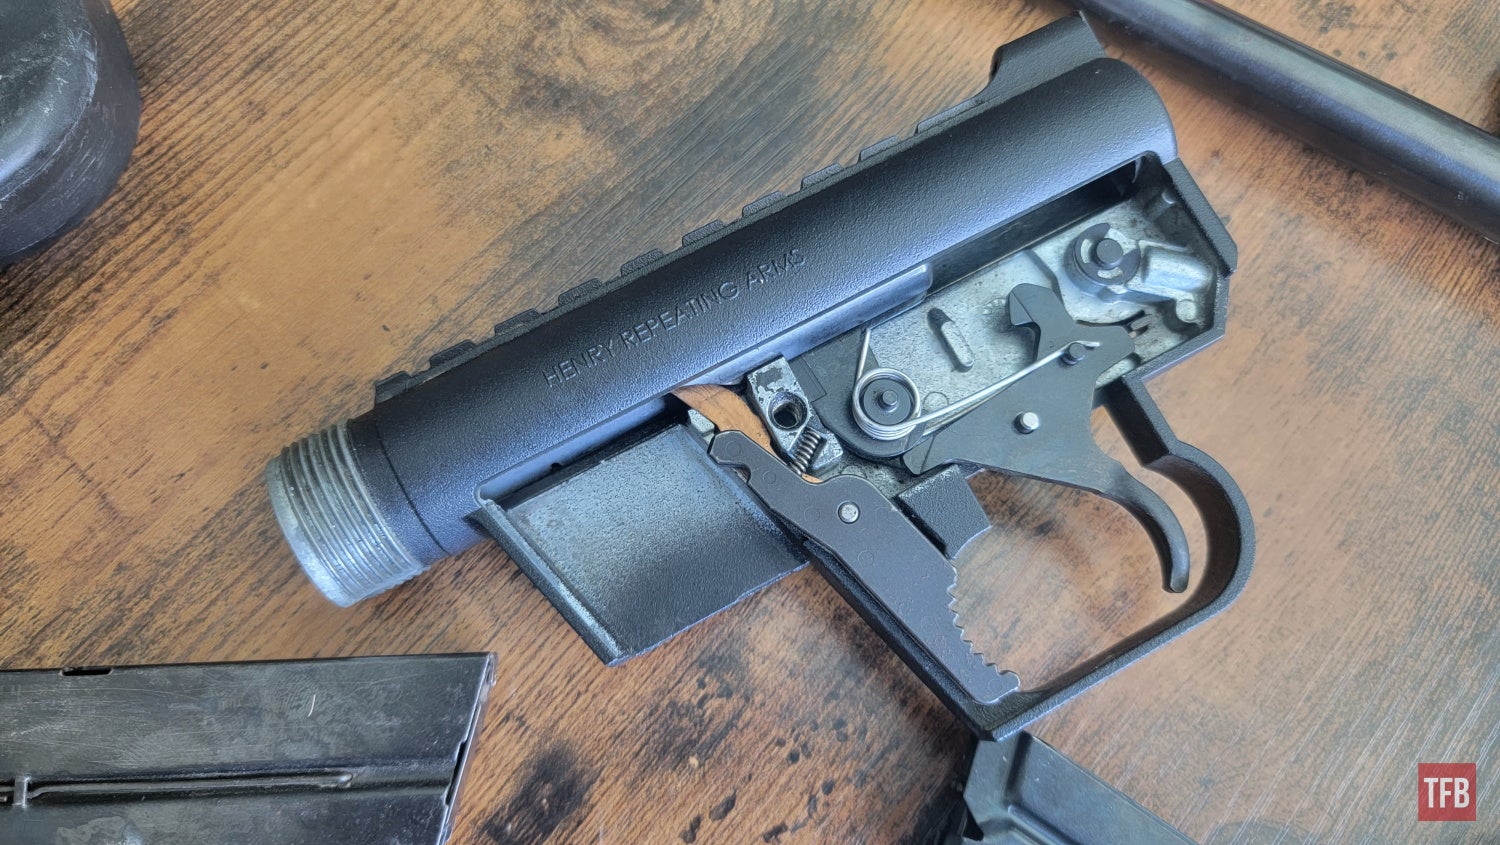
In order to get a nice, uniform coat that won’t affect the function of the gun, we have to disassemble literally everything on this gun into its base parts. Luckily, the Henry AR-7 is a very simple firearm and you shouldn’t have any trouble disassembling or reassembling it even down to its component parts. Once the firearm is completely disassembled, you’ll want to prep all the surfaces you’re going to paint. The first step to doing this is simply wiping any excess mud, water, gun oil, or other debris from the surfaces to be painted. I avoided painting any of the small moving parts of the gun so that I wouldn’t run into issues with function.
Once the parts were wiped clean, I then took my stripping pads and proceeded to “rough up” the stock, receiver, barrel, and all three of the magazines that came with the gun. The magazines and barrel were the only items that needed to have surface rust removed and to that end, I simply just put a bit of elbow grease into it and scuffed it away till it felt smooth with the rest of the surfaces.
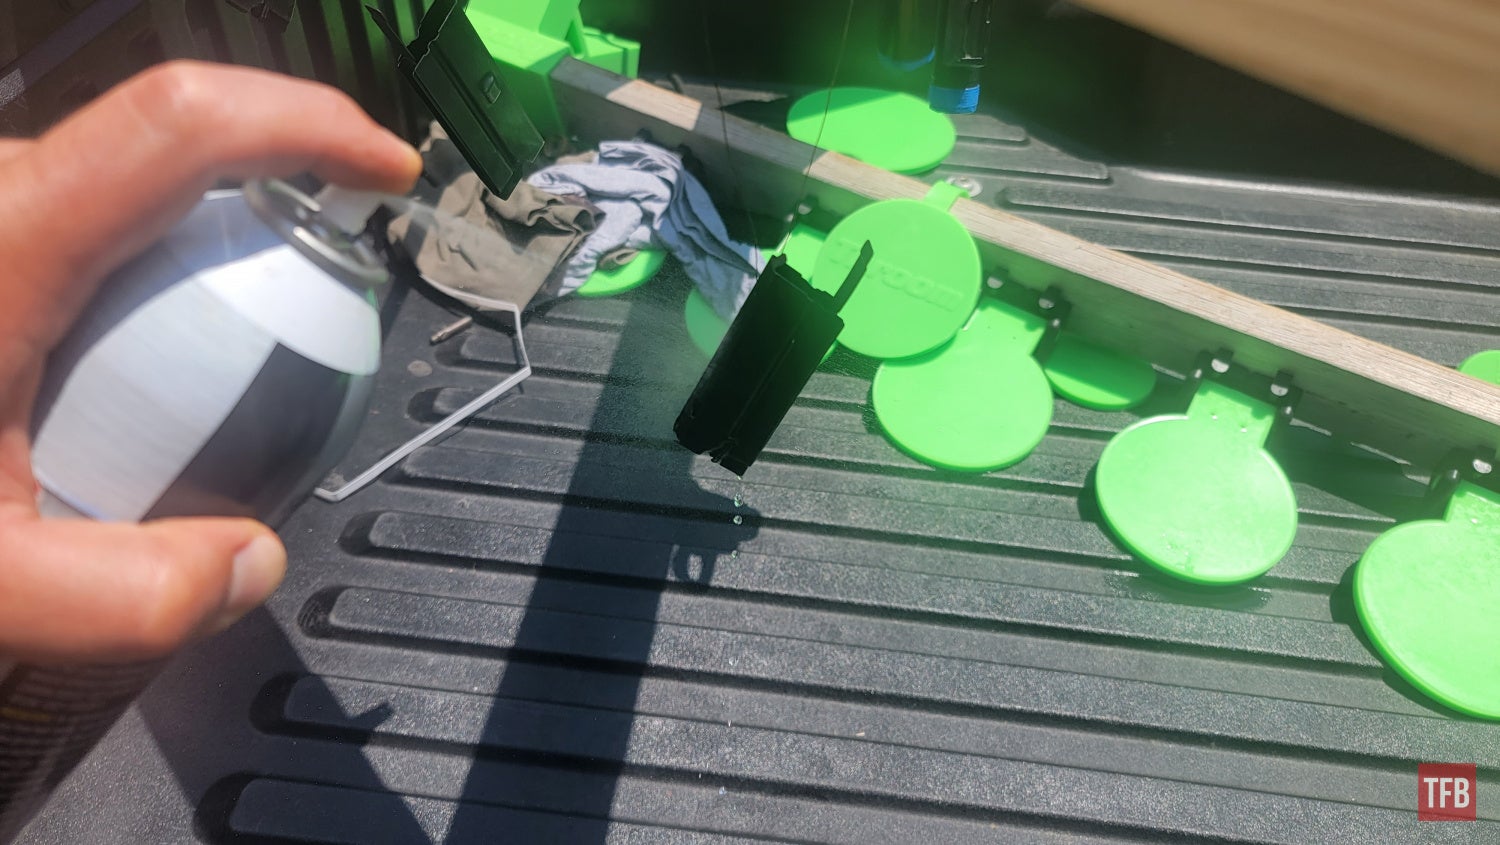
Once the scraping is done, you can wipe down the plastic stock and the receiver with a damp paper towel to remove any dust (do not use the Brake Parts Cleaner on these parts as it will ruin the plastic coating on both the receiver and stock). At this point, you can suspend all the parts mid-air so that they are ready to be sprayed. For the metal parts (magazines and barrel), I used my Brake Parts Cleaner to spray off any dust and debris with several passes each. After spraying the metal parts down with the Brake Parts Cleaner, I let them dry for about 10 minutes in the sun.
Step 2: Masking
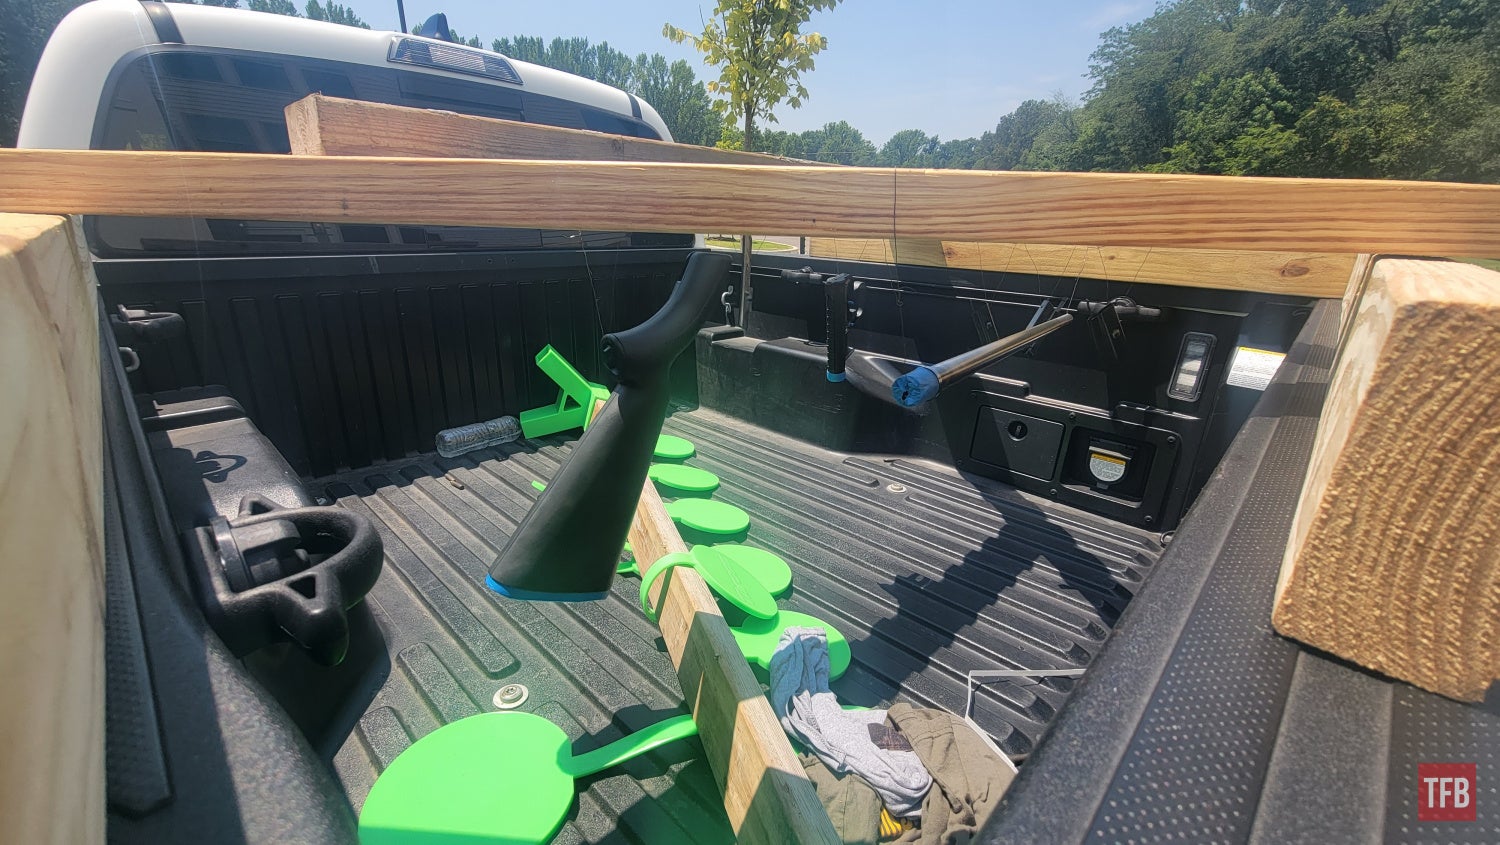
Masking your parts should be a familiar process if you’ve painted anything before. The goal here is to mask any sensitive areas which would include tapped holes, holes where parts rotate in, threads, and also places you want to remain the same color as before. For my project, this basically included the crown of the barrel, the barrel extension, the orange interior compartment of the stock, the threaded end of the receiver as well as two small stainless steel indexing pins used to hold the gun together in the proper orientation.
Step 3: Paint / Cure
Part of why I love Aluma-Hyde II so much is that it’s insanely accessible to everyone. As opposed to Dura Coat or Cerakote, which require more tools, more time, more skills, and more money, Aluma-Hyde II is cheap, easy to use, and doesn’t require any mixing or forced curing times in a high-temperature oven. For this job, we needed to make a few different types of coats for each set of parts. When spraying your parts, it’s best to make your passes short, light, and even all in the same direction if possible. Overspraying your parts can lead to buildup which can not only ruin the aesthetic of your finish but outright ruin it causing you to have to start all over.
For the receiver and magazines, I was worried about parts fitment becoming a problem with too many coats so I went fairly light on these parts and only added two coats within 15-minutes of one another. I took special care to not spray too much of any Aluma-Hyde inside of the receiver out of fear of interfering with the cycling of the bolt within it. The stock and barrel received the heaviest coats and I probably used 4 coats each for those.
Once you’re satisfied with the job you’ve done and you feel like you’ve got uniform coverage, you can let the parts sit out in the sun or inside the garage for about an hour or so. After this, they should be dried enough to touch lightly so you can move them into either curing in an oven or cure for the next two weeks in a mostly dust-free environment. I didn’t opt to oven cure my parts this time (mostly because I don’t think the plastic stock would have done so well in there), but if you want to, Brownells recommends that you cure Aluma-Hyde II for about an hour in an oven at 195°F. I did this in the past with great results using all metal parts and it’s quite honestly the fastest and most reliable way to get a good finish.

Final Results and Lessons Learned
I’m fairly happy with how this particular Aluma-Hyde job turned out. The receiver and stock both turned out beautifully and I found that taking special care to make really light coats on the interior of the receiver still allowed the bolt to move smoothly and freely forwards and backward just like before. The magazines and the barrel on the other hand could have probably stood to have slightly different things done for better results.

The magazines are quite honestly a bit harder to fit within the gun now and will probably need to be sanded down and possibly even recoated to get them to drop more freely. The coverage will ensure that they don’t rust the next time the rifle is taken on a backwoods trip with me but I felt that 4 coats were once again too much – Aluma-Hyde is pretty thick compared to other weatherproofing coatings and that fact reared its head in full force with the magazines.

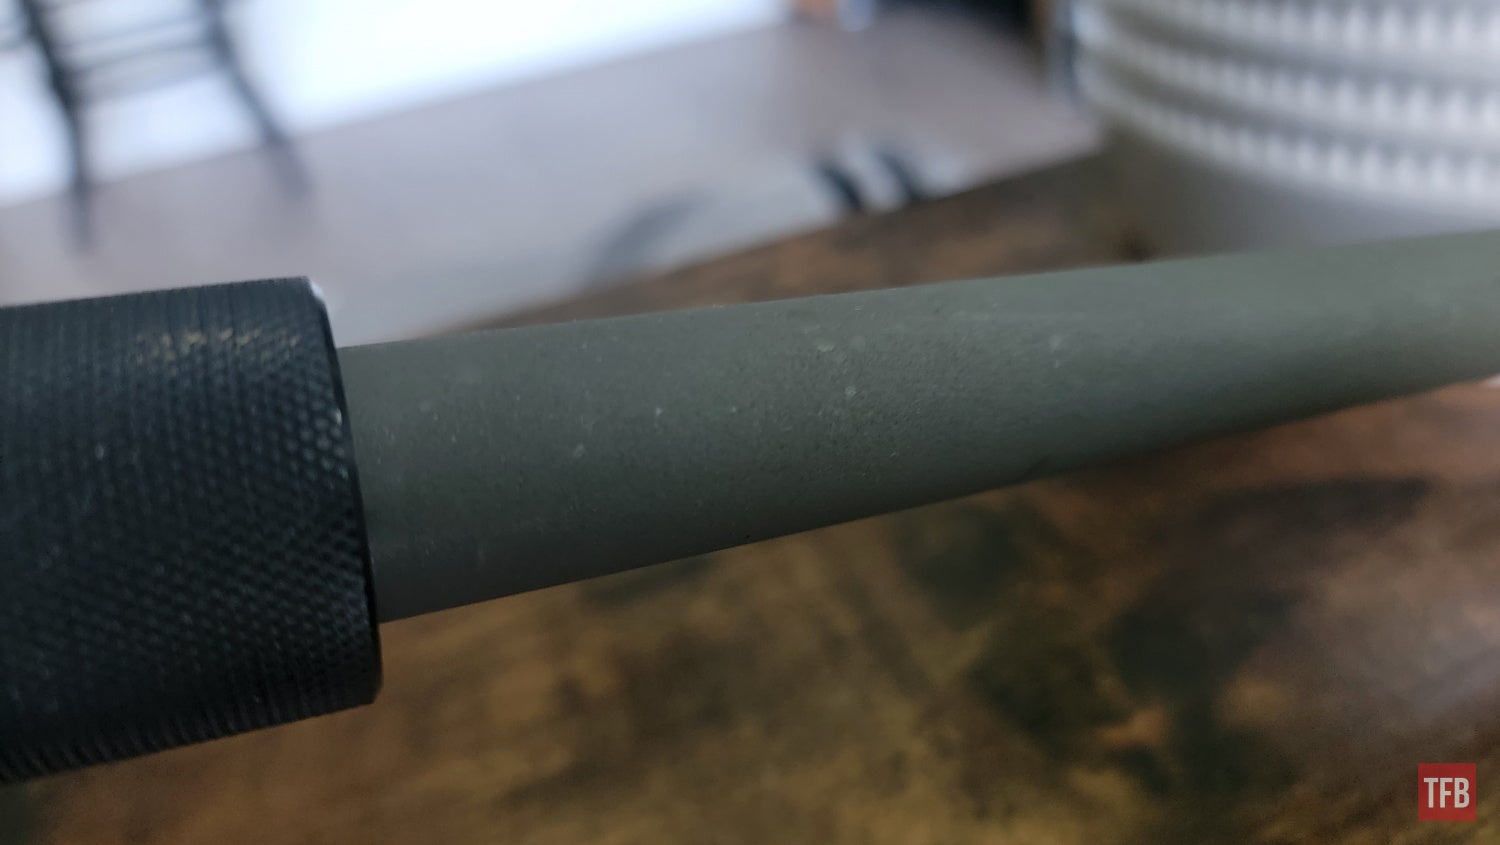
The barrel brought up an entirely different problem – temperature when spraying. On the day that I had the time and opportunity to spray the parts, it was about 100°F out. While this is within the application envelope for Aluma-Hyde, it did cause a slight problem of liquid spray buildup that dripped on the barrel when I went to spray it. Due to space restrictions, I wasn’t able to spray the barrel from the side very effectively and this caused a few spots to have really thick drops on them which I tried to remove with a dry cloth. However, the spots you see here are just cosmetic blemishes and don’t really affect the coating too much and I’m just happy I won’t be seeing rust on this barrel again any time soon.
Final Thoughts/ What’s Next?
The main goal of this project was simply to make the Henry AR-7 more corrosion-resistant. I know the interior of the barrel can still be subjected to corrosion, as can the bolt and trigger but coating those parts would inevitably lead to function issues – at least if Aluma-Hyde was used. Overall, I’m happy with the results and I’m looking forward to my next trek into the unknown with this rifle.
I’d like to hear your thoughts and suggestions on what should be done next with the AR-7. I know there are a ton of aftermarket and DIY modifications that can be made to these guns to make them much handier to use out in the field and I’d love to hear what you guys would do with one. As always, thanks for stopping by to read The Rimfire Report and we’ll see you all again next week!

We are committed to finding, researching, and recommending the best products. We earn commissions from purchases you make using the retail links in our product reviews. Learn more about how this works.