 Your Privacy Choices

If you have been reading some of my articles this past year, you must have noticed I have been using a Chronos 1.4 slow-motion camera. I have been looking up different ways to use my slow-motion camera in the context of studying firearms. I have helped to film weapon malfunctions that happen too fast for the eye to see. But what else can I do? Filming bullets flying through the air is kind of boring but there is something else you can do. Schlieren imaging uses a system of light and concave mirrors to see changes of density in a medium. Specifically the change in density of air. So I looked up how to do it and got to it.
Slow Motion @ TFB:
- Wheelgun Wednesday: Slow Motion S&W 500 – Mind The Gap
- Rifle Dynamics Slow-Motion AK Rifles
- Shockwave Shadows by Smarter Everyday – Supersonic Vs. Subsonic Bullets
Making a Schlieren Imaging Rig
The Smarter Everyday video about Shockwave Shadows was a huge inspiration for trying this out myself.
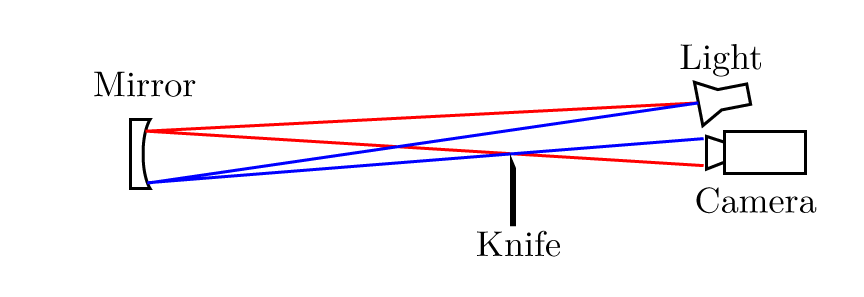
Photo by Miles Dai of MIT.
Making a Schlieren rig is not that difficult. It is rather simple and consists of a few components.
- Spherical/parabolic mirror
- Single point light source
- Razor blade
- Camera
- Subject to document
There are other ways to set up a Schlieren imaging rig but a single mirror is the easiest.
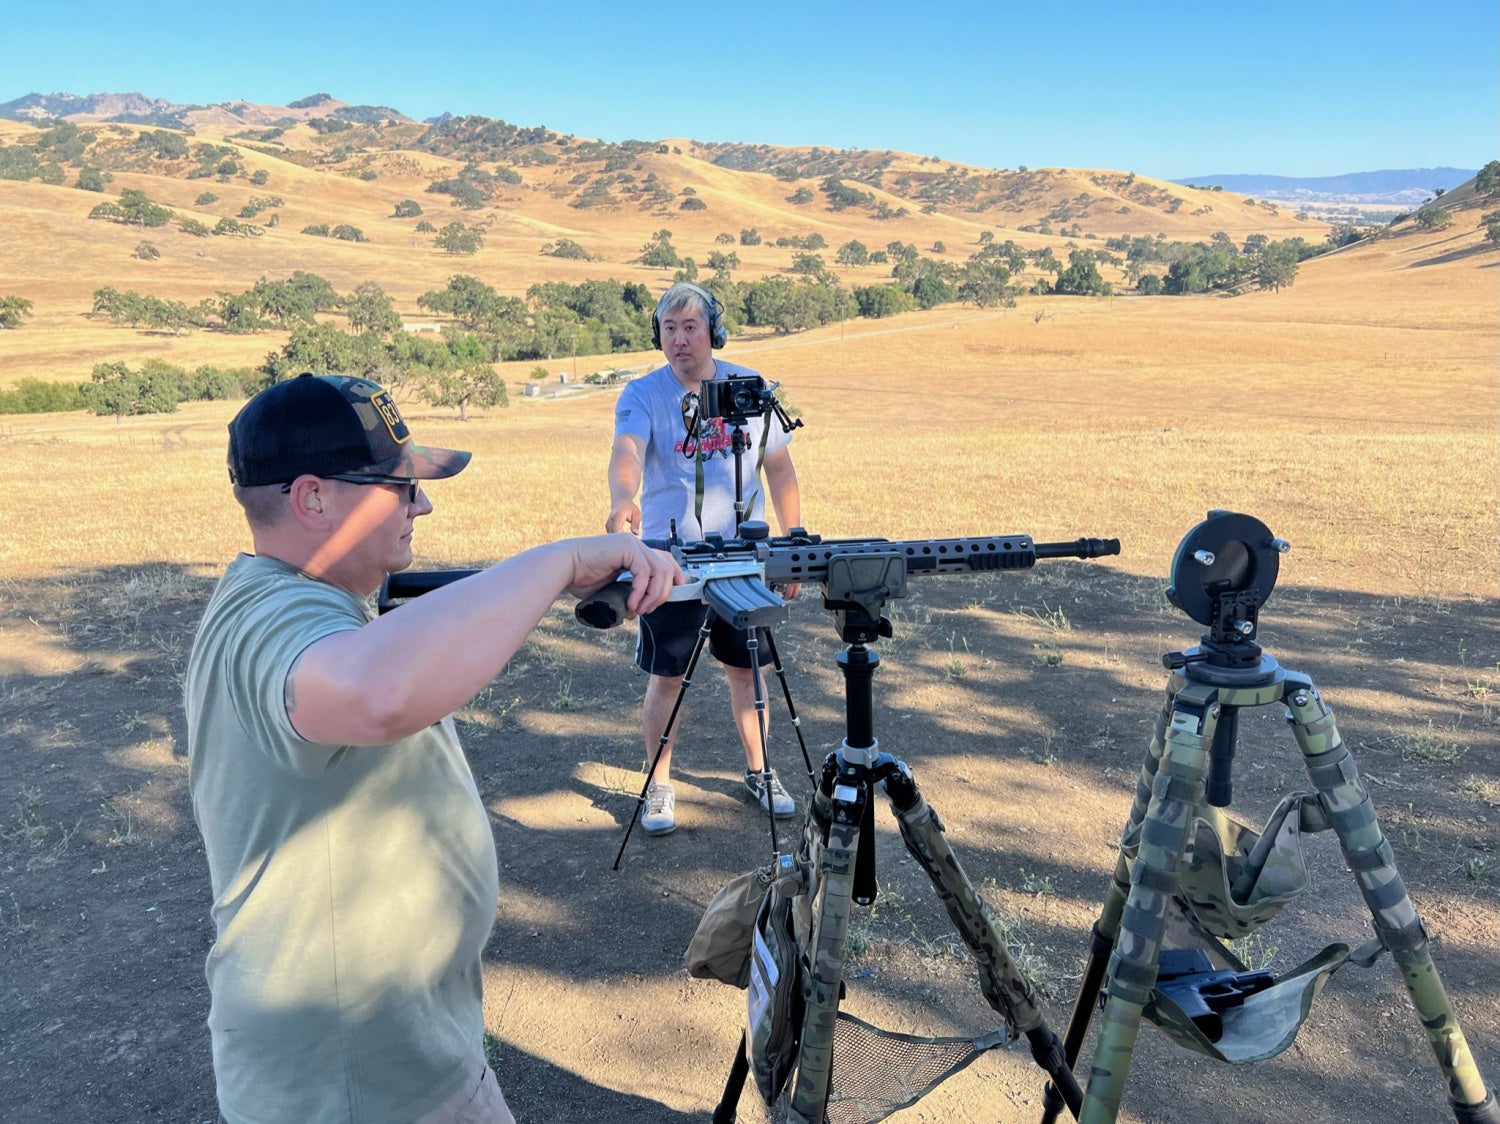
The first step was to source a spherical mirror. I was told by a fellow Chronos camera user in Germany to find a Newton Telescope and pull the mirror out of that. I found this telescope locally for $80.

Then I had to mount the mirror to something. Fortunately, it has three threaded rods sticking out the back with knurled cylinders that act like nuts. I shoved one of these threaded rods through a SmallRig camera block that has a bunch of 1/4×20 threaded holes. Then I screwed an ARCA plate to the bottom of this block so now I can mount the mirror to my tripod.

Now I need a single-point light source. I used a Surefire E1E with an LED head. I chose this because I can use my Nite Ize mini Maglite fiber optic adapter. I figured a fiber optic cable will be small enough. Many DIY Schlieren imagers use a small LED, then take a small piece of tin foil, poke a pinhole through it and wrap the LED so the hole is at the end of the LED bulb. To test my proof of concept, I used my Nikon 1 J5, which can film at 1200 frames per second.

Below is the footage from my proof of concept test. The flashlight and fiber optic work.
When I first tested this setup, I was in my home. But out at the range, the fiber optic was too dim, especially for the high frame rate I wanted to film at. So I pulled the fiber optic out and this light setup works like a charm. I used a SmallRig arm and clamp, screwed the arm into my camera cage and positioned the light next to my camera lens. In the Nikon 1 J5 test I witnessed a double image. It was the object I was observing and since the light was low casting upwards it cast a shadow against the mirror so I ended up seeing double. So to avoid that, I positioned the light next to my lens.
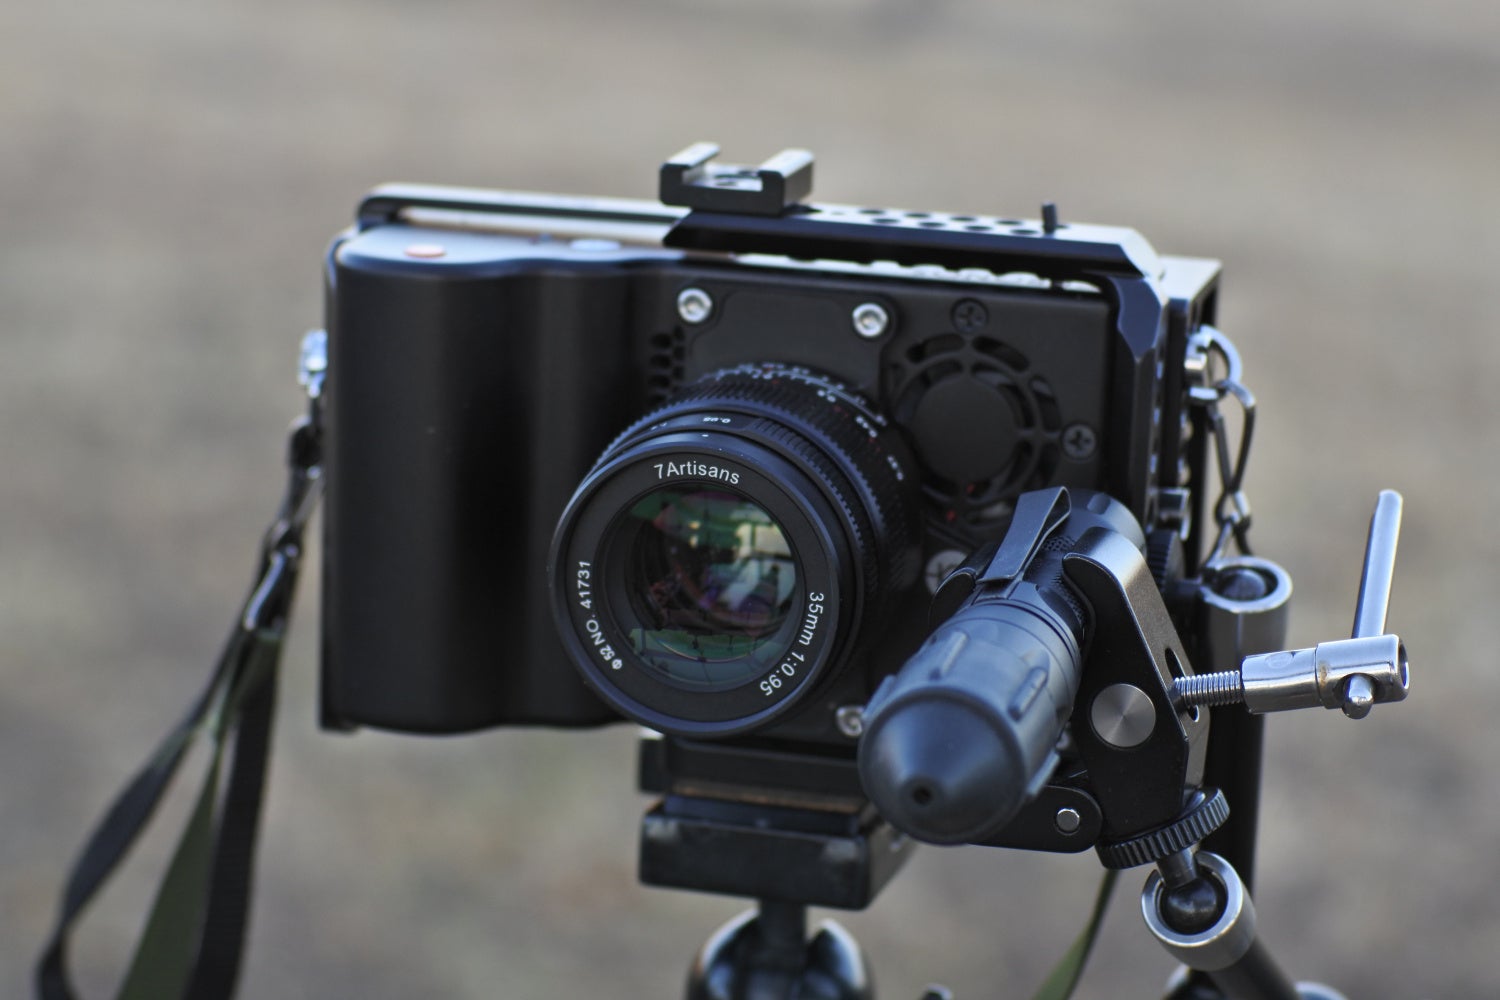
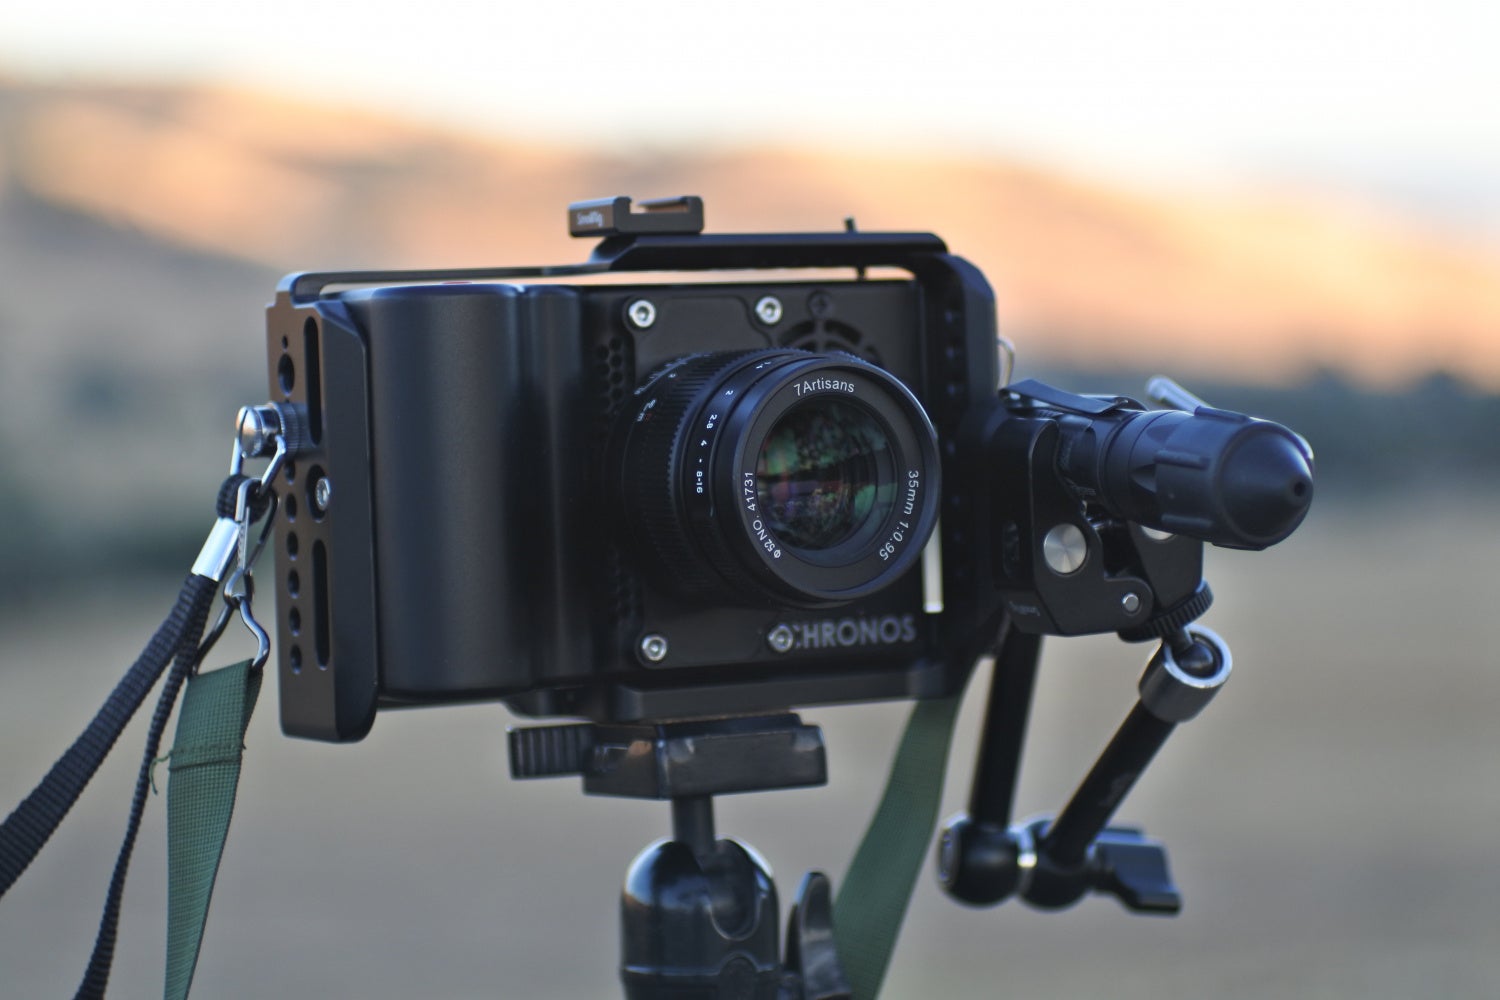
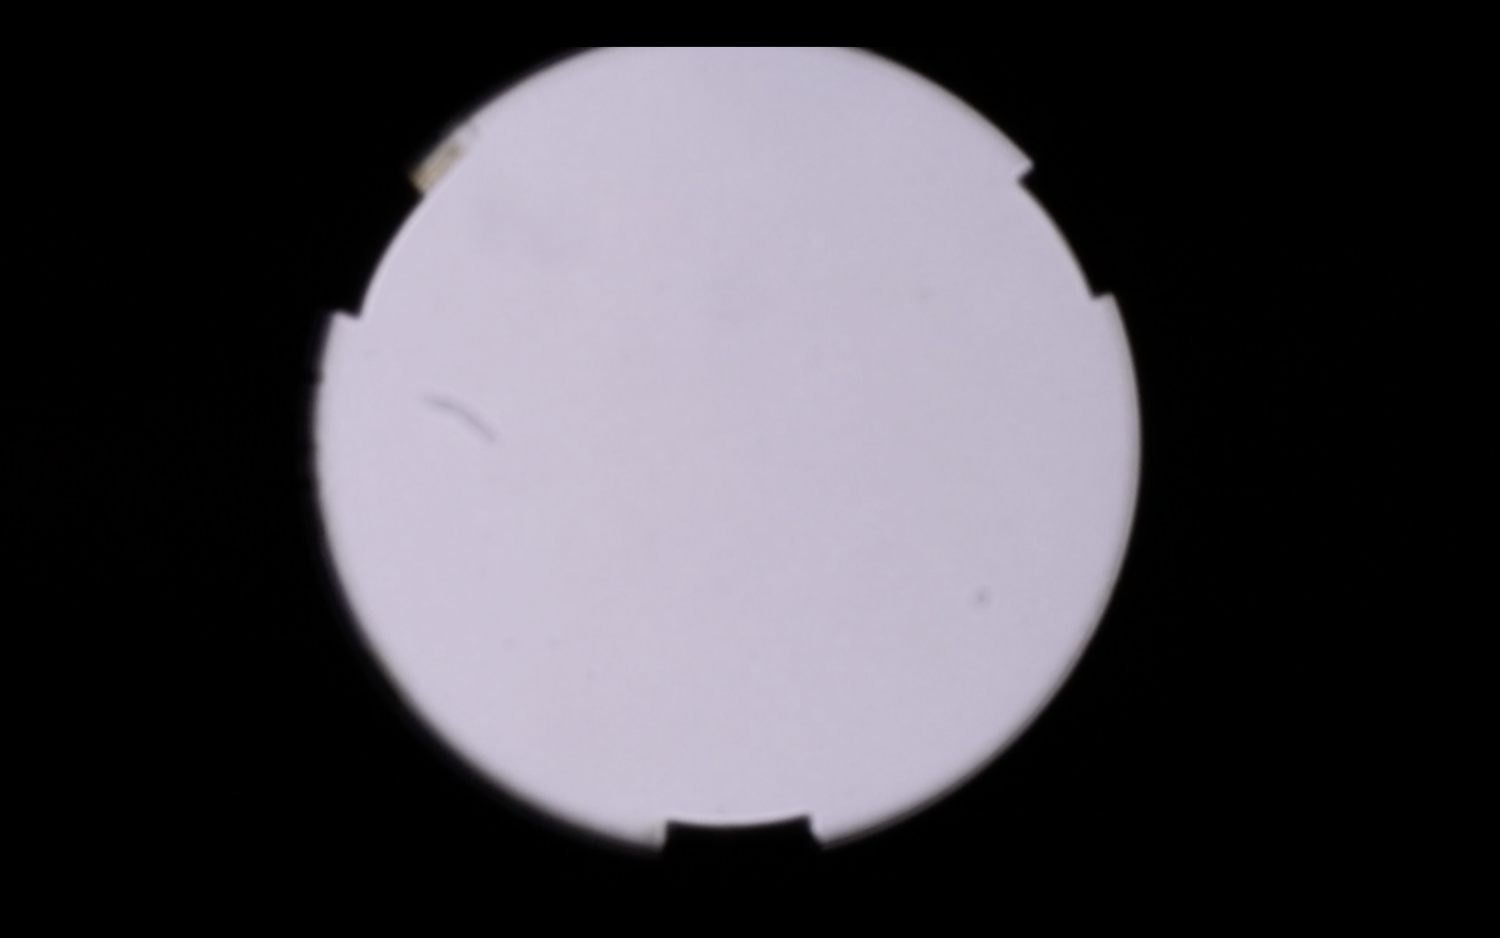
The challenge was finding the right position for the camera so the light bounces off the mirror and into the camera. When everything is lined up properly, this is what the camera sees. Later I found it easier to set up the light and camera, then adjust the mirror, since it is on a bowl tripod. I can aim the reflected light into the lens of my camera. Much easier than trying to position the camera up, down, left, right, forward or backwards on a tripod.
With the help of my friend Kythe, we tested a number of firearms and our friend’s air rifle just for fun. To our surprise, the air rifle yielded the most interesting images.
One of the things I wanted to capture was the muzzle blast from a muzzle brake. Since I did not want to ruin the spherical mirror, I had Kythe turn my AR 90º so in effect we would be looking at the top of the muzzle brake.
This was inspired by an Instagram post by Marten Van Ruitenburg, CEO of MDT TAC. See the post here. They used baby powder and compressed air to show how a certain muzzle brake works. I am not sure if this is an effective analog but it inspired me to try and capture something similar using Schlieren imaging.
Document The Invisible With Schlieren
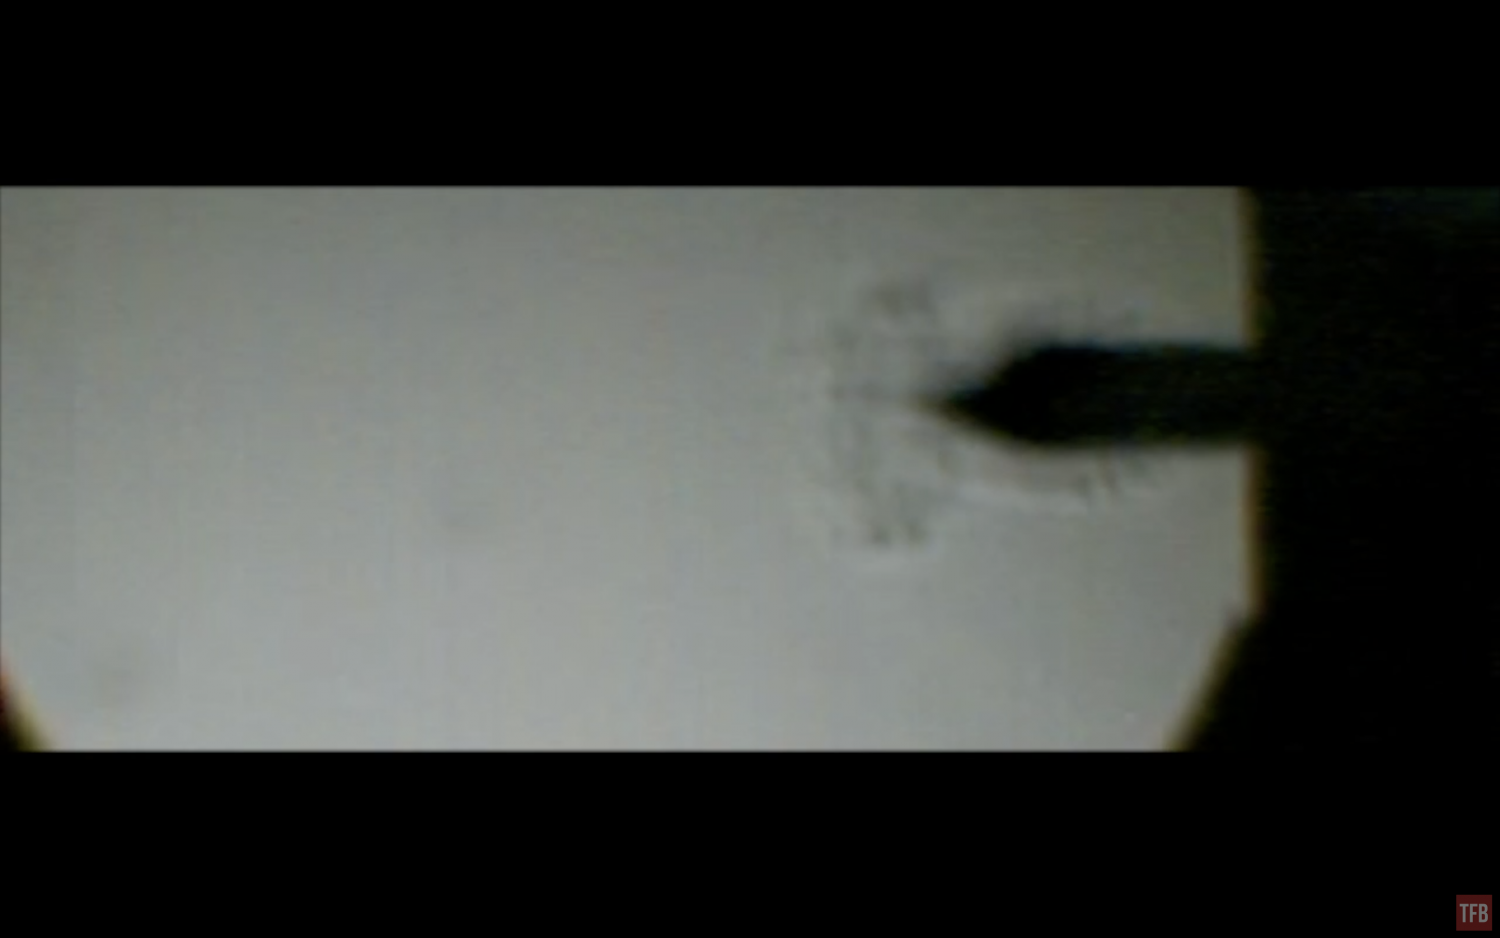
Unfortunately, due to the high-speed frame rate, the Chronos has to sacrifice resolution for speed. So it crops in and almost the entire muzzle brake is the size of the image. I did not get what I was hoping to see. But some of the other images were very interesting. We started with something easy, a .22LR bolt gun shooting subsonic and supersonic rounds. To our surprise, the subsonic .22LR round appears to have a very gentle bow wave at the tip of the bullet.

Do you see the slight curve just ahead of the bullet? I traced it in the photo below.

Subsonic .22LR
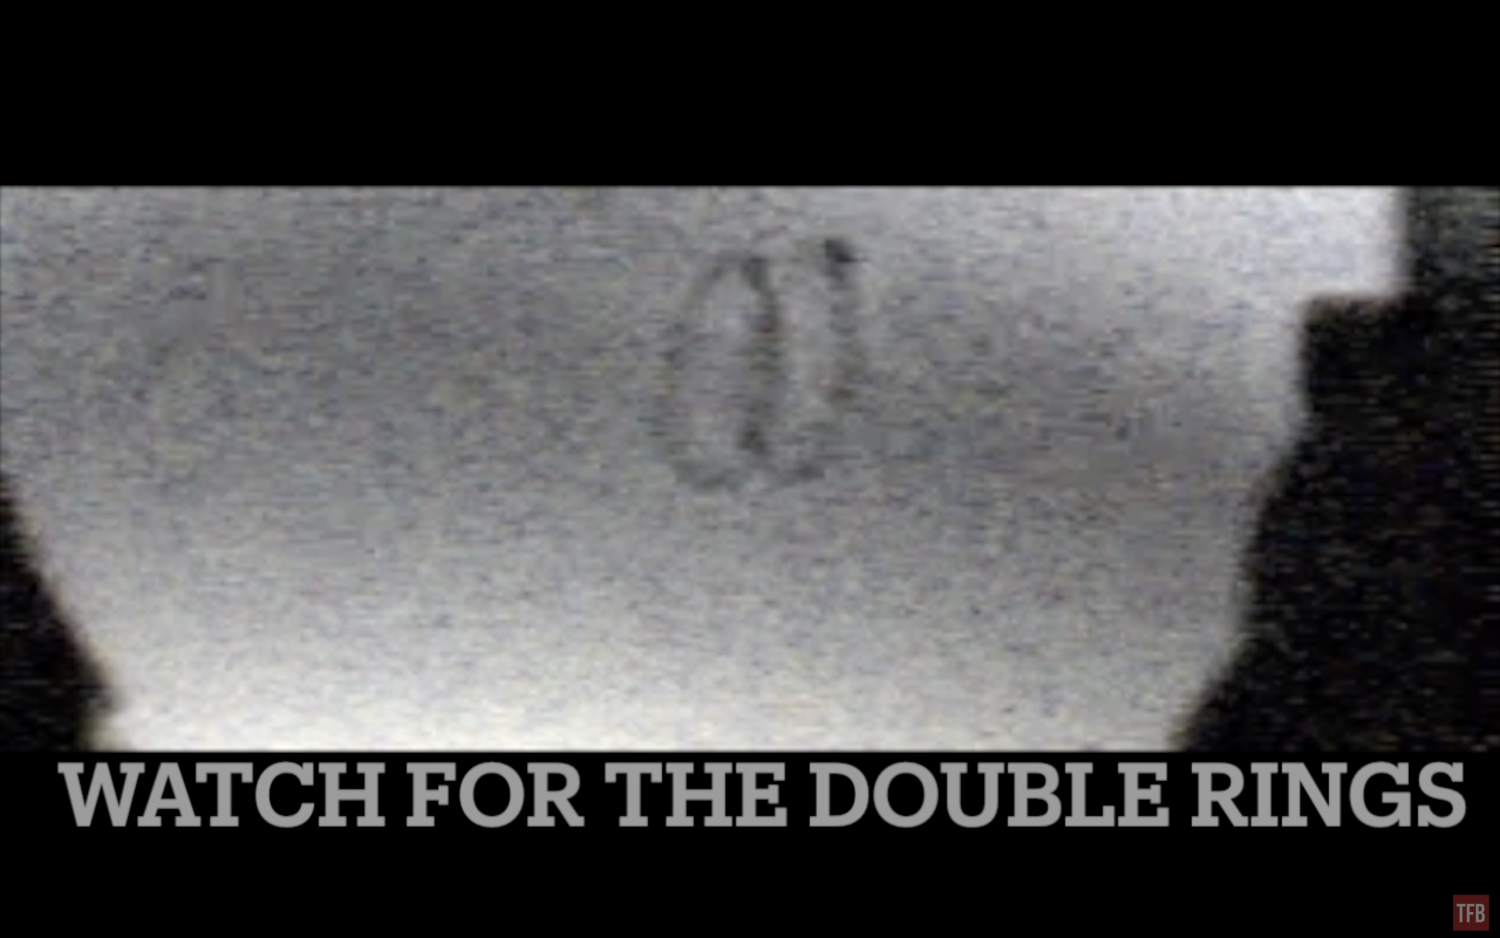
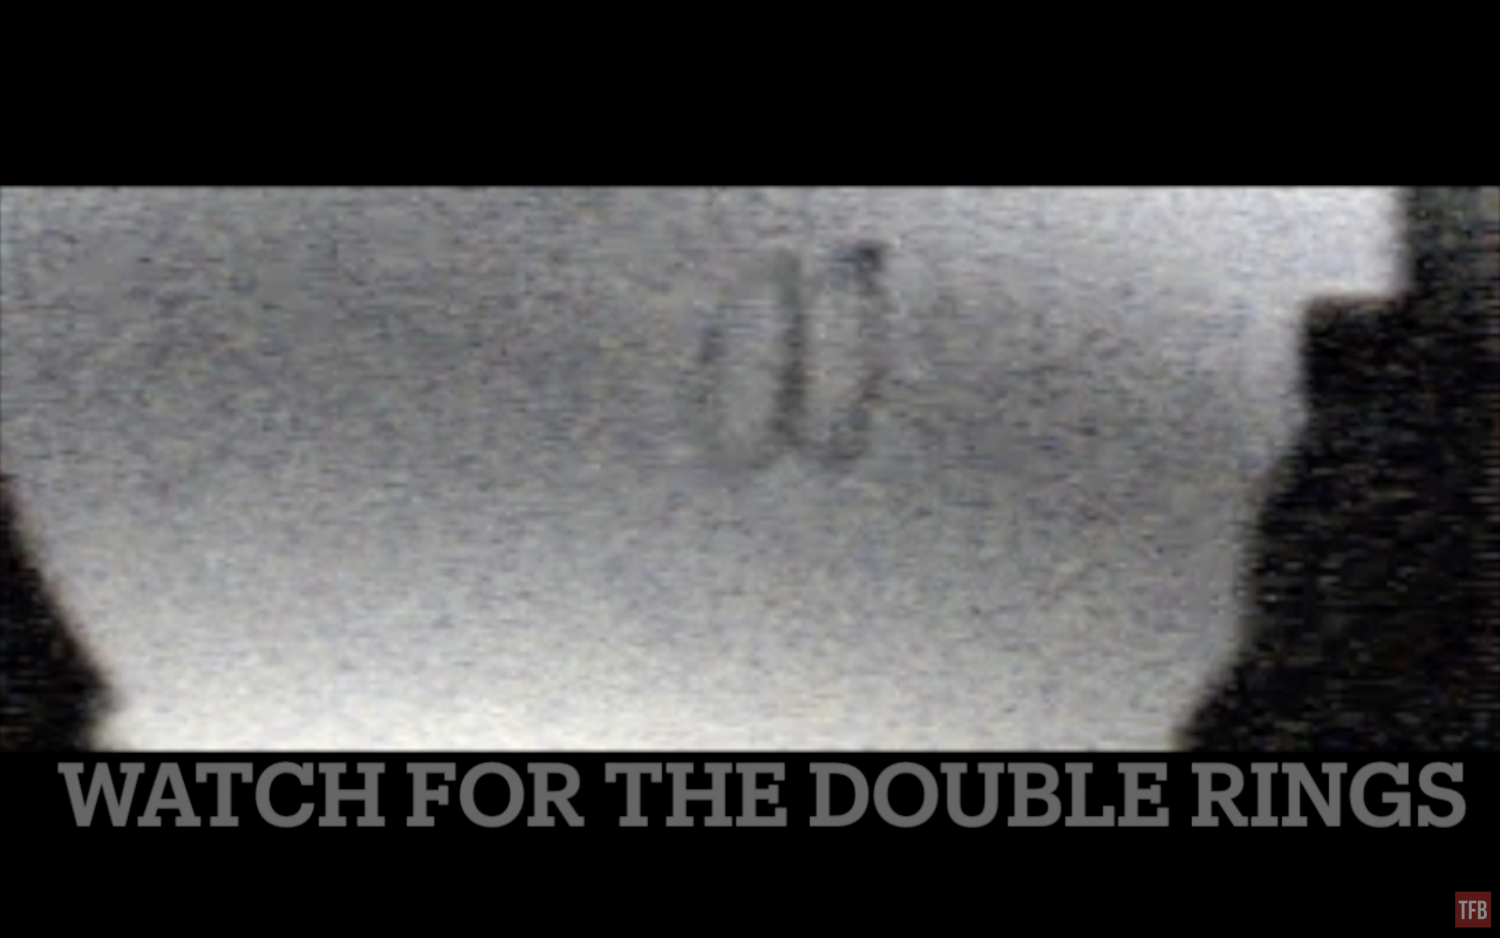
Also just before we saw the bow wave, a set of what looks like double rings flies out of the muzzle and the bullet flies through the double rings.
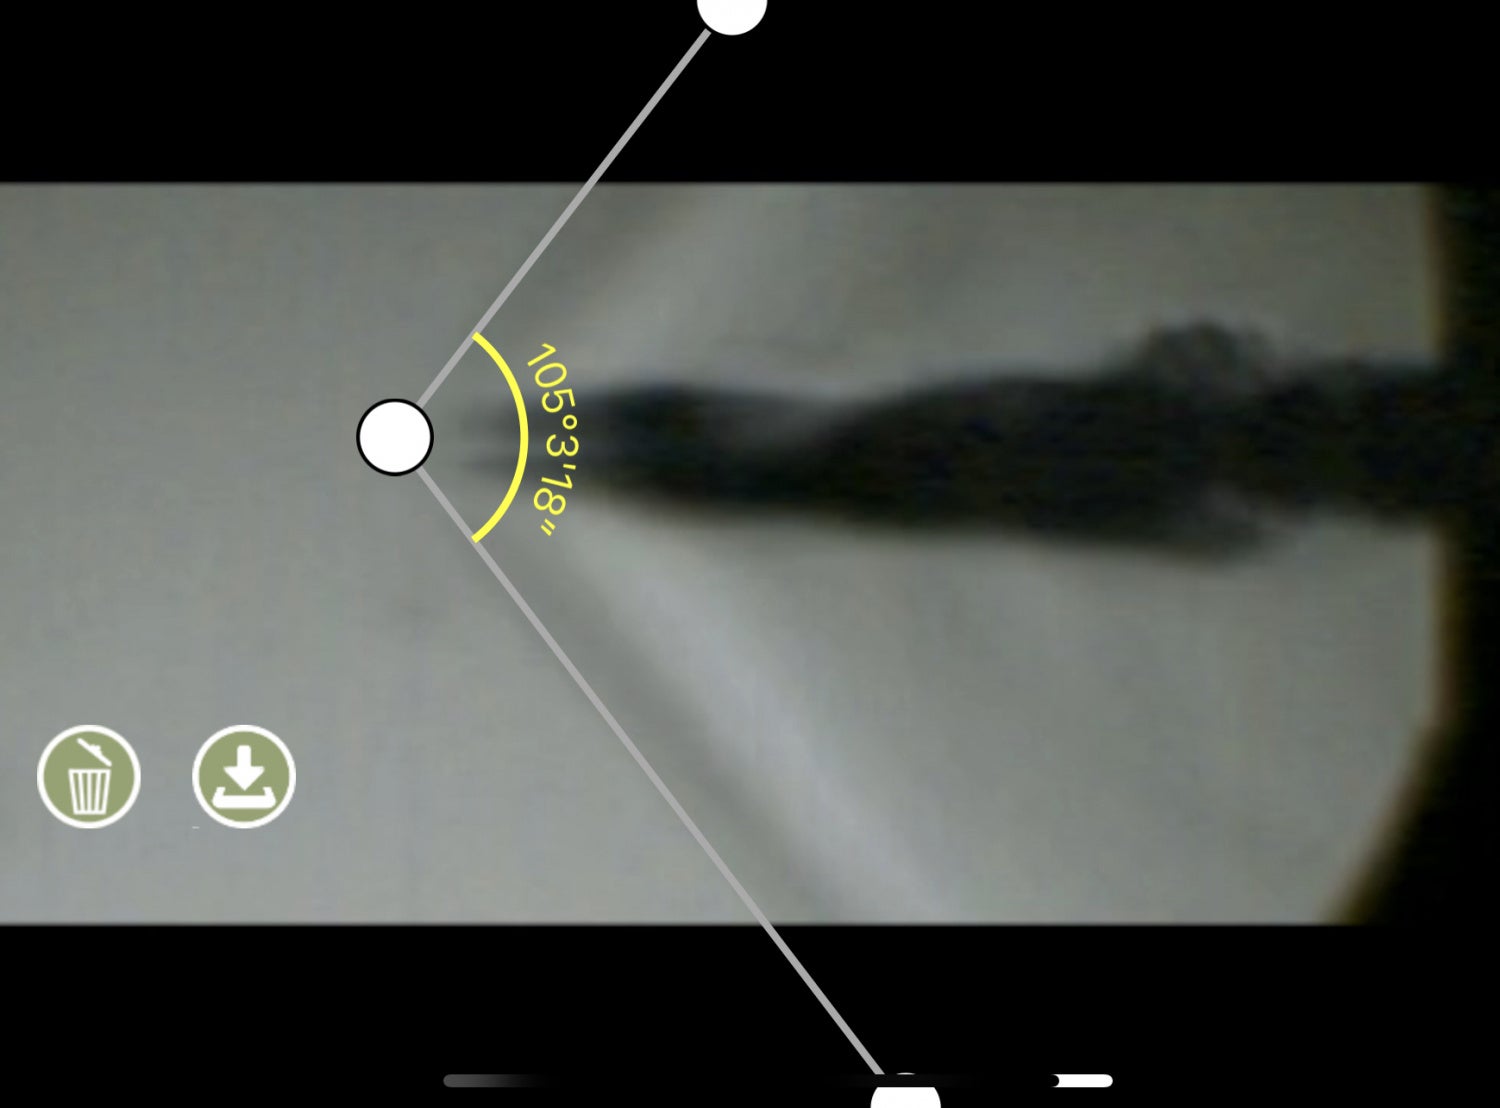
Now compare that to the supersonic .22LR bullet. You can clearly see a proper Mach angle or pressure wave now.
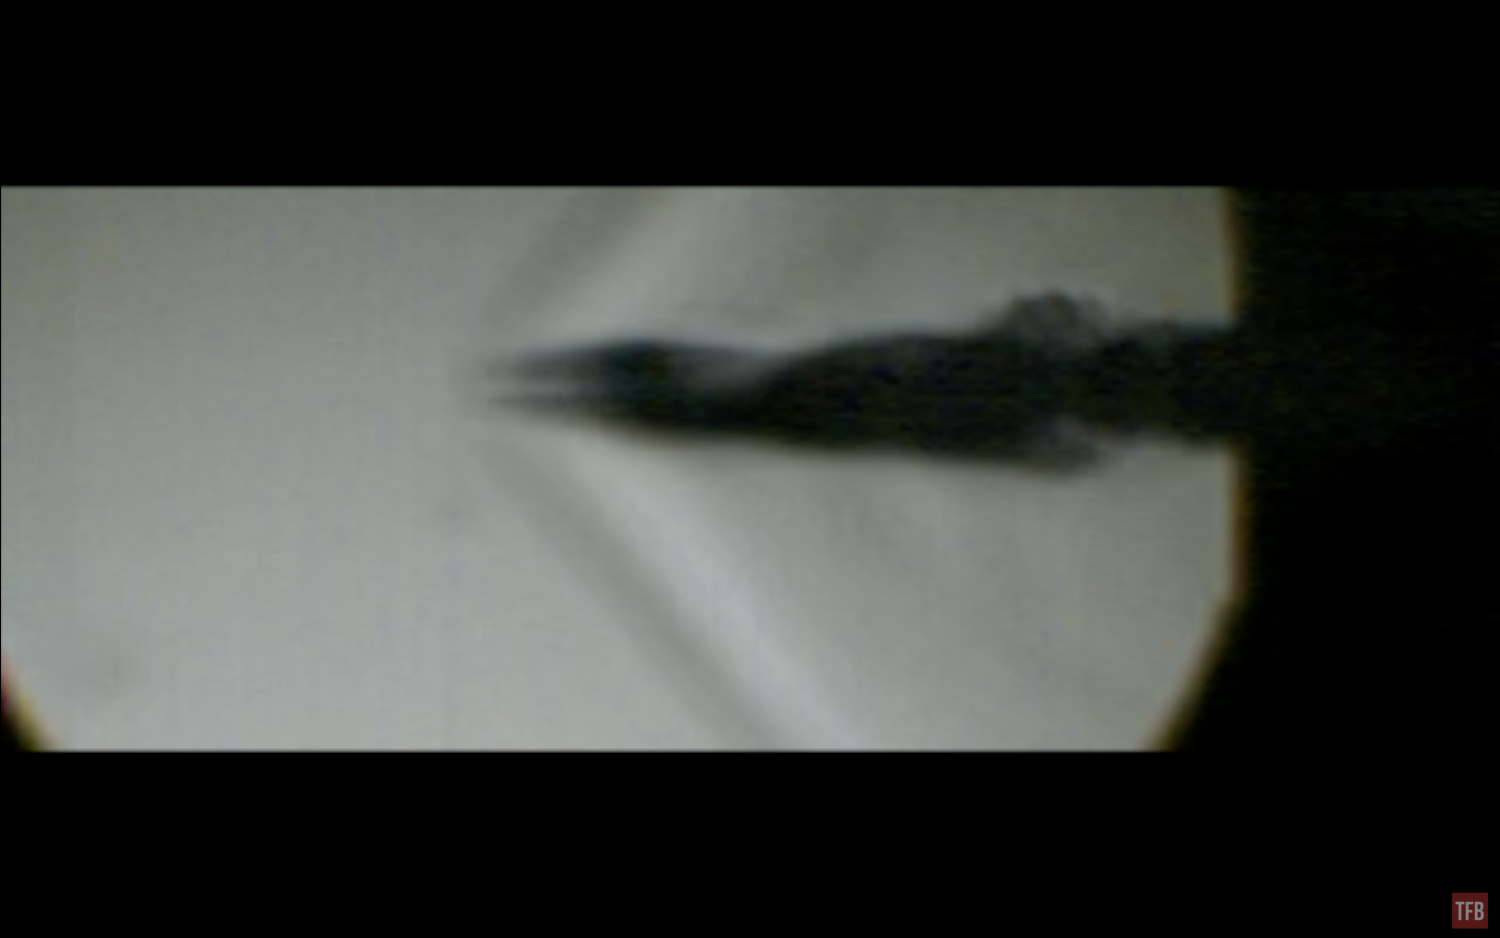
Supersonic .22LR
I downloaded a protractor app that allows me to draw on an image. It calculated an angle of 105º. Which makes the Mach angle 52.5º.
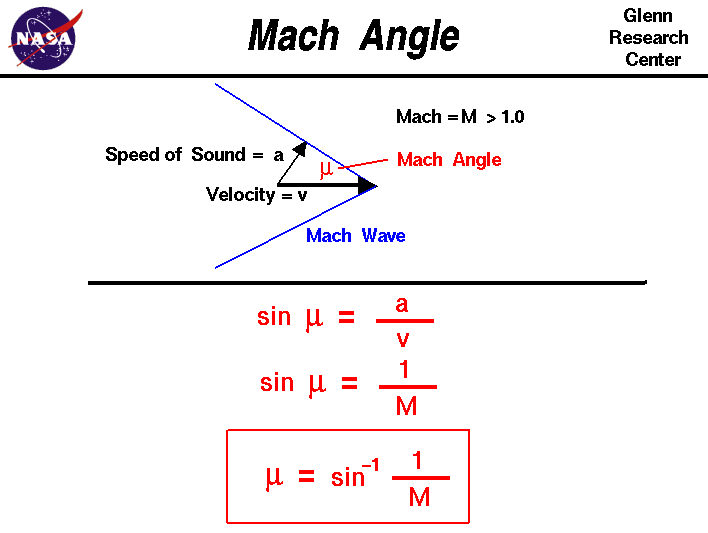
There is a formula to calculate Mach angle based on velocity and the speed of sound. You can then calculate the Mach speed from any two of those variables. Speed of sound is a constant, technically also depending on what elevation you are at, but at sea level, it is 1125 FPS or 700 MPH.
Given the Mach angle I measured is accurate enough, I calculated the speed of the supersonic bullet to be 1,418 FPS. Now, the bullets we used were solid copper handloads that Kythe made and he said velocity is on average 1,725 FPS. This means the Mach angle should be 37º. Far from the 52.5º that I measured. It would have been better if we chronographed this shot at the same time. But I can always revisit this another day. I am sure my measurement is not that accurate since the image is not clear. I need to fine-tune the settings and try to dial in the Schlieren imaging setup.
Next up was the 5.56 bullet which had a much steeper Mach angle.

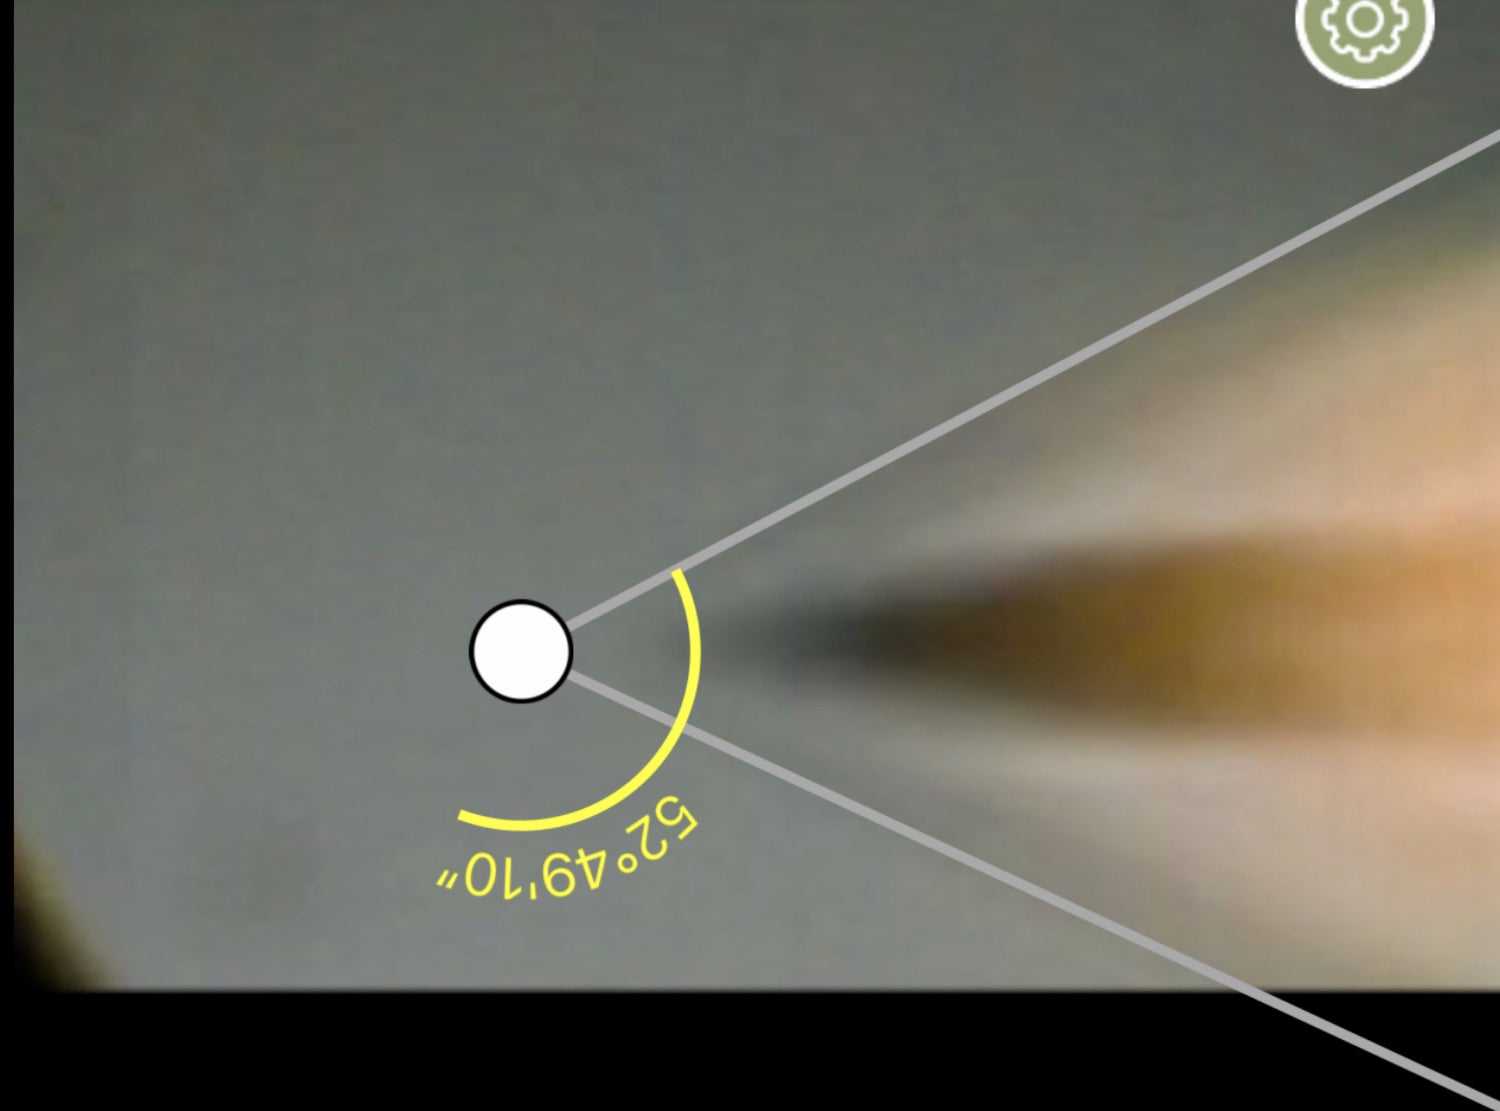
Based on this angle, I calculated velocity to be 2,567 FPS. This seems a bit low for 55gr ammo. But we already know my numbers are off from the supersonic .22LR. This is just one data set and proper science needs repetition and consistency so further testing will be required.
Air Rifle Schlieren
While we were killing some time, our friend Vic brought over his pump-action air rifle. It looked like an old Benjamin Sheridan. The air rifle produced some really interesting Schlieren images.
Similar to the subsonic .22LR, a set of double rings flies out of the muzzle. Then the pellet flies out. You can see gasses escaping the muzzle and as it dies down a second set of double rings fly out. In a second shot, we witnessed three sets of double rings.
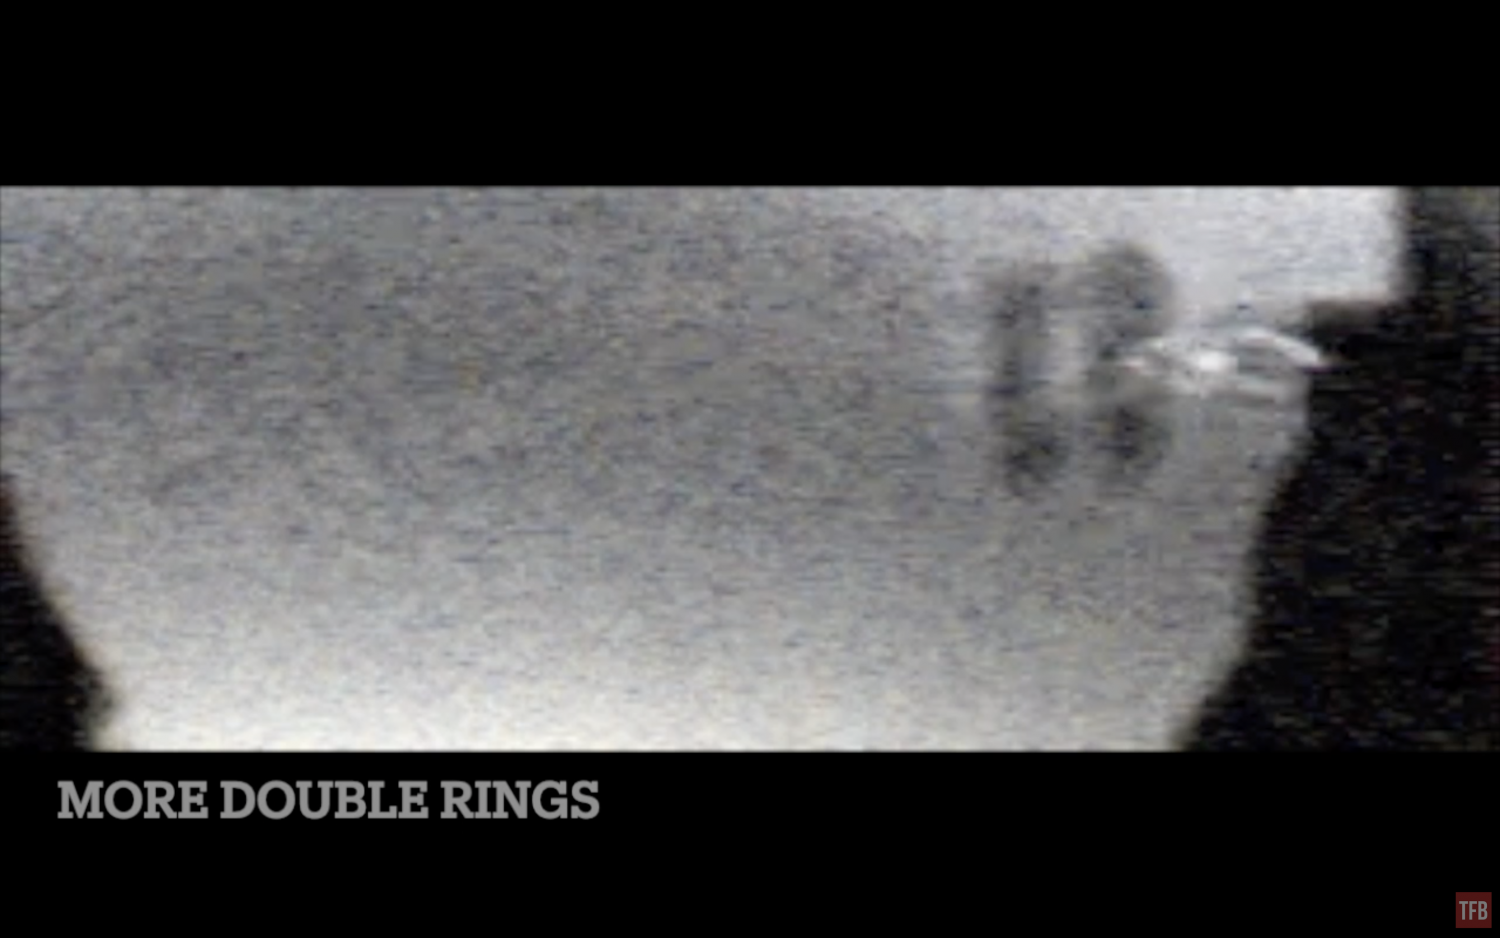
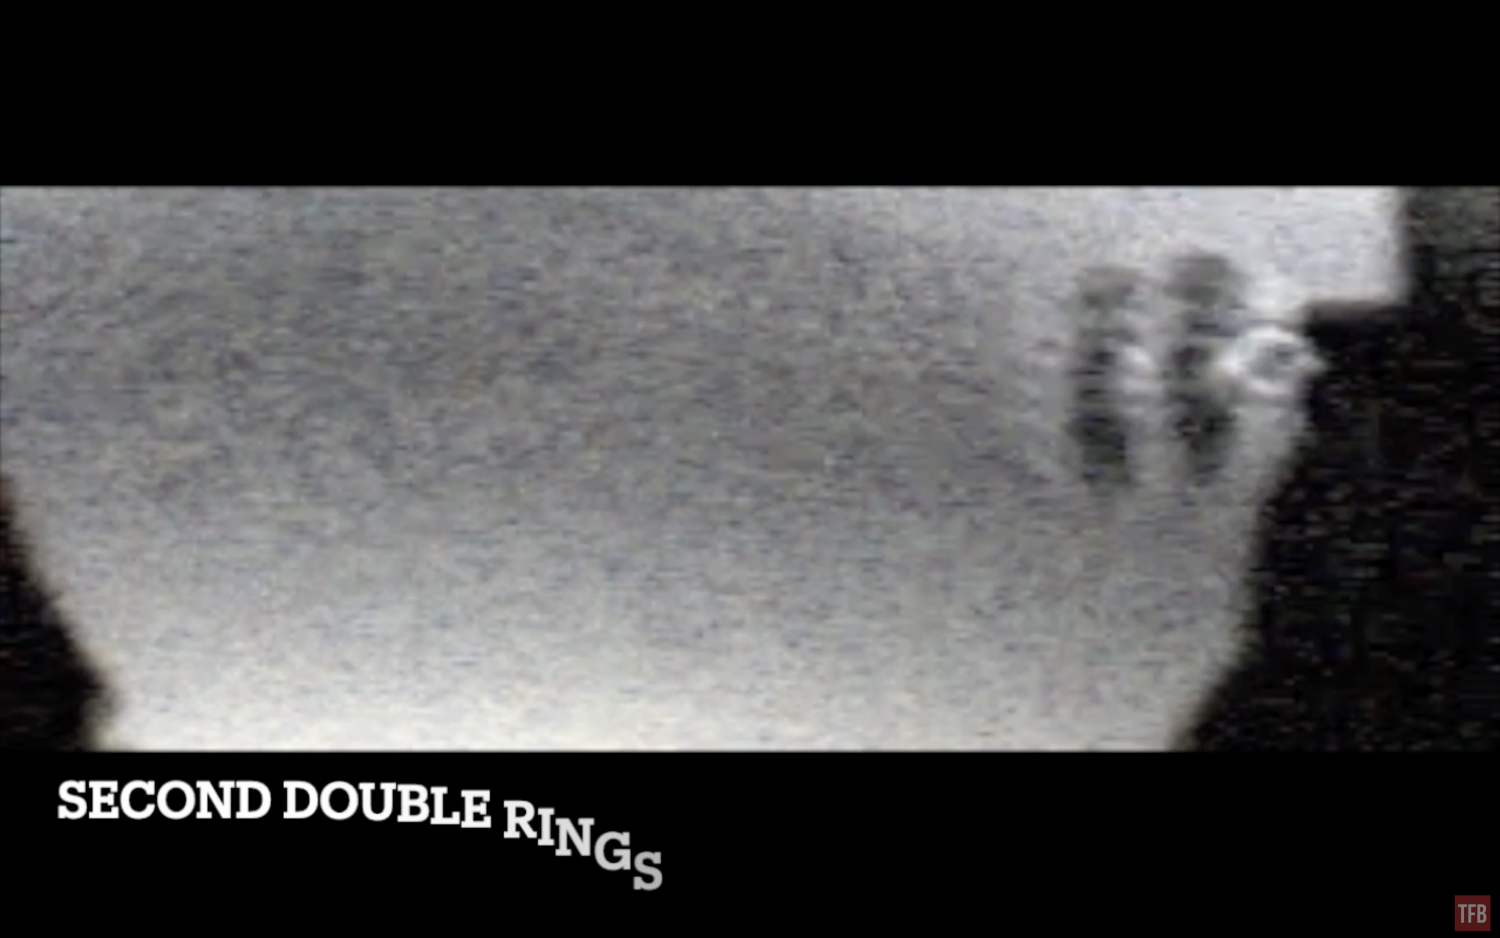
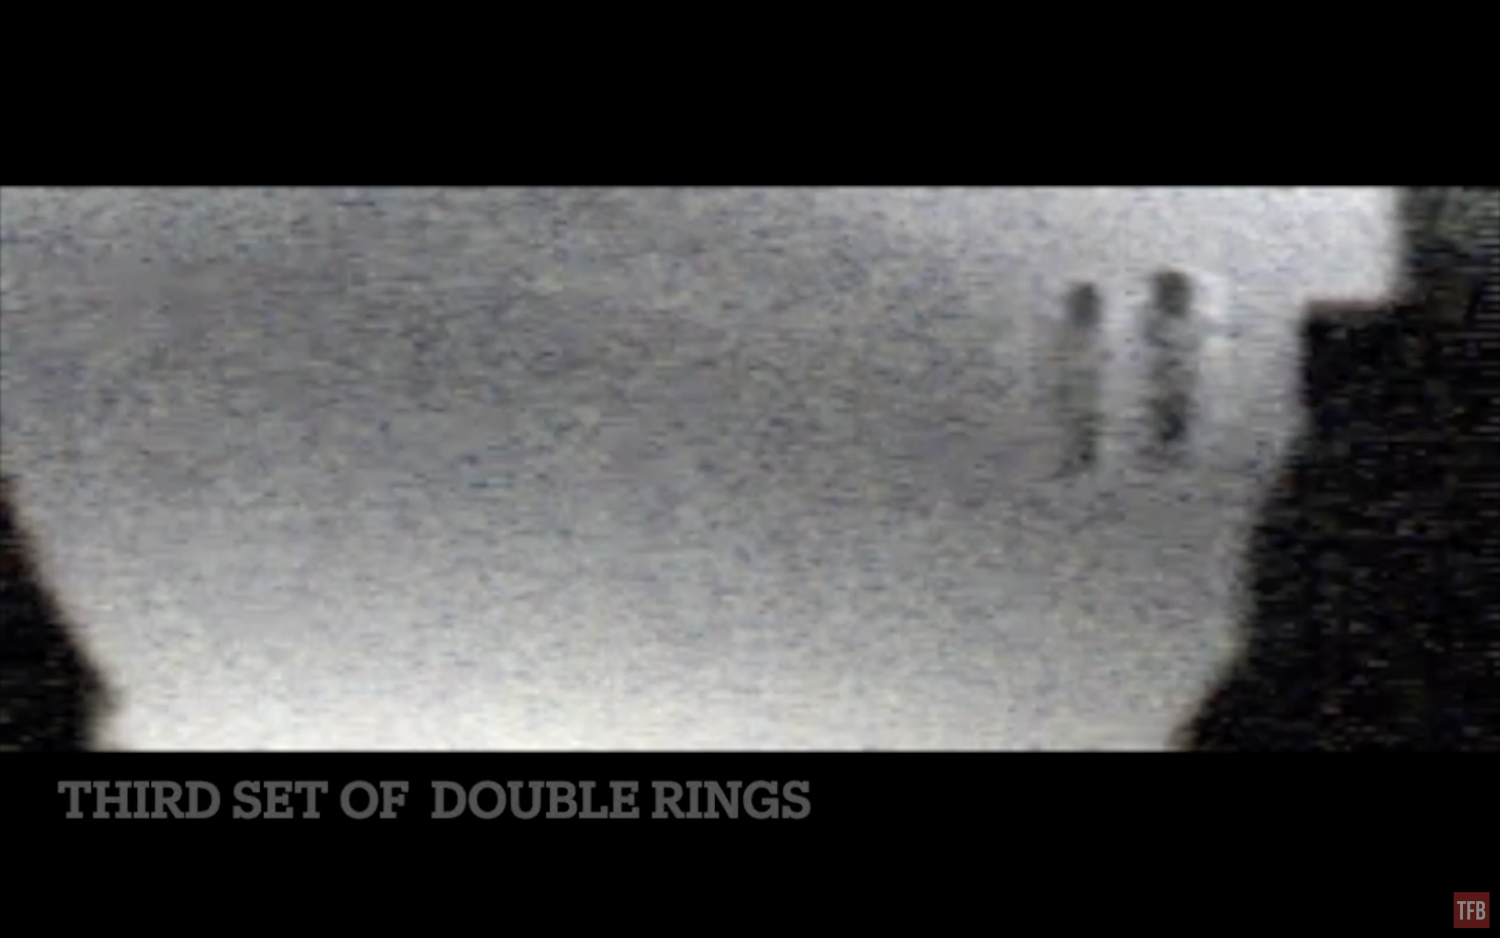
Between the double ring phenomenon, you can see gasses shooting out the muzzle of the air rifle. I filmed all of these images at 32,668 frames per second at a resolution of just 320×120. So while the image quality is not great, you can see something really interesting in the image below. It looks like Shock Diamonds aka Mach diamonds coming out of the barrel.

Here is a video explaining shock diamonds.
Now here is my video – watch carefully for all the small details I pointed out in this article.
Final Thoughts On Slow Motion Schlieren Imaging
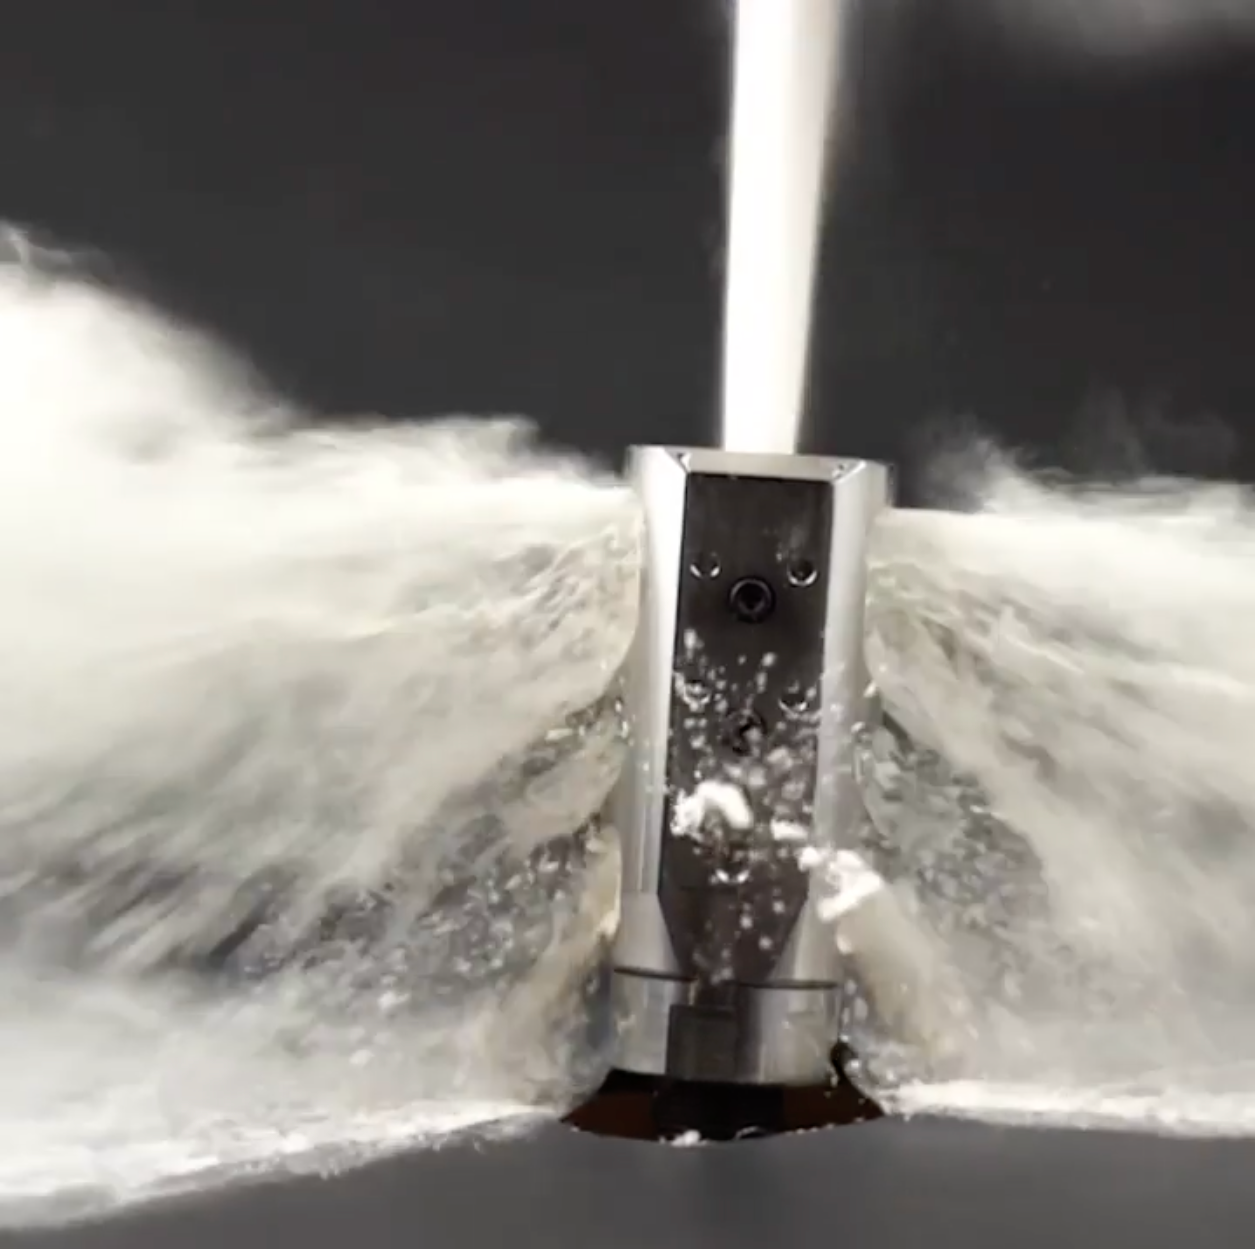
I had a blast filming this stuff. It is still early days. For starters, I never used a razor blade to cut the collimated beam in half. I am not entirely sure what that is for. I read on many accounts that it helps filter out the straight light rays while the light waves bent by the density changes will pass around the razor blade. More testing will be required and I am looking to get a bigger mirror. In the meantime, there is an alternate method to setting up a Schlieren imaging system and that is with the use of a Fresnel lens. You put the source of the light behind the lens and the lens focuses the light toward the camera.
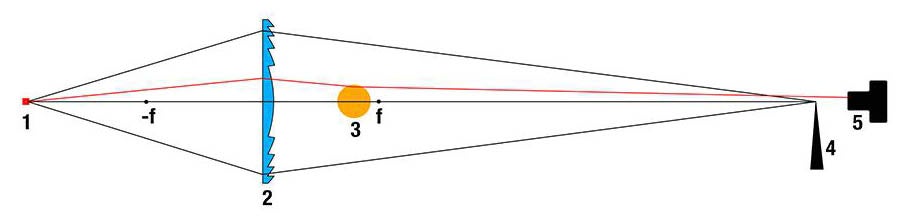
Photo by Petapixel
I ordered a 300mm Fresnel lens in hopes to film larger objects and more Schlieren images. If any of you readers have experimented with Schlieren, please let us know in the comments. Thanks for reading.