 Your Privacy Choices
Friday is here and you know what that means. Night Chenanigans! I mean Friday Night Lights. A while ago I wrote about MP5 lighted forends. Well, now it is time to delve into lasers. There are easy ways to do this but those often have compromises and we will detail certain criteria for mounting an MP5 laser.
MP5 @ TFB:
- TFB Review: Lee Sporting Trigger Group – AR FCG For MP5!
- TFB Review: Magpul MP5 SL Handguards
- FRIDAY NIGHT LIGHTS: Illuminating A Suppressed MP5 – Lighted Forend
Lasers For Your MP5
Just like my article on MP5 lighted forends, let’s establish certain criteria with how one should setup an MP5 laser.
- Must be able to use a suppressor
- Controlling your MP5 laser
- VIS and IR laser*
- VIS and IR light*
For the most part, criteria 1 is not that difficult. Most MP5 lasers will clear a can. The second criterion is more important. How do you control your laser? How do you plan to turn it on and off for proper laser discipline? Sure, you could move your support hand to press a button and go back to a normal shooting grip but now you have to repeat that process to turn off the laser. So planning out how you will control the laser is pretty important. The last two criteria may not be feasible so they are more like a wish list.
So how do we go about setting up an MP5 laser? Well, there are two ways to do this. The easiest way would be to use a handguard that allows you to attach the laser. Slapping a laser to a handguard is easy but we have to think about criteria 2. If you recall my review of the SureFire XVL2, I mounted it to my H&K SP5 KAC handguard.
This is an almost ideal setup. The XVL2 has everything one could want. It has both VIS light and laser as well as IR light and laser. The only minor issue is the user interface. How do you activate it and how do you switch from VIS to IR and back? I used the remote rail grabbing tape switch with the XVL2. That way I can mount the switch to the right side rail and squeeze it like a SureFire 628 forend. However, the XVL2 has a rotary switch to go from VIS to IR. If you are on IR mode, you cannot activate visible without removing your hand and rotating the selector rotary switch. You also have to remember what position is for which mode. One position is for laser, another is for light and a third option is a light and laser. While it is great to have options, this is less than ideal.
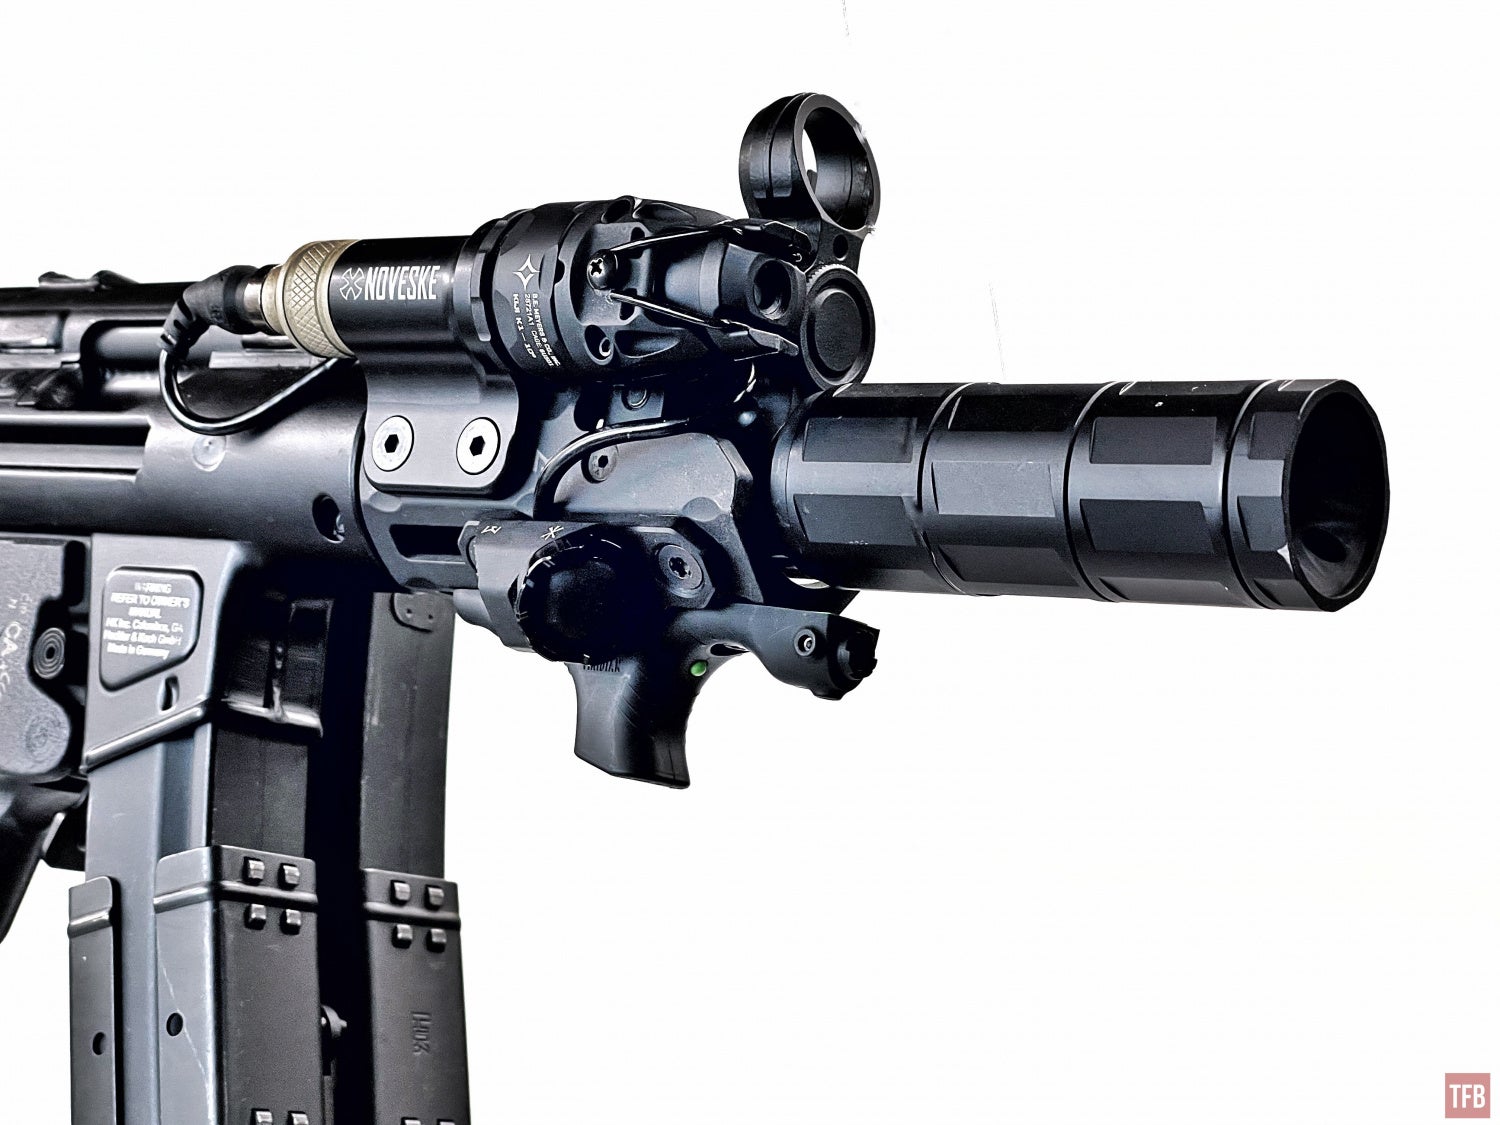
Sometimes the activation of the MP5 laser will dictate what you get and how you set it up. The Unity Tactical Hot Button and ModButton have taken over the industry with controlling lights and lasers. If your laser of choice can use an Insight/Crane plug, then you can use either a Hot Button or ModButton. Below I have a Hot Button to activate the SureFire Mini Scout Light with a Vampire head on it, while the ModButton activates the CQBL laser.
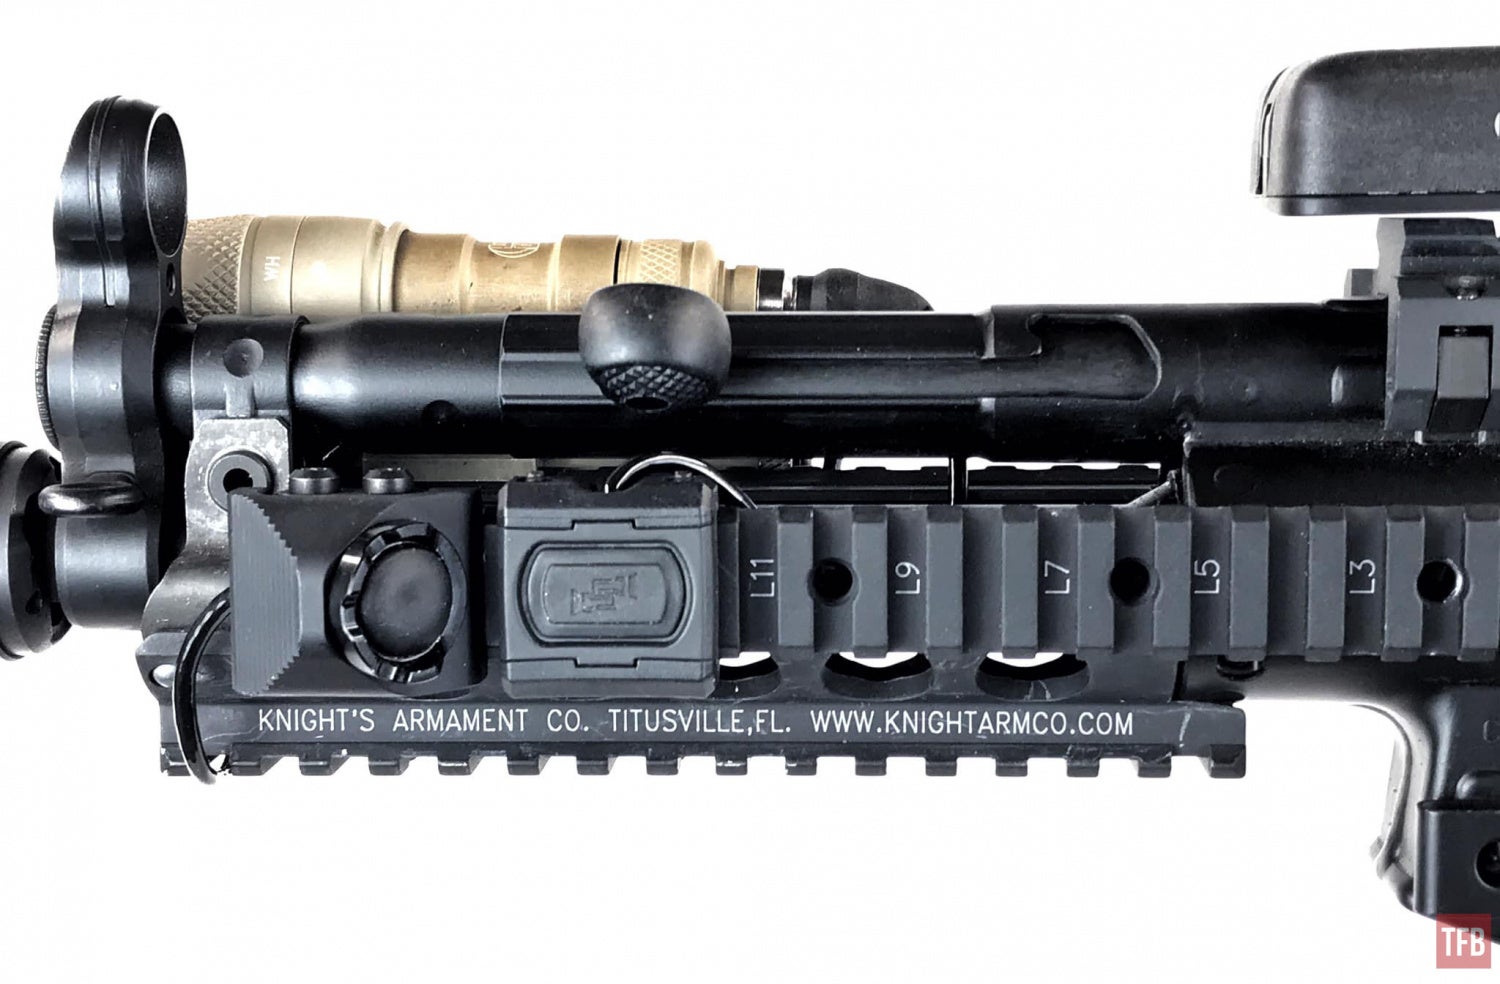

My support hand thumb rests against the angled Hot Button. I can press inward to activate the laser or I can press forward for the light. The Hot Button has a click built-in for constant on but only on their SureFire compatible Hot Buttons. The crane plug Hot Buttons lack this since most lasers you can double-tap for constant on.


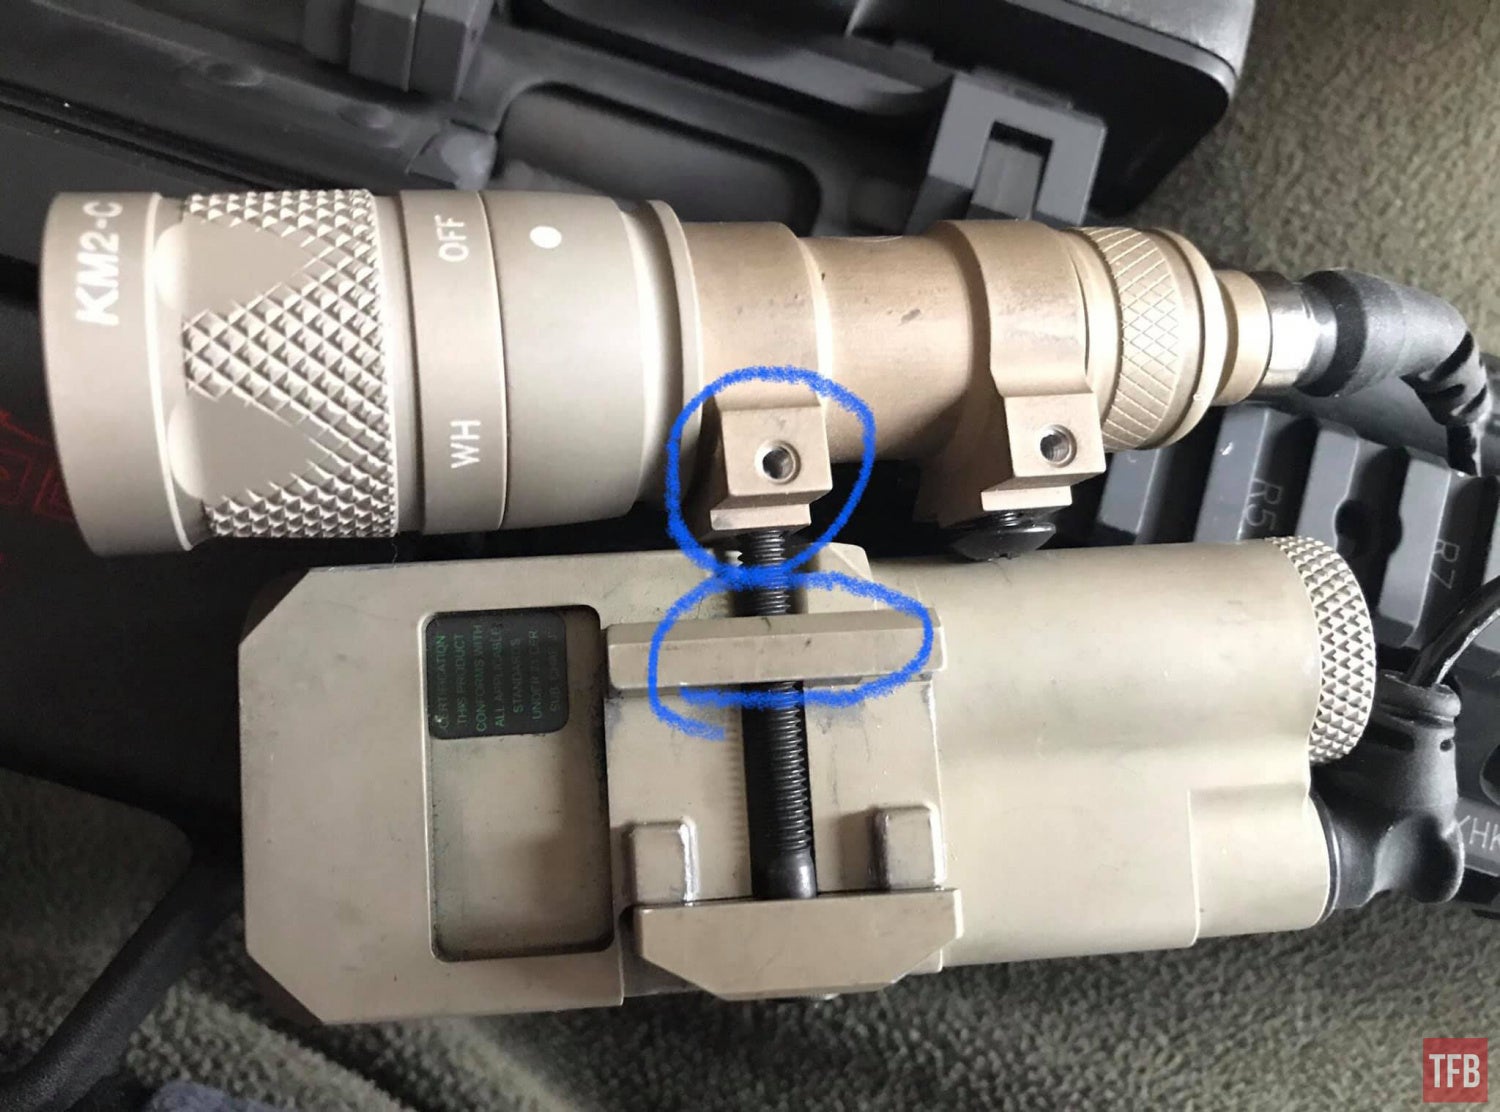
The setup you see above is a bit of a hack. The screw that clamps the CQBL to the rail is 8-32 which is the same thread pitch as the screw to mount the Scout Light body. So I bought a longer screw and threaded the Scout Light onto it. Nothing else holds the light in place so it is easy for the light to spin on this screw.
For a more secure attachment method, you can get the EchoArms X TNVC light body. Below is a prototype universal mount for use with Echo Arms M-LOK light bodies so I can use Modlite or Weltool heads. The only downside on an MP5 platform is the light sits below the laser.


A friend helped me design a ModButton mount and I modified it for the dual lead ModButton switch. So now I have a single button to simultaneously activate the CQBL and light.


Streamlight TLR-VIRII
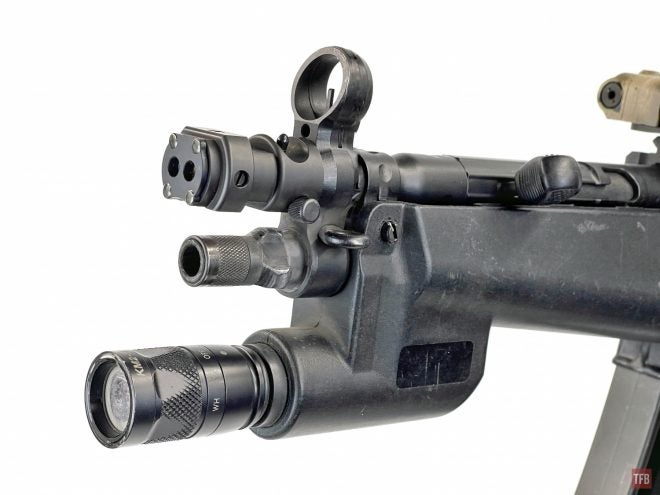
For a simpler and cost-effective MP5 laser solution, HK Parts sells a Picatinny rail that mounts to the front sight tower by replacing the handguard takedown pin with a screw. The rail sandwiches the front sight tower and is threaded. The downside to this is that it violates the first criterion which is suppressor compatibility. However, I modified the front tab to clear a trilug suppressor. Now I mounted a Streamlight TLR-VIRII to this rail. It is rather easy to reach the paddle switches by reaching my right thumb over or my right index finger reaches up.


Mounting Lasers On Top Of The MP5
You could mount a laser on top of your MP5 but controlling the laser becomes problematic.

EOTech LBC
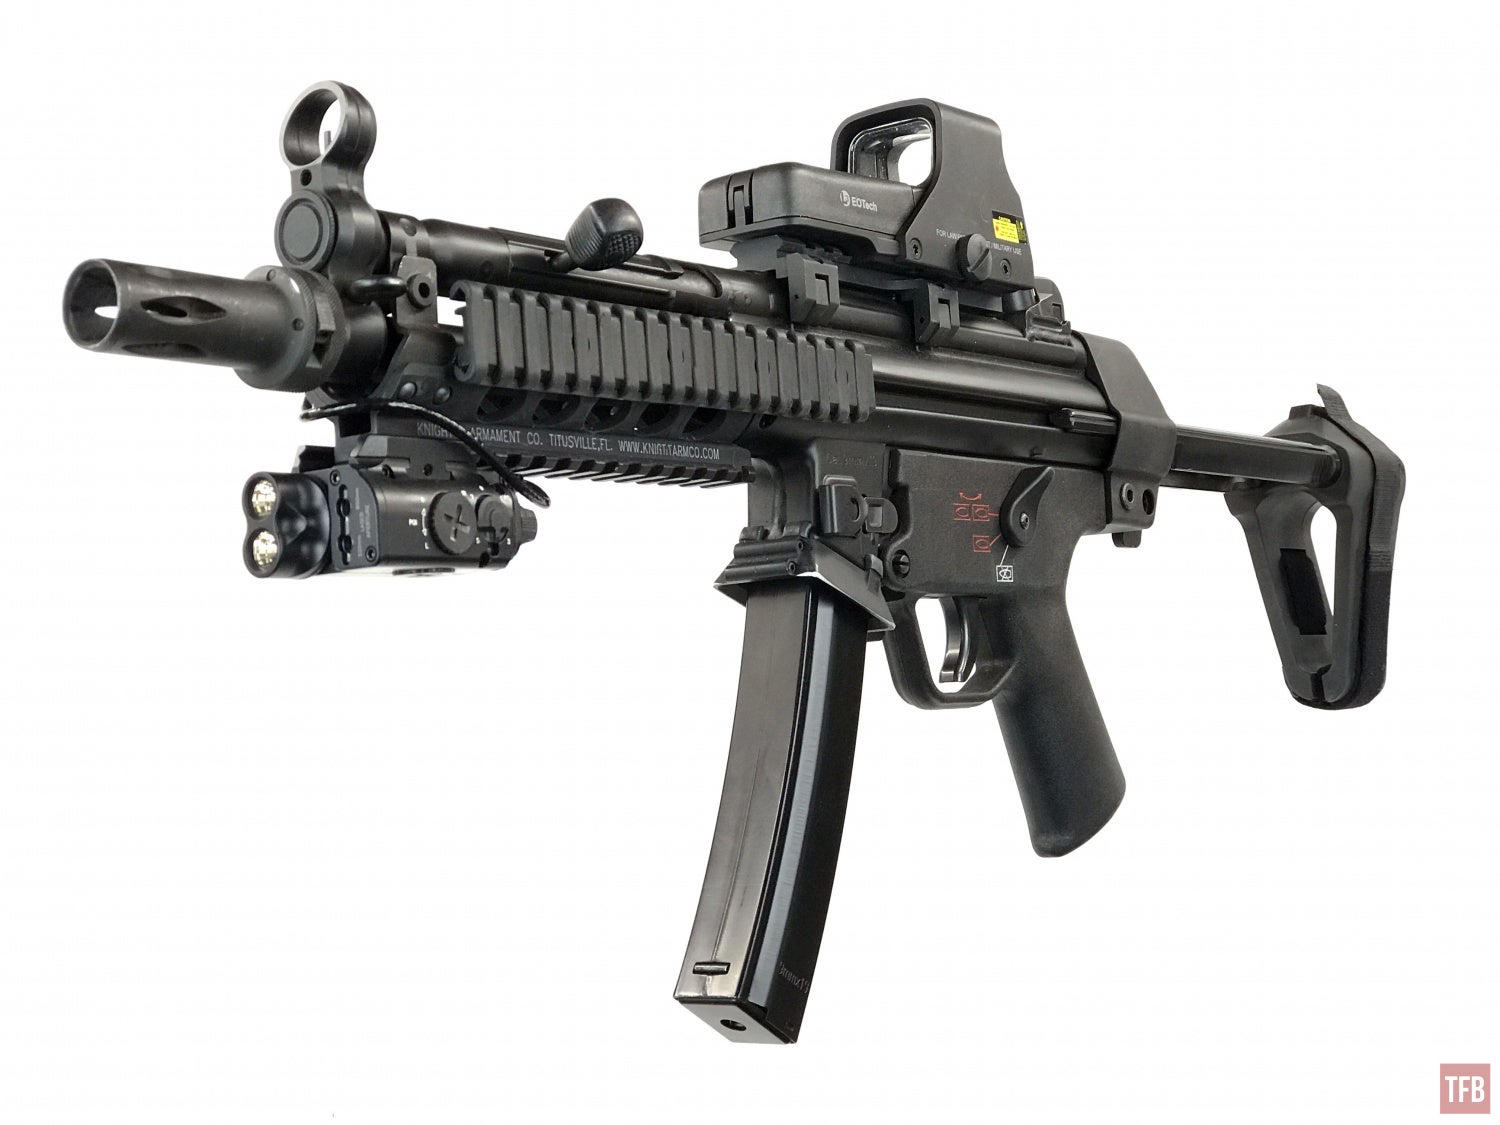
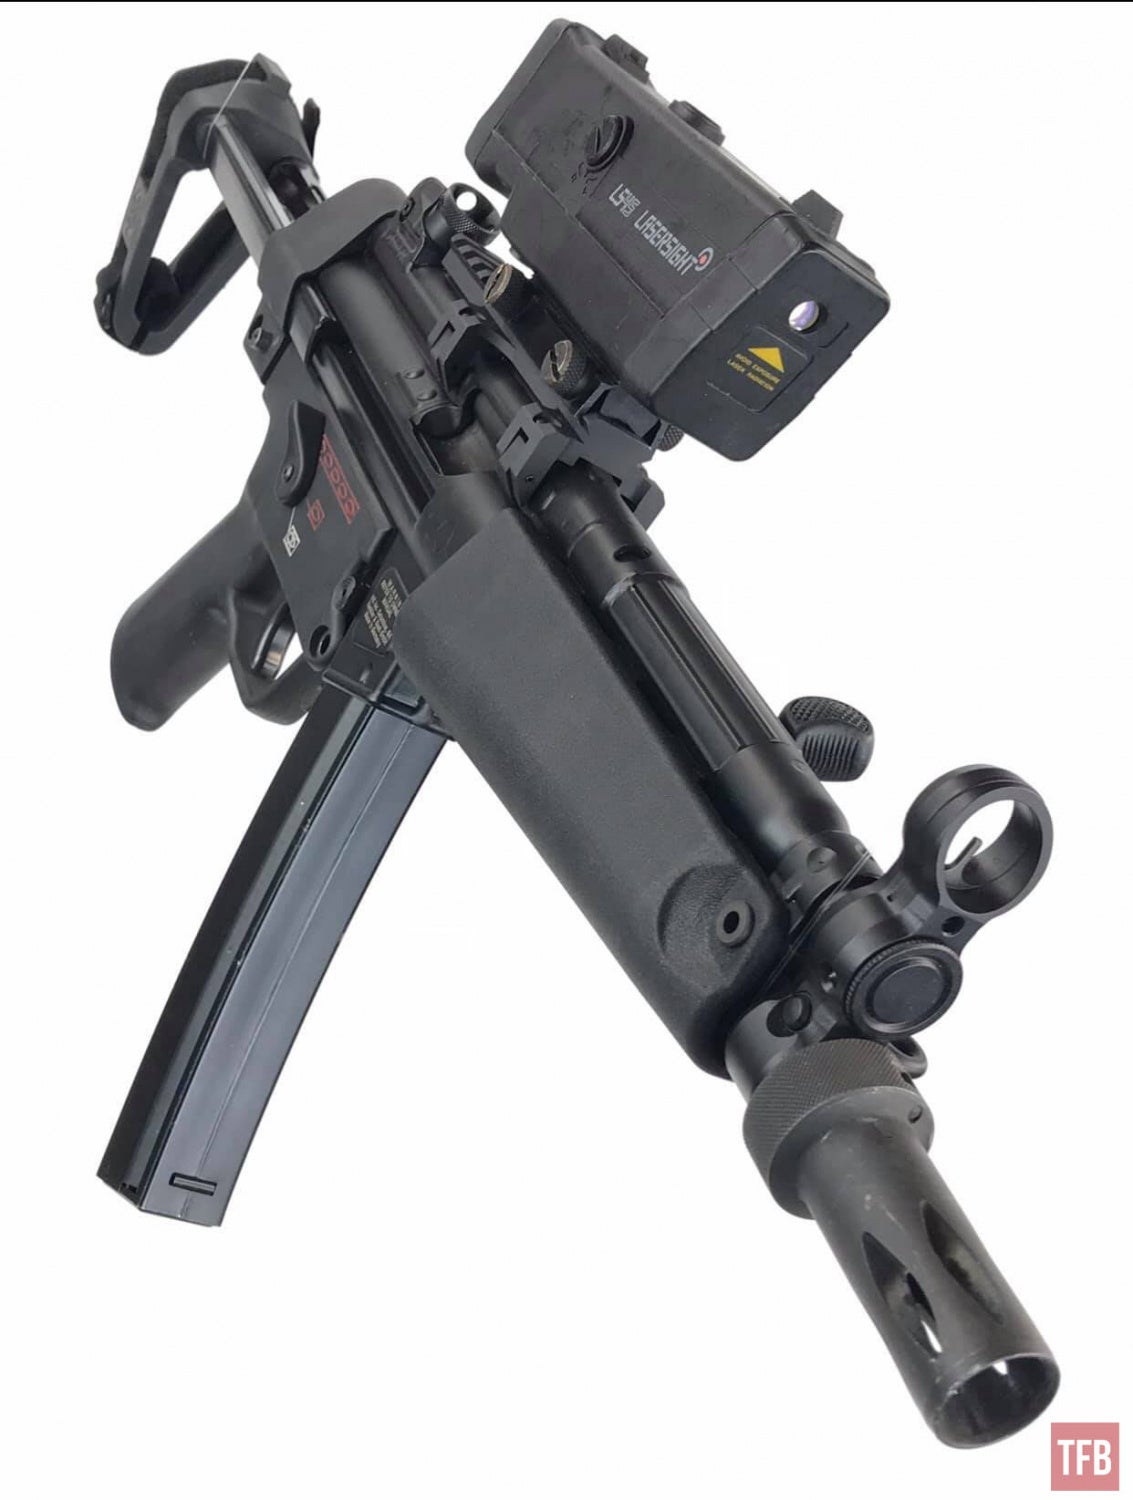
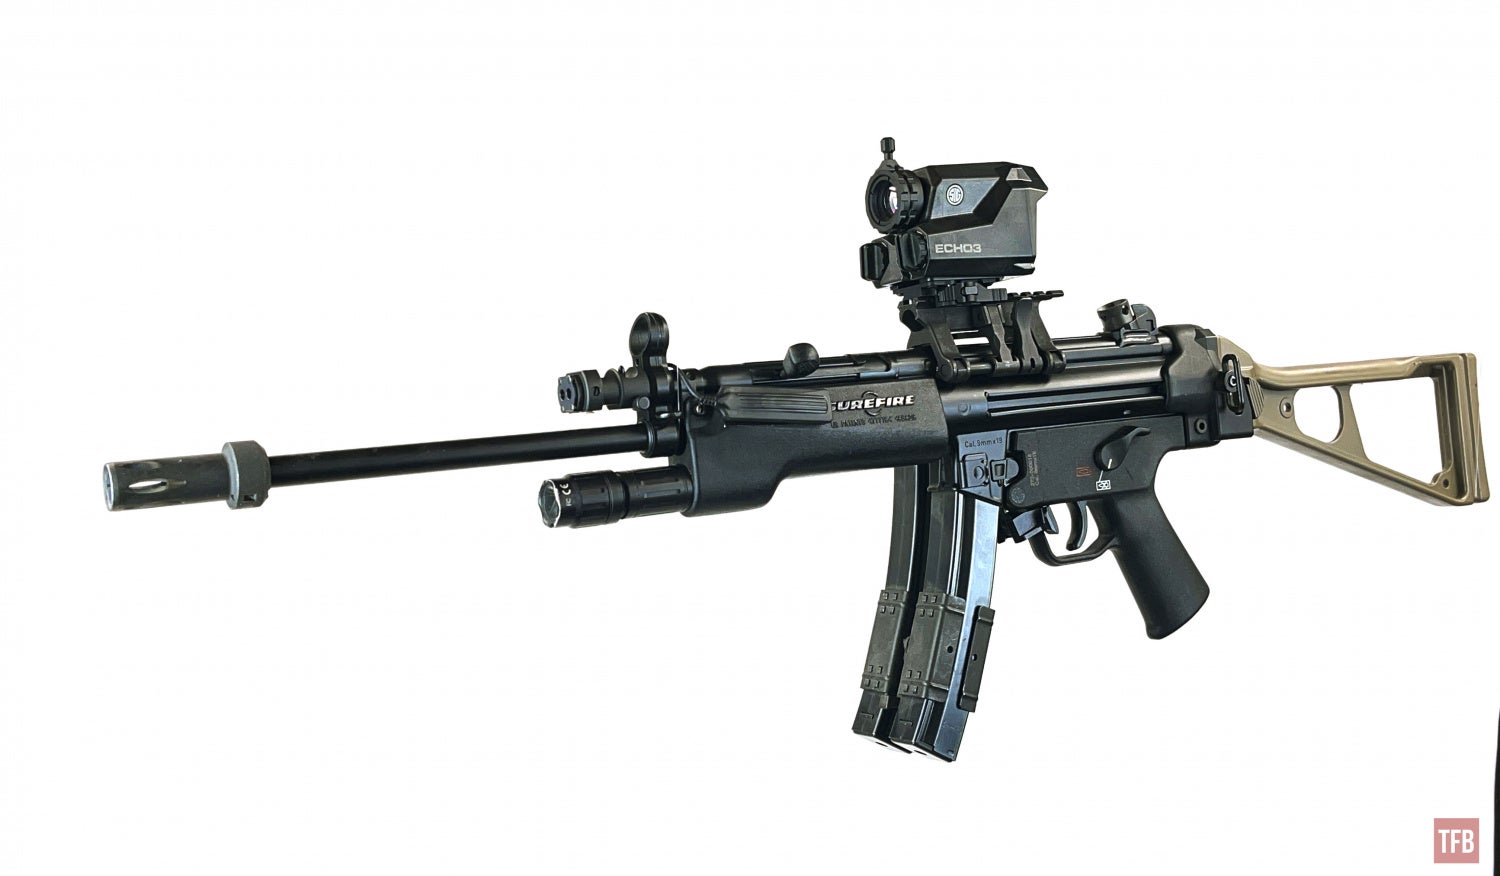
The Ismatronic LS45 Lasersight is not really practical but exudes peak 90s. For a more realistic and more practical MP5 laser, mounted to the top, I went with an EOTech LBC (laser battery cover) although an EOLAD could just as easily work. The problem is activation.
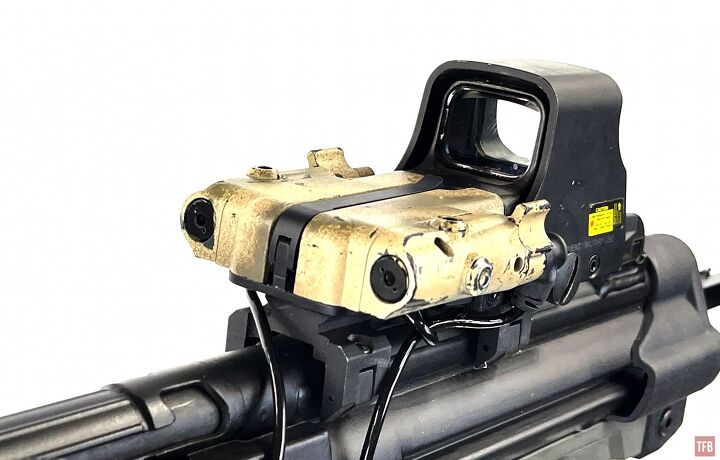
The EOTech LBC has toggle switches to turn on each laser. It has VIS on the right and infrared on the left (from the shooter’s perspective). Each side has a crane port and my ModButton mount project led me to FerniLab who made something similar but it is a short Picatinny rail for mounting a MAWL to an MP5. I got one hoping I could use it to activate an EOTech LBC. I have an Insight dual button that has two buttons and two wires with plugs. I can assign one button to a laser on the LBC but how do I mount it? The Insight dual switch has a spring clamp that grabs onto Picatinny. I wanted to maintain the use of my Laser Devices lighted forend so I hoped the FerniLab rail would work.

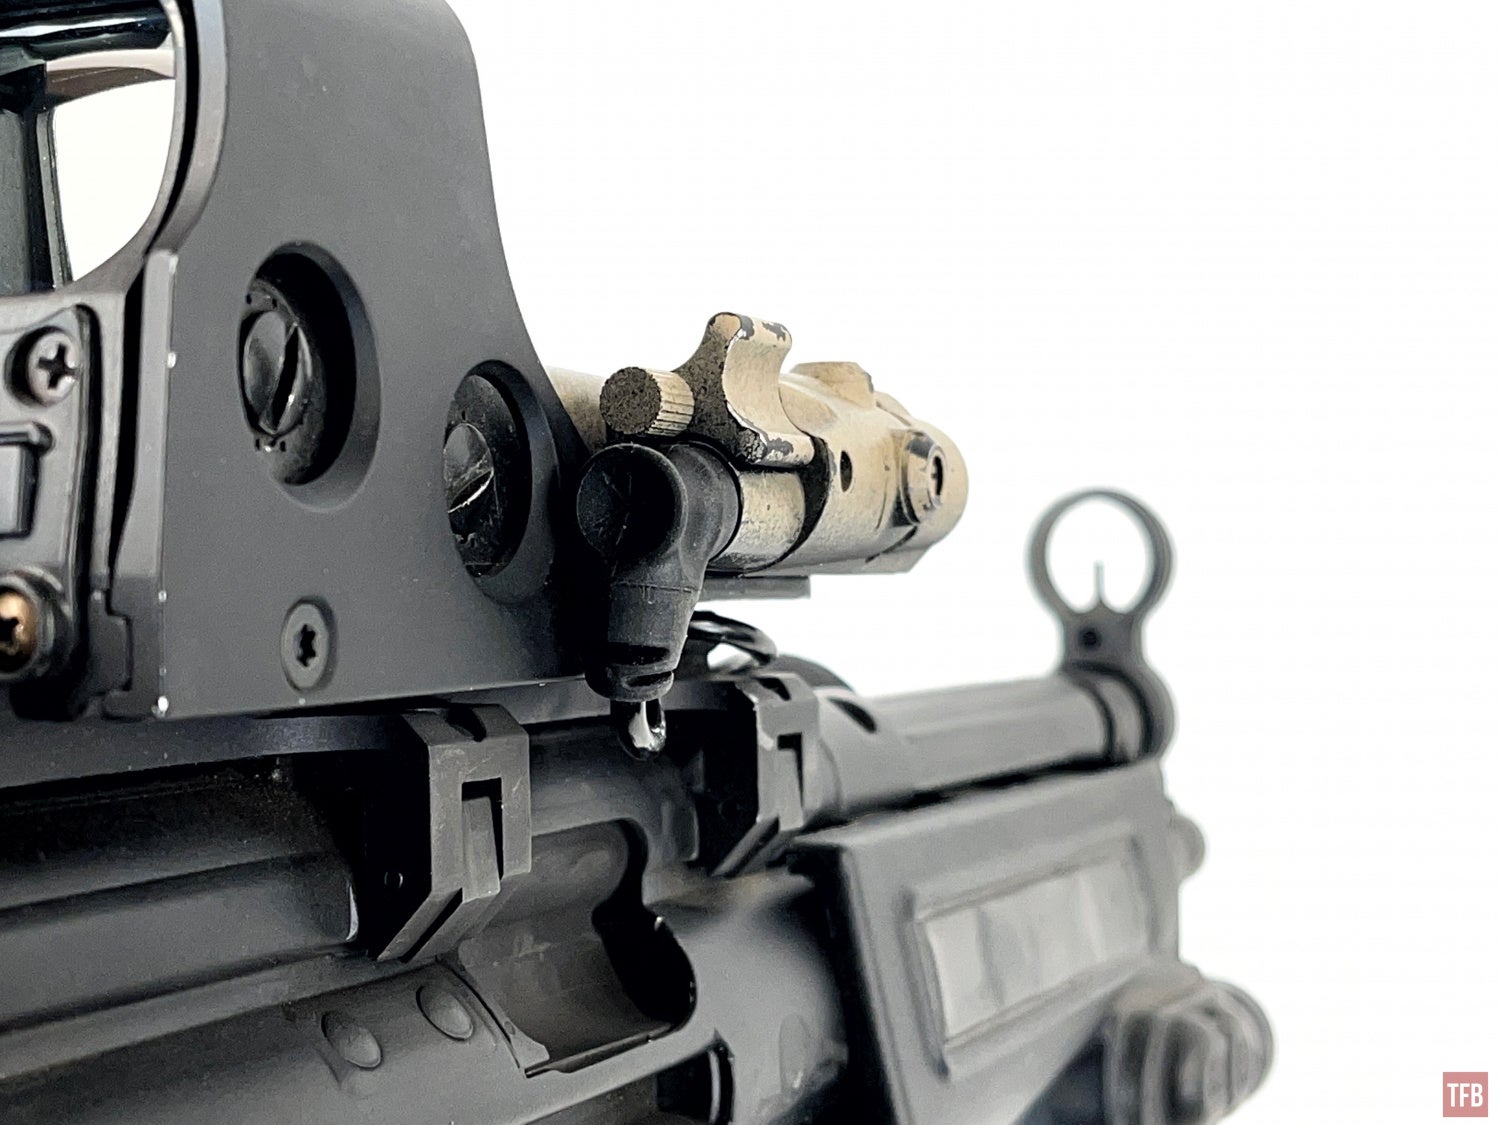
Unfortunately, the FerniLab rail is a bit tall in order to clear the charging handle. Which positions the switch too high. If I press my thumb on top, it obscures the IR laser.

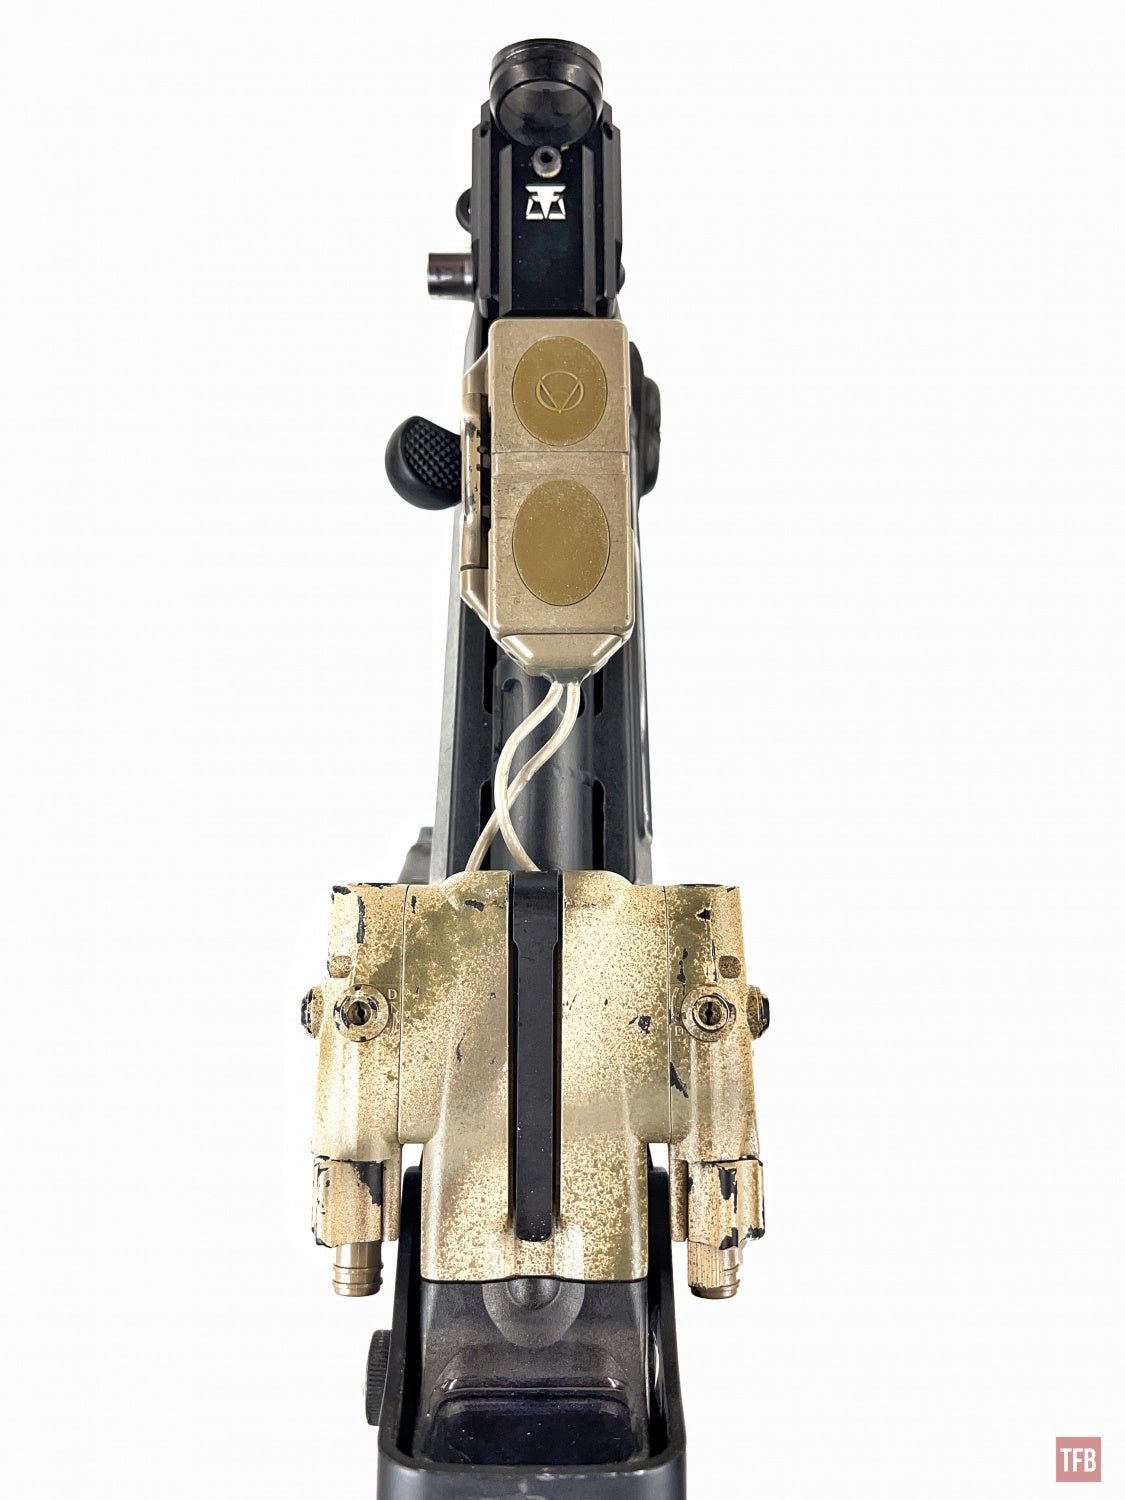

Then I realized I have a Unity TAPS that I got in a trade. It is the less desirable version that has twin Insight plugs but would be perfect for the EOTech LBC. I discovered I could remove the M-LOK/KeyMod indexing plate to make the TAPS thinner and then used 3M command strips to attach it to the side of my Laser Devices handguard. I did not want to drill holes into the handguard as these have become very rare. I can always remove the 3M command strips thus avoiding any permanent damage to the handguard.


Now I can squeeze the sides of the handguard. My fingers activate the light and my thumb activates the laser.


I set up the forward switch to be VIS laser.

For IR laser, I simply slide my thumb back a bit for the rear switch. This setup is exceptionally comfortable.

The only downside to this setup is that you have wires but I figured out a way to tuck the wires using the EOTech, optic mount and bending the wires just right.

I run the right side wire under the EOTech through the Picatinny slot, U-Turn and have the wire go back to the right side and it bends around the front. The left side wire simply goes through that U-bend in the right wire and I tuck the excess under and into the back of the Laser Devices handguard.


No issues with the right side blocking the ejection port.
MP5 Laser
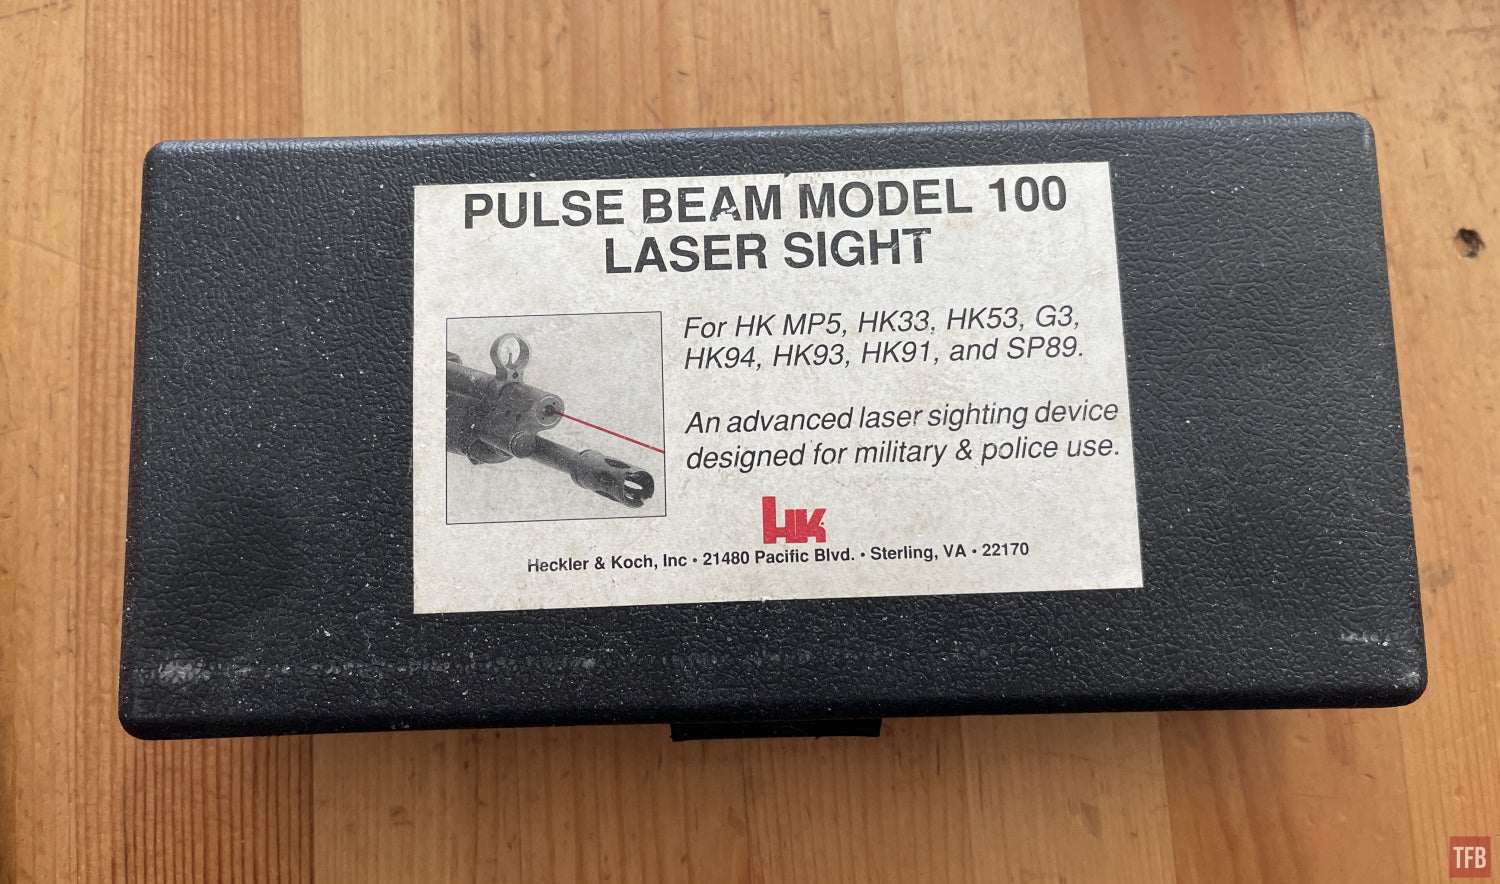
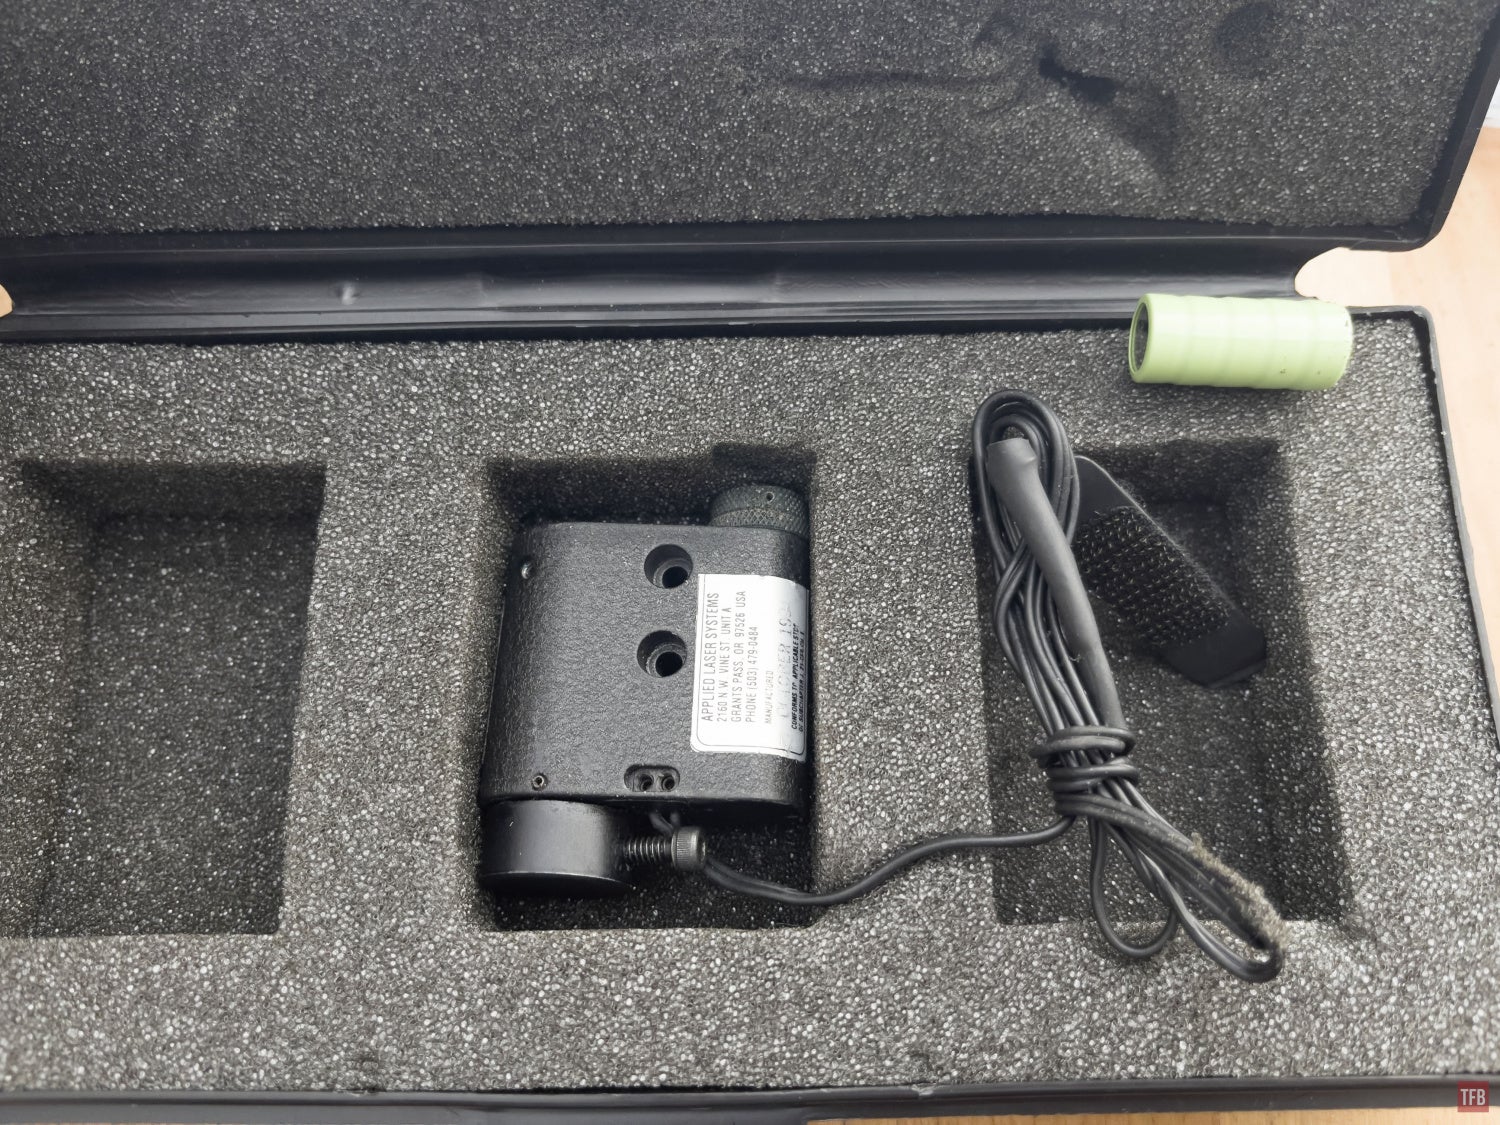
There were MP5 lasers specifically designed for the roller lock king. H&K had one called the Pulse Beam Model 100 which mounted under your front sight. I purchased this non-working unit a while back.

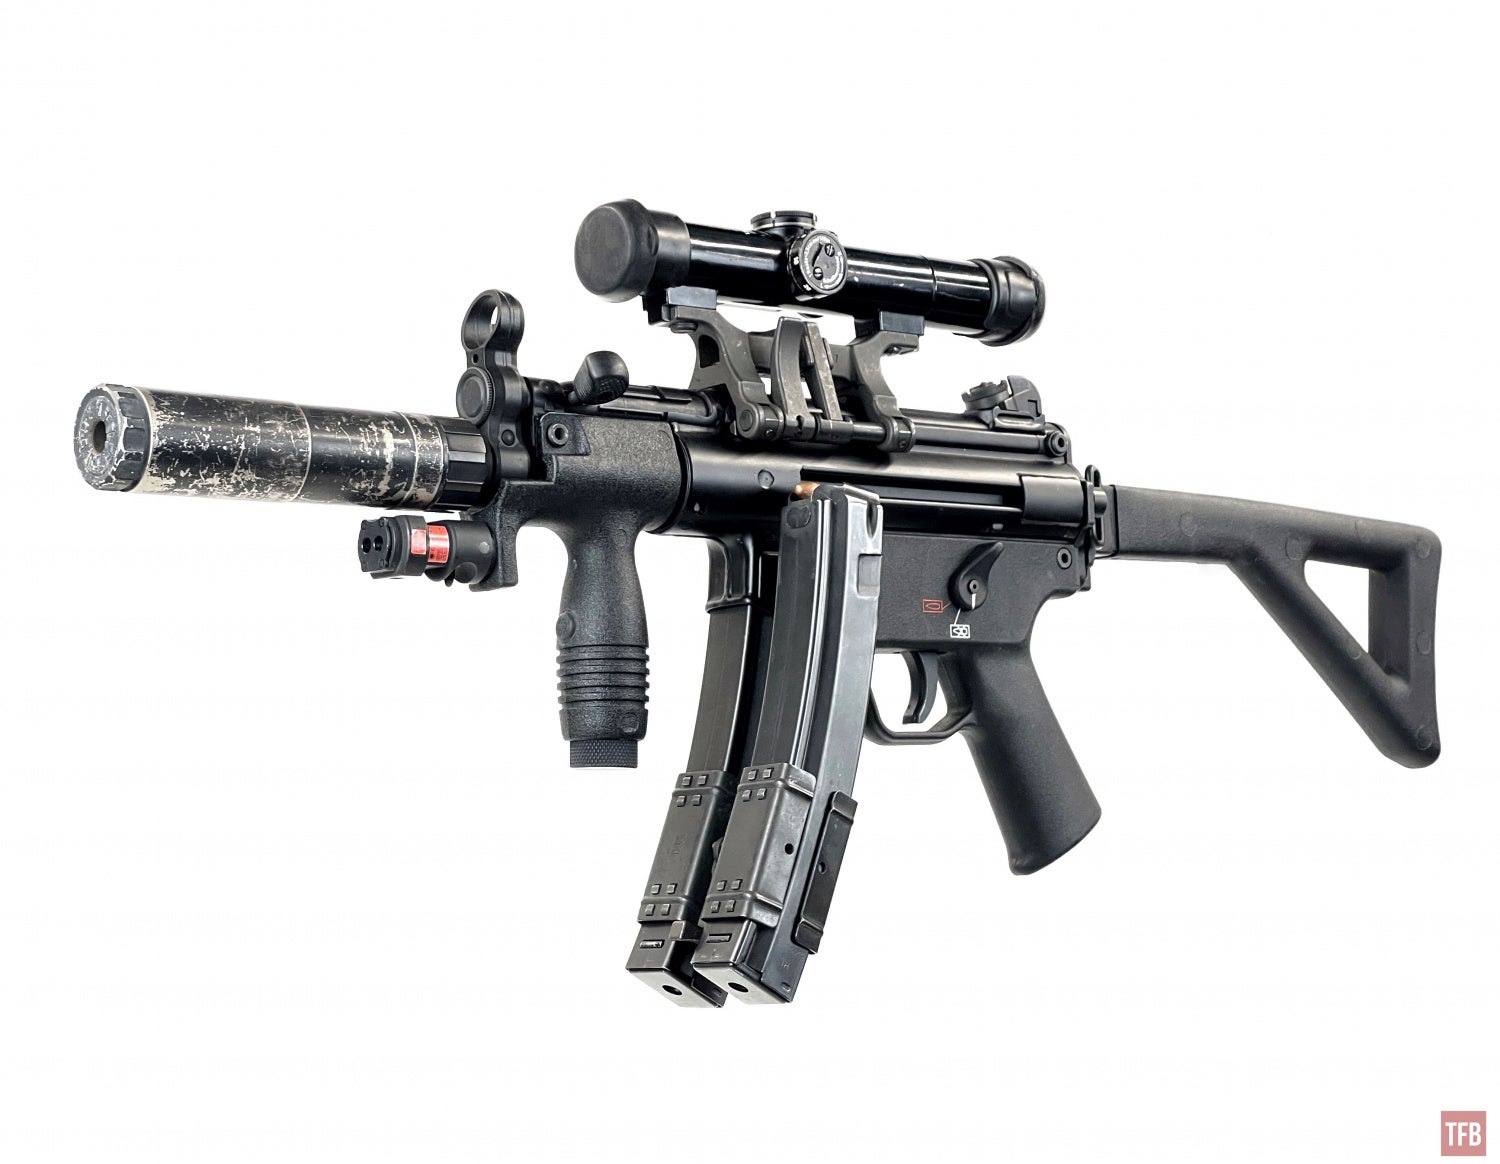
Laser Devices Dual Beam Laser
Laser Devices has one that is a dual-beam laser, VIS and IR.
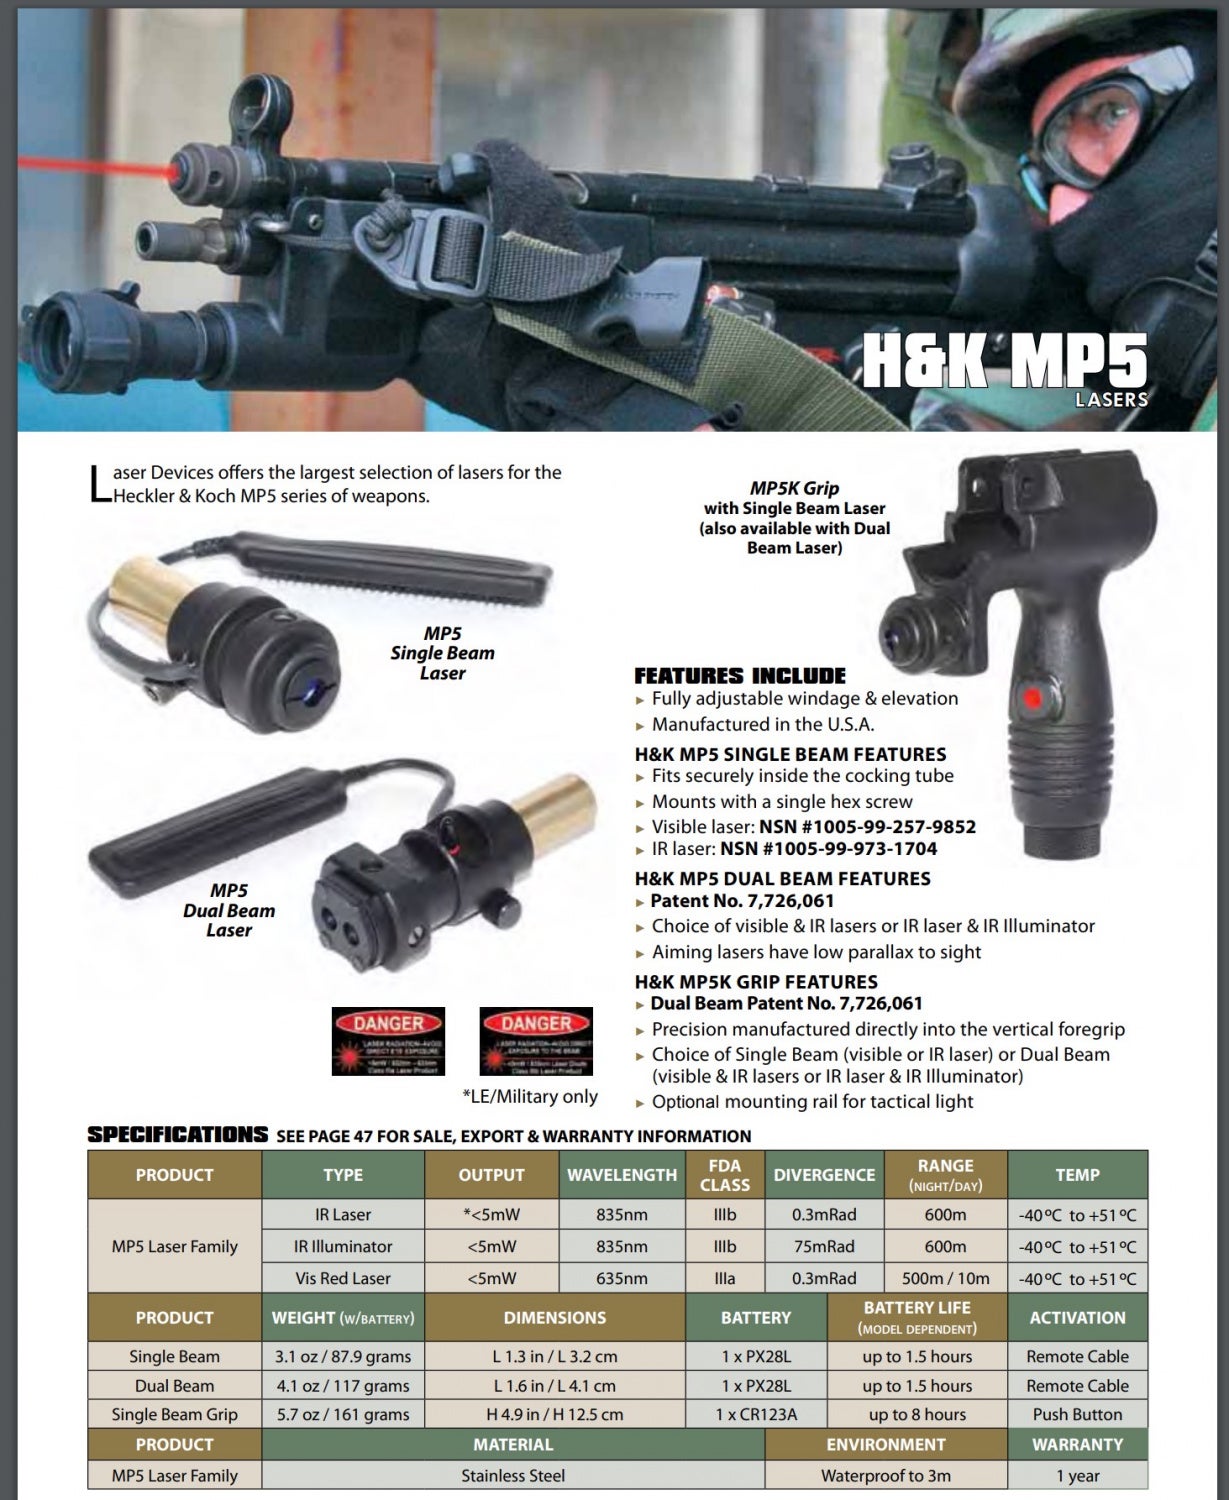
Photo from Aidan (Hop of TFBTV)
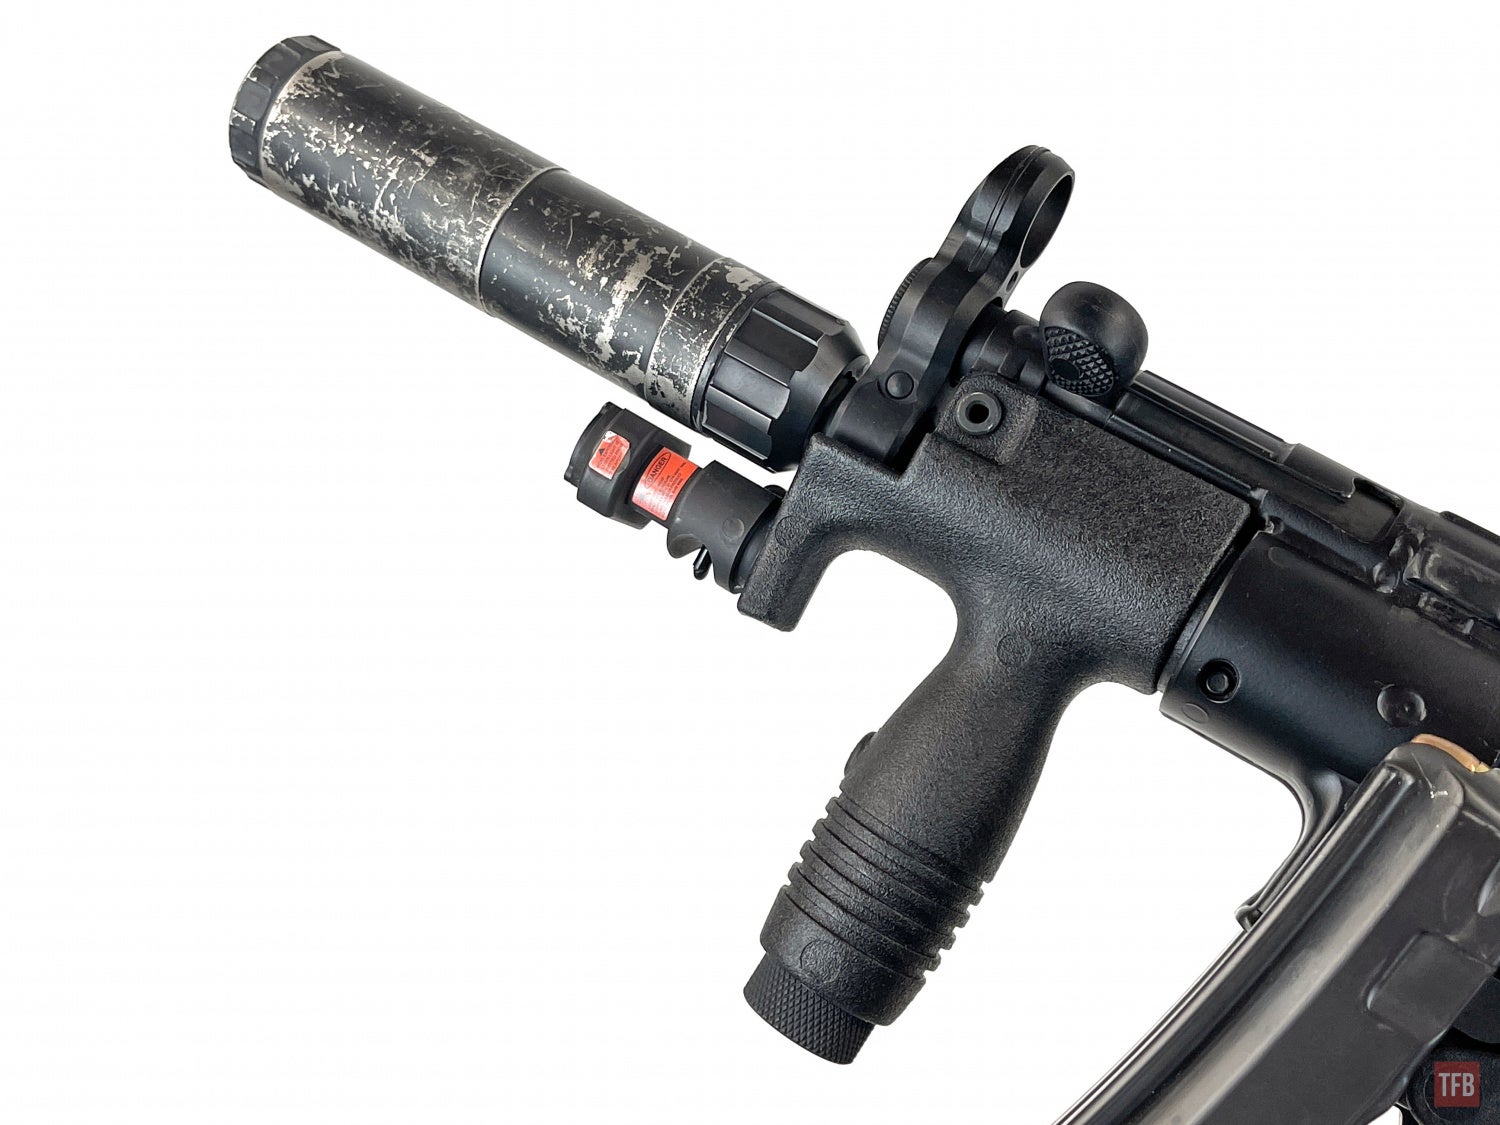
Thanks to my friend Dave, I have the Laser Devices Dual Beam Laser.


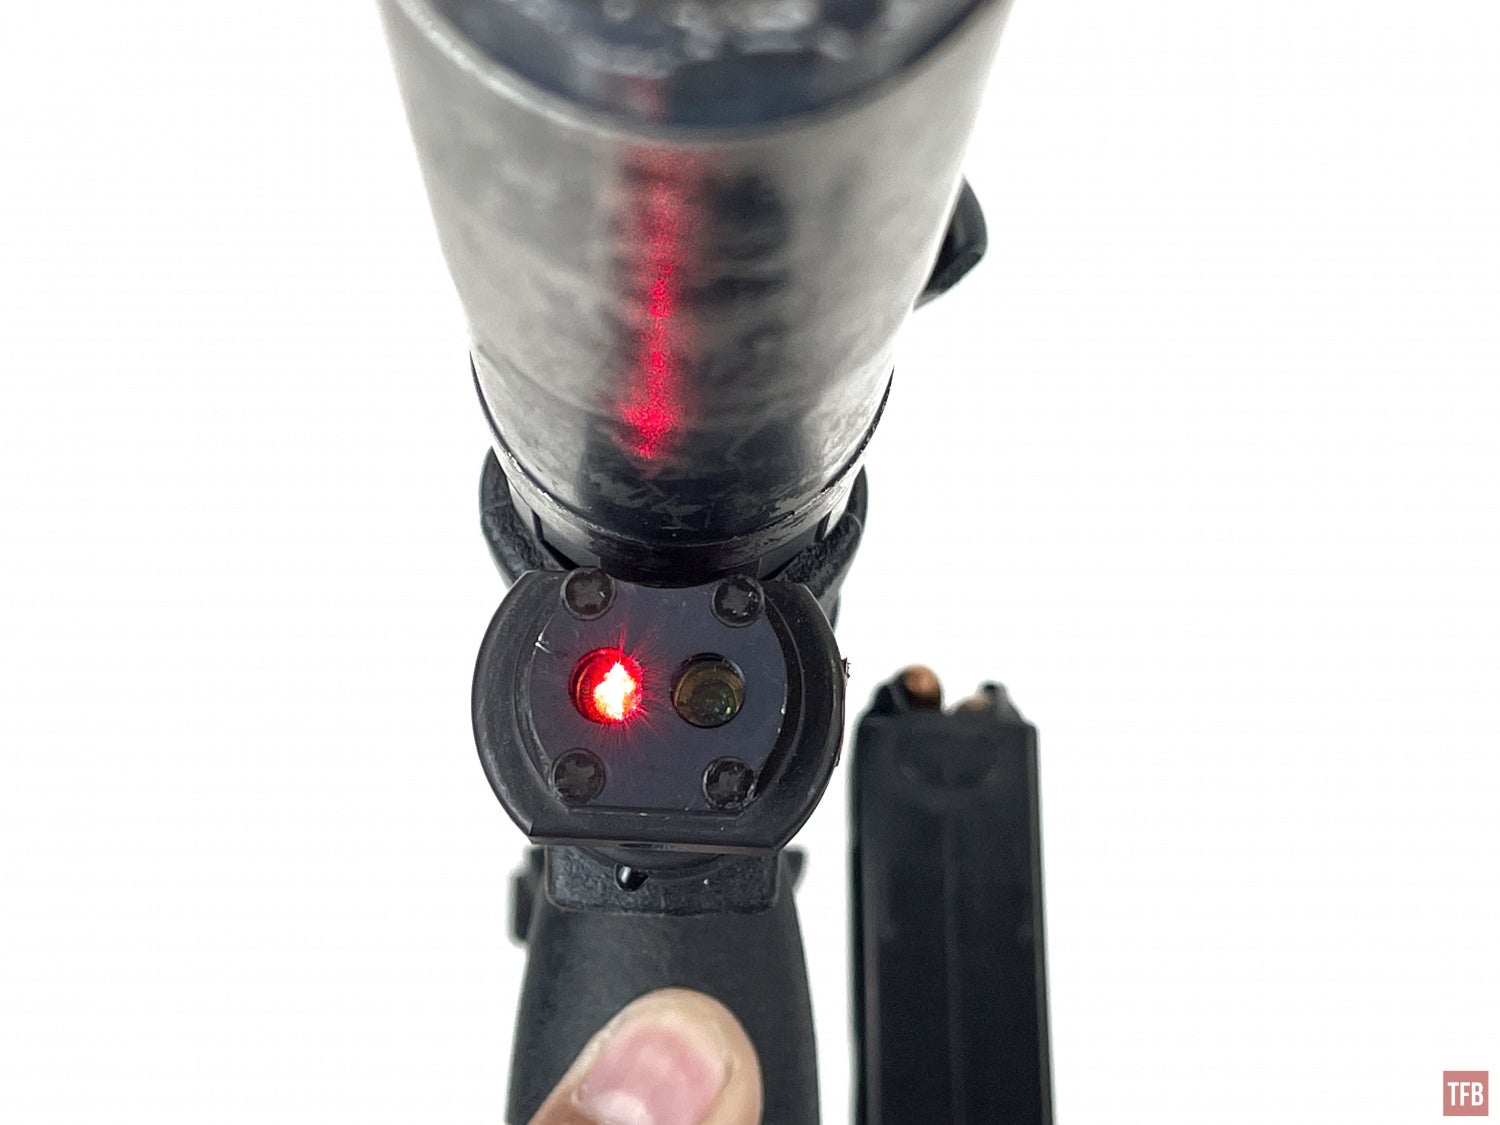
Can you see the immediate problem? You can not mount a suppressor.


The Laser Devices Dual Beam Laser is powered by a 28L battery.

I have since relocated the Dual Beam Laser to my H&K SP5L since I do not have to worry about interference with a suppressor.
Lasers For MP5K
Mounting an MP5 laser to an MP5K is more challenging due to the lack of real estate. One can mount a laser or a light but to achieve both that you can control at a whim is difficult.
Below is the best ergonomic MP5 laser setup I have been able to come up with for the MP5K platform but it is only for right-handed shooters. I used the Viridian Hand Stop laser, a Midwest Industries M-LOK handguard, an offset mini scout light body, a Unity MLOK Hot Button and a KIJI although a SureFire Scout Light or Vampire head would work as well.

I mounted the M-LOK Hot Button forward facing at the 4 o’clock position of the handguard.


My index finger wraps around the Viridian Handstop and the tip of my finger presses the M-LOK Hot Button to control the light. By squeezing both I can activate both. I can easy pressure on my fingertip and just activate the laser or vice versa to activate the MP5 laser.

Laser Devices Dual Beam Laser MP5K Grip
Similar to the MP5 Dual Beam Laser but this is installed into an MP5K grip and the grip is the battery compartment. It uses a CR123 to power the lasers. And unlike the MP5 DualBeam, this clears suppressors just fine.


The Dual Beam lasers have a selector switch to switch from VIS and IR. KILL is to turn the lasers off.


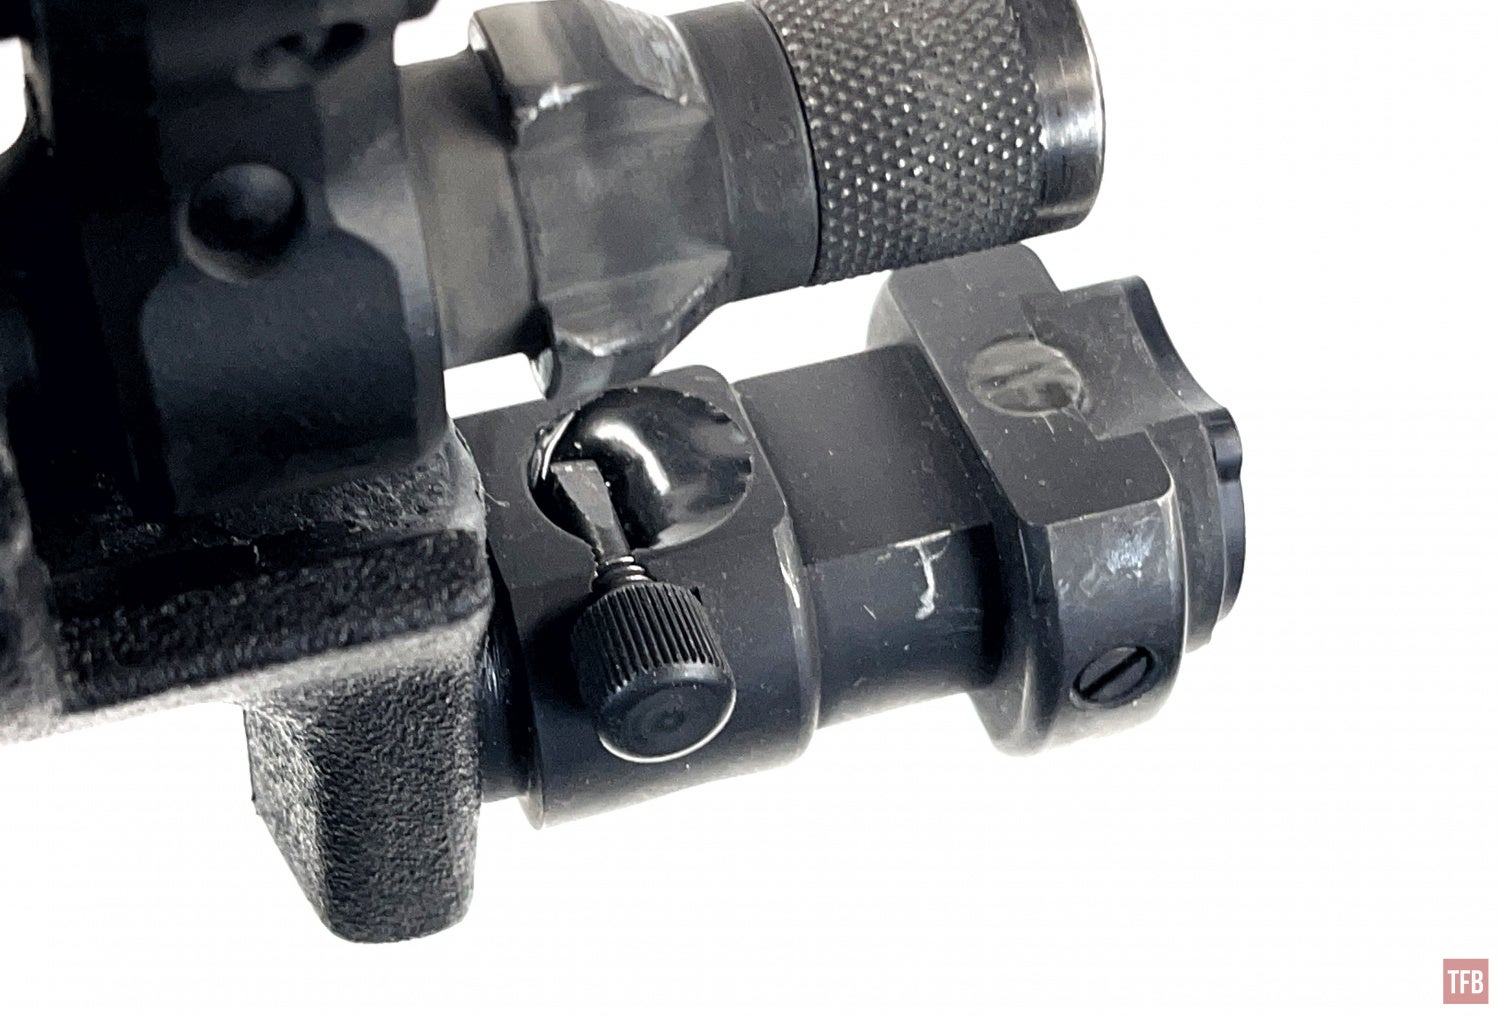
Laser Devices designed the sight adjustment tool to stay on this MP5 laser. The MP5 Dual Beam has the same feature. Just unscrew the mini flat head and use it to adjust windage and elevation. Screw it back in to store it.
In case you were wondering, the MP5K Dual Beam laser fits the MP5K briefcase.

Final Thoughts On MP5 Lasers
Mounting an MP5 Laser can be easy or challenging. However, often easy means some form of compromise like activation or you can’t use another accessory. Often my choice in an MP5 laser is focused for use with night vision and that adds an additional layer of complication. However, I realize that I am only using these at the range and having an infrared laser is nice but not mandatory. Night vision can see VIS lasers just fine (unless it is green or blue and you have filters on your objective lenses that block those wavelengths). So if you want to set up an MP5 with a laser, think about the issues and criteria I brought up here. The EOTech LBC with Unity Taps is probably my ideal setup now. It is everything I want with the only minor issue that I have to twist the Vampire head to switch from IR to VIS illumination. Hopefully, the options I mentioned may inspire you to set up your MP5 laser.