 Your Privacy Choices

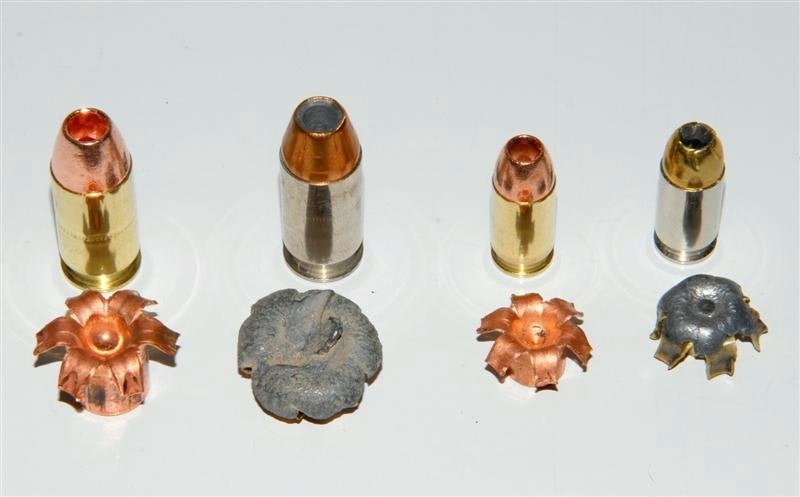
Ballistics gel or ballistic gelatin is a fairly common and familiar substance that is often used to test the efficacy and performance of various projectile or bladed weapons. Ballistics gel is quite often used by independent persons and professionals alike to either test ammunition or view the effects of said ammunition on what amounts to a close simulation of human and animal tissue. After the infamous Miami Dade shootout, the FBI established a set of testing protocols to determine the performance of ammunition. It’s generally understood that on a bare “10% Ordnance Gelatin” block a bullet should penetrate no less than 12 and no more than 18 inches into the target otherwise it begins to lose points in the FBI’s complex formula for determining whether or not the ammunition is suitable for law enforcement applications.
More Ammunition Articles @ TFB:
- CCI Blazer Named Most Frequently Purchased Handgun Ammo for 2021
- New Remington Premier TSS and Magnum Turkey Loads
- TFB Behind The Gun Podcast #39: Pat and Nick with True Velocity
These gel tests can give us great insight into how well our own personal defense or hunting ammunition is performing under different conditions but the catch is that premade ballistic gelatin blocks are made to very exacting standards and as a result, often cost way more than the average citizen would bother to pay in order to test their similarly expensive ammunition. So today I’ll be sharing with you a guide on how to make your own homemade ballistics gelatin stand-in so that you can try testing your own ammunition without breaking the bank.
DIY Guide to Making Your Own Affordable Ballistics Gel
First order of business. I am not claiming nor will I ever claim that this homemade formula is going to behave or perform the same as a true 10% Ballistic Gelatin FBI Block. There are rigorous and precise standards for manufacturing and testing a block but since I don’t have access to a 600 fps air gun or an affordable source of clear gelatin to make mine with, we’ll just be using these gel blocks as something similar to real ballistics gel. Even though these blocks might not meet FBI standards, I still think they can give us valuable information about our own hunting and self-defense ammunition. The aim of this DIY article is just to provide you with an affordable and consistent testing medium for your own purposes.
Materials and Supplies Needed
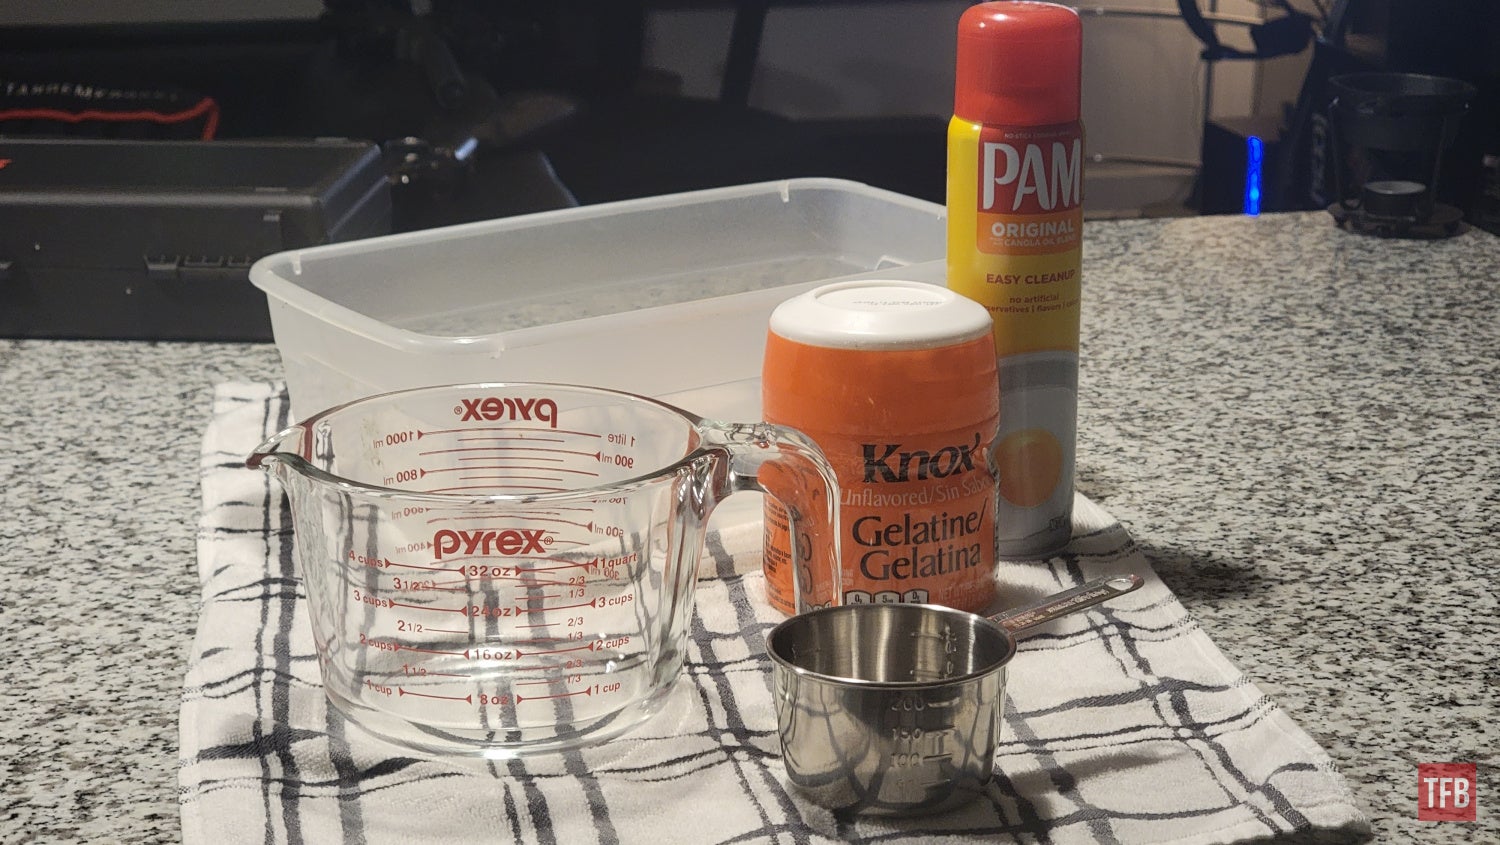
You’ll need a few affordable and simple supplies to get started. Most of this stuff can be found either at your local hardware store, online, or sometimes at grocery stores. If you have a rather well-equipped garage, you probably already have most of the stuff on this list, it’ll just be the methods, time, and patience that you need to commit to doing this.
- Measuring Cups (I used a 1 Liter Pyrex measuring cup and a 1 cup measuring cup)
- A large tub or bucket suitable for forming a large rectangular block (I used a plastic storage container)
- At least 8 ounces of Knox Original Unflavored Gelatin Mix
- Unflavored cooking spray
- Space in the refrigerator
Optional Items
I have provided links to the above items that you can find on Amazon. At the low end of things, you can get away with making these gel blocks for about $10 per block provided you don’t need any other items than the gelatin mix itself.
Step 1 – Mixing Process
The basic formula I use for my ballistics gelatin closely resembles the FBI’s 10% gelatin mix, however, I have simplified mine to work with basic measuring tools most of us have as well as the common quantities that the Gelatin is sold in. To start, you’ll want to measure out 2 quarts of cold water.
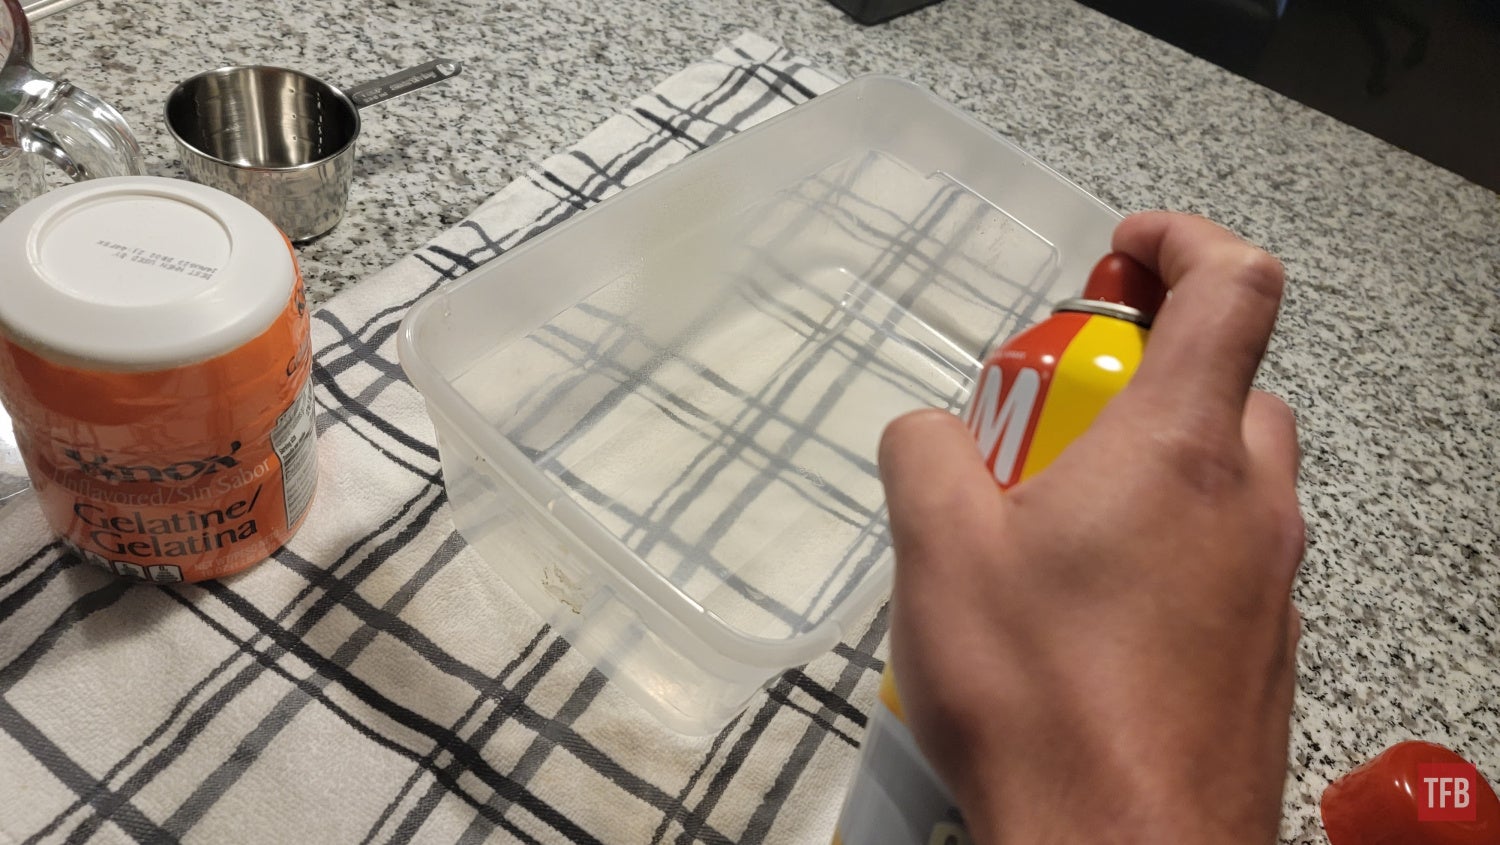
Next, you’ll want to take your cooking spray and give your mixing container a light coating so that the gel will more easily come out of the container or mold after its set. After this, you can pour the 2 quarts of water into the large mixing container if you’re doing more than one batch or you can pour the water directly into the mold you’ll be using if you’d like.

The next step will be to measure out 8 ounces of the Knox Unflavored Gelatin. You can use a 1-cup measuring cup for this. Try to be as precise as possible as any deviation in these two measurements can screw up the consistency of your gel block. After you’ve measured out your 8 ounces of gelatin you can begin mixing it into the water gradually. The slower you mix in the powdered gelatin the less chance there is you’ll start developing a lot of clumps. This is why it’s important that you pour the water into the mixing container first before the gelatin.
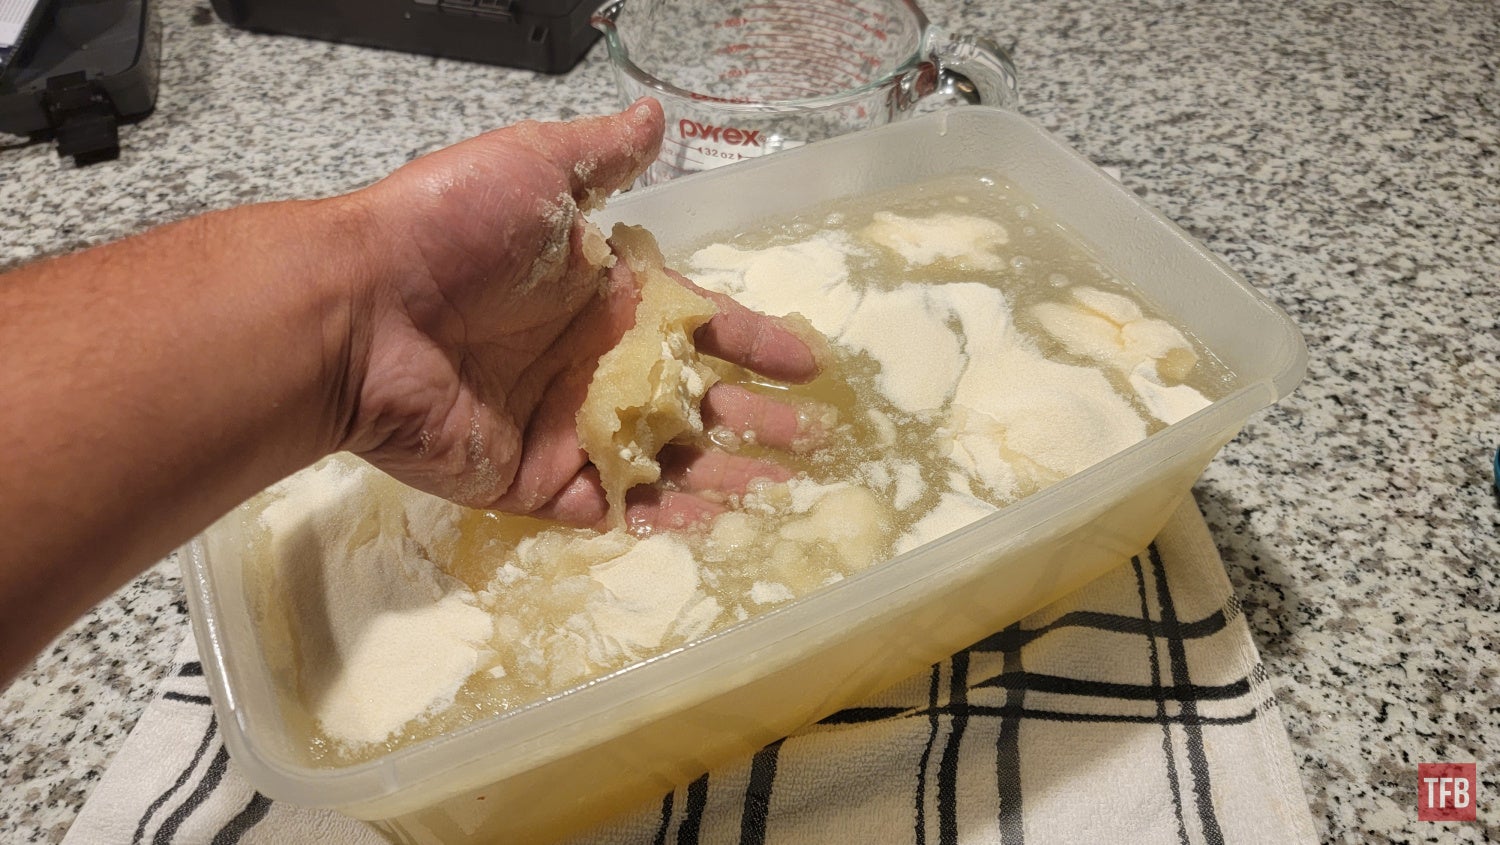
Dumping all of the gelatin in at once isn’t the best way to get a good mix.
Unfortunately, there is almost no way to eliminate all of the clumps when mixing the gelatin in with the water but that’s okay. After you’ve thoroughly mixed the gelatin with the water with your hands and can’t seem to get any of the small clumps to break apart and mix with the rest of the solution, you can begin removing them and placing them into a small pot. While the main container is continuing to cool down, you can start to melt these clumps on the stove using some of the solutions from your main container to help the process along. After you’ve melted all the clumps down into a more clear solution, you can add it back into your main container and mix it in again.
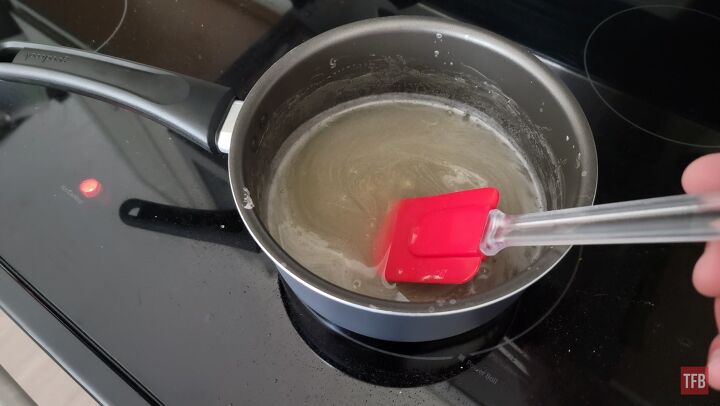
Clumps should break up more easily under heat. Use some of the solution to pour into the pot to help make the clumps go away.
(Fair Warning: Knox Gelatin is not kosher and is made from the skin, bones, and connective tissue of various animals. When you start to mix it, it’s likely that you’ll start smelling barn animals, this is because you are. Take this into account before you commandeer your wife’s kitchen)
Step 2 – Chill Out
After your solution is mixed enough to form a consistent and mostly clear liquid, it will have the consistency of snot. After you’ve got it mixed you can then carefully transfer the container into a refrigerator and let it sit overnight to solidify and hydrate. This usually takes about 12 hours so I find it’s best to mix the solution in the evening and then let it sit overnight.

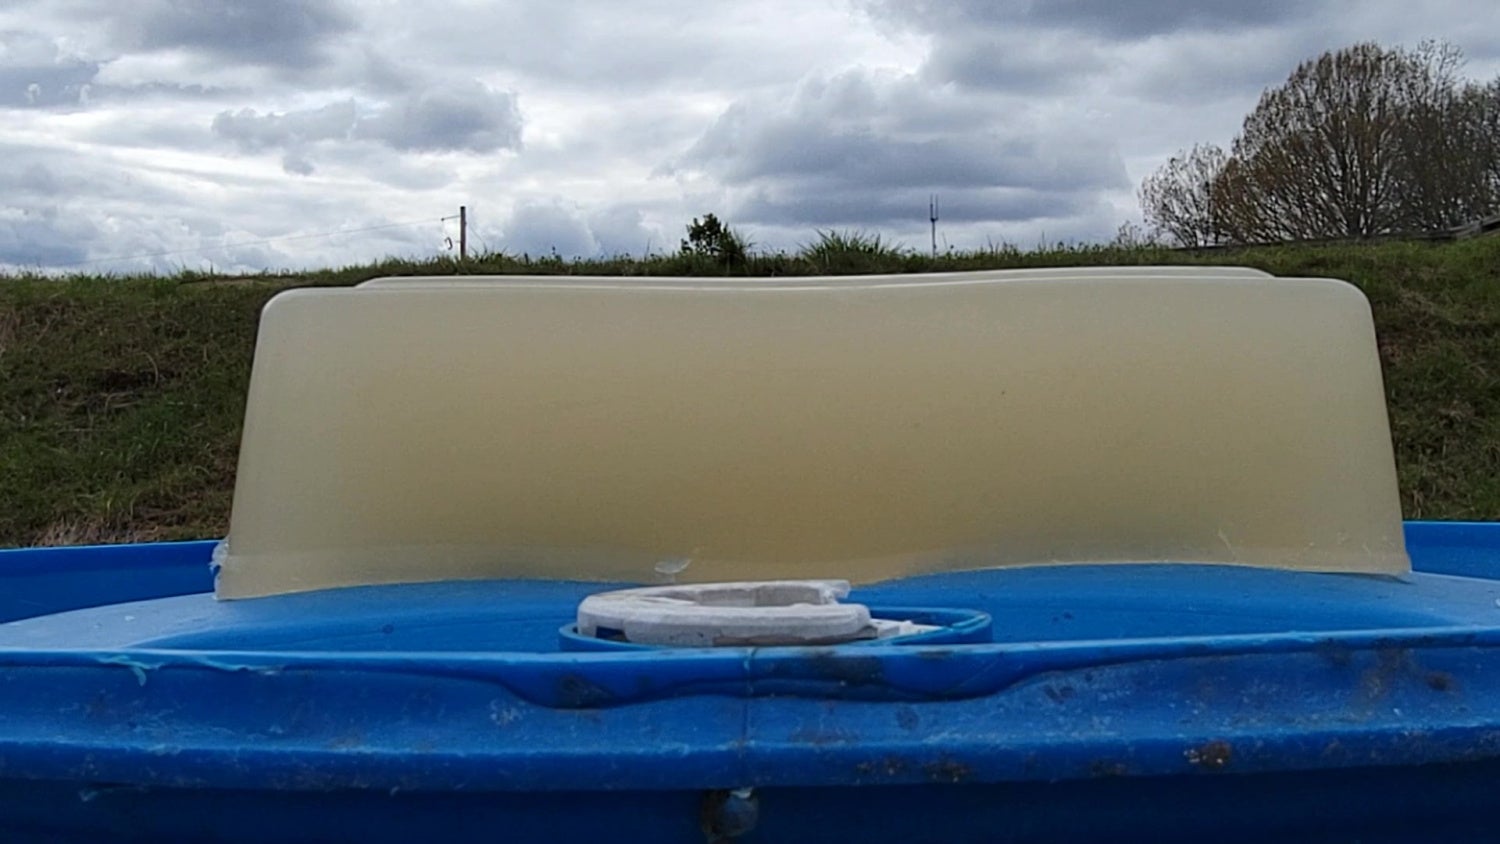
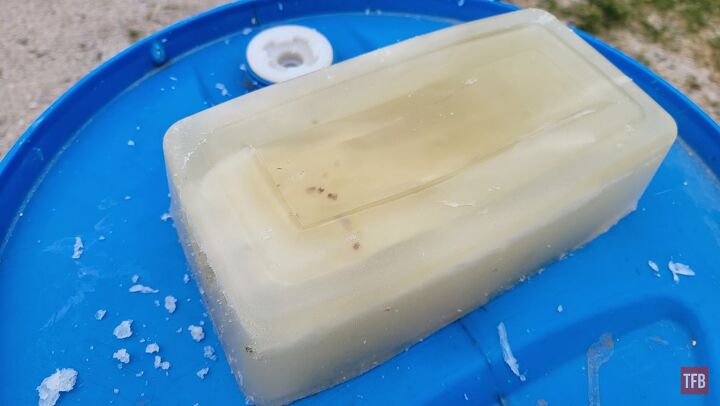
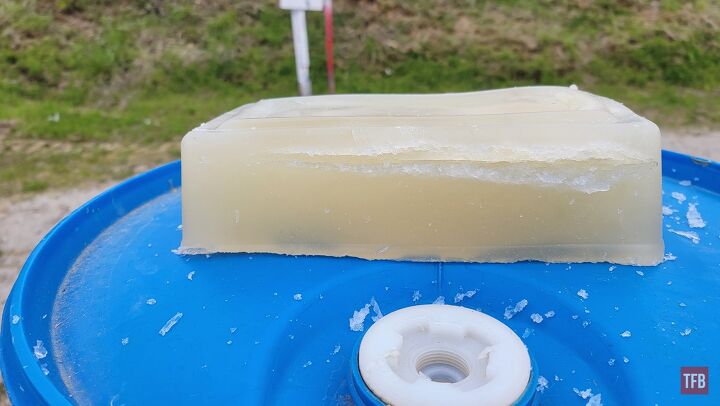
After the solution has chilled and solidified, it will have a very stiff but still malleable consistency to it. If it comes out just as soft as jello, then you probably didn’t add enough gelatin into the mix. The formula we used above gives us roughly an 11% ballistics gel mix which is a bit denser than the FBI gel blocks but the FBI didn’t even use 10% gel blocks, to begin with, they used to use 20% gel blocks but these turned out to be too cost-prohibitive.

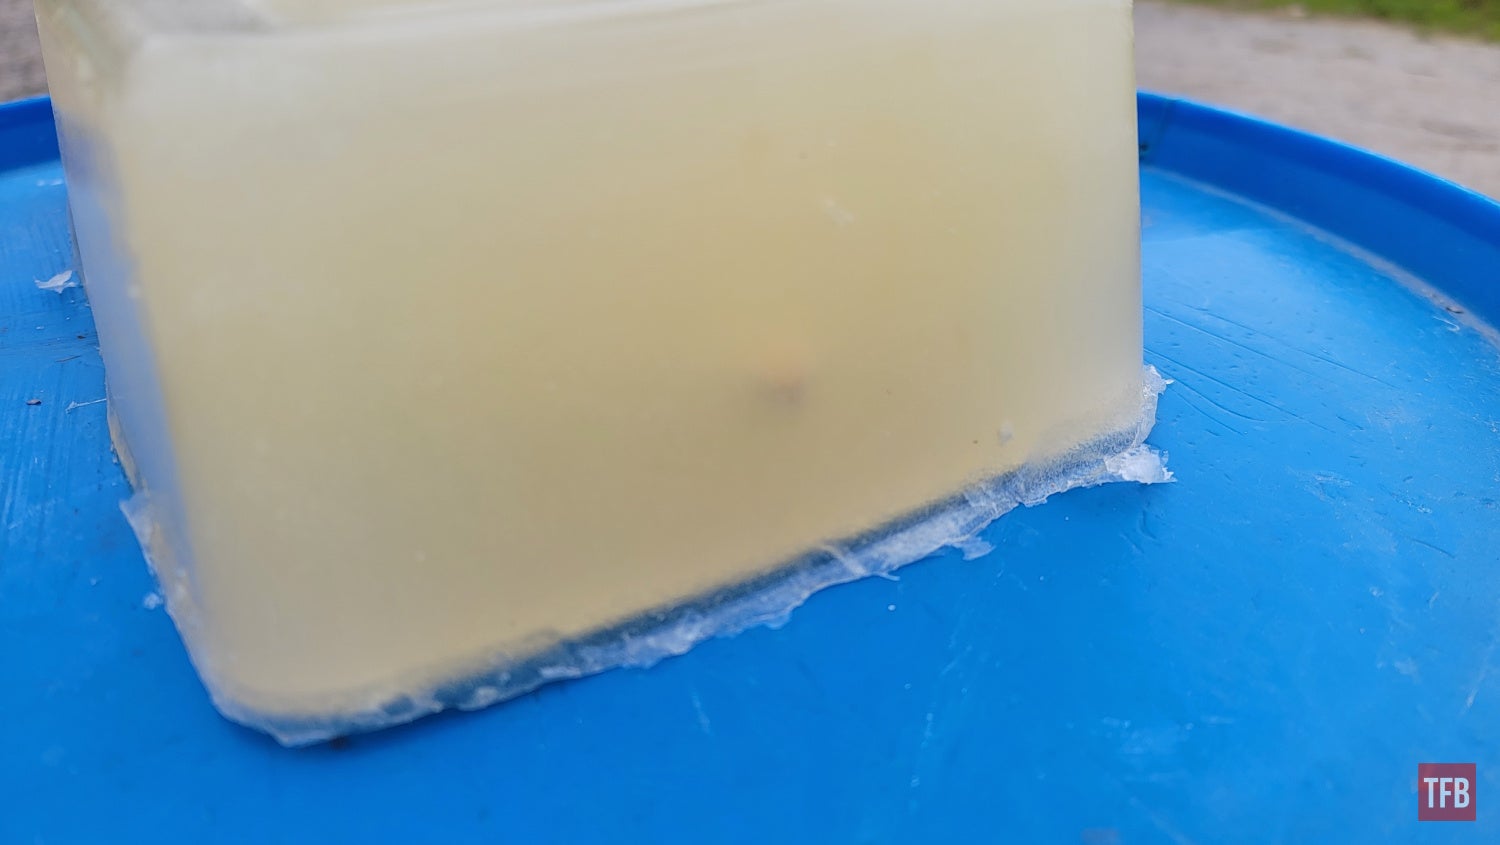
Note some of the discolored areas where the mix wasn’t uniform.
If you mixed your ballistics gel in a large container and want it to be in a different shape, or split a larger batch up into smaller molds, you can take your large boiling pot and gently begin to heat up the mixture making sure to stir it constantly as it melts so it doesn’t burn. After it’s been heated to a uniform consistency, you can then spray down your desired mold shape with cooking spray and then pour the heated gel into the mold and let it cool once again in the fridge. After this, you’re all done and you’re ready to use it!
Uses and Testing
There are a number of cool things you can test out using this cheap ballistics gel. I recently received some new Norma Eco Power-22 Fragmenting 24-grain 22LR ammunition intended for hunting. This lead-free ammunition is supposed to enter its target and fragment very quickly with a majority of the bullet’s weight continuing on and creating additional damage along the way. I wanted to see if Norma’s “fragmentation” claims actually measured up which was the impetus for this little experiment. I figured this was only fair since they advertise the ammunition on their website with a clear ballistics gel.
Bullet fragments can clearly be seen an inch or two into the ballistics gel.
I took my ballistics gel block to the range and set it about 20 yards away and shot it with the new ammunition using my Ruger 10/22. I was pleased to find that the ammunition worked as advertised and fragmented within the first couple of inches of the gel block but I only managed to capture a single piece of the main portion of the bullet to take pictures with – this was due to there not being enough ballistics gel to catch the tail end of the projectile.
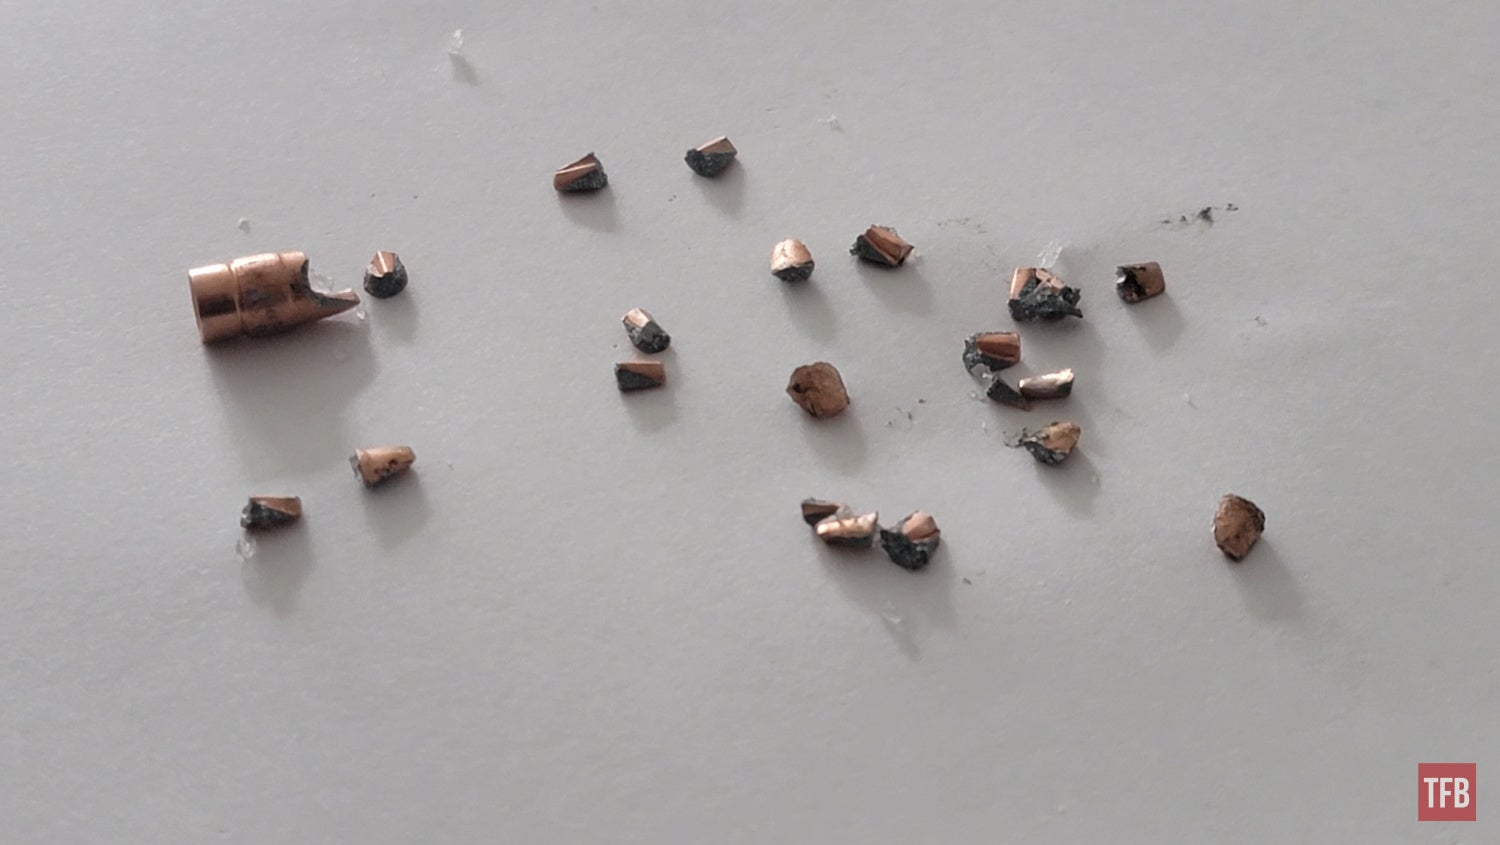
Several fragments plus one core from the Norma Eco-Power Lead-Free Ammunition.
In the future, I plan on testing out other types of ammunition including self-defense handgun ammunition to see how well it performs at different distances, through different types of clothing and barriers, as well as just for fun! I’m sure the rest of you could come up with some pretty interesting ideas for this homemade ballistics gel.
I think if you really wanted to, you don’t need to throw the used ballistics gel out. The gel can be reconstituted after you’ve removed all the projectile fragments from it but I’d highly recommend that the reheating process be done outside in order to limit exposure to any lead fumes. If you do decide to throw the gel out, it’s biodegradable and technically edible, so no negative impact on the environment aside from the lead fragments.
Thanks for stopping by to read this brief tutorial, if you try this experiment out, let me know how it works out for you in the comments below. I will be experimenting more with this DIY ballistics gel solution in the future and I’d be interested to hear what you guys would like to see tested. Happy shooting!
The single tail-end of a 22LR bullet I managed to capture, the remainder of the projectile cores passed through the entire block.
A glancing hit on the block from right to left with the Norma Eco Power-22. The projectile did not fragment as intended with this partial impact.
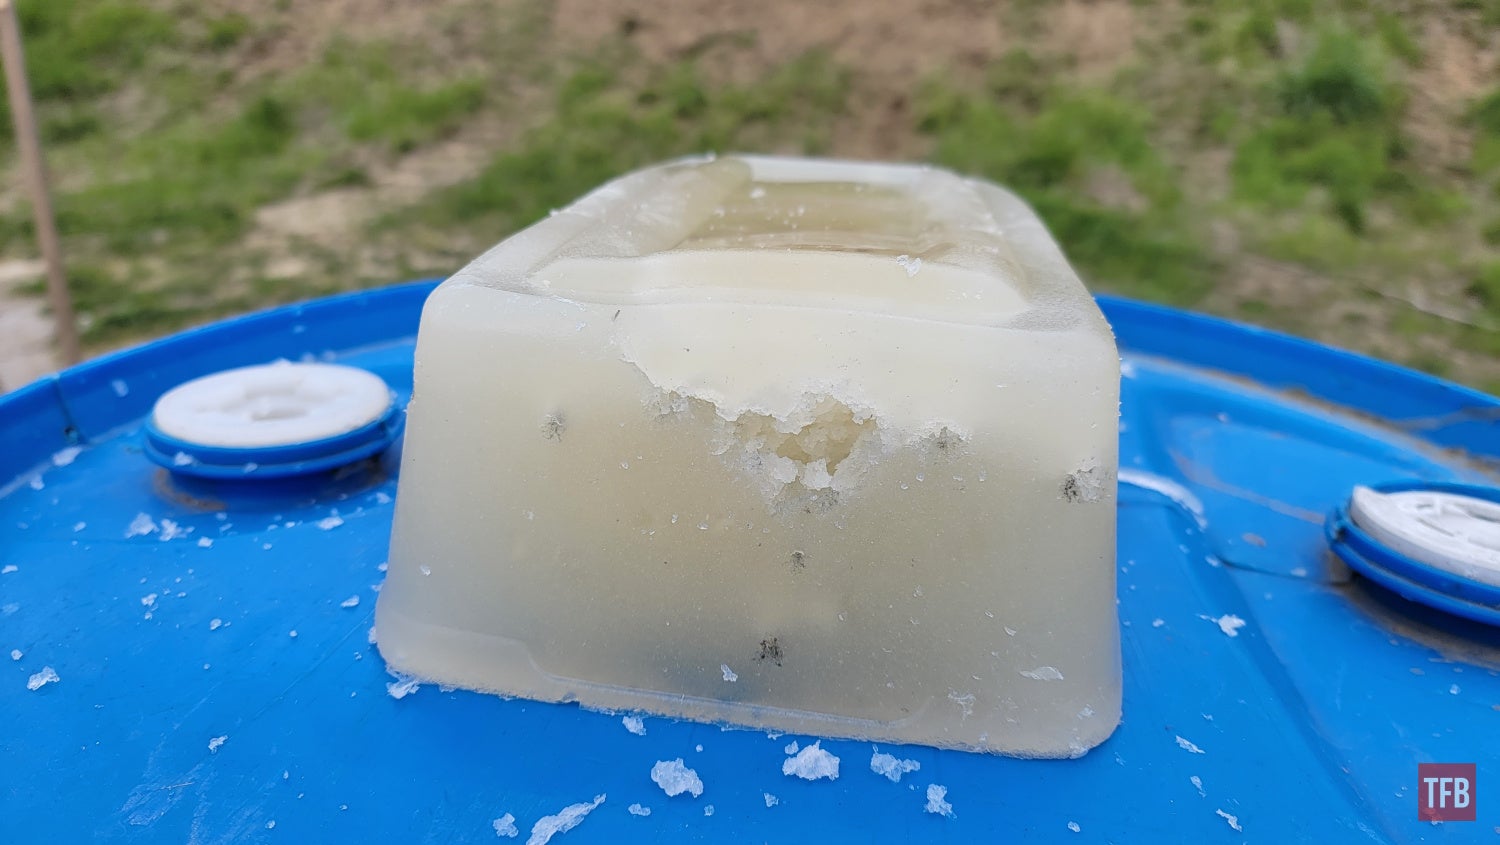
The block started to degrade and exposed an area of the gel that wasn’t completely mixed leading to a less dense portion. most of the projectiles went through and fragmented anyway after passing through the less dense areas. Future mixtures will not have this flaw. However, this one could be melted down and reconstituted to make a more uniform block.
We are committed to finding, researching, and recommending the best products. We earn commissions from purchases you make using the retail links in our product reviews. Learn more about how this works.