 Your Privacy Choices

Today on Friday Night Lights we take a look at the thermal workhorse from Trijicon. Specifically the IR-Patrol and briefly the REAP-IR. These thermals are one of the benchmarks in the thermal industry for weapon-mounted thermal systems. The Friday Night Lights series is sponsored by ATN Corp, manufacturers of night vision and thermal optics like the THOR LT. As with all of our sponsored series, Friday Night Lights will continue to bring you unbiased news and reviews from a variety of companies.
Trijicon @ TFB:
- Trijicon Announces Upgraded Thermal Riflescope Lines – REAP-IR & IR-HUNTER
- TFB Exclusive Review: Trijicon RMRcc for Concealed Carry Pistols
- TFB Behind The Gun Podcast Episode #30: Ryan Sikorski from Trijicon
Trijicon Thermal Monocular: IR-Patrol
When you peruse thermal hunting groups the Trijicon thermal lineup is one of the many that are recommended and used by hunters. I managed to get a used IR-Patrol for a decent price to check out what makes these so great. When I got it, I was rather impressed with the thermal image. However, there were some issues about the unit I got that I did not know about because I did not do my research. Apparently Trijicon offers eight different versions of the IR-Patrol.

Three of them have 1/4×20 tripod holes while the other 5 have Wilcox dovetails for mounting on a helmet. I did not know about the three models so I was a little disappointed. The seller had modified a PVS-18 dovetail and bolted it using a 1/4-20 screw to the tripod hole. It works but is not ideal.

Aside from lacking the dovetail mount, my LE100 was lacking some key features that I was looking forward to. The top three were edge detect, image capture and reticle for weapon mounting. The LE100 does not have those features. Here is a screenshot from their spec sheet. The LE100 and LE100C are the first two columns.

I was a little more than disappointed but thankfully my friend at Trijicon was able to update my IR-Patrol. It is merely a software upgrade. He also upgraded me to a dovetail. The dovetail is important for goggle mounting however I wanted it as a weapon mounting interface when combined with a Wilcox flip to side mount.
I question the use of IR-Patrol for helmet-mounted use. As you can see in the photo below, the IR Patrol is huge.
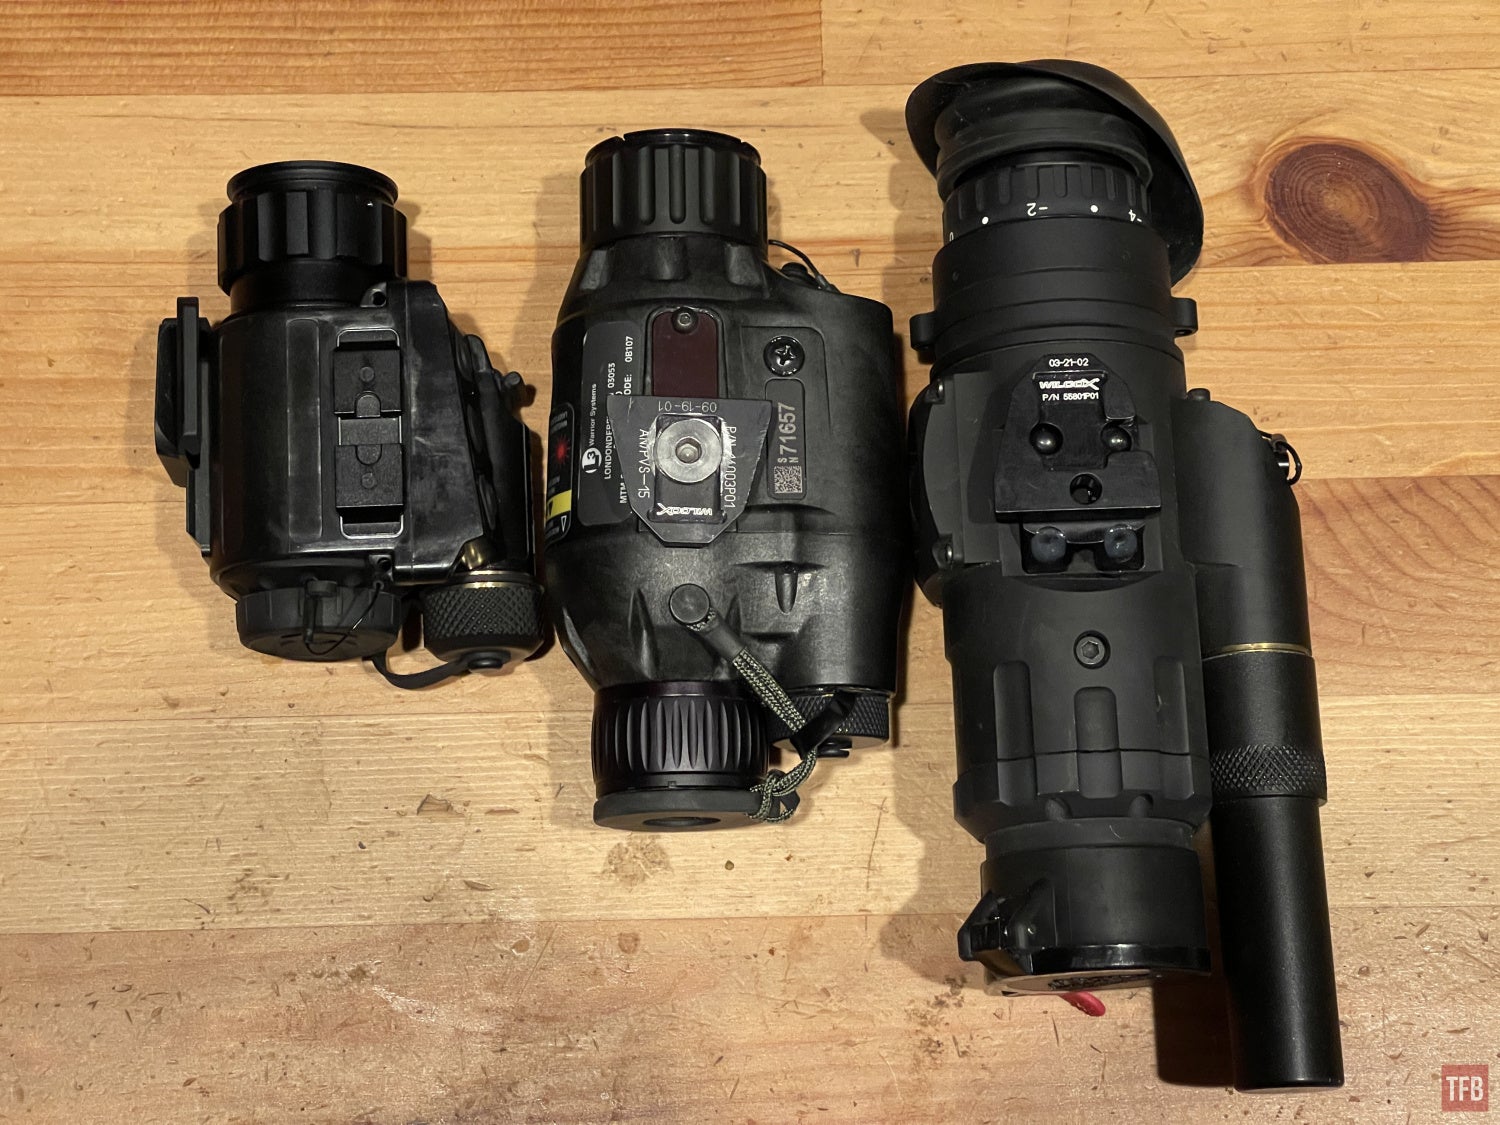
L-R: FLIR Breach, Insight MTM, & Trijicon IR-Patrol
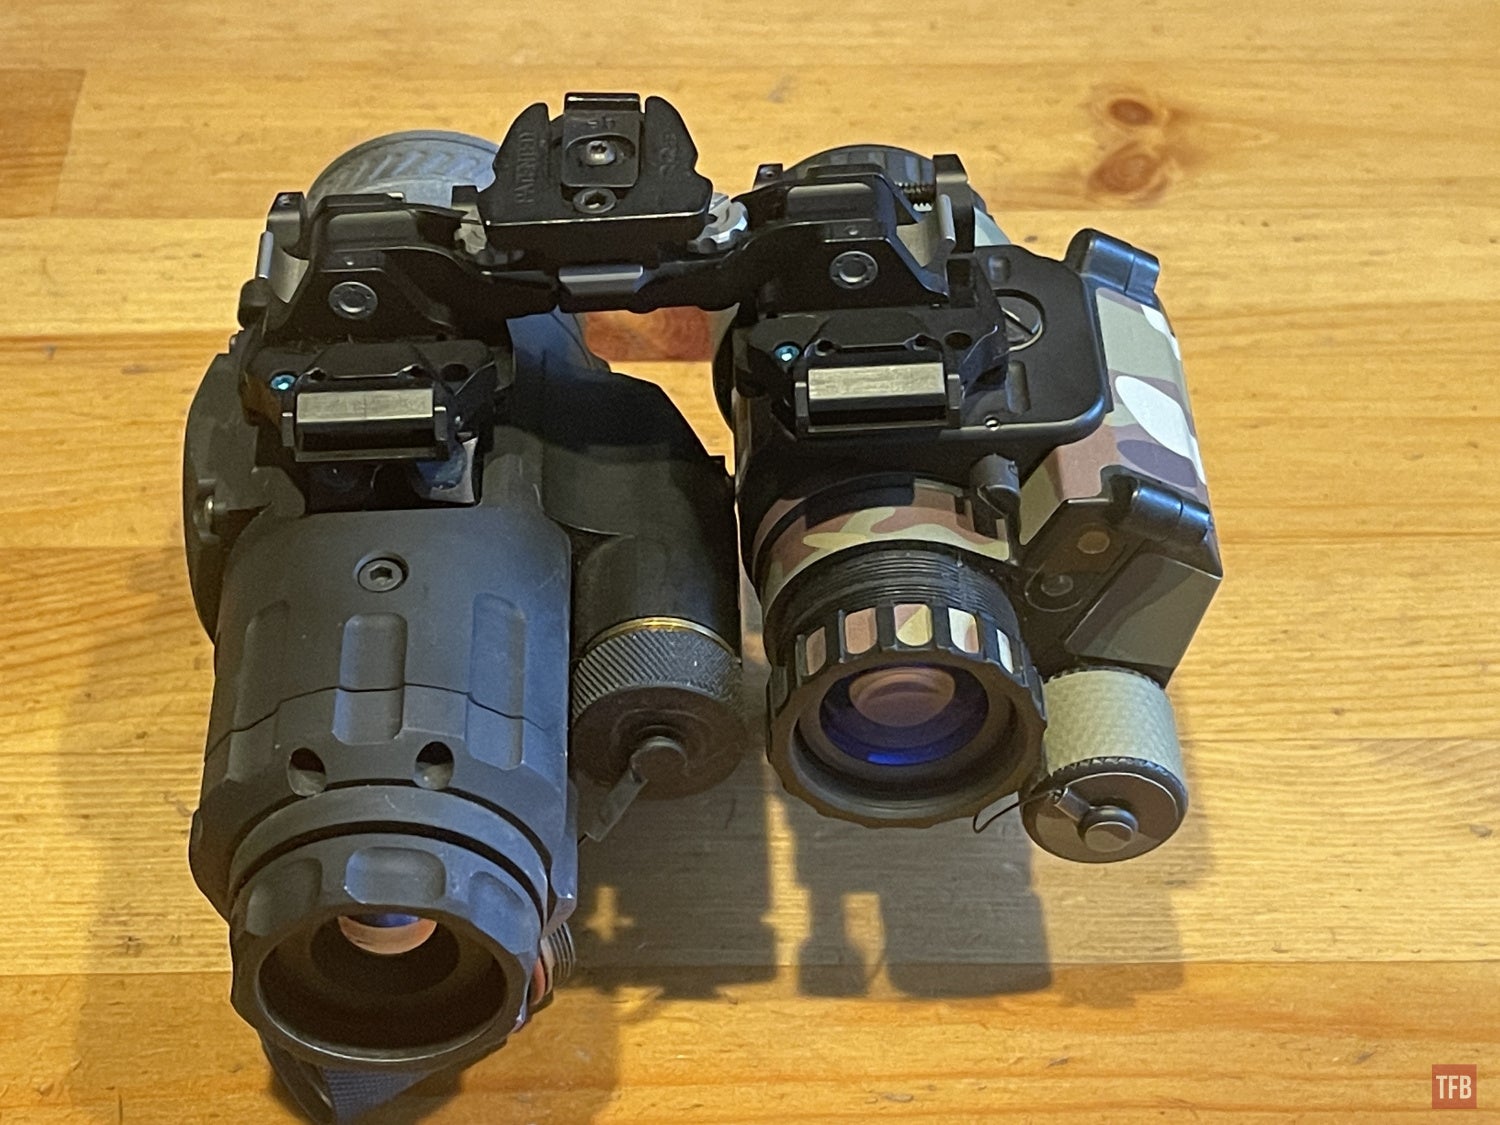
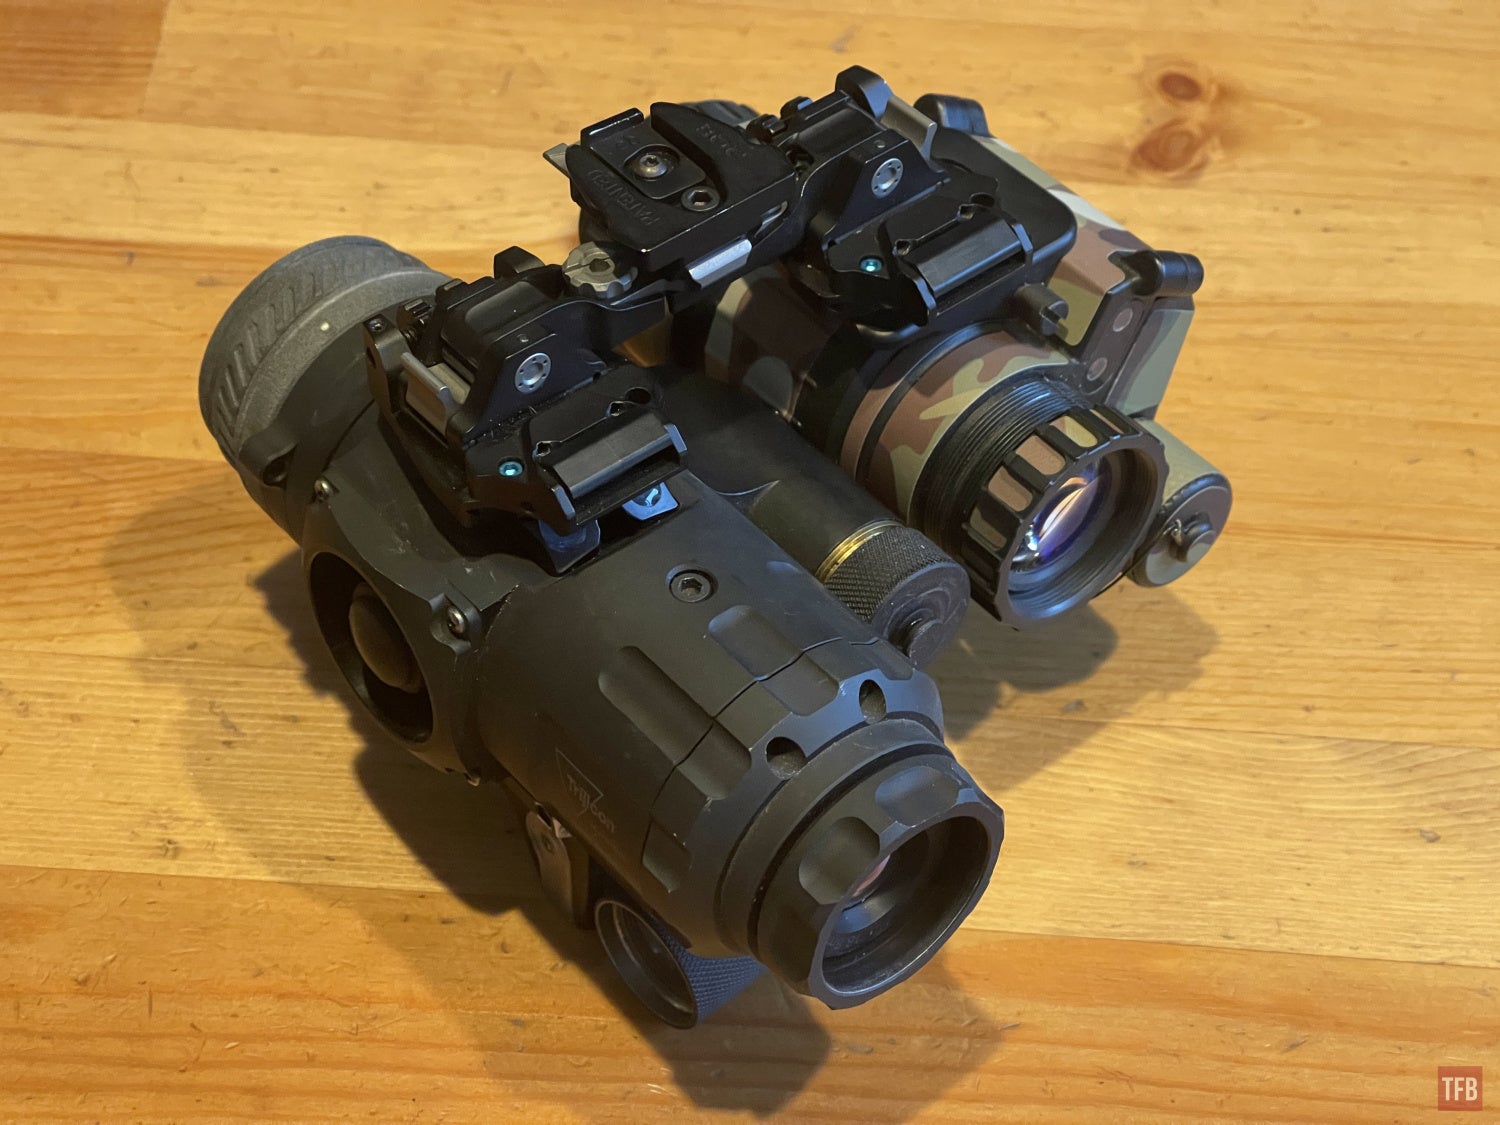
Another problem is how long the eyepiece is and the position of the dovetail. See the photo above and the photo below. When using a Wilcox bridge shoe it positions the PVS-14 really far forward.

It was only through an old and obscure ACME-Engineering/RQE shoe that positions a PVS-14 in the right place to work with the IR-Patrol.

Since the Wilcox dovetail adapter and Acme Engineering dovetail adapters only bolt to the J-Arm hole in the PVS-14, the large battery housing will always be on the left-hand side. This interferes with mounting the IR-Patrol over the left eye. So I have to run it over my right eye and have the PVS-14 over my left eye.
Powering The IR-Patrol
The IR-Patrol comes with a simple battery cap and is powered by a single CR123. However, run times on thermal devices are not great. So companies have made battery extensions. The first one is by IR Defense allows you to use a second CR123. See the chart below by TNVC.

Photo by TNVC

Single CR123 battery cap with a tethered extension below.
Someone else made a battery extension that allows the use of two rechargeable li-ion 17500 batteries. While the extension does stick out a bit your run time is now 8-10 hours on 60hz mode.
Mounting Accessories To The IR-Patrol

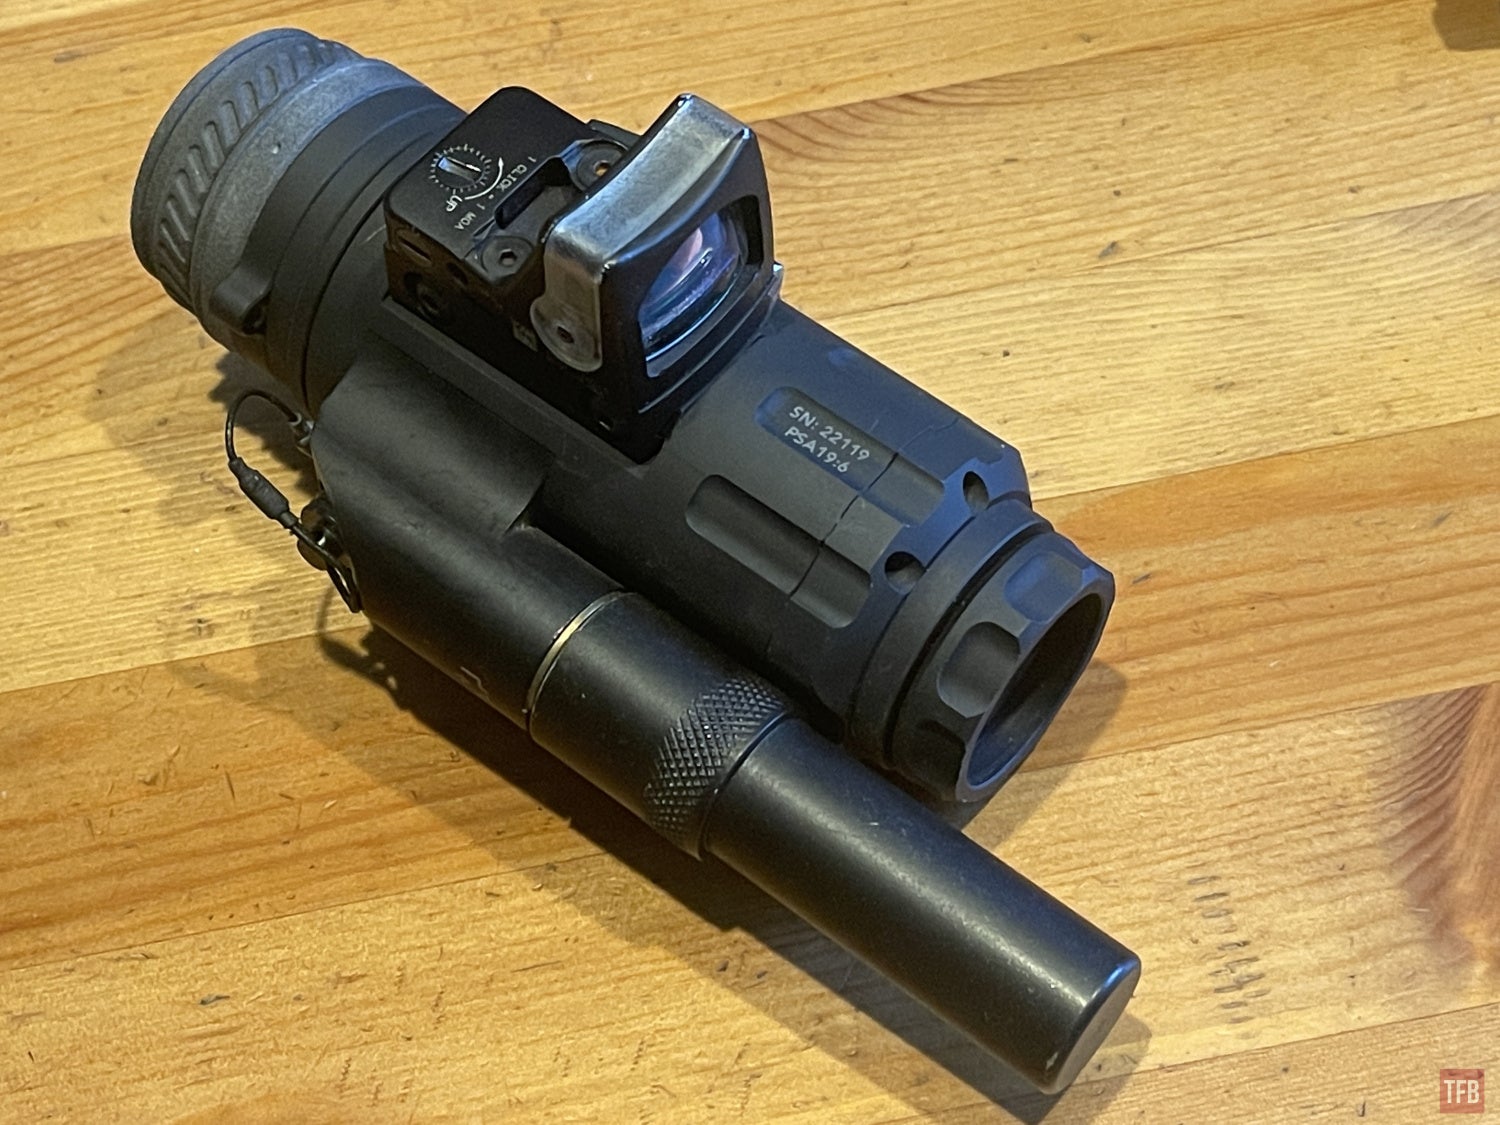
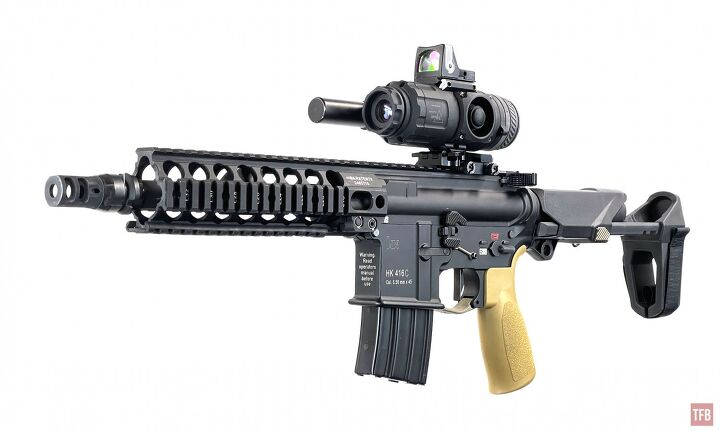
The IR-Patrol has a short Picatinny rail machined into the bottom of the housing. This is for a dedicated Picatinny to Picatinny mount by ZroDelta.
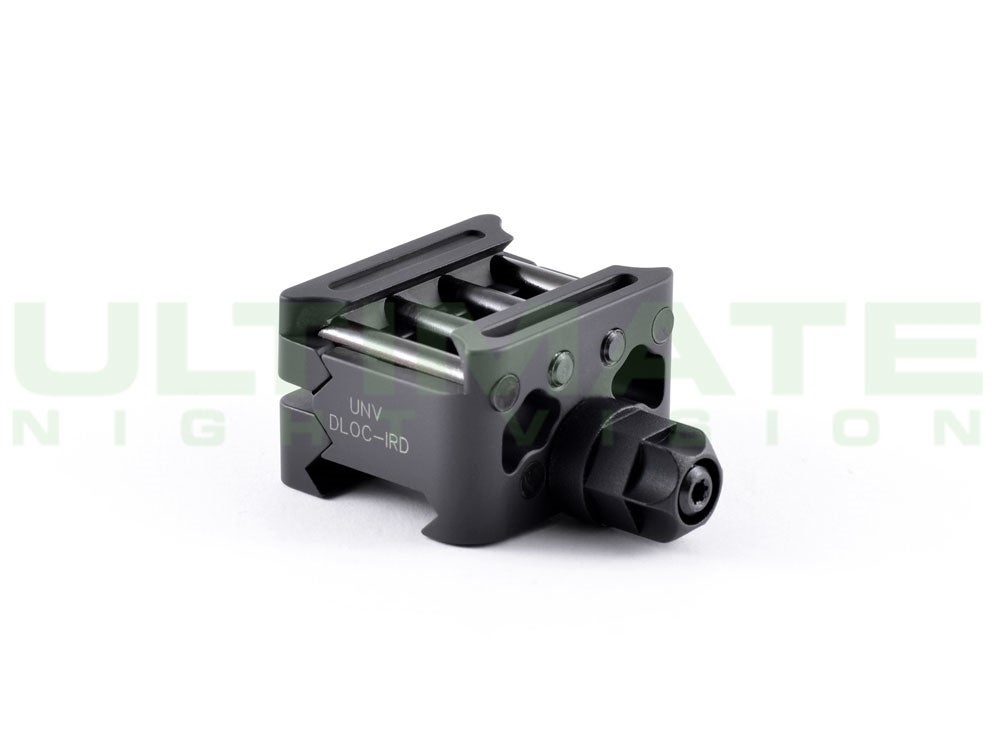
Photo by Ultimate Night Vision
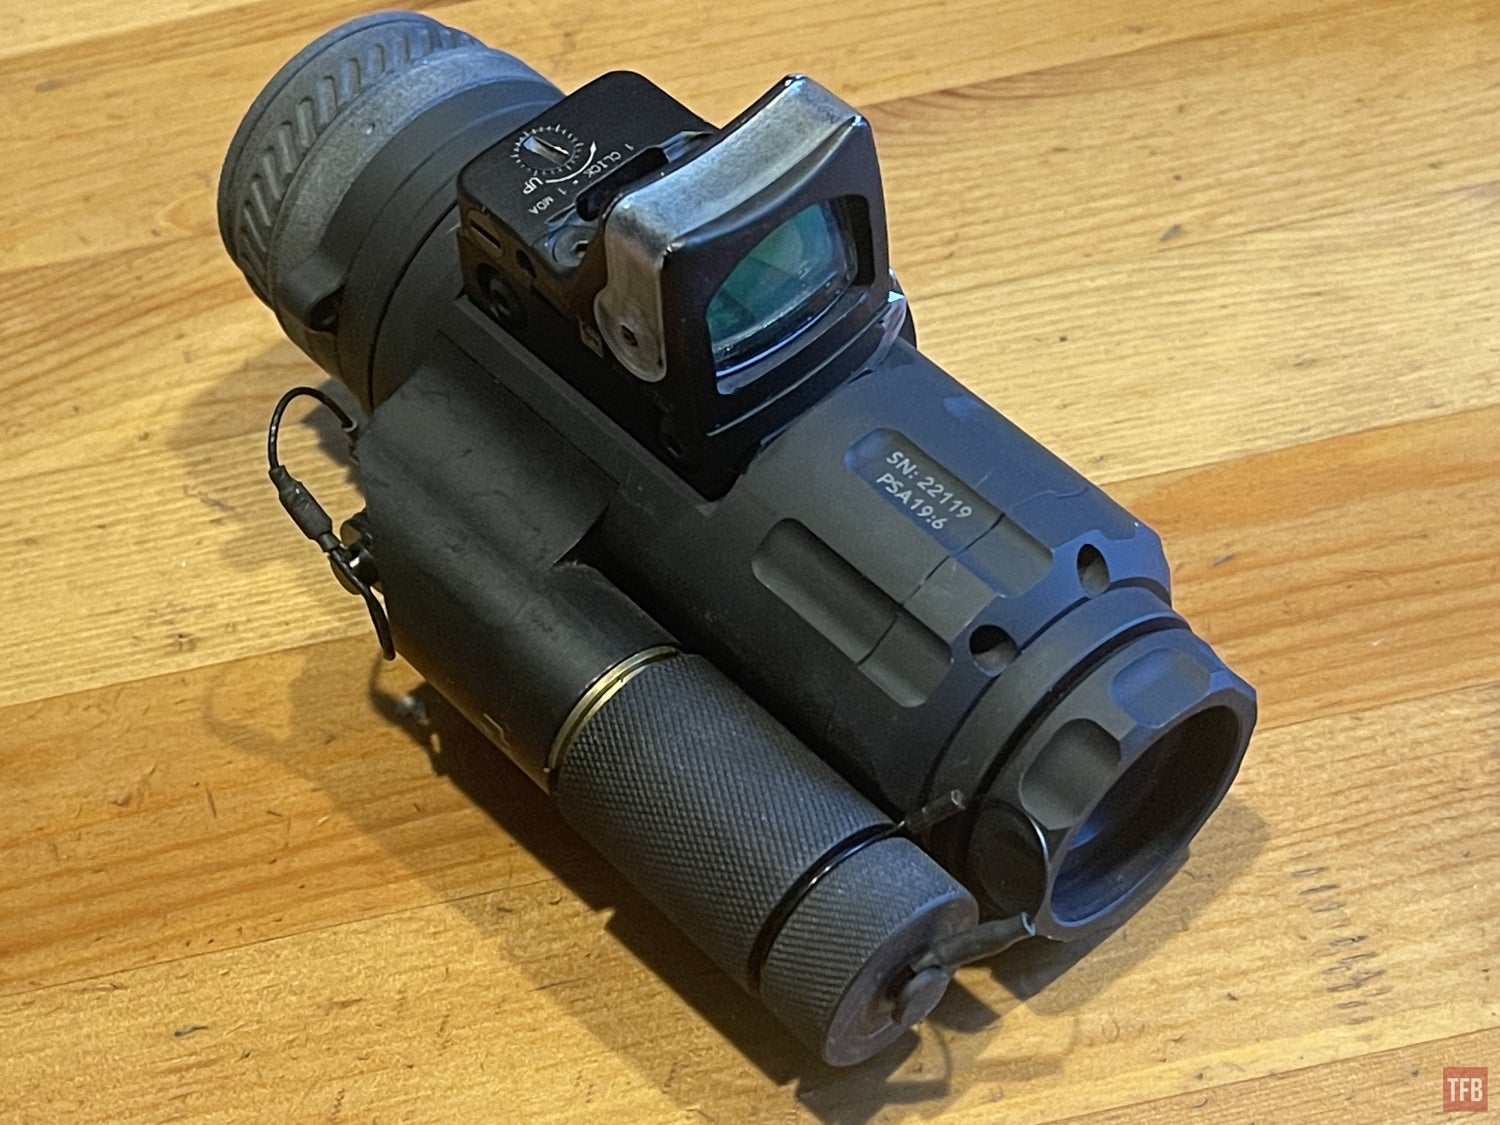
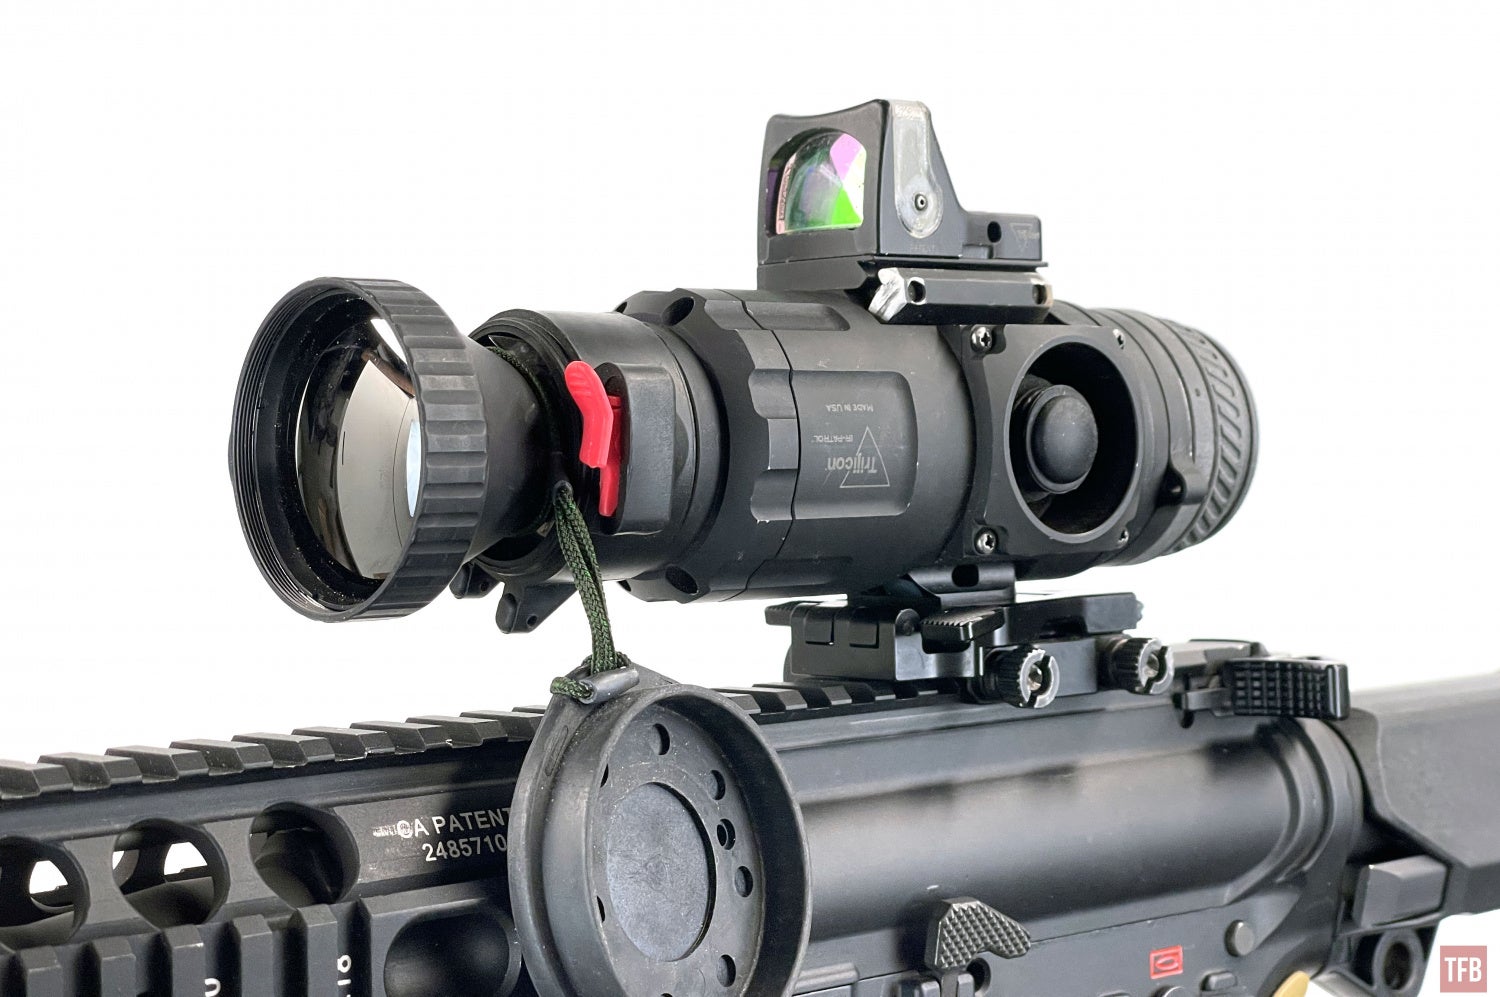
Since I am using the Wilcox flip to side mount, the Picatinny rail is free. So I mounted an RMR on it. This was easier said than done. The problem is how many slots Trijicon machined into the IR-Patrol. You can see the DLOC-IRD mount above has 4 cross members. Which matches the four slots in the IR-Patrol. The problem is that most RMR Picatinny mounts have a single cross member and the rail on the IR-Patrol is only long enough to fit an RMR. So the single cross member cannot fit on the rail. I had to buy a cheap aluminum mount off eBay and Dremel it to fit but you can see it uses two cross member bolts and it fits the IR-Patrol.
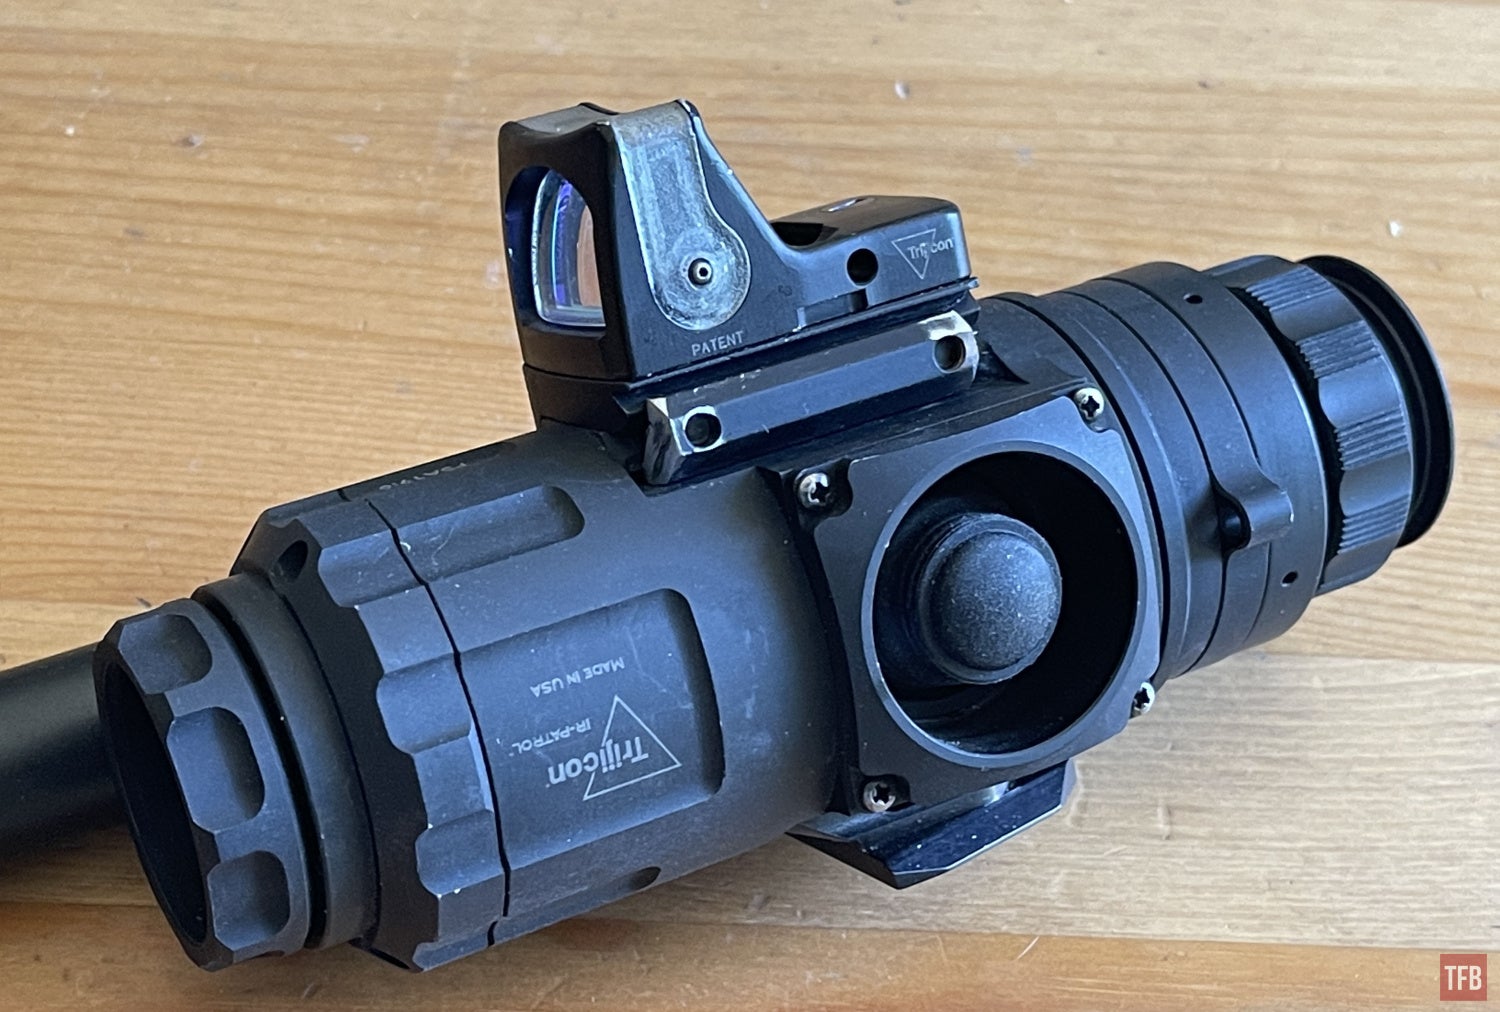
The height of the RMR is perfect for night vision.
Adding Magnification To The IR-Patrol
If you recall, I have a 3X germanium thermal magnifier that came with my Insight MTM. I often use it as a spy glass and hold it in front of my thermal devices for a quick and dirty 3x boost. It actually works very well but in most case I have to hold the 3X magnifier in front of the thermal device. To my surprise, the IR-Patrol objective lens is recessed a bit and is a perfect slip fit for the MTM magnifier.
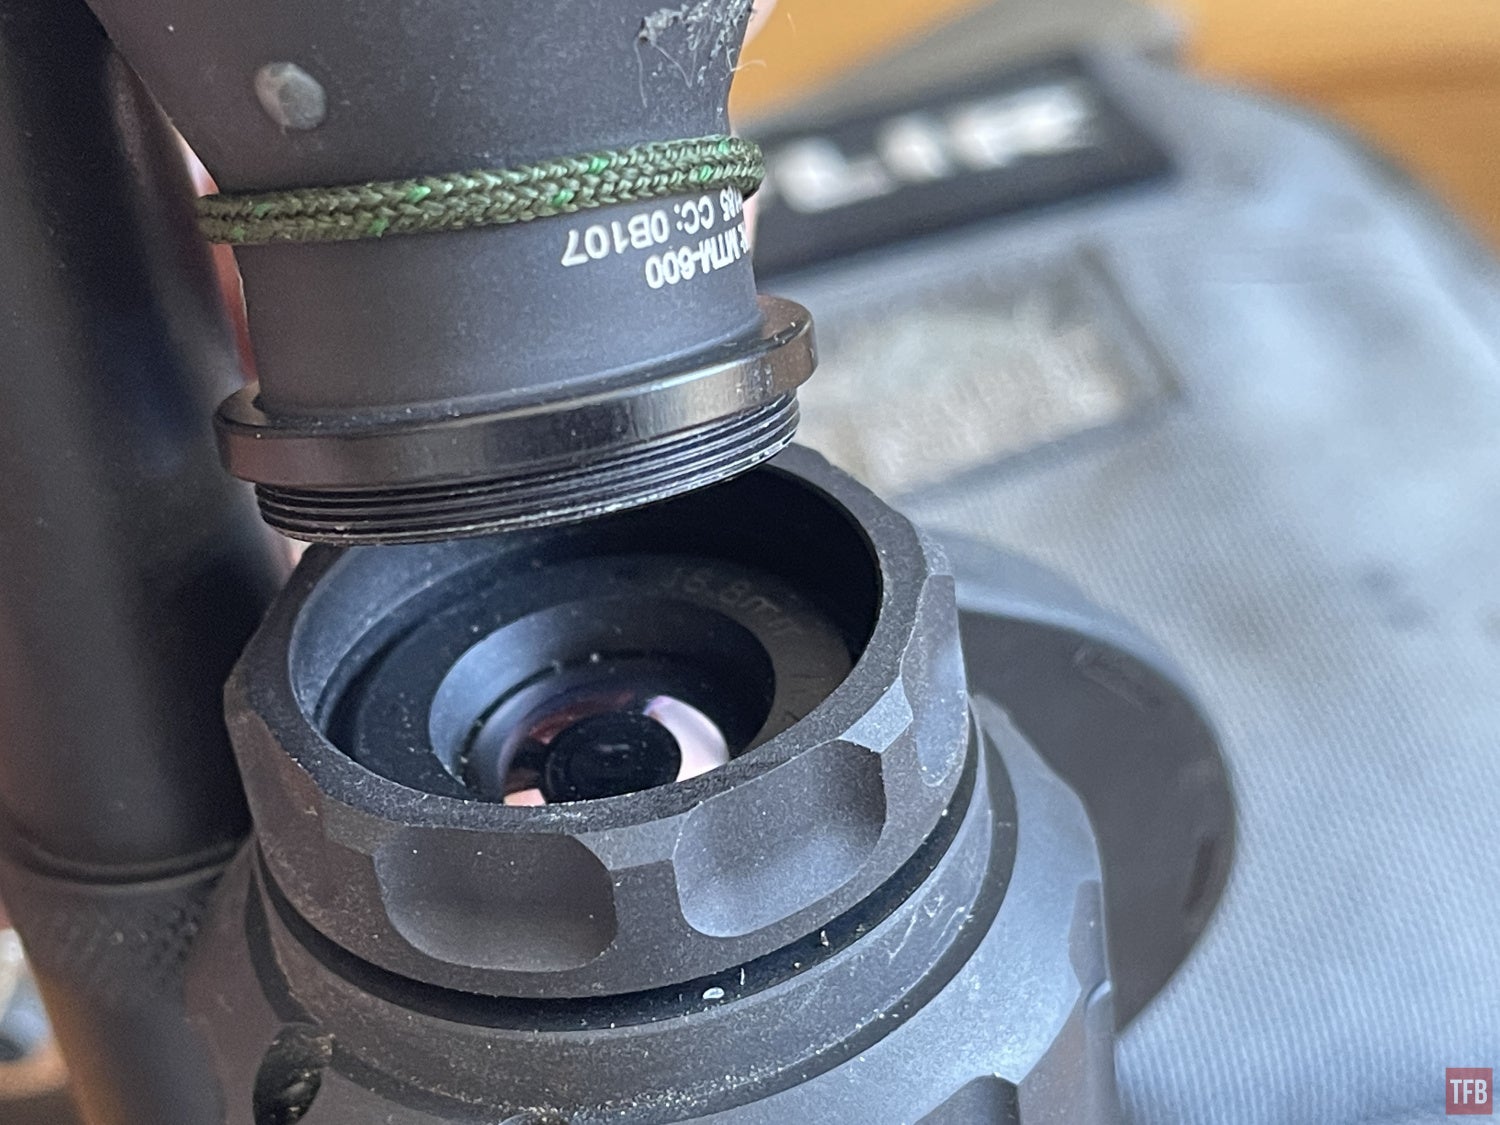


This centers the magnifier perfectly but it does not stay in place. I realized I could modify the butler creek flip cap and use it to hold the MTM magnifier in place.
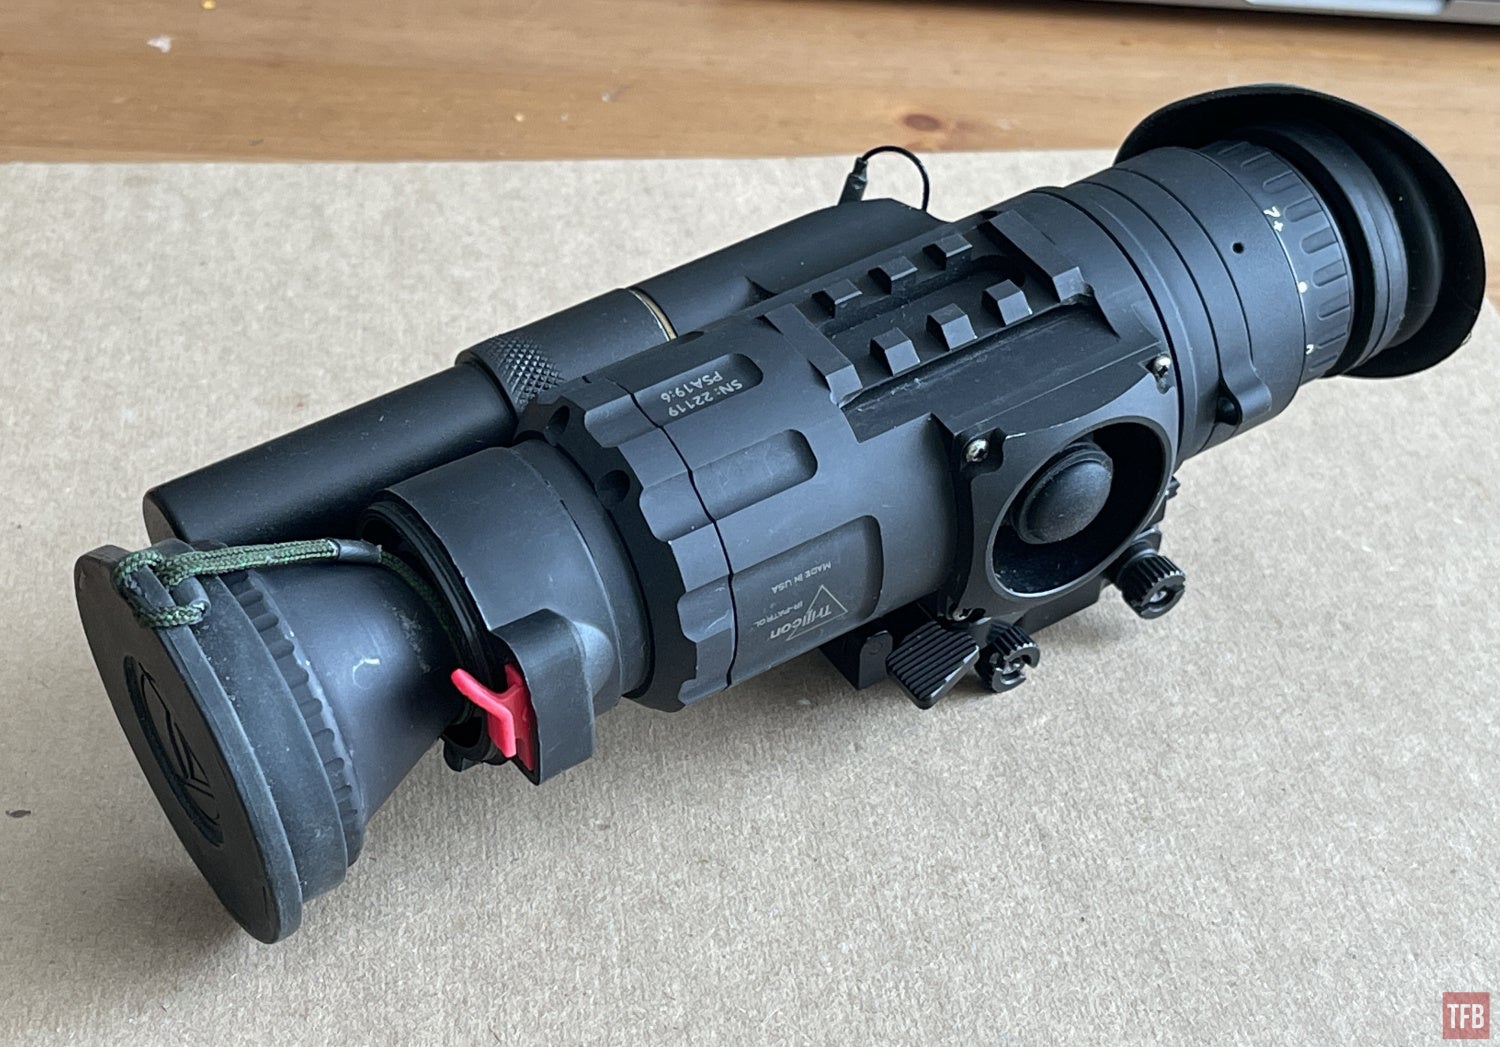
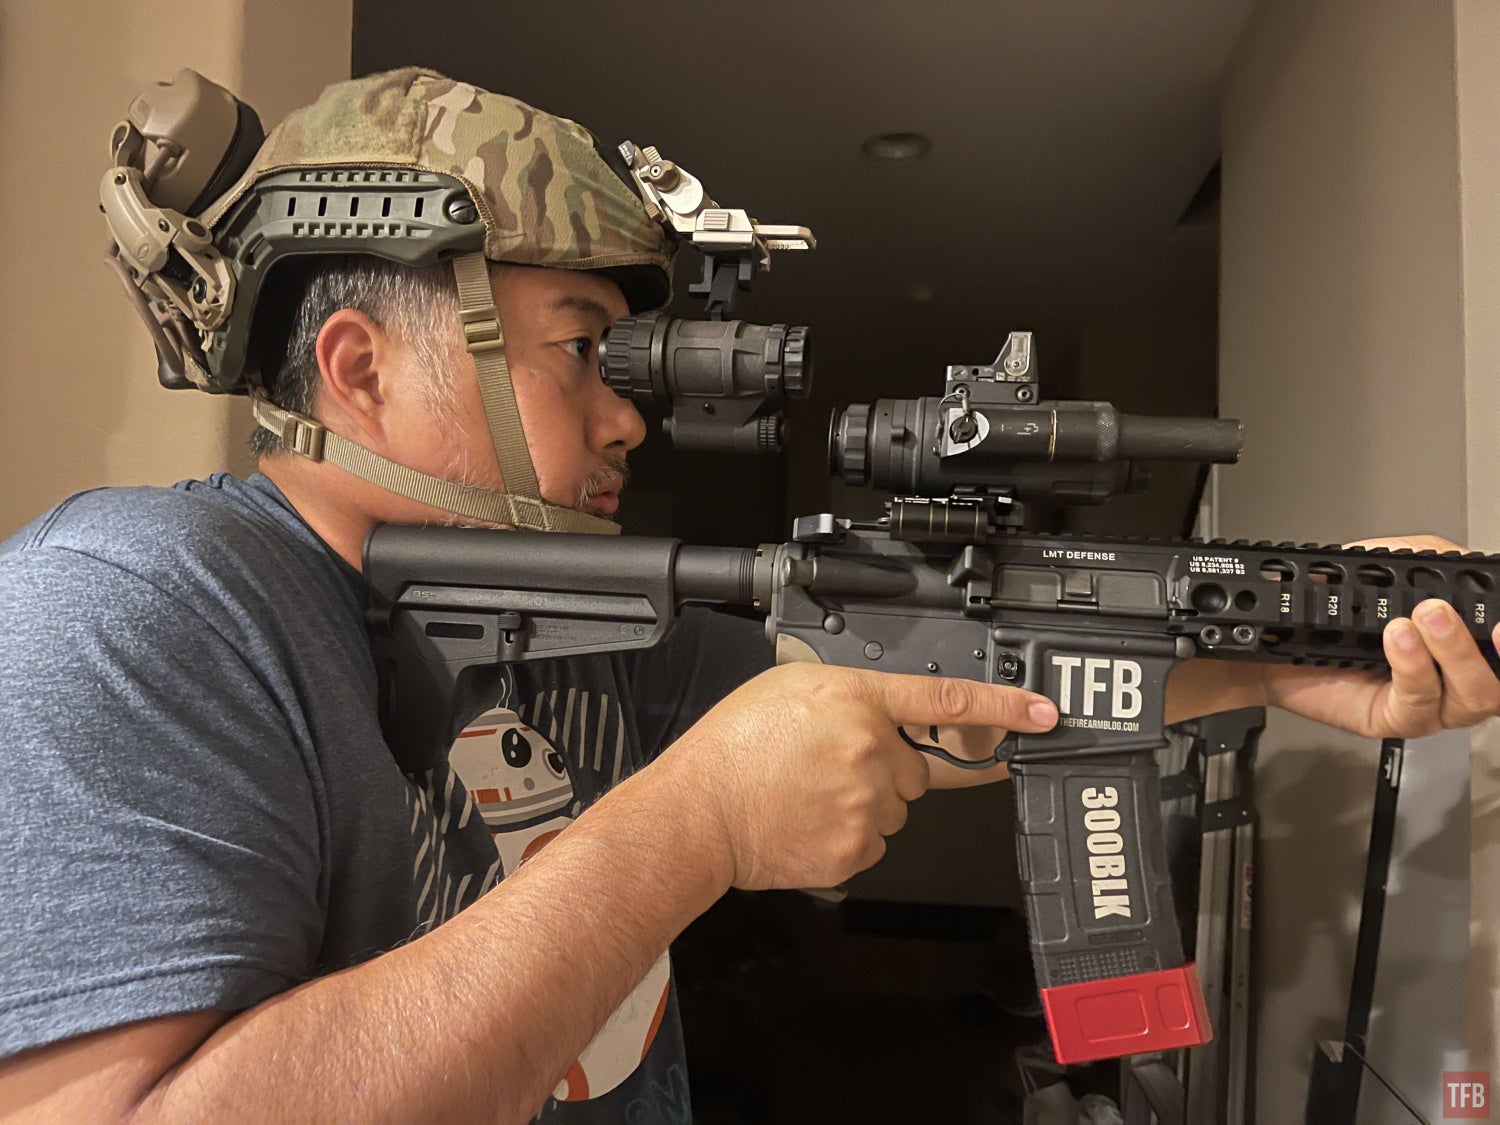
This works surprisingly very well. The butler creek cap has enough friction to hold the magnifier in place even when shooting. I like to keep the magnifier in a jacket pocket when I am hunting and if I see something with my helmet-mounted thermal, I pull the magnifier out and use it to look a little bit further and help ID the object I am looking at. If it is something I want or need to shoot at, I slip it onto the IR-Patrol objective lens and take the shot. I have not had any issues with POA shift or with the magnifier falling off due to recoil. I am only shooting this on a soft recoiling AR chambered in .300BLK shooting subsonic rounds.
Using The IR-Patrol
The only problem I have had with the IR-Patrol, besides buying the wrong model, is downloading the images it captures. Trijicon has a download cable that you can buy for a mere $299 (I am being sarcastic). The problem is that it has two different USB drives depending on the serial number of your device. Not sure why that is a thing but ok. Then you have to use a third-party program to download the images. Could not get it to work on my MacBook nor my old Windows laptop. I went with a simpler video out cable from Ultimate Night Vision so at least I could record the video out from the IR-Patrol. You saw some of that footage in the video above. I wish it stored the images internally and you plug the device into your laptop and it acts like a portable drive.
The IR-Patrol only has two reticles. a crosshair or circle with dot. The edge detect has too many false positives that I do not find it that useful so I usually leave it in black hot. As a weapon sight, it works great but eye relief is rather short. Trijicon uses a PVS-14 style eyepiece to look at the small screen in the IR-Patrol.

I upgraded my IR-Patrol with a 50º FOV PVS-14 eyepiece so the thermal display appears bigger. The downside is the glass is smaller in diameter so I have to be physically closer to see all the thermal image.
Trijicon REAP-IR Upgrade

Both Rusty and my friend have Trijicon REAP-IR thermal weapon sights. My friend uses it for work and it is the Gen 2 version which has two vertical CR123 batteries. The REAP-IR battery life is not great even with 2xCR123 so Do Techne, the guy who made rails for the Bushnell LMSS in my Tricked Out Spotting Scope article, made a replacement battery cover with a USB plug that sticks out. So now you can power the REAP-IR with an external USB power supply. I used a TNVC thermal remote battery since it can attach to Picatinny and mount directly to the top of the REAP-IR.


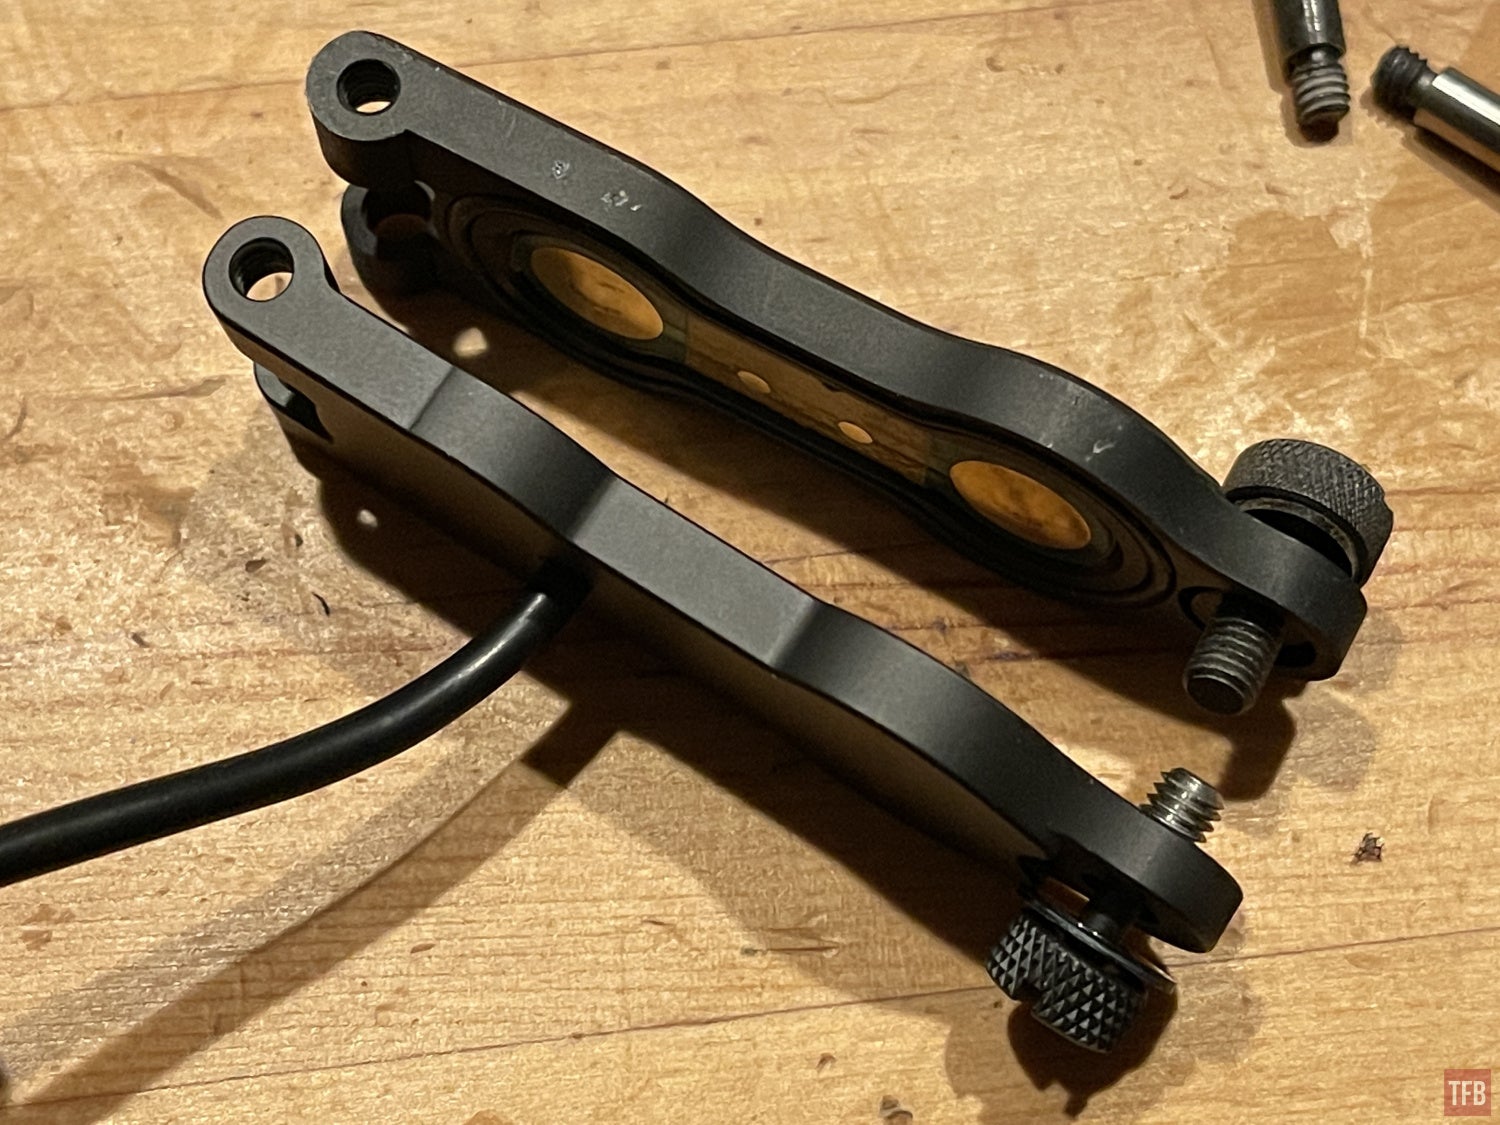
The installation is not straightforward but it is not difficult. The problem is that Trijicon installs the hinge screw from the side closer to the main housing. So the only way to remove the battery cover is to remove the battery compartment from the main housing so you can pull the battery cover screw out.

See how the factory battery door on the right has the screw pointing to the left? The main housing gets in the way of you removing this.


So how do you remove the battery housing?
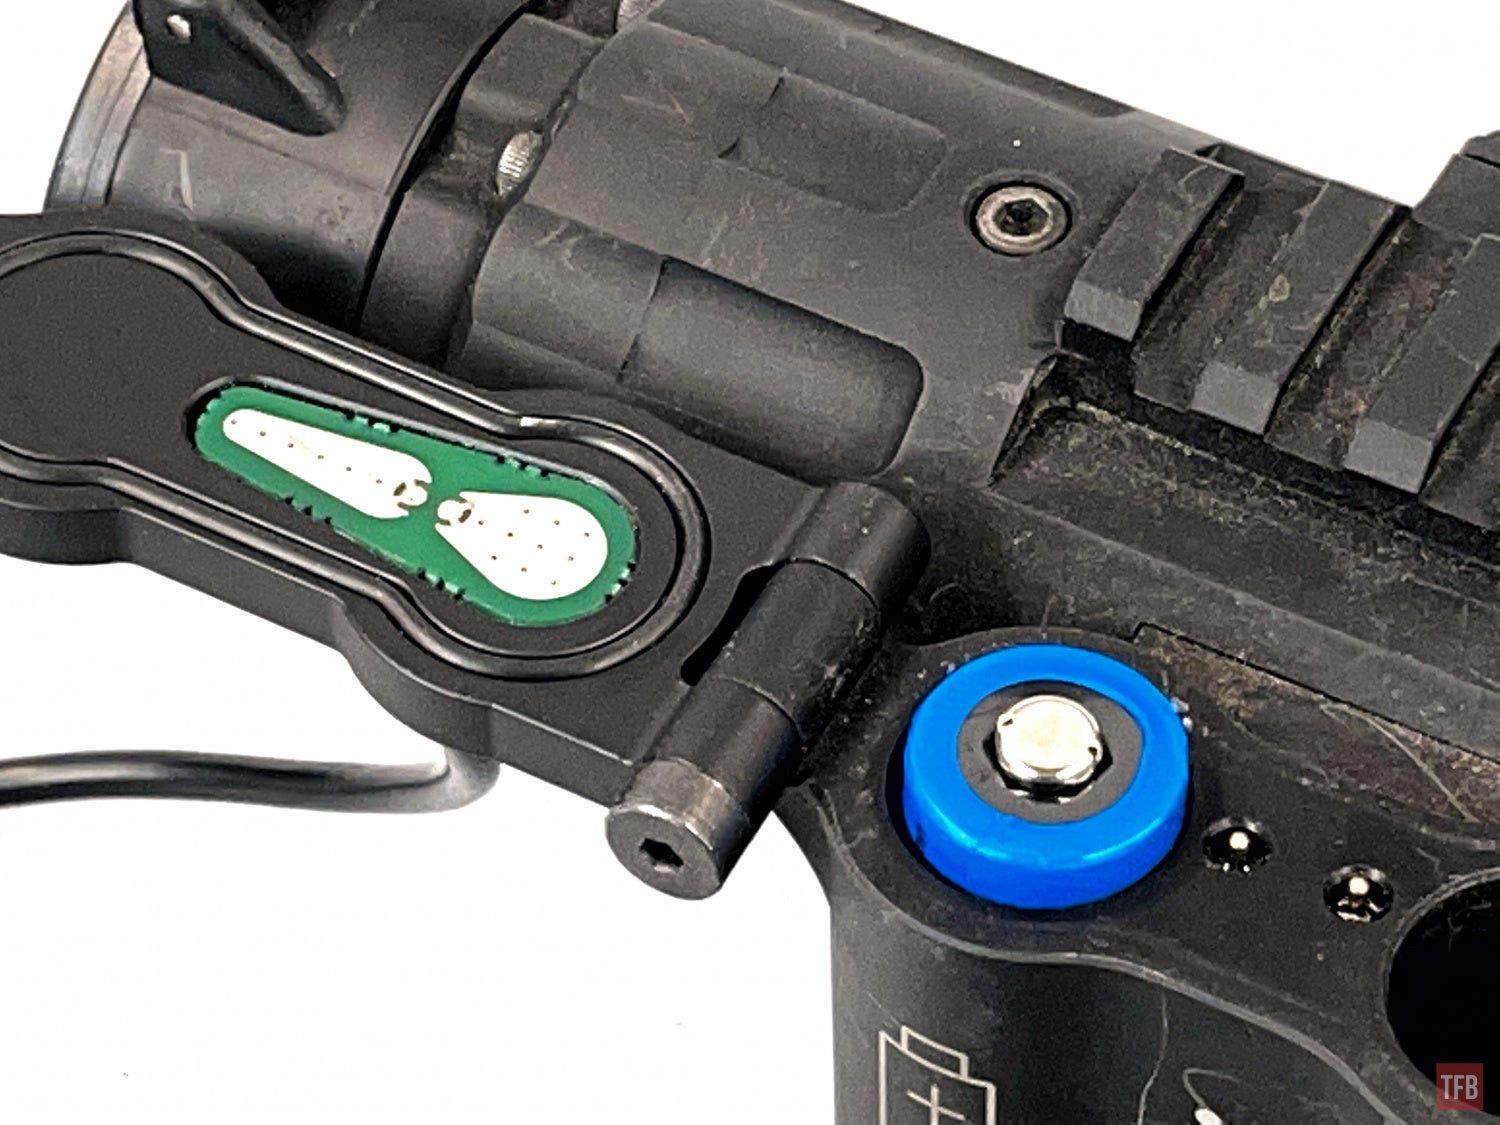
Easy, you remove the control stick on the other side. Warning: This will void your warranty. Here is the installation guide in case you want to see what it takes.
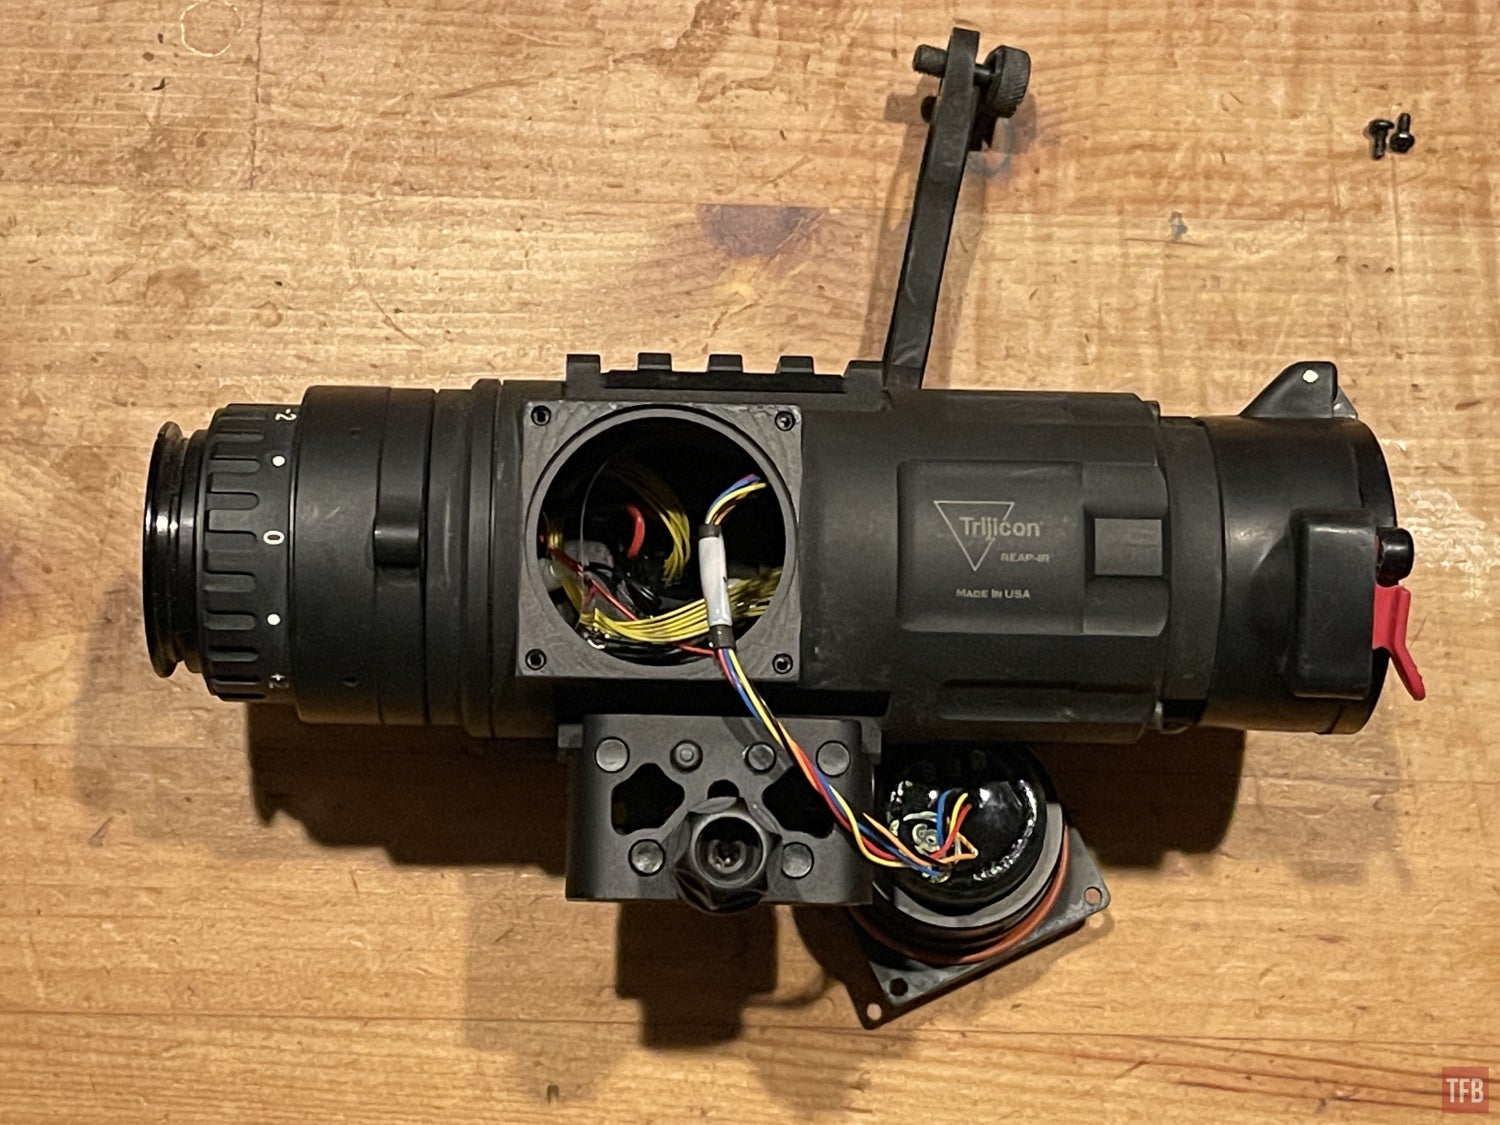
Make sure you remember which side is up on the control thumbstick so you can reinstall it properly. See the shiny screw behind the yellow wires? There are four of those holding the battery compartment to the side of the main housing. Carefully remove them to free the battery housing and then you can remove the factory battery cover and screw.

With this upgrade, the REAP-IR can have a battery run time exceeding 8 hours. However, you cannot go back and use CR123 batteries. It can only be powered by an external USB power supply. The only way to use CR123s again is the reverse the install and reinstall the factory battery cover.
Final Thoughts On Trijicon Thermal Optics
I can see why hunters like the Trijicon thermal sights. Back when it was just IR Defense, they used Flir 17micron cores in their IR-Hunter MK1. Then they switched to BAE Systems 12 micron cores and have been doing so ever since Trijicon bought them out. Then Trijicon bought OASYS from BAE so it is all under one house.
The price of the model that I got was great since it was used and came with a bunch of accessories. But I would not buy it at a full price especially since it is lacking in so many features. I do not understand why they even offer this neutered version when it is merely software and a dovetail that separates the models and they are only $1000 more. I wish the image capture was more streamlined so you could get the images off the device easier.
Regardless of those issues, the thermal image is spectacular. I brought the IR-Patrol with me to the Grand Canyon back in early October and was able to detect people over 1k yards away. I was able to recognize that they were people several hundred yards away. The germanium thermal magnifier helps a lot, especially for hunting. Digital zoom is not great since you are zooming in on pixels whereas my magnifier is quick and easy, just hold in against the objective lens and you get an optical zoom which I found really helps to ID targets of interest.
If you want more information go to Trijicon’s website.
TFB’s Friday Night Lights series is brought to you by ATN

We are committed to finding, researching, and recommending the best products. We earn commissions from purchases you make using the retail links in our product reviews. Learn more about how this works.