Your Privacy Choices
Welcome everyone to the TFB Armorer’s Bench! As mentioned in the little blurb, this series will focus on a lot of home armorer and gunsmith activities. In this article sponsored by Wheeler, Tipton, Caldwell, and Frankford Arsenal, I happened to do a little maintenance on my Chiappa 1887 Lever Action shotgun and while disassembling and reassembling, I thought to myself that it may be beneficial if I did an Armorer’s Bench on diagnosing a light primer strike problem. That is what I did for the previous article but I made sure to mention my willingness to roll out a disassembly/reassembly article. I saw a comment that gave me the go-ahead so to speak so here we are! All that being said, let’s dive right into Chiappa 1887 Disassembly/Reassembly!
Disclaimer: It is stating the obvious when I say do not attempt this if you do not have confidence you can. There is no shame in not taking your gun apart. Consult a competent gunsmith/armorer for advice or if they would do the goal you wish to achieve. Refer to the first Armorer’s Bench article So, You Like Taking Guns Apart? where we talk about knowing your limitations.
TFB Armorer’s Bench: Chiappa 1887 Disassembly/Reassembly
Welcome to our recurring series of Armorer’s Bench which is made possible and brought to you by Wheeler, Tipton, Caldwell, and Frankford Arsenal who are our sponsors. Here, we at TFB hope to inform, entertain, and even inspire any would-be gunsmith or armorer out there. Ideally, with the information I provide and with the help of our sponsors, you can have some useful knowledge pertaining to the conservation and improvement of firearms technology while at the same time sharing experiences and teaching each other new tips and tricks along the way in the comments. Digging deep into what it is to be an armorer or gunsmith has significance but what is important is what those people do to show they’ve earned that title. I am happy to share my experiences and knowledge and hope it is informative!
Make your personal safety a priority:
- Practice proper gun safety. Always make sure before the firearm hits your bench that it is unloaded and safe to be handled.
- Wear the proper safety equipment. The main one would be safety glasses (decent ones) since parts are often under spring tension and you may work with high RPM tools. Other honorable mentions would be latex gloves or a respirator when working with potentially harmful solvents and oils. Also hearing protection when working with loud machinery or test-firing firearms.
- Modifications, alterations, and customizations will void your firearm’s warranty 9.5 times out of 10. Please take that into consideration before attempting any at-home gunsmithing.
- If you are unsure about proper safety practices, disassembly procedures, or warranty standards, stop, put down the tools, and consult a competent gunsmith.
Step One: Chiappa 1887 Disassembly/Reassembly
The first thing is first! Safety. Yes, I know safety is boring and so mainstream but bear with me. Make sure your firearm is unloaded. Check the chamber, magazine, and space between. Then check again. As far as PPE, I highly recommend wearing safety glasses at the very least. There is a V-spring in the disassembly that could easily fly out of place.
Note: This disassembly will focus on the receiver internal parts and will not cover the trigger mechanism due to its simplicity.
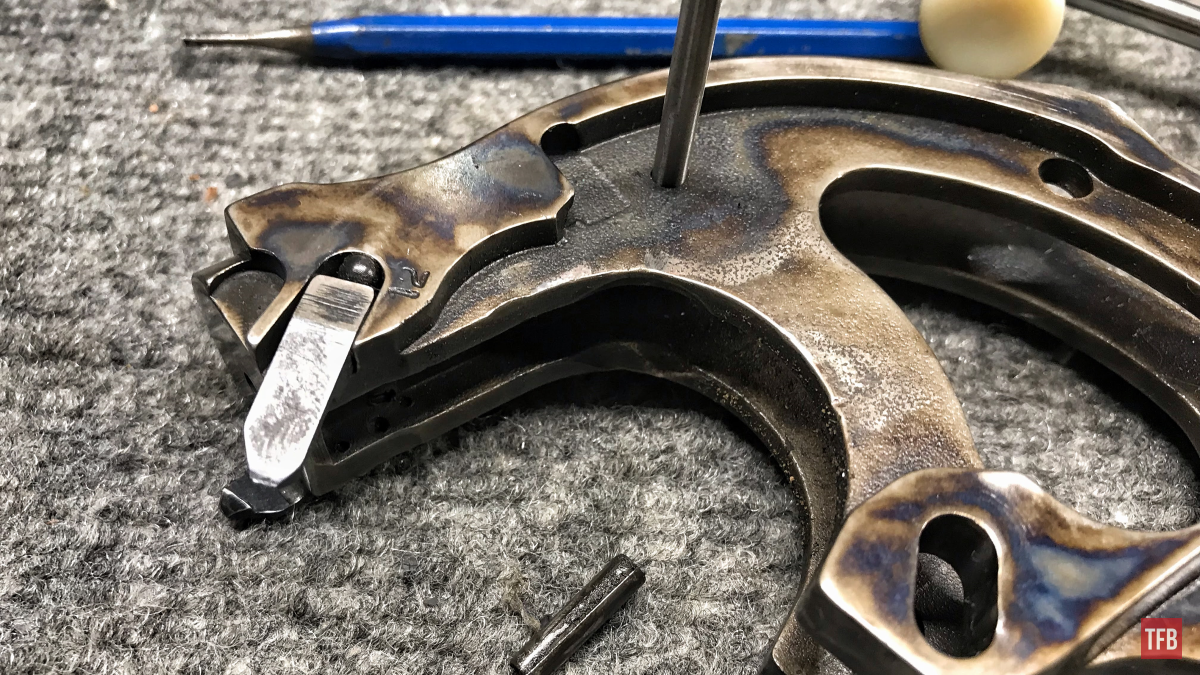
Step Two: Chiappa 1887 Disassembly/Reassembly
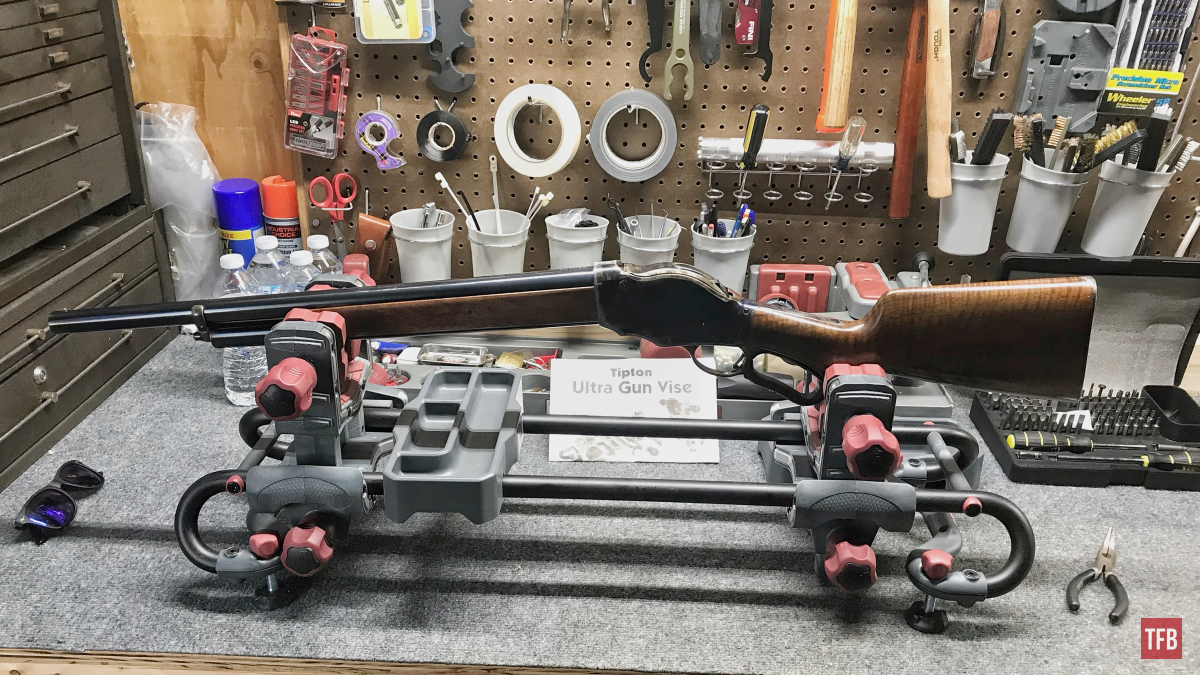
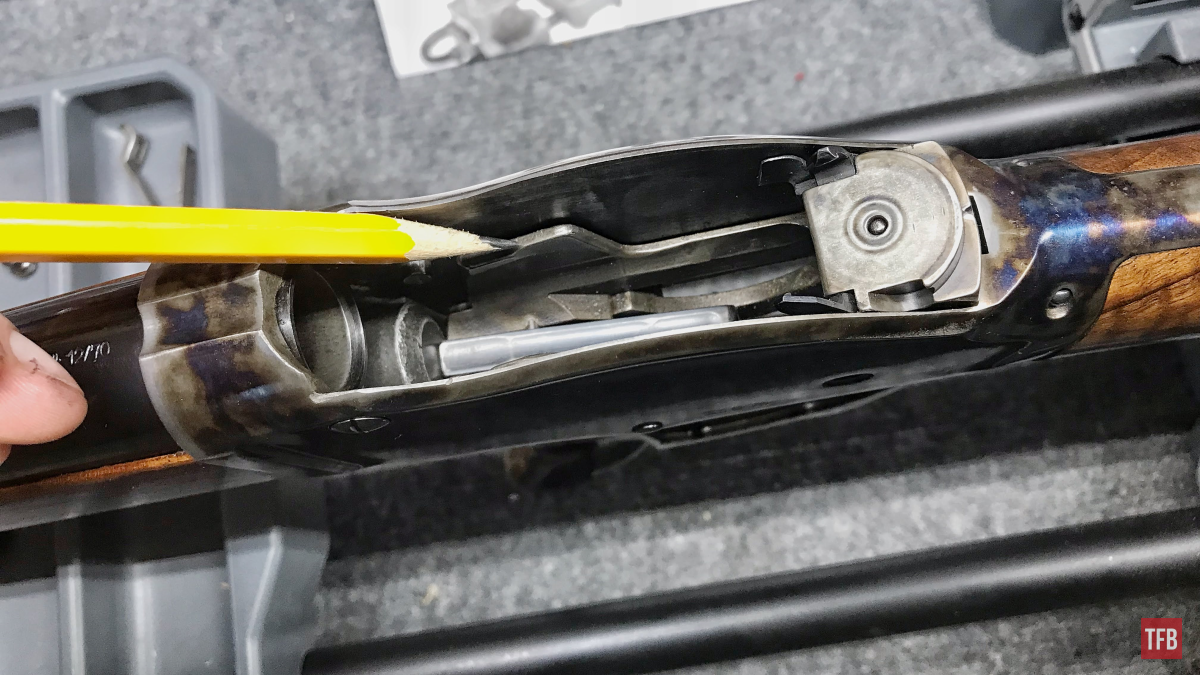
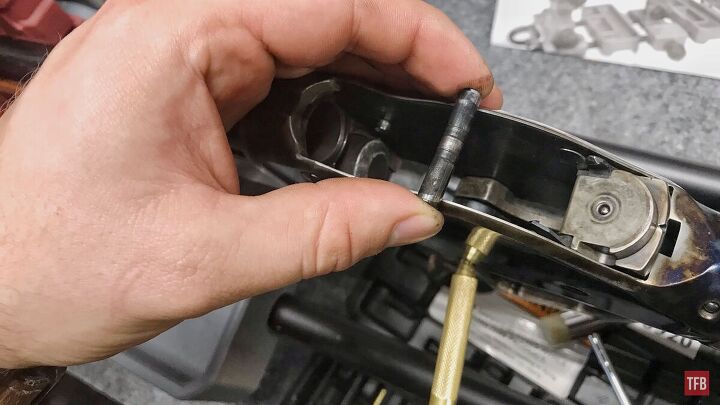
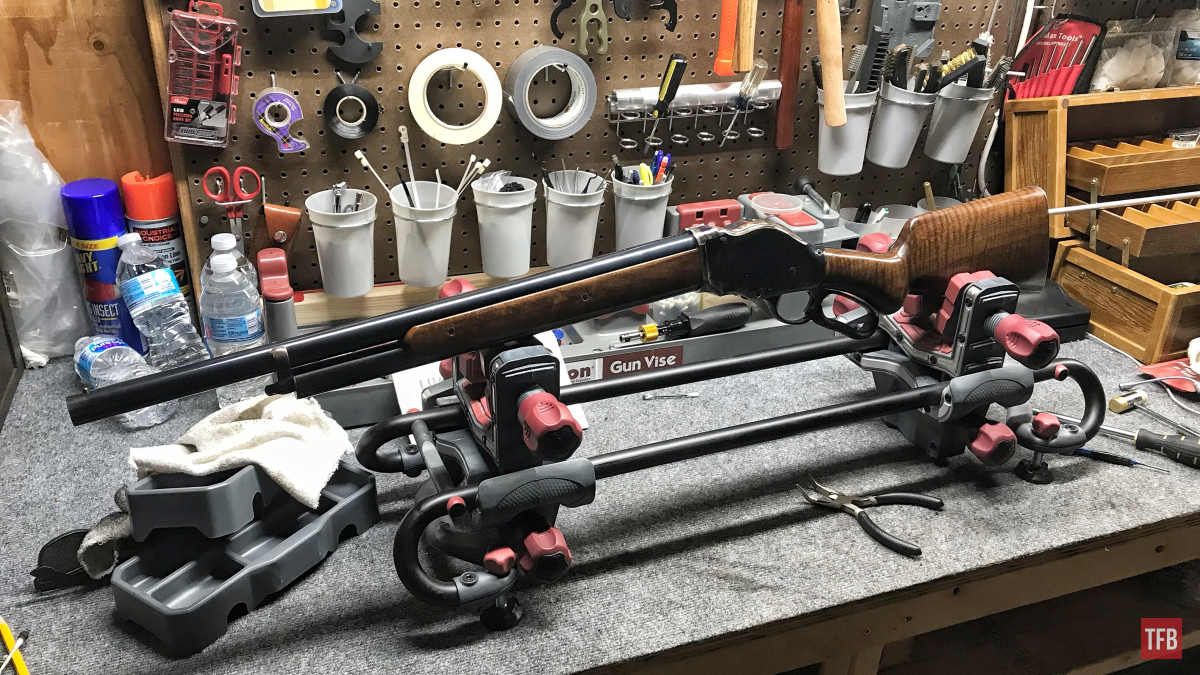
Most of this is made much easier with the help of some form of a work-holding device like a gun vise. The first step is achieved by lowering the lever fully into the forward position. Note the V-spring. This spring provides a spring force to the hammer and carrier/lifter.
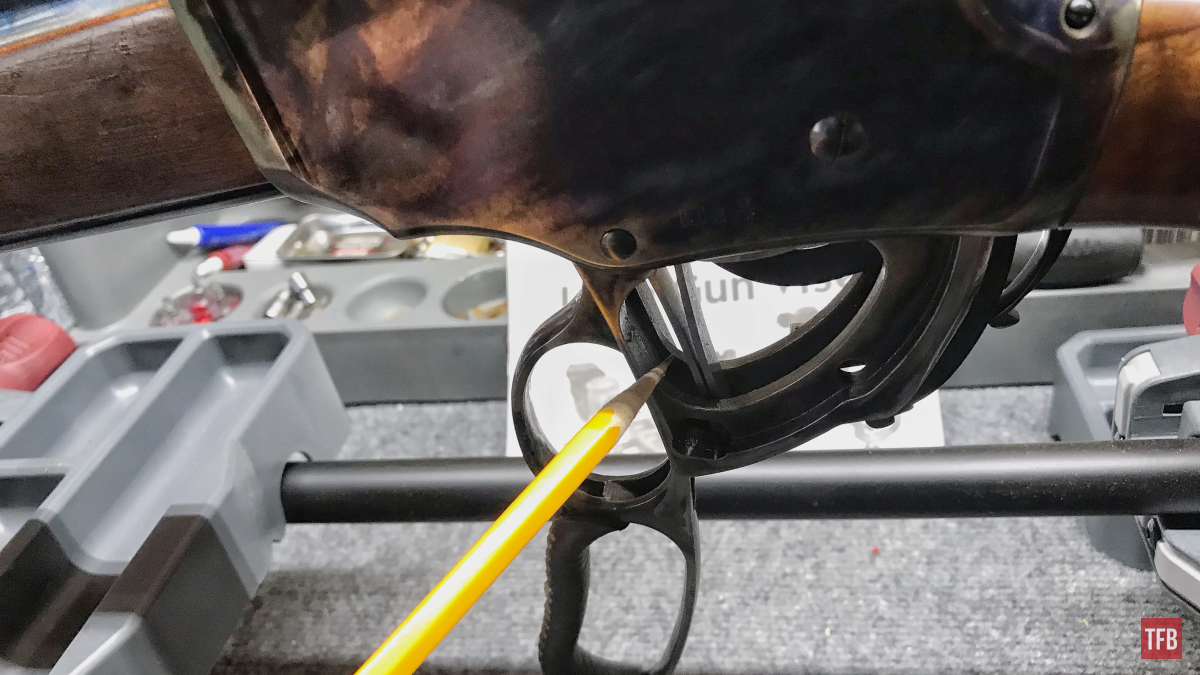
Step Three: Chiappa 1887 Disassembly/Reassembly
With the V-spring located we can carefully grasp it with a pair of needle-nose pliers. Squeezing it together will dissipate the spring tension that it normally provides to parts inside.
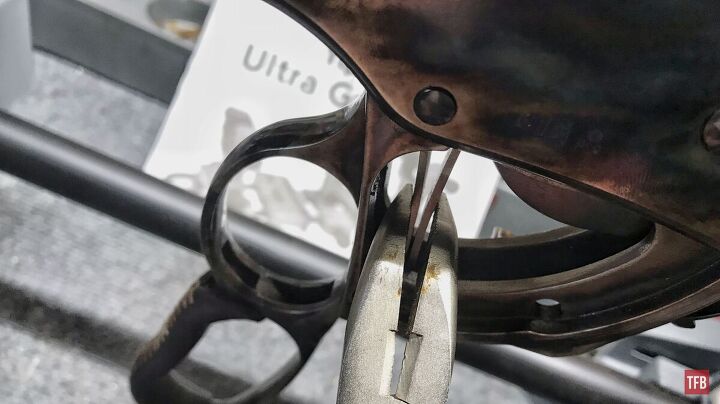
This allows you to dislodge and remove the V-spring directly downward.
Step Four: Chiappa 1887 Disassembly/Reassembly
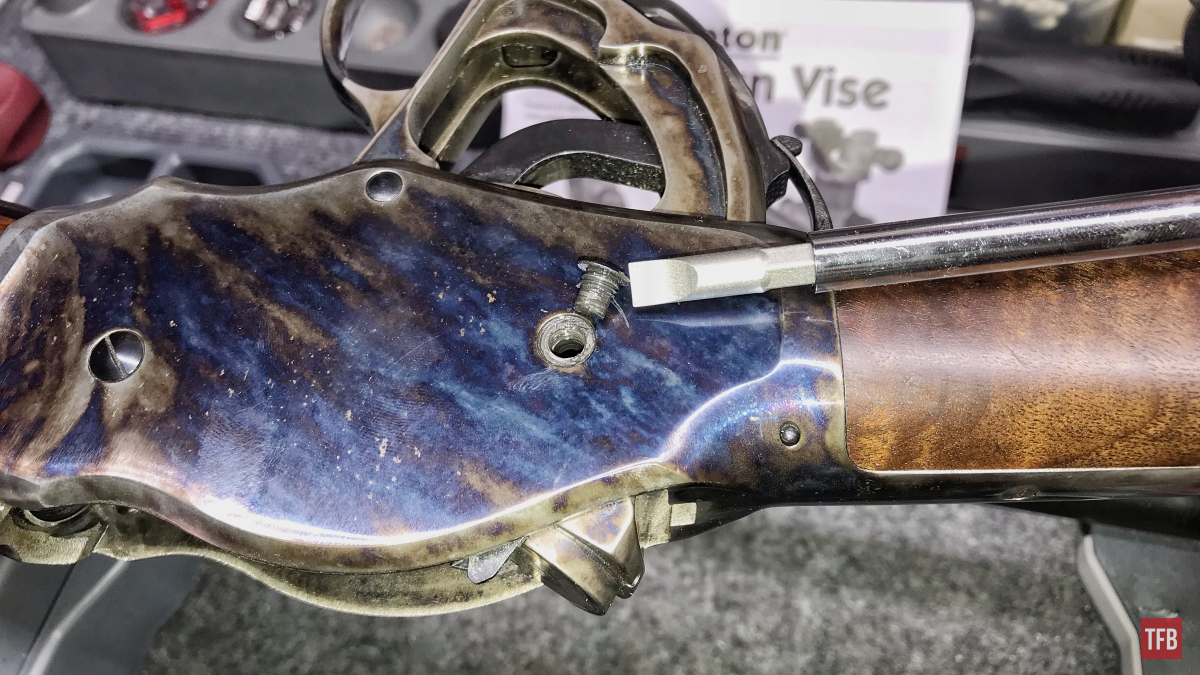
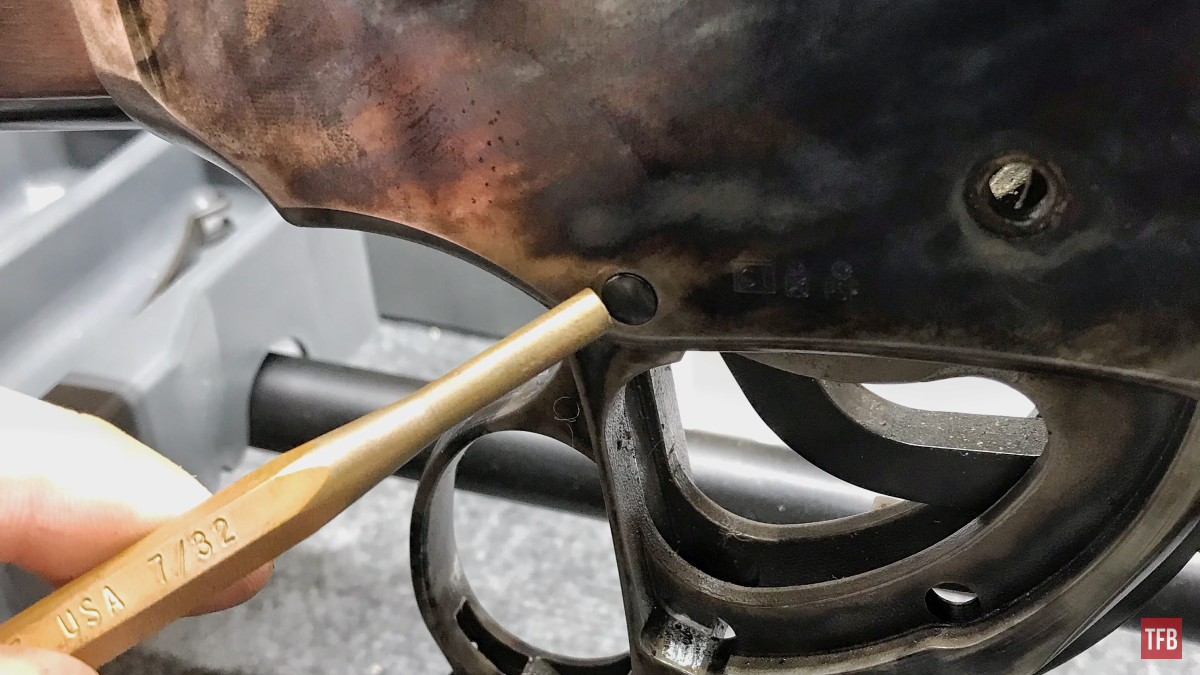
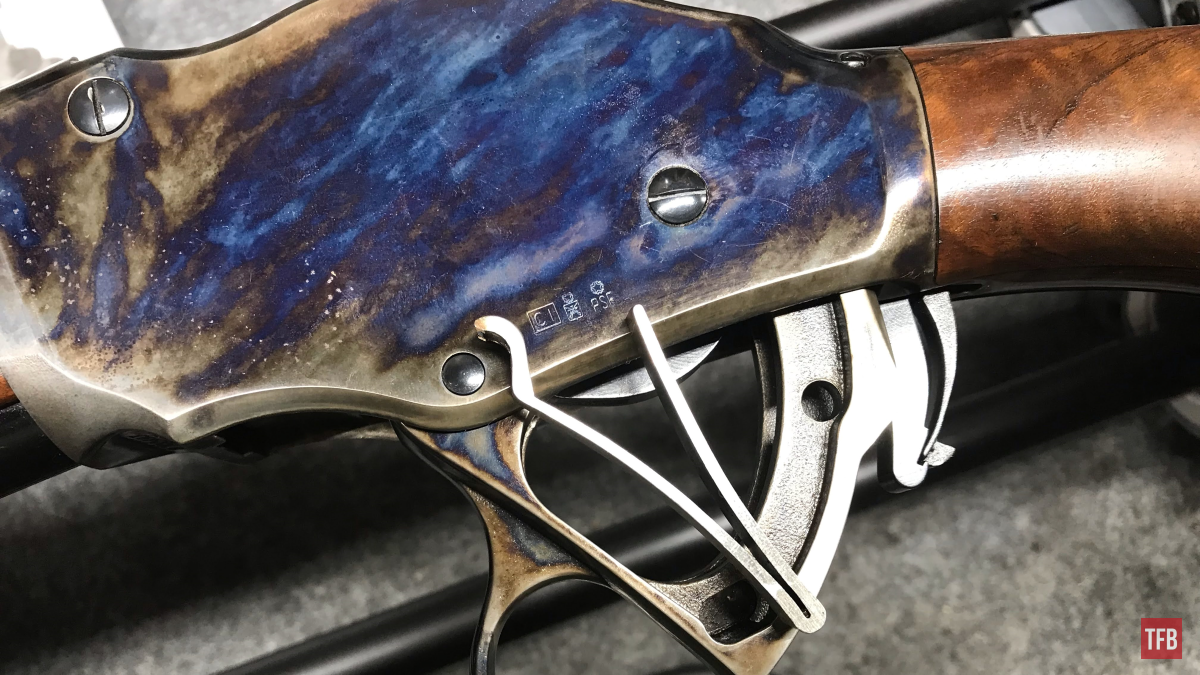
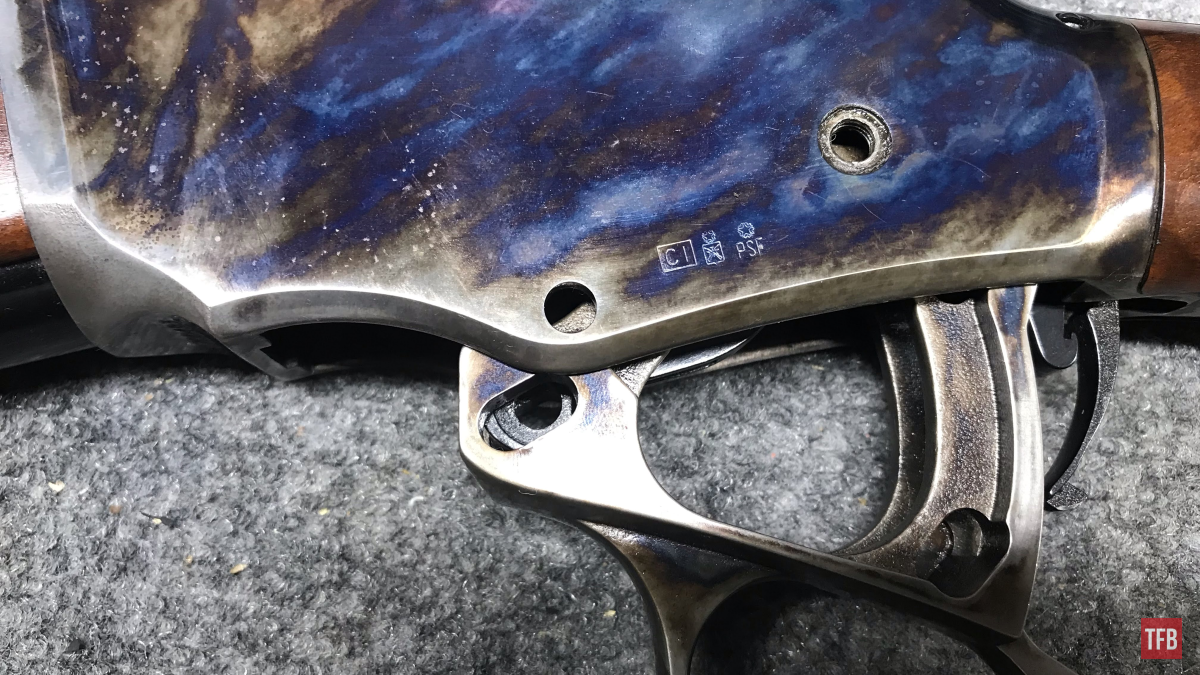
With the V-spring out of the way, we can move forward with what I would call a Carrier. The first screw to the carrier to be removed is the one on the left-hand side of the receiver.
Note: This particular screw has been troublesome for years. Under recoil, it will loosen itself and back its way out. I am really lucky that I have not lost it. There are a grand total of three threads so Loctite really does not do much. In my reassembly, I added some red Loctite instead of blue.
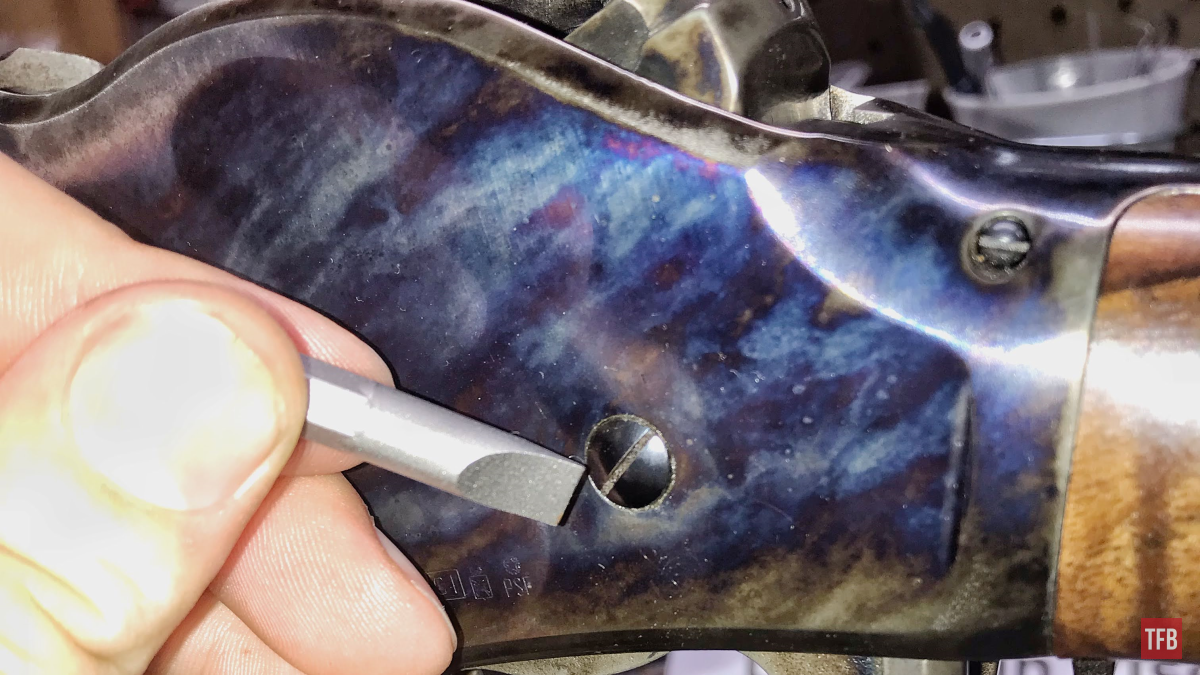
Now that the left-hand Carrier screw was removed, we can take out the right.
Note: These screw head slots are very slim. Use the correct bit to unscrew them!
Step Five: Chiappa 1887 Disassembly/Reassembly
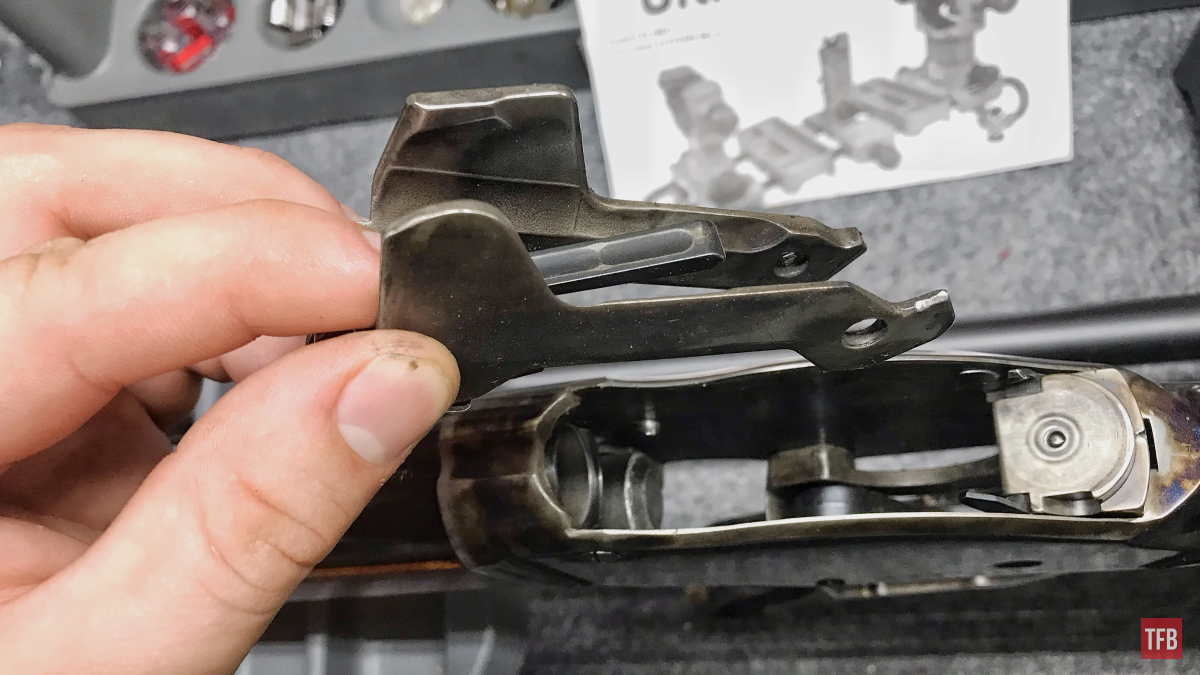
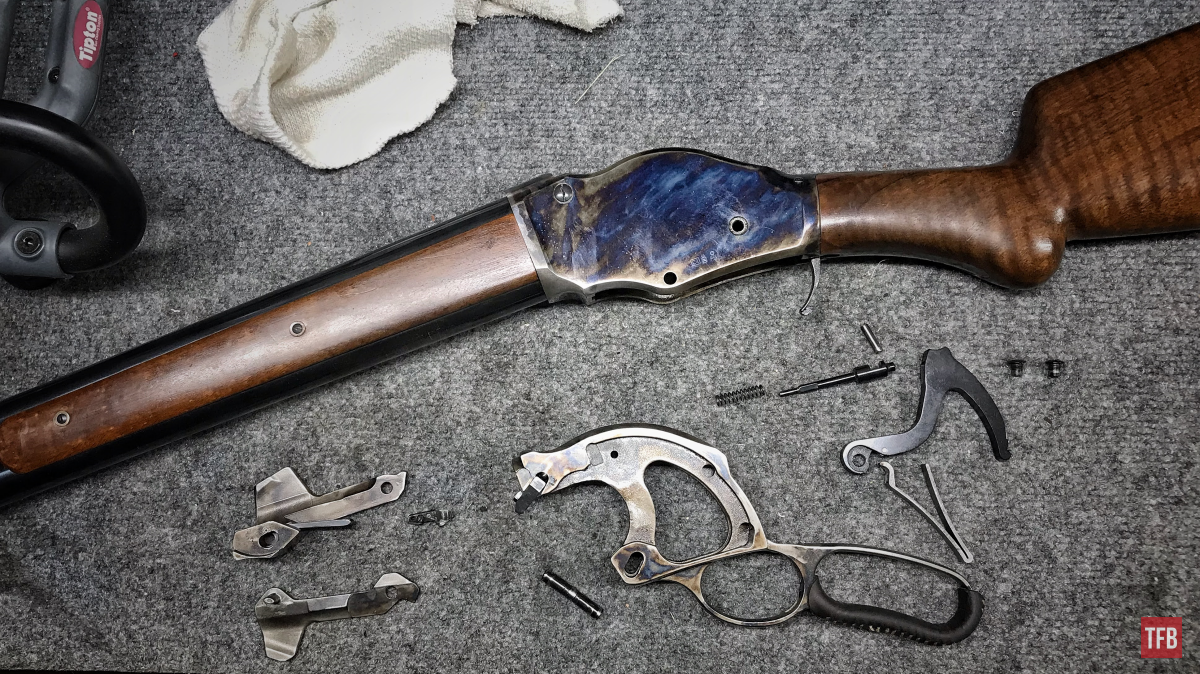
Here I am pointing to the Carrier. It should be taken into consideration that the Carrier is a total assembly of three pieces and only two of them are together constantly.
With the two Carrier screws removed the Carrier can be lifted out of the receiver.
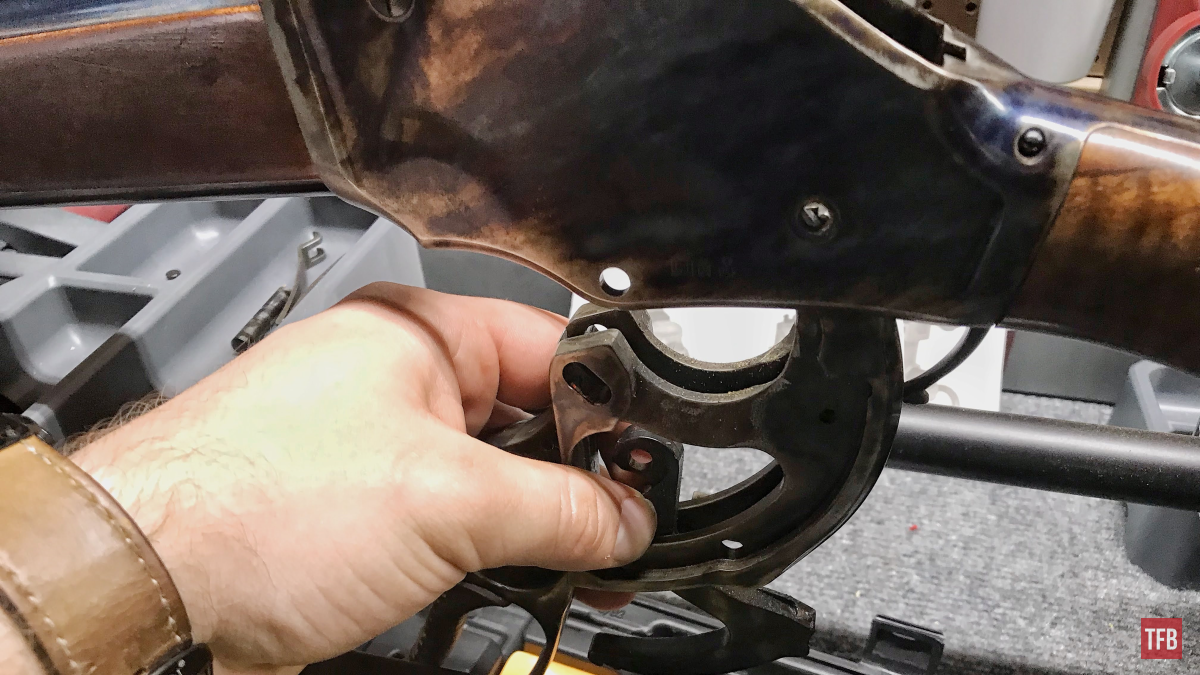
Step Six: Chiappa 1887 Disassembly/Reassembly
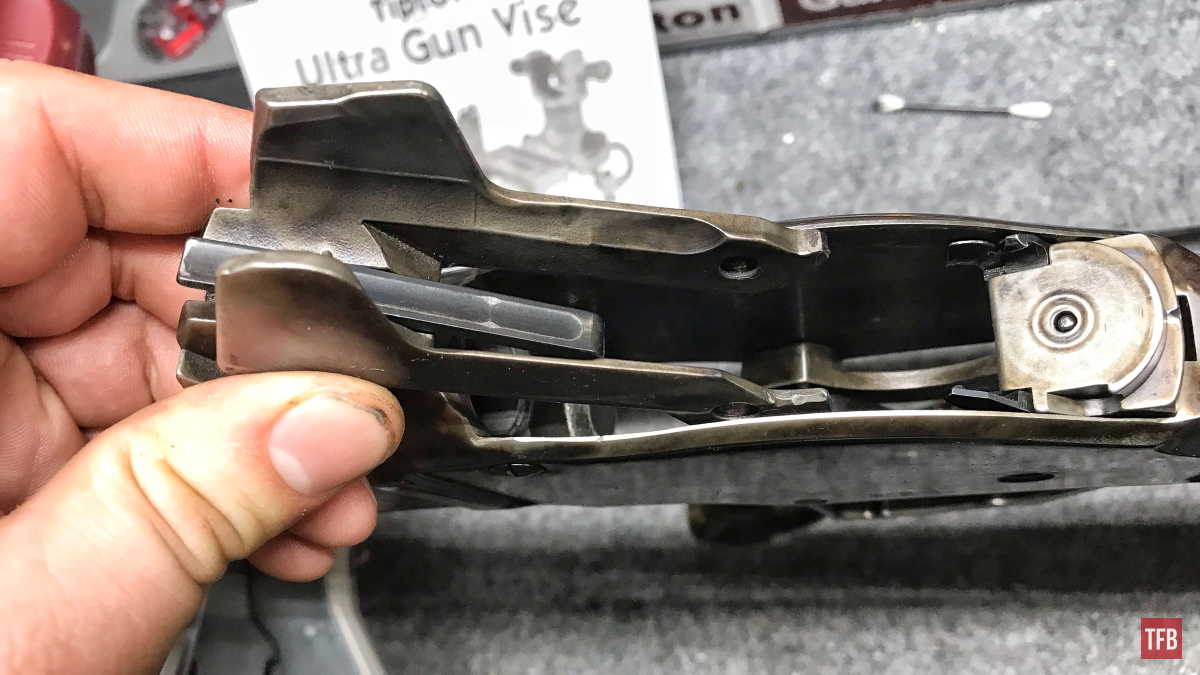
Now that the Carrier is out of the receiver we can punch out the lever/hammer pin. This pin can be driven out either direction and should be done with a nonmarring punch like nylon or brass if need be.
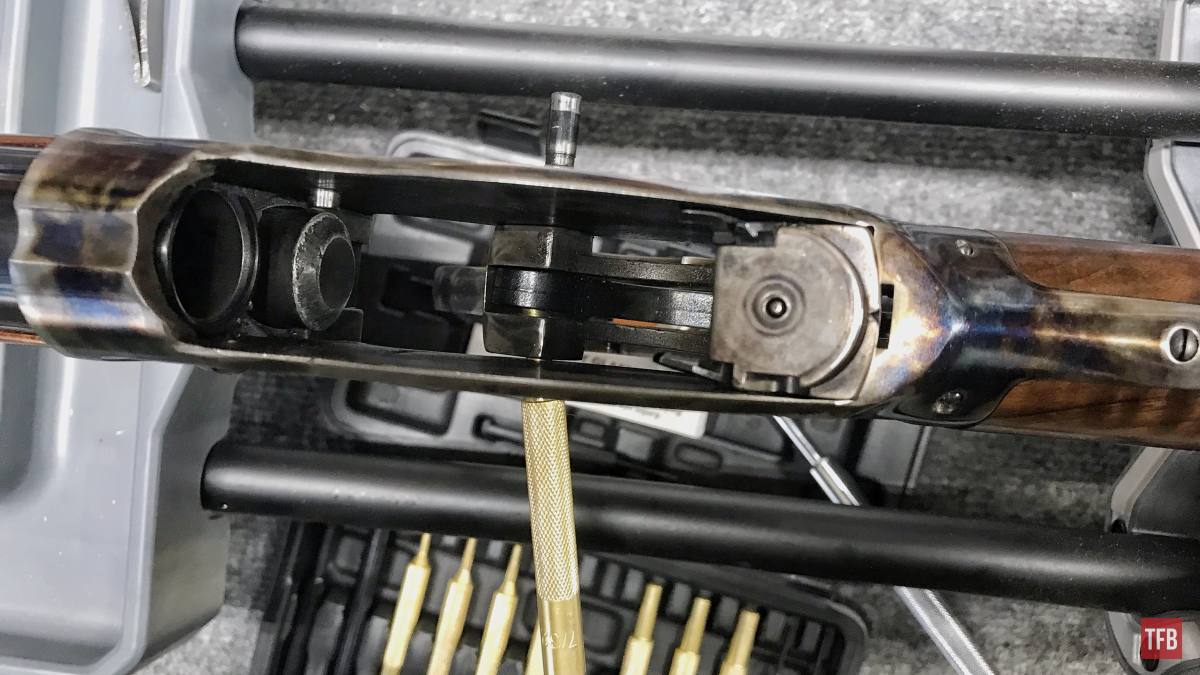
Below you can see the two grooves in the lever/hammer pin. The grooves correspond with the claws/hooks of that V-spring that was removed earlier.
Step Seven: Chiappa 1887 Disassembly/Reassembly
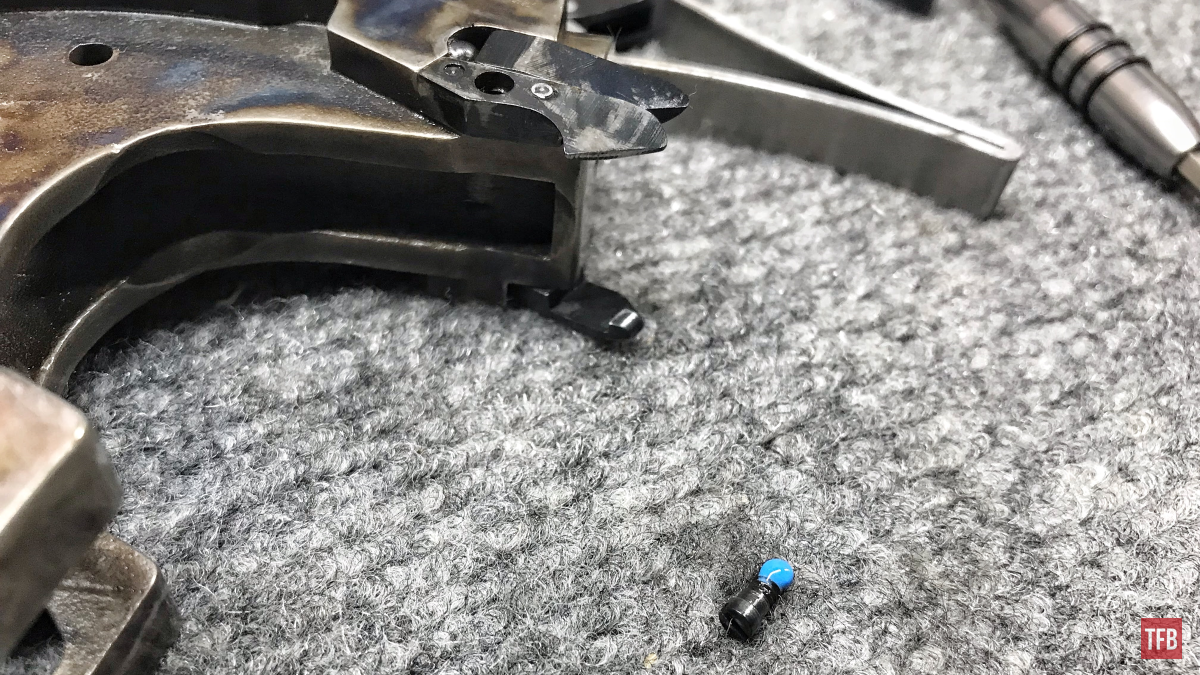
With the lever/hammer pin punched out, the punch can be removed from the receiver. The hammer and lever will drop free independently so be careful of what is under them.
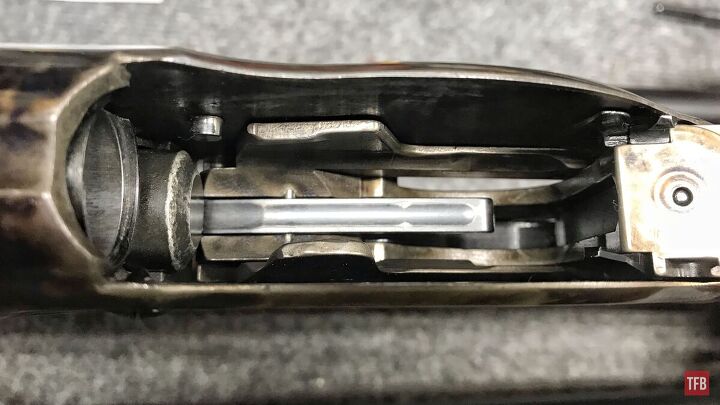
Note the odd xenomorph-looking shape of the hammer. Well done, John Browning!
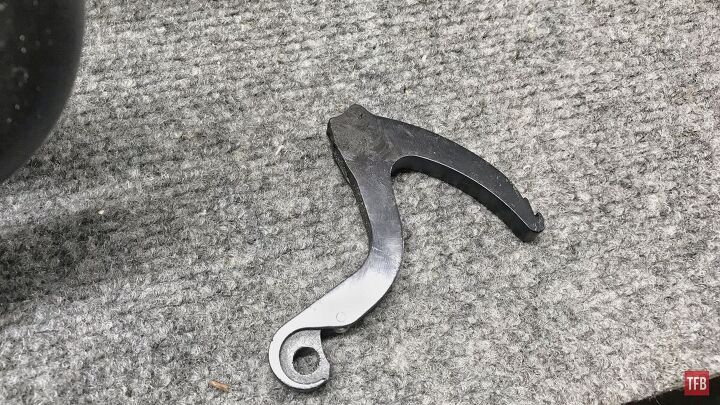
There is actually a recess in the front face of the hammer which contacts the firing pin.

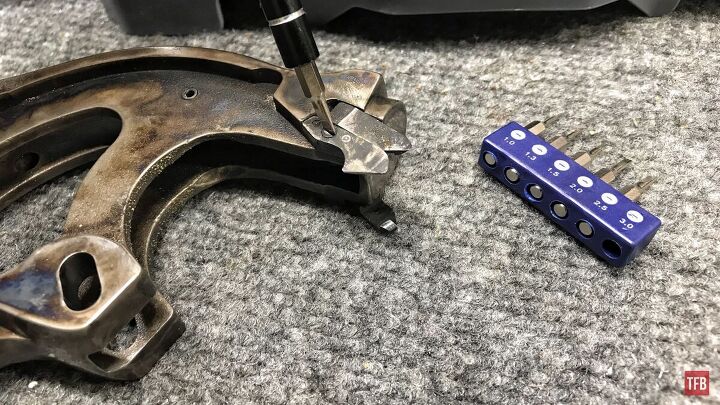
Step Eight: Chiappa 1887 Disassembly/Reassembly
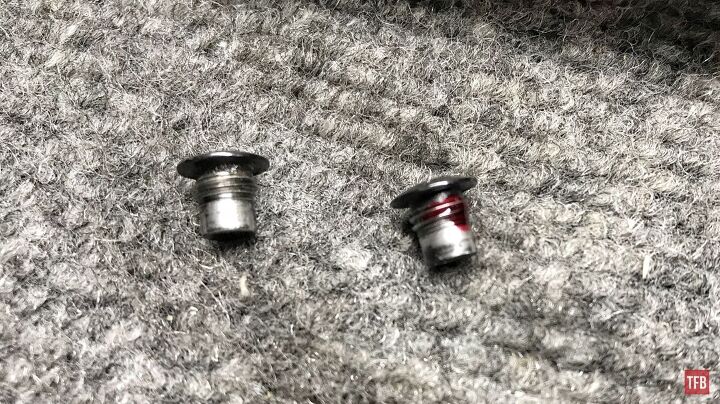
From here, using a 5/32 roll pin punch you can punch out the firing pin retaining pin.
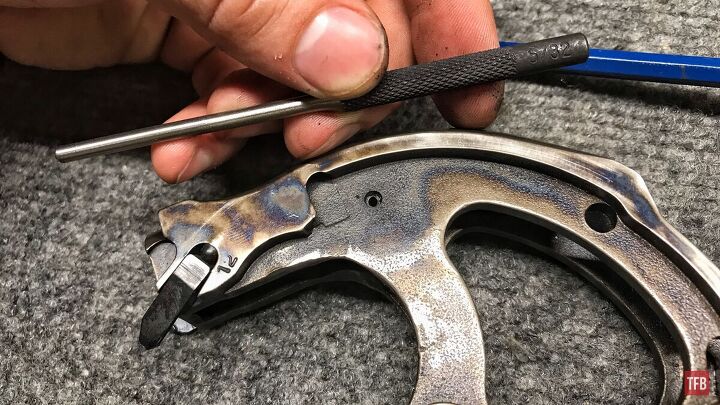
I punched it out from the left but make sure to double-check if one side looks easier to punch through over another for whatever reason.
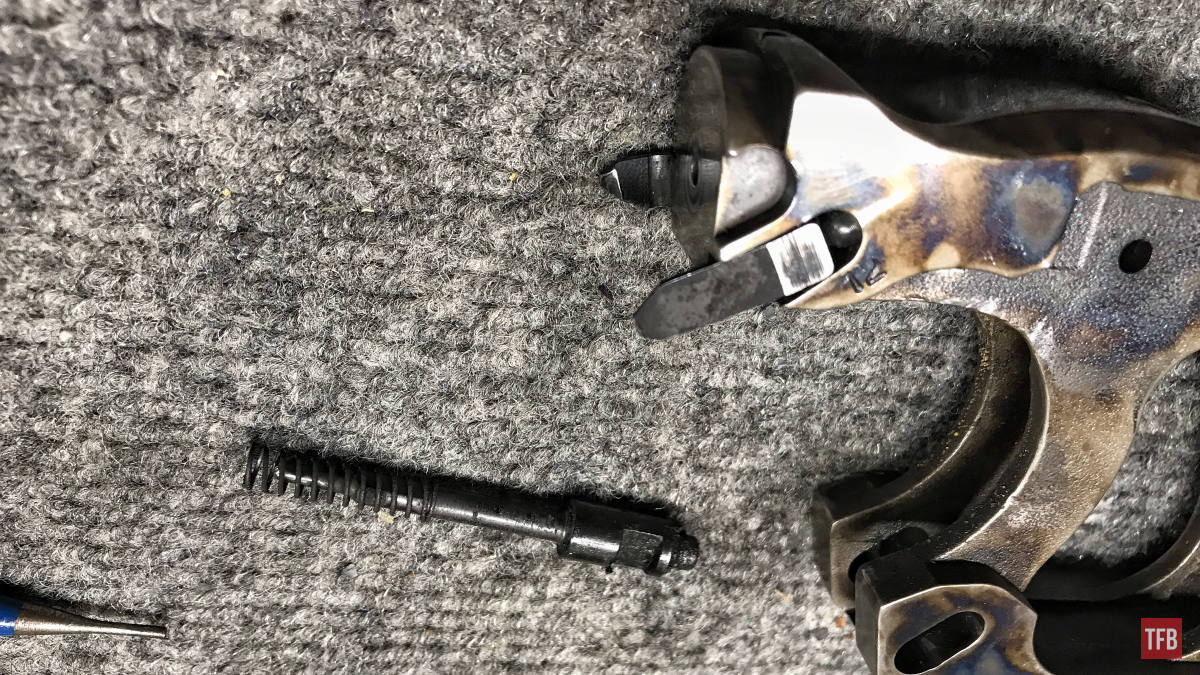
Step Nine: Chiappa 1887 Disassembly/Reassembly
With the firing pin retaining pin punched out, the firing pin and firing pin spring can be removed. They are not under much spring tension at all. The firing pin spring is mainly there just to rebound the firing pin back.
Step Ten: Chiappa 1887 Disassembly/Reassembly
The removal of the Shell Cam and extractors are completely optional as far as cleaning goes. I took off the cam just to clean under it and put some Loctite on the threads since it was loose.
The extractors should not be removed unless it is completely necessary. They are removed by depressing the plunger beneath the extractor arm in order to take spring tension off of the extractor arm. The extractors can then be rocked out of their slot. The plungers are under a ton of spring tension and it is extremely easy to slip off if you are not careful.
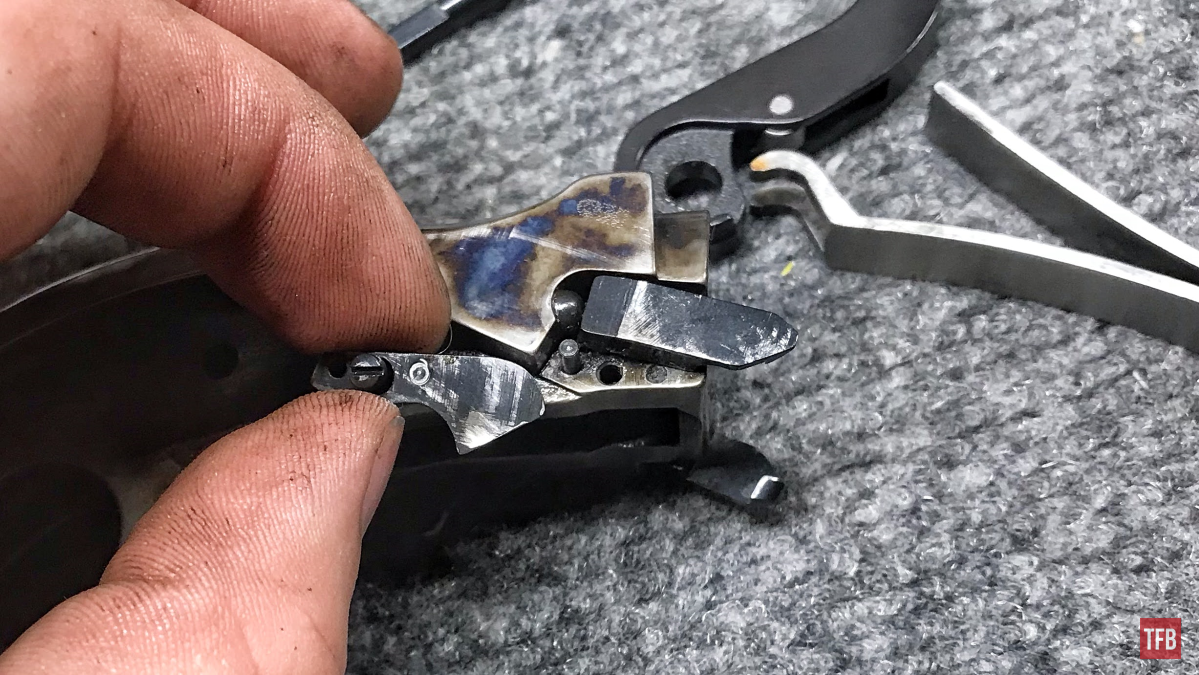
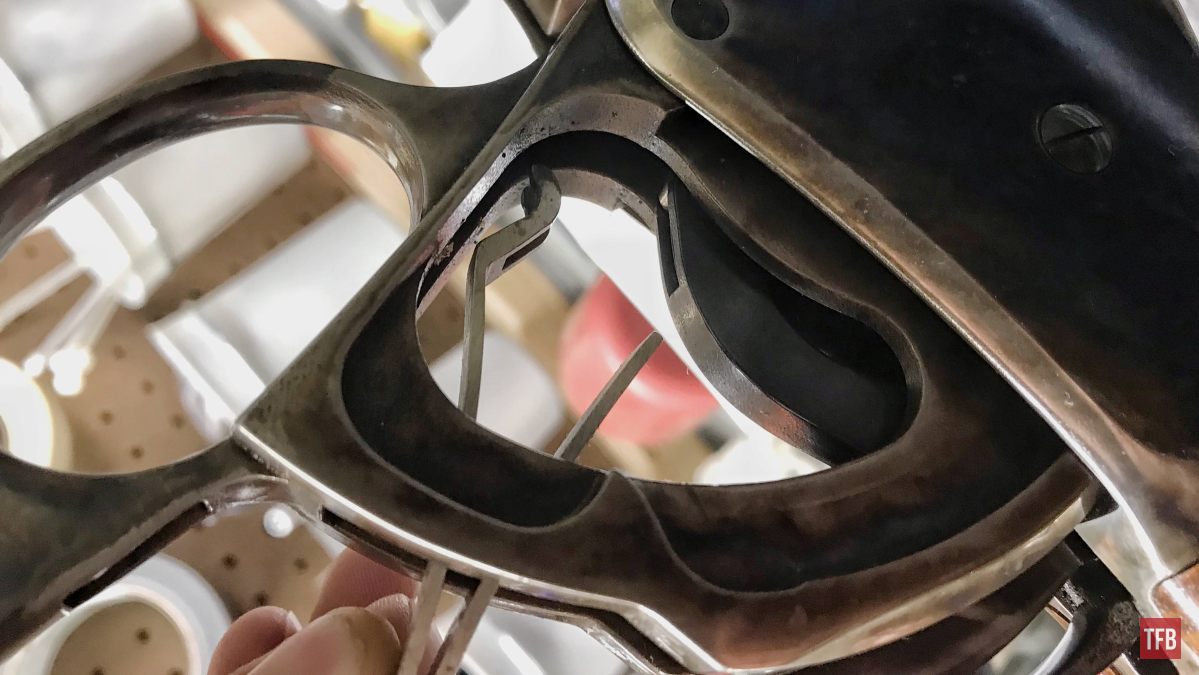
Take a Moment: Chiappa 1887 Disassembly/Reassembly
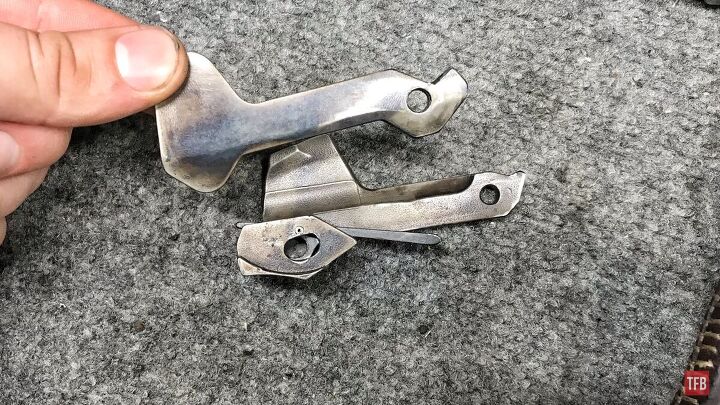
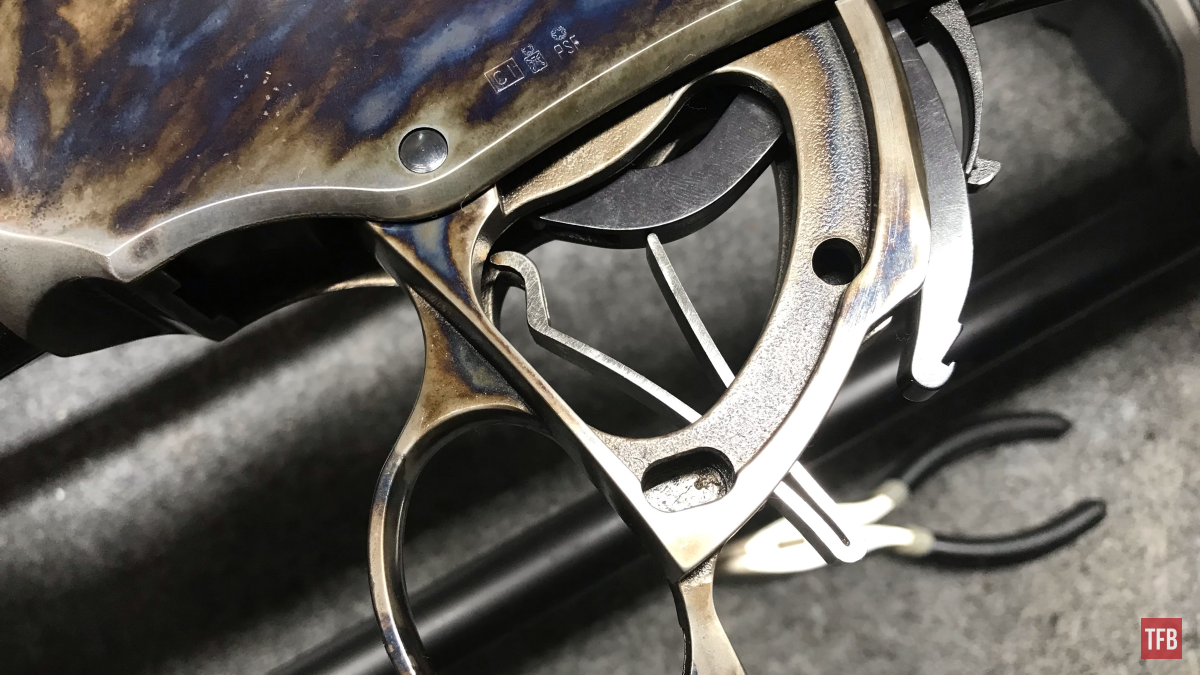
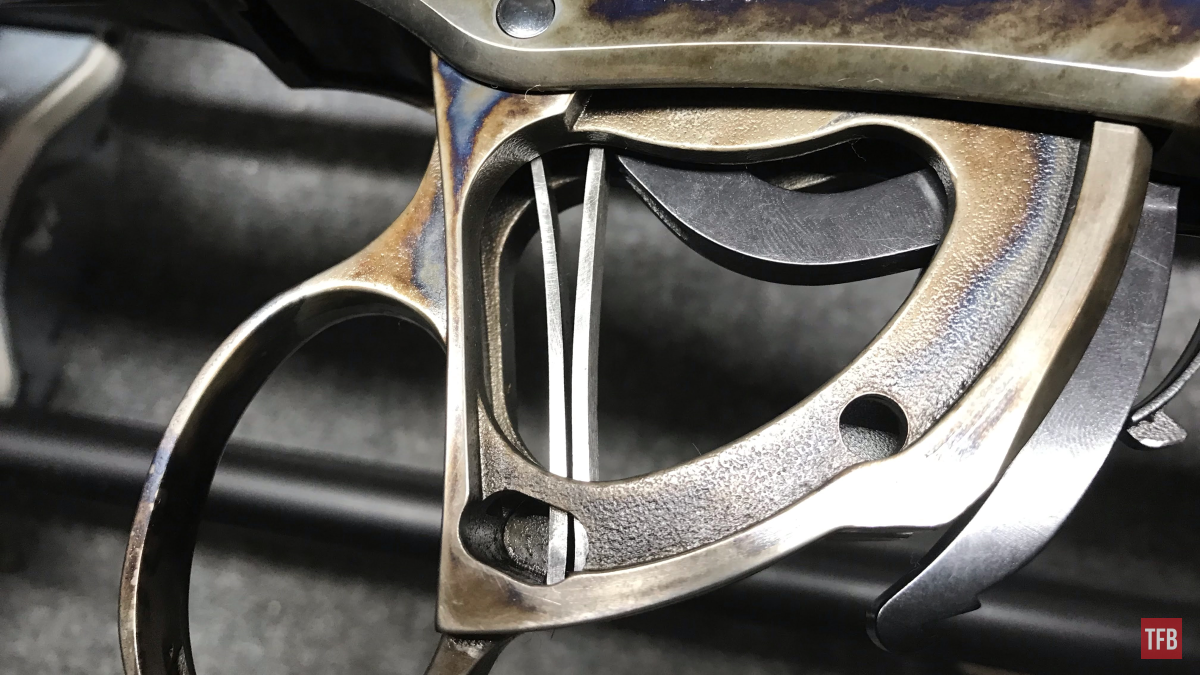
Here I have placed the hammer outside the lever in order to show how it sits. The V-spring and pin are also shown in how they fit together.

Here is the orientation of the V-spring that sets itself in the two grooves of the lever/hammer pin.
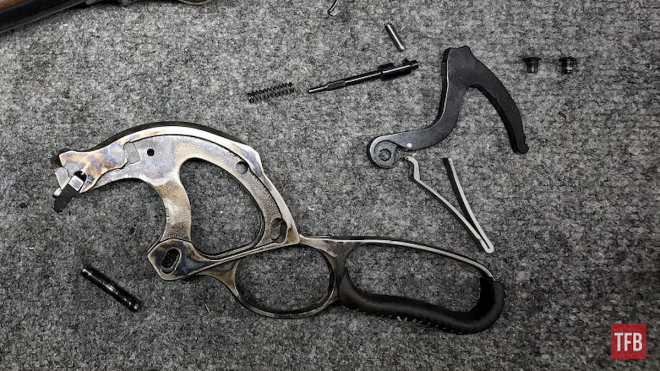
Here are all of our parts spread out.
Reassembly Notes: Chiappa 1887 Disassembly/Reassembly
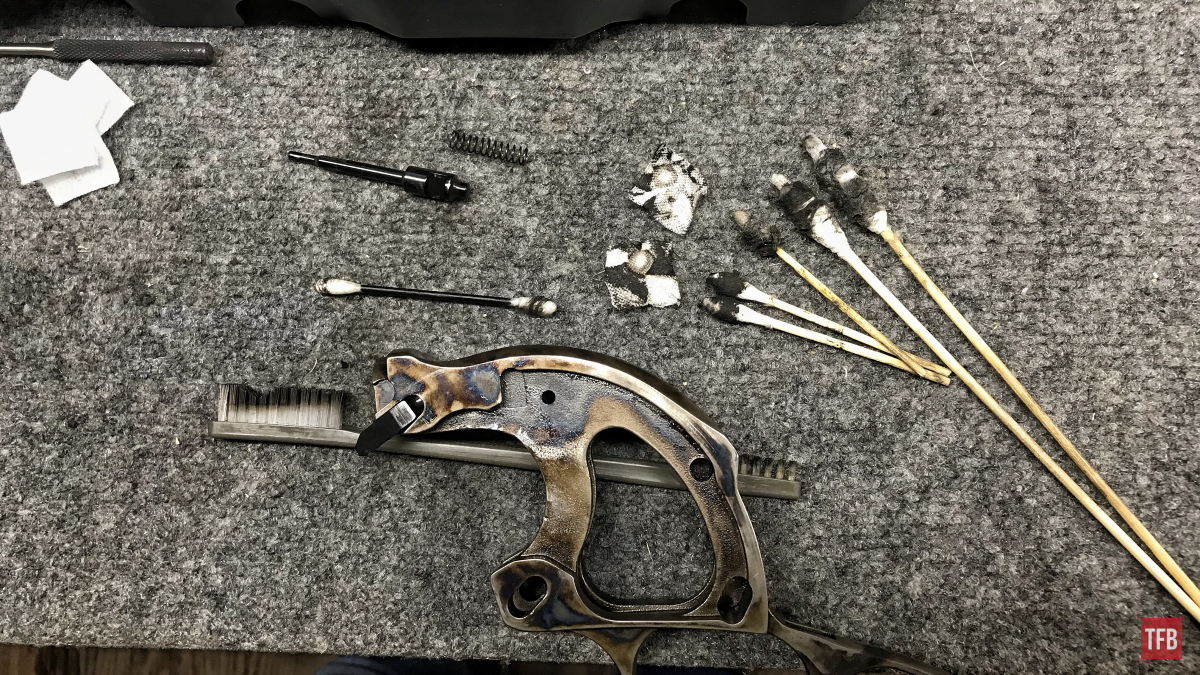
Not to take a short cut but the reassembly of this gun is the same in reverse. I do however have some minor notes to keep in mind. Loctite is my friend on this gun because I have shot the bejesus out of it. Parts come loose after 3000 rounds I guess. I blue Loctited the cam screw since it was very noticeably loose.
Make sure to clean out the firing pin channel since it is prone to collecting and keeping fouling and carbon.
When reinstalling the lever, hammer, and lever/hammer pin, you can insert the lever first with it all the way forward. Then just slide the hammer up through the slot at the bottom of the lever.
When reinstalling the carrier, make sure to insert it in one assembled piece and it helps to line up the screw holes if the gun is on its side.

My personal gun has an issue with wandering Carrier screws so I decided to put red Loctite on them.
Reinstalling the V-spring is going to be the hardest part of this whole thing. With the lever all the way forward and the hammer and its pin installed, take the V-spring and insert it in the same slot at the bottom of the lever as previously mentioned.
Grasp the spring as done before and from there hook the two grooves with the spring while angling the spring v toward the oval cut on the left like below.
Final Thoughts: Chiappa 1887 Disassembly/Reassembly
Well, there you have it! Another successful disassembly of a cool gun. Sure felt good to do this with an old school gun. Hope it is helpful to someone out there or at the very least informative. These guns look a ton more complicated than they are and it is just the best tip of the hat to John Browning who really was not a huge fan of this gun. It was only a necessary evil to him.
As always, thank you for reading TFB! Be safe out there, have fun while shooting, and we will see you next time for the TFB Armorer’s Bench brought to you by Wheeler, Tipton, Caldwell, and Frankford Arsenal! Also, let us know what you think in the comments below! We always appreciate your feedback.

Pro Range Glasses, Clear

The Caldwell® Pro Range Glasses feature a stylish wrap-around design and are a great choice for all shooters. They feature an adjustable nose piece and temples for all day comfort. The scratch resistant lens meets ANSI Z87.1 standards and offers 99.9% UV protection.
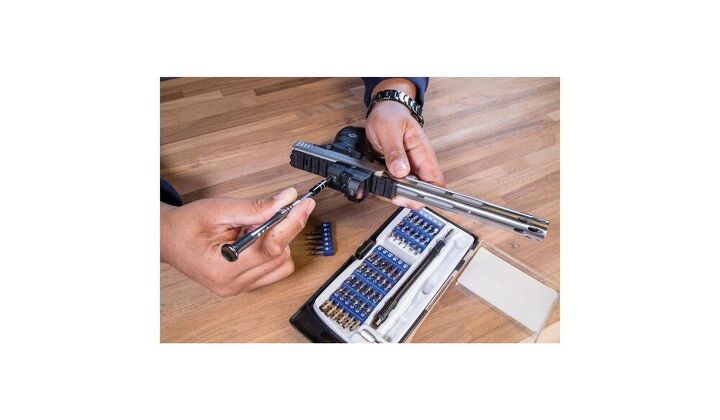
72 Piece Professional Gunsmithing Screwdriver Set
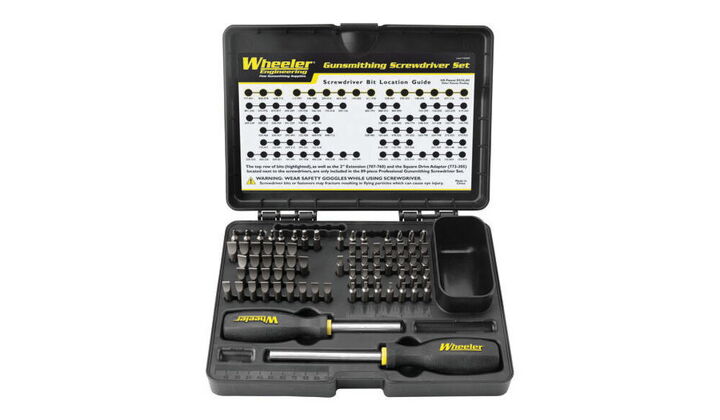
The Wheeler 72 Piece screwdriver set features 54 hollow-ground flat bits, 4 phillips, 3 torx, and 8 specialty bits all made from durable S2 tool steel with a 56-58 Rockwell “C” hardness rating. The precision-engineered bits have a concave shape that allows for insertion all the way into the screw slot of rmaximum contact to prevent burred, buggered, busted up screw slots. The kit also includes 2 non-slip, overmolded plastic handles that come in a convenient hinged storage case whcih includes a bit location guide.
Universal Bench Block
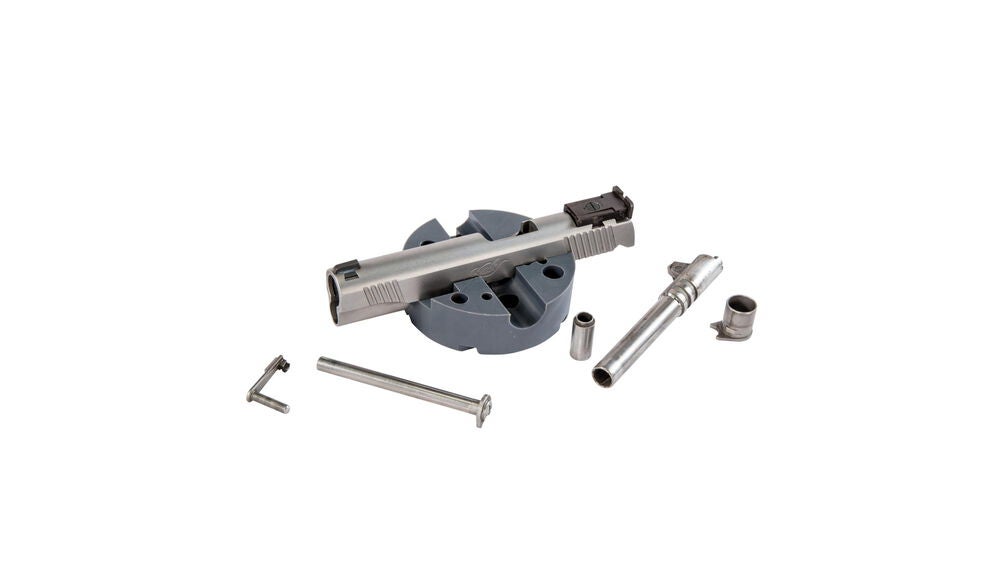
Made of non-marring urethane, the Universal Pistol Bench Block is perfect for use on M1911 pistols as well as other firearms such as 10/22s.
Tipton ULTRA GUN VISE
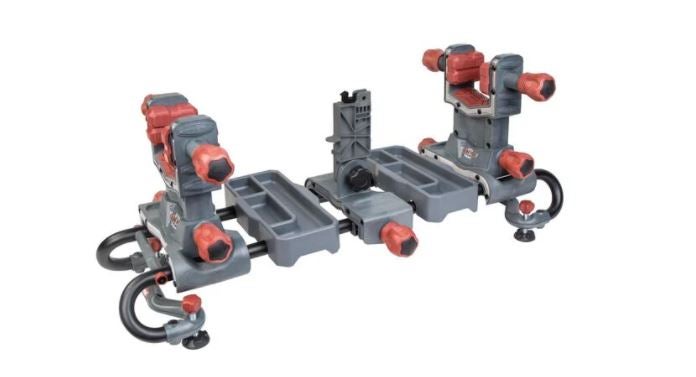
The Tipton® Ultra Gun Vise features a completely modular interchangeable design to allow virtually any shape firearm or crossbow to be cleaned and worked on with ease. The ball and socket articulating clamp pads allow for the pads to adapt to any surface. The dual clamp technology rigidly holds any firearm shape in place, while the rigid steel tube frame structure allows for complete access to your firearm or crossbow. The front and rear clamps are both height and length adjustable, and feature fast-turn knobs allowing for quick clamping. The solvent-resistant accessory and tool trays are movable and removable to stand up to even the toughest jobs.
Precision Micro Screwdriver Set