 Your Privacy Choices
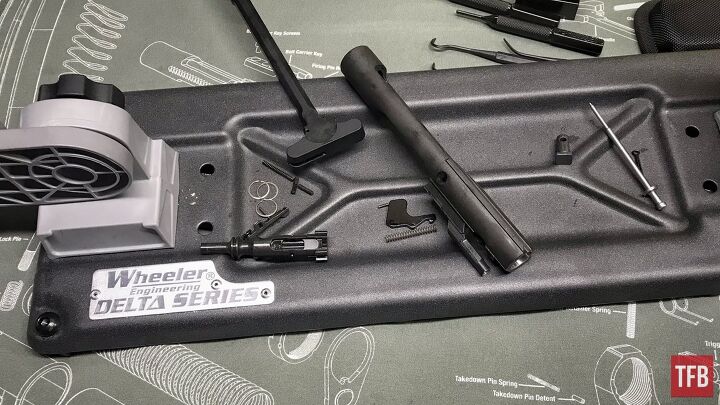
Welcome everyone to the TFB Armorer’s Bench! As mentioned in the little blurb, this series will focus on a lot of home armorer and gunsmith activities. In this article sponsored by Wheeler, Tipton, Caldwell, and Frankford Arsenal, we’ll show how to completely disassemble an AR15 bolt carrier group. I am well aware that most of the folks who pass through these parts are into the new, cool, and tacticool. I personally love older and obsolete stuff but I also like to take things apart and put them back together. That being said we here at TFB thought it would be nice to have a resource available for disassembling and assembling an AR15. Smith & Wesson was gracious and kind enough to help us out and sent us one of their Sport II models. Now we are back to it folks! Took a nice little break over Labor Day weekend and now we can jump back into our disassembly articles on the AR15. This one is sort of a special intermediate article focusing on the BCG (bolt carrier group) and charging handle that would be removed from an AR15 upper during cleaning or disassembly. Let’s dive right in!
Disclaimer: It is stating the obvious when I say do not attempt this if you do not have confidence you can. There is no shame in not taking your gun apart. Consult a competent gunsmith/armorer for advice or if they would do the goal you wish to achieve. Refer to the first Armorer’s Bench article So, You Like Taking Guns Apart? where we talk about knowing your limitations.
TFB Armorer’s Bench: Complete AR15 Disassembly – Bolt Carrier Group
Welcome to our recurring series of Armorer’s Bench which is made possible and brought to you by Wheeler, Tipton, Caldwell, and Frankford Arsenal who are our sponsors. Here, we at TFB hope to inform, entertain, and even inspire any would-be gunsmith or armorer out there. Ideally, with the information I provide and with the help of our sponsors, you can have some useful knowledge pertaining to the conservation and improvement of firearms technology while at the same time sharing experiences and teaching each other new tips and tricks along the way in the comments. Digging deep into what it is to be an armorer or gunsmith has significance but what is important is what those people do to show they’ve earned that title. I am happy to share my experiences and knowledge and hope it is informative!
Make your personal safety a priority:
- Practice proper gun safety. Always make sure before the firearm hits your bench that it is unloaded and safe to be handled.
- Wear the proper safety equipment. The main one would be safety glasses (decent ones) since parts are often under spring tension and you may work with high RPM tools. Other honorable mentions would be latex gloves or a respirator when working with potentially harmful solvents and oils. Also hearing protection when working with loud machinery or test-firing firearms.
- Modifications, alterations, and customizations will void your firearm’s warranty 9.5 times out of 10. Please take that into consideration before attempting any at-home gunsmithing.
- If you are unsure about proper safety practices, disassembly procedures, or warranty standards, stop, put down the tools, and consult a competent gunsmith.
Step One: Complete AR15 Disassembly – Bolt Carrier Group
Assuming that your upper is still attached to your lower start by making sure your bolt is in battery and then push the rear pin (called the takedown pin) till it clicks and is held captive on the right side of the receiver. This will allow your AR15 upper to pivot forward from your lower receiver.

With the upper pivoted forward, you can either push out the pivot pin at the front of the lower receiver and remove the upper from the lower or just leave it be.
Step Two: Complete AR15 Disassembly – Bolt Carrier Group
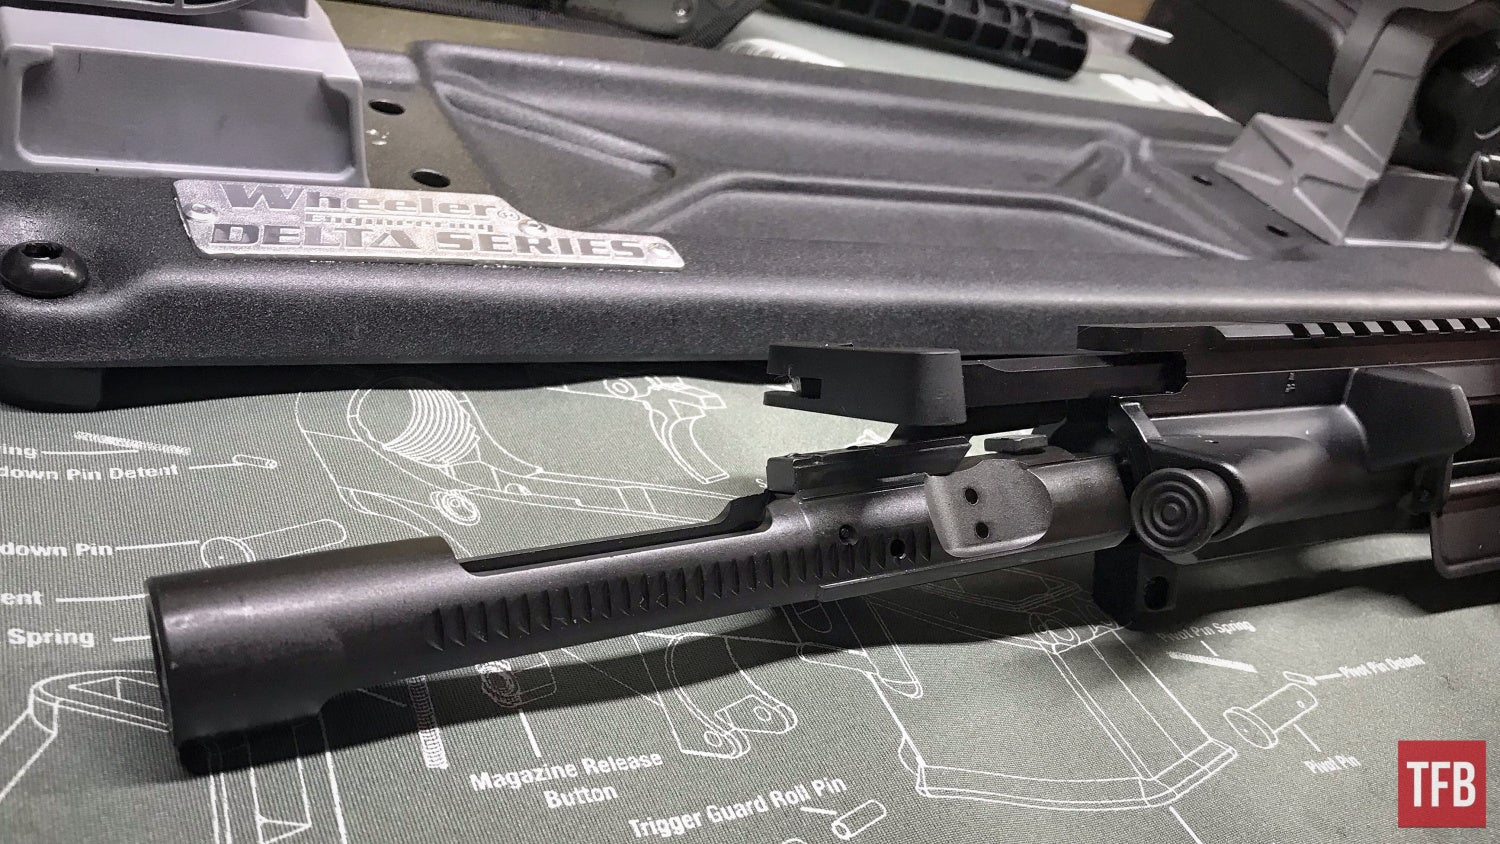
With the rear of the upper receiver away from the lower you can begin to pull out the bolt carrier group and charging handle.
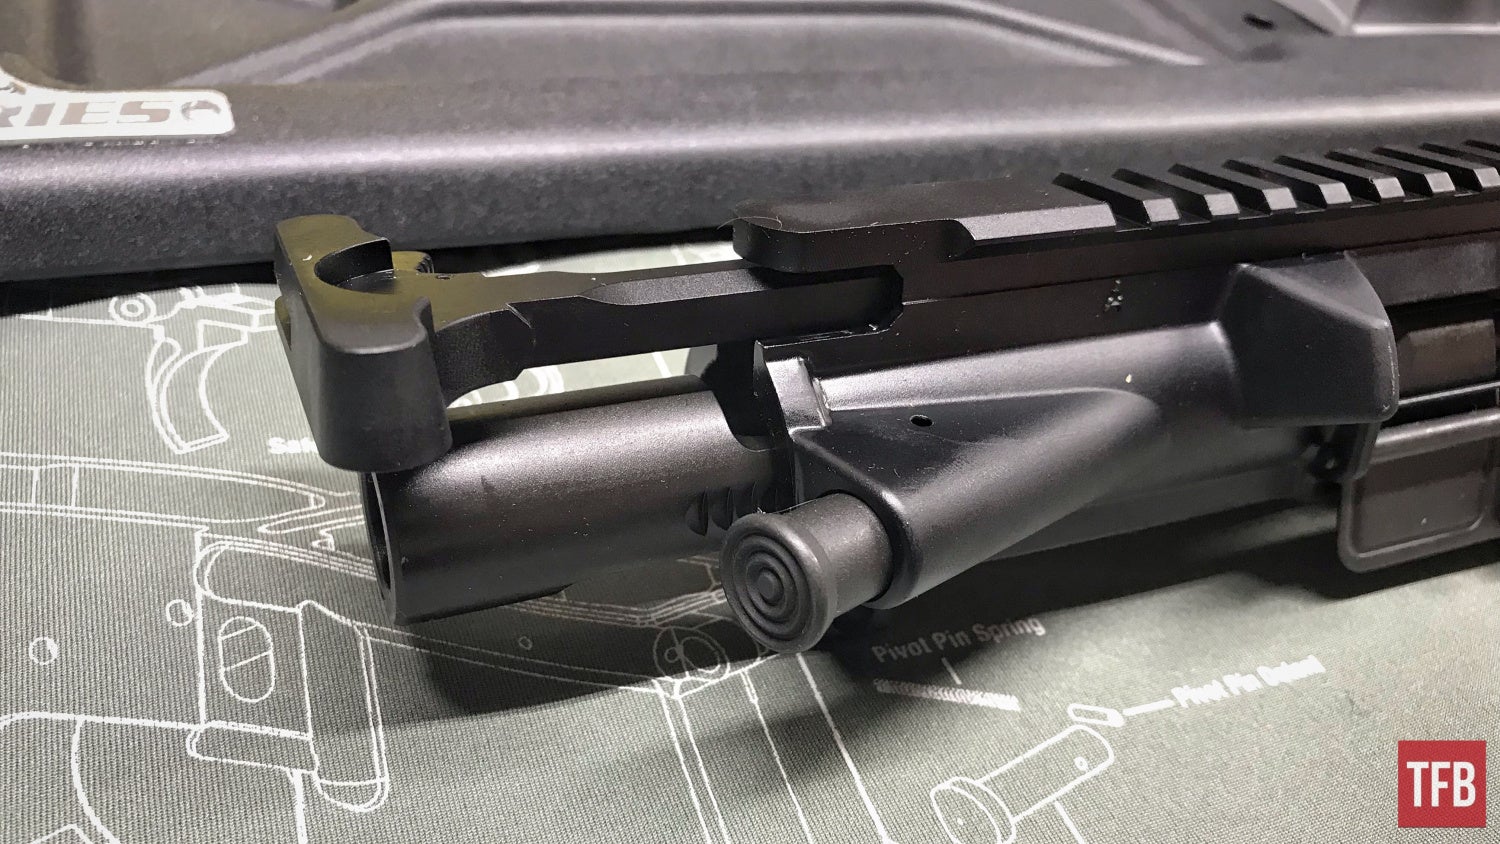
If you pull both fully to the rear the bolt carrier group can typically drop/pull free as is.
Step Three: Complete AR15 Disassembly – Bolt Carrier Group
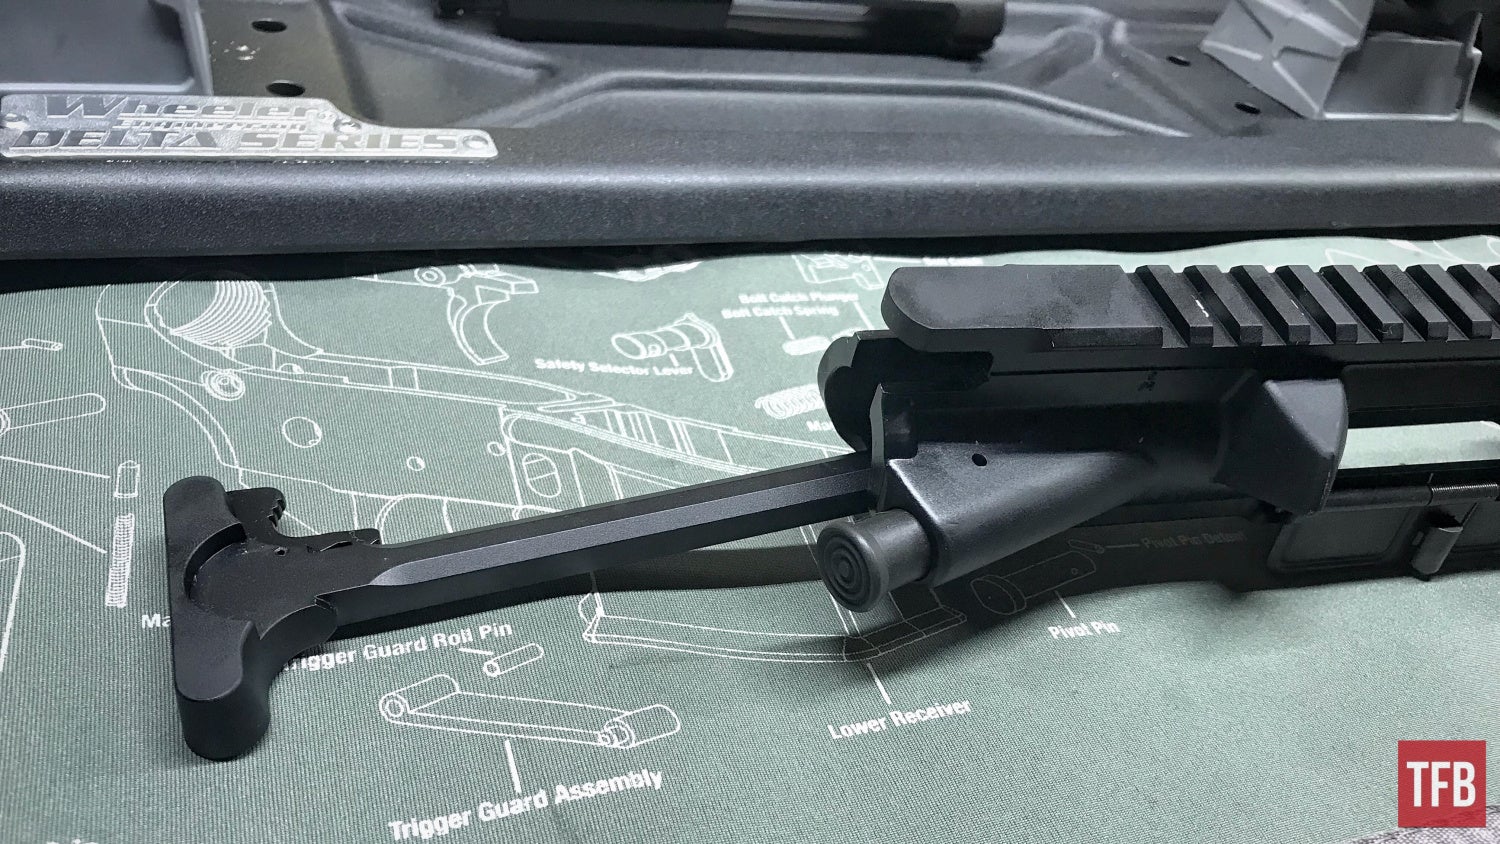
The charging handle has a built-in ridge which prevents it from coming straight out the back. With the bolt carrier group removed the charging handle must be pulled back to its stopping point and then gravity will usually let it fall through a slot in the charging handle channel. Remove the charging handle.
Step Four: Complete AR15 Disassembly – Bolt Carrier Group
Now onto the fun bits! The remainder of the disassembly is gratefully helped along by some of Wheeler’s specialty tools that I will list after the article.
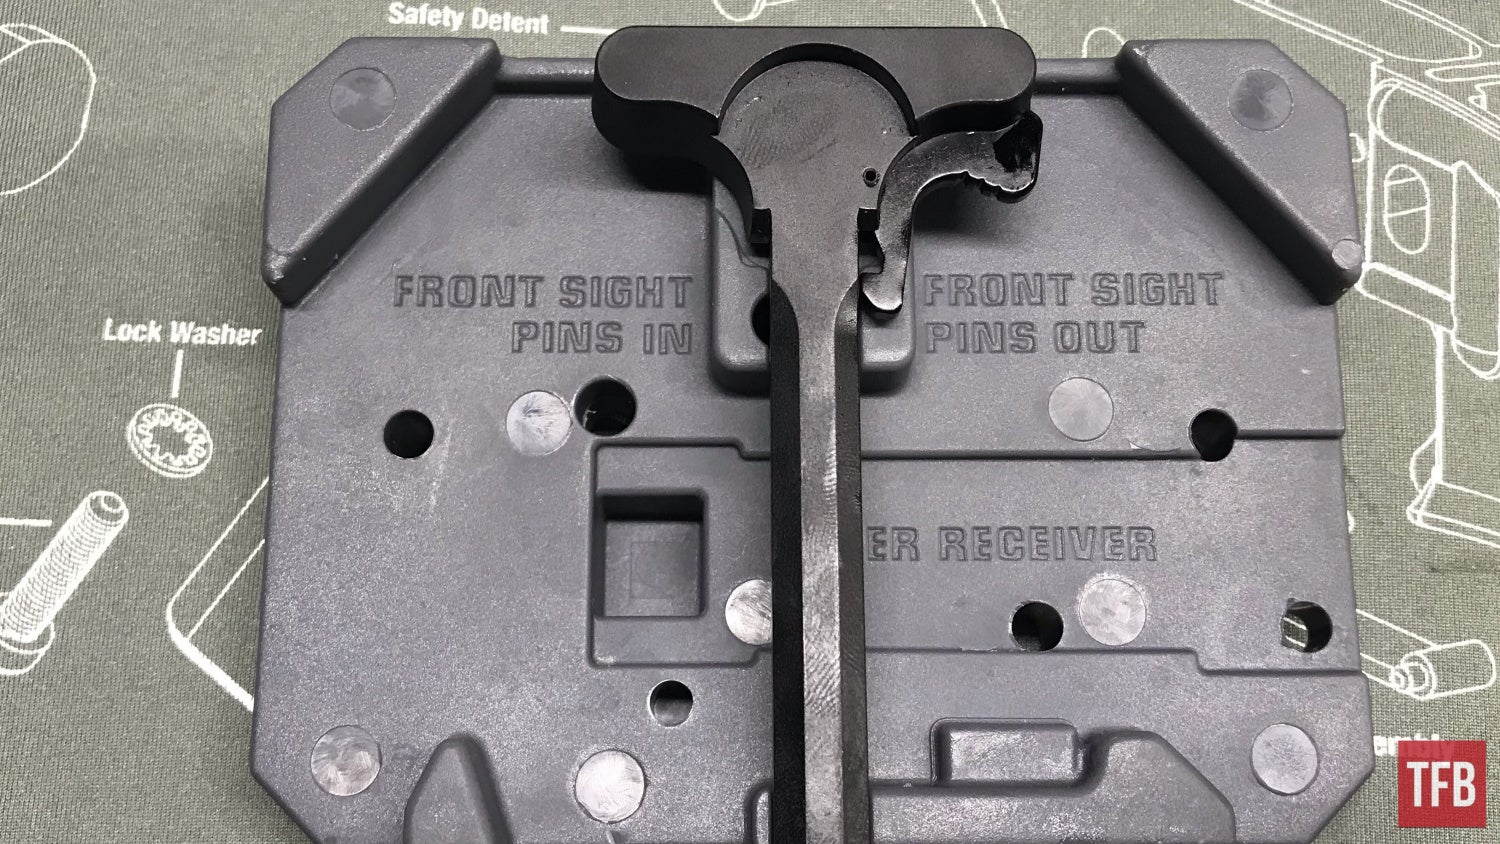
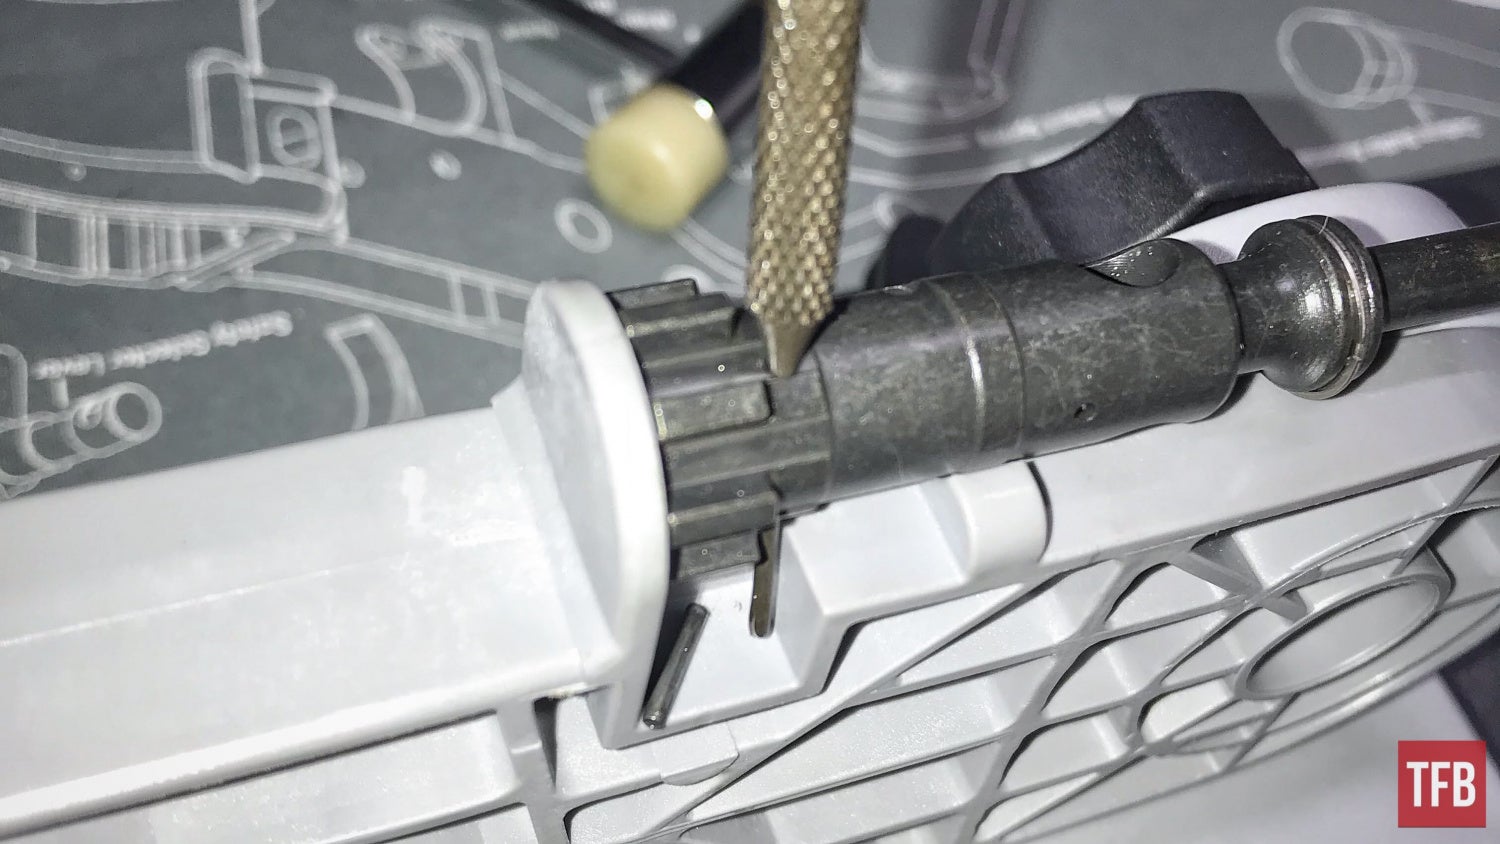
There is almost no real reason to take apart your charging handle (especially a very plain one) but here we go. Using a bench block (like this one from wheeler), place the charging handle flat with its channel facing the block.
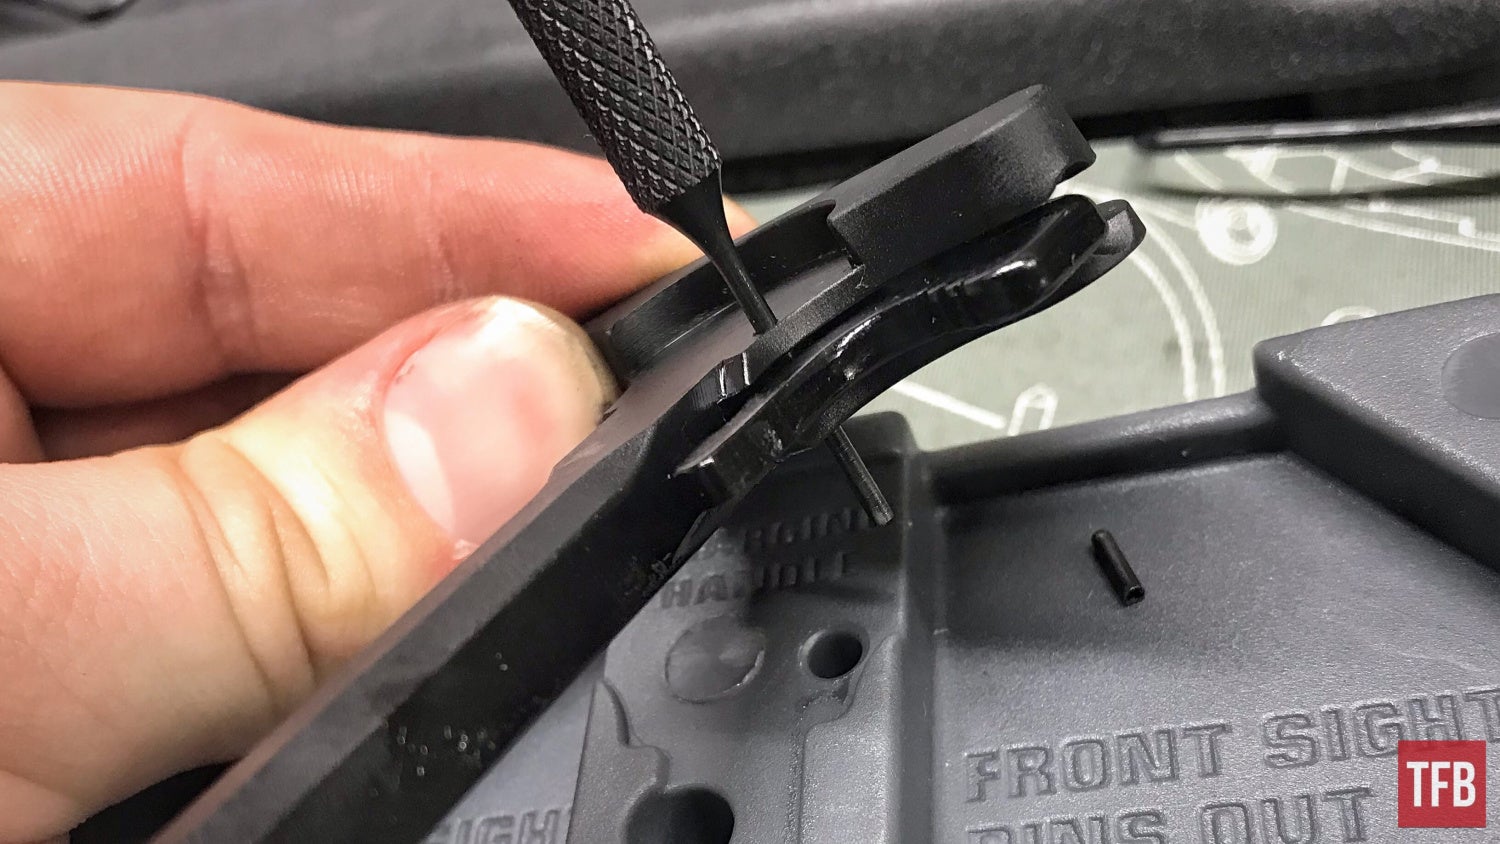
Use a 1/16 roll pin punch and place it like in the photo below. Be aware that once you drive out the pin that the charging handle lock is under spring tension and may leap across the room. It would not be a bad idea to do this where there is something to stop it if it does try to fly.
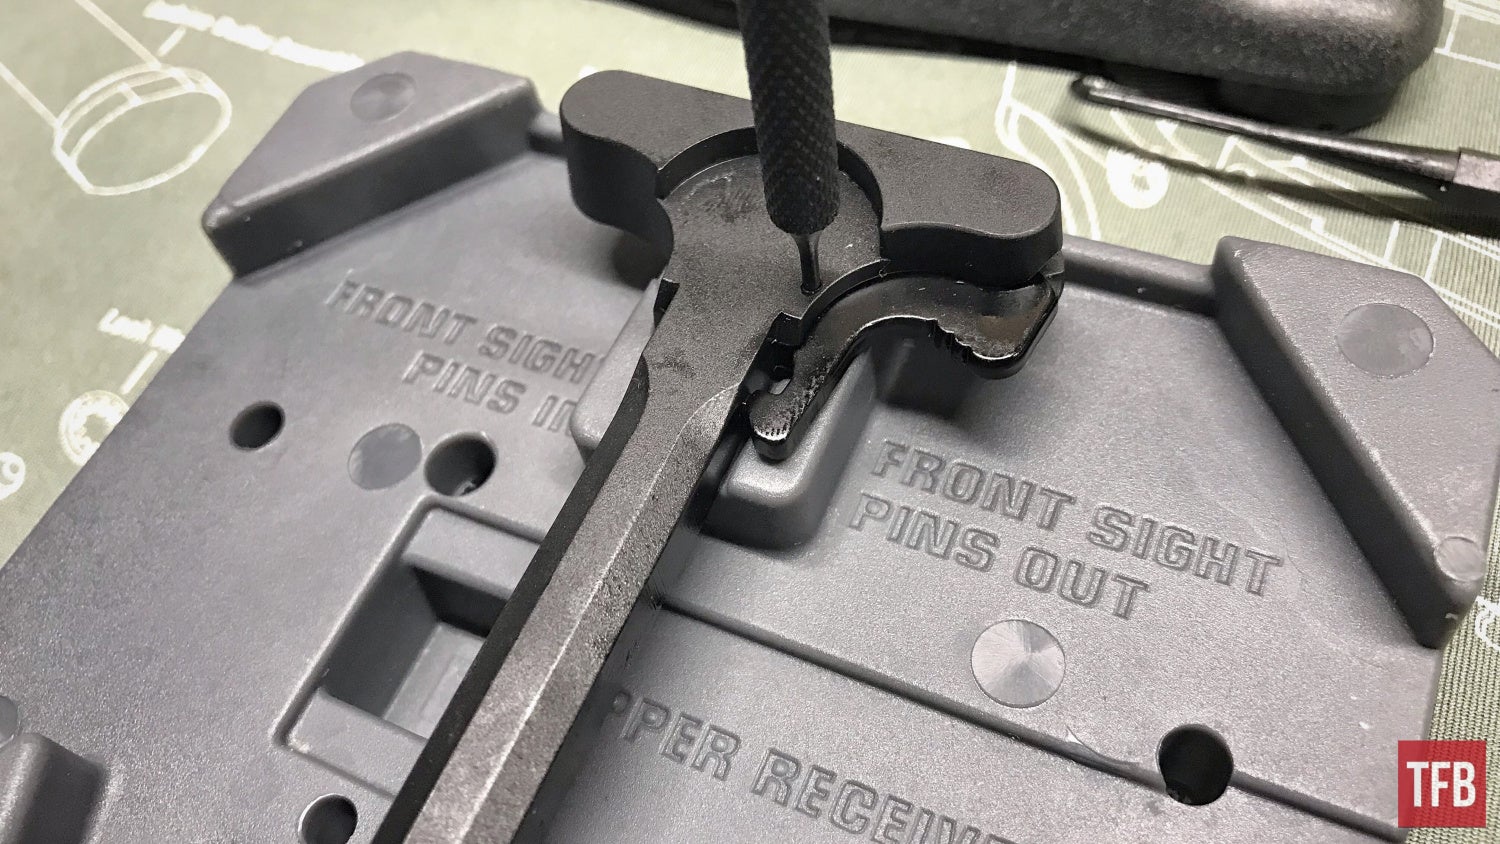
Most of the time the spring tension will hold your punch in place until you remove it.
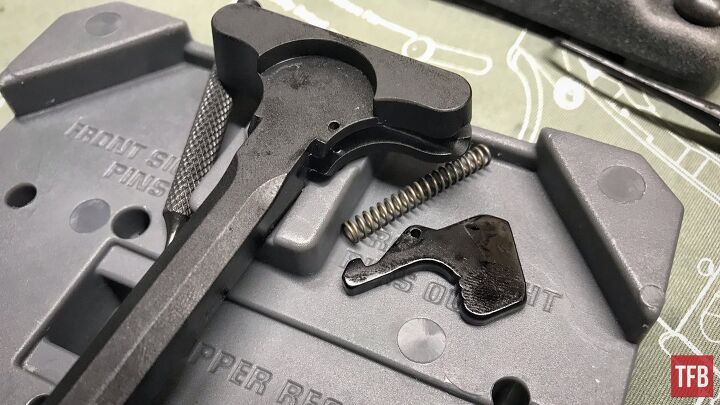
Punch out the pin and remove your punch keeping track of the charging handle lock and spring.
Step Five: Complete AR15 Disassembly – Bolt Carrier Group
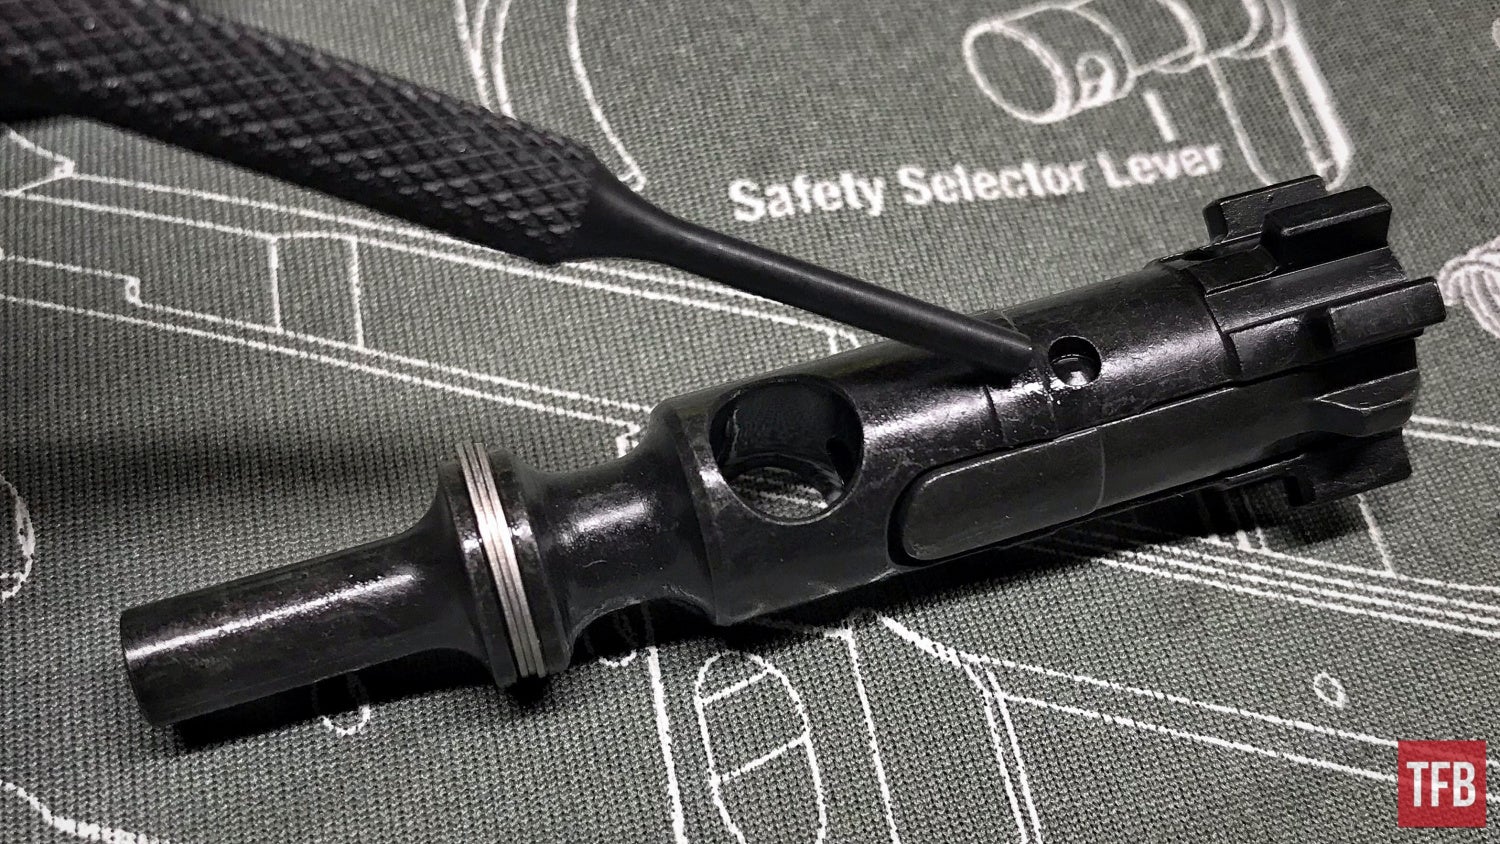
Now onto the bolt! First thing here is to make sure that your bolt is in the forward position.

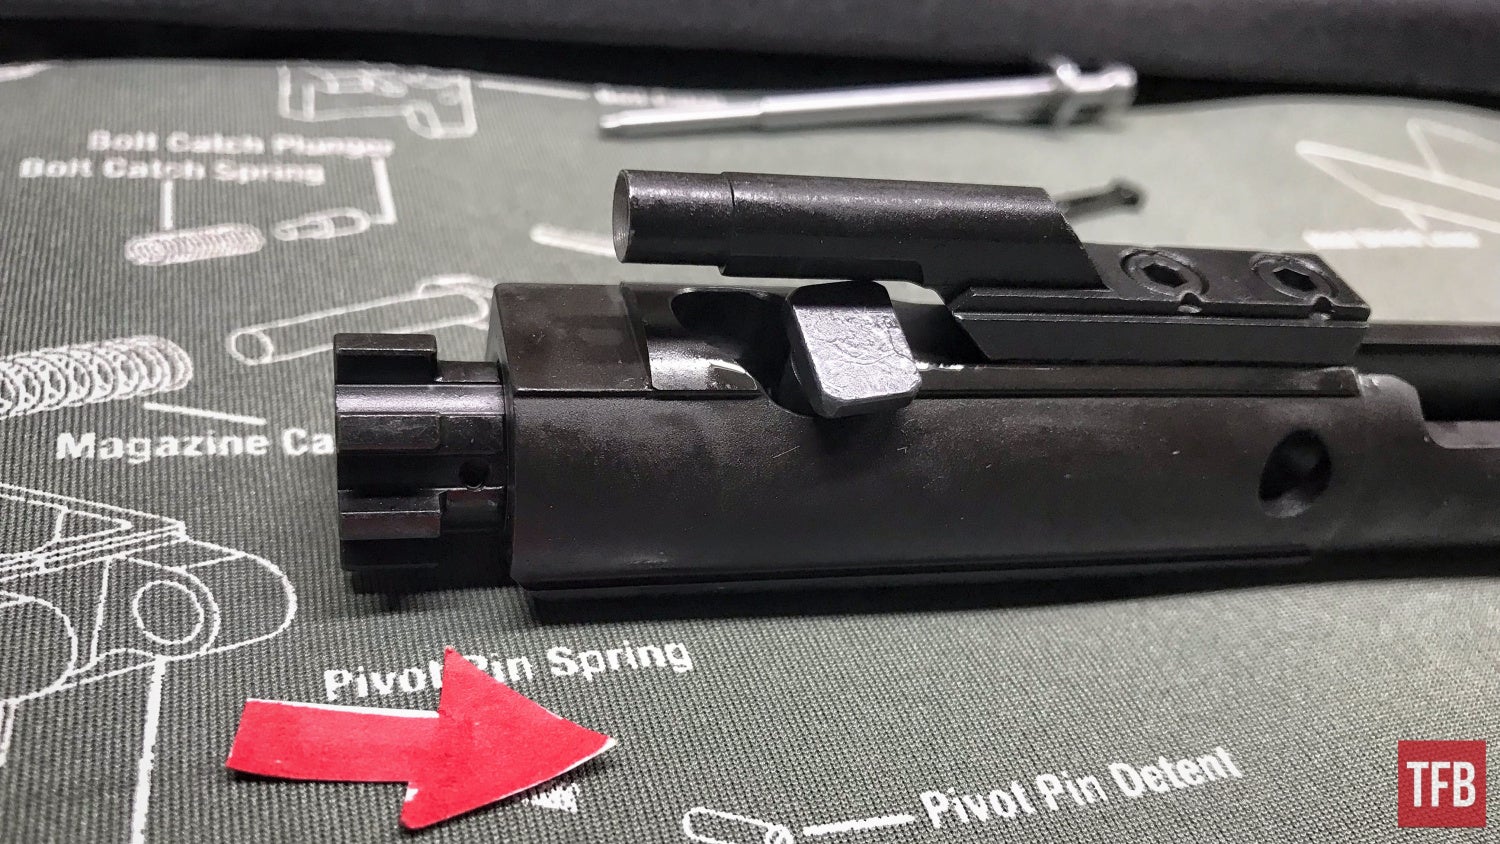
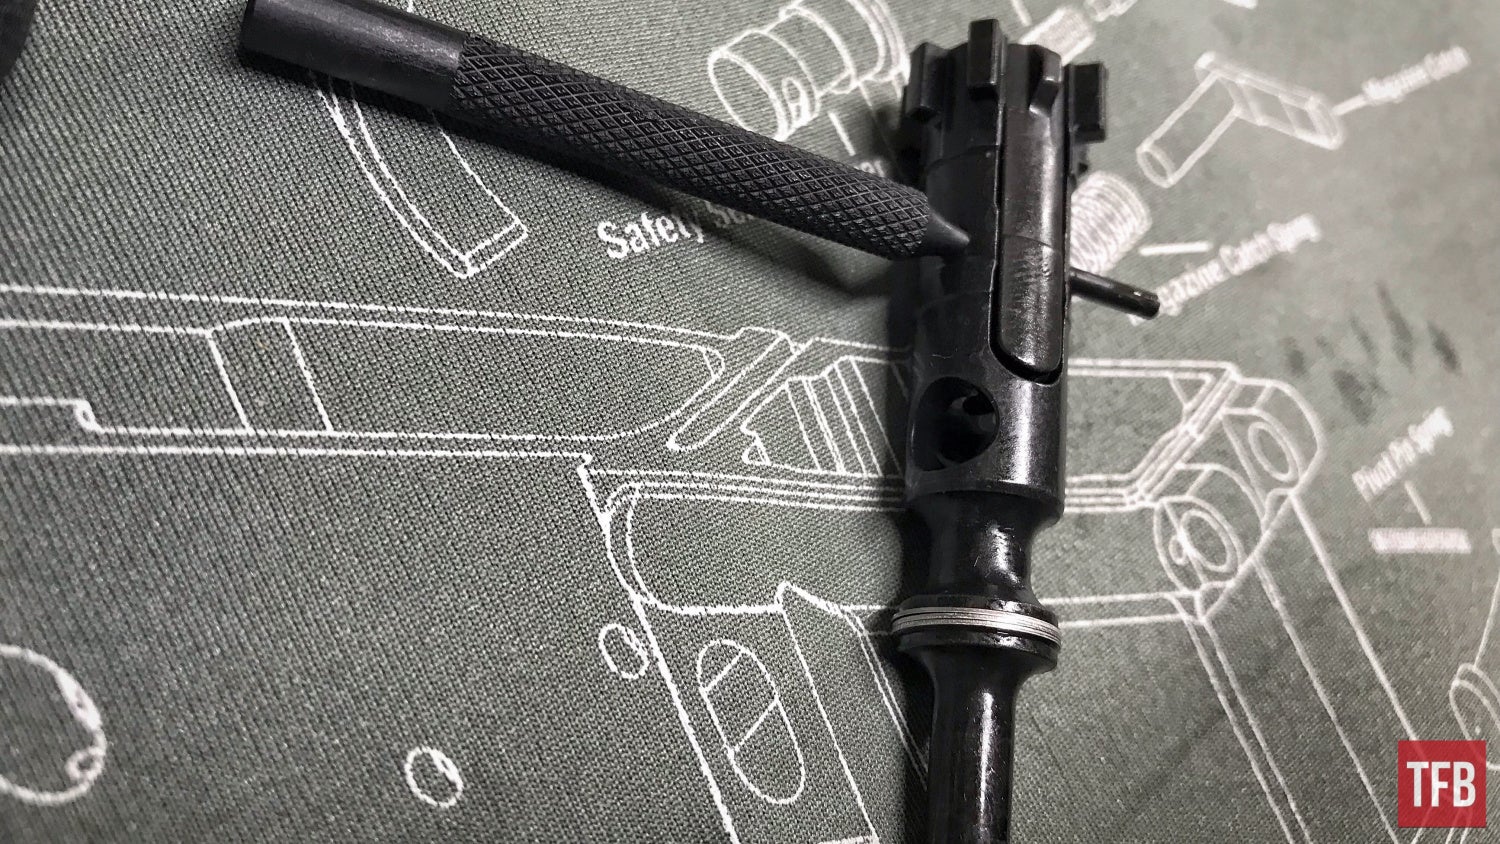
Note the loop-looking piece of metal on the side of the bolt. This is commonly referred to as the cotter pin or the technical term is a split pin. The cotter pin is what prevents the firing pin from falling out of the bolt carrier group.
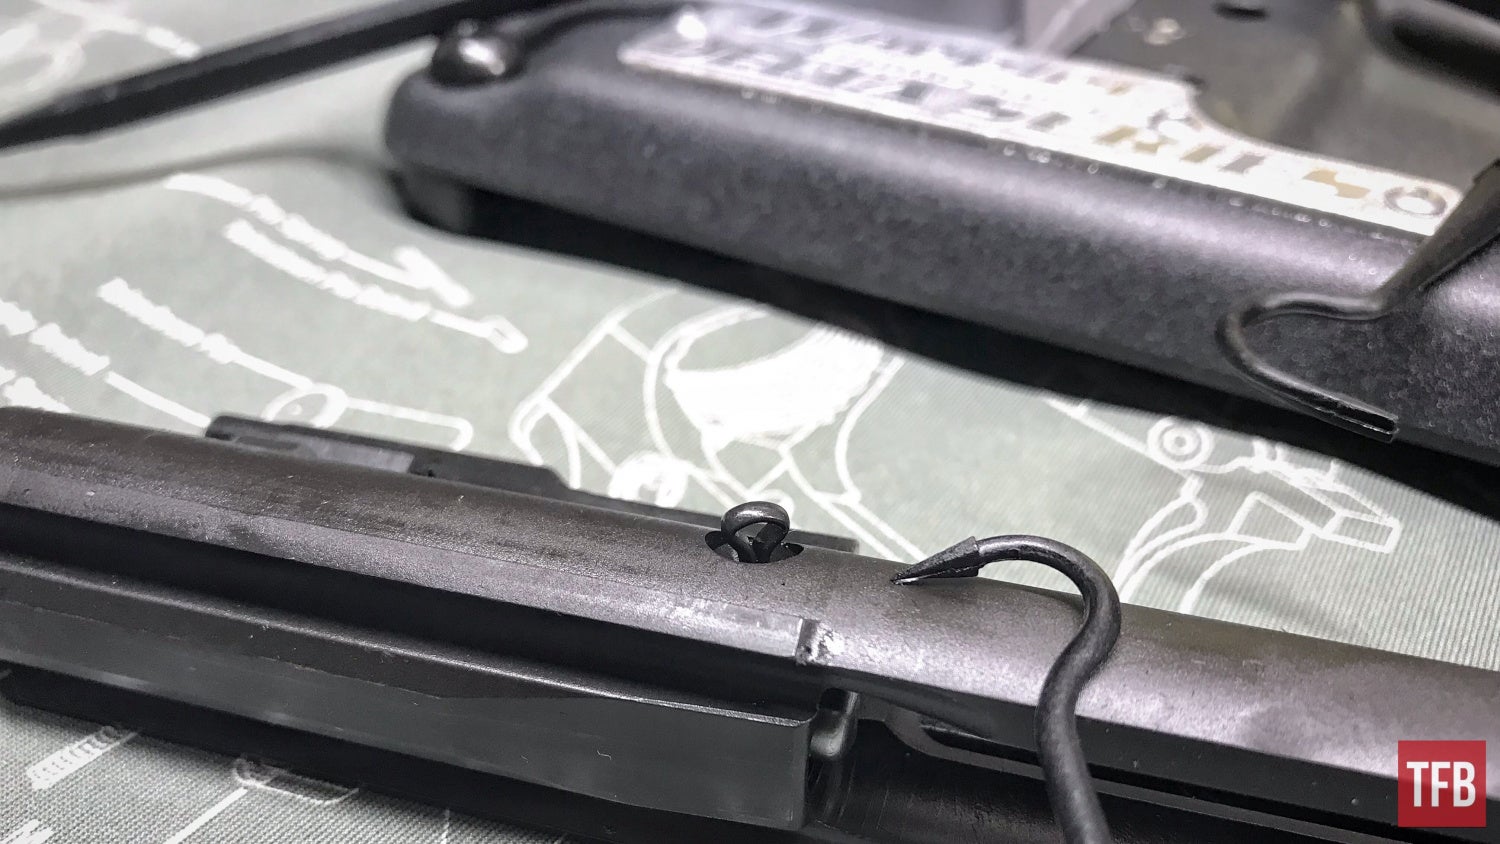
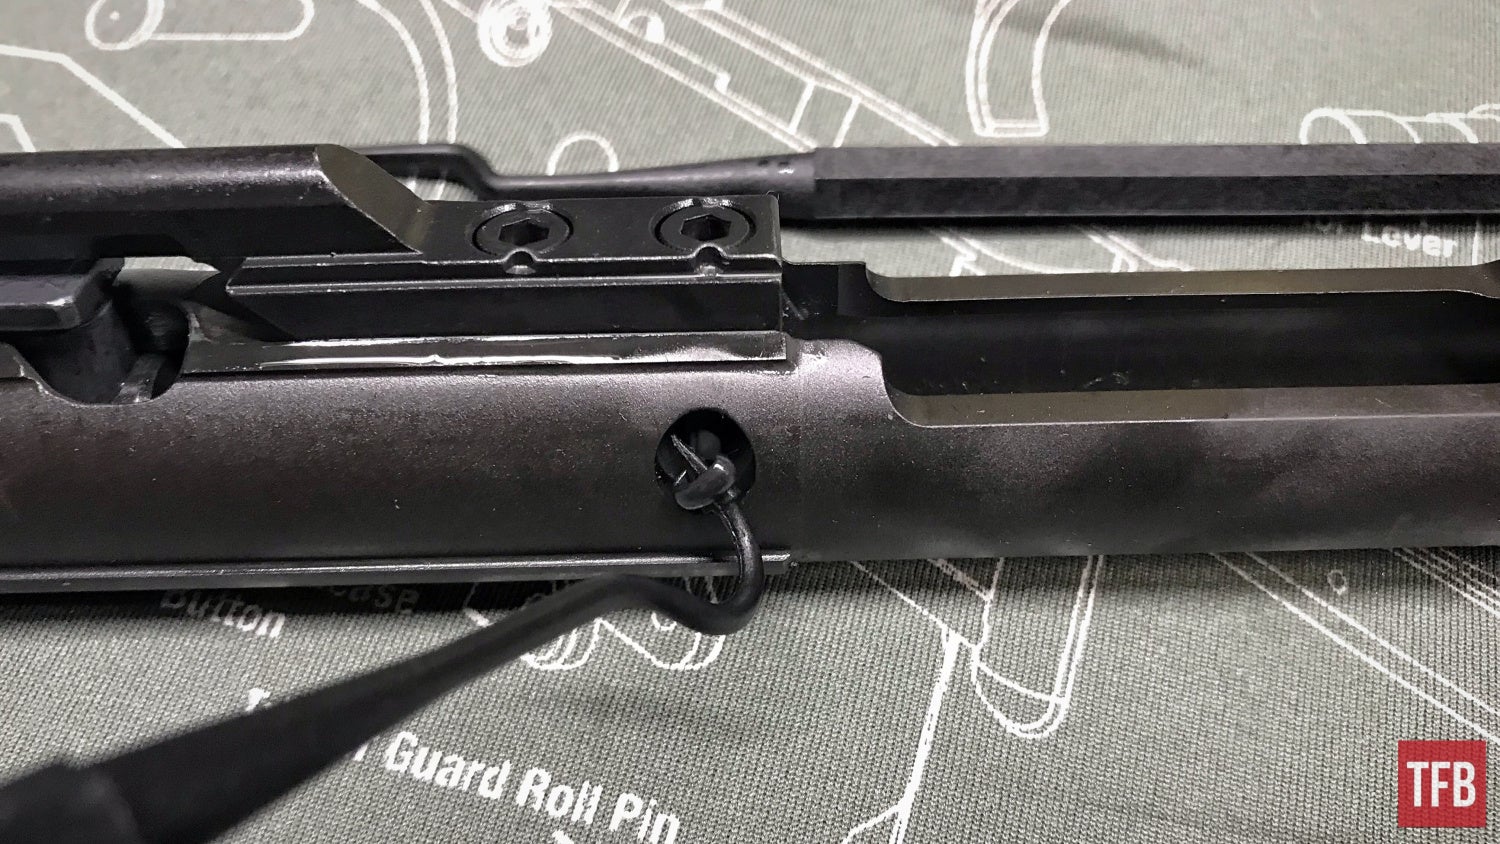
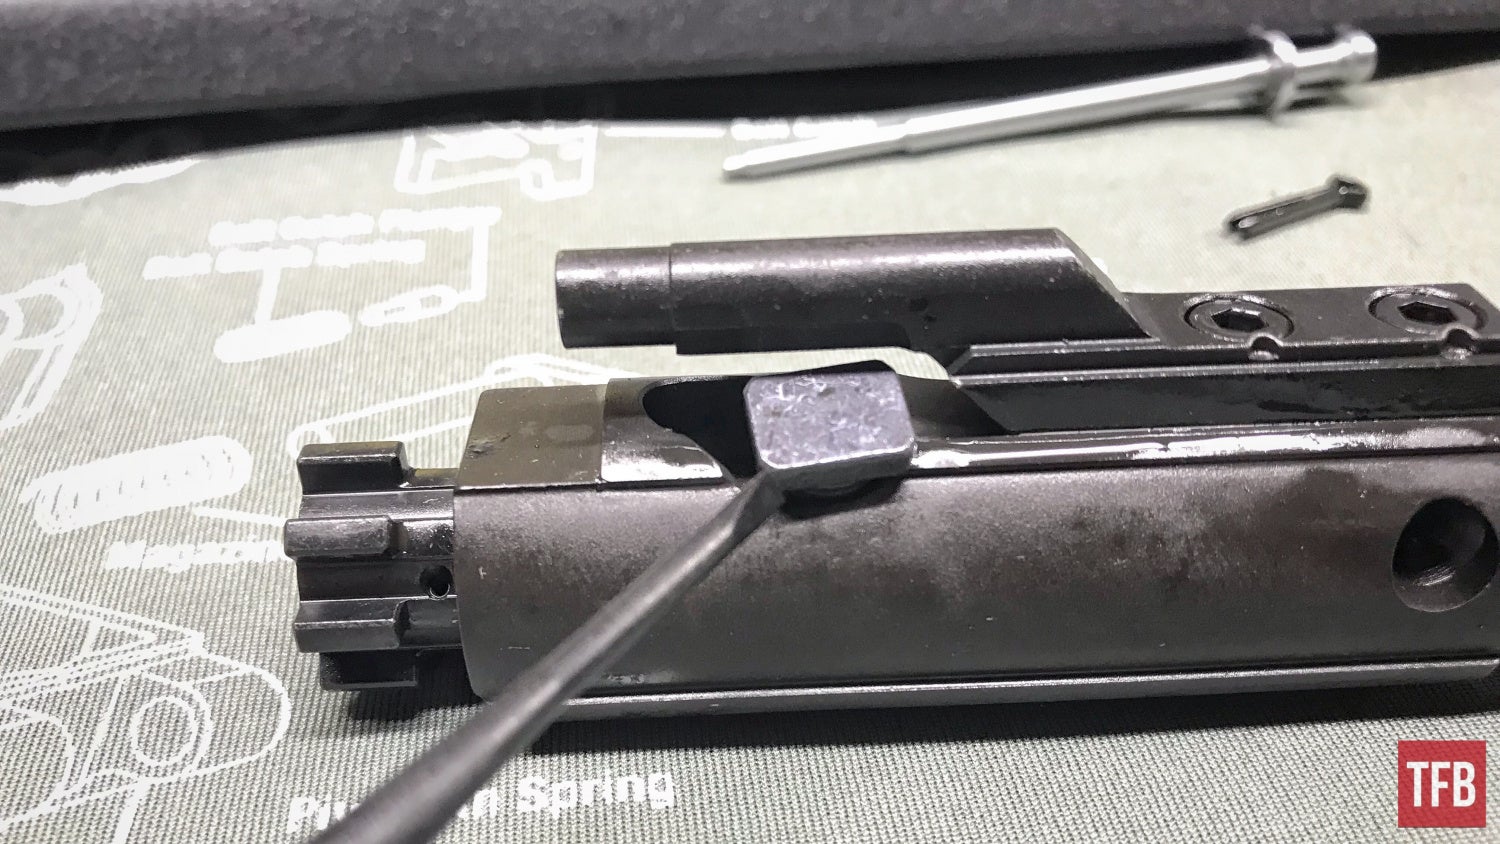
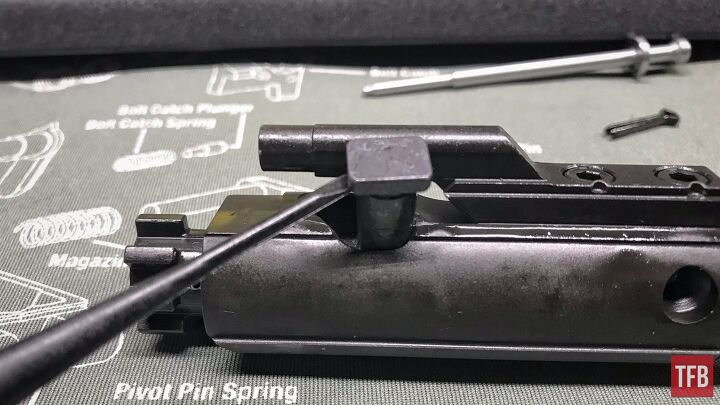
You can use a small punch or a hook tool like shown below and begin to pull the cotter pin out.
The pin itself provides its own spring tension and should not go anywhere once removed.
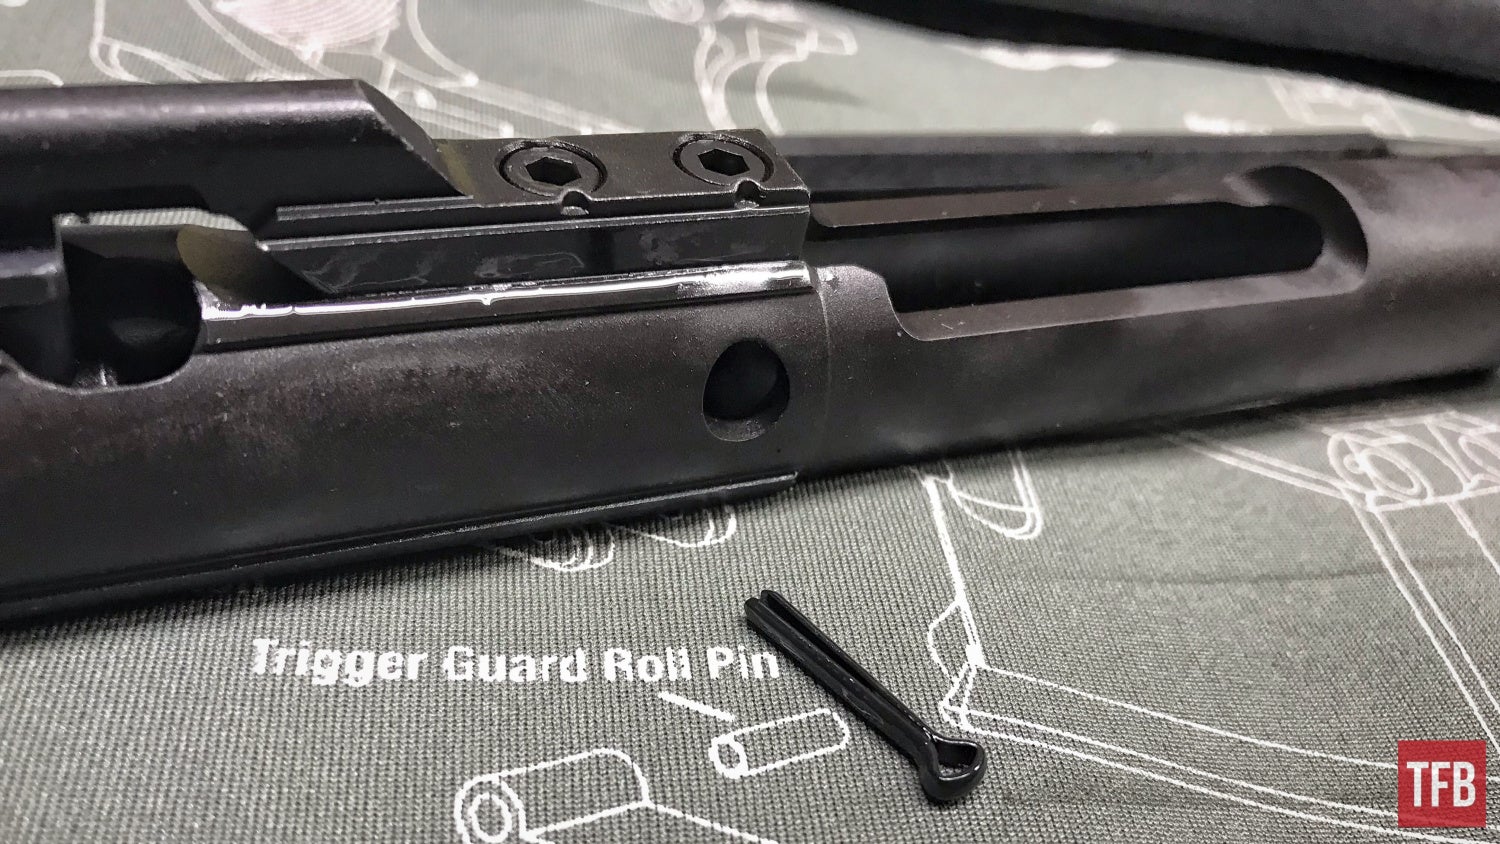
Step Six: Complete AR15 Disassembly – Bolt Carrier Group
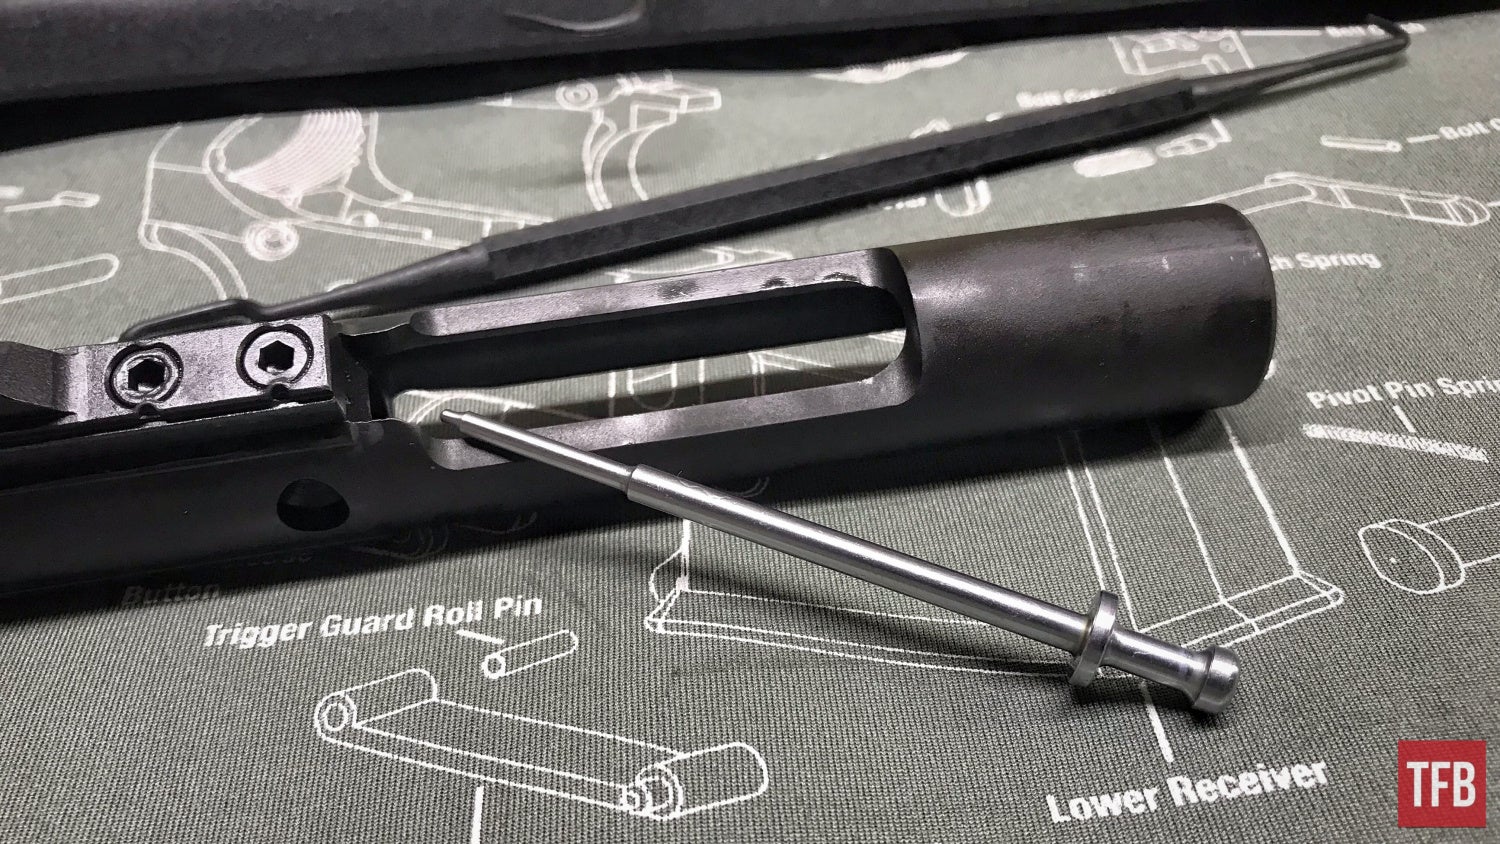
With the cotter pin removed, the bolt carrier group can be put vertically with the bolt face towards the sky. Typically the firing pin will fall free with the assistance of gravity.

Otherwise, some light tapping with a nylon hammer will allow the firing pin to fall free.
Step Seven: Complete AR15 Disassembly – Bolt Carrier Group
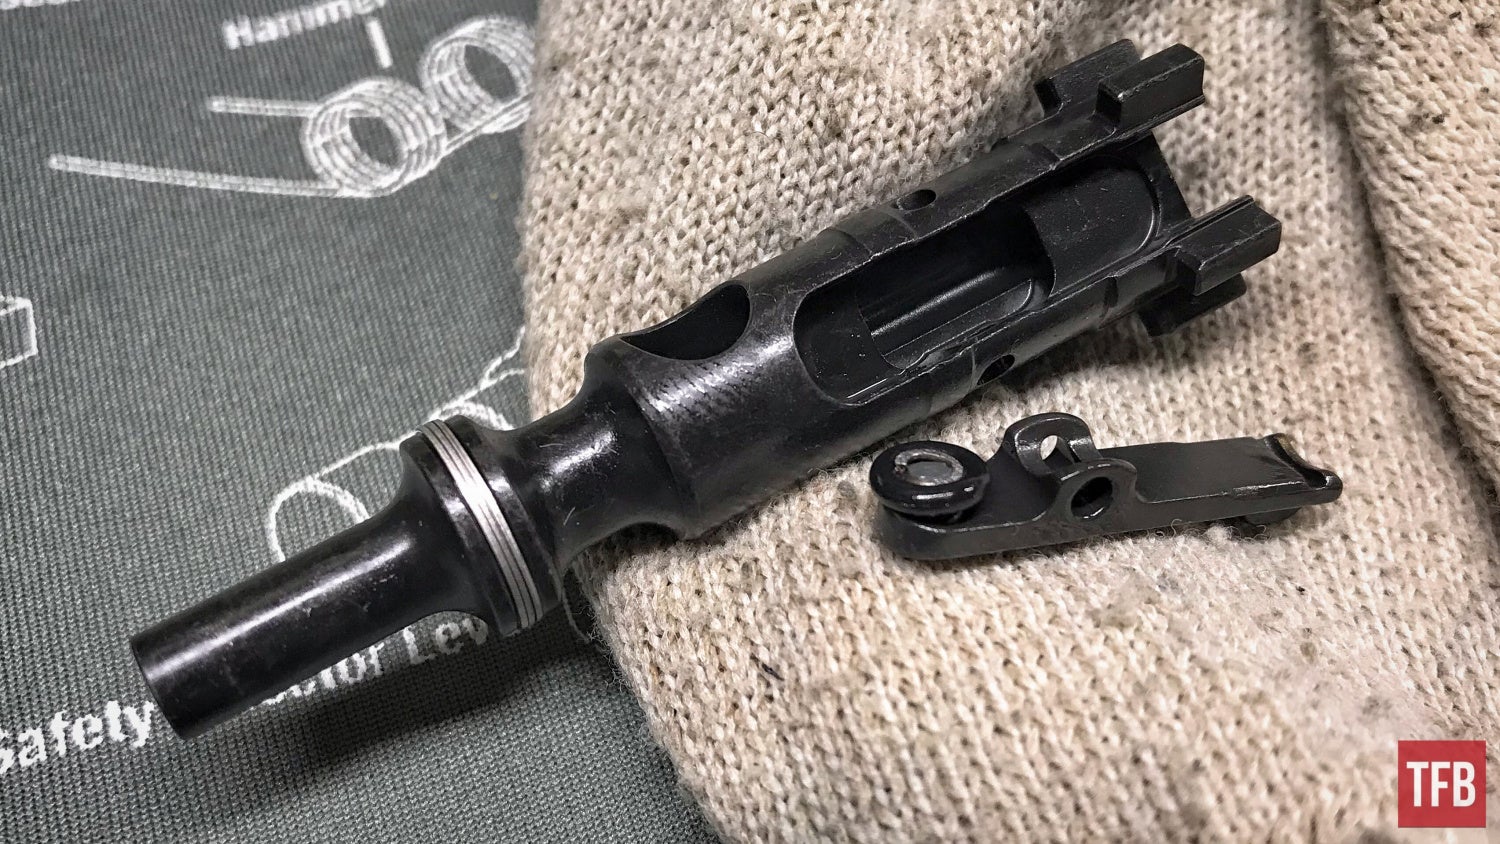
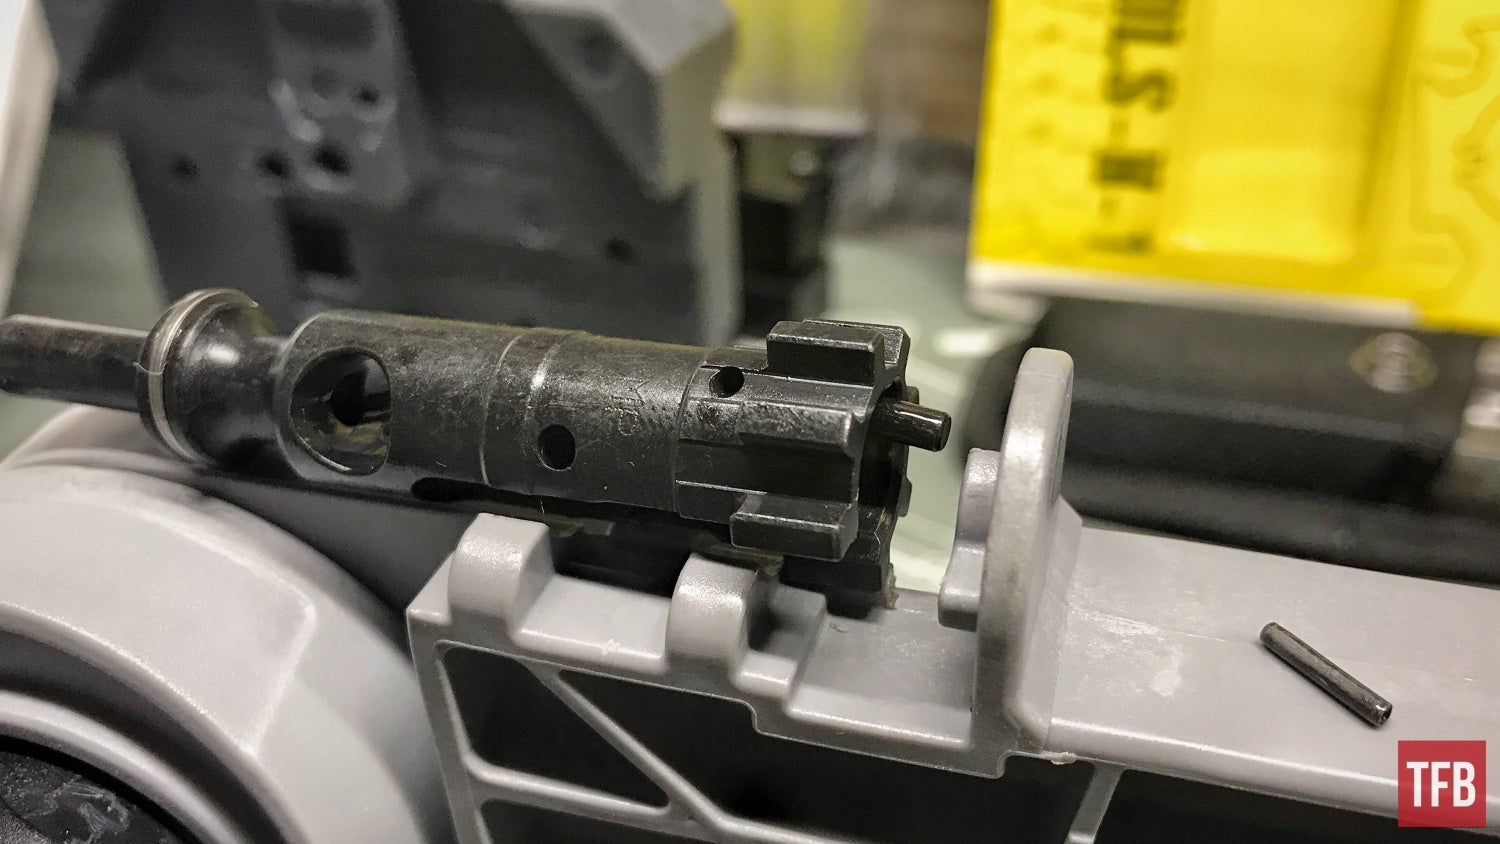
Slide the bolt backward in the orientation below.
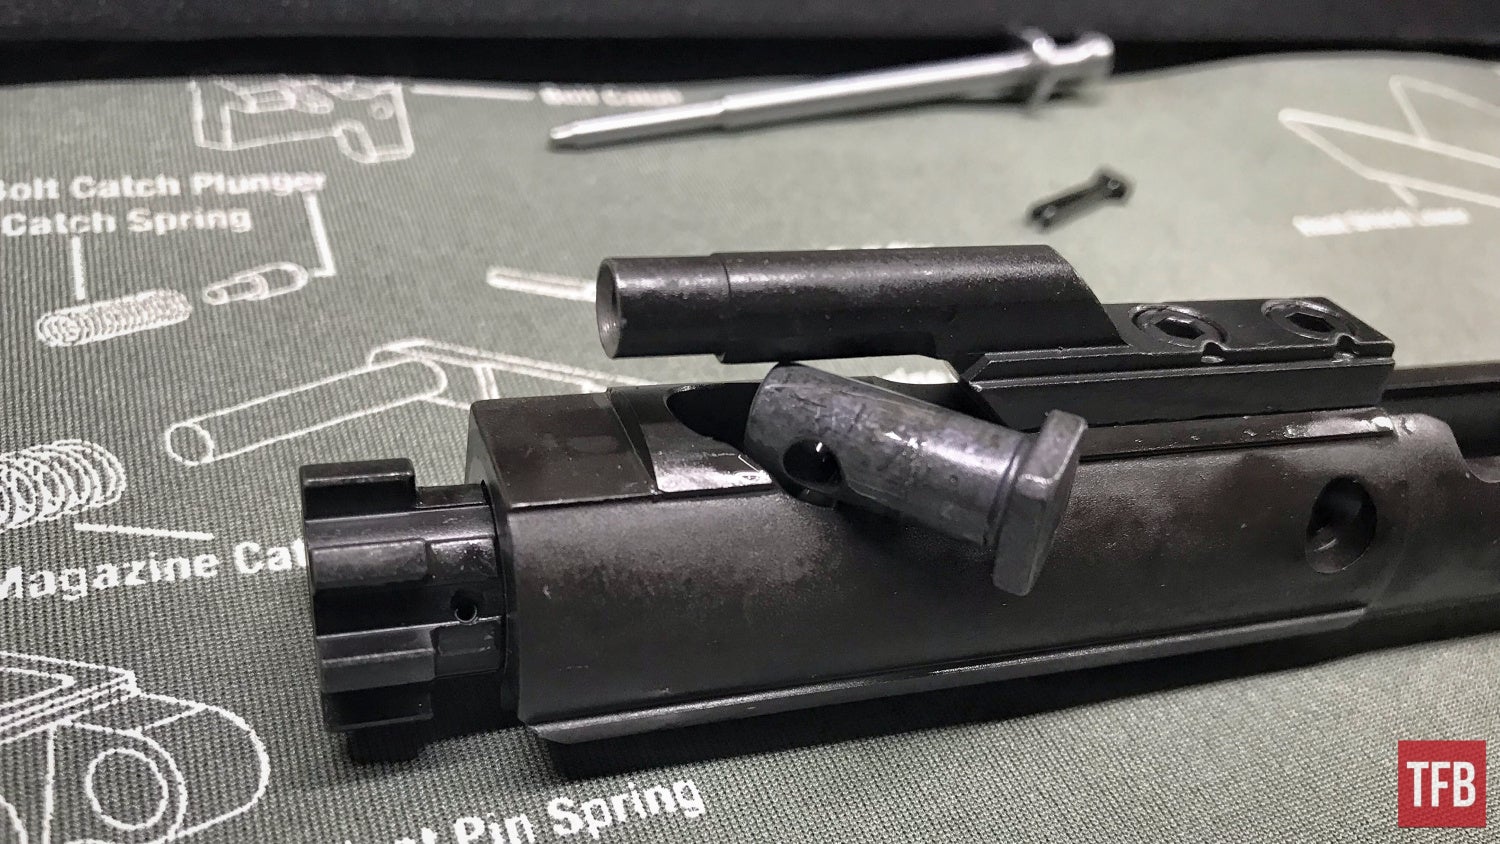
With the bolt as far back as it can go into the carrier, spin the bolt cam pin so that the long faces of the bolt cam pin are parallel with the carrier as shown below.
Note: I have seen some bolt cam pins that are perfectly round and these would just need to be spun while applying upward pressure till it is released.
The bolt cam pin in this position can be pulled from the bolt and carrier. It can be grasped with needle-nose pliers or pry upward with a flathead screwdriver.
Remove the bolt cam pin and note how the orientation matters in terms of reassembly and the hole in which the firing pin usually travels through.
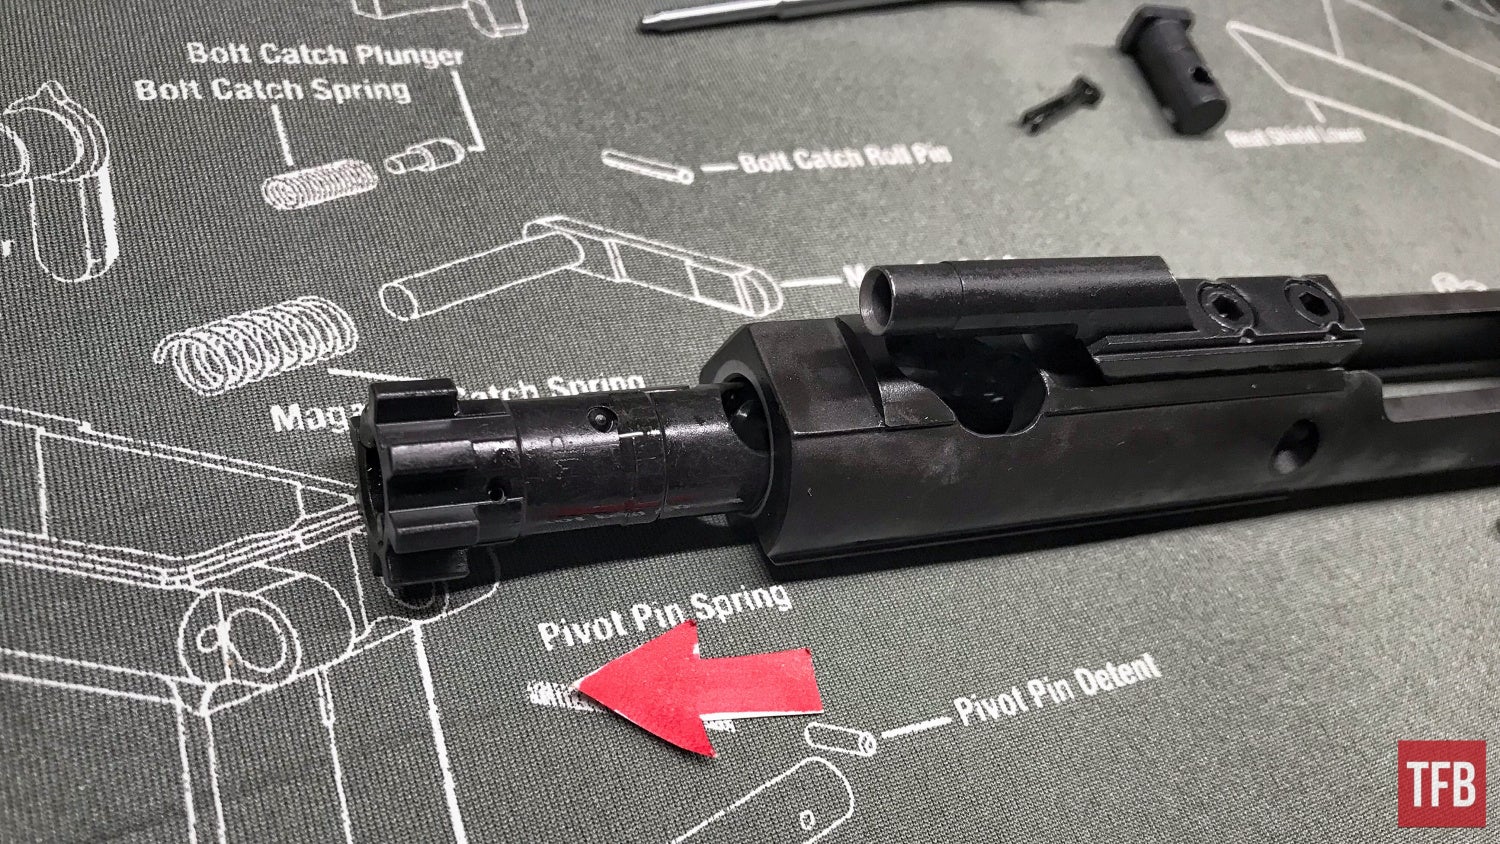
Step Eight: Complete AR15 Disassembly – Bolt Carrier Group
With the bolt cam pin removed the bolt assembly can be pulled out the front of the carrier.
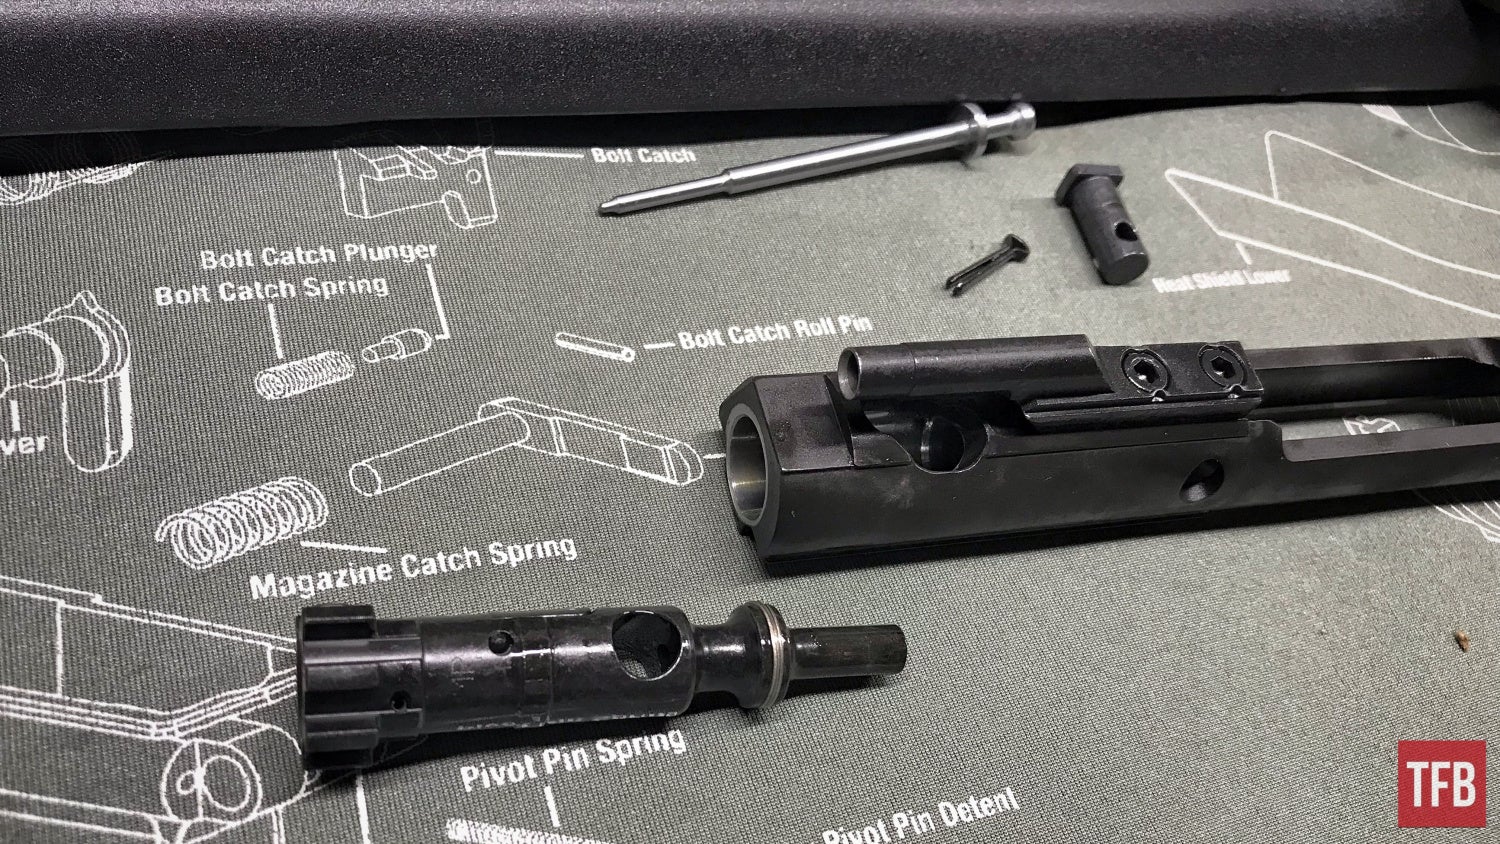
Step Nine: Complete AR15 Disassembly – Bolt Carrier Group
For the disassembly of the bolt, I used Wheelers Delta Series Mag Well Vise Block which comes attached to their AR Armorer’s Vise. This mag well vice block has a bolt disassembly jig built-in and I highly recommend it for anyone who thinks they might do this more than once. Everything done can be accomplished with a normal bench block and some patience.
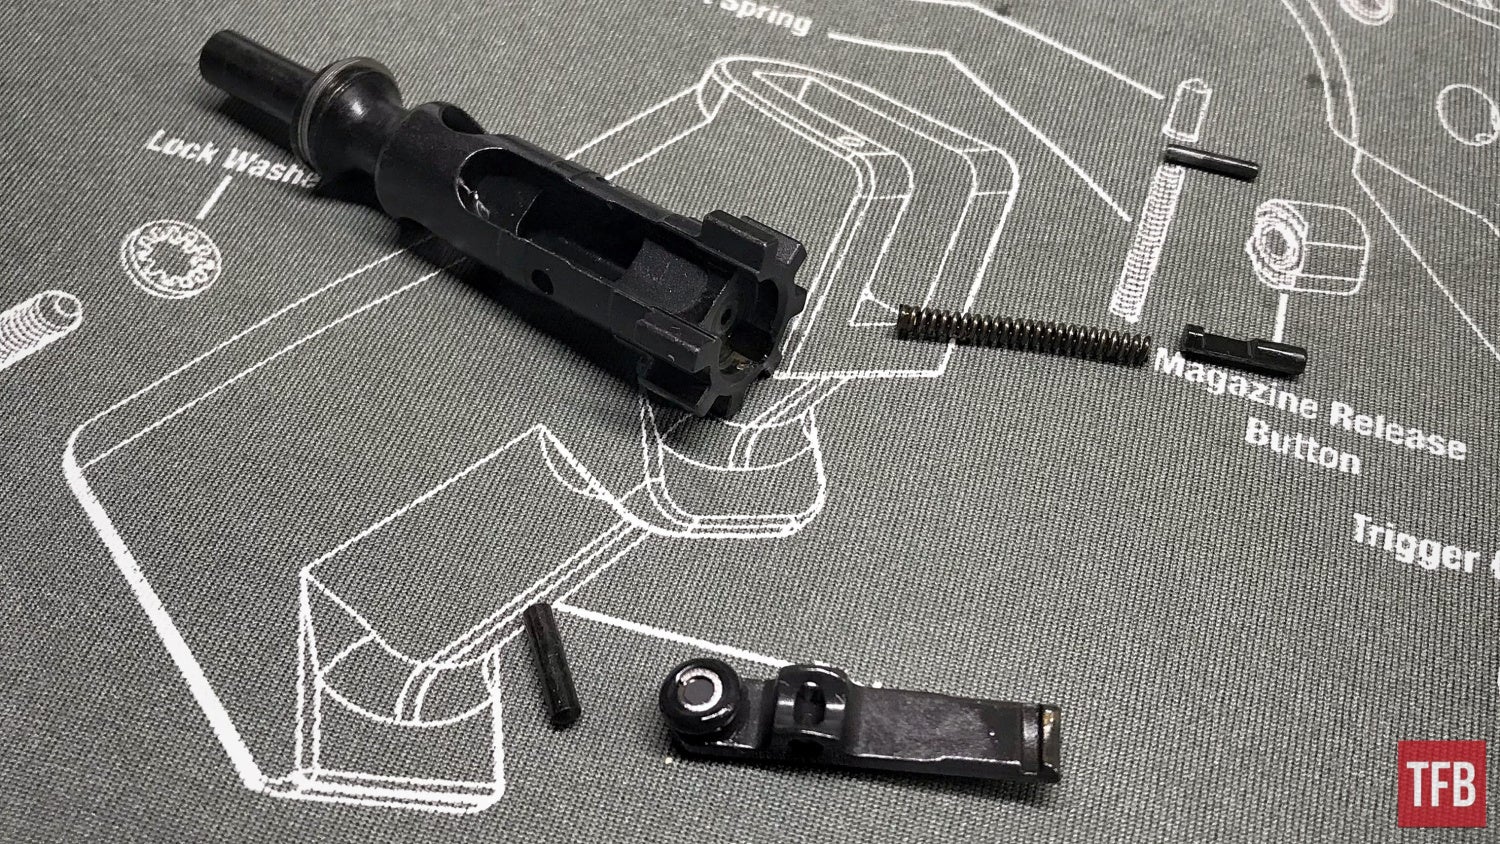
Before we can use the vise jig, we need to remove the extractor from the bolt. This can be done over a bench block or using the jig just to go for the extractor. Punch out the pin using a 3/32 punch.
Be aware that the extractor is under spring pressure. This may cause your punch to become captive until pulled out.
Be sure to cup your hand over the extractor or hold it in such a way that the extractor faces the bench. Pulling out the punch will release the extractor, extractor spring, spring insert and O-ring.
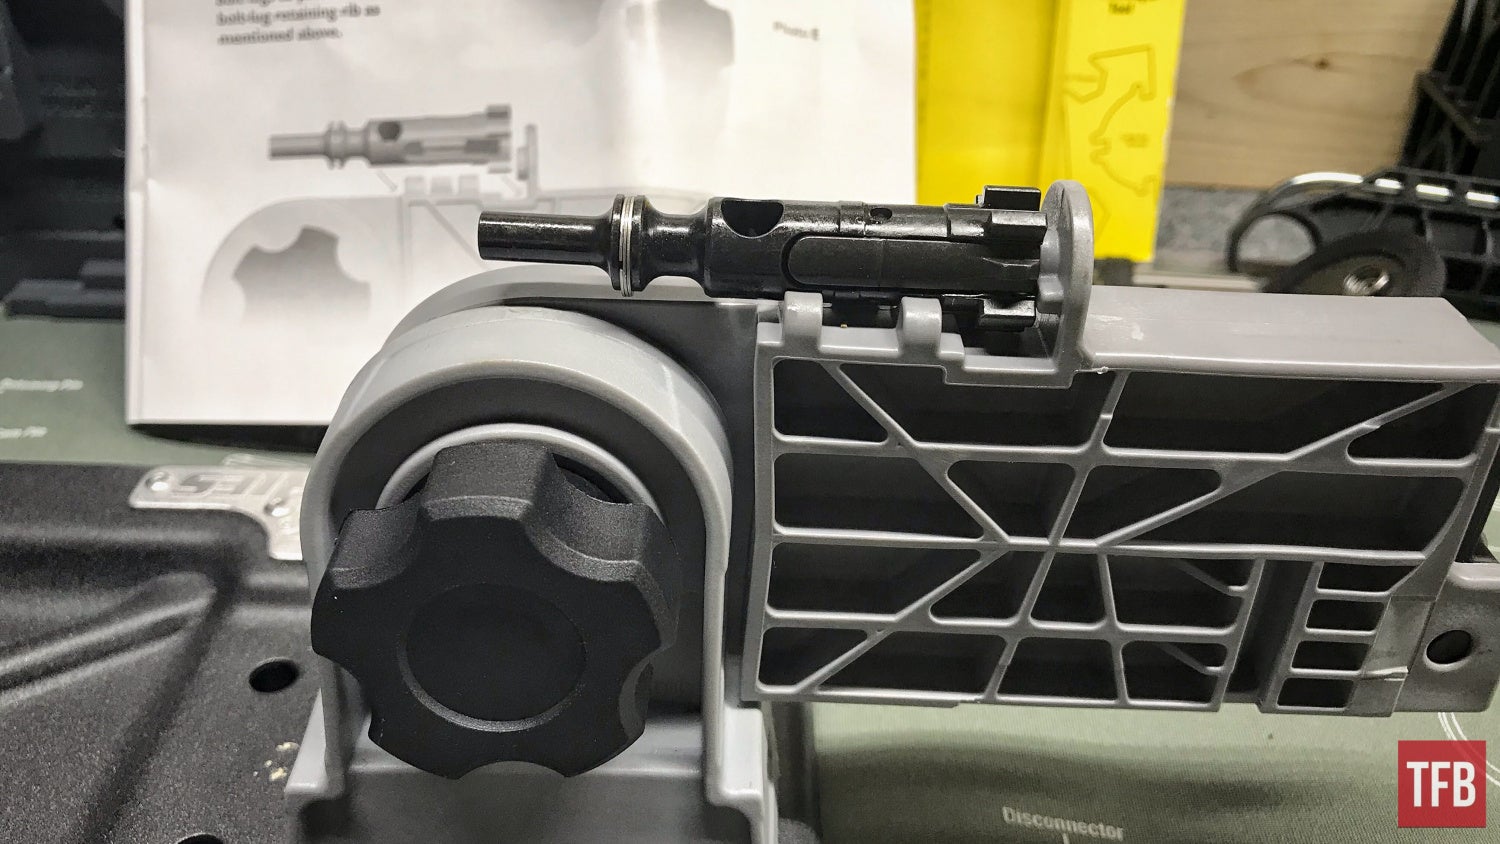
Step Ten: Complete AR15 Disassembly – Bolt Carrier Group
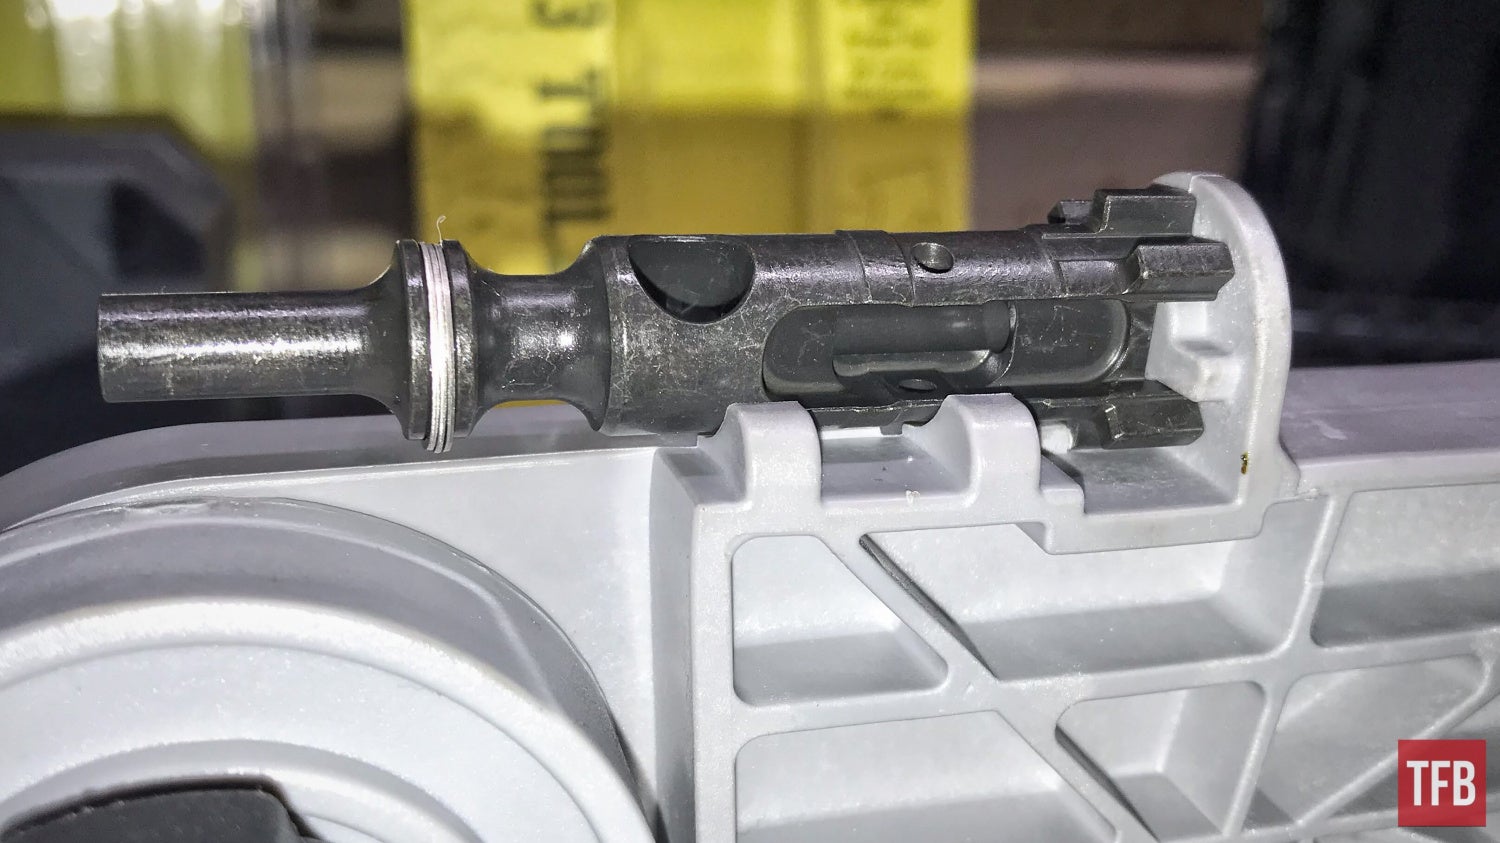
As previously mentioned this is made extremely easy with this jig. Removing the ejector is not terribly difficult without this jig. The biggest factor is having some sort of work holding device or bench block. The ejector is under spring tension and is held in from going anywhere by a pin. That pin resides in a cut-out inside the ejector itself. Think of the ejector shape like an open mouth and in between the ejector’s figurative teeth is where that capturing pin resides. With the extractor removed, the bolt can be placed in the jig like so below.
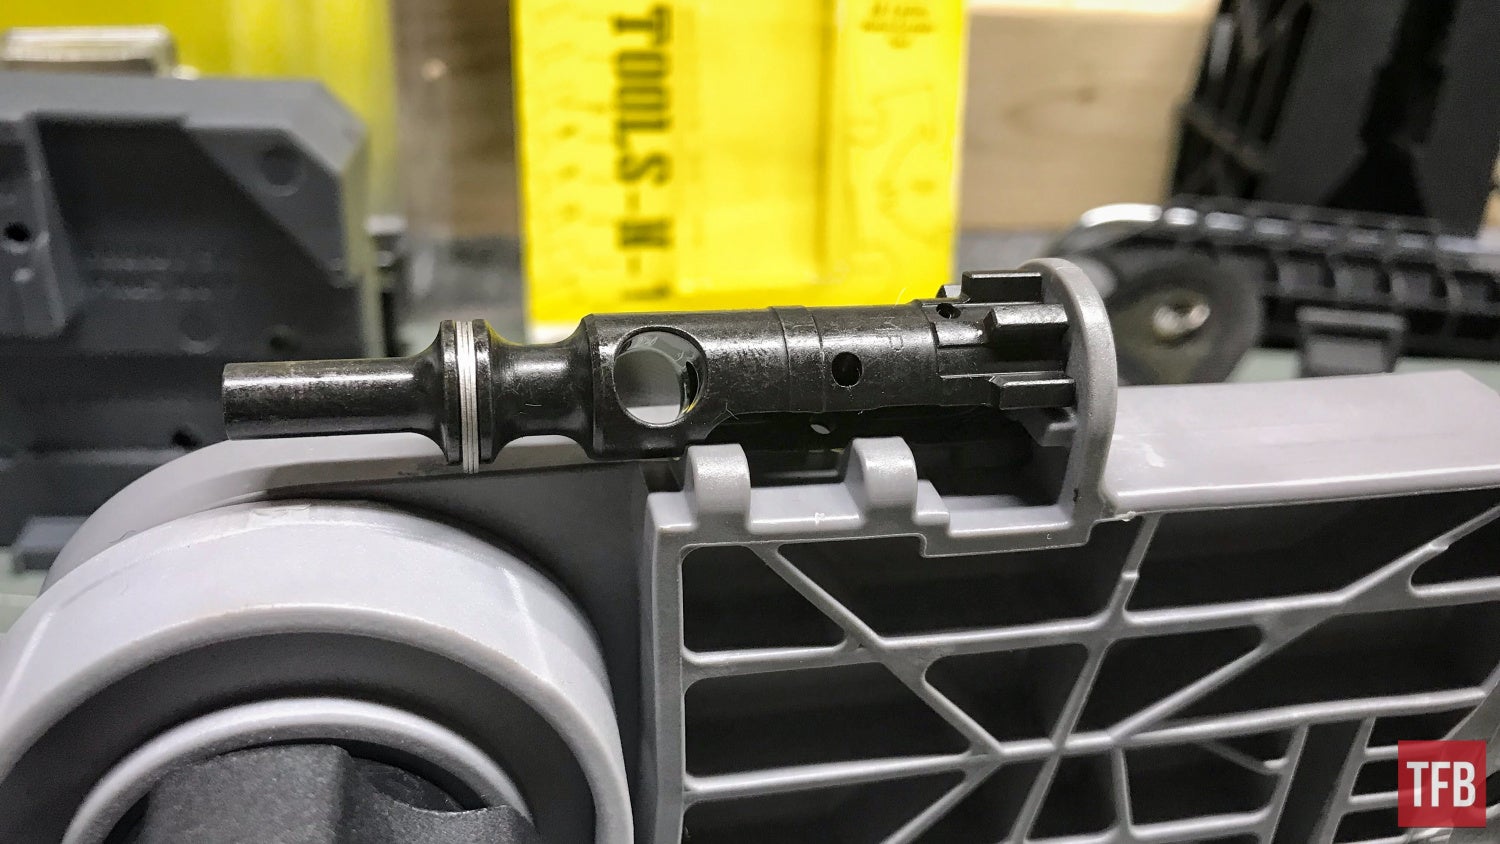
From there the bolt assembly can be twisted counterclockwise and locked into the jig. This places the bolt in a fantastic position in which the ejector pin can be driven downward. Another byproduct of this position in the jig is the ejector is put under slight pressure which in turn takes a small amount of pressure off of the pin waiting to be punched out.
Using a 1/16 punch carefully punch out the ejector pin keeping in mind that we are working with parts under spring tension and that tension may capture the punch.
Remove the punch from the bolt assembly. If you are not using a jig like the one above make sure to put a rag around the bolt face in order to capture the ejector and spring. With the jig simply rotate it clockwise in the jig to release some of the spring tension and then slowly back the face of the bolt away from the jig.
Remove the ejector from the bolt face. Sometimes the ejector spring will stay in its recces. It can be grasped or a small punch can be inserted to pull it out.
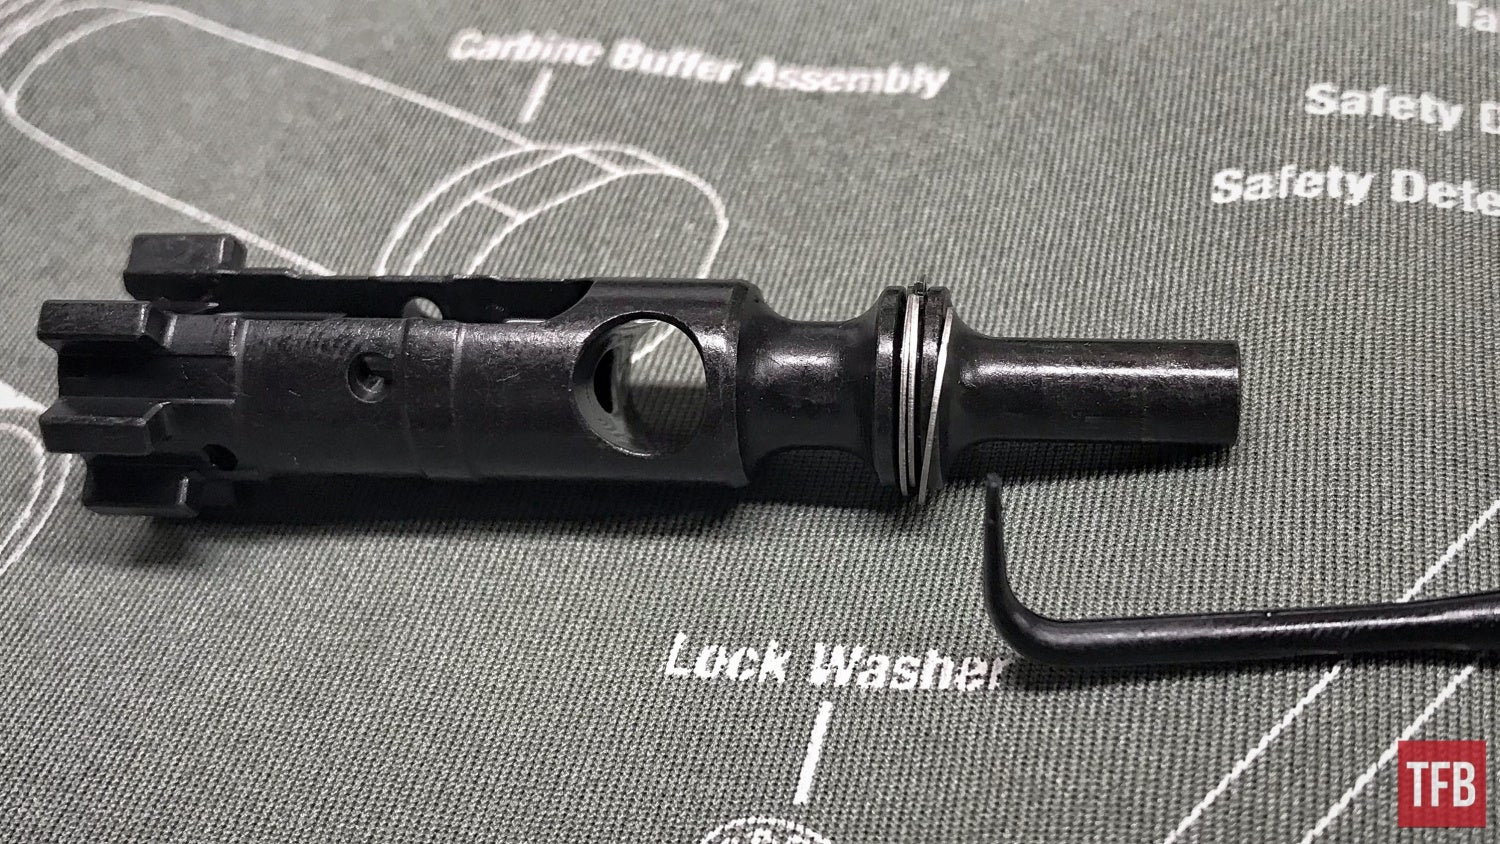
Step Eleven: Complete AR15 Disassembly – Bolt Carrier Group
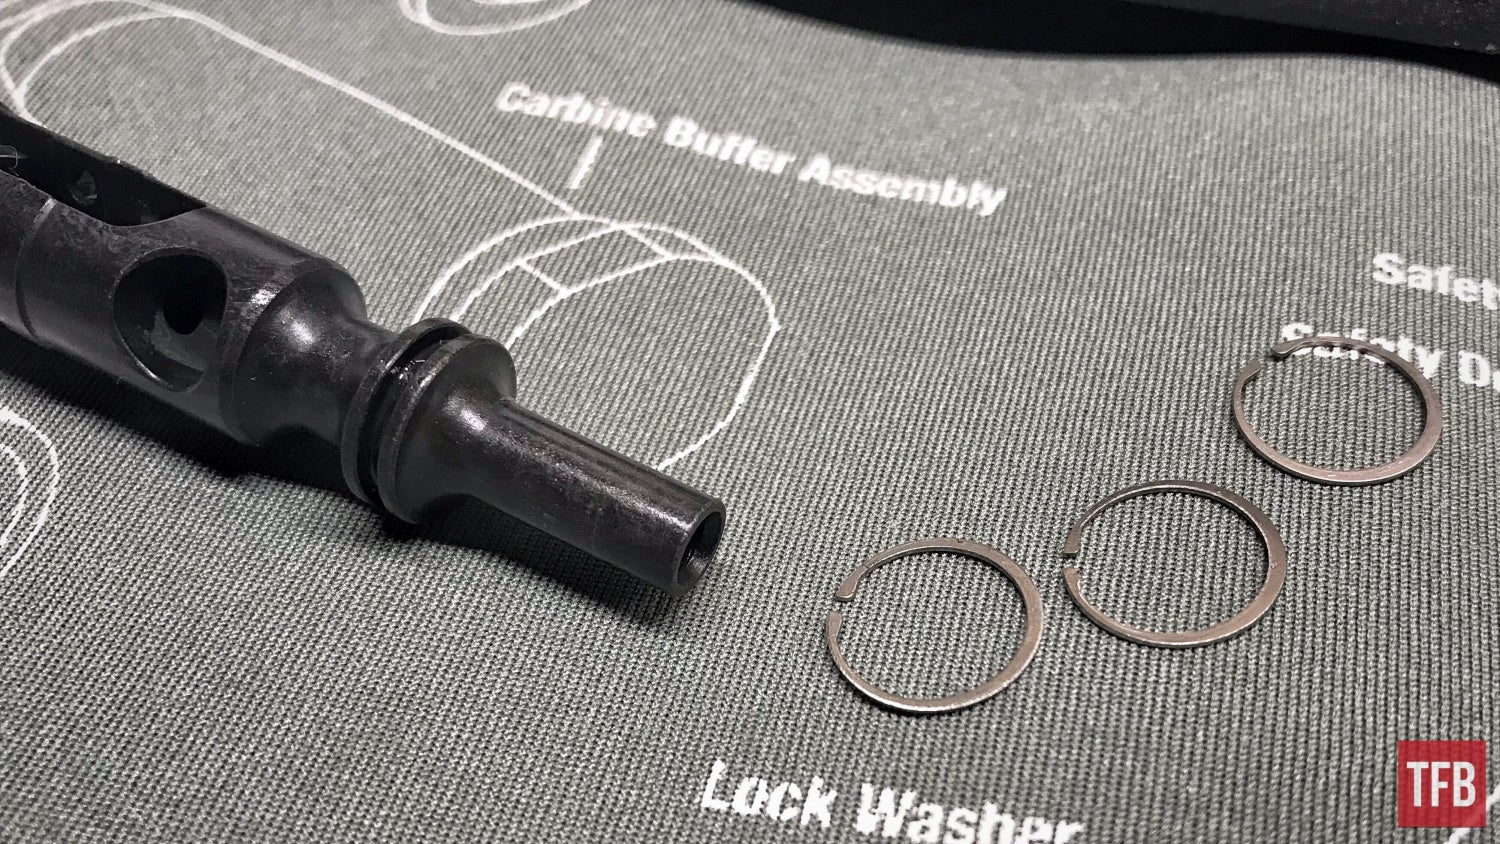
There are three gas rings located on the rear of the bolt assembly. These are entirely optional and do not need to be replaced super often unless you are avidly shooting your AR15 and have noticed changes in your bolt carrier group’s performance. I do not recommend that they are removed just for the fun of it since they can be damaged.
They do not have any sort of correct alignment and rotate freely in their slot. They are spring-like but CAN BE BENT so be careful if they are being removed for routine non-replacement-related maintenance.
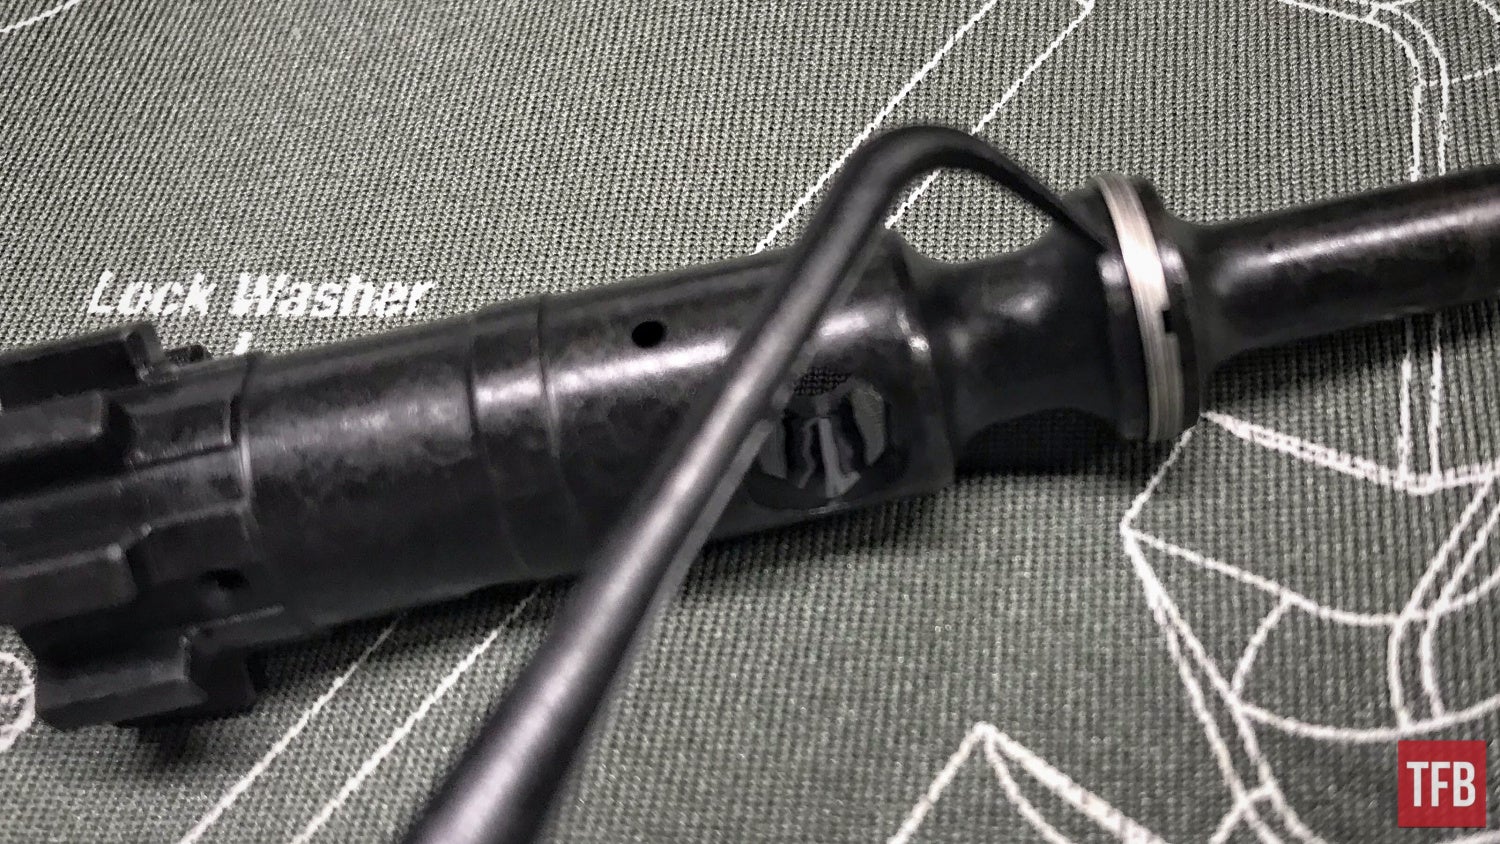
It is easiest to grab one of these rings using a pick of some sort. Sneak the pick in through an open slot in the rearmost ring. Rotate the pick and pivot in such a way that you are able to lift the ring and push it towards the rear.
Repeat the last process until all three rings are removed and set them aside in a safe spot if they are to be reused.
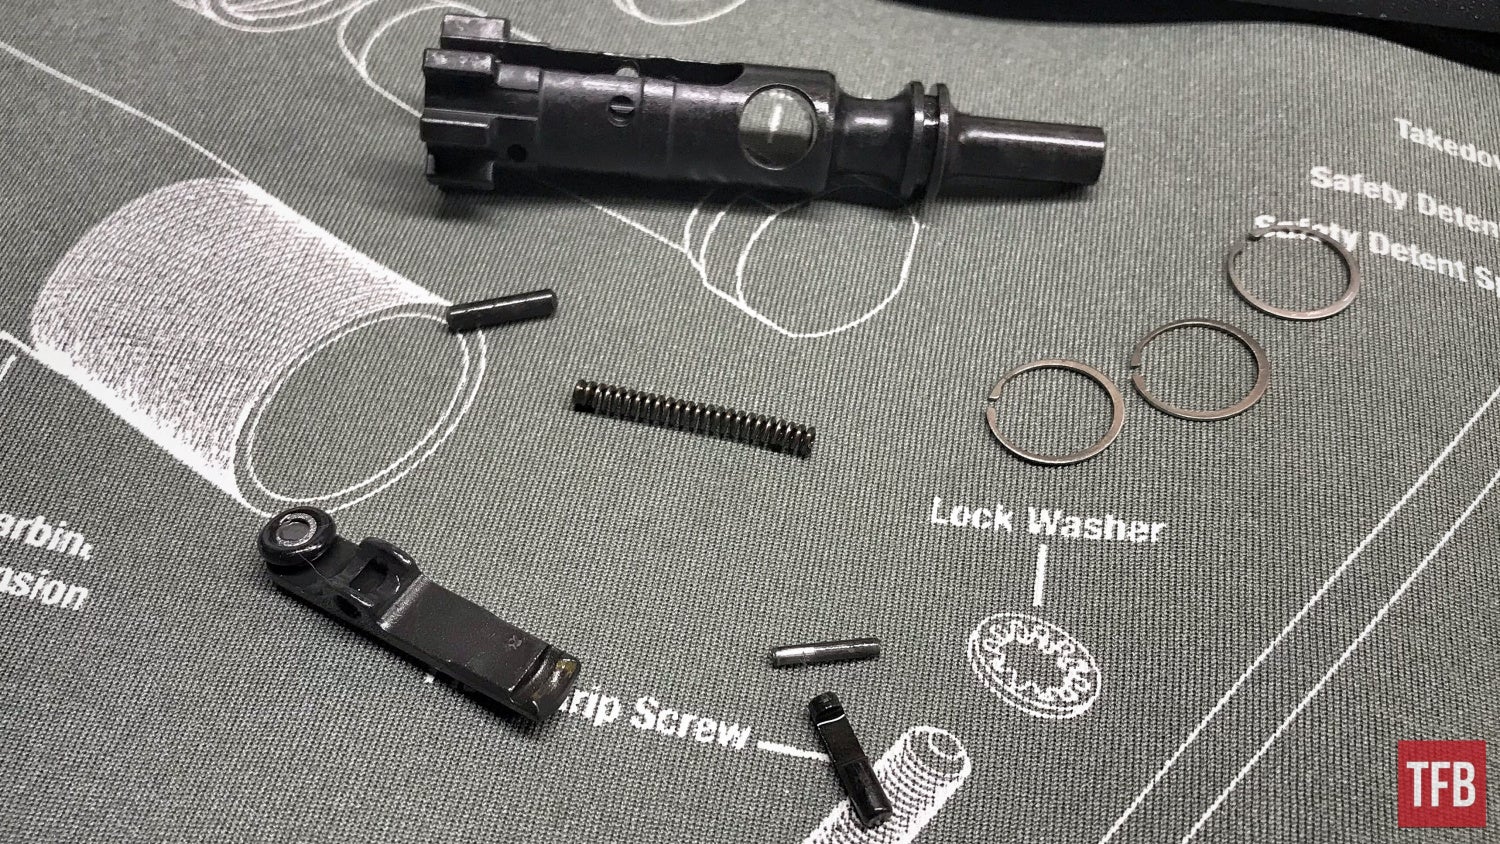
End of The Bolt Carrier Group – Complete AR15 Disassembly
There we have the bolt carrier group taken apart. Do not worry! At some point, we will go over the assembly of everything that has been taken apart so far. If anyone has their own tips and tricks or recommendations for anyone out there that needs a hand with their BCG, feel free to talk amongst each other in the comments. Maybe at some point, we can do a separate tips and tricks article! Keep in mind that some folks may be new to this sort of thing and be considerate of any questions they may have. Thanks for tagging along so far and see you next time!
As always, thank you for reading TFB! Be safe out there, have fun while shooting, and we will see you next time for the TFB Armorer’s Bench brought to you by Wheeler, Tipton, Caldwell, and Frankford Arsenal! Also, let us know what you think in the comments below! We always appreciate your feedback.

Pro Range Glasses, Clear

The Caldwell® Pro Range Glasses feature a stylish wrap-around design and are a great choice for all shooters. They feature an adjustable nose piece and temples for all day comfort. The scratch resistant lens meets ANSI Z87.1 standards and offers 99.9% UV protection.
AR Armorer’s Bench Block

Tired of trying to secure your AR parts while installing a pin, detent or spring? The AR-15 Bench Block is the answer! Specifically designed for AR-15 assembly and disassembly, the AR-15 Bench Block is the perfect tool. It securely holds the upper receiver, lower receiver, front sight and charging handle during assembly, disassembly and maintenance.
Delta Series Mag Well Vise Block

The Delta Series AR-15 Mag Well Vise Block is quite possibly the handiest tool an AR-15 owner could ask for. Designed for use with the Tipton® Best Gun Vise™, this center support slides into the magazine well and provides a steady base for cleaning or light gunsmithing on your AR-15, in either breech or closed position. Users without a Best Gun Vise can mount the Mag Well Vise Block directly to their bench top with the included fasteners. Loaded with handy features, this tool is a must have for anyone with an AR-15. The innovative bolt service station locks bolt in for servicing extractor pin, and the center section rotates 180° (in 7° increments) and locks into place at desired location by using the magazine lock on your receiver. A built-in hammer stop prevents damage to lower receivers, and the solvent-resistant polymer construction provides durability and is non-marring to firearms surfaces. The mag well arm is removable for clamping in a bench vise when additional rigidity is required.
Hammer and Punch Set, Plastic Case

The Wheeler® Hammer and Punch Set includes a polymer/brass combination hammer, eight precision brass punches, four steel punches and two plastic punches. It comes in a handy molded case. It makes for a great tool for driving pins or drifting sights at the shooting range, or on your gunsmithing bench.
Wheeler AR Armorer’s Ultra Kit

Ultra Kit includes: AR-15 AR Armorer’s Vise, AR-15 Combo Tool, Torque Wrench, AR-15 Armorer’s Bench Block, AR-15 Roll Pin Installation Tool Kit, Upper Vise Block Clamp with Gas Tube Alignment Tool, Maintenance Mat with Exploded AR-15 Diagram, Pivot Pin & Roll Pin Installation Tool, AR Front Sight Tool, Delta Ring Tool, Strap Wrench, AR-15 Bore Guide, AR-15 Adjustable Receiver Link, .22 Cal Bore Brush, Bolt Carrier Brush, Chamber Brush, Magazine/Upper Receiver Brush, Nylon Brush Handle, Double-ended General Cleaning Brush, Cleaning Pick Set, and Custom Fitted Carrying Case.