Your Privacy Choices
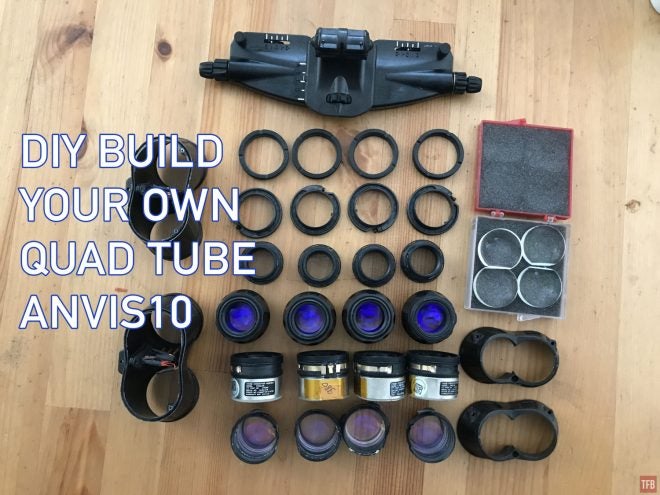
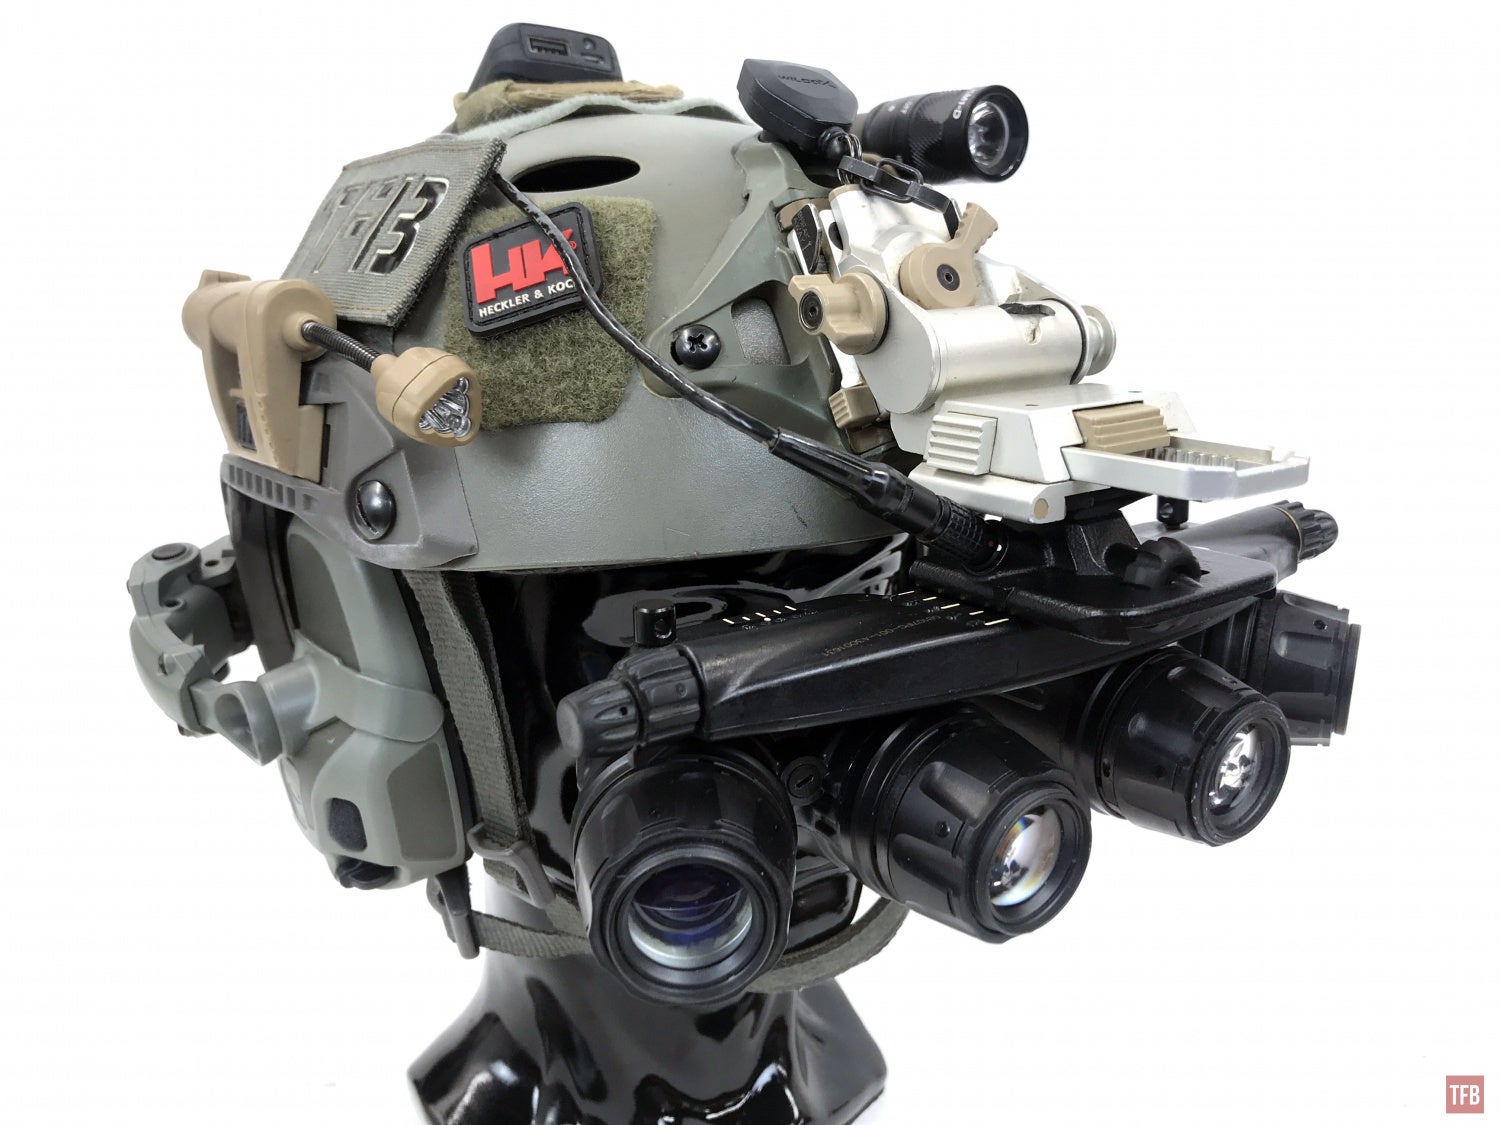
It is Friday night and you know what that means. Friday Night Lights is brought to you by ATN Corp, manufacturers of night vision and thermal optics like the THOR LT. As with all of our sponsored series, Friday Night Lights will continue to bring you unbiased news and reviews from a variety of companies. Today we boldly go where no one has gone before. We build our own quadtube ANVIS10.
Quadtubes @TFB:
- FRIDAY NIGHT LIGHTS: A Peek Through ANVIS10 PNVG (Panoramic Night Vision Goggles)
- Friday Night Lights: Ground Panoramic Night Vision Goggles (GPNVG)
- Friday Night Lights: QTNVG – Panos For The Masses
- Open Source BPNVG (Bootleg Panoramic NVG) with TFB Reader Stubbs
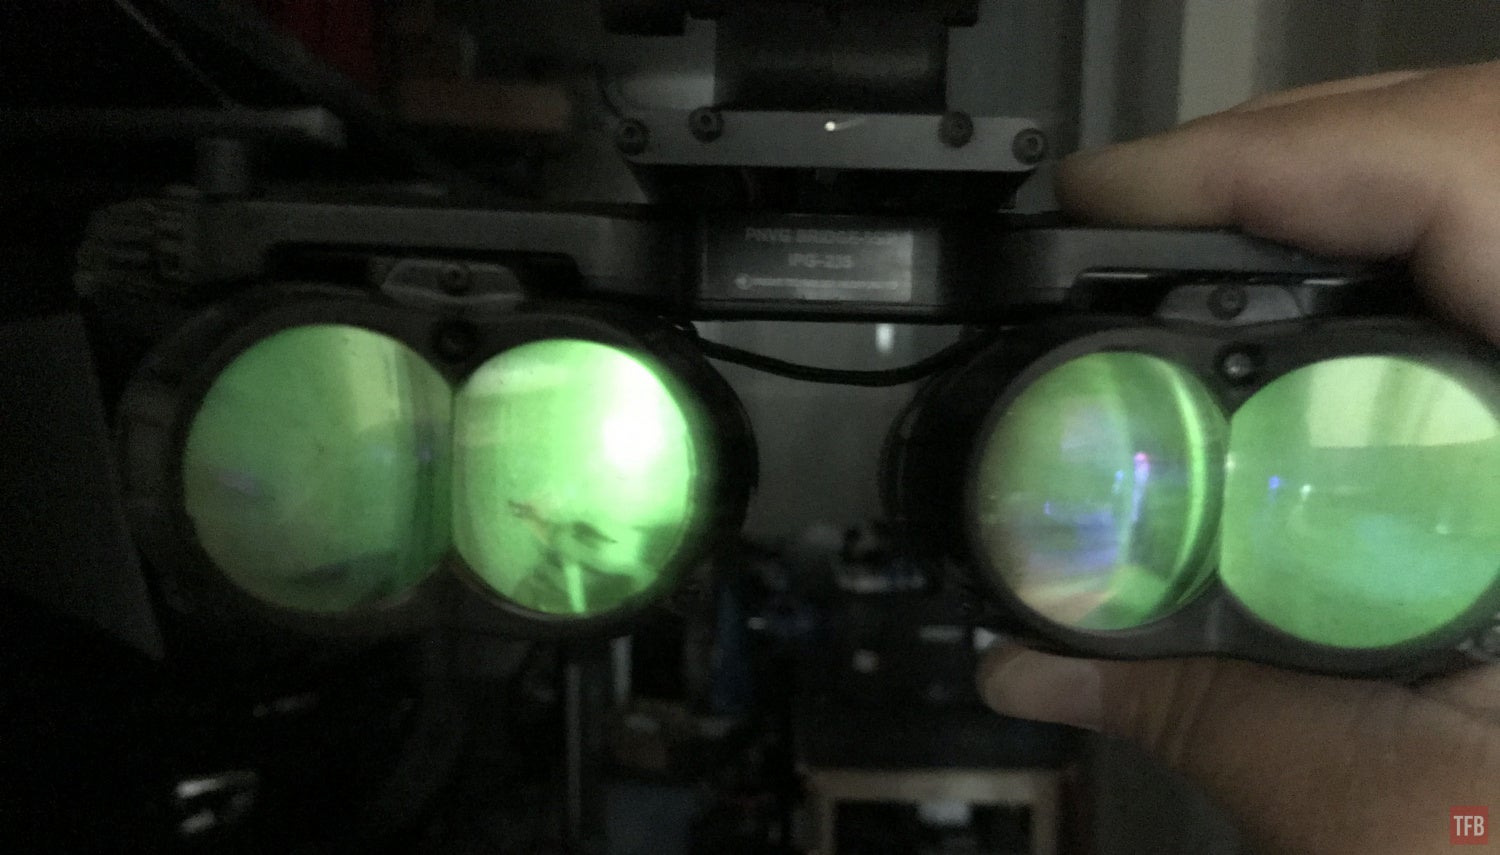
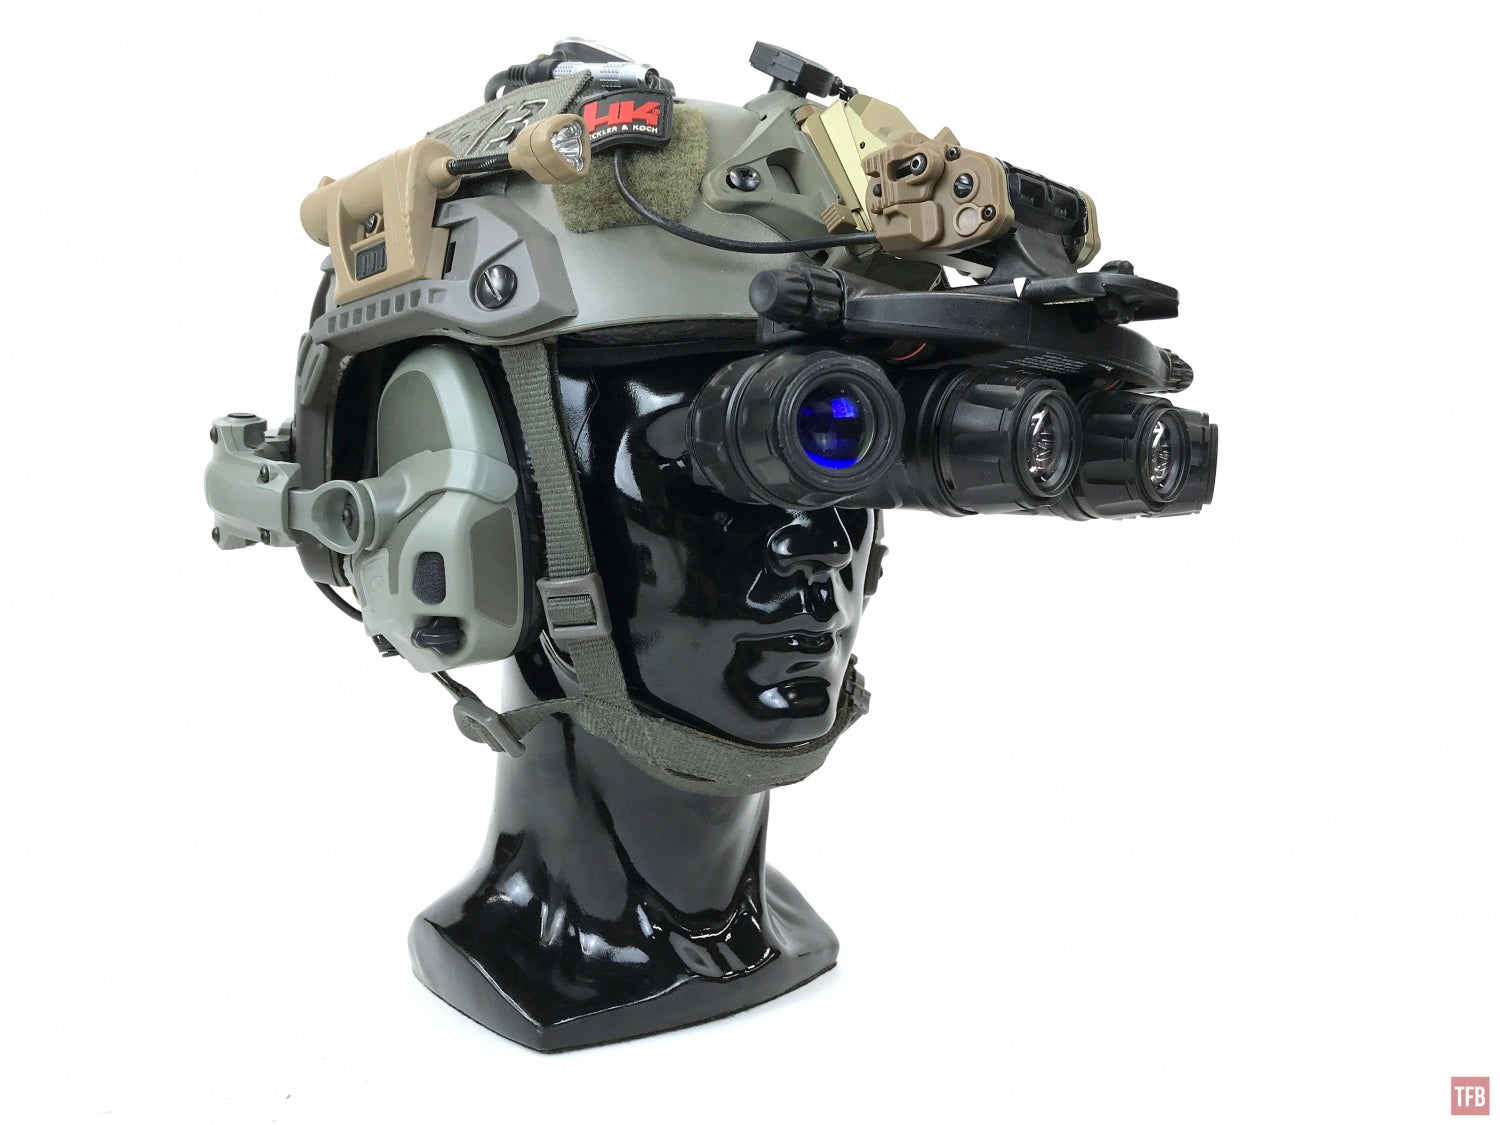
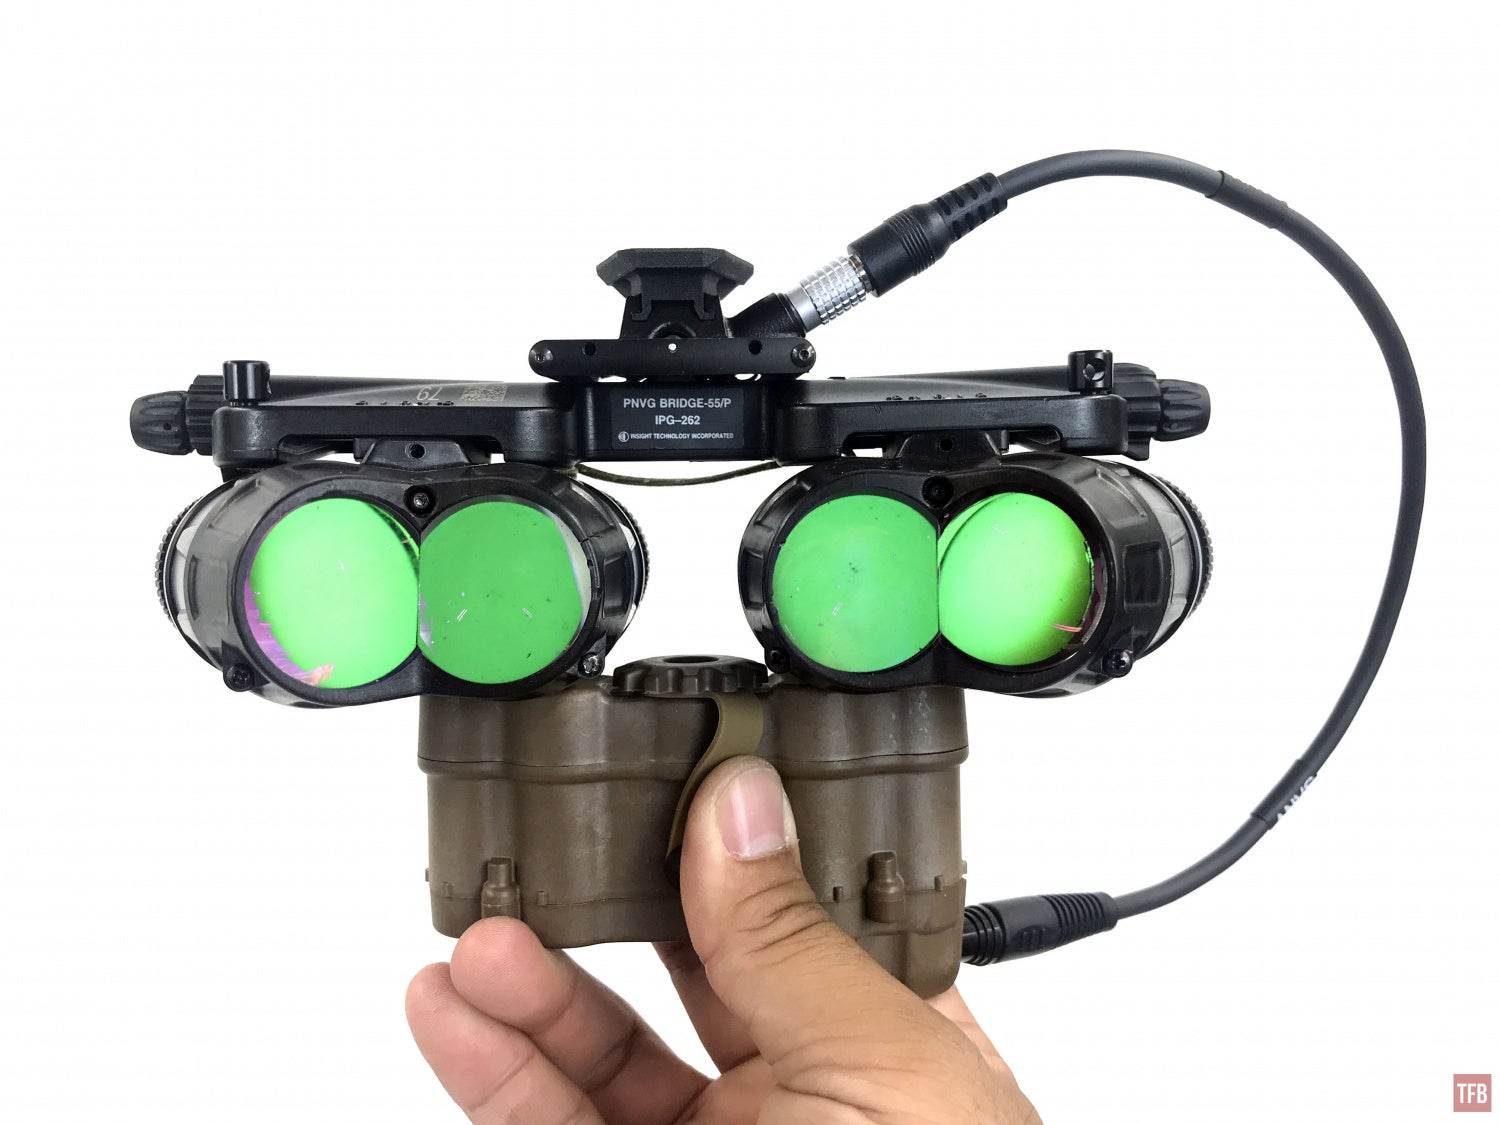
PNVG (Panoramic Night Vision Goggle) aka ANVIS10
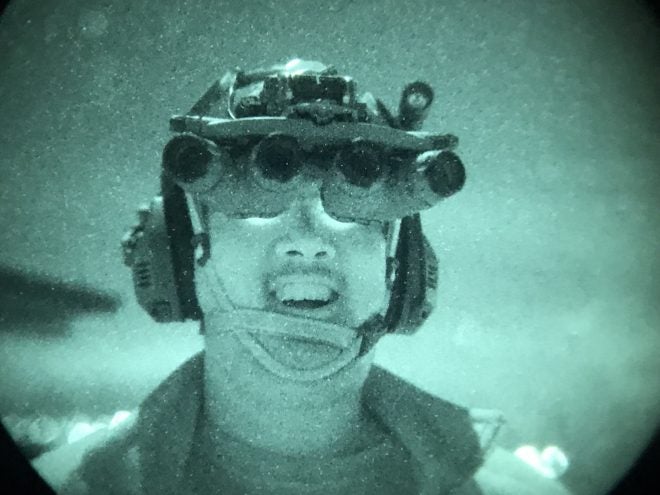
I have been memed since this glorious moment.
Just a little over two years ago, I got a chance to check out my friend JW’s quad tube set of PNVG AN/AVS-10 also known as ANVIS10. They were my first intro into quadtube night vision and while it was brief, the memories were forever engraved in my mind. This led me to get the QTNVG housing to affordably possess quadtube night vision. Well, recently an opportunity arose to get my very own set of ANVIS10. Only it was a D.I.Y. build kit sold on ARFCOM.
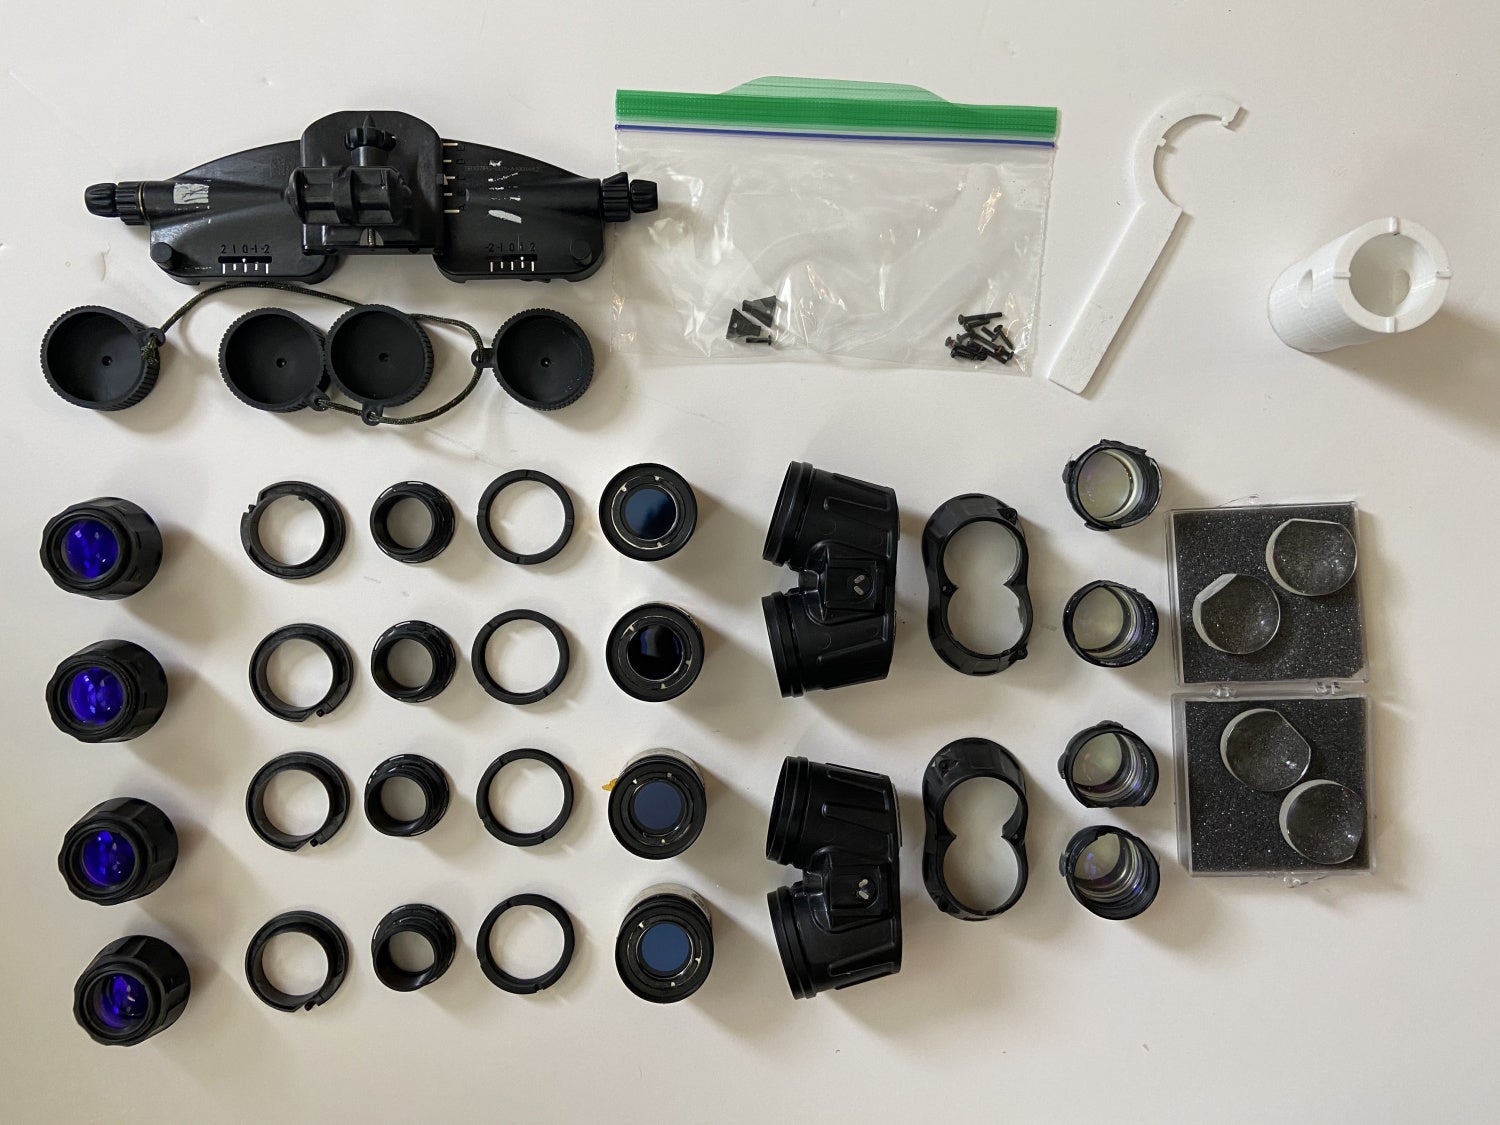
Photo by USMCTOPGUN
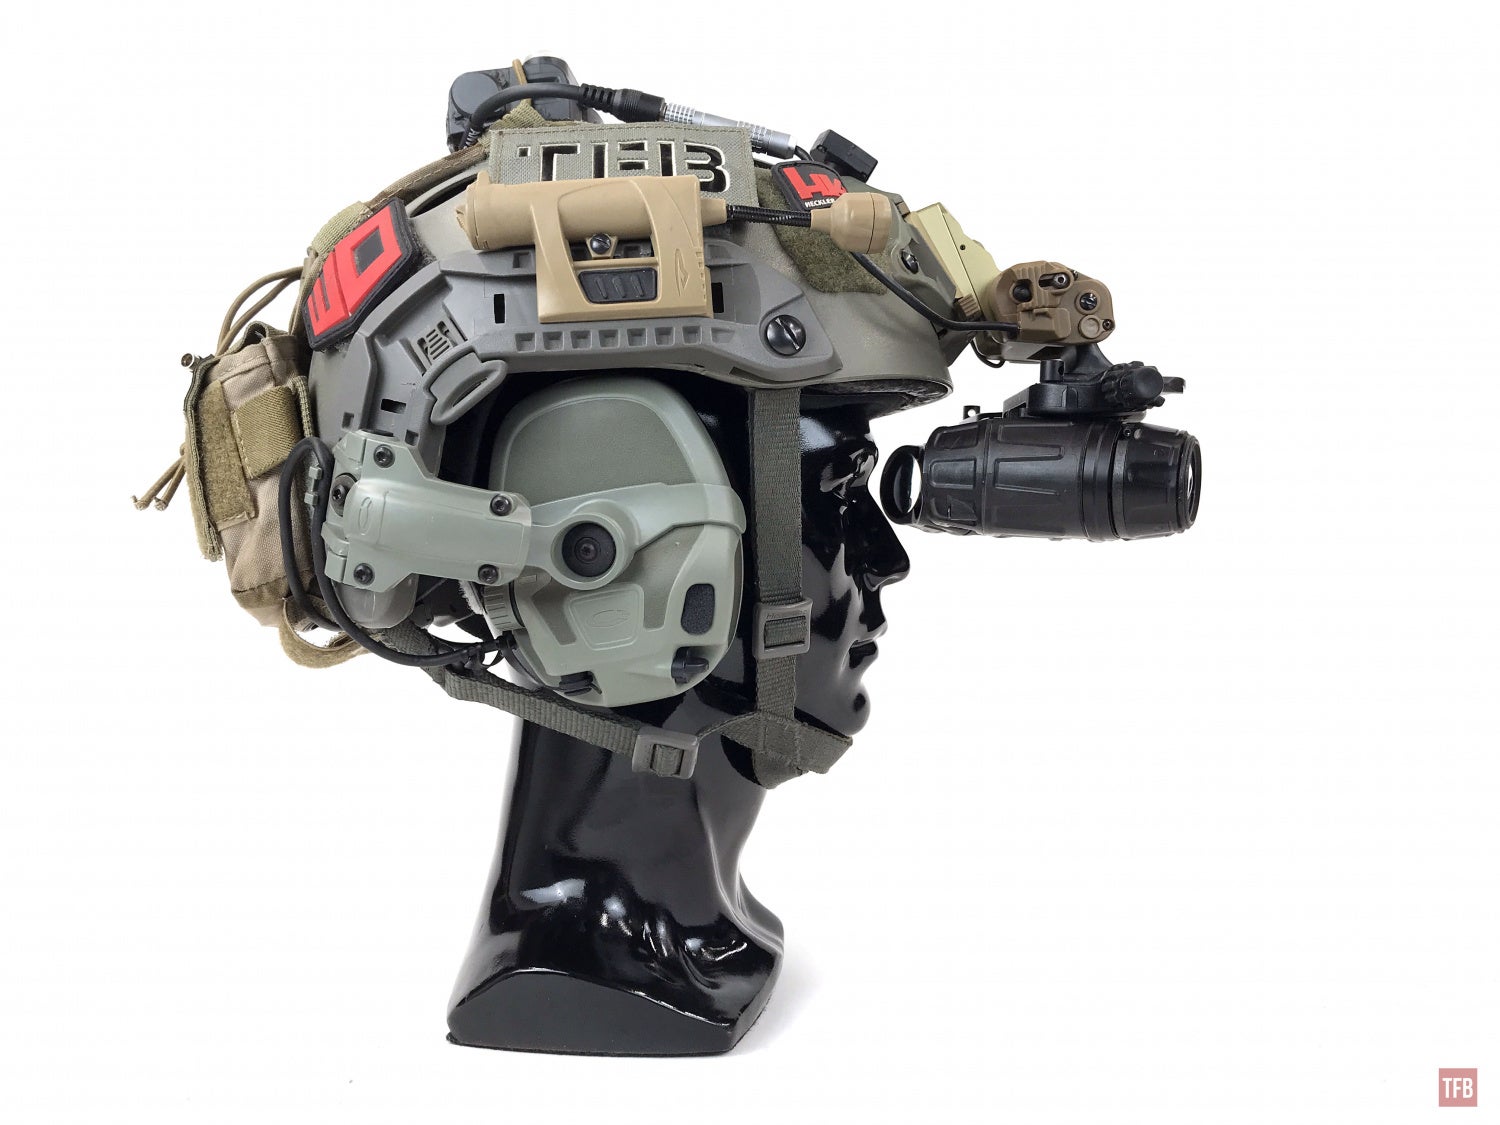
Building A Quadtube ANVIS10
First, let us get something out of the way. Building your own quadtube is not that much of a money saver. The QTNVG housing is $4k. Add four tubes and it gets pretty spendy. You can save some money by buying used tubes especially if you don’t care about the specs matching. But ANVIS10s are not cheap. This D.I.Y. build kit cost me $9k. Buying an already assembled ANVIS10 can be around $12k-$15k. The problem with trying to “build” your own ANVIS10 is it is not like a PVS-14. You cannot source spare parts. They just aren’t there and everything including the intensifier tubes is 100% proprietary.
So why did I buy it? I wanted to demystify the ANVIS10 and discover what it takes to assemble one. With the QTNVG, the “build” is rather simplistic: remove objective lenses, pop in the tubes secure them and reinstall the lenses. Collimation is a bit trickier but that isn’t real “building”. I thought this D.I.Y. kit looked like a fun challenge. Plus I have not seen or heard of anyone documenting this. If you recall, I wrote an article about building your own PVS-14. While this article will detail how to build an ANVIS10 it is more of an in-depth look at the ANVIS10.

At first glance, the ANVIS10 build looked somewhat straightforward. The only aspect I had some concerns about were the eyepieces. I reached out to ANVIS10 guru Ed Wilcox to pick his brain. Unfortunately, he has never had to assemble the rear eyepieces himself. They come assembled. Luckily, Jay Crymes of Sureshot Nightvision reached out on social media and said he has built a few ANVIS10s so if I had any questions I could reach out to him. I did and will include his advice later in this article.
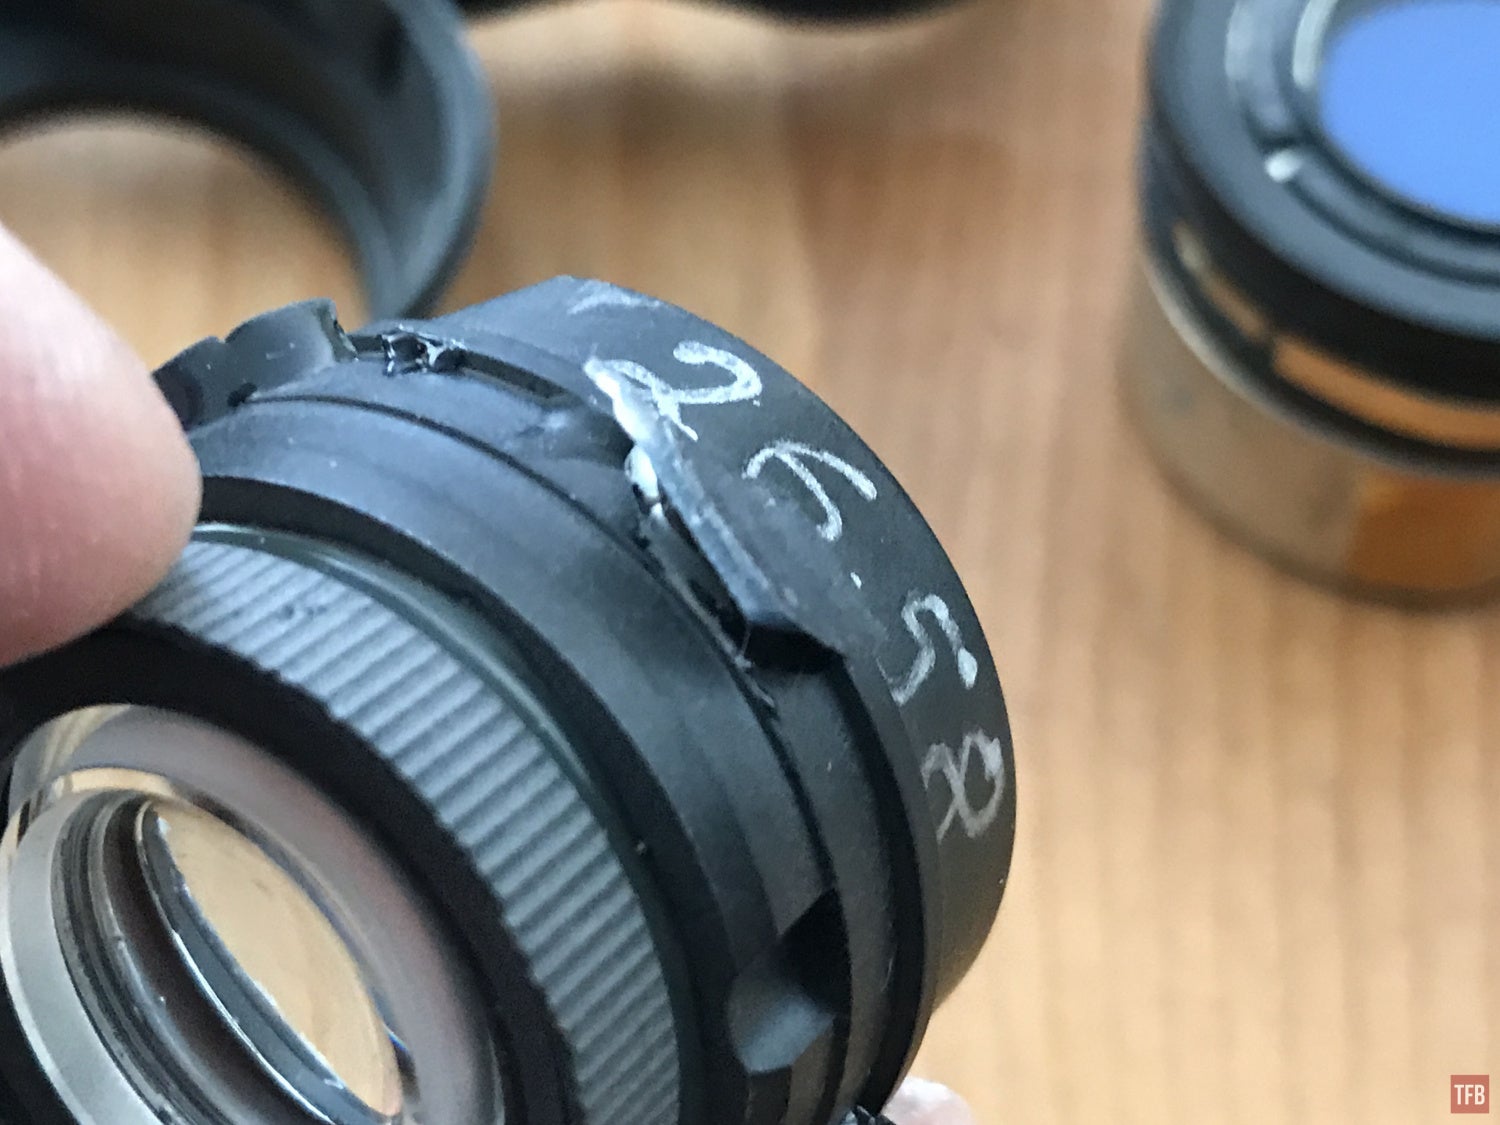
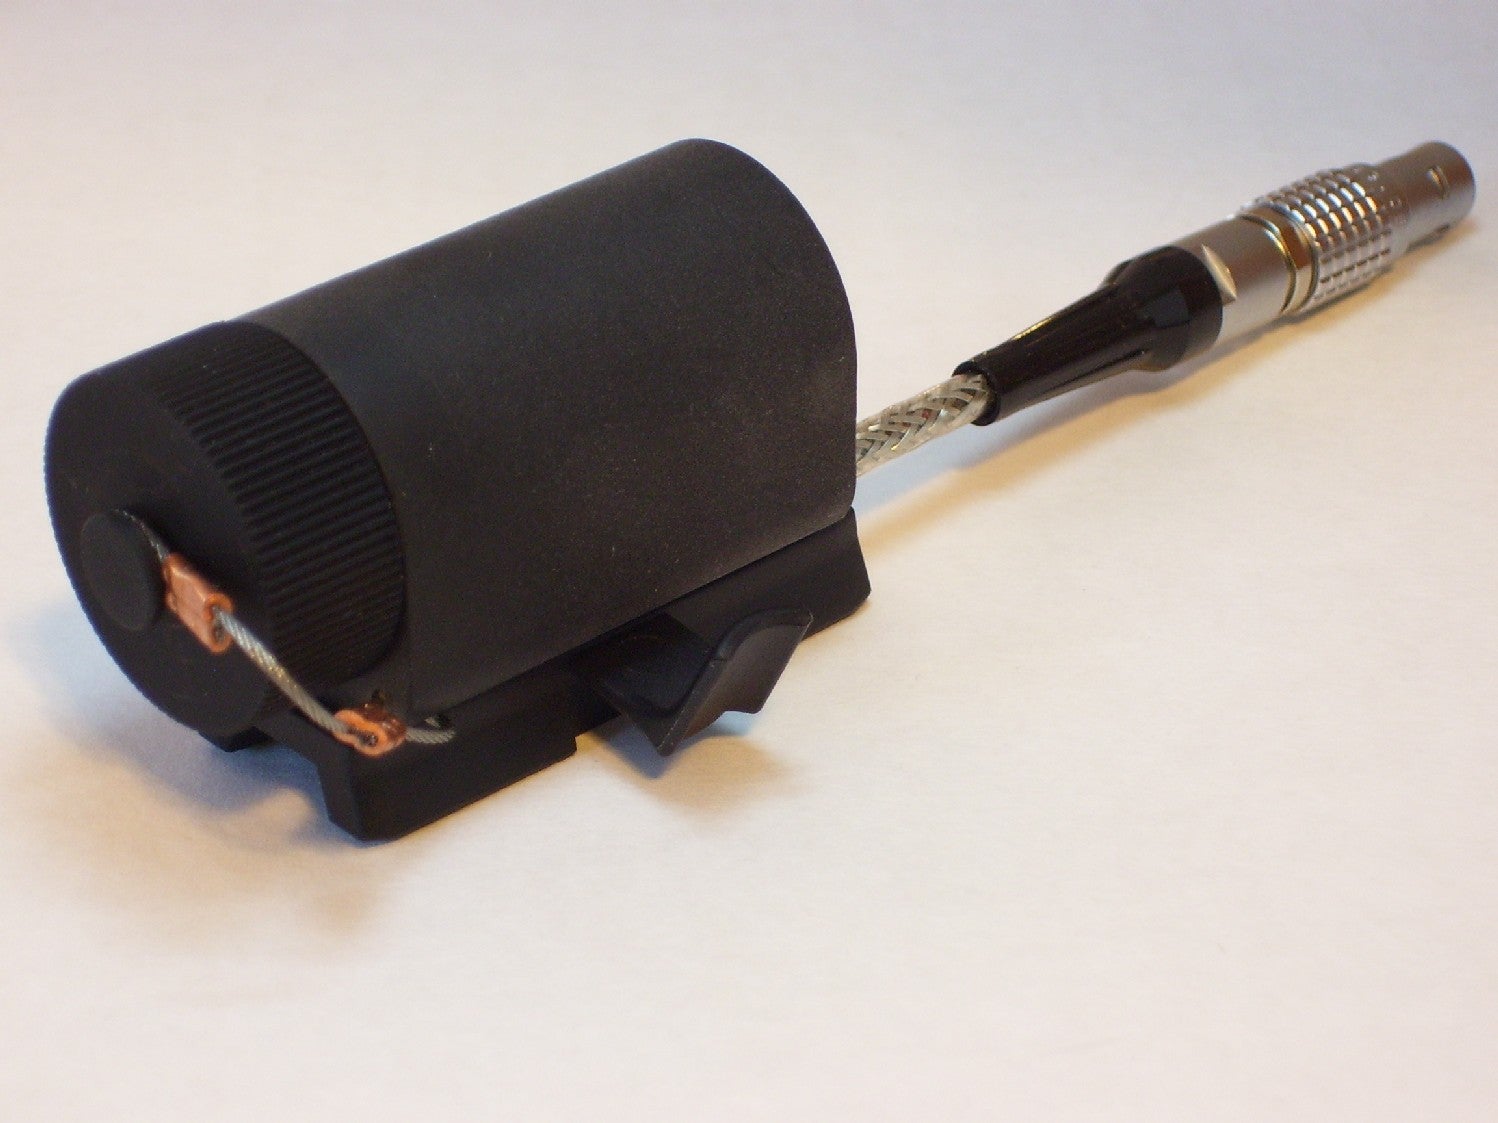
ANVIS10 Objective Lenses
One thing I was interested in was how much the objective lenses weigh. They are lighter than I expected. Regular PVS-14 objectives weigh twice as much and the lighter weight RPO objective lens weighs 1.27 ounces.

Part of the ANVIS10 kit are these polymer rings. One of them looks sort of like a top hat and is threaded inside. This is what the objective lens threads into for focus adjustment. The other ring sits between the lens and the “top hat” and is tightened around the objective lens shaft which then acts as infinity focus and close focus stop. Below is the combined weight of one ANVIS10 objective lens.

You can see the collar on the right objective lens.
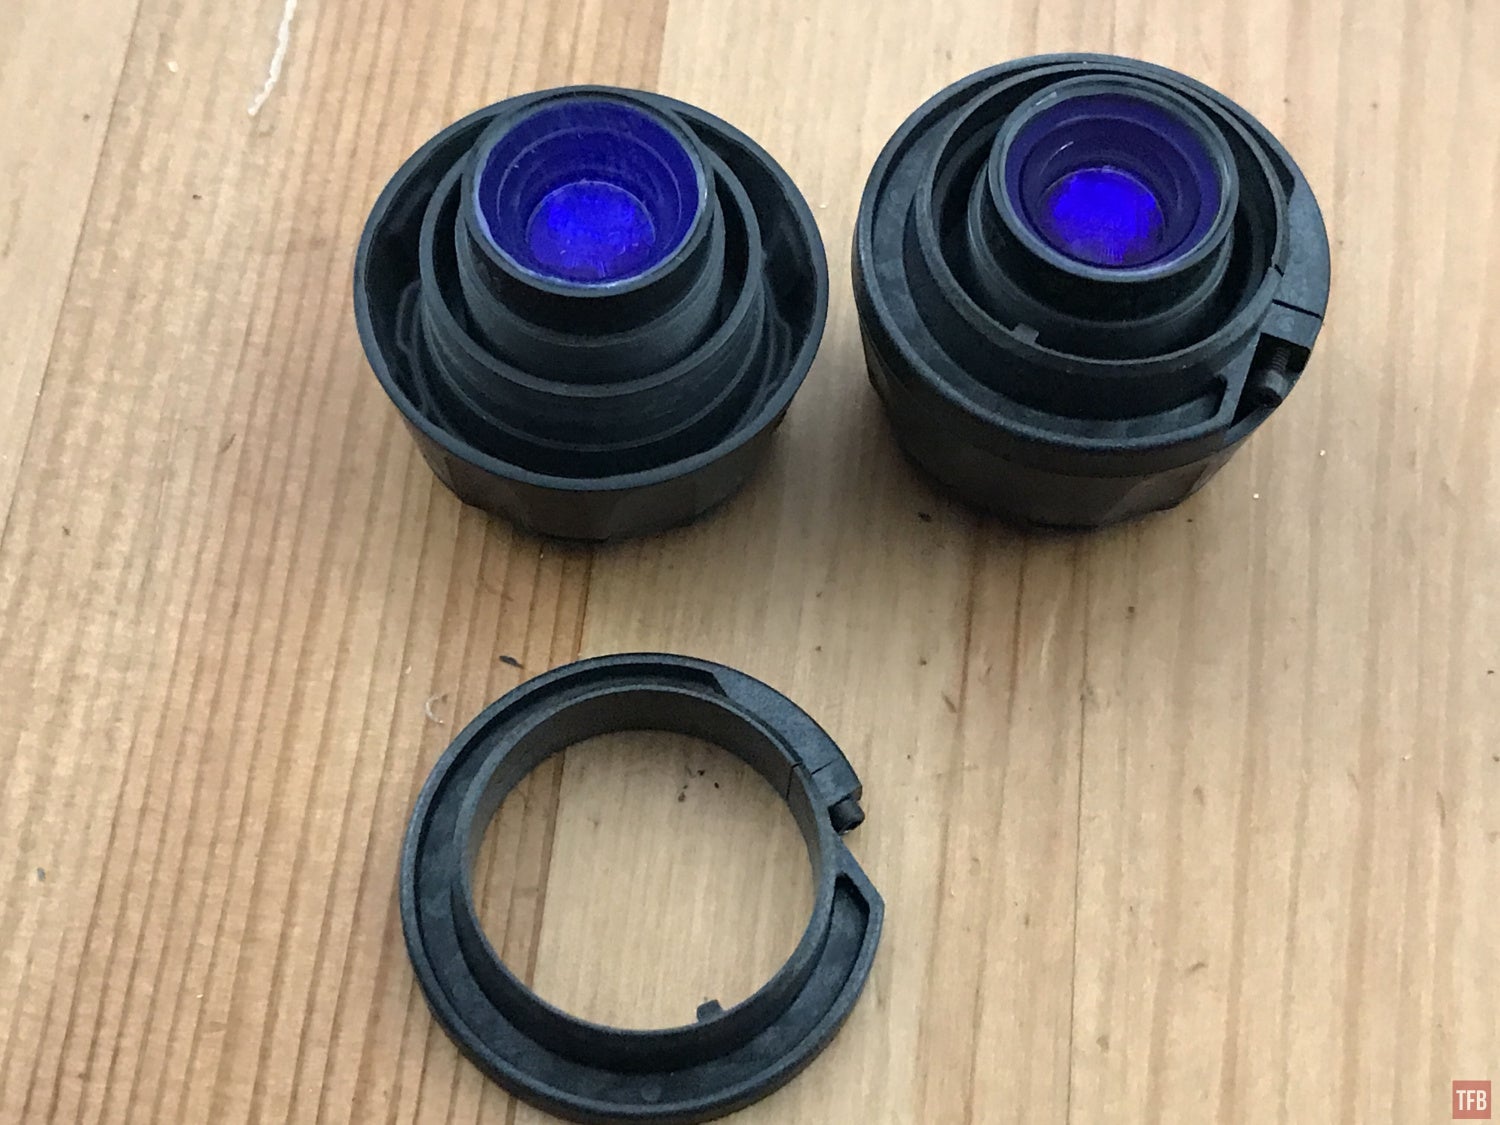
See the square nub on the side? That indexes on a similar bump on the top hat. So when the collar is tightened around the objective lens, it limits its rotation.

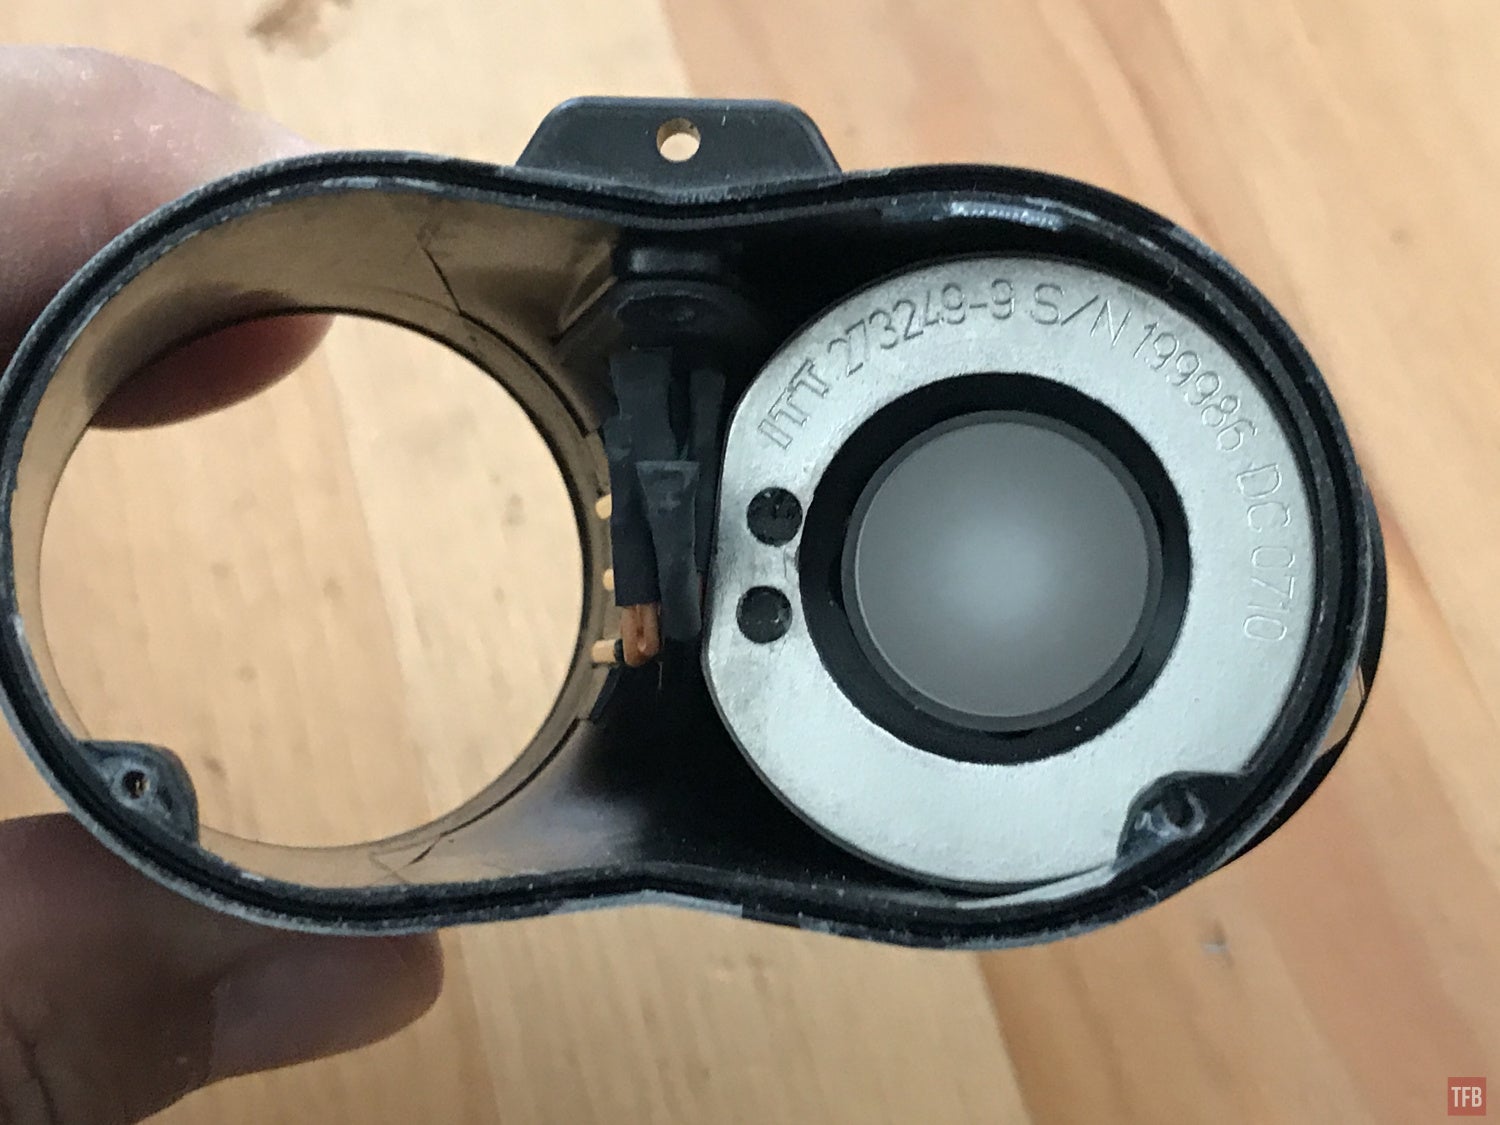
ANVIS10 Image Intensifiers
According to Jay Crymes, the proper way to assemble the ANVIS10 is to insert the tubes into the housing as deep as possible. As mentioned before, the image intensifier tubes of the ANVIS10s are proprietary.
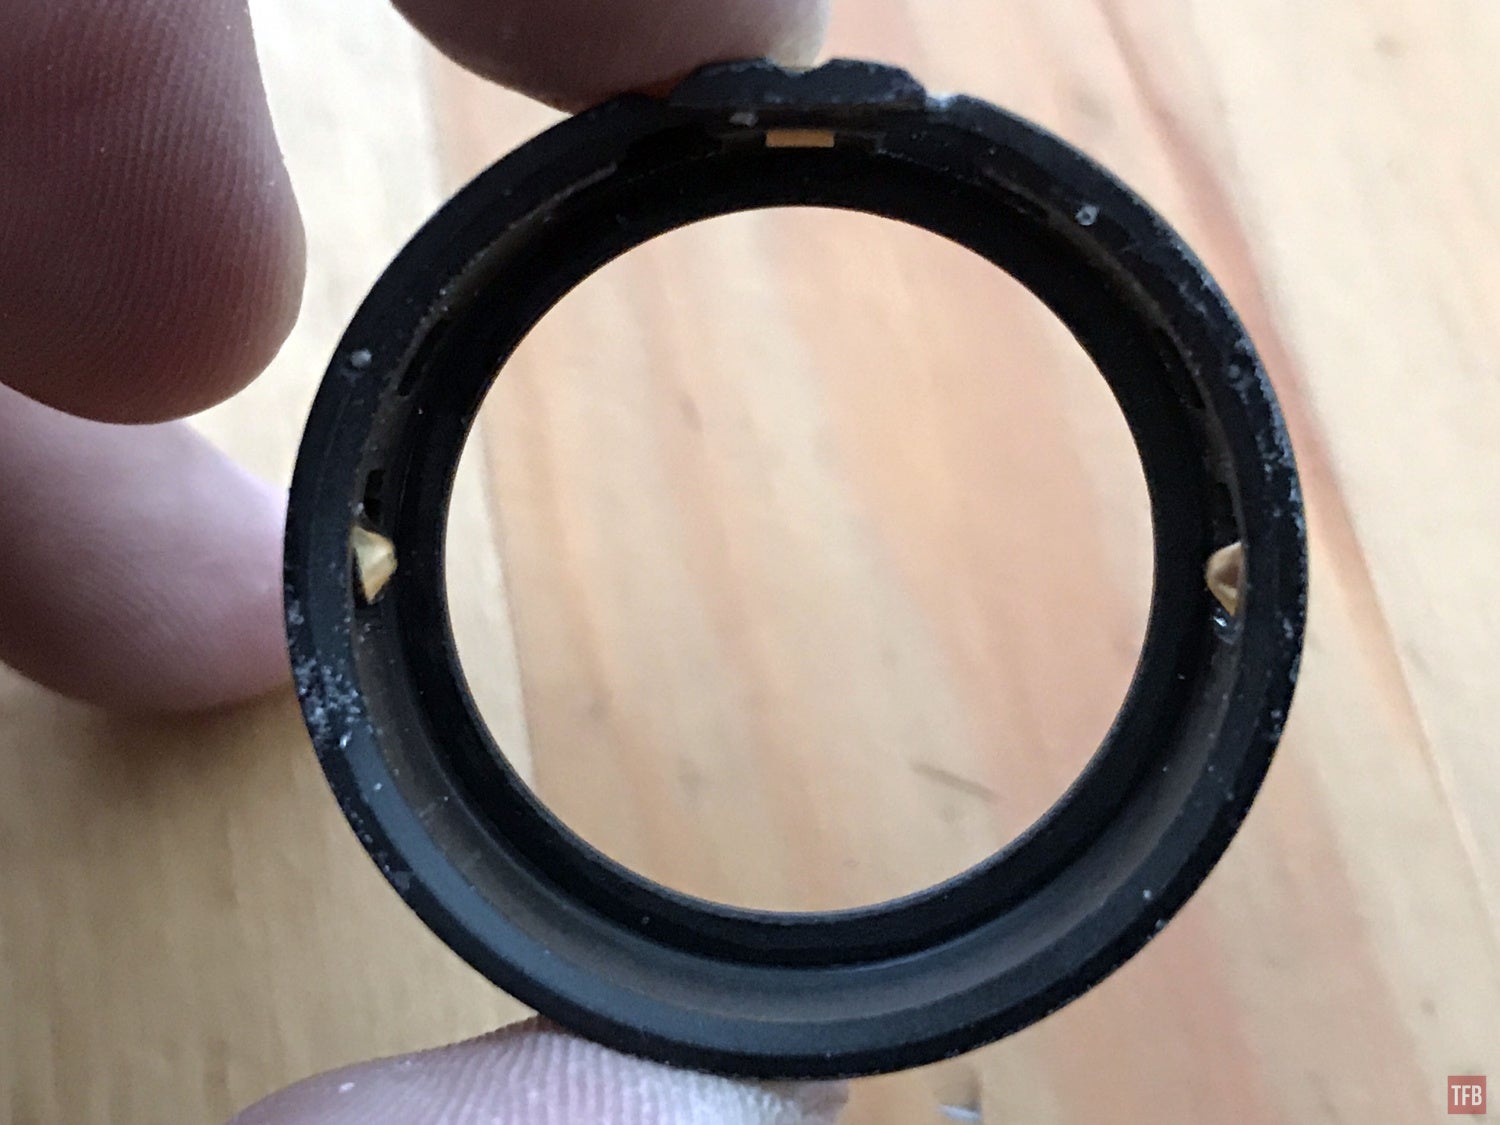
The tubes have a black jacket with three contact points.

Yes, it says “intensifier ass.”
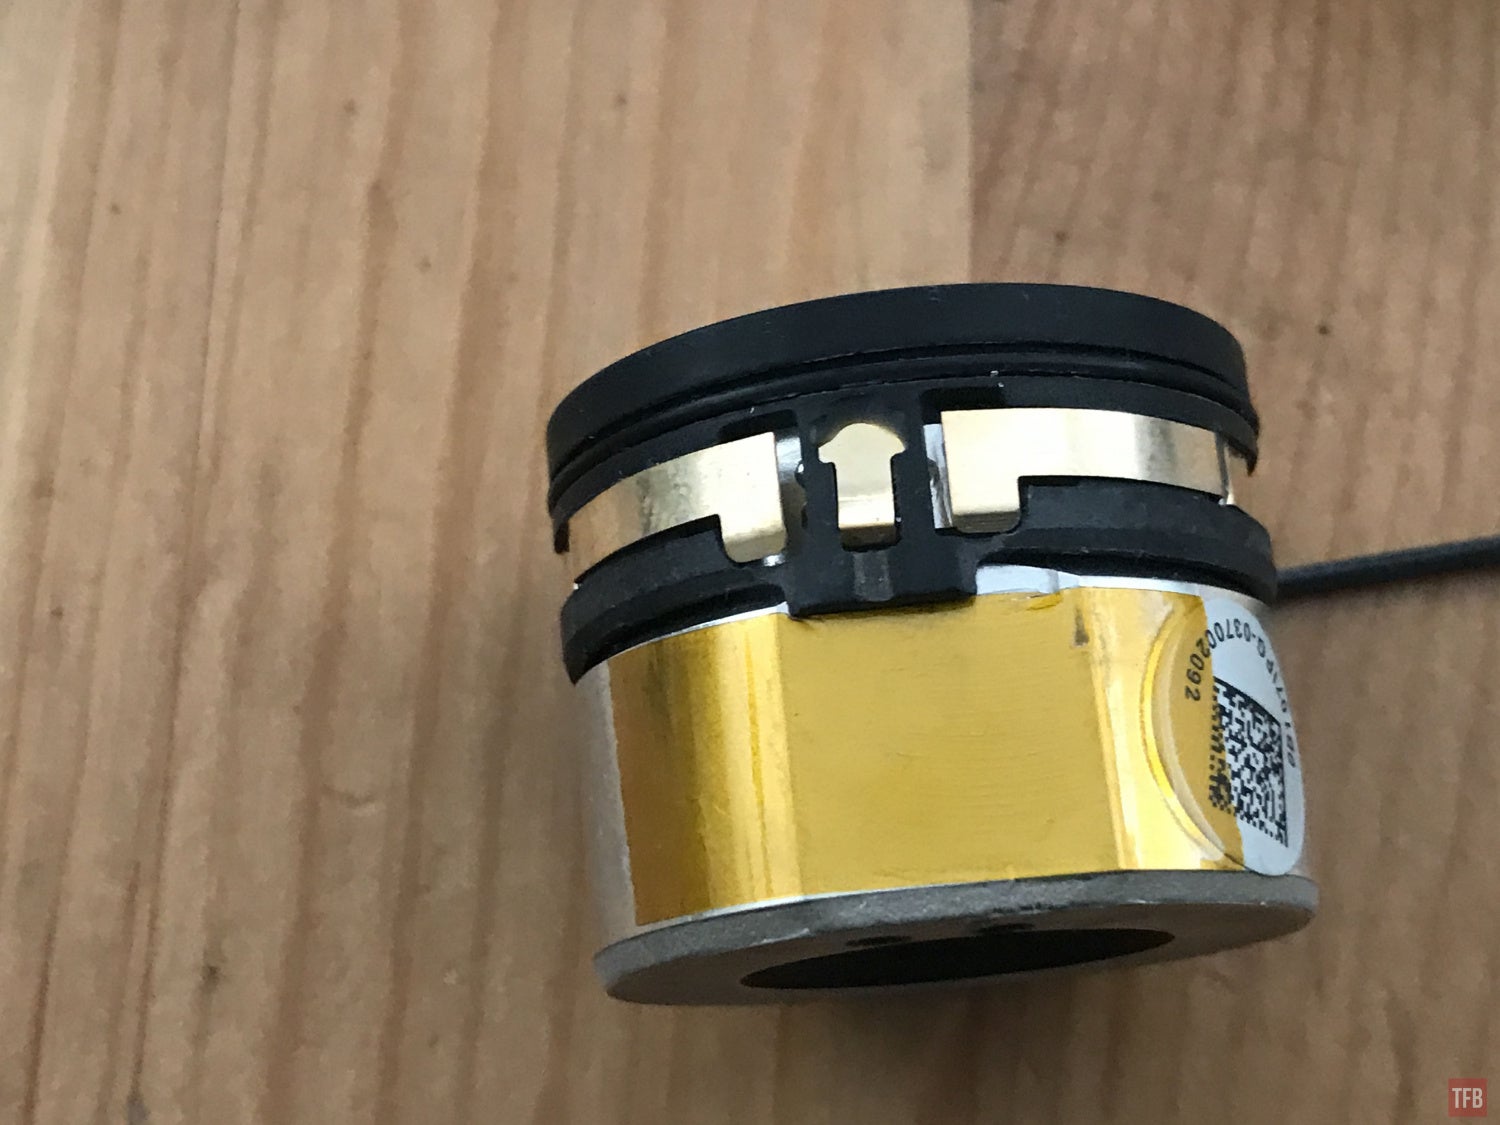
What is really interesting is that the quadtube ANVIS10 was made by Insight who later merged with L3. Yet they did not make their own tubes. Litton made image intensifier tubes and could have provided them for this build. However, the tubes are made by ITT. You will notice that one side of the image intensifier boot is flat, This is so that the tubes can sit closer together inside the housing.

With the black jacket removed, you can see the tube is stepped and tapered. The black jacket has a tab that indexes with the flat side of the tube.
As I mentioned, it has three contact points which is odd since most image intensifier tubes have two contact points. I have seen some with four points but that is for manual gain. ANVIS10s do not have manual gain.
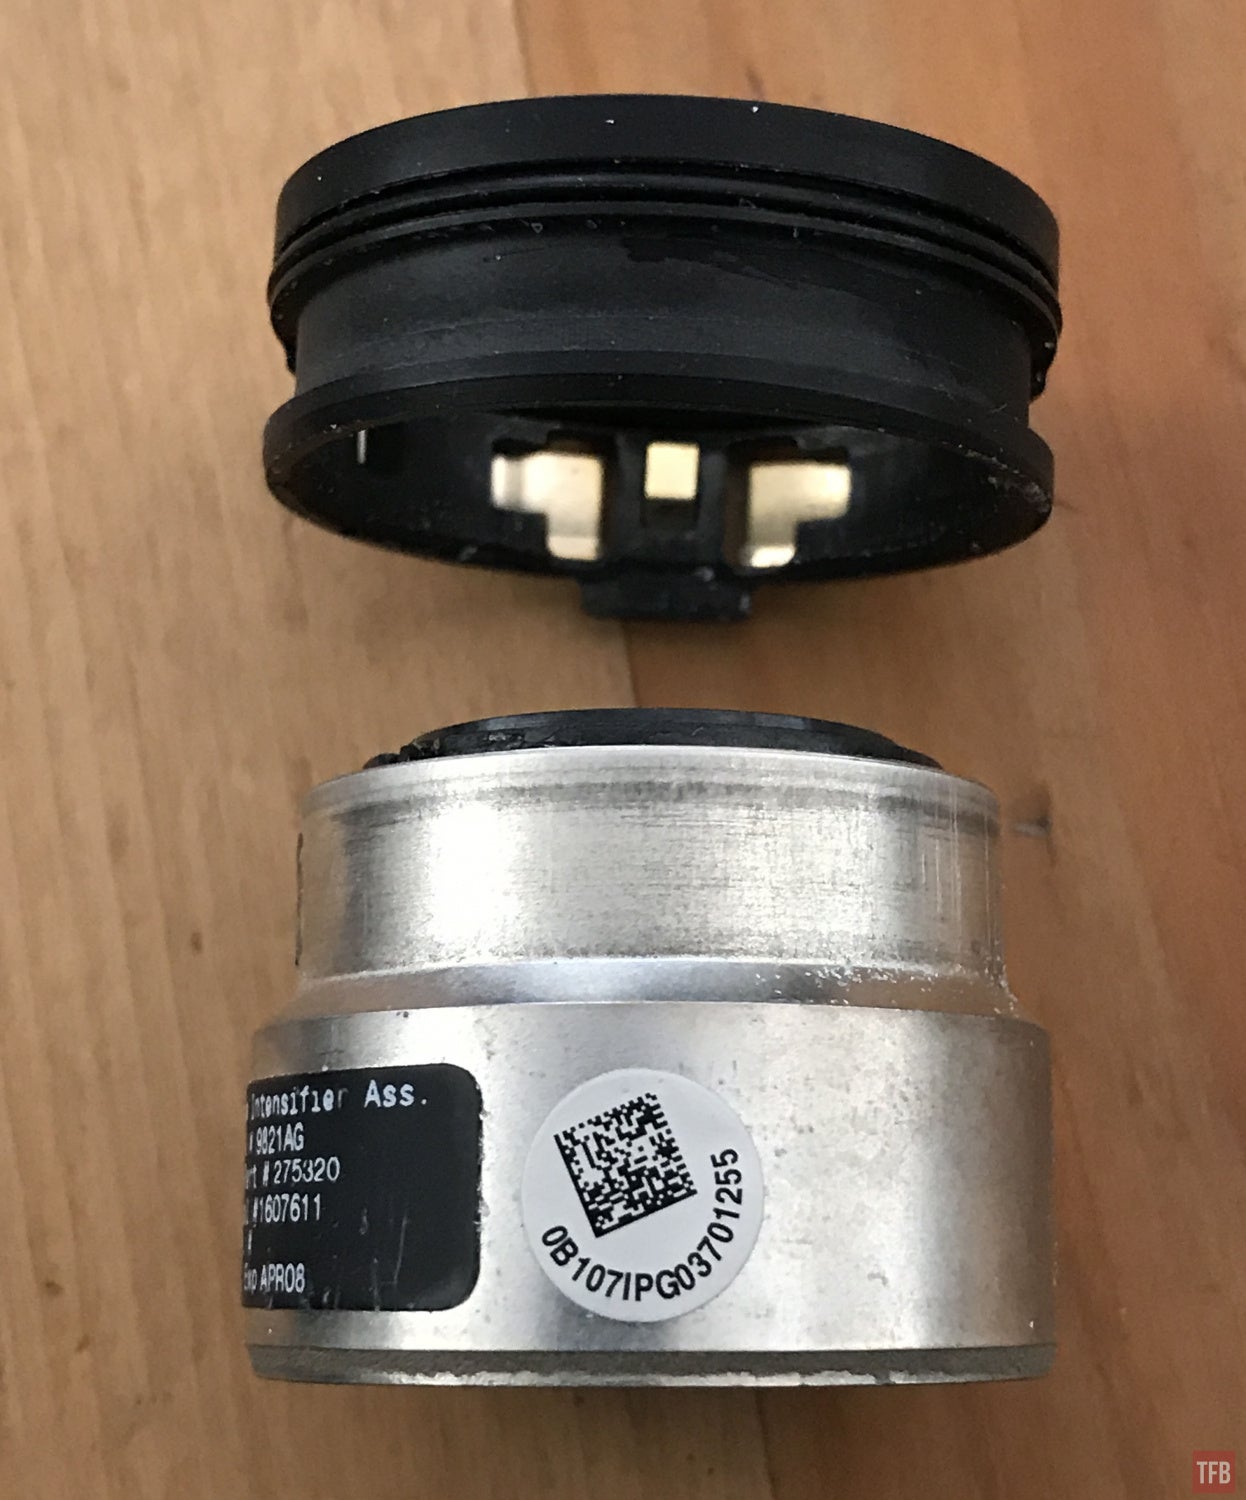
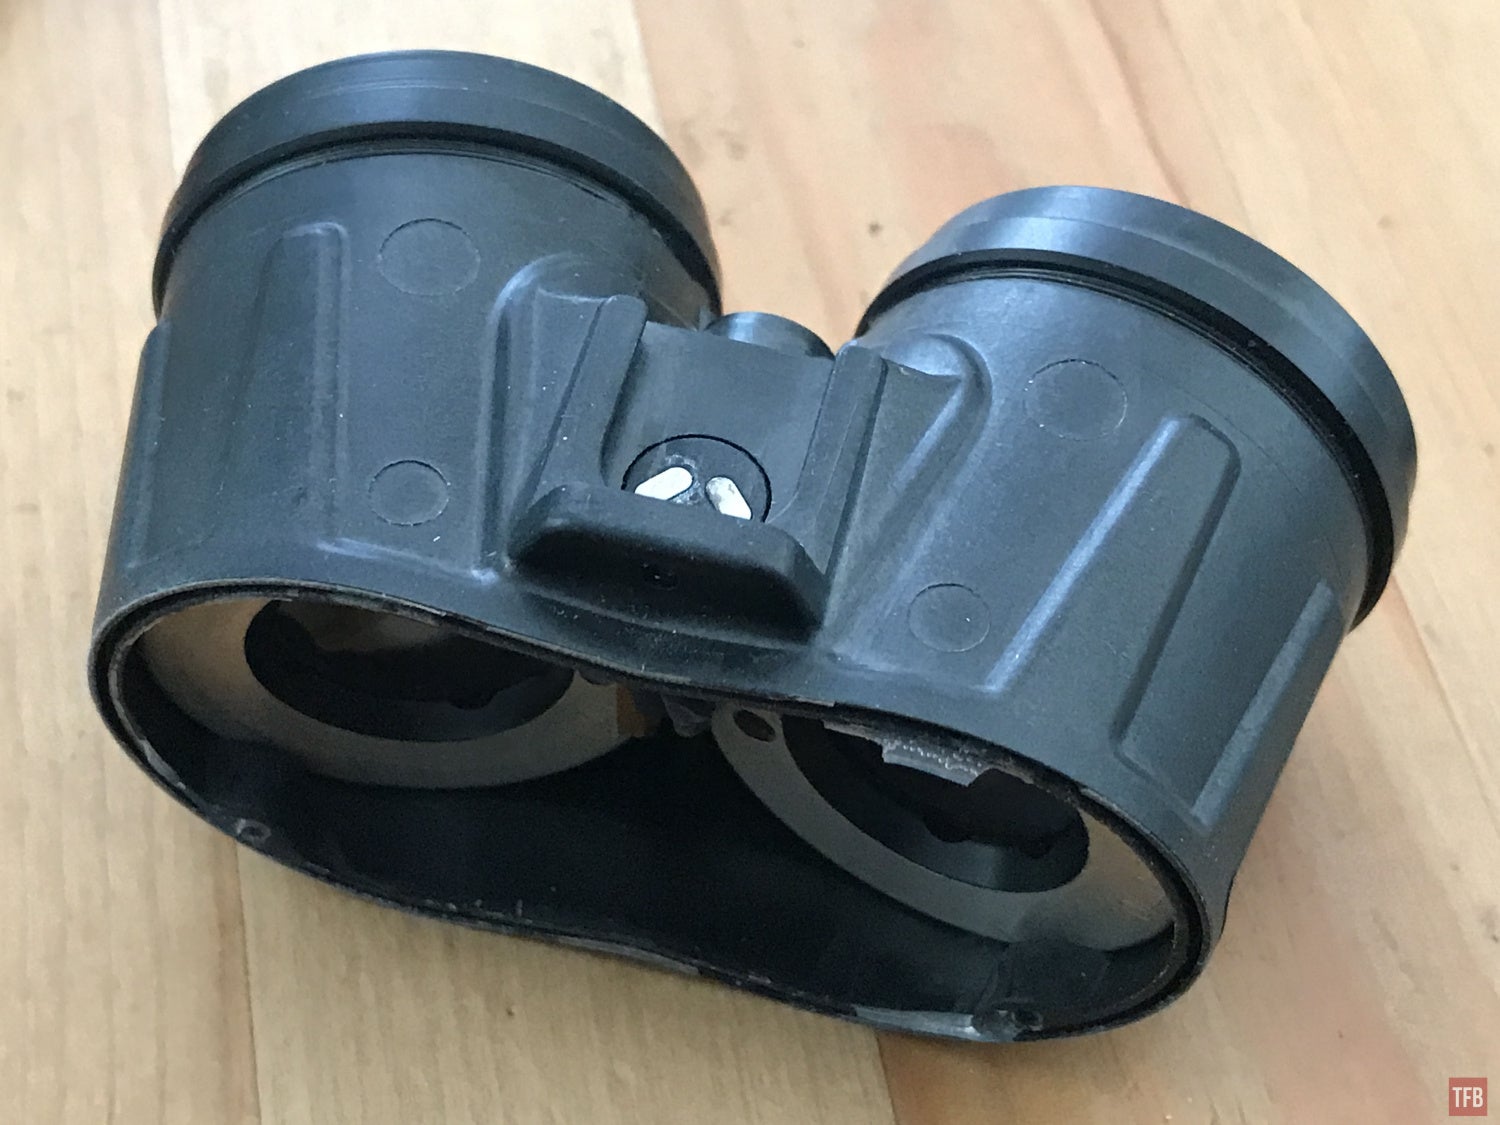
ANVIS10 pod housing
When you look into the back of the quadtube pod housing, you can see three contact points on either side.

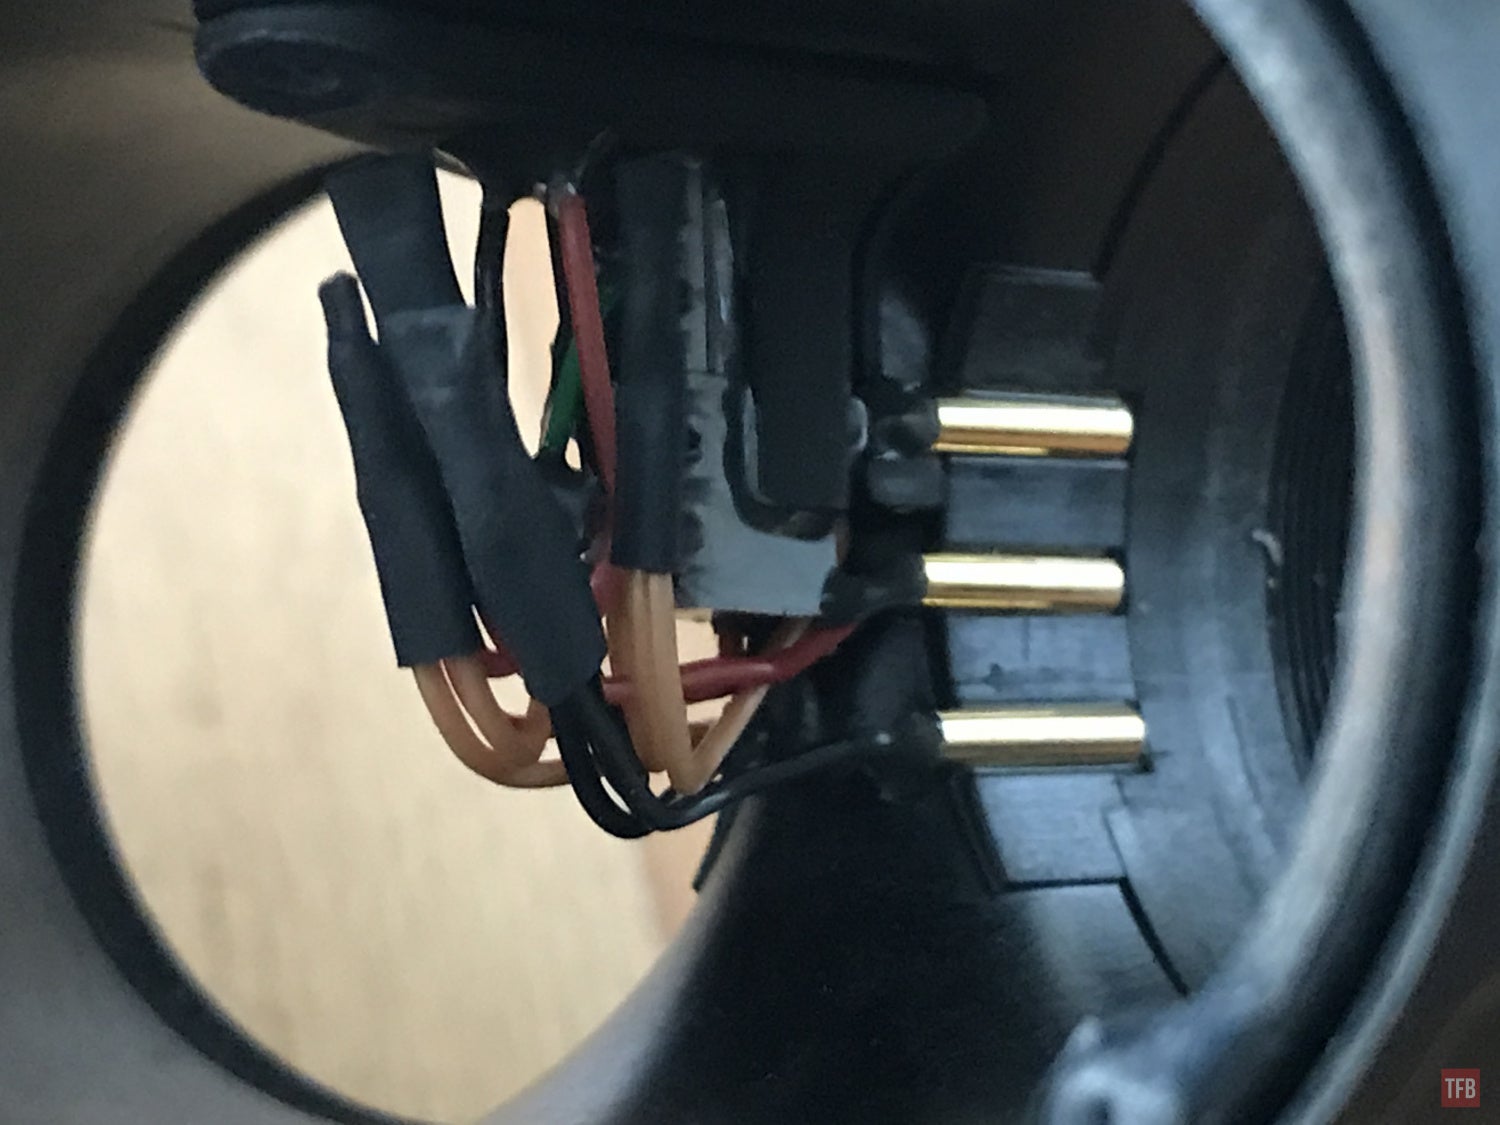
I am not sure why the tubes need three electrical contact points when there are only two on the pod itself.
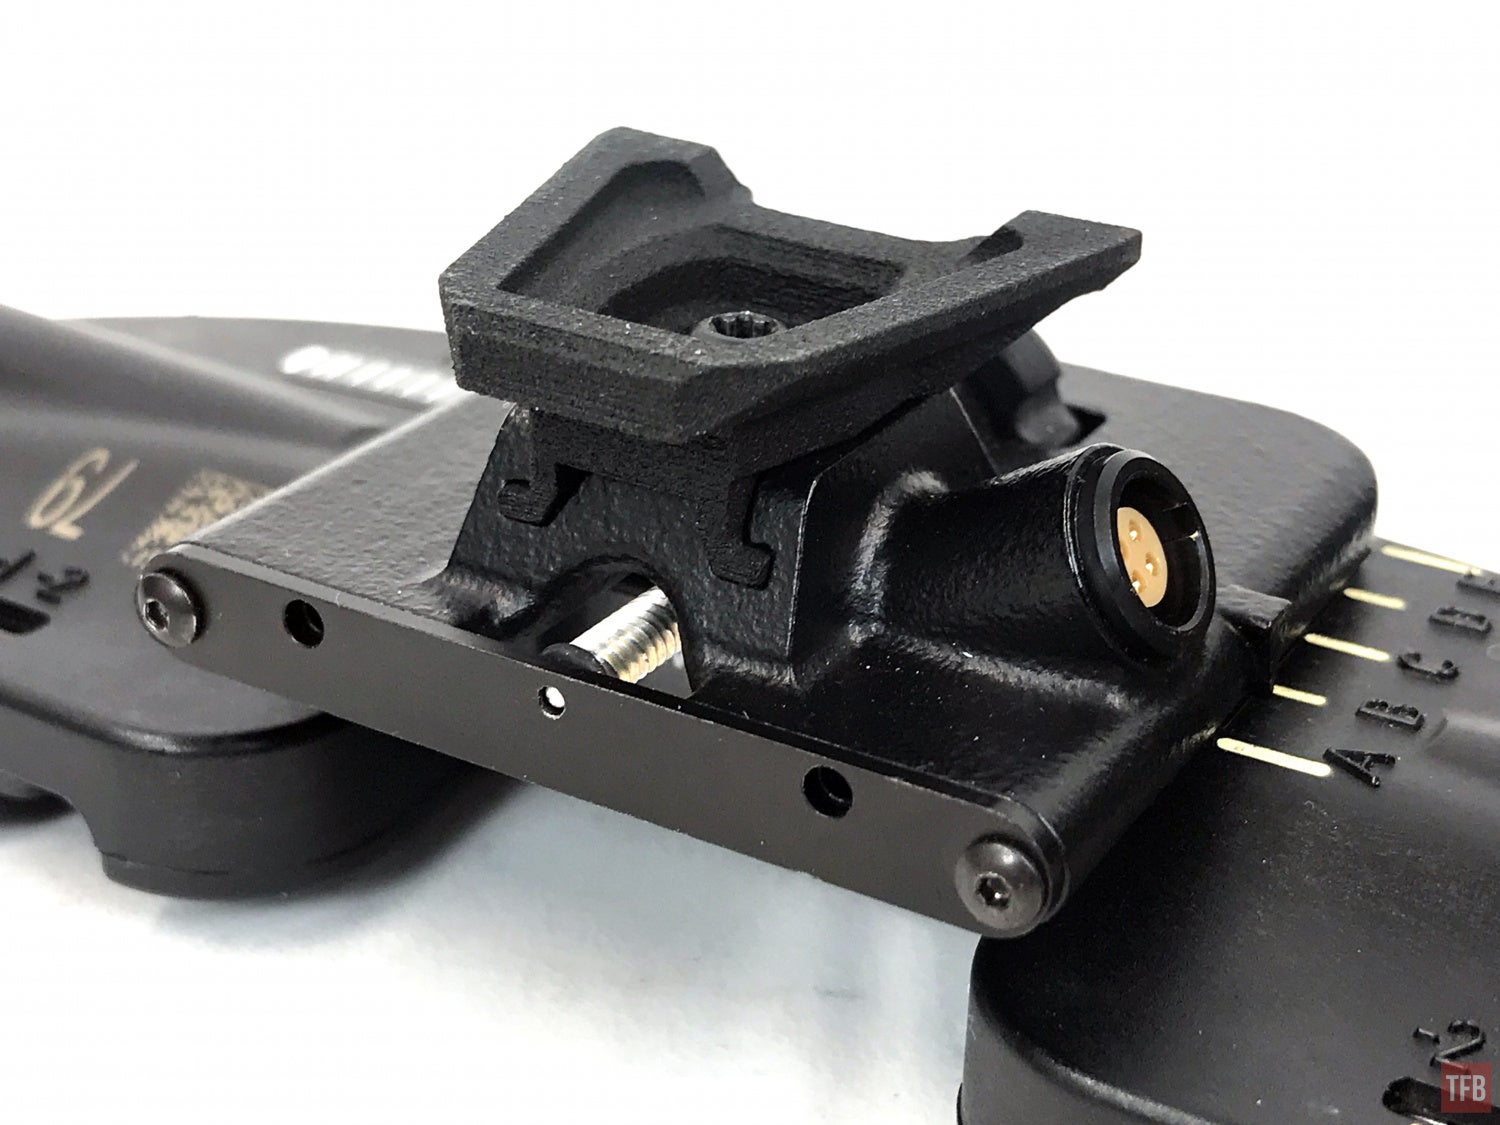
The quadtube ANVIS10 bridge only has two contact points on each side to deliver 3 volts to the pod
You need to insert the tubes backwards from the front of the pod housing.

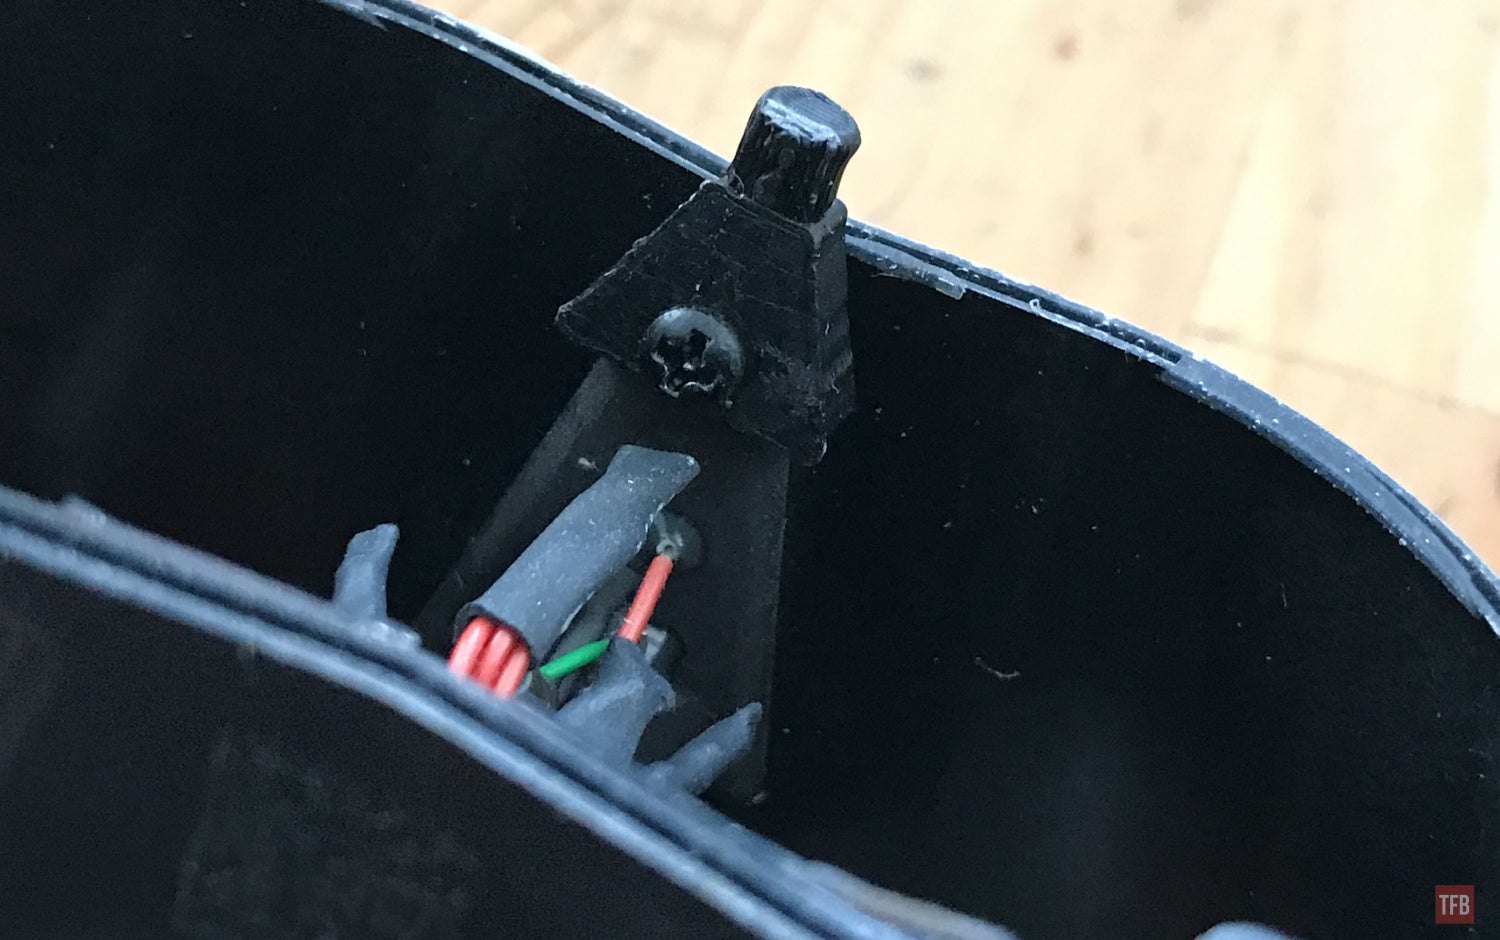
In the back of the pod housing is a small hole. USMCTOPGUN provides a 3D printed part that you screw onto that hole and plugs into the eyepiece.
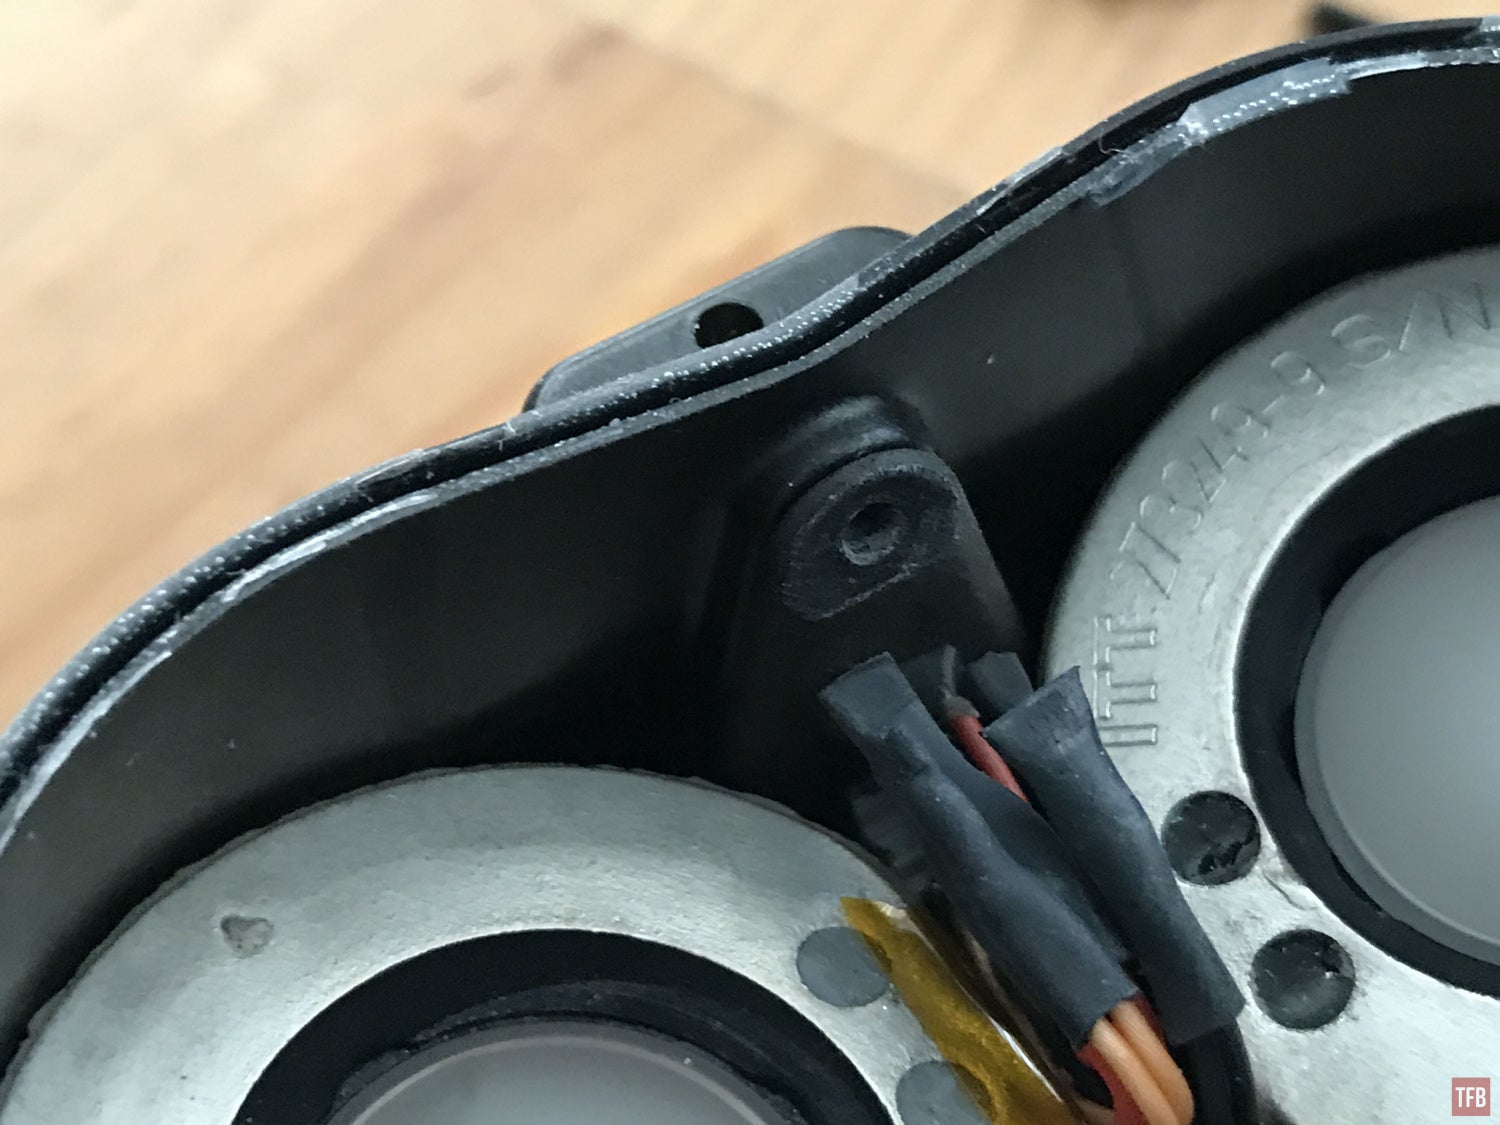
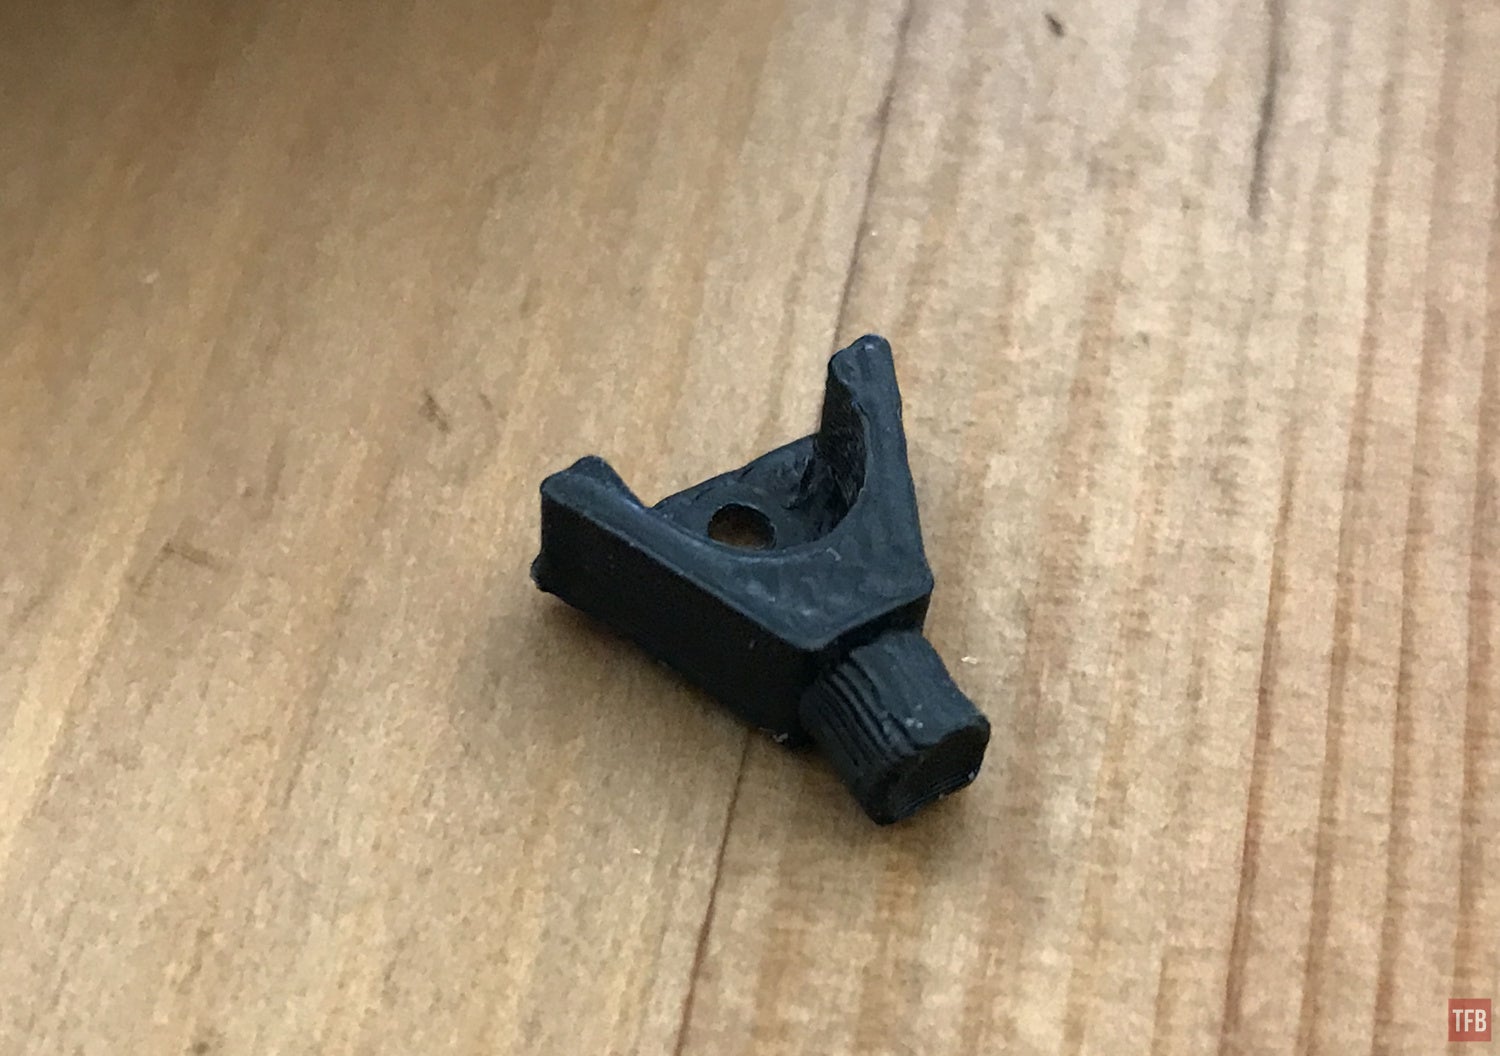
One small problem is that the printed plug does not have a hole. There is a screw that needs to screw into that plug. So you will need to carefully drill a small hole into that post.

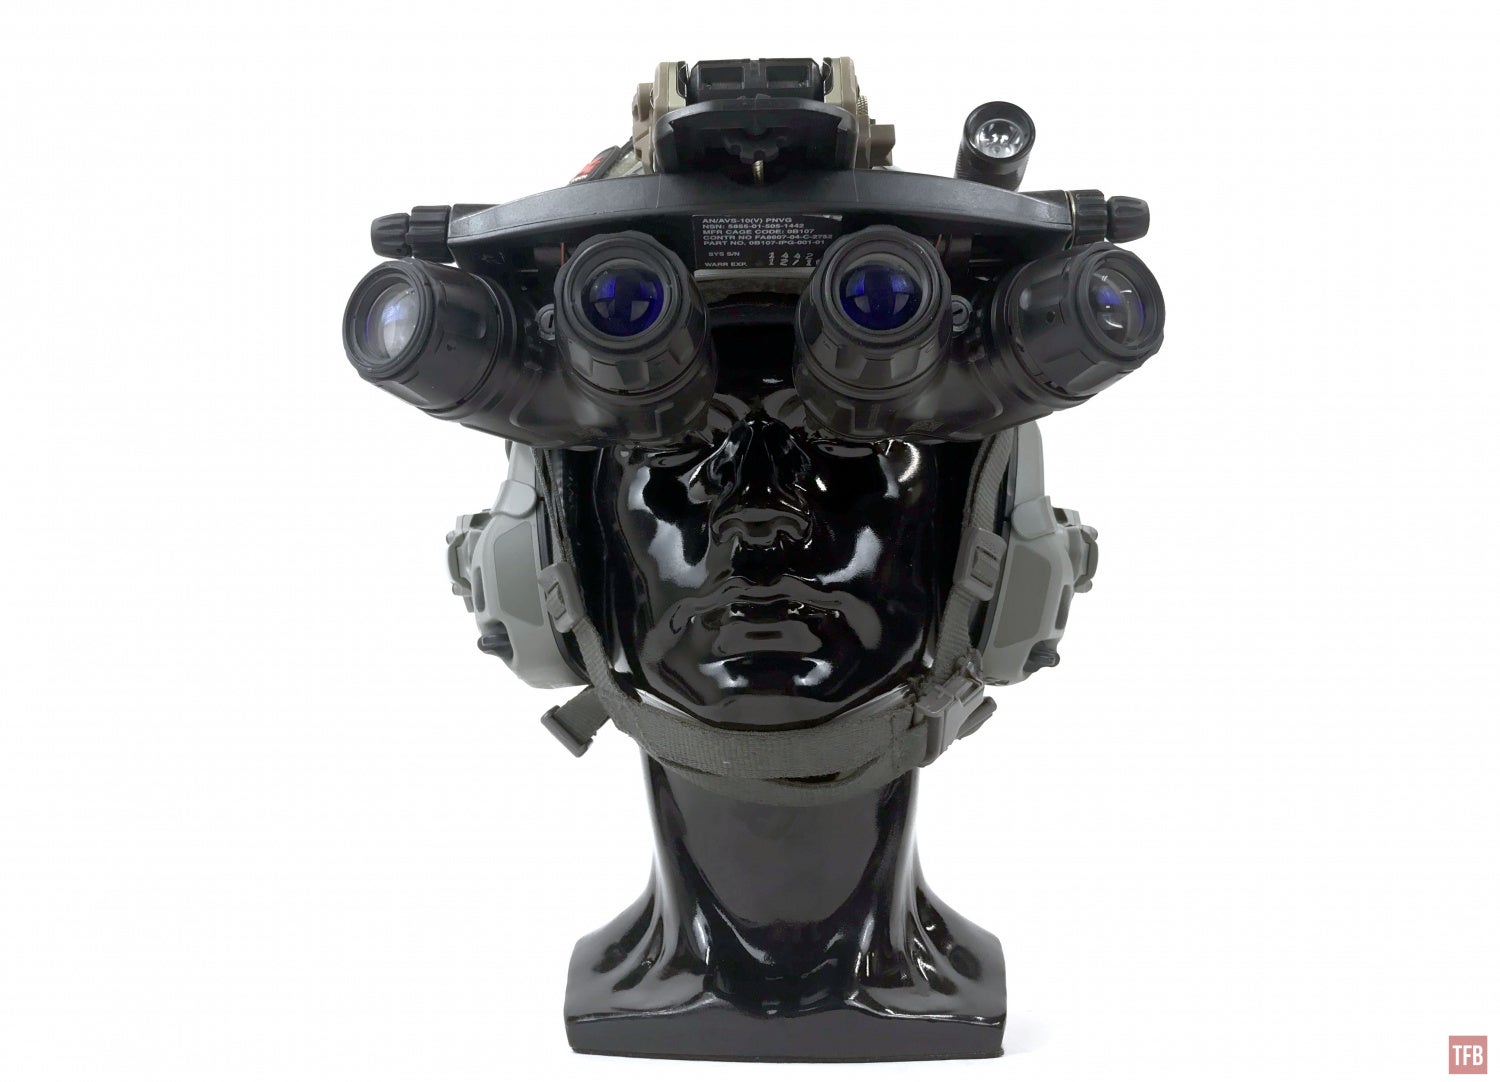
ANvis10 eyepiece
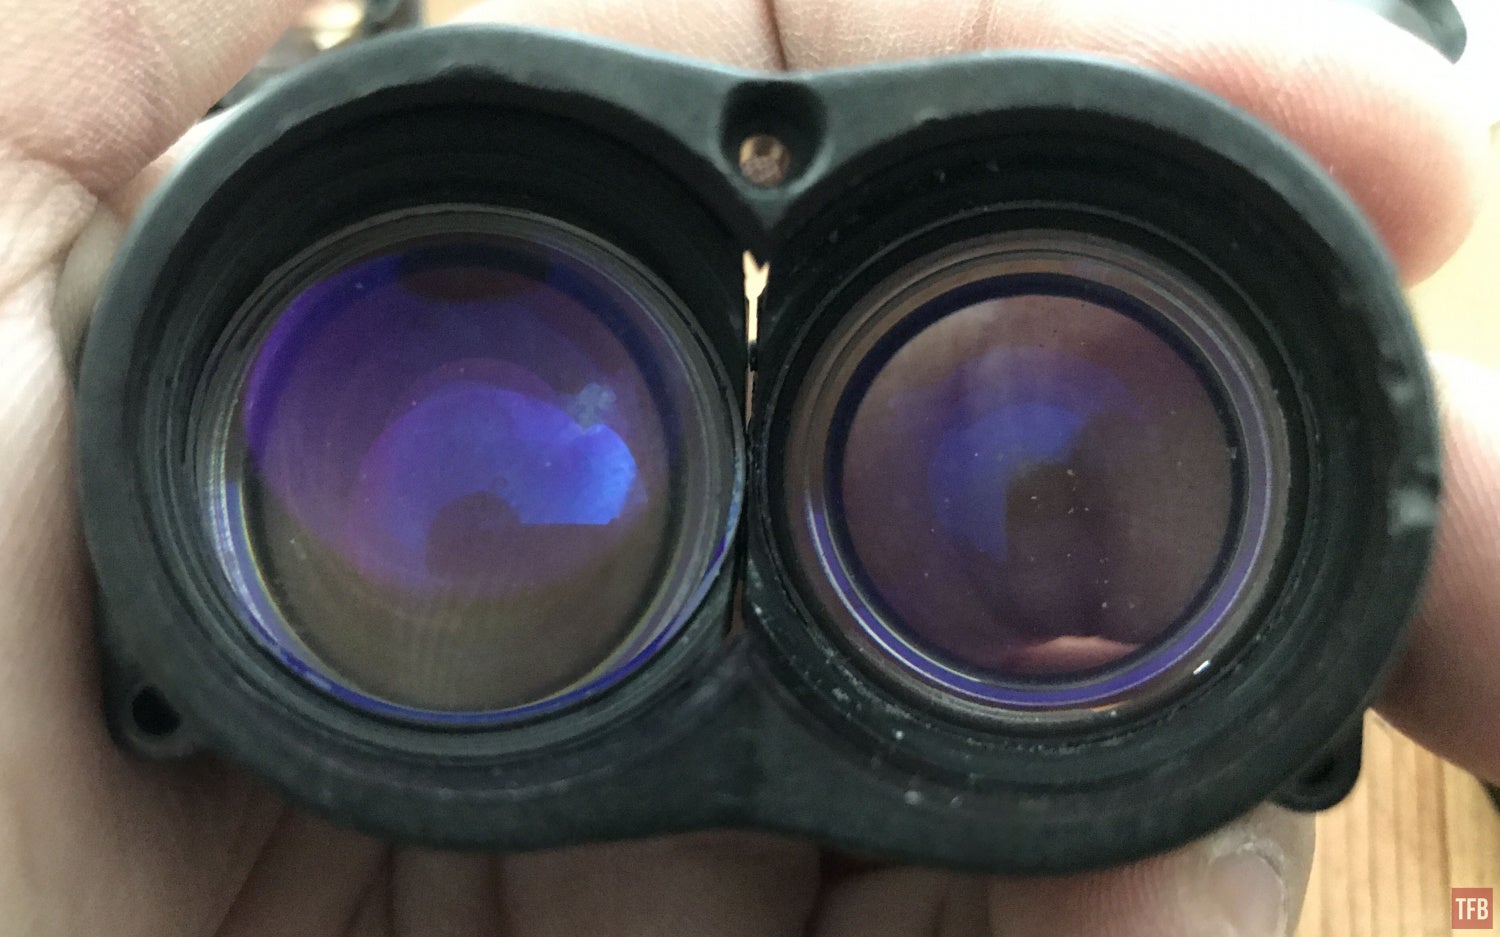
This is the most complicated part of the build. Trying to keep dust out of the lenses. The quadtube eyepieces are made up of four lens elements. Three of them are acrylic while the last one is glass. Jay Crymes told me to be careful with the acrylic lenses as they have special coatings and cleaning them too much can scratch or remove the coatings. Also since they are acrylic they can scratch rather easily. Installing them is rather straightforward. The order is smallest to biggest with the curvature of the lens bowing out to your eyeballs.

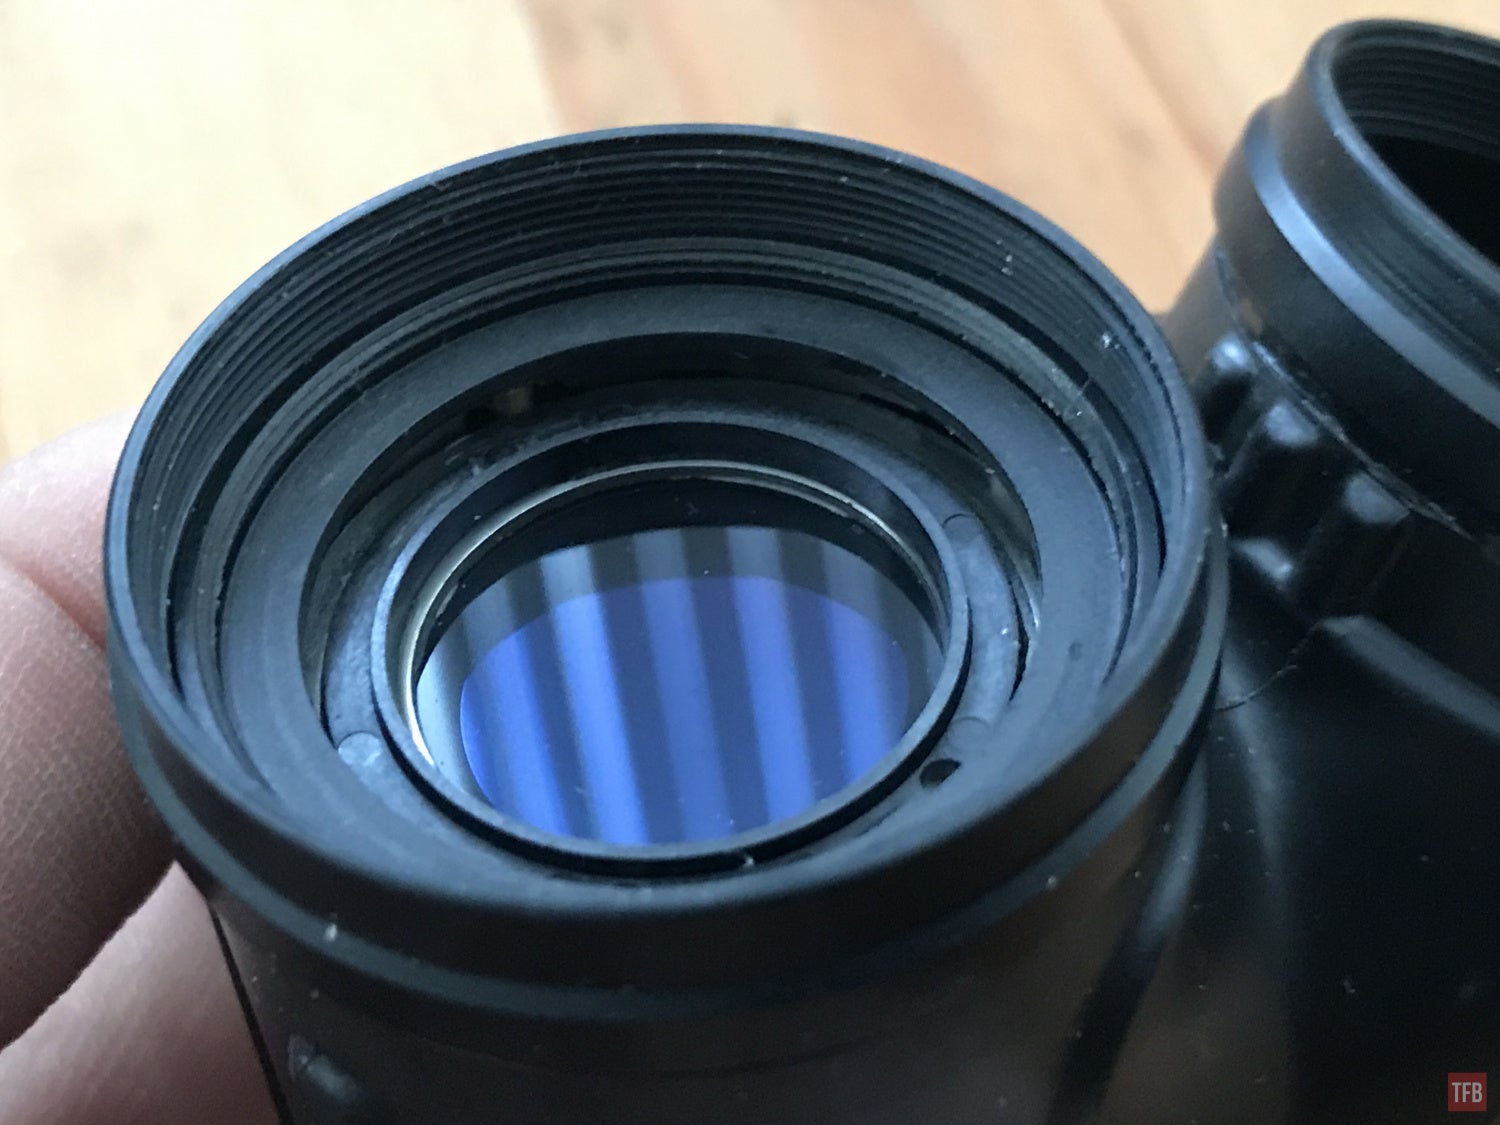
This quadtube kit was clearly assembled from a mix of various ANVIS10 parts. I am not sure where they got them from but the parts are not from the same goggle. The lens cell has a polymer cup which you see above. Mine came with globs of epoxy on three sides. The lens cell is supposed to be epoxied into the eyepiece housing and mine had remnants inside the housing, however, they do not match the globs on the lens cups you see below.

In order to get the lens cup to fit inside the eyepiece housing, I had to remove the globs of epoxy. I used a hobby knife to cut them off the housing and cup. I was a little concerned about the lens stack in the cup since the glass lens touches the plastic lens underneath but Jay said it is fine.
Earlier I had mentioned that Jay Crymes recommended I install the tubes as deep as possible.
The tube has been pushed down and the black jacket is a couple millimeters above it.
When you install the eyepiece, the lens cup is tapered and it fits into the recess of the output window of the image intensifier tubes. So when you push the eyepiece onto the back of the pod housing, the lenses will nestle up against the tubes and push the tubes forward. Jay said this is critical to keeping the proper distance from the tube to the lenses. If you don’t then the image will be distorted and possibly out of focus. Quadtube eyepieces do not have adjustable diopters, other than the QTNVG. So getting this spacing is critical. Insight did make clip-on diopters but I do not have any.
Installing Objective Lenses
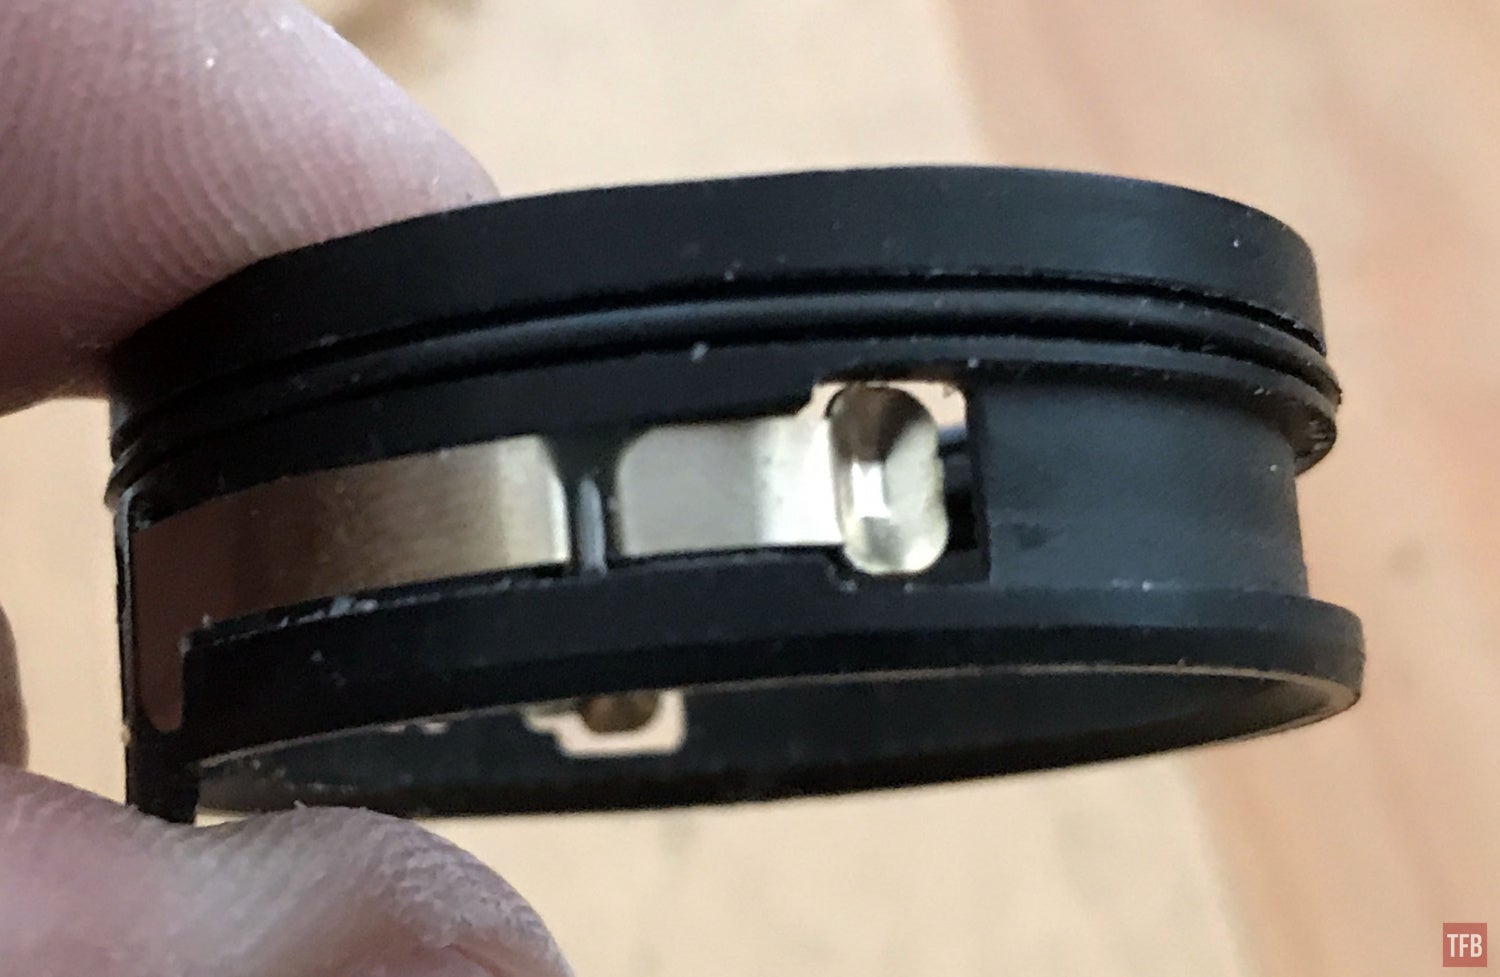
The top hat-looking part has three nubs on the back. These interface with a black ring that is attached to the front of the image intensifier.
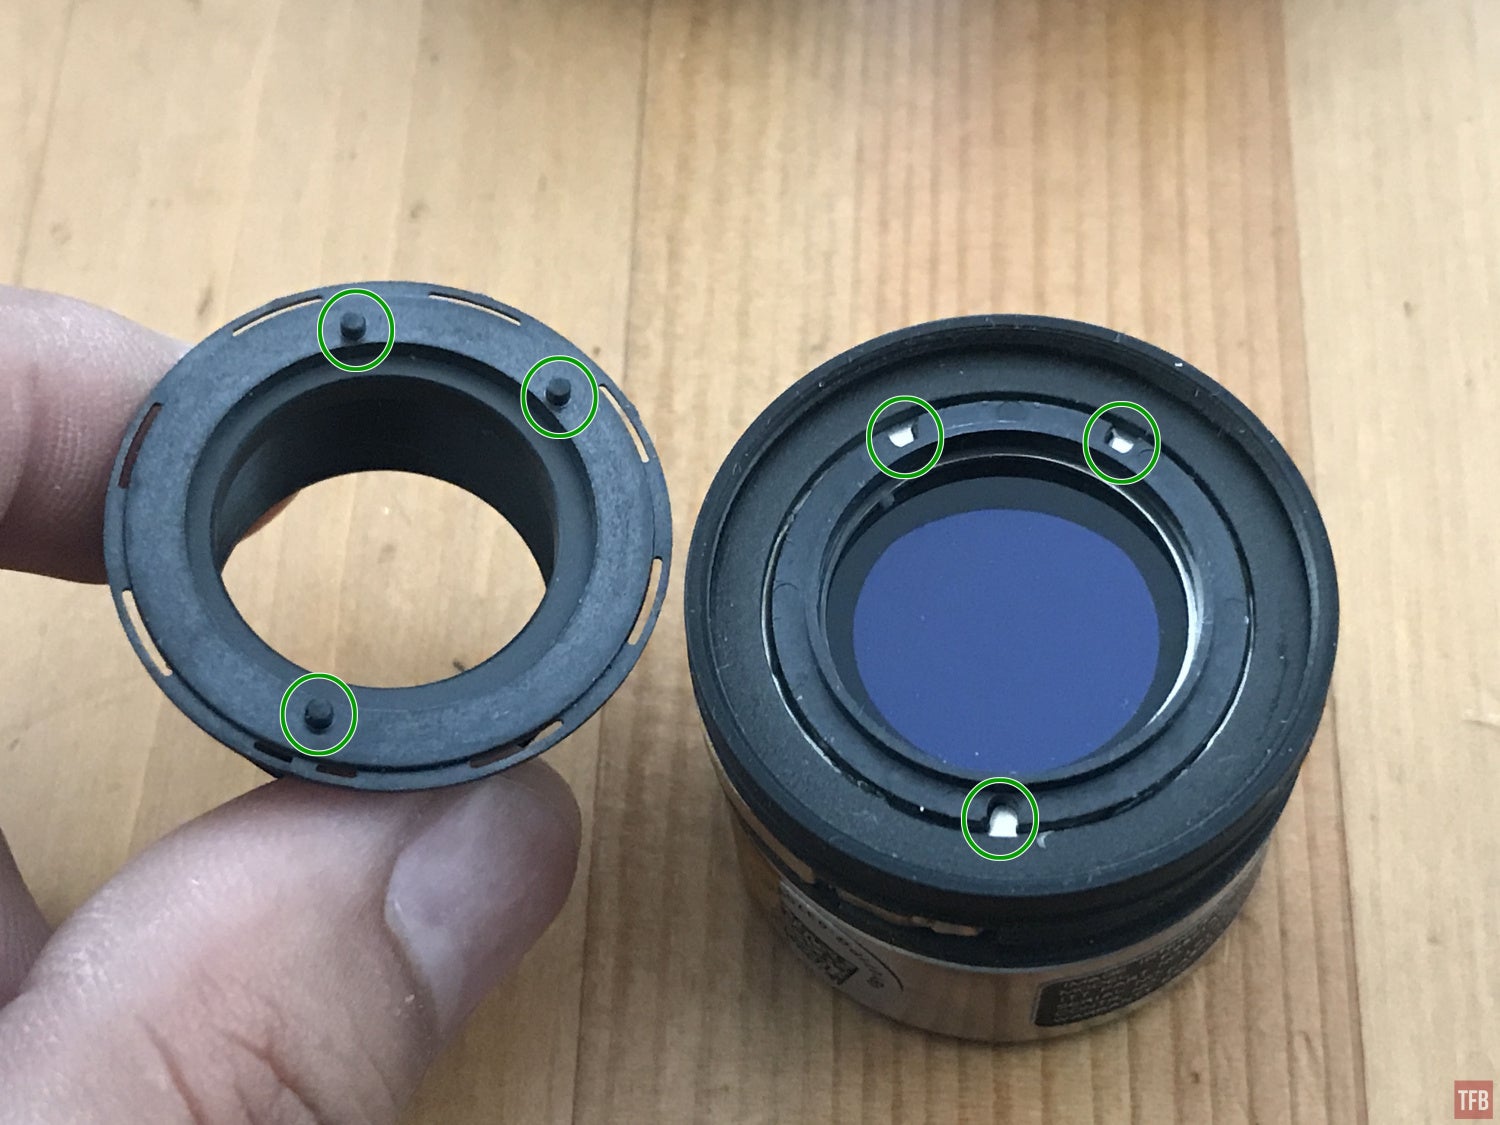
With the top hat keyed in place, you screw the tube retaining ring down onto it. This locks it into place. Then you simply slide the collar onto the eyepiece and screw the objective into the top hat. USMCTOPGUN provides 3D printed tools. I only used the tube retaining cylinder tool. I am not sure what the spacer wrench is for and I do not see any part of this quadtube build that would even fit that tool.
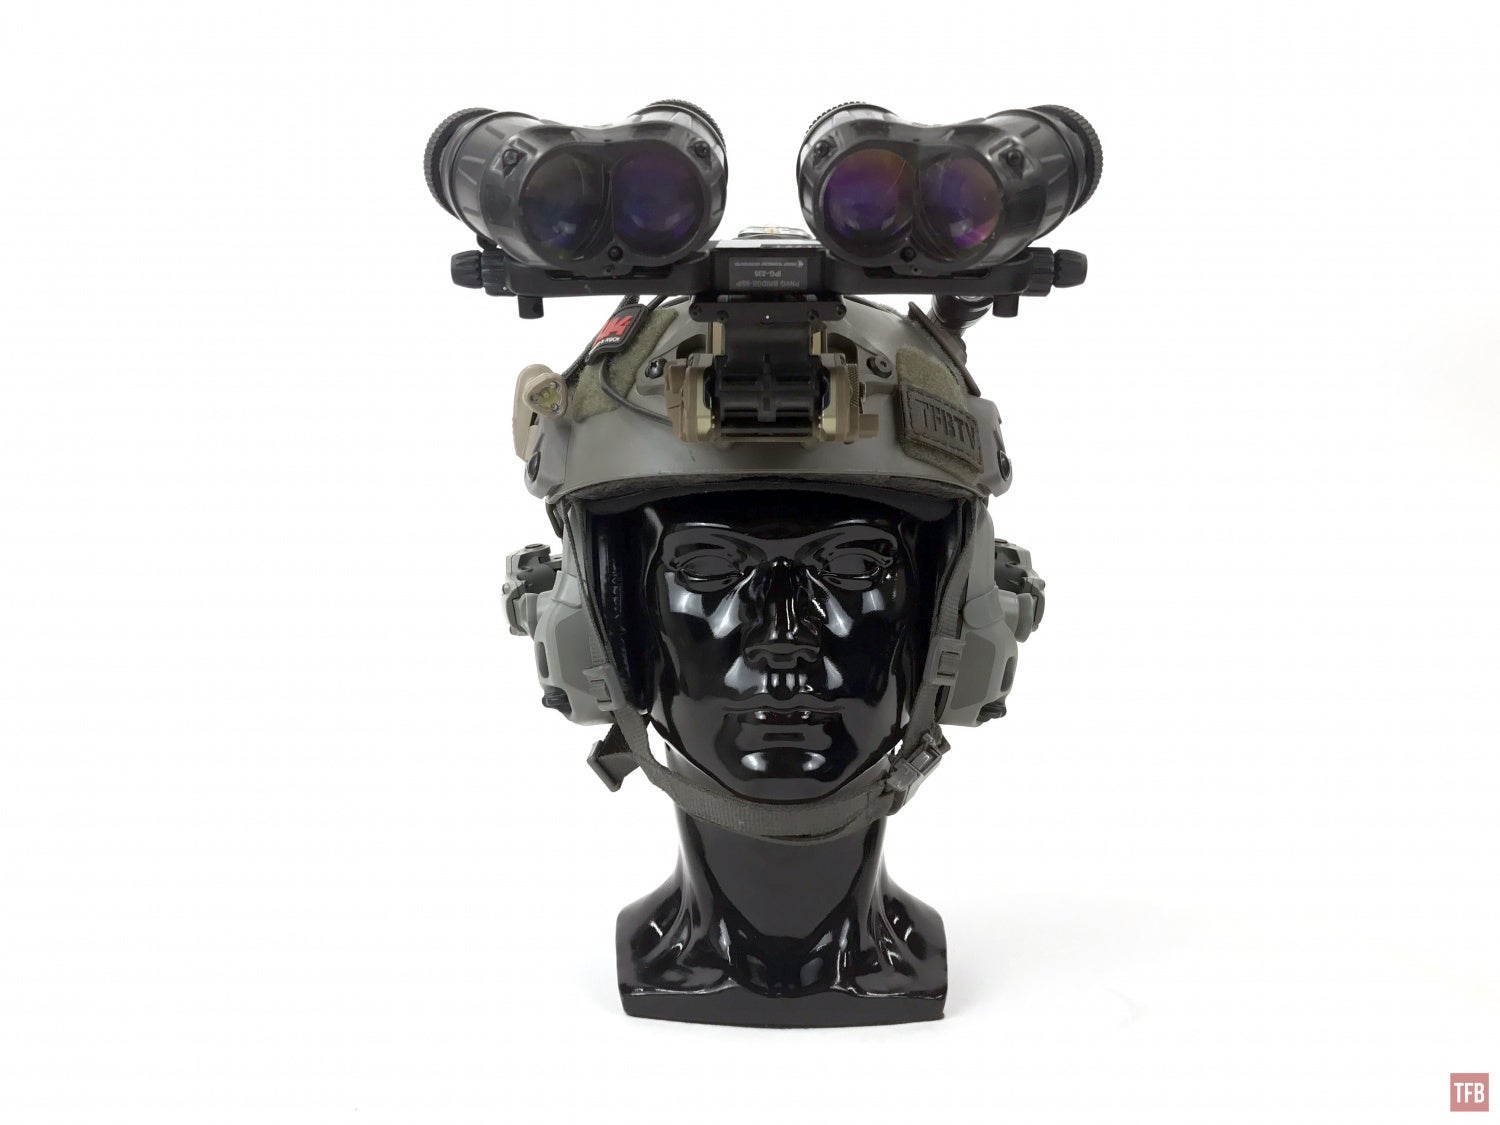
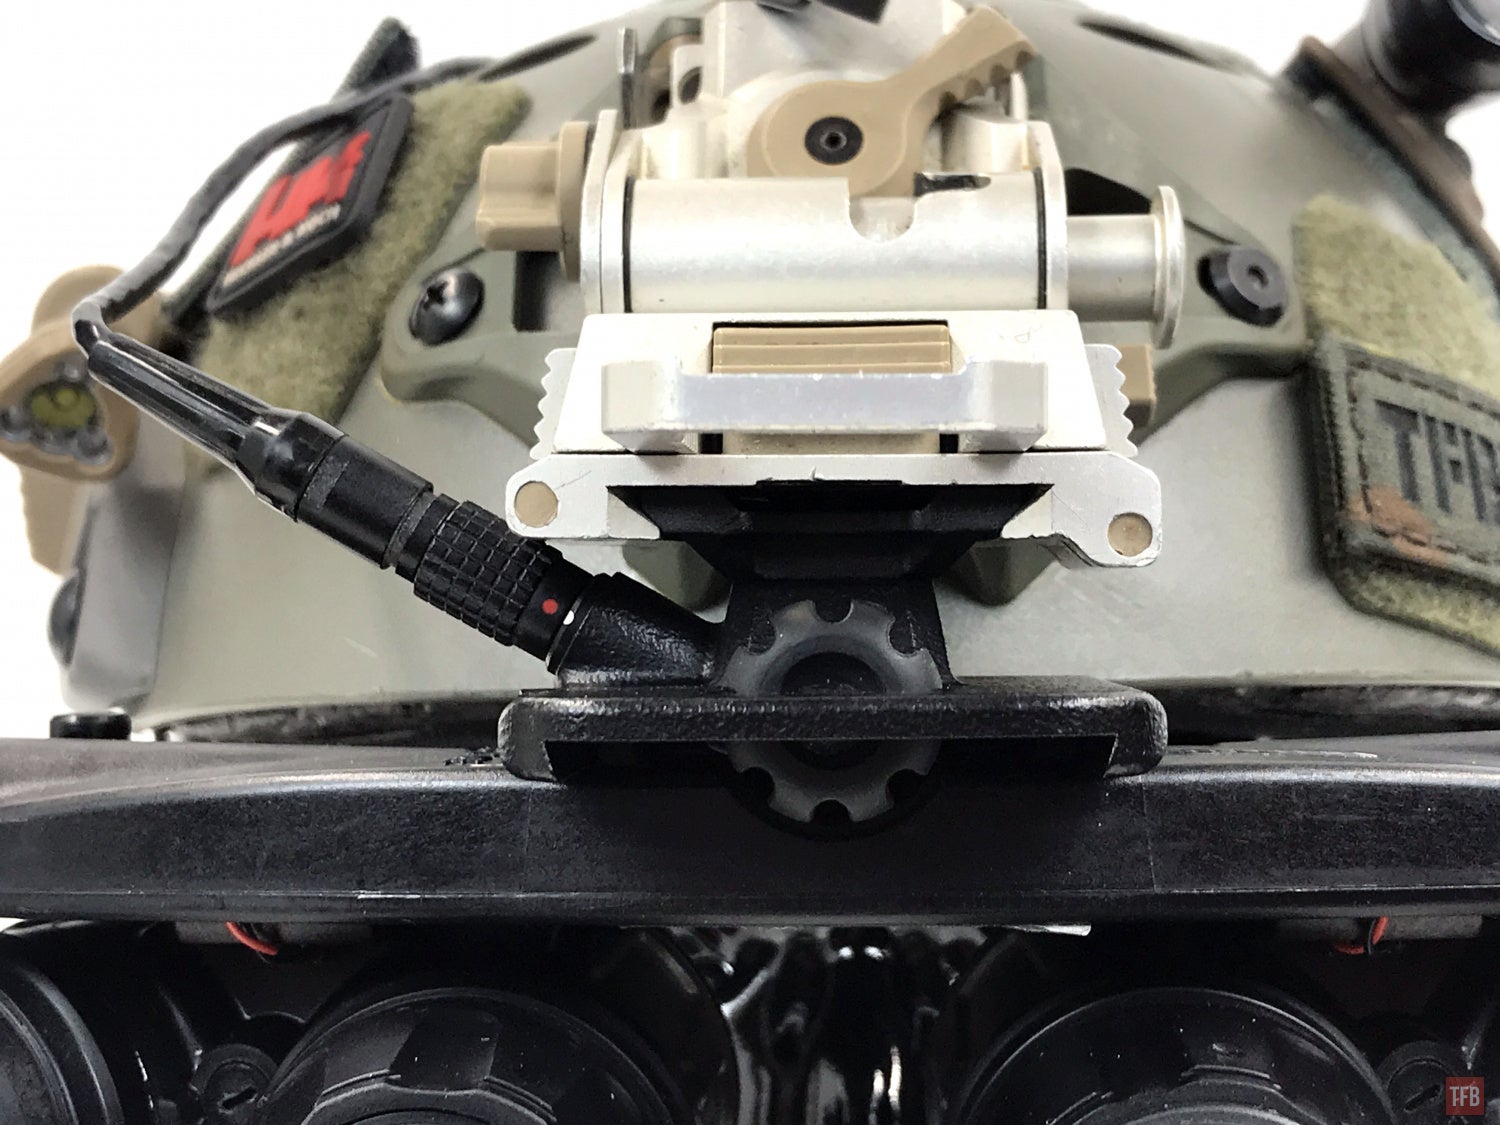
Once you have completed one pod, slide it onto the small U-shaped dovetail on the ANVIS10 bridge. I have a Clip-On Power Supply (COPS) from my old ANVIS goggles and it also works to power the ANVIS10 quadtubes.

Flip the COPS over to power the bridge and test the pod to make sure you installed everything correctly and it turns on.

Then just repeat the process for the other pod.
Success!


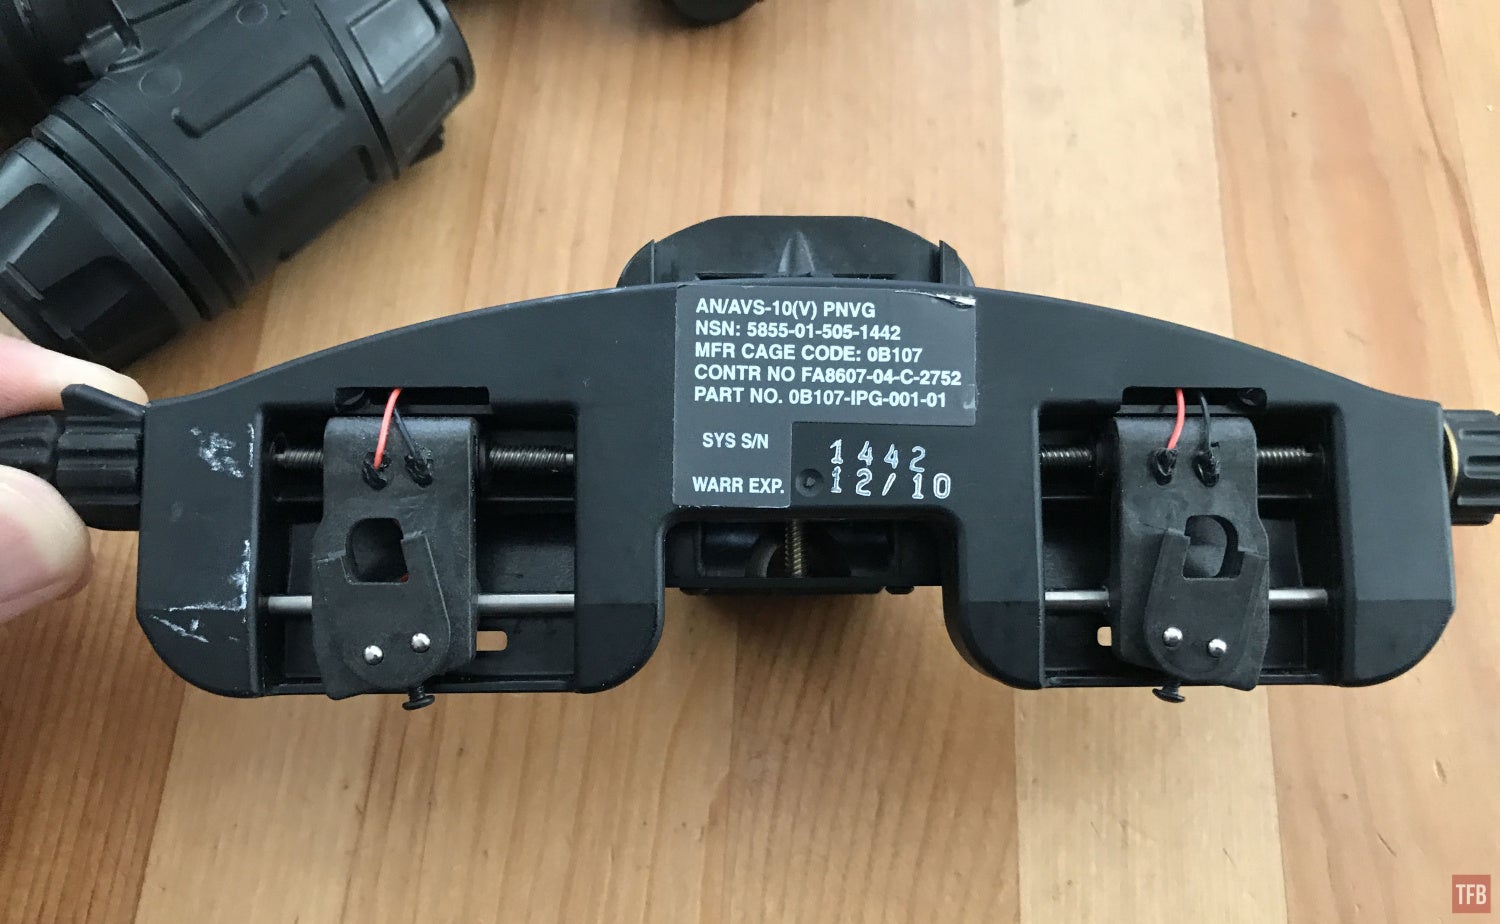
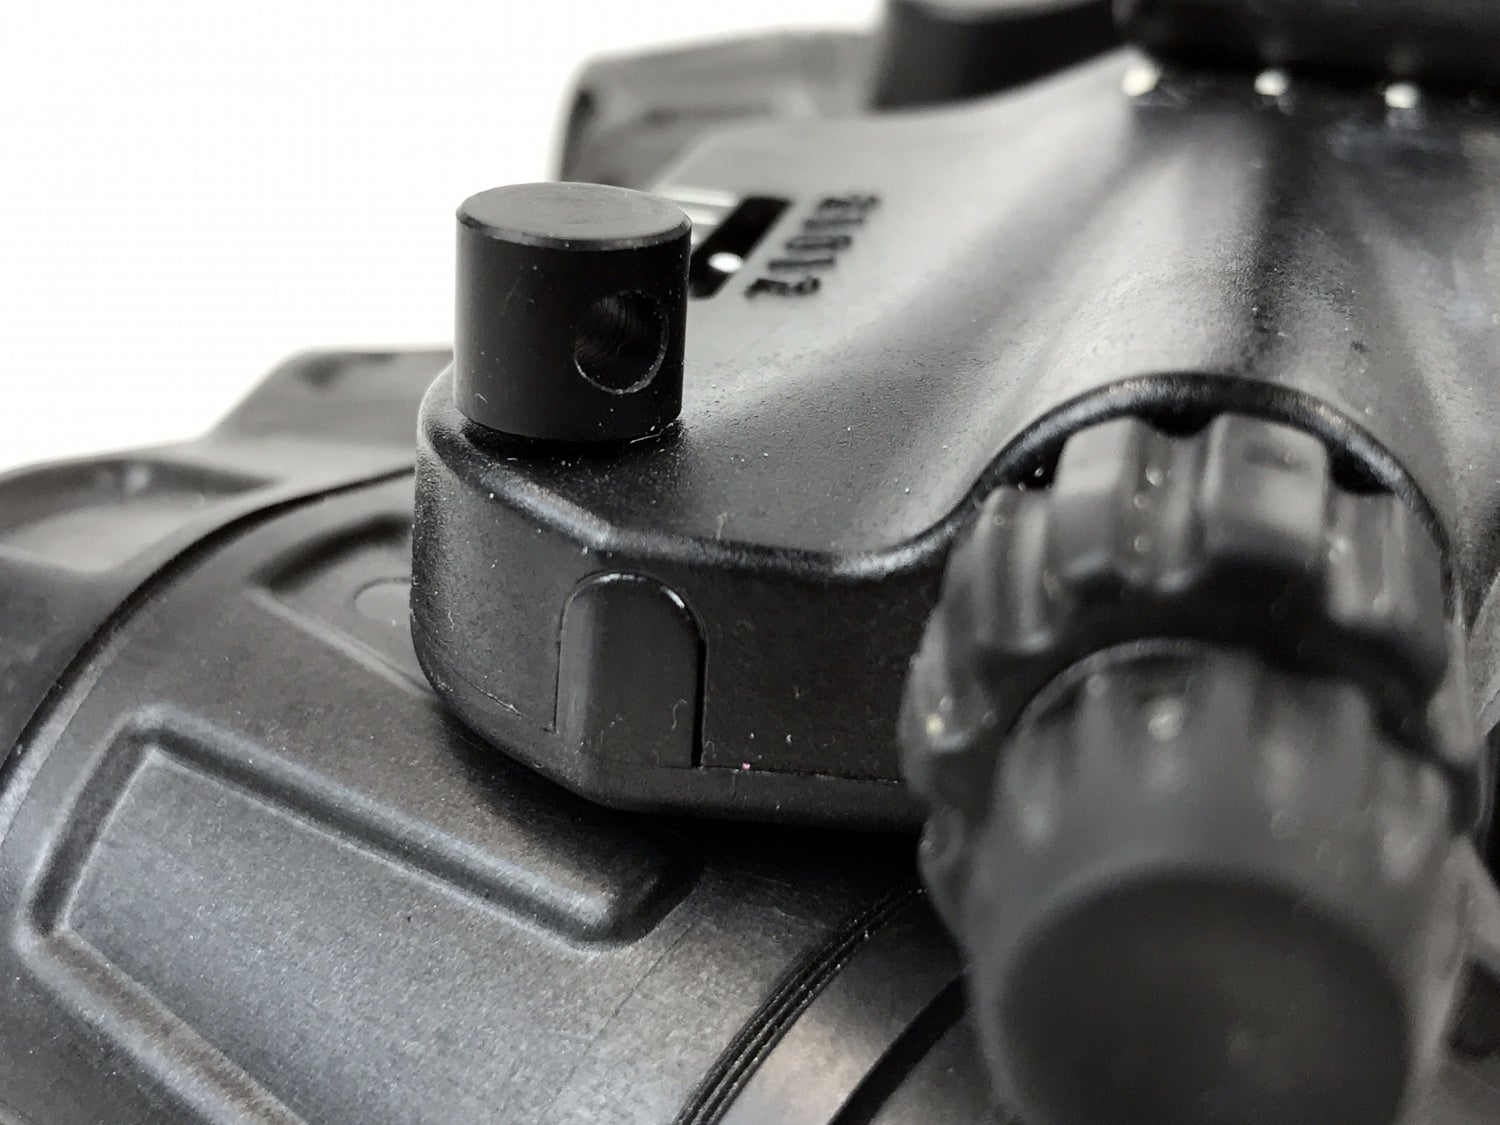
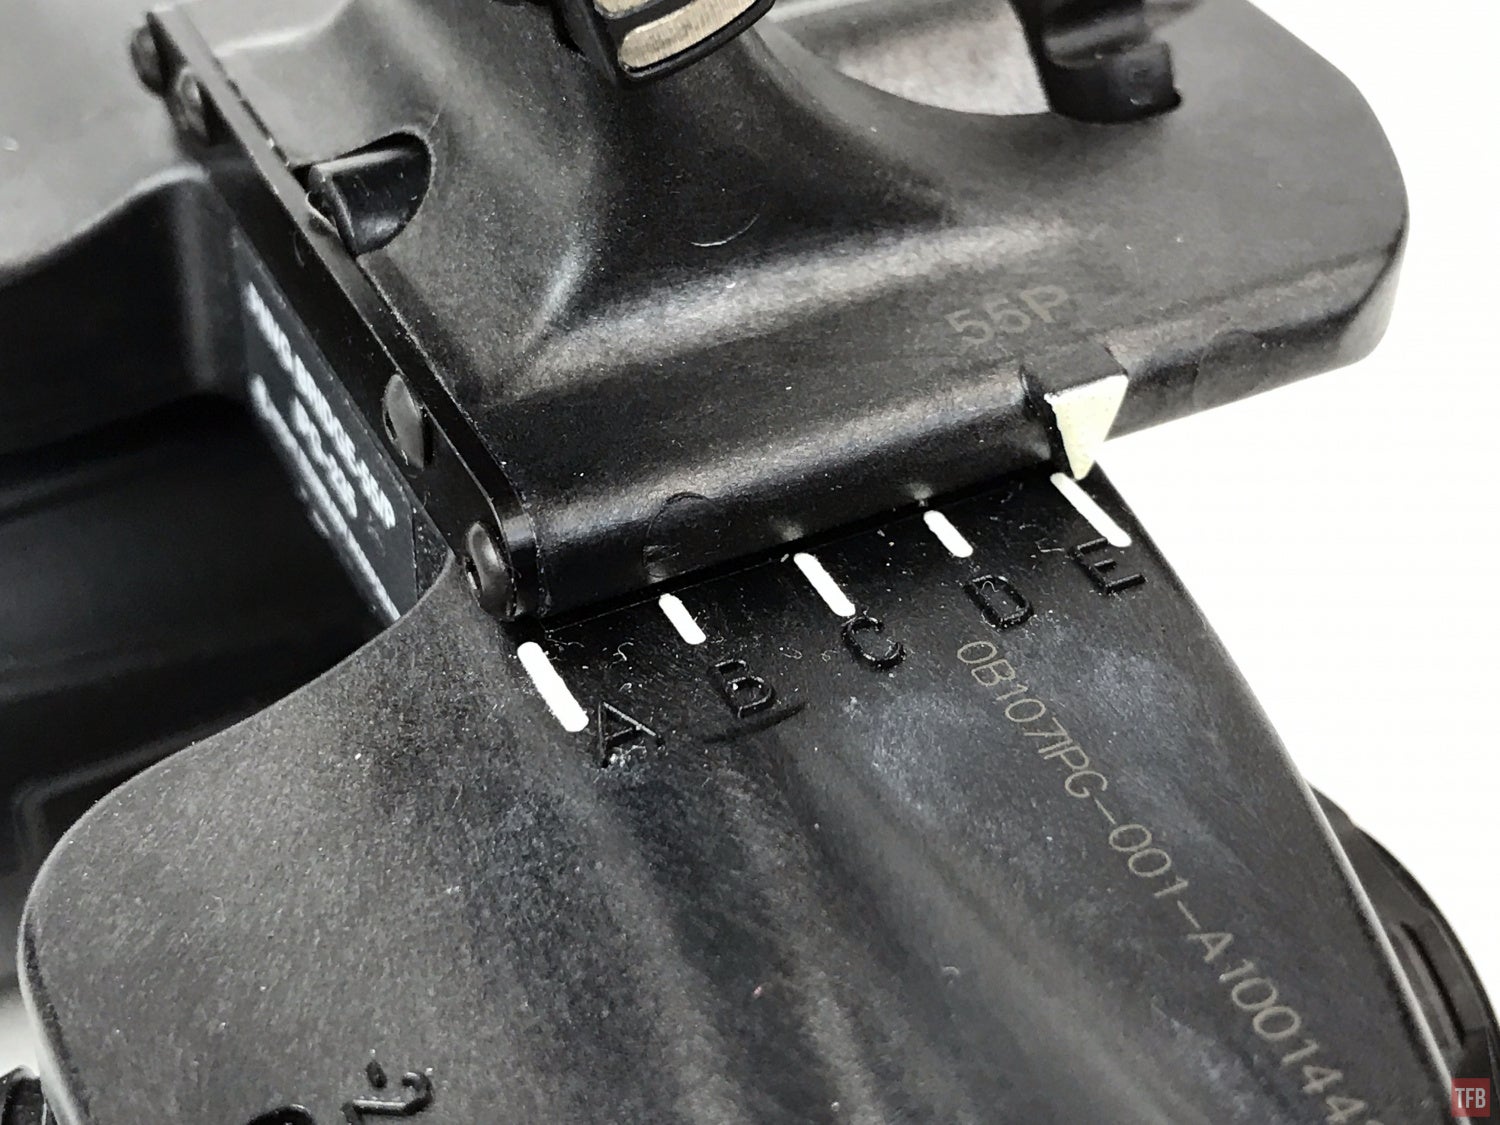
PD adjustment indicator
Helmet bungee anchor
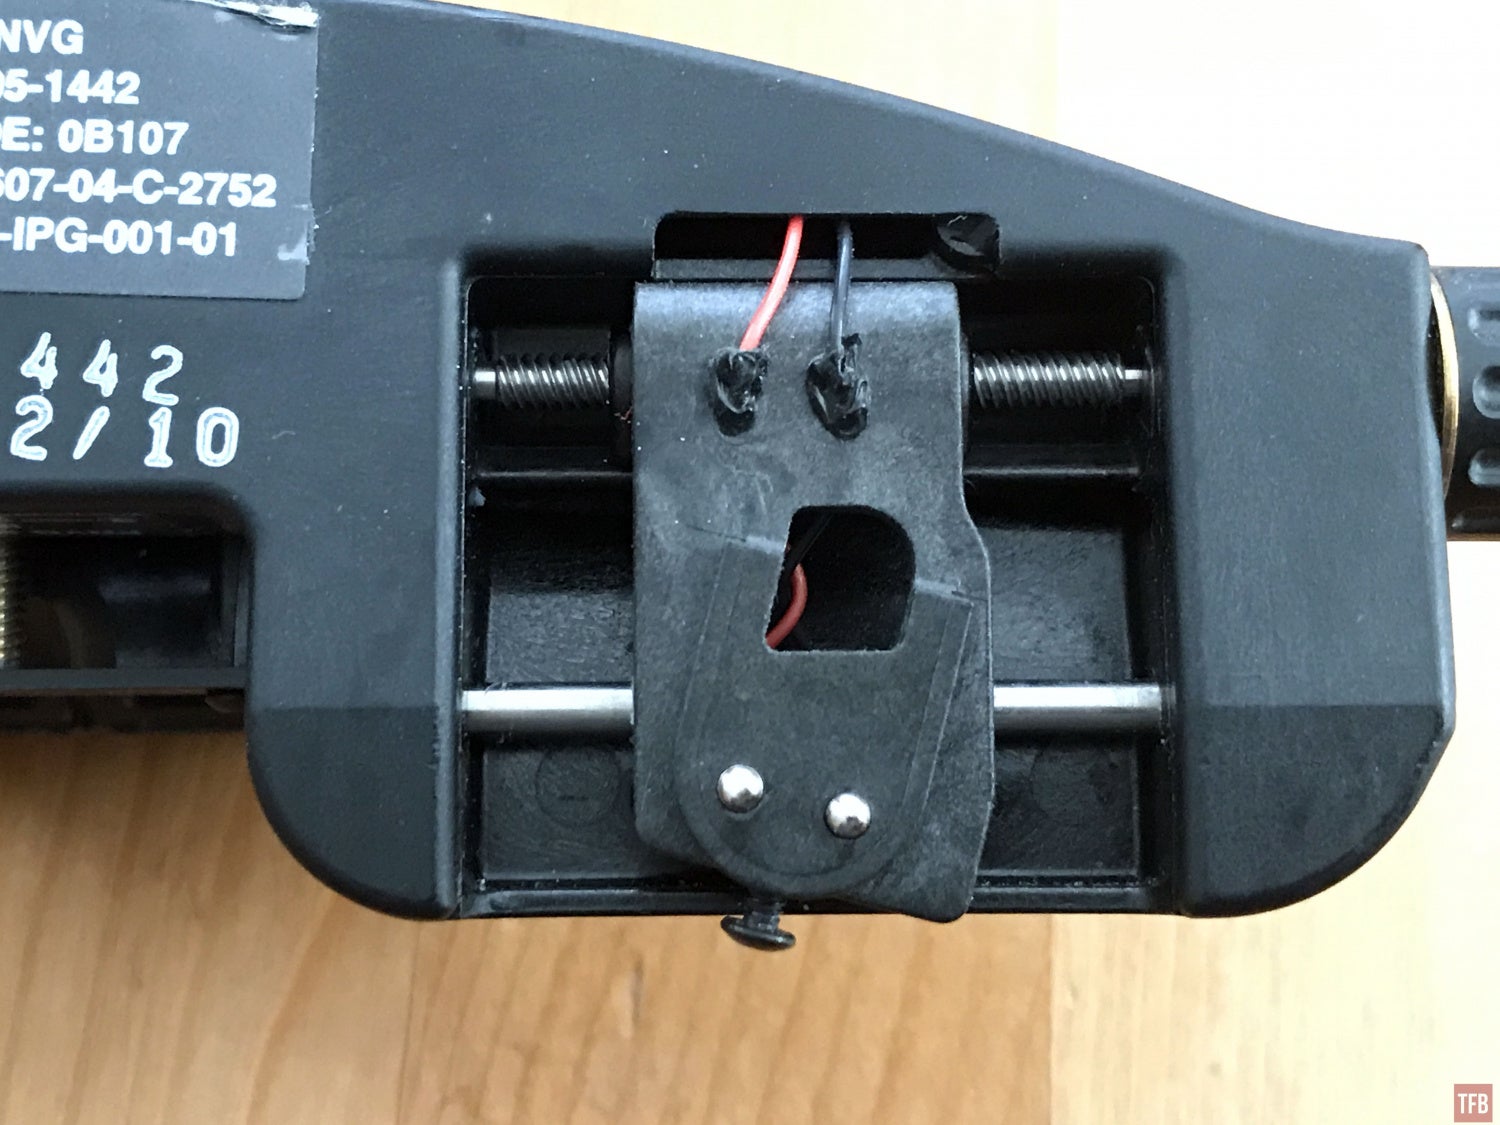
Just like the ANVIS9, the ANVIS10 has adjustments on either end of the bridge. On the right side, pictured below, there is a wheel with a triangular protrusion. This adjusts the angle of the quadtubes in relation to the ball dented mount. If you want to pitch the goggles up or down you turn that wheel. Outside of the wheel is a smaller knob. This is for adjusting the right pod left and right for pupillary distance adjustment,.

On the opposite side, you have the left pod PD adjustment knob and the larger wheel is a friction lock to lock the pitch adjustment for the bridge.
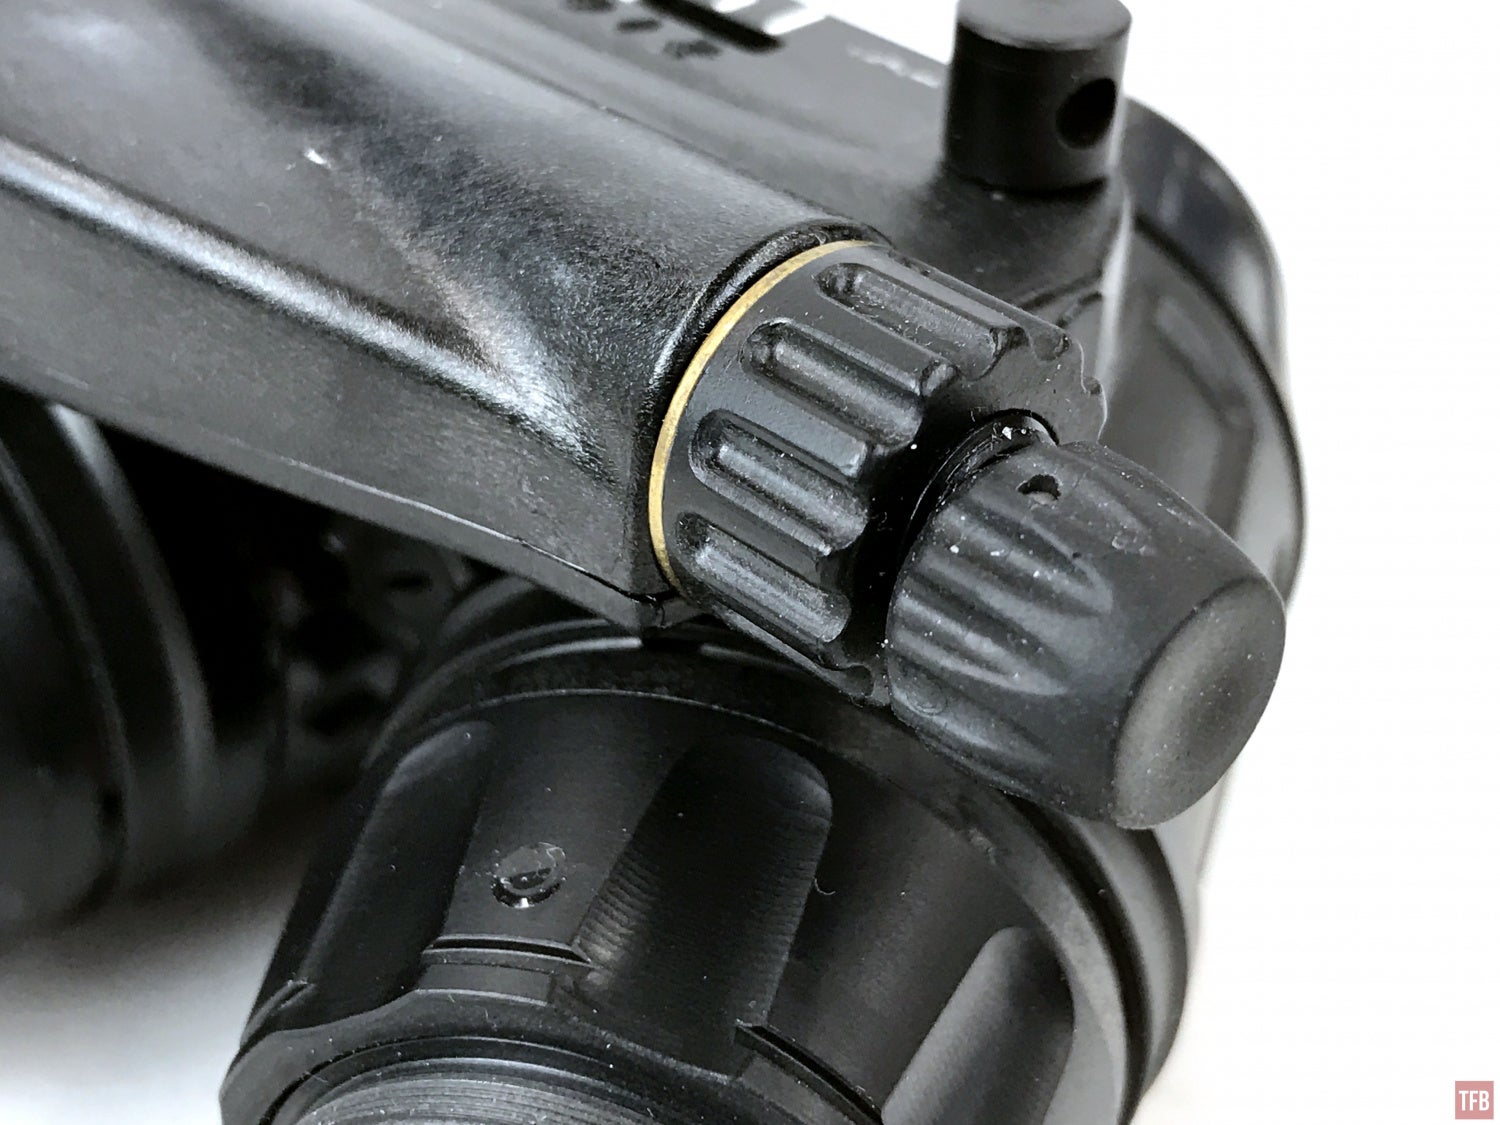
The central post on the bridge has a wheel in front, just like ANVIS9, to adjust them forward and backwards.
ANVIS10 Accessories
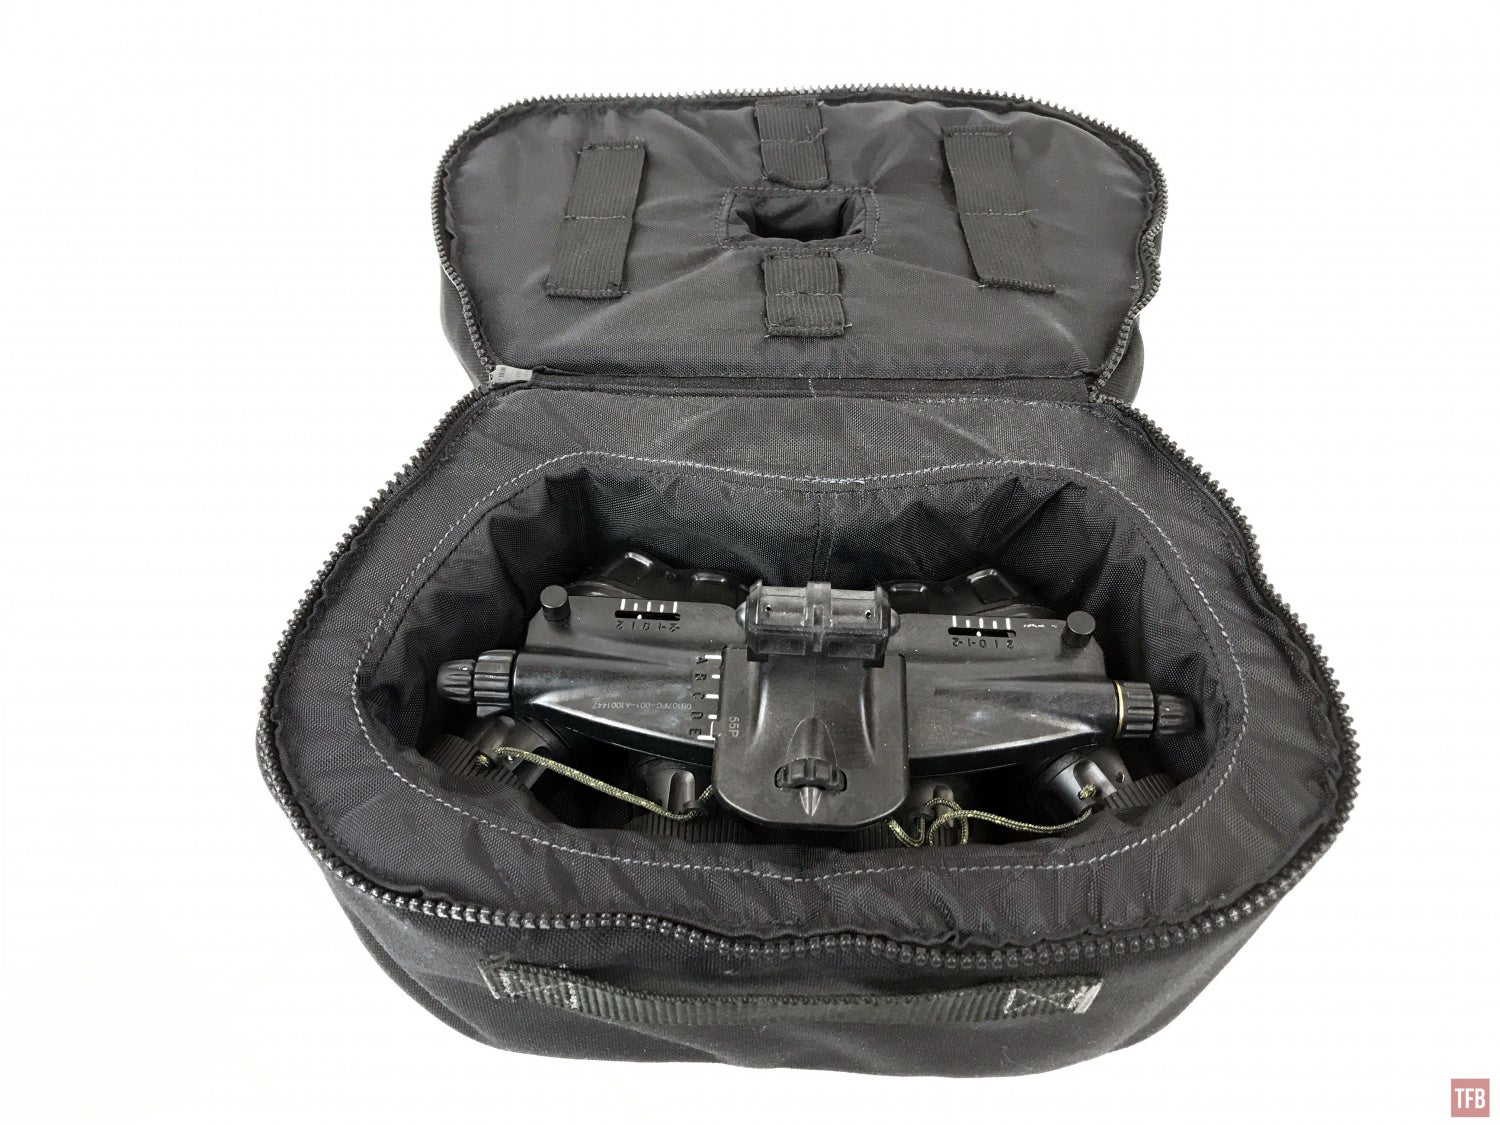
The D.I.Y. ANVIS10 build kit came with the padded case. It is similar to the GPNVG padded case only a little bit smaller and does not have a hard case.


ANVIS10 case with GPNVG case below it.

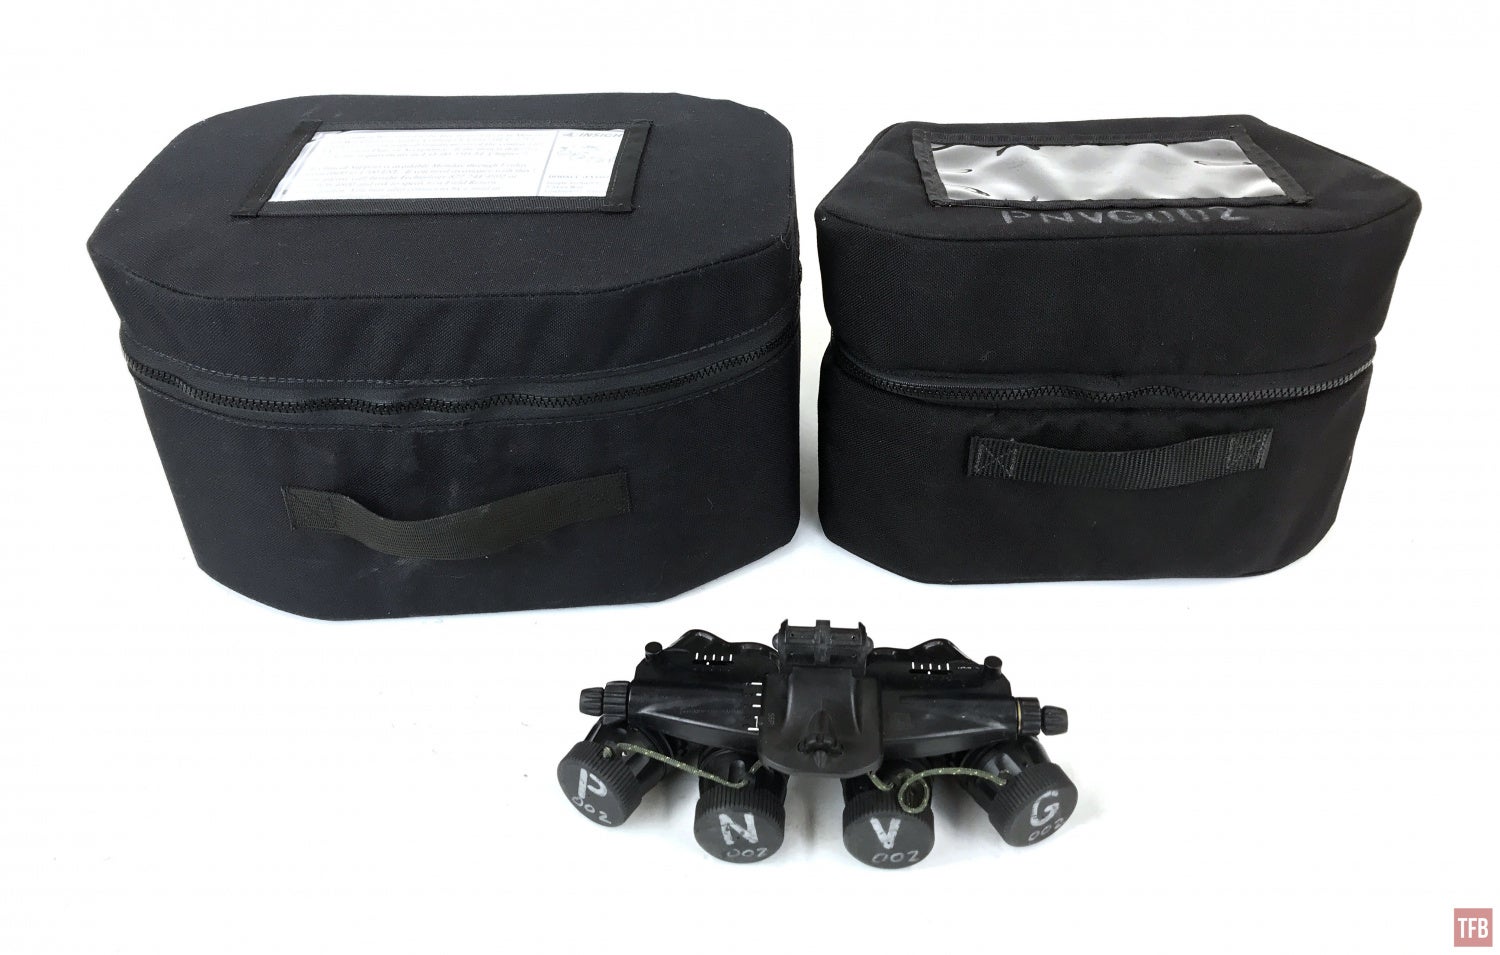
The QTNVG fits in the ANVIS10 case
If you recall, the GPNVG case comes with a hard case to protect the quadtube NVGs, the ANVIS10s fit inside but I cannot keep the day filters on and close the lid.

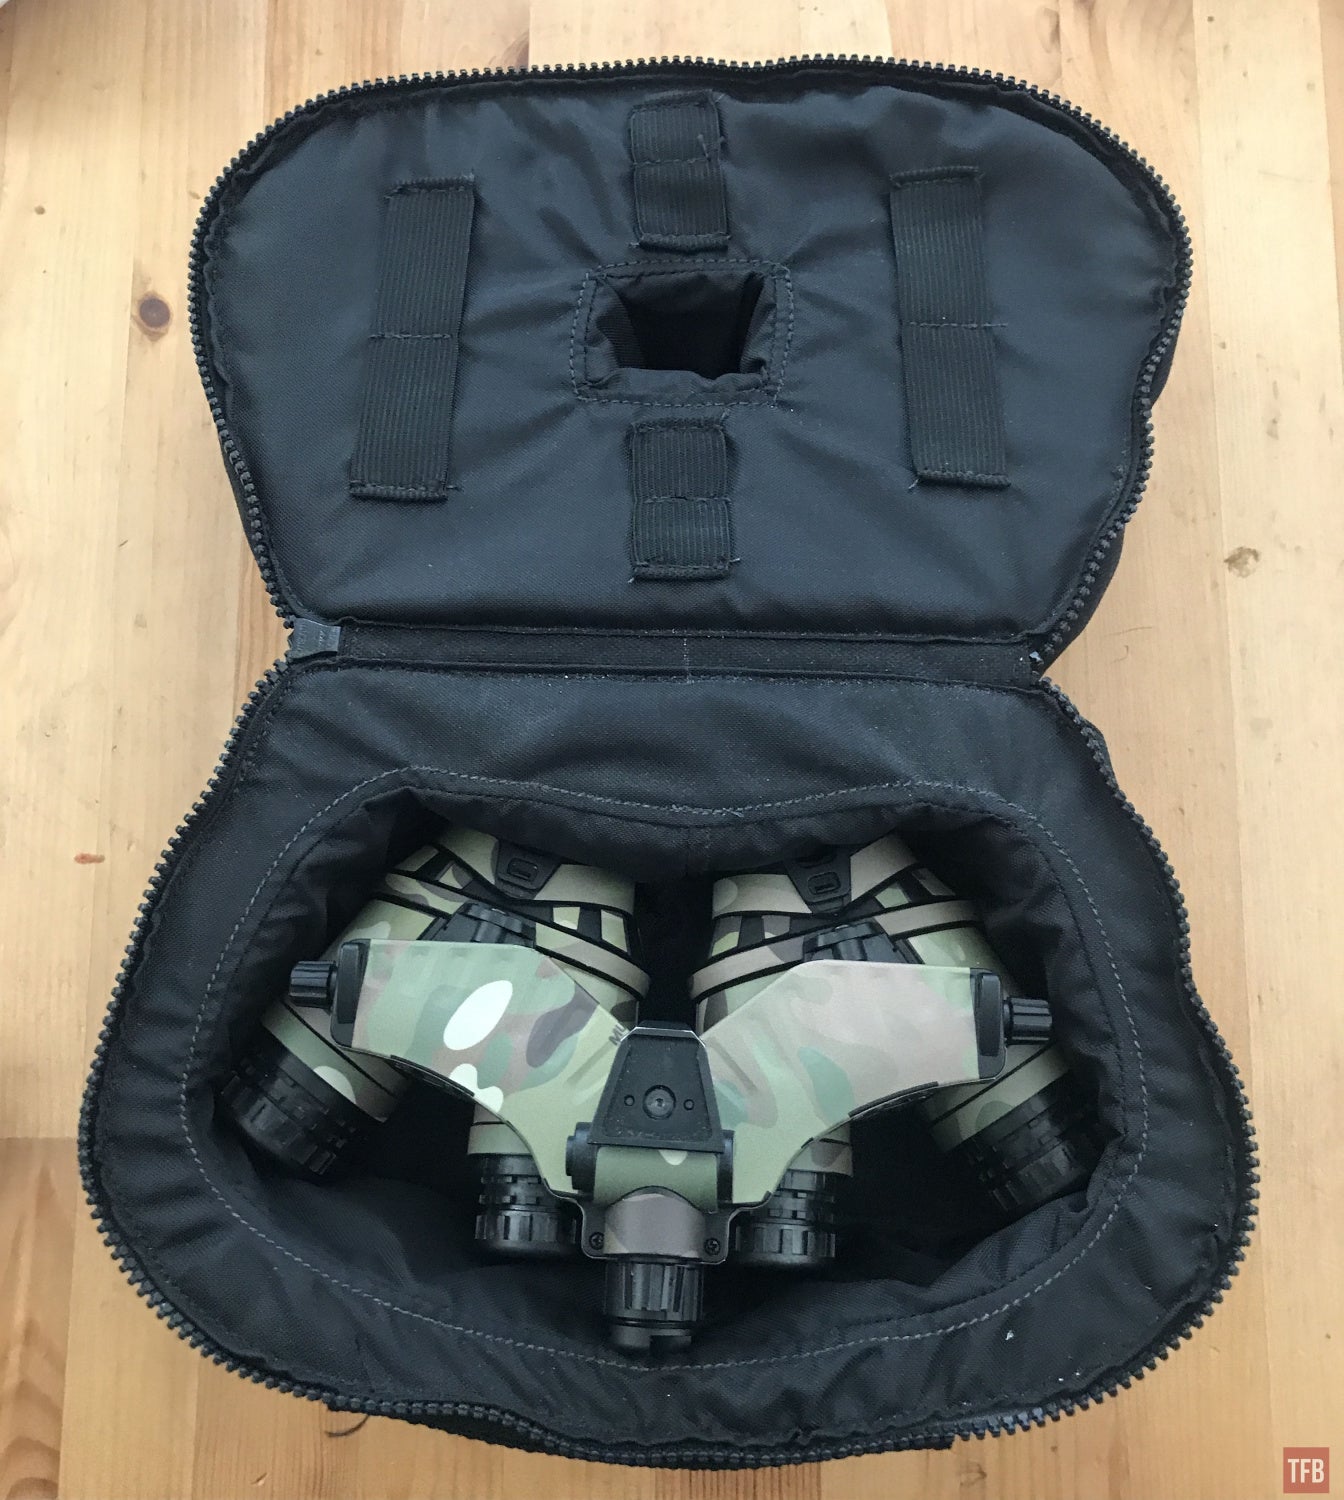
I grabbed a GPNVG padded case from TYR Tactical for my QTNVGs. They actually fit the PNVG ANVIS20 better and I can keep the day filters on while closing the case. This is for light travel and space saving. Compared to the giant foam box that the PNVGs came in.

ANVIS`10 Upgrades
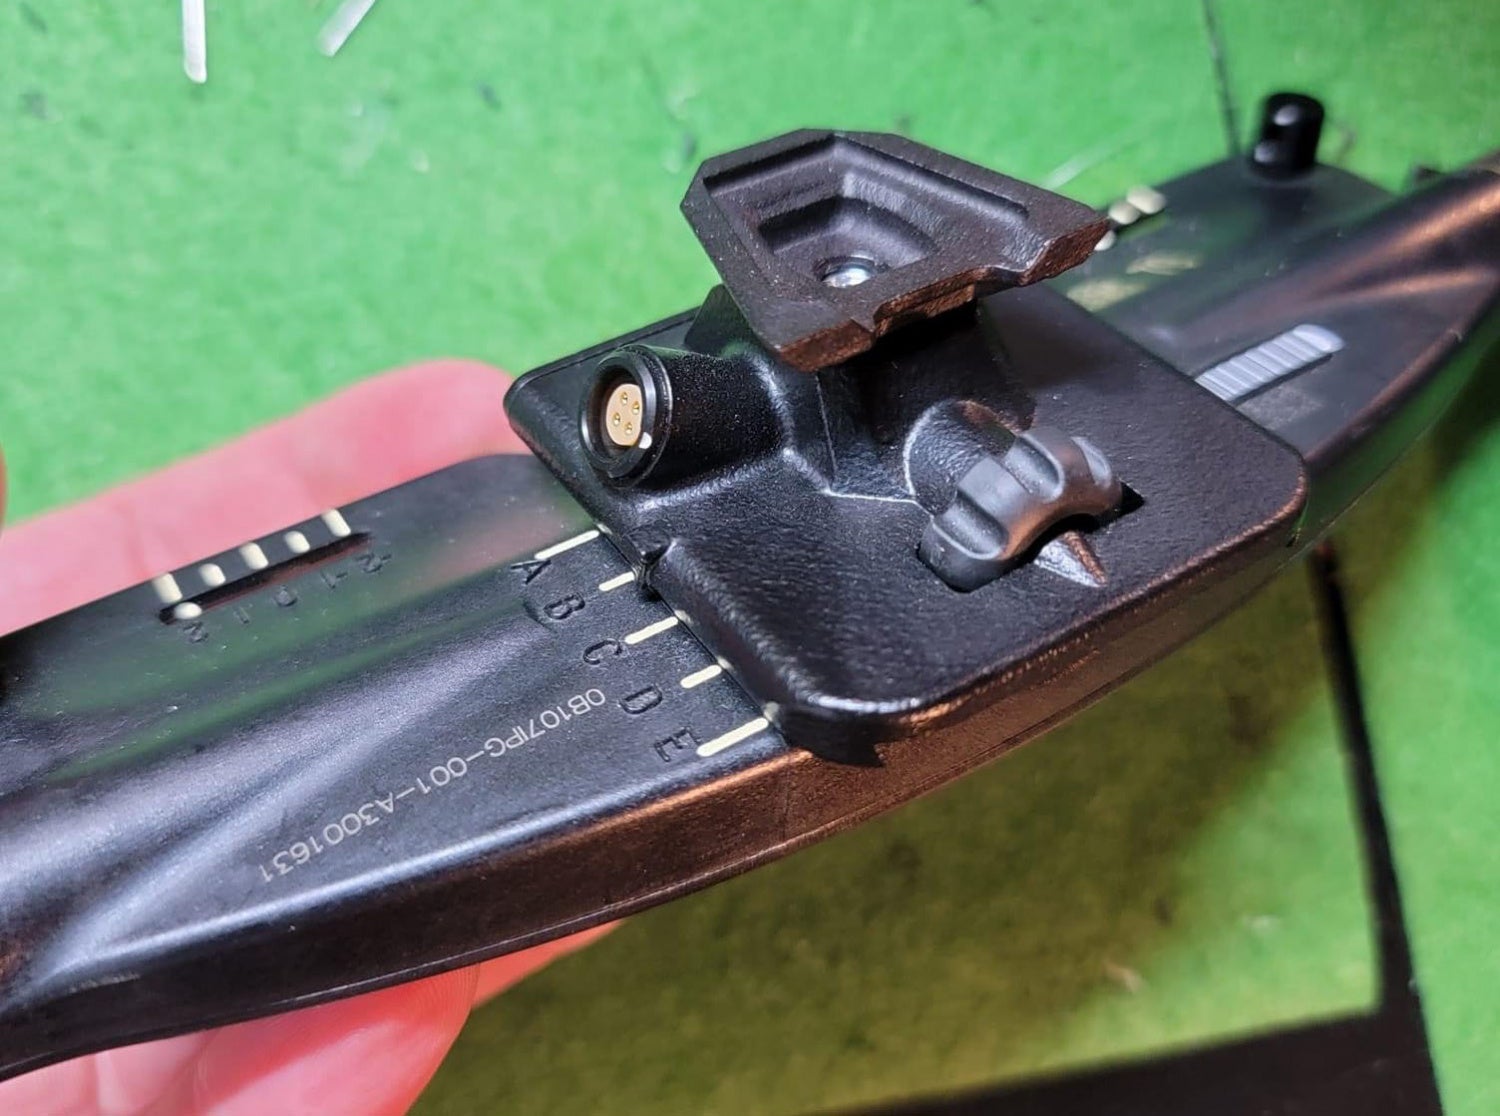
Photo by Nocturn Industries
Jeffery Melochick and Nick Berube of Nocturn Industries have upgraded an ANVIS10 into a ground PNVG. While it is to ruggedized, it eliminates the ball detent for a more user friendly dovetail. In order to deliver power to the ANVIS10, They added a LEMO port for use with an ANVIS remote battery pack. The bridge still maintains the forward adjustment.
EDIT: Jeffery lent me his modified bridge.

Factory ANVIS10 bridge on top, Nocturn Industries modified bridge on bottom
The dovetail looks similar to the one Jeffery uses for his UANVB aka Katana.


Ed Wilcox mentioned he made a stand-alone CR123 battery pack that attaches directly to the ANVIS10 pod, similar to the GPNVG. However he had designed his battery pack before ever seeing the GPNVG battery pack.

It is a modified version of his SBP Arc Rail battery pack.
Just like the QTNVG, you can add a COTI to the ANVIS10 and have fusion panos. The mount attaches to the objective lens so unfortunately it will limit your ability to change the focus of that lens.

Final Thoughts: ANVIS10 Or QTNVG?

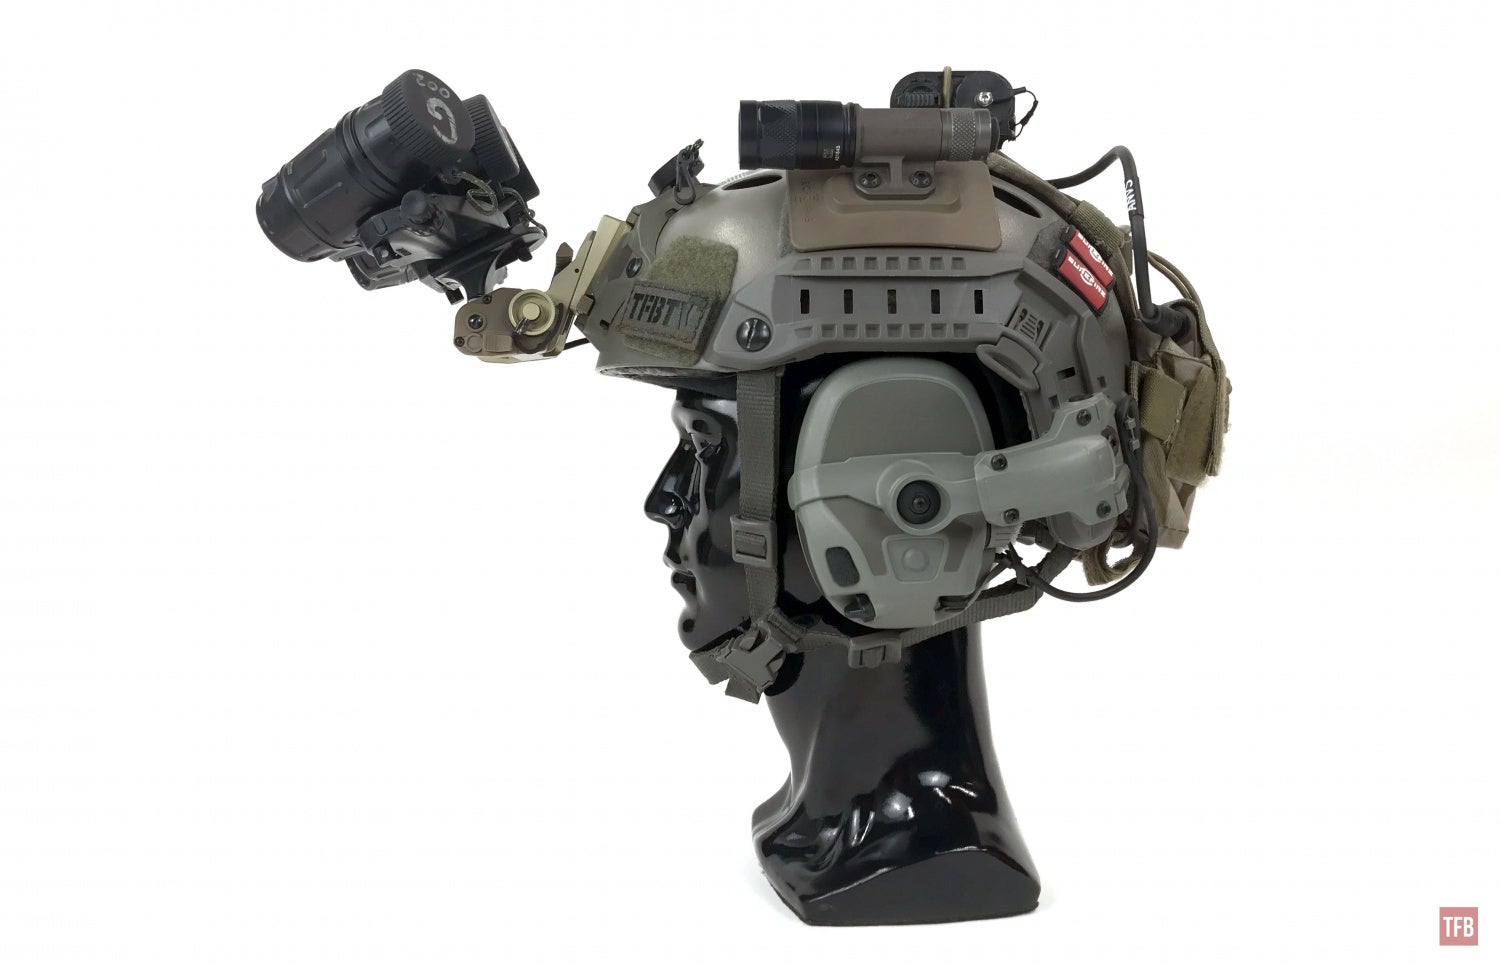
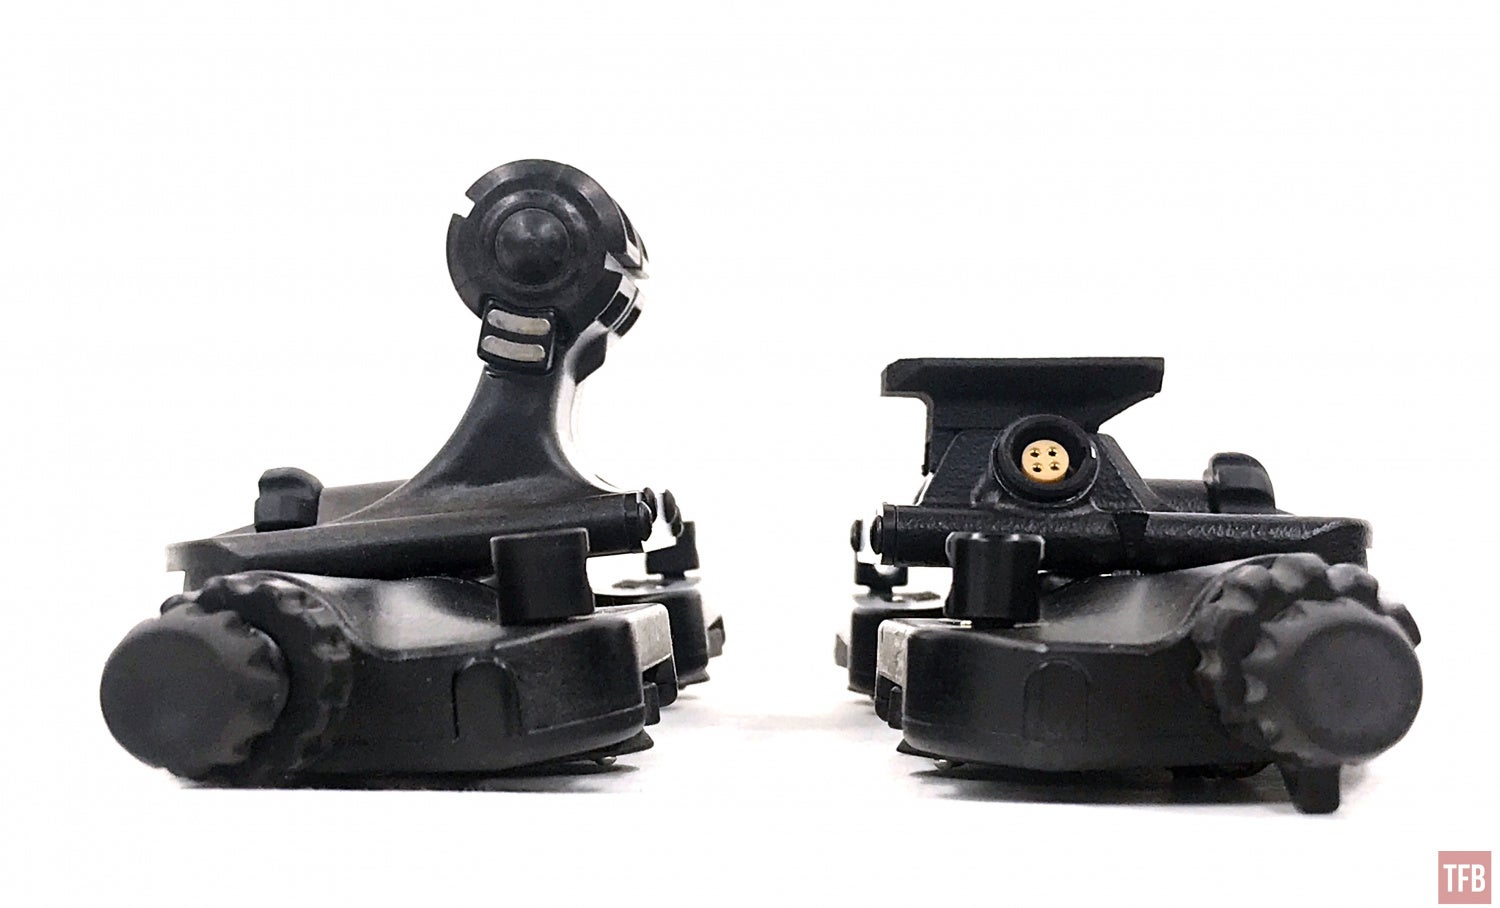
ANVIS10 is noticeably smaller than the QTNVG
That is the big question. I am ambivalent. They each have their pros and cons. The price is about the same depending on the tubes you get for the QTNVG. So let’s discuss what makes them different.
The QTNVG is great because it is an affordable way into a quadtube system. It is still currently being manufactured and while it is made in China, it is still possible to get some support. At least you could buy replacement parts if you needed to. That is not really possible for the ANVIS10. I do not know what the supply from USMCTOPGUN looks like but that well has to be near bone dry. I would not expect a lot of spare parts or support for ANVIS10. Ed Wilcox is hard pressed for replacement parts.
The ANVIS10 are not that heavy at just 23.5 ounces. That is just a little bit heavier than a set of bino dual tubes. 1431s are around 21 ounces built with battery whereas the QTNVG weigh 30.5 ounces with battery.

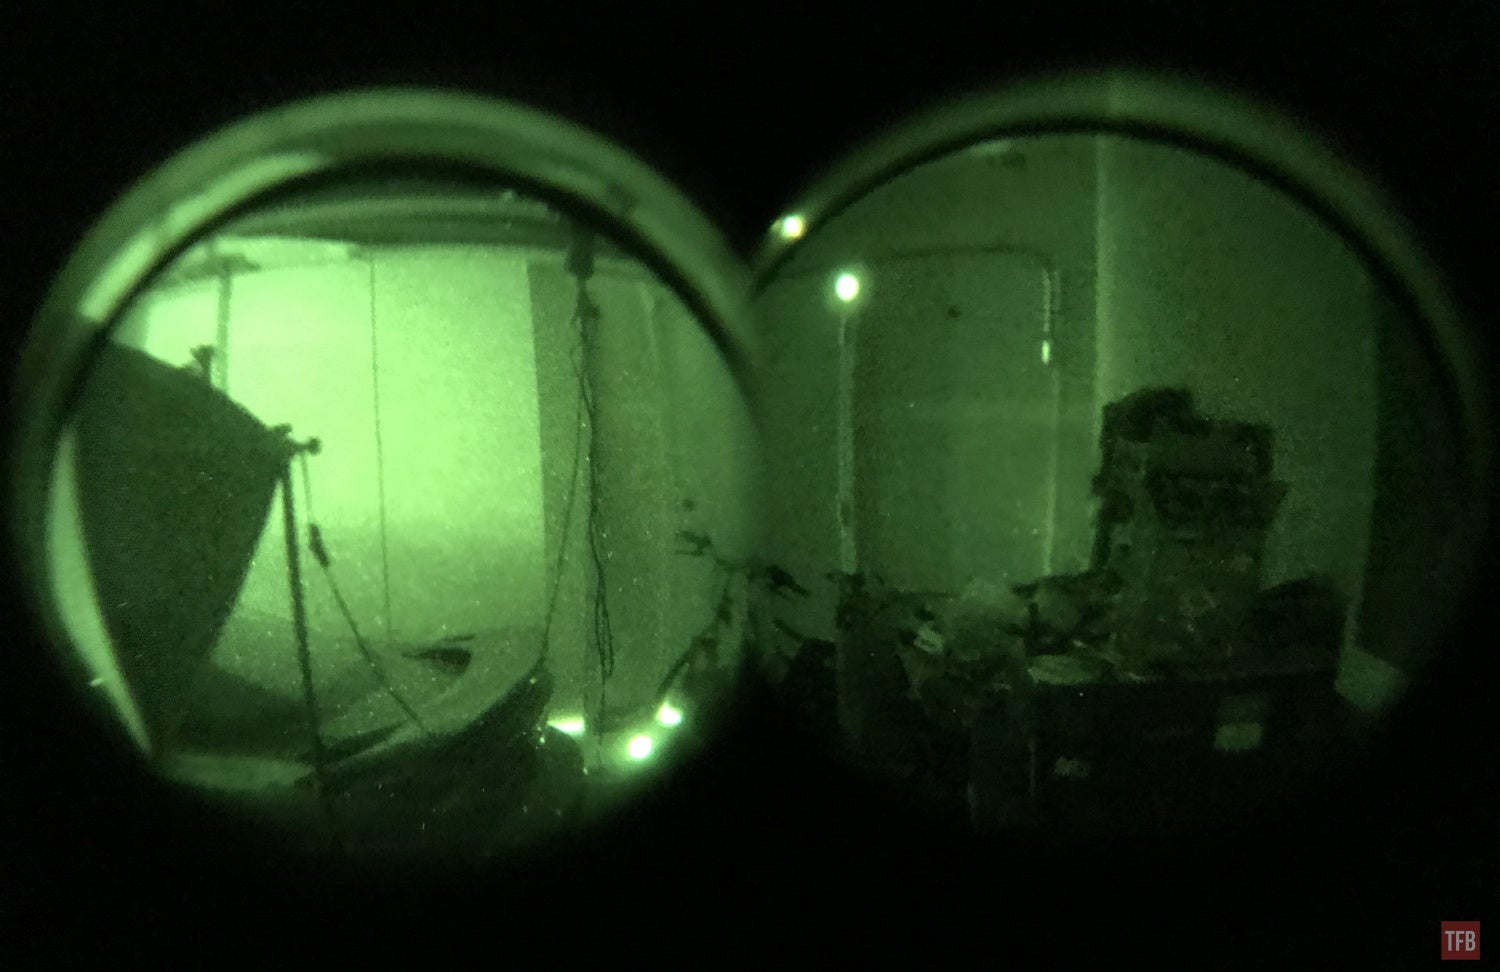
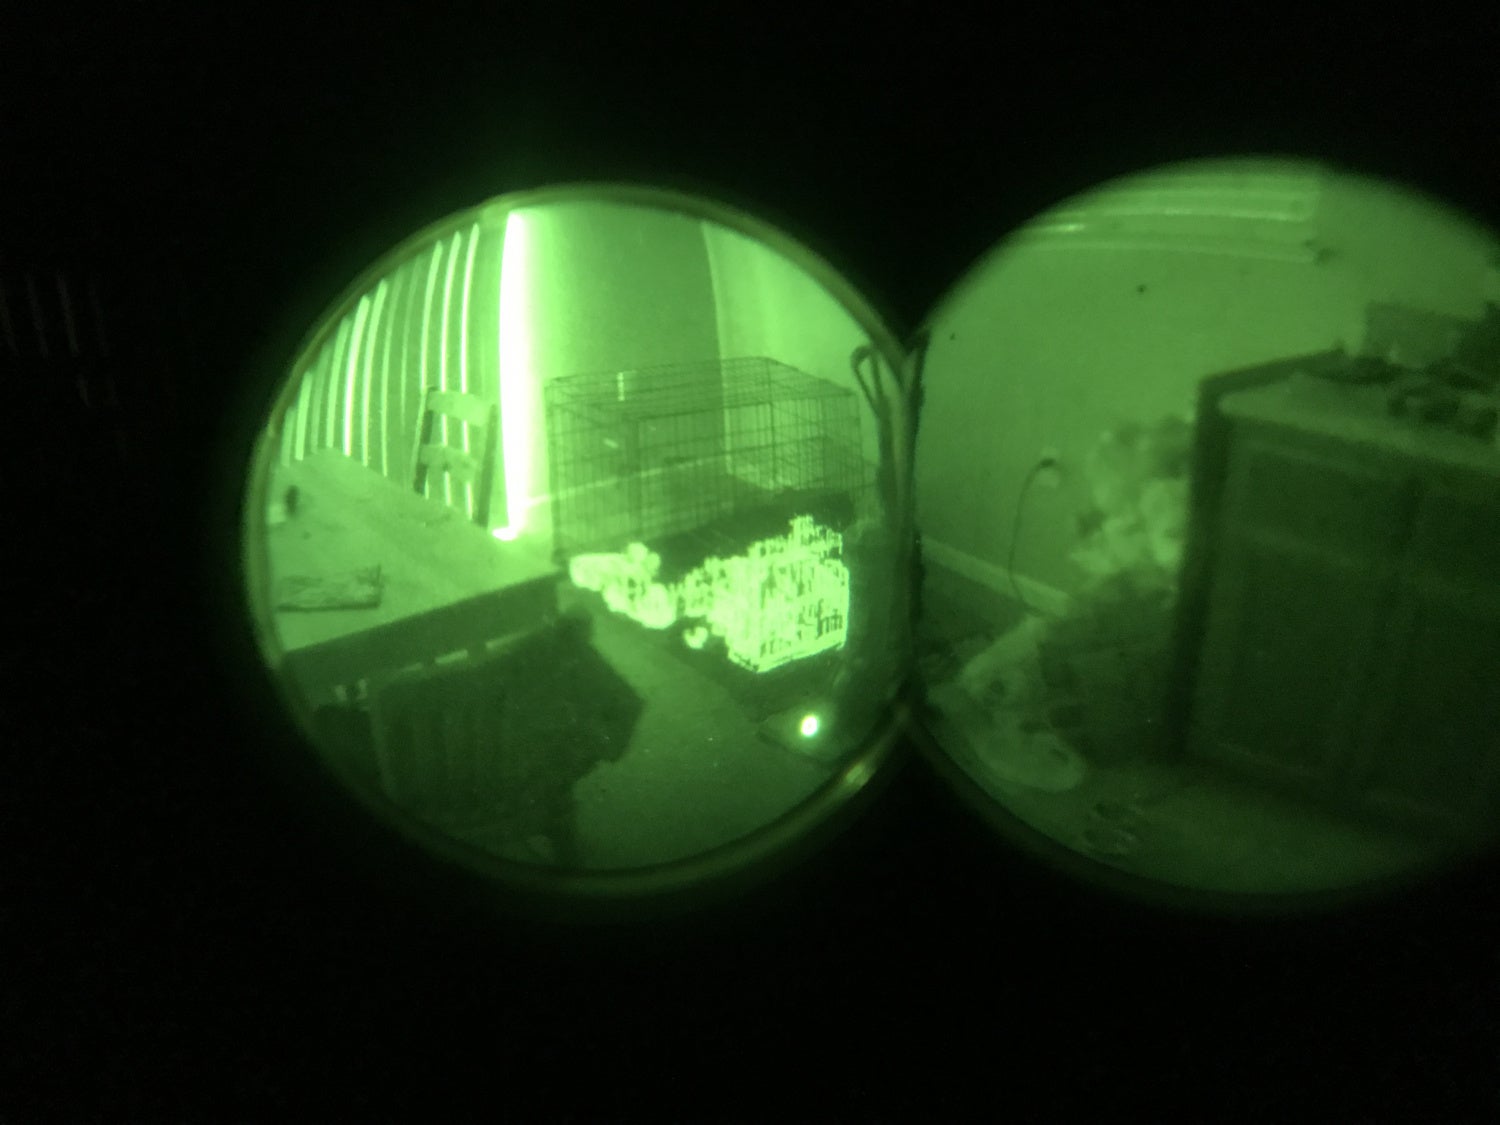
Filed of view is smaller on the ANVIS10s since they use 40º FOV lenses as opposed to the 50º FOV lenses on the quadtube night vision goggle (QTNVG). That means you only get a combined 97º FOV on the ANVIS10 but 120º FOV with the QTNVG. I noticed a significant loss of FOV with the ANVIS10 when I tried driving at night with them. The QTNVG allows me to see my driver-side mirror and rearview mirror by simply glancing at them with a movement of my eyes. The ANVIS10 FOV is not wide enough and I have to turn my head slightly to look at the mirrors. The QTNVG has a narrow exit pupil for the eyepiece. If your eye is not perfectly centered, the image can be distorted. I was hoping the ANVIS10 would be more forgiving since they are 40º FOV. Mine do not seem to be that forgiving but that could be due to me not “properly” spacing the lenses in the eyepiece. I do not have a factory built ANVIS10 to compare.
The ANVIS10 quadtube uses the ball detent mount system. This means you have to use a different helmet mount and run a remote battery pack to power them. They do not have onboard power unless you use the COPS. The QTNVGs have onboard power and a dovetail interface that works with standard mounts like the Wilcox G24. Both quadtube housings are not that robust. The ANVIS10 bridge seems just as fragile as ANVIS9. And I have seen two QTNVG bridges break their pupillary adjustments.
I am thinking of holding onto the ANVIS10 for the cool factor and getting rid of the QTNVG. I can always build another QTNVG if I want to. But the ANVIS10 is the first panoramic night vision goggle so it has a place in night vision history. Is it practical? Not really especially with the onset of the Noisefighter Panobridge. But I like them.
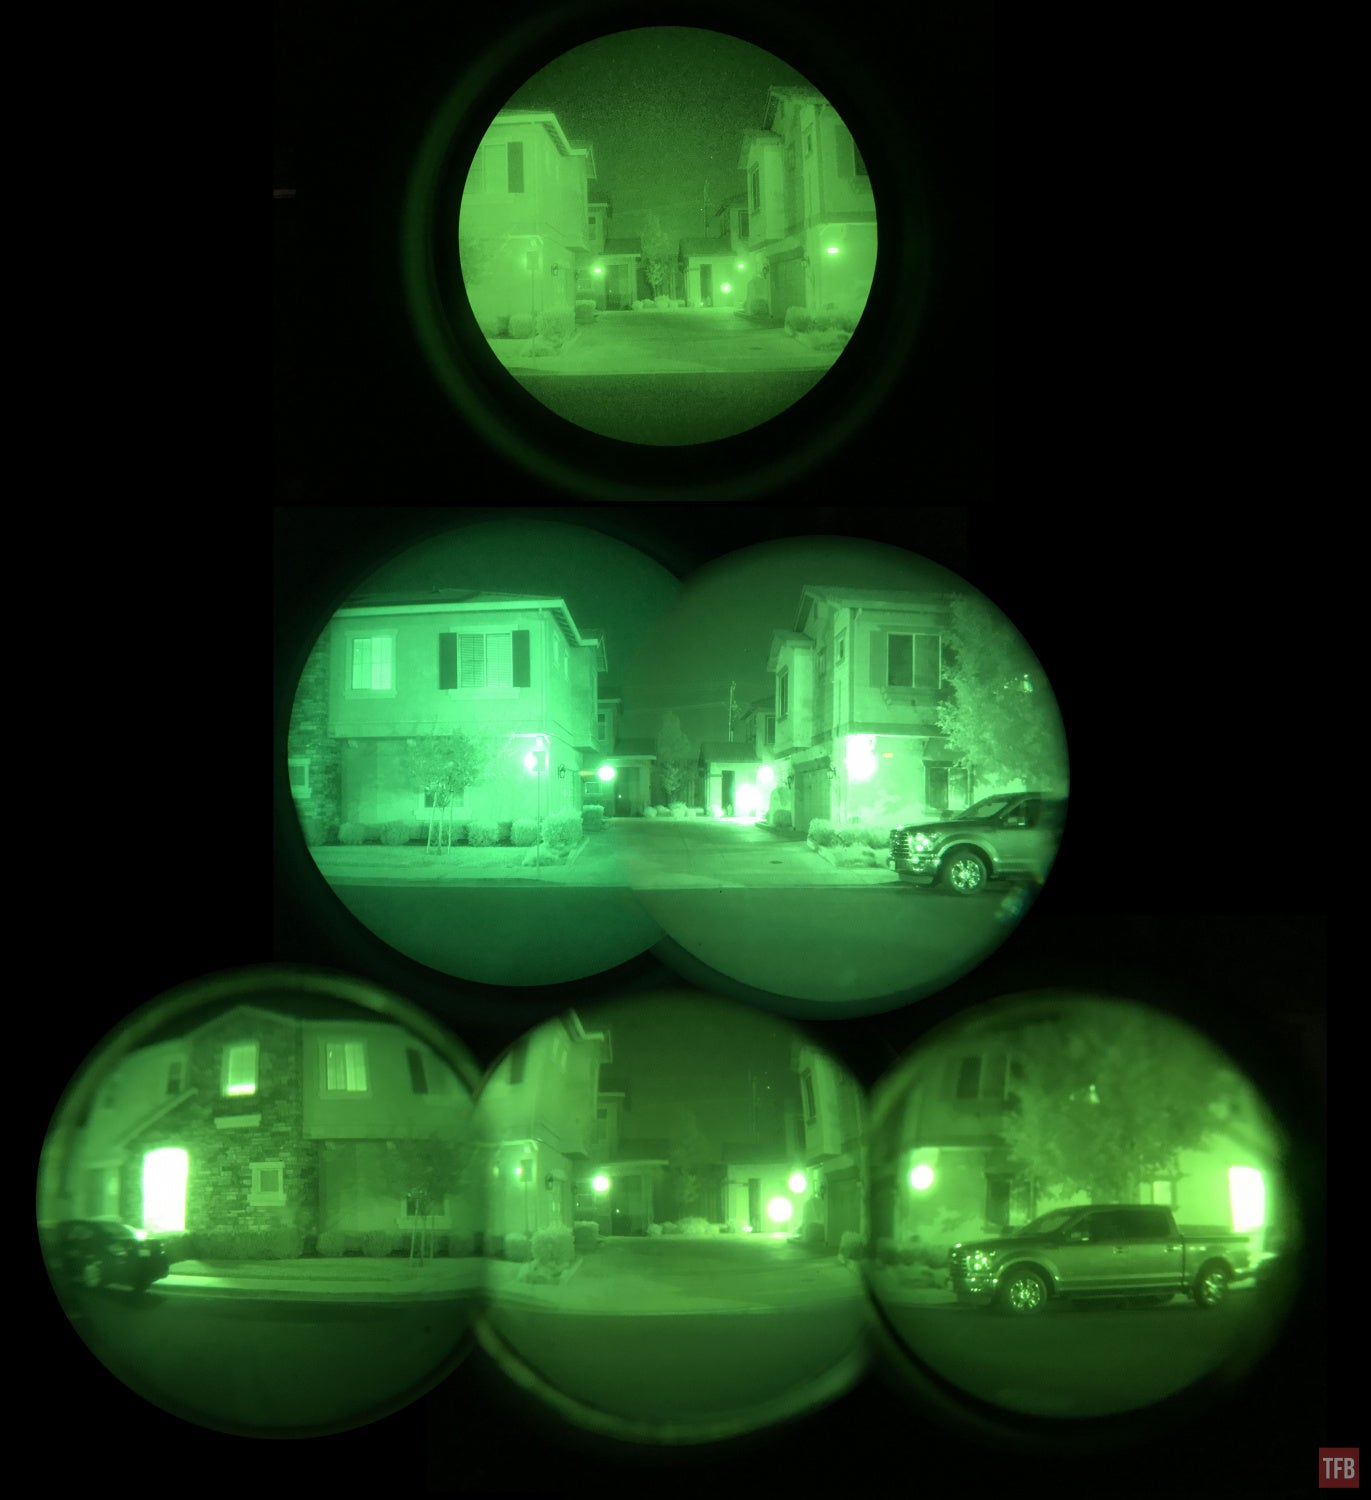
POV comparison
40º, 75º (Panobridge), 97º ANVIS10
TFB’s Friday Night Lights series is brought to you by ATN