 Your Privacy Choices

Good evening everyone and welcome back to TFB’s Friday Night Lights series. We are excited to announce that FNL is now sponsored by ATN Corp, manufacturers of night vision and thermal optics like the THOR LT. As with all of our sponsored series, Friday Night Lights will continue to bring you unbiased news and reviews from a variety of companies.
A couple years ago I wanted to check out the SIG Sauer Echo1 thermal sight. However, SIG Sauer was discontinuing it and replacing it with a newer thermal sight. The SIG Echo3 is that replacement and it is better than the Echo1.
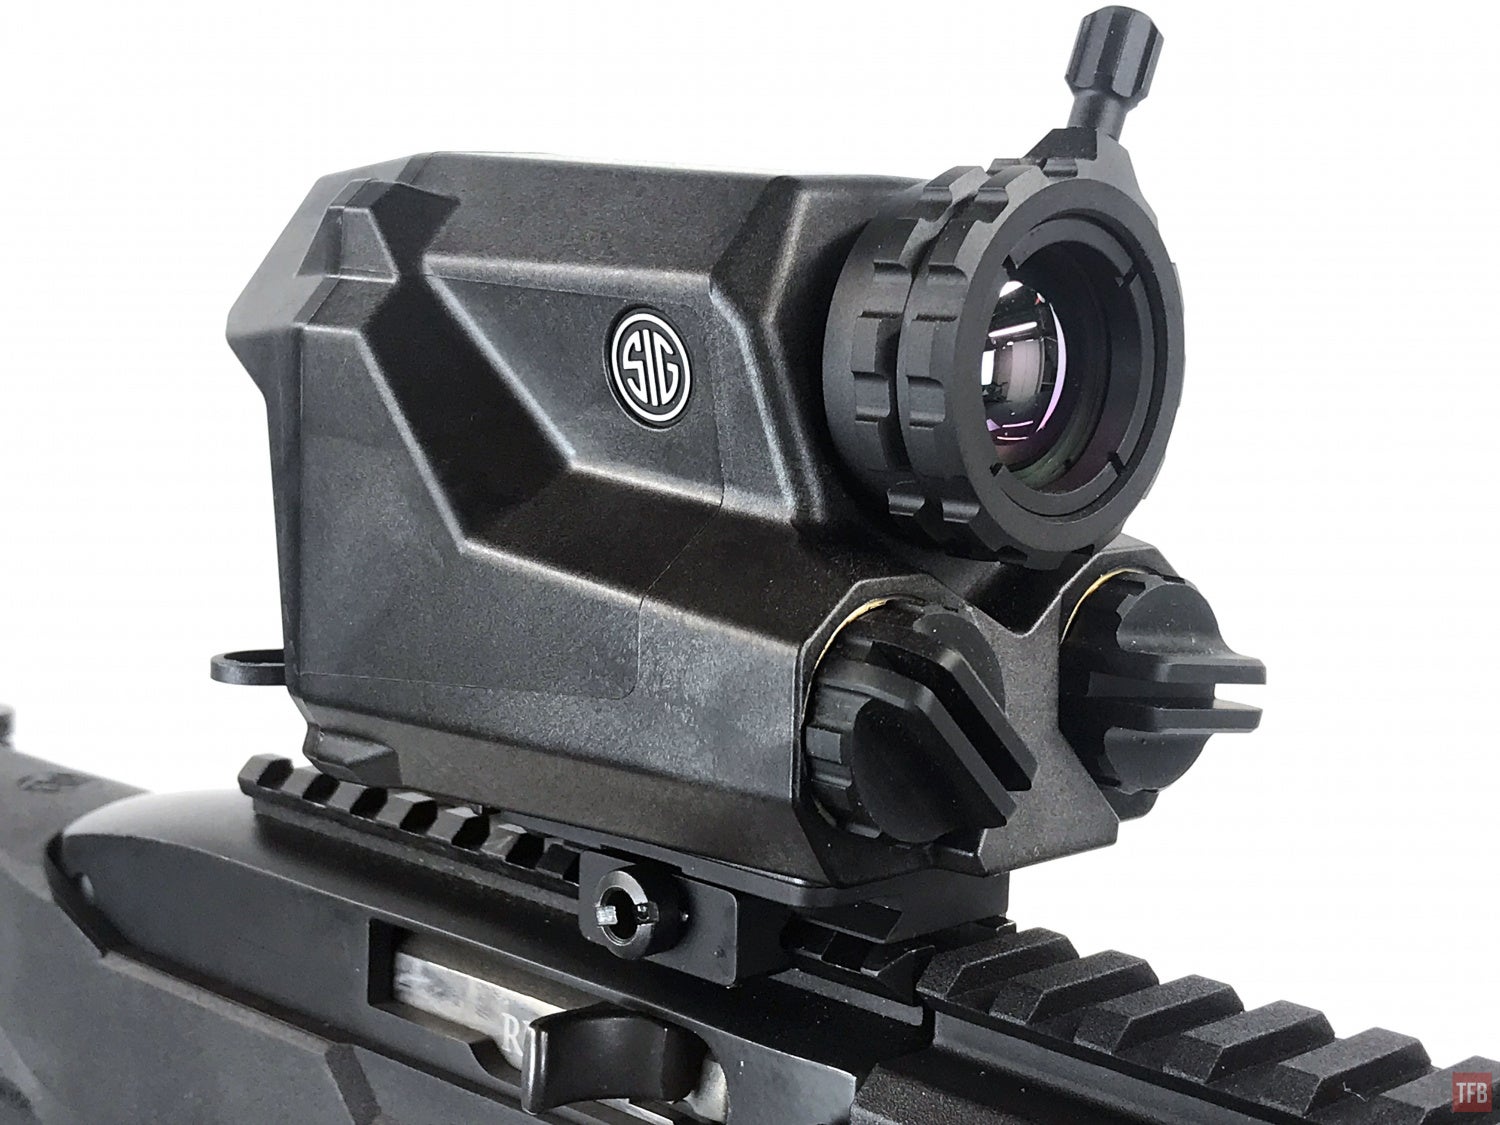
Echo3 Thermal Reflex Sight
Here is the Echo1 that came out a few years ago.
The Echo3 is a similar design and concept. It is a Thermal Reflex Sight. SIG sent me their 1-6x Echo3 and it has a 23mm Germanium objective lens. Just below the objective lens is the battery compartment. There are two battery caps. The Echo3 is powered by a CR123. It uses two CR123s to increase battery capacity for a longer run time. The SIG Echo3 can run for 6 hours on two CR123s.

The Echo3 has a removable throw lever which helps to adjust the focus for the objective lens. SIG did remove the small trench sight at the top from the Echo3.
At the bottom, they use a QD throw lever mount.

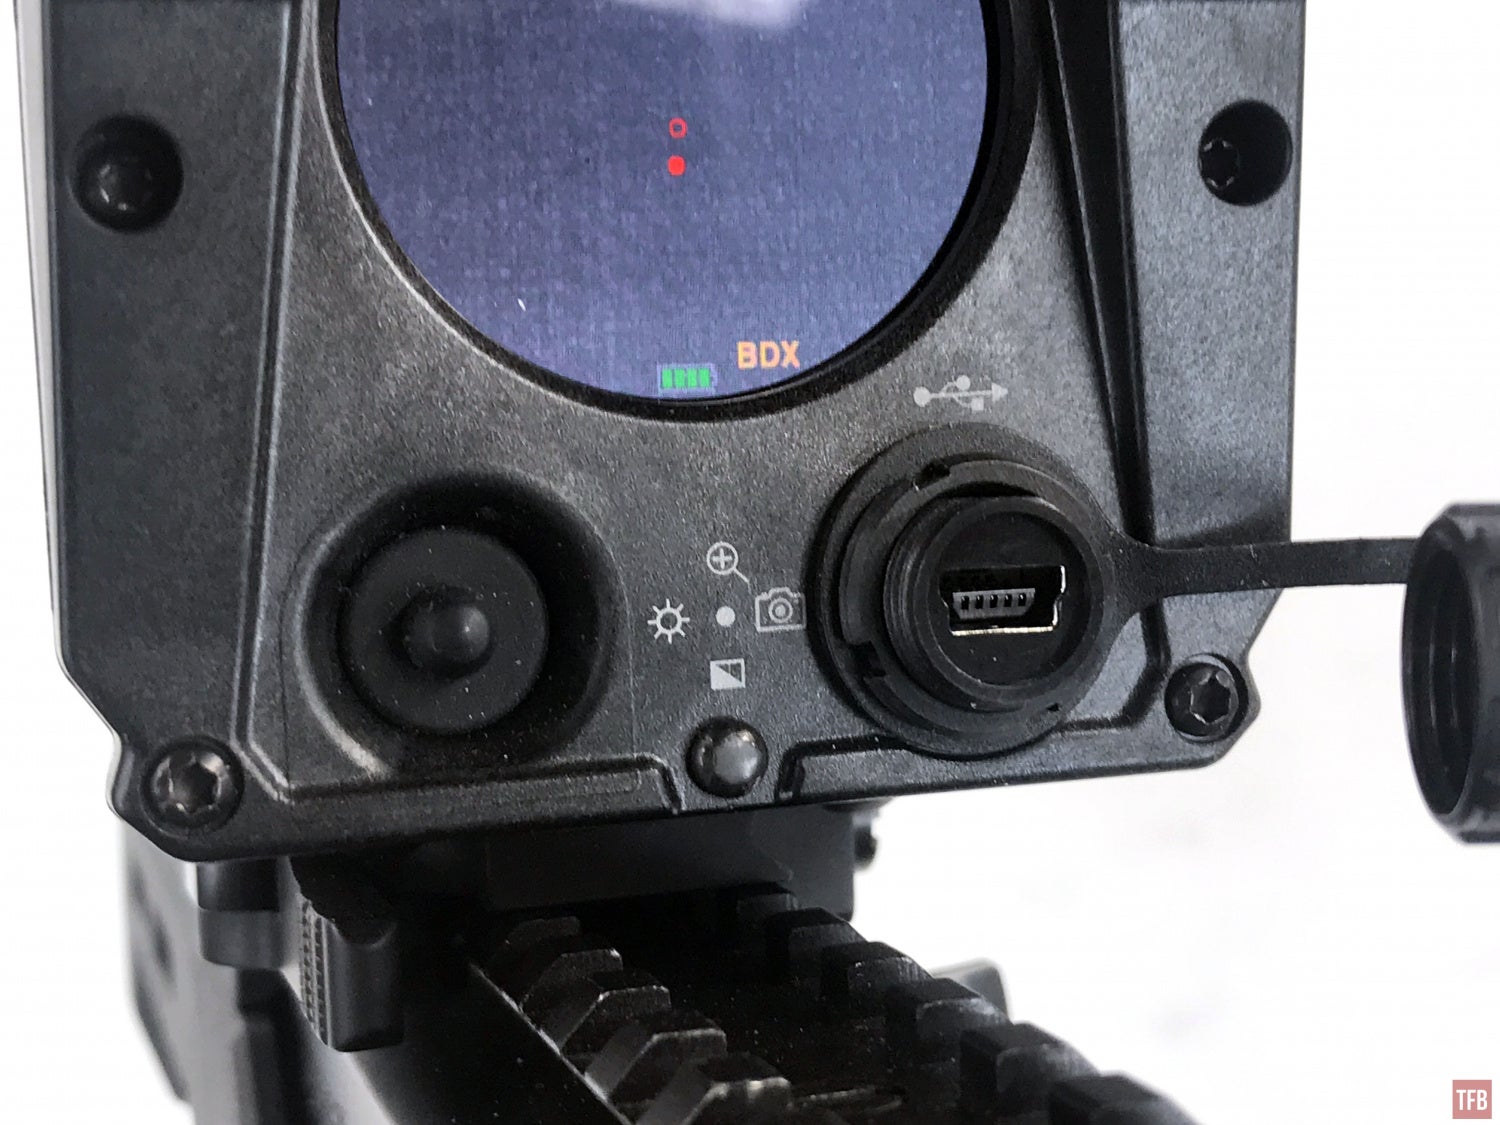
The rear is somewhat similar to the Echo1. You are looking at an LCD screen rather than an eyepiece like traditional thermal weapon sights. This simplifies the design but also cause a small issue if your eye sight is not good enough to focus at objects close to your face. Take a look at the screen cap below. See how far forward the SIG Echo1 is? Depending on your eyesight, you might have to do that with the Echo3.

At the back is the directional button. Push and hold to turn the unit on. Push and hold when it is on, to turn it off. When you move the little joystick up, you can change the digital zoom. The left position adjusts the screen brightness. Press down and you can cycle through the thermal color palettes. And right will enable image or video capture. If you push the button forward and hold it for a couple seconds, you will bring up the internal menu. Here you can change a lot of settings such as enabling BDX mode, changing reticles, changing recording from image to video or recoil activated. To the right of the joystick is a mini USB port for downloading any videos or images you captured. You can also plug in a USB power bank to extend the run time.
The Echo3 has 8 color palettes to choose from.

The echo 3 has a number of reticles to choose from.
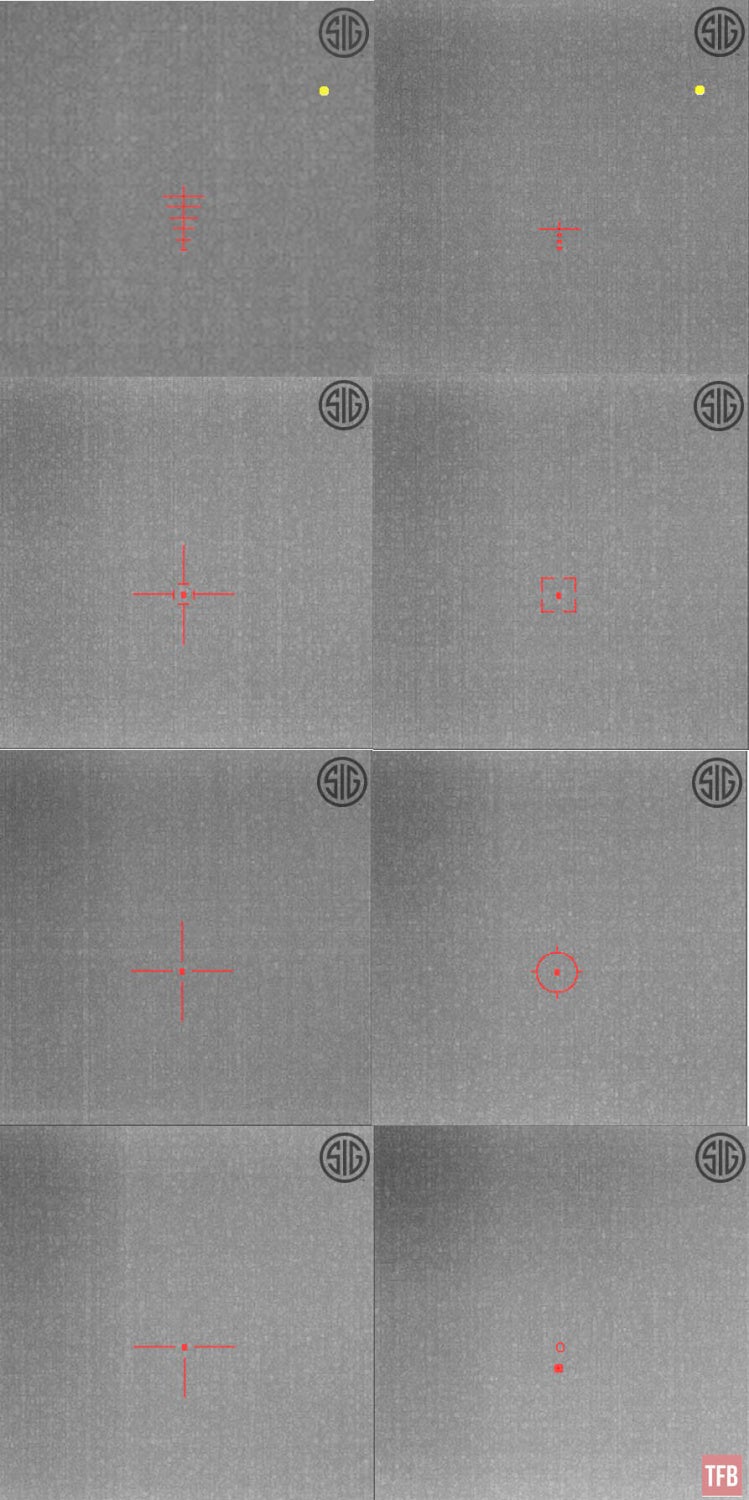
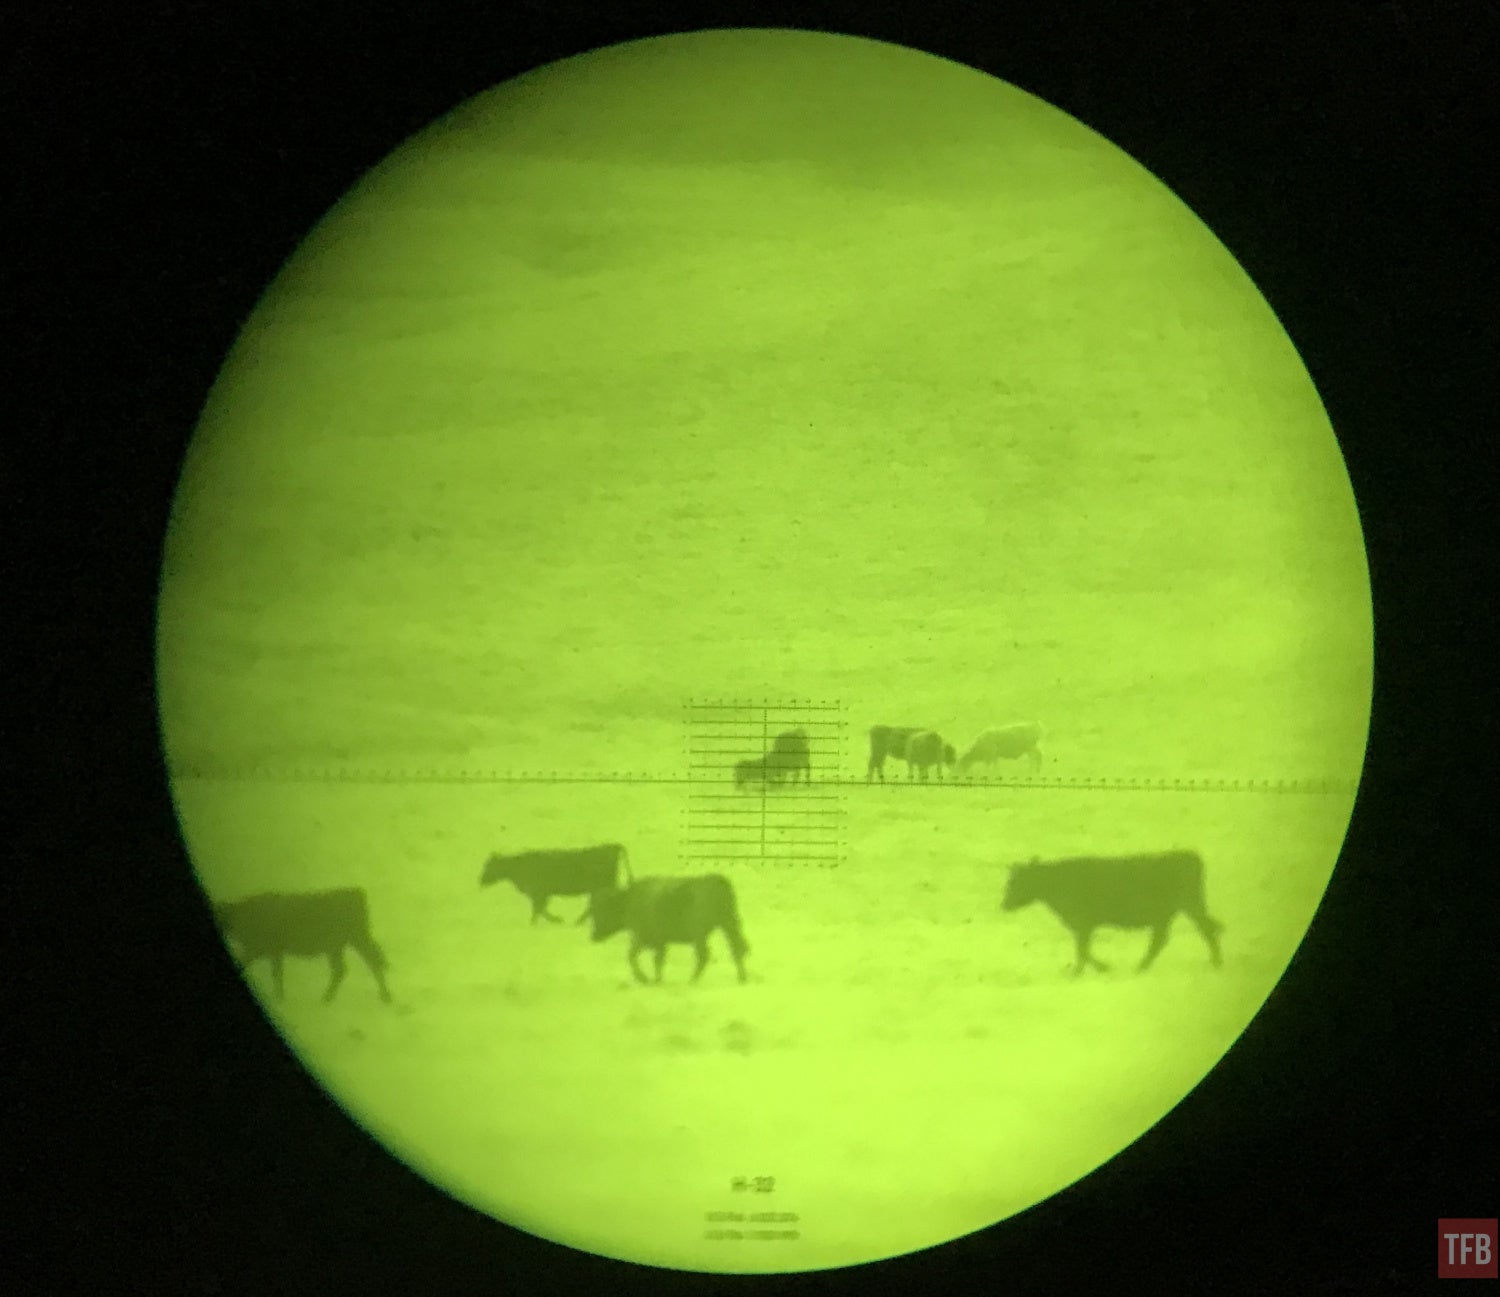
Some of the reticles actually change size when you zoom in. Sort of like first focal plane. But the reticle I like the most was the BDX reticle. See the picture above? It is the bottom right reticle.
SIG BDX Compatibility

One of the main features that the SIG Echo3 has is its ability to connect to the SIG BDX app. More importantly, you can use the Echo3 with any of their SIG KILO range finders that are also BDX compatible. What does this mean? You input your ballistic data into the app, connect your Kilo range finder and Echo3 to each other to the app. Then when you range find your target, the Kilo range finder will give you a ballistic solution which is fed into the Echo3 and the BDX reticle shows you your ballistic hold to shoot the said target. My friend Kythe has a pair of SIG KILO3000BDX binoculars so we tested the Echo3.
Due to the ammo crunch, I opted to test this with my Ruger Charger 10/22. I have plenty of .22LR ammo and ballistic drops would be greater at closer distances.
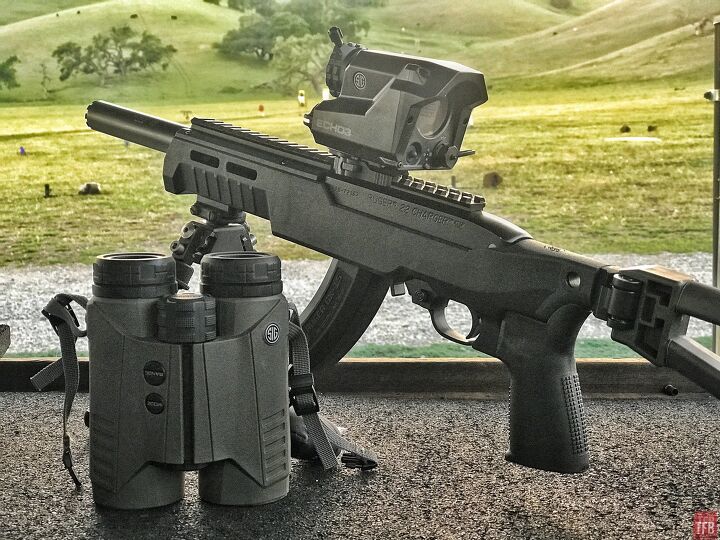
SIG Kilo3000 BDX LRF binoculars.
Even though my Charger barrel has been chopped down to 4.5″, it was not hard shooting out to 200 yards.
Shooting out to 300 yards on the other hand was a bit more challenging. This is where I wanted to see the BDX system work.

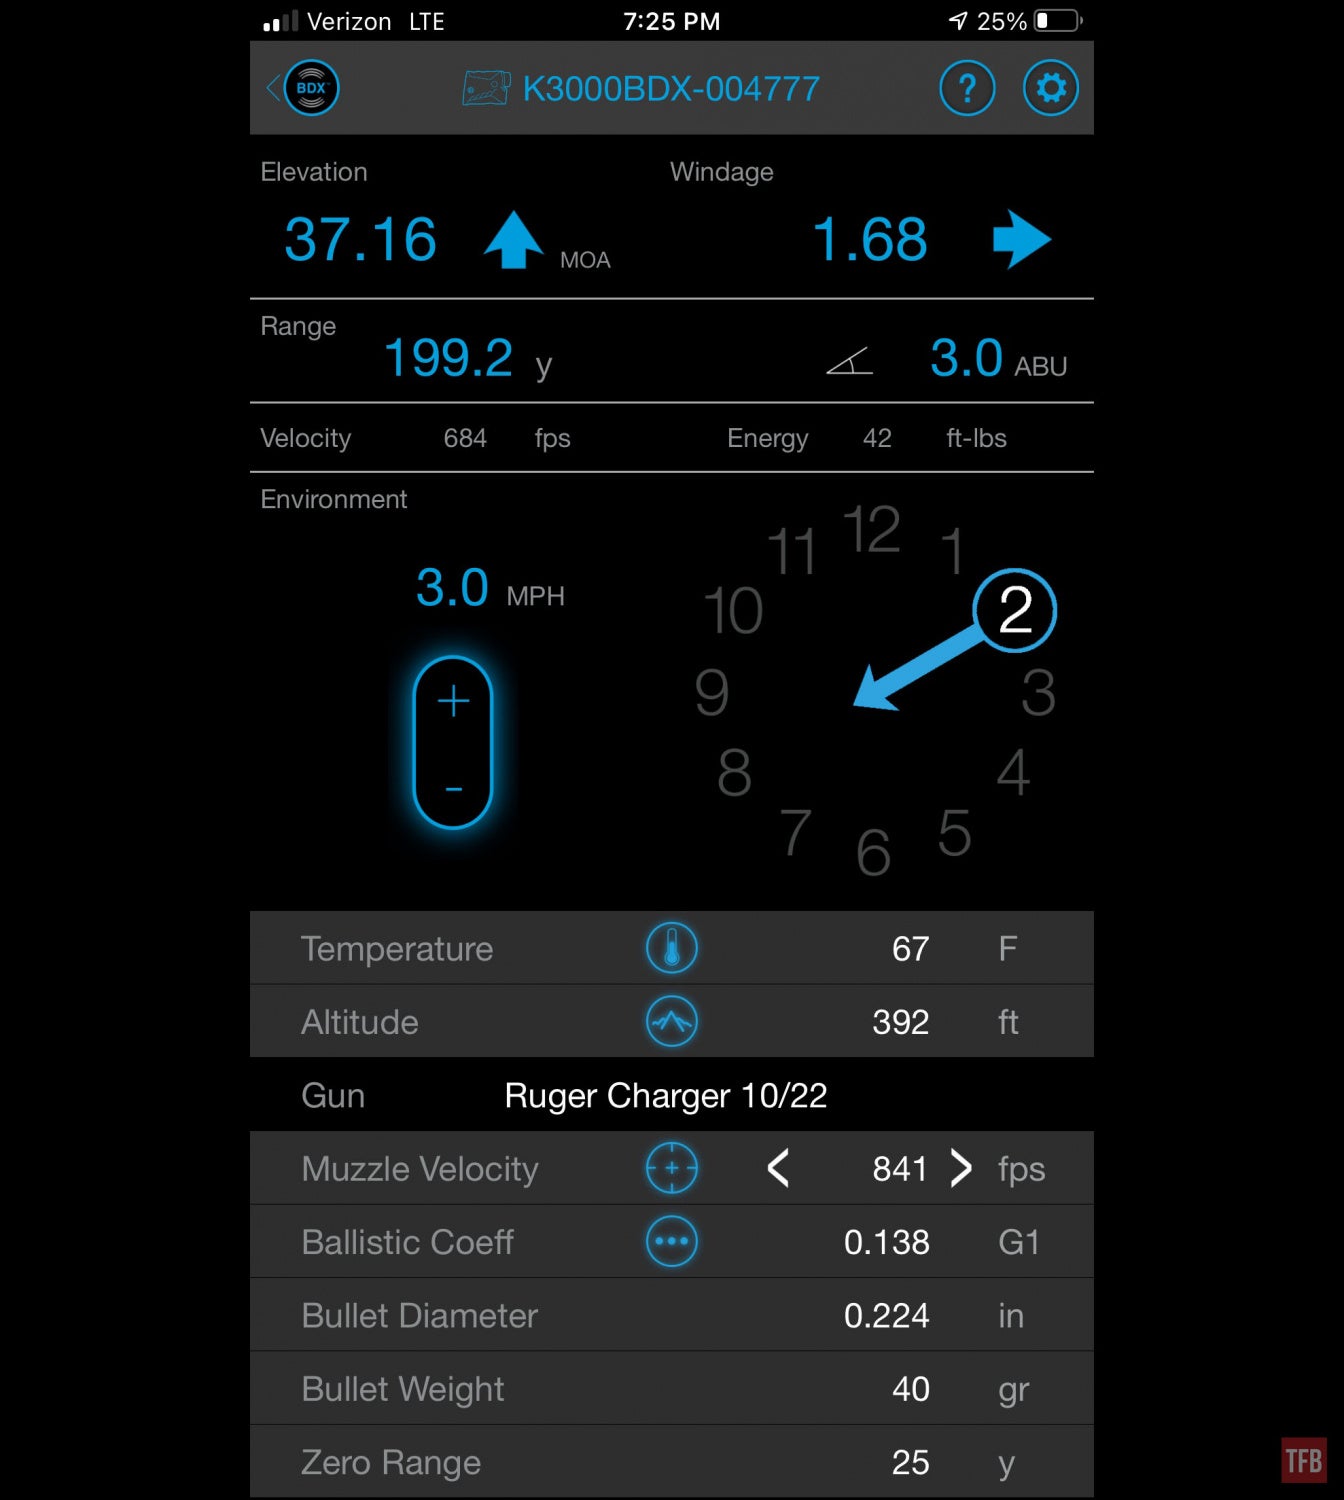
73.49 MOA hold over for .22LR to hit 300-yard target.
Huge thanks to my friend Kythe for helping me figure out the BDX app and letting me use his KILO3000BDX binoculars. I’ll be honest, the BDX app has a lot of features and settings and it is easy to get lost and overwhelmed with the details. When I first tried the Echo3, I had mounted it on my Pork Sword .300BLK pistol but realized I didn’t have that much ammo to keep trying it. When I switched gun profiles to the Ruger Charger, the laser range finder did not seem to generate the correct ballistic correction for the .22LR ammo I had inputted.
A quick call to SIG Sauer Electro Optics and I learned that after you change gun profiles you need to open the Rangefinder option again. Doing so will update the rangefinder with the latest ballistic information. Otherwise, it will have the last information it accessed. So it was still set to .300BLK even though I meant for it to be using .22LR information.
When we tested the Echo3 for the last time, we had a slight hiccup. The laser rangefinder had to be in ABU (Applied Ballistics Ultralight) mode but it was defaulting in ABE (Applied Ballistics External) mode. When the laser range finder is properly “bonded” (connected) to the Echo3, there is a small blue BDX logo that shows up at the bottom of the screen. When the laser rangefinder was set to ABE instead of ABU, the onscreen BDX logo would still be blue but we were not getting any ballistic corrections. Below is what the screen looks like when everything is working. See the blue BDX logo? Look at the top of the screen. It tells you the distance the laser range finder measured and it tells you what the ballistic correction is. In this case 6.60 MOA.

Another minor issue we had was more than likely due to user error. I had measured the velocity of my .22LR bullets using my pocket chronograph. But I did not measure my BC (ballistic coefficient). We inputted a generic BC we found online for the ammo I was shooting. But the rounds were still landing short of the target. Kythe played with the BDX app a bit and found you can “true” the data by tweaking the muzzle velocity of the bullets. See the screencap posted earlier? In order to hit the 300-yard target, we went from 1070 fps down to 841 fps.
Using the Echo3
Once we got the BDX app figured out, it was a lot of fun plinking targets with the Ruger Charger and only using the Echo3. However, there are other applications for the Echo3. I mounted it to my spotting scope to help aim my spotting scope while scanning for targets and game.


Final Thoughts About The Echo3
The Echo3 retails for $3,299. It is a bit more expensive than the Echo1 when it came out, however, the features and more importantly the thermal image has improved significantly. The SIG BDX system is great once it is set up properly. Especially if you are shooting a caliber with a lot of ballistic drop and you want to reach out further. Zeroing the reticle was rather easy. You simply move the reticle to the point of impact. The only concern you should be aware of is the lack of a rear eyepiece. So you have to focus on the screen just a mere few inches away from your face. This may be an issue for those whose eyesight has trouble focusing at such close distances. There is also no eyecup so the light from the screen may light up your face a bit but you can lower the brightness a bit.
If you are interested in the SIG Echo3, check out their website.
TFB’s Friday Night Lights series is brought to you by ATN

We are committed to finding, researching, and recommending the best products. We earn commissions from purchases you make using the retail links in our product reviews. Learn more about how this works.